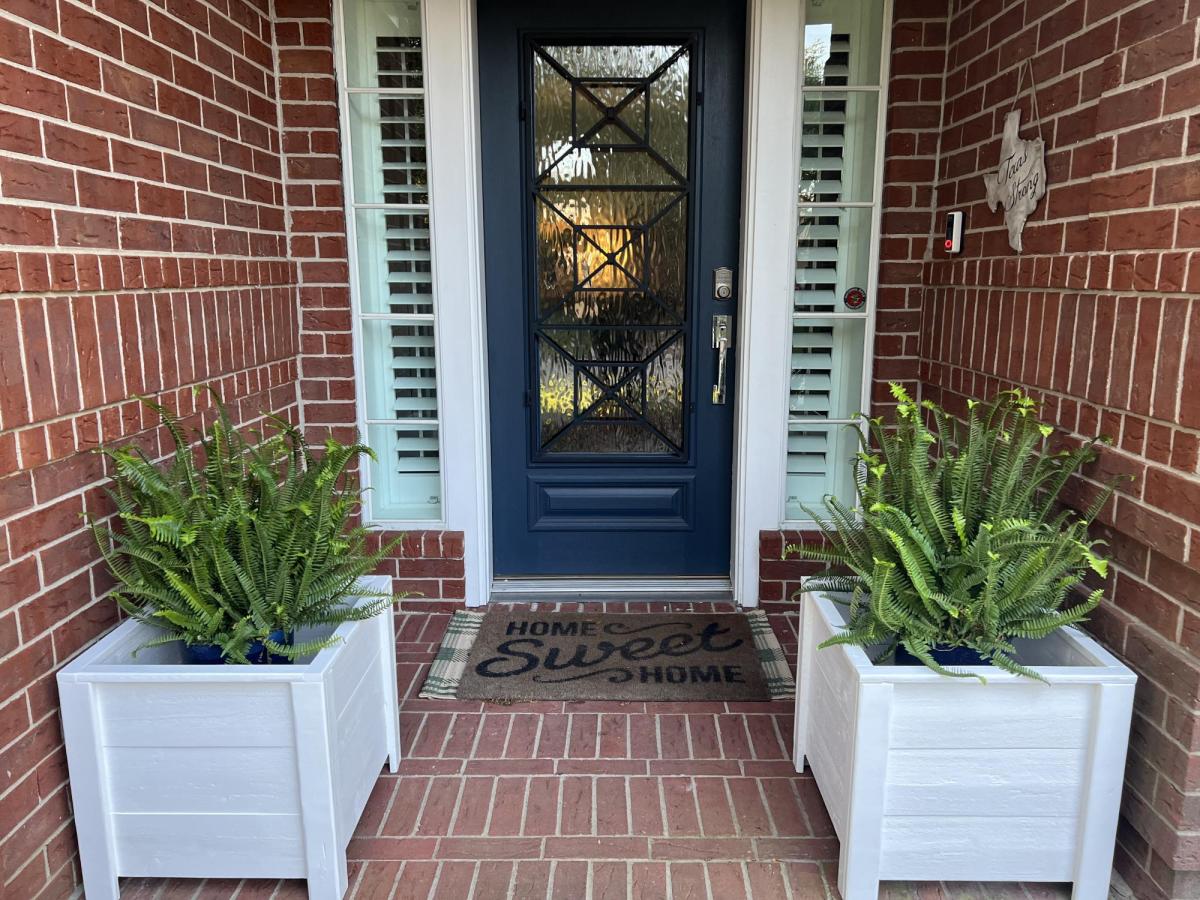
Easy Build DIY Planter Box
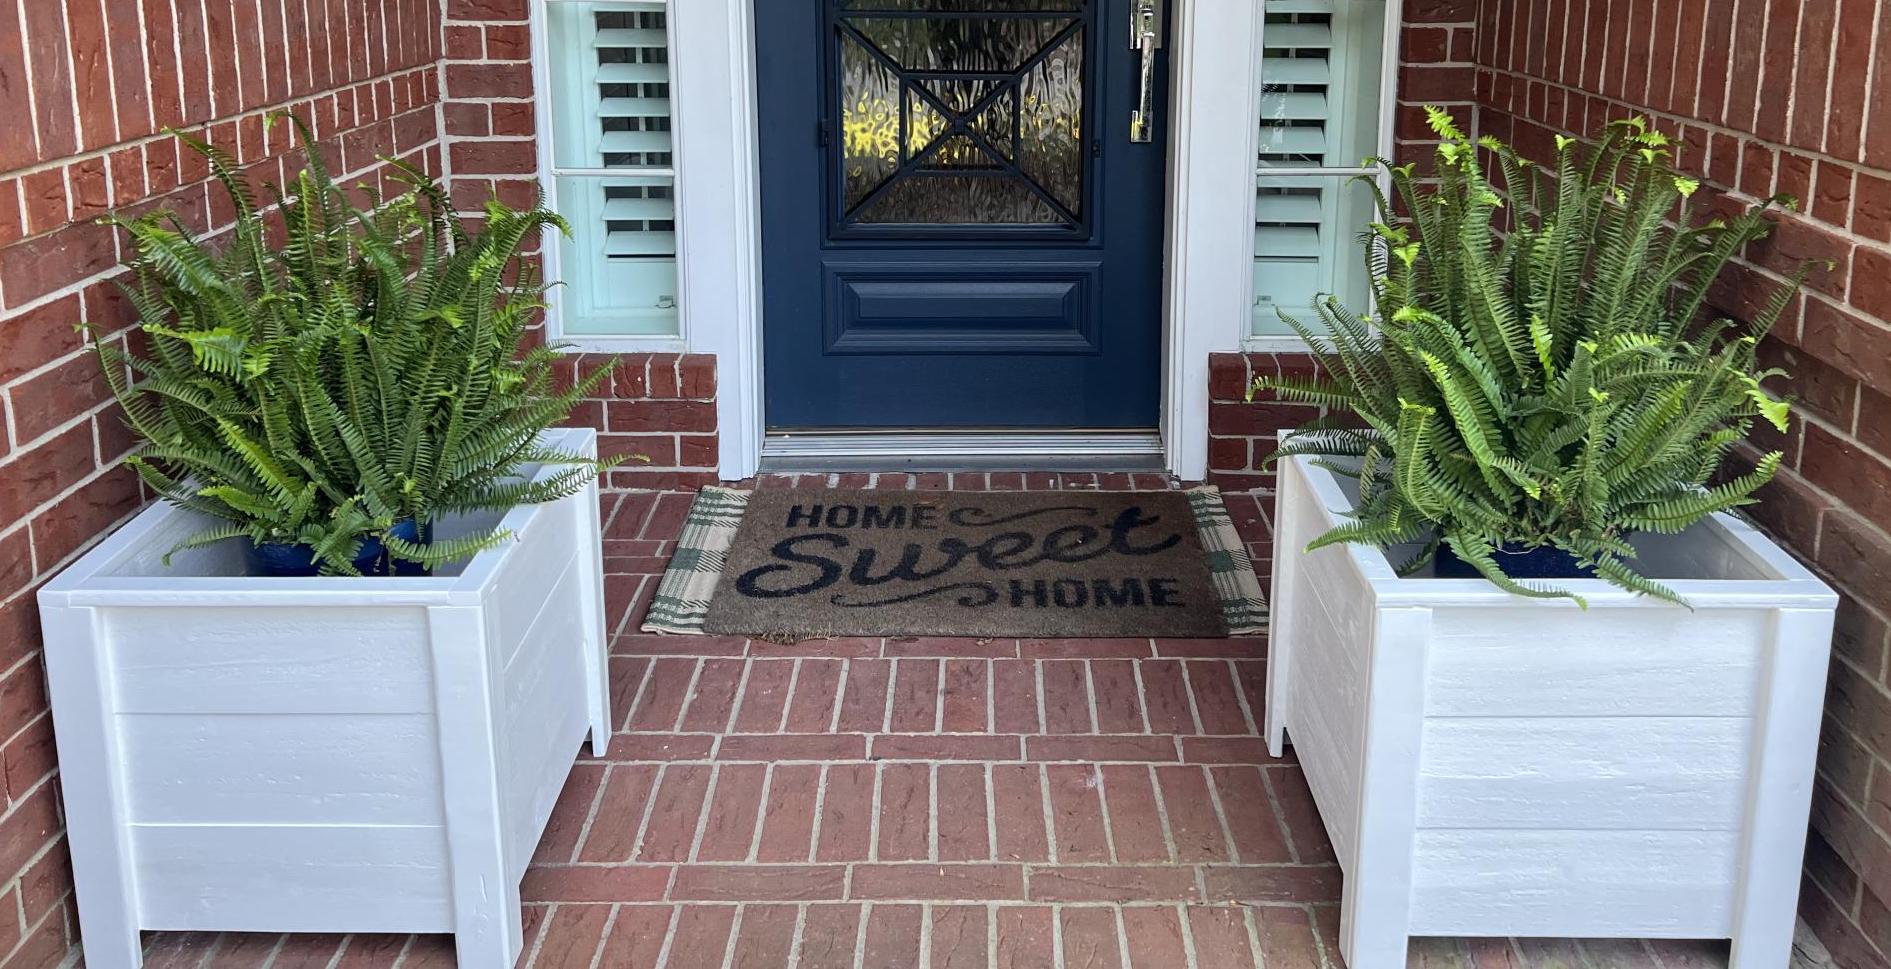
I was looking for planter boxes for my front door and these were easy and super sturdy. I absolutely love them and how they enhanced this area! Thank you Ana for this simple yet impactful plan!
Built from Plan(s)
I was looking for planter boxes for my front door and these were easy and super sturdy. I absolutely love them and how they enhanced this area! Thank you Ana for this simple yet impactful plan!
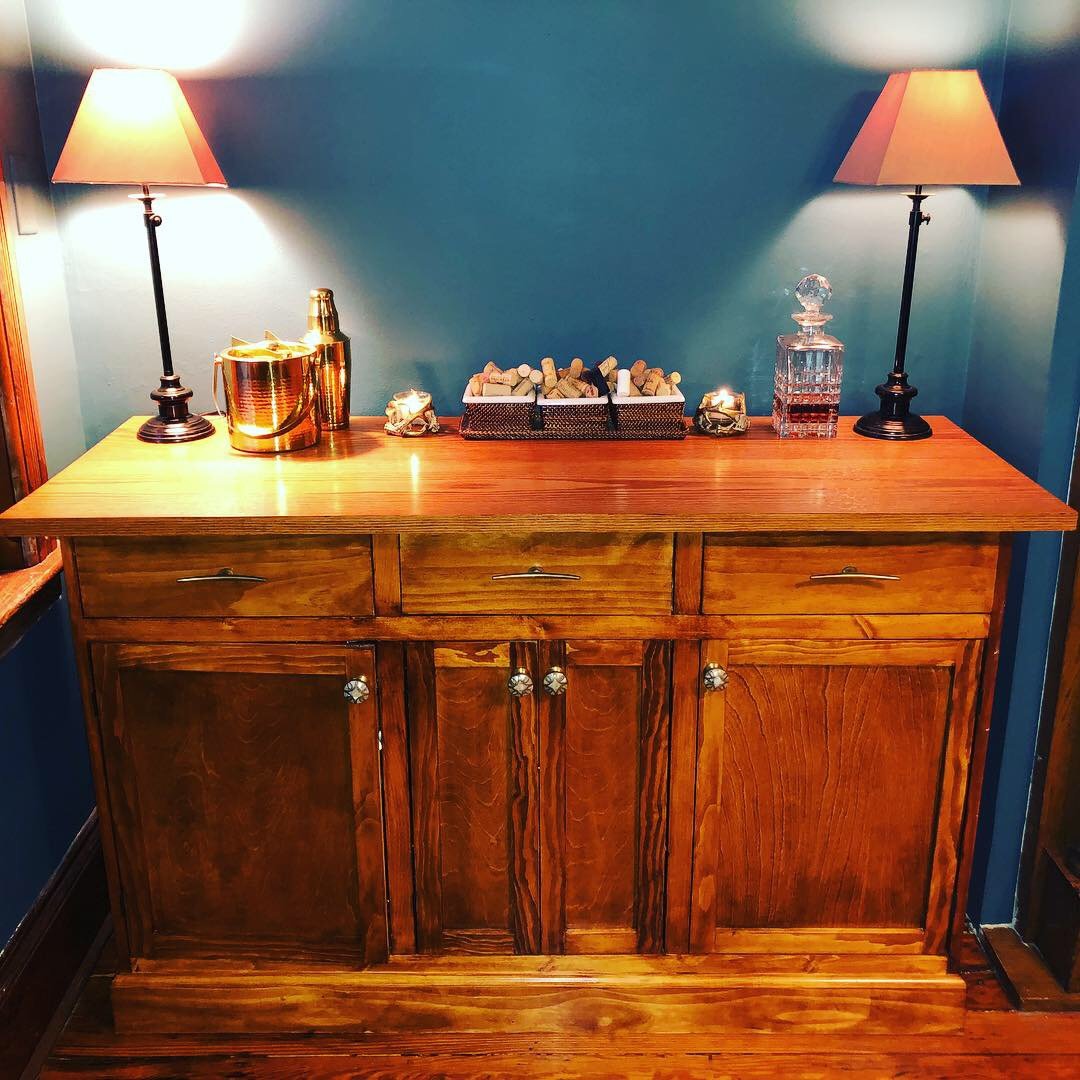
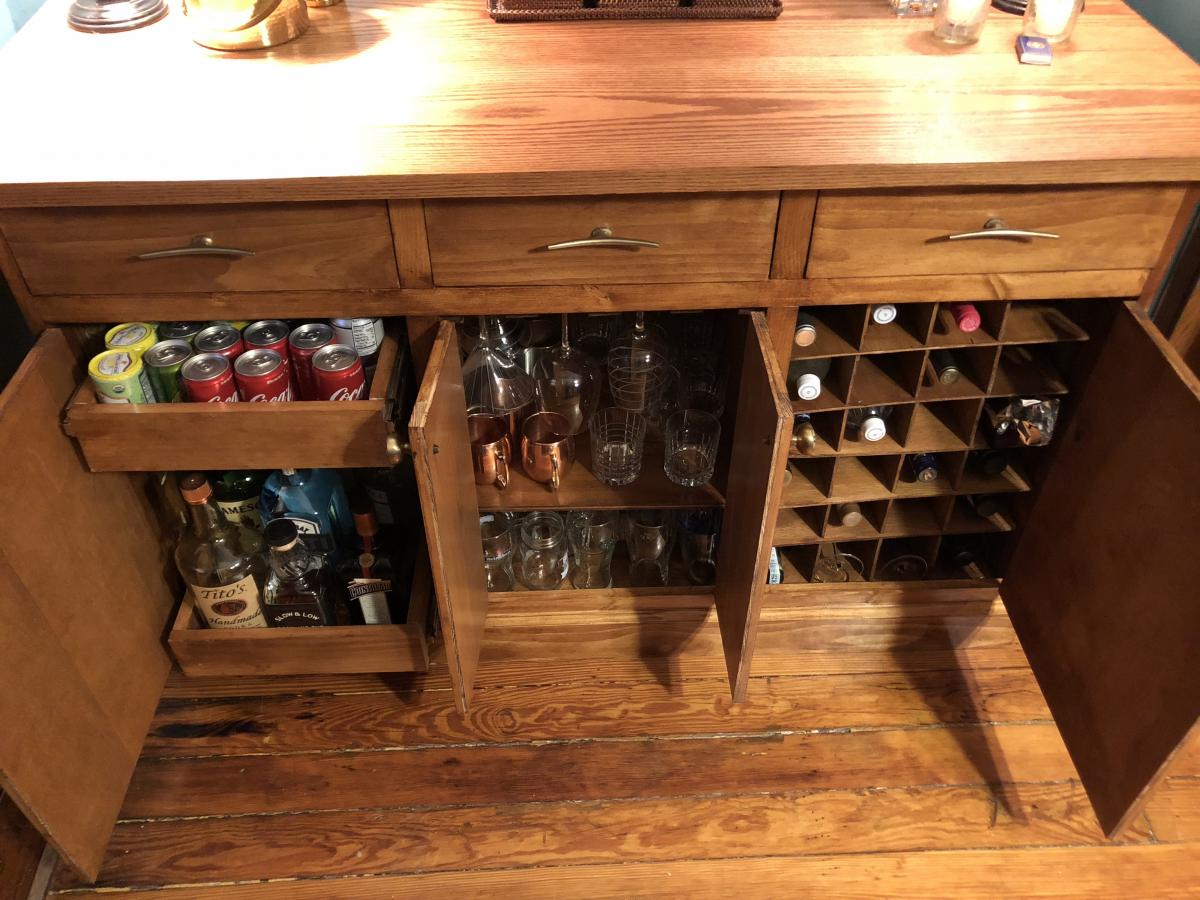
Made from a combination of Ana White plans to build the ultimate home bar! I used the Rustic Sideboard / Buffet Table and Modular Bar Wine Grid Hutch plans for this custom build
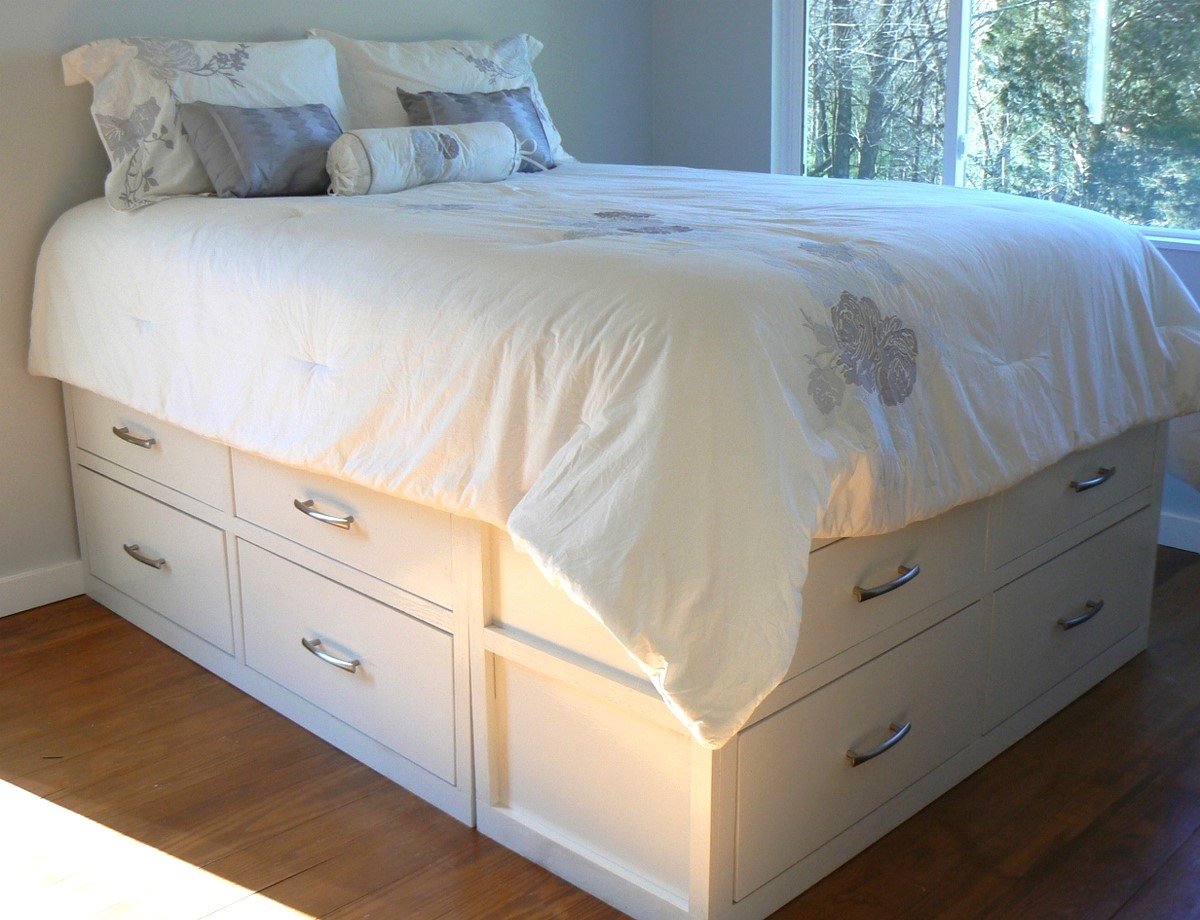
After we built the first level, we decided we didn't like how low to the ground the mattress was going to be, so we made another level. Our master bedroom is very small so this gives us plenty of storage space! The floor throughout the house is wavy, so theboxes do not meet perfectly ( you can see a slight gap at the bottom) which drives me crazy, but I will have to live with it for now. We kept the drawer face simple (less work, and we like the clean lines). Our mattress is quite thick, so I see myself building a step stool in my near future! This was our first project and very easy to follow. Already working on my next project. I am addicted! Thanks for the great site, Ana!
Wed, 02/22/2012 - 13:05
Total height is 25 inches. I love how tall it is, because the dogs cannot jump on the bed! I wish we would have thought about the double drawer height before we started as it would have brought the cost and time down significantly. We live and we learn. Enjoy your new bed!
Tue, 07/31/2012 - 19:48
Just wondering how you attached the double drawer layers together... Love the look of it...
Mon, 06/10/2013 - 17:41
Sorry for the delay in response. I haven't been on the site in awhile and I could not figure out my password! We used the Kreg Jig to attach the top level to the bottom. Looking back on it, we should have just built the walls as one piece, but since the top drawers were an addition, after the fact, we just had to deal. The 1x2 trim piece gave it a finished and less pieced together look. It has been so long since we built this, the details are fading!
Sat, 08/06/2016 - 20:37
I'm new to furniture making and was wondering if you had plans for your work since I like the height, queen and twin size? Also, I was wondering if any drawers are for storage purposes, as I would like them to be?
Mon, 10/08/2012 - 08:00
Hi this is exactly what I need to do!
we just bought a new bed and I new I'd be making this not thinking I decided not to buy the box spring, now I realize my bed will be on the floor...
I would love it if you could share everything you learned in making it double decker! please
thanks
Natasha
Mon, 06/10/2013 - 17:48
Better late than never, I hope...
First thing we learned, the bed is a little too high, so we should have made slightly smaller drawers. Still happy our dogs can't get up there, but I have to actually hop up on the bed every night, and still have yet to get around to making my step stool.
Second, cut the side pieces for the height needed for two drawers, then you have a cleaner look with no middle trim piece. I don't mind it, but I would like it more without, I think.
That is really all I would change. The plans were easy to follow and made it easy to alter for our needs.
Tue, 05/07/2013 - 23:52
I am flabbergasted by this AMAZING bed you MADE over the WEEKEND! This is simply unbelievable! I absolutely could never do something like this. Are you willing to make a King size one exactly like this and sell it to me??
Oh please?!
Renee
Mon, 06/10/2013 - 17:53
Thank you for those kind words! I was a little nervous about taking on such a big project, but we had a fun time building it { I can't say the same for sanding and painting :-) } and are very happy with the space it freed up in our very small bedroom! Just take your time, invest in a Kreg Jig, and you can do it too!
Thanks for the plan; I’m proud of how it turned out and my family loves it!
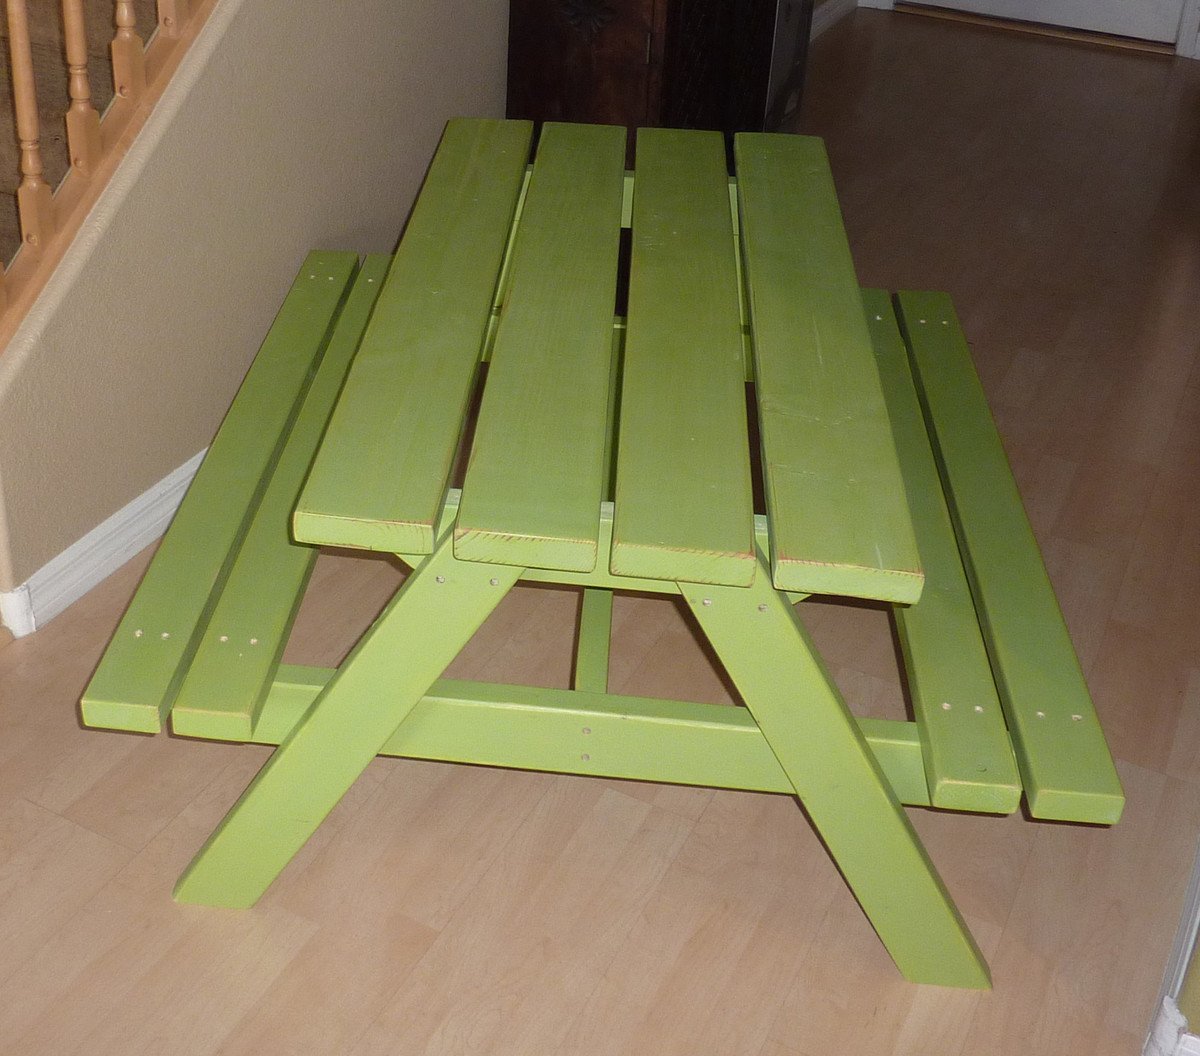
I have been wanted to build this table for over a year and finally had the time for it. The plans made the cuts very simple.
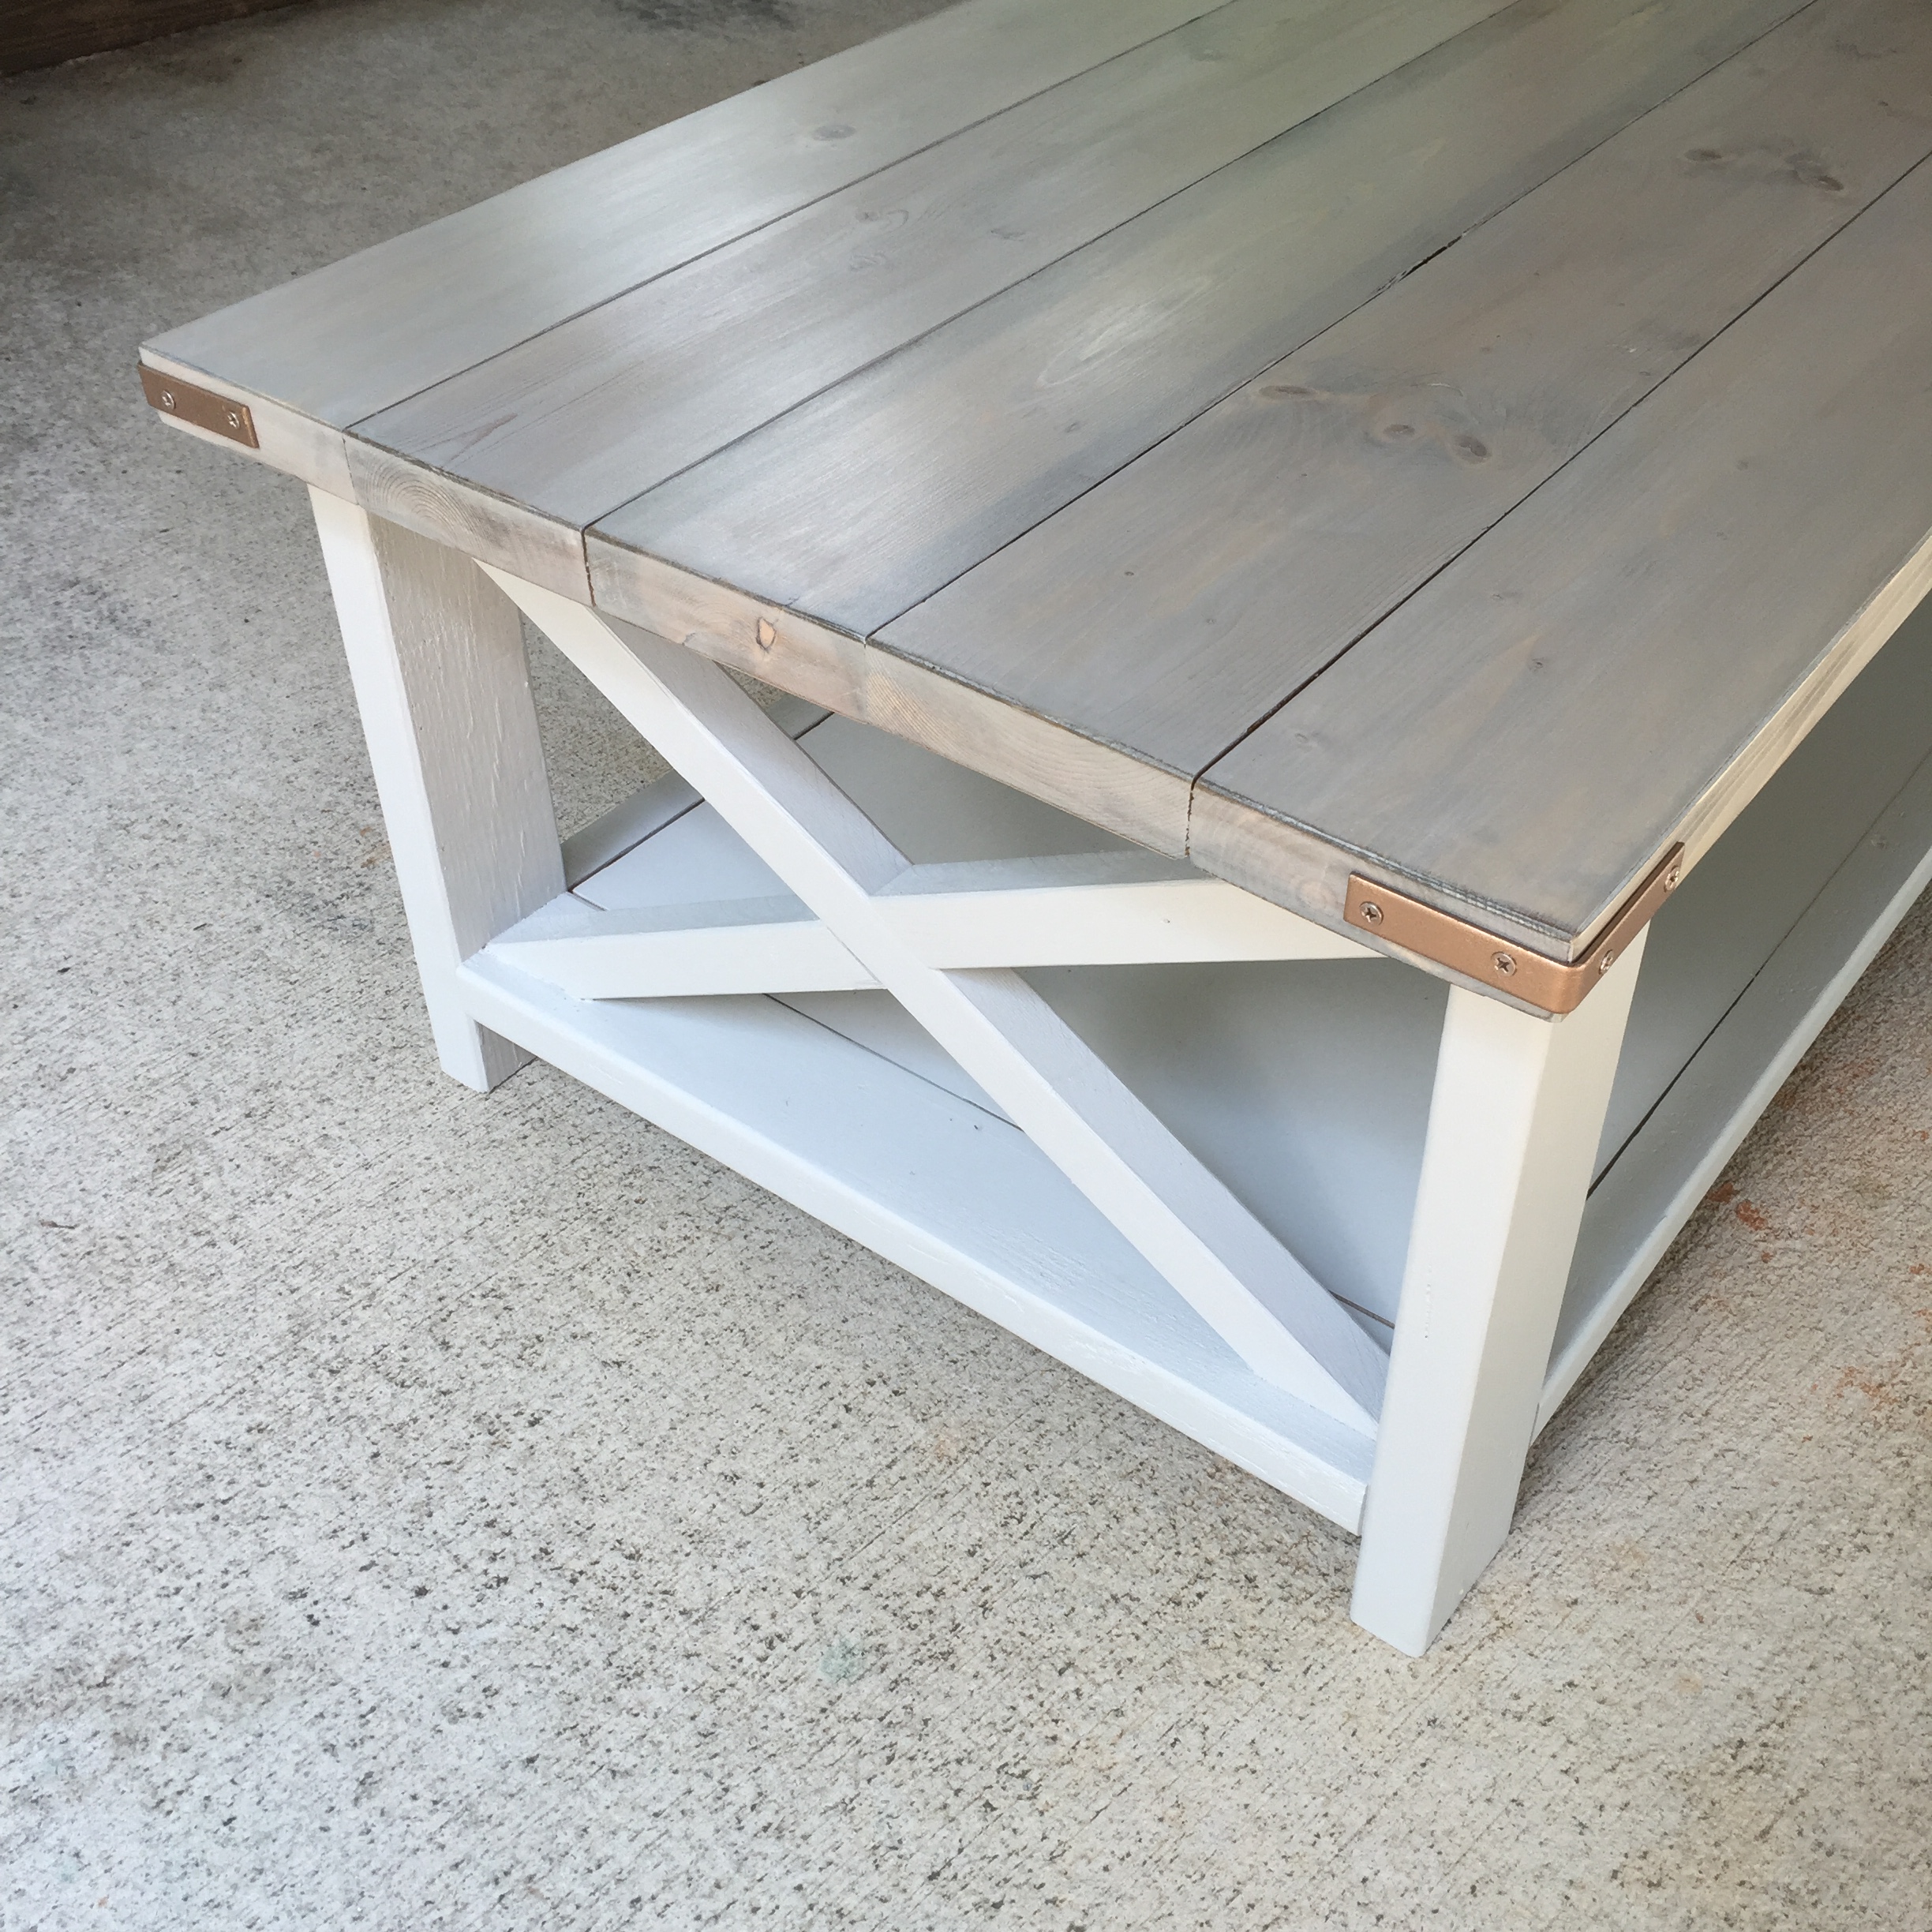
I started this project a few months ago for a friend. The build went easy enough and was complete is less than a day. The only issue I had was with the X's. My miter saw doesnt cut past 55 degrees and it called for 60 degrees. I had to eye it and the X's turned out less than perfect. It did give me a compelling arguement to upgrade from my 10" to a 12" sliding saw (we will see how that pans out). The finishing was the real problem for me. Ive had issues in the past with not liking the final color and having to sand the whole project over and over until I finally just settle. I was hesitant on the vinegar and steel wool finish but went for it anyway. The top turned orange, almost like a fresh cedar color. I whitewashed it the following day and roughed it up with some light sanding. It looked great. I added poly and the top turned orange again. It was horrible. I had to sand it and start over. I then went with a weathered grey with a whitewashed top coat and it looked great but my friend wasnt a fan. I sanded AGAIN and tried another color. Third time was a charm and the sunbleached stain with whitewash came close to what we wanted to acheive. He likes it, I like it, and eveyone is happy!

I used plans for the Essential Entryway Bench and Shelf with Hooks, tying them together with a shiplap panel. This was my first big project using a Kreg jig and Rip-Cut. Many more to come!
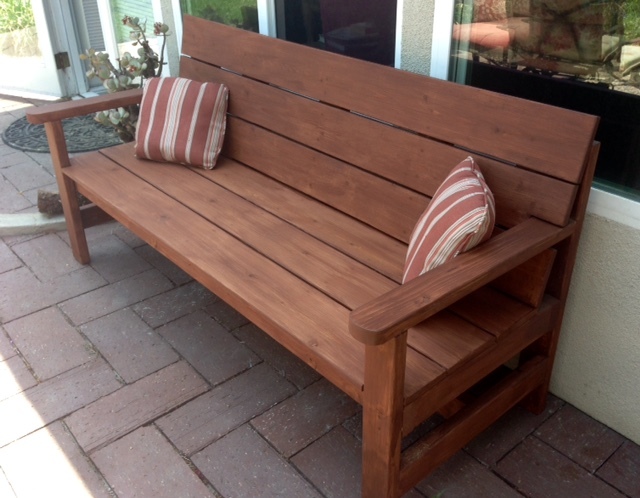
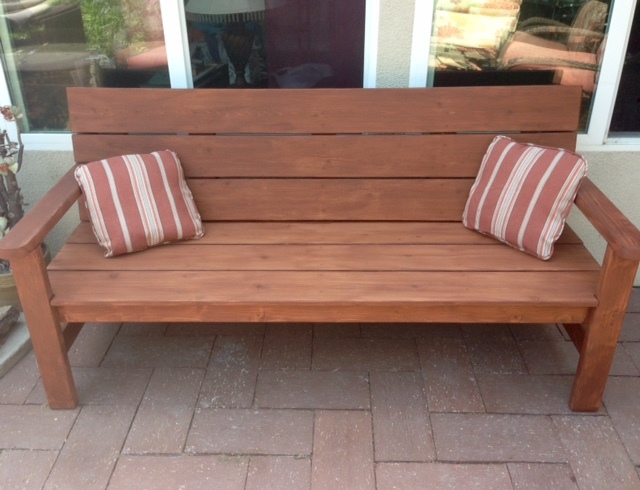
Great plans! I modified the bench by adding a slanted back (which enabled me to put the slats closer together), extending and curving the front of the arms and extended the seat to the outside of the legs.
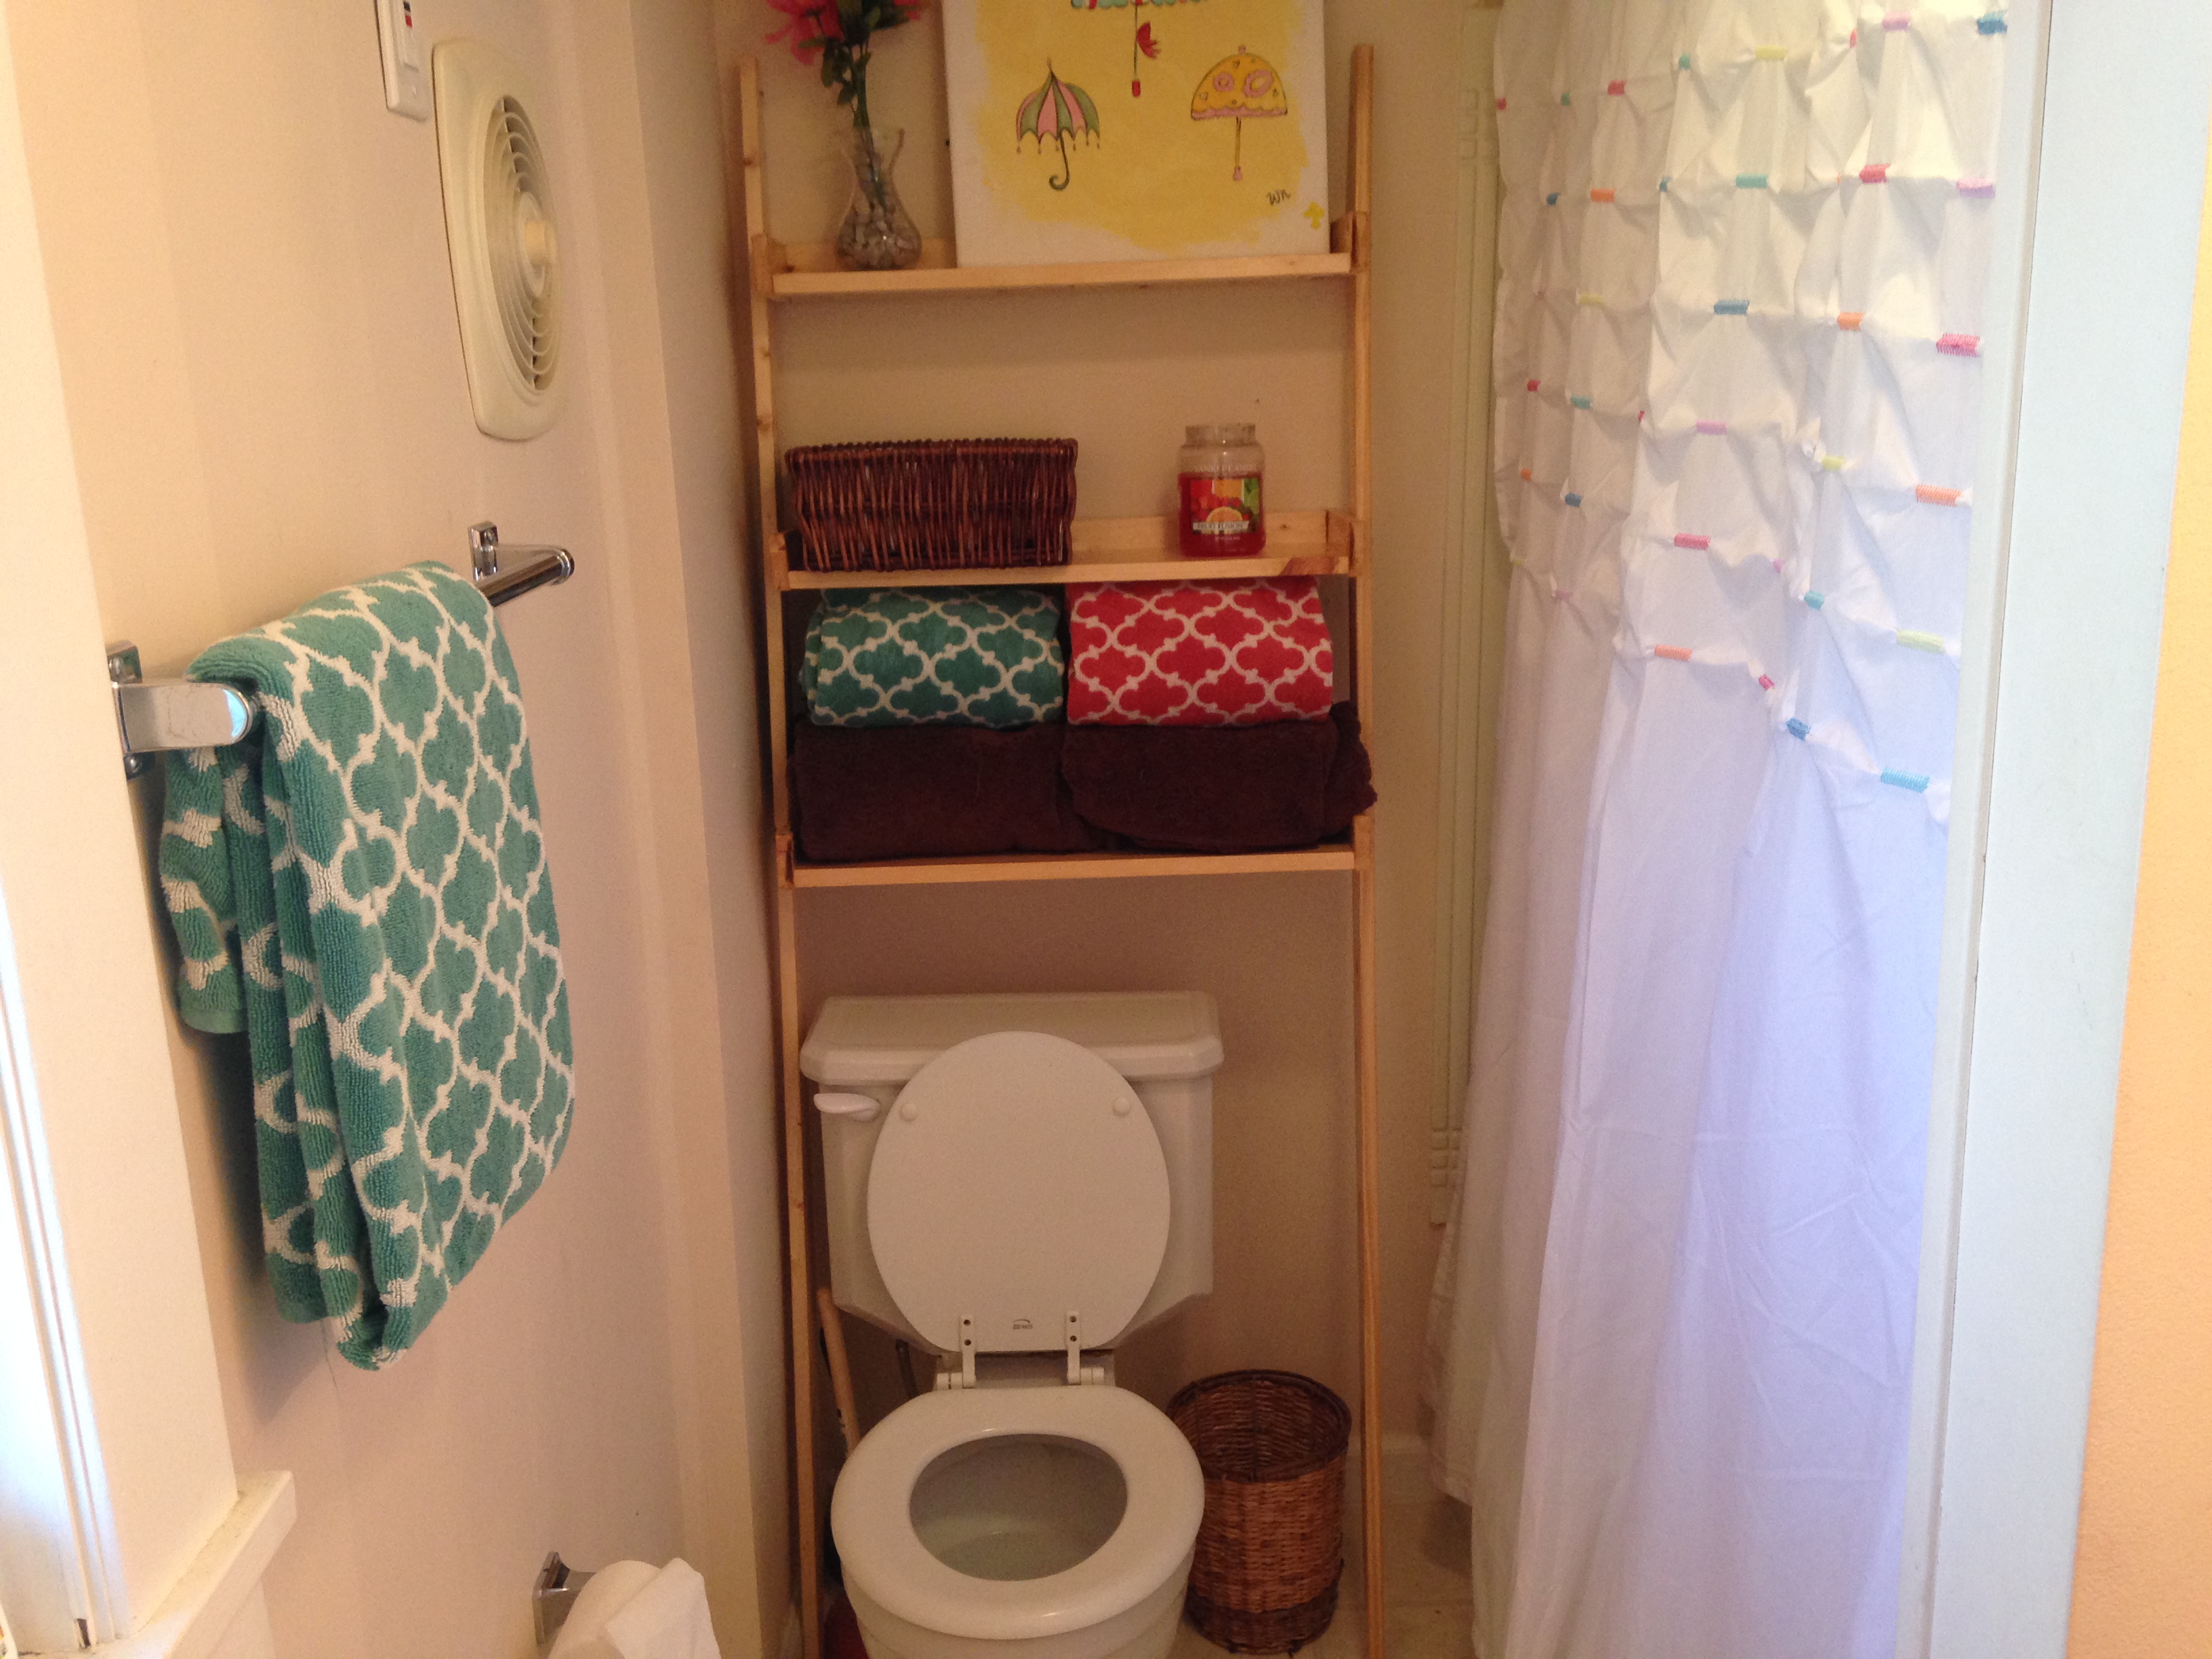
I am a really beginning builder (read: this is about my fifth project ever), but it works perfectly for our really tiny, narrow bathroom. I finished it with some stain we already had on hand. Thank you so much for the building plans!
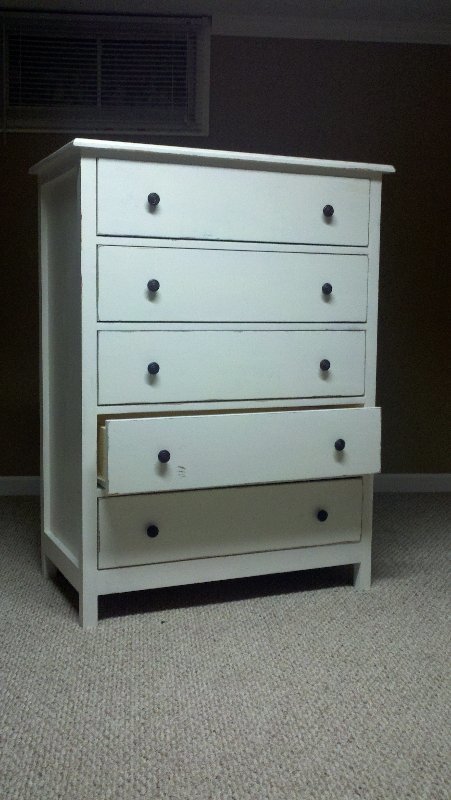
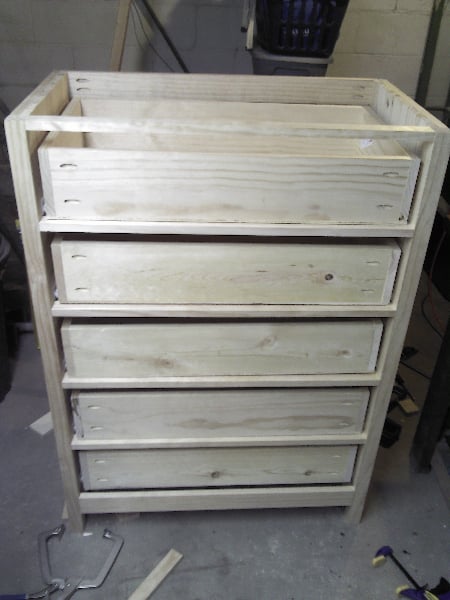
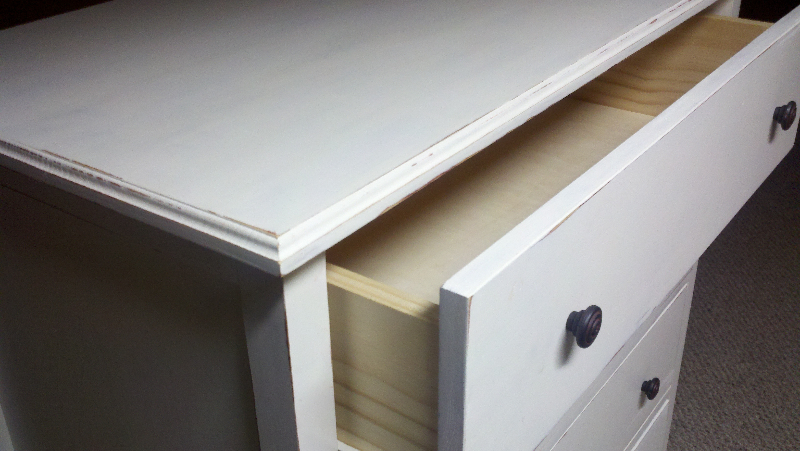
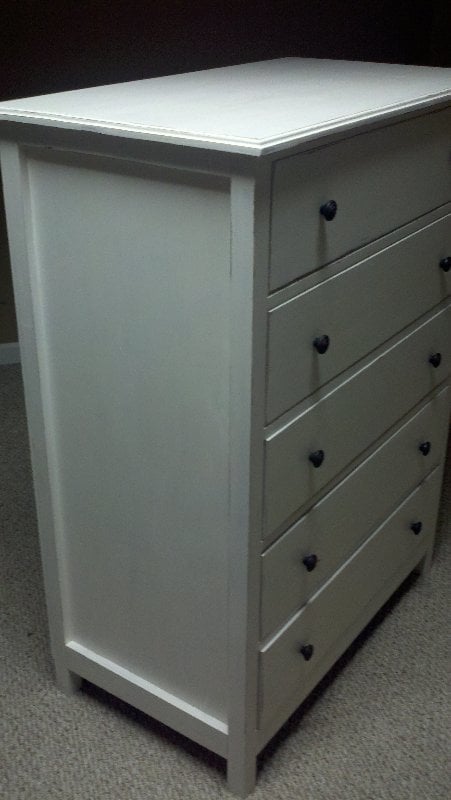
I took Patrick's design and expanded it. The dresser is deeper and has one more drawer than the original. The finish is only slightly distressed because that's how my 'client' wanted it. The drawer slides were the toughest part. The carcass MUST be square or at least very close. I built the whole thing, then tore the carcass apart and rebuilt it because my first attempt was not square enough. Obviously the drawers won't slide smoothly if it isn't square.
Edit: I get a lot of requests for the plans and/or cut list for my modifications. I do not feel comfortable re-posting the plans on my website and can not do it here either (only pictures can be uploaded). Please feel free to e-mail me (bbomerATgrvland.com) or request the plans in the comment section of my blog (linked below) and I will send you a .pdf that shows my modifications at each step.
Edit 2015-01-26: I do not believe that I am getting notifications for all the comments here, so please use one of the methods above.
Edit 2015-01-28: I have posted my alterations here: http://grvland.com/wordpress/2015/01/28/dresser-plan/. Please comment there with any questions, because I can not guarantee that I will get notified if you comment here.


Sun, 03/16/2014 - 19:08
I would love to receive a copy of your modified plans. My email is [email protected]. It looks great and is just what I need for my daughter's room!
Wed, 04/02/2014 - 20:24
Please send me the modified plans to [email protected]. This piece looks amazing, and I can not wait to try it out!
Thanks,
Sara Mitchell
Mon, 09/15/2014 - 07:36
Please send a copy of your modified plans! This dresser is beautiful, and I would love to try and recreate it. Please send the plans to [email protected].
thanks!
Lauren

Tue, 11/04/2014 - 12:13
Please send me a copy of your modified plans. The dresser looks great! You can send it to me at [email protected]. Thank you very much!
Ana
Sat, 12/13/2014 - 20:24
Please send me a copy of your modified plans! Its just what I'm looking for. [email protected]
Sat, 12/27/2014 - 17:17
I would love your modified plans for this dresser! my email is [email protected]
Thanks

Sun, 12/28/2014 - 09:07
If possible I would also love to use your expanded plans. My email is [email protected].
Thanks and happy holidays.
Steve
Sun, 12/28/2014 - 17:07
I would love o get the updated plan for the larger dresser. Please email to [email protected]. Thanks!
Sun, 12/28/2014 - 21:58
I would love to have a copy of your plan as well. My email is [email protected]. Thank you in advance.
Sat, 01/03/2015 - 14:35
Hello,
I would also love a copy of your plans. My email is [email protected]. Thanks in advance :)
Tue, 01/05/2016 - 10:32
Hi .. I was just wondering if I could get the free plan for a three drawer dresser ? Nothing fancy , just wat to make one for my wife for her b-day , comin up soon ,, any help would be great ,, Thanks , and hope you have a happy new year/ Bye for now , Claude.
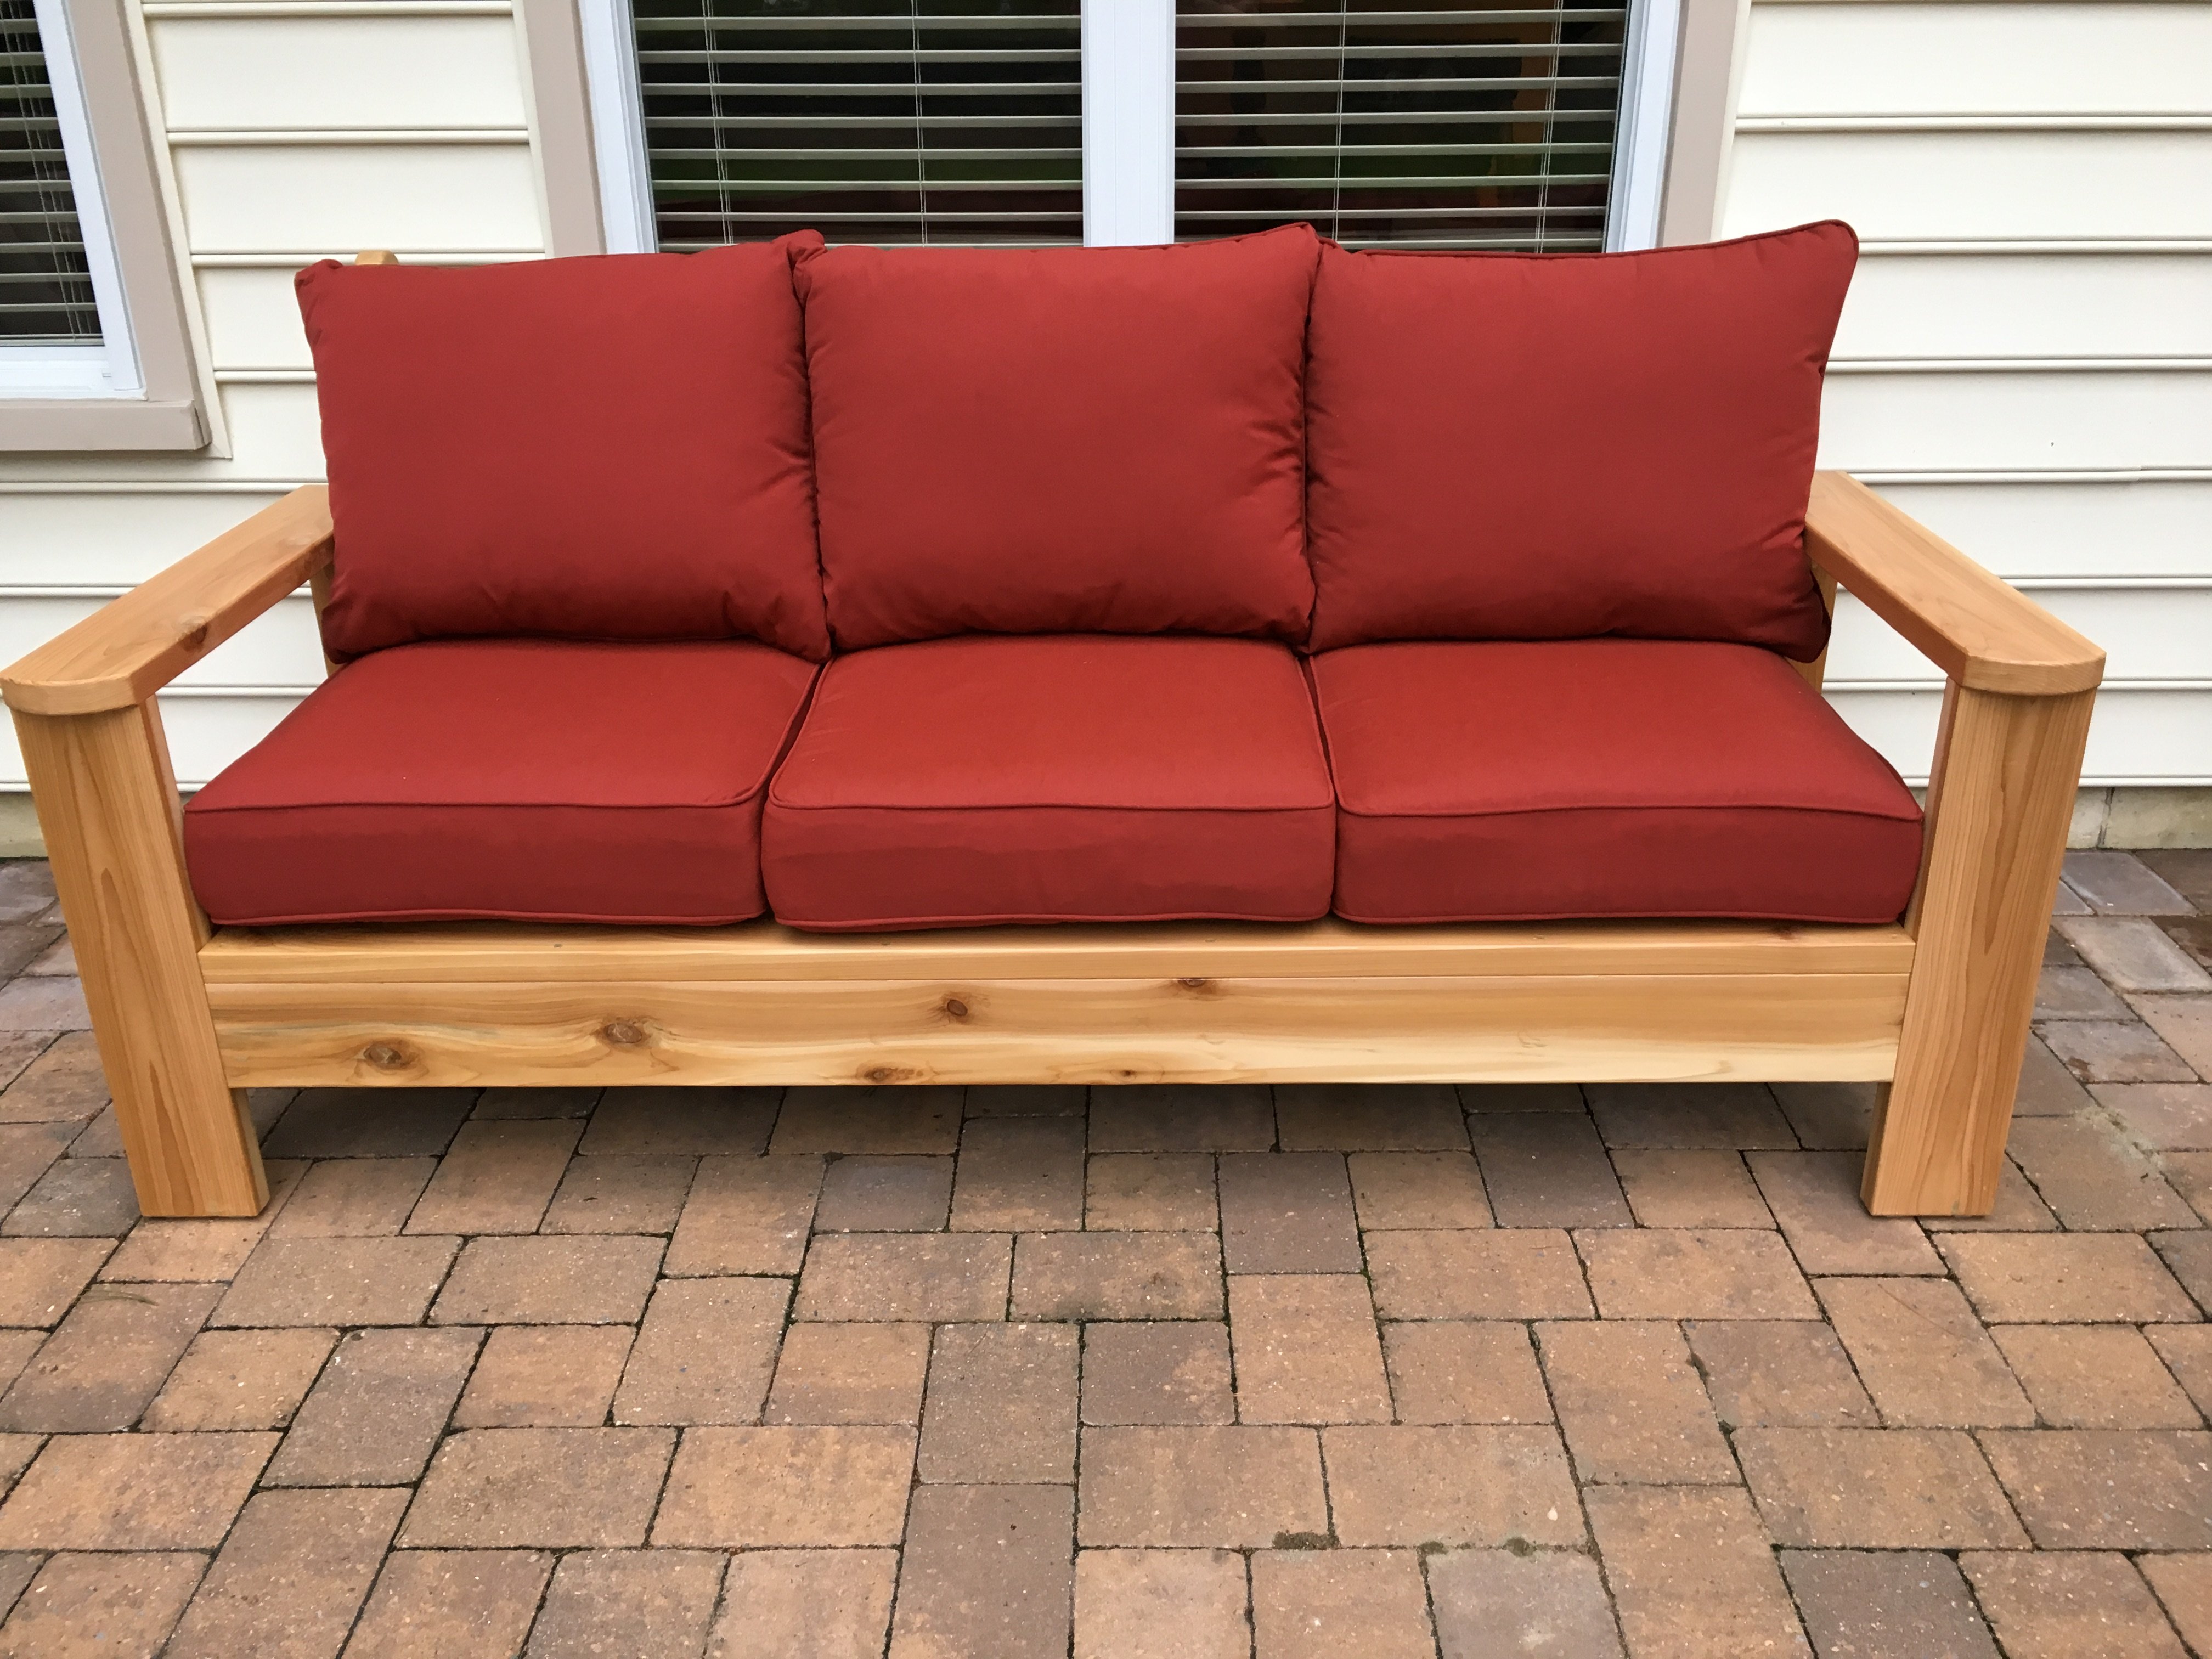
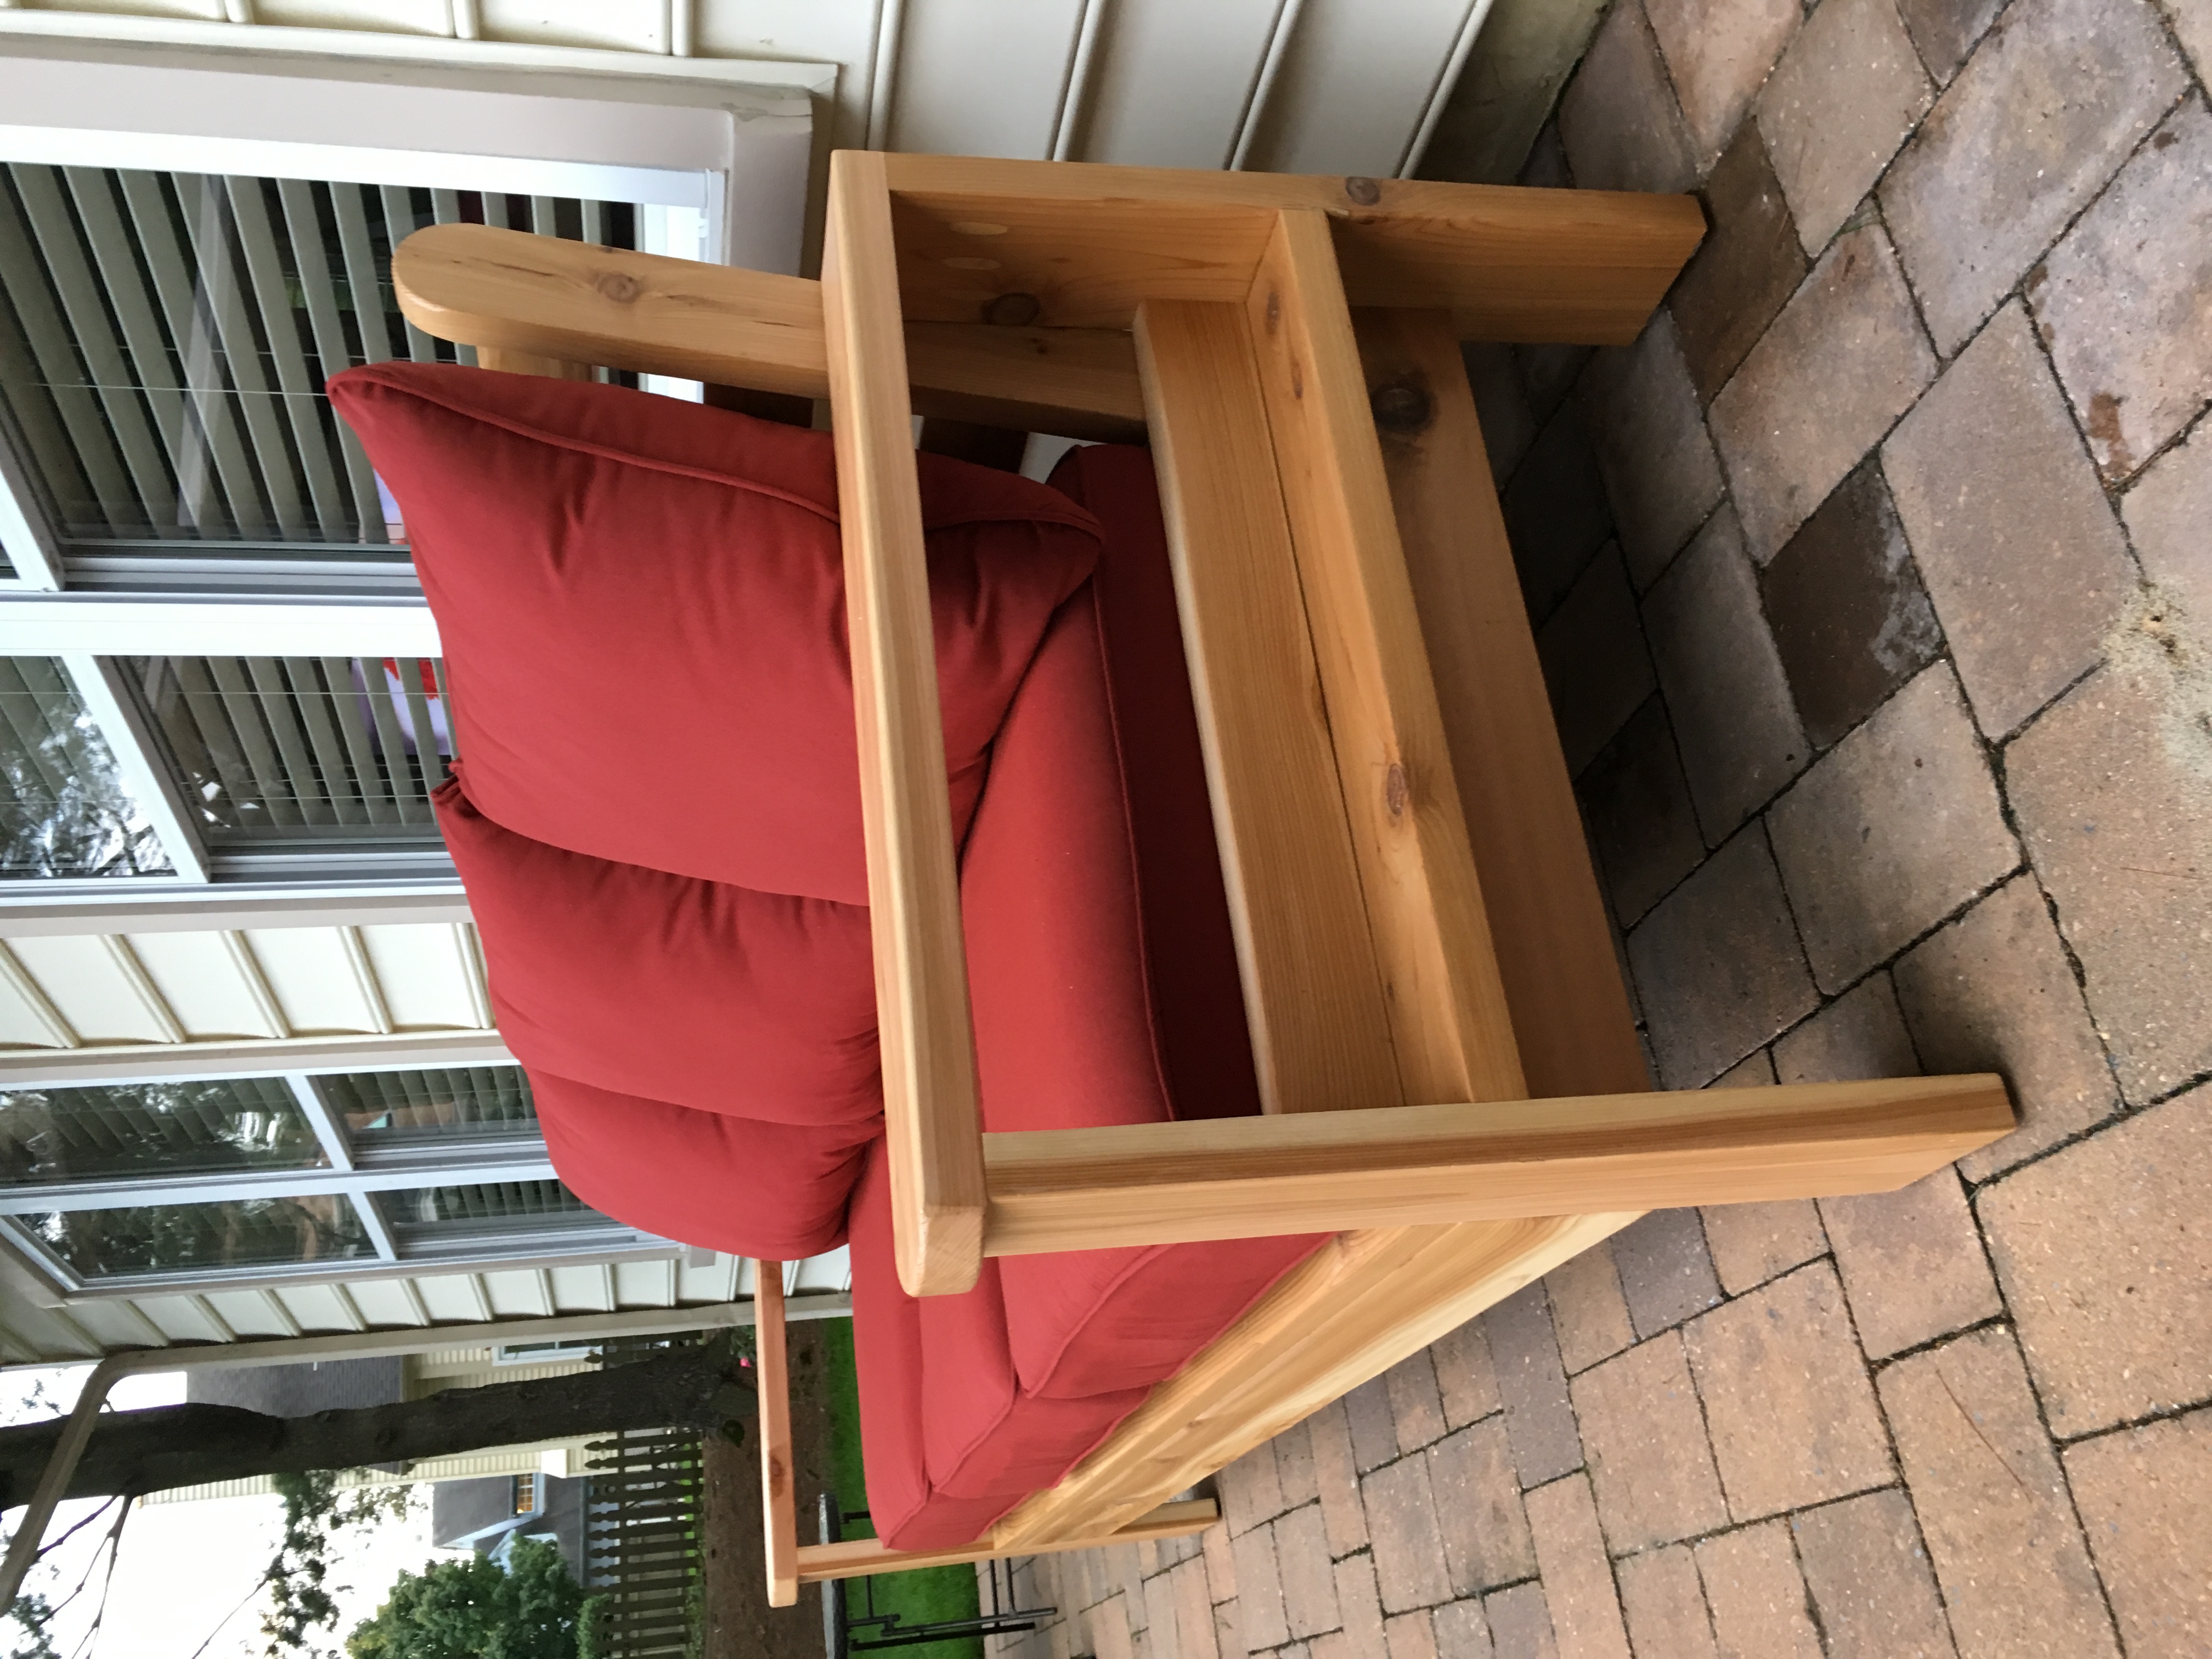
Made an outdoor sofa inspired by Ana White's plan. I made a few modifications including using 2x6's, hiding more of the non-pocket hole screws, using HD pocket holes in more areas and building an incline for the backrest. Cushions are Sunbrella from Lowe's.


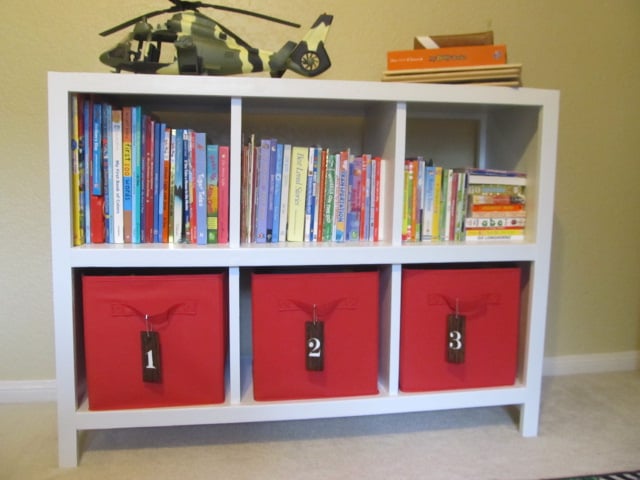
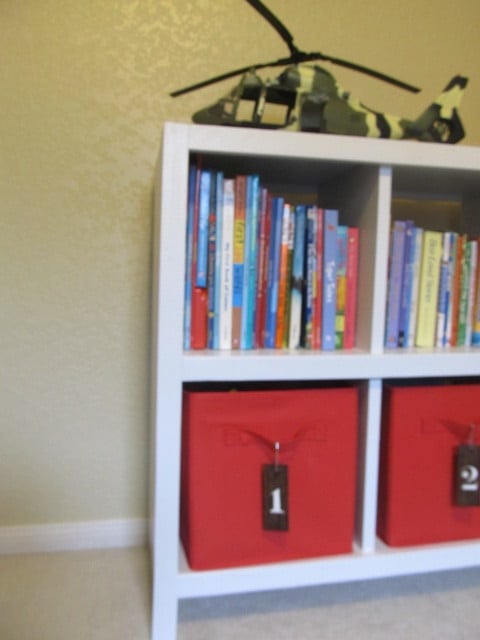
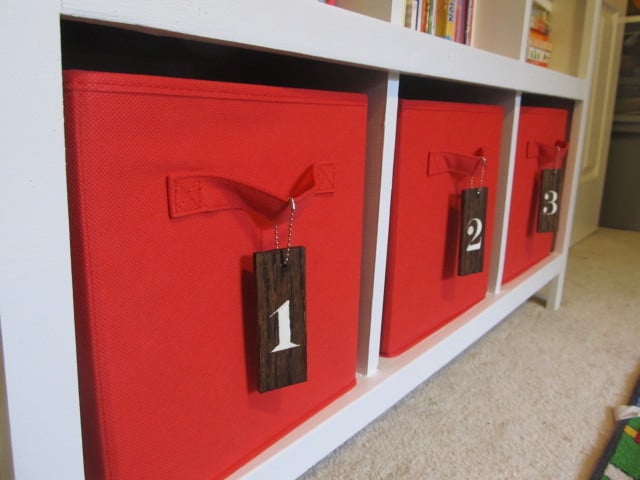
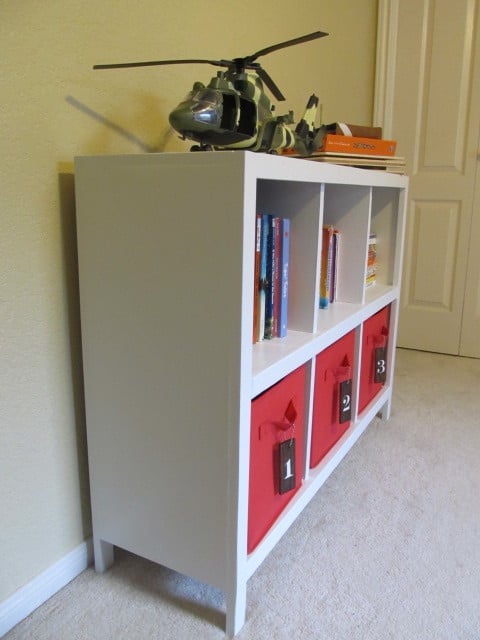
I have been searching for something to replace my son's plastic Fisher Price bookshelf/toy box for some time now. He had so many books on the shelf it was sagging. I came across this plan and thought it was perfect. I love that the shelves are tall enough for his bigger books to stand up. I picked up three red totes at Target to hold his smaller toys on the bottom. This plan was easy to follow and I had no problem when putting together the frame of the bookshelf. I did however have some problems when it came time to put in the dividers for the shelves. They are not evenly spaced, but I don't think you can even tell. The best part is my son loves it and that is the most important. It is easy for him to go over and pick out a book whenever he wants.
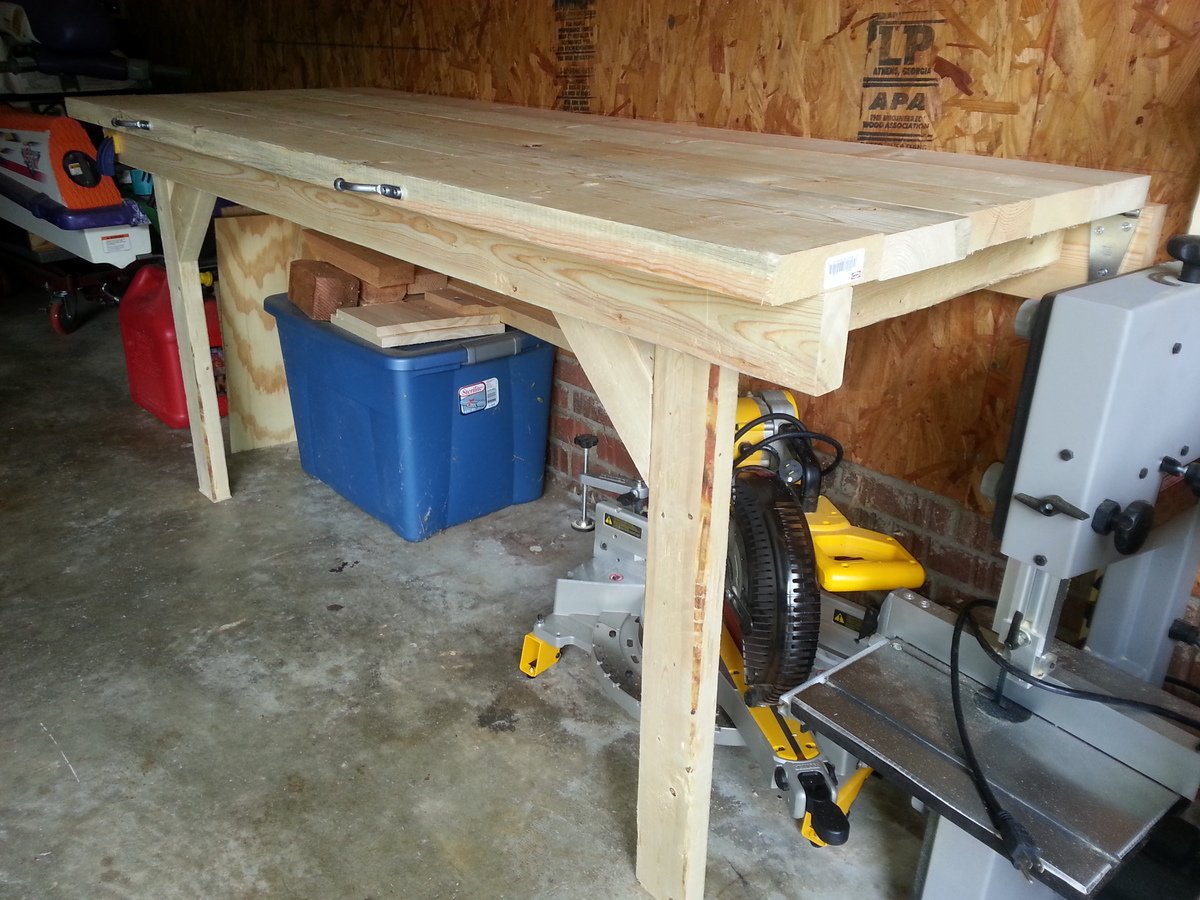
I wanted a good flat and level workspace to continue projects. This workbench folds up to the wall in my garage so I can still park when not working on anything. I made it pretty stout with 2x4s and 2x6s since it would need to support fairly large pieces of furniture without deflecting. It is very heavy as a result though (good core workout folding it up and down :) )
I used two folding shelf brackets on the legs to keep them from accidentally being kicked out from under the table while it's out. (http://www.woodcraft.com/Product/2001690/2615/Folding-Shelf-Bracket-8-P…)
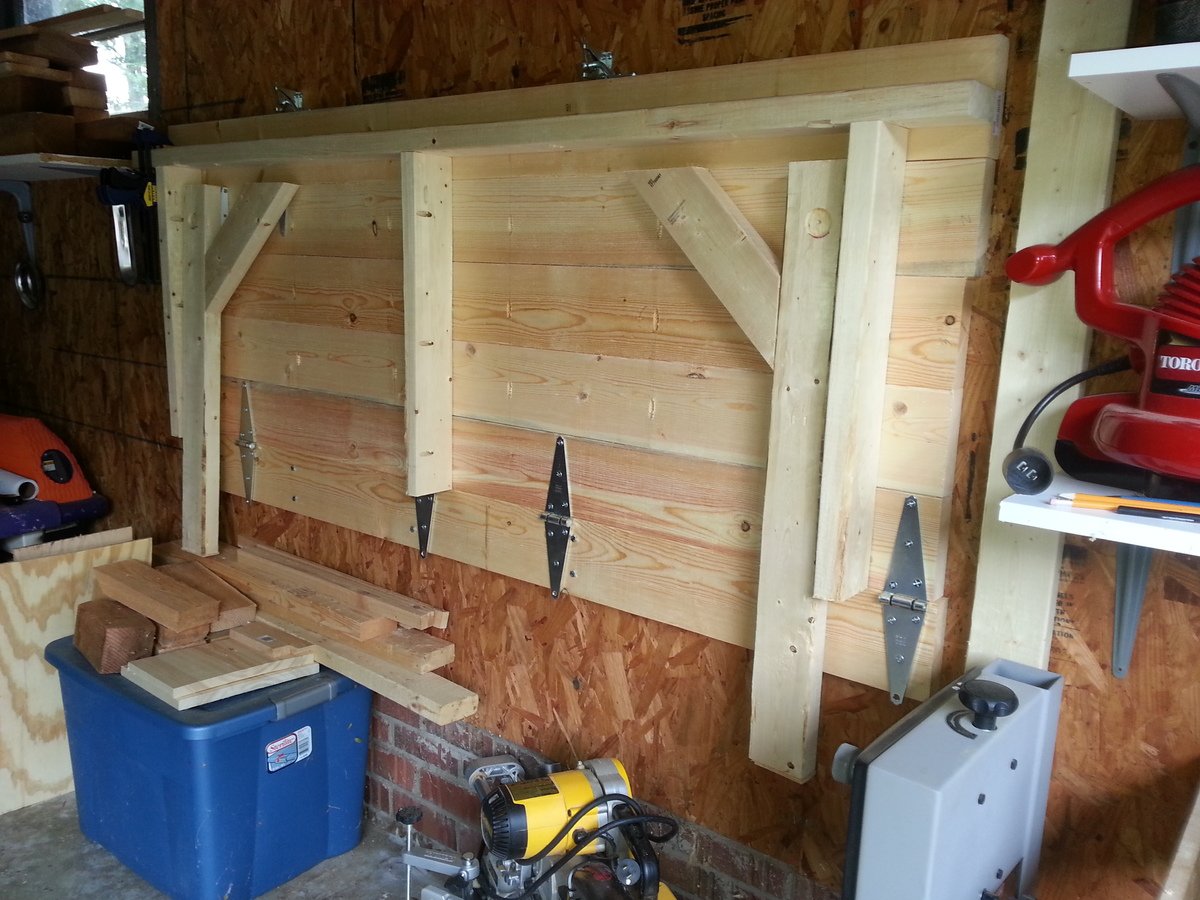
I used four heavy strap hinges to connect the table to the 2x6 (which was lag screwed into studs). Two gate latches were used to secure the edge of the table to studs when the table is folded up.
I cut the legs approximately, and then when the table was hung I cut and shimmed them to get the table level on the uneven surface of the garage floor.
Fri, 08/15/2014 - 16:32
I really like this fold up bench design. It may be heavy, but I bet it's incredibly sturdy. I also have a really compact garage. I have pegboard on my walls, so a bench that folds UP doesn't work for me when I want to get a tool.
My own bench is more light duty. It's a sheet of 2x4' plywood attached to a frame made from dimensional lumber. It folds down so I have access to the tools at all times. It's based on a design on the Family Handyman website, although you can find the same design all over the web.
Thu, 02/05/2015 - 18:50
Great idea! I need to build this. Can I please get a picture of it folded up, so I can see the hinges on the legs and the latches holding it while folded?
Fri, 11/06/2020 - 13:55
Can you show another picture of the hinges you used on the legs that can fold out when lowered?
Thanks! Kate
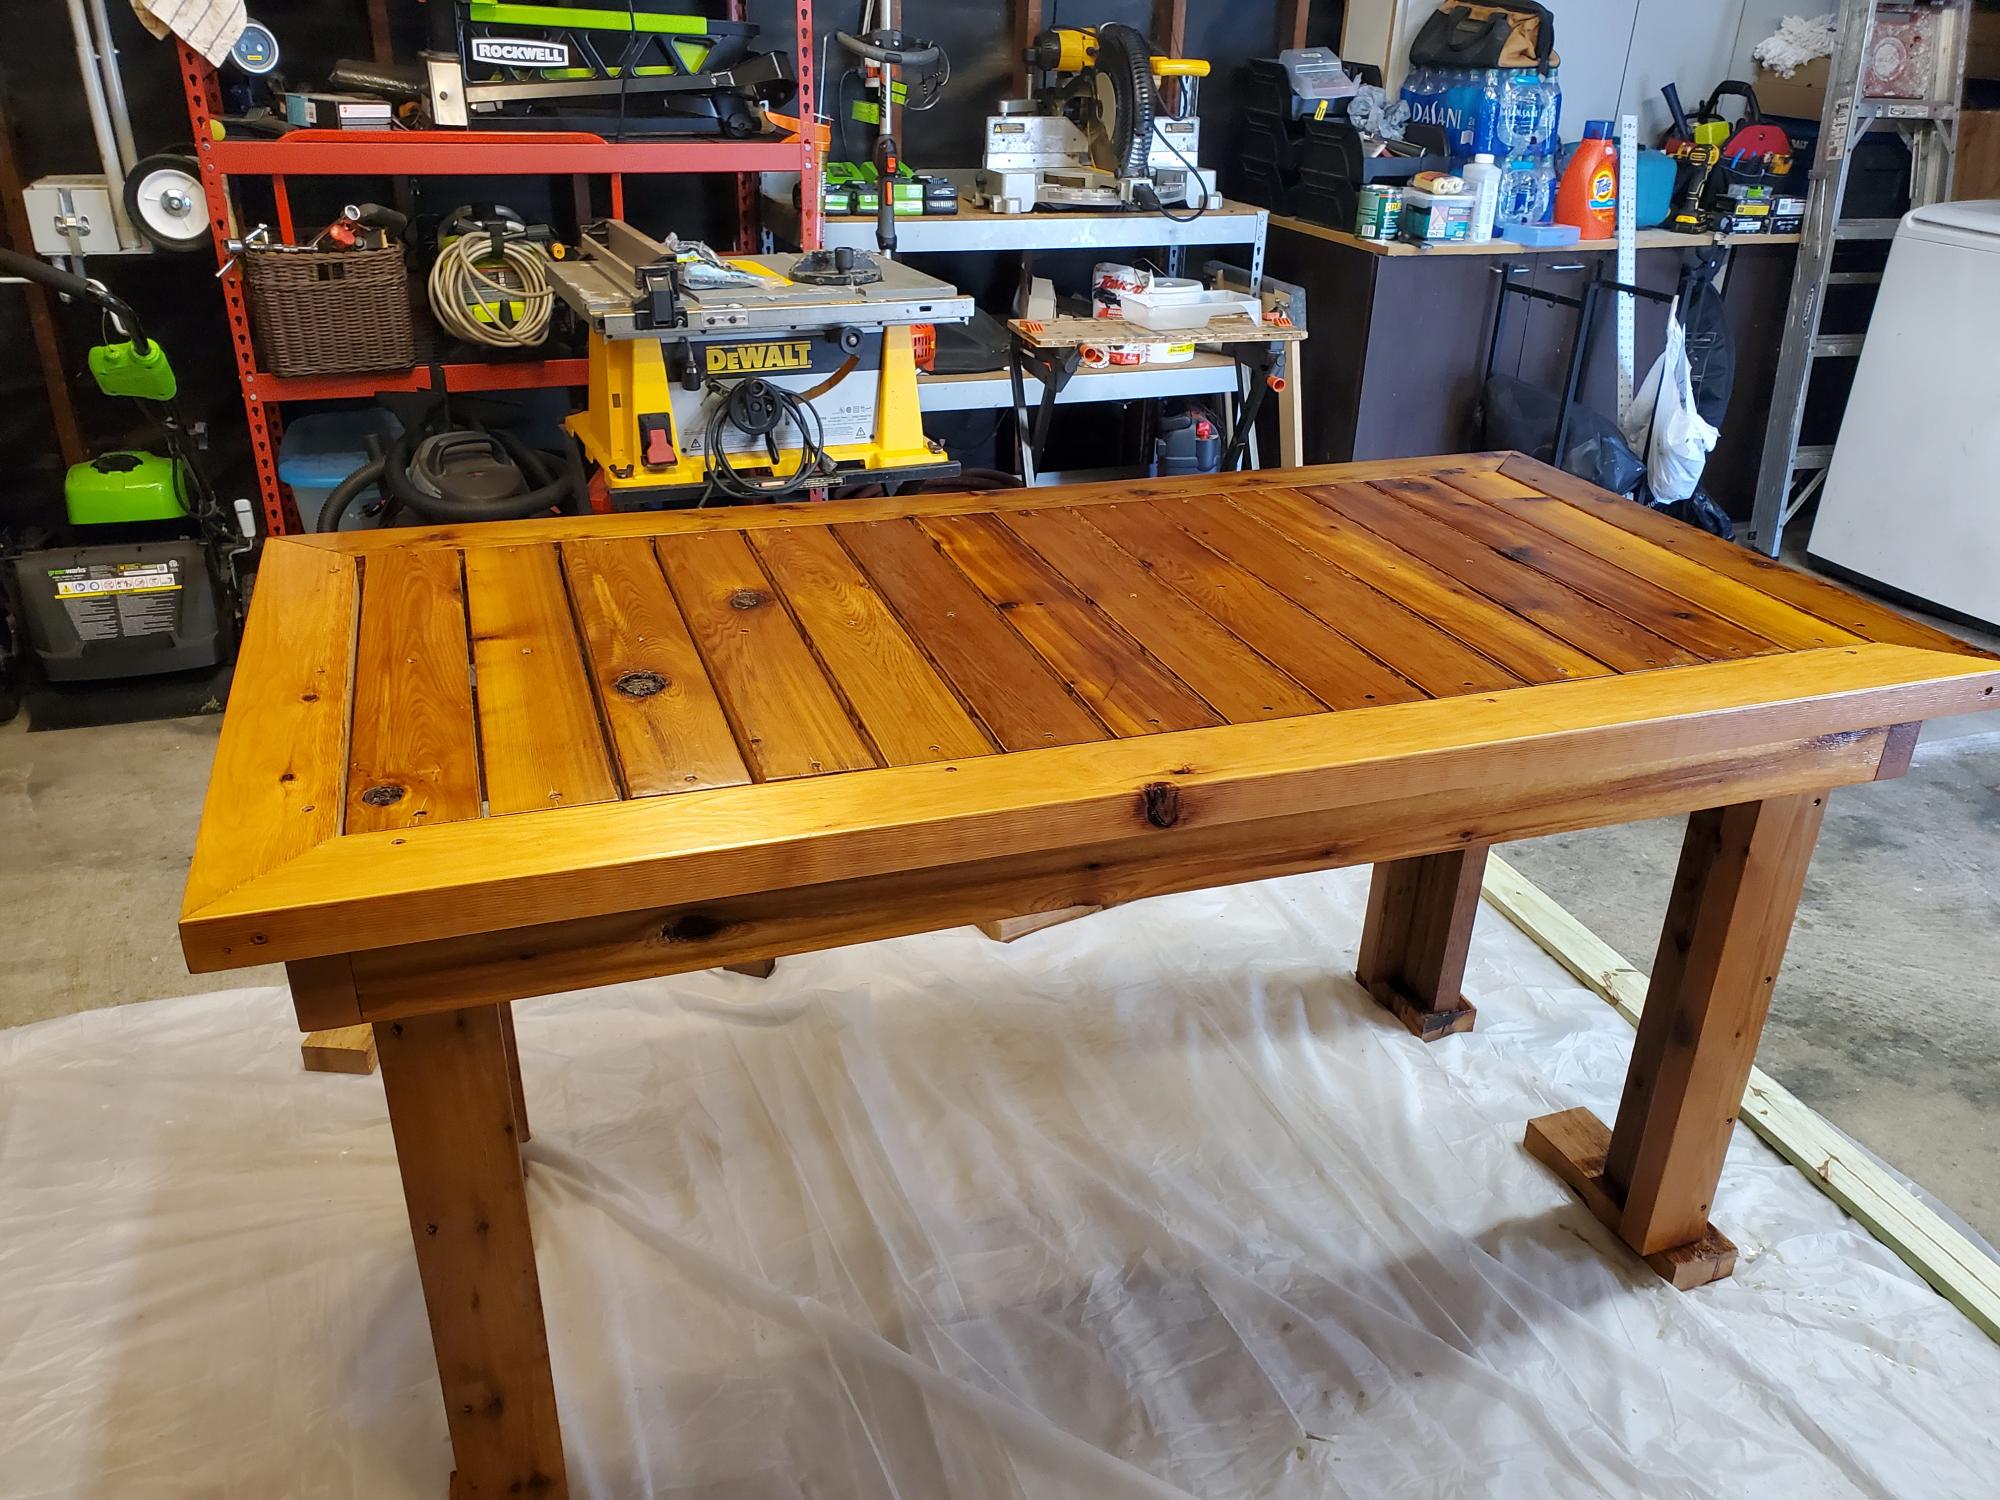
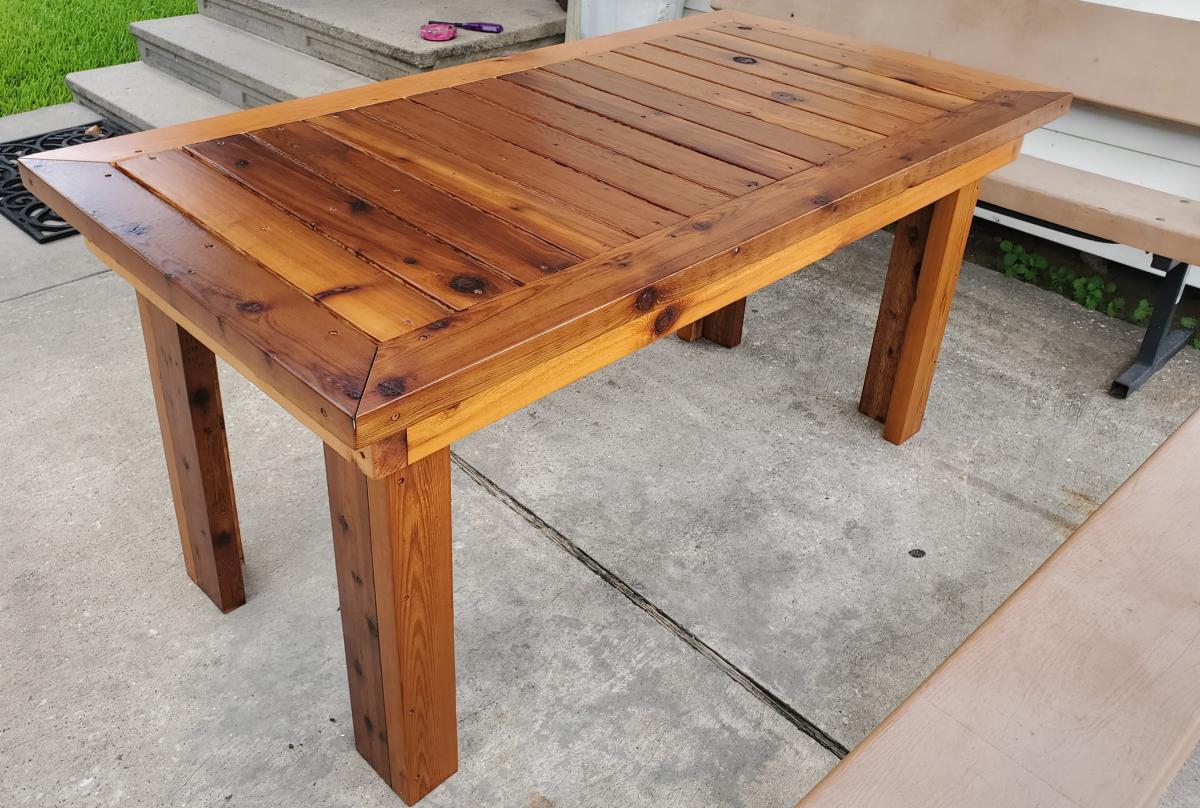
All cedar 2x4 version of the Simple Outdoor Dining Table with a satin urethane finish.
https://www.ana-white.com/woodworking-projects/simple-outdoor-dining-ta…
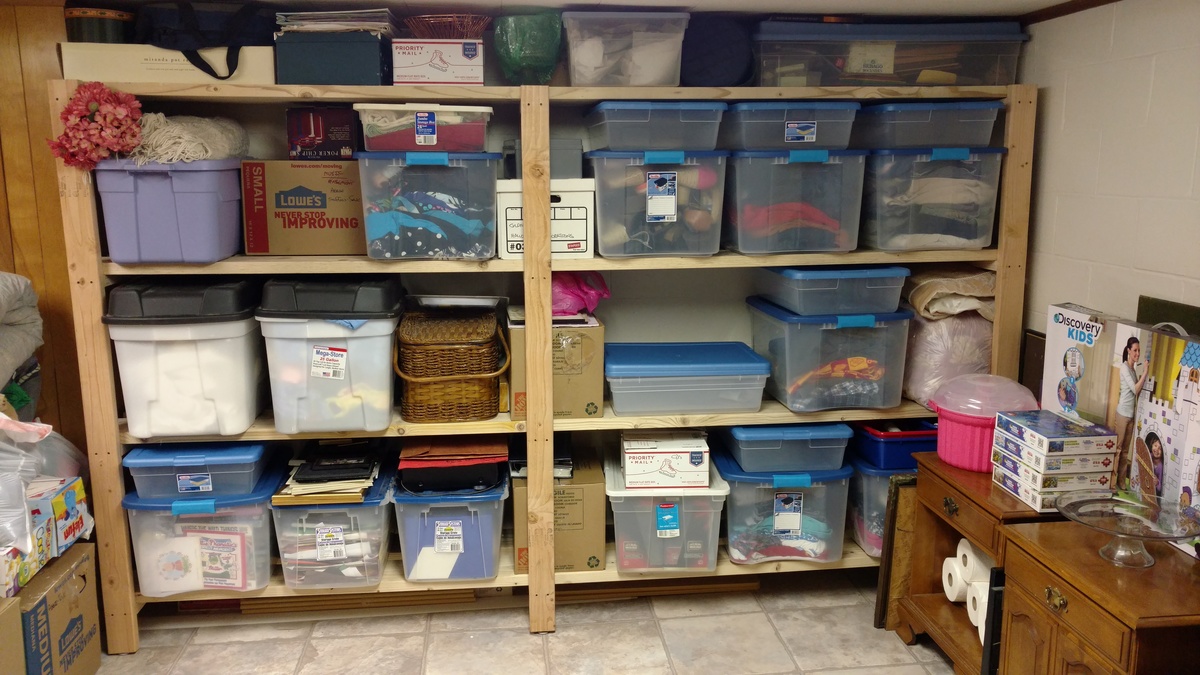
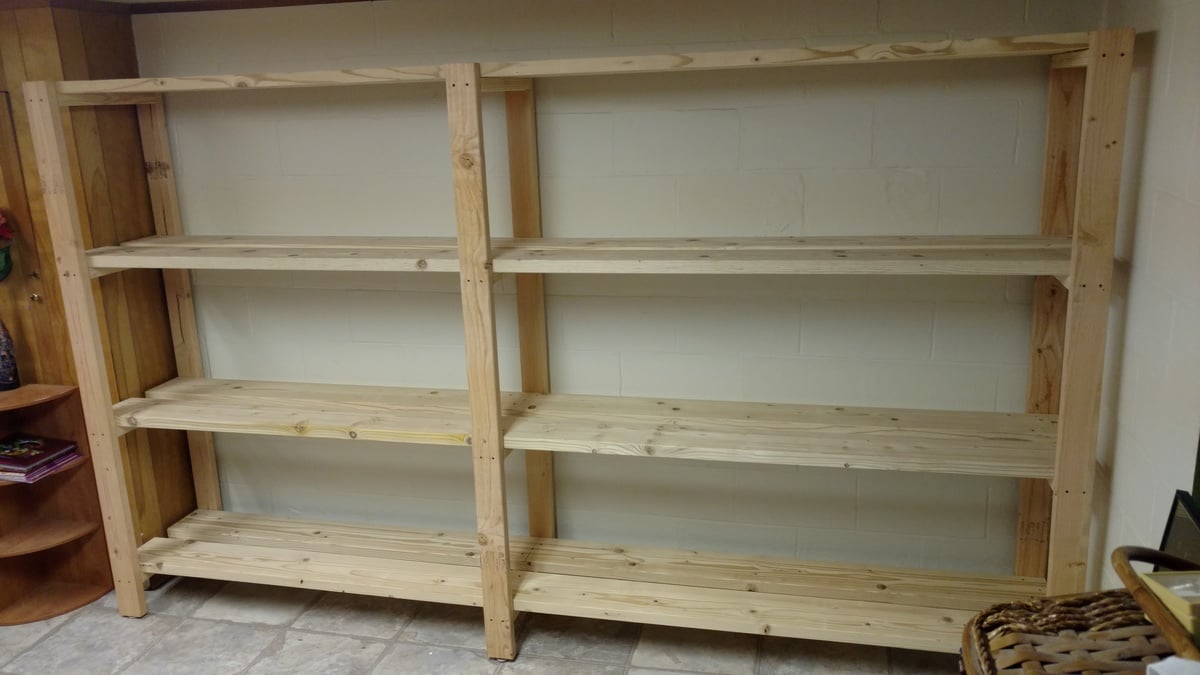
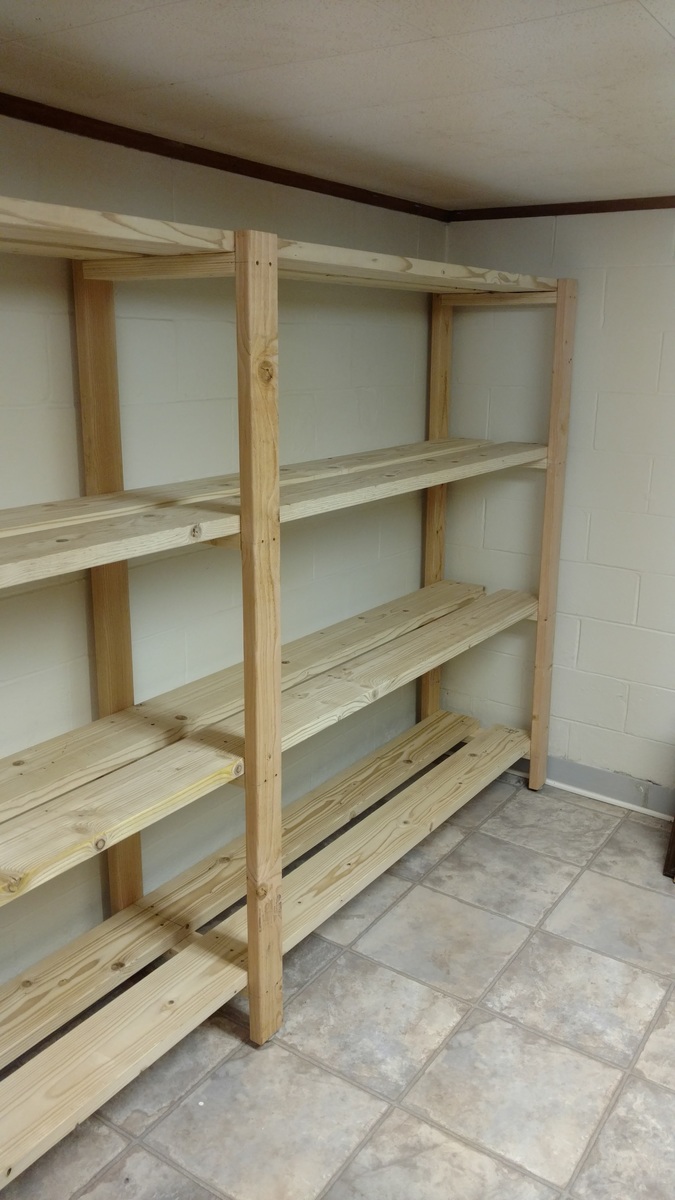
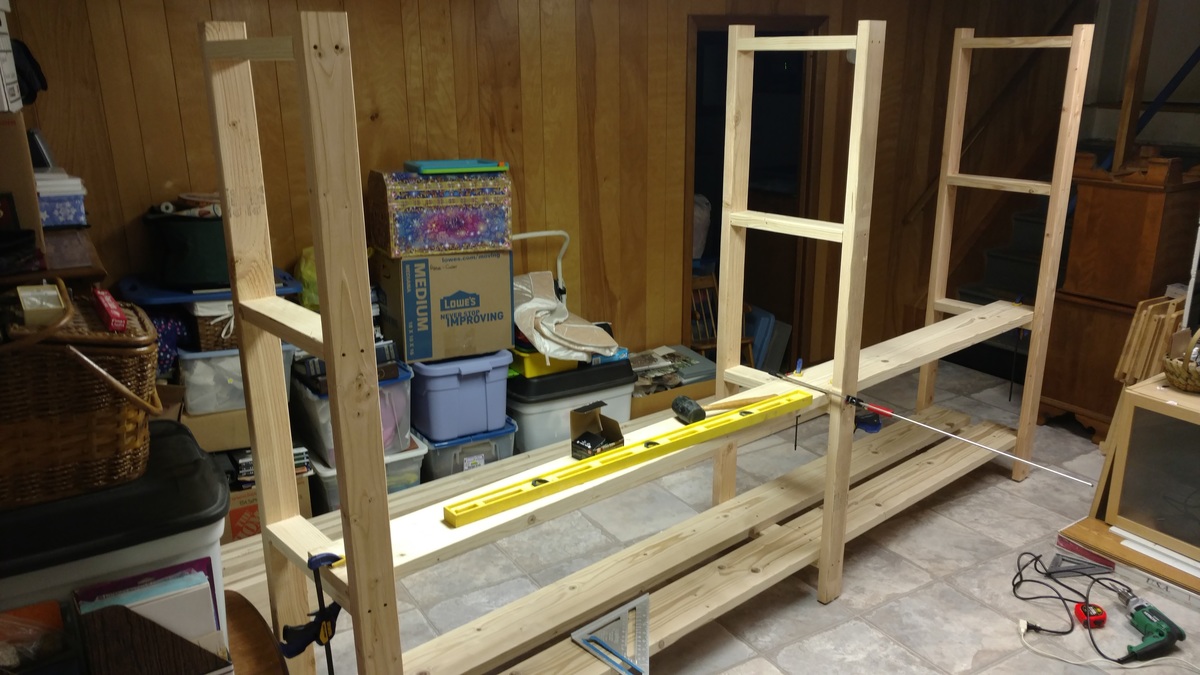
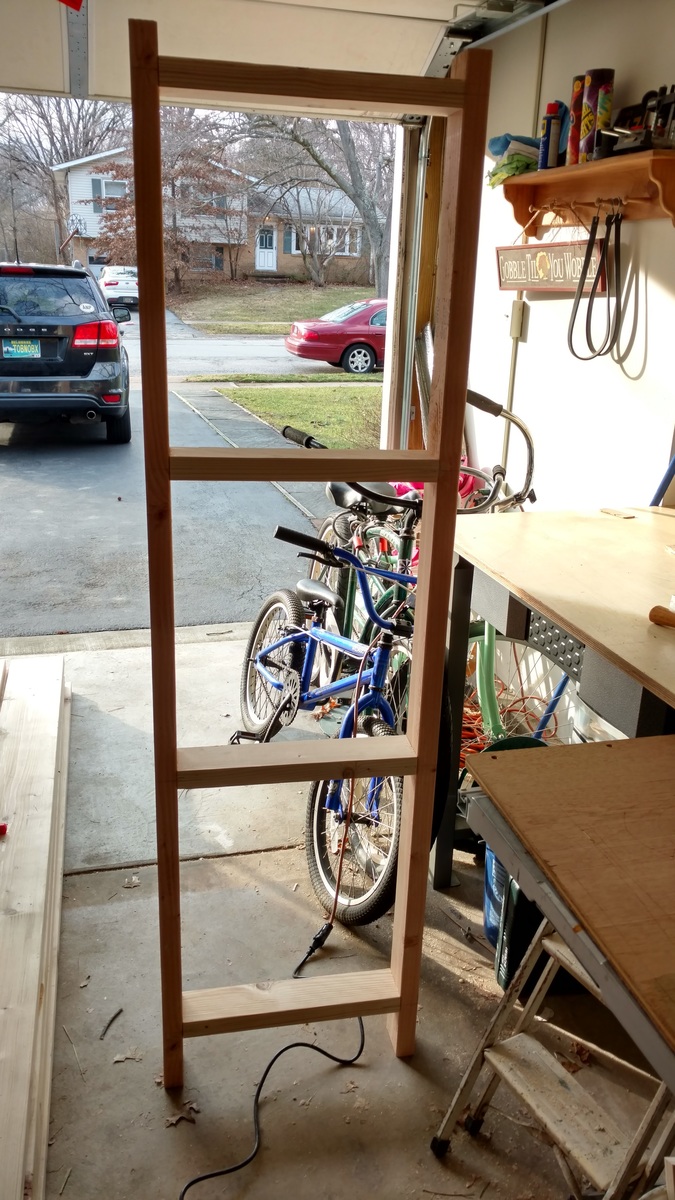
Time to get organized in 2017....and what better way than with some custom shelving. This was not too bad of a project to complete. It only took about 6-8 hours to cut, frame, and assemble everything together (thanks to an interruption or two). 'Twas nice to have a project for once that I didn't have to care about finishing the project with wood filler, sanding, painting. I am sure my wife thanks me more as I would have been another week getting things just right!
A few changes that I made from the original plans:
- used 2x8 for the shelving runs as I only was dealing with a 10ft run and was a few bucks cheaper to buy 8 boards vs 16 boards. Plus less cuts!!!
-installed adjustable furniture feet in the supports to deal with sloping basement floor. Unexpected side effect was it was easier to slide the unit around in the basement as I assembled it.
Outside of those changes I remained faithful to the original design. I didn't bother filling the screw holes as we will be hiding the shelving unit with a curtain once we turn the room into a TV/Office area.
Also as it wasn't 100% clear from the original plans, but the height measurements for the shelf supports are to center... not sure why it didn't register with me right away... but just in case anyone else didn't realize that as well.

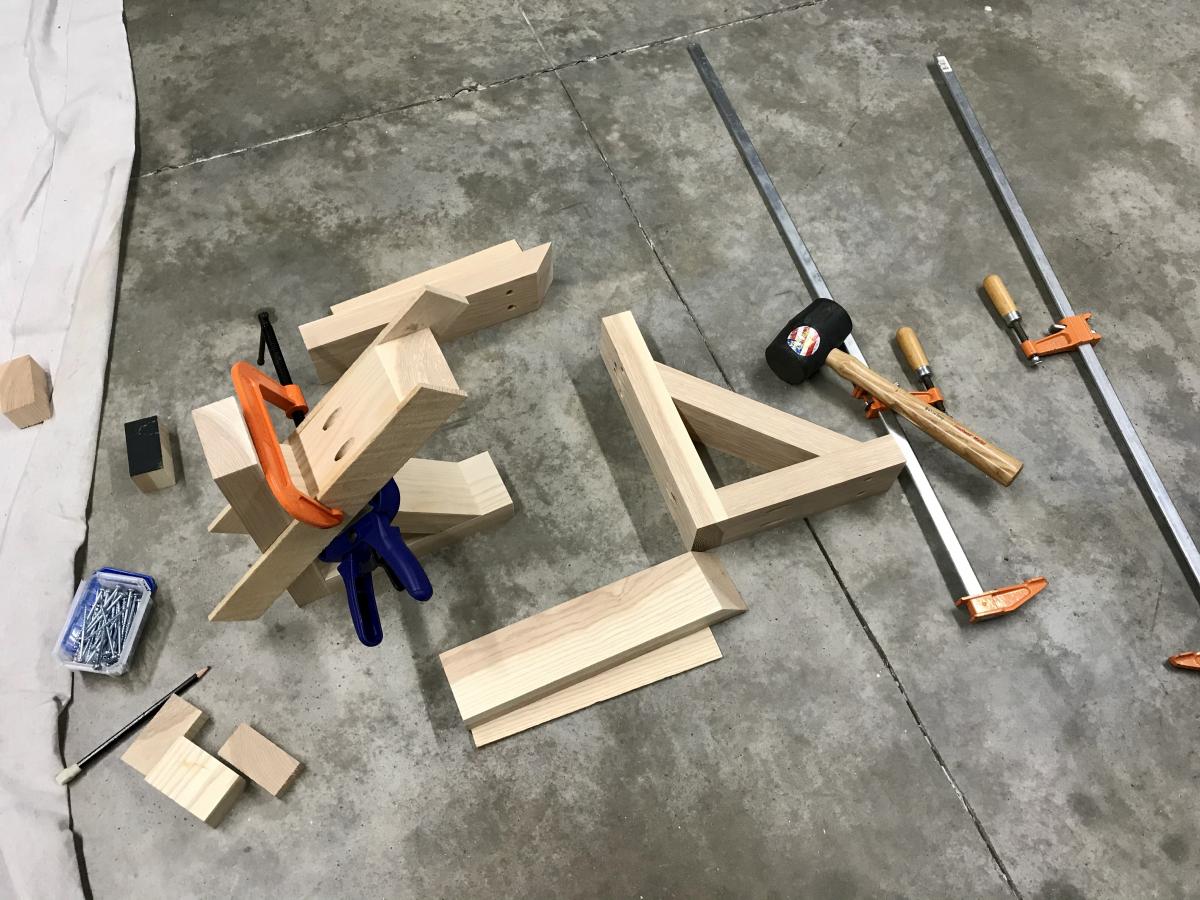
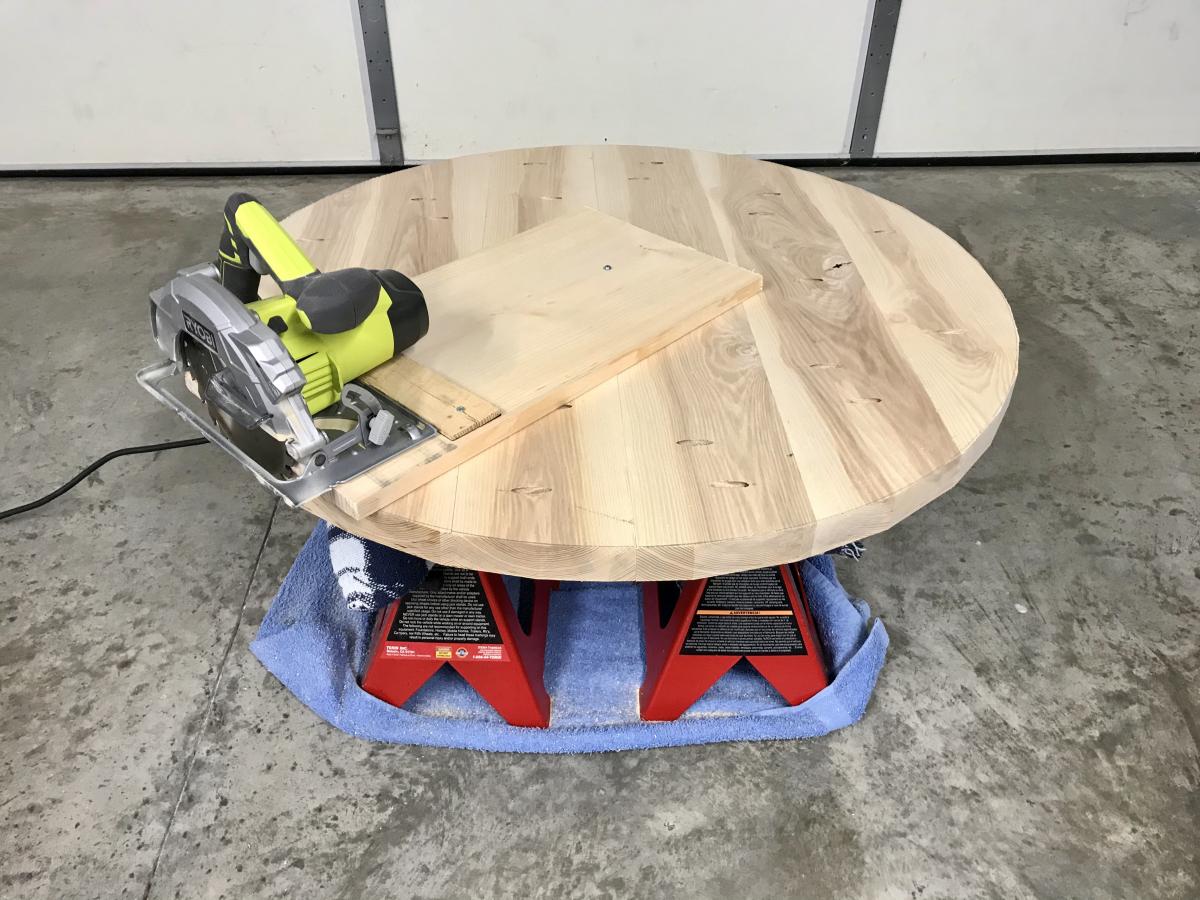
Here is Ana White’s round farmhouse table miniaturized into a coffee table measuring 18” in height and 36” in diameter using hardwood Ash.
The table top construction was slightly simplified by screwing six (1.5” x 6” x 36”) panels together. The circular saw jig setup worked out well.
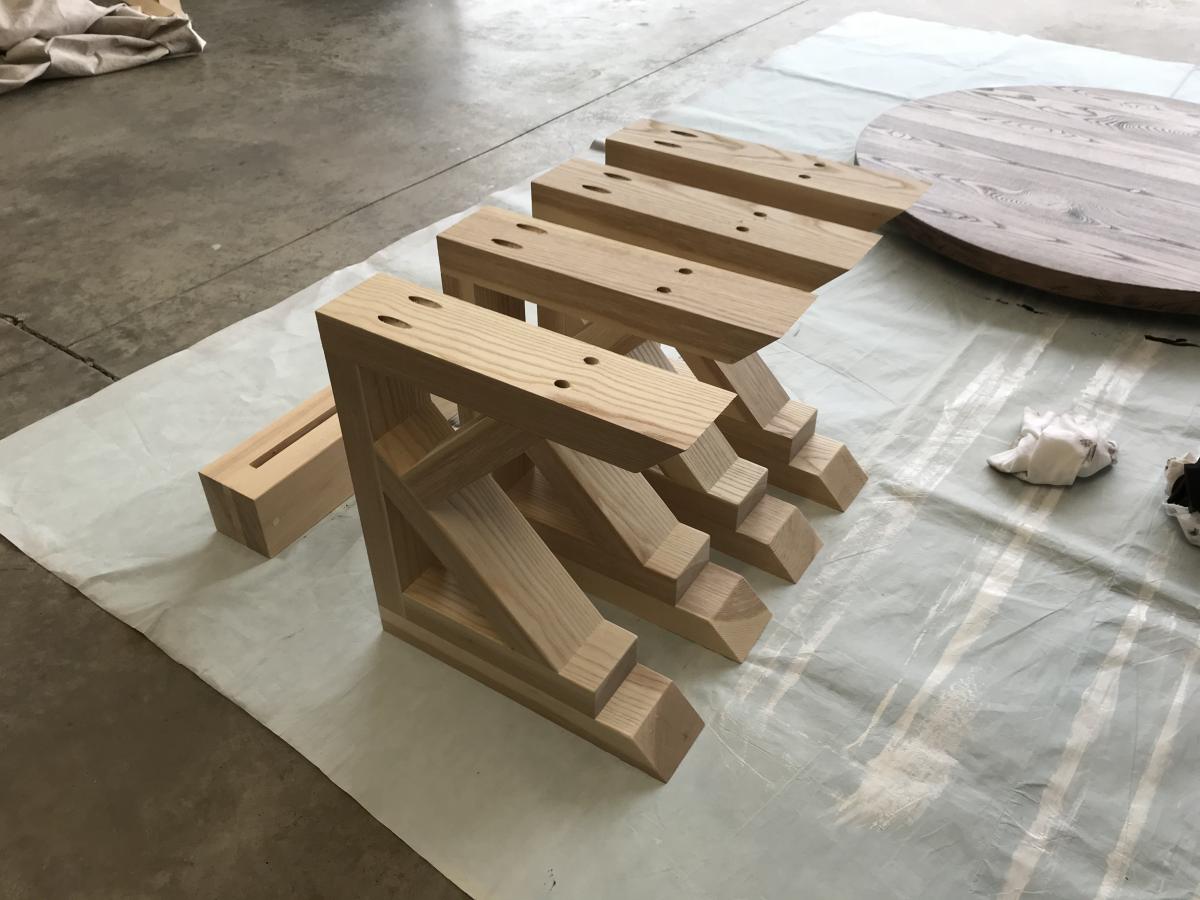
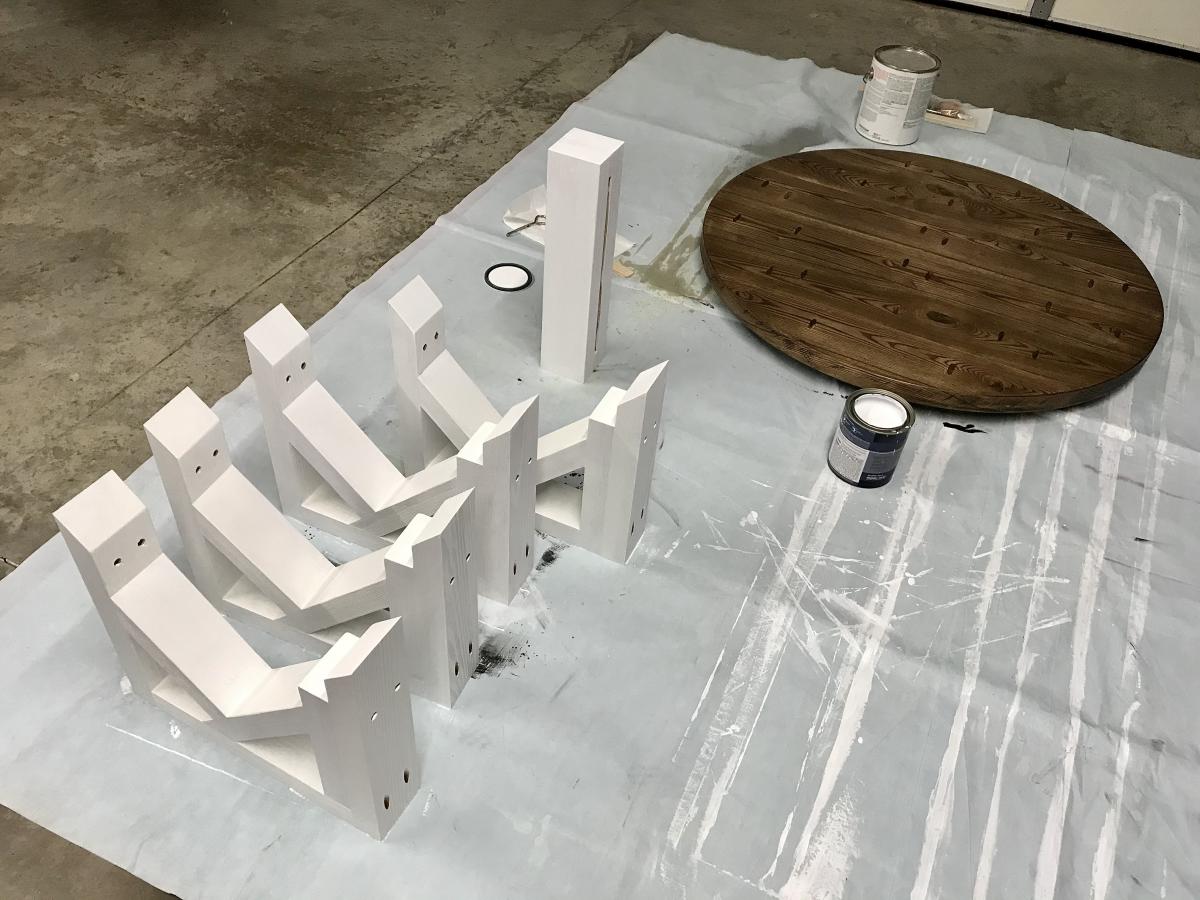
A Kreg jig and a variety of clamps were instrumental in securing clean, tight joints for the base.
Thanks for the inspiration and useful tips on your site!
Tue, 12/08/2020 - 11:25
Stunning mini version, love this coffee table!
Sun, 01/10/2021 - 19:59
Hi, would you be willing to share what measurements you used to make the smaller base? TIA!
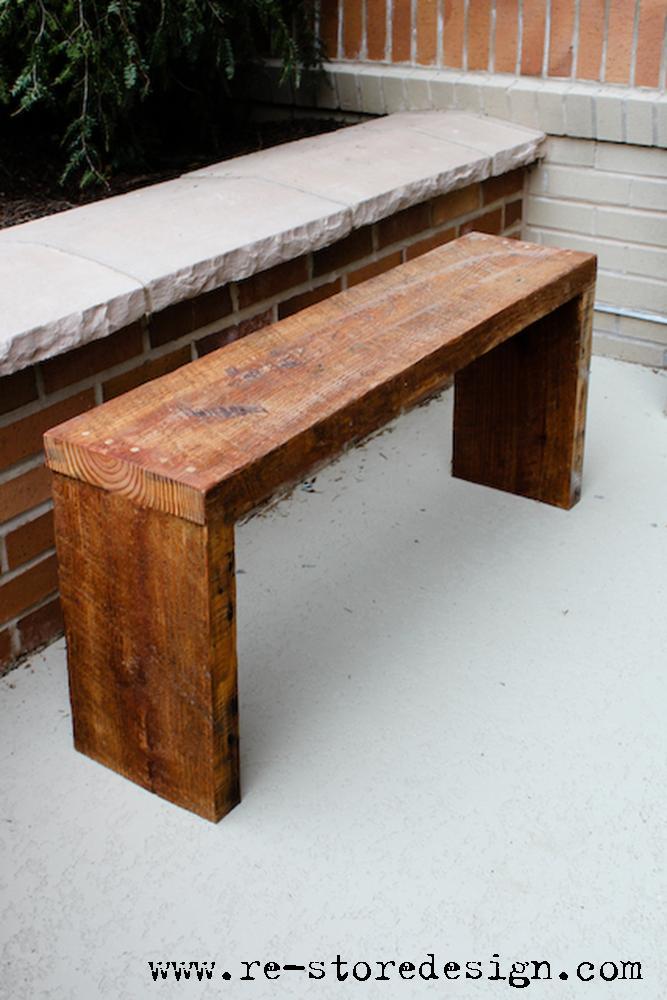
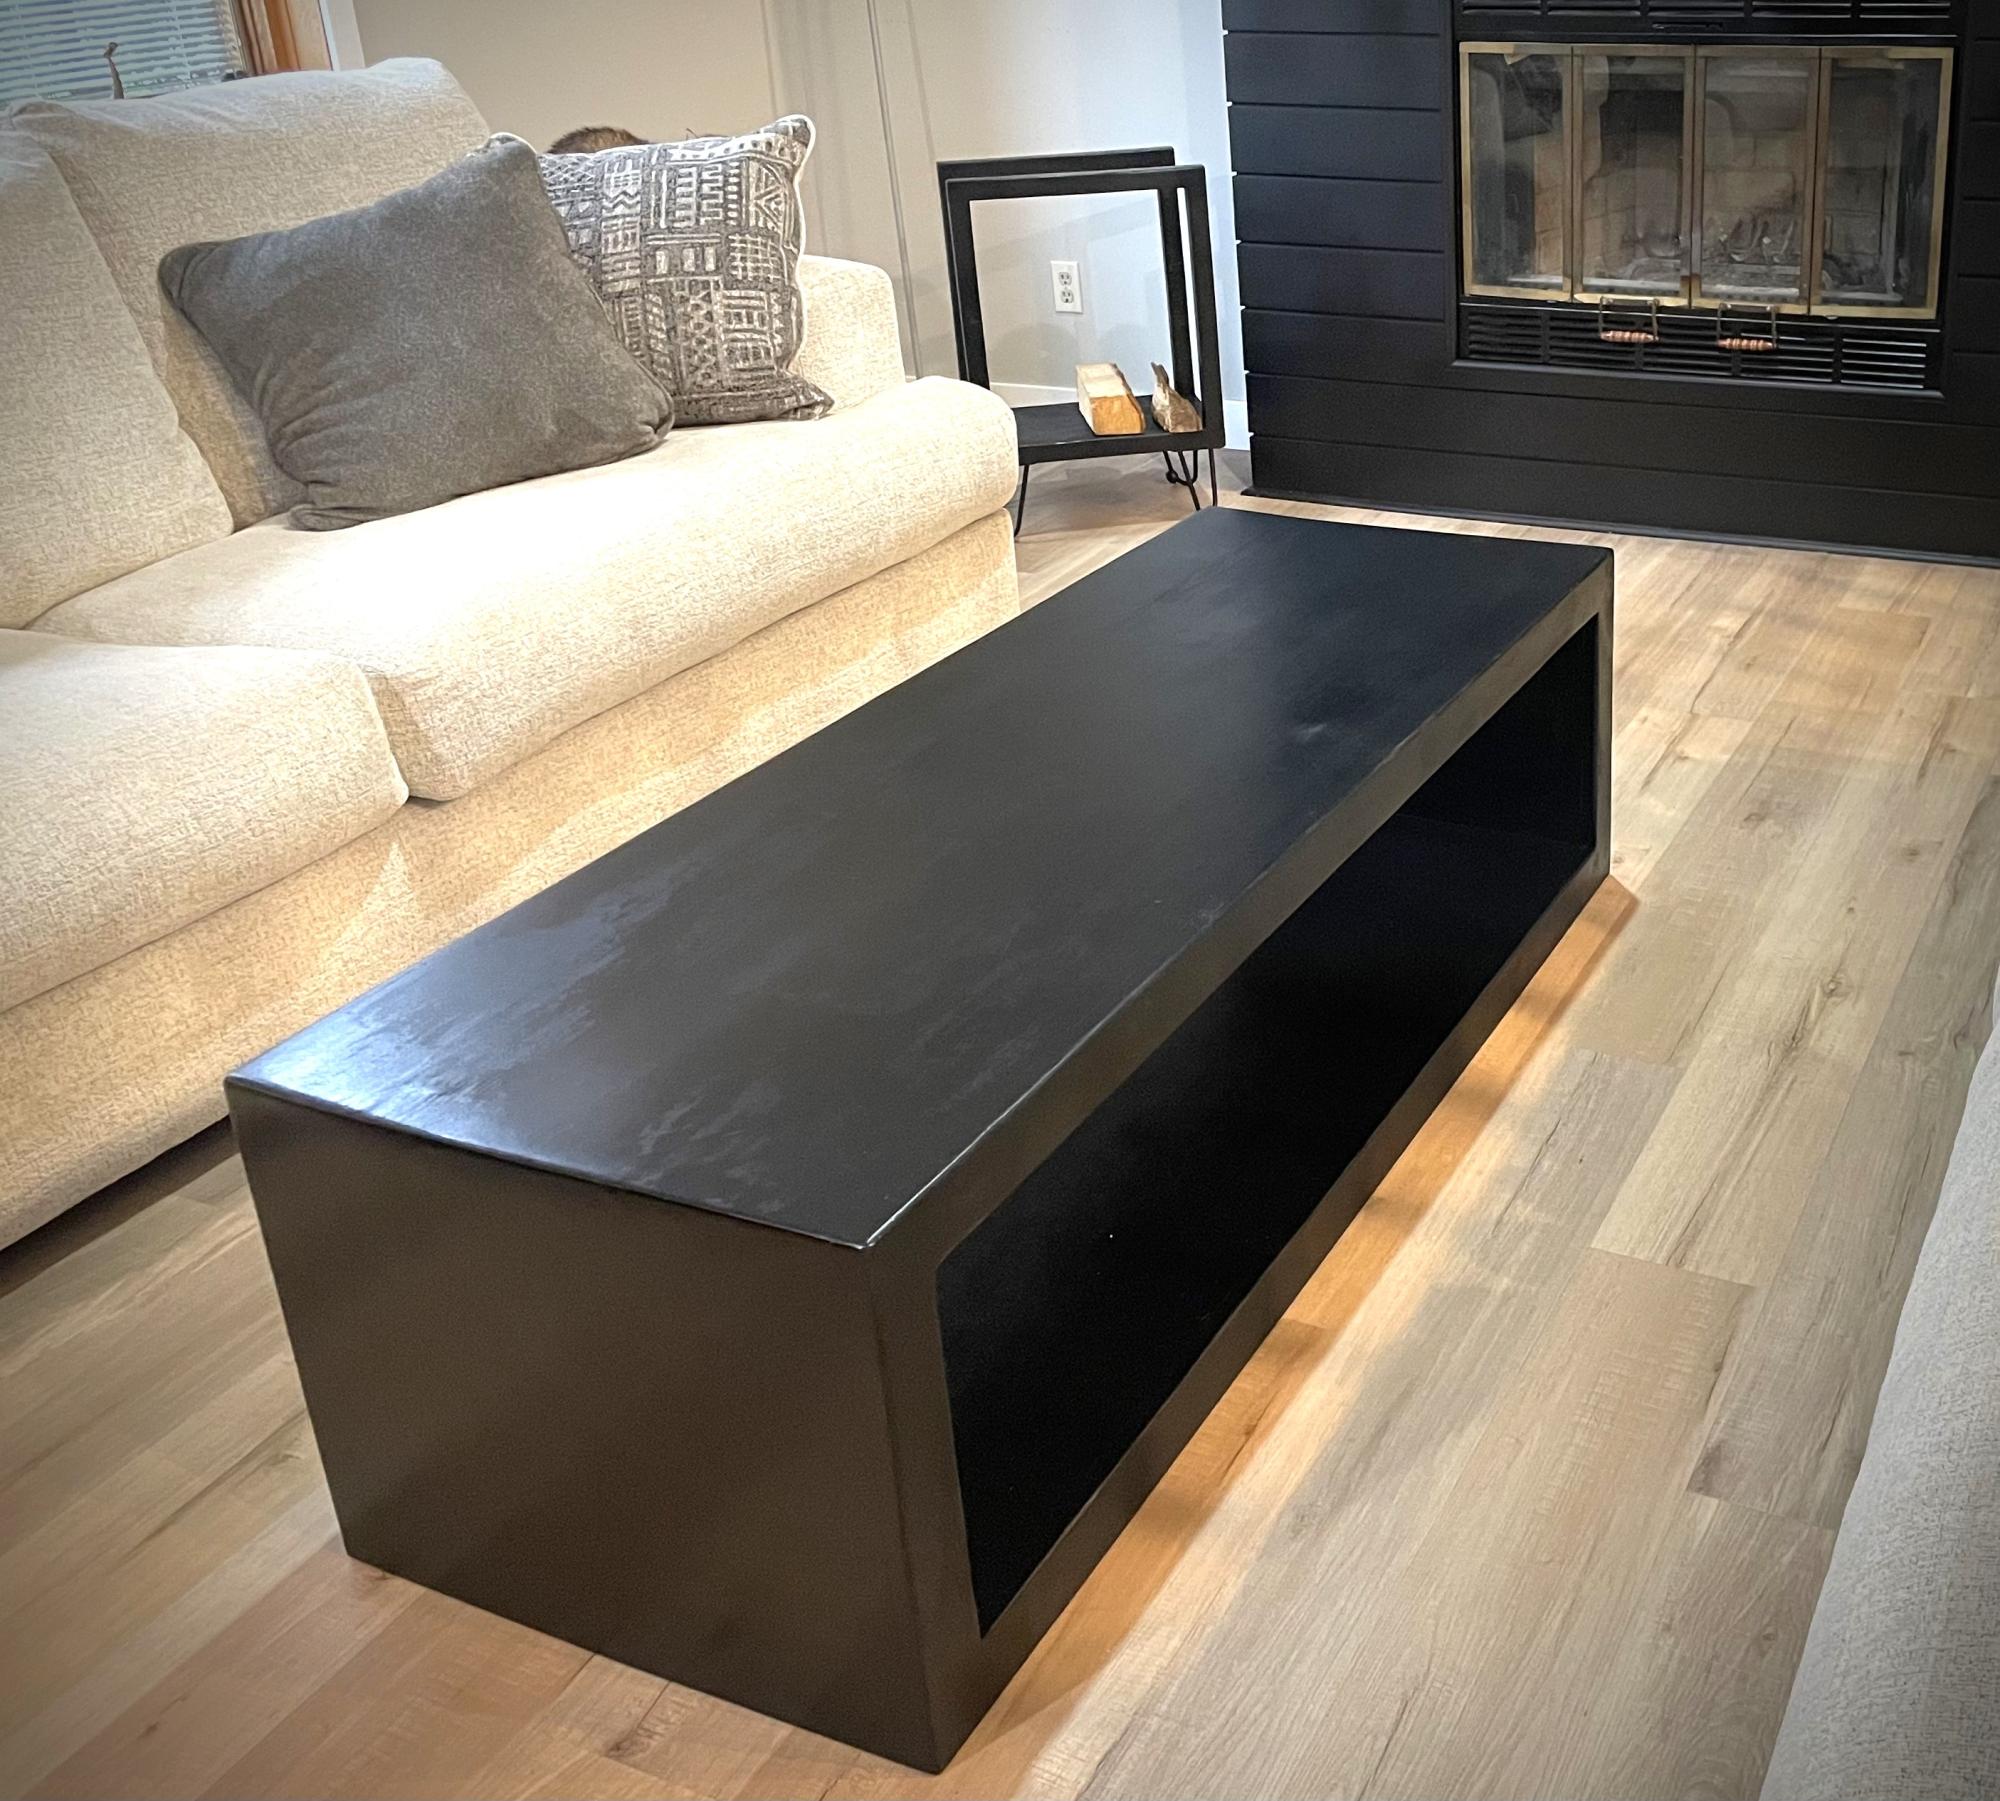
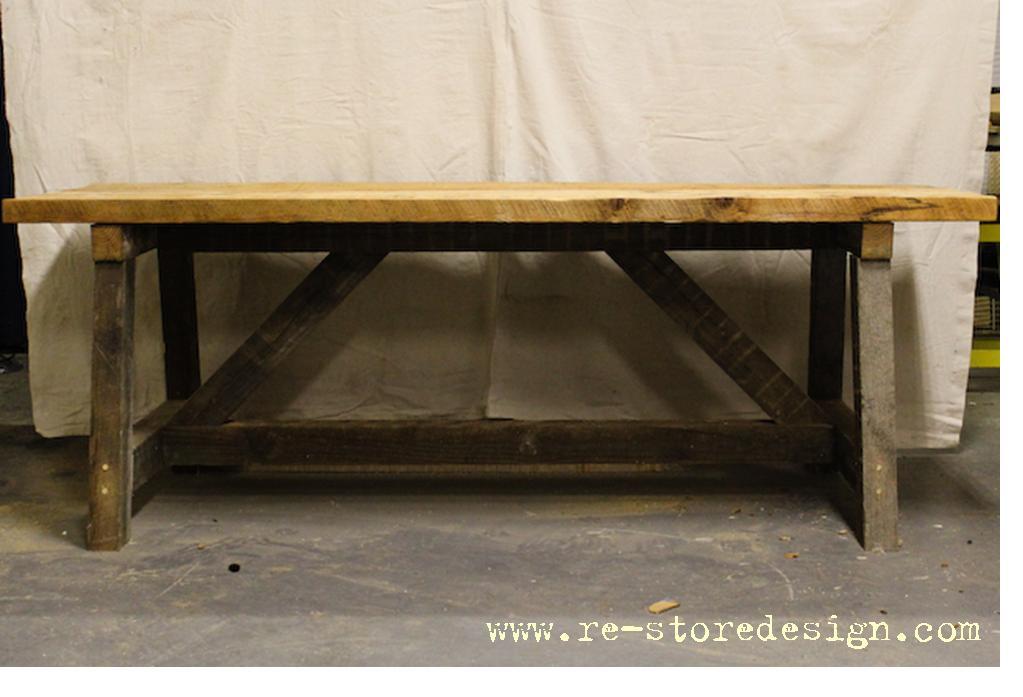
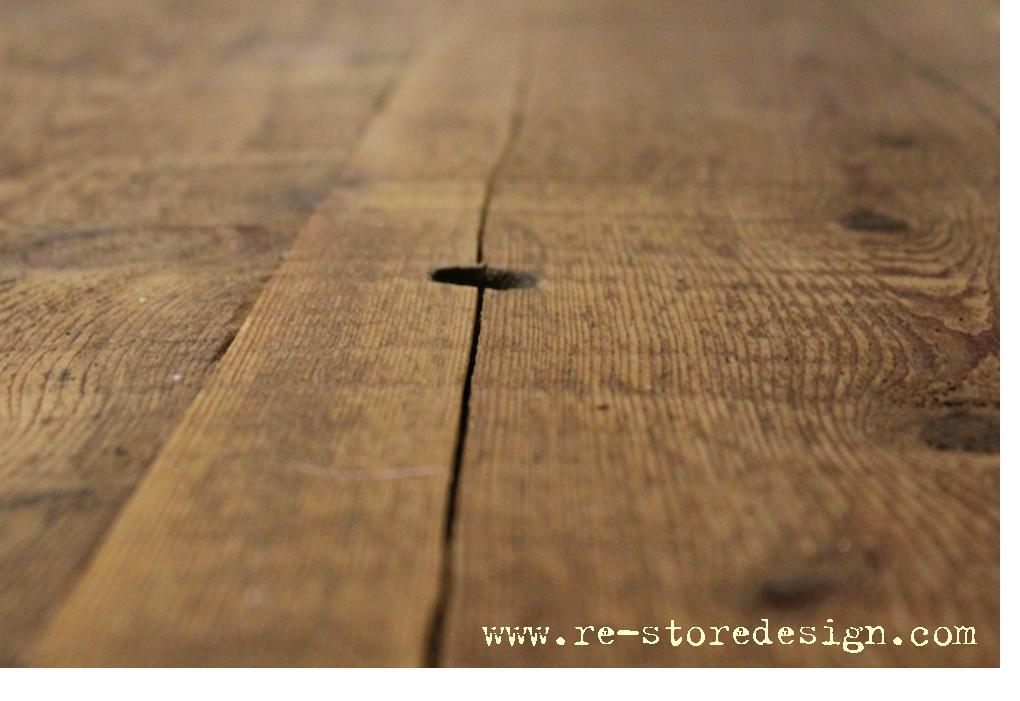
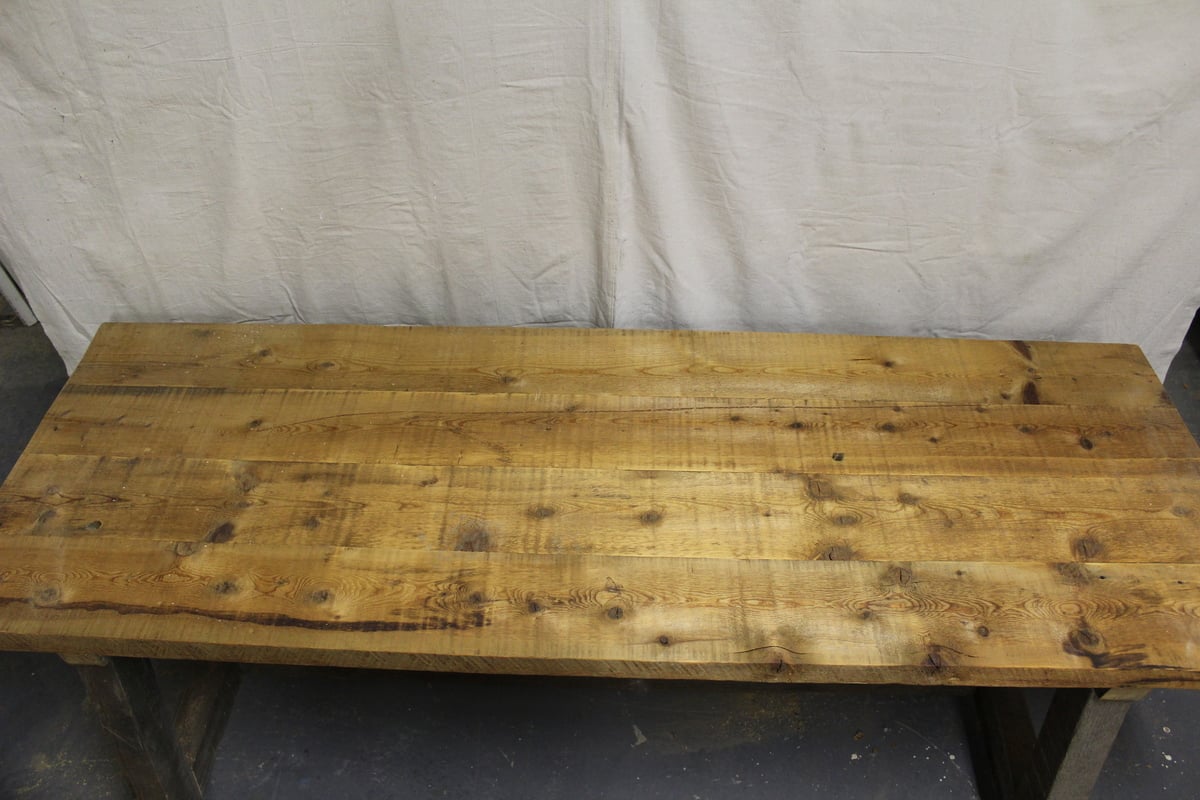
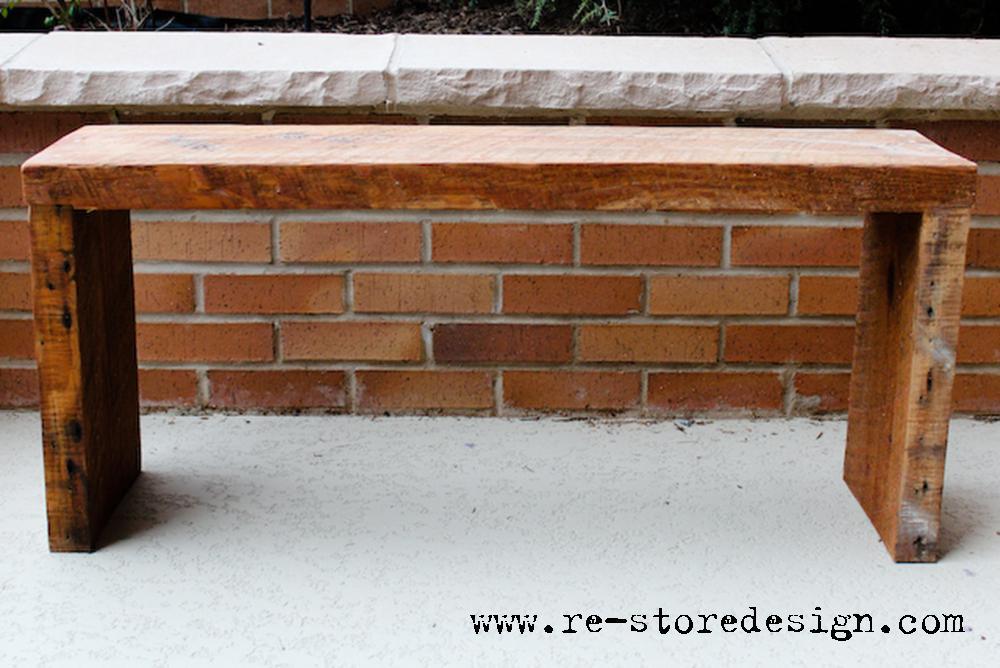
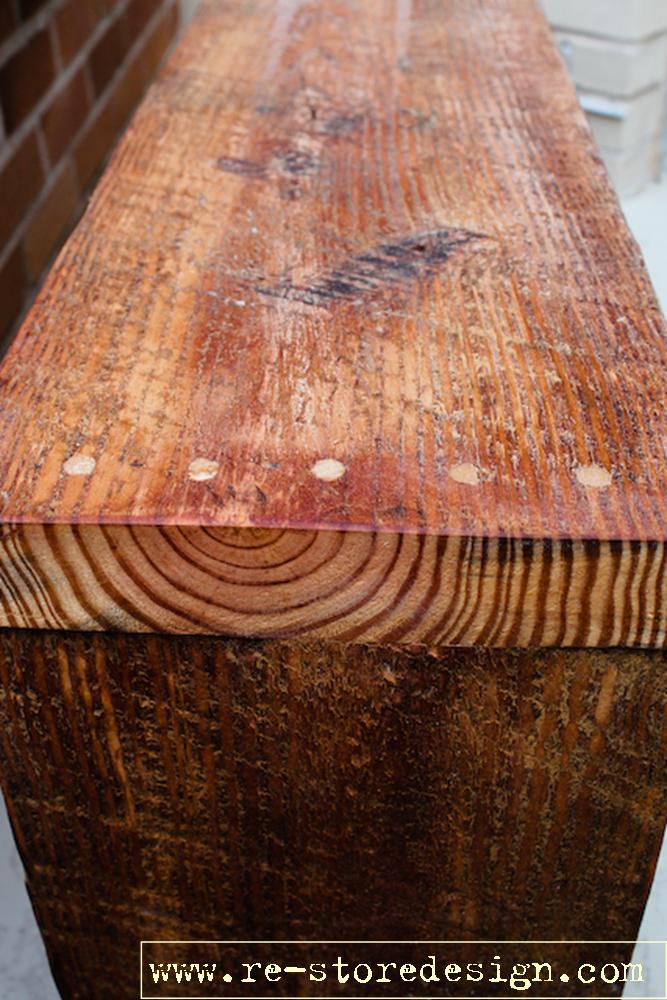
I built a couple benches to go with the reclaimed wood farm table I recently built. They are made out of hard to find 2″ reclaimed rough sawn lumber. The benches would also make a great coffee table or side table. Each bench is 36″ long and 18″ tall and 9″ deep.
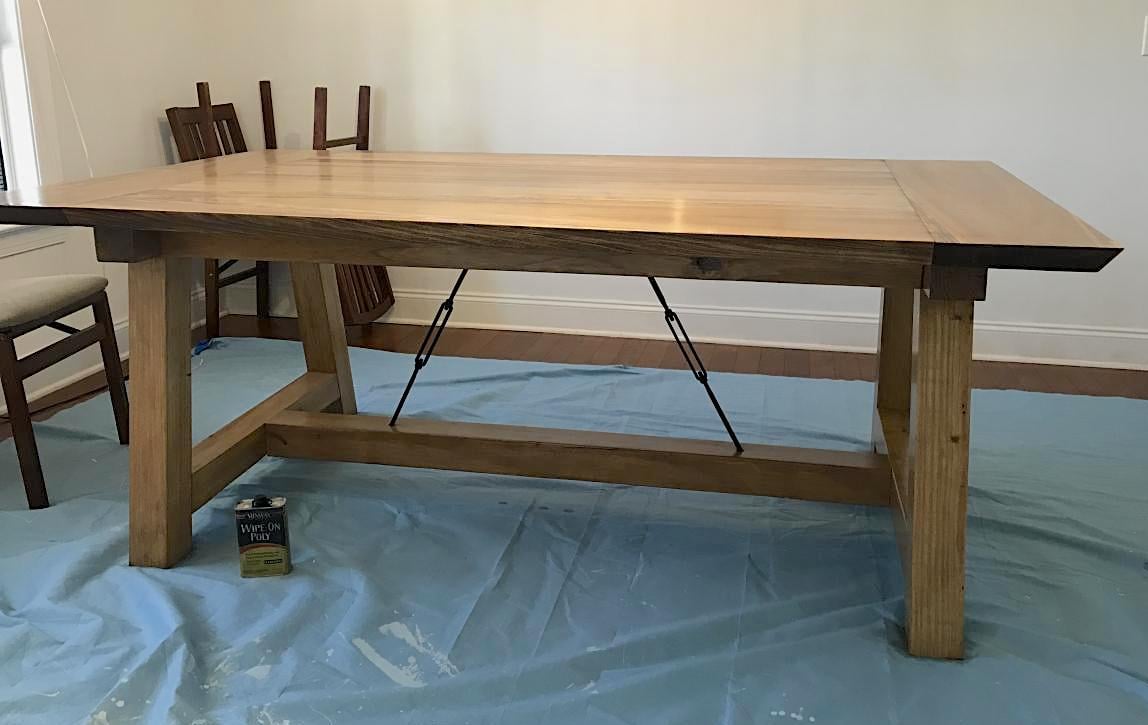
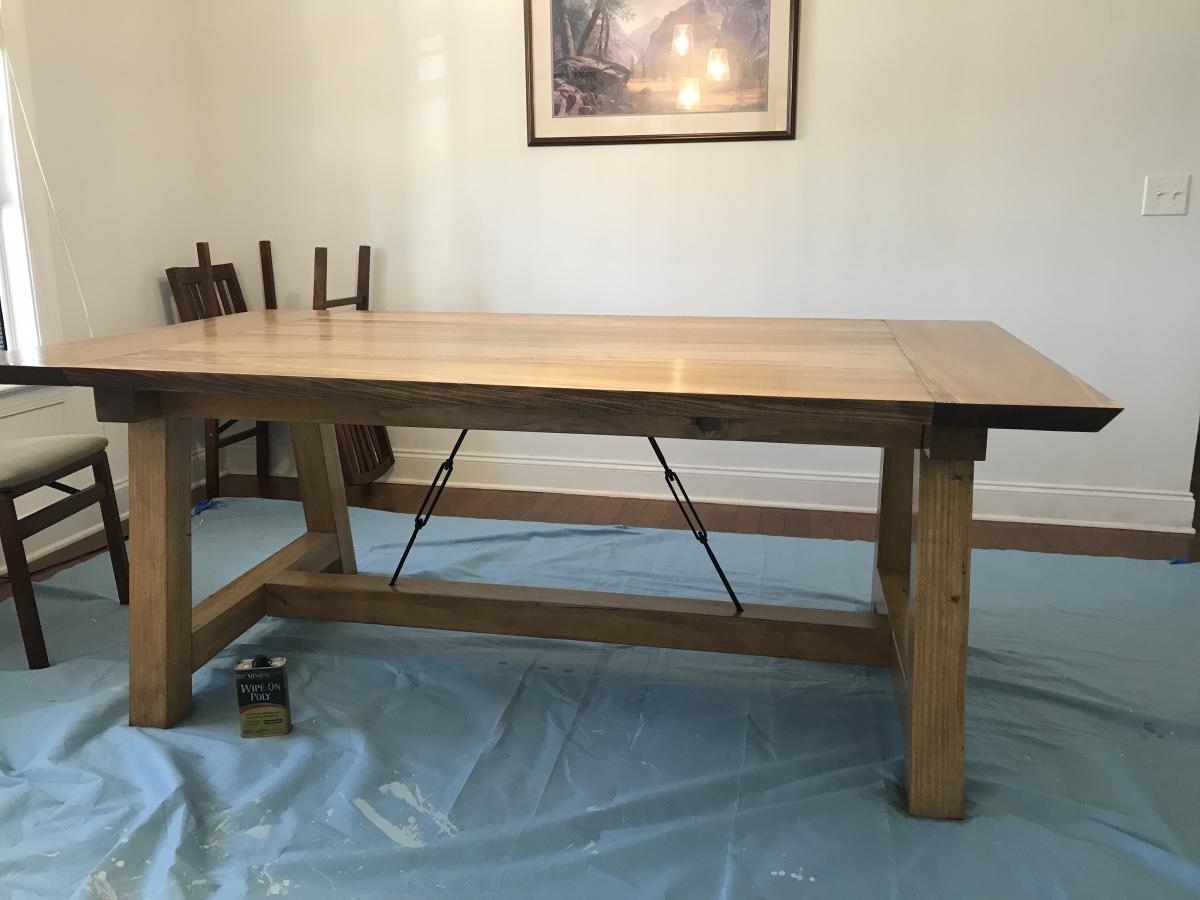
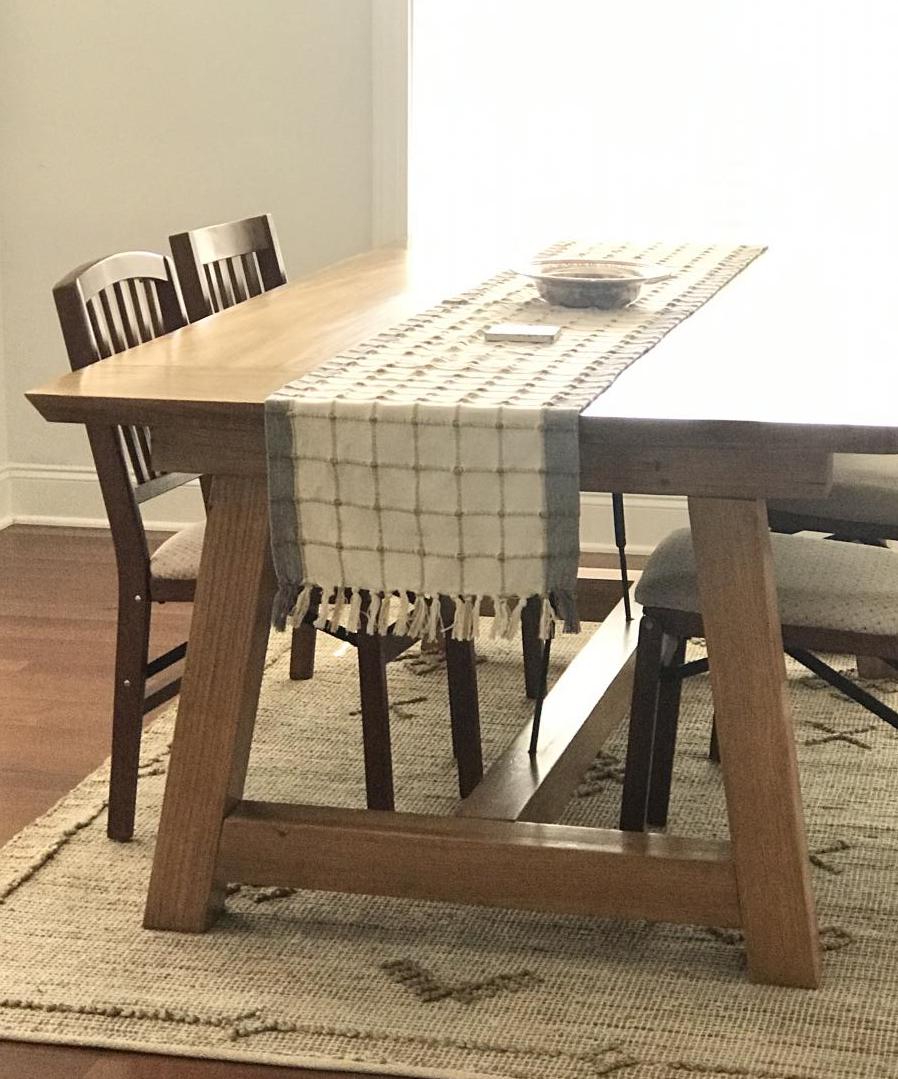
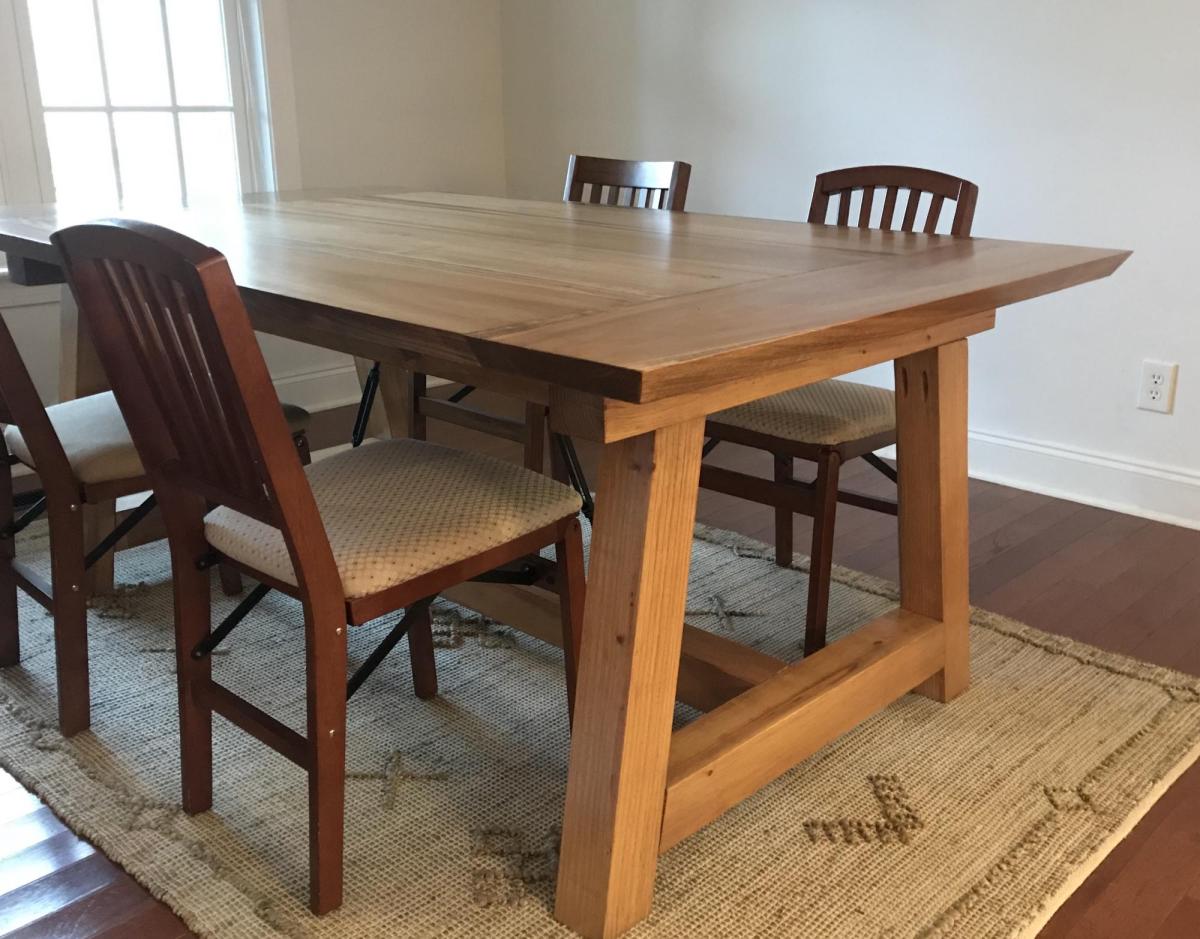
My hubby and I used the tressle table plans to make this awesome table. We changed it up, adding the turnbuckles like a Pottery Barn table that we wanted. I think this turned out way better!
We used yellow pine for the lower portion and poplar for the top.
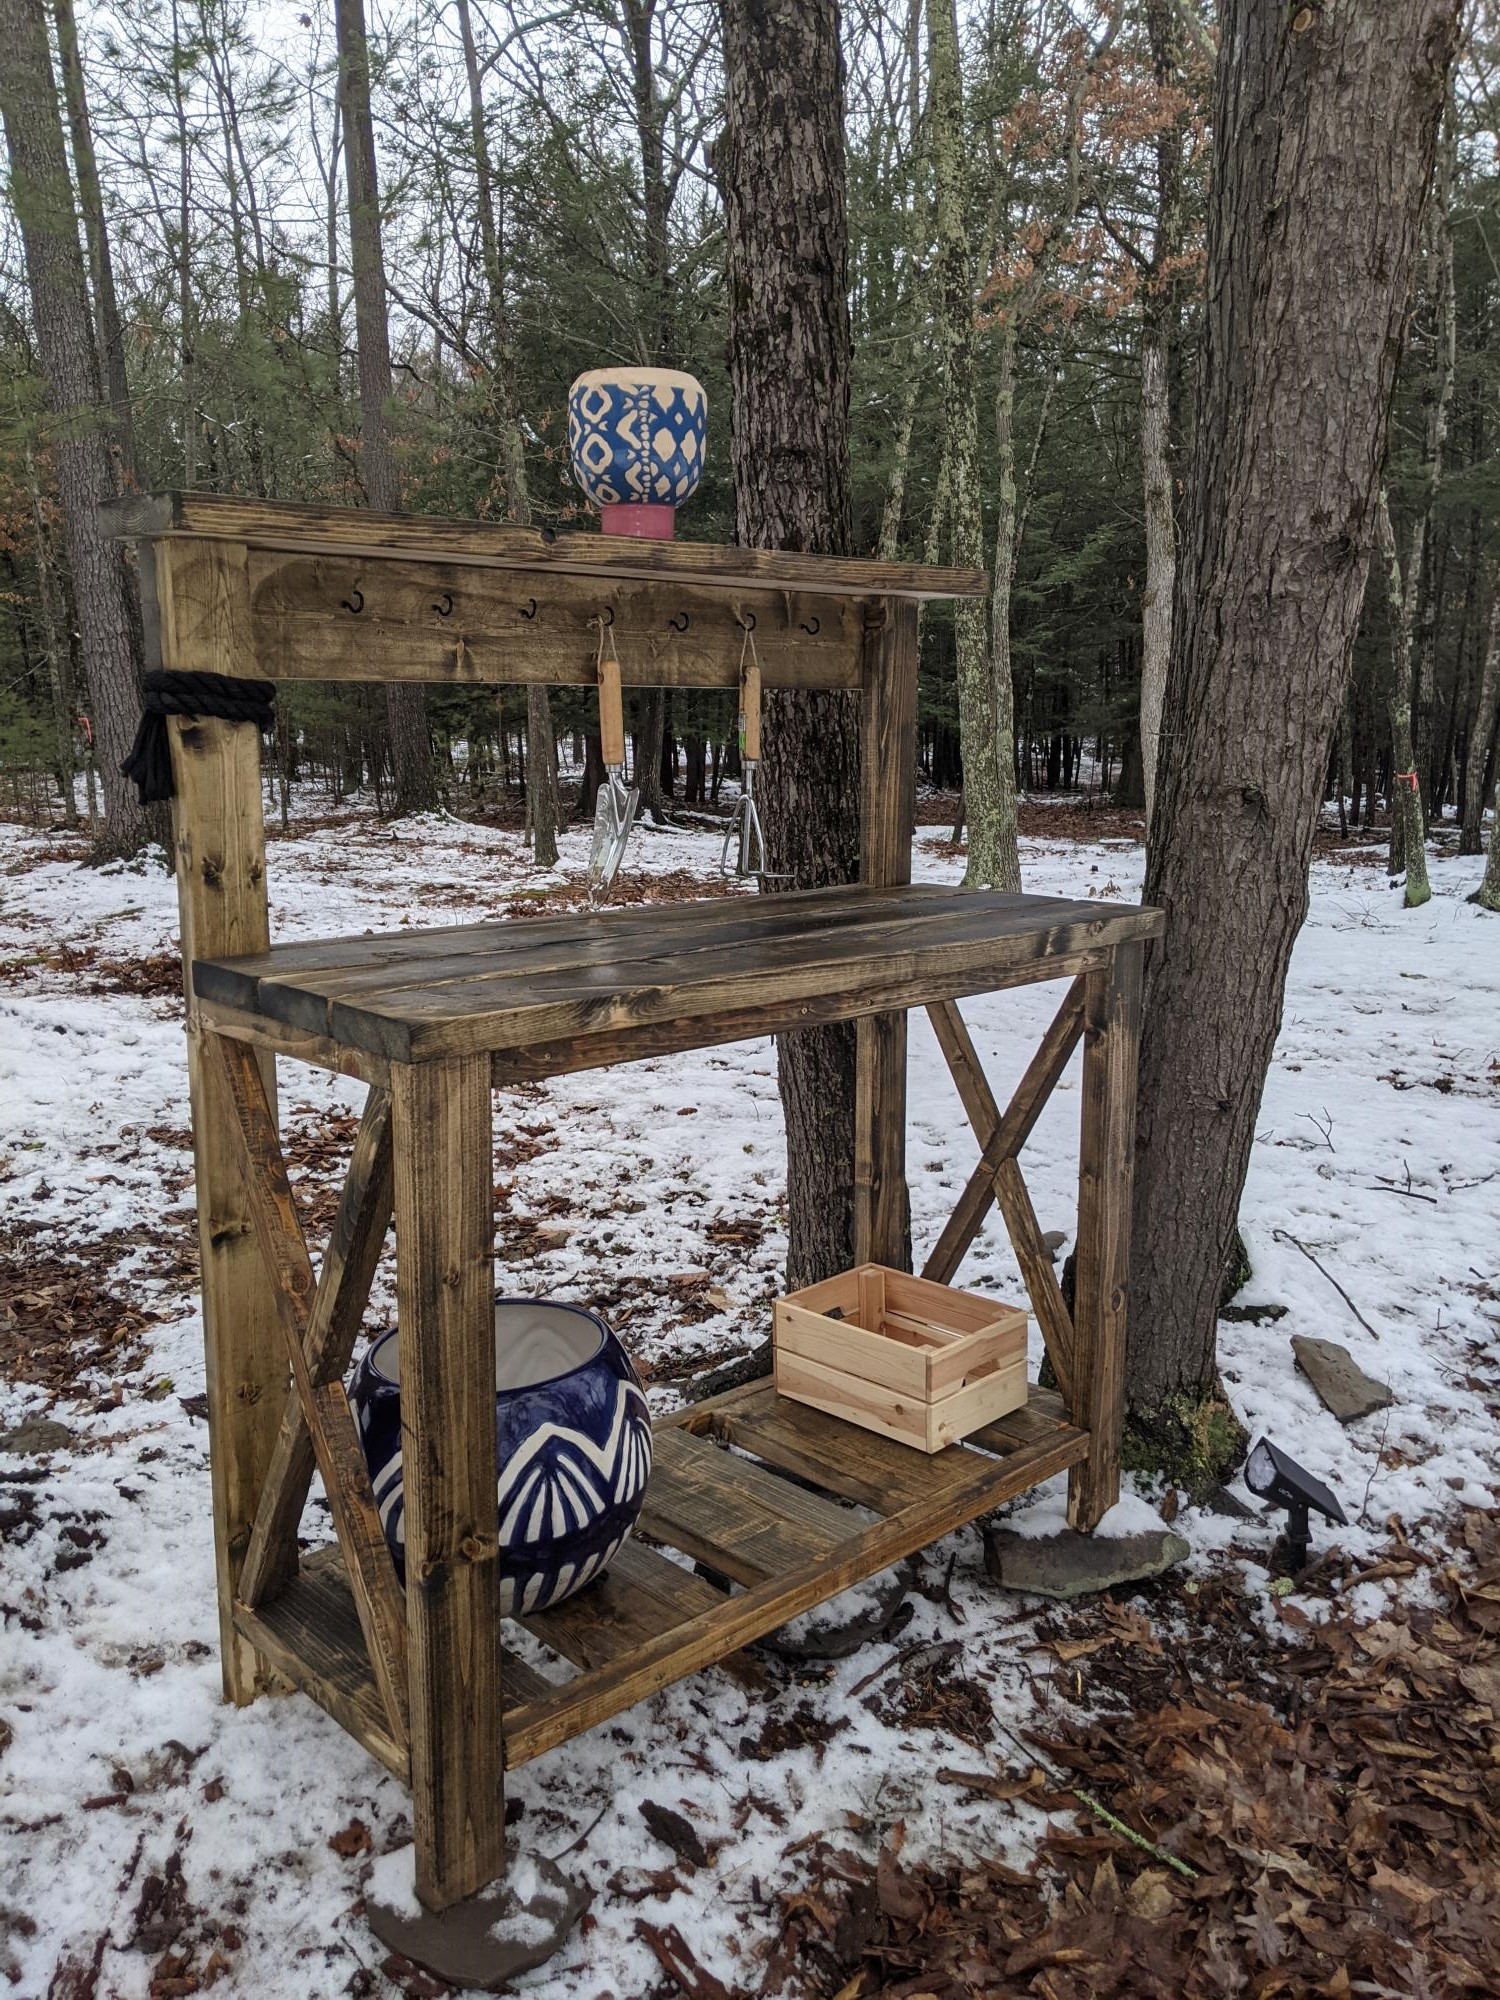
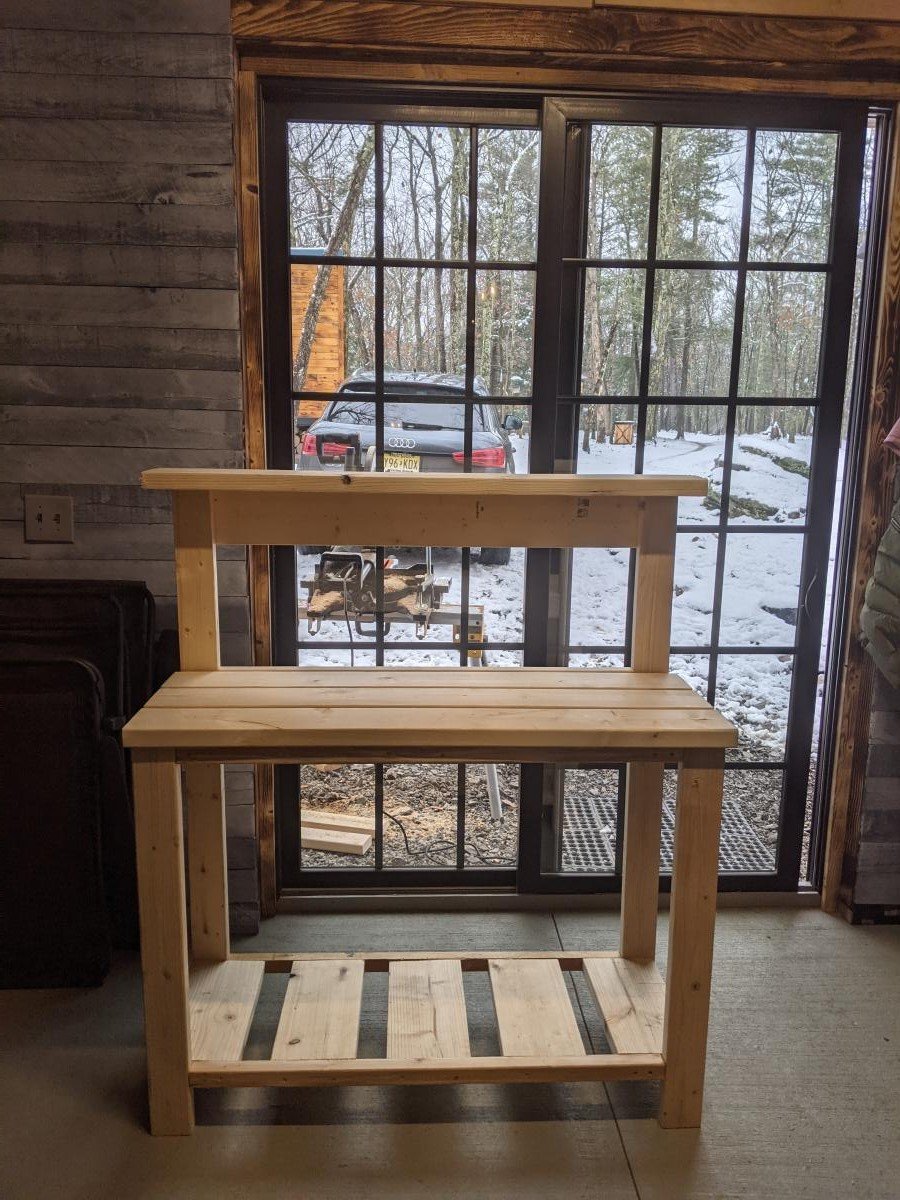
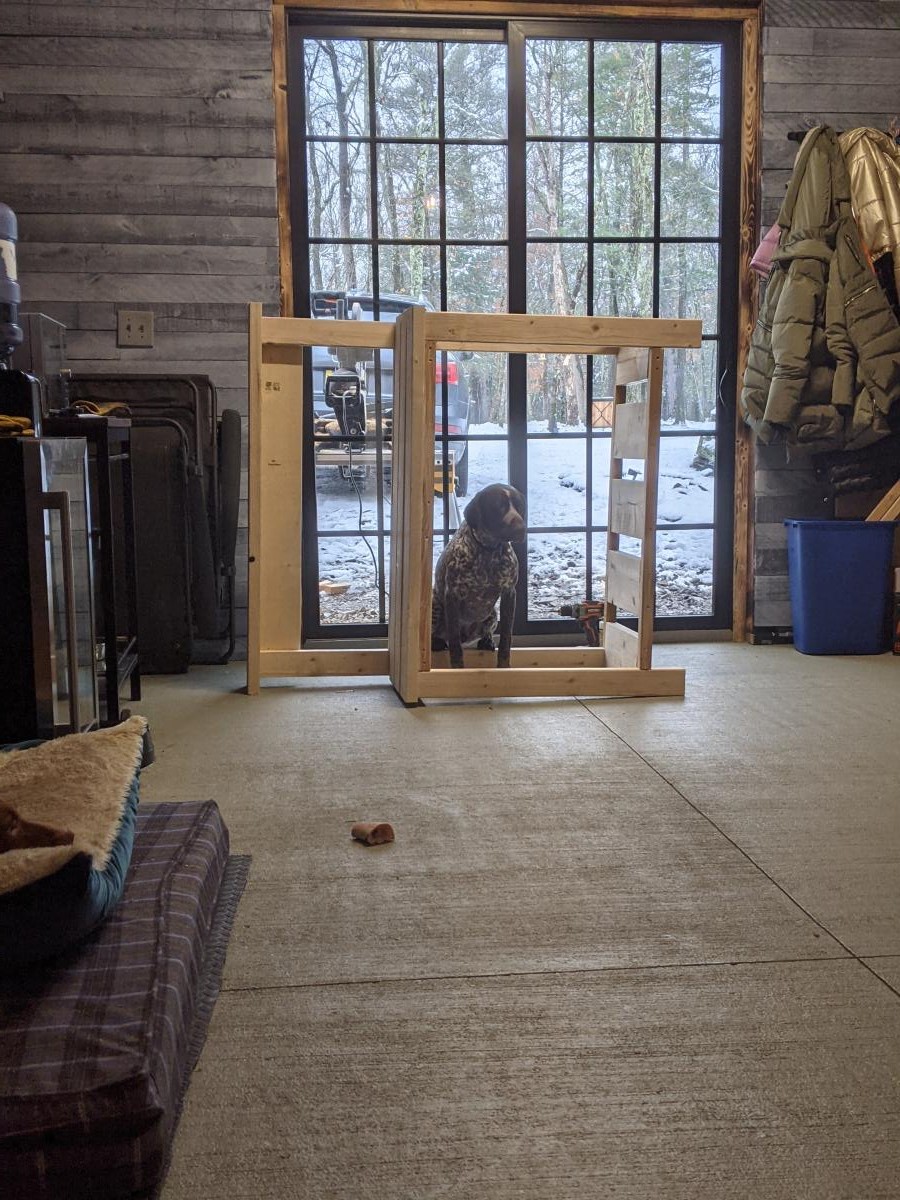
Potting table, was easy to build, very strong and stable because of the size of the wood used. It's a big table -- an entire dog fits inside :)
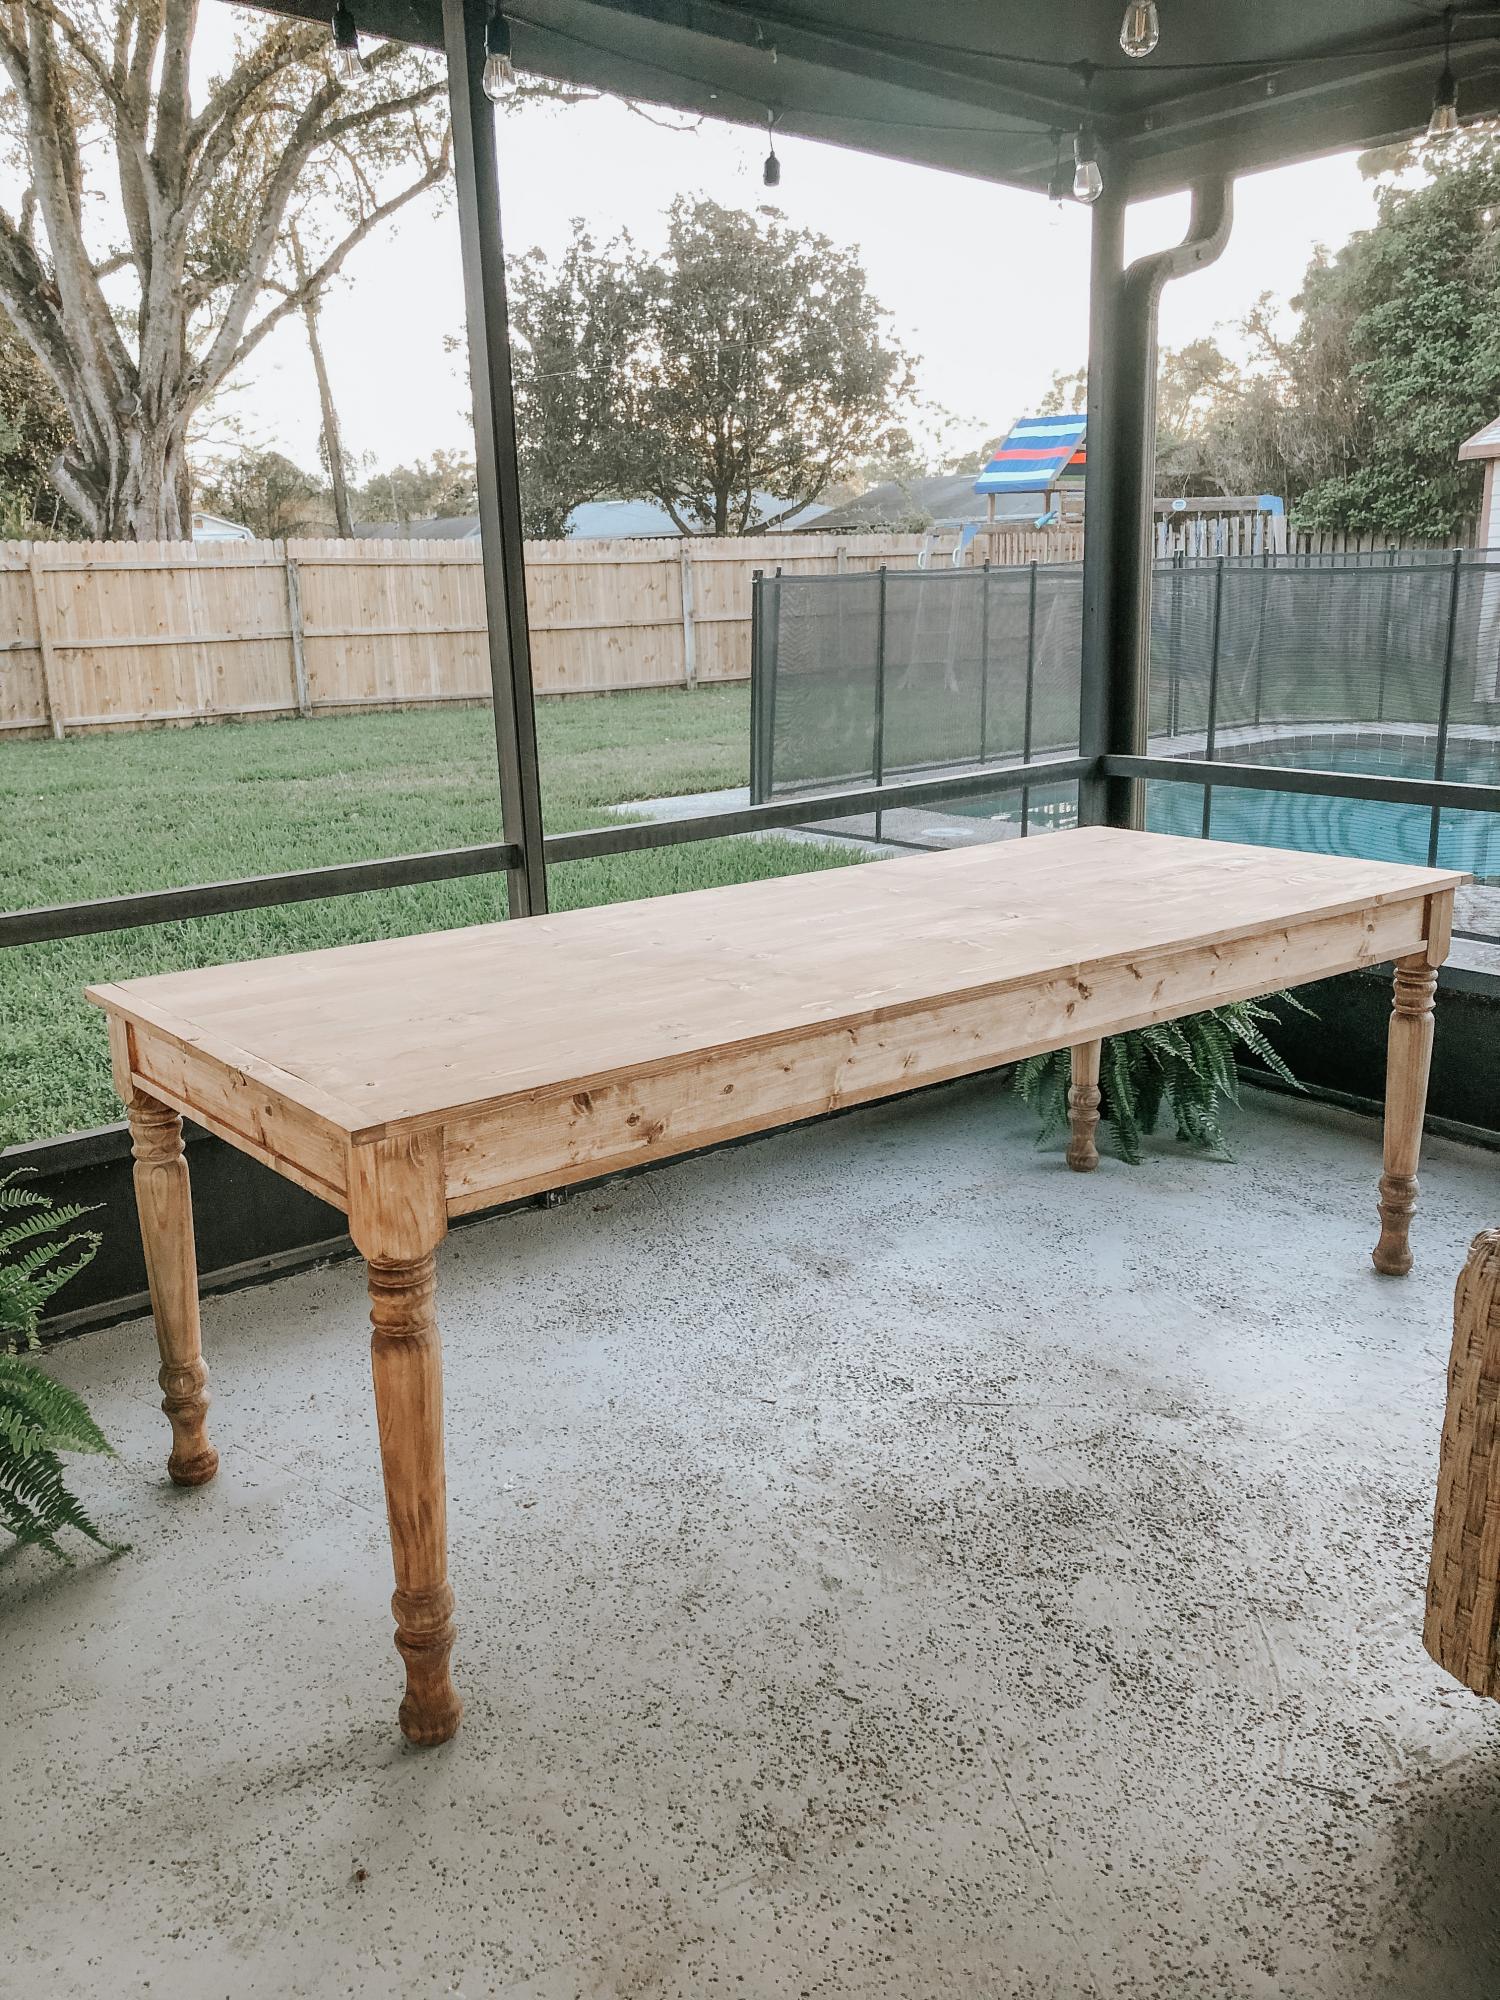
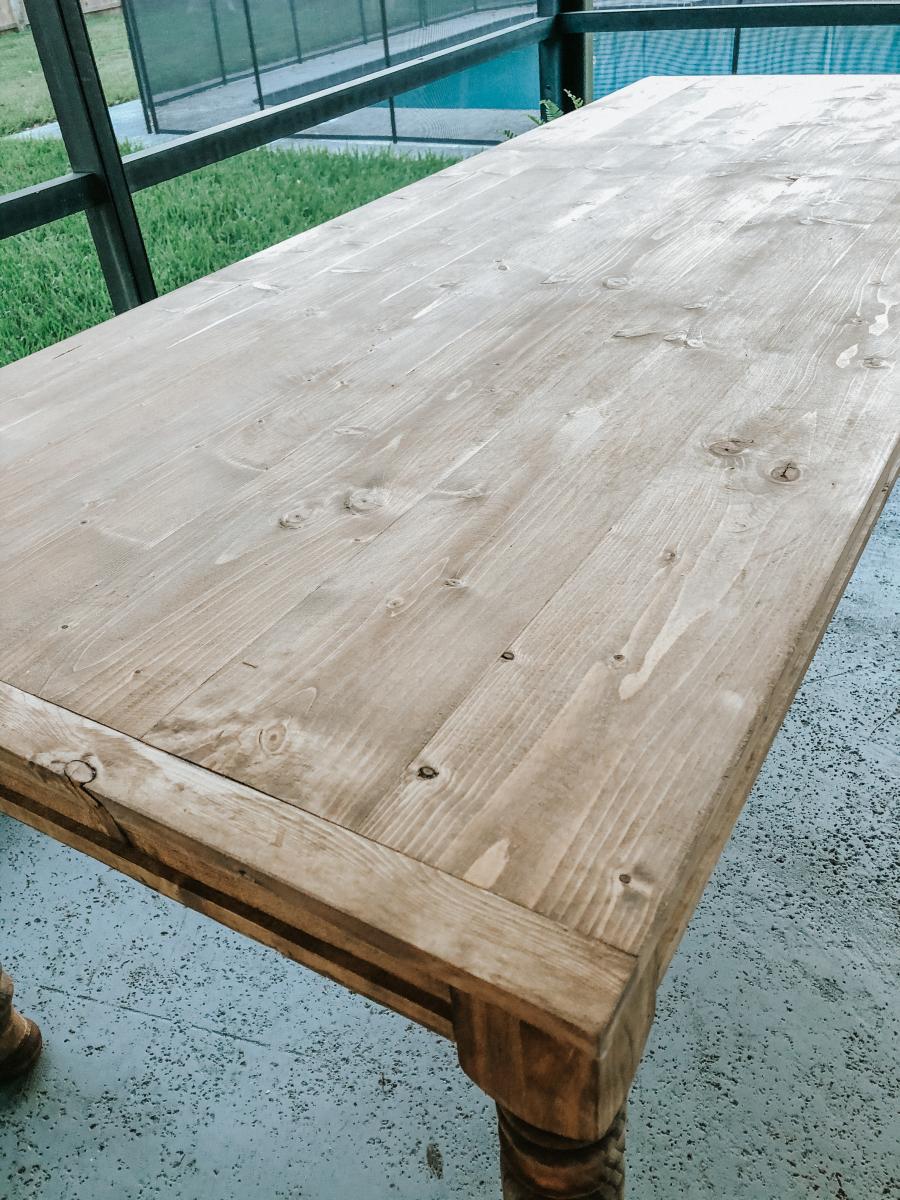
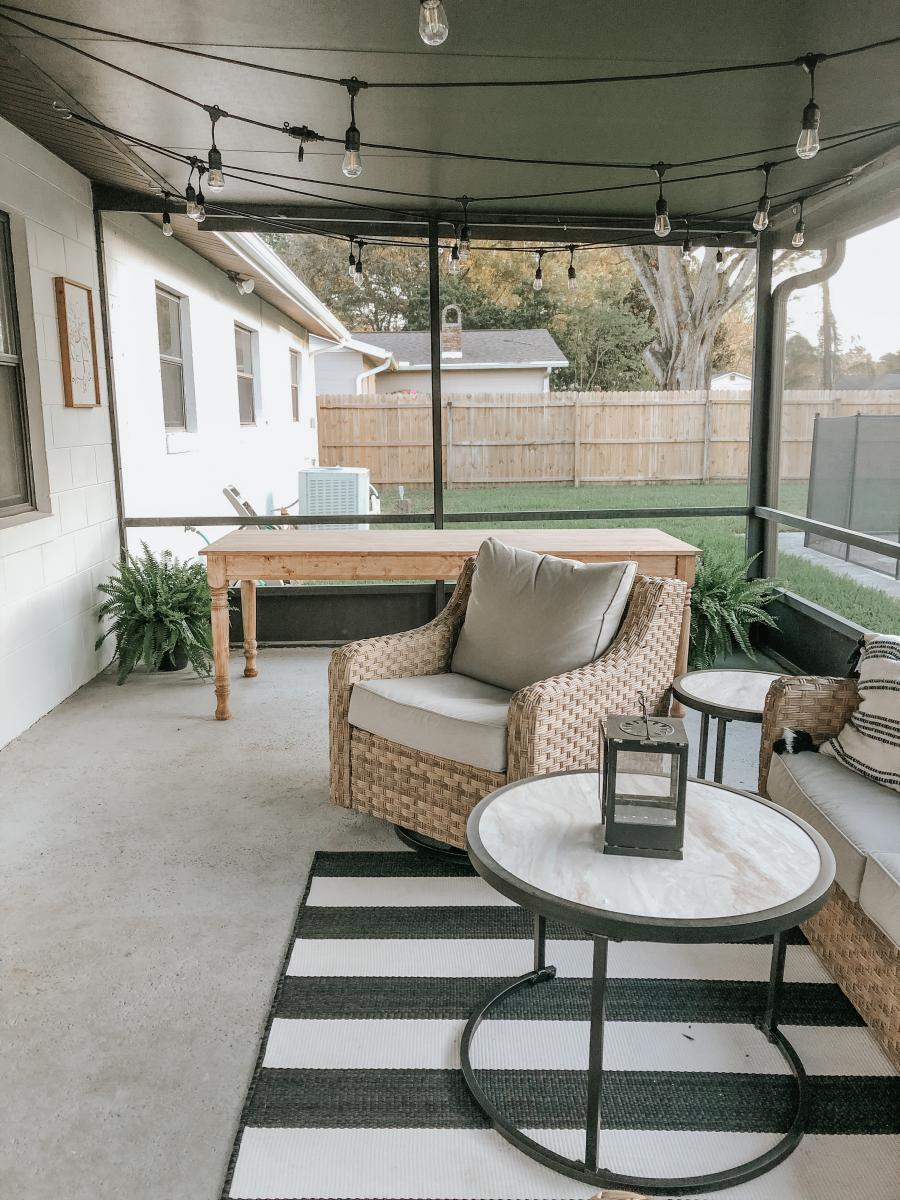
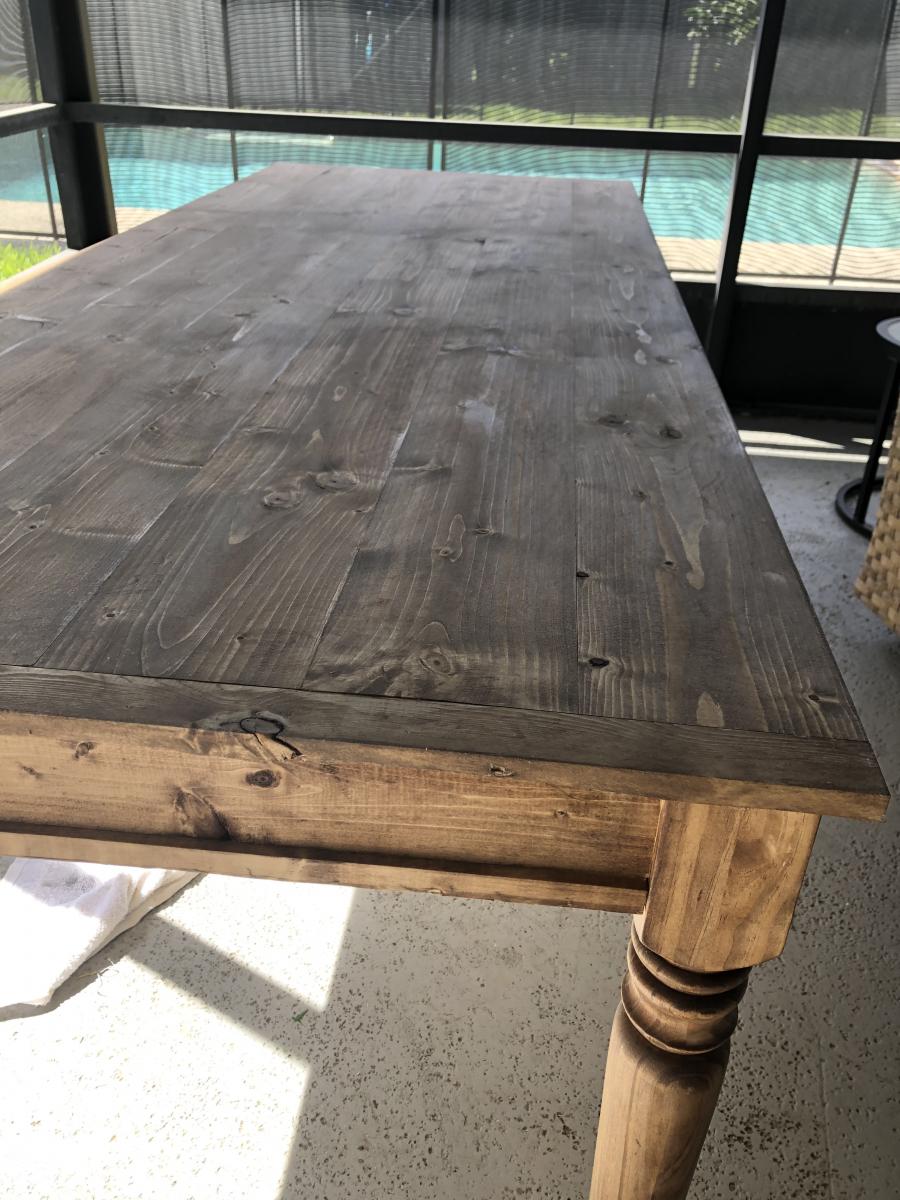
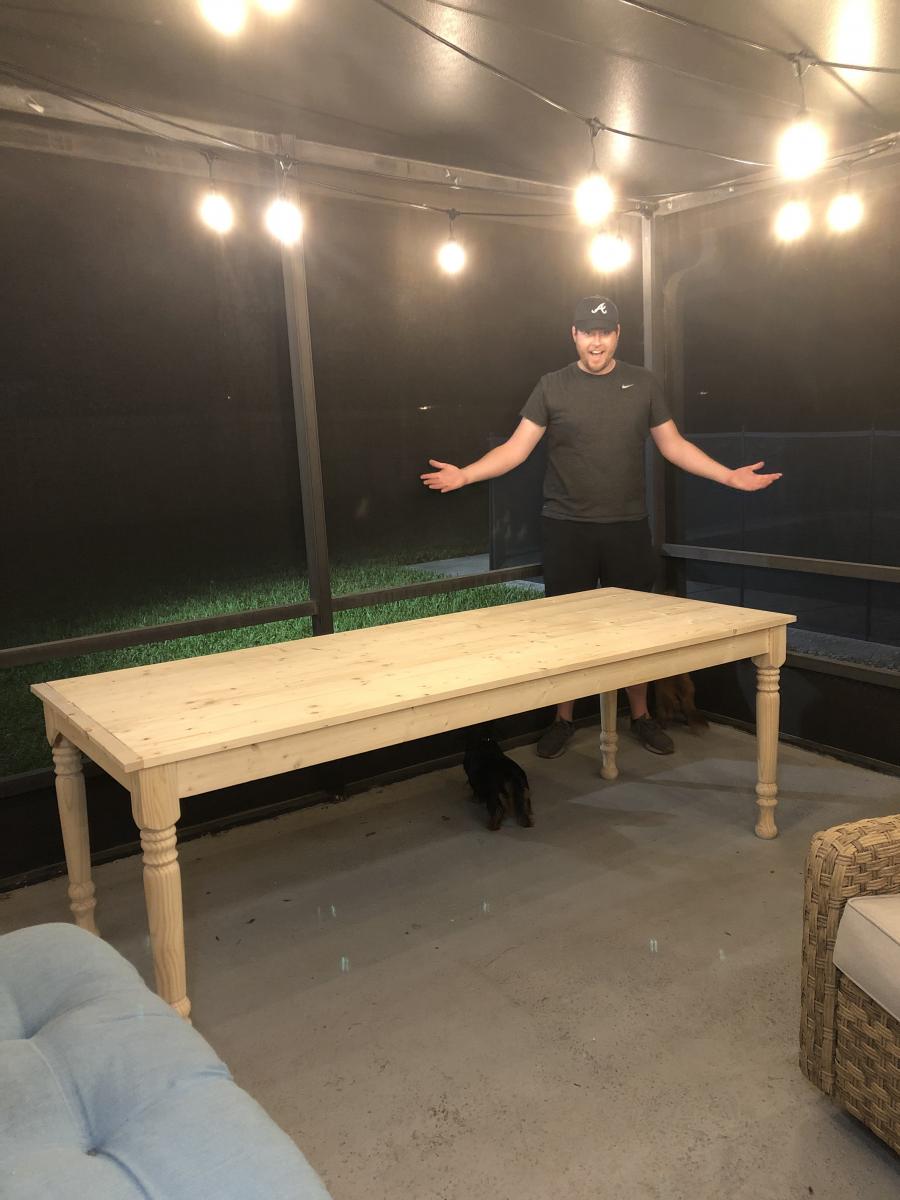
My wife and I were wanting a large outdoor farmhouse table that looked stylish, and like it could have been bought at Pottery Barn or another high-end furniture store. We found this plan that Ana white had made "Small Old English Style Farmhouse Dining Table". We often host groups from our church and will have 15-20 people on our patio or around our pool area, so we needed a bigger table... I just made some modifications to make it longer (7ft) in length to better fit our space and allow for more people to sit.
To make this plan longer, I simply adjusted the cut-list on the long 1x2s, 1x4s, and 1x6; and added a crossbar to prevent the longer tabletop from sagging. I also added the diagonal corner struts to make the table a little sturdier.
Adjusted Shopping List:
4 - 1x2 @ 8ft
5 - 1x4 @ 8 ft
6 - 1x6 @ 8ft
Waterproof 1 1/4" Kreg screws (for outdoor use)
Minwax Weathered Oak
Minwax Vintage Grey
Adjusted Cut-List
• 2 - 1x2 @ 26.5"
• 2 - 1x2 @ 76.5"
• 2 - 1x2 @ ~33.25"
• 2 - 1x4 @ 26.5"
• 2 - 1x4 @ 76.5"
• 4 - 1x4 @ 7.25" w/ 45º miter (diagonal corner supports)
• 1 - 1x4 @ ~28" (Crossbar - I forget the exact measurement)
• 6 - 1x6 @ 82"
For seating we just bought some inexpensive farmhouse weather resistant chairs from Walmart:
https://www.walmart.com/ip/Yaheetech-Metal-Dinning-Chairs-Stackable-Cof…
Tue, 03/02/2021 - 08:46
Love the to see the increased length on this plan. thanks for sharing!


Comments
Ana White Admin
Tue, 04/18/2023 - 15:32
Love these planters!
The finish choice is beautiful and it looks amazing by your front door! Thanks for sharing.