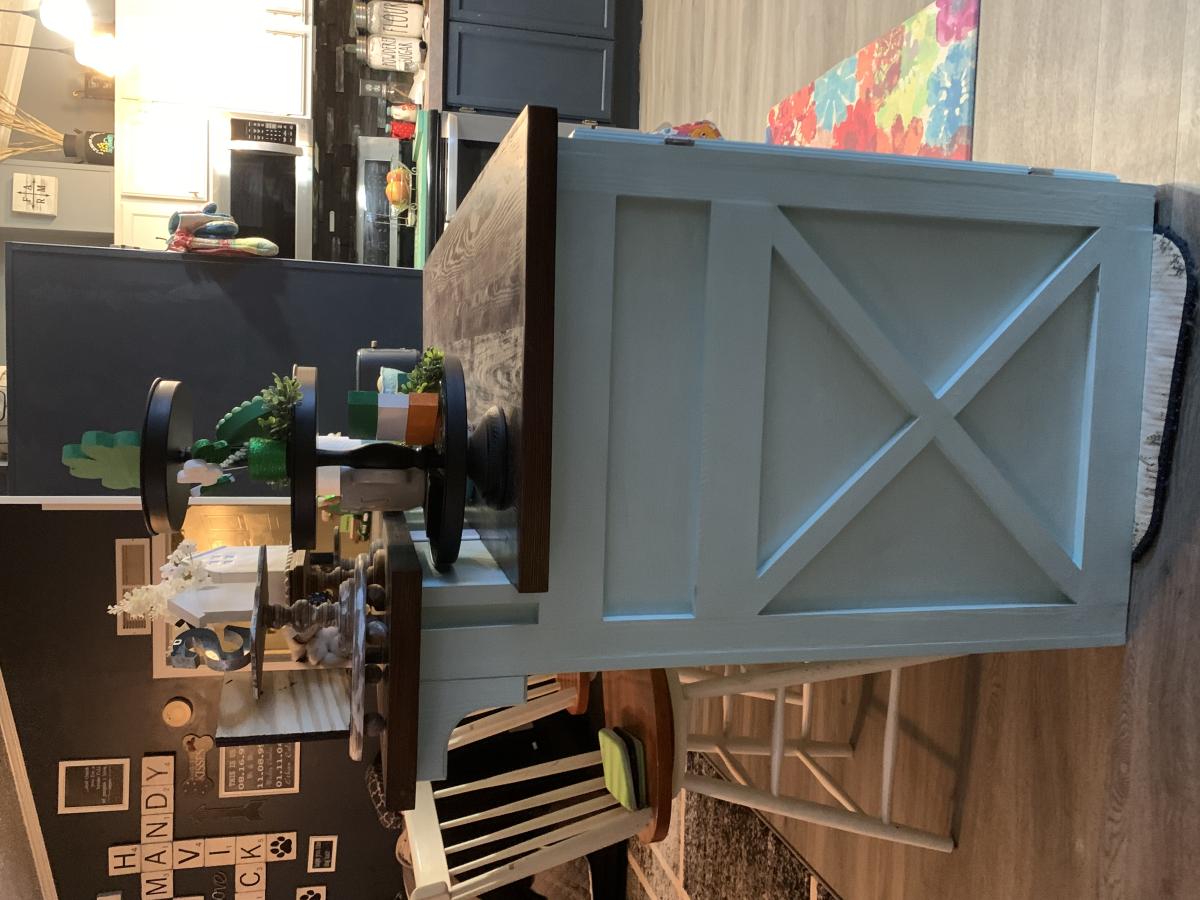
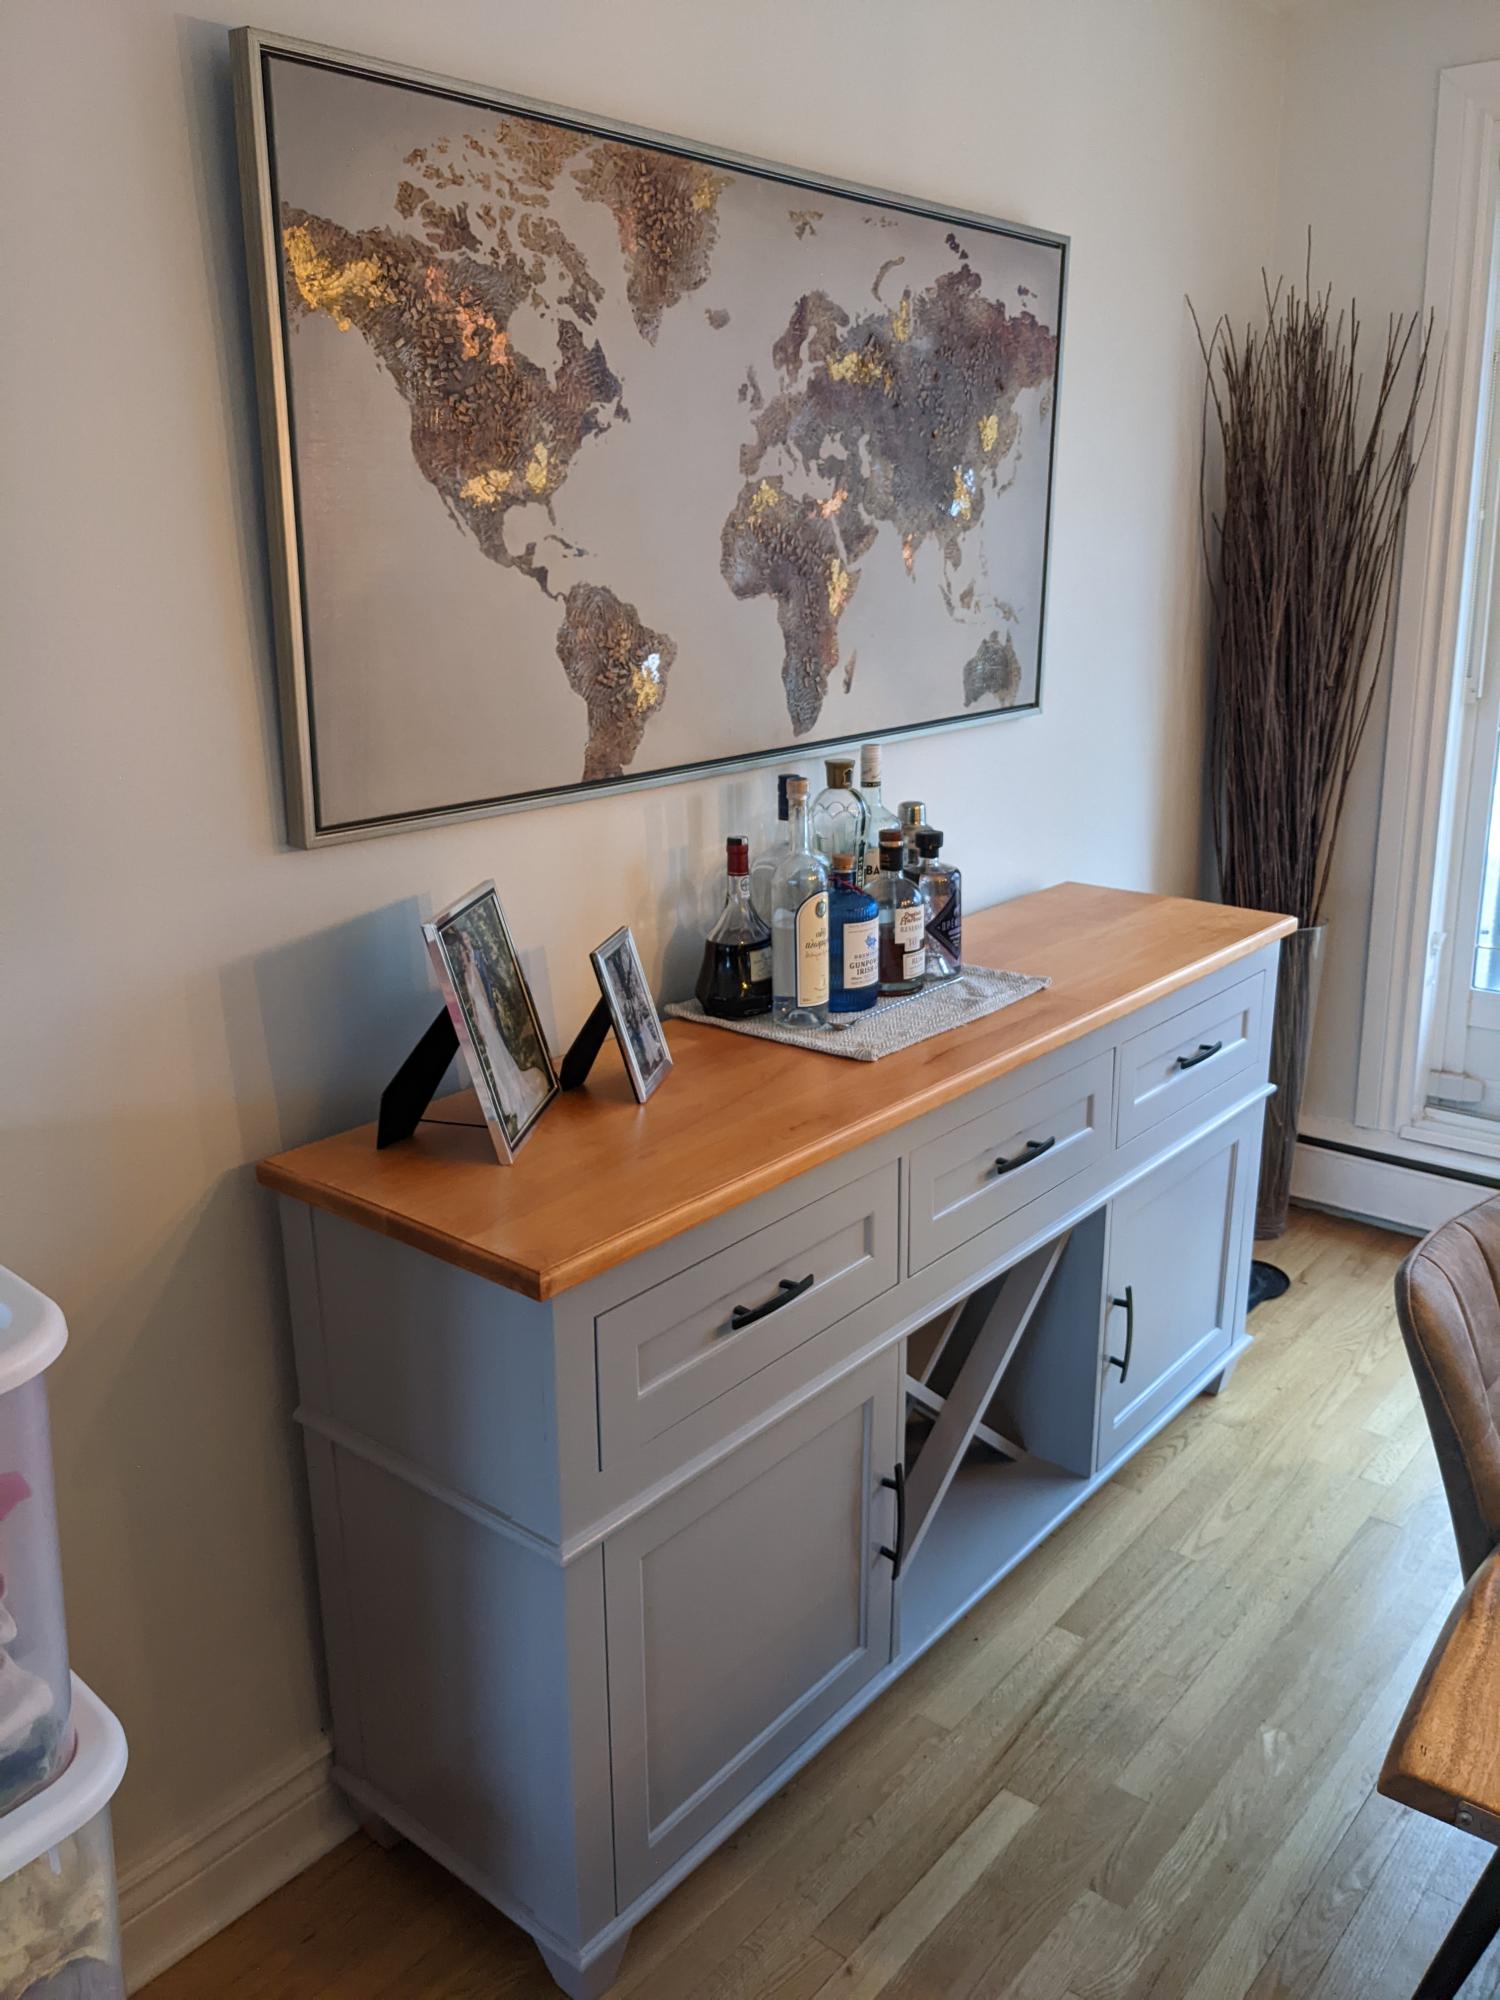
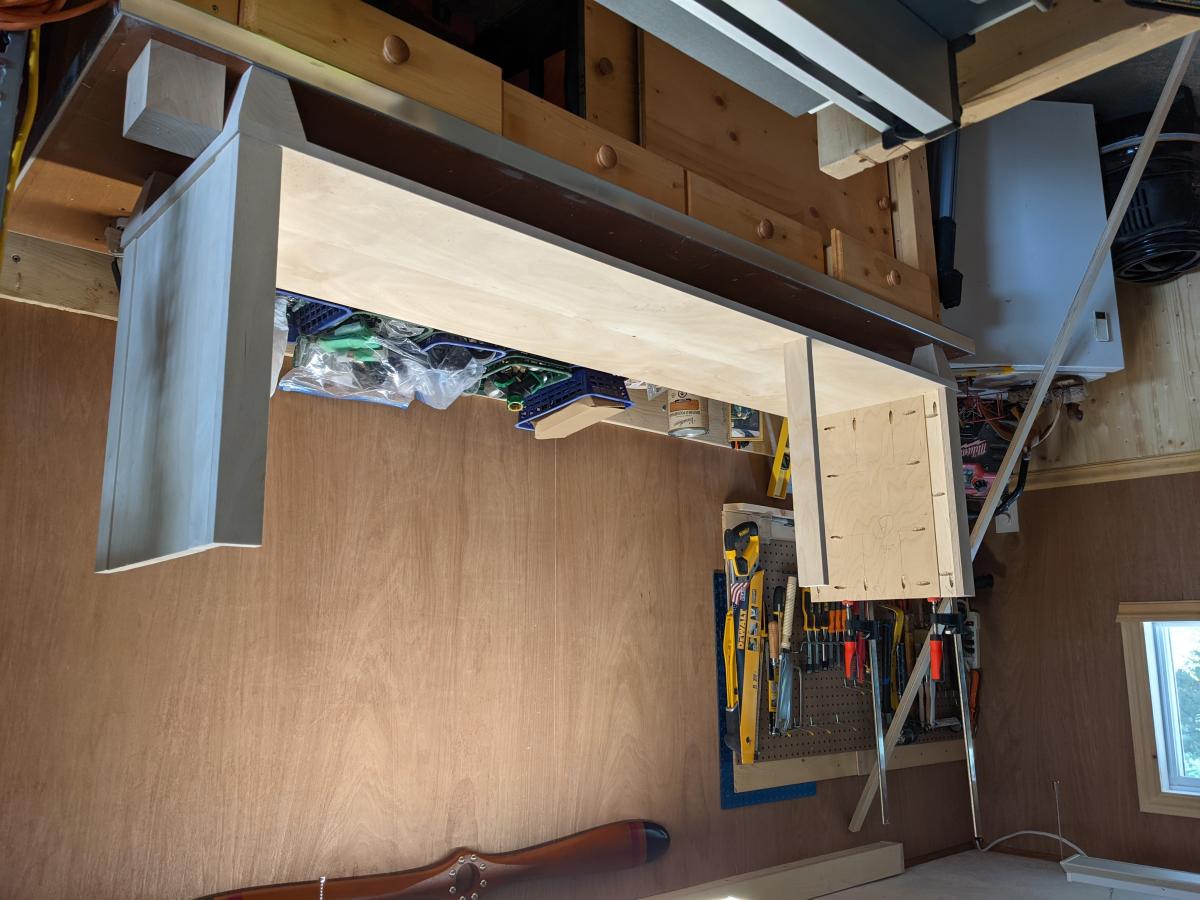
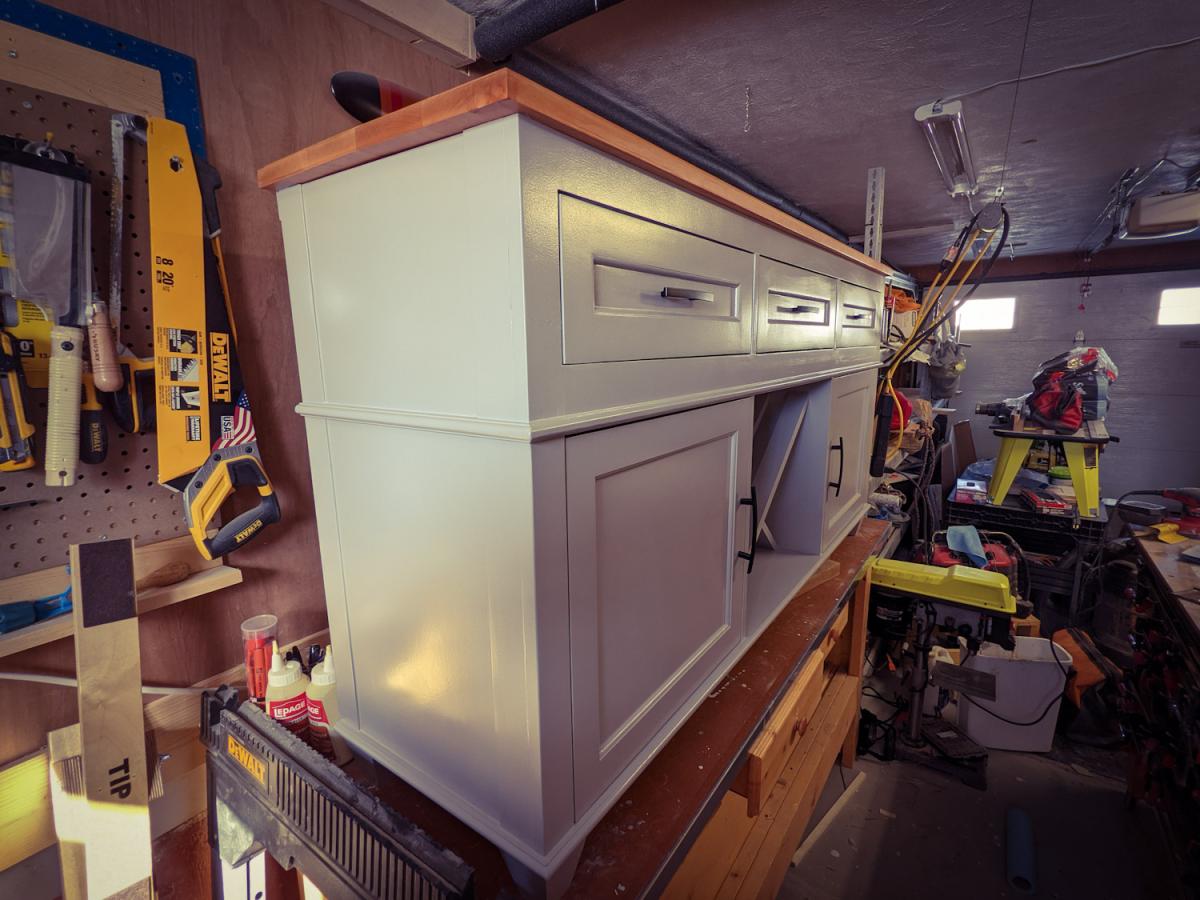
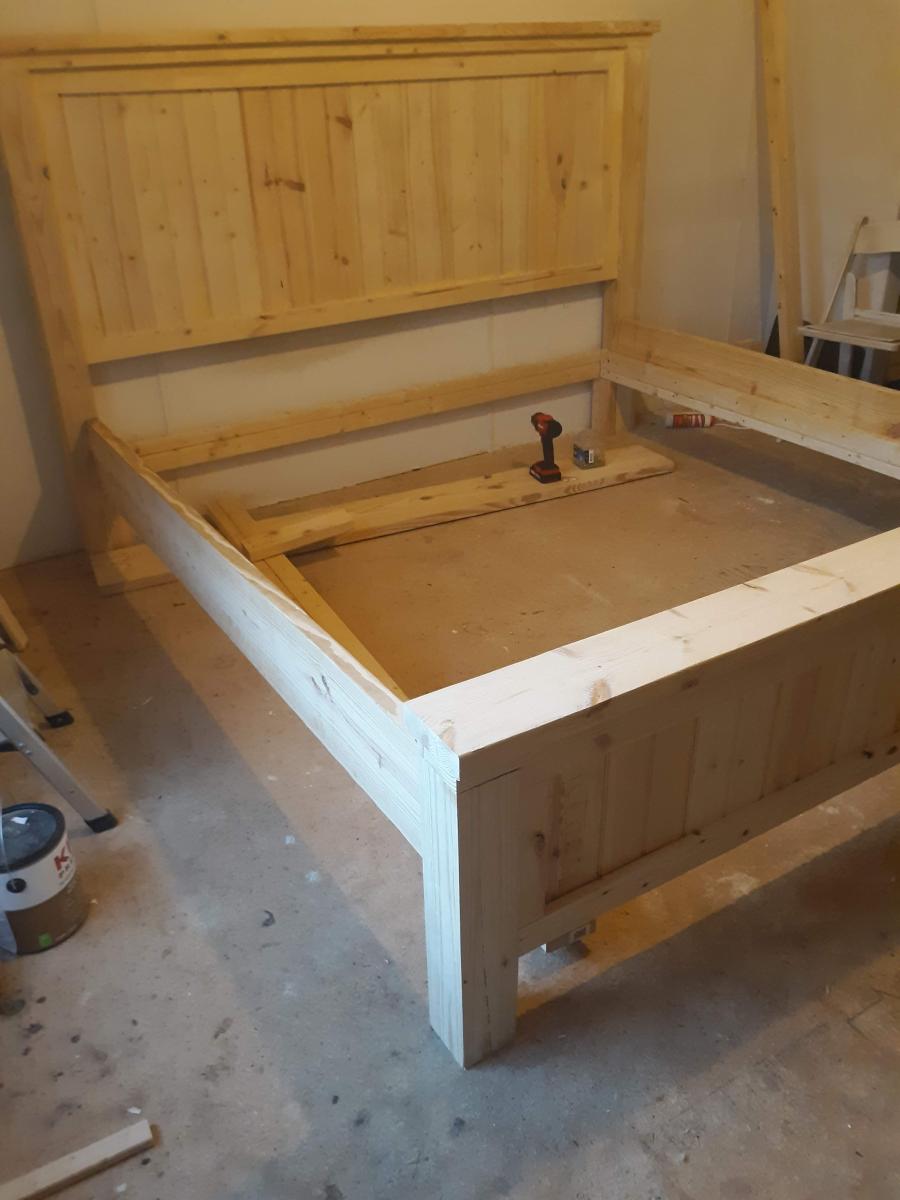
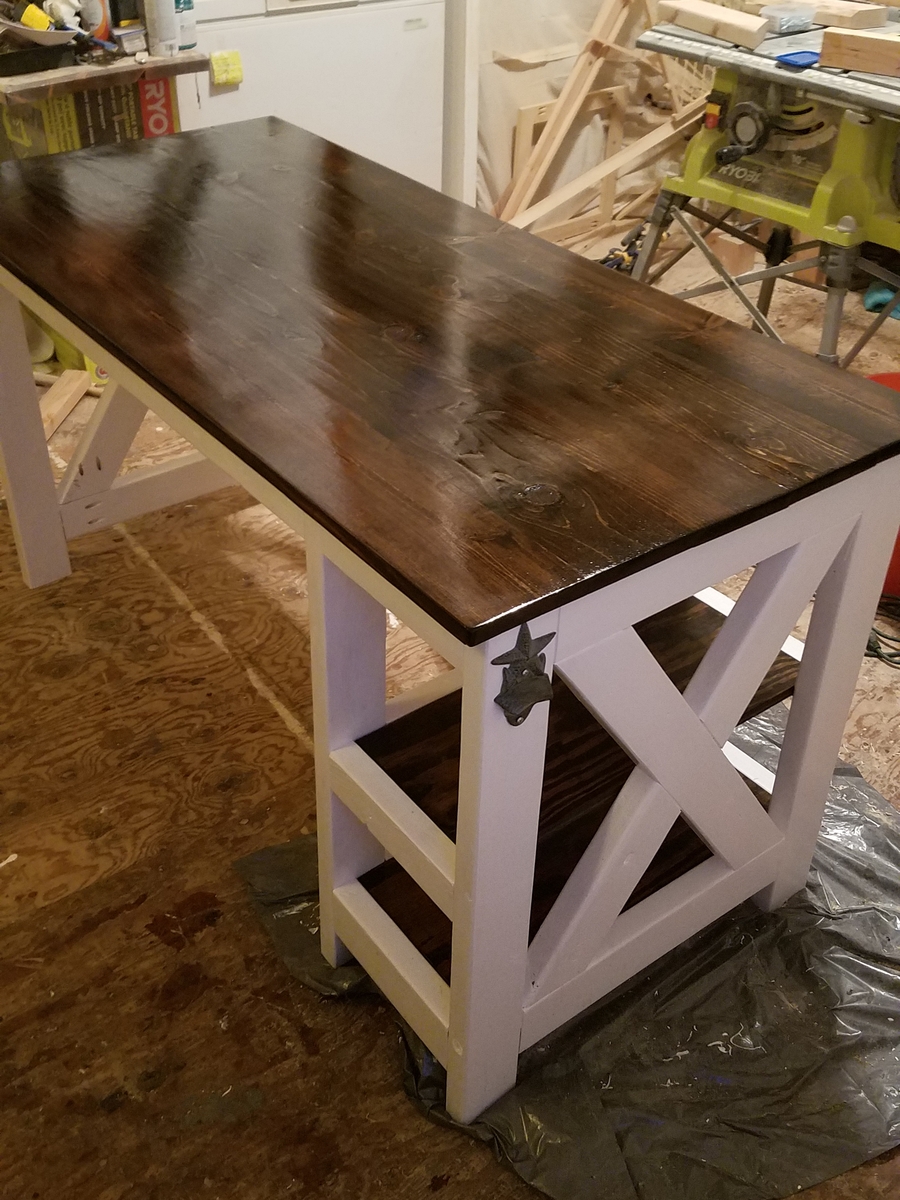
Community Brag Posts

Farmhouse X Desk

Submitted by Malka on Thu, 02/08/2018 - 11:12

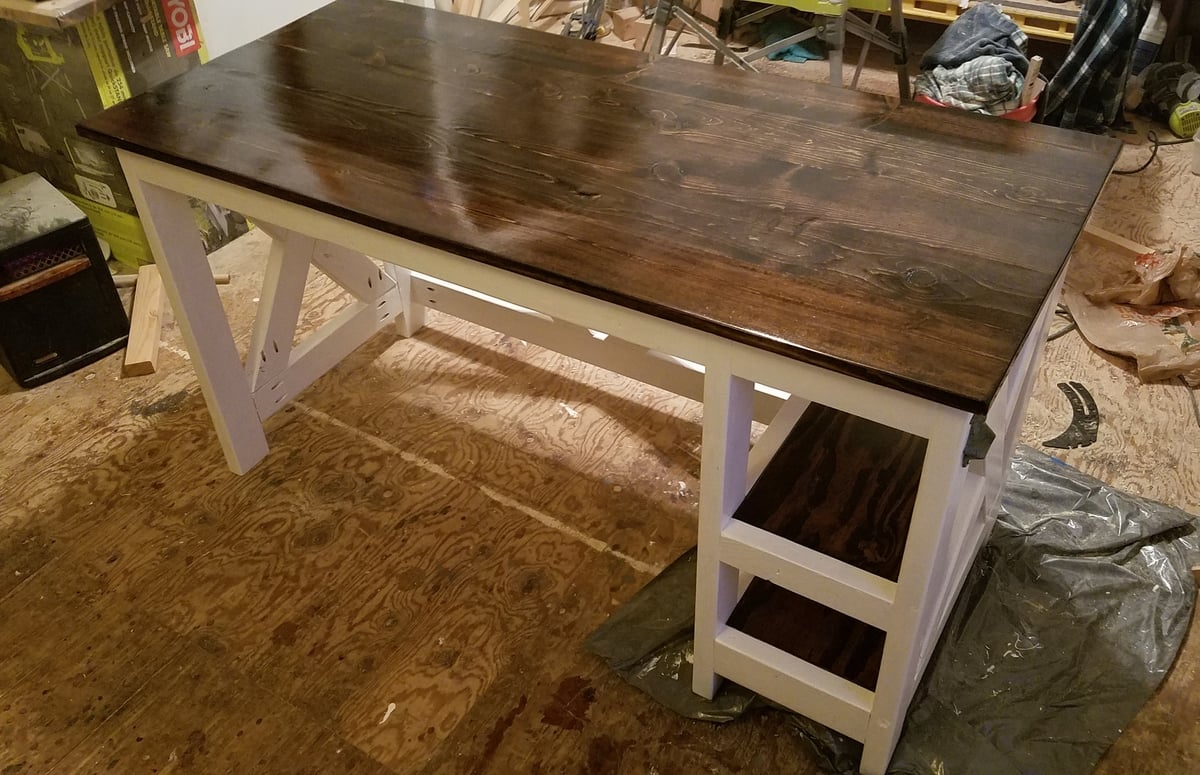
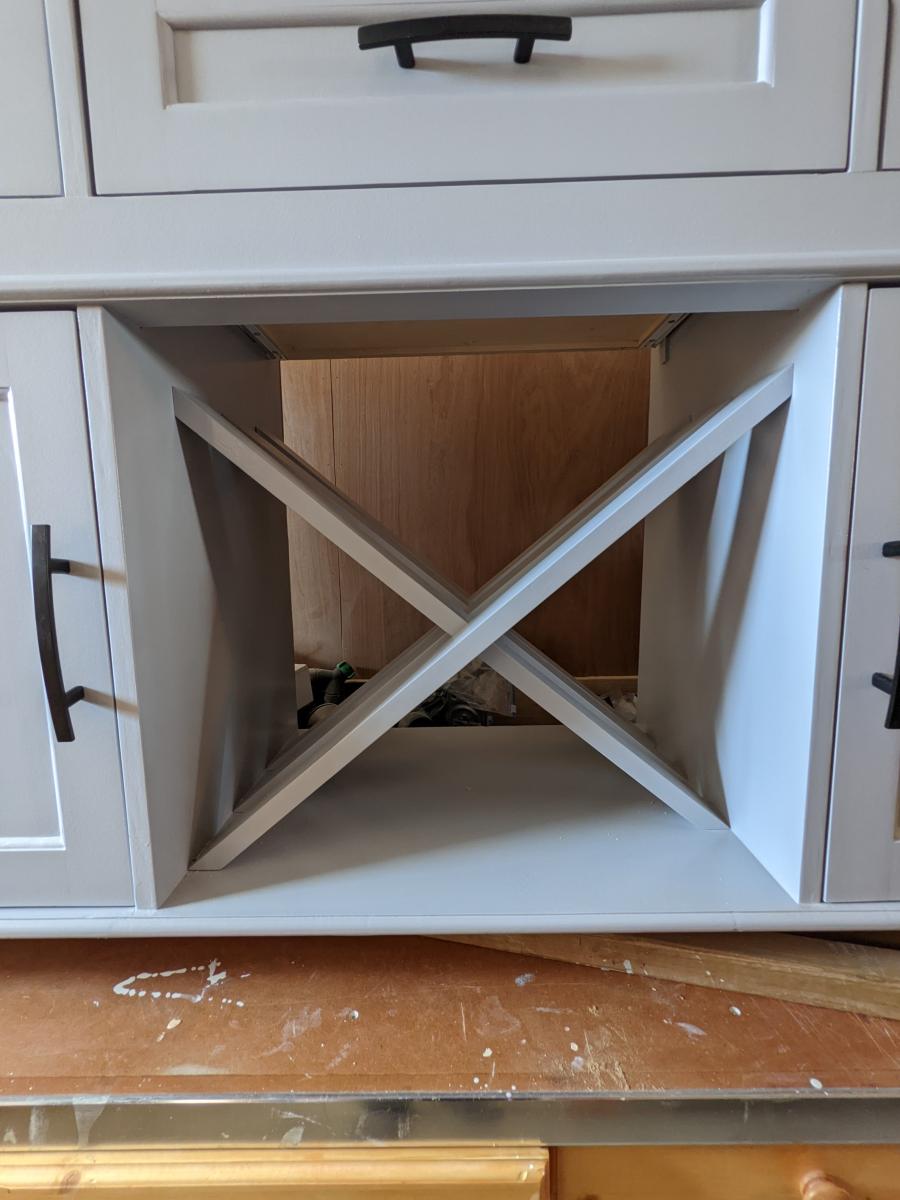
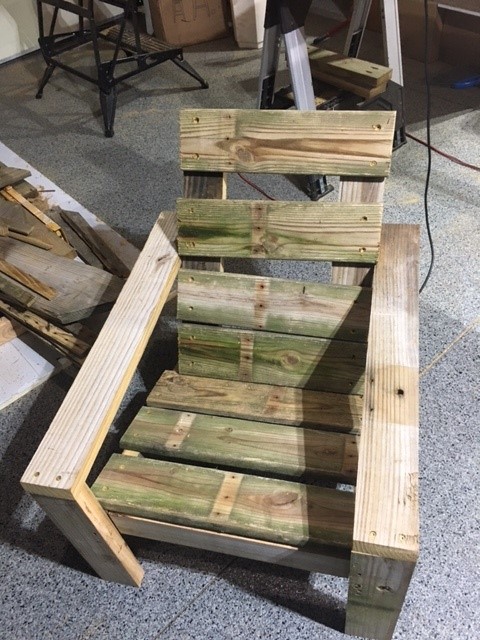
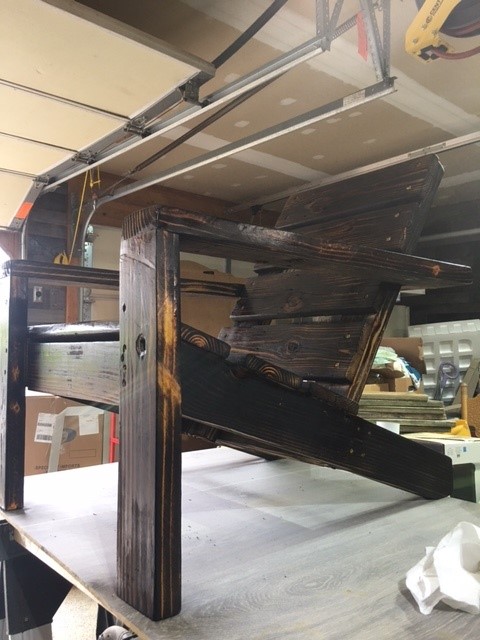
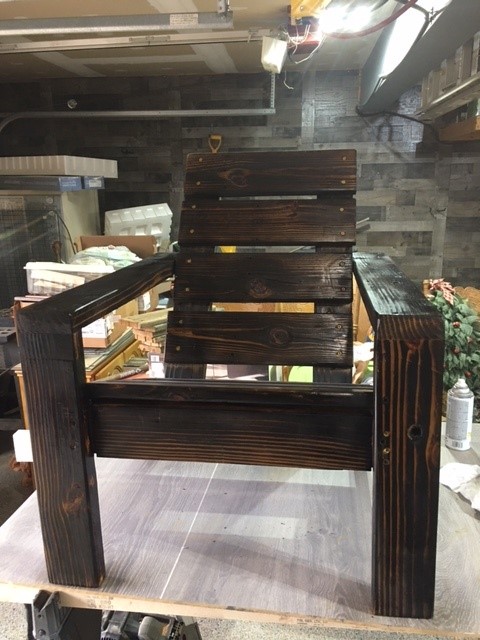
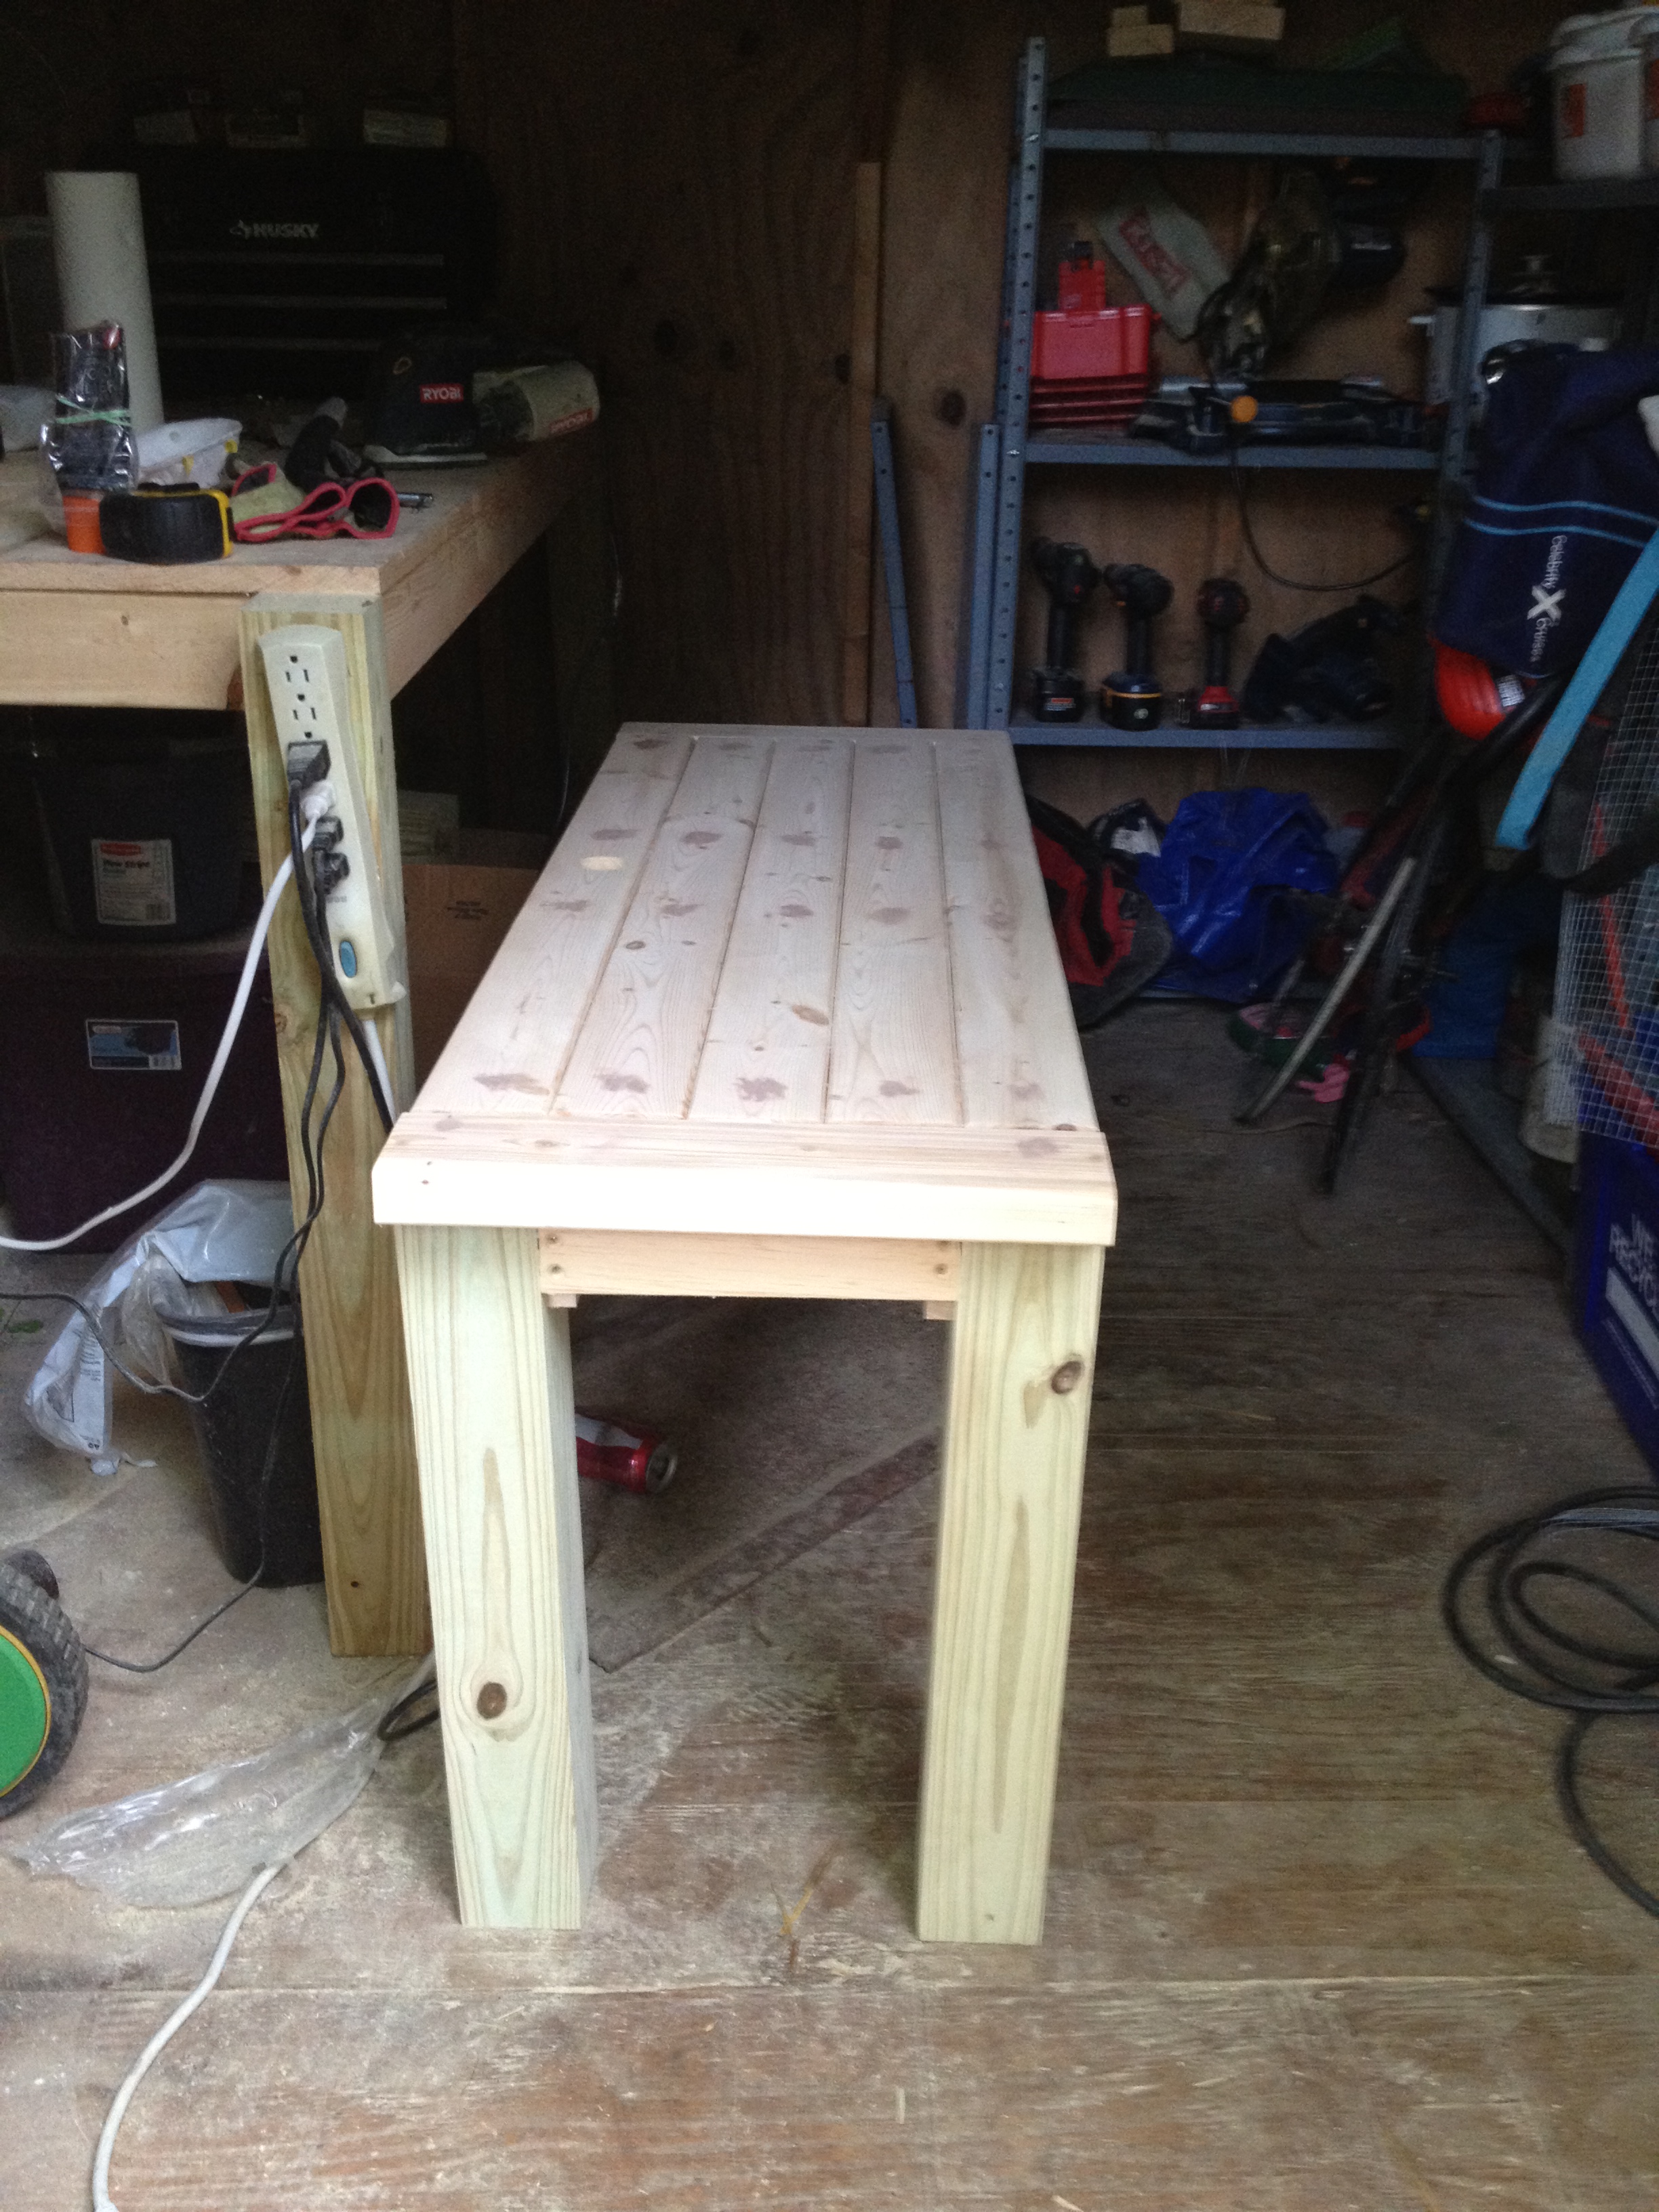
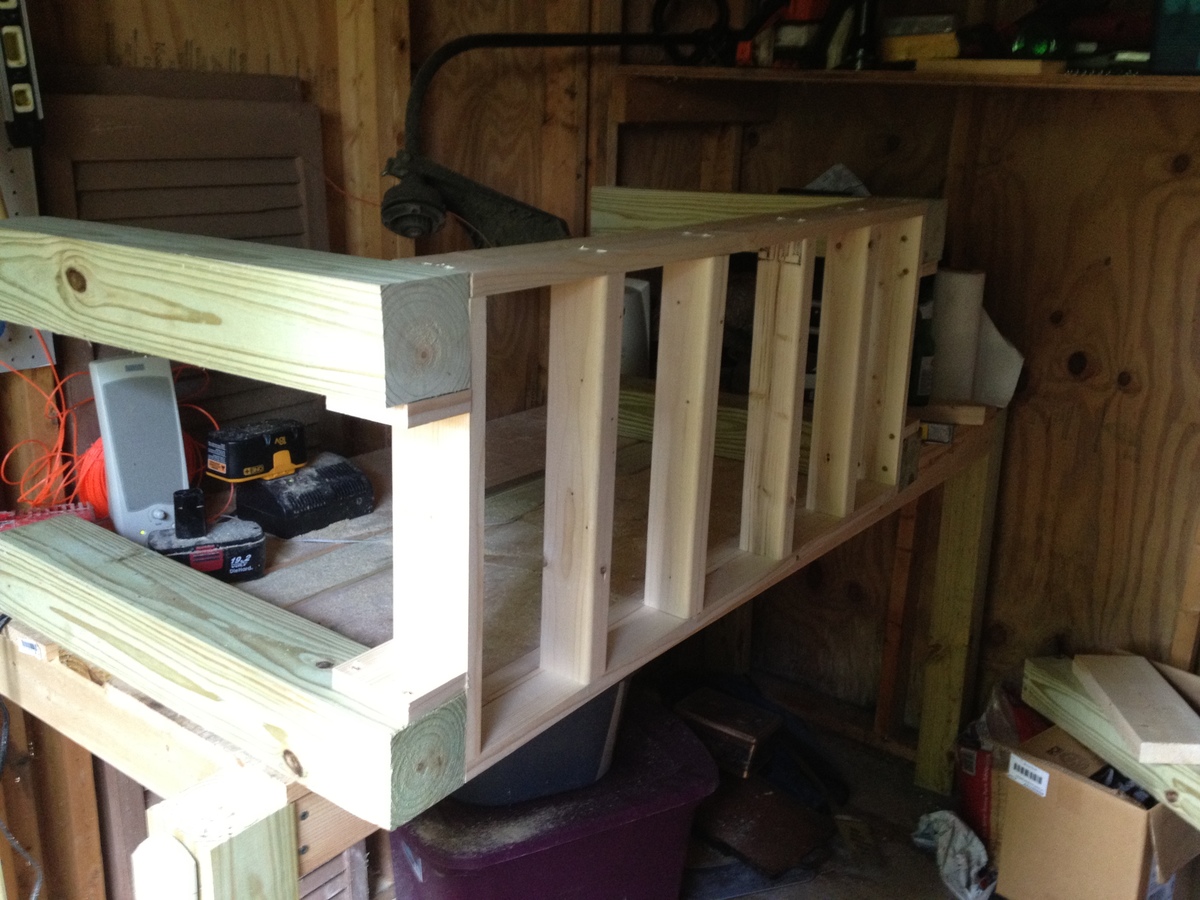
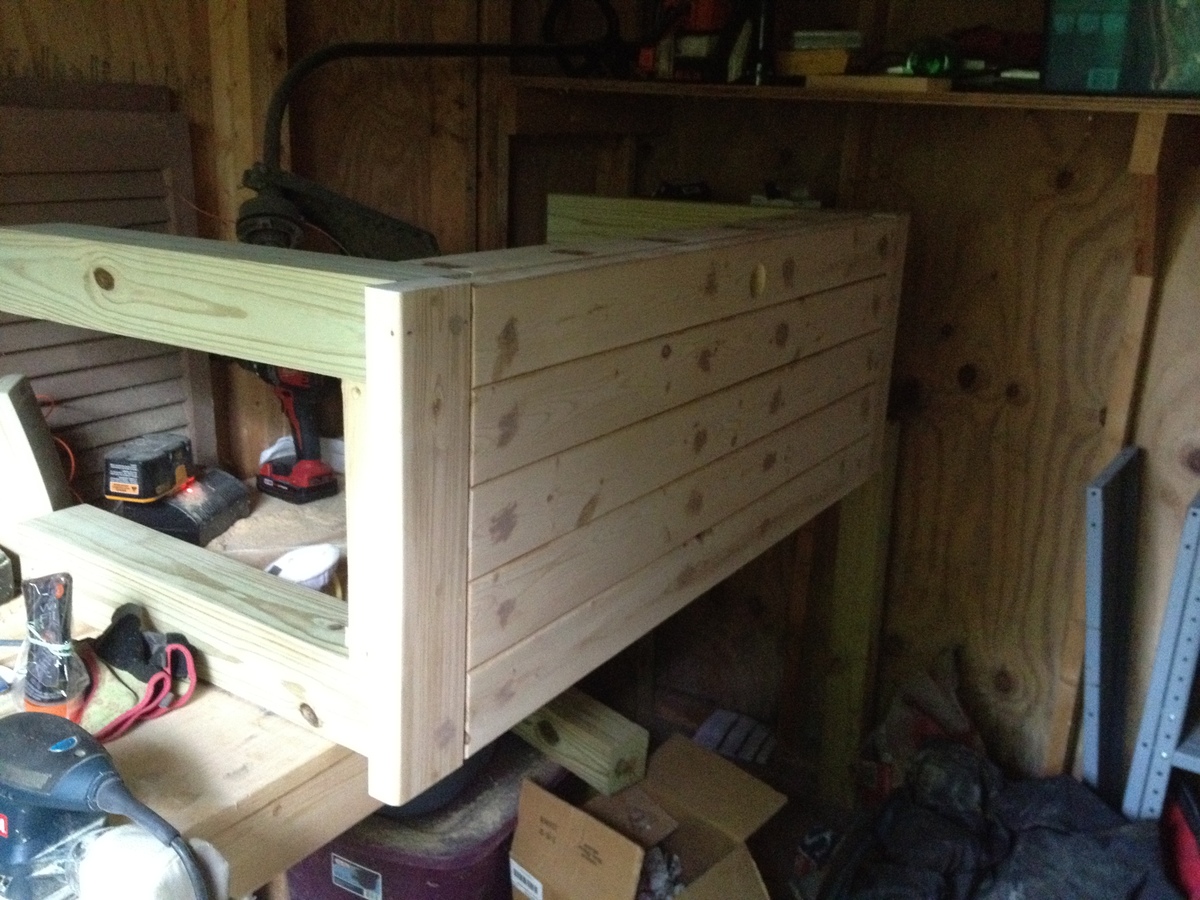
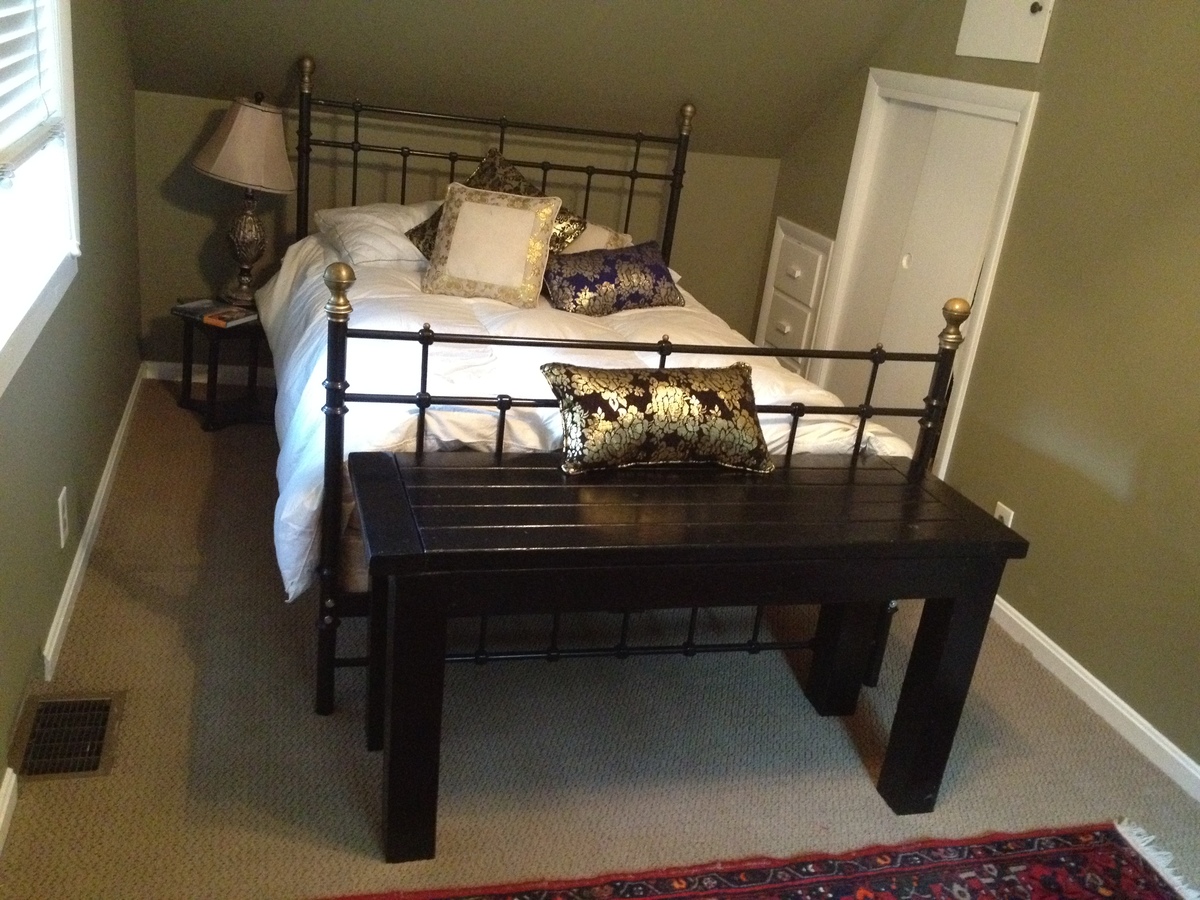
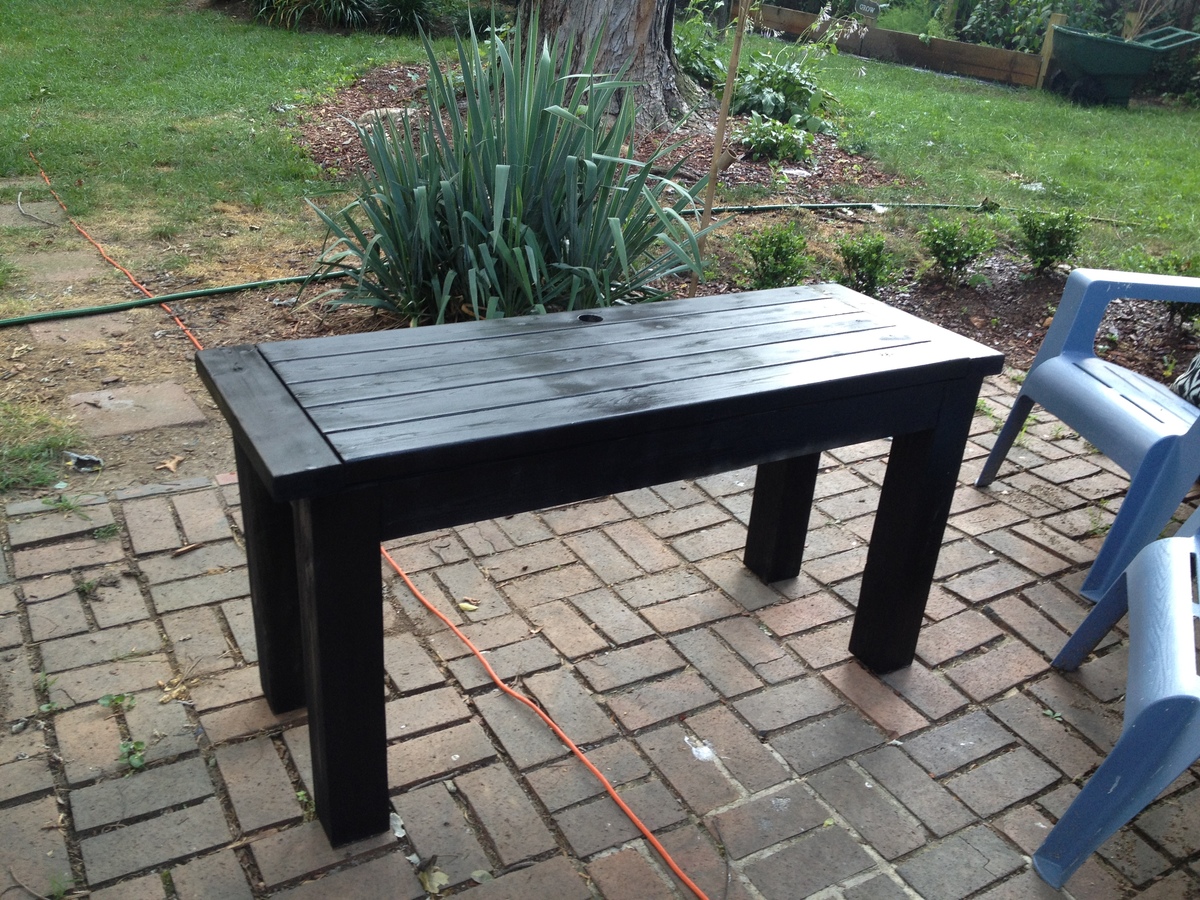
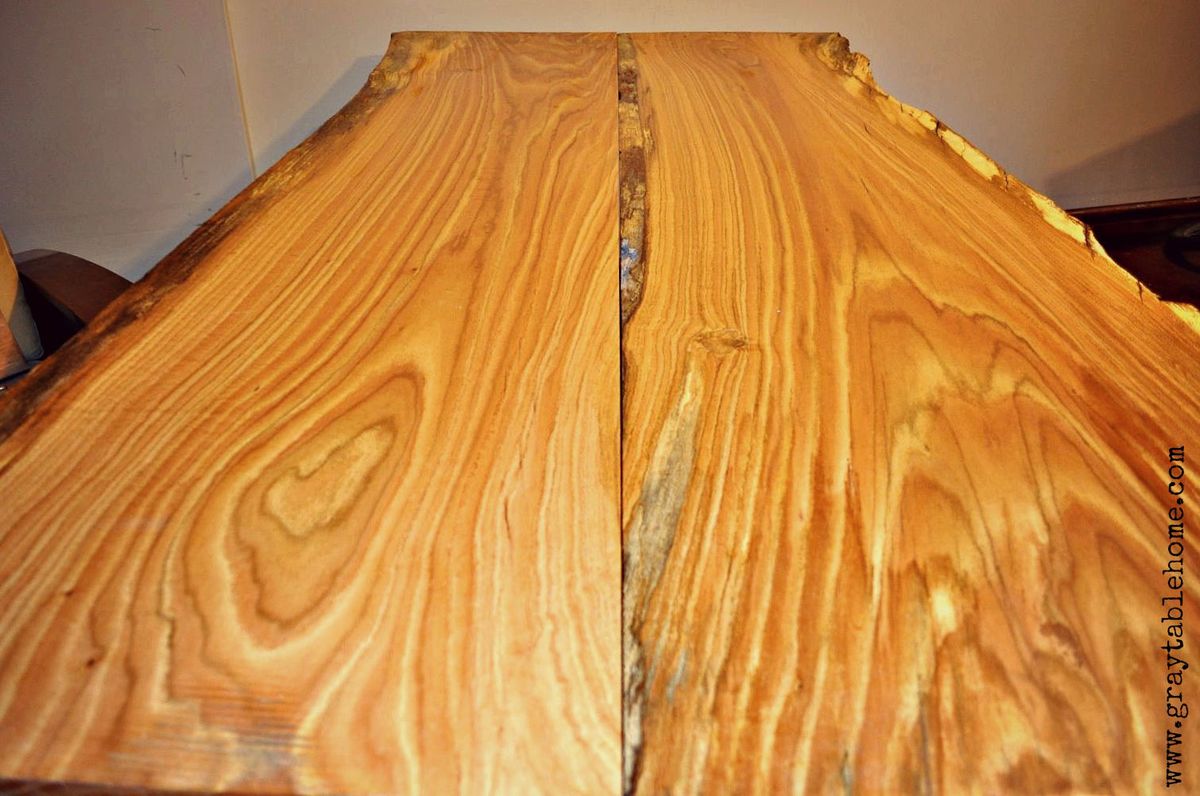
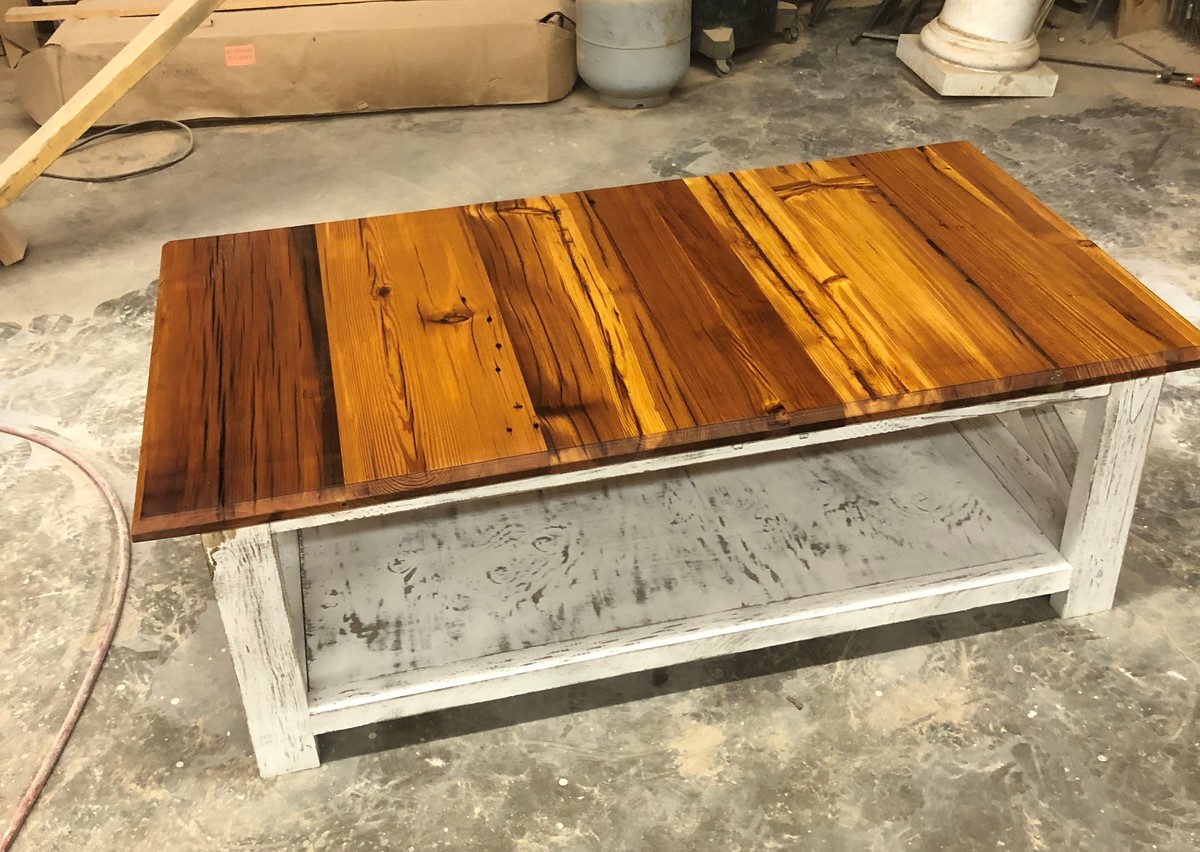
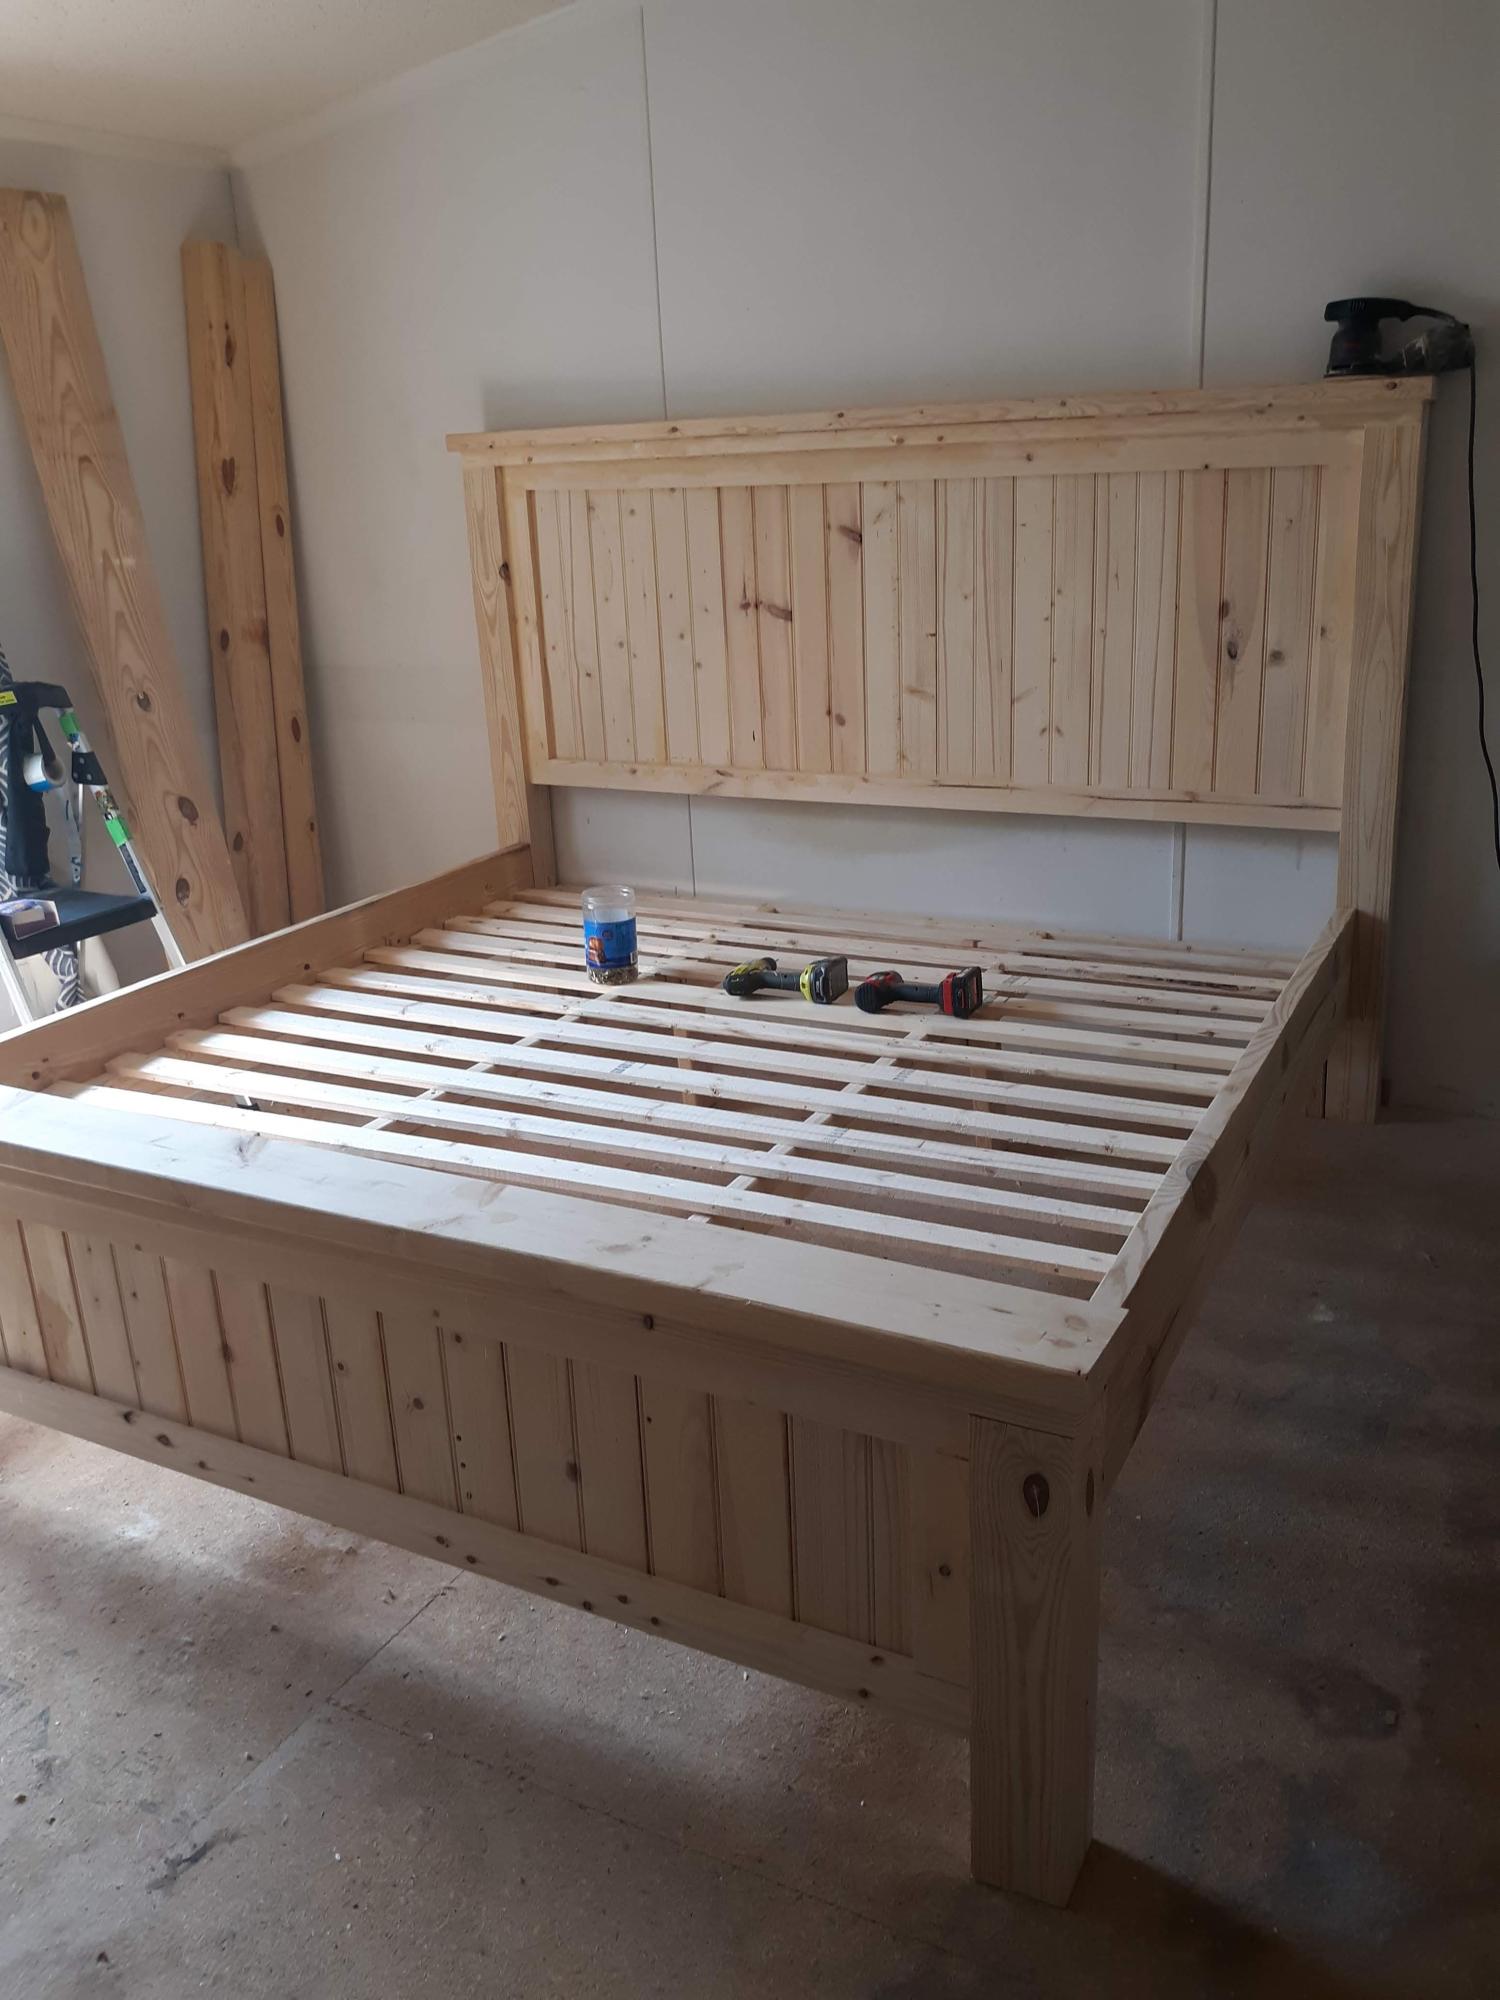
My fiance wanted a new craft desk so I sent her some ideas from Anas site, and she loved this one.  I had her pick out paint  (bright white by behr) and stain (minwax dark walnut), then got to work.  Easy build overall, though I strongly recommend people measure the X brace angles they'll need before cutting them, because using the angles provided in the plan left gaps I wasn't happy with and had to redo the cuts. 


Built from Plan(s)
Estimated Cost
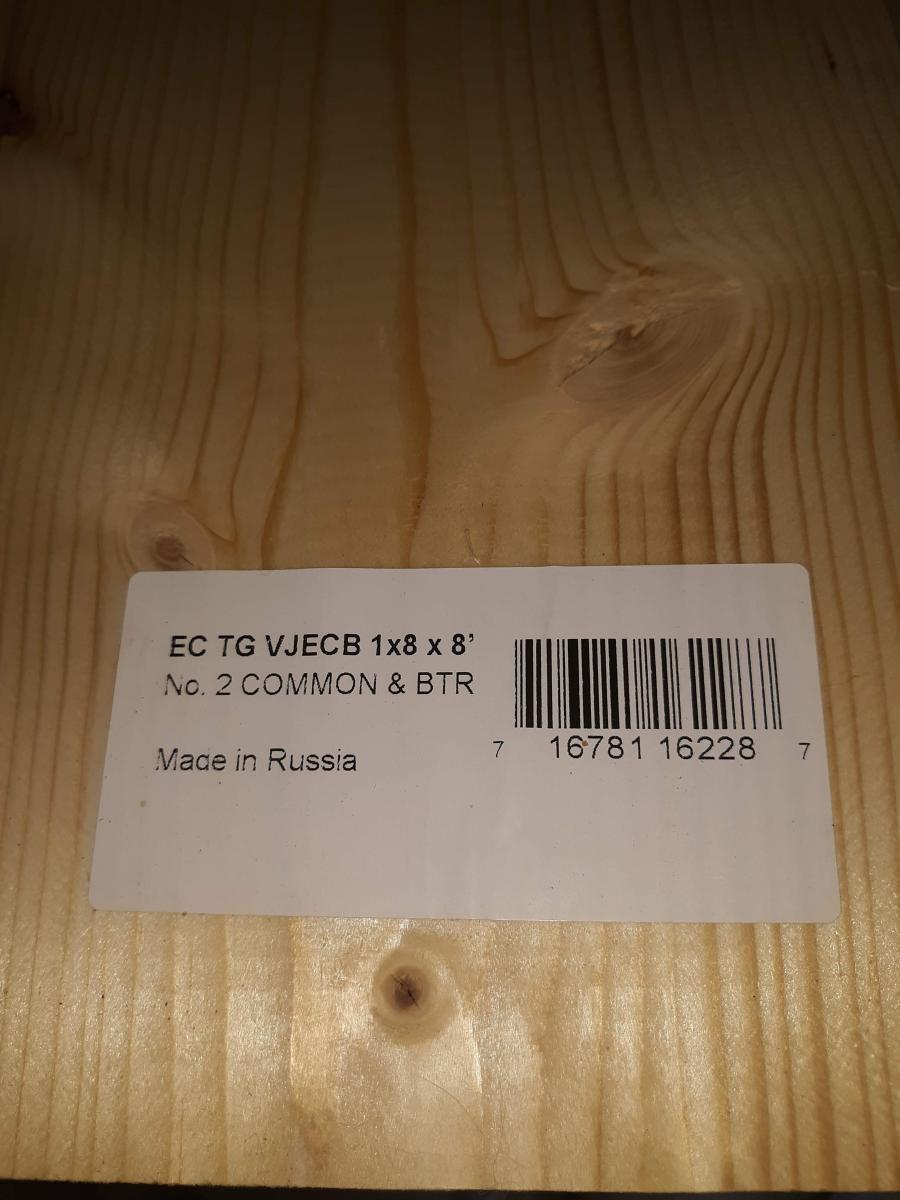
$120 for lumber, paint, stain and kreg screws.
Estimated Time Investment
Weekend Project (10-20 Hours)
Finish Used
Minwax clear gloss poly
Recommended Skill Level
Beginner

Shepard Kitchen island

I used Ana’s Shepard Kitchen Island plans. Made some alterations per my wife’s request. Added ten inches on each side to store kitchen items and cookie sheets, etc. She also wanted a raise bar on the back and X's on the side. We replaced the wine rack in the middle with a pot and pan slide out rack. Also made the right side bottom door into a deep drawer for her storage containers. Ana’s plans make builds so easy. I appreciate all the plans she shares with us.

Built from Plan(s)

Comments

Pallet Shelf for books

My daughter's books never seem to end up on her book shelf in a way that she can easily see them. They are usually laying on their sides and stacked in heaps. We needed a way to keep them organized and easy for her to find the books she's looking for. I made two shelves in less than 20 minutes total.

Estimated Time Investment
An Hour or Two (0-2 Hours)
Finish Used
Natural
Recommended Skill Level
Starter Project

Patio Sectional

Submitted by camilton on Thu, 07/18/2013 - 12:24

I absolutely love this sectional! It is a little awkward for my pregnant wife to get up and down from because of how low it is but when you are down it is really nice and you can just kick back and relax.

It has its flaws but for my second ever attempt at building something I am very proud. And out of this project I found a great local lumber mill with excellent straight boards for great prices, learned when it comes to something like a counter sink drill bit spend a little extra learned this after snapping both kobalt and ryobi brand and buying the sturdy dewalt that is in my garage now.

After sanding I used Rust-oleum spray paint and sealed it all with two coats of Cabot spar varnish.

Added bonus our Wal-Mart had cushions on sale for 50 + percent off!

Estimated Cost
175
Estimated Time Investment
Weekend Project (10-20 Hours)
Finish Used
Rust-oleum spray paint
Cabot spar varnish
Recommended Skill Level
Beginner

Comments

Planked Wood Look Headboard

Submitted by JackAttack on Tue, 07/21/2015 - 15:47

Really great and easy plans to follow. The only thing I would do different is replace all the 1x3's with 1x4's.

Estimated Cost
Under $100
Estimated Time Investment
Afternoon Project (3-6 Hours)
Finish Used
Rustoleum Dark Walnut
Recommended Skill Level
Beginner

Comments

Thank you Anna! Salsa Console Table Project

Submitted by jblair814 on Fri, 04/01/2022 - 06:48

I have to give a massive shout out to Anna White and to all the other folks who did their own variation on the Salsa Console Table.

I started this project before my daughter was born, and needless to say, that turned it from a "couple of weeks" project to a "most of the year" one!

The good news is that in taking my time, I was able to think and re-design and that made the final project so much better! I kept the original idea of a 'criss-cross' wine rack, elevated the drawer/cabinet design with shaker-style joinery, and laminated the top myself (sooooo happy with how that turned out). I made the extra bits of trim around the mid-section and base myself with a router and scraps from the drawer faces (since trim is so expensive at box stores)

Lastly, the finishing involved two of my very favorite products: Benjamin Moore Advance for the body(expensive but diamond-hard finish) and Varathane Poly Stain and Seal (there is just no substitute for slow-drying oil finishes on tabletops - so smooth and rich in colour)

All in all, the project cost me around $600 (high prices of wood during Covid to blame) but there is just no substitute for doing it yourself, and since most solid wood buffet tables run $2000+ I still came out ahead.

Cheers fellow woodworkers!!!

Built from Plan(s)

Comments

Simple Outdoor Lounge Chairs

Submitted by tlcbbp on Tue, 05/31/2011 - 20:19

I am going to be making more of these, but I just loved how they turned out. The cushions were ten bucks at Target.

Estimated Cost
45 dollars, including paint and stainless/coated screws
Estimated Time Investment
Day Project (6-9 Hours)
Finish Used
Exterior Eggshell Paint
Recommended Skill Level
Beginner

Comments

Murphy Bed

Submitted by Newfey on Fri, 07/19/2013 - 14:59

This is a Murphy Bed that I made for my daughter Alicia for their getaway home at Canadian Lakes, MI. Due to limited space i had to make it horizontal instead of the normal way of being vertical. It really comes in handy and takes up very little space.

Finish Used
Red paint mixed with Baking Soda
Recommended Skill Level
Intermediate

Comments

JoanneS

Fri, 07/19/2013 - 15:17

Looks great! Love the color and the trims you used. Where did you find your hinge hardware? PS- How did you like the baking soda paint? I've tried ASCP which was good but very pricey, and last time made my own with some plaster of paris. Your finish is lovely.

Newfey

Sat, 07/20/2013 - 18:47

I bought the spring hardware on line. I can't take the credit for the paint as my daughter did that part. She loves the way that the baking soda and paint covers everything and it is a whole lot less expensive than buying the commercial stuff.

Craftsman cottage loft bed

So thankful for these plans!  My daughter requested a cabin loft bed that could double as a "crafting nest".  I only had to make a few architectural modifications, but I built this by myself in five days, so I would say it's a very DIY-friendly build!  My daughter loves it and it adds functional and aesthetic appeal to the room!

Built from Plan(s)
Estimated Cost
$350 building materials.
Estimated Time Investment
Week Long Project (20 Hours or More)
Finish Used
Exterior: Paint wash 1:1 acrylic chestnut paint to water, brushed on with a foam applicator. Trim and roof is painted with Behr Incognito. Interior: Amber tinted Shellac. "Cedar Shakes" are a bundle of $5 cedar shims from a big box store, cut to length.
Recommended Skill Level
Intermediate

2x4 Modern Adirondack Chair

I used the 2x4 modern Adirondack chair plans. I made it entirely from old treated lumber that came from a deck I tore down. All decking boards and 2x10 beams that I ripped to size. The finish is burned.

Comments

Mother's Day Gifts

Submitted by kareylynn on Sat, 06/04/2011 - 14:00

I built two of these benches for under $30 of lumber and supplies. They were great Mother's Day gifts that thrilled my mom and mother-in-law. I will have to upload pics of the other one soon. It's already at the lake house and painted a beautiful barn red.

Estimated Cost
$30 for 2 benches
Estimated Time Investment
Afternoon Project (3-6 Hours)
Finish Used
I painted with yellow semi-gloss paint, then sanded down the edges to "shabby" it up a bit. The second bench was painted with a barn red color and sanded down, too.
Recommended Skill Level
Beginner

First Project - 85% success!

Submitted by OH3 on Mon, 07/22/2013 - 11:07

This is my first real project that I took my time on. Actually my first real project ever. I wanted to replace my Ikea console table because it has started to bow (Ikea furniture does not fend well on moves). I modified the measurements and this is now 24" wide 18" tall - same length. Solid piece of furniture. I could not find all the lumber, but I improvised. Since this was my first project, I could not get the boards to match up all too well, and I do not have a chop saw that would cut a 2x6 - when I placed the 2x6 I did not like the look so I swapped it out with 2x4's.

I used Rustoleum black lacquer spray paint. I like how the grain came out, however, it took way too much spray paint. I will consider using black latex paint next time.

I have since applied 2 coats of poly and sanded it down and steel wooled it - and finally a coat of paste wax to preserve it. If I do not like the imperfections, I just might make it an outside patio table.

Thank you so much for these plans, I spend 3 hours at work looking through all the plans on you site. I even have bought the lumber for my next project - an outdoor table (same design) so that I can use it next to the grill as a counter surface and wire baskets.

***UPDATE*** - I finished the table, however it came out 4" less wide than the old table, however I was able to re-purpose it and use it as an end table for one of the guest bedrooms. The table could have come out a little better, I guess I can only get better!

Again thank you!

Built from Plan(s)
Estimated Time Investment
Afternoon Project (3-6 Hours)
Finish Used
Rustoleum Black Lacquer spray
poly-urothene high gloss
Recommended Skill Level
Starter Project

DIY Convertible Bar / Pub Table

Submitted by susanshamp on Thu, 07/30/2015 - 16:38

This rustic modern version of a pub table has multiple uses - it can rest along a wall to make a 16 foot long bar, or rolled together to form an 8 foot long pub table. It is standard counter height 36" and will accomodate seating for 8-10 counter stools. If you don't have live edge wood slabs, you can also use construction lumber (2x8s or 2x12s) to achieve similar dimensions and versatile use in a more cost effective way.

Estimated Cost
Using construction lumber, approx. cost is $50 per table
Estimated Time Investment
Afternoon Project (3-6 Hours)
Finish Used
Poly on slabs, distressed black paint on base
Recommended Skill Level
Beginner

Comments

kev117s

Fri, 07/31/2015 - 04:10

Awesome idea! I think I will have to try for a dining table version of this table. Do you happen to have a way to lock the 2 pieces together? 

King farmhouse bed

Submitted by Texan59 on Thu, 04/14/2022 - 07:45

Always wanted to build my own bed frame and this was it. Let me start out by thanking Ana, for her great plans. I also wanted to say that even with lumber prices at high prices, does not mean quality lumber! The big box stuff took a lot of prep to become workable. I purchased the 4x4 posts from a local guy with a small saw mill. They were actual 4x4 inch, so some measurements needed to be adjusted.
Very satisfied with the outcome as visible by the inspectors in the last picture! Our plan is to finish it in a flat whitewash finish topped with a matte poly. This piece of furniture is stout and will last generations.

Comments

Single Step Stool

Submitted by tatifl on Mon, 06/06/2011 - 14:26

I really loved the inspiration Vintage Step Stool when I saw it but what I really needed was a single step step stool to place in front of the sink vanity in our downstairs bathroom. I have had a cheap plastic Sesame Street one there for the longest time but I hate it because it's so, well, baby-ish! Also, I wanted something that was only 5.5" high so that we could still open the vanity door without the step stool getting in the way and without having to move the step stool first. So, I printed out the plans for the Vintage Step Stool and I played around with it - I drew my version, then drew it again using MS Publisher and printed out a template for the sides. I used a 1 x 8 x 4 to cut the sides and top and a 1 x 2 x 4 to cut three supports. I also splurged and bought a pocket hold jig jr.!! I used a jigsaw to do ALL of my cutting. The completed size is about 9.5"d x 11"w x 5.5"h. This is the first thing that I have ever designed and built myself and I just have to say that I am sooooo proud of myself!! I can't wait to show my dad!

Estimated Cost
$20 (not incl cost of jig)
Estimated Time Investment
An Hour or Two (0-2 Hours)
Finish Used
I used spray paint
Recommended Skill Level
Starter Project

Comments

Frosted Plexiglass Entry Door

We gutted our above garage apartment a year ago and have been DIYing as much as is reasonable inside. We installed Allure Ultra vinyl flooring throughout, which is thicker than the old, chipping peel and stick vinyl there was previously. Instead of planing the previous termite eaten hollow-core door with heavy, less-than-secure glass jalousies, we decided to build our own entry door.

We were able to use orphaned 2x6s in my mom's garage and old trim we saved from gutting our apartment. The choices we made amounted to a total of about $150 for this door, including basic door hardware and $70 plexiglass. The hardest part was spraying the plexiglass, as I'm a rather unsuccessful spray painter.

We appreciate having our custom door, and we hope someone else in need of an entry door is inspired to save money and try one out too!

Estimated Cost
$150, based on our choices and what wood was already owned
Estimated Time Investment
Week Long Project (20 Hours or More)
Finish Used
Olympic semi-gloss latex paint in a deep purple shade.
Recommended Skill Level
Intermediate

Comments

JoanneS

Thu, 07/25/2013 - 16:04

This is gorgeous! You did such a great job on this, love the custom design features you added to this door. It looks classy and expensive. :)

Little girls Jr. Loft Bed

Submitted by TamiJ on Mon, 08/03/2015 - 22:26

I built this for my little girl's room and she loves it! She loves the play area underneath especially. The build did not take that long, but the finishing (sanding and painting) took many hours. It is very sturdy. My girls sleep up there together all the time, and we have even had adults sleep up there. We didn't have a corner to put it in, so I built wider steps along the same wall as the bed. 

Estimated Cost
$200
Estimated Time Investment
Week Long Project (20 Hours or More)
Finish Used
Antique white with a satin finish.
Recommended Skill Level
Beginner

Comments

Janeece

Wed, 09/16/2020 - 19:25

I am interested in this design, but would like to have it with a full size mattress. How would I alter the plans? I would also like to have the stairs be storage drawers/stairs. Can you help me with this?
Thank you!

Lockers

Submitted by Ndilbeck on Sun, 03/04/2018 - 17:20

Lockers for the whole family 

Estimated Cost
$250
Estimated Time Investment
Day Project (6-9 Hours)
Finish Used
Gloss paint
Recommended Skill Level
Intermediate

Comments

kaperswoodworks

Mon, 01/25/2021 - 14:54

The plans linked is for a piece that is nothing like the picture here. I’ve noticed lately your website has incorrect links, the pdf print option doesn’t work, and the focus seems to be less on the plans and more about selling your pre-cut stuff. Very disappointing.