Community Brag Posts

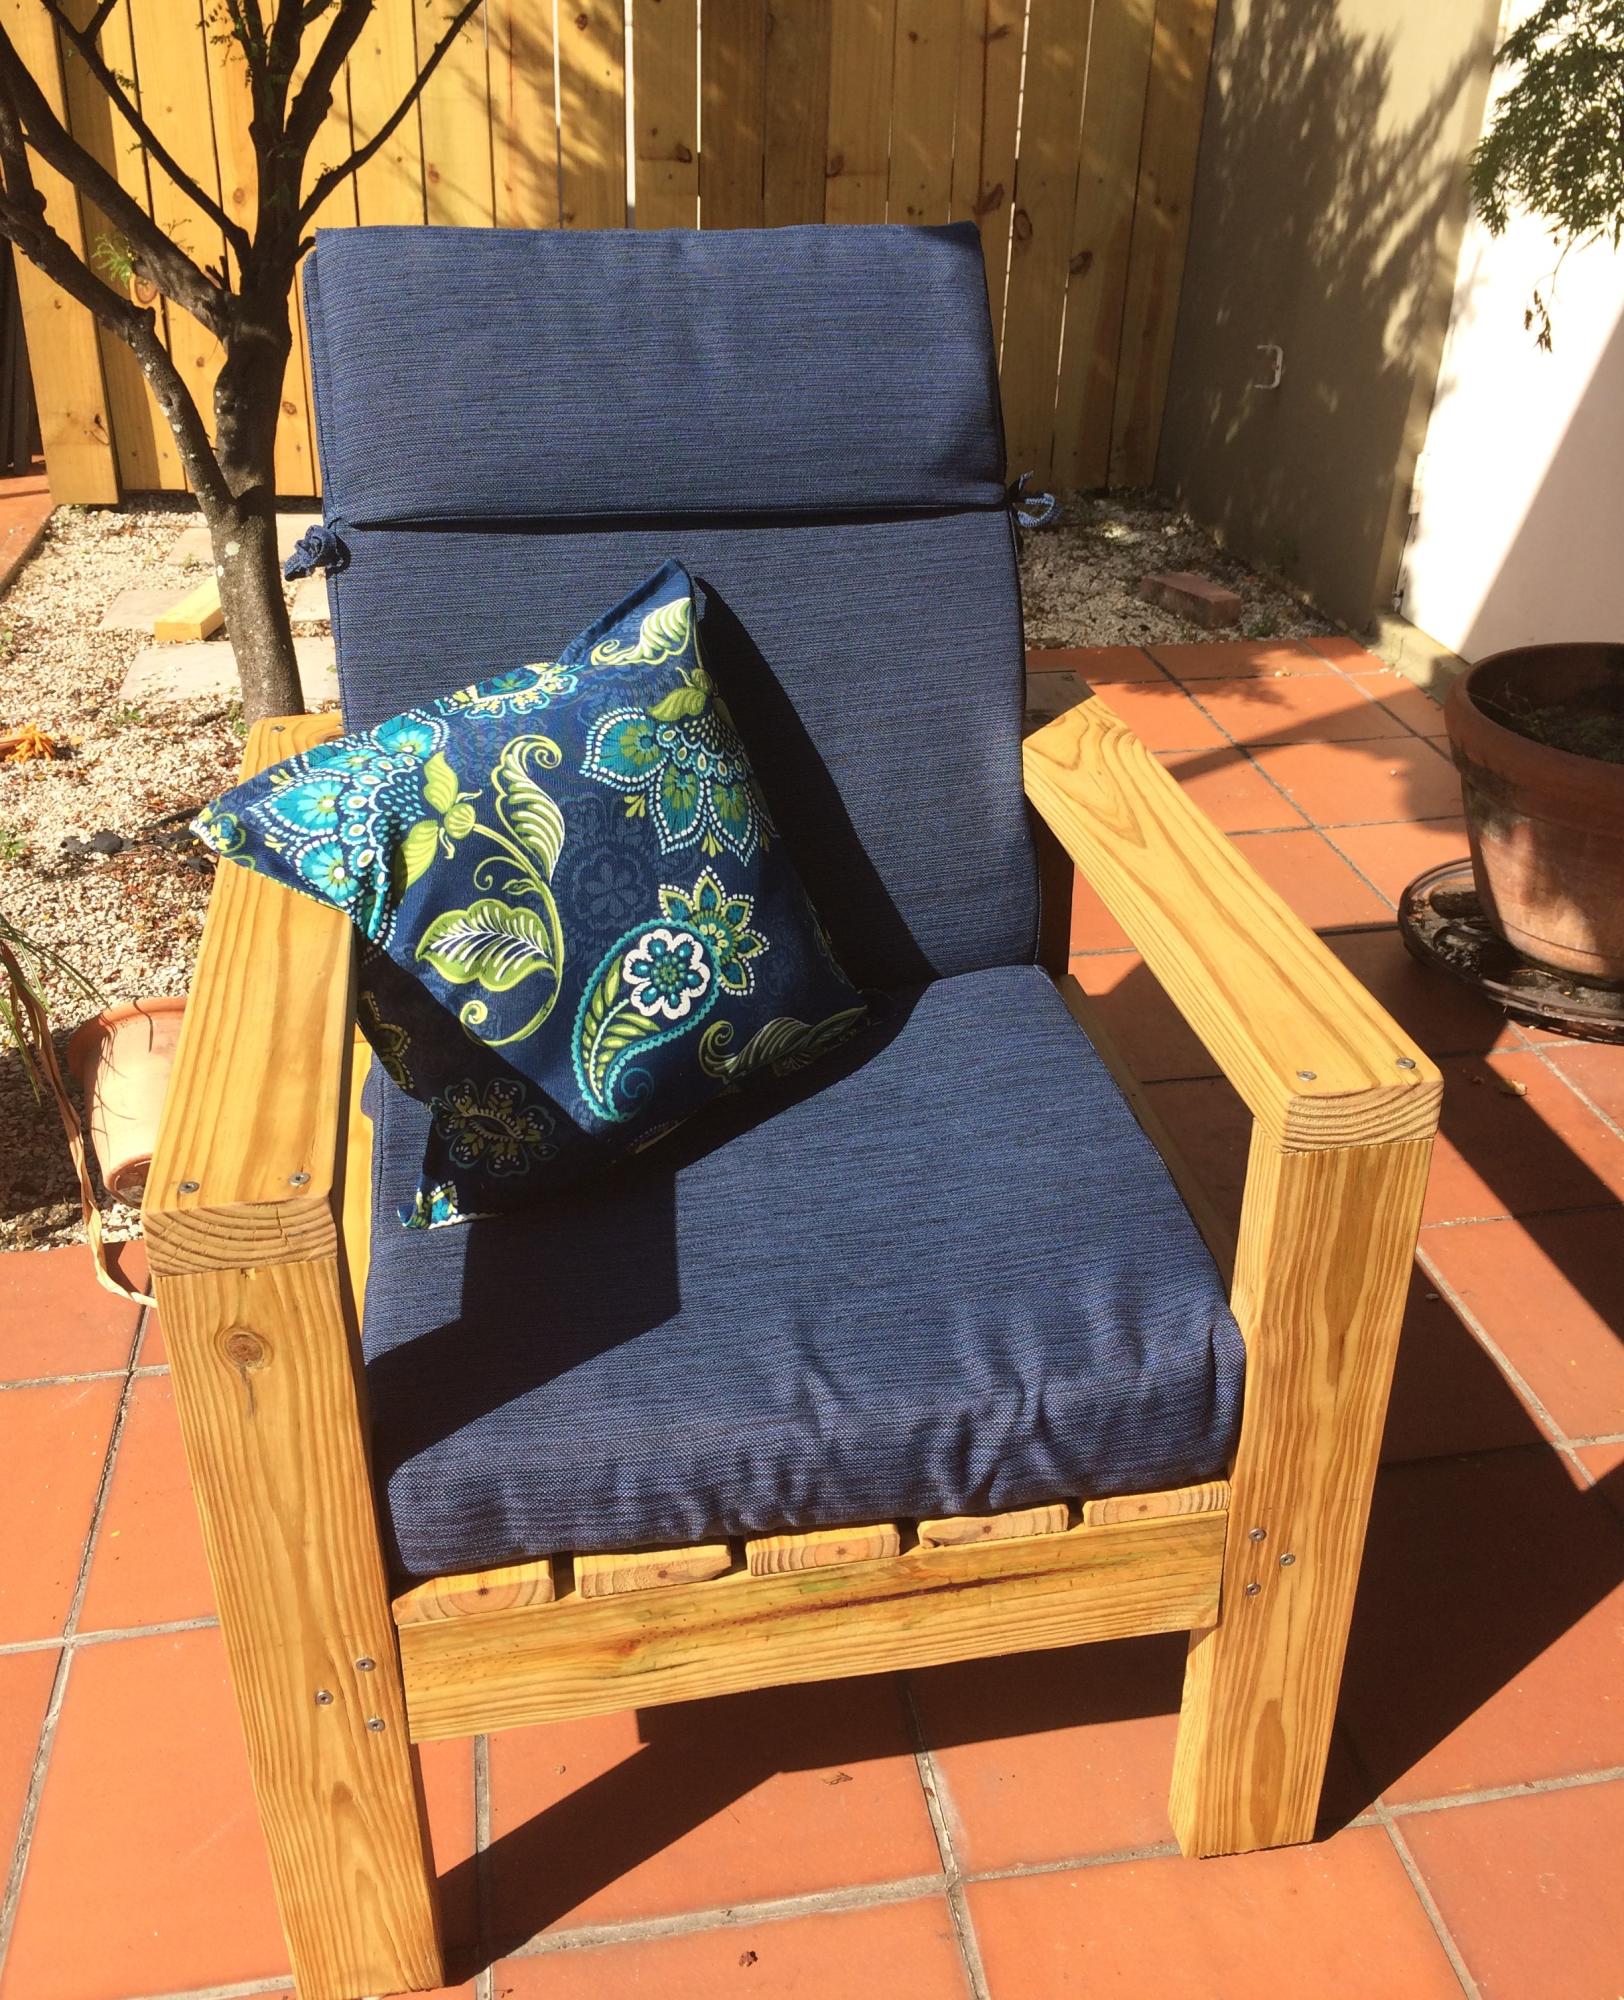
simple outdoor chair

Submitted by Anonymous (not verified) on Sun, 01/15/2017 - 11:00

This was my first chair. I made the arms and base with 2x4's. I added a 2x4 apron in the front and back and 1x4 apron to the sides.  My next chair I will try to use the Kreg for the arms, the base will be hidden with aprons, so it doesn't matter. The slates are 1x4 as the instructions provided recommended.  I got the cushion from Lowes for $50

Built from Plan(s)
Estimated Cost
$50 - for pressure treated wood, exterior screws, stain and sealer.
Estimated Time Investment
Afternoon Project (3-6 Hours)
Finish Used
Ipswich Pine- used foam brush
spar urethane - clear satin
Recommended Skill Level
Beginner

Master Bath Barn Door

Submitted by Anonymous (not verified) on Fri, 03/17/2017 - 16:34

Created this door with pine wood tongue and groove lumber and pine wood planks. Purchase barn door hardware / track from Jet.com and door handles from Hobby Lobby. 


This replaced my Master bath door and I think came out pretty good. Thank you for the ideas!!!  Jeff M.   Brownstown, Mi

Estimated Cost
Wood 55.00
Handles 2 for 8.00
Stain ( left overs)
Barn door track 54.00

Total $117.00 and 10 % Military discount at lowes
Estimated Time Investment
Weekend Project (10-20 Hours)
Finish Used
Minwax. Mix of Kona and Driftwood Grey
Recommended Skill Level
Intermediate

Tapered Crate

Submitted by dmcarwin on Sat, 02/16/2013 - 08:06

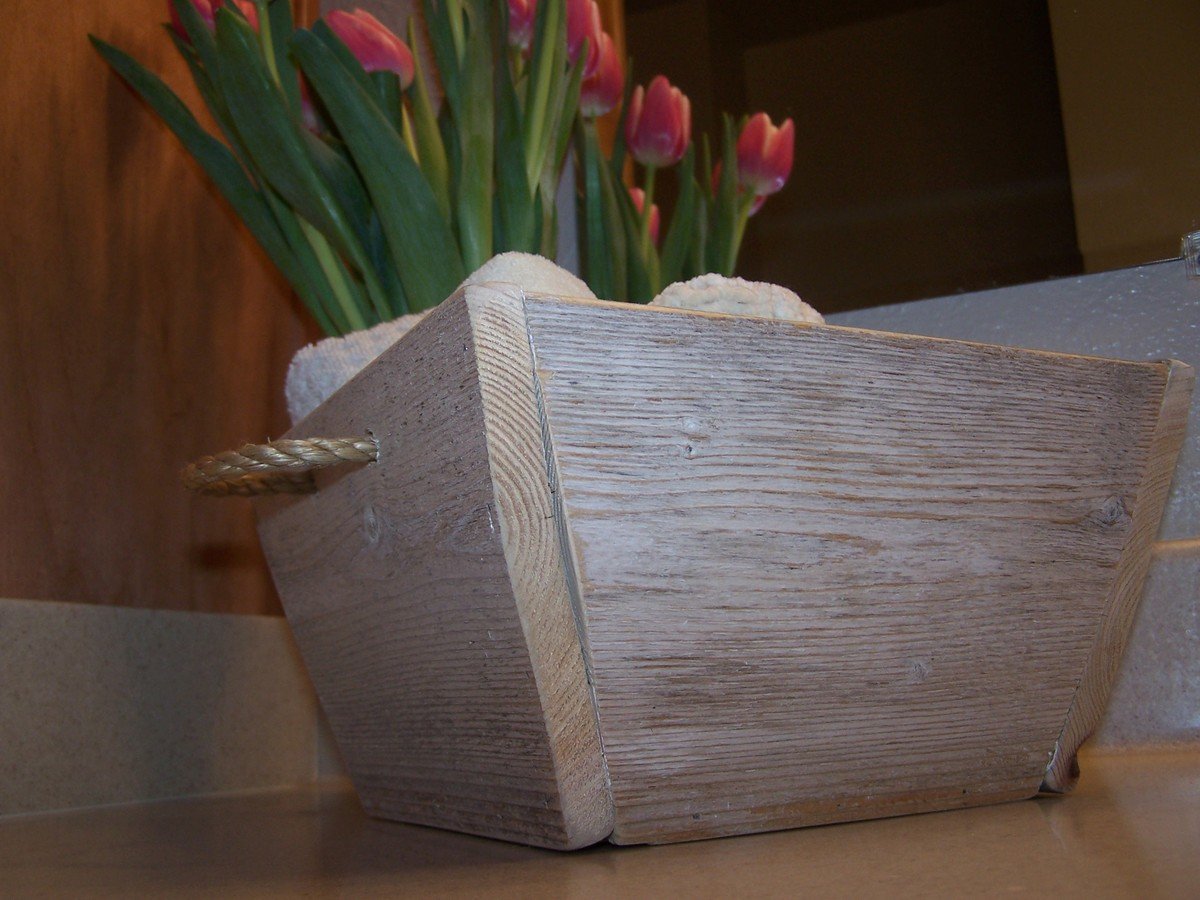
I was so excited when I saw the plan for this! I love making crates out of wood. It was quick and easy and I already had a cedar fence post! It was less than 30 minutes start to finish! For more pictures check out my blog post. Thanks Ana!

Estimated Cost
Free!
Estimated Time Investment
An Hour or Two (0-2 Hours)
Finish Used
It was naturally finished for me!
Recommended Skill Level
Starter Project

Comments

sarahwilley2

Sat, 02/16/2013 - 10:45

Great job! This looks awesome. I can't wait to make some of these babies!

Redwood Planters

Submitted by powerof2 on Thu, 09/09/2021 - 21:39

Planters from Easy Build DIY Planter Box. Some modifications, but essentially direct from the plans. I used redwood fence pickets for the slats, finished the frame with an "ancient oak" stain and the faces with spar varnish diluted with paint thinner.

Comments

DIY outdoor chairs for our firepit

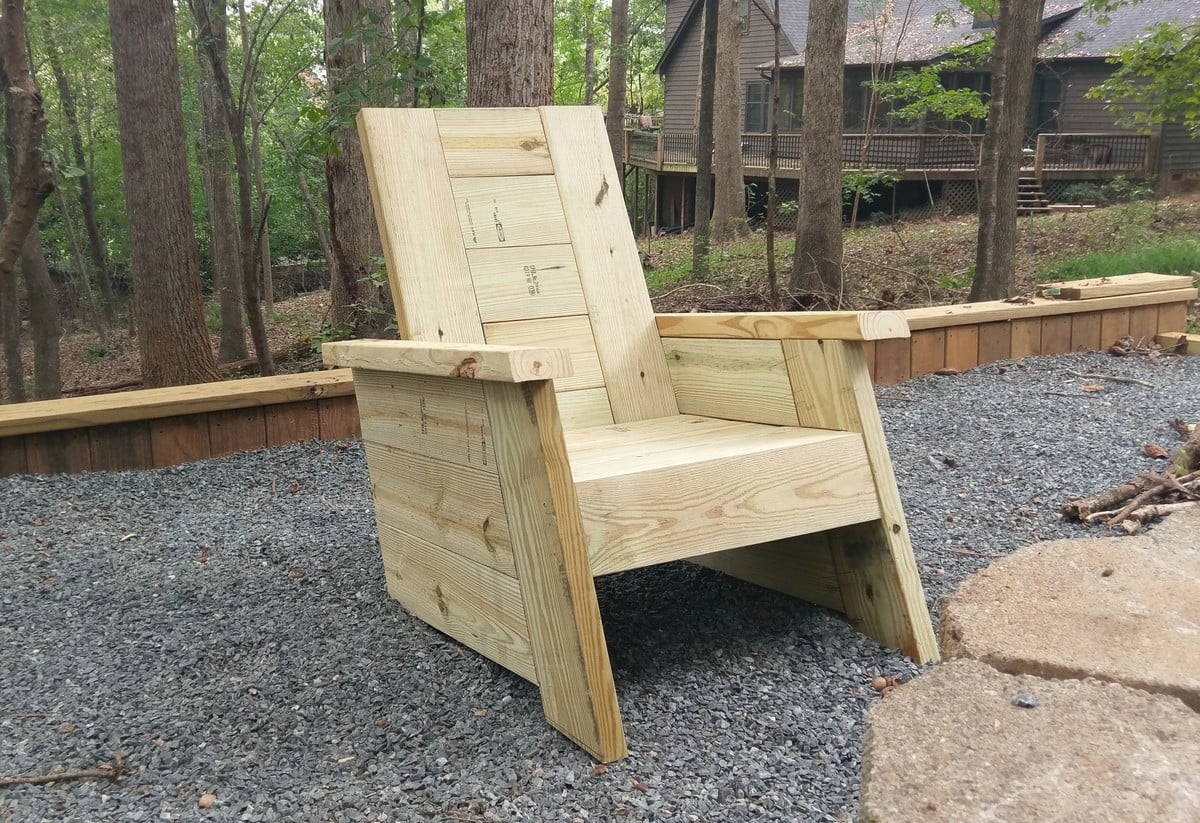
Here is one of the new chairs I'm building for our new fire pit.  They are made out of four pressure treated 2x6s (and one 2x4), and have a comfortable 18" seat depth, 19" seat width, and 110 degree angle for the backrest.  

More information, and a link to our plans are located on our blog, FamousArtisan.com

Estimated Cost
$50
Estimated Time Investment
Day Project (6-9 Hours)
Finish Used
None yet.
Recommended Skill Level
Intermediate

Comments

Spice Rack (Built-In)

Submitted by bhammond on Tue, 01/28/2014 - 21:00

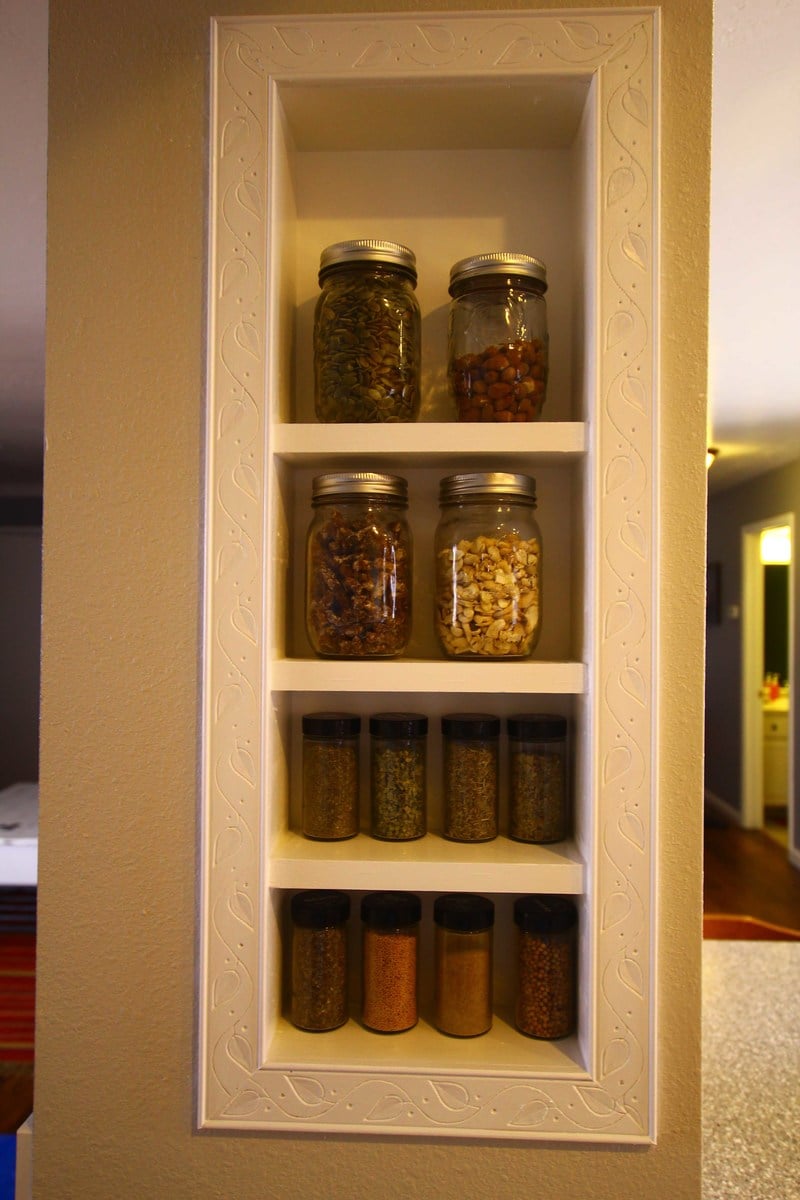
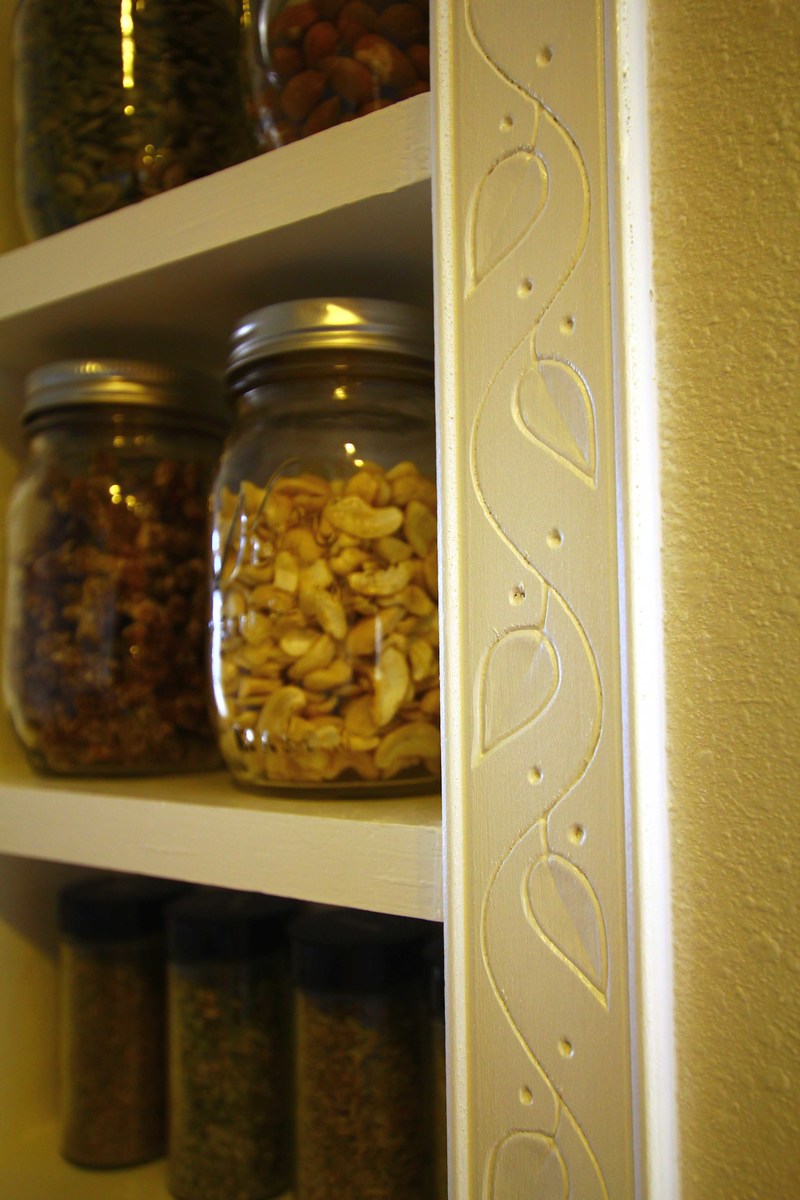
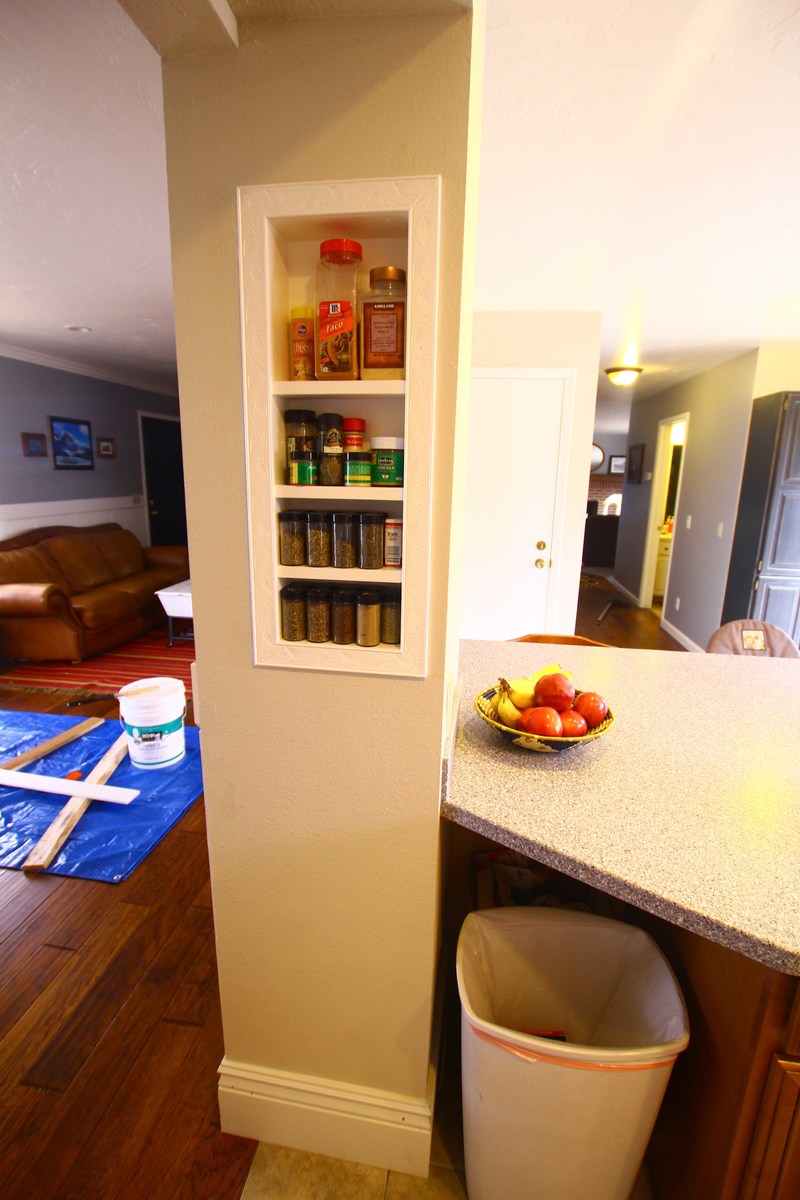
I followed the spice rack plans but put this right inside my wall and added a face frame. I love the detail in the carved wood!

Built from Plan(s)
Estimated Cost
$10
Finish Used
White paint and white caulk in cracks. The detailed carved wood was bought from Home Depot.
Recommended Skill Level
Starter Project

Master Closet - Wraparound

Submitted by Anonymous (not verified) on Fri, 04/29/2016 - 11:41

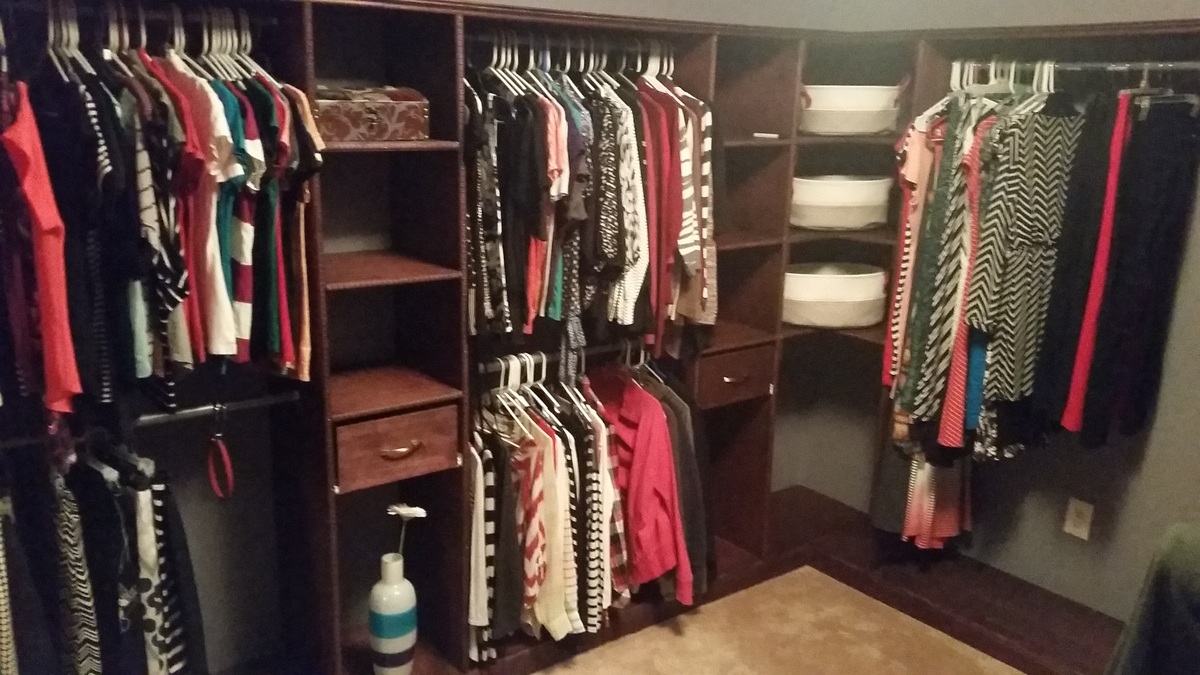
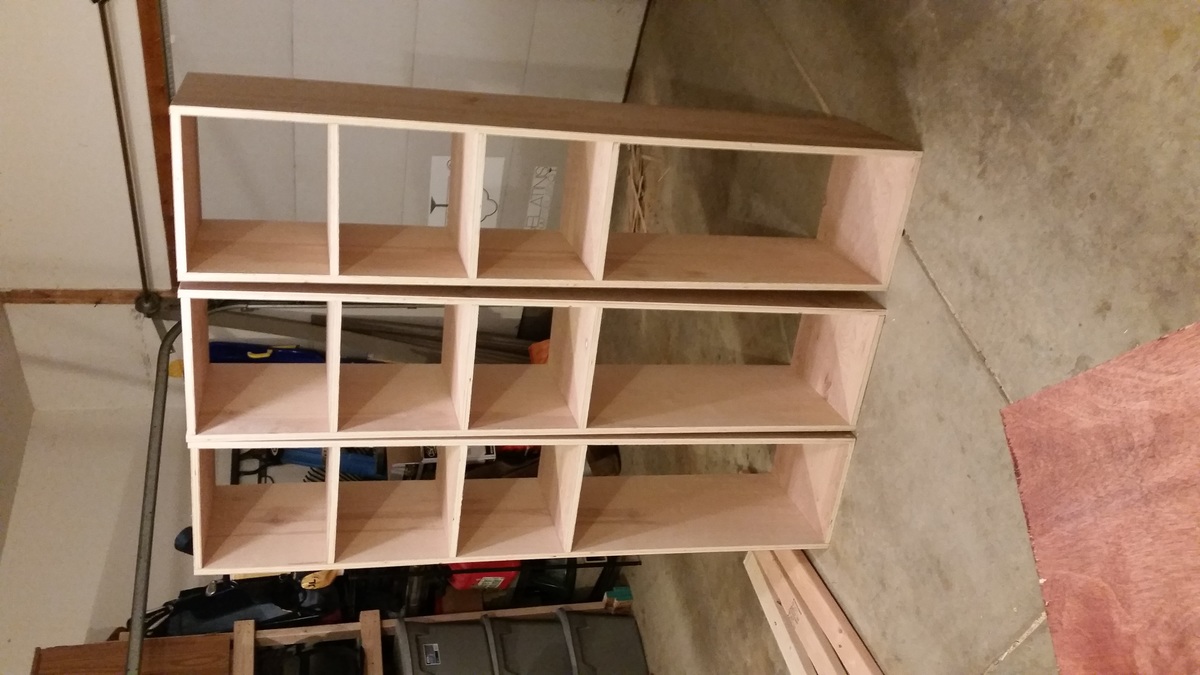
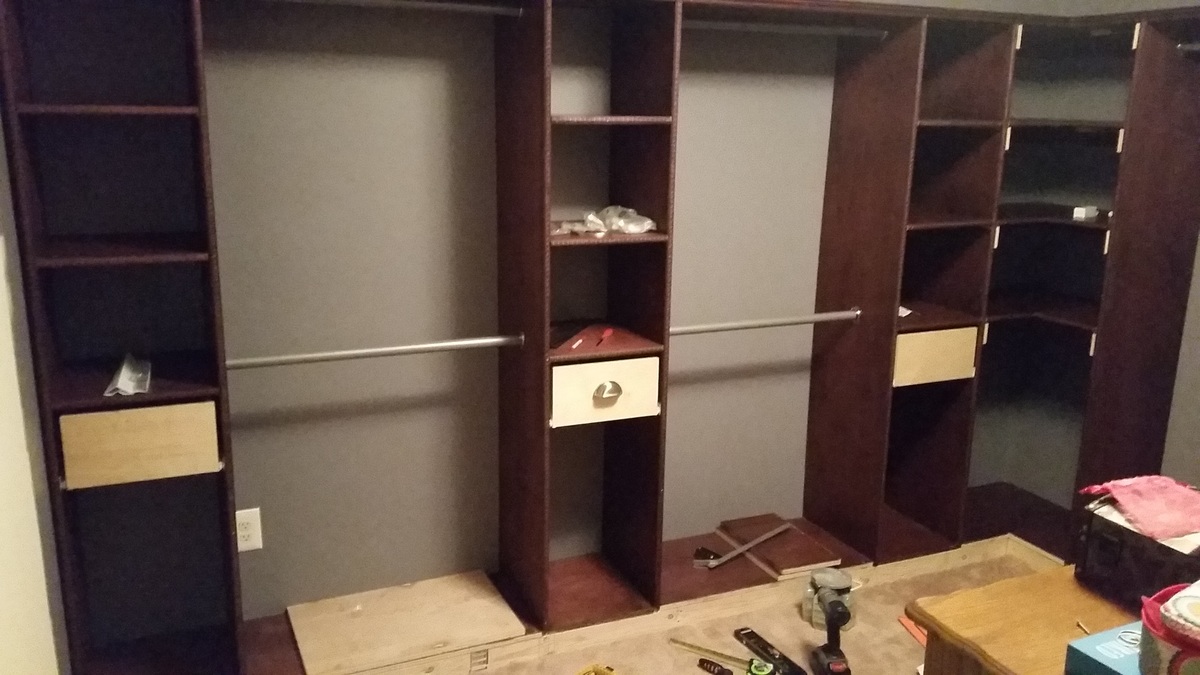
I thought I'd wait and take these glorious after photos once I was done - but nevermind that idea.  Here are some pictures of progress, start to finish.  I still plan to build some shoe cubbies for the towers so that my wife has a little more shoe-room.

We have a 5th bedroom directly off the master with a double door entrance where the 5th bedroom's closet would have been.  The room had been an office for the previous owner and my wife decided it would be a perfect closet for her.  I followed the plans quite closely for the towers.  I wish I had considered my 8+ foot ceilings and just built the towers taller because 1) storing stuff on top will look messy, and 2) The hanger rods aren't spaced quite well enough for longer clothing.  Because of this, I had to build her another hanger on the other side of the wall, which increased the complexity of the project (corner shelves, more wood, more staining, more finishing, etc).  In the end, I think it turned out great.  I will walk through the process very quickly.

  • Bought premium birch plywood, had them cut it down in the store.  They did a good job.  If I were doing it again, I would buy Aspen or Pine in precut boards, and I estimated it would have cost less than $100 more with a much higher quality and more workability, especially considering I stained instead of painted.
  • Built Towers - used my kreg pocket hole jig a TON on this project.  For boards across the top, I put the pocket holes on top, where they will be out of site.  For bottoms, I was able to use finishing brads to nail down my boards to the frame.
  • Stained wood.  I used an oil stain.  After letting it dry 24hours+, I used finishing wax to turn make the plywood very smooth.  I painted on the wax real heavy and then buffed with an electric polishing wheel.  *tip* no matter what you are thinking, stain your wood before cutting and assembling.  It will save you hours.
  • Built 2x4 bases for the frame of the system.  I used my bases as a template for cutting back the carpet.  I then fastened the bases into the wall studs and sub flooring.
  • Installed towers, played with spacing until it felt right and then fastened them into the walls and into the base.
  • Cut wood down to size for the top and bottom pieces and installed and nailed down.
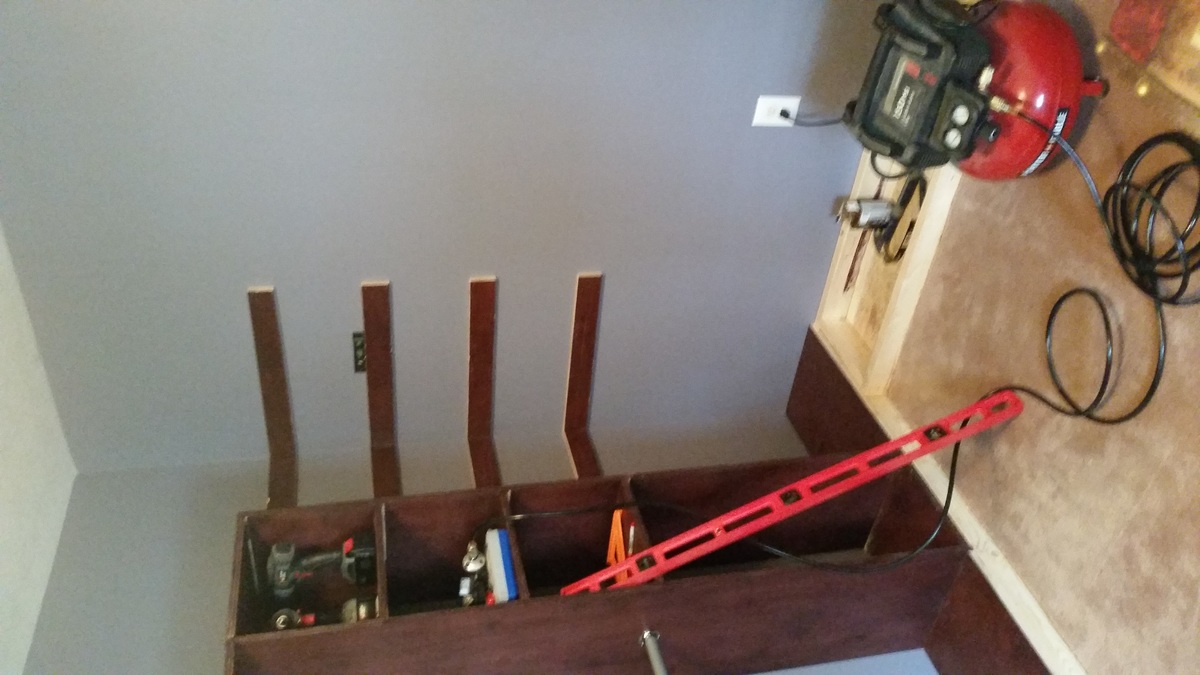
  • Cut down scraps into strips to support the corner shelves and nailed them into the wall.
  • Cut down scraps into corner shelves.  I used 2 pieces of wood for each shelf and added supports on the underside so that they can bear decent weight.  I should have just done more pocket holes.  It would have been stronger and cleaner.
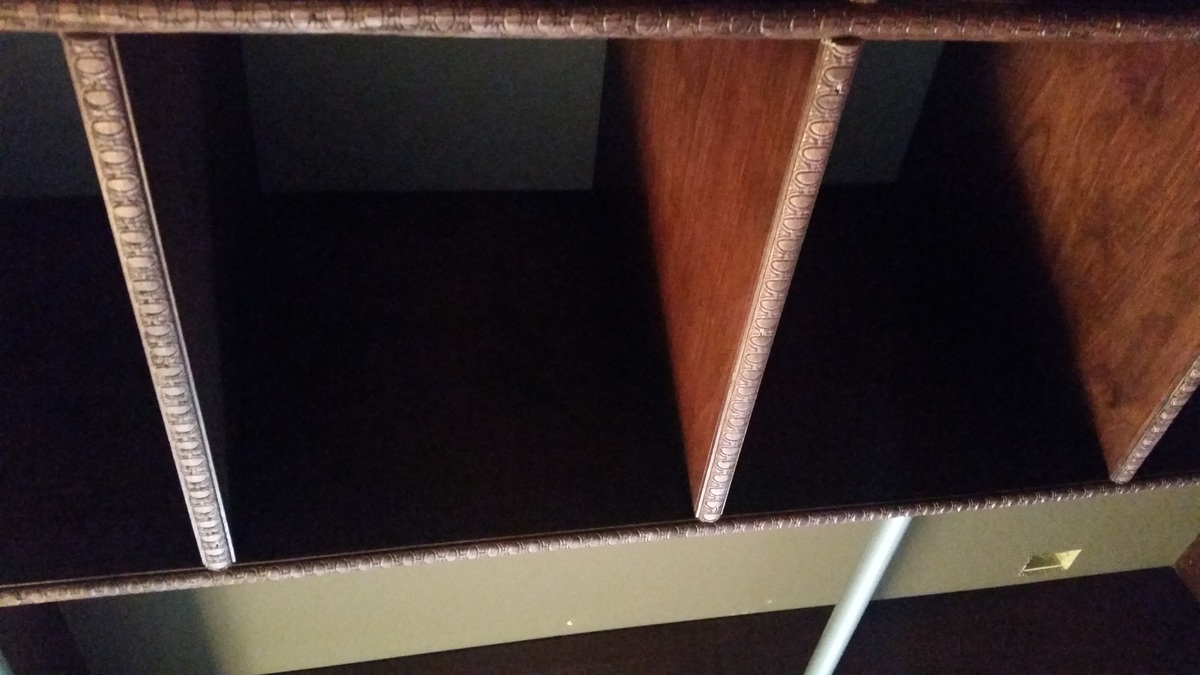
  • Installed mini crown molding along top border.  Installed 1/4 inch trim on all facing edges (rather than mess with laminating strips). Installed baseboard trip to cover frame and clean up border of frame and carpet.
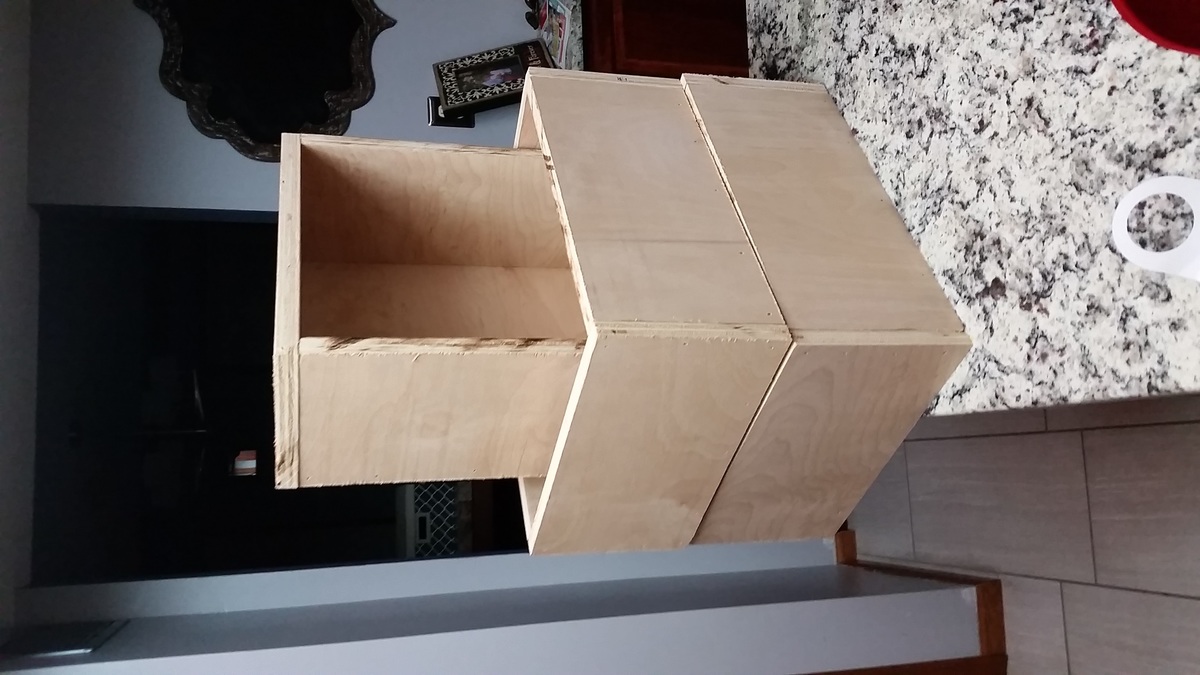
  • Built drawers using scrap plywood from the project (via the drawer plans on this site).  I didn't mess around, just cut my wood down to the right size and brad nailed the heck out of it.  They are very sturdy.  A thinner bottom and back would have decreased their weight, but I don't see any issues the way they are built.  I opted for the 1/2 inch gap around the border of the drawers.

That is pretty much it.  I think I have about $500-600 in it. Probably 60-70 hours.  If I did it all over again, I could do it better and faster and on the same budget.  As noted in the plans, SQUARE is the most important thing.  I had to fix all the tower shelves once I had them mounted to the wall because they just were not level/square enough.  

Estimated Cost
$500-600
Estimated Time Investment
Week Long Project (20 Hours or More)
Finish Used
Varathane Premium Fast Dry Oil Wood Stain and MinWax Dark Finishing Wax
Recommended Skill Level
Intermediate

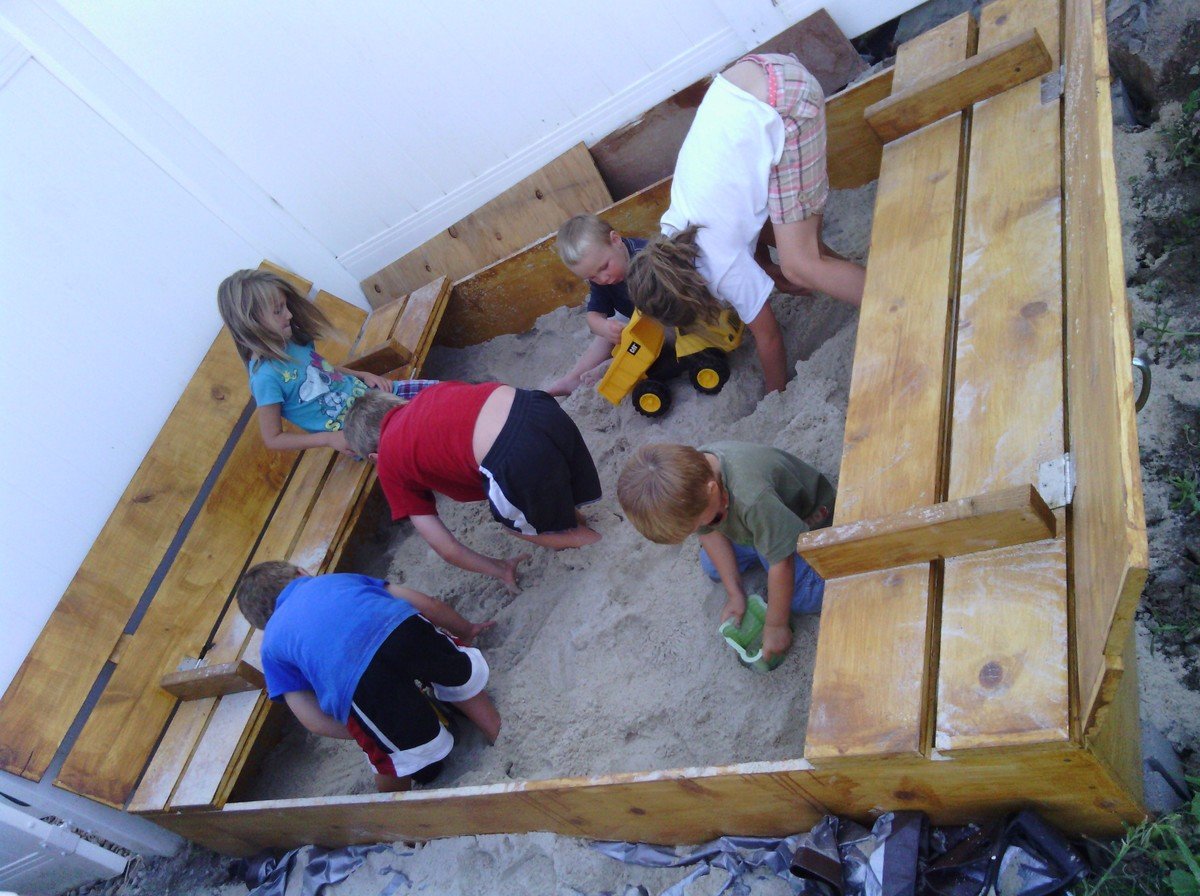
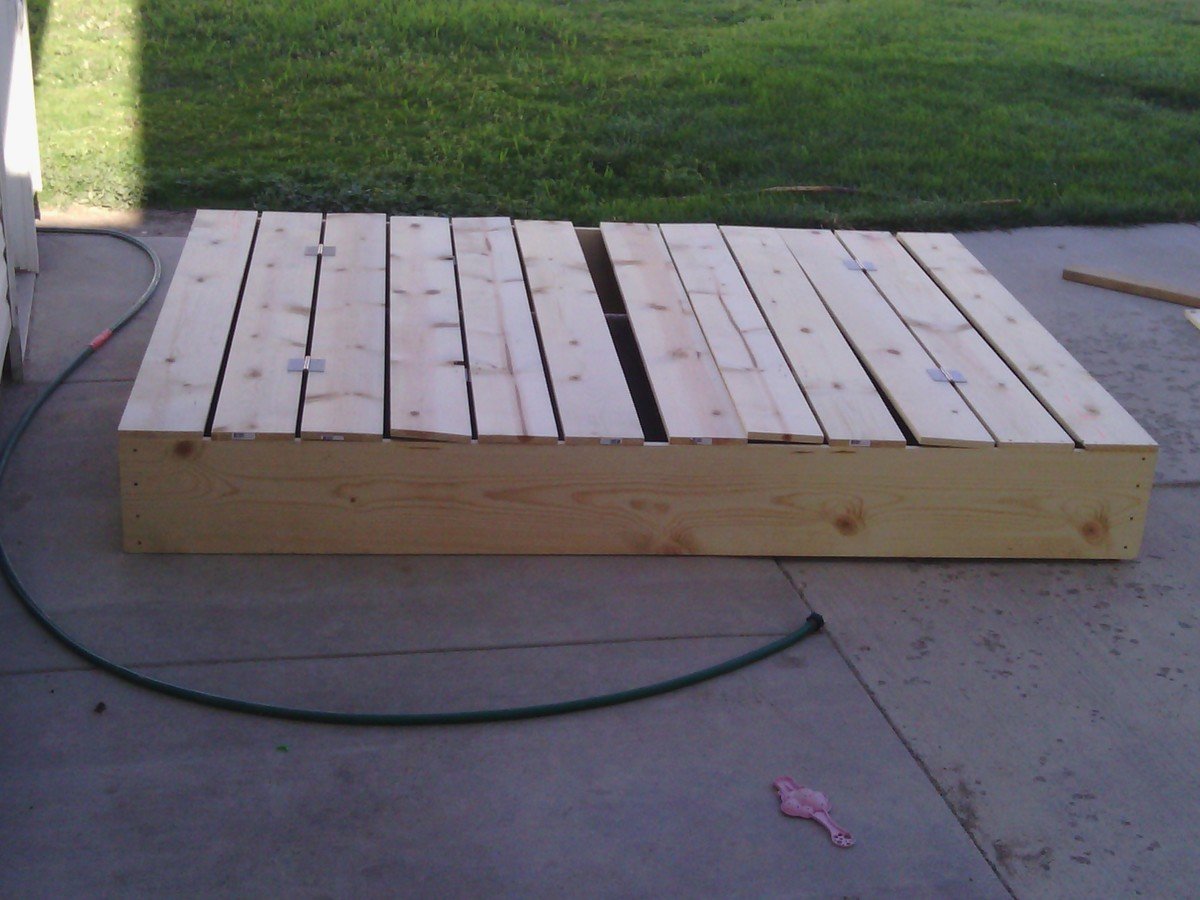
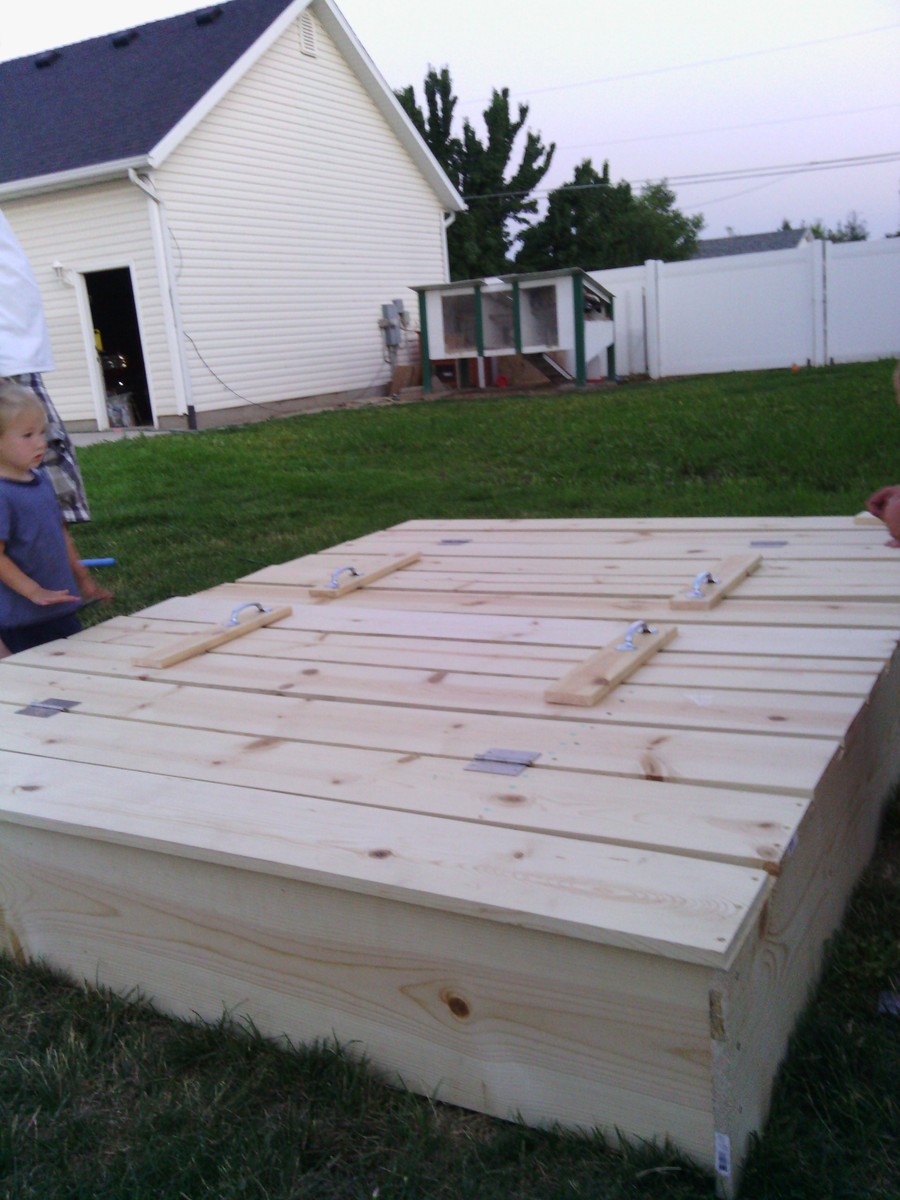
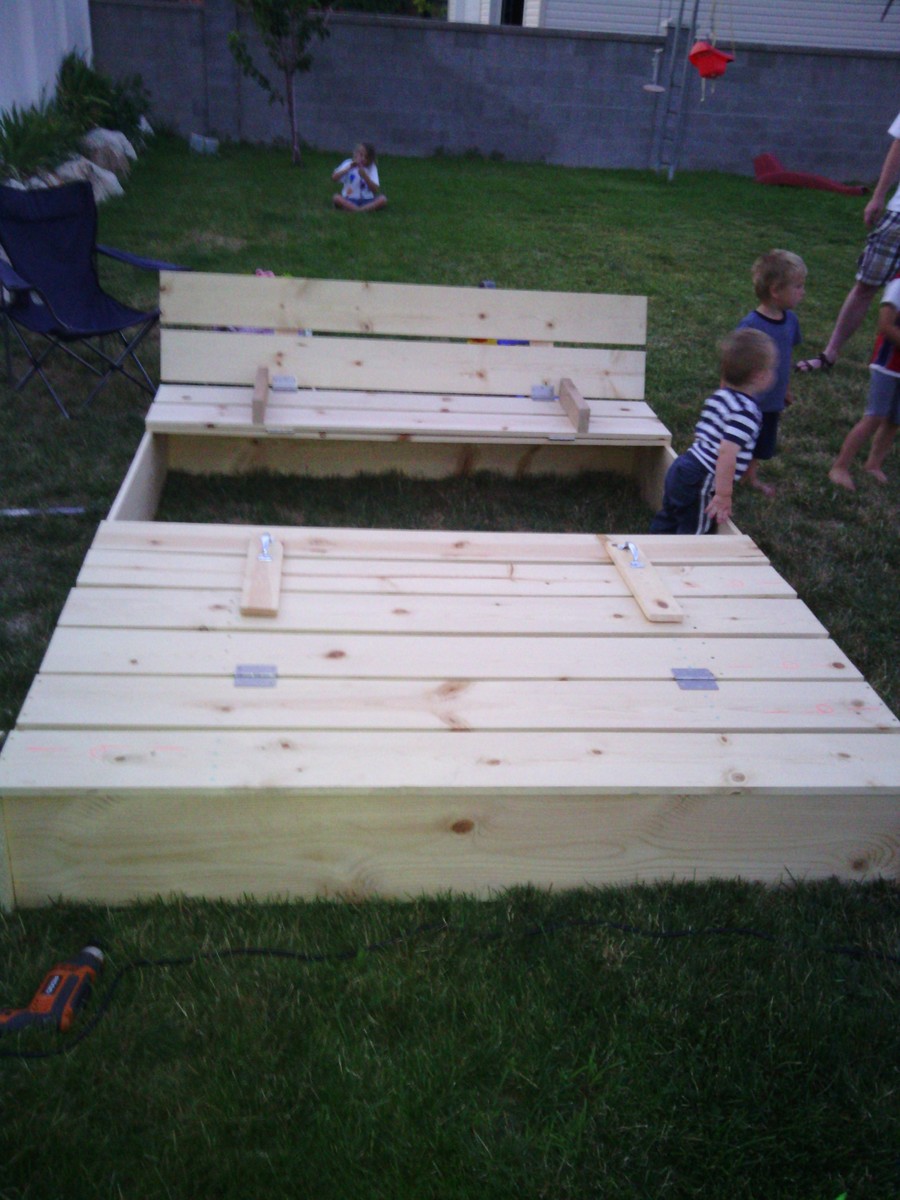
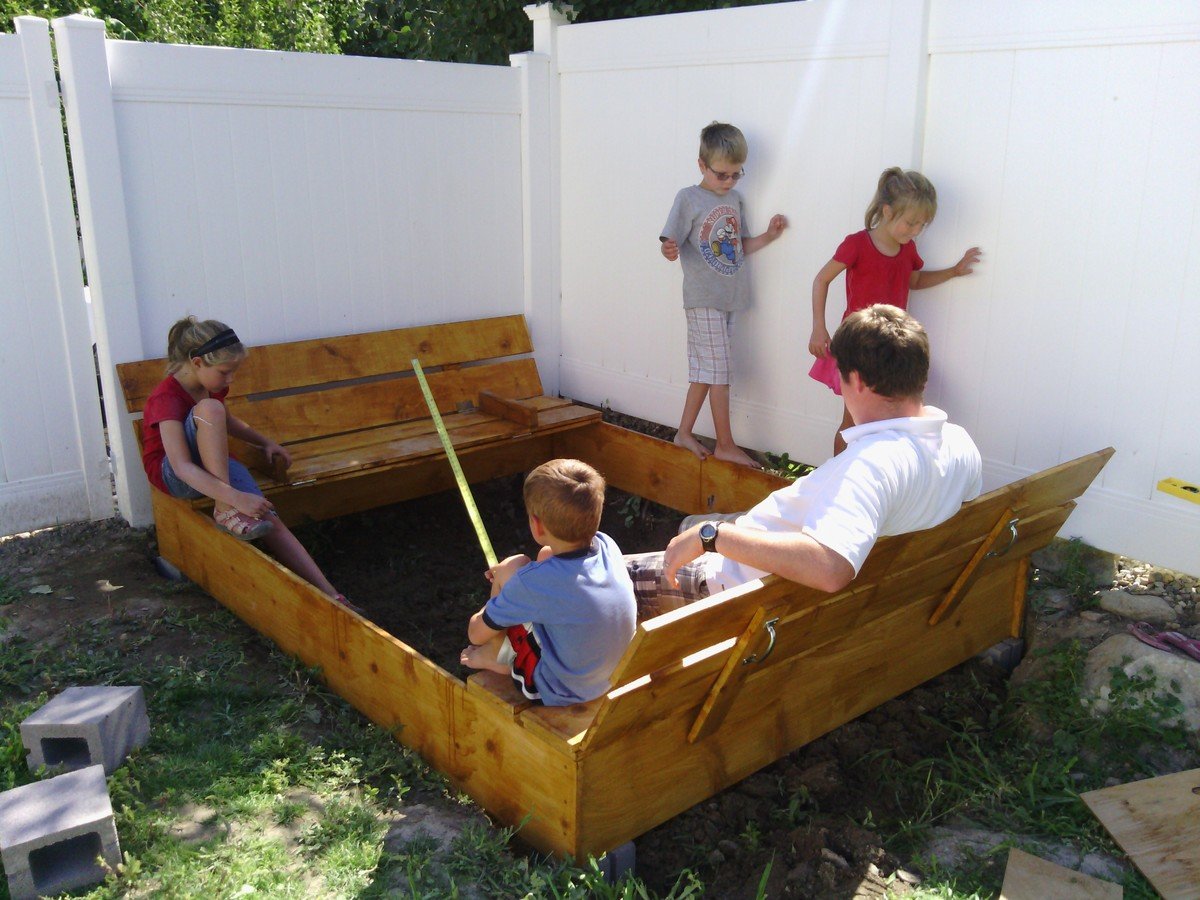
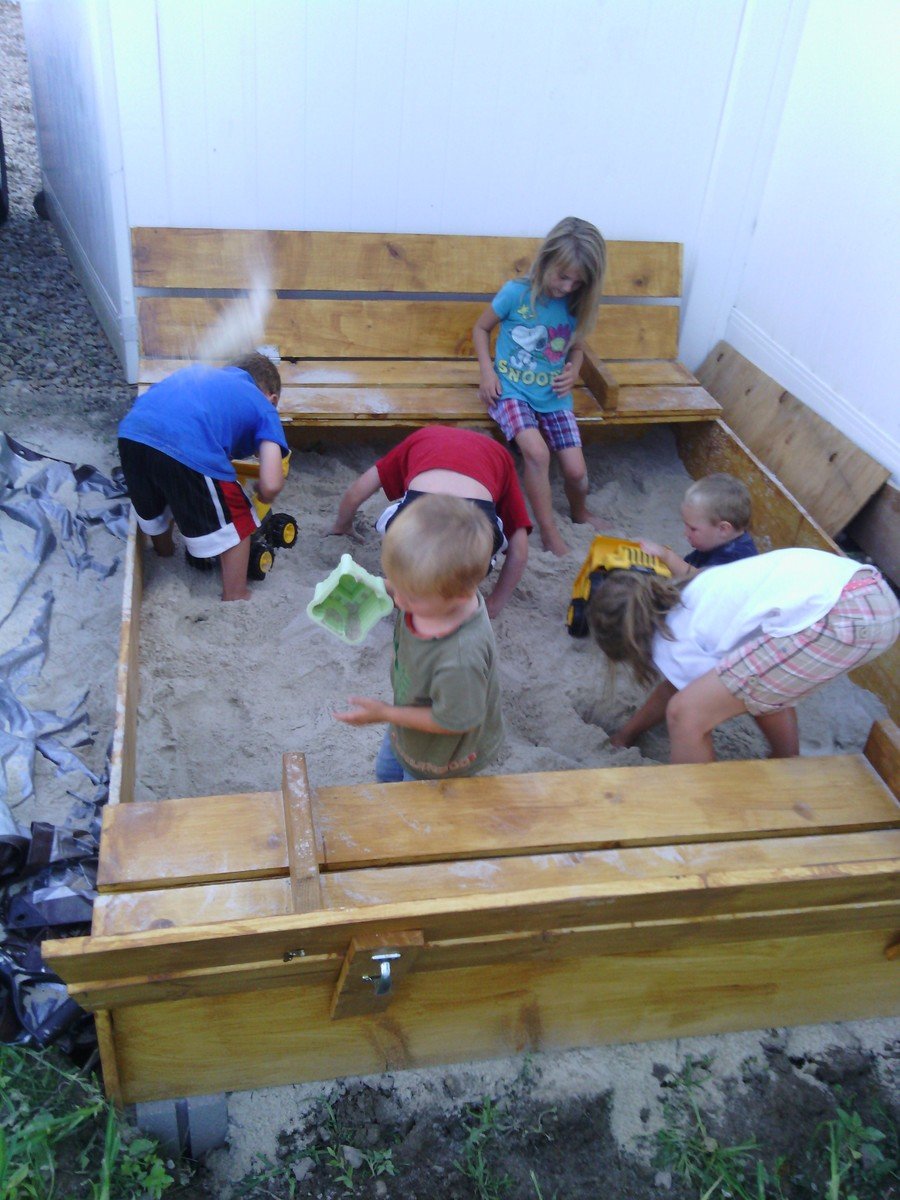
Large 6 X 8 Sandbox

We wanted to make a large sandbox for lots of kids. We love that it has an easy cover and two large benches to sit.

Supplies and Steps are shared at http://myhomedonemyway.blogspot.com/2013/07/building-6-x-8-sandbox.html

Built from Plan(s)
Estimated Cost
$250
Estimated Time Investment
Day Project (6-9 Hours)
Recommended Skill Level
Beginner

Comments

Patio Table

Submitted by Rennie82 on Wed, 06/13/2012 - 17:42

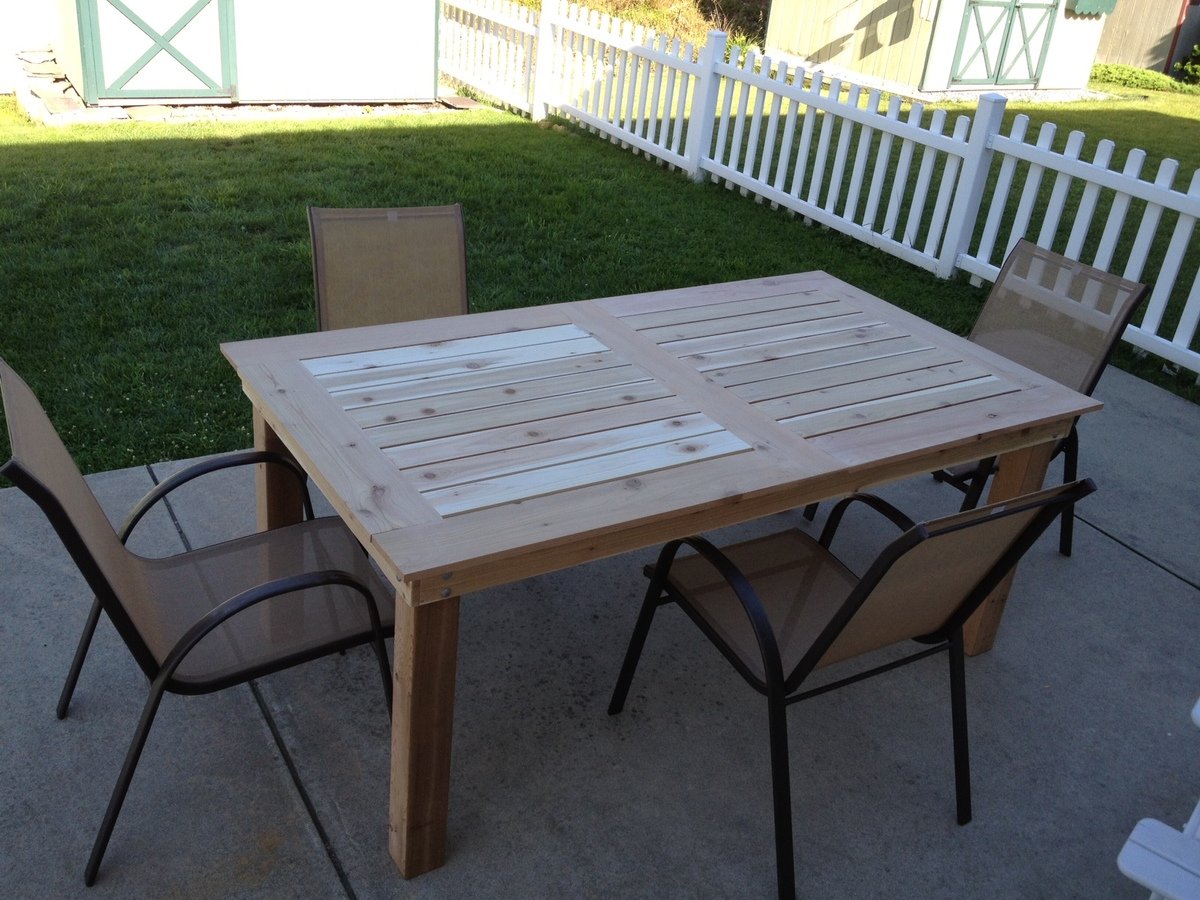
Project took a lot more time and patience than the last few little ones that I have done. I like the simple outdoor table but wanted a little bit more. I used the basic concept and mixed it with a patio table from PB that I really enjoyed but didnt want to pay $800 for. The table looks fantastic and am still debating on what type of finish, if any, to use. Hoping to make the matching bench soon for one of the sides of the table.

Built from Plan(s)
Estimated Cost
Around $120 including the carriage bolts so I can take off the legs.
Estimated Time Investment
Weekend Project (10-20 Hours)
Finish Used
None as of yet, leaning towards Thompsons clear waterproofer
Recommended Skill Level
Intermediate

Comments

Clara Play Table

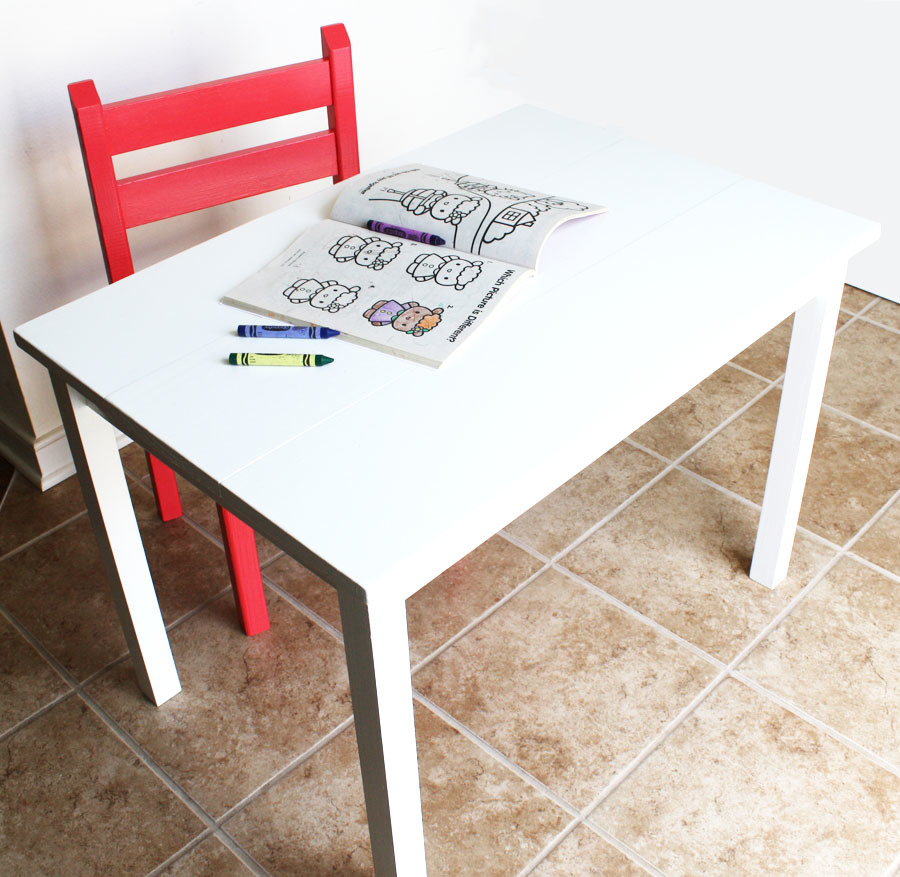
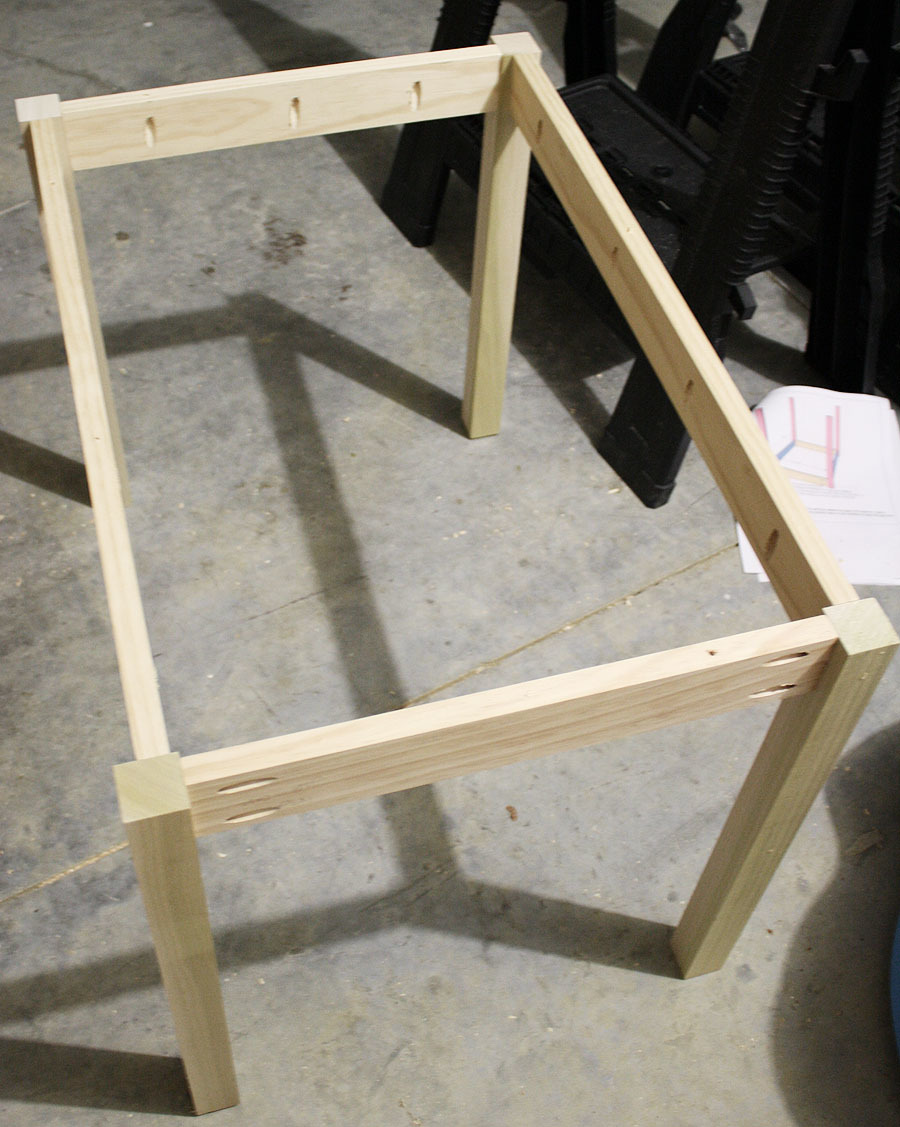
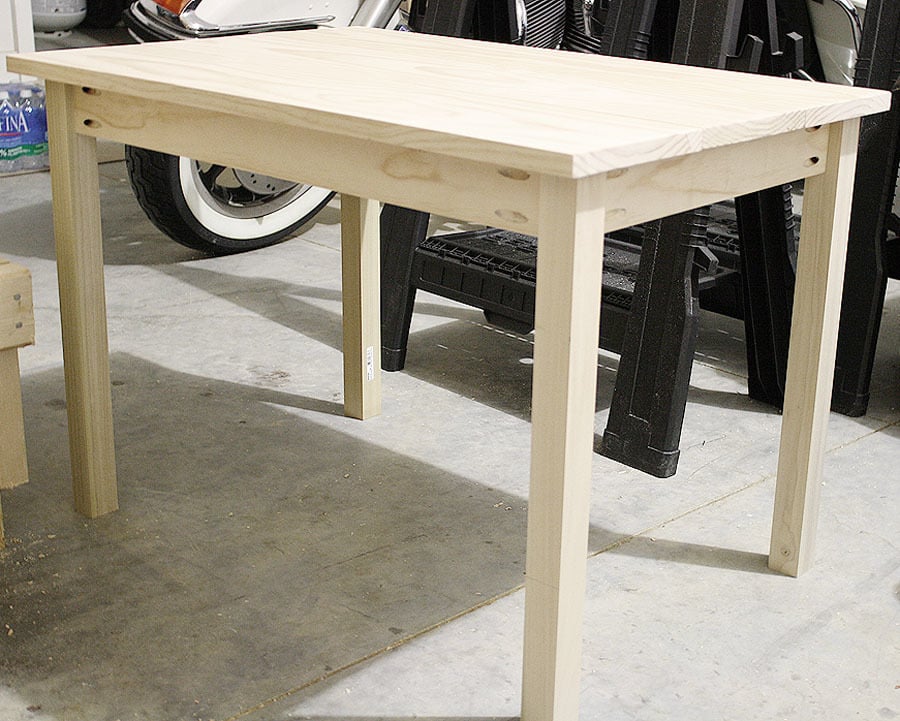
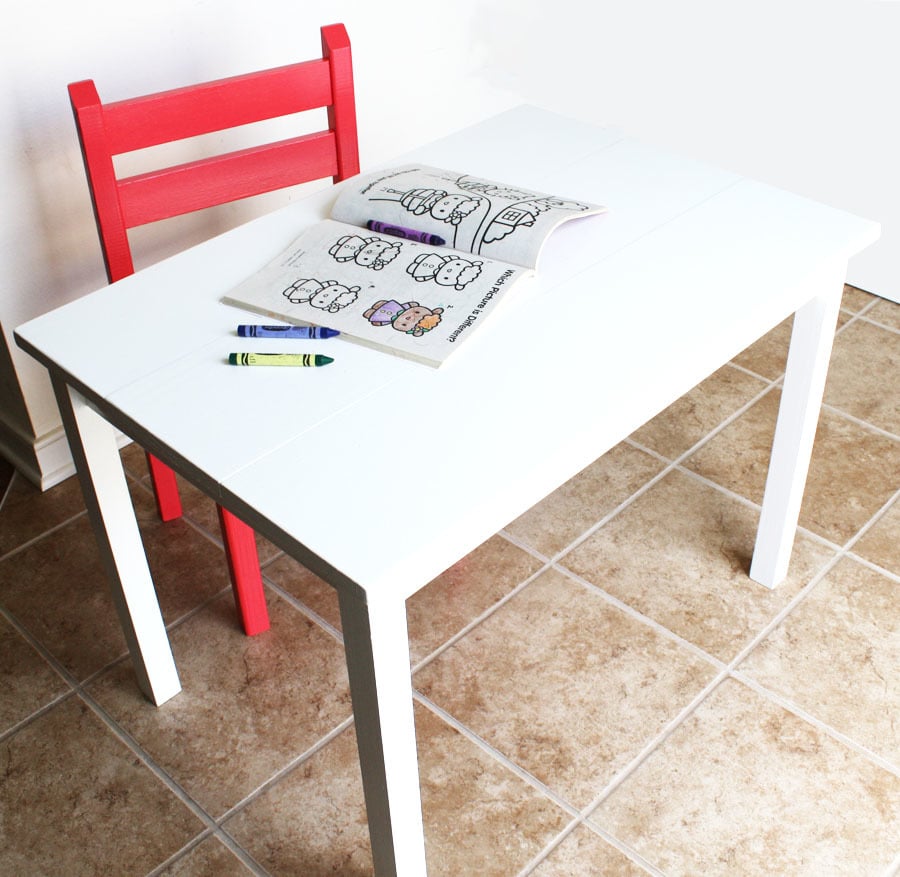
This table was super easy to build... it took me only 3 hours! I opted to use hardwood poplar 2x2s for the legs because furring strips frustrate me to no end (bowing boards, splitting wood, etc.) and the poplar also made it sturdier. Had I used furring strips, this table would have only cost me $15, but I opted for the more expensive route... but still, $35 ain't bad!

Also, I used the Kreg Jig for this project, set on 3/4" with 1 1/4" pocket hole screws - EXCEPT when I drilled the base frame onto the table top. I used 1" pocket hole screws for that, just in case the 1 1/4" screws were too long and came poking out the top of the table.

Click my blog link for the complete play-by-play!

Built from Plan(s)
Estimated Cost
$35.00
Estimated Time Investment
Afternoon Project (3-6 Hours)
Finish Used
Primed with Zinsser 3-in-1 Primer, then painted with 2 coats of glossy white.
Recommended Skill Level
Starter Project

Play Deck/Fort

Submitted by seeca13 on Sun, 06/01/2014 - 10:06

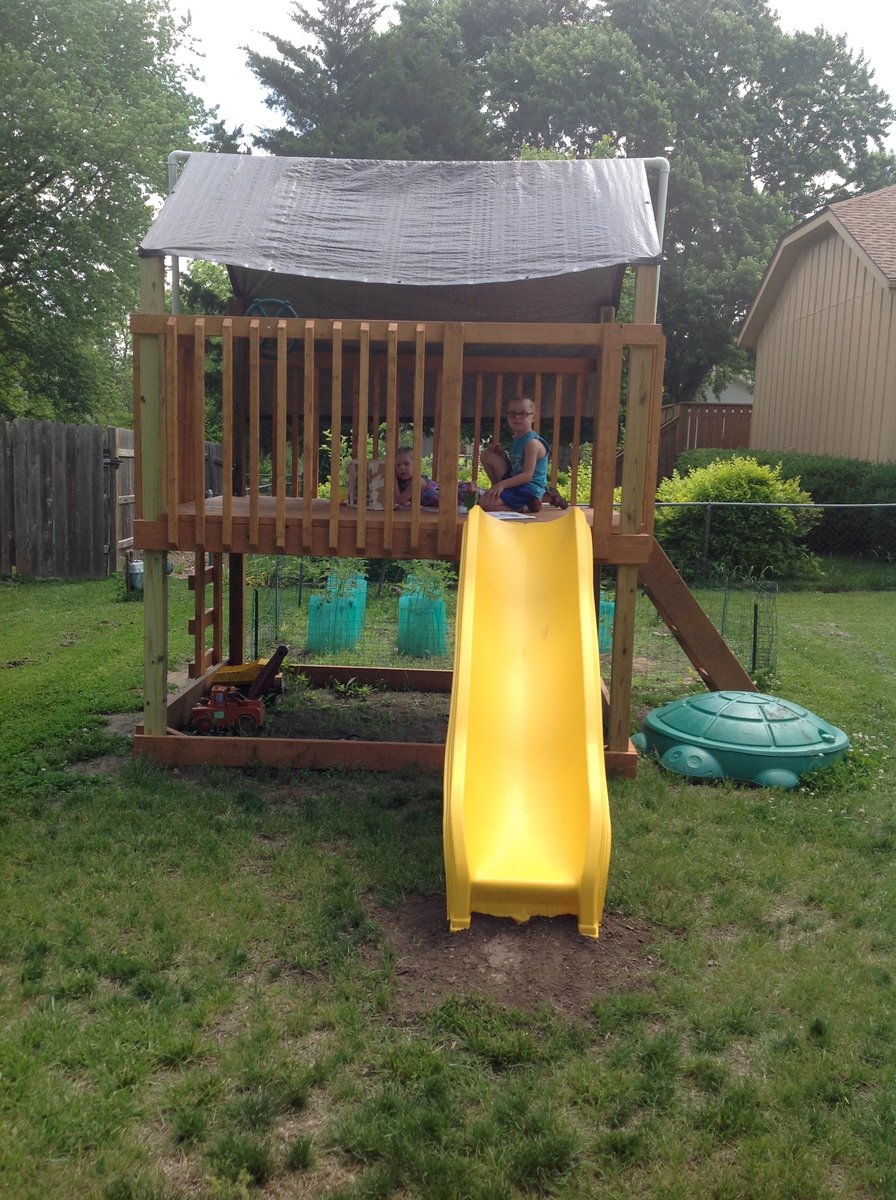
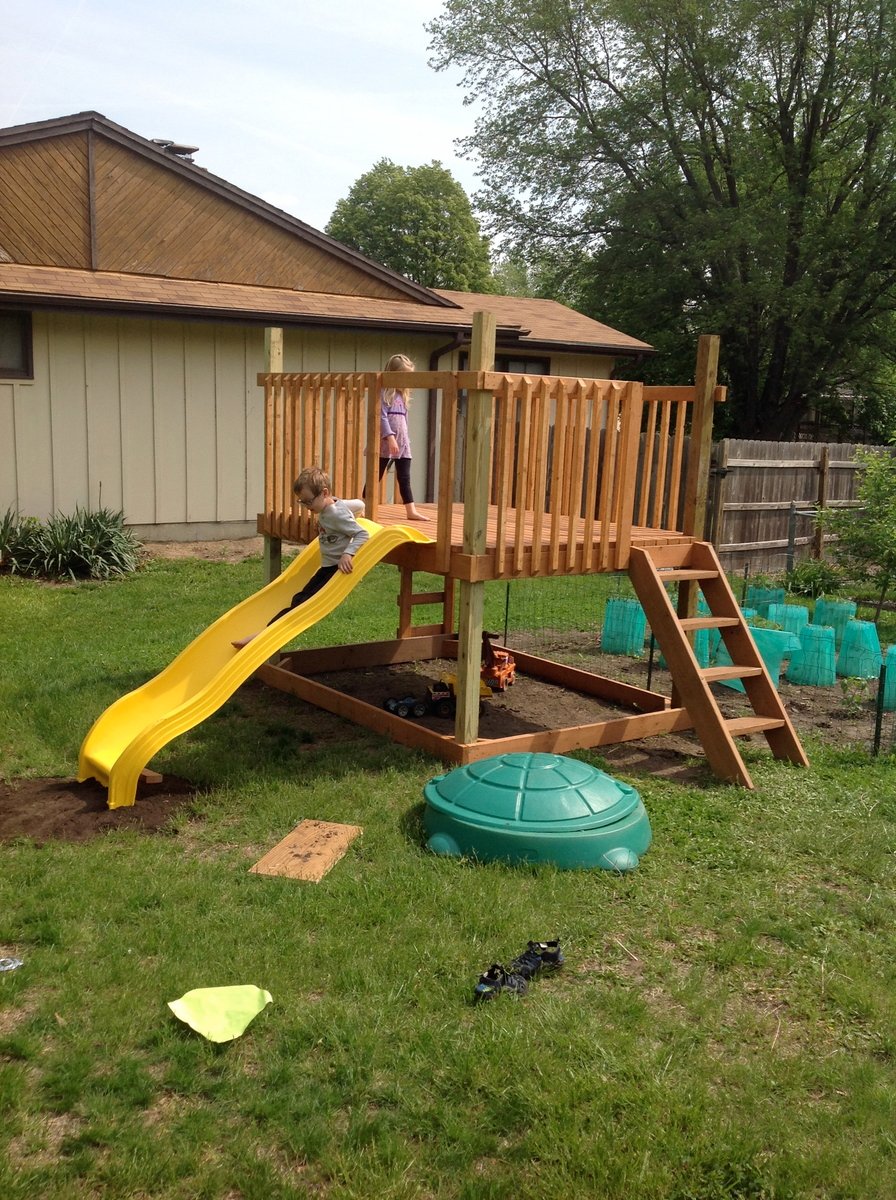
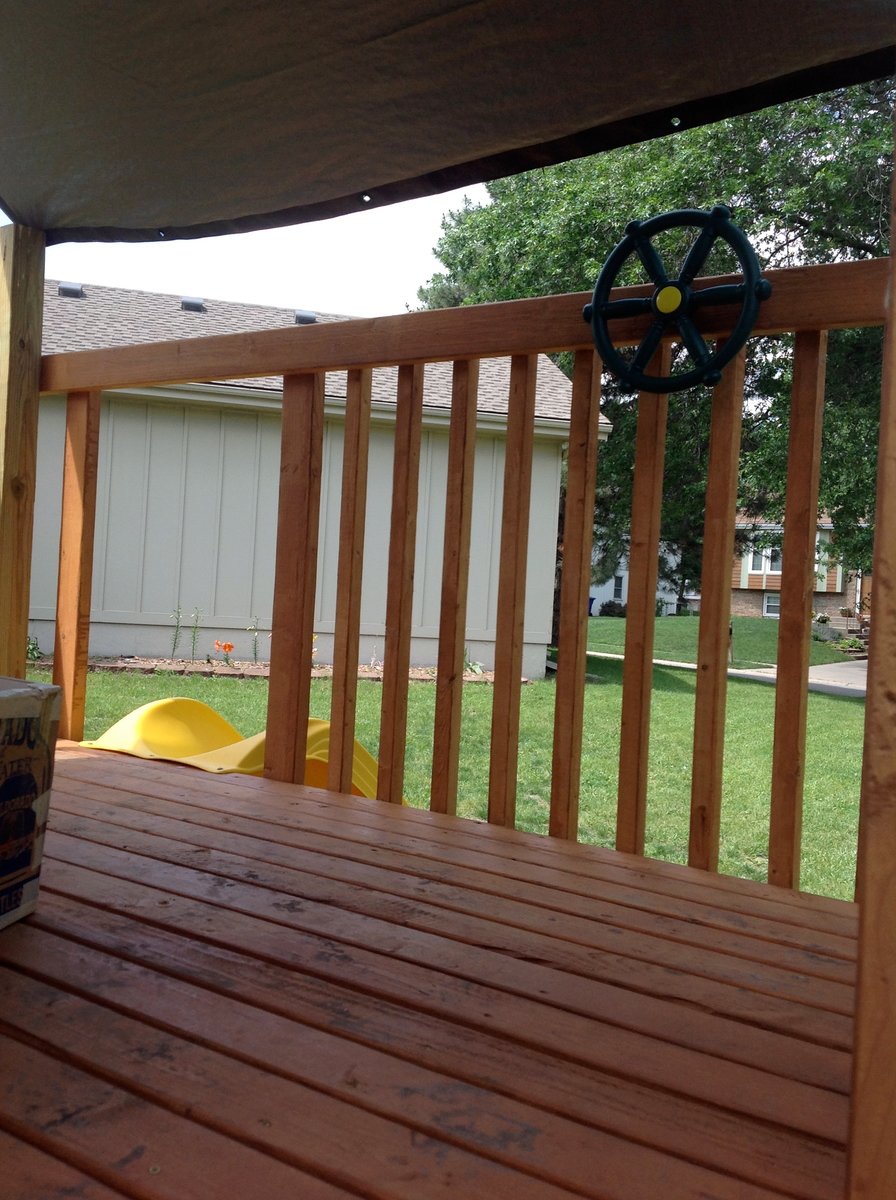
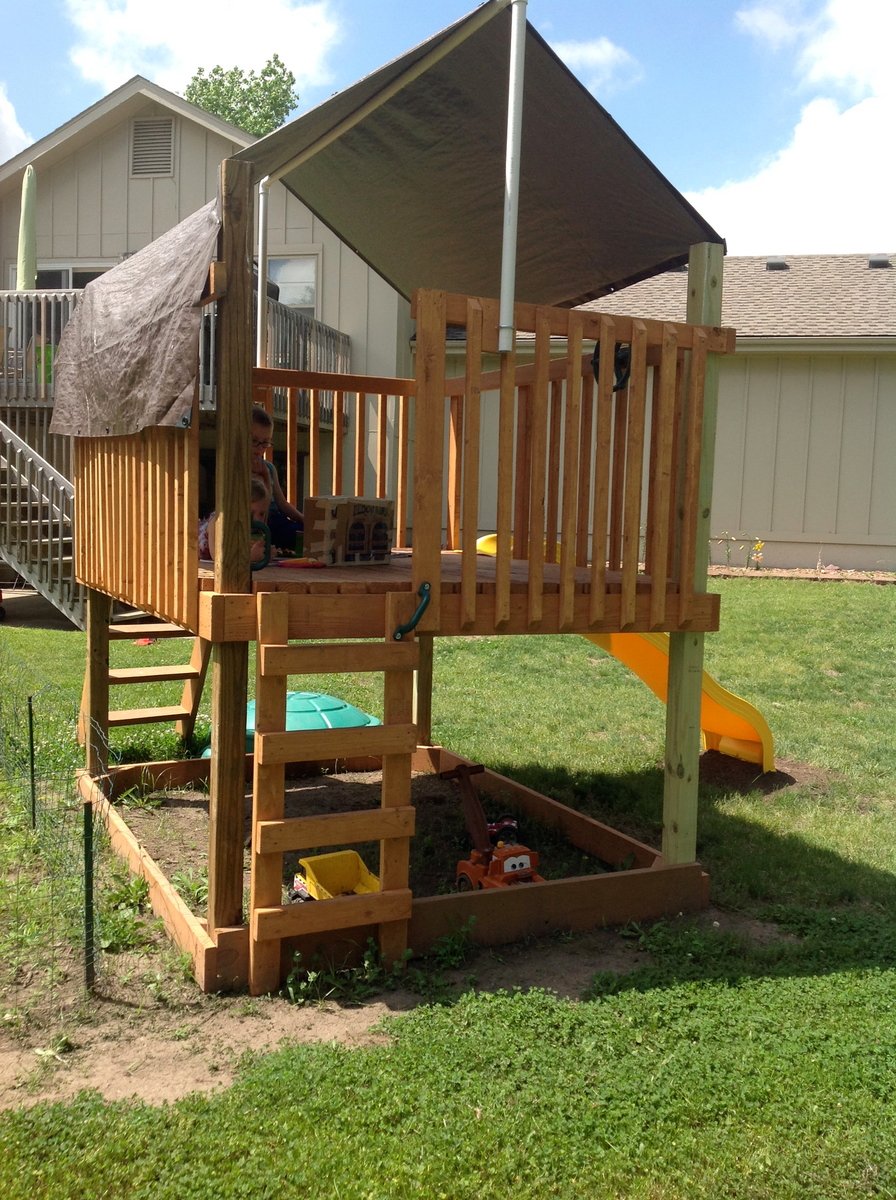
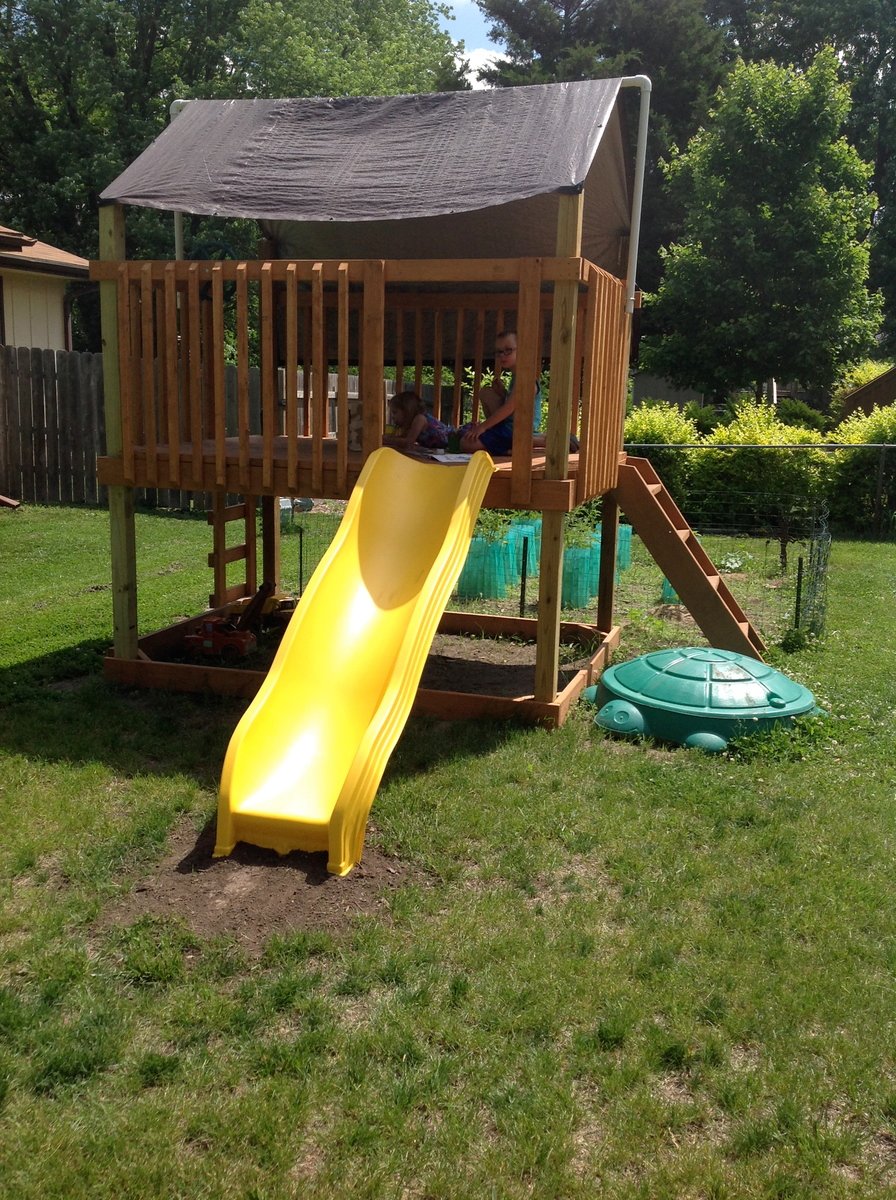
I wanted to build a structure for the kids to play in, but not include a playhouse. I used the playhouse deck design and made it slightly smaller (6 feet by 8 feet). The "roof" is removable to provide shade when it's sunny. It's just PVC and a tarp - pretty simple, but it does the job. I used treated posts and untreated lumber for the rest of it. I painted everything in my garage before assembling it. Once all of the wood at been painted, but came together pretty quickly!

Estimated Cost
$300 (including screws and paint)
Estimated Time Investment
Weekend Project (10-20 Hours)
Finish Used
Thompsons deck stain
Recommended Skill Level
Intermediate

Workbench with Drawers and Carts on Casters

Submitted by vendo on Tue, 03/19/2024 - 07:38

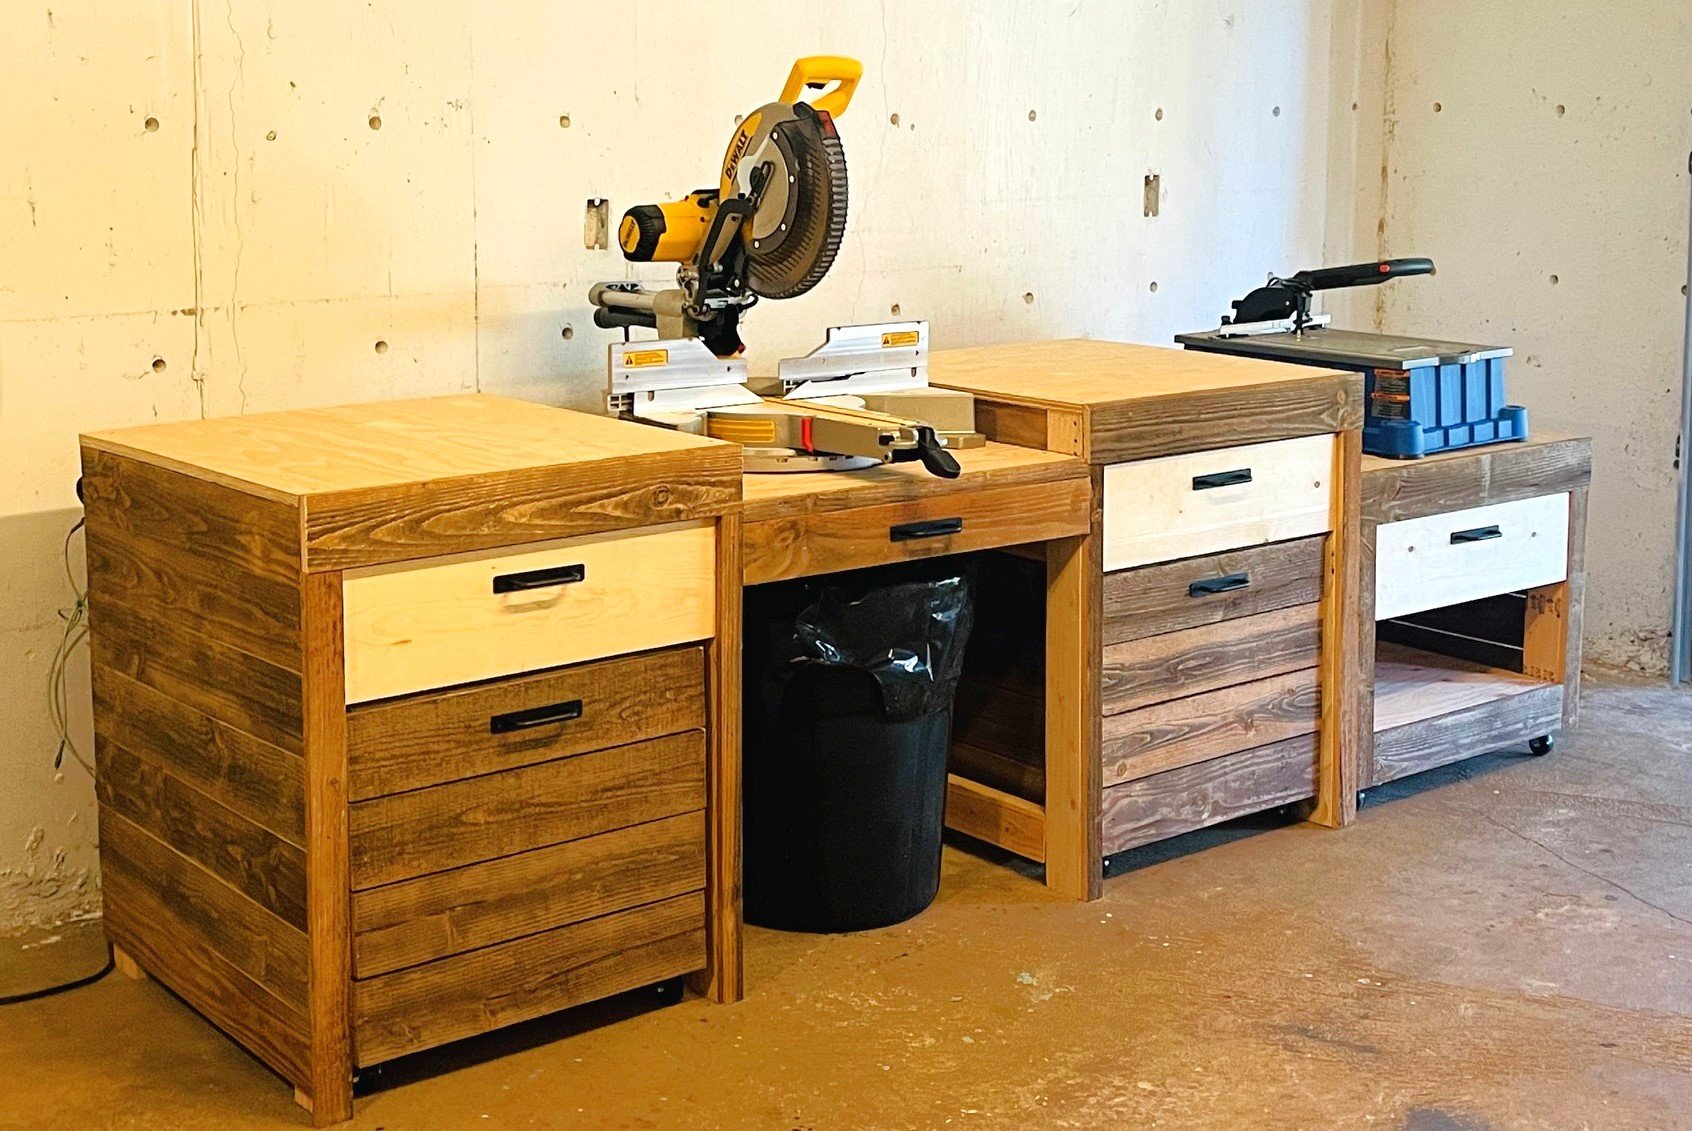
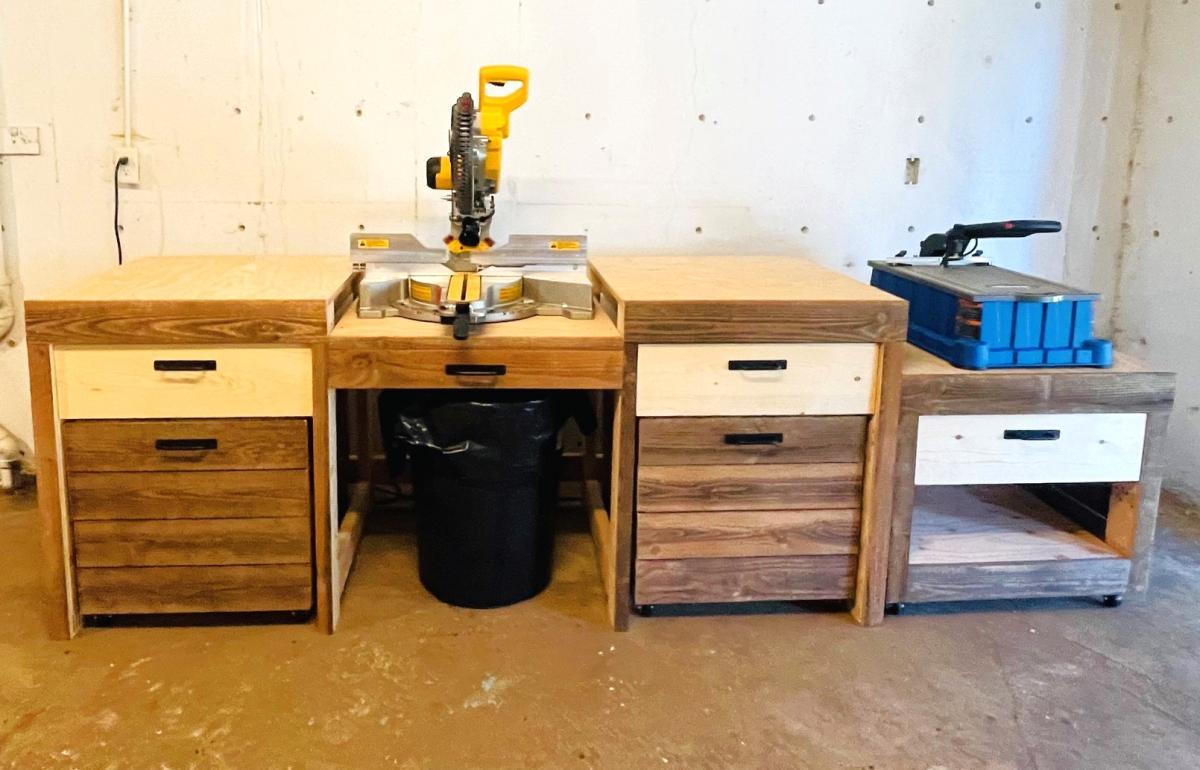
Using Ana's Ultimate Workbench Plan and her easy drawer method I built this. I decided to do storage carts that roll in and out for small scrap lumber storage. The Kreg Foreman got it's own cart, I made it so the deck of the machine was at the same height as the work surface. I added a drawer so all of my kreg bits and screws can be in one place. I had batteries and chargers laying all over my small shop, so I incorporated a battery charging drawer. I'm excited for the projects to come using my new set up!

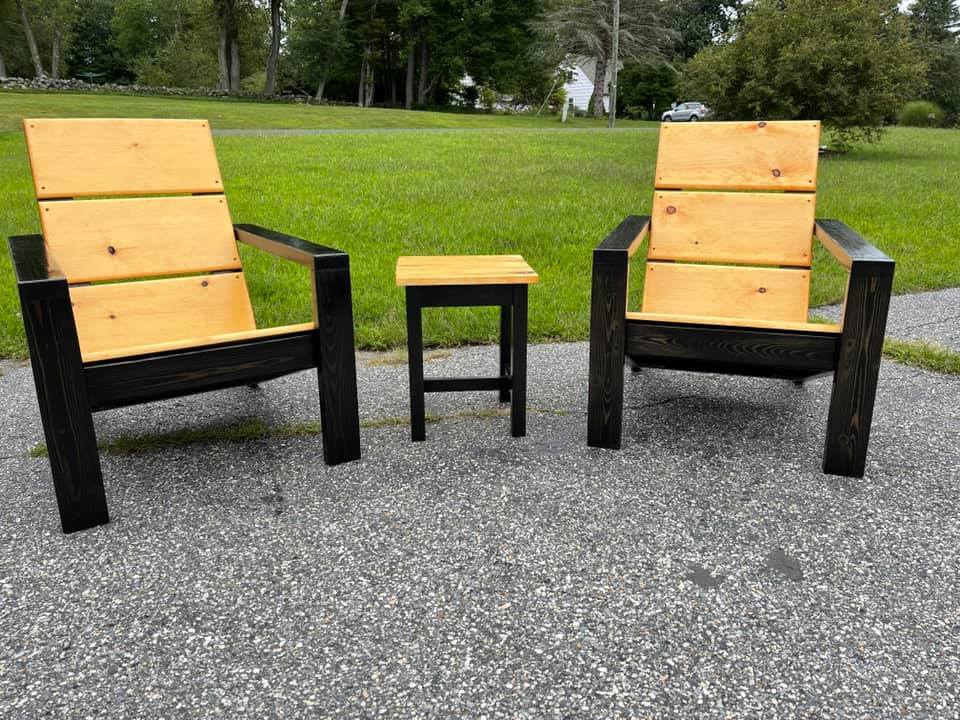
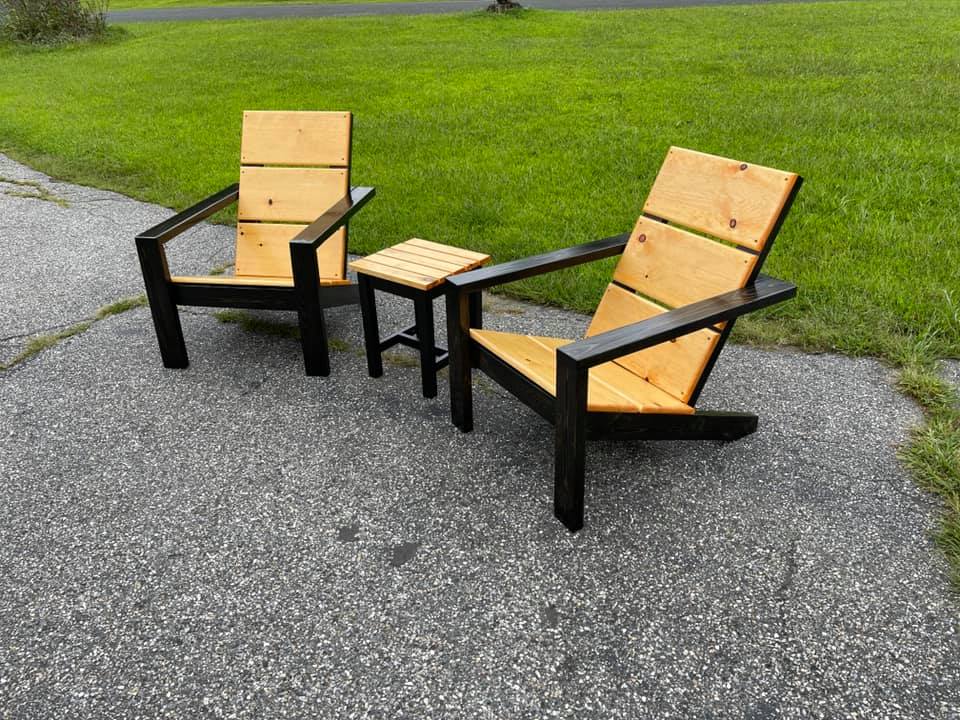
Modern Outdoor Chairs

Submitted by tiacobazzi on Wed, 06/17/2020 - 15:31

My husband built these for our little deck!!! They turned out AMAZING!! The plans were so easy to follow! I am so happy with how they turned out and can't wait to build our next Ana White design!! THANK YOU!!!

Built from Plan(s)
Estimated Cost
$60 for both chairs and table!
Estimated Time Investment
Afternoon Project (3-6 Hours)
Finish Used
Outdoor stain
Recommended Skill Level
Beginner

Comments

ladybug'13

Wed, 06/17/2020 - 20:38

He did a great job! They're beautiful! May I ask where you got the cushions? I'm thinking of making a few of these myself and would like recommendations :)

Three Bin Laundry Sorter

Submitted by Meyer1120 on Mon, 01/21/2013 - 21:10

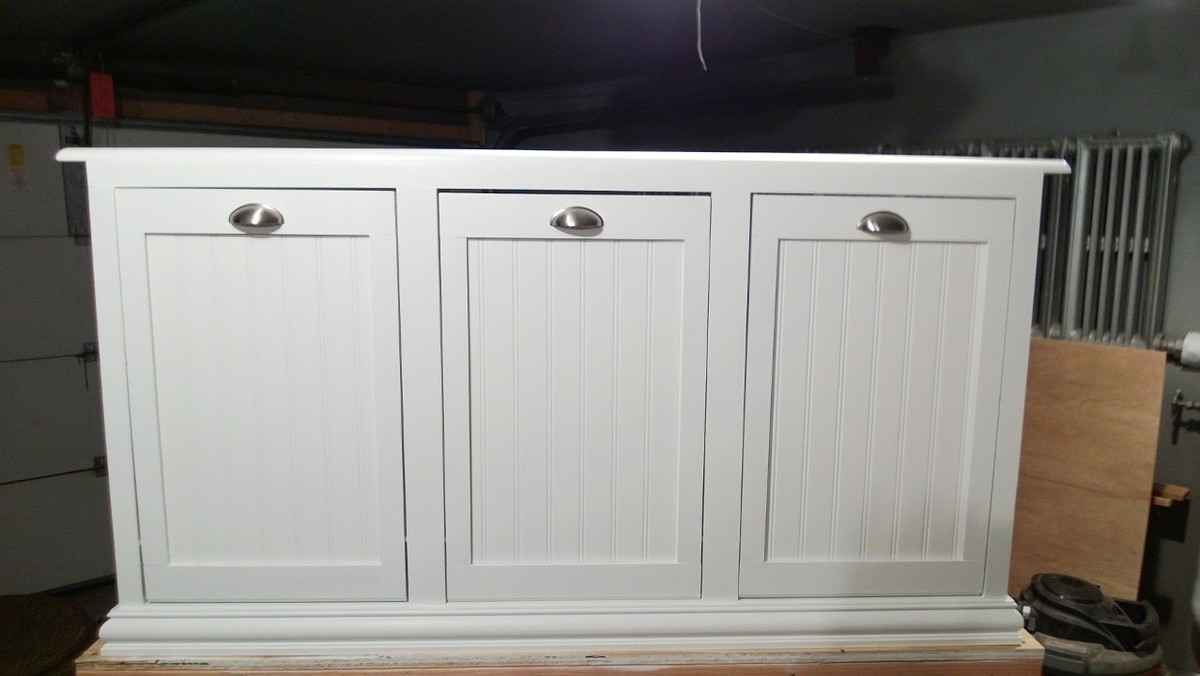
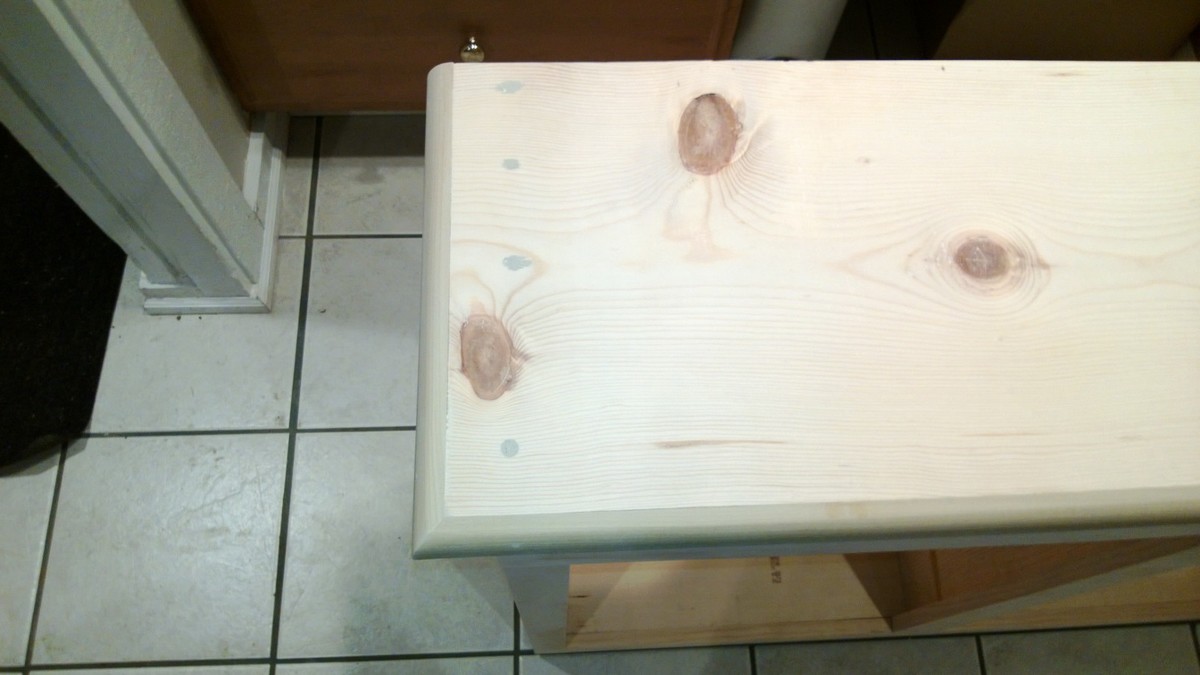
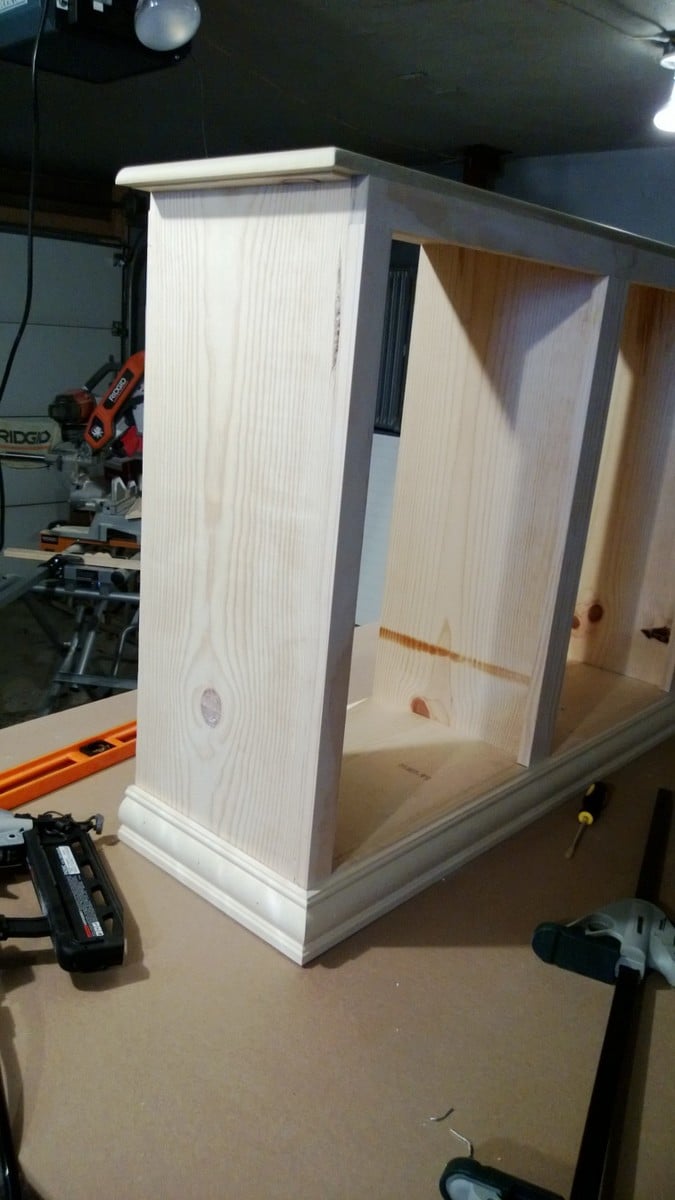
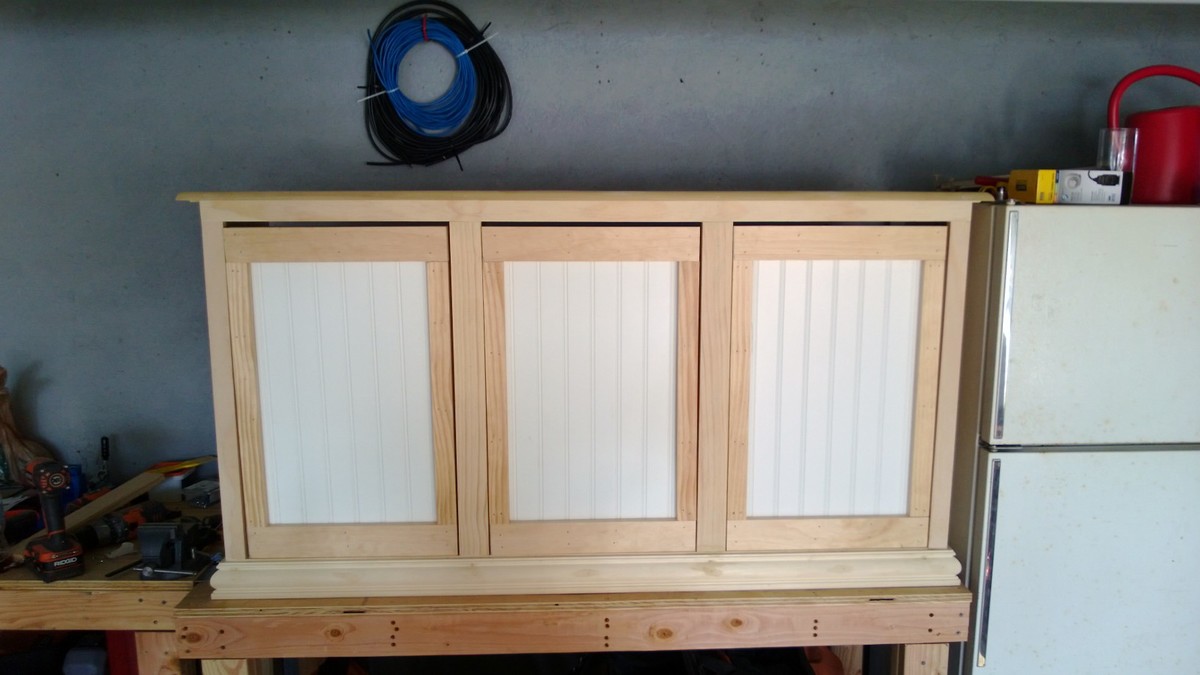
Modified the original plan to meet our needs of a laundry sorter. Had problems with the hinges so ditched them. I used dowels with a combination of a chamfer cut on the bottom of the door. Dado-ed the trim on the doors and slide the bead board panels in. The face frame is all held together with pocket hole screws, which I highly recommend because it eliminates nail holes and keeps the face frame square. This was my first wood working project, took me a little long to get it done. Thanks for looking.

Modified January 28

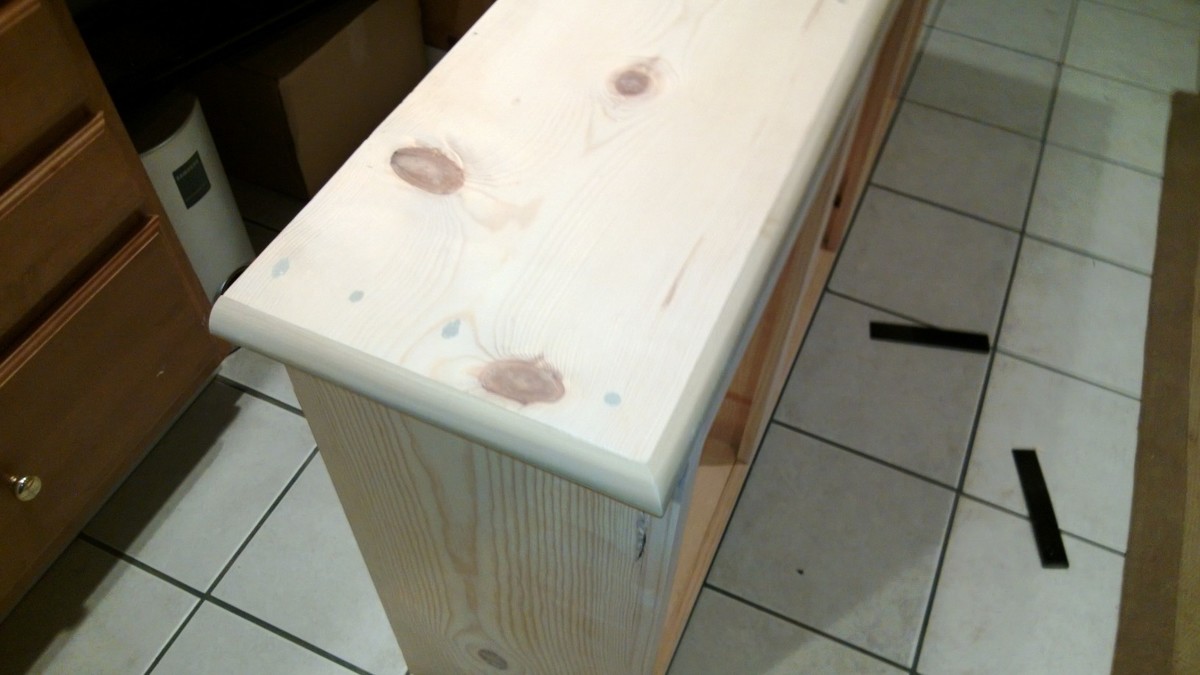
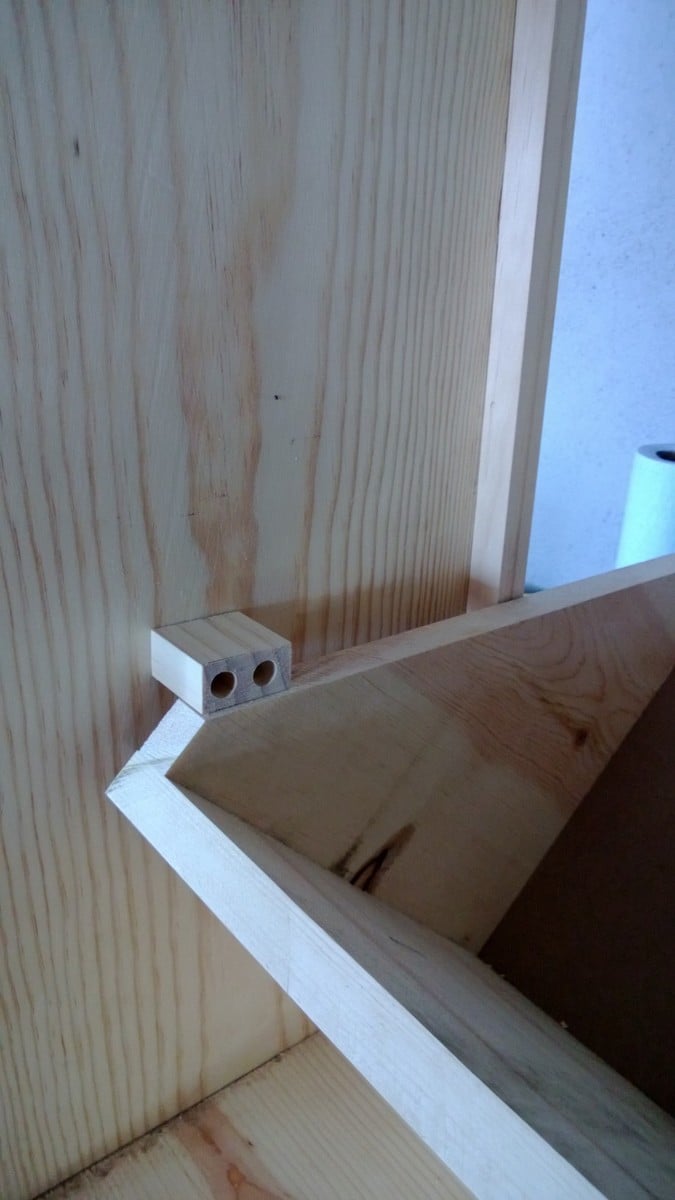
So here are some more pictures of my project. I don't really have any good pictures of the dowels. But what I can tell you is, I drilled holes through the sides of the face frame and the trim pieces and then measured where the holes would be in relation to the "drawer". I then drilled holes in the drawers at those measurements, I was careful to not go to deep. I think I went in half an inch. After that I started at one end and placed the dowels in, then put each drawer in. It wasn't easy but with a little patience it worked. The key is to wax the dowels so they will last longer as well. I also am including pictures of the top and bottom trim. On the top the original plans called for an overhang piece and I didn't like the way that looked. I ran the top board an inch long on each side and then wrapped it in quarter round trim. I did this because I plan on adding the Mimi Hutch Top. The bottom was built per the plan, but I ran into a problem with my bottom trim not being level and you could tell. So I raised the whole unit on 1 1/2 legs then placed it on a level surface and again wrapped it in a decorative trim. The key on both trims was a nice miter joint. Last picture I added was of my stoppers. I took scrap from the 1x2 trim and cut them to an inch and a half or two (can't really remember), then using the Kreg Jig drill bit drilled recessed holes. I then opened the doors until the side 45s were level then mounted the blocks on each side. I feel that it is better than a chain or string catch. Again thanks for looking and I hope I answered all of your questions.

Estimated Time Investment
Week Long Project (20 Hours or More)
Finish Used
Primmer and paint
Recommended Skill Level
Intermediate

Comments

moosmani

Tue, 01/22/2013 - 11:29

Dowels! What a great idea! Would you mind sharing how you did it? Could you possibly add some pictures showing the dowels? You did a great job. It looks beautiful.

mullid1

Thu, 01/24/2013 - 09:27

I love what you have made! Could you post pictures of the top and the bottom trim? I'm very impressed that this is your first project!

mullid1

Tue, 01/29/2013 - 09:12

Thank you for the photos and new instructions! You're awesome!!!

VLT

Fri, 03/15/2013 - 12:05

This is lovely; I like the trim job you did. Is there a way to post the plans so we can all get to them. I cannot believe this was your first project!

Liz82

Sat, 11/16/2013 - 18:23

I am a little confused. I love the three bin laundry sorter, but everyone is mentioning plans. I am not finding plans for it on the site. Also, what goes in to hold the clothes? There may be obvious answers, but I am not seeing them. I'd appreciate any help you could give.

towering inferno

Tue, 12/02/2014 - 02:58

I've been thinking of working up one very similar to this, also with 3 bins, but I didn't want to use chain either.  Those stoppers will be ideal - do you put them on both sides or is one enough?  Thanks for the share!

Karahd

Sat, 01/24/2015 - 11:29

Hi-

Im not sure if you still have the plans to this awesome project, but if you do, would you be able to share them with me? Ive been looking to make something like this forever, but just couldnt find any help!

thanks,
karah
[email protected]

petemoore

Mon, 02/08/2016 - 07:46

hi im the same as everyone can you send me the build plans with dimensions etc

many thanks

virginie D.

Wed, 03/02/2016 - 14:49

Hi

It's exactely what i need. so amazing. Someone can send me the plan please? I'm so newbie to do tat all by myself without plans. Thanks you.

virginie D.

Wed, 03/02/2016 - 14:49

Hi

It's exactely what i need. so amazing. Someone can send me the plan please? I'm so newbie to do tat all by myself without plans. Thanks you.

ajbreaux

Mon, 05/02/2016 - 14:22

My wife loves this . if its possible could i get the plans and hopefully have time to build it to give to her for mothers day ? thanks 

Kimhubbell

Fri, 12/02/2016 - 11:01

I would also love to have the plans for the 3 bin sorter. I am barely an intermediate so more specifics would be a huge help! Thanks to anyone who could help.

lworthy

Mon, 07/10/2017 - 04:19

 I absolutely LOVE your laundry sorter!!!! You did a fabulous job and the TRIM, WOW amazing!!!! I've searched Ana's website and cant find the plans' could you please email me the plans to [email protected].  I started building my own furinture back in October 2016 and the reward is amazing... Keep up the good work.

Happy Building,

Lisa

woodmama

Tue, 01/16/2018 - 22:18

I'm too new at woodworking to be able to tackle this right now, but would love to download the plans for future. My most successful project so far is a pretty standard bookshelf. I got a free plan, with lots of guidelines and explanations, at https://tinyurl.com/ydeup8lo -- it came with a 440 page guide, "The Art of Woodworking" that has tips and techniques, and am plowing through that right now.

momto3

Wed, 02/28/2018 - 12:53

This is amazing.  I am very new to woodworking.  Could you send me the plans please?  I would be most appreciatative 

Ljohns

Wed, 03/11/2020 - 23:27

I would love to have the plans for the three bin laundry sorter to build for my laundry room. Are the plans available? Awesome work!

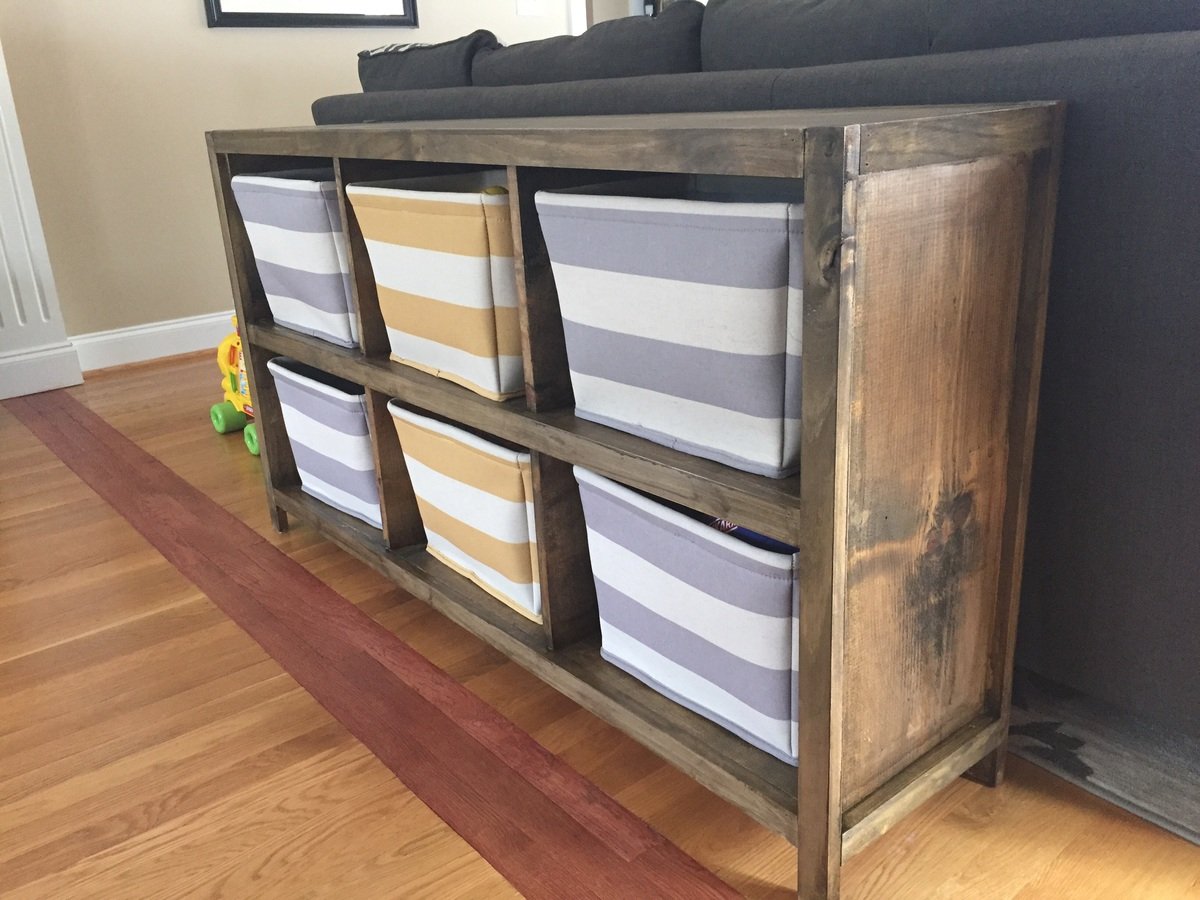
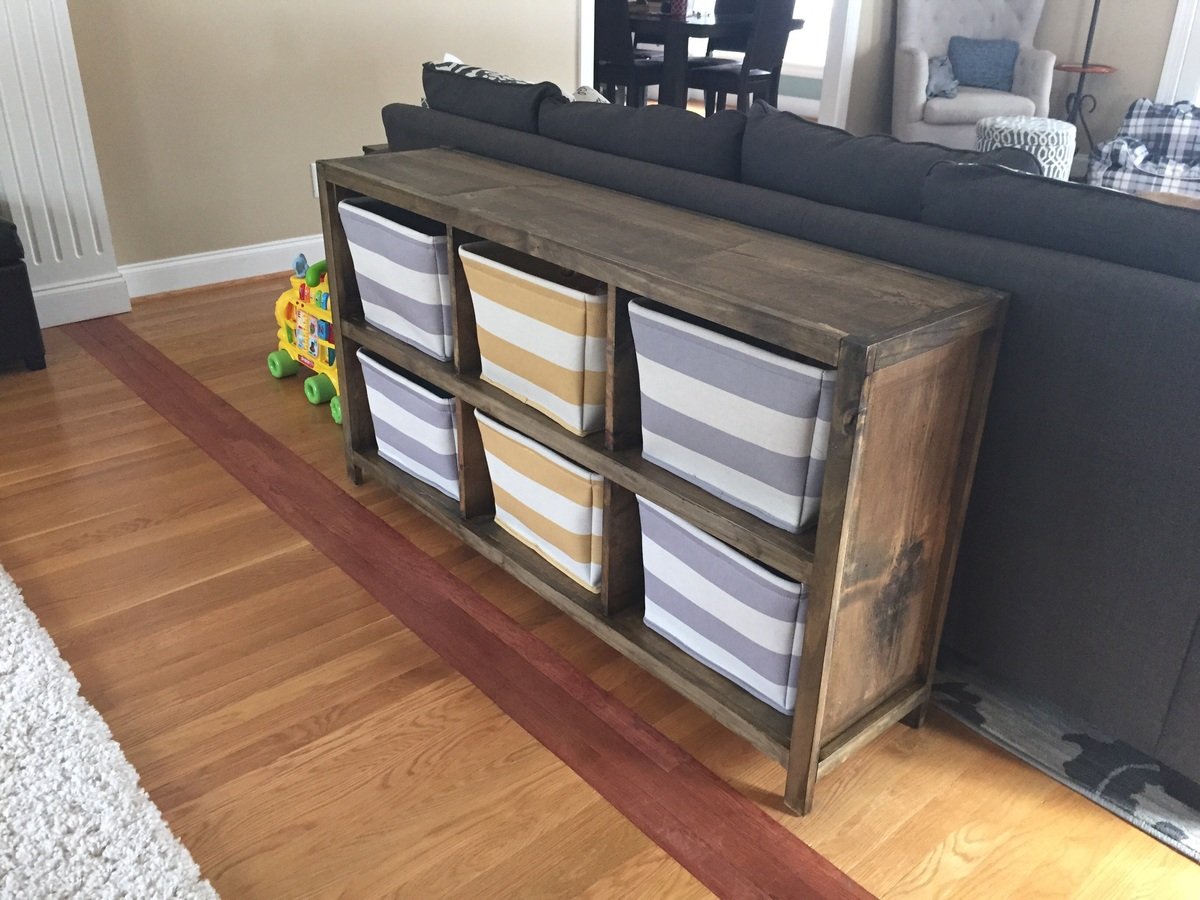
"Cube" storage unit

Submitted by kds199 on Fri, 10/14/2022 - 09:49

My wife and I wanted a nice way to hide more of our son's toys in the living room that didn't look tacky. We actually bought the cubby bins before even deciding what to make. (From target of course.) I made the bookcase out of wood shelving that already looked kind of beat up when I bought it knowing that the wood stain wood bring some character to it.

I only changed the plans slightly by making the legs flush with the inside so I could trim the ends and customizing the size of the cubby openings to fit the bins. (Mine aren't actually cubes.)

Built from Plan(s)
Estimated Cost
$60
Estimated Time Investment
Afternoon Project (3-6 Hours)
Finish Used
2 coats of stain...minimal sanding to keep the surface looking rough
Recommended Skill Level
Beginner

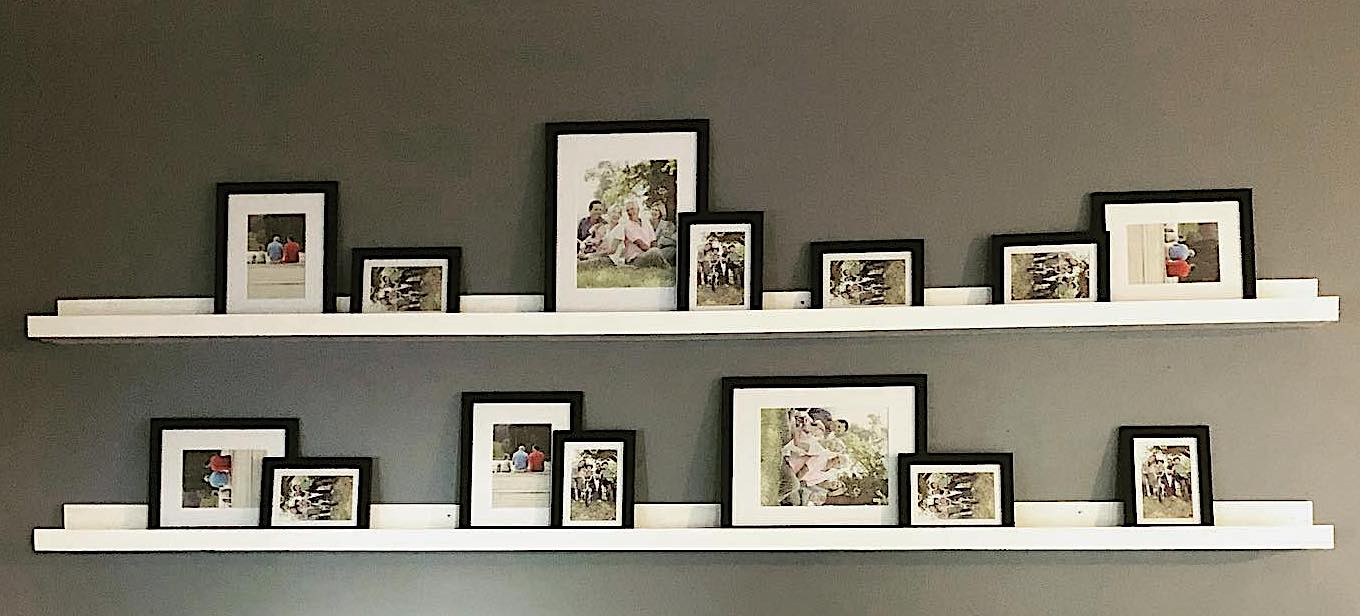
Easy 8 ft shelves

Submitted by jeff.meyer on Wed, 06/16/2021 - 20:18

Easy picture frame shelves.

Built from Plan(s)
Estimated Cost
24.00
Estimated Time Investment
An Hour or Two (0-2 Hours)
Finish Used
white paint
Recommended Skill Level
Starter Project

Comments

Modern Adirondack Chairs and Adirondack Table

Submitted by jer727 on Mon, 08/30/2021 - 12:18

This is one of my first wood working projects I have accomplished and these two plans were some that I really enjoyed making.

Comments

Seasonal And Holiday

lawn and garden shed

Submitted by brittanyj on Wed, 08/19/2015 - 13:17

Needed a shed to store bikes and mowers, etc, so I'd have more room in the woodshop : )  I made a lot of modifications to the plan to fit my space and make it much larger.  The completed size is 7 foot tall at the peak, 6 feet deep and 5.5 feet wide.  I made it as a 3 sided shed, using the wall as the 4th to save on cost, increase air flow, and make the exterior house wall accessible.  I also made an egress in the back of the shed in order to get behind the shed if needed. 

Instead of roofing shingles, I opted for ribbed metal sheets and one clear sheet in the middle to make a skylight, so there would be light in the shed.  This is my favorite part of the project.  It was a huge pain to attach the roofing from a ladder with very limited access, but it looks great and I love the light coming in.  We have very little rain in CA, so I'll have to wait until winter/rainy season in order to test out its waterproofing. 

Since the shed sits between the house and the neighbors block wall fence, and I wanted to use as much of the space as I could, I decided to design the shed to have the side wall against the house rather than the back wall, as shown in the plan.  This took a large amount of modifications, but with careful planning and measuring, it can be done.  This also meant blocking off access to behind the shed, so I cut an egress in the back wall and added hinges so you can lift the back cut out panel, and rest it on a stop block attached to the fence behind it in order to have access.  That's what woodworking is about- problem solving.  Love it. 

As you can see by the full shed picture, it fits a large amount of stuff- 2 adult bikes, mower, edger, trimmer, chainsaw, hedge trimmer, garden tools, shovels, etc, with plenty of room for more.  I now have a free corner in my garage that I've already filled with a DIY rolling workbench and more pegboard space for tool hanging.  Woodshop increased space= happy Brittany. 

I should also mention that building the frame and adding the pickets was quite a quick and easy job.  The hardest and most time consuming part was the roof (I didn't have metal cutting tools), rolling each very heavy wall to the site (I was alone) and the previous 2 weeks in which I built the paver patio the shed sits on.  Hard work, but worth it.  I love it!
Built from Plan(s)
Estimated Cost
$280
Estimated Time Investment
Week Long Project (20 Hours or More)
Recommended Skill Level
Intermediate

Comments

brittanyj

Mon, 01/25/2021 - 13:15

It has been incredibly useful for storing! One thing about the skylight- Over time the sun has warped it and there is now a hole and crack there. So I wouldn't plan on the clear roofing being a long term solution- I will be replacing it with either thicker clear roofing or 2 layers.
Back