Community Brag Posts

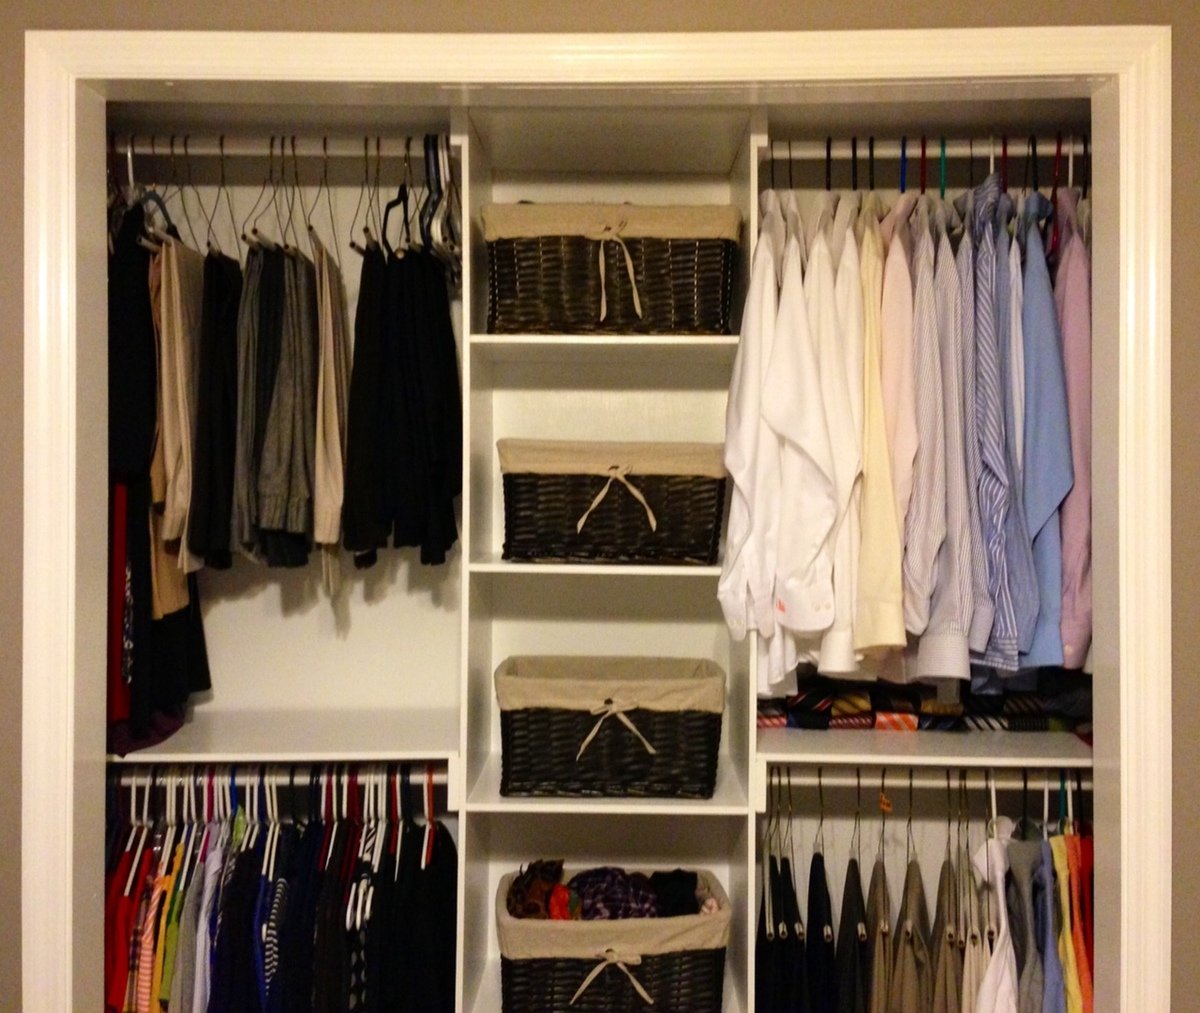
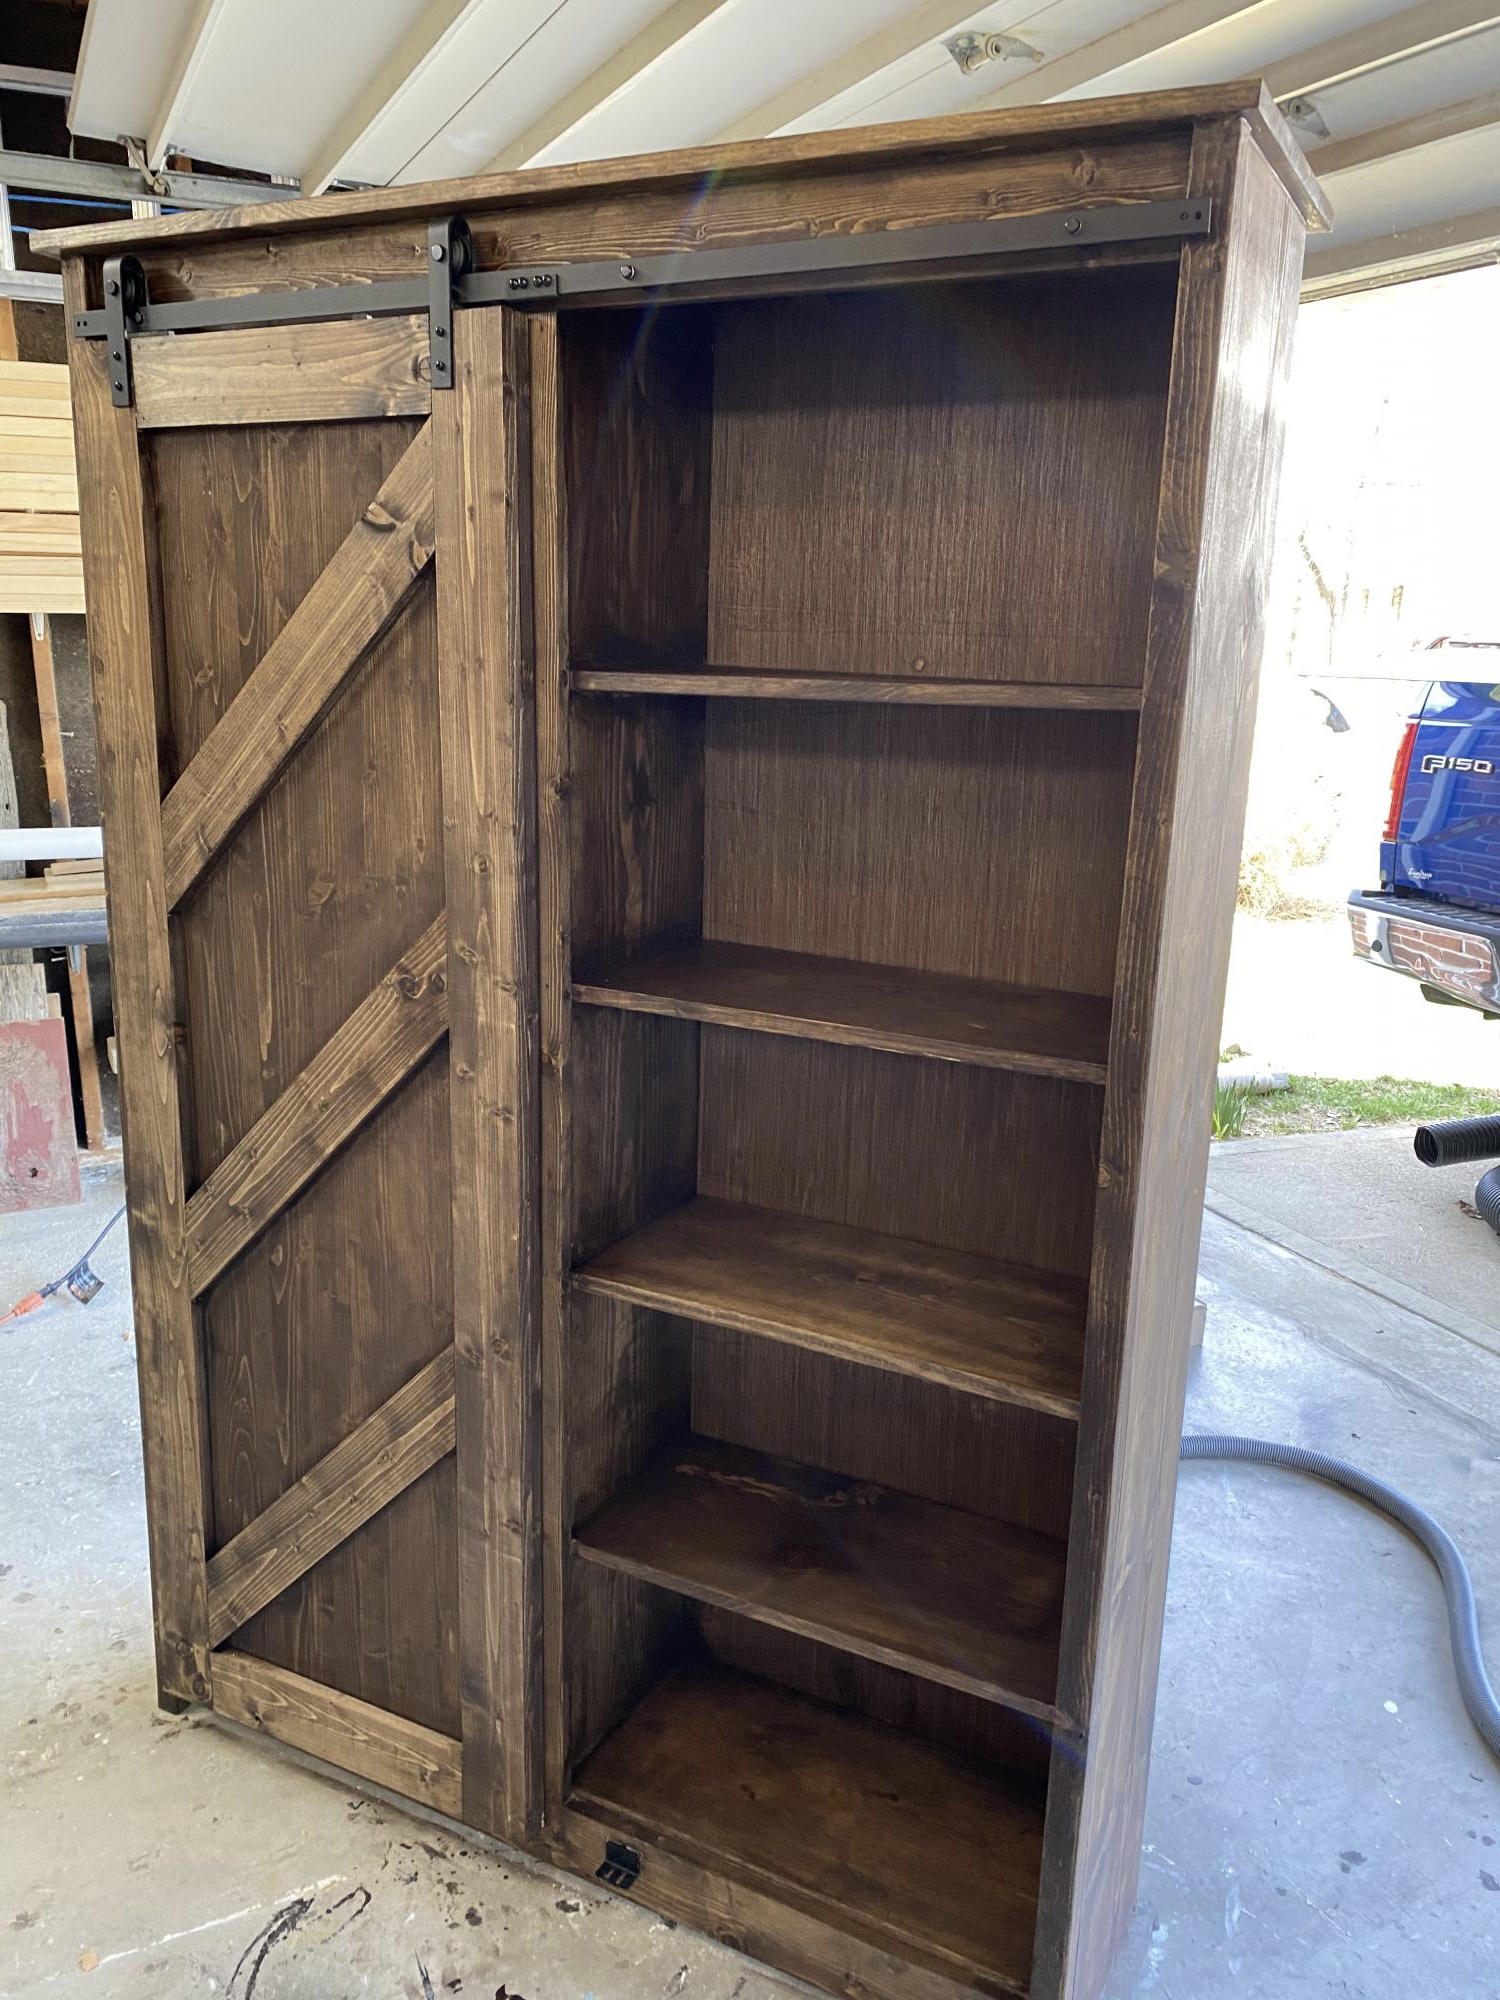
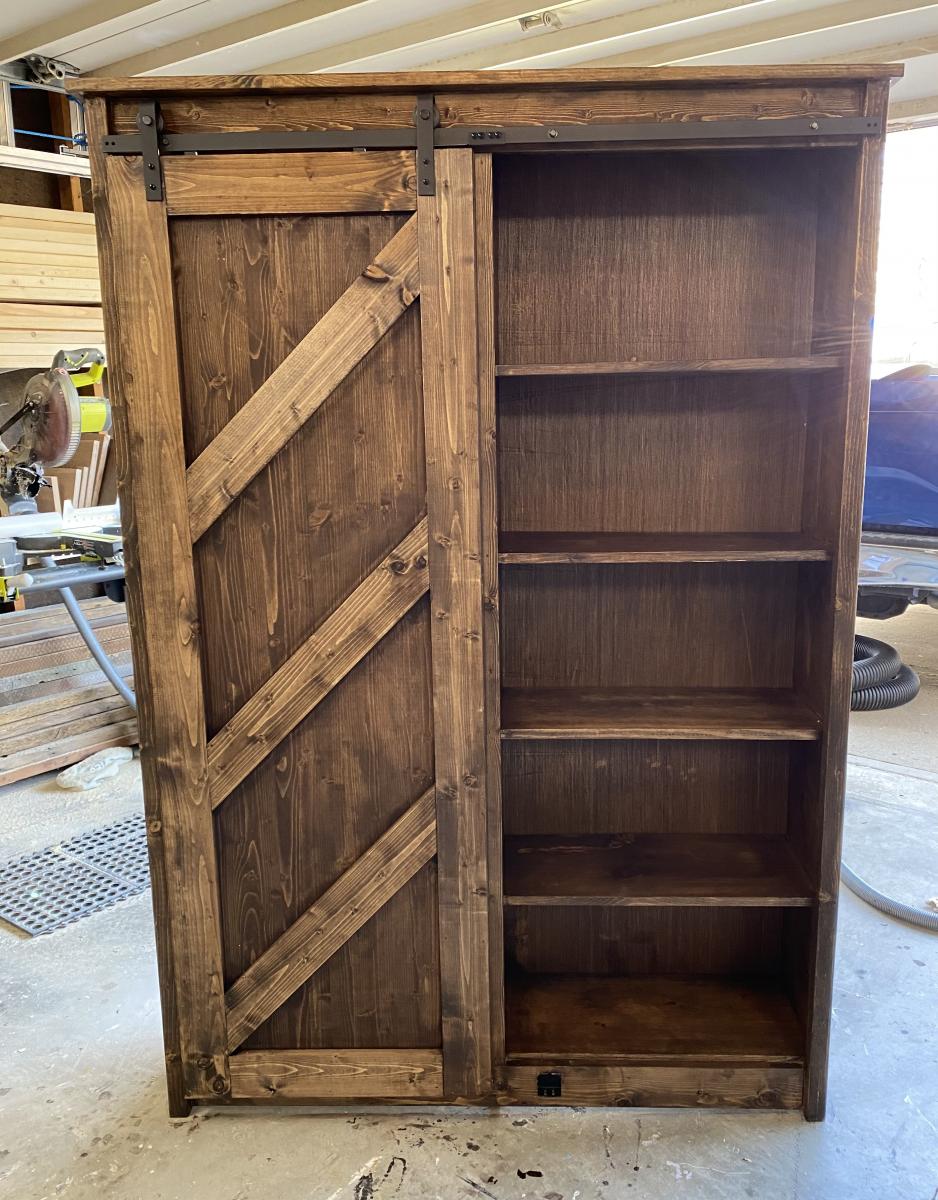
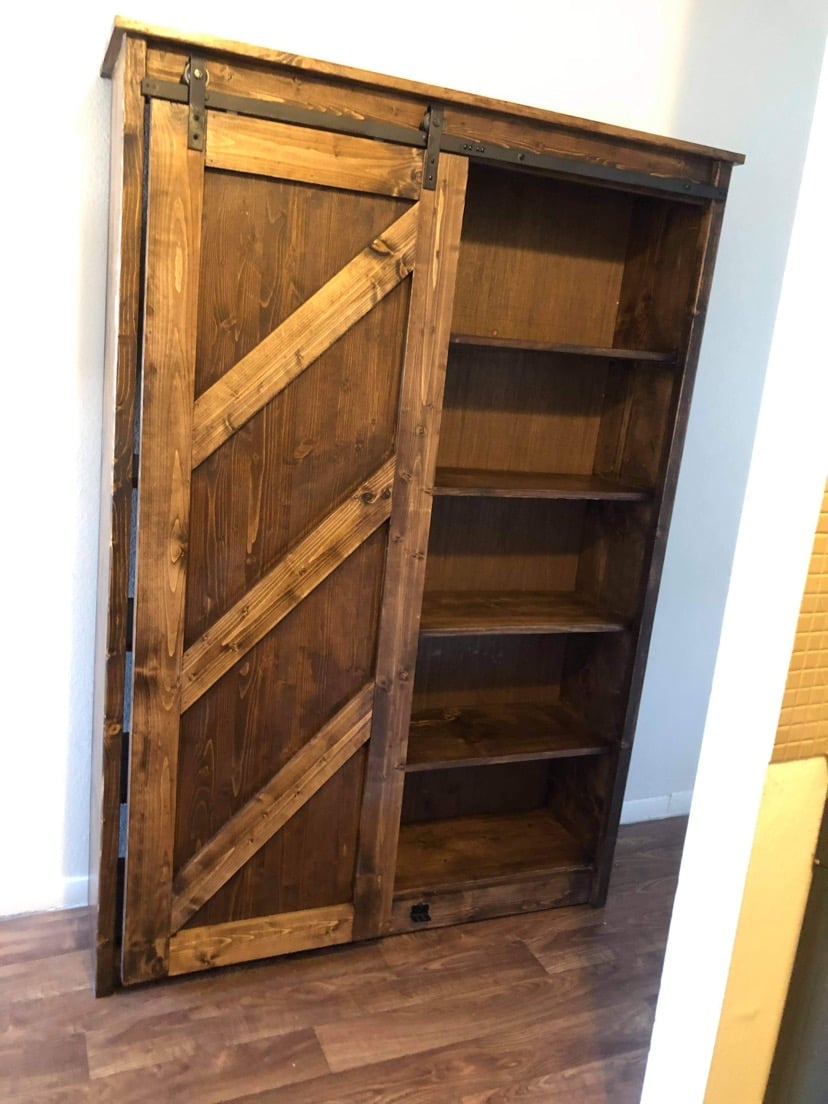
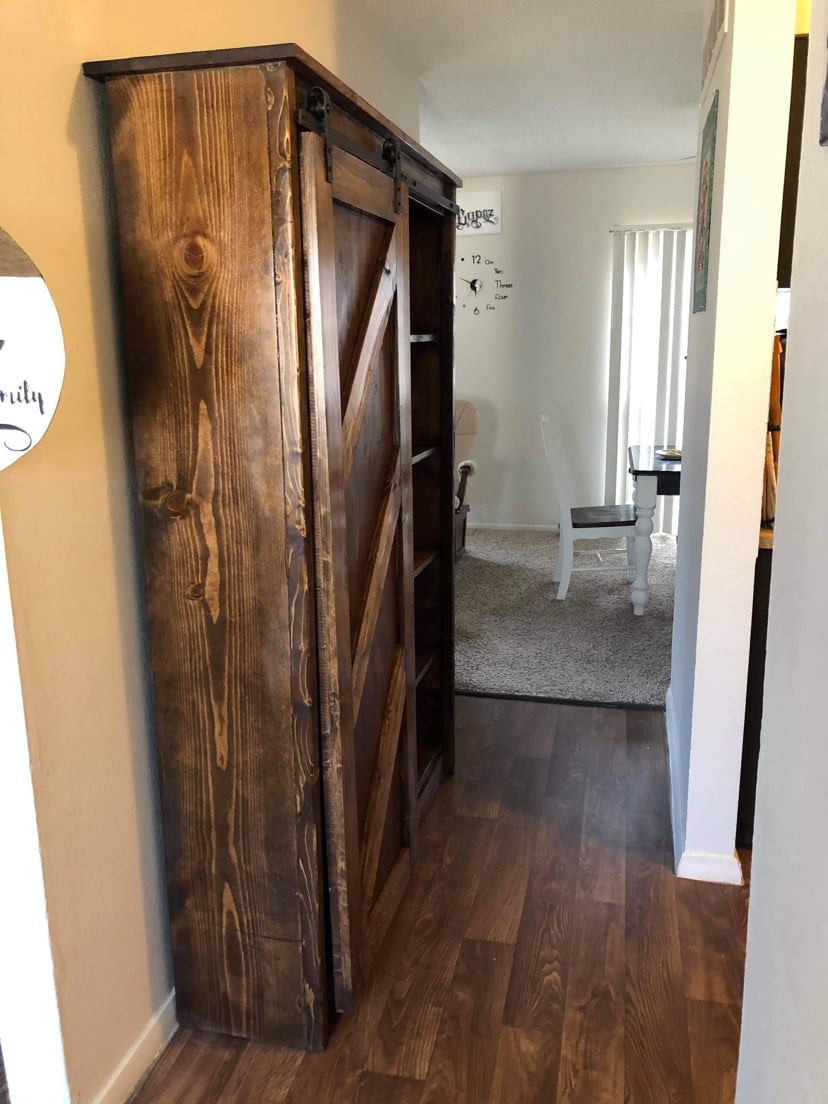
Simple Closet Organizer

Submitted by bcy419 on Thu, 10/11/2012 - 13:46

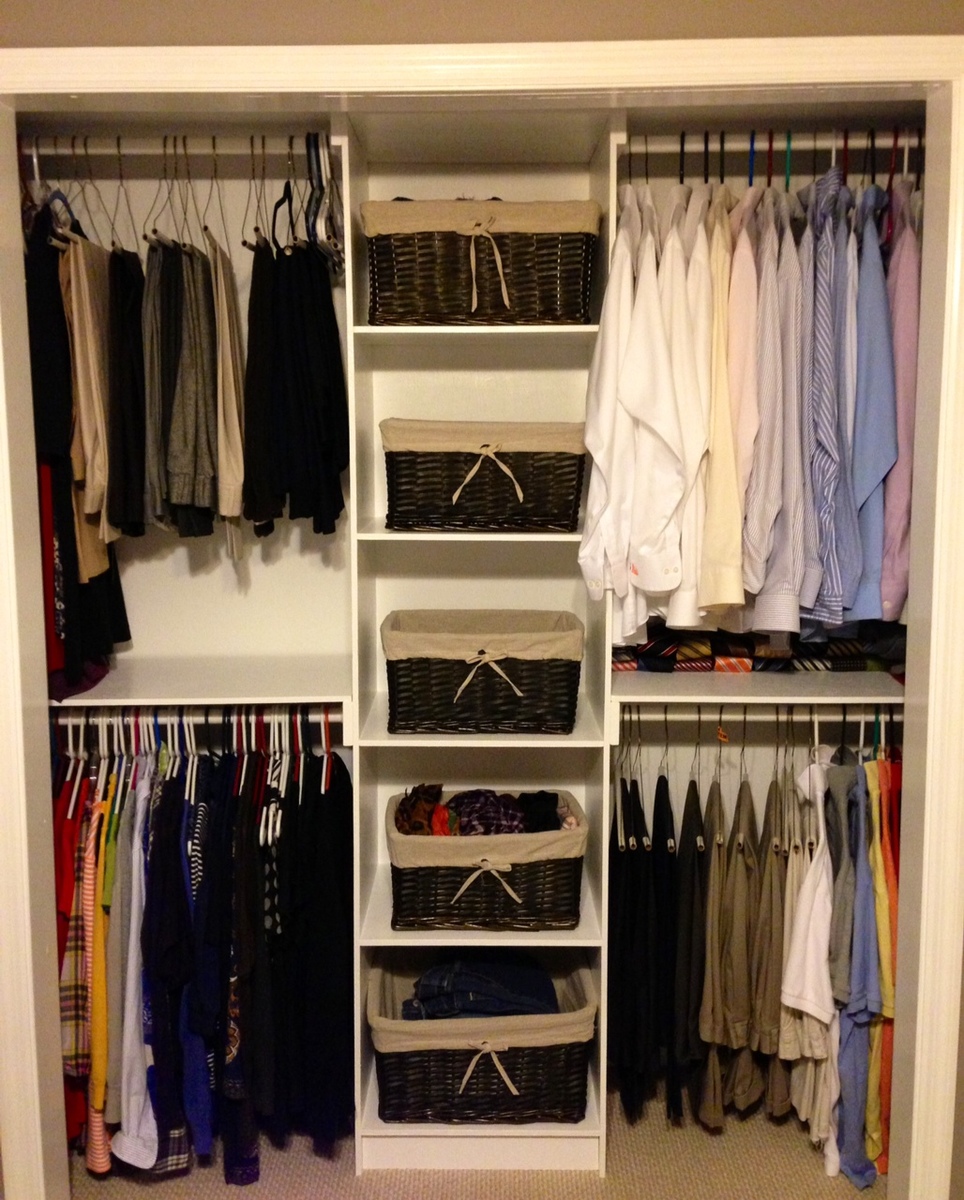
This was mine and my wife's very first woodworking project. Overall, it wasn't bad at all. I thoroughly enjoyed the actual process of cutting the wood and putting everything together. As far as the painting goes, I'd much rather just go on to another woodworking project, but I have to say that all the hard work paid off. Anna's plans helped tremendously. I tweaked slightly just because we wanted our center piece to be a little taller and slightly more narrow. We also added two shelves on each side, for a total of four. For our small reach-in closet, this was by far the best way to go about everything. We definitely have much more room and overall it is a much better use of the space.

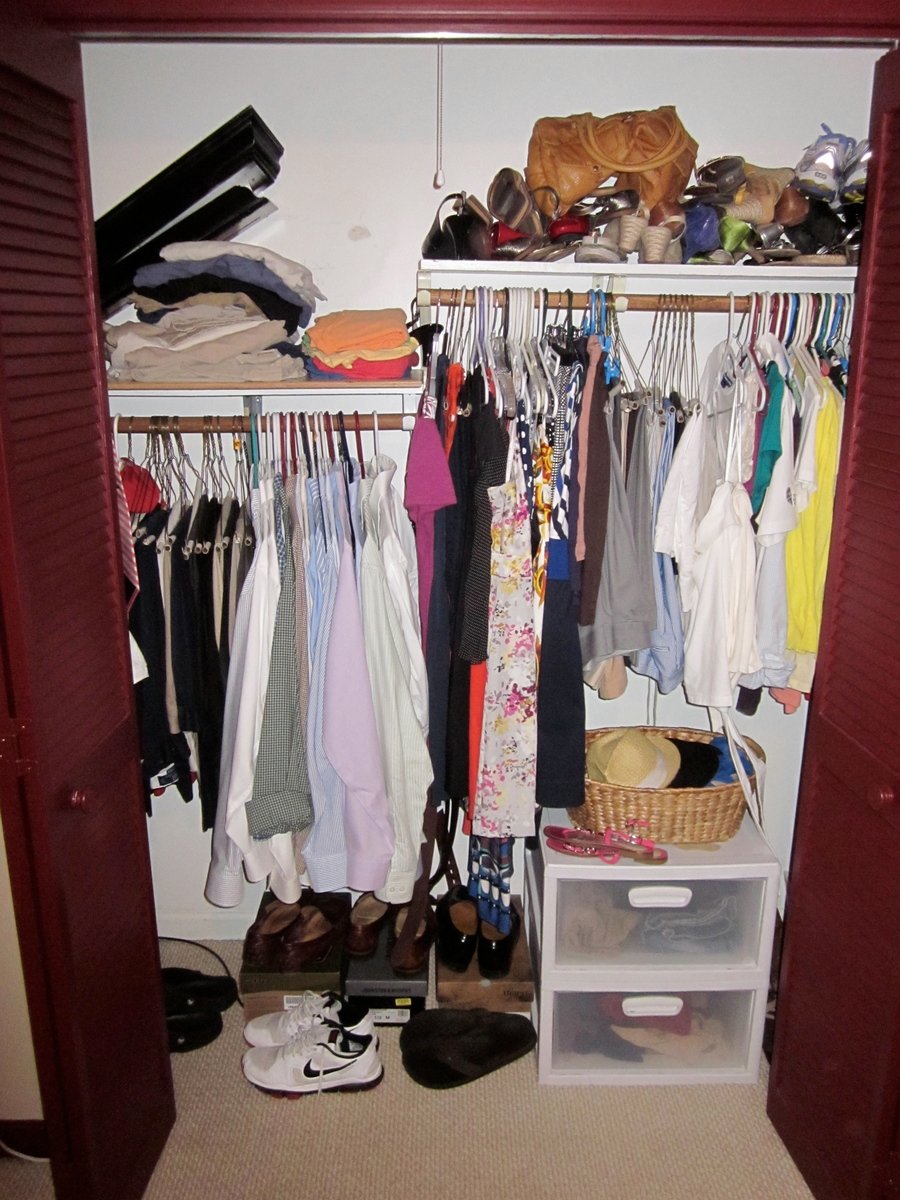
I threw in a "before" picture just for fun.

We also just finished the Farmhouse Queen Bed that Anna has plans for, and we will be putting up a brag post on it very shortly.

Built from Plan(s)
Estimated Cost
$40-$50
Estimated Time Investment
Weekend Project (10-20 Hours)
Finish Used
We just went with a simple white. My wife and I sanded everything down, then used some leftover Behr Premium Plus, Self-Priming, Interior Semi-Gloss that we previously used on our bedroom trim. We sanded between coats and applied a total of three coats for the finished product.
Recommended Skill Level
Beginner

Fancy X Farmhouse with umbrella

I built this for use as an outdoor patio table suitable for an umbrella by eliminating the center truss below the table. Instead, I used my Kreg Jig to join the two sets of legs with 2 2x4s each set about 6 inches off center directly under table top. (See picture). I used Douglas Fir for most of this build. I also added a 1x2 cap to the bread board ends of the table top to help stabilize it against warping. I secured the table top to the frame with countersunk screws under glued wood plugs since I needed to allow a gap between boards for water drainage. I used the Varathane wood weathering product to soften the “new wood” look. I helped preserve the wood with a coat of Benjamin Moore’s clear Arborcoat. This acrylic product will allow the wood to continue to gray naturally. I recommend this as an intermediate project due to the awkwardness of joining the 45 degree angle cuts. Having a second set of hands here would have been very helpful.

Built from Plan(s)
Estimated Cost
$150
Estimated Time Investment
Day Project (6-9 Hours)
Finish Used
Varathane wood weathering
Benjamin Moore Arborcoat clear

Applied with foam brushes.
Recommended Skill Level
Intermediate

Do-It-All Mobile Workbench

Submitted by JL Hurst on Wed, 11/28/2012 - 11:02

The need for a proper workbench in my garage/shop is a must, but. So is space! I already have a fold down workbench I’ve made with ¾ inch pipe & a door, but. I just need something that can handle all my tools. So, I stumbled upon these plans from the Family Handyman & couldn’t find a reason why this wouldn’t work in my shop. It has room for storage, can easily accommodate my tools & most importantly fold up to store. Easy to build too! Make sure you read all the plans first as some of the materials could be pricey, but well worth it. Technically it’s taken 2 months to build this bench, as I operate on a firefighter/teacher’s budget & during the holiday season no doubt. I ordered all the shelf standards & brackets through Amazon, $210.00 for those alone, but they hold so much weight to support your tools I figure it’s worth it. The rest materials (wood, screws) were purchased at Home Depot for around $150.00. The plans called for ¾ inch ply & it was $45.00 per sheet. However they did have a smaller thickness for $22.00 per sheet & was only a 1/32 inch thinner. I plan on topping all my surfaces with some ¼ inch tempered hardboard later on so I knew it would work. That also left me adjusting my screw size to mount my brackets. Due to the reduction in thickness of the plywood all my #8-1 inch screws needed to be adjusted to ¾ inch so to not screw through the ply. I also hit the molding isle to nab some pieces to use as furring strips to use under the shelves before attaching the brackets. This way I can sand each strip to match before mounting to make sure it lined up flat with the center top. One more thing; where it says “drill 1/8 inch hole in brackets make sure you use 1/8 inch pop rivets. I barrowed a pop rivet gun & was handed some rivets as well. Popped two & they had to be trashed because the rivet size turned out to be 5/32. So I stepped up in drill bit size & it all worked out. As I said, I’ll be topping it with some ¼ inch hardboard. I also plan to run it’s own electrical with an outlet on each post. I hope you all enjoy & this can help!

Estimated Cost
$350.00
Estimated Time Investment
Weekend Project (10-20 Hours)
Recommended Skill Level
Beginner

Comments

Rusty Cottage

Thu, 11/29/2012 - 07:03

This is by far the best workbench I have ever seen!!! Thanks for sharing. And excellent choice of table saw and miter saw.

JL Hurst

Thu, 11/29/2012 - 14:59

If I had it to do over I'd had gotten the contractor grade portable saw from Dewalt. The smaller version I have is the same 10" saw, but. It's maximum rip capasity is only 16. The other will at least rip a sheet of ply in 1/2.

Thanks for the kind words on the bench! I hope everyone that may find this valuable will. The plans came out of a 2005 issue & were hard to find on the internet.

uniquetrio2000

Thu, 07/04/2013 - 18:28

I love this work bench and would love to build it but i cant find them. Could you post them or email them to me please. uniquetrio2000 [at] gmail [dot] com

phantom1

Tue, 06/02/2015 - 05:39

I built this bench 3 years ago and I couldn't be happier. The portability, space savings and functionality make it wonderful!

StepFar

Mon, 01/08/2018 - 14:44

Am I missing the actual plans for this. I downloaded the pdf but it doesn't have the build plans apart of it.

Porch Swing

Submitted by Anonymous (not verified) on Tue, 09/15/2020 - 19:18

I used this plan and it came out amazing. It was easy to follow and my wife loves it. Thank you!

Built from Plan(s)

Comments

X - Farm House Table

I modified this plan just a little on the ends, and I can not tell you how pleased I am with it! I did run into some issues with lining the boards up properly due to imperfections (and not laying the boards out ahead of time in the store because I was rushing at closing time), but in the end, I decided to add a wood filler in between the boards and everyone just raves over it. I could not imagine it having come out better. I would not do it any other way. 

Thank you Ana!! 

PS... I have a wonderful idea for a loft bed, but the plans are not provided. I know you would do it justice.. how do I submit the photo????

Built from Plan(s)
Estimated Time Investment
Day Project (6-9 Hours)
Finish Used
Satin, Custom mixed stain, stainable wood filler, sander.

Recommended Skill Level
Intermediate

Comments

jeffross

Sun, 01/07/2018 - 07:22

My appologies if I'm missing it but are there build plans for this table.  I would really like to build this for a friend but I'm not sure my skills will enable me to free style this. Thanks in Advance.  Jeff

cjtrunk21

Fri, 05/29/2020 - 11:50

Did plans over get posted for this table? Love the design. Thanks.

Grandy Barn Door Fireplace and Matching Console

Submitted by Anonymous (not verified) on Wed, 11/11/2020 - 17:38

We originally built the original console a while ago as an entertainment unit for underneath our television. We enjoyed the console so much that we decided that we wanted to do another modified console with a fireplace in it and make the other one into a buffet/storage area for the dining room.

Both of these are fairly modified from the plan, however the basic concepts remain the same. One big thing that we did was use 1x4s as much as possible to reduce the different sizes of lumber we were buying to both reduce complexity and end up with as little as possible scraps.

The frames are made of the 2x3s, The sides (4 deep), shelves, middle shelves and face frame are all 1x4s. The back and inside frames are scrap plywood. The top is 1x6s.

The addition of the fireplace was not difficult. What it did require us to do was to add the centre section and essentially create a box that is closed to the outside cabinets. If it were not closed off it wouldn't support the fireplace insert correctly. The important piece with the fireplace is to ensure you have enough clearance on the top and sides to allow the fireplace to mount safely without overheating. The nice thing about this setup is the additional shelf above the fireplace which we used for electronics. The wires go through the back of the cabinet and it looks very clean.

These are probably my favorite things I've built this year. They're simple to make and add a lot to any living space.

Built from Plan(s)
Estimated Cost
$500
Estimated Time Investment
Weekend Project (10-20 Hours)
Finish Used
White paint for body
Minwax Polyshades Classic Black for top
Recommended Skill Level
Beginner

Comments

Dress-up Tower

Submitted by JReed on Mon, 01/21/2013 - 12:33

Our daughter has just recently gotten into playing dress up so we were looking for storage for all of her new dresses and accessories. This tower was the perfect solution. We used a mostly MDF and some plywood we had left over from other projects to help keep the cost down. We added a mirror to one side and 3 hooks to the other side. Very pleased with the result!

Built from Plan(s)
Estimated Cost
$40
Estimated Time Investment
Afternoon Project (3-6 Hours)
Finish Used
Basic white interior paint
Recommended Skill Level
Beginner

Great storage

Submitted by Anonymous (not verified) on Sun, 03/05/2017 - 18:35

I made my shelves 16 ft by 6ft by 2ft - added another plank to each shelf to increase the width. I compensated for the slope along the garage wall by offsetting all the screw-in points in the front legs half an inch. This thing is HEAVY.


I anchored the unit to the wall by securing 2 scrap 2x4s to the studs - 1 at the 2nd set of legs and 1 at the far right legs - and screwing the unit legs into the 2x4s. This way, I didn't have to line the unit up precisely with the studs.

Estimated Cost
$190 lumber
Estimated Time Investment
Day Project (6-9 Hours)
Finish Used
None/natural
Recommended Skill Level
Starter Project

Potting Bench

I am a complete newbie to anything woodworking. I just turned 60 and used a drill for the first time about 9 months ago. Thanks to Anna and her plans and videos, I have developed some some self confidence in this art and absolutely loving it.

Farmhouse coffee table and king size bed is next.

Thank YOU Anna!!! You totally rock!!!!!!!!

Estimated Time Investment
Day Project (6-9 Hours)
Recommended Skill Level
Beginner

Comments

Storage Captains Bed

Submitted by Anonymous (not verified) on Fri, 09/16/2022 - 05:03

So this was a really fun project from start to finish, I wanted a storage bed with a place for my son to showcase his Super Hero collection!

Estimated Cost
300
Estimated Time Investment
Week Long Project (20 Hours or More)
Finish Used
Paint
Recommended Skill Level
Intermediate

Comments

Extra Tall Bar Stools

Submitted by TCnTash on Wed, 12/17/2014 - 09:21

My wife and I built our whole bar, from the shelves, bar, and the kegerator! We needed stools to round out our endeavor but we werent willing to shell out the kind of money required.  My wife found this plan and we morphed it a bit to meet our needs.  The KREG JIG saved us big time! The seat upholstry took us a bit of time, but we figured it out thanks to YouTube.  Great project for a weekend, took us a tad bit longer due to the arrival of our daughter but, we still got it done!

Built from Plan(s)
Estimated Cost
~$150, this got us three stools. We had bigger measurements than the plan called for, so you could definitely squeeze another chair if you stick to the plan.
Estimated Time Investment
Week Long Project (20 Hours or More)
Finish Used
Wheat color stain, and spray on Satin polyurethane.
Recommended Skill Level
Beginner

Simple Outhouse

Submitted by Anonymous (not verified) on Thu, 04/20/2017 - 12:26

I had my nephew build this outhouse for our new 70 acre lot - no neighbours in sight so I had him put in an acrylic window (with a view).  I left off the deck and had him put the boards tight together so 'critters' didn't get in as easily. I made a sign for above the door - 'Waste Management' for a touch of humour.  The plans were easy to follow and I love it.  Thanks, Ana.

Built from Plan(s)
Estimated Cost
Approx. $300 for material and $250 for my nephew's labour.
Estimated Time Investment
Weekend Project (10-20 Hours)
Finish Used
sealer
Recommended Skill Level
Beginner

Comments

Barn door bookcase

Submitted by EOdonnell on Fri, 04/02/2021 - 08:14

Fun project!

Built from Plan(s)

Comments

Our First DIY Project: A TV Corner Unit

Submitted by tedi.l on Fri, 03/22/2013 - 09:07

My husband and I wanted to store our bicylces on the main level of our home, but to do that we need to move our tv and it's components to a corner. We didn't see any premade consoles that we liked, so I searched around on the web until I found Ana White's design!

Feel free to visit our blog to see the unit come to life in detail :)

Built from Plan(s)
Estimated Cost
$200
Estimated Time Investment
Week Long Project (20 Hours or More)
Finish Used
We purchased paint that had primer in it, and got away with applying only two coats (with some light sanding in between),
Recommended Skill Level
Beginner

Awesome Adirondack chairs!!!

Submitted by Anonymous (not verified) on Sun, 05/23/2021 - 05:12

I'm a mom of two kids and new to wood working. The video instruction and the plan were so comprehensive! Thank you Ana, you inspired me to do more wood projects. I feel so accomplished and got so many comments on my new chairs. They are really really comfortable. My husband, who has a stiff back, loves the chair as it is also comfortable for him.

Estimated Cost
$120
Estimated Time Investment
Day Project (6-9 Hours)
Recommended Skill Level
Beginner

Comments

Upholstered Bench

Ideally we would’ve loved to have found a nice thrift shop coffee table and added a nice upholstered top to make a cheap and cheerful bench for the dressing room.

Unfortunately, no such table was to be found. So we did what DIYers do. We built one ourselves. Of course, as usual, we had big dreams and no clue where to start. In theory it seemed easy enough. Wood, nails…put them together.

After visiting Ana White’s amazing site, we came across this plan. Come on, it has the word EASIEST right in the title! It was perfect for us. Our bench is tweaked somewhat from Ana White’s.

Built from Plan(s)
Estimated Cost
$65
Estimated Time Investment
Weekend Project (10-20 Hours)
Finish Used
ProClassic latex paint from Sherwin Williams
Recommended Skill Level
Beginner

Crib Mattress Wood Sectional

Submitted by Anonymous (not verified) on Thu, 11/09/2017 - 09:55

Submitted by Abigail Marolt on Facebook -


I made a your crib mattress sectional with an extra armless couch to make one large U-shaped design! It was my first project with a kreg jig and a circular saw, but it certainly won't be my last. We love using this couch every day!

Recommended Skill Level
Starter Project

Texas size wooden cooler

I have used one of your cooler plans to create this one of a kind piece. Love your website - Thank you !

Built from Plan(s)
Estimated Cost
$60
Estimated Time Investment
Weekend Project (10-20 Hours)
Finish Used
orange/red solid stain
Recommended Skill Level
Beginner

Comments

Jody Knowles

Mon, 06/01/2015 - 12:20

Been thinking about making one of these. As a Texan this one definitely appeals to me !

Great job, it looks really nice.

Play kitchen

Submitted by SoCalMom on Fri, 12/22/2017 - 15:32

This was my first major build and while not perfect and I was little clunky building along the way, I’m happy with how it turned out and I think the girls will love it for Christmas. We are beach dwellers and surfers, but I’m also a former (always) a farm girl as well, so we put a surfing pig on it too. I wanted to keep it whimsical a bit so put starfish knobs for the burners. Took me a long time and more money than average probably because of learning curve as well as having to sneak work on it between working, toddler and infant. I got a Kreg and more tools for Christmas, so I am looking forward to more building! 

update: My little destroyer broke the door within 10 minutes because it was too big for her to work around. So I “remodeled” it and made the door just the top half so that is her oven. MUCH BETTER. Now she can use it far easier and it isn’t dropping to the floor. 

Estimated Cost
for actual used materials, somewhere around 125
Estimated Time Investment
Weekend Project (10-20 Hours)
Finish Used
Paint and contact paper
Recommended Skill Level
Beginner

Our new pantry

We bought a vacation home that has such a small kitchen. I knew we needed more storage. So I checked out Ana's plans and made this bad boy based on the Simplest Armoire plans.

The home is in the mountain/lakes area of northern New Hampshire, so I wanted to bring the outside colors in. I used Valspar Cabin Red paint and the Valspar Antiquing glaze over the top after distressing it a bit.

Built from Plan(s)
Estimated Cost
$200 +
Estimated Time Investment
Weekend Project (10-20 Hours)
Finish Used
Valspar Cabin Red paint
Valspar Antiquing glaze
Recommended Skill Level
Beginner