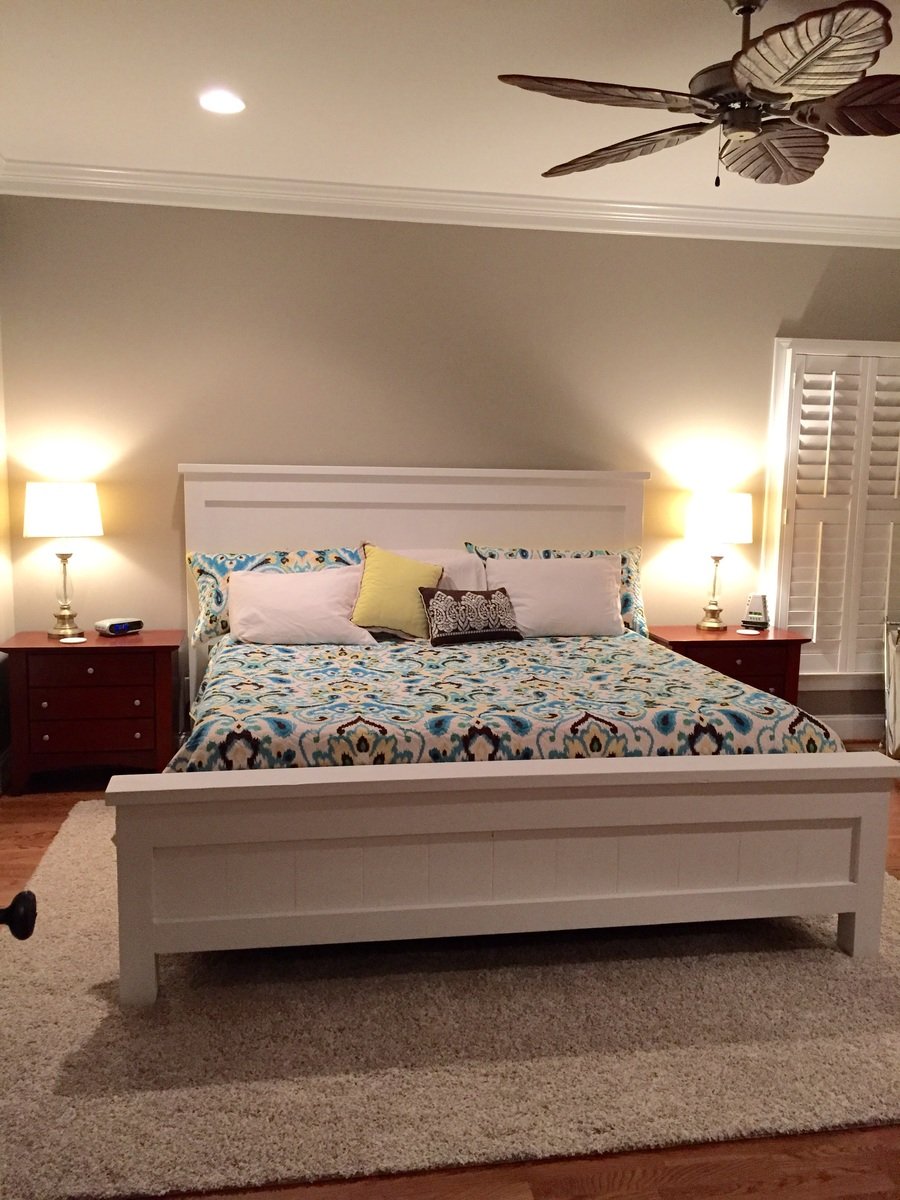
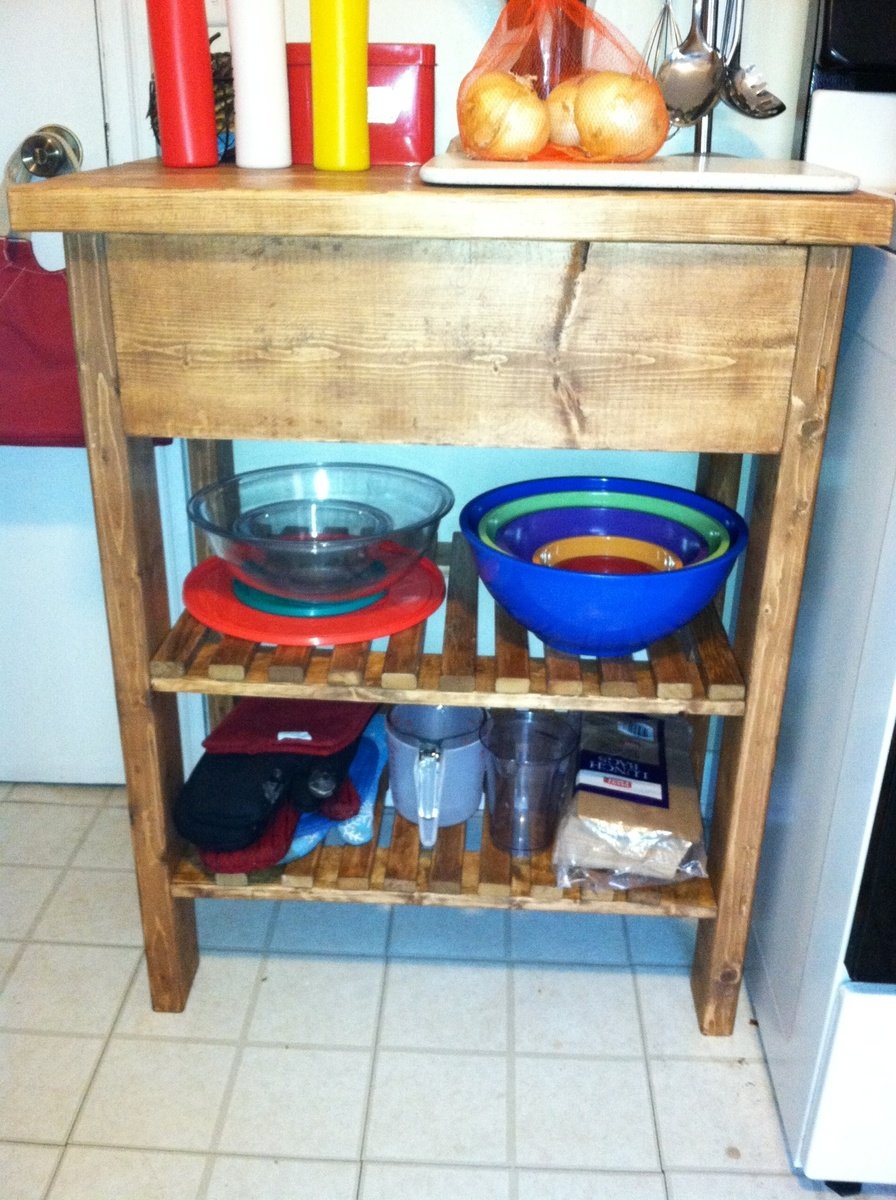
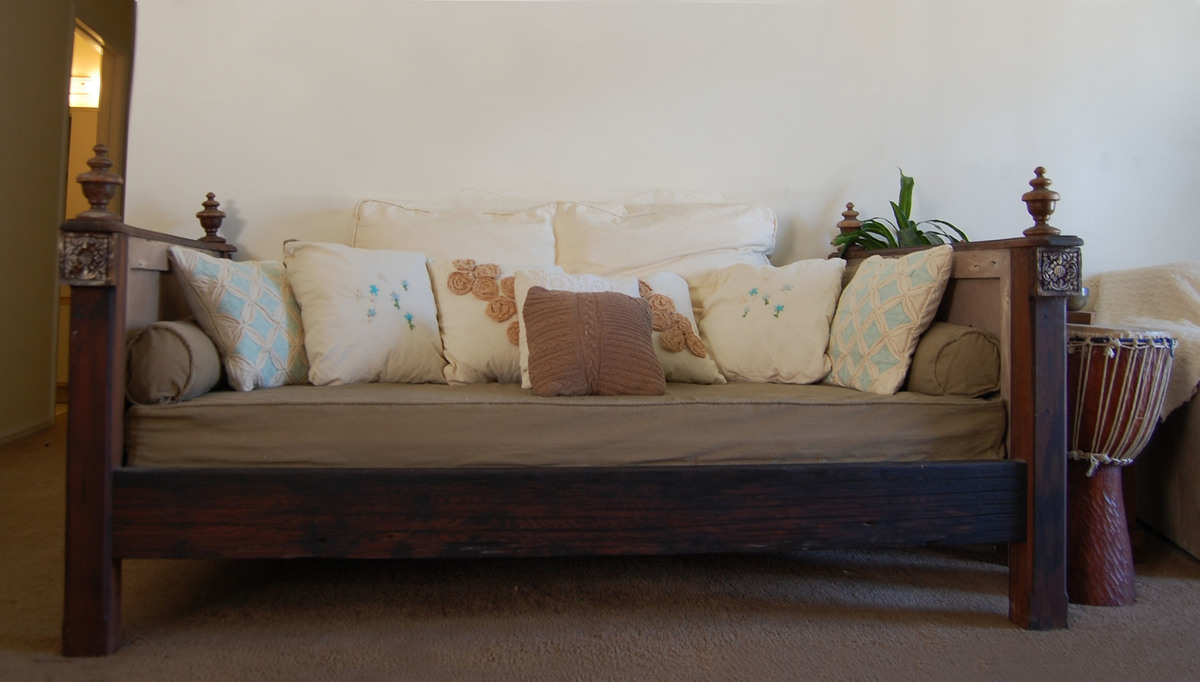
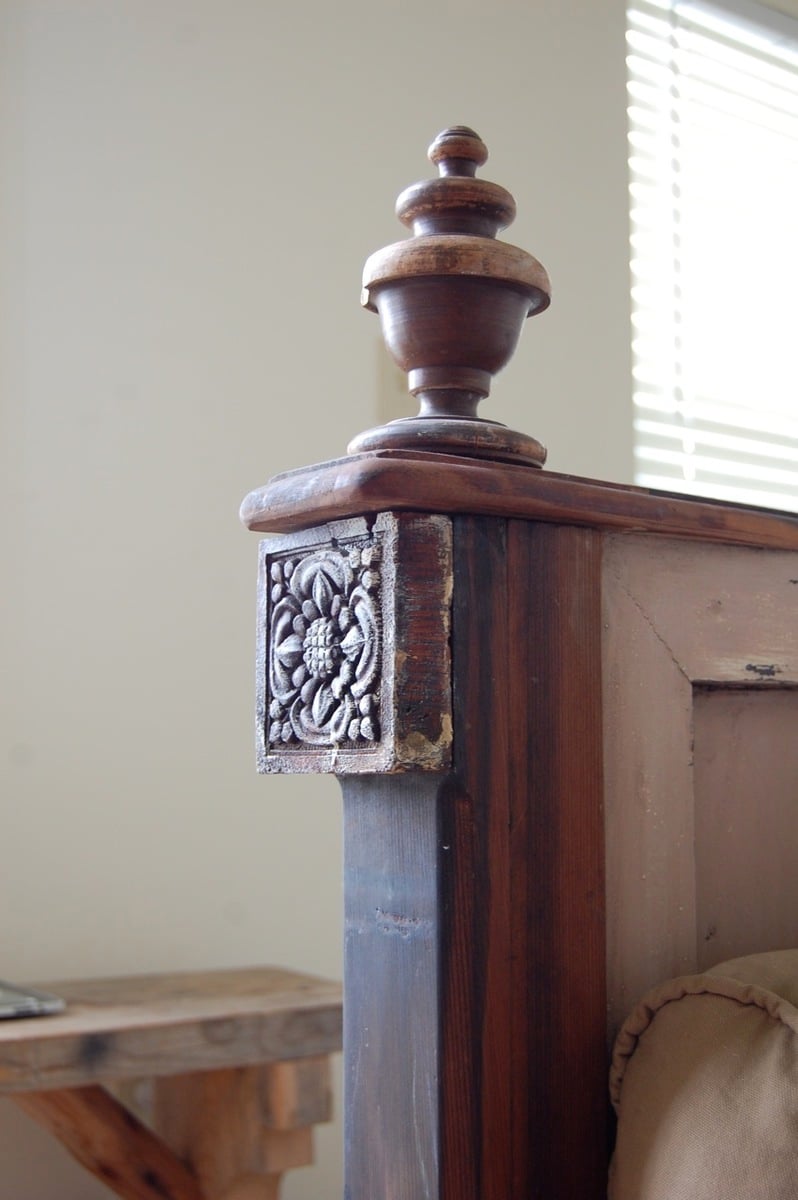
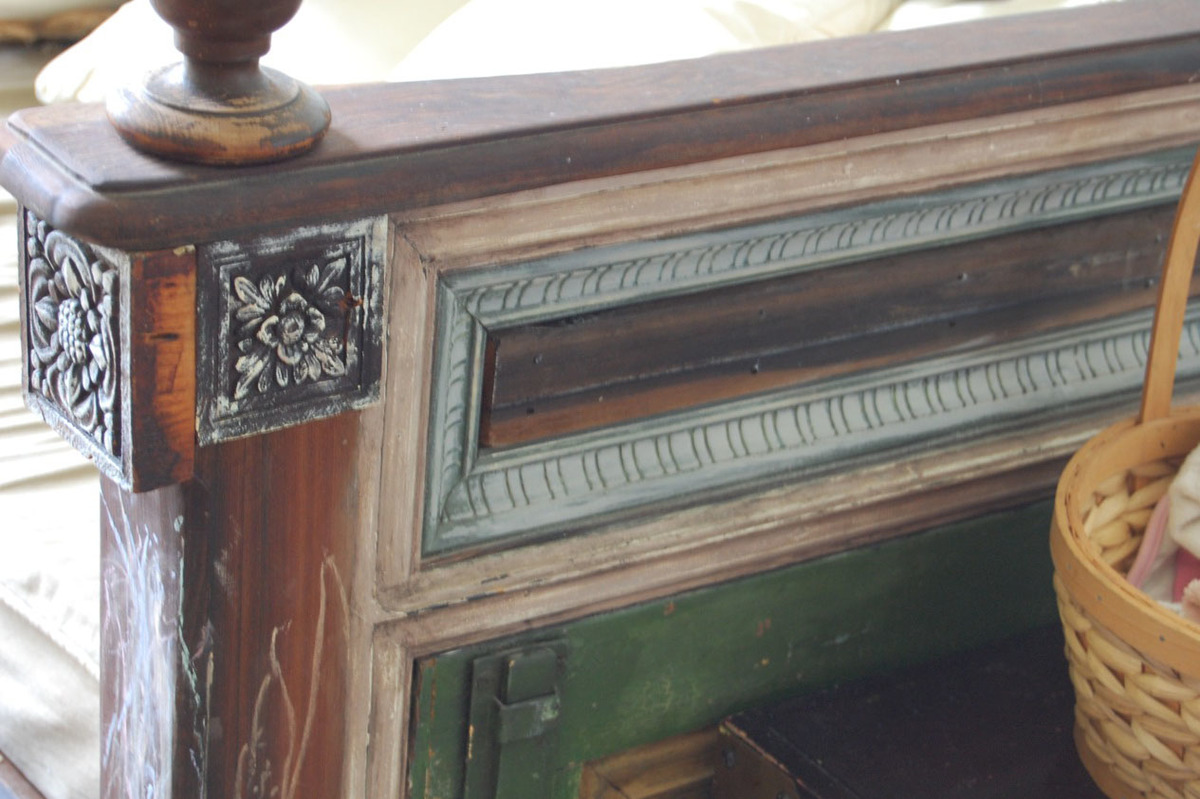
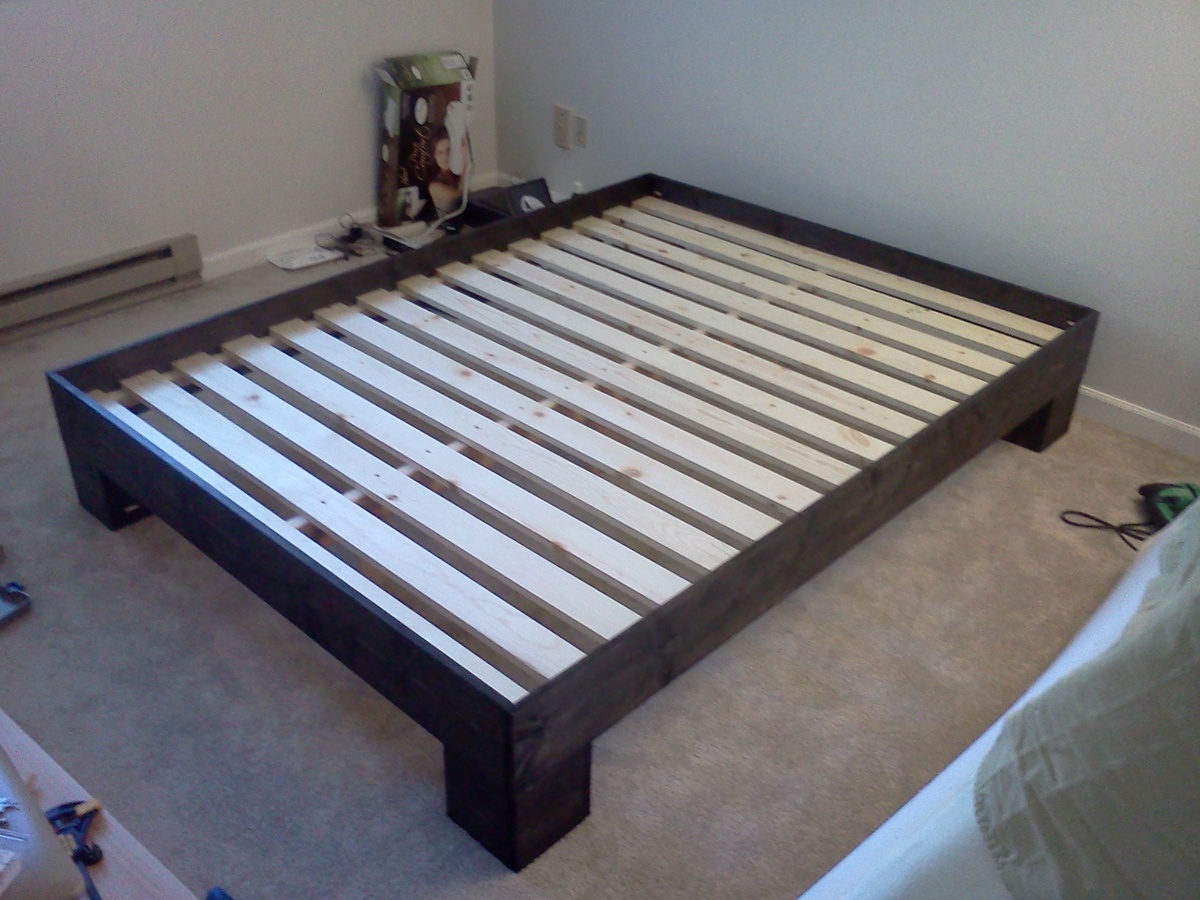
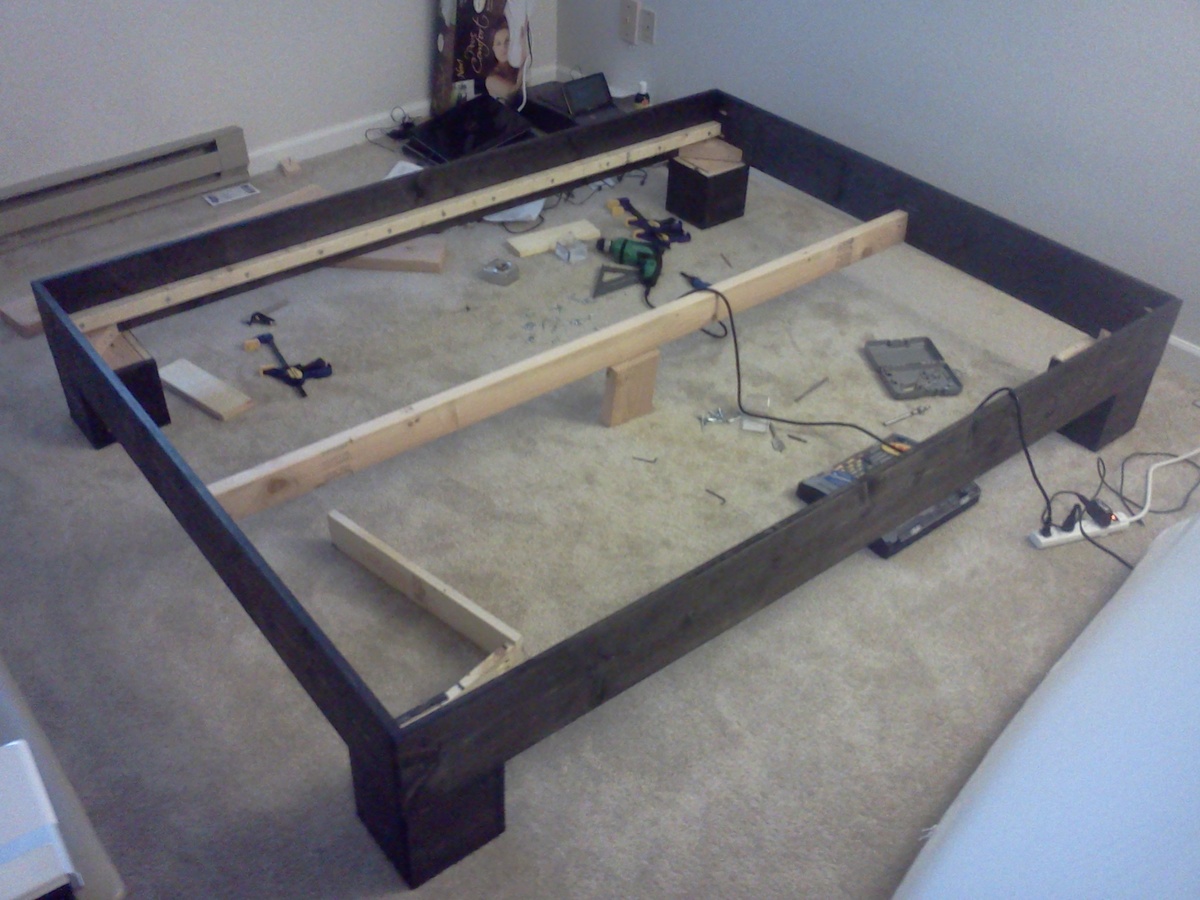
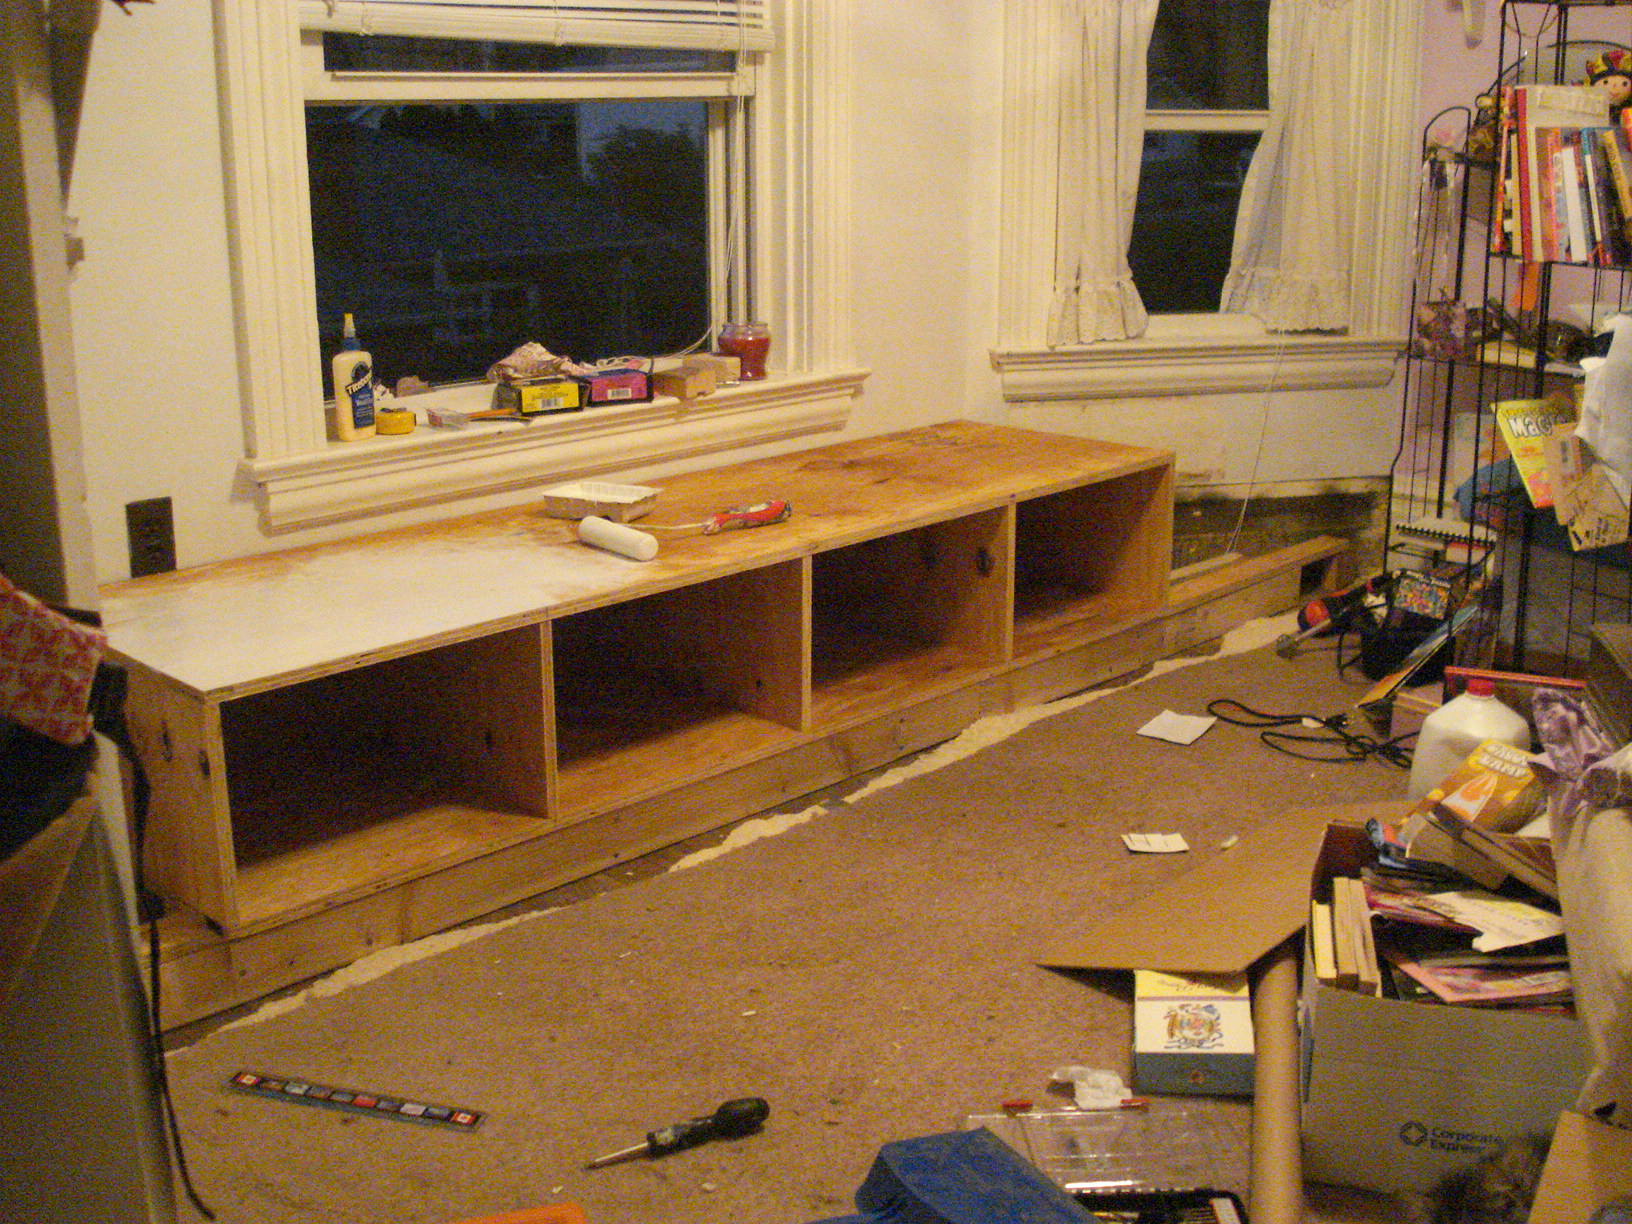
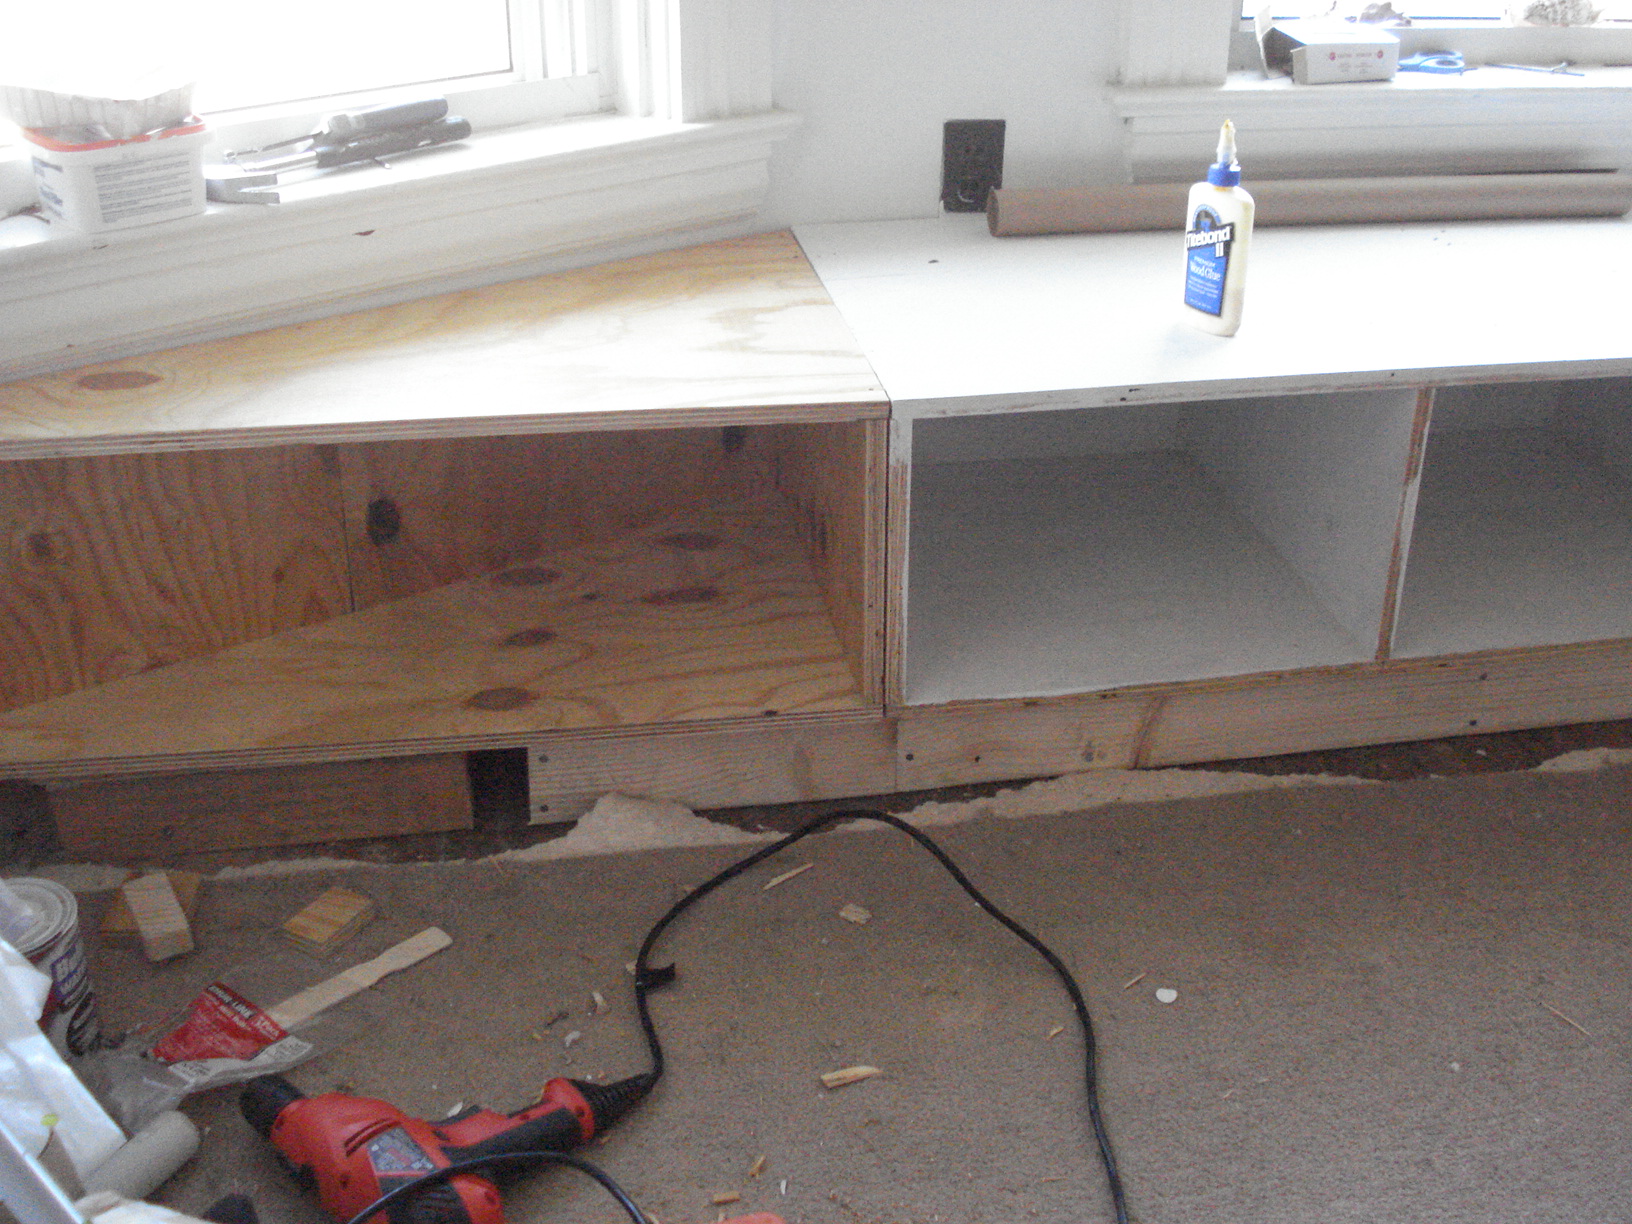
Community Brag Posts

Farmhouse King Bed

Submitted by Tdunlap33 on Tue, 04/07/2015 - 17:48

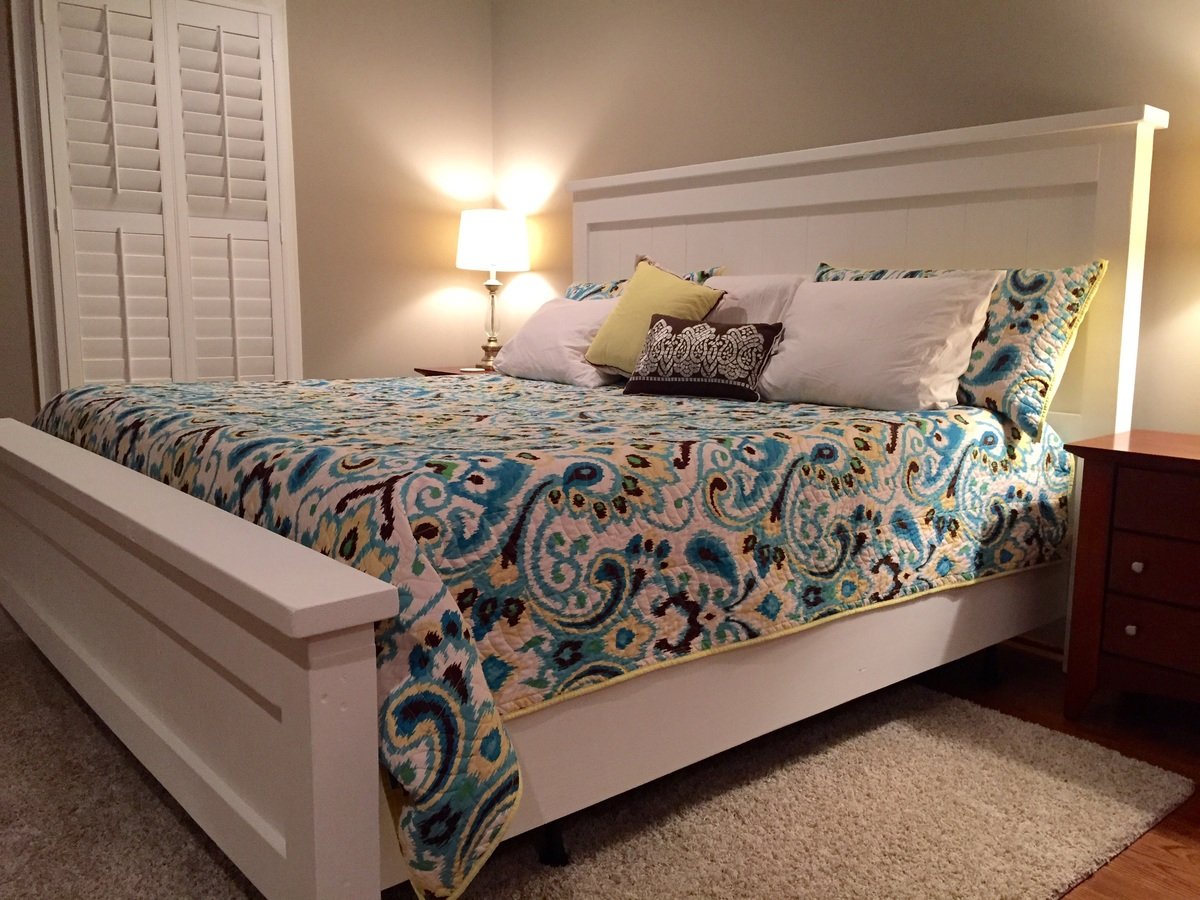
First project my husband and me attempted- turned out awesome! Very sturdy bed. The metal frame and box springs are not attached, it just sits inside the wood rails, headboard and footboard. We worked on this a few hours at a time on Saturdays and Sundays for one month since we work full time. Definitely more projects to come! 

Estimated Cost
$200
Estimated Time Investment
Weekend Project (10-20 Hours)
Finish Used
Latex primer and latex white from Sherwin Williams
Recommended Skill Level
Starter Project

Comments

Upholstered Bench

Ideally we would’ve loved to have found a nice thrift shop coffee table and added a nice upholstered top to make a cheap and cheerful bench for the dressing room.

Unfortunately, no such table was to be found. So we did what DIYers do. We built one ourselves. Of course, as usual, we had big dreams and no clue where to start. In theory it seemed easy enough. Wood, nails…put them together.

After visiting Ana White’s amazing site, we came across this plan. Come on, it has the word EASIEST right in the title! It was perfect for us. Our bench is tweaked somewhat from Ana White’s.

Built from Plan(s)
Estimated Cost
$65
Estimated Time Investment
Weekend Project (10-20 Hours)
Finish Used
ProClassic latex paint from Sherwin Williams
Recommended Skill Level
Beginner

Cubby Storage System

Submitted by beckysnest on Fri, 04/01/2011 - 11:04

This was my first building project ever! Even though it took longer than I expected to complete (I have four tiny kids and snagged an hour here and there during nap time over the course of many months), it was absolutely worth the time investment (and wait)! Hanging the doors was tricky (my awesome husband tackled that part), but other than that it was easy to put together. Finishing it was the hardest part by far. If I were to do it again, I'd probably do some preliminary sanding of the boards before putting them together and I would most certainly not use oak (I was talked into it by the HD guys) especially since I ended up painting it. I think it would have turned out just as great if I'd used a cheaper wood or MDF. Thanks for the plans Ana!

Estimated Time Investment
Week Long Project (20 Hours or More)
Finish Used
Started with two coats of Behr Ultra Interior Satin (paint w/primer) color matched to Martha Stewart Barn Red (sanded between coats). After one final (light) sanding to distress, I finished with one coat of Ralph Lauren Glaze in Tobacco that I had on hand (brush on one side of surface and then quickly wipe away excess with an old rag--moving the rag in the direction of the wood grain). The glaze brought out the wood grain more and helped tone down the exposed wood.
Recommended Skill Level
Beginner

Crib Mattress Wood Sectional

Submitted by Anonymous (not verified) on Thu, 11/09/2017 - 09:55

Submitted by Abigail Marolt on Facebook -


I made a your crib mattress sectional with an extra armless couch to make one large U-shaped design! It was my first project with a kreg jig and a circular saw, but it certainly won't be my last. We love using this couch every day!

Recommended Skill Level
Starter Project

Rustic Bathroom Vanity

Submitted by ivyfamily5 on Wed, 12/15/2021 - 09:51

I built Ana Whites Bathroom vanity with drawers. I love how easy the plans are to follow and even adjust. I tweaked the measurements to fit the space I had. After supplies, I spent a bit less than a store bough vanity, and it is solid wood rather than the cheap materials the less expensive store bought one. It turned out beautiful! I also built the mirror frame and the shelves to match. Thank you, Ana, for your amazing website, plans, videos, and confidence to tackle the projects myself. My daughter chose the mahogany stain because she loved the way it sounds..."It's Mahogany!"

Built from Plan(s)

Comments

Texas size wooden cooler

I have used one of your cooler plans to create this one of a kind piece. Love your website - Thank you !

Built from Plan(s)
Estimated Cost
$60
Estimated Time Investment
Weekend Project (10-20 Hours)
Finish Used
orange/red solid stain
Recommended Skill Level
Beginner

Comments

Jody Knowles

Mon, 06/01/2015 - 12:20

Been thinking about making one of these. As a Texan this one definitely appeals to me !

Great job, it looks really nice.

Play kitchen

Submitted by SoCalMom on Fri, 12/22/2017 - 15:32

This was my first major build and while not perfect and I was little clunky building along the way, I’m happy with how it turned out and I think the girls will love it for Christmas. We are beach dwellers and surfers, but I’m also a former (always) a farm girl as well, so we put a surfing pig on it too. I wanted to keep it whimsical a bit so put starfish knobs for the burners. Took me a long time and more money than average probably because of learning curve as well as having to sneak work on it between working, toddler and infant. I got a Kreg and more tools for Christmas, so I am looking forward to more building! 

update: My little destroyer broke the door within 10 minutes because it was too big for her to work around. So I “remodeled” it and made the door just the top half so that is her oven. MUCH BETTER. Now she can use it far easier and it isn’t dropping to the floor. 

Estimated Cost
for actual used materials, somewhere around 125
Estimated Time Investment
Weekend Project (10-20 Hours)
Finish Used
Paint and contact paper
Recommended Skill Level
Beginner

Our new pantry

We bought a vacation home that has such a small kitchen. I knew we needed more storage. So I checked out Ana's plans and made this bad boy based on the Simplest Armoire plans.

The home is in the mountain/lakes area of northern New Hampshire, so I wanted to bring the outside colors in. I used Valspar Cabin Red paint and the Valspar Antiquing glaze over the top after distressing it a bit.

Built from Plan(s)
Estimated Cost
$200 +
Estimated Time Investment
Weekend Project (10-20 Hours)
Finish Used
Valspar Cabin Red paint
Valspar Antiquing glaze
Recommended Skill Level
Beginner

Salvaged Wood Daybed

Submitted by kristah on Mon, 06/29/2015 - 18:44

I originally planned to make the Lydia daybed as is, but we decided to make it with reclaimed materials after being inspired by redwood we found that had been salvaged from old pickle barrels. We ended up with chunkier posts for the legs (3 1/4" by 3"), and used a thick solid piece of wood for the front (2"x 7 1/2") , which did change the dimensions of our project a bit. We attached an old shutter to the plywood for the sides, and found salvaged bed post tops for the tops. We left off the scalloped edges because they seemed too delicate for the look we had going. Also, my husband had fun with his new router on the edges. We decided to use 1x8's for the slats under the bed b/c we thought it would give more support to the latex foam we had used instead of a traditional mattress. Because we move a lot, we wanted to be able to take the daybed apart if necessary. We attached the sides to the daybed with bed rail brackets. I posted more about the daybed on my blog. Sewing the cushions/pillows took much longer than making the actual daybed!

Built from Plan(s)
Estimated Time Investment
Weekend Project (10-20 Hours)
Finish Used
Tung oil on the redwood- Milk paint on everything else
Recommended Skill Level
Intermediate

Outdoor Sofa

Submitted by Richm7 on Sun, 04/24/2022 - 11:05

Two seater couch inspired by your web site . I have altered the design a little and added an ottoman . Built from Australian Eucalypt . Nicknamed Blackbutt Gum . It’s a hardwood but finishes very nice , sanded with 240 grit , varnished with marine grade diluted 10% with turps . Look forward to your weekly plans they inspire me to build projects and give me lots of ideas . 
 

by Richard
Northland
New Zealand

Built from Plan(s)

Toy Armoire

I adjusted the height of the armoire to 72 inches. It was a little tricky getting the doors to hang straight. I blame the new driveway; we just moved into a new house with a sloped driveway (our old one was super flat). I got the hardware at Lowe's. I also added a block of wood at the top, on the inside, to mount the door catches. I mounted them on the top and bottom on both doors, so four catches total. That really helped with the way the doors looked when closed.

Built from Plan(s)
Estimated Cost
$100
Estimated Time Investment
Weekend Project (10-20 Hours)
Finish Used
I used Minwax Dark Walnut with Minwax Satin Polyurethane. Two coats of each.
Recommended Skill Level
Intermediate

Rustic X beach beverage center

Submitted by one wolf on Tue, 09/08/2015 - 06:52

We used old dock wood for the surface of our X table for a nice beach house beverage center (sand bar!).  We adjusted the size to fit our space (a little longer and wider) and used additional studs for the shelves instead of 1" shelving, glued and PH/PS together.  To cut the X pieces I just held the 1x1 on the end of the table where it goes and marked the lines. Then I clamped a guide board at the correct angle on the table saw to make all the cuts, starting a bit long and shaving off until it just fit.  


With all the pocket holes and screws I wouldn't consider this a beginner project. Some additional steps and pictures in your description would help also.  End result is really nice.


Built from Plan(s)
Estimated Cost
$50
Estimated Time Investment
Weekend Project (10-20 Hours)
Finish Used
Patina wood from an old dock for the surface and the base is painted flat gray.
Recommended Skill Level
Intermediate

Comments

Arbor bench from leftover trellis

Submitted by Anonymous (not verified) on Sat, 07/16/2022 - 17:57

The previous owners planned to built a rose Arbor, and left the pieces in our barn. Using the Arbor bench plan I was able to use all the pieces to build this version. Great summer hangout!

Built from Plan(s)

Comments

Chunky Leg Bed Frame slightly taller

Submitted by nagariz on Sat, 08/27/2011 - 01:06

First time really building anything out of wood. Getting a kreg jig was probably the best decision I made on this project. I made the legs slightly taller (7") for a bit of underbed storage and used a 2x4 brace instead of 2x6, so I could sit the slats down a bit lower but still keep a gap above the legs. The mattress sits 3" below the edge of the bed. I put a few legs under the center support, but they probably weren't necessary for the queen size bed. I spent about $150 for the lumber ($50 just for the bigger slats for my memory foam mattress), and about $50 for the kreg jig jr. and screws. I did not use any glue so I can take it apart later, and so far it seems pretty sturdy with no creaks. Thanks so much for the plan Ana!!! On to a headboard and bedside tables...

Estimated Cost
$150
Estimated Time Investment
Weekend Project (10-20 Hours)
Finish Used
Ebony Minwax stain one coat for 15 minutes
Recommended Skill Level
Beginner

Comments

VelvetSky

Sun, 08/28/2011 - 20:16

I love this! I am looking to build something like this, so I can get rid of my box spring.

Larissa (not verified)

Sat, 10/08/2011 - 13:11

This looks awesome for a first timer! Good job and I agree about the Kreg...it is a wonderful investment for any future projects. I have memory foam too so will probably do the same with having wider slats.

Modern Adirondack Chair

Submitted by Anonymous (not verified) on Sat, 11/19/2022 - 03:24

Easy build, turned out great. Our first project like this. We built 4!

Comments

Window seat built in

Submitted by daliae on Sat, 09/17/2011 - 20:19

I made this two years ago in my daughter's room, before I got to know Ana's site. This was my ever first carpentry project. It took me 4 whole days to finish. The whole wall is like a bay wall so I had to custom make the built in. Also – I did that when my husband was out of town so in order for me to be able to lift all the pieces from the basement to the second floor, I made it of 4 pieces. When my husband came back home he thought I paid someone to built it.

I made it out of 2x4’s and plywood. I trimmed the bottom with a trim.

One day I will add drawers and the cushions are in the making.

Estimated Cost
100 $
Estimated Time Investment
Week Long Project (20 Hours or More)
Finish Used
Primer and two coats of Valspar high gloos White Dove from Lowe's.
Recommended Skill Level
Beginner

Comments

nhoffer

Thu, 06/11/2015 - 20:20

Do you have more pics of the finished product...especially where it meets the angled wall? I don't have a table saw (yet) so I'm trying to figure out if I can handle this without one. :(

Entry Mirror (from The Handbuilt Home)

Submitted by Linda7 on Tue, 10/01/2013 - 14:48

My sister and brother-in-law recently moved to Albuquerque and purchased a home with a wonderful view of the Sandia Mountains. I built them the mirror from The Handbuilt Home (p. 36), and they hung it in the entry hall. The reflection in the mirror is a gorgeous view of the mountain range out of their large living room windows. Because this was not a rustic build, I used better pine boards, sanded very smooth.
Thank you to ANA for the great plan (and book!). Also a great big hug to JOANNE and TRACY for responding so quickly to my query regarding attaching the mirror to the frame. I ended up having the mirror company attach the mirror with silicone because I was afraid mirror clips would mar the smooth, shiny surface of the wall. We also covered the back of the mirror with craft paper, contact cemented to the frame to protect the mirror silvering.
This was a fun build, and my sister and b-in-law are very pleased with it.

Built from Plan(s)
Estimated Cost
Around $75.00
Estimated Time Investment
Weekend Project (10-20 Hours)
Finish Used
Minwax Express Color "Crimson", two coats, followed by four thin coats of gloss poly, sanding between coats with fine grit.
Recommended Skill Level
Beginner

Comments

JoanneS

Tue, 10/01/2013 - 18:11

Linda, your mirror looks fabulous! The finish is just gorgeous, and I love the hardware you used. Beautiful build! :)

Linda7

Tue, 10/01/2013 - 18:20

Thanks for the nice complement, Joanne. I really do appreciate your help!

Garage shelving unit

We made this peace 12 feet long, the hardest part was to find straight boards at home depot and adjust the feet because of an uneven garage floor. It was my first big project and hubby helped so I can't take all the credits :)

Estimated Cost
$126
Estimated Time Investment
Afternoon Project (3-6 Hours)
Finish Used
Unfinished
Recommended Skill Level
Beginner

2x4 sectional

Submitted by Anonymous (not verified) on Sun, 02/26/2023 - 05:49

After building my workbench and some shelves to organize my makeshift wood shop, I went online to find practical first projects. Stumbled upon the Ana White site and really liked the simplicity of the pieces and the thoroughness of the plans (cut list, pictures, etc). Had the wood dimensioned at a local lumber yard and started building. Upon completing the first bench - sealed with a tinted Thompson’s water seal - found a local upholster to make the cushions. Now to find a place to put them that the wife approves. Build already approved by the pup (see last photo).

Comments

Seasonal And Holiday