Community Brag Posts

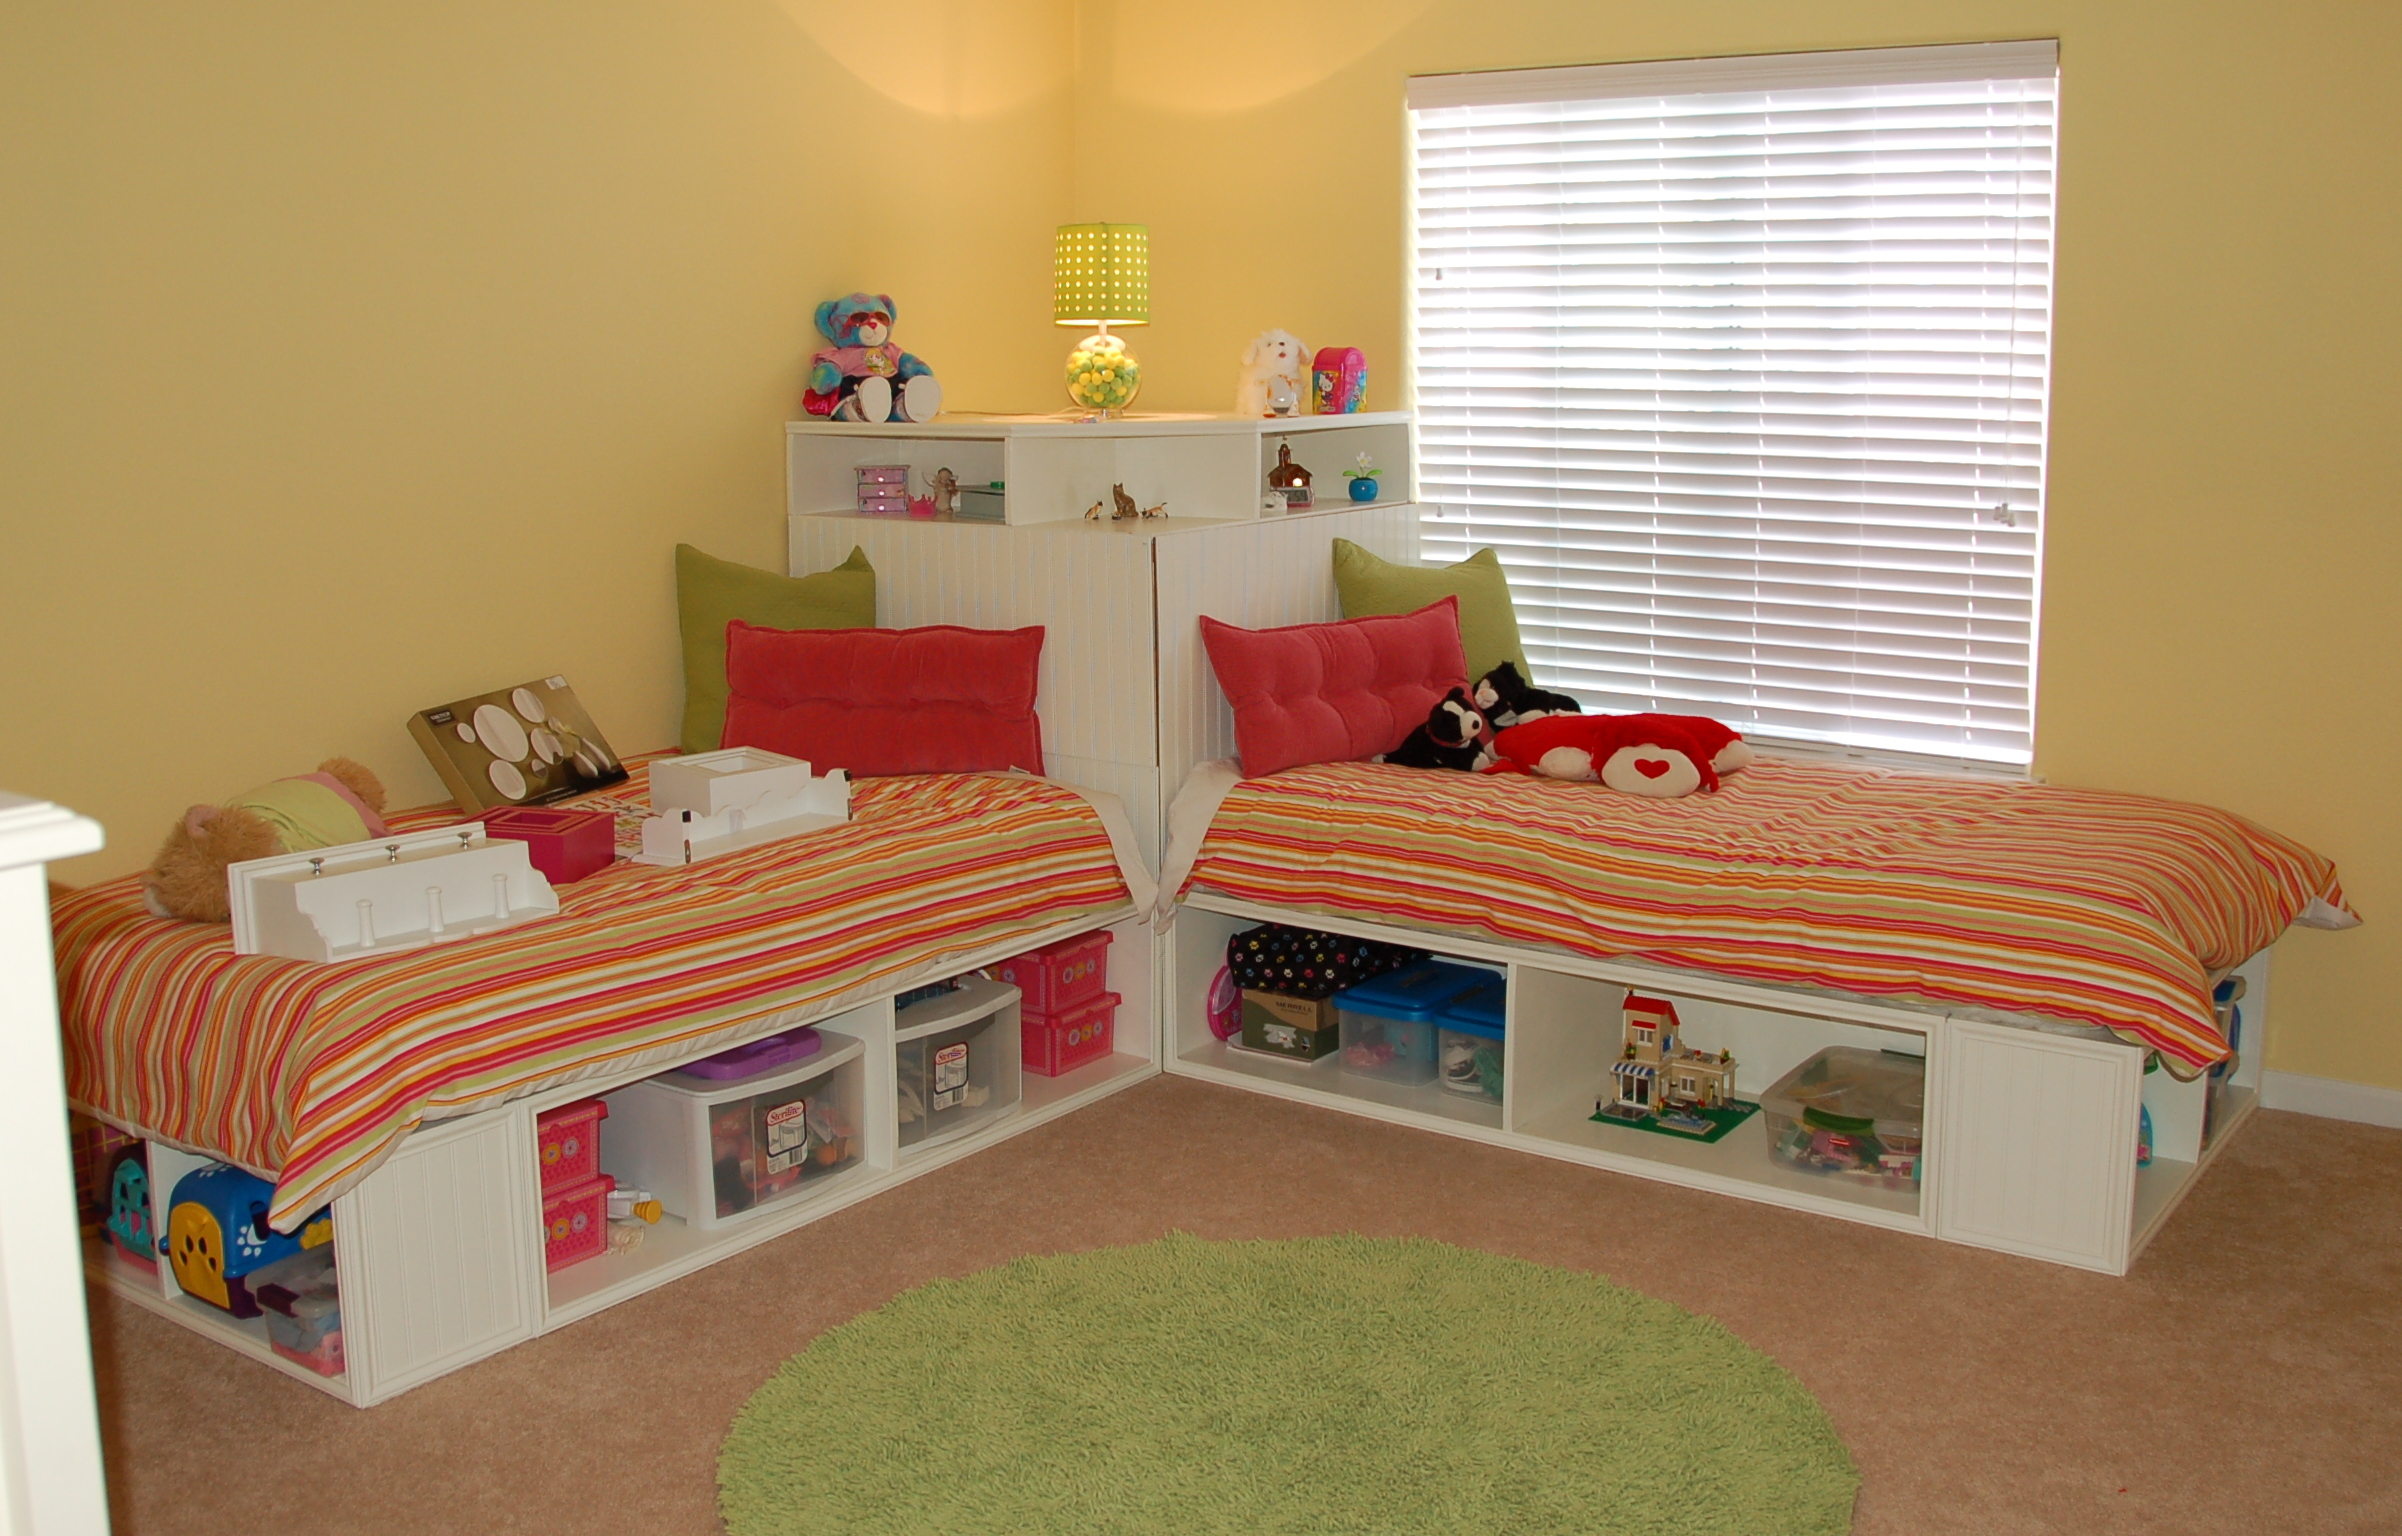
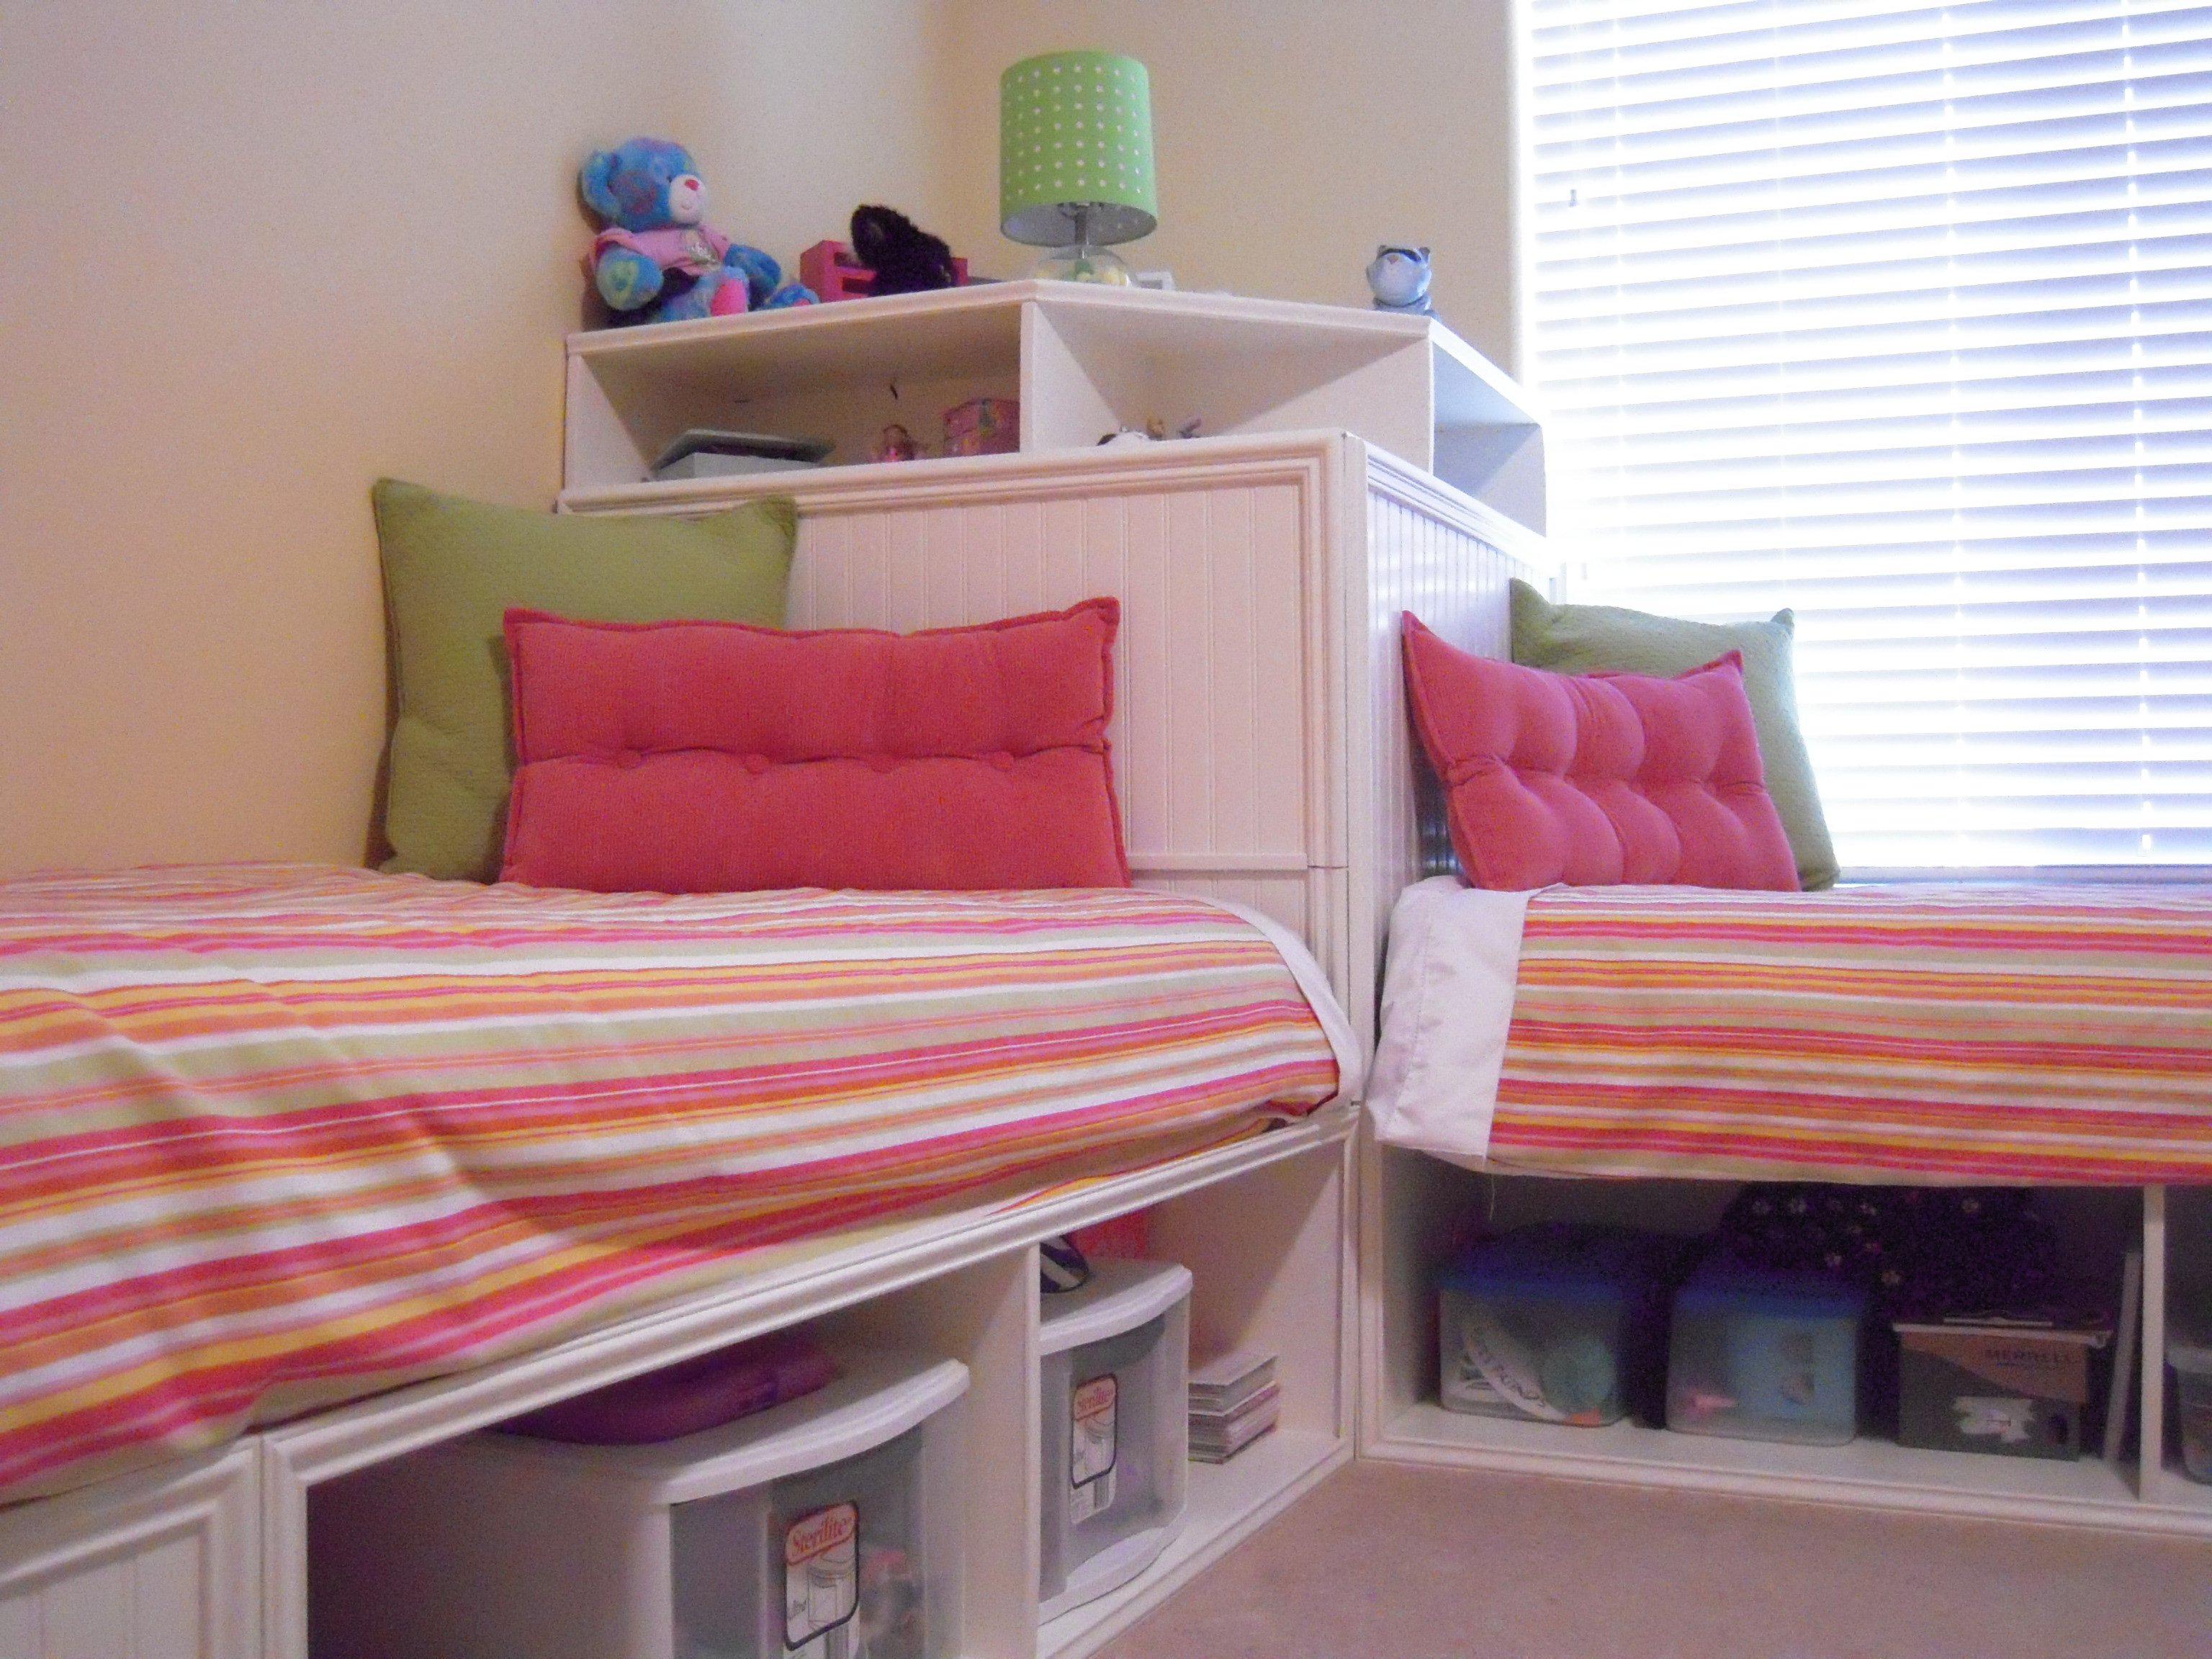
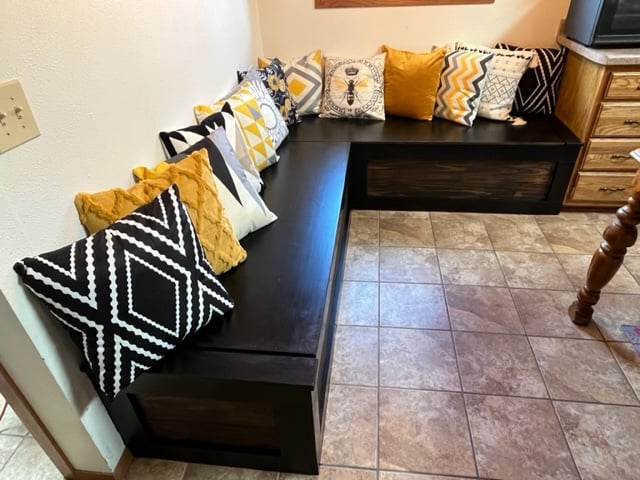
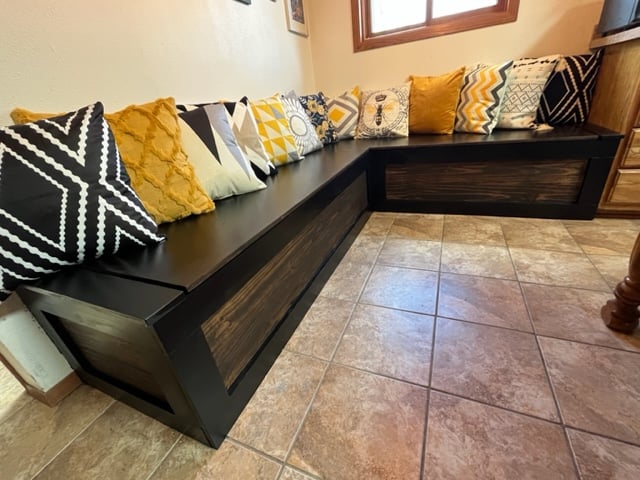
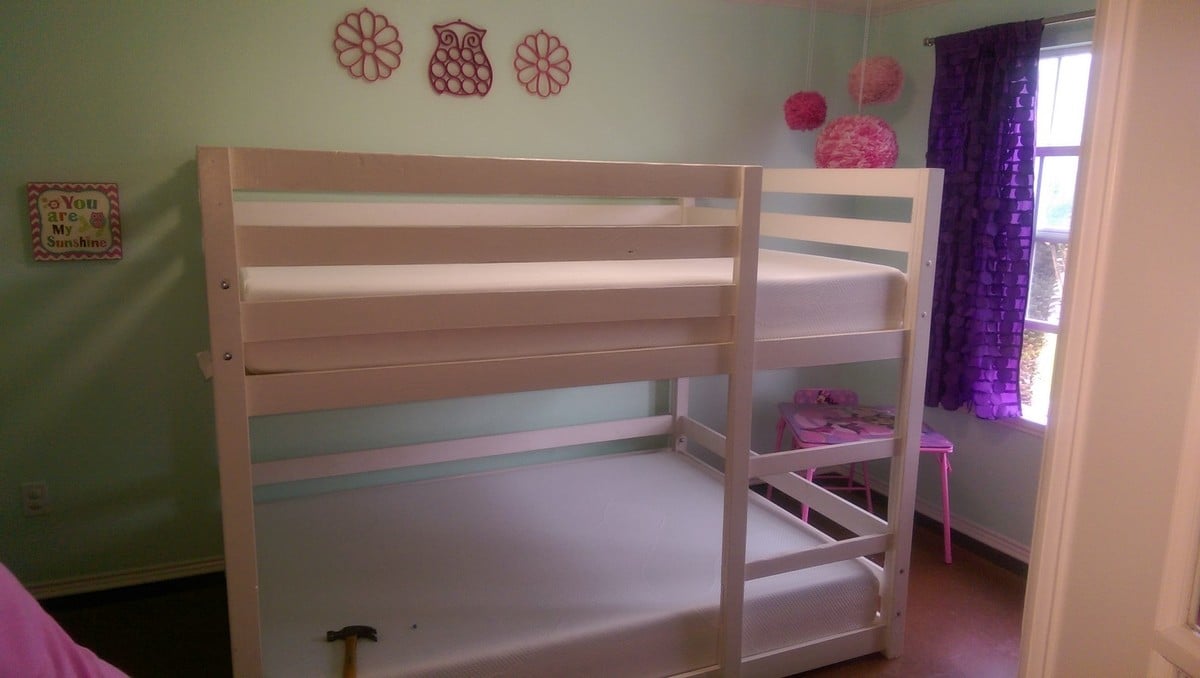
Twin storage beds and modified corner unit (secret storage)

Submitted by k slampa on Sat, 07/02/2011 - 22:17

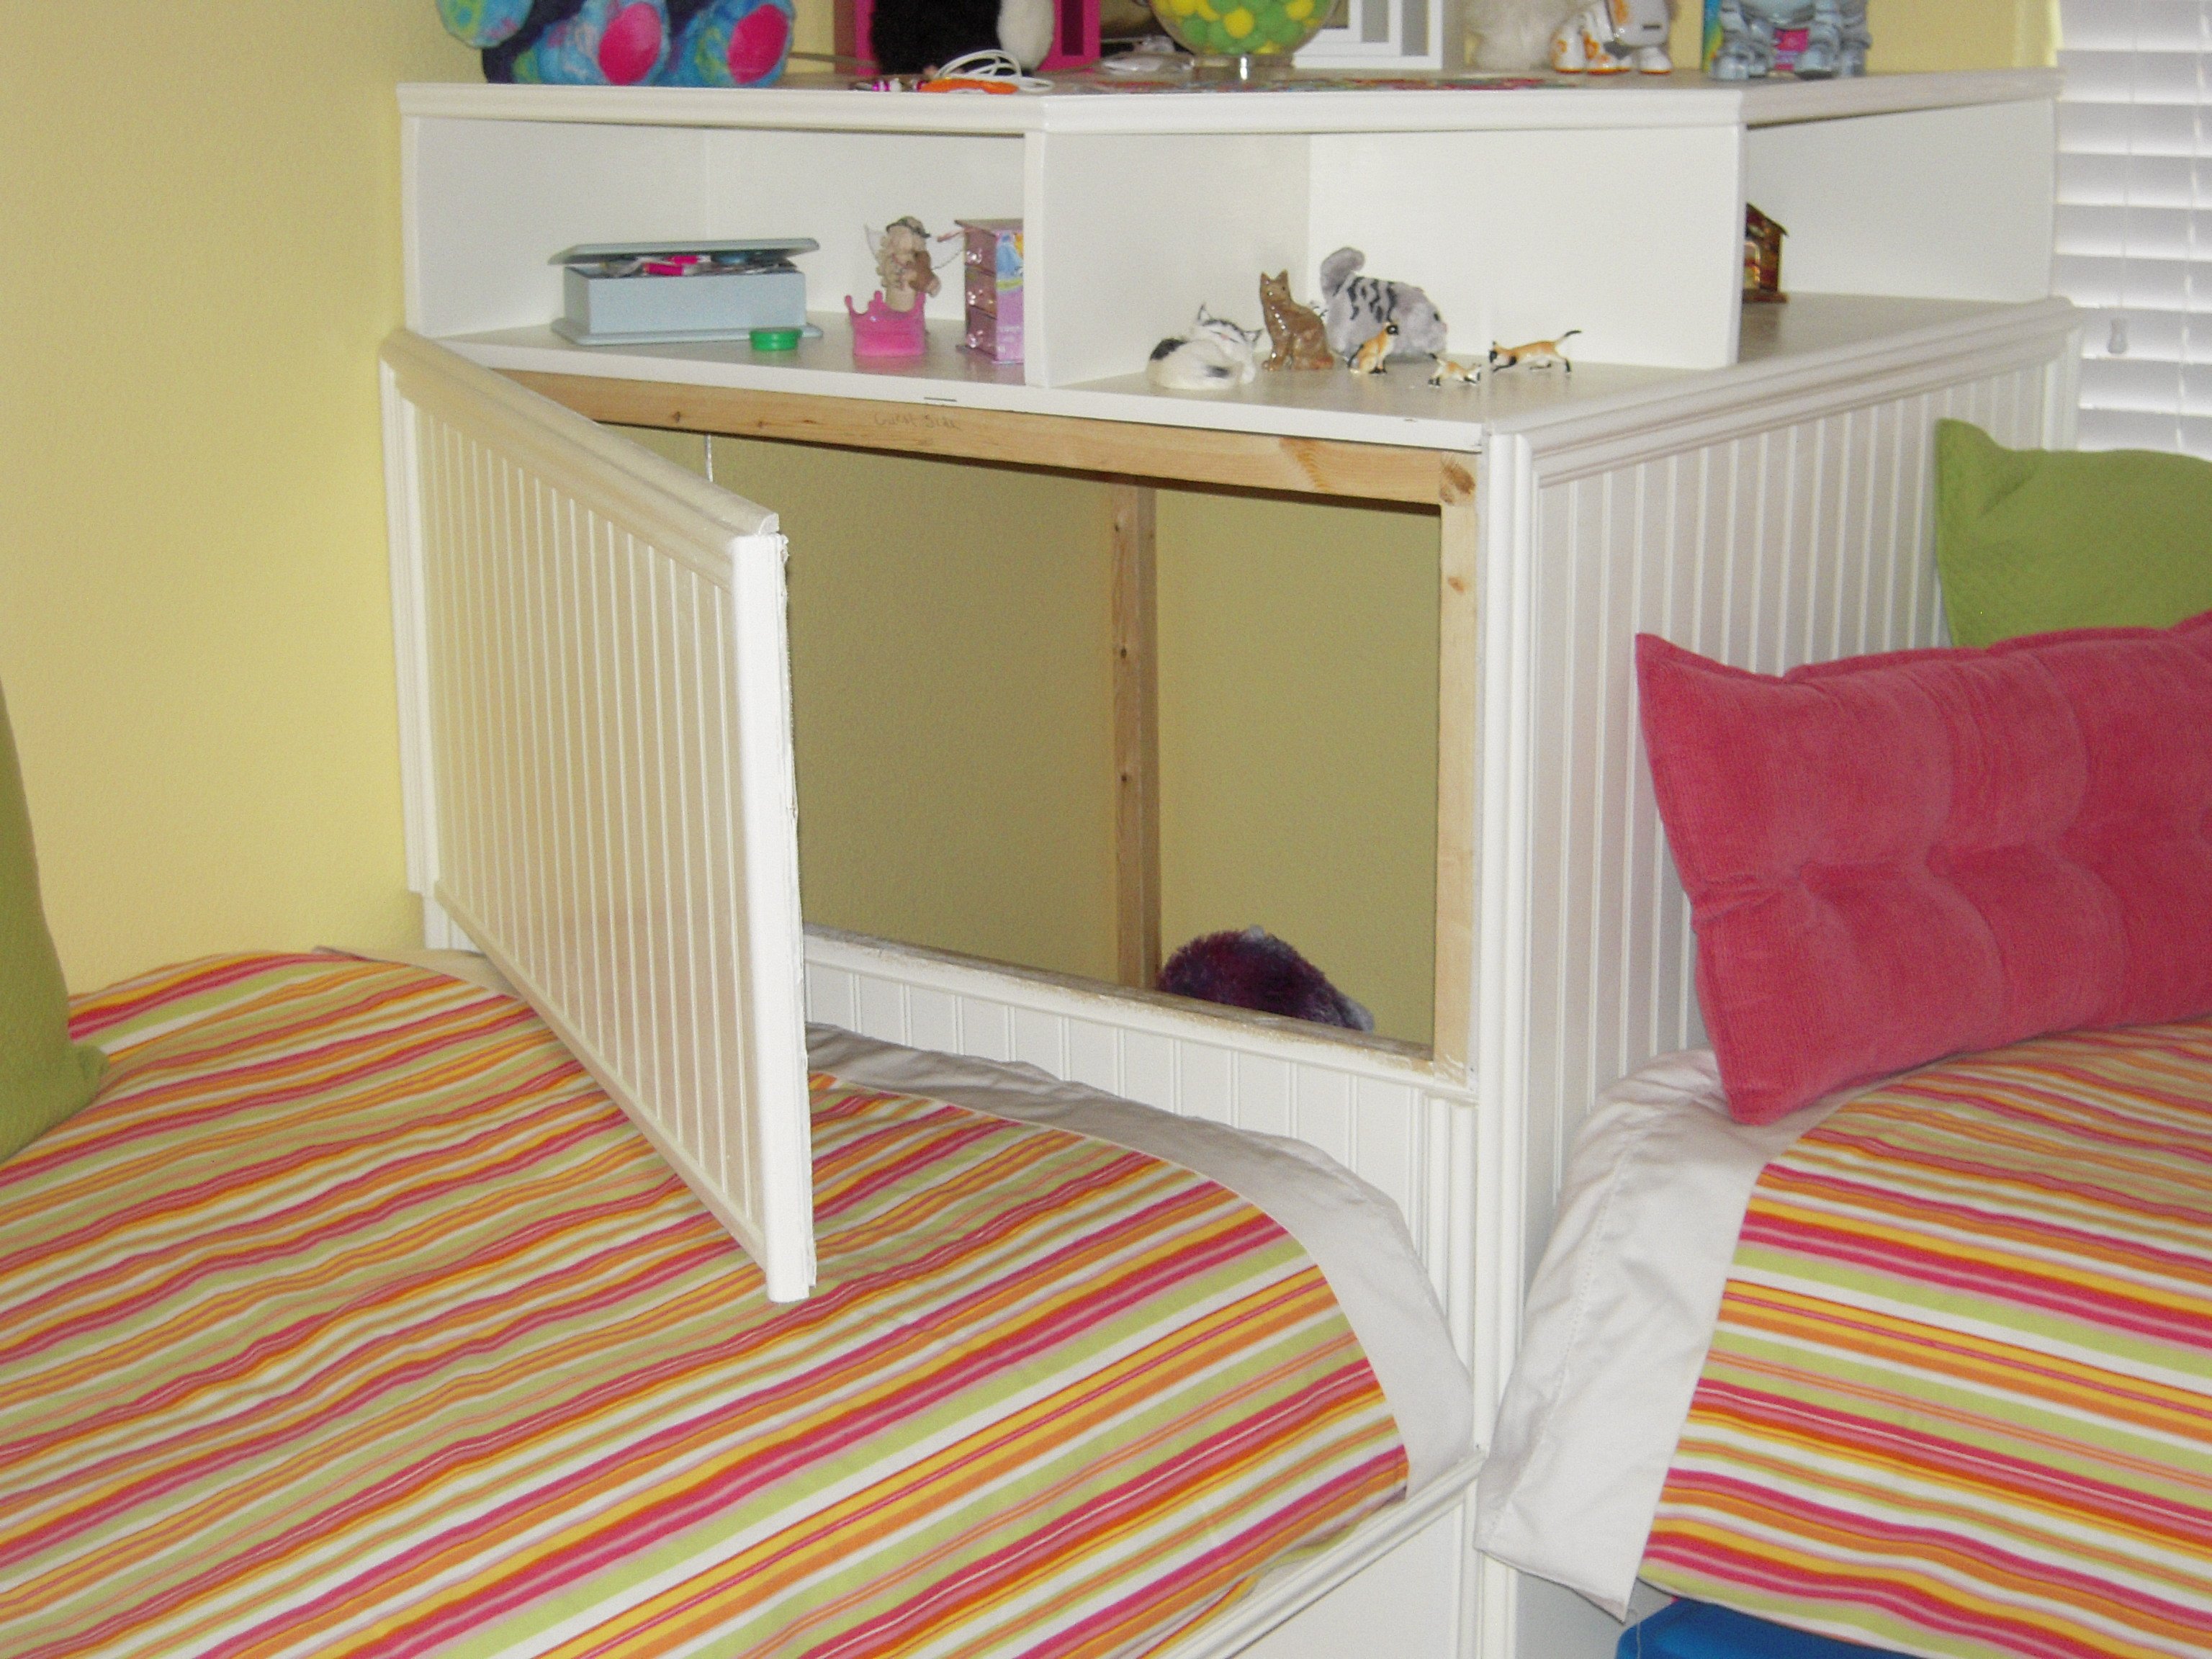
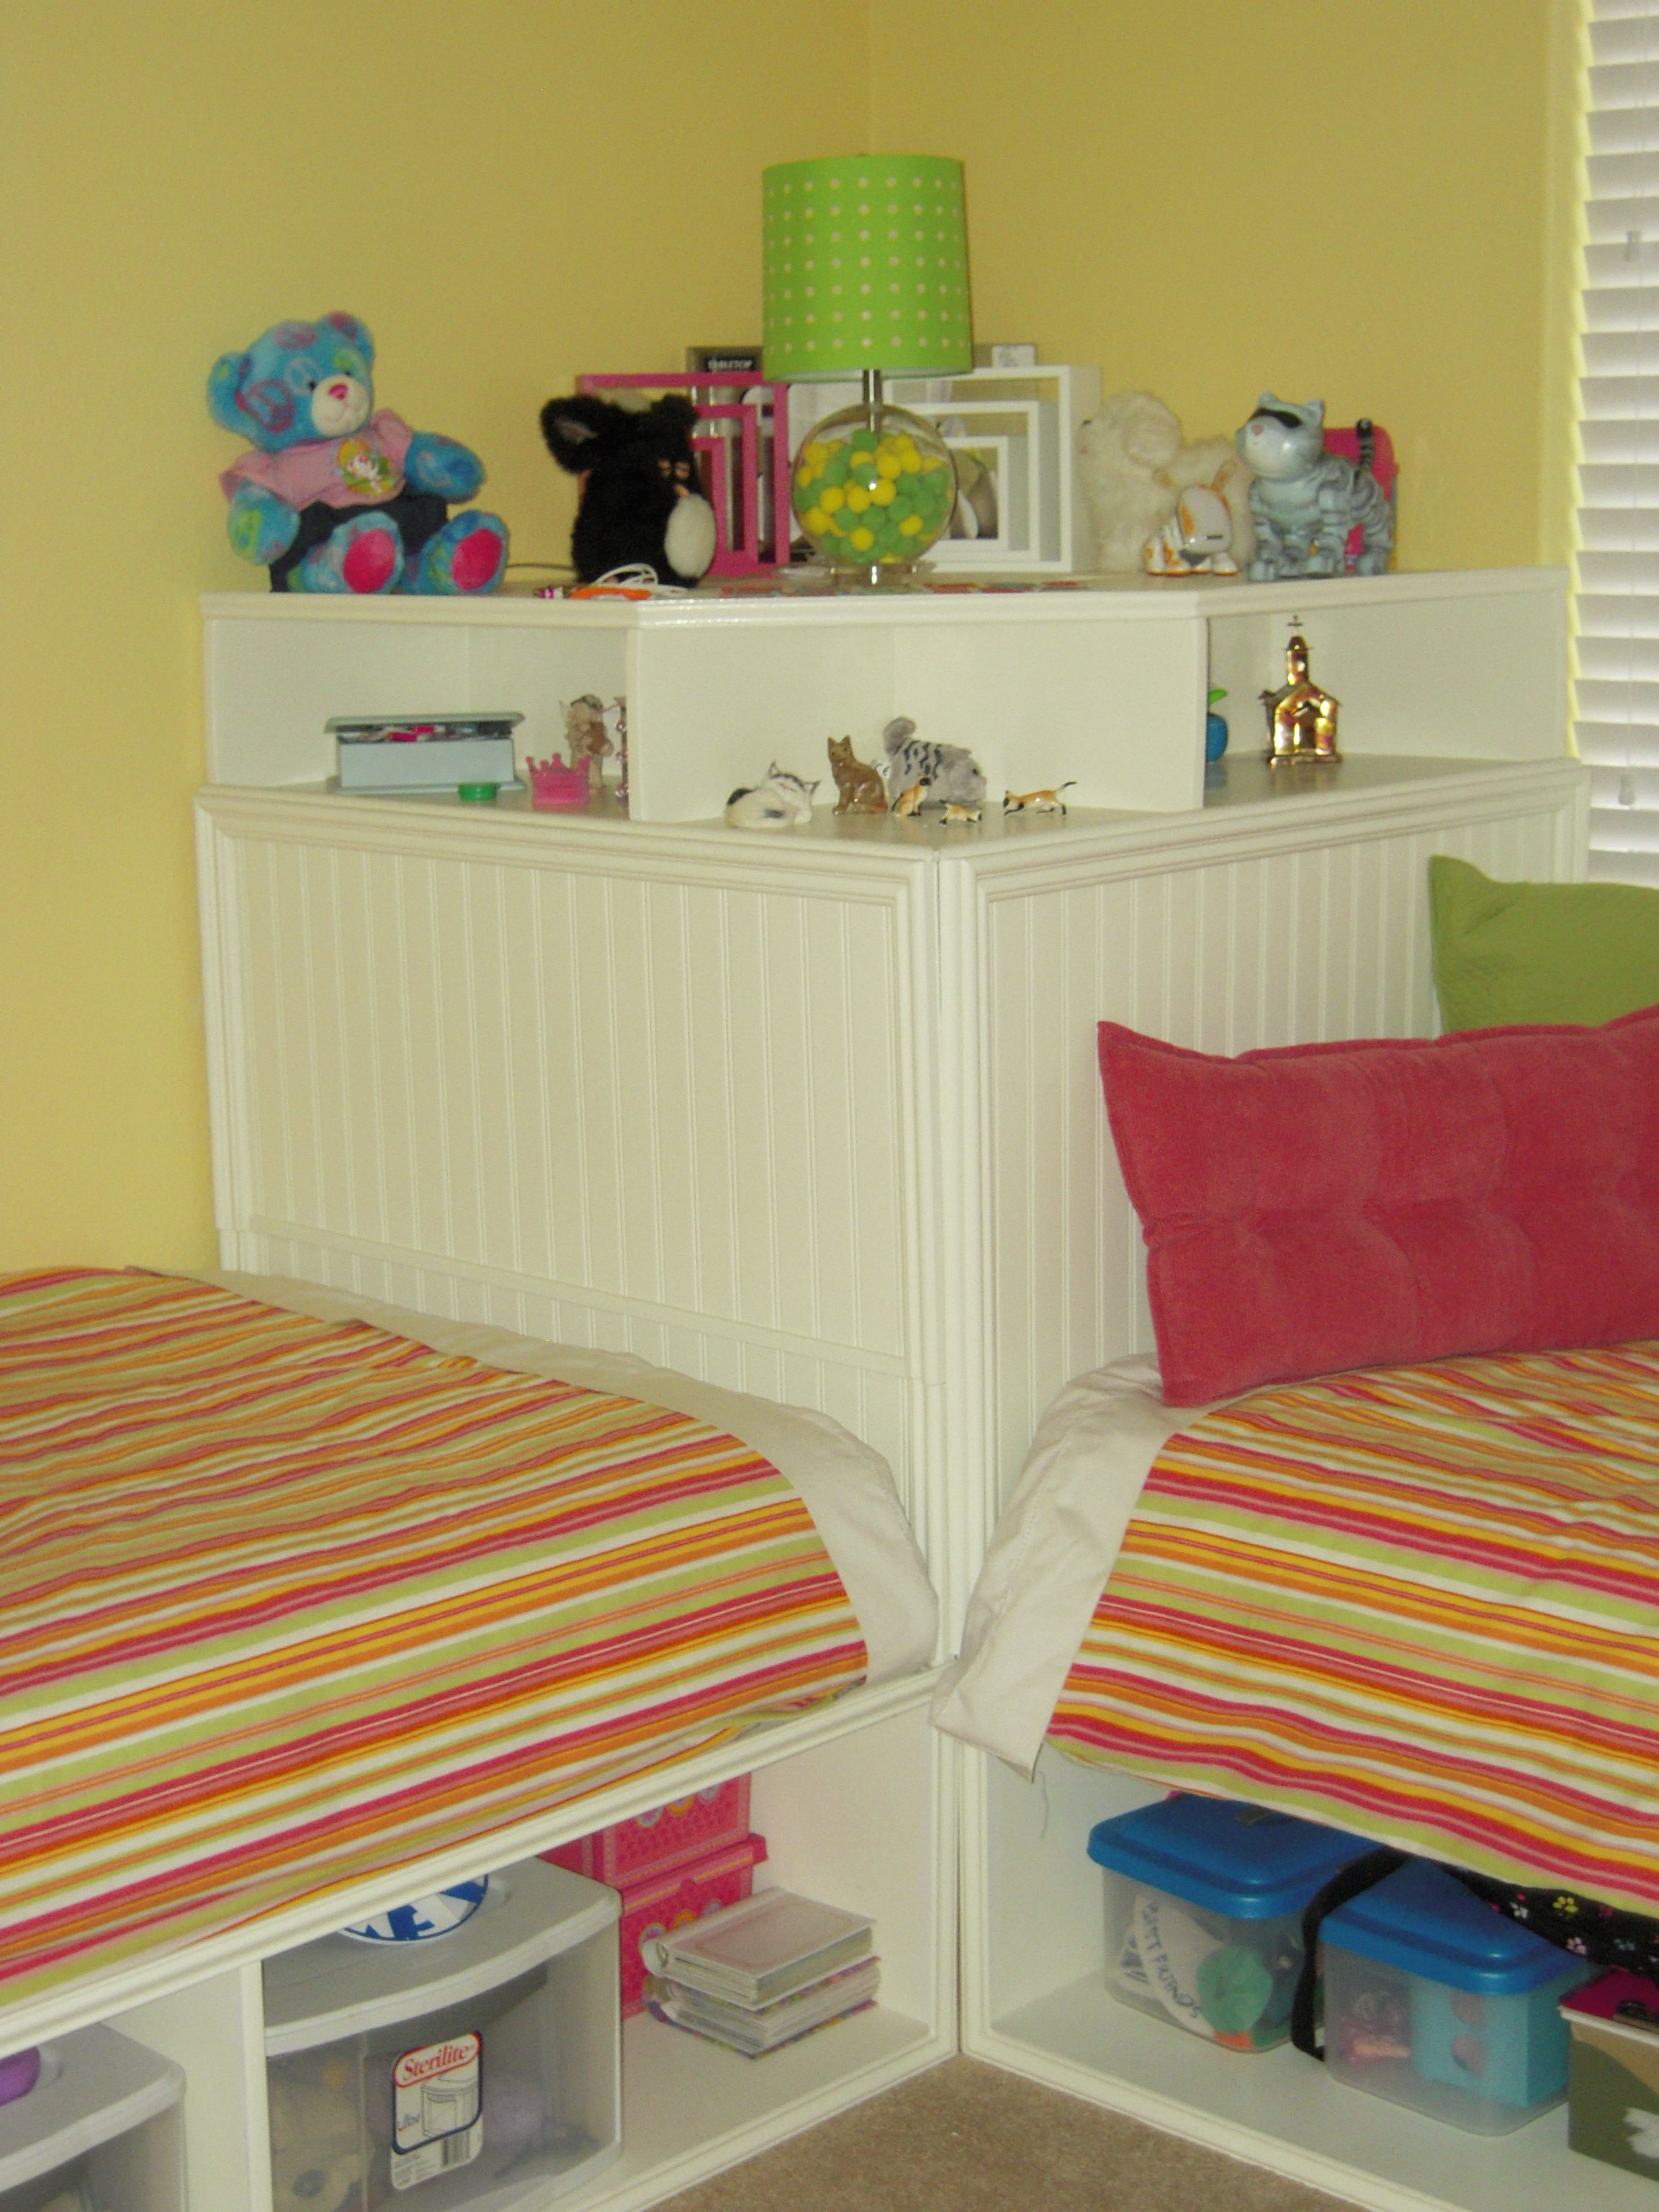
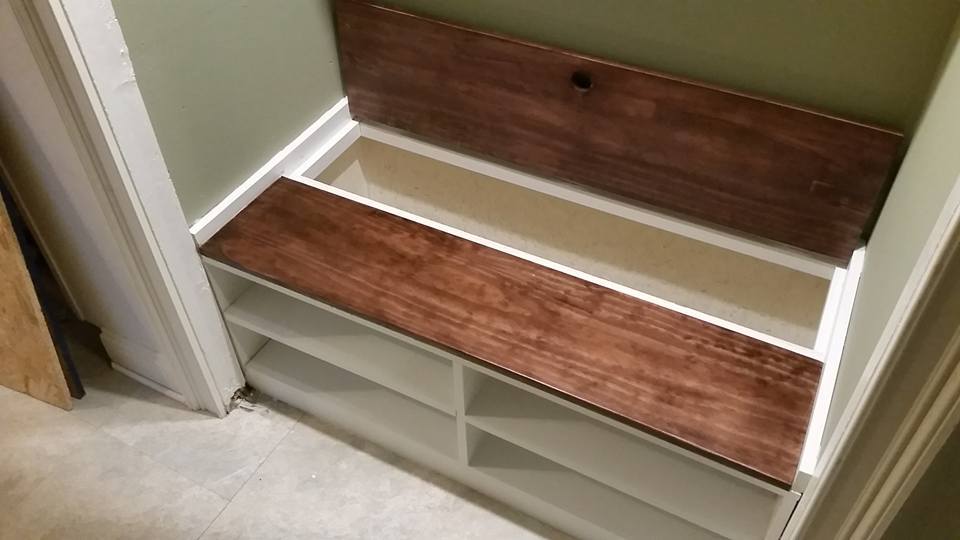
I loved doing this project. I used Anna's plans but modified them just enough to help be with my biggest problem, stuffed animals! :) I increased the height by eight inches and cut one of the bead board panels just above the mattress. Next I attached the top panel using a piano hinge. Finally, I reinforced the bottom panel with an extra piece of 1x1 (horizontally) so that my daughter can climb in to and out of the corner unit and not crack the bottom bead board panel. She now has a place to put all her stuffed animals and as a bonus a new "secret hiding place.

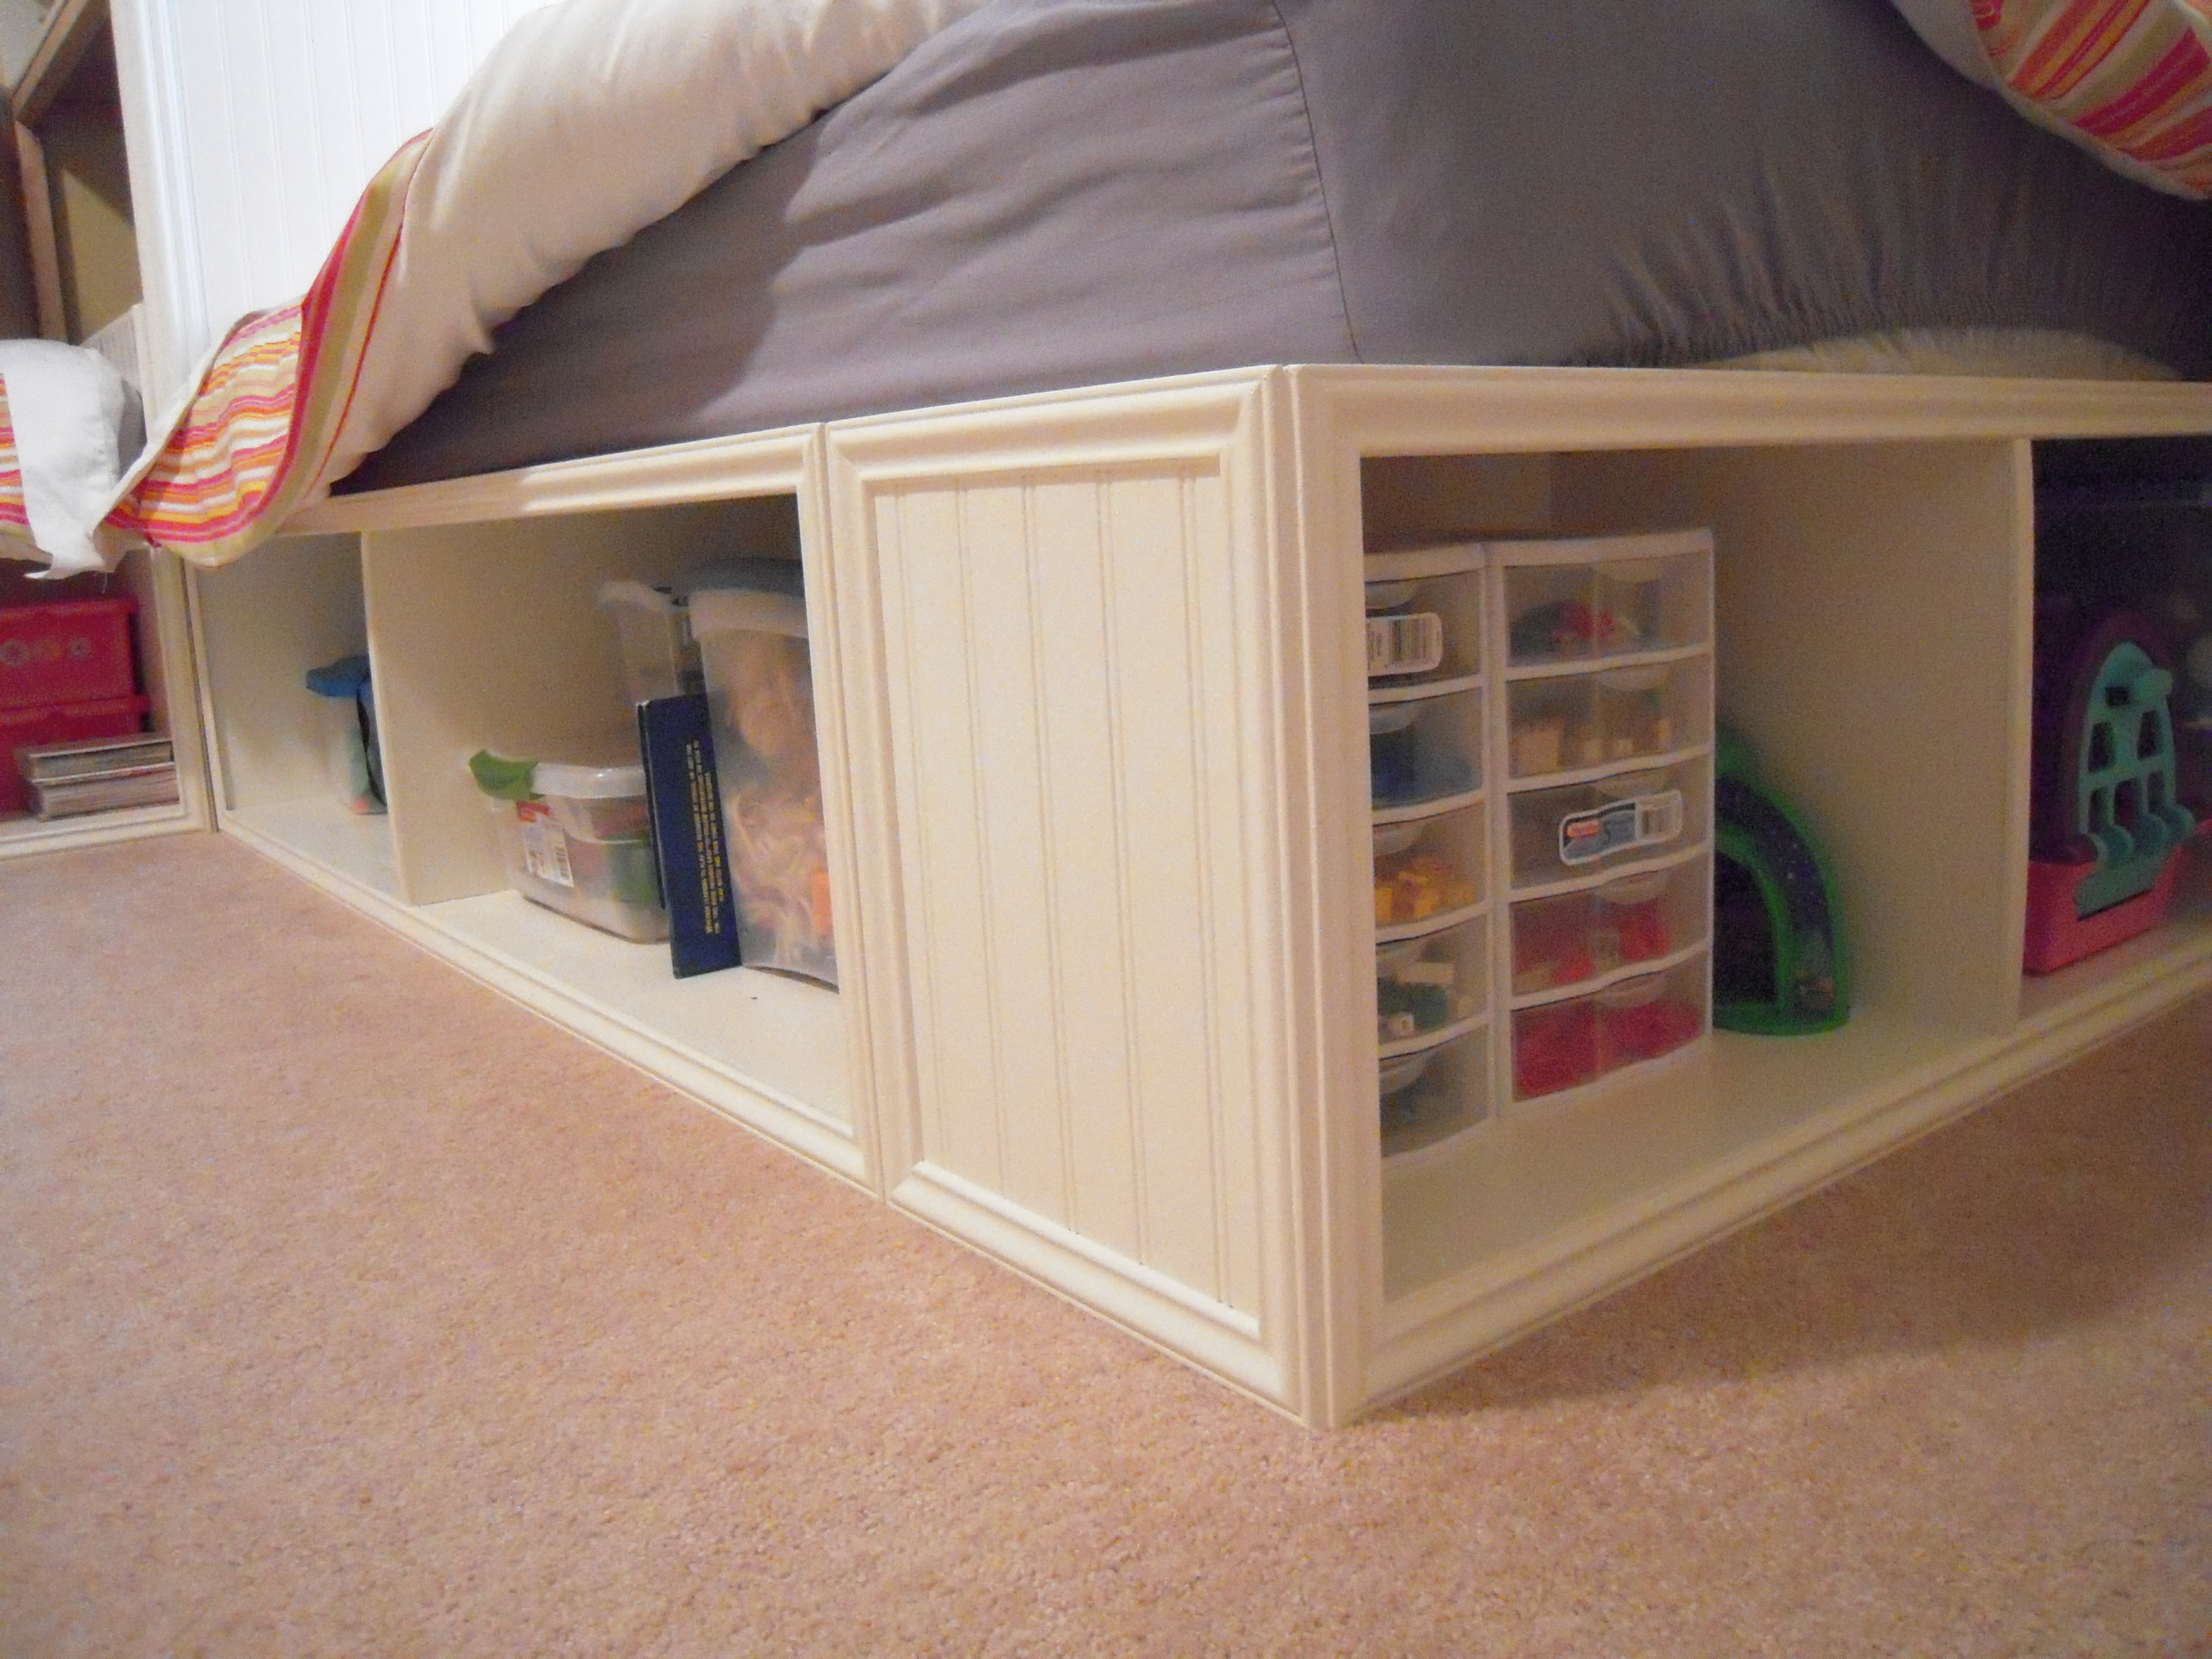
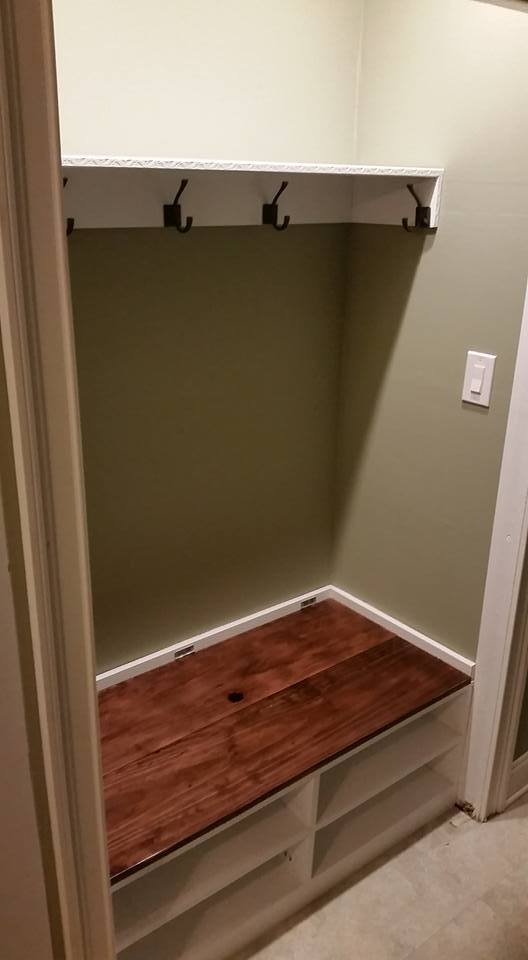
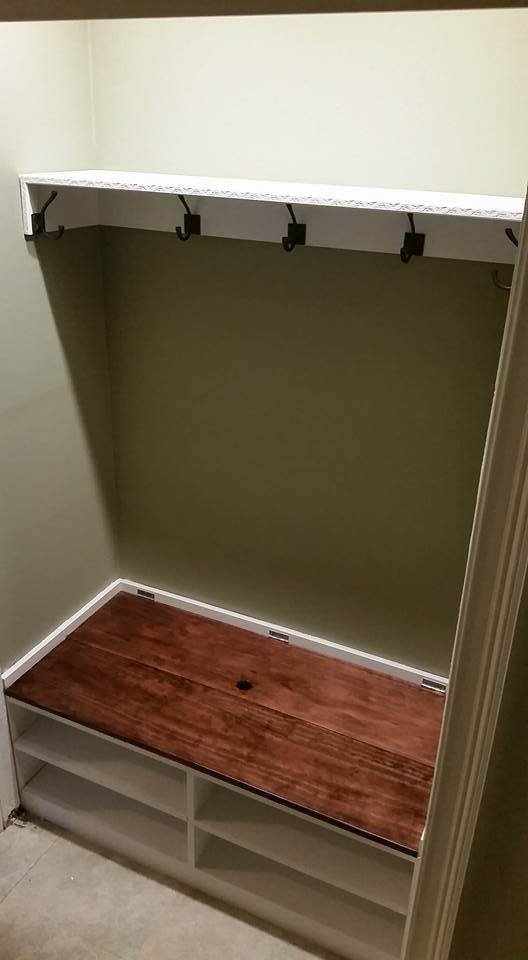
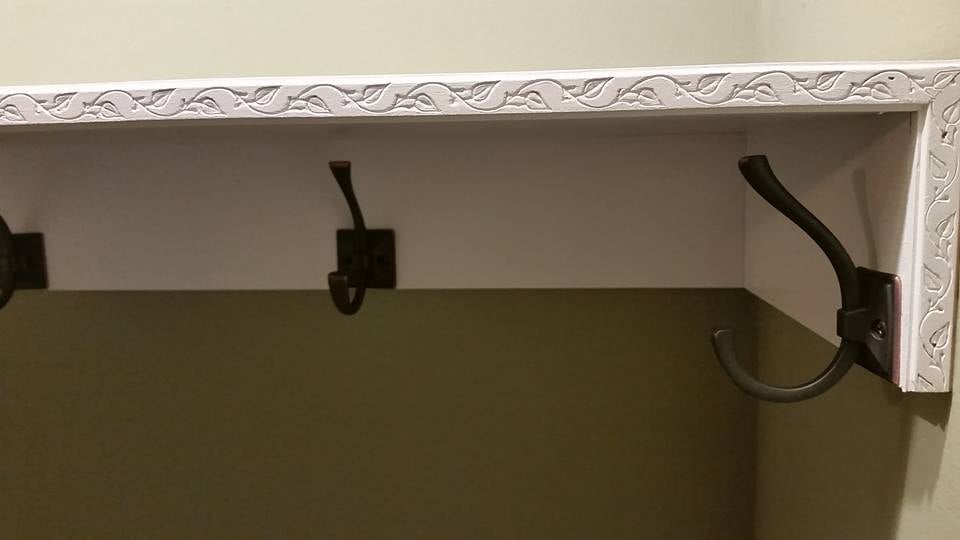
To spruce up the storage beds and corner unit I added moulding to the front of everything and then painted everything cream colored to match her dresser. The molding took extra time, but it was well worth it! Because I increased the height of the corner unit I also added a thin piece of plywood behind each piece of bead board (heard boards) to help reinforce it and would support the weight of someone leaning back on the "head board". All in all it was a great project to work on, Anna's design plans were easy to read and allowed me to make adjustments when necessary without any trouble.

Estimated Cost
$700-$800 total
Estimated Time Investment
Week Long Project (20 Hours or More)
Finish Used
Latex high gloss paint
Recommended Skill Level
Intermediate

Comments

stcarroll

Thu, 07/07/2011 - 12:36

This is so perfect! The trim makes it all look very professional. I love the idea of the door and utilizing the extra storage...something we all need more of! I also built the storage beds, but my girl's room isn't big enough for the corner unit, but if we ever move and they have a bigger room I will be back to look at you design for the corner unit! Good job!

My $30 Closet Makeover!

Submitted by scokenour on Mon, 07/11/2011 - 12:57

This project is closest to the Simple Closet Organizer, but I wanted to be able to re-use the existing components of the closet. The only purchased materials were one sheet of cabinet grade plywood and dowel rod holders (since I already had paint and screws).

Estimated Cost
$30
Estimated Time Investment
Afternoon Project (3-6 Hours)
Finish Used
sand, prime, sand, paint
Recommended Skill Level
Beginner

Comments

DIY Barn Beam Mantel

We always wanted a real barn beam in the house, we bought an old ash beam that we used to create a modern mantel.   After some research, I decided to save some money and mount it on a 2 x 4.  I've provided some instructions on my blog.

http://www.woodworkingfourdummies.com/blog/barn-beam-mantel-diy


Cheers,

Ian

Estimated Cost
We paid $150 for the hand hew barn beam mantel.
The only other costs were a 2x4 and a few screws!
Estimated Time Investment
Day Project (6-9 Hours)
Finish Used
Polyurethane
Recommended Skill Level
Beginner

Garage shelf and work bench

Submitted by Anonymous (not verified) on Wed, 08/10/2022 - 12:29

Used the plans from attached garage shelving to make a 10 ft, 24 inch wide shelf then used similar idea for workbench which I still need to put doors on. I love it! Such an easy plan!

Comments

Modified shoe bench

Submitted by mdj1281 on Mon, 11/16/2015 - 05:06

In our new home there was a 46" wide coat closet at the entrance. My wife wanted a place to sit down, take off shoes and put our coats and backpacks when we were home. I found Ana White's plans for this shoe bench and modified it to fit our space. The project took 3 days to complete due to the painting, staining and polyurethane, construction of the bench itself was quick. Previously I added a light switch and two 3" LED recessed lights in the ceiling. The project came out wonderful and I am very pleased. Thank you for the inspiration!


-Mike

Estimated Time Investment
Weekend Project (10-20 Hours)
Finish Used
White semigloss paint (2 coats), Minwax Red Mahogany 225, Varathane Polyurethane semi-gloss (3 coats)
Recommended Skill Level
Beginner

Comments

Kindergarten Bookcase

Submitted by MikeB on Tue, 11/15/2011 - 10:49

Here is my first attempt at this bookshelf. Don't own a pocket hole jig, so I used screws(1 x4 shelves) and brads(Molding) through side boards. Gotta invest in the Kreg jig for future projects. I used a jigsaw with a guide to cut the back panel. I cut it a little outside the line and sanded it flush with the sides. (no table saw, either)...

For the fronts, I used molding. I found out that the pre-painted molding, doesn't like to hold paint. Took several coats of the Hunter green to cover sufficiently for the base coat. Time estimate was given for construction and sanding. Thanks for the awesome design Ana. My wife's Kindergarten class should really enjoy this in the classroom along with the Kinder-nook.

Built from Plan(s)
Estimated Cost
less then 30 dollars
Estimated Time Investment
Afternoon Project (3-6 Hours)
Finish Used
Hunter green Latex as the base coat. Pure white latex, dry brushed after about an hour dry time after last base coat was applied. Finally, a Polyurethane finish to seal. This was my first attempt at dry brushing. It is very easy, just make sure that you blot your brush really good prior to brushing on.
Recommended Skill Level
Beginner

New bed for my youngest

Submitted by Anonymous (not verified) on Mon, 04/10/2023 - 15:45

Moved into a new house after a fire destroyed almost everything, rather than buying new beds for my kids, we decided to build! They turned out beautifully, and the kids love them! Decided to modify the camp loft bed, removing the stairs and using the foot of the bed a ladder style.

Comments

$15 Cedar Lemonade Stand!

My kid-o's love to sell lemonade. So, we made a trip to the local hardware store. Because I am terrified to use my husbands electric saw, any wood we purchased would have to be cut with a hack saw and a miter box. And since the stand is to be stored in the backyard, we opted to build it from cedar. We ended up purchasing 8 fence pickets for about $15 total. This was also to be a great way for my kids to apply the some of the knowledge they have picked up this year, our first year of homeschooling. My children, ages 7 and 9, measured all of the boards that needed to be cut. It turned out GREAT! We already had some extra boards, spray paint and screws on hand; so, the grand total was $15.00 for the entire project!

Built from Plan(s)

Bird House against predator

Hi I was tired to see the magpies and flickers destroying the nest and kill the sparrows After days of research i came up with this model that i tested last summer and believe me, it was successfully accepted by sparrows This year i made bunch of them, some different models till i get to the yellow one style that is perfect I really loved it and i'm here sharing it with you guys I will share plan for this bird house in my Instagram next week (June 12)

Comments

Outdoor sectional with drop cloth canvas rollouts

Submitted by dubtodd on Thu, 06/08/2023 - 21:09

Slight mod, table added from wood picnic table that the sectional replaced.

Comments

Camp Loft Bed with Stair, Junior Height

Submitted by Anonymous (not verified) on Sat, 02/27/2016 - 12:23

This was a fun project for my husband and I! My 4 year old absolutely loves her bed. We have plans to add a curtain to the bottom to let her open and close it for her reading nook (or as curtains for her "stage")! :) 

Estimated Time Investment
Weekend Project (10-20 Hours)
Recommended Skill Level
Beginner

Sliding Door Console

Submitted by Anonymous (not verified) on Thu, 06/29/2023 - 09:29

This cabinet was inspired by an Ana White project. My wife wanted more storage in our new home, and we had a sofa table at this location. But it was just a top, no shelves. I custom fit it to be flush with the window sills at the top and ends so it takes on a bit of a built in appearance. The top and bottom are oak faced plywood, all edges covered with iron on oak facing. As I was short of the expensive plywood, the ends, shelves and kick are doug fir plywood with a light oak stain; while not a perfect match gave a pleasing result that guests have not caught. The doors are 1/2" MDF, with a 2" solid oak end glued on where I routed the slots to open them. Slots are 1/4" +, 3/8" apart, and the top and bottoms of the doors routed to leave a 1/4" rail. The bottoms of the bottom slide slots have a slick poly tape in them, which really helps the doors to slide easily.

Sides and interior are brush finished with 3 coats of semi-gloss polyurethane, while the top has 5 coats. The MDF on the doors has one sprayed coat of white primer (oil based to avoid bringing up the MDF) with a final sprayed coat of mat finish enamel. I need to do one more step, light sand with 320 grit and paste wax the top to get that really fine finish.

While not as easy as Ana makes it look, it turned out pretty well. That hard part on a piece this size is getting all the pieces cut precisely, and I mean with less than 1/32nd difference, to provide a good fit. As it was I had to custom cut the oak opening ends on the doors to account for the small differences in widths at the top and bottom to obtain a nice fit against the sides. Next time I'll triple check all finish dimensions to make those small adjustments in parts before assembly, then triple check again for placement during assembly.

While I'll always see the small "errors", my wife is very pleased with the finished cabinet.

Al King, www.KingTechnologics.com

Great plan - added to make it even bigger

The plan is great, I followed the instructions exactly.  Then altered the plan to build a second rack that would fit the bottom of the door, with foil, saran and bag storage at the bottom.  Consequently it was heavy and I was very skeptical of the hollow core door anchors, but I installed 3 at the top and 2 at the bottom of both pieces.  It's very solid and secure....would probably have worked fine with even less. This door is only 32" wide but has plenty of room for this project.  Thank you, looking forward to trying more of your plans.

Built from Plan(s)
Estimated Time Investment
Day Project (6-9 Hours)
Finish Used
Primer and latex paint.
Recommended Skill Level
Intermediate

Comments

Double Outdoor Chair with Table

Submitted by Anonymous (not verified) on Fri, 09/01/2023 - 15:34

Good morning, I took this double chair with table and made it my own. Adding bigger arm rests and table top. This chair is so comfortable and sturdy. Totally love all your projects. Keep up the awesome work. Thanks agin

Perfect playhouse

Submitted by Anonymous (not verified) on Mon, 05/02/2016 - 06:37

Perfect little playhouse my husband built for our girls.   It took about a week to build by himself, but worth every minute.   He did a wonderful job.   Such a good daddy!

Estimated Cost
1400
Estimated Time Investment
Week Long Project (20 Hours or More)
Recommended Skill Level
Intermediate

Full over Full Bunk Bed

Full over Full bunk beds. Adjusted for Full from a twin measurement. only 1" off floor for more head room.extra rail bar coverage upstairs for my daughter who rolls out of bed regularly.

Built from Plan(s)
Estimated Cost
used common board mix and a few premium cuts. Pine was more costly. @$250
Estimated Time Investment
Weekend Project (10-20 Hours)
Finish Used
White primer/paint
Recommended Skill Level
Beginner

Comments

bjerfr

Sat, 07/11/2020 - 10:12

What measurements did you use to adjust to a full size?

Modified Simple Modern Outdoor Table and Benches

Submitted by AandTsMom on Wed, 05/16/2012 - 10:21

We wanted two smaller tables and four benches so we can rearrange as needed to make one big or two small tables. We can also move them back and forth between patio and deck. We hoped to have this done in a weekend but it took us two weeks working at night after the kids went to bed. I love how they turned out but I'm not sure I will try another project this involved!

Estimated Cost
$200
Estimated Time Investment
Week Long Project (20 Hours or More)
Recommended Skill Level
Intermediate

Comments

Finns-Dad

Sun, 05/20/2012 - 06:20

I really like the idea the two tables and being able to arrange them differently. Now I have to make more!!! Great job.

Back