Community Brag Posts

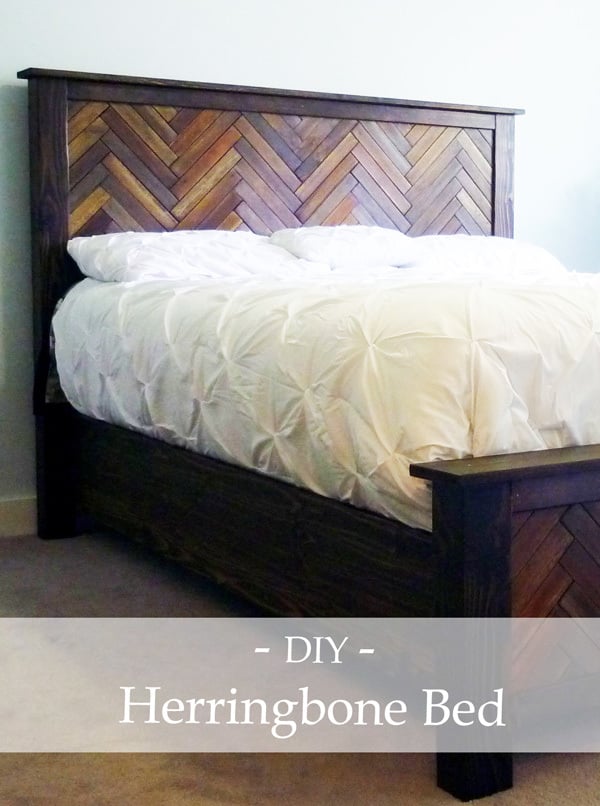
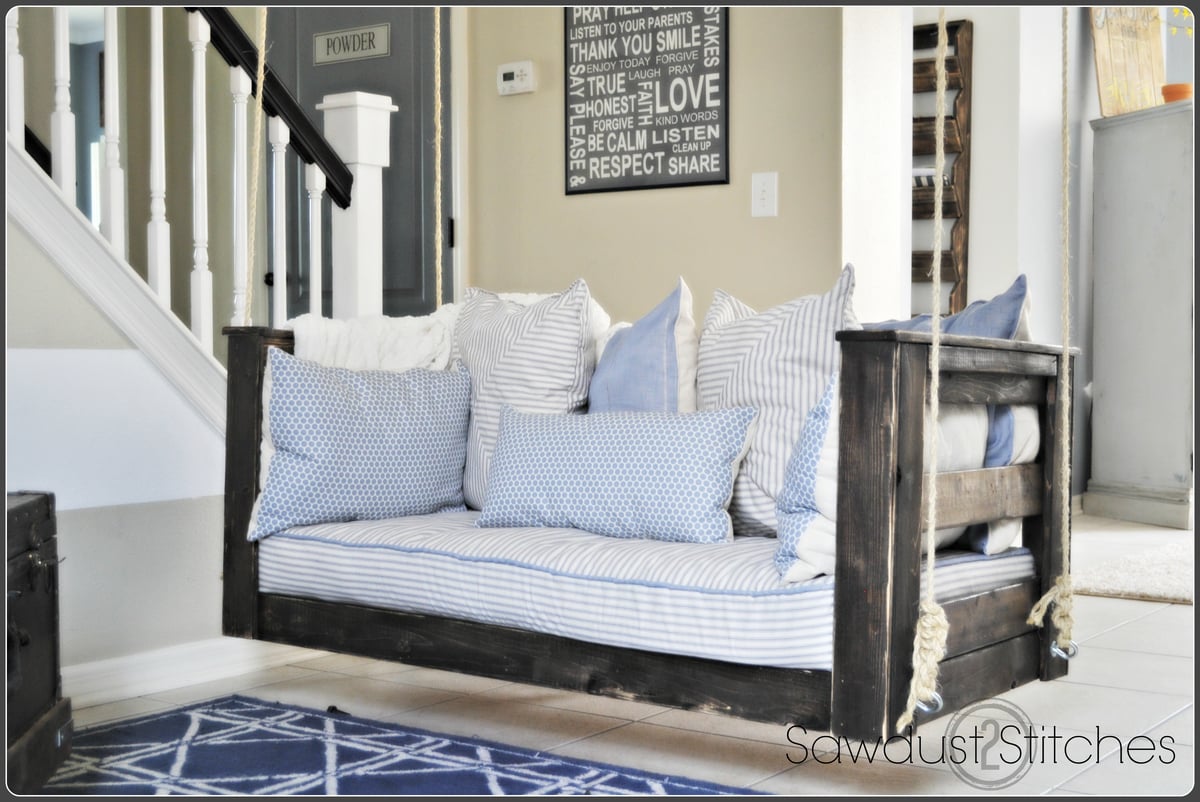
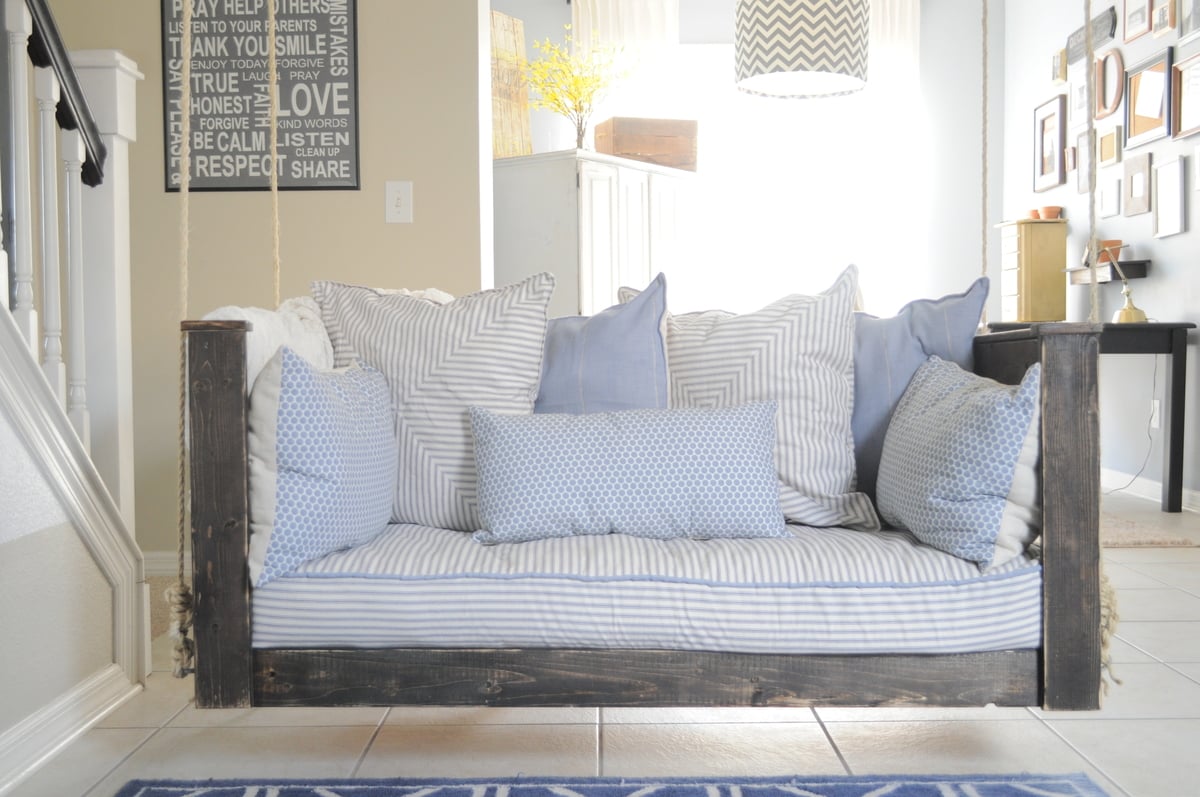
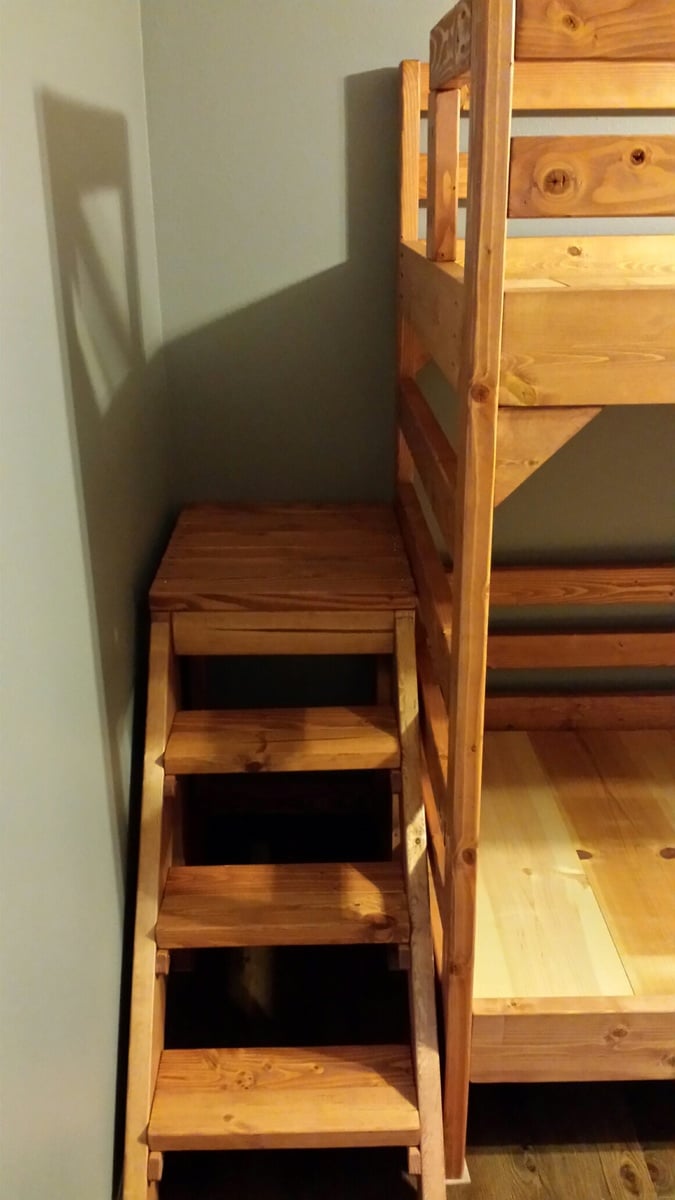
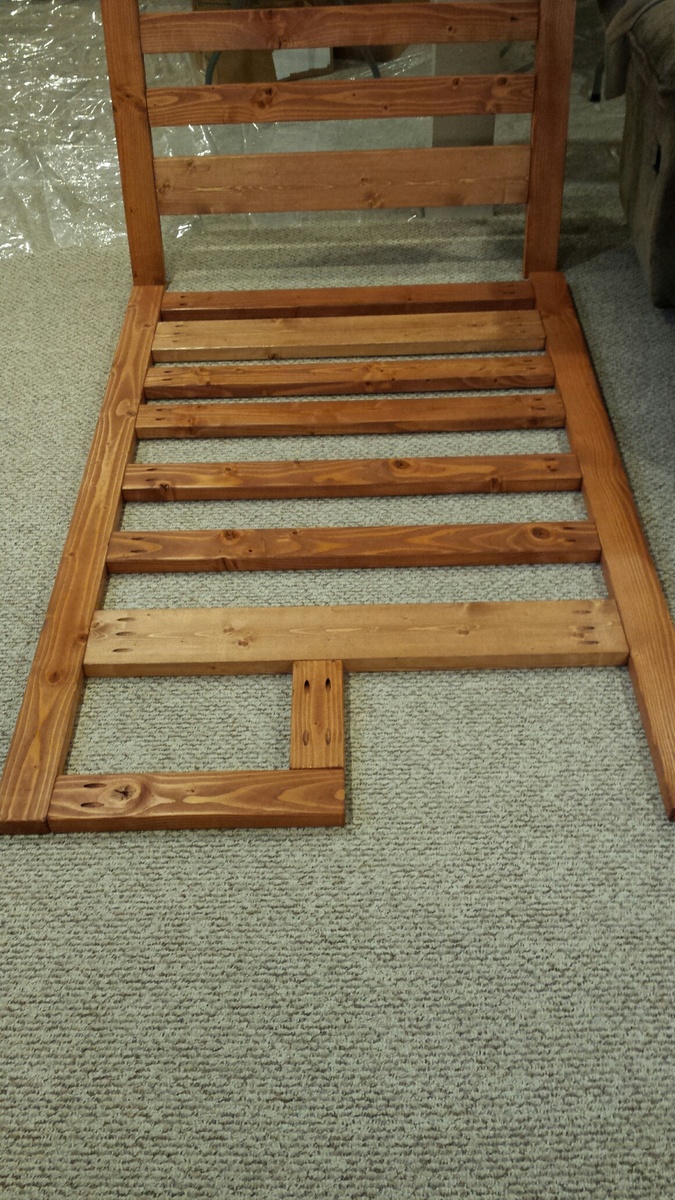
Herringbone Cassidy Queen Bed

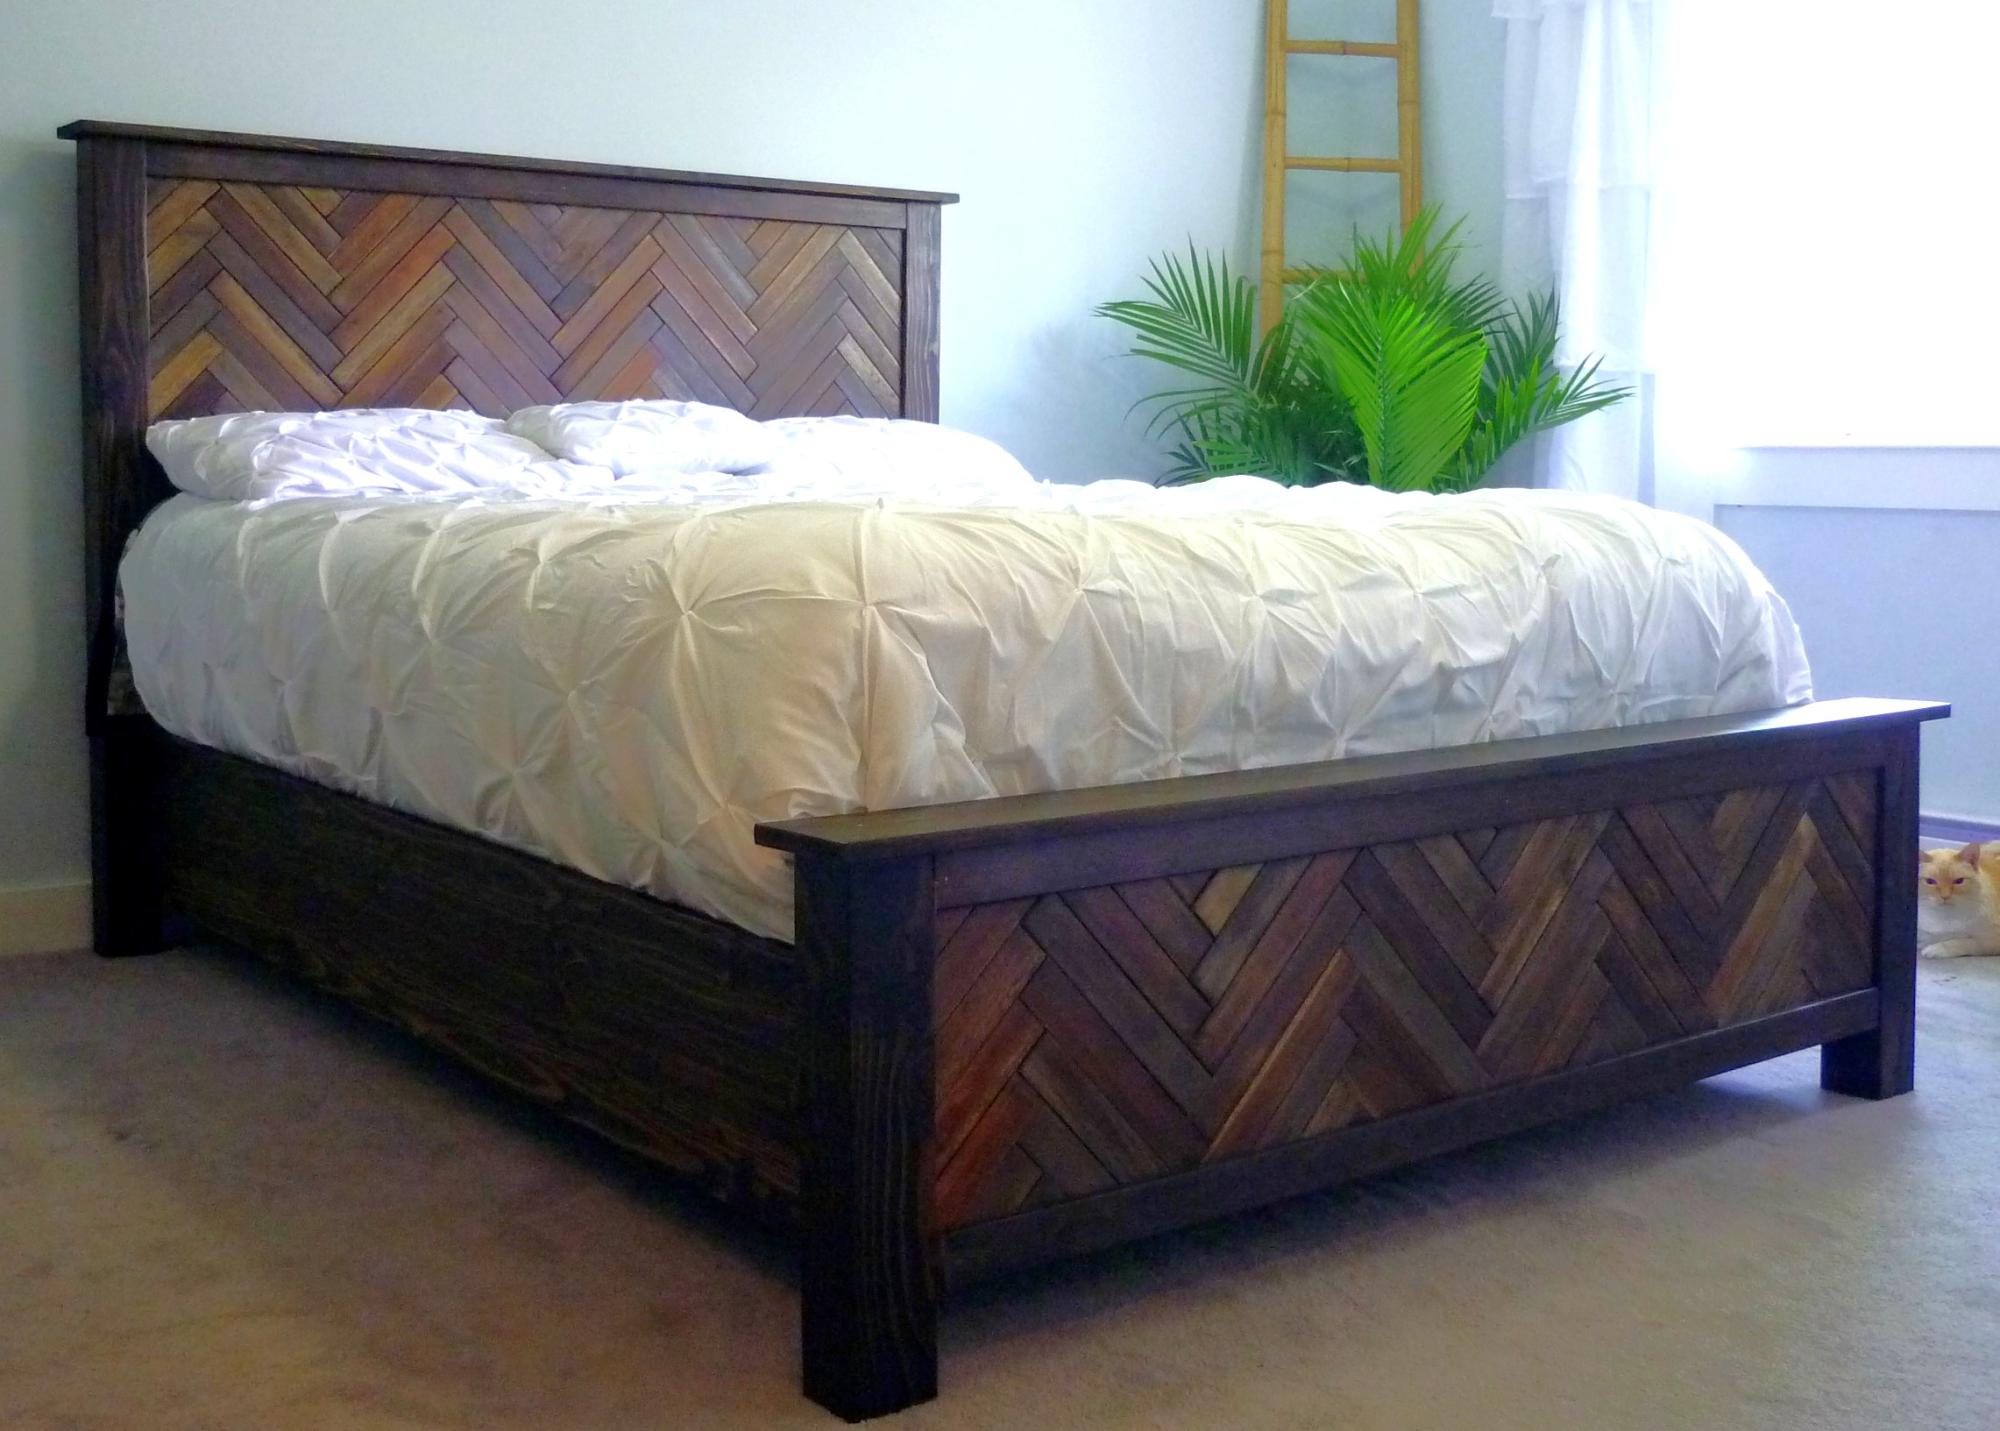
I have never made anything before, this was my very first project. I had a total blast! Our old bed was falling apart, so it as a great time to try out my hand at woodworking. I really wanted to use up some old wooden deck tiles I had in my garage. I didn't feel comfortable using a miter saw for a chevron pattern so herringbone it was! I am totally in love with this bed and seriously cant thank Ana White enough for making it so people like me can make things like this.

Built from Plan(s)
Estimated Cost
200$
Estimated Time Investment
Week Long Project (20 Hours or More)
Finish Used
MinWax oil based stain in Jacobean and espresso. Paste wax for finish.
Recommended Skill Level
Beginner

Comments

Pursuit of Handyness

Sun, 04/20/2014 - 10:49

This looks really nice. Are you sure this is your first project? I like the idea of using the deck tiles. Where do you find these and what type of wood are they? This may sound a little cheesy but I don't know where my life would be like if it weren't for Ana White and her blog. I absolutely love woodworking.

jeannajustfine

Sun, 04/20/2014 - 11:25

Thank you so so much! 100% sure its my first project..lol. The deck tiles I bought at Capitol Iron, which is a home and garden store we have here in B.C. They were display pieces so I got them for VERY cheap, almost free hehe. I know you can buy them new online, but they are pricey. As for the type of wood, since they were a display it is a hodge podge of diff kinds. Teak, eucalyptus, acacia I know for sure. I seriously LOVE this site. I have looked and found nothing even close to it. By far an amazing resource for any aspiring builder. I see you have made some pretty impressive stuff yourself!

jeannajustfine

Mon, 04/21/2014 - 12:18

Thank you :) and thank you so much for this site. It is amazing how much you have to offer. I honestly can say I would never in my life would have tackled something like this if I had not stumbled across your page. The amount of joy I feel every time I walk by that silly bed is nuts..lol. Too cool. Still cant believe I made that myself (with no boy help..lol) Cant wait to make some tables next! You're awesome.

anfrench

Fri, 05/29/2015 - 14:52

I just wanted to let you know how impressed I am by your finished product! I have been interested in building a bed, but since I have no experience I have been unsure where to start. But the fact that you did this as your first project has me very inspired! Well done!!!!!

shartam

Wed, 10/21/2015 - 13:21

Does anyone have the plans for this bed in California King size? I have a california king mattress and would really love to make this... I see this is for a queen size bed..

Thanks!

Tall Wood Planters

Submitted by Knuckles78 on Fri, 05/15/2020 - 05:27

Added some extra trim pieces to finish it out. turned out really nice!!

Built from Plan(s)

Comments

Double Outdoor Chair

Submitted by Anonymous (not verified) on Sat, 03/02/2024 - 11:16

I make these double benches with storage in the middle… very sturdy and comfortable…. Will last a long time….

Stewart Larocque

Cedar Outdoor Sofa

Submitted by Anonymous (not verified) on Sat, 10/08/2016 - 18:58

Made an outdoor sofa inspired by Ana White's plan. I made a few modifications including using 2x6's, hiding more of the non-pocket hole screws, using HD pocket holes in more areas and building an incline for the backrest. Cushions are Sunbrella from Lowe's.

Estimated Cost
about $550
Estimated Time Investment
Weekend Project (10-20 Hours)
Finish Used
MinWax Spar Urethane. 2 coats with sanding in between coats using 220 grit
Recommended Skill Level
Intermediate

Comments

Library Book Cart

Submitted by Terukosan on Wed, 09/12/2012 - 22:54

I built this book shelf for my daughter.

I made both the top and the bottom shelves an angled.
I used a finishing nail punch to emboss the name.

I mixed 3 different color stains to match the other furniture.

Used 2" caster wheels from Home Depot.

Built from Plan(s)
Estimated Cost
$55
Estimated Time Investment
Day Project (6-9 Hours)
Finish Used
Minwax wood finish (Golden Pecan, English Chestnut, Red Oak), Minwax Wipe-On Poly
Recommended Skill Level
Beginner

Comments

tommirhea

Fri, 09/14/2012 - 09:39

This is so pretty, I love the name in it! How wonderful. When you mix your stains, how do you know how much of each? Is is just a trial and error type of thing?

Terukosan

Fri, 09/14/2012 - 12:06

Hi tommirhea,

Thank you for your nice comment!

Mixing stains is just a trial and error. Pour into empty yogurt cup and mix with form brush. I like rustic looks, so, I don't care if color is not even ;-)

Have a nice weekend,

Sunny

tommirhea

Fri, 09/14/2012 - 12:14

Okay, thanks. I think I will try it on the desk I am going to make. I don't always love the color of stains, but never thought I could just dump different ones in to make my own :) I like rustic looks as well, makes it more unique.

Farmhouse X Table

This project was pretty dang easy. My husband and I whipped this out one weekend and were pleasantly surprised with the outcome. It now sits in our dining room and we LOVE it!! We used Rust-o-leum's Kona stain and it could not have been more perfect of a color. We used a brush to apply in sections and wiped it off immediately. Before staining we beat it with chains, hammers, screws, etc. And we also scraped it up and gouged it out with screw drivers, crowbars, and any other items we could find. Be sure and sand it down really well. We finished it off with a matte finish polyurethane. Thanks for the designs! We are on to table number 2 now! Jordi

Built from Plan(s)
Estimated Time Investment
Afternoon Project (3-6 Hours)
Finish Used
Rust-o-leum's Kona; matte finish polyurethane
Recommended Skill Level
Beginner

Comments

MichelleC

Mon, 09/24/2012 - 07:42

It's beautiful, great job! Did you have to use a pre-stain conditioner? I am definitely going to build this table and I like the color of that stain!

JJ and Shanon (not verified)

Mon, 10/29/2012 - 09:42

Hey, where can we find the plans for this table? We're new to this site. Thanks!

Outdoor Sofa & Coffee Table

Submitted by Ulrike on Fri, 07/31/2020 - 09:38

This project took a while. Stained everything before assembly which made it easier. Plans are easy to follow. Thank you for making them available. Our property is starting to look a lot like your website.

Estimated Cost
180
Estimated Time Investment
Weekend Project (10-20 Hours)
Recommended Skill Level
Beginner

Comments

jwood4

Mon, 08/02/2021 - 08:35

Looks amazing! What method did you use (pocket holes, dowels, deck screws, etc) to join the visible portions like the arms?

Crib Mattress Porch Swing

This is s porch swing I made to go in my front sitting room. I re-purposed my sons old crib mattress. It definitely gives the front room the "wow" factor.

Estimated Cost
$40.00
Estimated Time Investment
Afternoon Project (3-6 Hours)
Finish Used
Jacobean by Minwax
Recommended Skill Level
Beginner

Comments

REASMOM

Fri, 08/15/2014 - 16:09

I love it! I had never thought of re-using a crib mattress, might have to give this a try :)

Outdoor Privacy Wall

I built this wall to give us a little privacy when our family wants to lay out and go swimming. Also, to hide our neighbor’s ugly fence! The length for all pieces are 8’ long for no cutting and the widths are 1x2, 1x6, 4x4 with 3/4” spacing and about 100 or so deck screws. I modified the pattern from a photo of a fence I seen on HomeDepots YouTube.

Estimated Cost
140
Estimated Time Investment
Afternoon Project (3-6 Hours)
Finish Used
Thompson Waterseal - Semi Transparent - Autumn Brown
Recommended Skill Level
Beginner

Basement Shelving....

Time to get organized in 2017....and what better way than with some custom shelving. This was not too bad of a project to complete. It only took about 6-8 hours to cut, frame, and assemble everything together (thanks to an interruption or two). 'Twas nice to have a project for once that I didn't have to care about finishing the project with wood filler, sanding, painting. I am sure my wife thanks me more as I would have been another week getting things just right​​​​​! 

A few changes that I made from the original plans:

- used 2x8 for the shelving runs as I only was dealing with a 10ft run and was a few bucks cheaper to buy 8 boards vs 16 boards. Plus less cuts!!! 

-installed adjustable furniture feet in the supports to deal with sloping basement floor. Unexpected side effect was it was easier to slide the unit around in the basement as I assembled it. 

Outside of those changes I remained faithful to the original design. I didn't bother filling the screw holes as we will be hiding the shelving unit with a curtain once  we turn the room into a TV/Office area. 

Also as it wasn't 100% clear from the original plans, but the height measurements for the shelf supports are to center... not sure why it didn't register with me right away... but just in case anyone else didn't realize that as well. 

Estimated Cost
$150 for wood, screws, wood glue, and adjustable furniture feet
Estimated Time Investment
Day Project (6-9 Hours)
Finish Used
None
Recommended Skill Level
Beginner

Dining room sideboard

Submitted by dougw on Fri, 12/19/2014 - 09:12

I made a few modifications from the original plans as I wanted to have some visibility into the cabinets. I used natural pine and finished with a tea, vinegar/steel wool solution to give it the reclaimed wood look.

Built from Plan(s)
Estimated Cost
$400
Estimated Time Investment
Week Long Project (20 Hours or More)
Finish Used
Tea then Vinegar/Steel Wool. Protected with wax.
Recommended Skill Level
Intermediate

Comments

Jessica b

Wed, 08/17/2016 - 23:42

Would you have plans available for the modifications that you made? This is beautiful!!

Potting table

Submitted by OlgaB on Tue, 02/02/2021 - 17:15

Potting table, was easy to build, very strong and stable because of the size of the wood used. It's a big table -- an entire dog fits inside :)

Built from Plan(s)
Estimated Cost
150.00
Estimated Time Investment
Afternoon Project (3-6 Hours)
Finish Used
Ready Seal, Burnt Hickory
Recommended Skill Level
Beginner

Comments

Ana White Admin

Wed, 02/03/2021 - 10:32

I love your comment about an entire dog fitting inside, get that dog a work belt, lol! What a wonderful project, love the woodsy setting for your photo! Great job:)

Ava's Play Kitchen

Submitted by tcalford on Wed, 12/31/2014 - 09:10

We really wanted to give our 2 year old a play kitchen for Christmas. We also didn't want to spend the money on the likes of the Pottery Barn set, and weweren't sold on the lesser-expensive options. Fortunately, a quick internet search led me to Ana White's website and plans for this play kitchen. As someone who has never built anything before, the plans seemed very doable. All of the brag posts were also inspirational and sold me on starting this project. I worked on this an hour or so after work for a couple of weeks, and then a few longer nights running up to Christmas Eve (always a bit of a procrastinator!). As neither my wife or I know how to sew, we decided to turn the space underneath the sink into a cabinet. The paint color was left over from painting our kitchen and family room, and we decided to stain the stove and counter tops. Overall, we are very pleased and proud with how this turned out, and our 2 year old loves playing with the set!

Estimated Time Investment
Weekend Project (10-20 Hours)
Recommended Skill Level
Beginner

Comments

JoanneS

Wed, 12/31/2014 - 13:15

This looks awesome! Love all the details and the green color with the stained counter. Great job!

Modified Camp Loft Bed with Stairs into Bunk Beds

Submitted by tarzan21 on Sun, 02/08/2015 - 11:46

Using the Junior Height Camp Loft Bed plans...

I raised the height from 65 to 67 inches to better accomodate a bottom bunk.  Added bottom rails and extra 2X4s for the head board.  

I shortened the width and length of the stairs to better fit in the room, and in doing so, made a small mod to the post by the stairs to prevent the boys from falling down the stairs.

Kids Love them

Estimated Time Investment
Week Long Project (20 Hours or More)
Finish Used
Minwax Cherry Wood and Satin Poly
Recommended Skill Level
Intermediate

Our Thanksgiving Family Project

Submitted by loniwolfe on Wed, 03/09/2011 - 16:50

My husband, step father and I built these Thanksgiving weekend (2010) and my mom got us a half bushel of oysters to snack on and made awesome steamed mussels with bread for dinner. This was a very fun family weekend.

I modifyed the plans a little to make the arms angle in a bit instead of being straight boards and also created the curved front. Then after building the first chair, Pat decided to make the second chair's back rest taller and cut angles to match the arms.

I picked intermediate because of needing a miter saw for all the different angles needed for getting the front right.
Also, It took one day for each chair

Built from Plan(s)
Estimated Time Investment
Weekend Project (10-20 Hours)
Finish Used
To my knowledge, Pat has not yet stained them, but once he does I will take more pics and find out what he used!
Recommended Skill Level
Intermediate

Outdoor bar

Submitted by Flowerchld on Tue, 08/08/2017 - 17:03

Outdoor pallet bar with sink I found in the garage. Just a dumping sink under cabinet,not hooked up to plumbing.

Estimated Cost
$200
Estimated Time Investment
Weekend Project (10-20 Hours)
Finish Used
Paint, stain over paint,poly, slate tile sealer
Recommended Skill Level
Intermediate

Comments

trindadt

Thu, 05/09/2019 - 09:05

I love this design it looks like the bar on the new show Abby's.  If you have plans for this bar I would sure like a copy.  Thanks in advance for any help you can give in this matter.  

adirondack chair

Submitted by JennyInGex on Tue, 06/18/2013 - 12:47

LOVed building and painting this. Although using European wood is a headache as of course the standard wood sizes are different. ... always 4-6 mm off... so all my things are crooked. I don't care though and it is my new favorite chair. I used ArchiTect blue exerior color, two coats, and pine wood.
I am grateful for Ana White's metric conversion chart in the book I now have but when going to the hardware store here, I am confronted with numerous standard wood sizes that are not the same as in the US!

Estimated Time Investment
Weekend Project (10-20 Hours)
Recommended Skill Level
Beginner

Sawhorse Table

Submitted by Alark on Wed, 06/26/2013 - 06:32

New table for our patio space. This was a fun, relatively easy project. The weather was my only hiccup in the building. Spent an afternoon making cuts, the next day sanding and staining and then assembly. Hubby saw the pieces laid out before staining was complete and loved the two tone look, so I went with it. I used minwax Kona for the stained area and covered everything with Spar Varnish.

Built from Plan(s)
Estimated Time Investment
Weekend Project (10-20 Hours)
Finish Used
Minwax stain - Kona,
Spar Varnish
Recommended Skill Level
Intermediate

Comments

Back