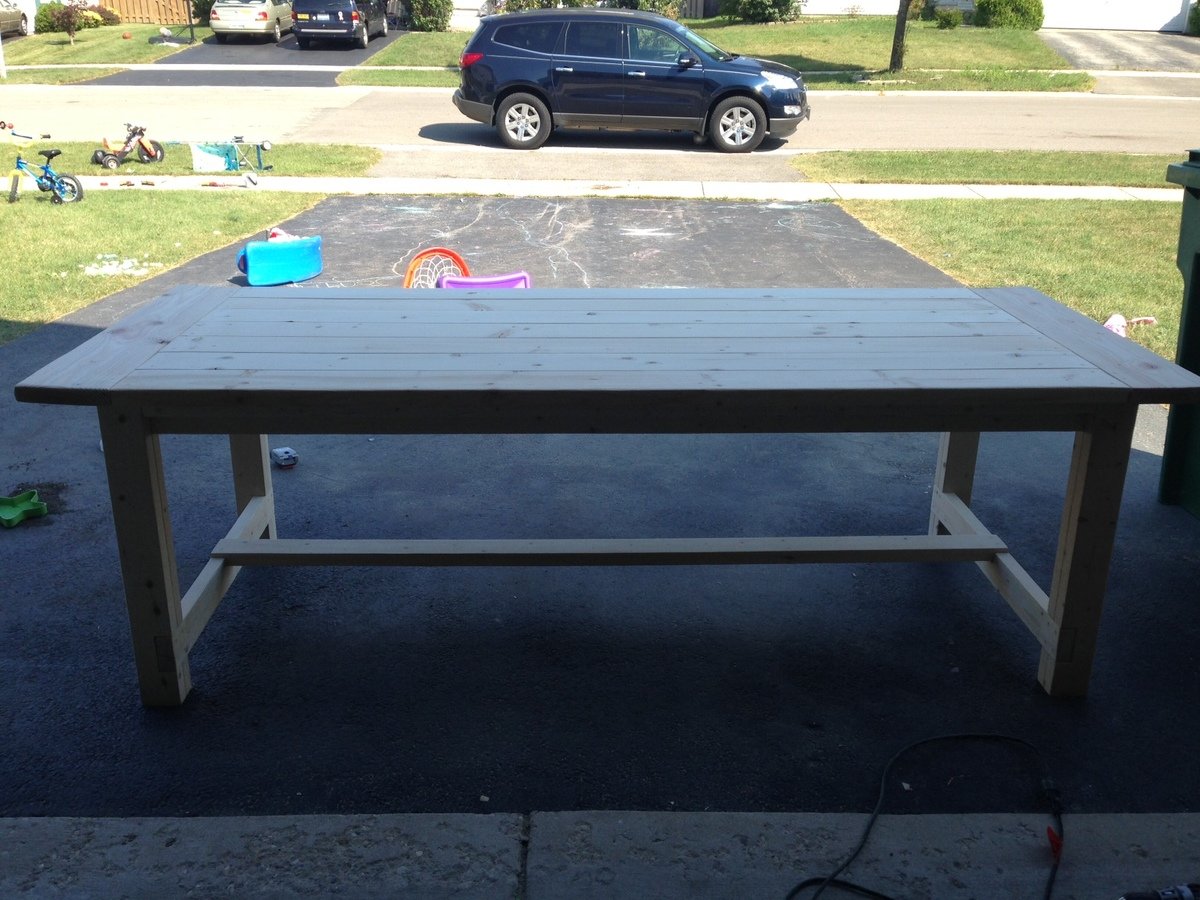
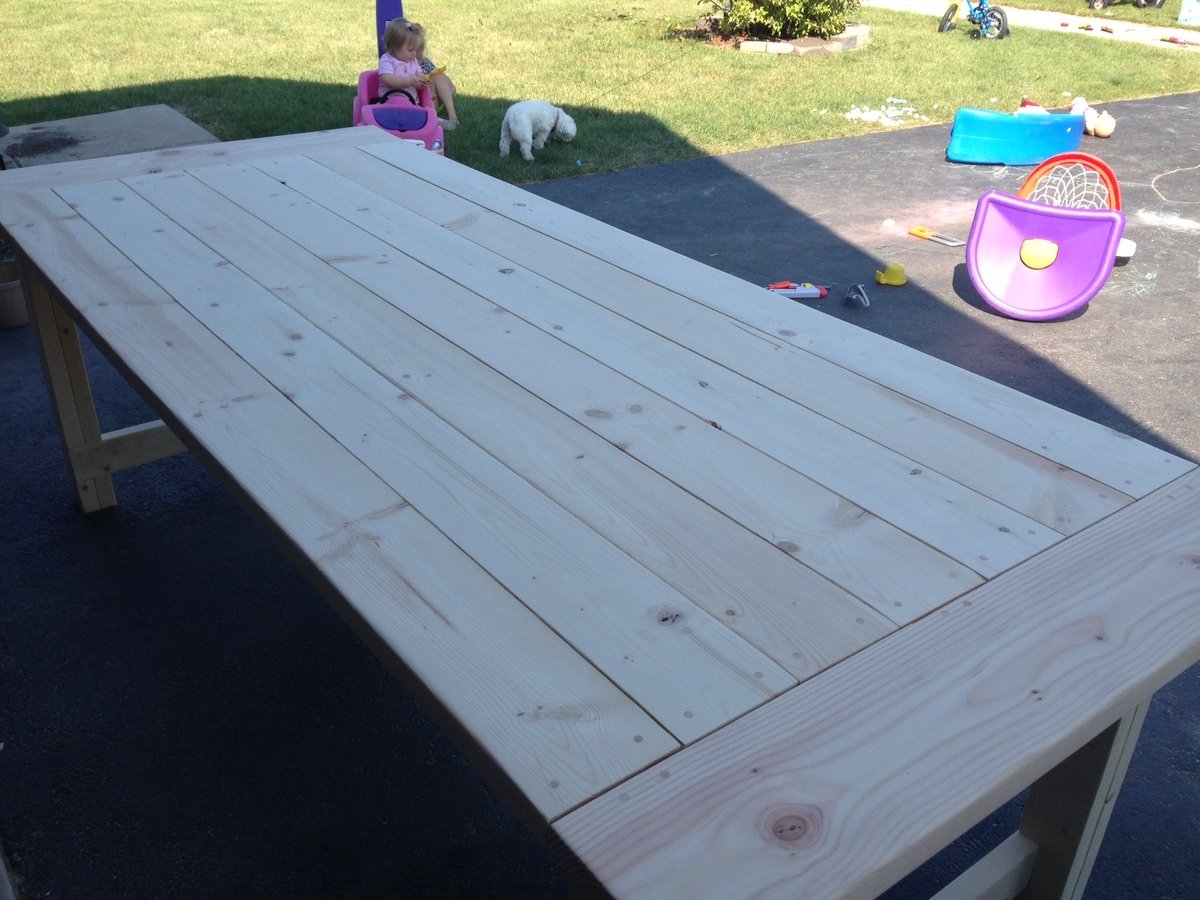
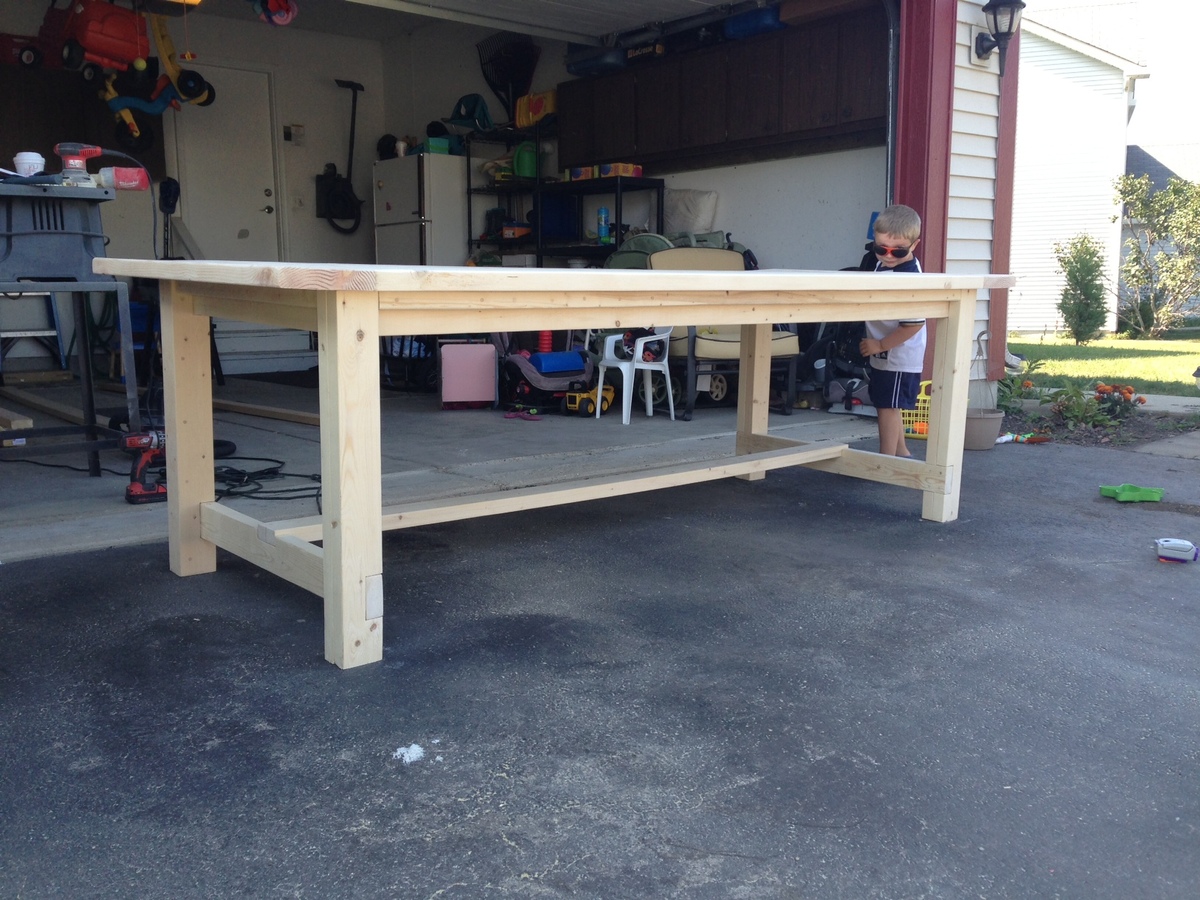
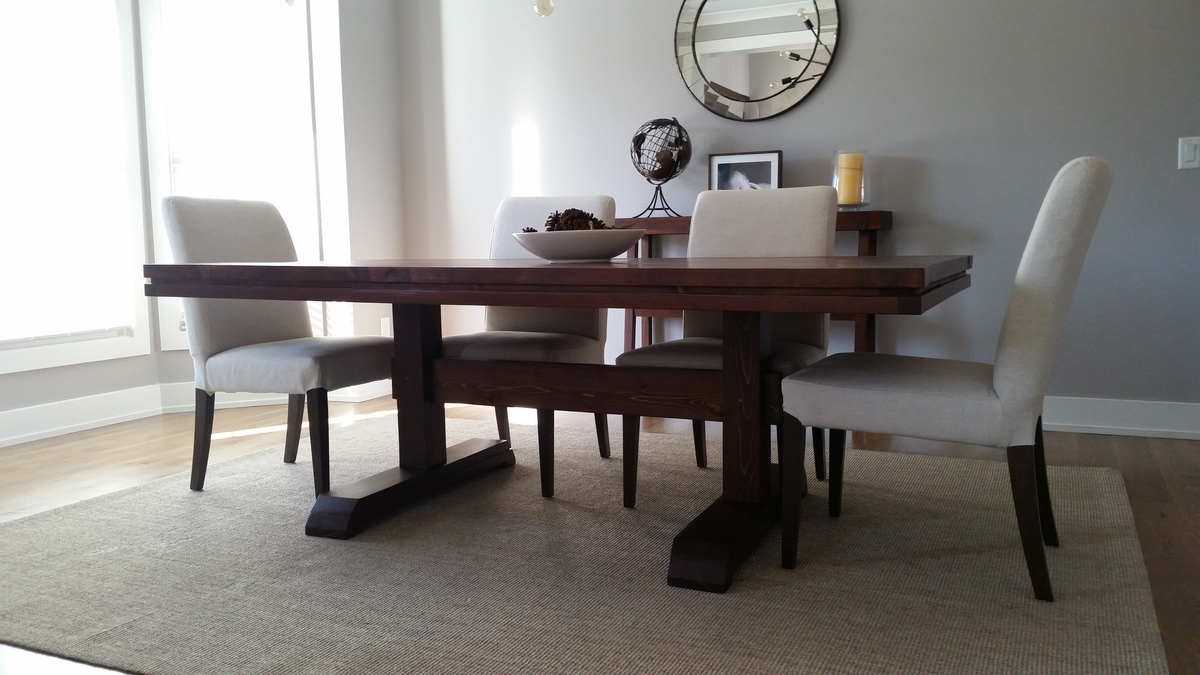
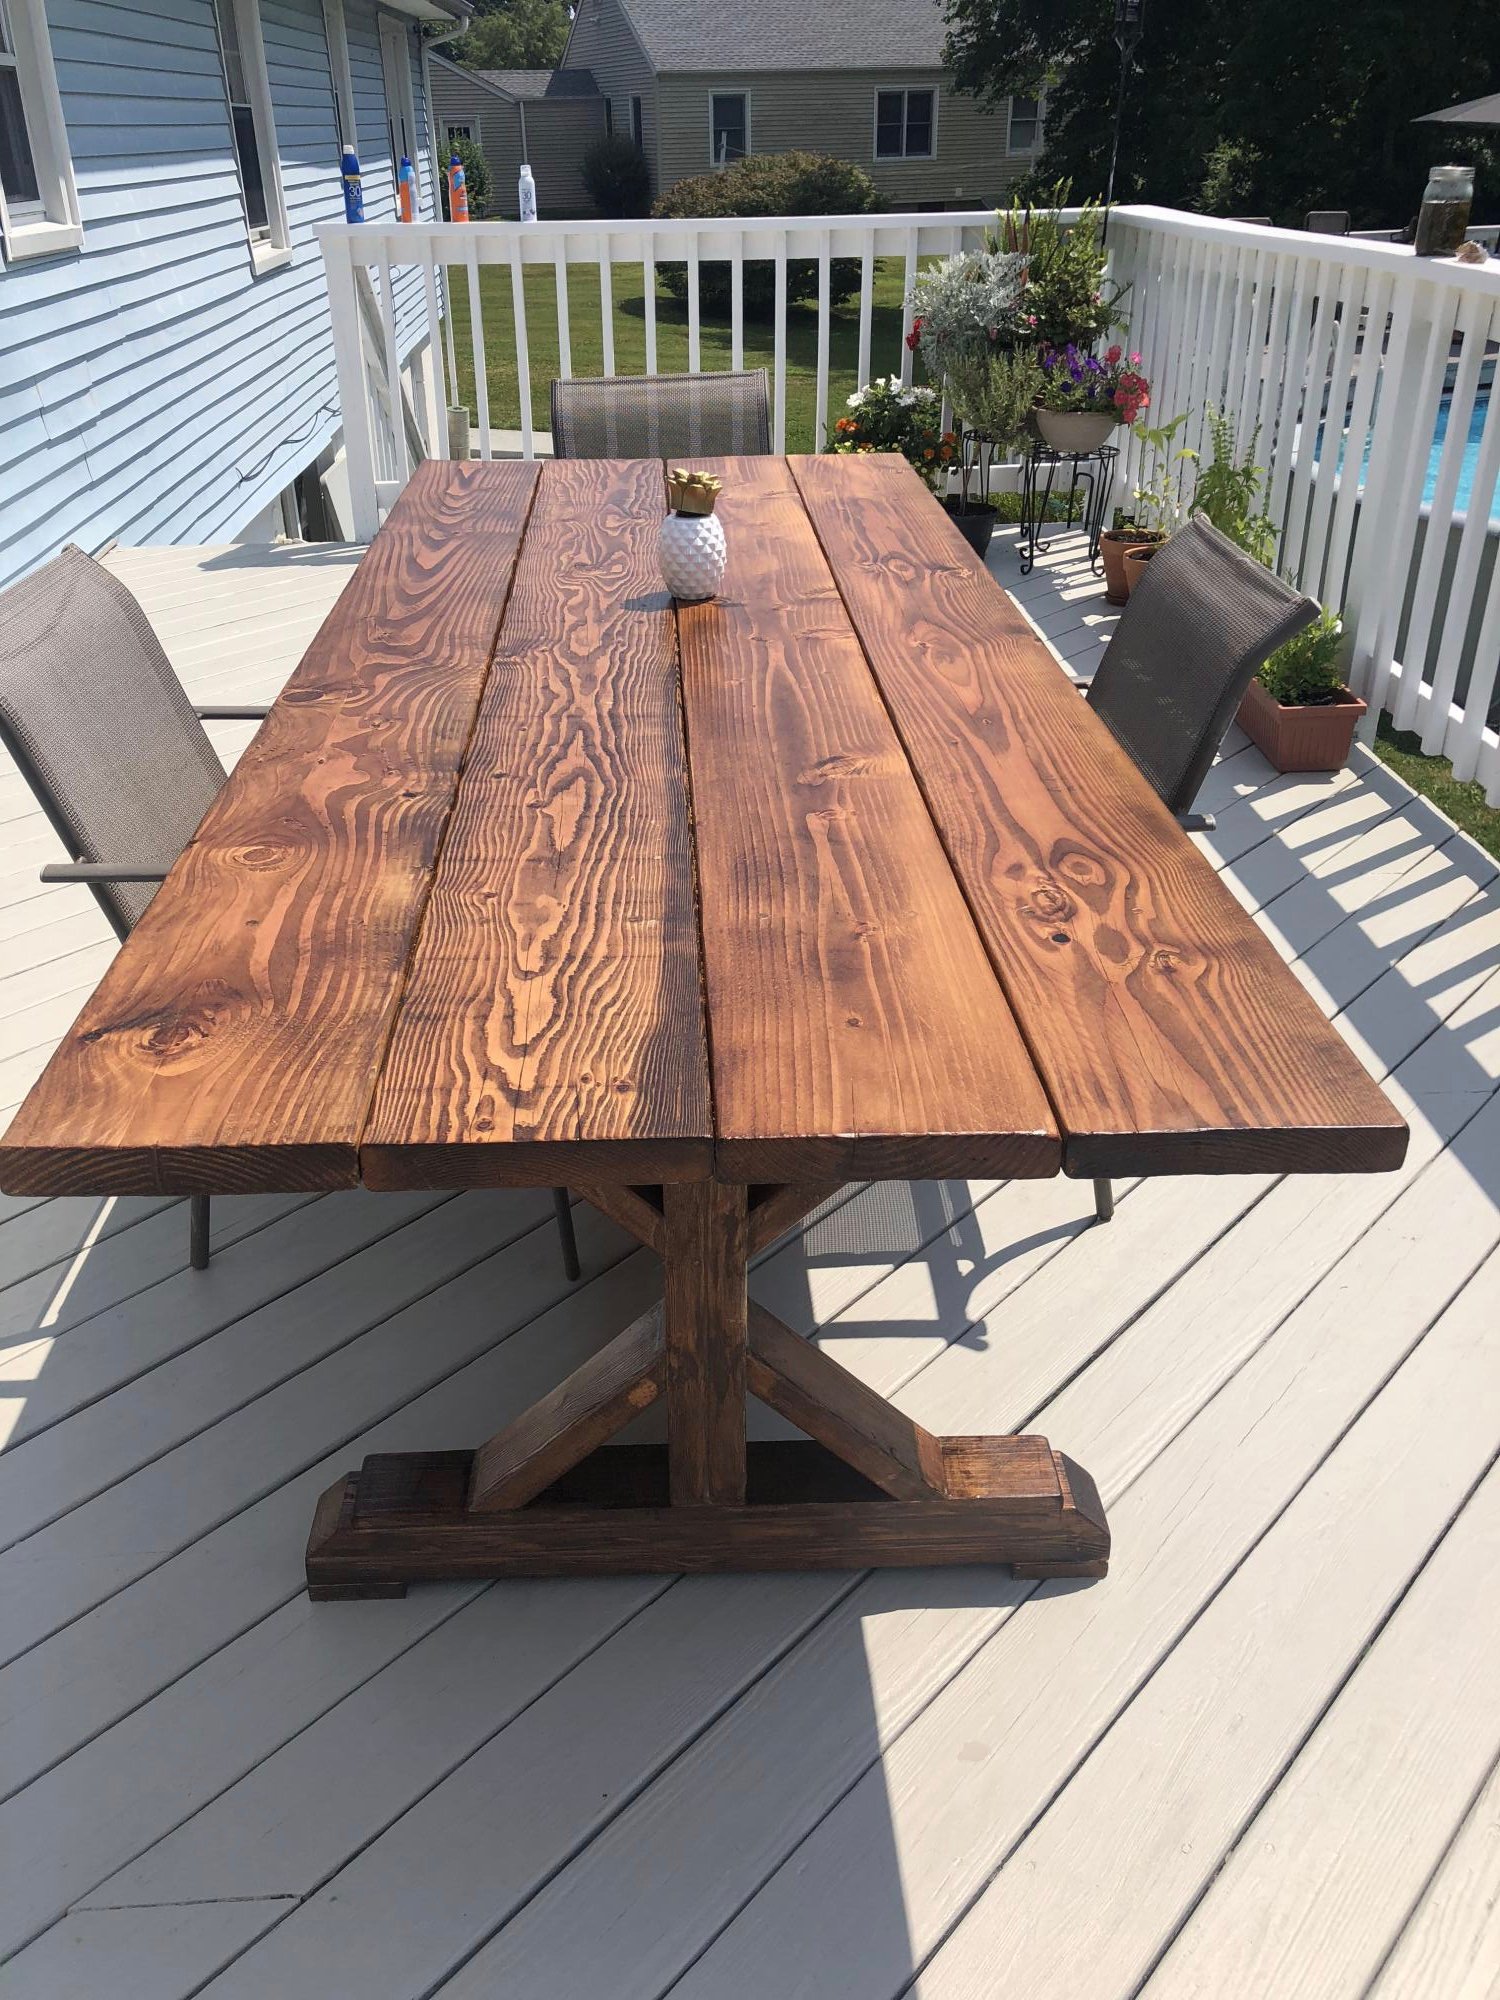
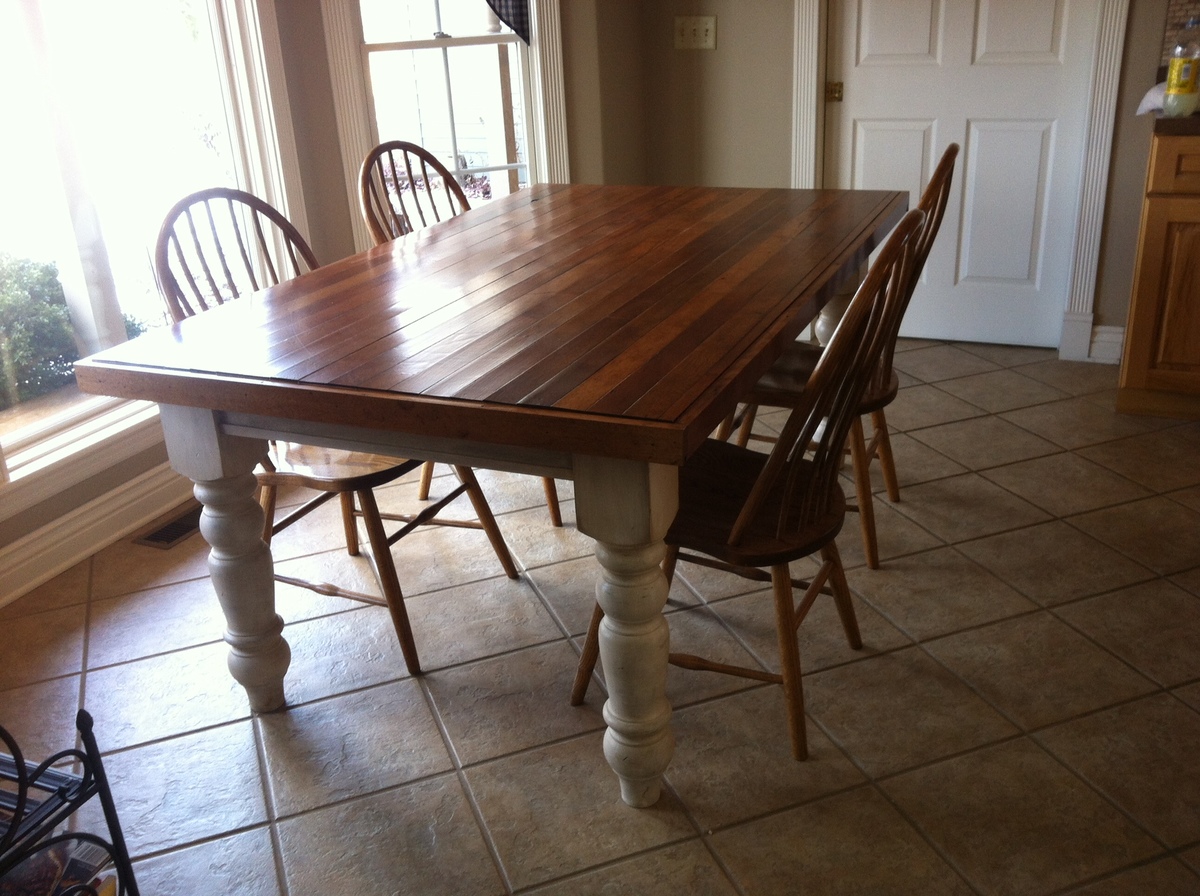
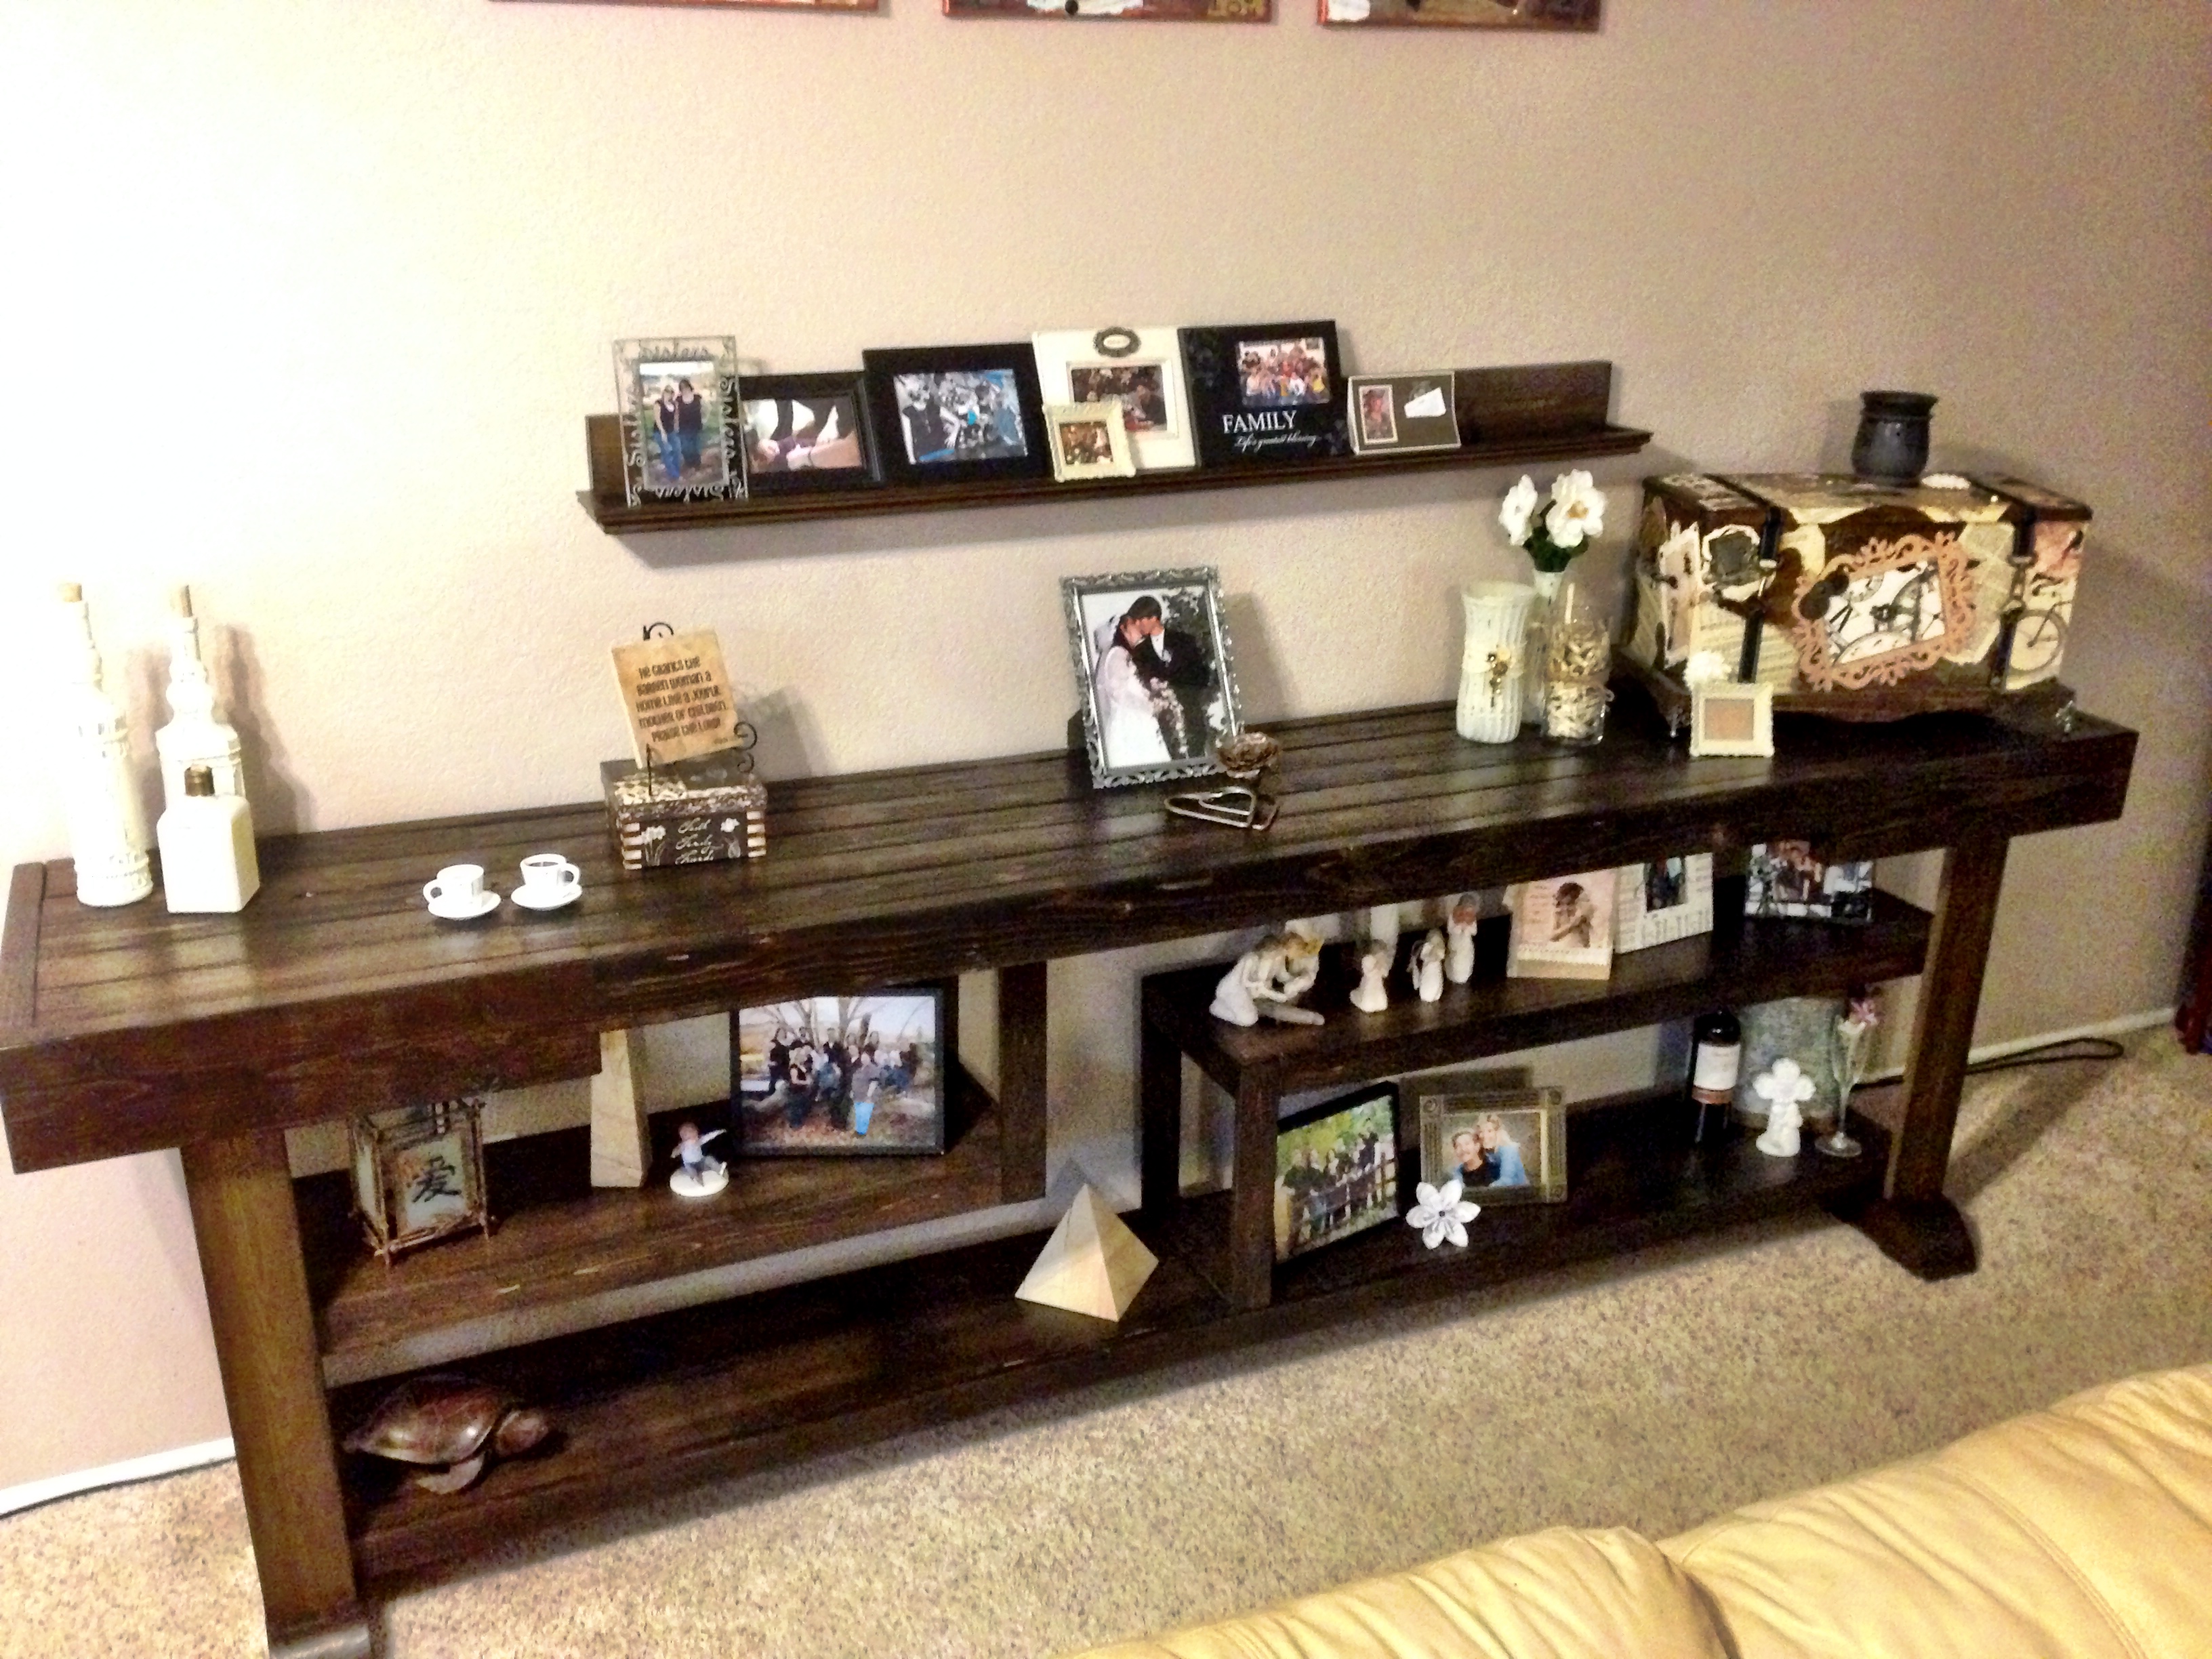
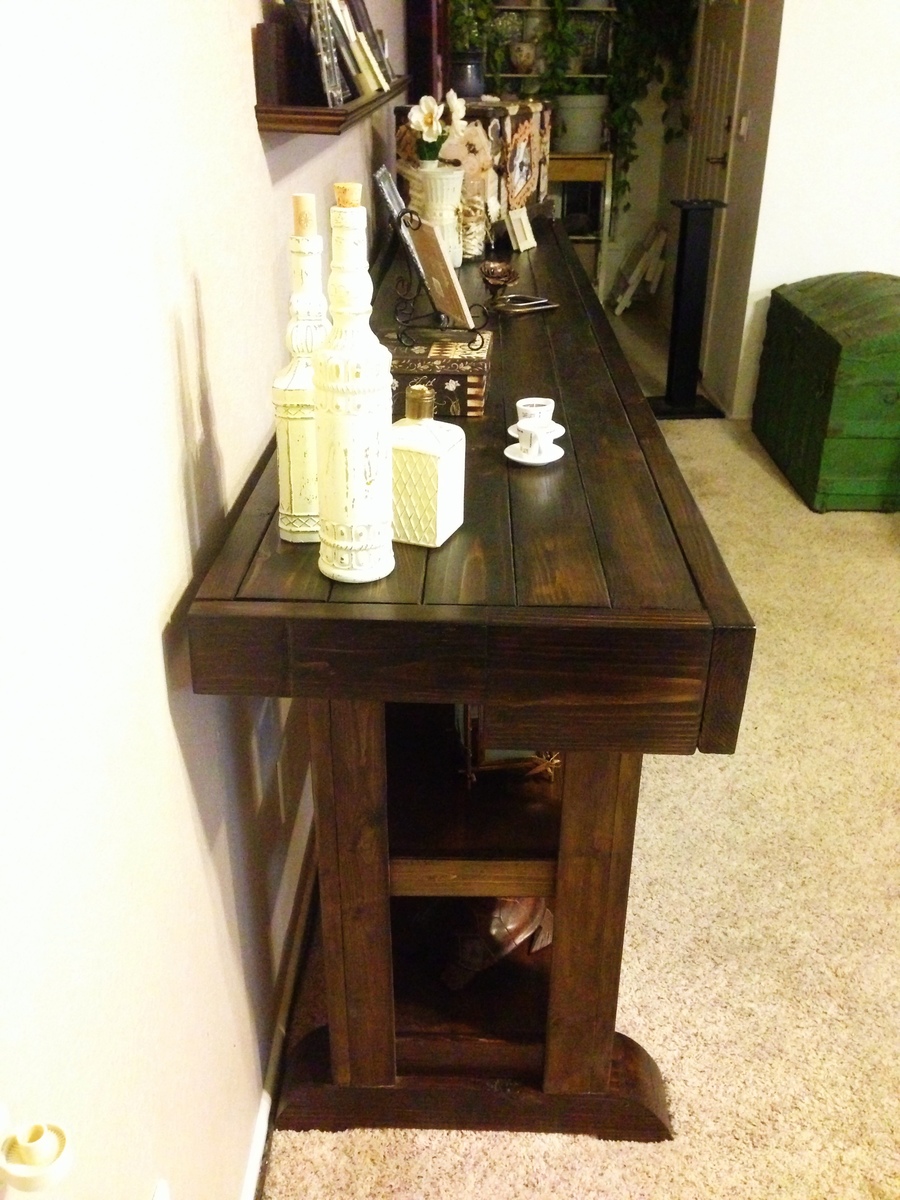
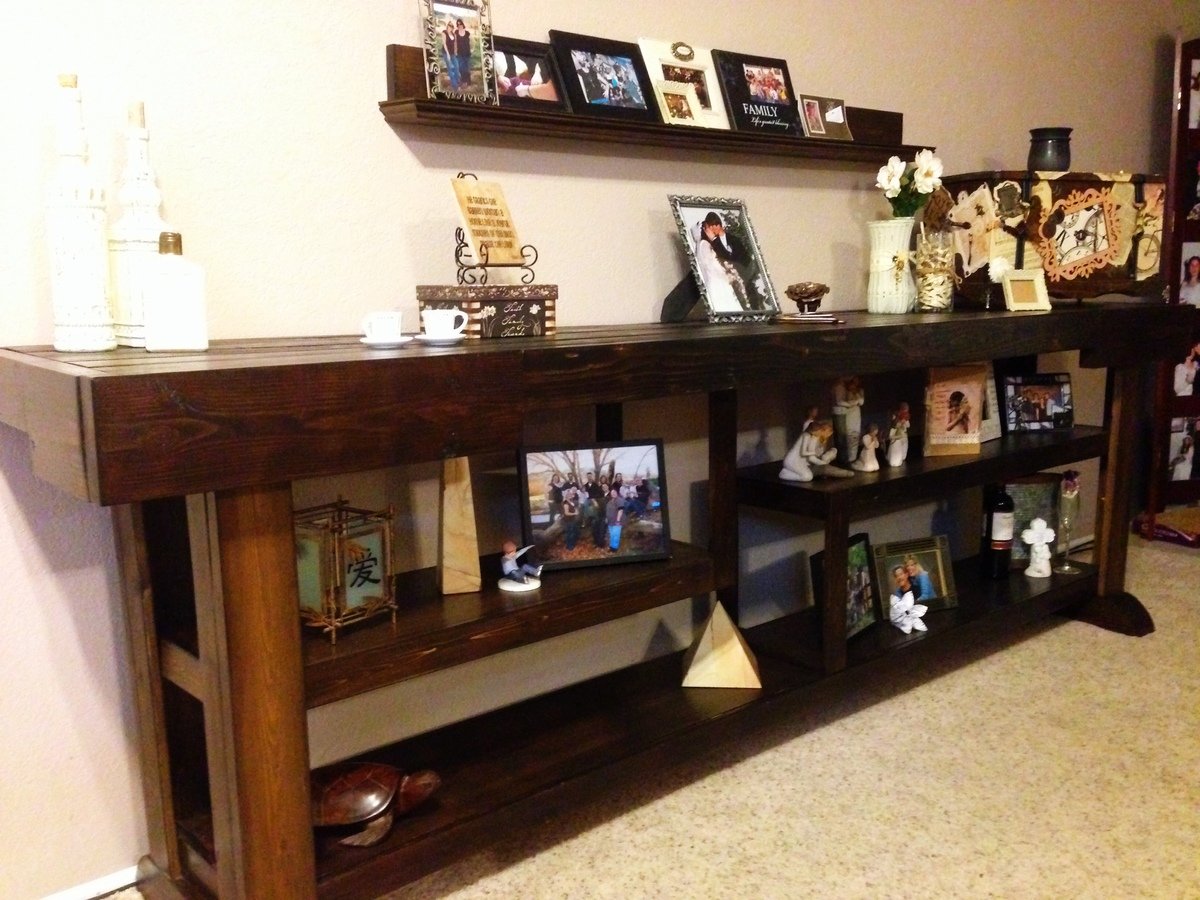
Community Brag Posts

Farmhouse Table

Submitted by JouniorB21 on Mon, 09/23/2013 - 12:48

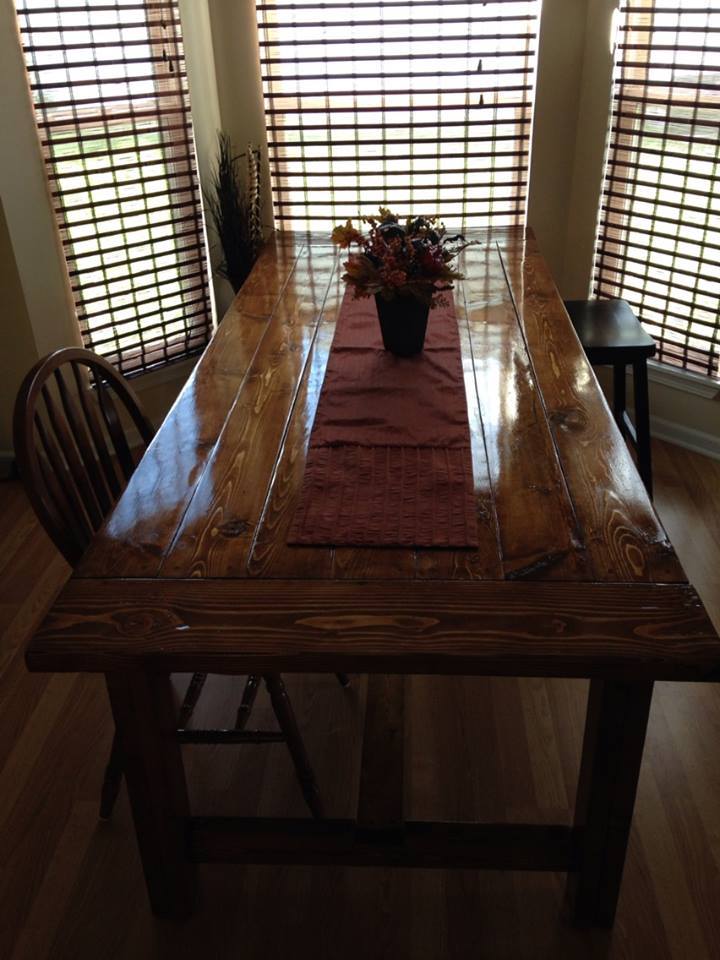
I worked on this over the past couple of months (would have been quicker, but you know..life gets crazy sometimes!!)

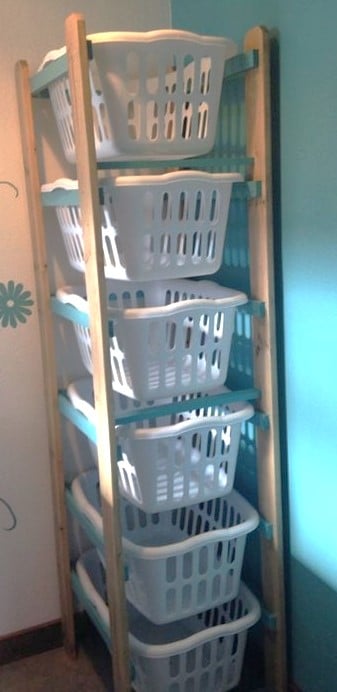
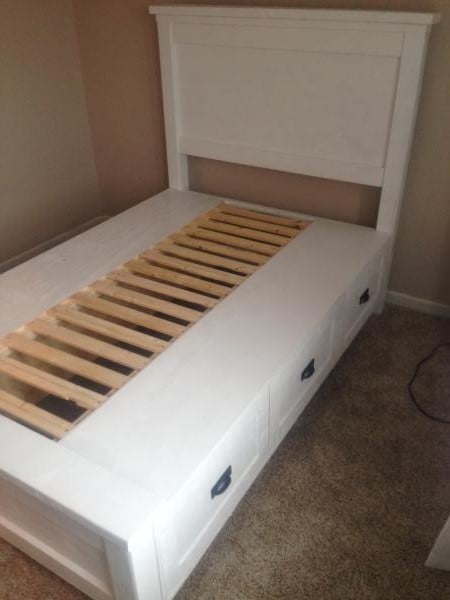
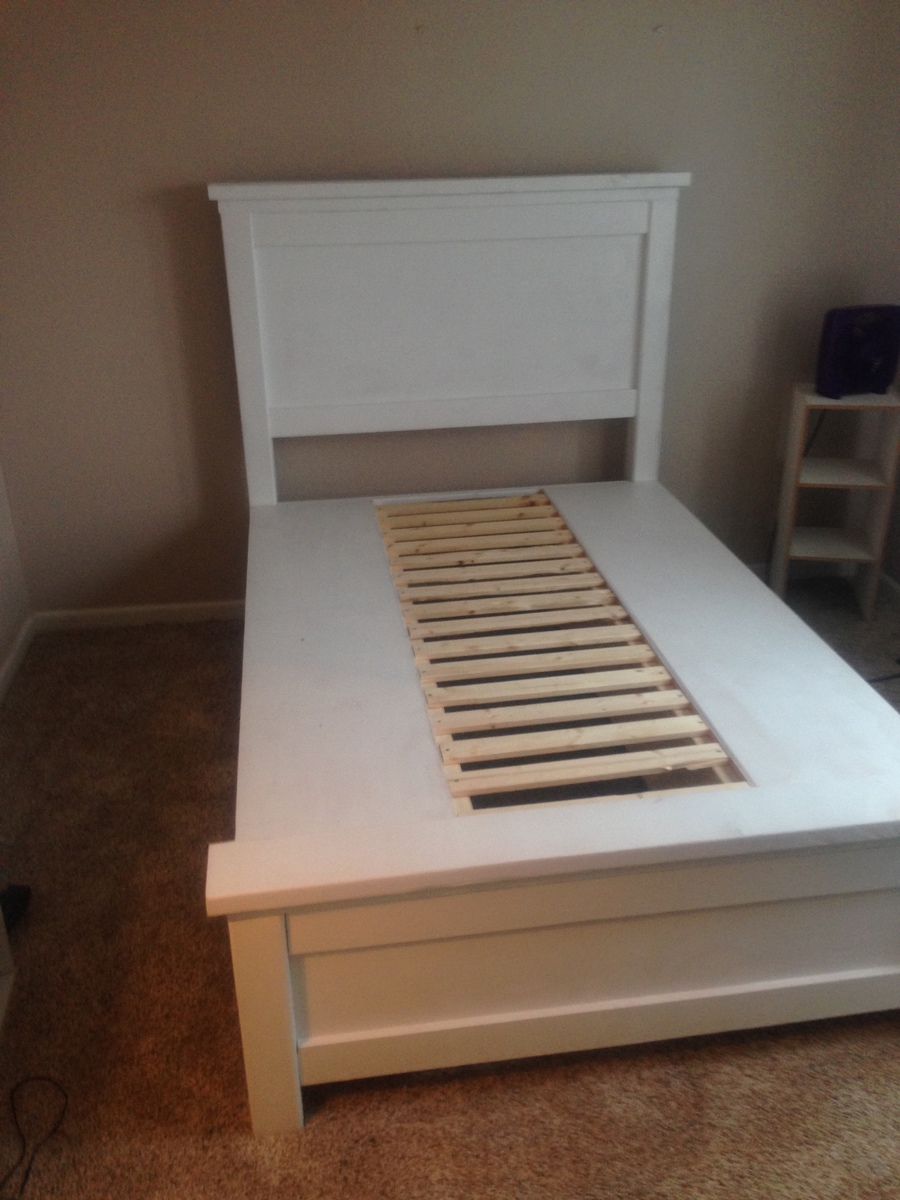
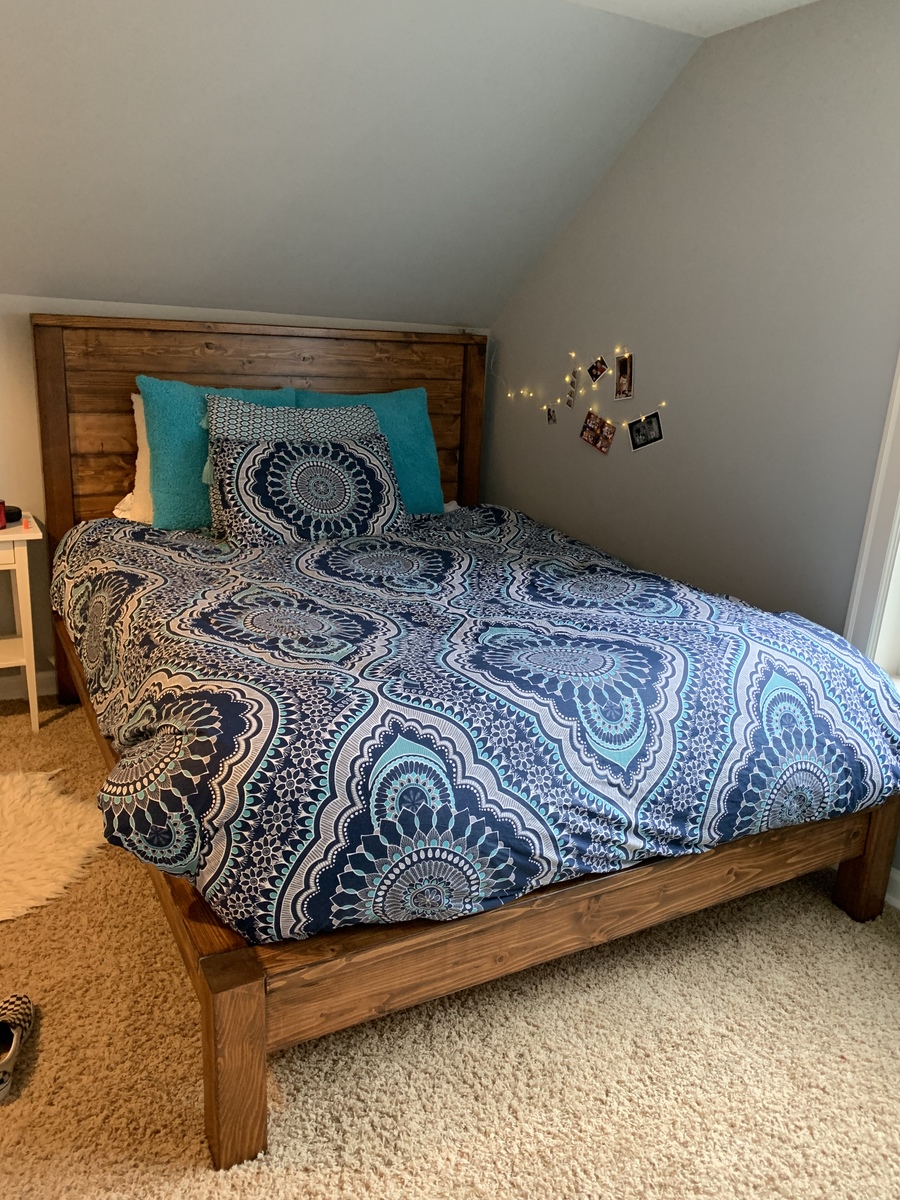
I used the farmhouse table plans to a tee and then stained and poly'd it. It turned out great!!! My Wife loves it and now all I have to do is build the benches. The wood is cut for them, just need to find the time to do it. This is my 4th Anna-White project. I have also built a bench for the end of our bed, some laundry cubbues, and a day bed.

I love this site and plan on using much more...I have friends and family wanting me to build them stuff...the only thing now...is how much do I charge..... :)

Estimated Time Investment
Week Long Project (20 Hours or More)
Finish Used
Miniwax Old American and semi-gloss poly
Recommended Skill Level
Intermediate

Comments

Distressed finish fireplace

Submitted by Anonymous (not verified) on Tue, 01/22/2019 - 04:41

This was a great plan to use!  We changed some of the measurements to fit our space and added a simple base to the bottom.  My inspiration was a picture of an old chippy mantle from a flea market.

Estimated Cost
$100
Estimated Time Investment
Weekend Project (10-20 Hours)
Finish Used
I stained everything first then lightly rubbed vasoline over some areas. Used a white paint (rustoleum white linen chalk paint)and dry brushed on until distressed look was achieved.
Recommended Skill Level
Beginner

Channing Bookcase

Submitted by plumbguy on Mon, 12/07/2015 - 14:40

I'm a better plumber than a carpenter.

Built from Plan(s)
Estimated Time Investment
Weekend Project (10-20 Hours)
Finish Used
Paint & Poly
Recommended Skill Level
Beginner

Farmhouse Storage bed

Submitted by 1bwalls on Sun, 12/27/2015 - 12:37

I built this in a full size.  Took some time to adjust all the measurements.  I used cheap lumber since I was painting it and it cost a little over $350.  Then I spent another $75 because I screwed up measurements.  :). This was only the 3rd thing I ever built, so I think I did alright.  The plans were great!  Watched several videos on YouTube about squaring drawers and that helped.

Estimated Cost
$425
Estimated Time Investment
Weekend Project (10-20 Hours)
Recommended Skill Level
Intermediate

Modern Farmhouse Bed

Submitted by Anonymous (not verified) on Tue, 02/26/2019 - 08:33

I made this as part of a room makeover for my teenager. It was my second furniture project, the first being Ana’s original farmhouse bed. This was my first project with the Kreg jig and I watched a great YouTube video by shanty2chic to learn the basics of pocket holes. This was also my first staining project and I love the results. My daughter loved it so much she had me stain her closet doors to match! The lumber for the bed was only $120, I spent an additional $80 on wood and screws for the slats to support the mattress, my new kreg jig came with enough screws to make the bed frame. I spent another $80 on wood conditioner, stain and poly since she didn’t like the first stain (Briarsmoke, which I will definitely use on another project).

Built from Plan(s)
Estimated Cost
$200
Estimated Time Investment
Day Project (6-9 Hours)
Finish Used
I started with a wood conditioner and then used Varathane Early American stain applied with a rag and dry brushed on top of that with varathane Kona, again watching a shanty2chic video for technique. Poly is water based satin finish. I used the triple thick but still had to do 2 coats, partly for coverage but also because the water based poly raised the grain so I needed to do a light sand and a second coat of poly for a smooth finish.
Recommended Skill Level
Intermediate

Comments

okstout4

Mon, 10/19/2020 - 19:49

This is very nice. Love the color too. I used Special Walnut in Behr brand and it came out too dark. Wished I had looked at some of these builds before I did the Behr brand stain.

Benches that Convert to Picnic Tables

Submitted by Steph99 on Thu, 02/02/2023 - 11:14

Simple benches that convert to picnic tables

Comments

Seasonal And Holiday

Kentwood Bookshelf

While staging my sister & brother-in-laws home so they could list it for sale, I ended up with an "empty wall" in their living room and nothing to fill it with, but knew a small bookshelf would work perfectly! I loved the look of the Kentwood bookshelf plan. I'm not the fastest builder, but after a couple hours, I had everything cut, all pocket holes drilled and everything fully assembled. I only applied one coat of stain and a single coat of poly and skipped adding a back...for now. I may go back and add a back later, but for now I'm thrilled with it (and so was my sister!)

Edit:  I finally added a back to the shelf - just in time to sell it to a friend. ;)

Estimated Cost
$80
Estimated Time Investment
Day Project (6-9 Hours)
Finish Used
Minwax Jacobean stain, Minwax Wipe-on Poly
Recommended Skill Level
Beginner

Rustic shelves

Submitted by ogie287 on Fri, 03/29/2019 - 18:06

I love the look of these shelves. I needed something for the wall space to either side of the kitchen window and sink. The ceiling slopes down at least a foot on that wall so there's less space for cabinets and putting up cabinets that fit the space wasn't working. Shelves were the answer. The pictures show only the left side of the window/sink, but I did put up a matching shelf on the right side. I used a 1x8 for the shelf and 1x6 for the back.

Built from Plan(s)
Estimated Time Investment
Afternoon Project (3-6 Hours)
Finish Used
1 coat weathered gray stain, 1 coat antique white stain, 2 coats matte polyurethane
Recommended Skill Level
Beginner

Modern Craft Table *tweaked*

Completed Modern Craft Table! We tweaked the plans a bit because I was looking for a larger table top. The top now measures 48" x 76". We simply did this by adding an extra set of cubbies to the other side of the shelves. Absolutely LOVE how this turned out! All I need now is 4 counter height stools built and lots of shelves to complete my craft room! Will be sure to post those once they are completed!

Built from Plan(s)
Estimated Time Investment
Weekend Project (10-20 Hours)
Finish Used
Ultra White Latex Paint
Recommended Skill Level
Beginner

Comments

Ana White

Thu, 11/17/2011 - 01:10

Darn I was so excited to see you craft table! I apologize that your brag post did not show images. If you can send me images at knockoffwood(at)gmail.com I'd be happy to post. Thanks so much for submitting a brag post. Ana

Guest (not verified)

Sun, 03/04/2012 - 07:31

I LOVE LOVE LOVE your craft table. I want one! Looks like my husband wil have to get busy! Thanks for sharing!
Kristina
Houston, TX

Kimmy (not verified)

Tue, 03/20/2012 - 17:51

Is this the pic of the one you did ?? I am wanting a bigger table top too. I have waited years for just the right table and this is it.

Kimmy (not verified)

Tue, 03/20/2012 - 17:51

Is this the pic of the one you did ?? I am wanting a bigger table top too. I have waited years for just the right table and this is it.

Kimmy (not verified)

Tue, 03/20/2012 - 17:54

Is this the one you made ? I want a bigger table top as well. But I don't see the extra cubbies.

Kimmy (not verified)

Tue, 03/20/2012 - 17:54

Is this the one you made ? I want a bigger table top as well. But I don't see the extra cubbies.

naildoctors

Tue, 05/29/2012 - 00:05

This is great!! I am planning something similar, but what is your idea or the plan you used for the middle support to keep it from sagging over time? My idea is to run another cubby in the middle from side to side. What do you think?

Laura Mulholland (not verified)

Mon, 01/21/2013 - 09:54

I love the modern craft table, just what I have been looking for, do you share instructions, dimensions, etc.? thanks, Laura

HapETexanGal

Thu, 05/12/2016 - 15:14

I'm loving this and would love to have FIL build it for me but the plans look like its for the regular modern craft table but not the tweaked?  Also is there support for the middle?  Can you send me a link for the tweaked supply list please, can't seem to find it.  Love what you do!

Entry Cosole/Media Stand

Submitted by Anonymous (not verified) on Fri, 03/24/2023 - 14:09

Thank you for this plan! We did a few alterations like the soft close shaker doors. We painted with Navy Blue paint mixed with BBFrosch chalk mix. Love this so much! John + Jina
Colorado

Comments

Handmade pedestal farmhouse table

Submitted by Anonymous (not verified) on Wed, 01/20/2016 - 09:42

Modified slightly to include just two legs and excluded the decorative pieces for a more streamined look.

Built from Plan(s)
Estimated Cost
$400
Estimated Time Investment
Weekend Project (10-20 Hours)
Finish Used
English chestnut stain with a flat poly
Recommended Skill Level
Beginner

Fancy Outside Dining table!

Submitted by cfrascone on Mon, 07/29/2019 - 08:55

After looking for an outside table with no luck, not to mention the unbelievable price tag, I asked my husband to make me this table..He worked on it for the day with my son and ILOVE the way it came out!!! The plans were simple and easy to follow. Thank you Ana!!!

Built from Plan(s)
Estimated Time Investment
Day Project (6-9 Hours)
Finish Used
Stain
Recommended Skill Level
Intermediate

Adirondack chair

Submitted by Anonymous (not verified) on Fri, 05/05/2023 - 07:30

I used 1 by 8 rather than 1 by 10 for seating. Nice cedar was used, very comfy, thanks for the plan

Comments

Window seat with drawers using the mudroom bench with easy drawers plan

Submitted by Anonymous (not verified) on Fri, 05/12/2023 - 17:57

Our home had a window seat that was only 14 inches deep and too small to sit on lengthwise. The before photo shows it just before I started the demolition phase. I had found the mudroom bench with easy drawers plan and decided it would work for our space. This was my first DIY woodworking project. I bought a Dewalt 12-inch compound bevel, sliding miter saw, a Kreg Pocket hole jig, and a Kreg straight-edge guide, and I plan to use them for future projects. I really enjoyed following the plans and building this project.

I got all of my wood at my local Lowe's by sorting through a lot of boards to find the best ones available. I found a nice-looking sheet of hardwood plywood for the top and sides. It was expensive ($84), but I wanted to try staining the project rather than painting it so that it would complement our flooring and other furniture in the room. I decided that if it didn't work out with the stain, I would paint over it.

A local Benjamin Moore paint store did a great job at finding a stain that would match and could be painted over if necessary. It only required one coat of stain to achieve the desired color, and I applied three coats of polyurethane over it.

We ordered a custom cushion with a cover to match the size of our new window seat with drawers. We, and our doggies, are very pleased with how the project turned out! Thank you, Ana White, for the excellent plans and video!
Gene St Germain, Poulsbo, WA

Built from Plan(s)

Comments

Antique hardwood flooring Husky Farmhouse Table

Submitted by Anonymous (not verified) on Fri, 02/12/2016 - 17:52

Found 120 year old mahogany hardwood flooring at The Old House Society that provided the table top. Built the subframe and legs per the standard plan. Then attached a 3/4" ODF plywood deck. Strip hardwood was nailed to the top with 1" finishing nails thru the flooring tongues. Cleaned the hardwood, applied 2 coats of shellac and 3 coats of satin polyurethane. The modification to use the strip flooring was the most tedious to get a tight fit. The antique, aged and stressed flooring gives the table a real antique look. Build time was @ 8 hours. Applying the finishes took several days of drying/curing before use. My wife loves it and I am proud of the final project.

Built from Plan(s)
Estimated Cost
Legs from Osburn Wood Products @ $55.00 each plus shipping. Mahogany subframe parts @ $50.00. 4 x8 ODF 3/4" plywood @ $ 65.00. Re-cycled strip flooring @ $250.00. Finishing materials @ $30.00. Total @ $550.00
Estimated Time Investment
Weekend Project (10-20 Hours)
Finish Used
2 coats of shellac. 3 coats of satin polyurethane. Used Golden Mahogany stain to cover cut edges and scars. Amy Howard linen paint on legs and subframe. 1 coat of light antique wax first. 1 coat of dark antique wax final coat on legs and subframe.
Recommended Skill Level
Intermediate

Another great Loft bed

Submitted by mijohnst on Thu, 01/12/2012 - 08:30

This is another one if your popular loft bed houses. Thanks very much for the plans! I changed a few things, but not as dramatic as others have done. Was a fun project and my daughter actually helped. One spur of the moment idea was to allow her to paint a mural on the backside so that in few years when she out grows it we'll be able to look back and remember how we built it together.

Built from Plan(s)
Estimated Cost
$300
Estimated Time Investment
Week Long Project (20 Hours or More)
Finish Used
White and blue paint.
Recommended Skill Level
Intermediate

Comments

Cindy from Indiana (not verified)

Sat, 01/14/2012 - 10:34

You guys did a great job - very cute! I also love the idea of a hidden mural that you get to revisit in the future. So cool!

Enclosed Garden Raised Bed

Submitted by Anonymous (not verified) on Wed, 05/31/2023 - 14:33

My husband and boys made a beautiful enclosed raised bed using your plans. It was modified to include exterior raised beds for flowers.

Built from Plan(s)

Comments

Seasonal And Holiday

DIY Famhouse Table

Submitted by Anonymous (not verified) on Wed, 07/05/2023 - 08:24

I used the farmhouse table plans, with a few modifications. I made two benches to go along with it. This was my first big wood project and I'm pretty proud of it. My daughter bought her first home and needed a table custom sized to her space so this was perfect. I love all of Ana's plans, so easy to follow.

Living Room Console Table

Well after a successful first project building a Wine Console for my sis-in-law it was time to tackle a project for my own home. We have a huge back wall in our living room that used to be covered by a cheap set of "DVD/CD Organizer" shelves. I hated them from the day I bought them, but they were cheap and they did what we needed. So for my next project I wanted to replace them with something classier.

The basic concept is based off the same workbench console that I used to build the wine table but with some major modifications. First off, it's 9 and a half feet long to better fit the size of the wall. I also wanted to add some shelves for more display space. The wife likes non-symmetrical design styles so I offset the shelves with one hanging from the bottom of the tabletop and the other resting on the bottom shelf.

I just finished it and moved it in so we're still trying to figure out what to put on it. Personally I like a more minimalist approach while my wife loves picture frames so I made a deal. You can see a guest appearance of the first of two $10 gallery shelves that I plan on putting the rest of our pictures on. Stained the same color as the table it looks great on the wall right above it.

It's all made from good ol' Home Depot pine and finished with 3 coats of Varathane's Kona Stain-Poly applied with a brush.

Built from Plan(s)
Estimated Cost
$100
Estimated Time Investment
Weekend Project (10-20 Hours)
Finish Used
Kona Stain-Poly by Varathane. 3 coats
Recommended Skill Level
Beginner

Comments

Val Manchuk

Sun, 12/29/2013 - 21:22

What a unique and creative design you did with the shelves! Looks good!

Val @ artsybuildinglady.blogspot.ca