Community Brag Posts
DIY Greenhouse Project -Added elevated raised beds & temp/humidity control
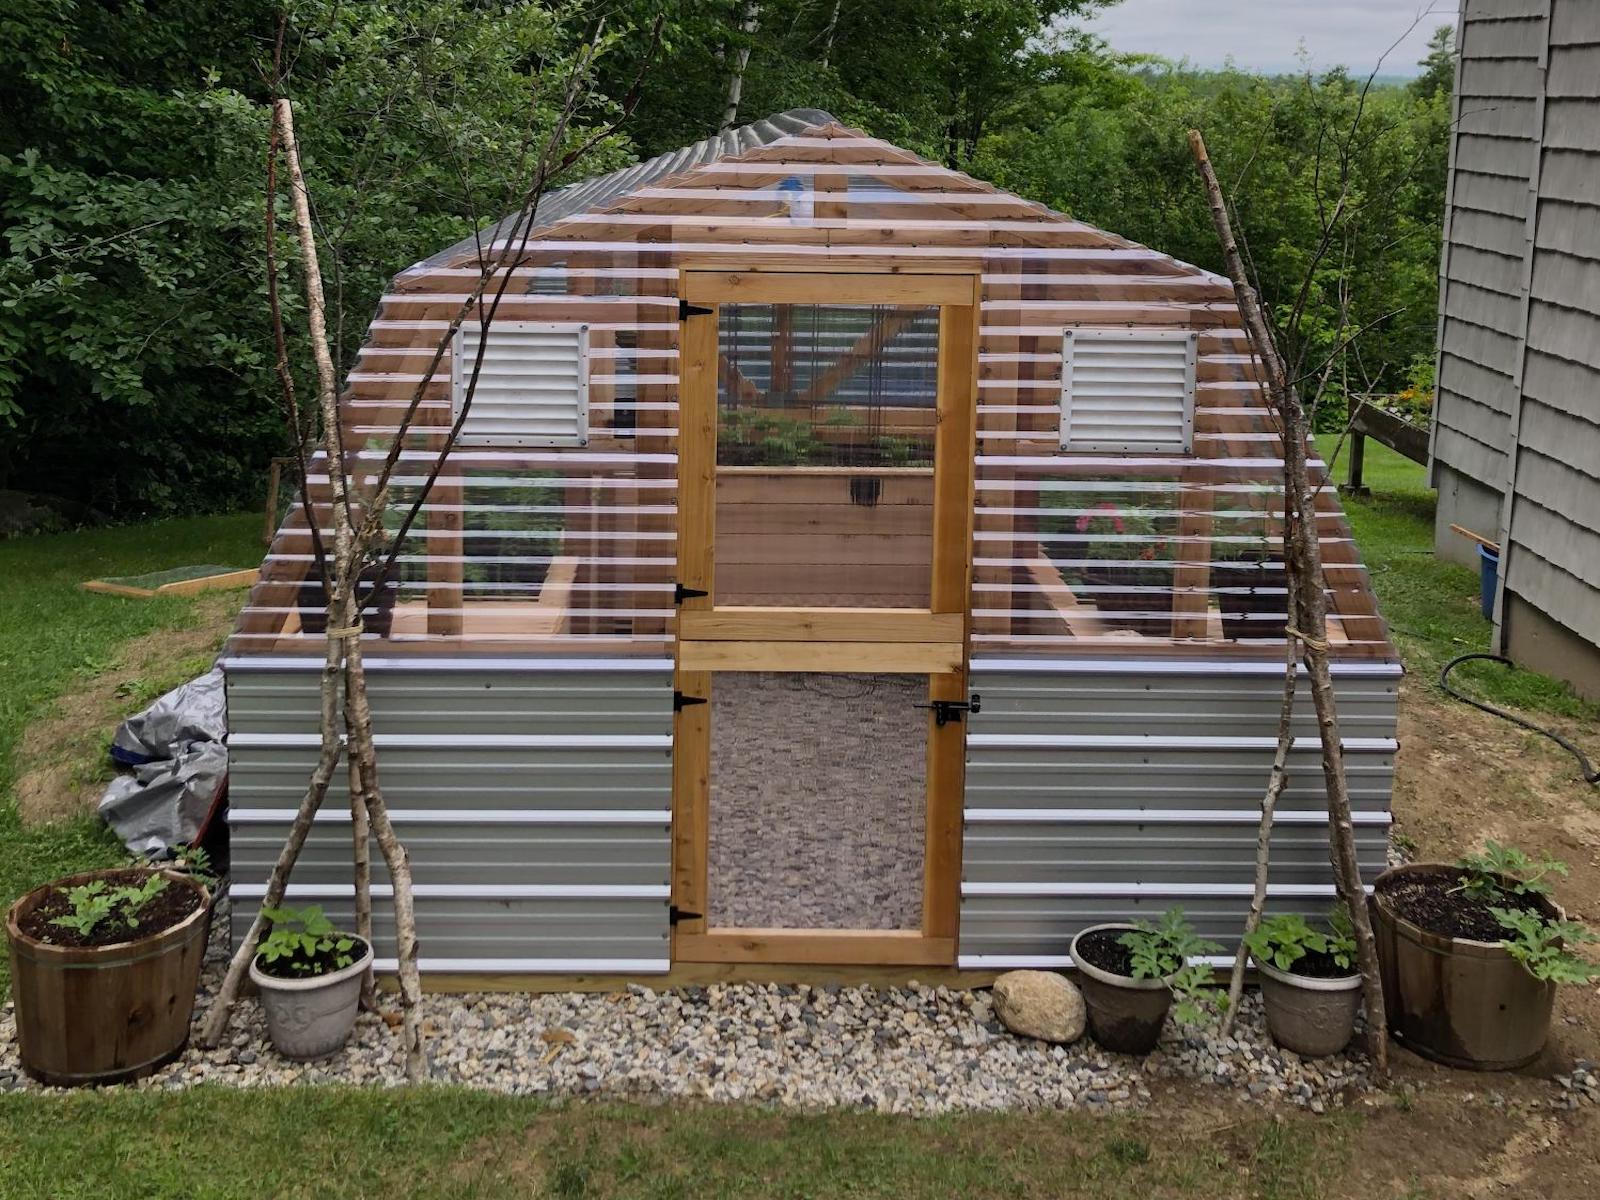
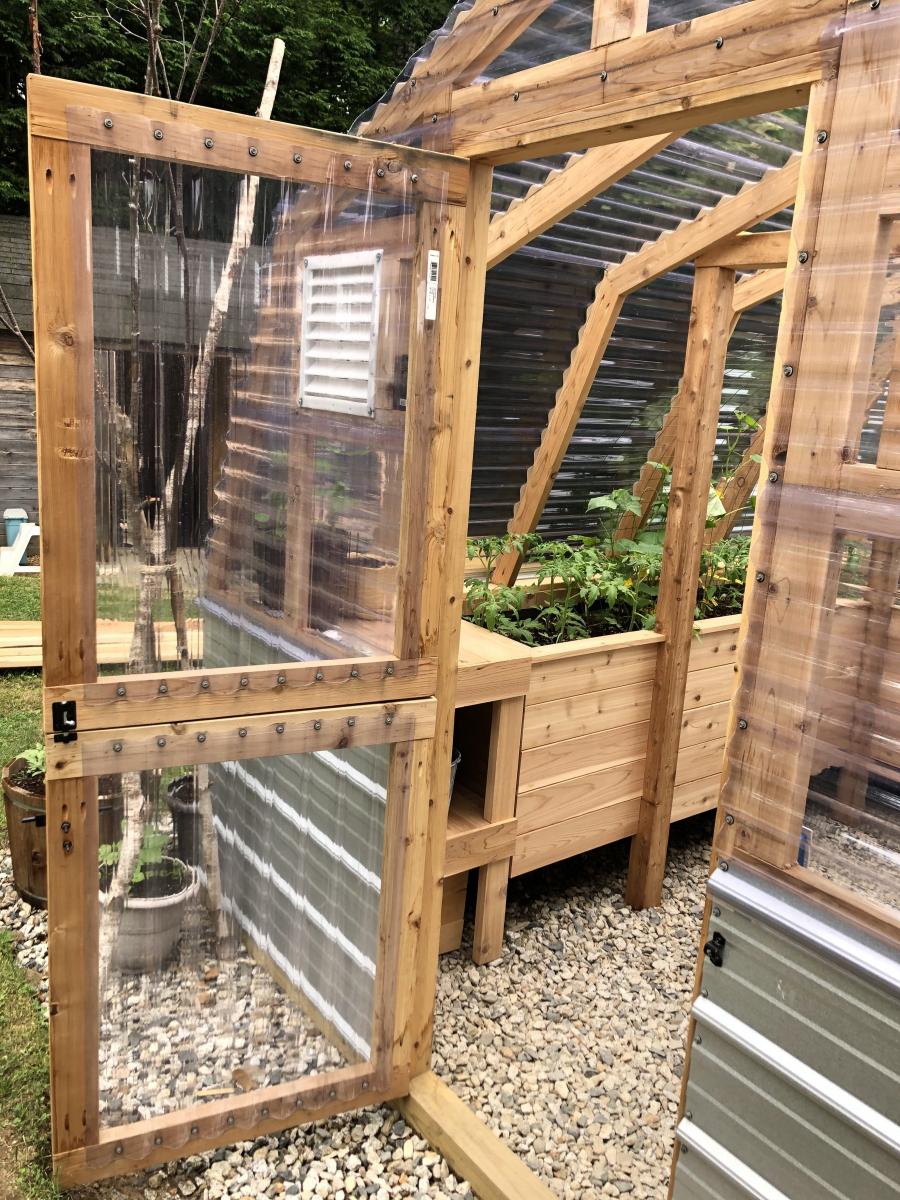
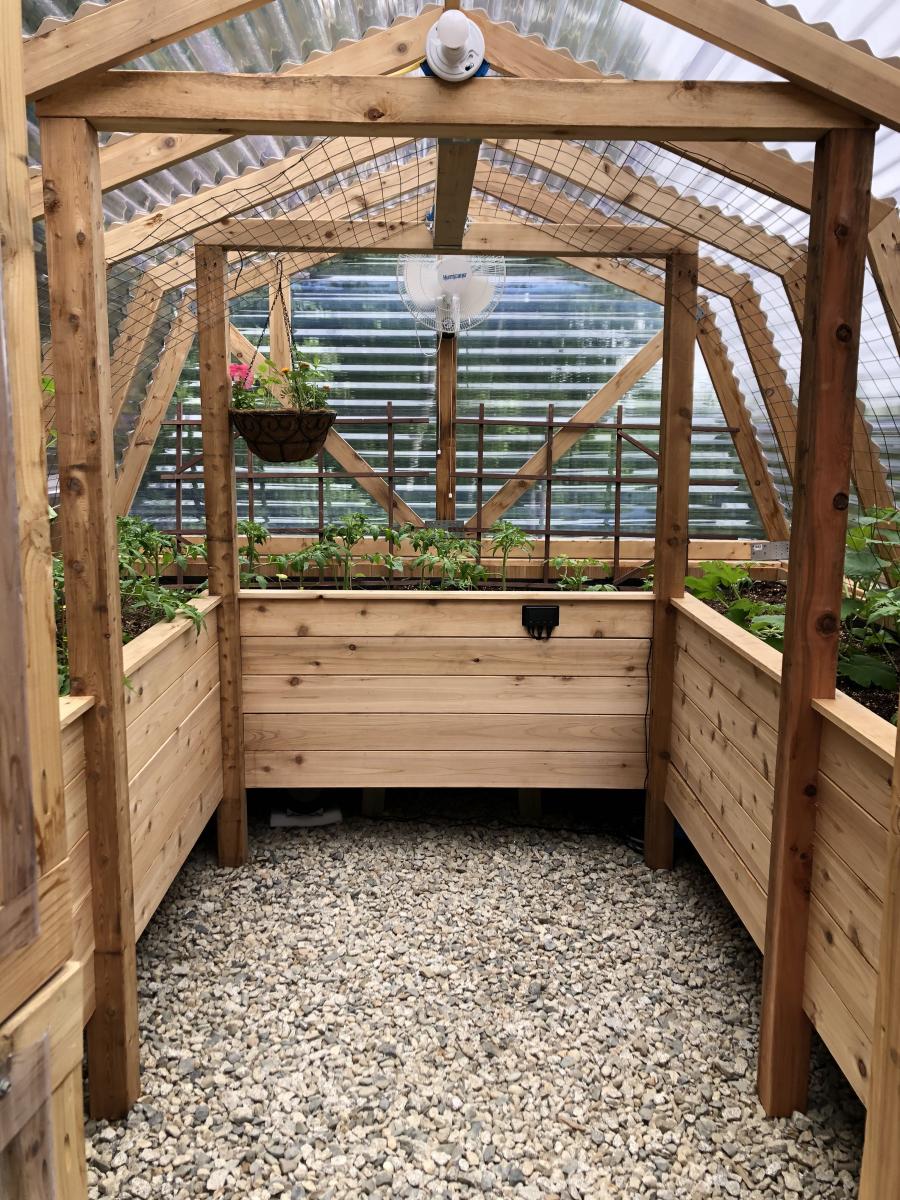
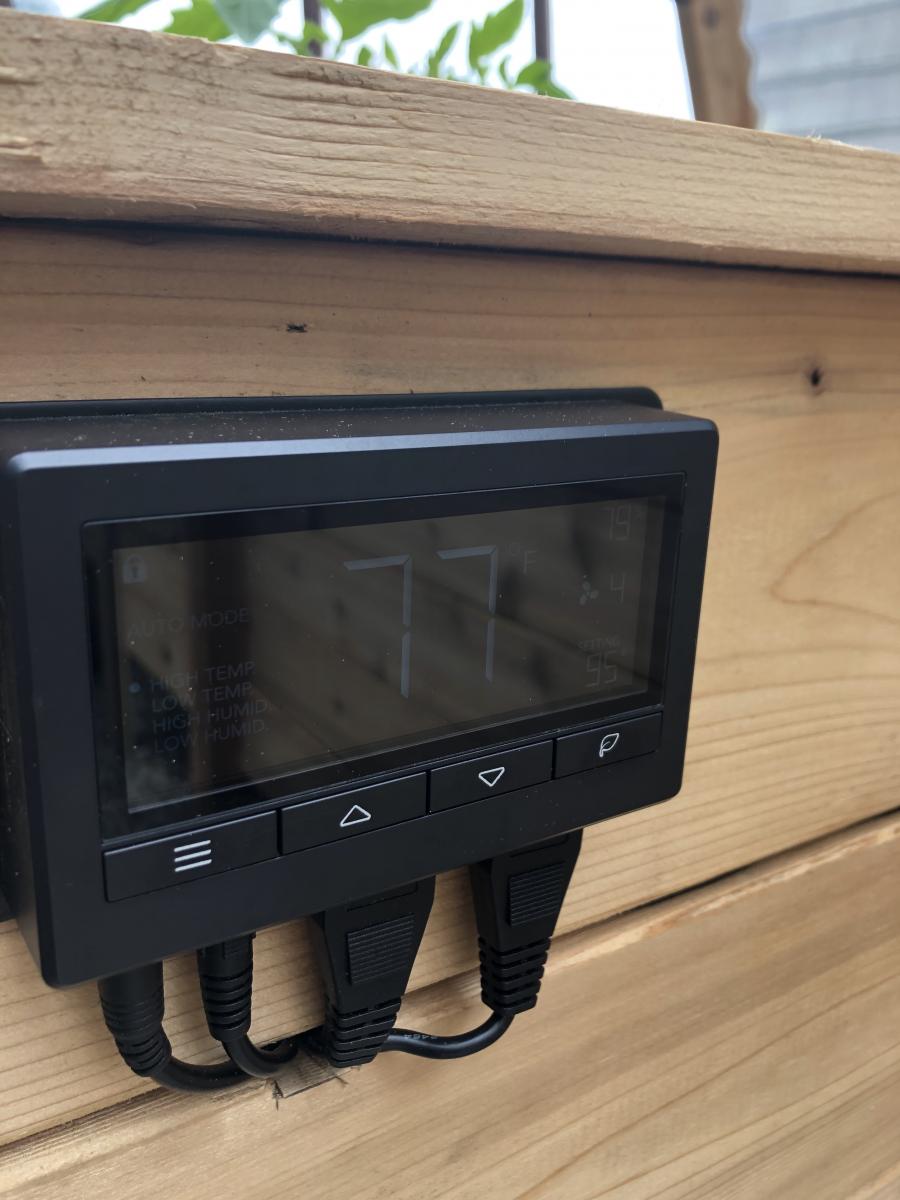
We loved this greenhouse plan from AnaWhite and wanted to be able to grow in 3 seasons so we modified the design to include humidity & temperature control & 18" deep elevated cedar beds inside with 4x4 posts for support and trellis option. We added electricity in order to have a lighted workspace and the ability to put in a circulating fan to control mold and fungus. We added 2 work tables (2x2') on the inside of the door left and right side door in order to do seed trays & store supplies. This was a wonderful project for my husband and my plants inside are doing incredibly well compared to my outside garden beds here in zone 5. Products used:
Foundation
We had a landscape company come and scape/dig a platform and then fill/compact with crushed rock
My husband then used rebar driven into a 4x4 frame in order to secure the frame to the ground and create a base upon which to build the greenhouse
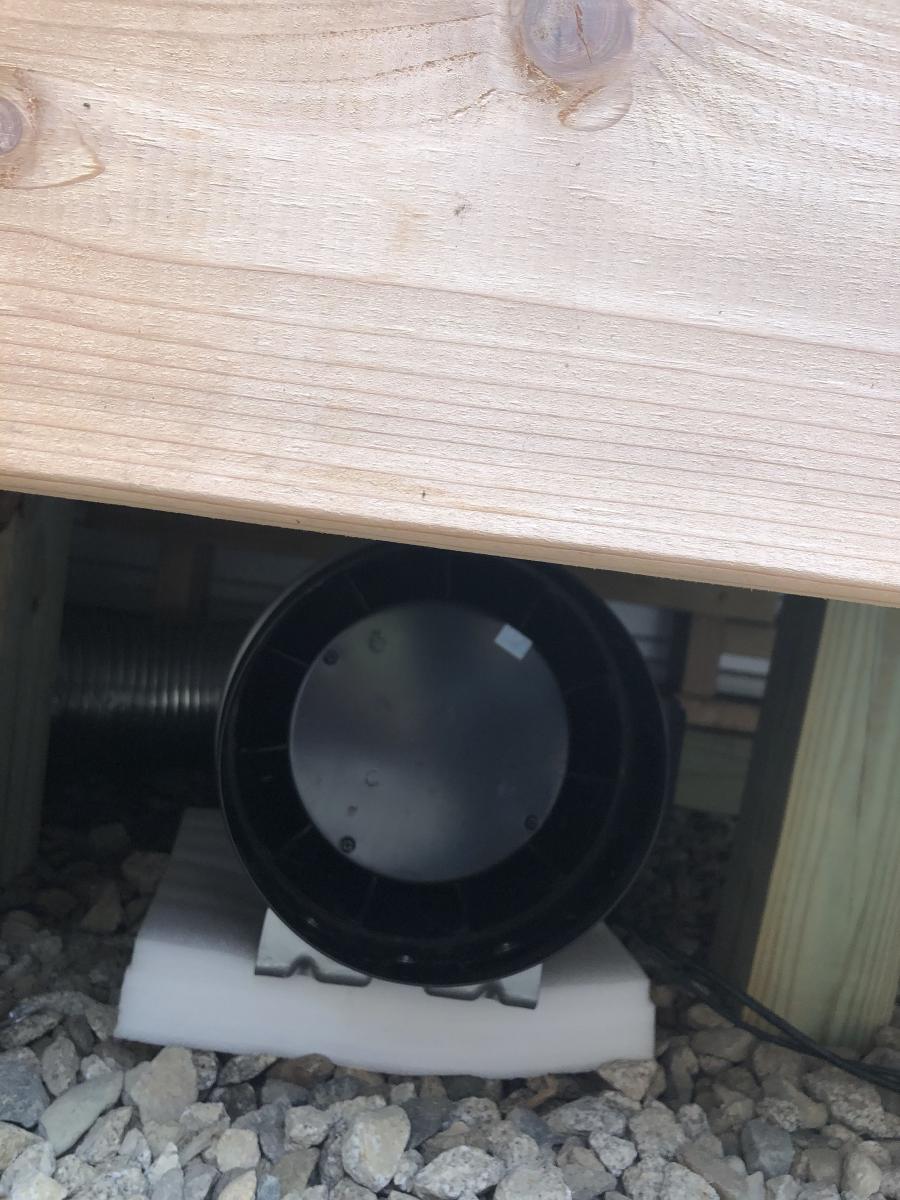
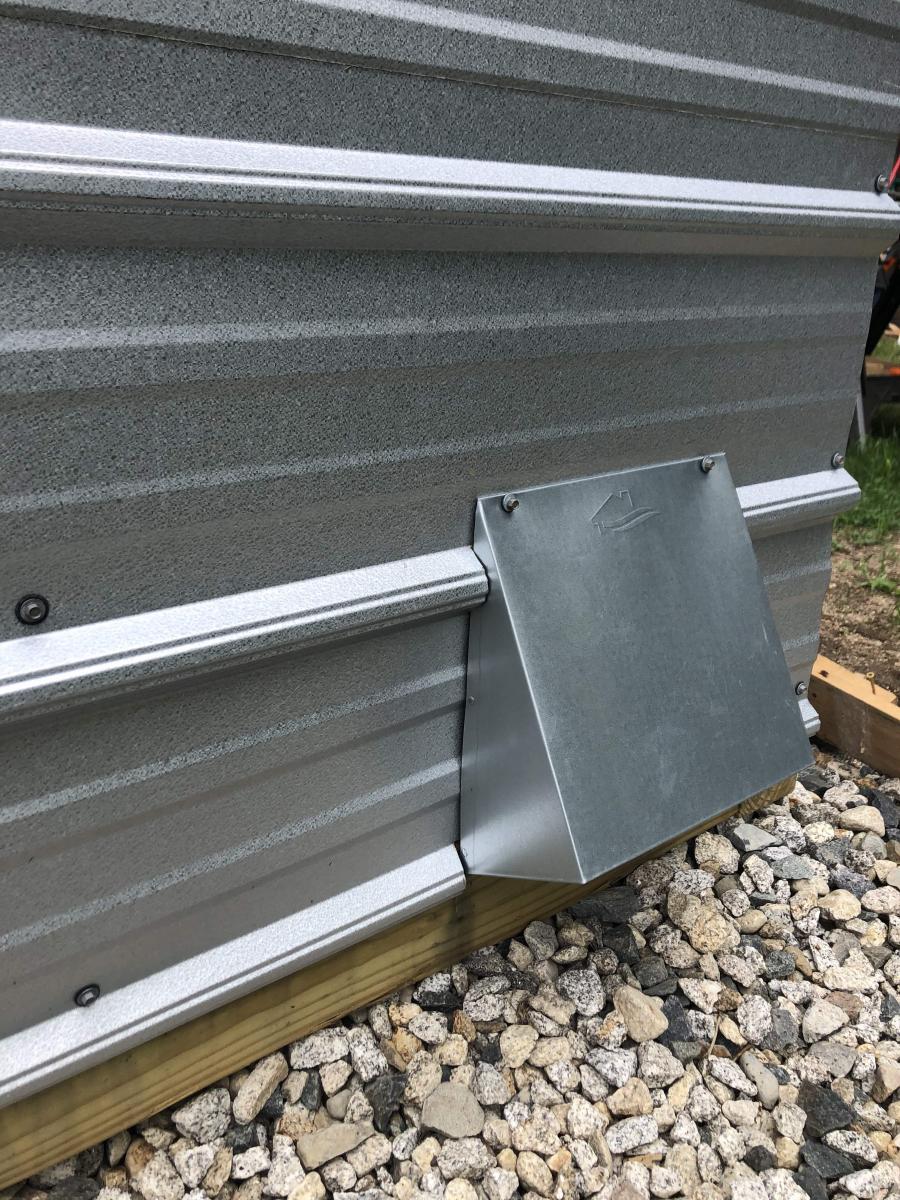
Active ventilation
AC Infinity Cloudline T8 Inline duct fan
Air king range hood wall cap 8" on the bottom outside of the greenhouse wall for air intake + flex 8" duct to the fan itself
Shelter logic autovent automatic shelter vent kits (1 on each side of the front wall) in order to allow air intake from the bottom back of the greenhouse under the elevated beds to flow to the front of the greenhouse and out
Circulating fan- Hurricane wall mount fan 16" - this fan has 3 speeds with tilt function and small mounting bracket
Soil - sourced 3 yards of 50/50 loam/compost from local landscaping supply
60% loam
30% organic compost
10% organic topsoil + perlite
Soil beds
-cedar frame 2 feet wide along sides, 3 feet wide on the back wall
-galvanized metal roofing with holes drilled into it for drainage
-landscape cloth lined
Built from Plan(s)
Estimated Cost
$2000
Estimated Time Investment
Week Long Project (20 Hours or More)
Finish Used
None
Recommended Skill Level
Intermediate
Comments
Wed, 09/09/2020 - 13:09
Thanks for that update! I…
Thanks for that update! I was wondering how to vent this project, as Green houses need the ventilation. Good to know dollar amount also. Great photos.
Wed, 09/09/2020 - 13:09
Thanks for that update! I…
Thanks for that update! I was wondering how to vent this project, as Green houses need the ventilation. Good to know dollar amount also. Great photos.
Wed, 09/09/2020 - 13:09
Thanks for that update! I…
Thanks for that update! I was wondering how to vent this project, as Green houses need the ventilation. Good to know dollar amount also. Great photos.
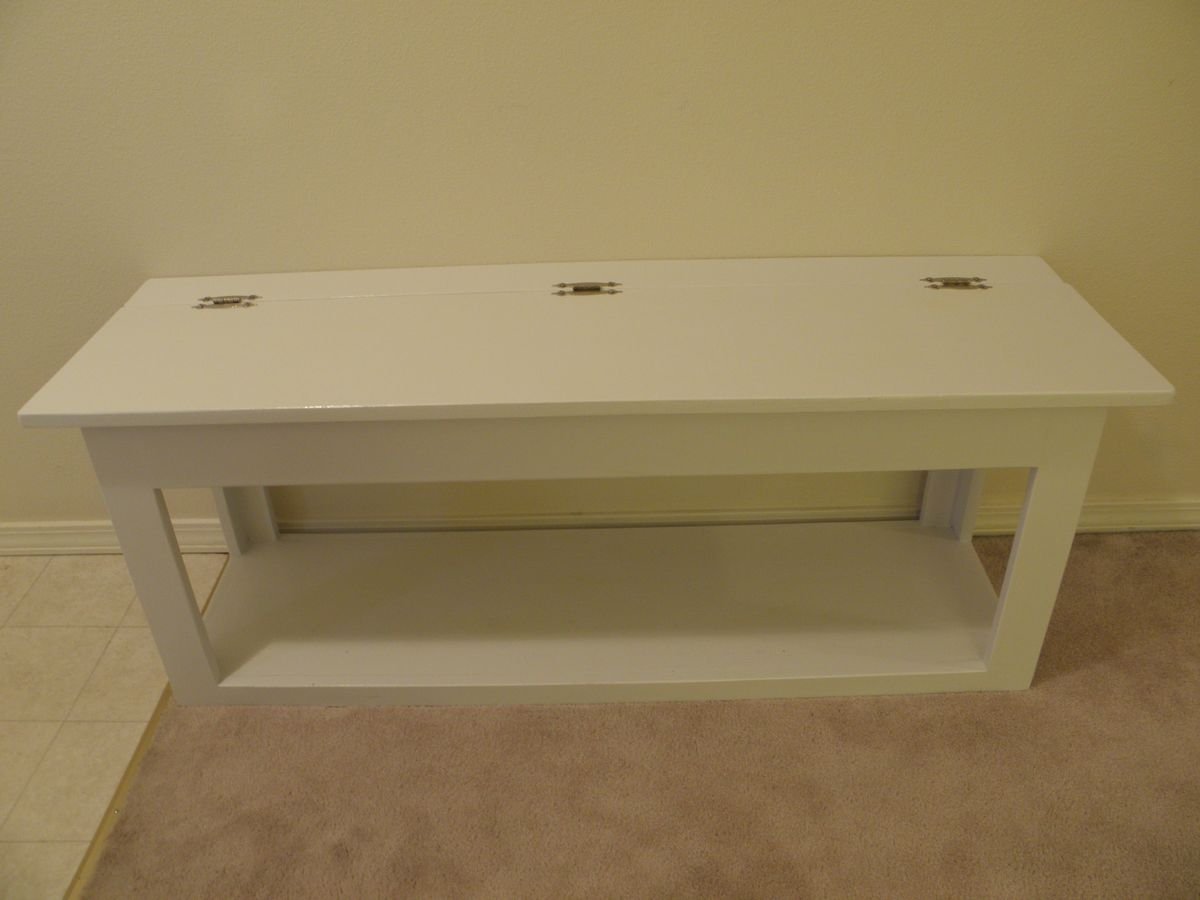
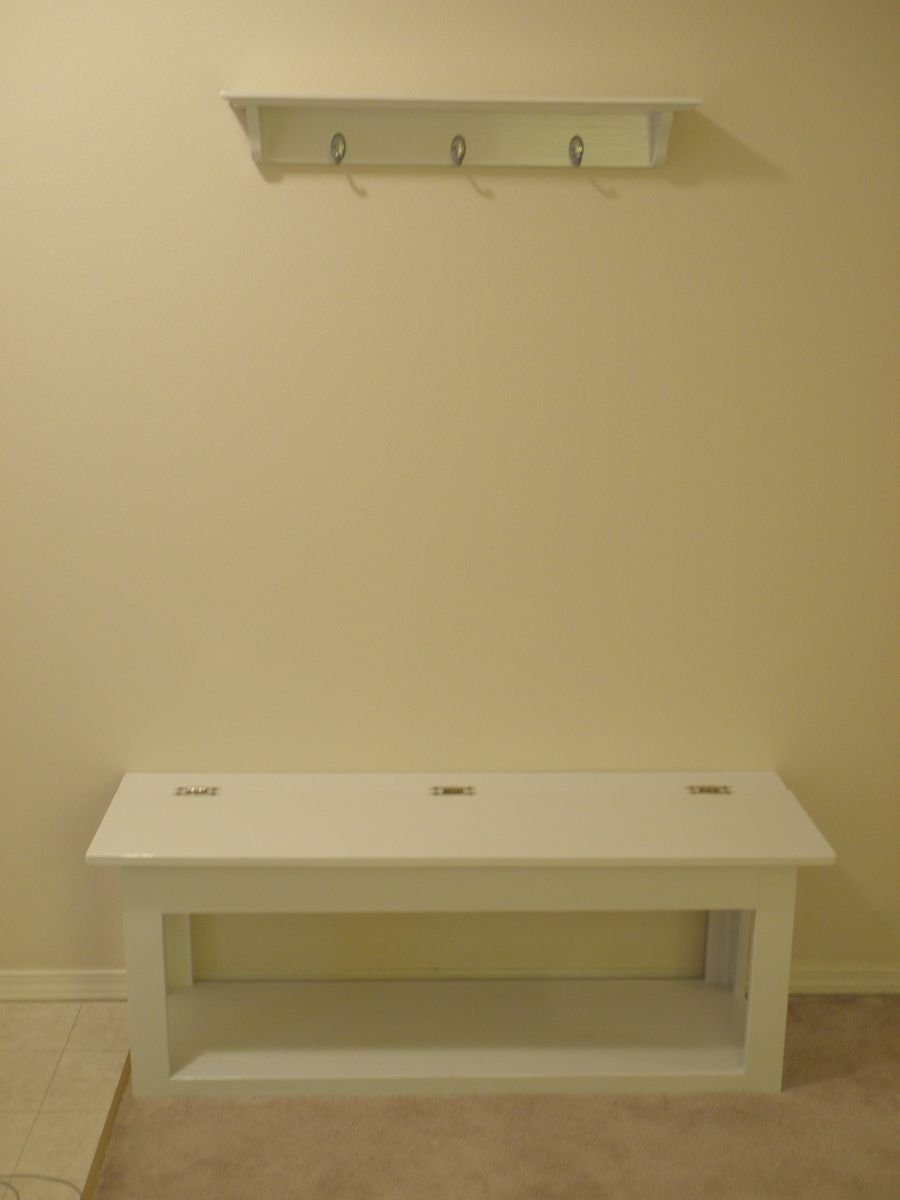
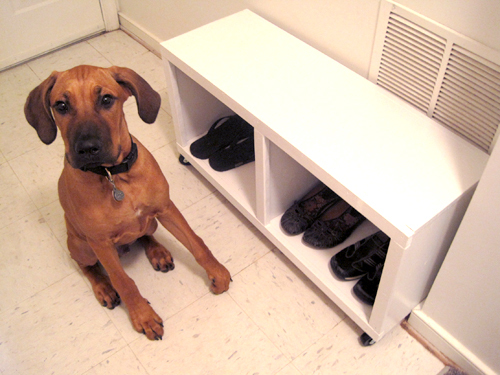
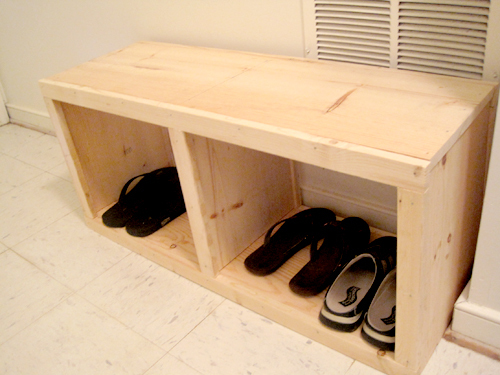
Flip Top Storage Bench
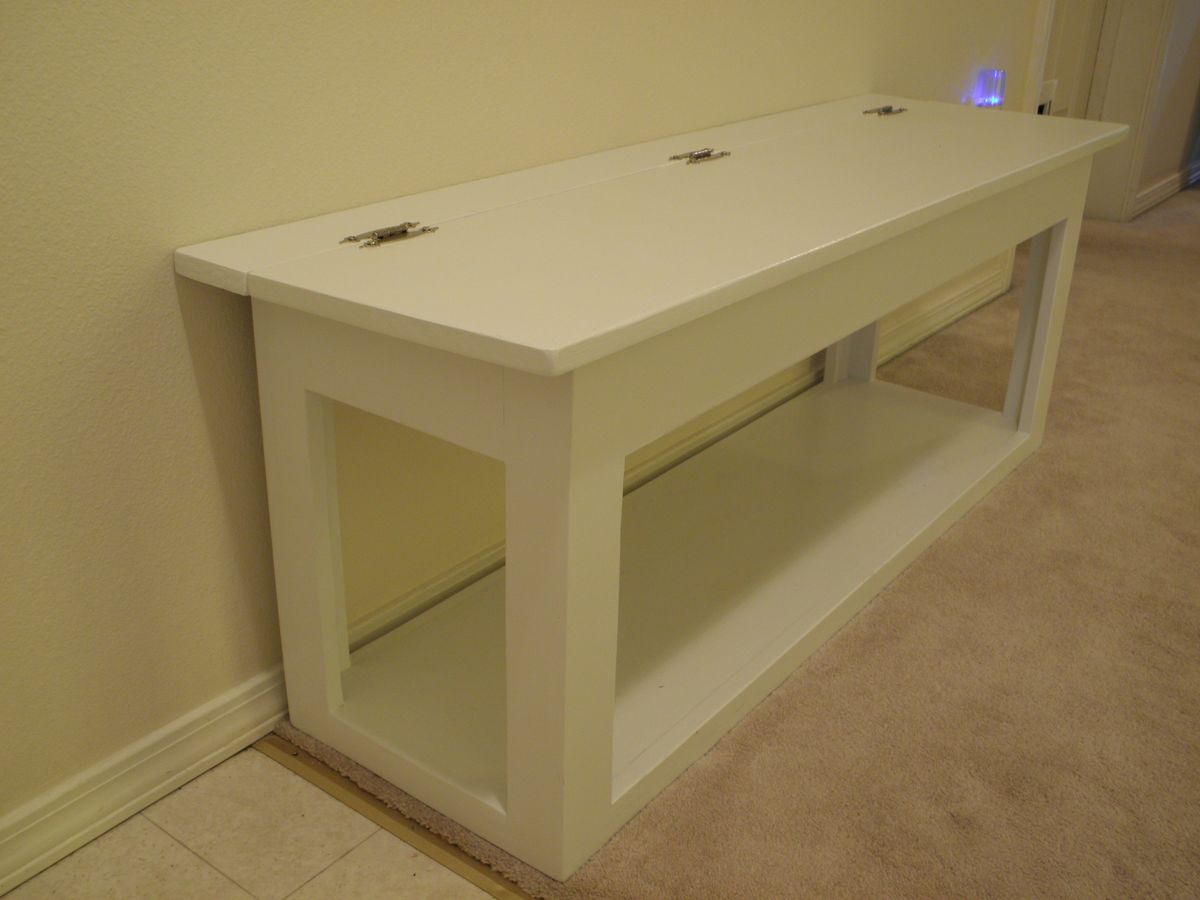
My first build! Very simple and straightforward. I chose to not have the bench raised off the ground; however, the legs were cut at the same length as the plans, so my shoe storage is a little taller than the plans, giving me more room for boots.
If I was to do it again, I would not use 1x3's for the lower cross boards, instead I would use 1x4's to match the upper cross boards so there's some symmetry, since it just sits on the floor rather than being raised up.
The build itself took me about 3 hours, which seems like a lot for something this simple, but again, it was my first build, first time using the Kreg Jig (love it!!), and it took me a while to deal with my less-than-perfect boards.
The hardest (and longest) part of this project was the painting! I have alway just used wood stain when I have refinished furniture, but I decided to go with white Rustoleum primer followed with 2 coats of Rustoleum paint, and finished off with a coat of Rustoleum lacquer. The paint was very thick and even with a $20 paint brush it did not go on evenly--it was a huge source of irritation! I also decided to use decorative hinges on the exterior rather than slim hinges on the inside.
Built from Plan(s)
Estimated Cost
$50
Estimated Time Investment
Weekend Project (10-20 Hours)
Finish Used
Rust-oleum Primer (white)
Rust-oleum latex paint (flat white)
Rust-oleum lacquer (clear gloss)
Rust-oleum latex paint (flat white)
Rust-oleum lacquer (clear gloss)
Recommended Skill Level
Starter Project
Comments
Wed, 01/16/2013 - 12:16
Beautiful bench!
This looks awesome! I am about to start building this as my first project and I bought a Kreg Jig too! Hope mine turns out as good as yours! Thanks for sharing your photos!
Mon, 01/21/2013 - 19:50
Thanks! I have no doubt
Thanks! I have no doubt yours will turn out amazing--it's funny how getting used to a tool (like the Kreg Jig) can instill confidence! I've since built a frame (easy) and 2 farmhouse tables and am working on a triple pedestal farmhouse table...I'm so glad I started with this bench because I learned a LOT from it. Good luck on your project(s)!
Wed, 01/16/2013 - 17:56
For All First-Timers
Lots of posts recently with first projects. You learn very quickly that it isn't the length of time that it takes you to build the box but the care you put into accurate measurements and cutting and checking for square constantly. I still take a long time to build even the most simple project. Then you find that it is the finishing that really takes a long time. Just take your time and you will end up with great results. By the way I add a tiny bit of water to latex paint to help eliminate brush strokes and use a foam brush for the final coat. Also I use spray paint for small projects.
Mon, 01/21/2013 - 19:46
Jake--thanks for the tips, I
Jake--thanks for the tips, I appreciate it! I've discovered I LOVE building, but it's quite the learning process, so I'm thankful for any feedback I can get :)
Amazing Storage Shelf
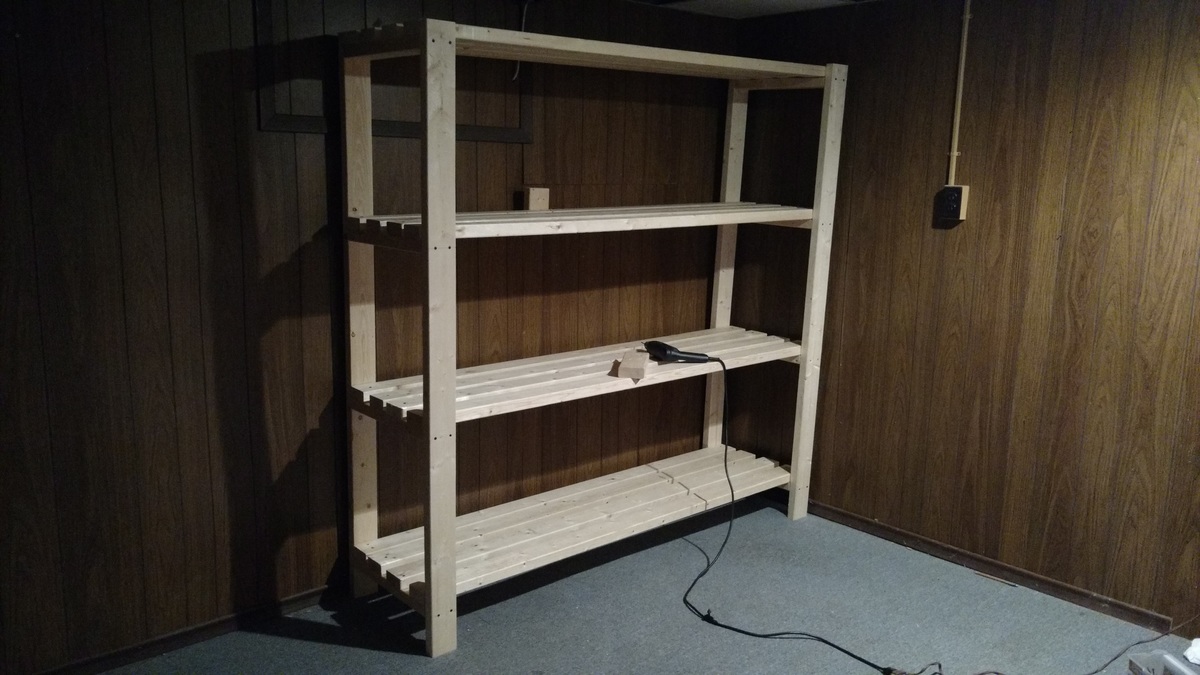
Love this shelf. We found we had to pre-drill holes since the wood we used was very dense, but in the end it was still a 1-day project (including buying wood and running other errands). It was perfect for our storage room since we really wanted a shelf to store totes, but didn't want to spend a lot on a room we never go in. In the end we spent $80 on wood, which is far less than comparable metal shelves for $160-$180 elsewhere. In addition this thing is STURDY. Thank you Ana!!
Built from Plan(s)
Estimated Cost
$80 (CAD)
Estimated Time Investment
Day Project (6-9 Hours)
Finish Used
None
Recommended Skill Level
Starter Project
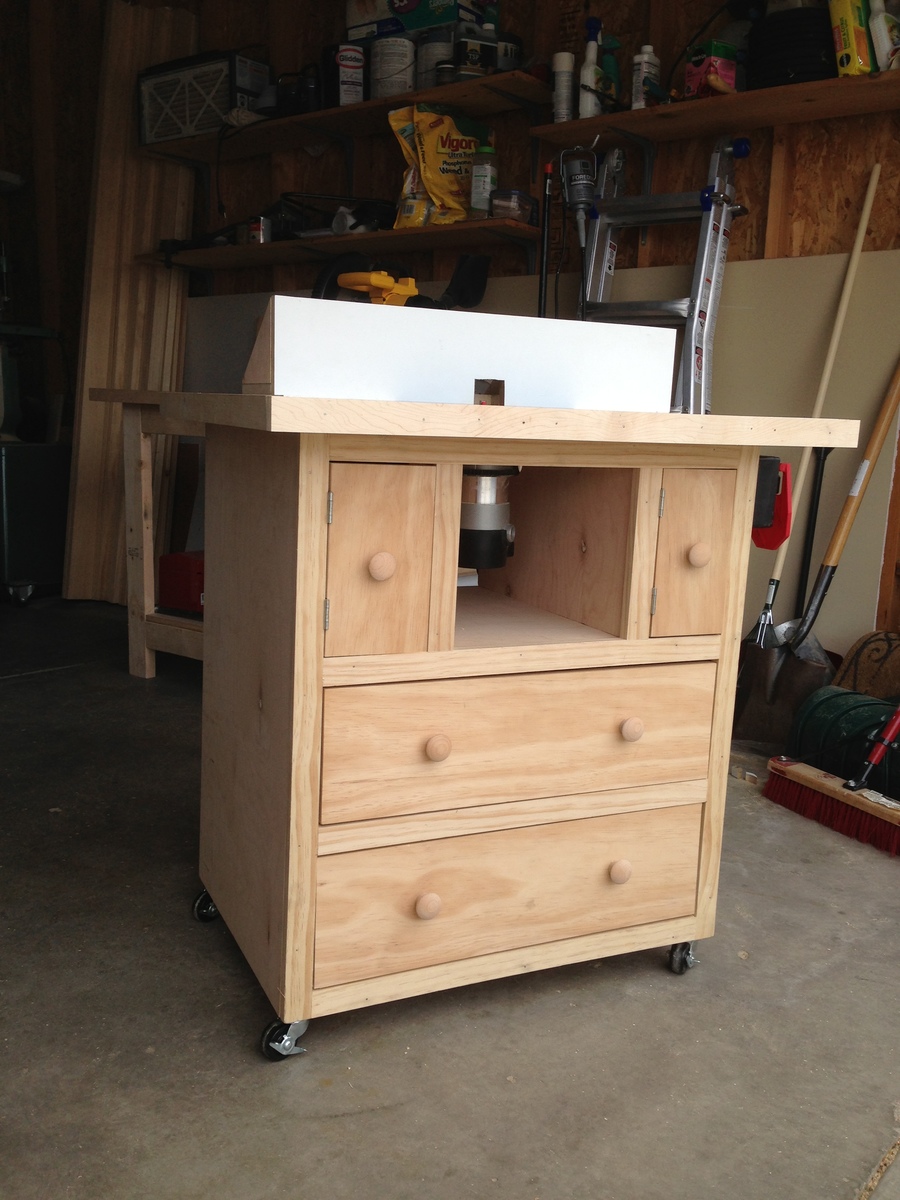
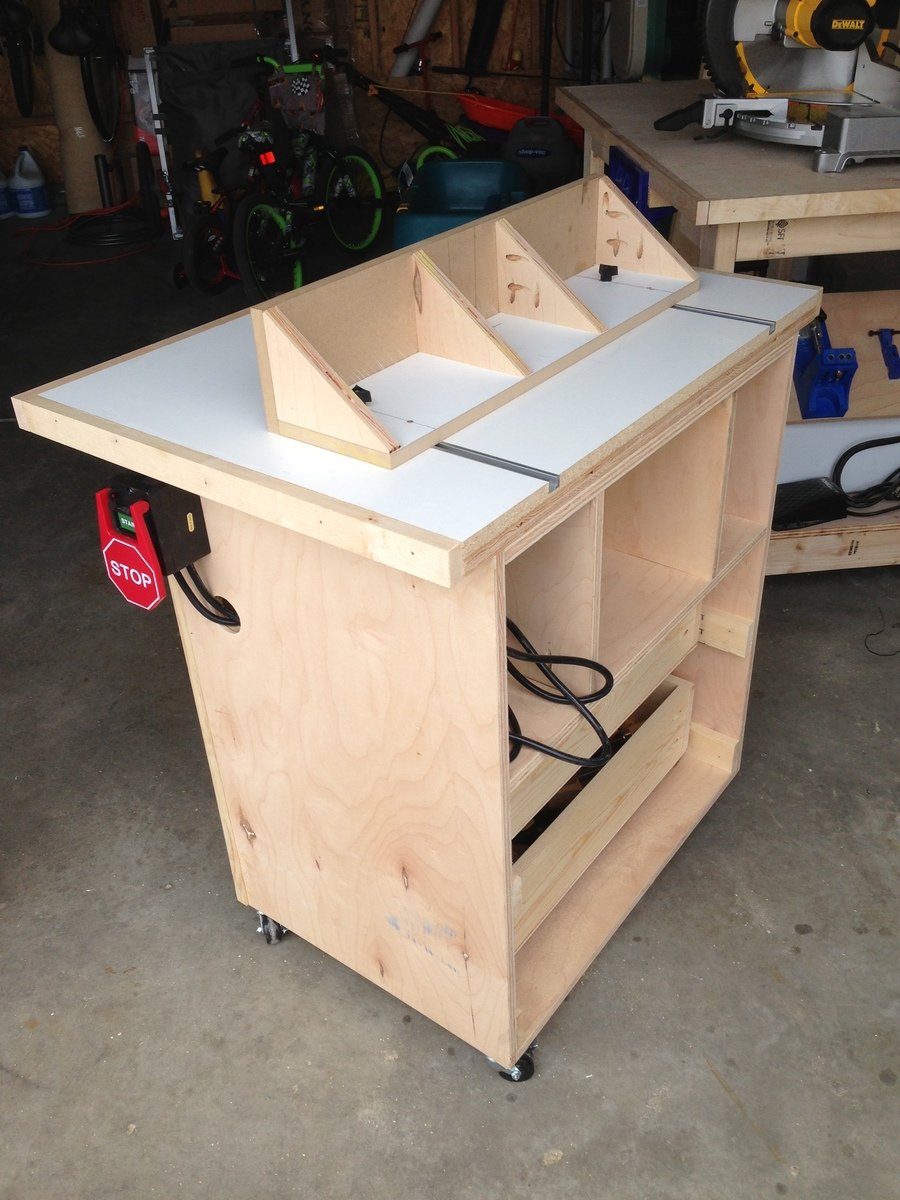
Router Table
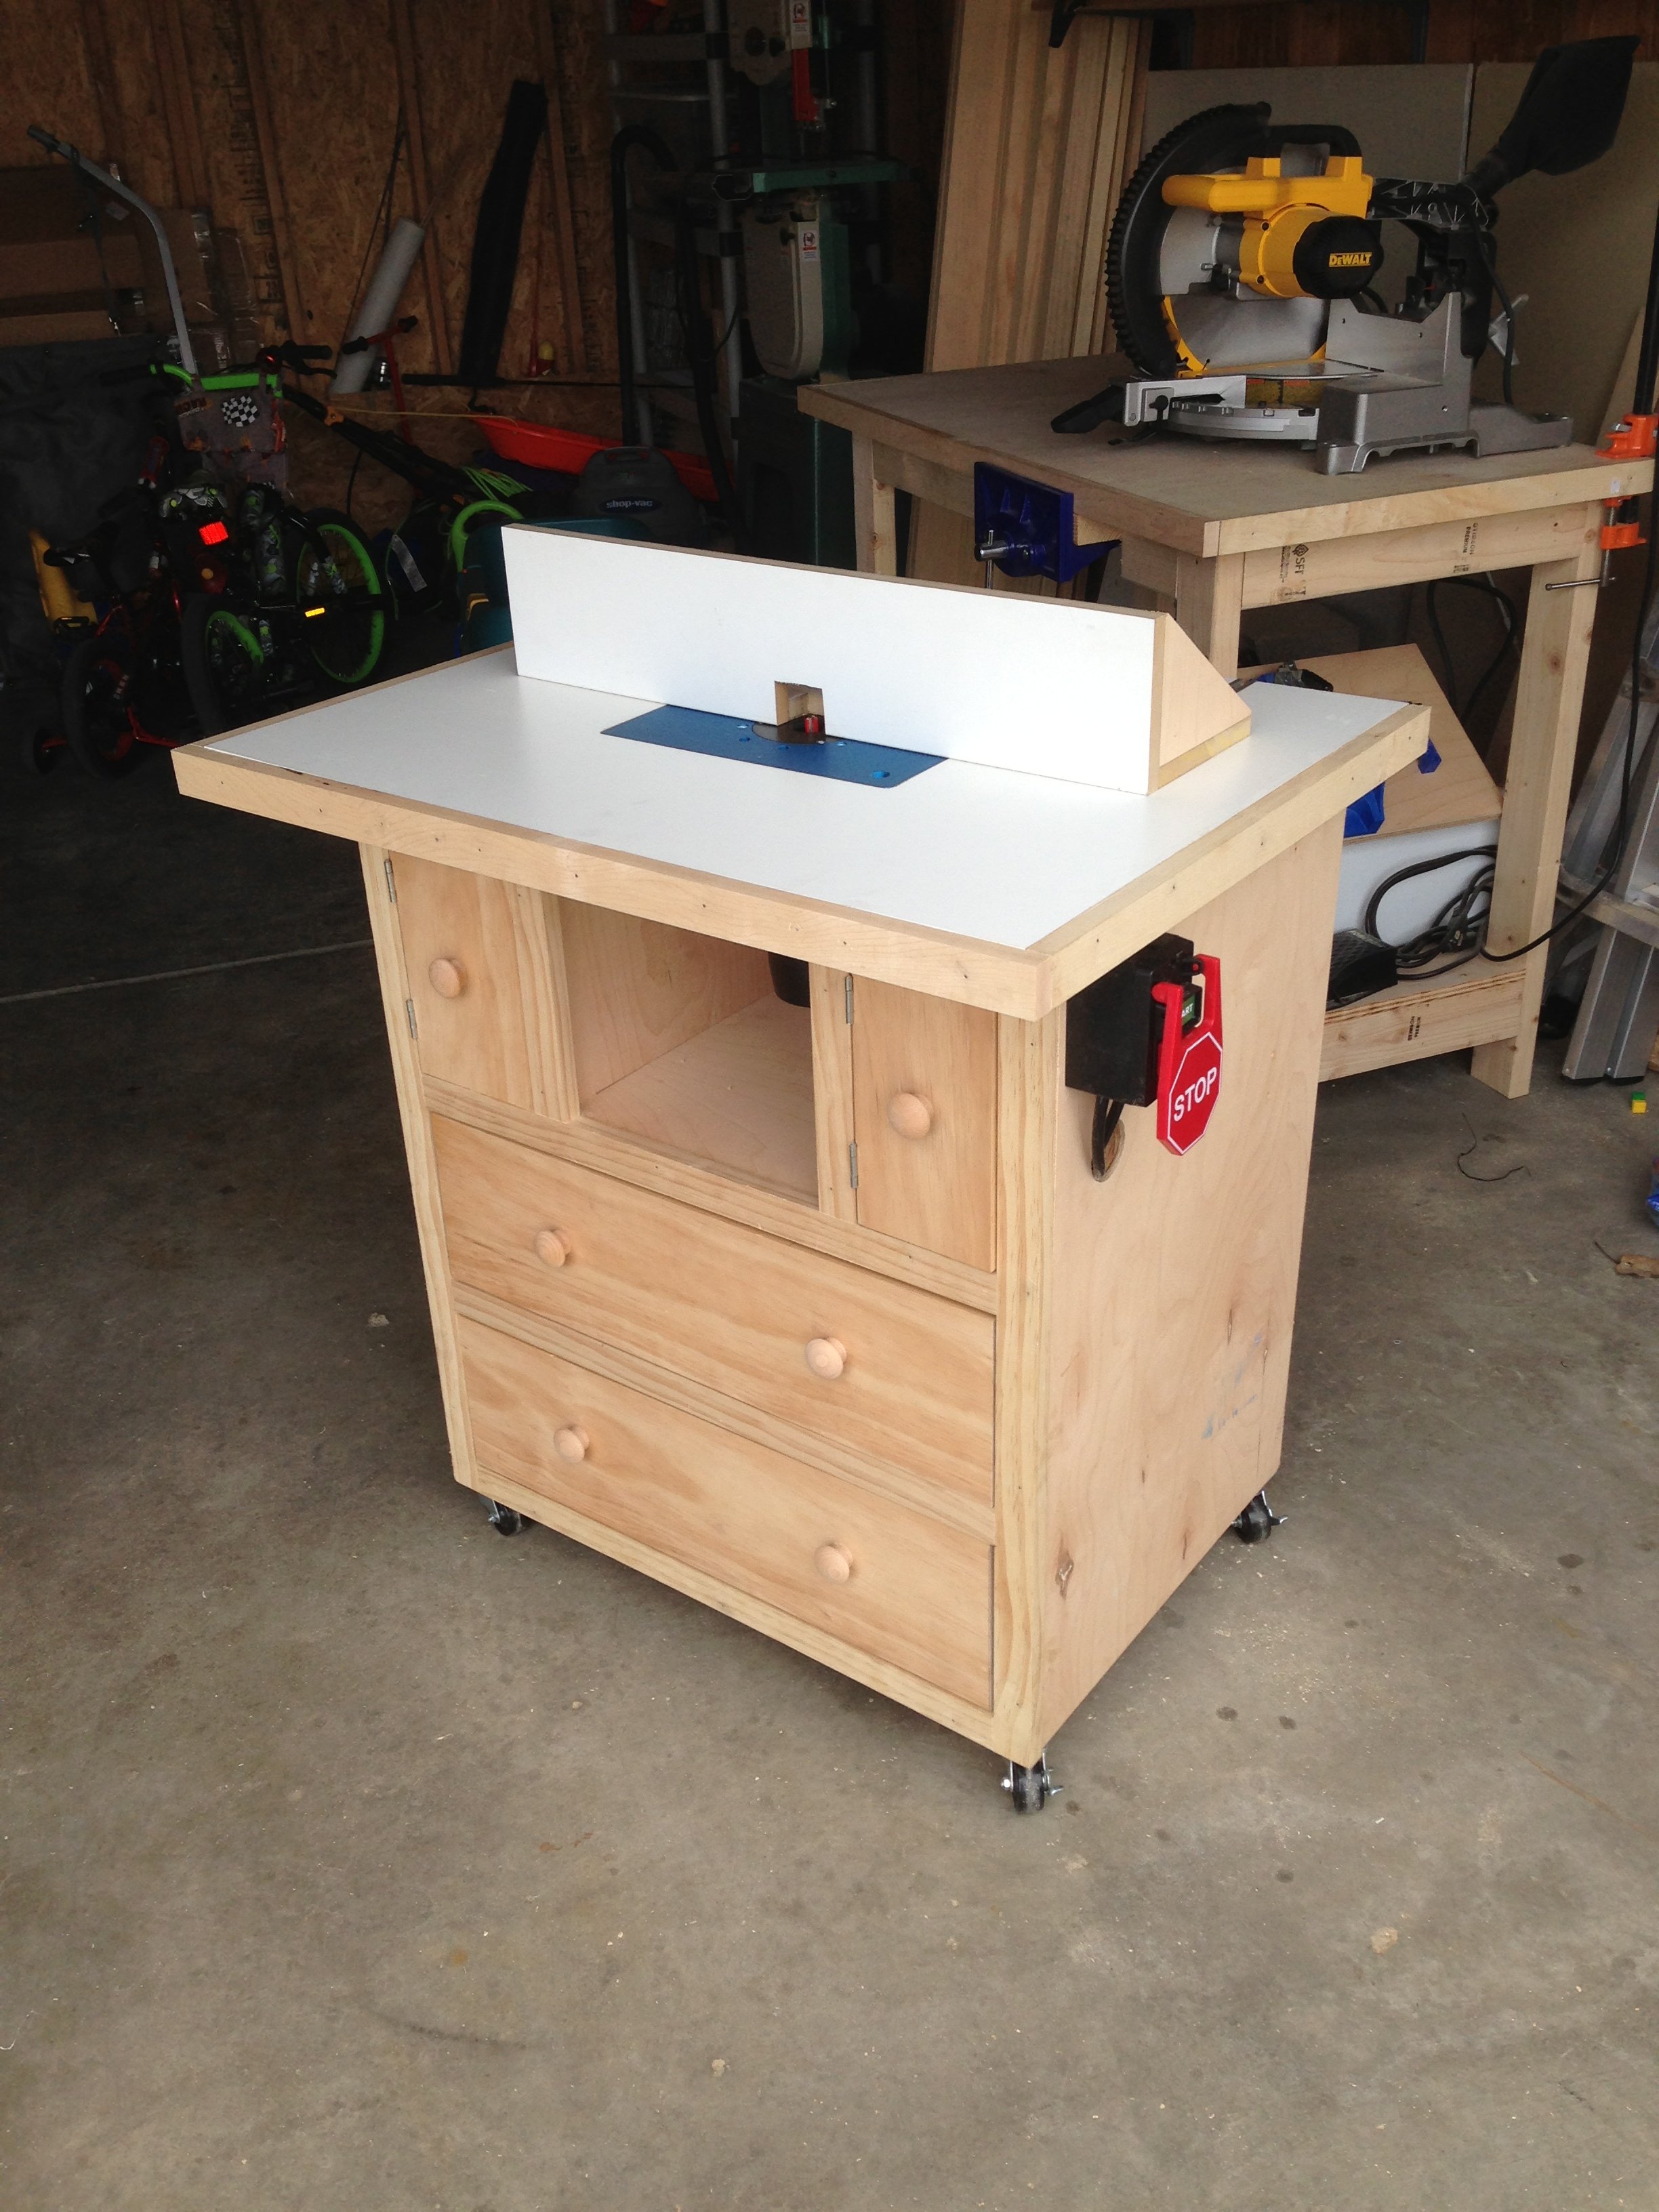
My wife has been asking for new dressers for the boy's room for a while now but every time we go out shopping for them I am very disappointed in the quality of what is available. So I decided to make them myself. I have not made any furniture before and needed a few tools to help me out and thought what better way to get both the practice and the tools then build my own router table.
I searched the web for plans and found these great ones. I loved these plans but wanted to make a couple of changes anyway. I decide to build the table top as well as the cabinet and decided to make it a little taller to fit me better. Due to the changes and making the table top it took me 2 days to finish, 1 day for the cabinet and 1 for the top and to put it all together. (Not having used a router before it took me a while to get the template just right to cut in the insert.)
It works great and looks great in my shop. Now on to the dressers.
Built from Plan(s)
Estimated Cost
350 with the router
Estimated Time Investment
Weekend Project (10-20 Hours)
Finish Used
none
Recommended Skill Level
Beginner
Comments

Sun, 04/21/2013 - 10:55
I need to build one of
I need to build one of these!!
Yours looks very nice!
American Girl Doll Closet
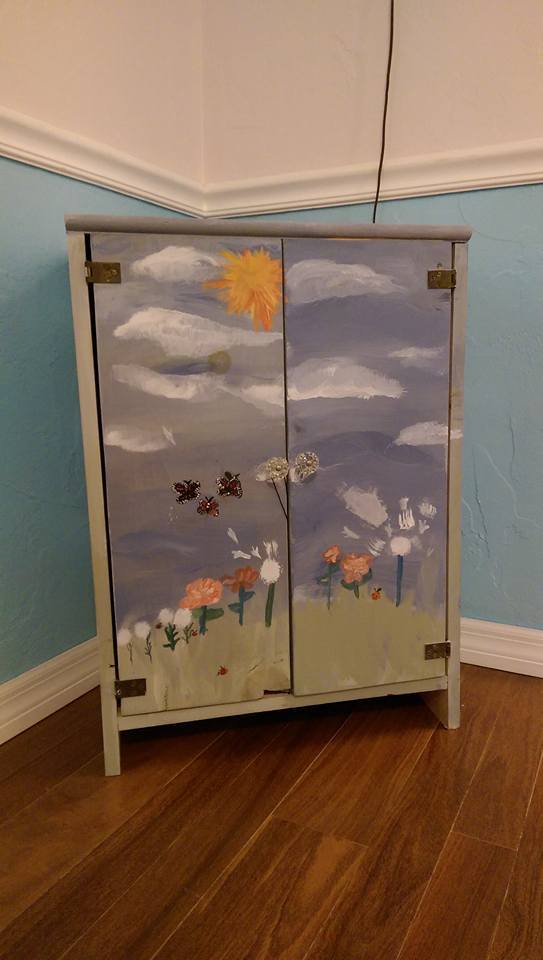
This was fun and easy. I had some of the wood already so I didn't spend that much. My girls painted it to add a personal touch. I would consider adding a magnet to help the doors stay closed a little better. Its been a couple of years and they are still enjoying this. At the time I had no idea how to make a star. Now I know it woudl be easy with a jig saw.
Built from Plan(s)
Estimated Cost
$50
Estimated Time Investment
Day Project (6-9 Hours)
Finish Used
Paint
Recommended Skill Level
Intermediate
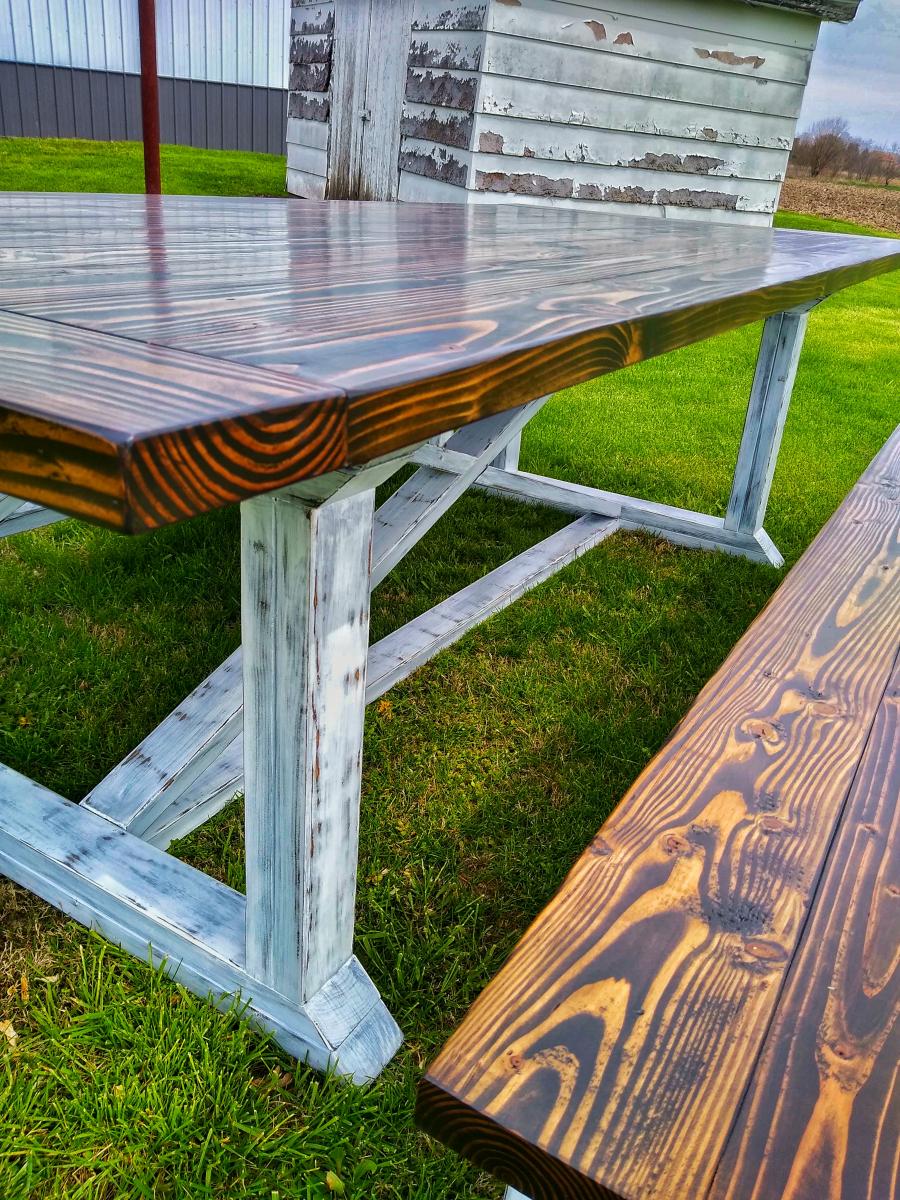
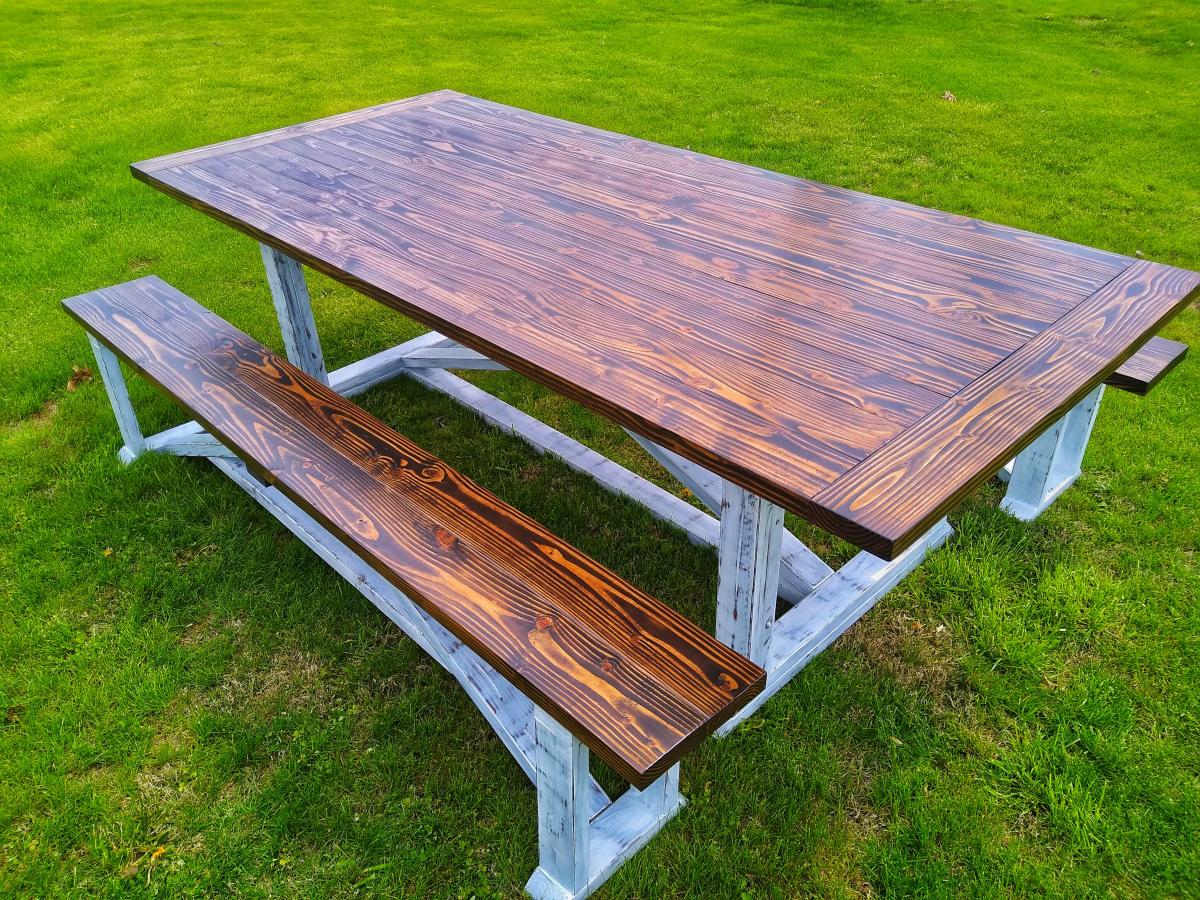
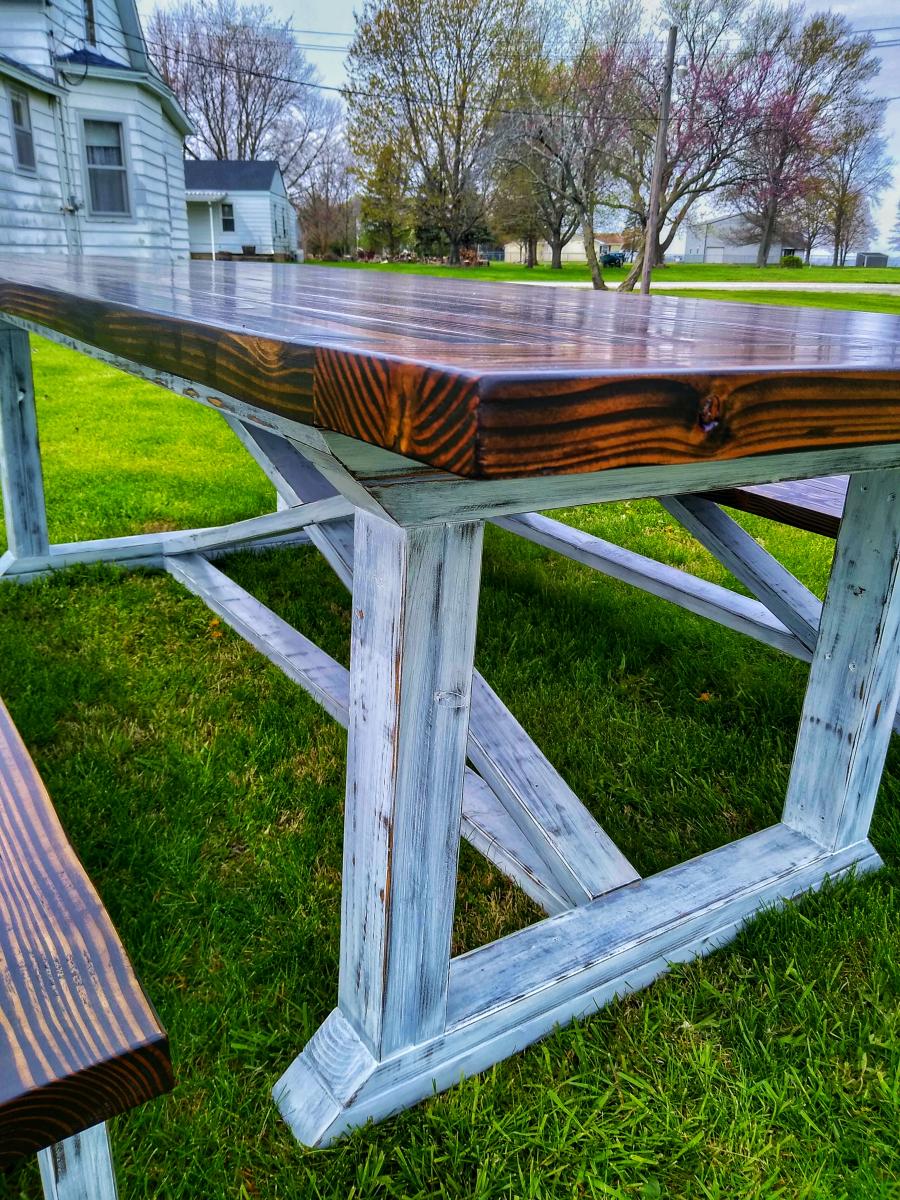
Farmhouse Table
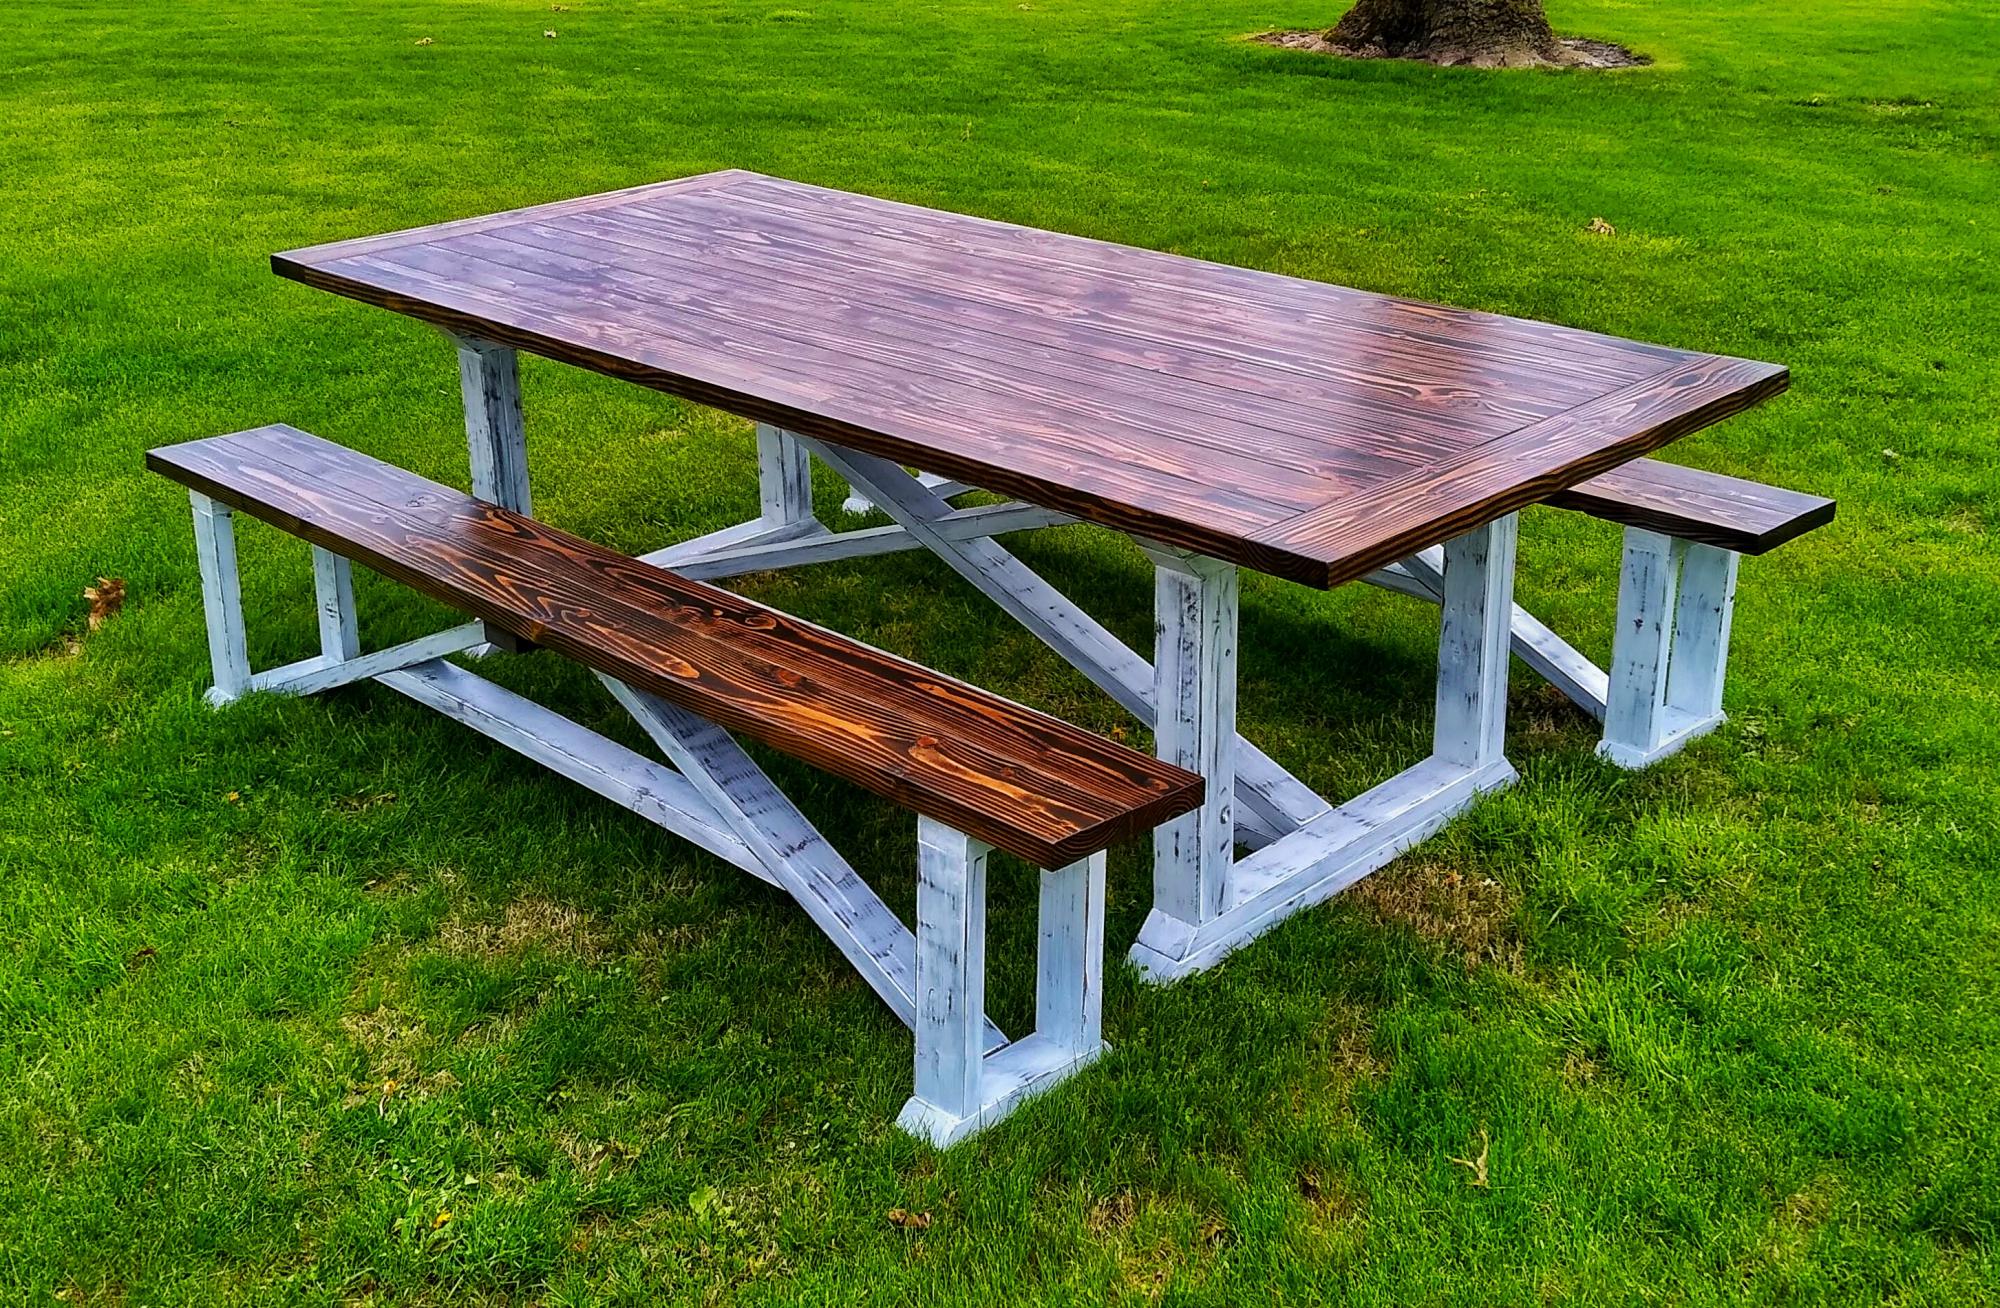
This was my first Farmhouse Table build. 8ft long with 2 benches. Distressed white with True Brown tops.

Built from Plan(s)
Comments
Cedar Raised Garden Beds - 3 Tiers

Steps:
1) Cut the boards to the specs below or adjust to your space
2) Kreg Jig the cut boards along each of the sides (length wise and on the ends) for attaching and making a box.
3) Make 3 separate boxes, don't assemble until you move to location. I used 4x4 cedar posts in the corners of the base box to add stability. I used 2x2 pine in the front corners of boxes 2 and 3 for stability. Install these after the dirt has been added so you can hammer in as a stake, attach with screws on front and sides. I created 2 stakes for boxes 2 and 3 and added to the front to prevent bowing when the dirt is added.
Box Dimensions:
1) (base) 70.5" L x 46 W x 4 cedar boards high
2) 70.5" L x 32 W x 2 cedar boards high
3) 70.5" L x 16 W x 2 cedar boards high


Built from Plan(s)
Estimated Time Investment
Day Project (6-9 Hours)
Recommended Skill Level
Beginner
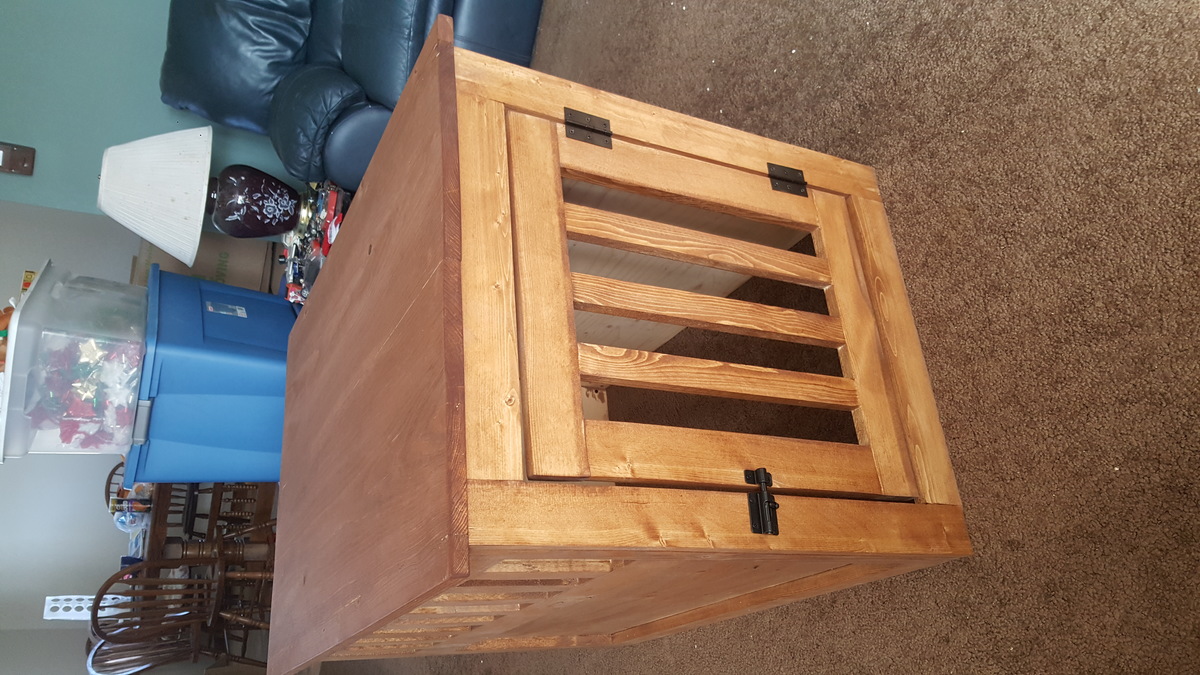
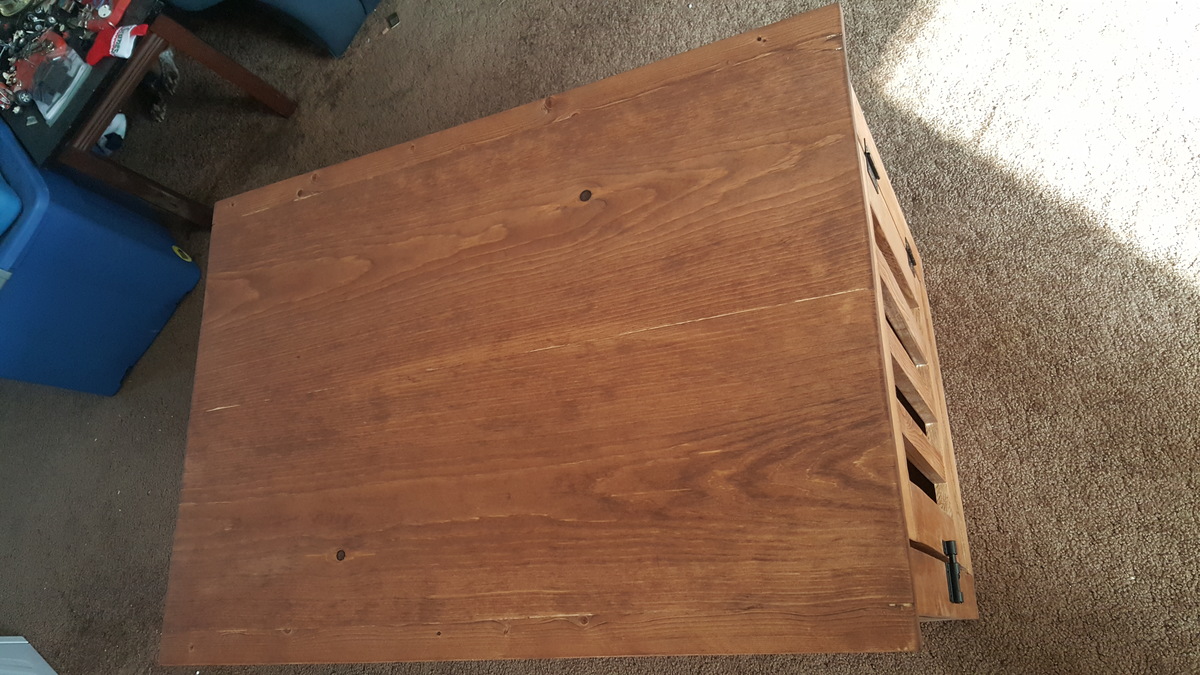
Mission Style Dog Kennel
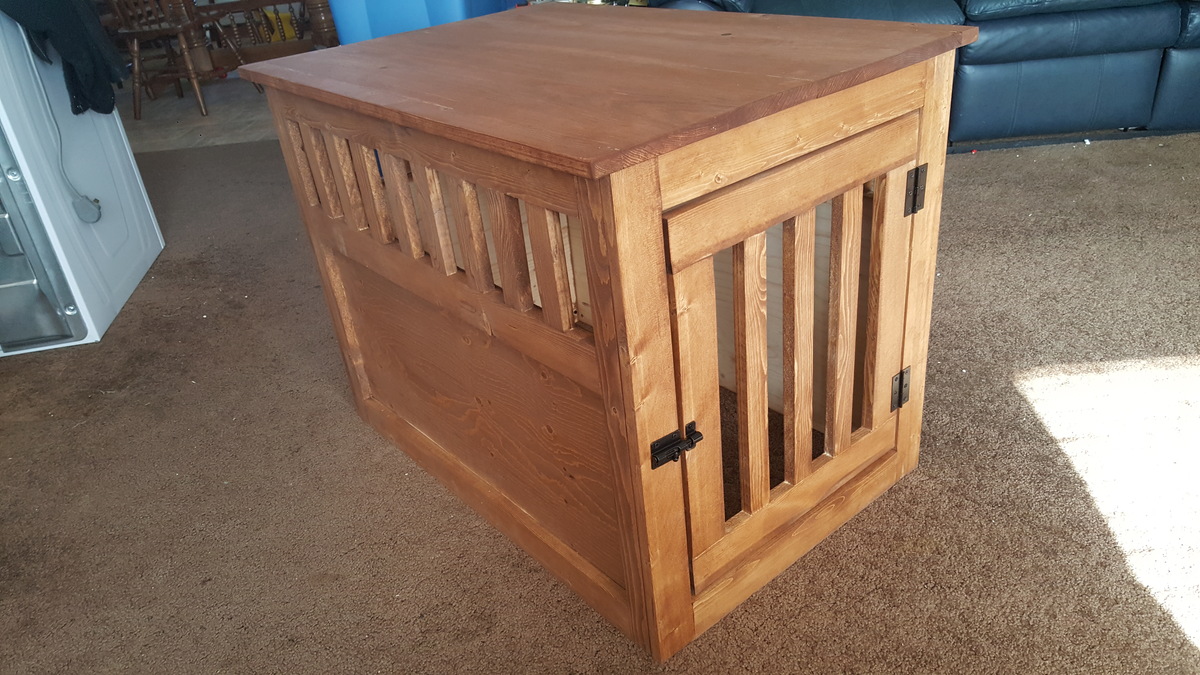
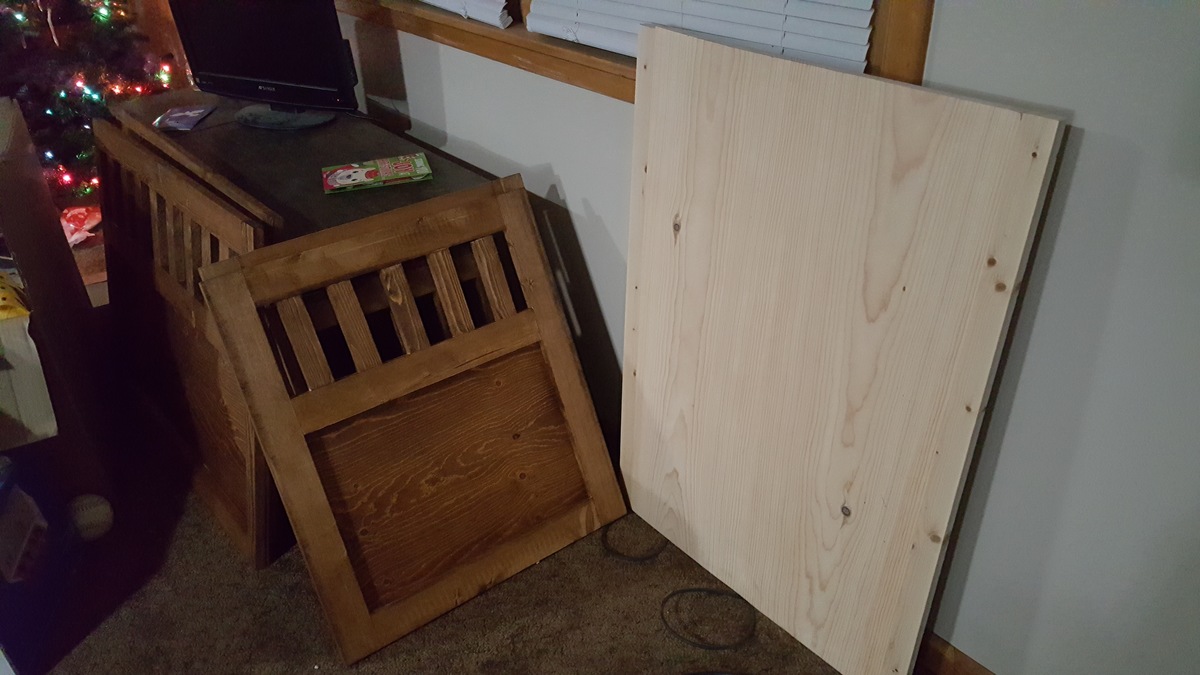
This project was really pretty easy. The hardest part was holding the pieces just right so they ended up where we wanted once the kreg jig hole screws went in. Also, we had to be sure not to overtighten the screws and cause splitting.
We did have to make two adjustments to the plans. I think the first was a typo...where it says 2 - 1x2 @ 15 3/4" (door sides) they should actually be 1x3 based on the images.
The second adjustment was the plywood for the back 17 3/4" x 21" ended up too wide for the end to fit on, so we made it 17 3/4" x 20"
Built from Plan(s)
Estimated Cost
$100
Estimated Time Investment
Weekend Project (10-20 Hours)
Finish Used
Early American stain and satin polyurethane.
Recommended Skill Level
Intermediate
Comments
Sun, 12/24/2017 - 17:17
Loved this Project
This was my first wood working Project! I learned alot about what to do and not to do for future projects. We are excited about how it turned out!
Spice Cabinet
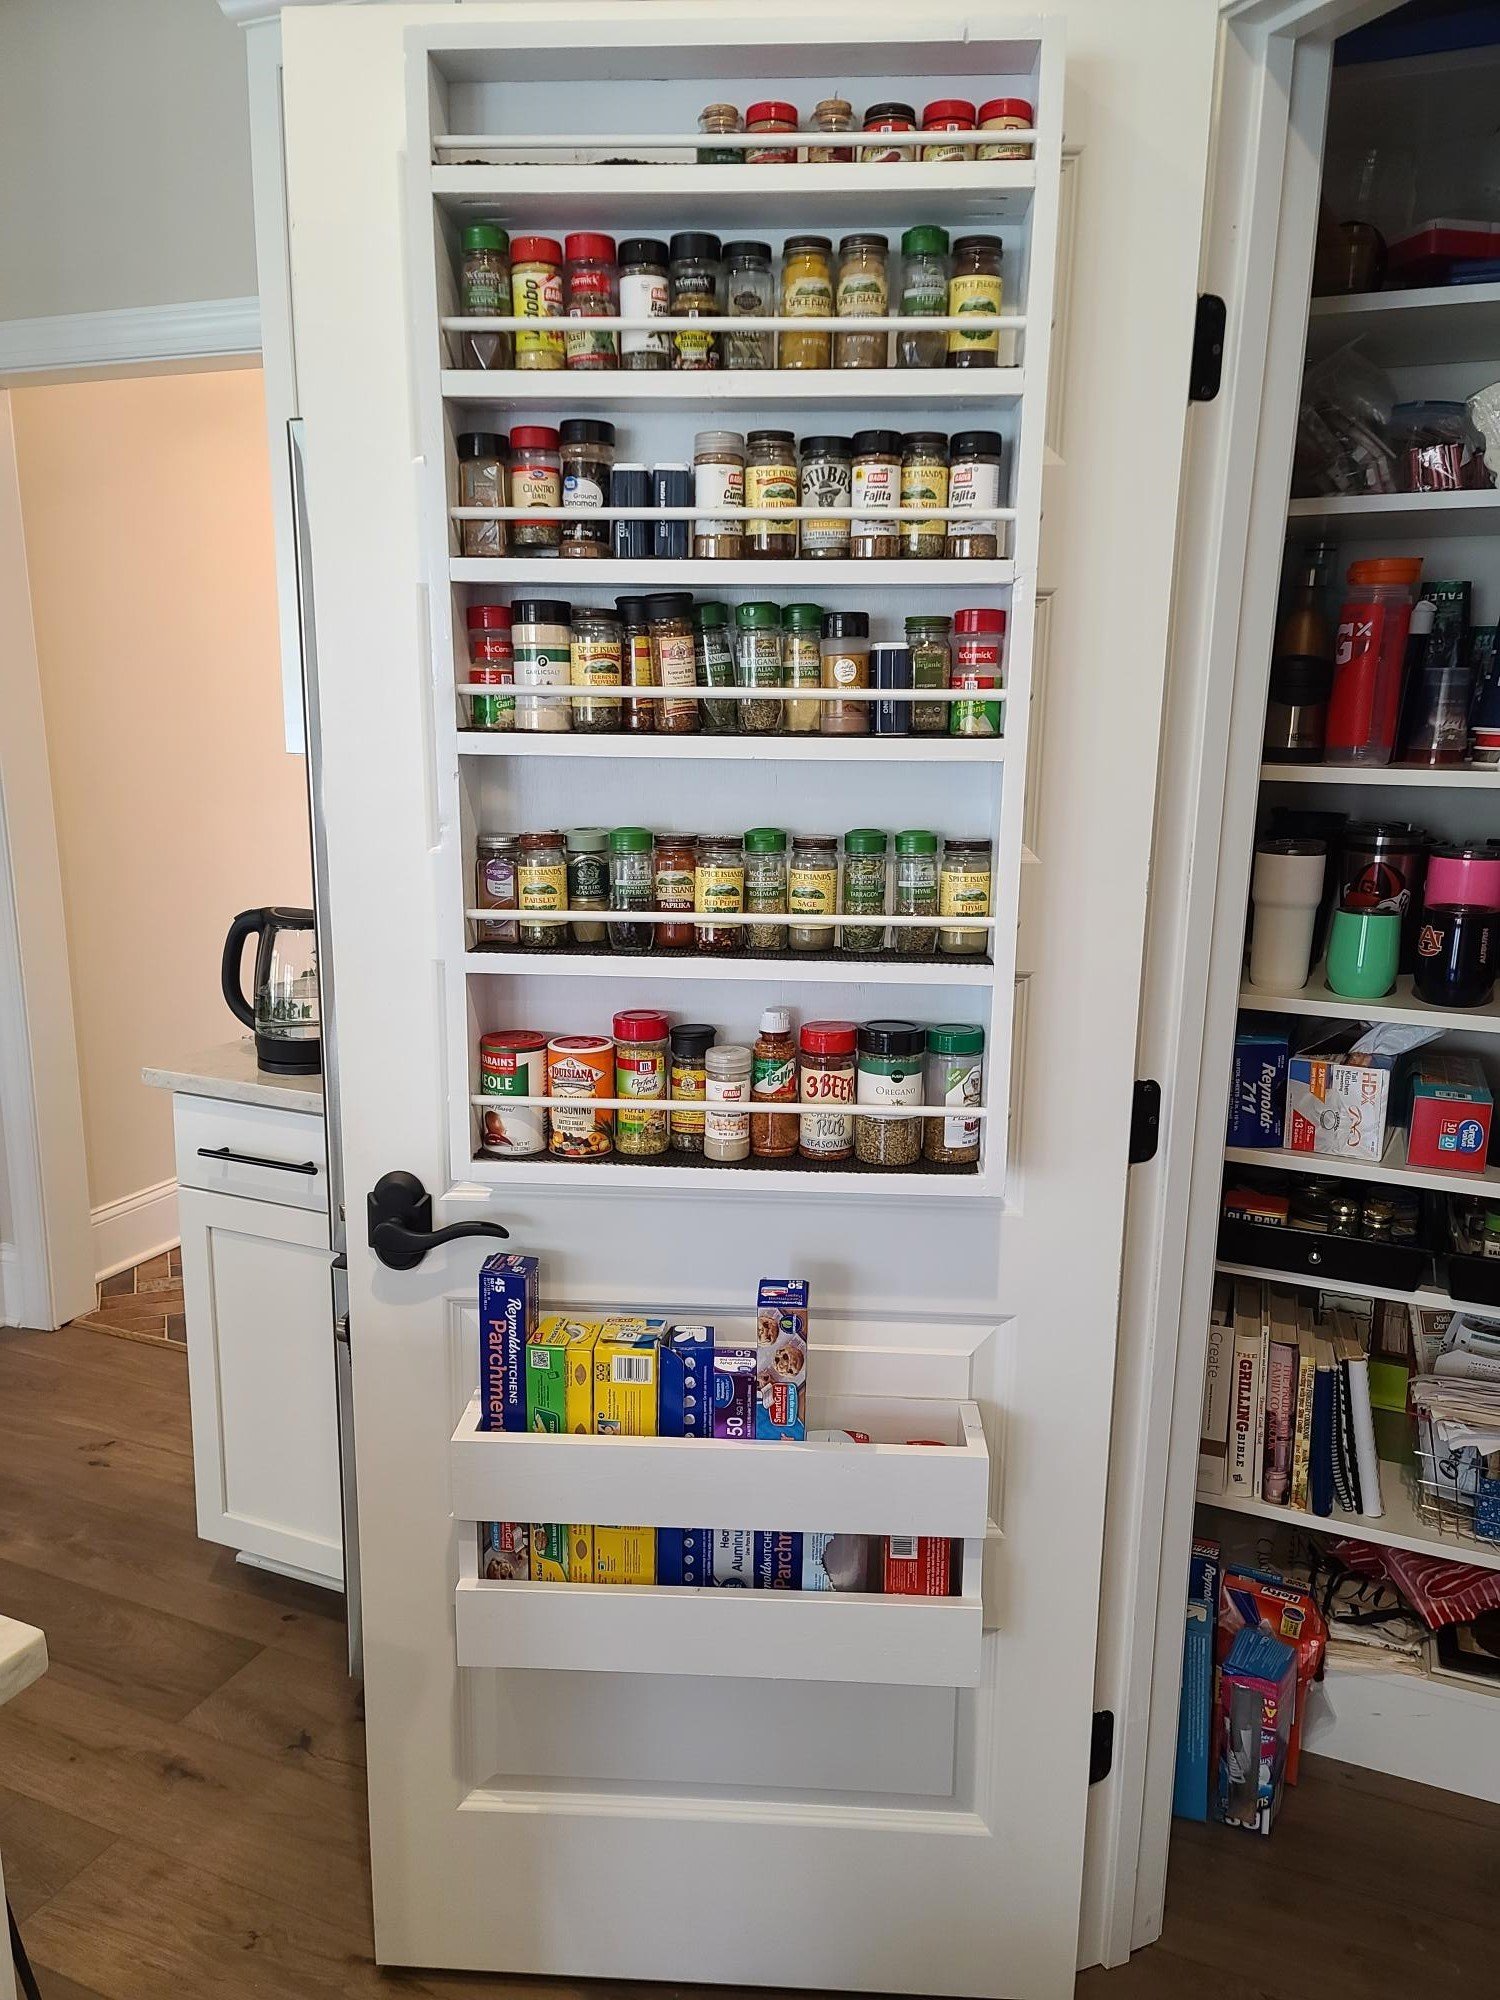
Love to cook, didn't have enough space in the pantry for all my spices. Used the spice cabinet plan and it was perfect.
Built from Plan(s)
Comments
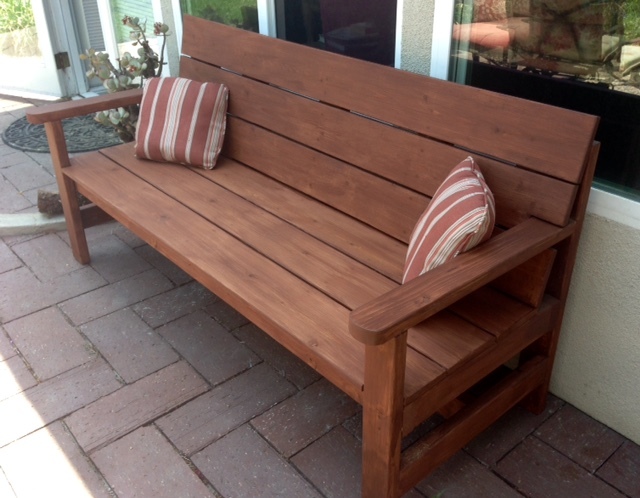
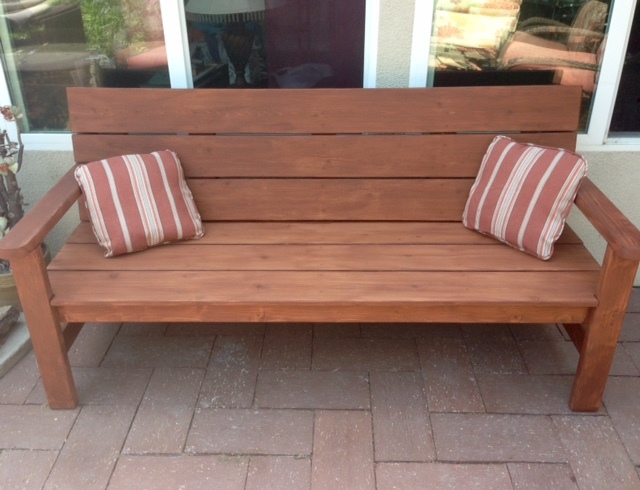
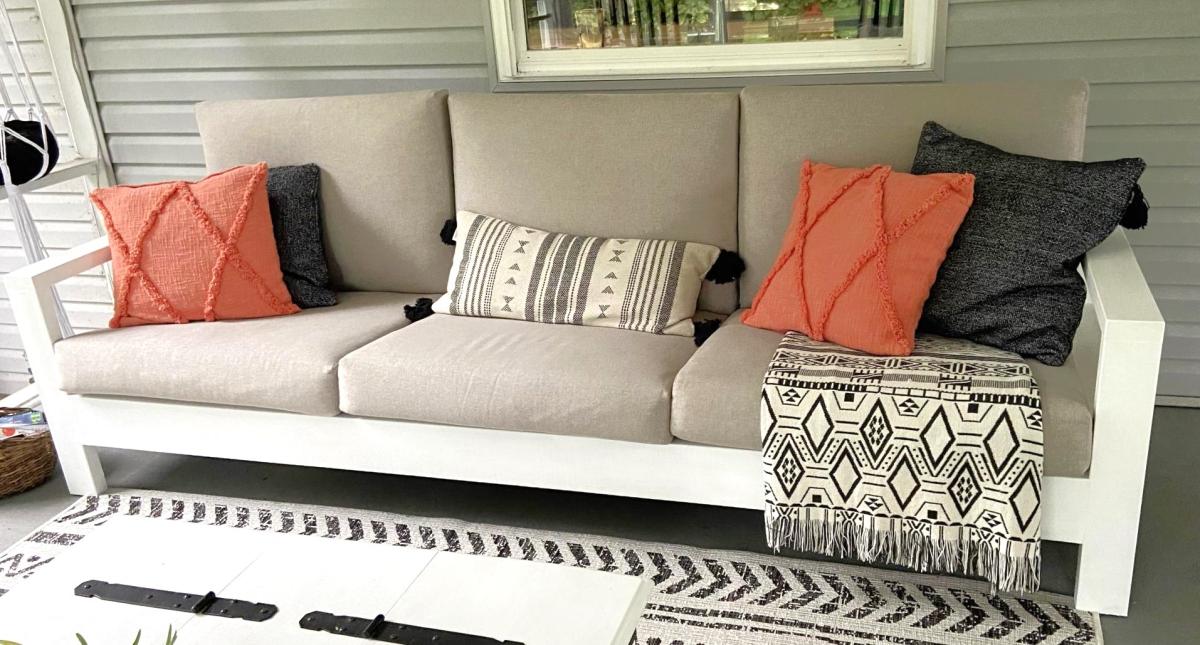
Outdoor Sofa
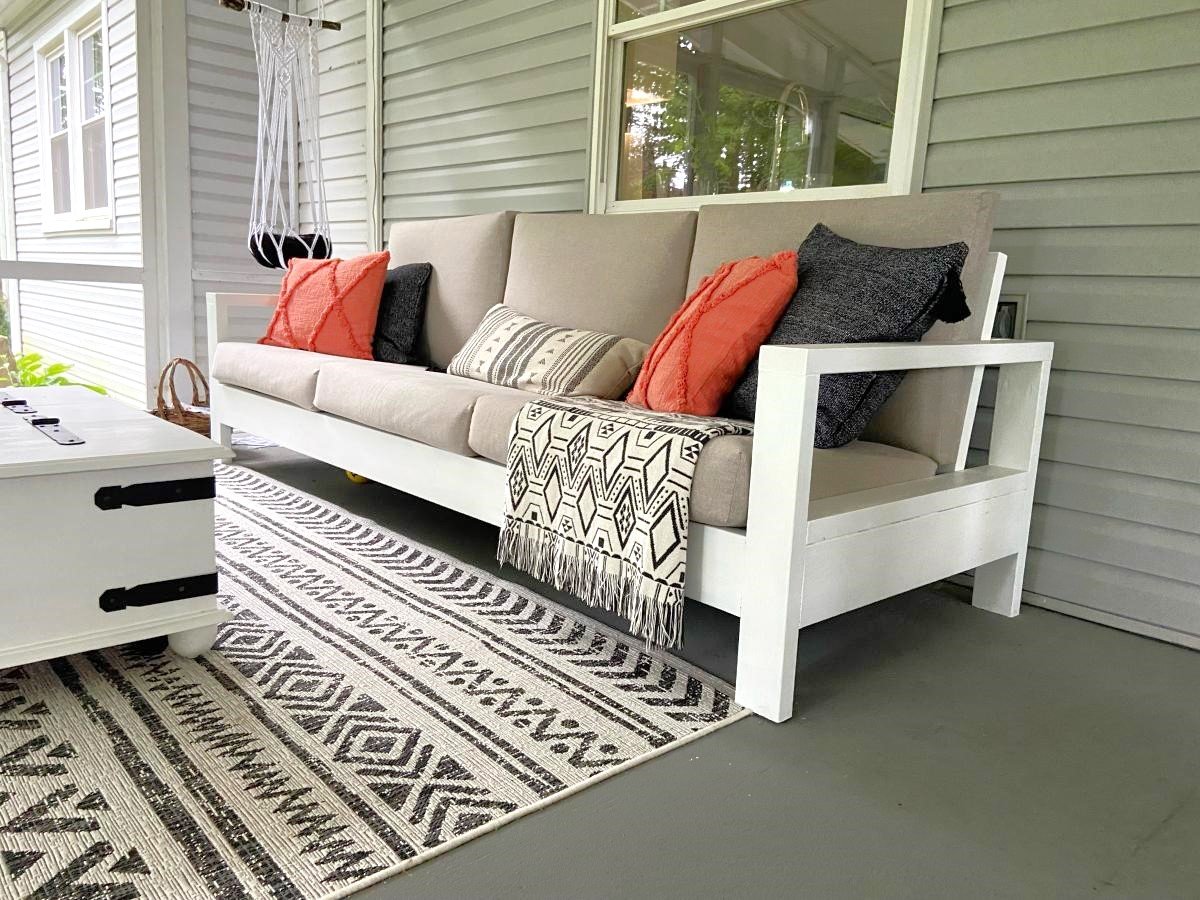
This was our first big project with our Kreg Jig. We adapted the plans to make the sofa 8' long. On Friday night, my husband did all the cuts and I pre-painted everything. With the help of our son, we had the whole sofa built in a few hours on Saturday morning. I puttied the visible holes, did a second coat of paint, and made custom cushions. The plans were very easy to follow. I followed the others' advice about pre-painting and assembling the back on a perfectly level surface. It came out better than I expected and it's super comfortable!
Built from Plan(s)
Comments
Sun, 04/10/2022 - 10:33
WOW Gorgeous!
Thank you for sharing, it looks amazing! Would love to hear how you made the cushions.:)
Mon, 04/11/2022 - 07:44
I want this one
I want the plans for this one! I like this style a lot better. I really like how the bottom cushions are at a slant. I suck at modifying plans.
Seasonal And Holiday
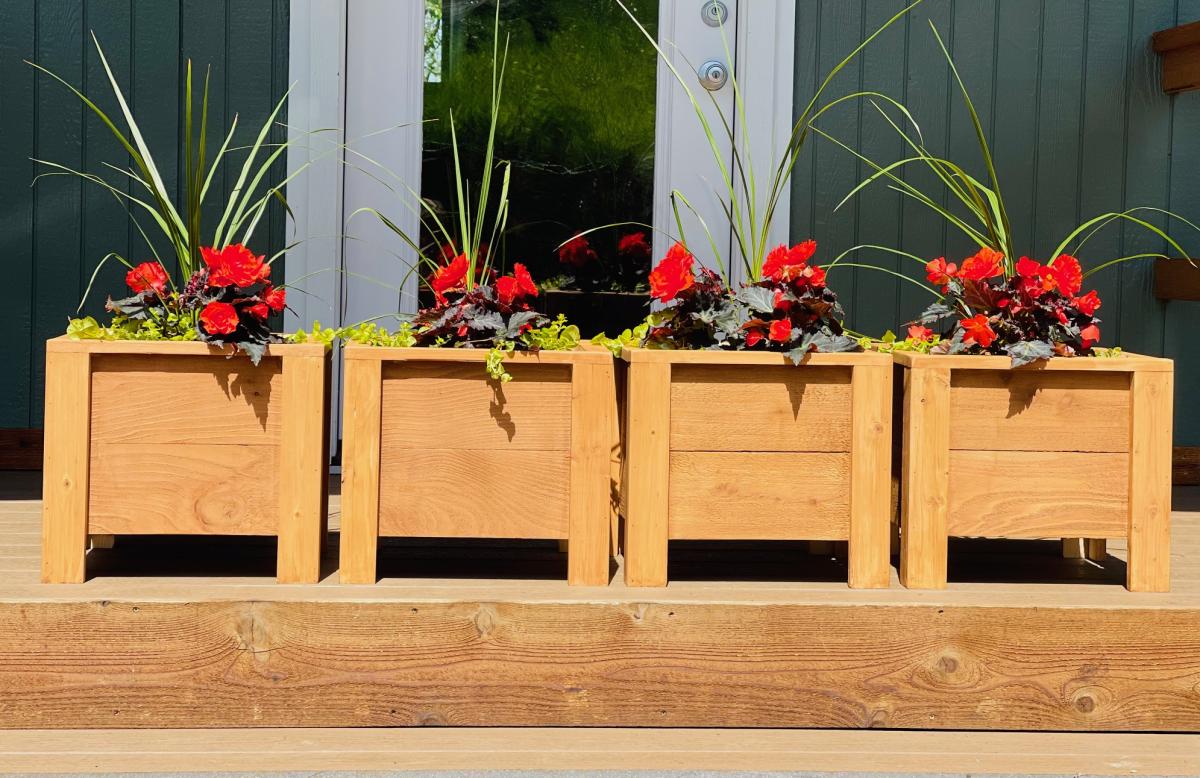
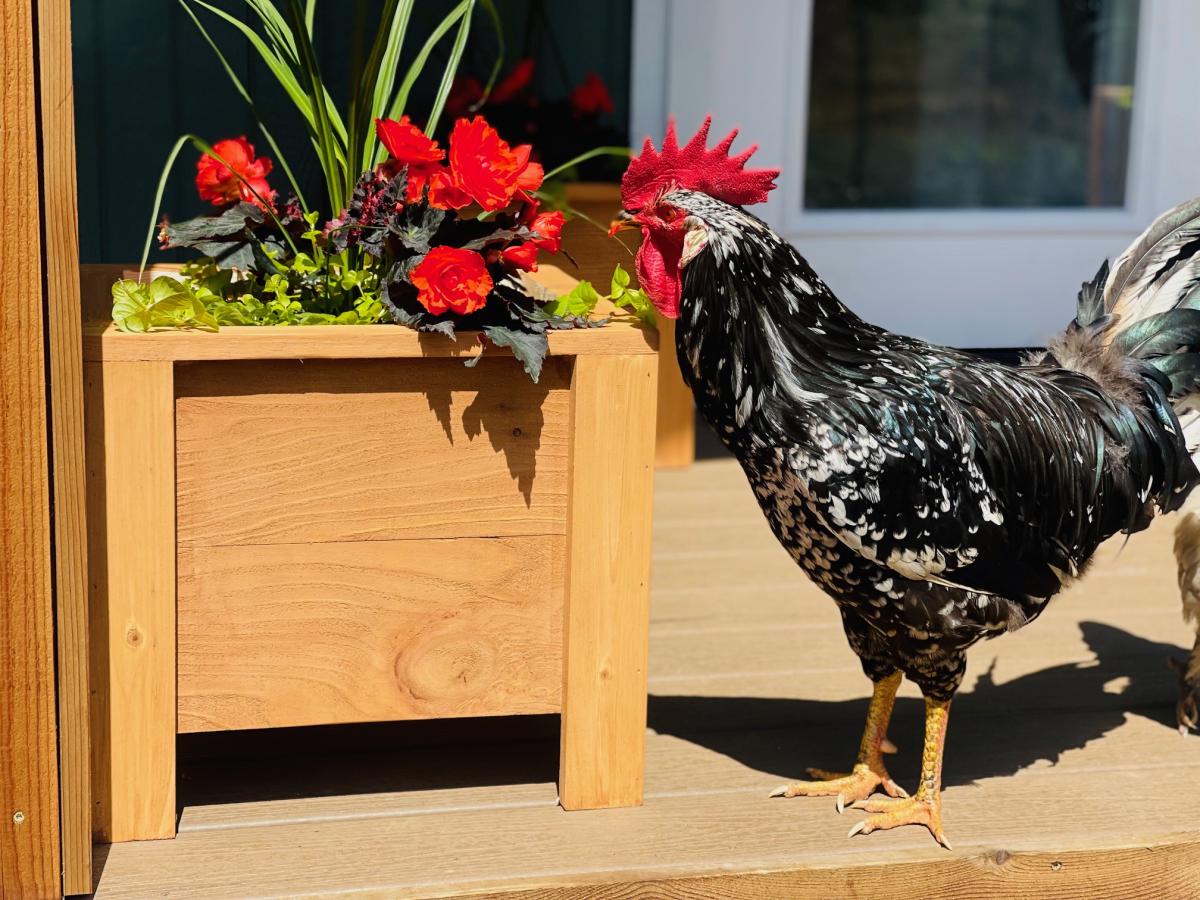
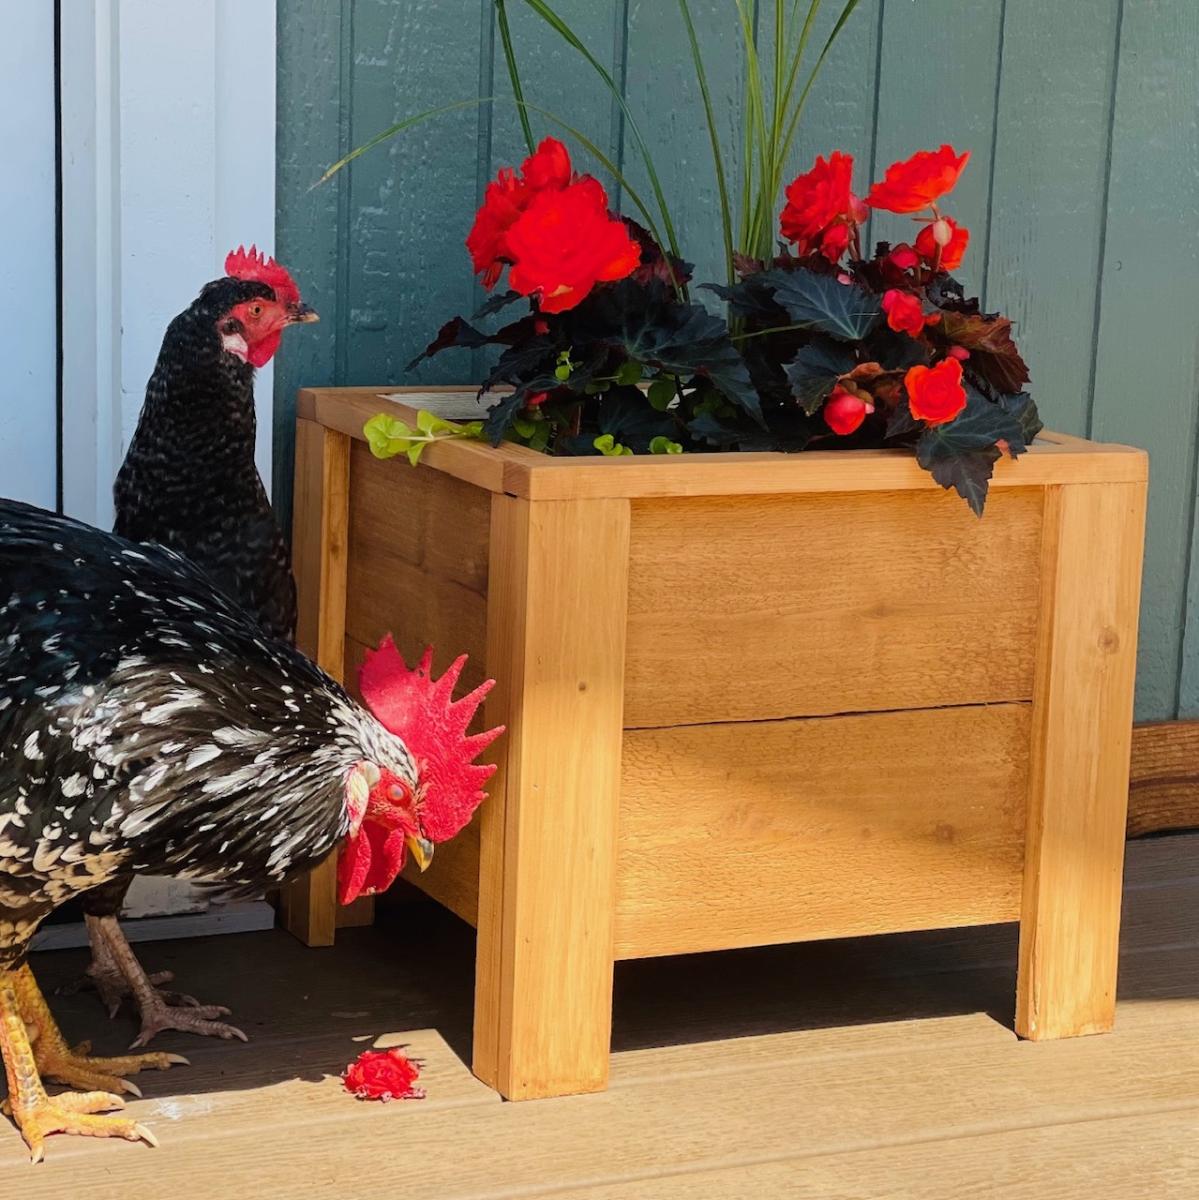
Easy Build Fence Picket Planters
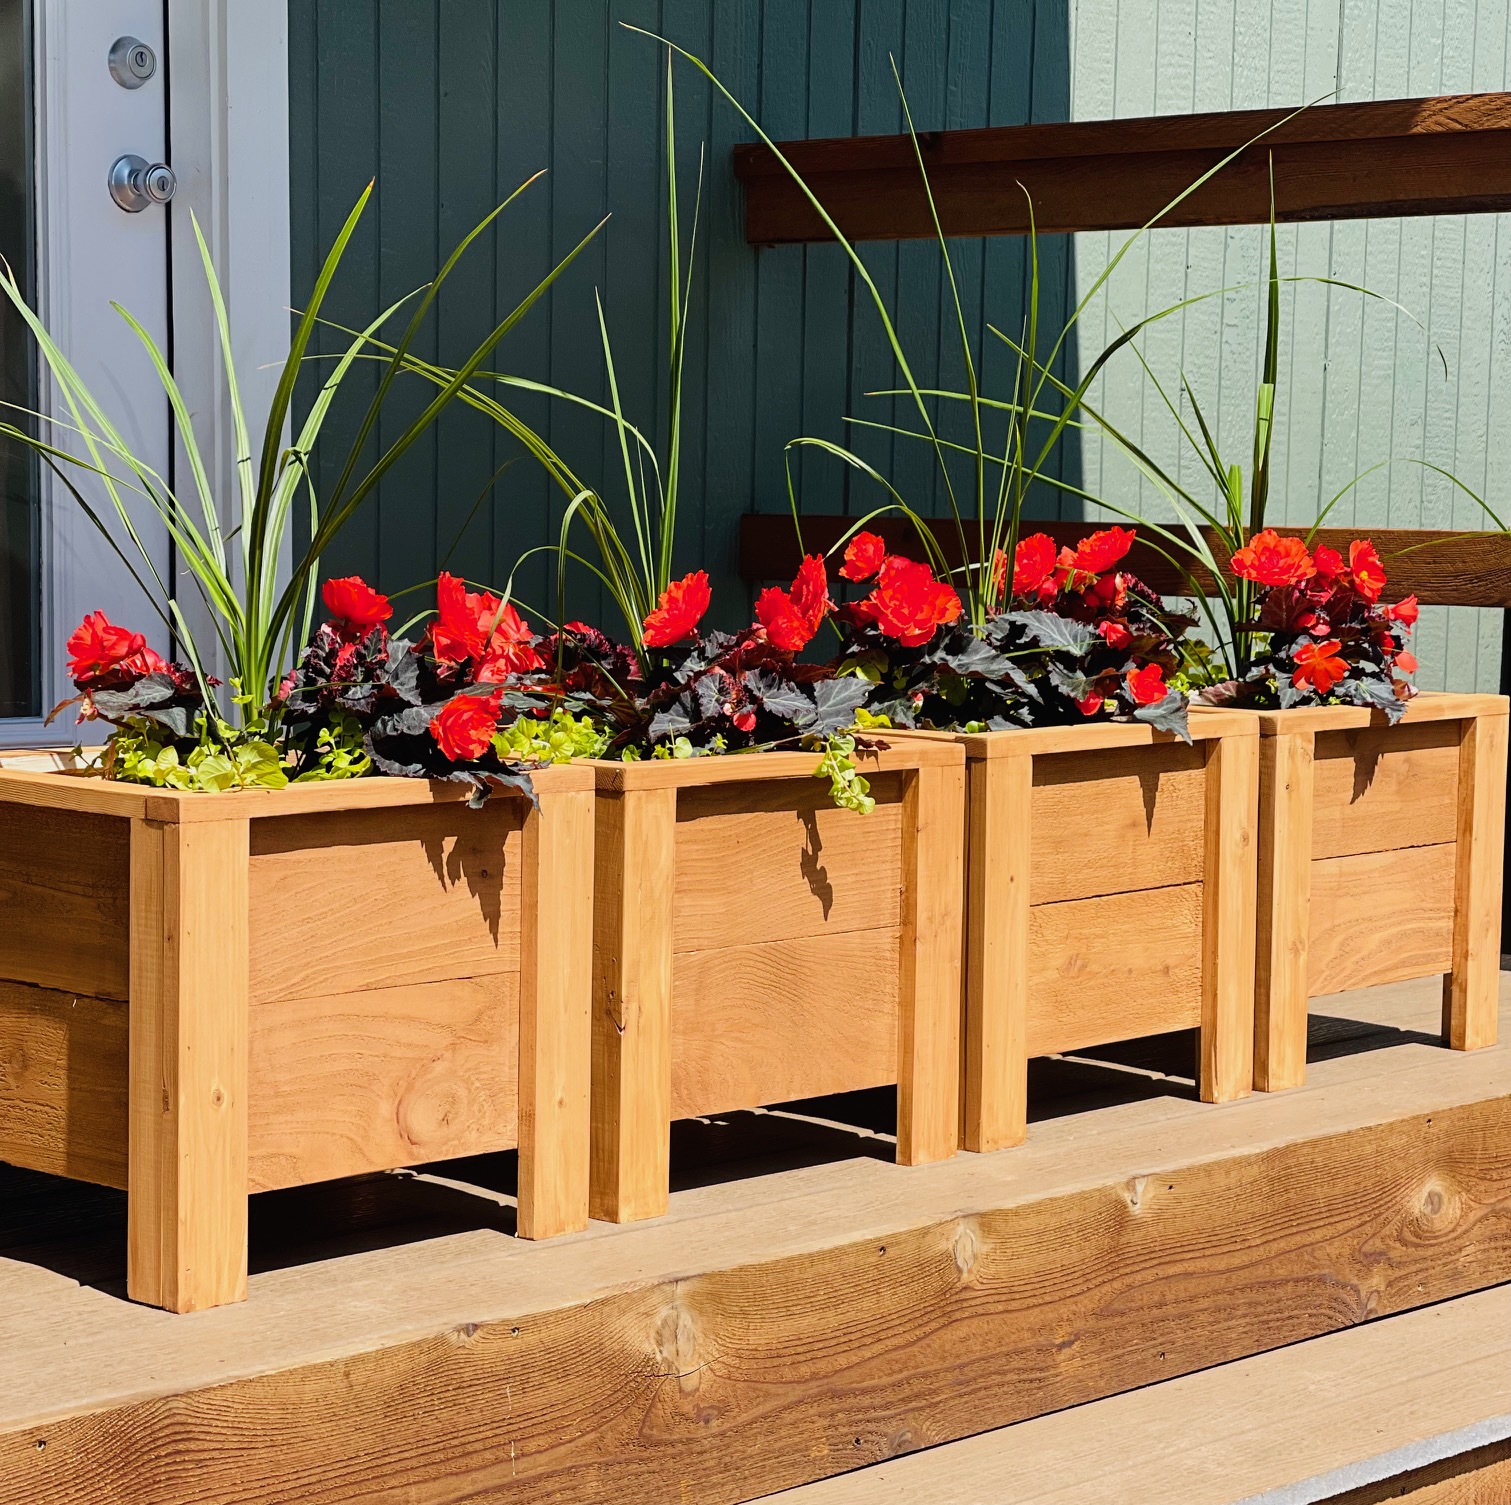
I've been wanting to build this plan for quite some time! Took me about 2 hours to build and 1 hour to finish. Giving these as gifts for Mother's Day! Total cost was about $15 per planter. I scaled down the design after I found the plants I wanted to put in them. Ana has the best and easiest plans!

Built from Plan(s)
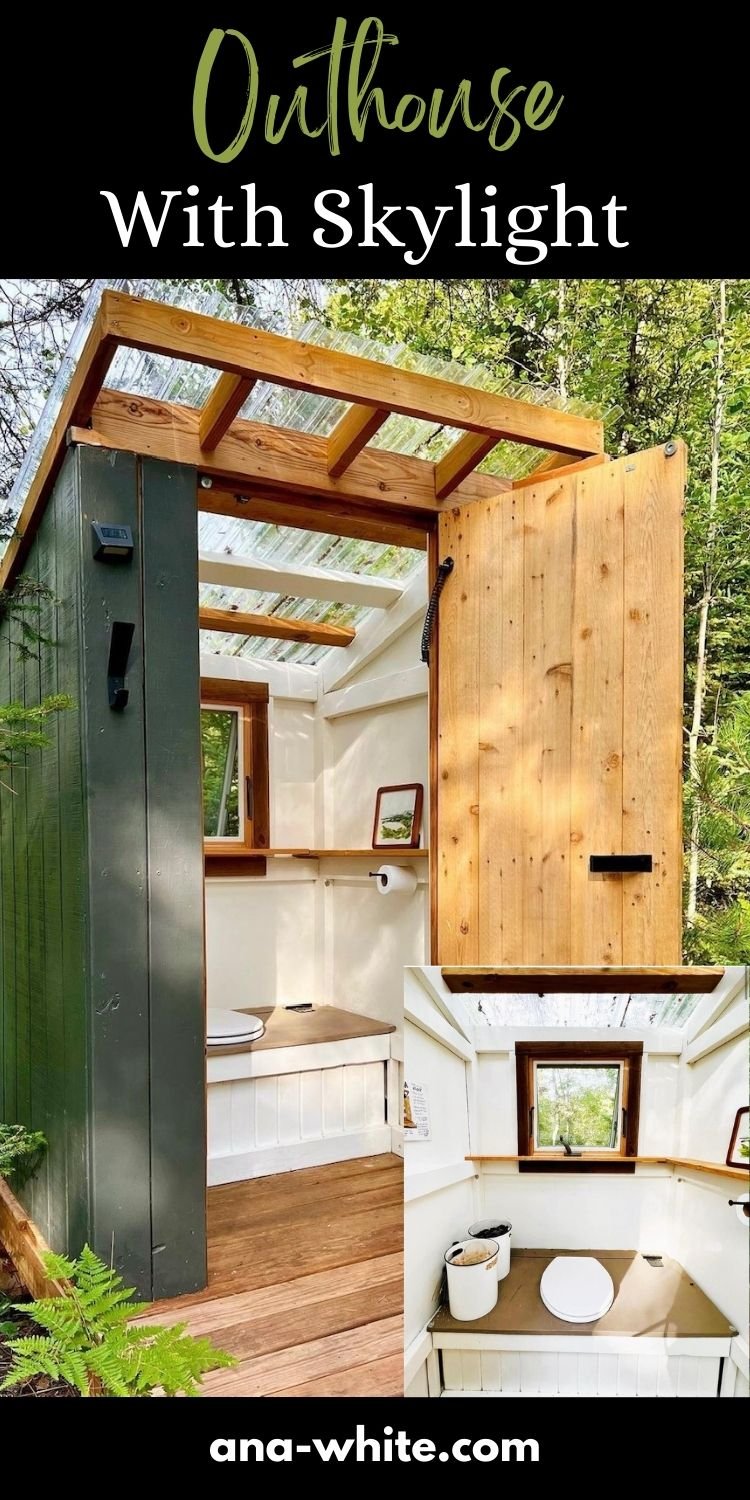
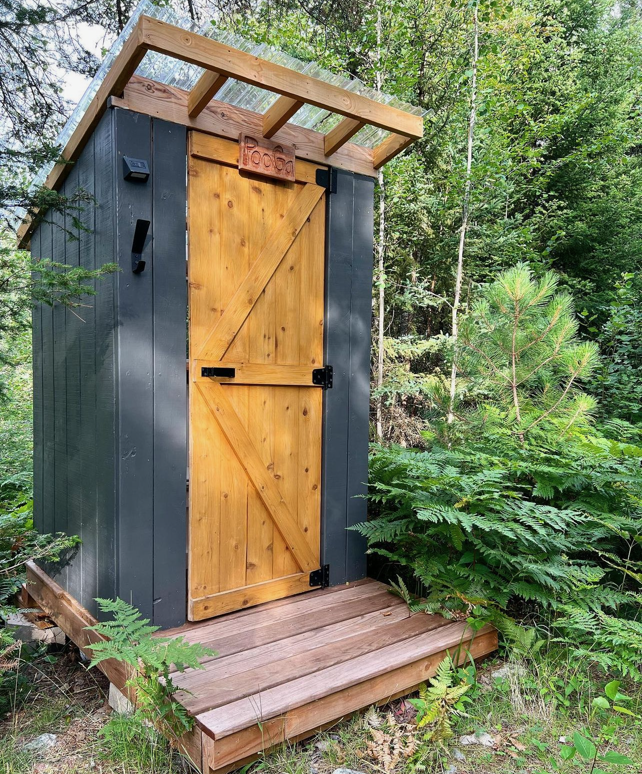
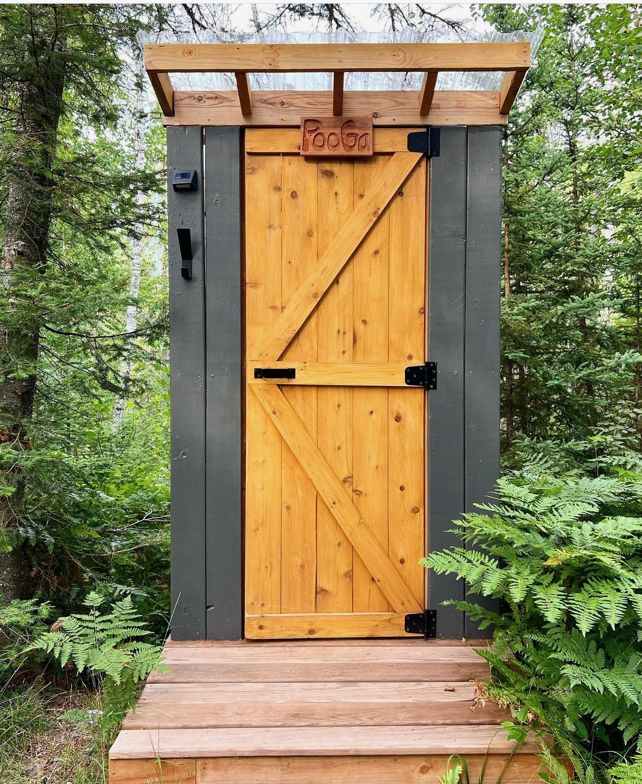
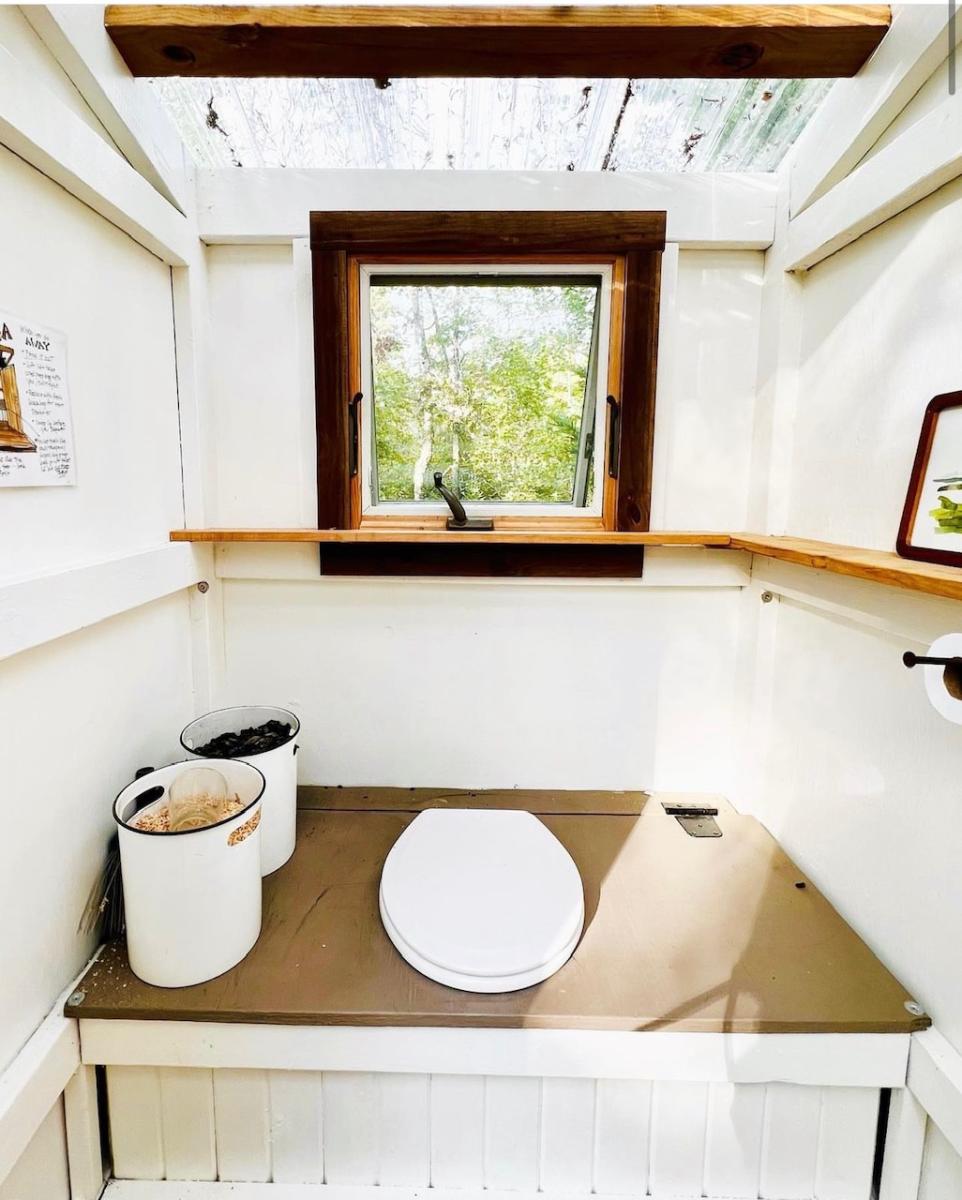
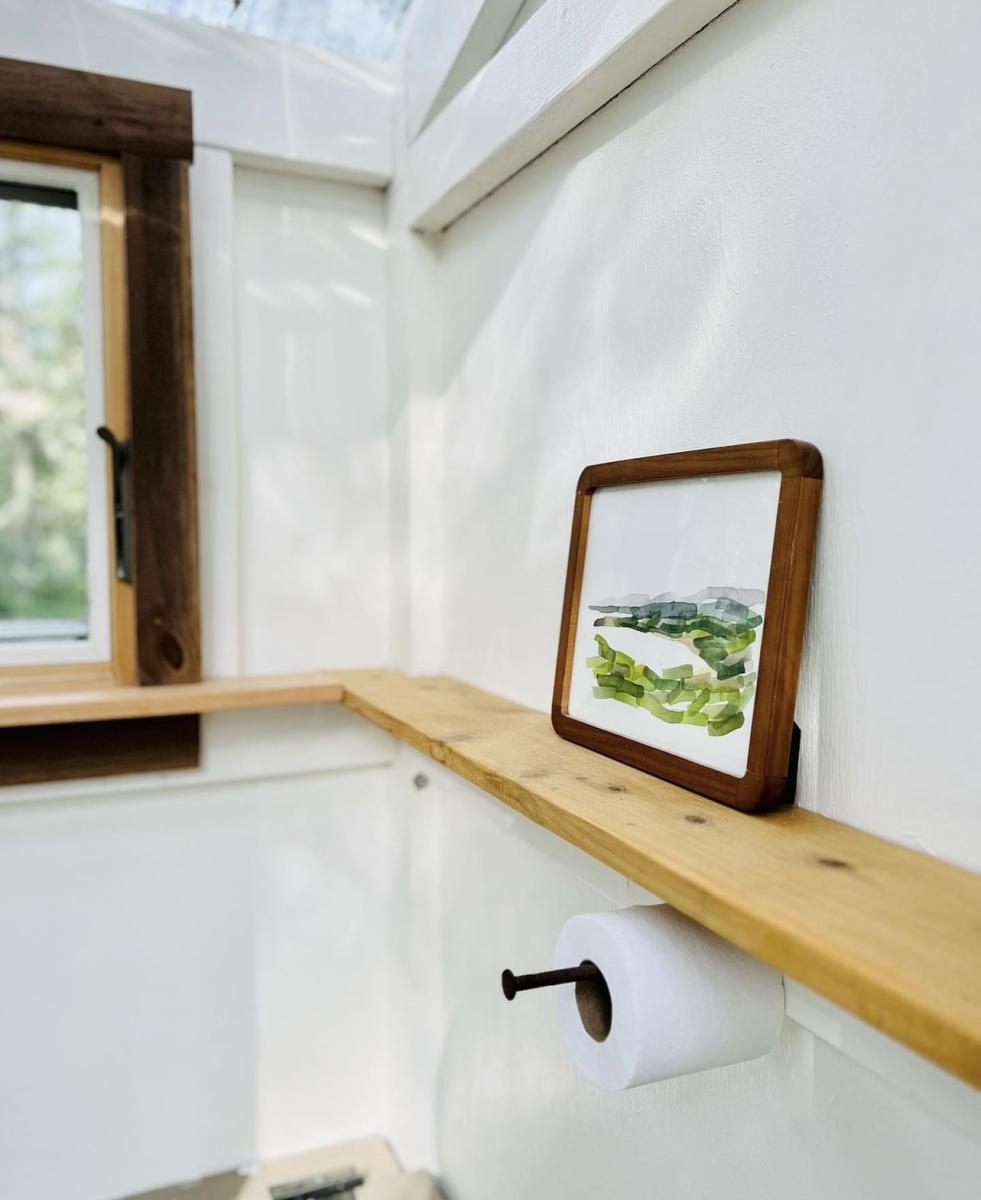
Outhouse with Skylight
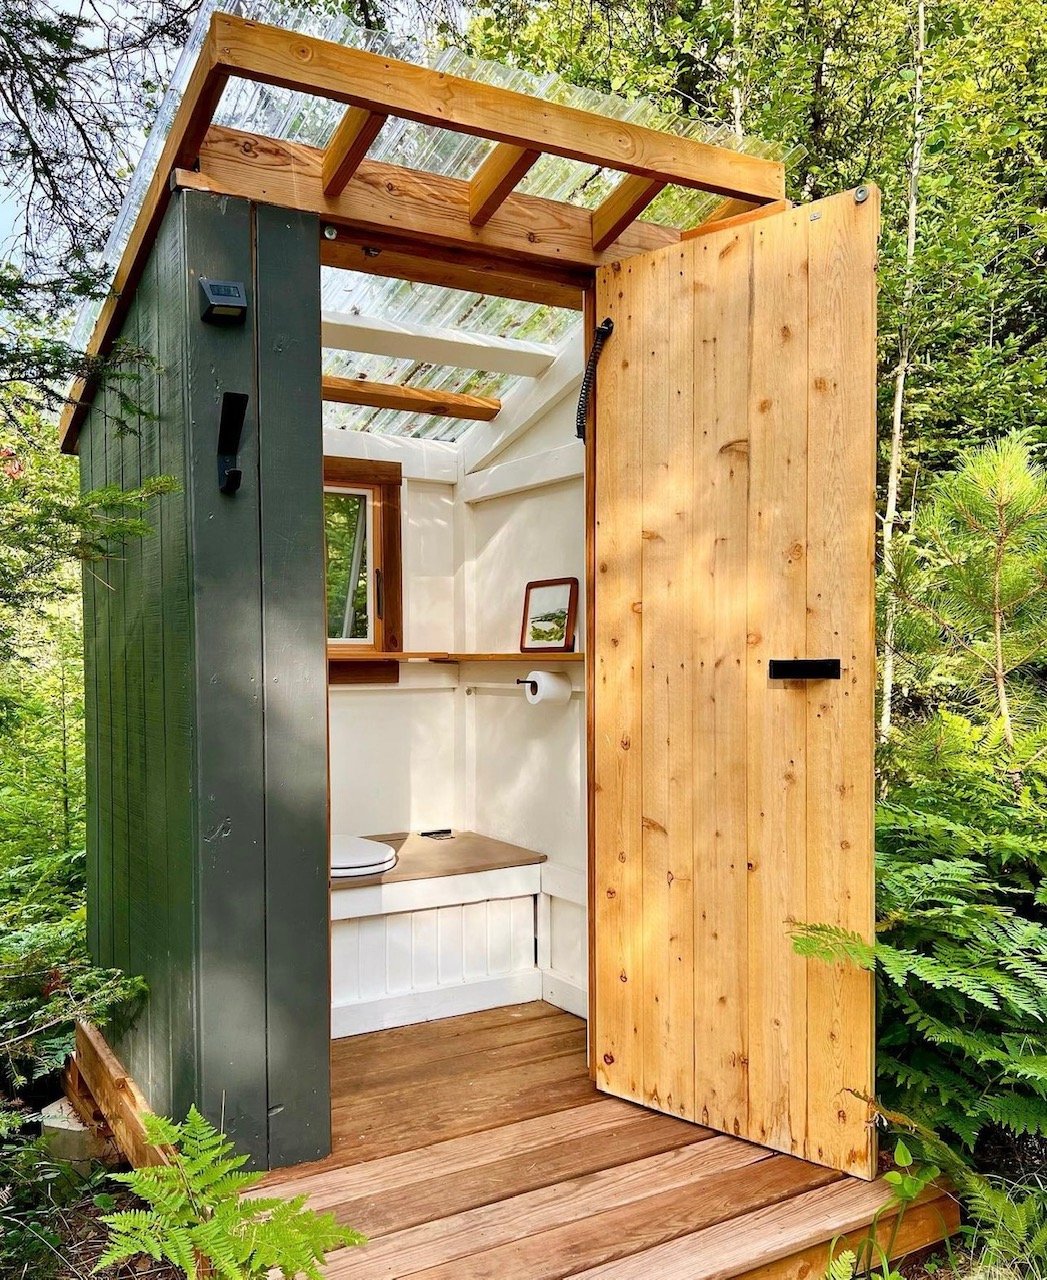
Our favorite throne in town.
My daughter and I built the outhouse in the snow a few years ago. Once the TwoGa was named after the Stuga, the outhouse quickly became “The PooGa” (aka “The Ash-Hole “🤣). We use ash in the winter and sawdust in the summer, to keep away the stink, which works like a charm.
This is an adaptation to an Ana White outhouse design.
Pin For Later!
Built from Plan(s)
Comments
Fri, 08/04/2023 - 11:06
Best Outhouse Around
Love what you did here, the natural light and bright cheery interior, well done!
West Elm Knockoff Rolling Cubby
This was my very first build! I didn't even have a saw, so I had the lumber guys at Lowes cut my boards for me. Also, I altered the dimensions to fit my space.
Check out my blog link for more info!
Built from Plan(s)
Estimated Cost
$64.00
Estimated Time Investment
Day Project (6-9 Hours)
Finish Used
Primed and painted with white glossy paint.
Recommended Skill Level
Starter Project
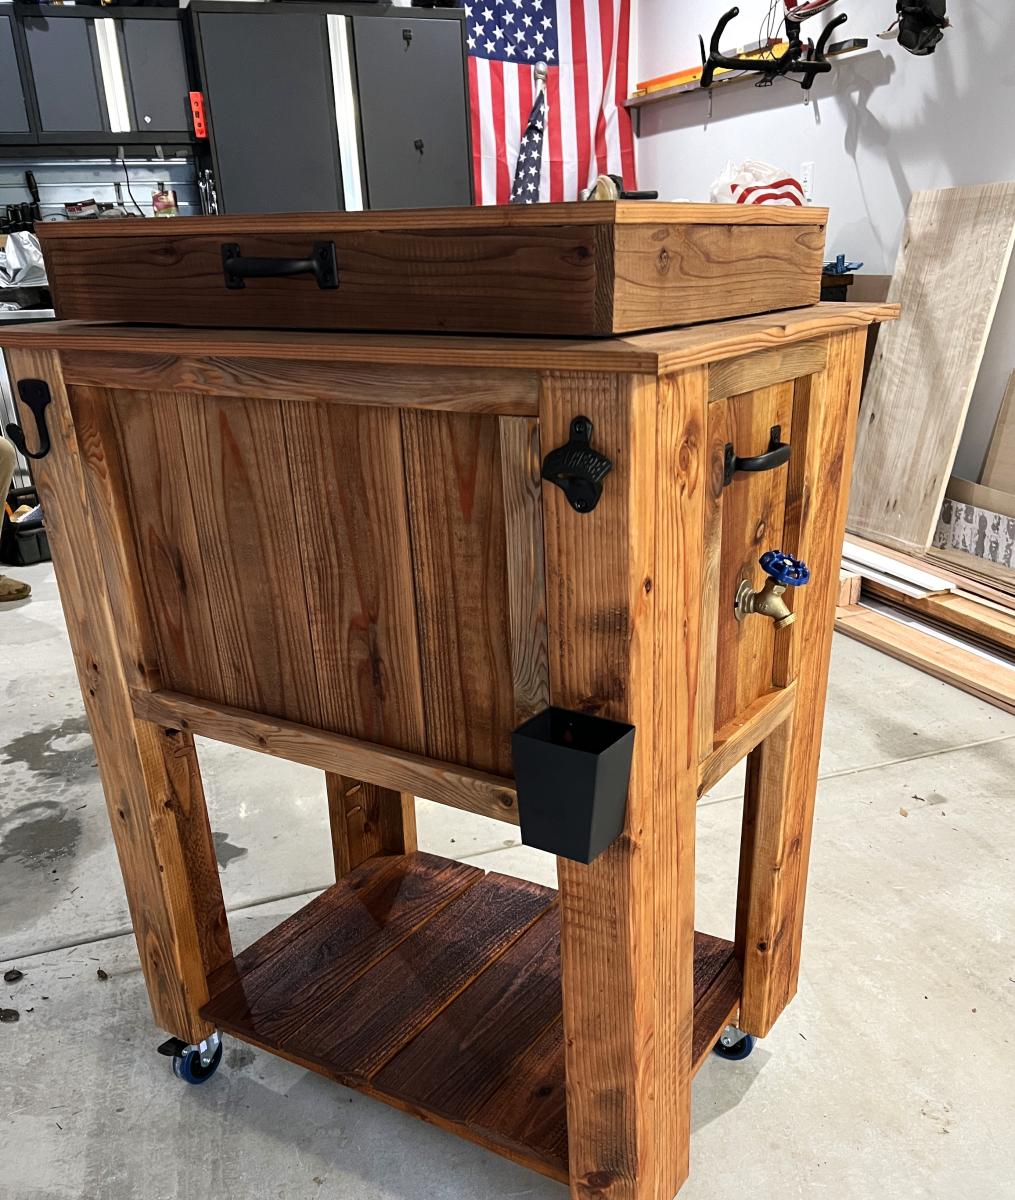
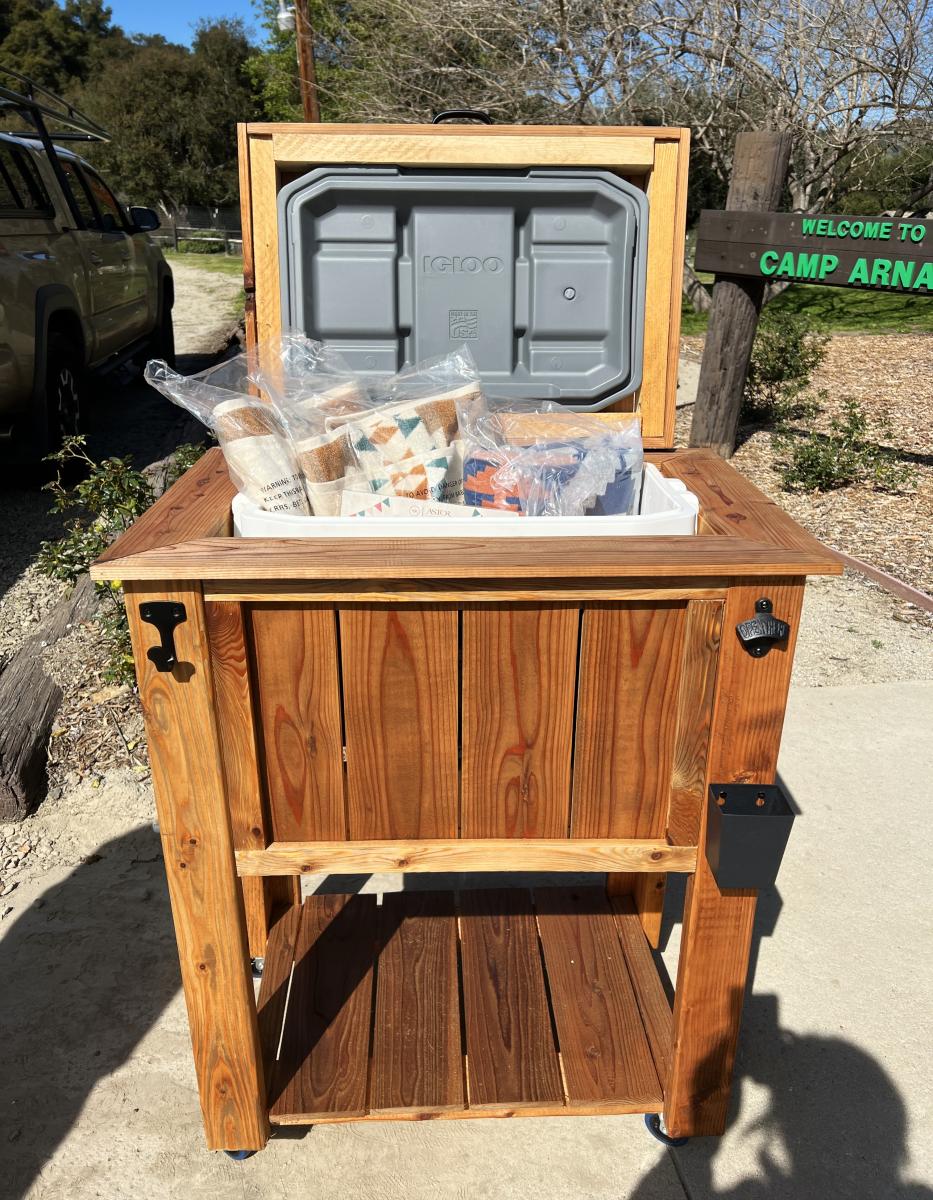
Custom Wood Cooler Stand
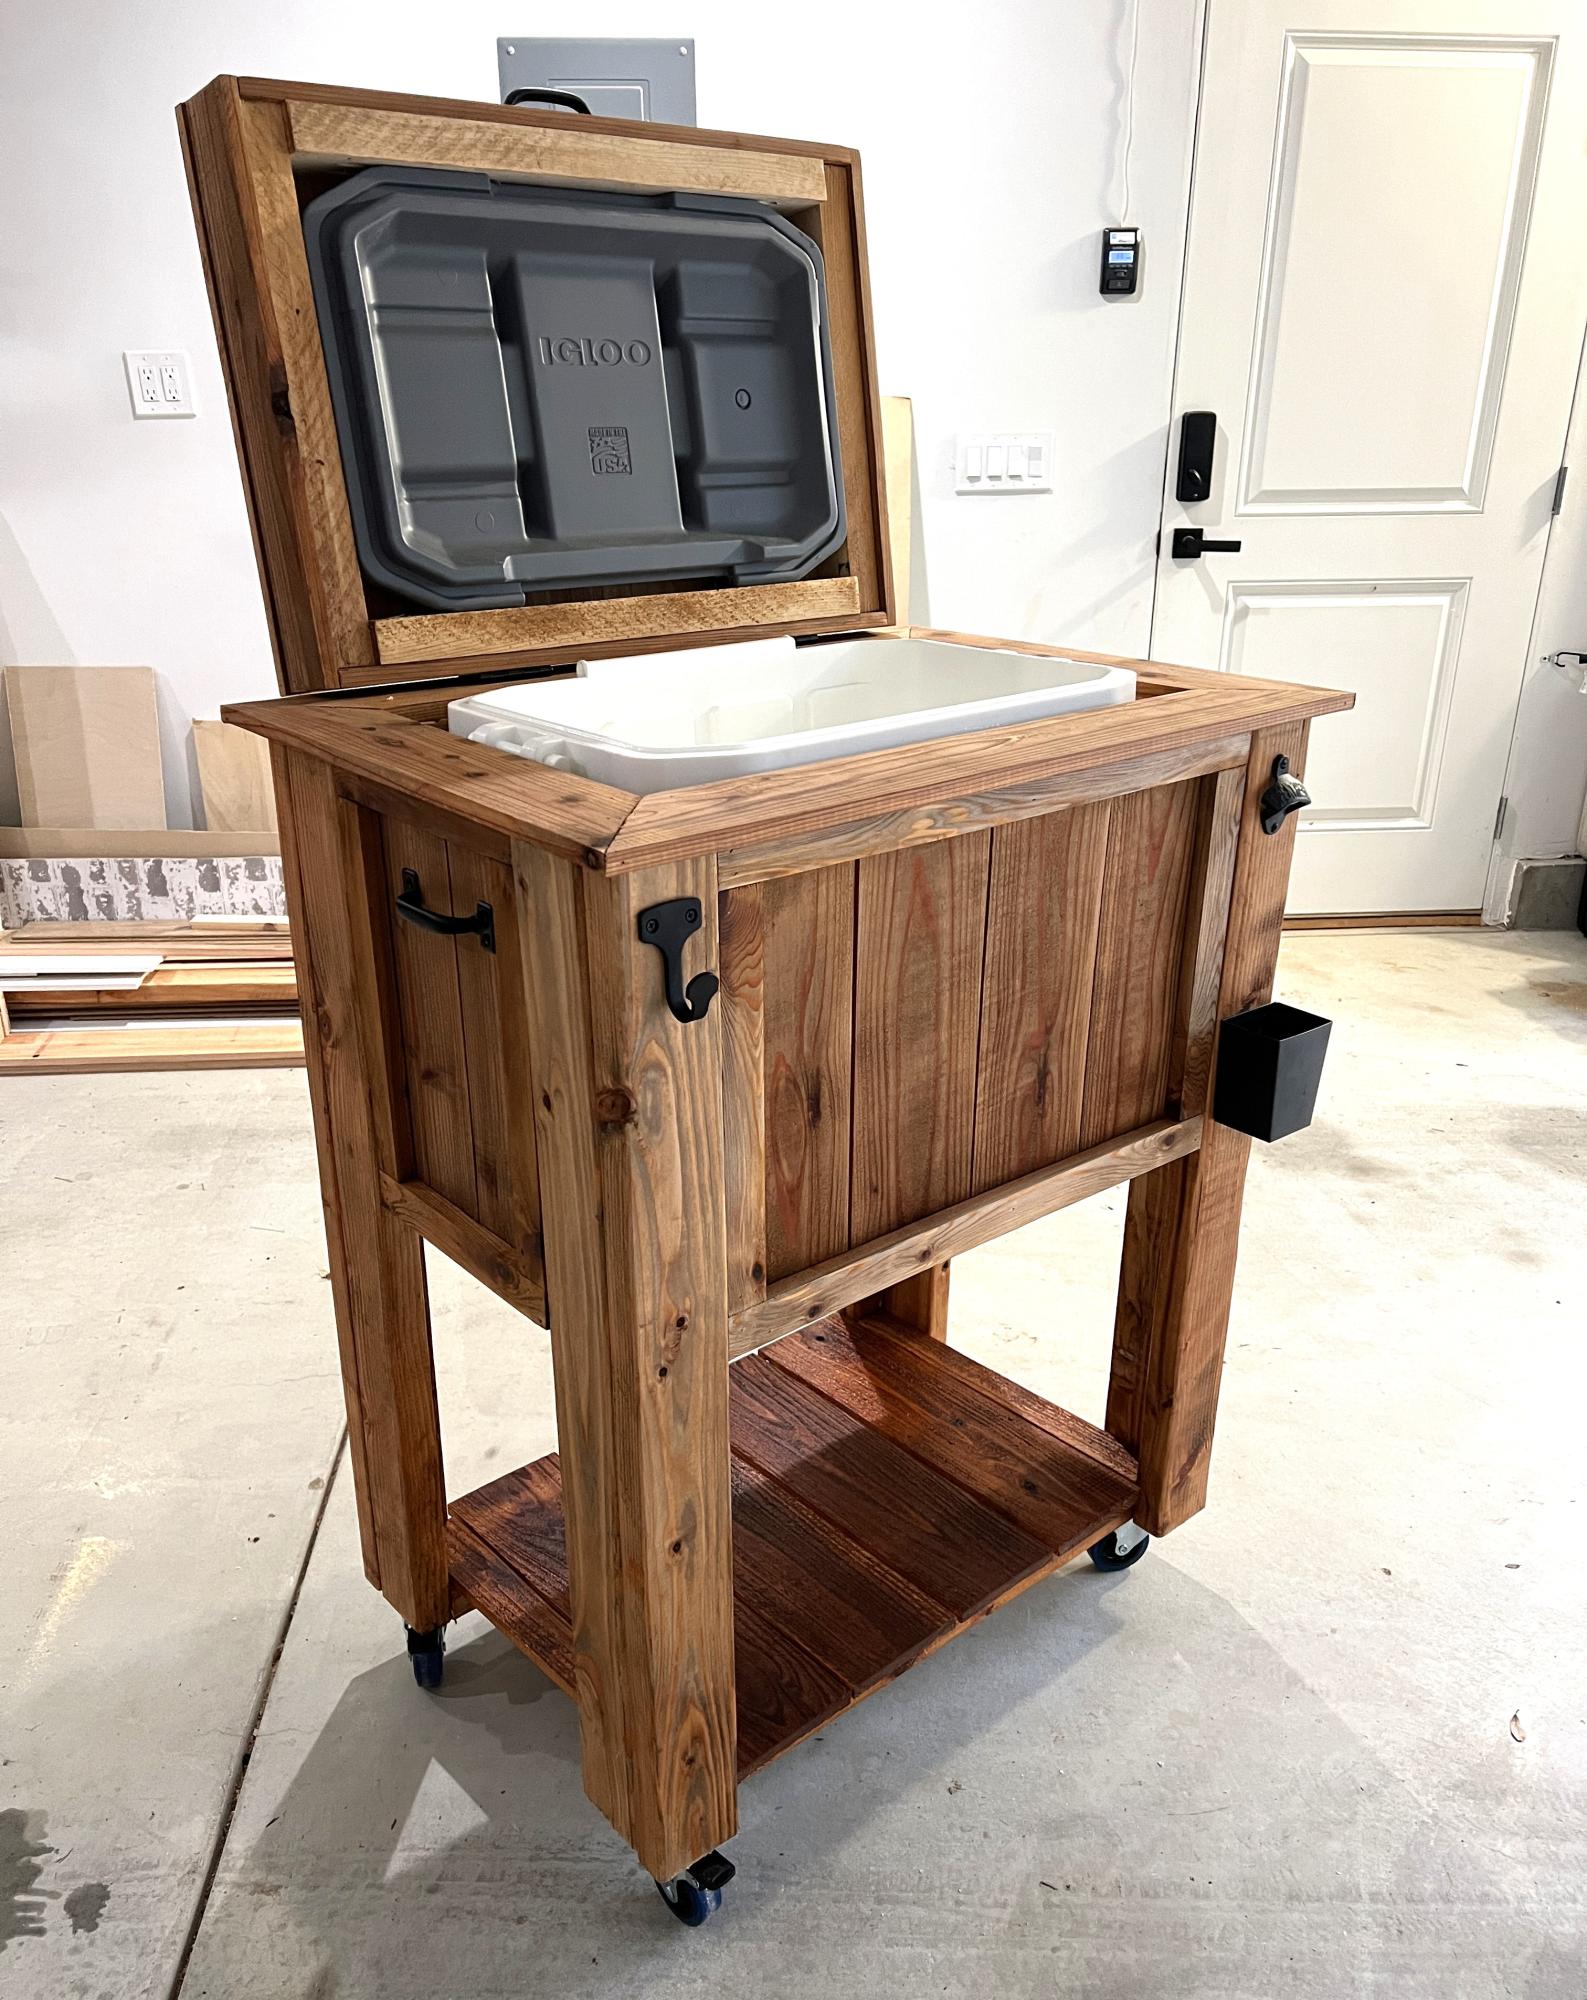
I made this Ice Chest Cart for my son’s schools silent auction. It features a spigot for drainage, bottle opener, hook for a bar towel and I also set it on castors so it can be easily moved.
Built from Plan(s)
Patio Furniture
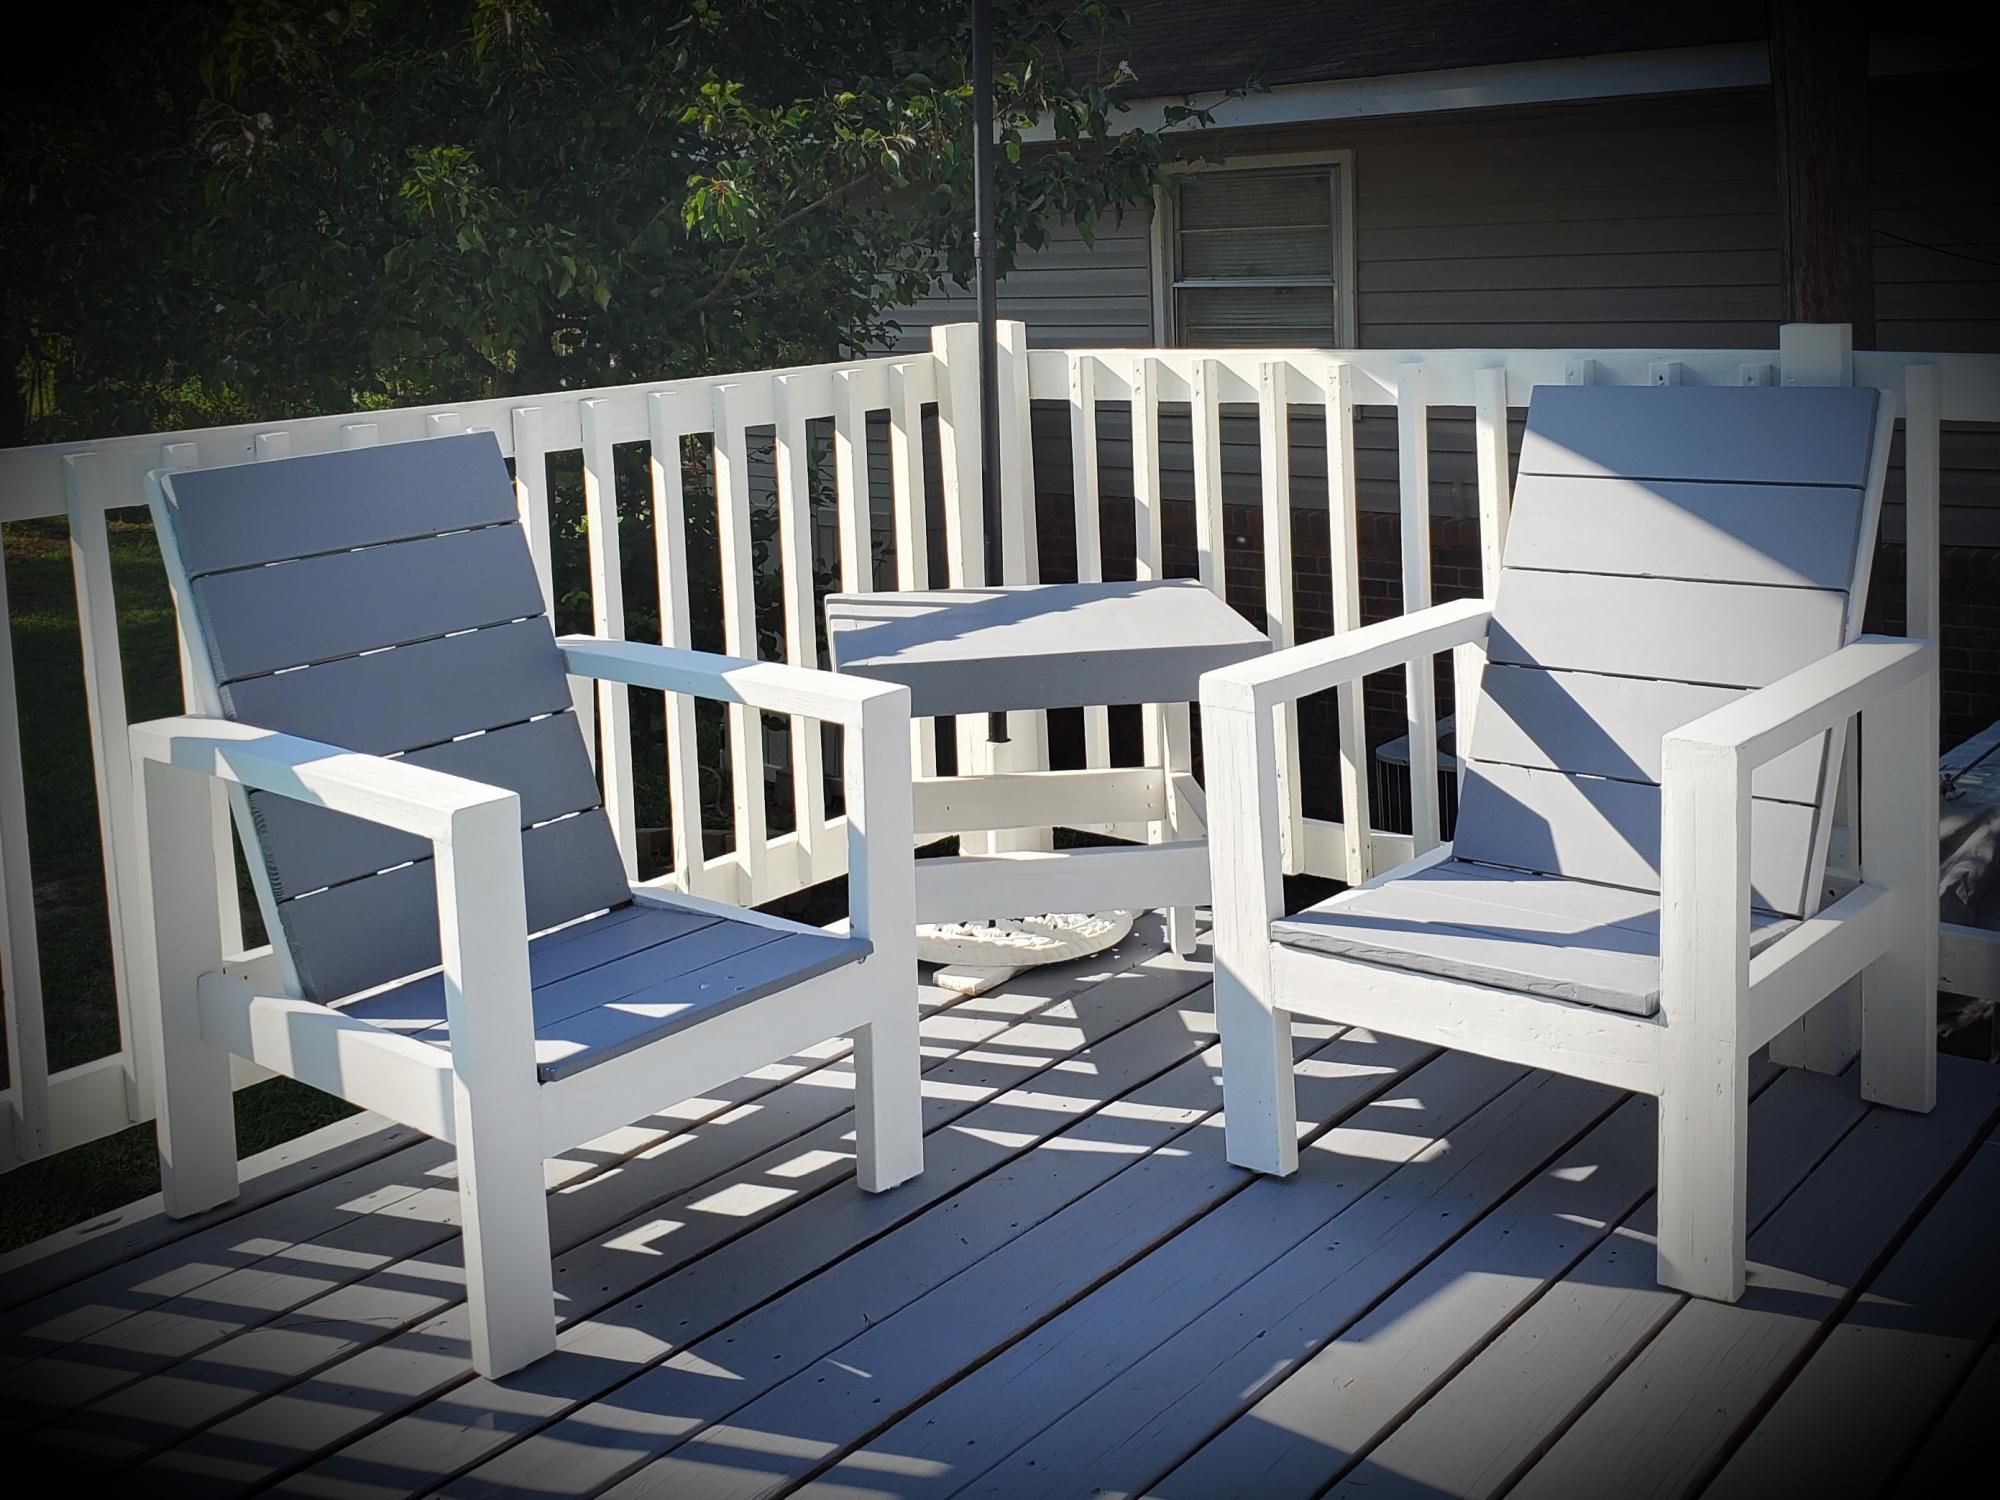
With a mix of the 2 attached plans, I found the perfect design! Plus, I was able to build them both, including the table, out of the scrap from the deck I built!! Thank you so much!!!
Built from Plan(s)
Comments
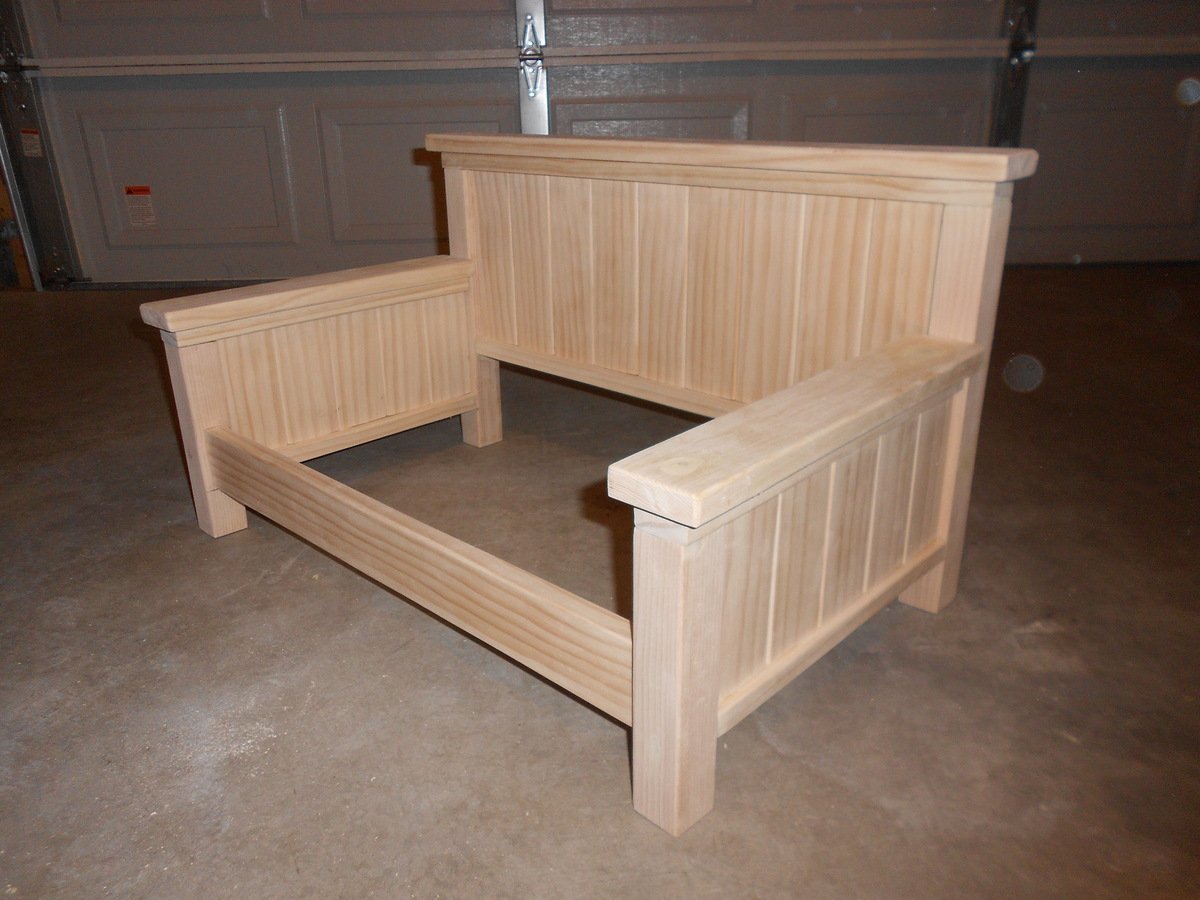
Doggie Daybed
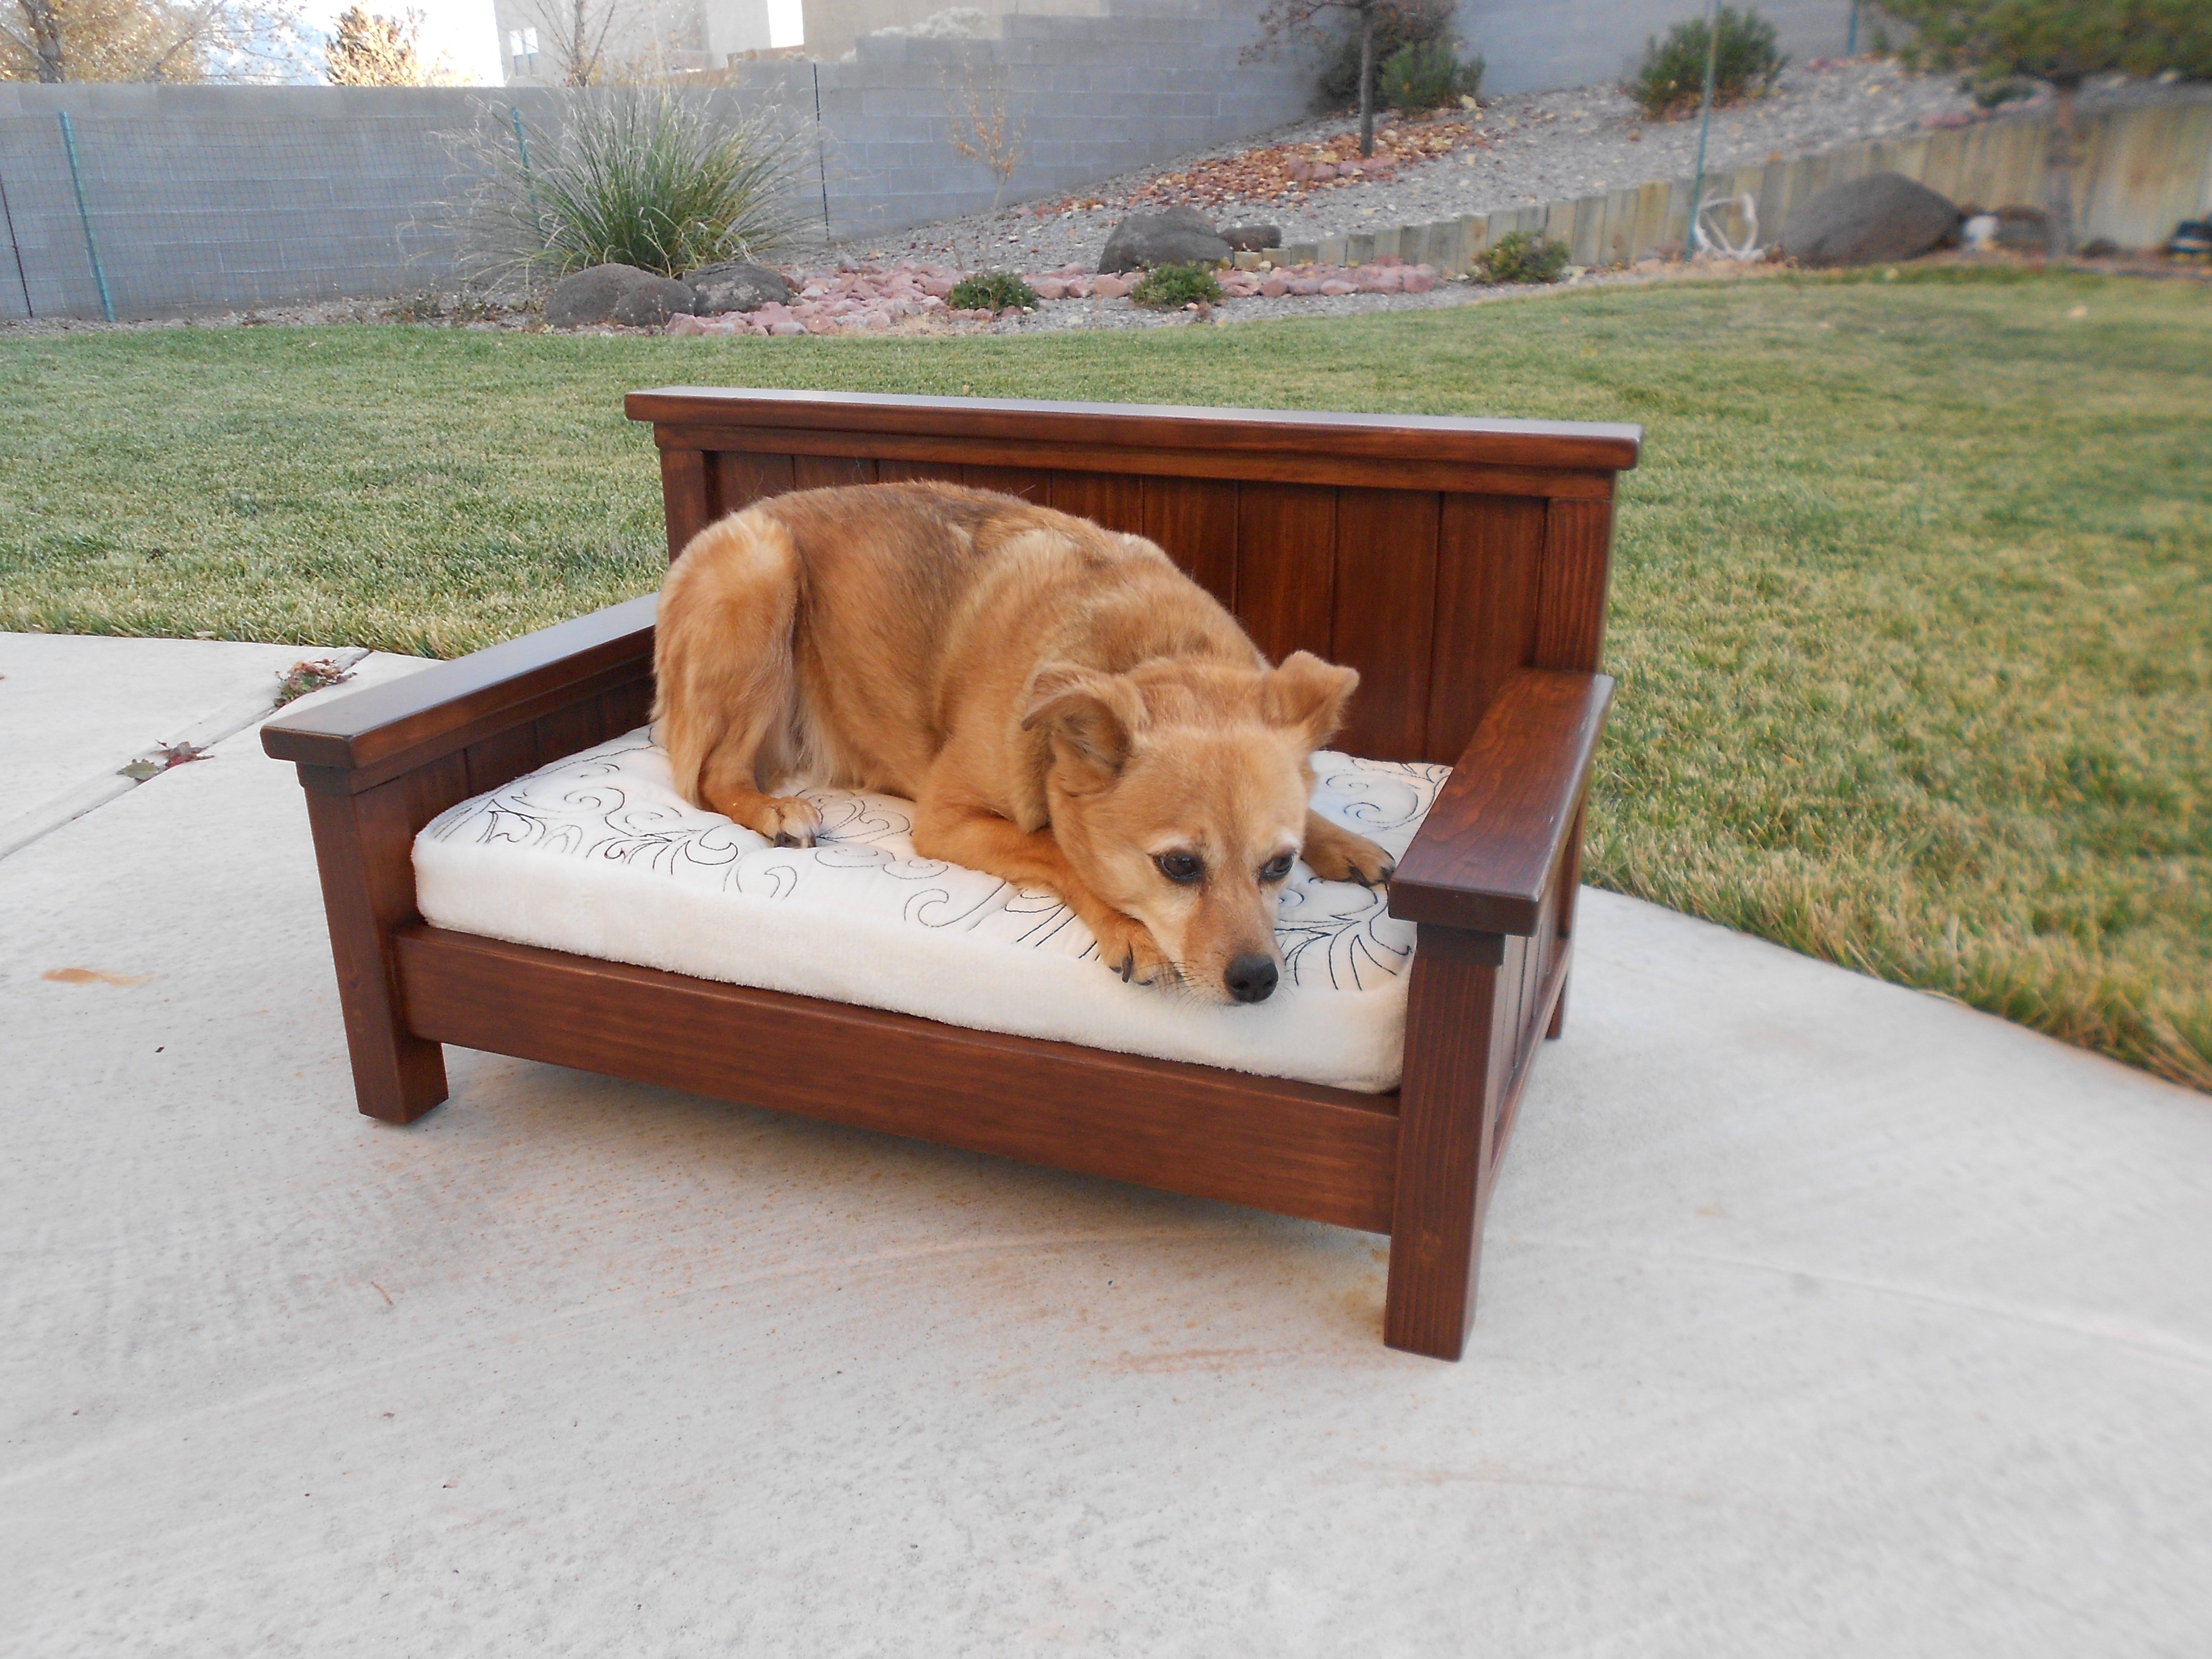
Since making a twin size daybed still seems intimidating to me, I decided to get some practice by making a small version for our dog. I modified the doll farmhouse bed making it a bit larger and in daybed style. We'll see if our doggie takes to it. If not, it will be a toddler couch!

Built from Plan(s)
Estimated Time Investment
Weekend Project (10-20 Hours)
Finish Used
Poly Shades
Recommended Skill Level
Beginner
Comments


Wed, 12/05/2012 - 07:07
Love this!
I built the big farmhouse storage bed and nightstands in my bedroom and my dog needs her own little farmhouse bed now. I've been trying to decide how I want to do it... You've just decided for me. Thanks!
Wed, 12/05/2012 - 09:00
I love this!!! I think I
I love this!!! I think I might steal this idea and make one of these for my nephews as a little couch. About how much did you spend on lumber?
Wed, 12/05/2012 - 21:10
Thank you! I believe I spent
Thank you everyone! I believe I spent about $25 to $30 on lumber. I have the lumber receipt and it came to $44 but I had a lot left over.
Wed, 12/05/2012 - 20:52
I pretty much just followed
I pretty much just followed the plans, except making it taller and wider by adding more slats and making everything taller. The finished dimensions turned out to be approximately 26 ½” x 16 ½”. I kind of made it up as I went, but I did take some notes. Here is the first part of my altered cut list:
9 ea – 1x3 @ 8” tall (headboard panel slats)
10 ea (5 for each side) – 1x3 @ 5 ¼” tall (side arm panels slats)
2 ea – 2x2 @ 8” tall (side arm legs)
2 ea – 2x2 @ 13 ½” tall (headboard legs)
For the rest of the cut list, I didn’t take notes. I just cut the lengths to fit my new dimensions. I hope this helps. If you’d like more measurements just let me know and I can measure the actual bed.
Wed, 12/05/2012 - 10:07
This looks beautiful. Where
This looks beautiful. Where did you get the cushion from? How big is the cushion?
Wed, 12/05/2012 - 20:21
Thank you! I made the
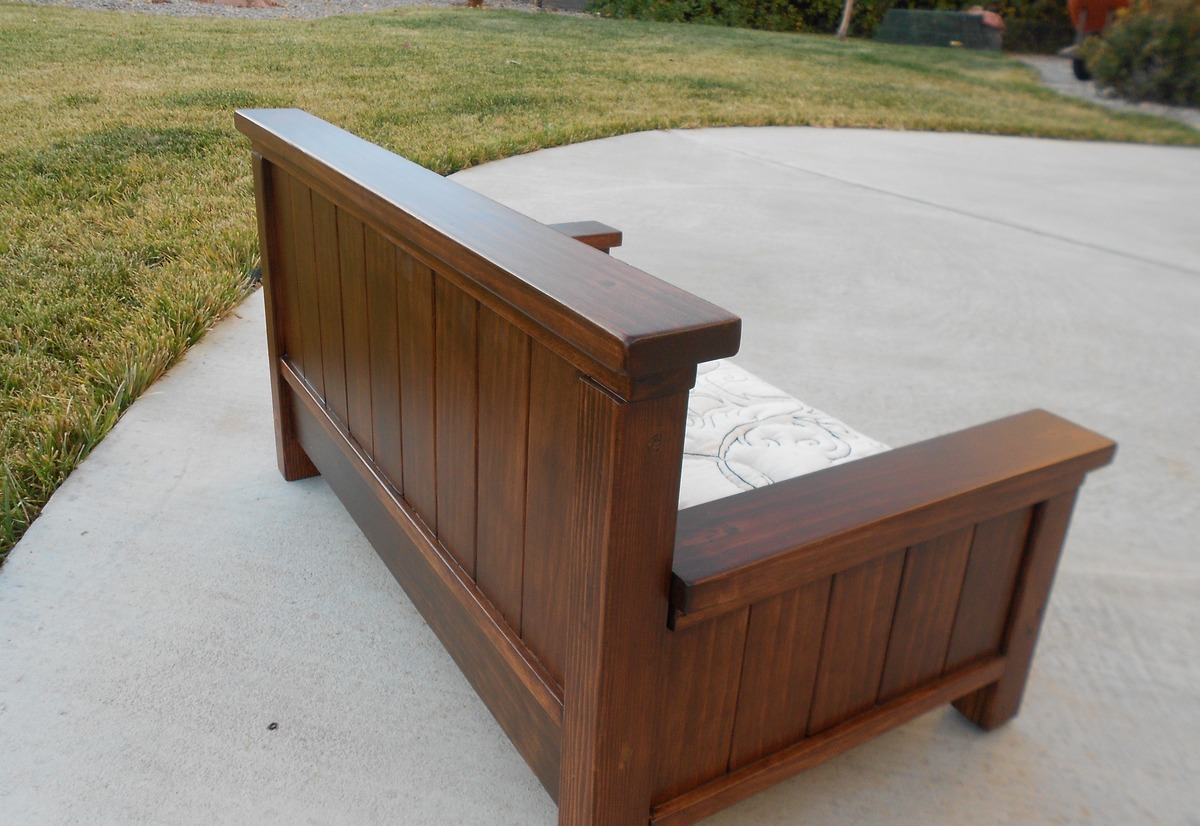
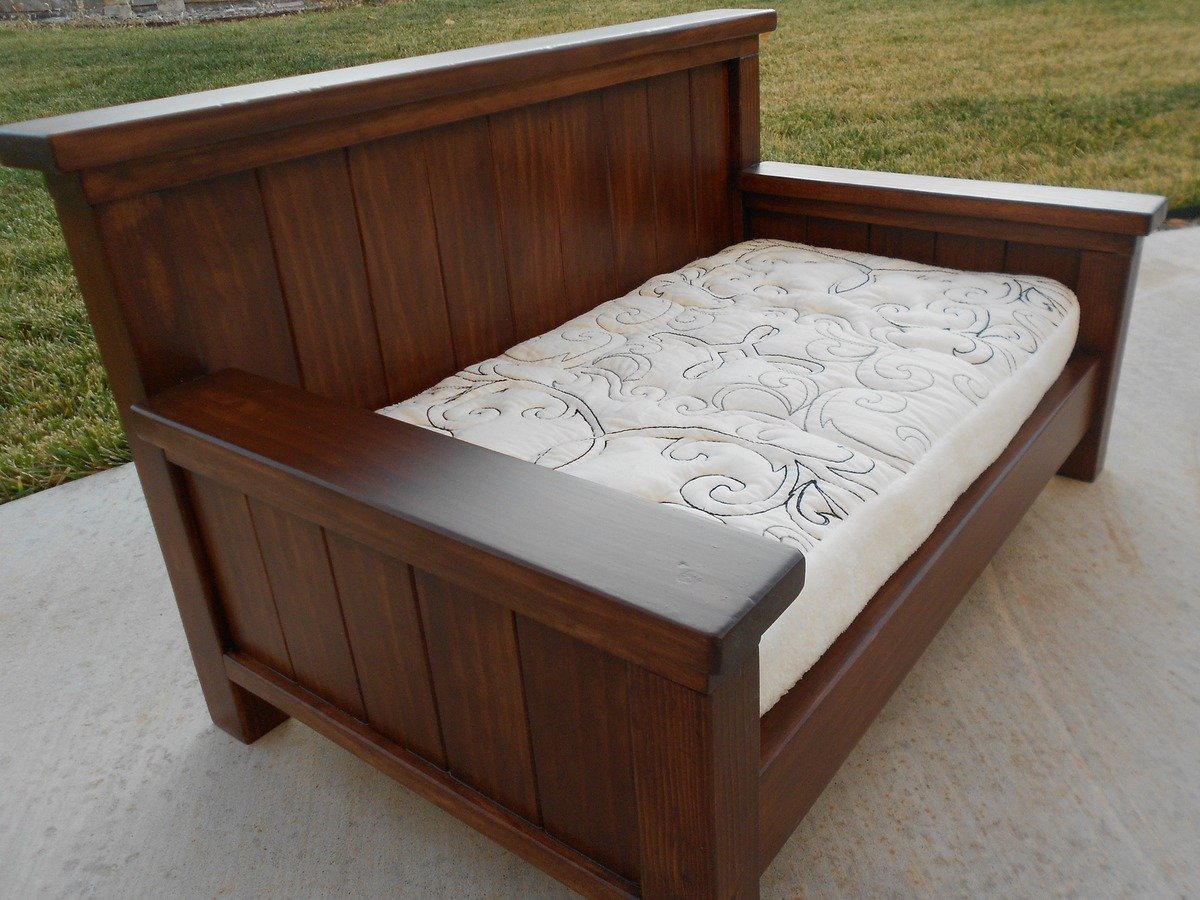
Thank you! I made the cushion with foam and batting. I got the foam piece from the fabric store. It was 2" thick, 22"x22" square. It was on sale, but I don't remember how much I paid. I cut it down to 22" x 12” to fit the inside of the bed. A regular handsaw worked great for cutting the foam. Super easy, but messy. I wrapped it in batting so it finished a little bigger, 23” x 13”. I bought one pillow sham from Walmart because I liked the design and cut it apart to make the cushion top. The rest is from one of those cheap fuzzy blankets.
Wed, 12/05/2012 - 10:30
That finish is beautiful!
That finish is beautiful! Can you tell me how you did it?
Wed, 12/05/2012 - 21:08
Thank you! I have much to
Thank you! I have much to learn about finishing. I first used regular stain. I think the color was gunstock. It turned out so not what I was going for. It was too orange. So then I stained it again with Minwax Hickory Gel Stain. Better, but the wood putty still showed and looked terrible. So I resorted to Minwax Bombay Mahogany Poly Shades which I found difficult to work with, but it did a fantastic job of covering over the wood putty filled holes. I think I used either 2 or 3 coats of the Poly Shades. I’m sure I could have skipped the first two stains and could have had the same result!
Mon, 12/17/2012 - 19:30
Fantastic bed!! I've been
Fantastic bed!! I've been shopping for a dog bed. This is 100 times better than anything in the store. I may have to borrow you're idea :)
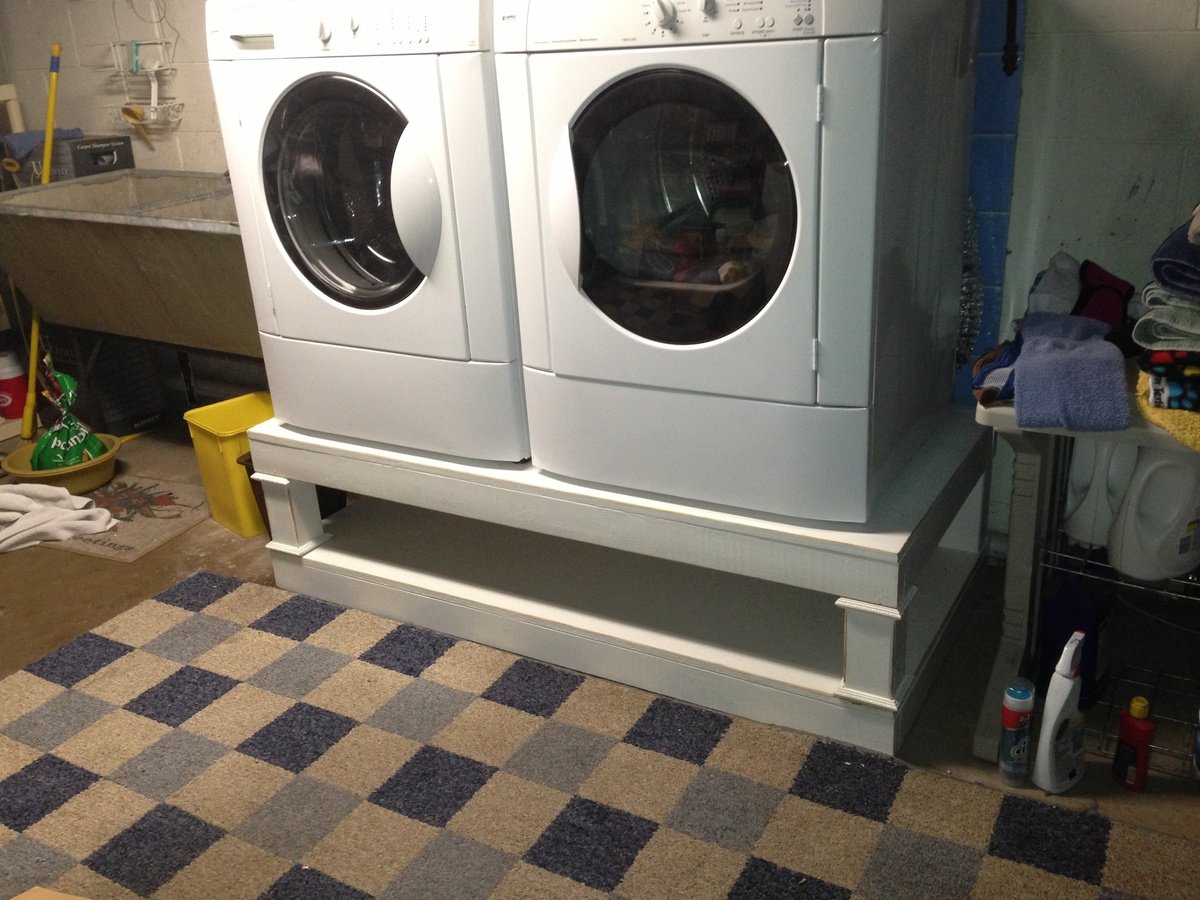
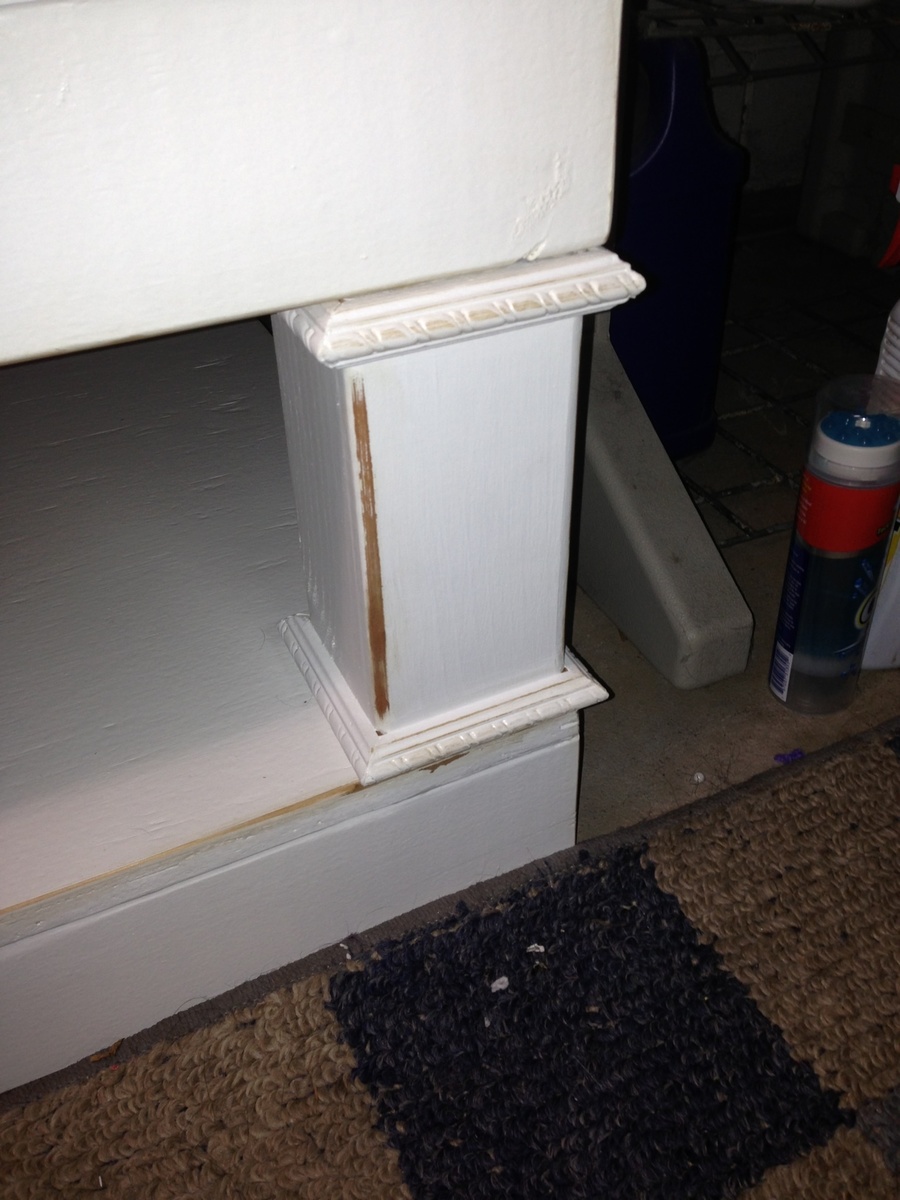
Washer & dryer pedestal
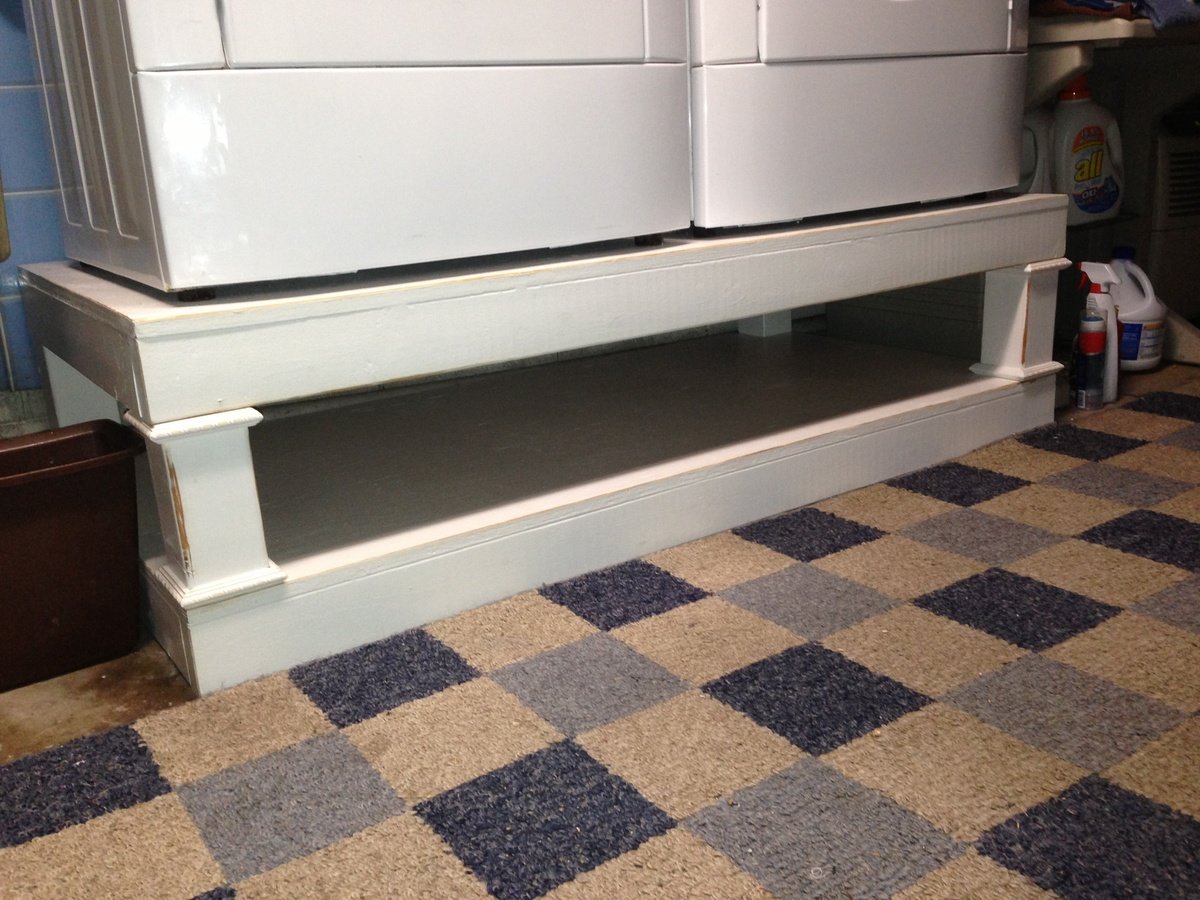
Made this for my mom for a Christmas gift. I had to modify the height for space requirements. Used white semi gloss that I already had in the basement, and distressed the edges with golden oak stain. Quick and simple job.
Built from Plan(s)
Estimated Time Investment
Afternoon Project (3-6 Hours)
Finish Used
White semi gloss, rustoleum golden oak stain for distressing on edges.
Recommended Skill Level
Beginner
Just My Size Closet
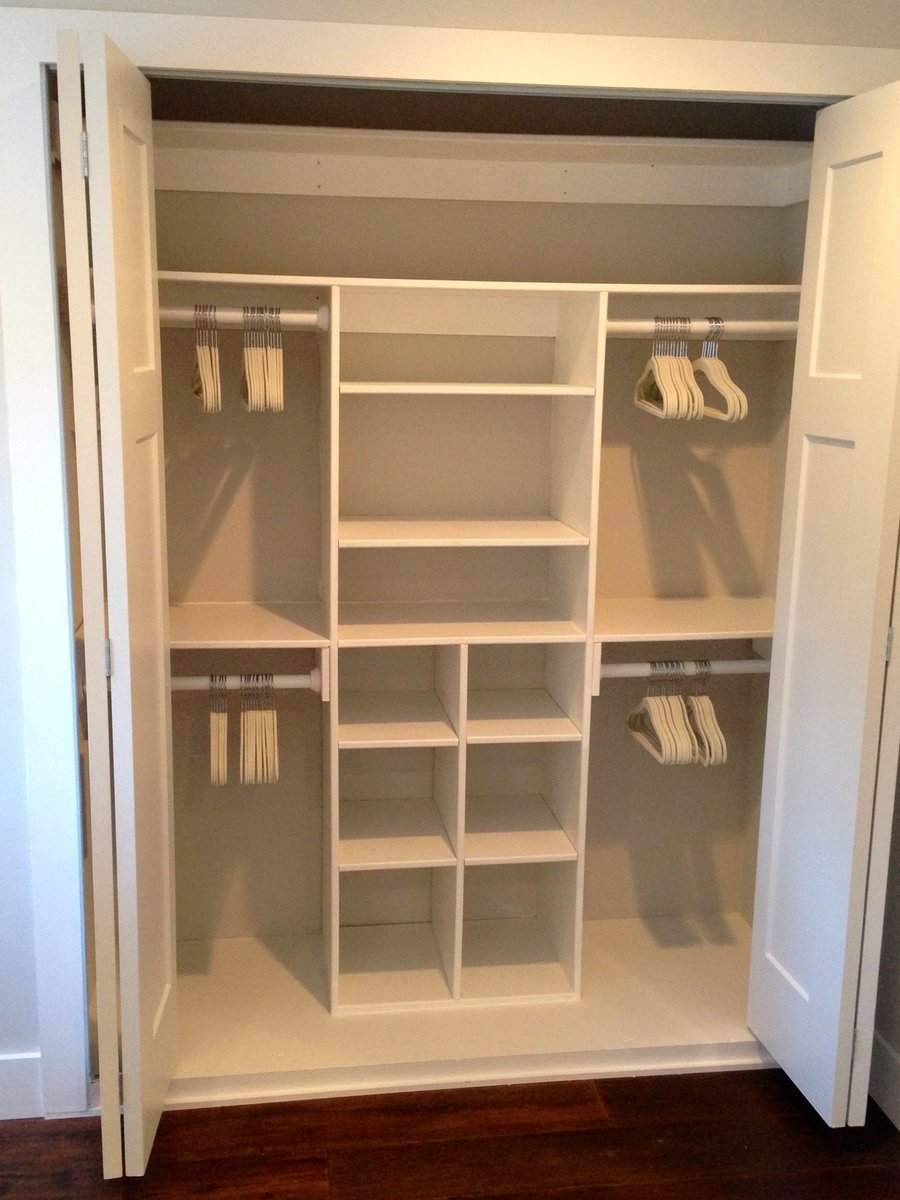
Just My Size Closet!
Built this from Ana's plans with a few modifications.
Started with a big empty box after ripping the old stuff out and finished with this look.
Adjustable shelves and all !
Built from Plan(s)
Estimated Time Investment
Weekend Project (10-20 Hours)
Finish Used
Whatever white paint my wife bought !!
Recommended Skill Level
Beginner
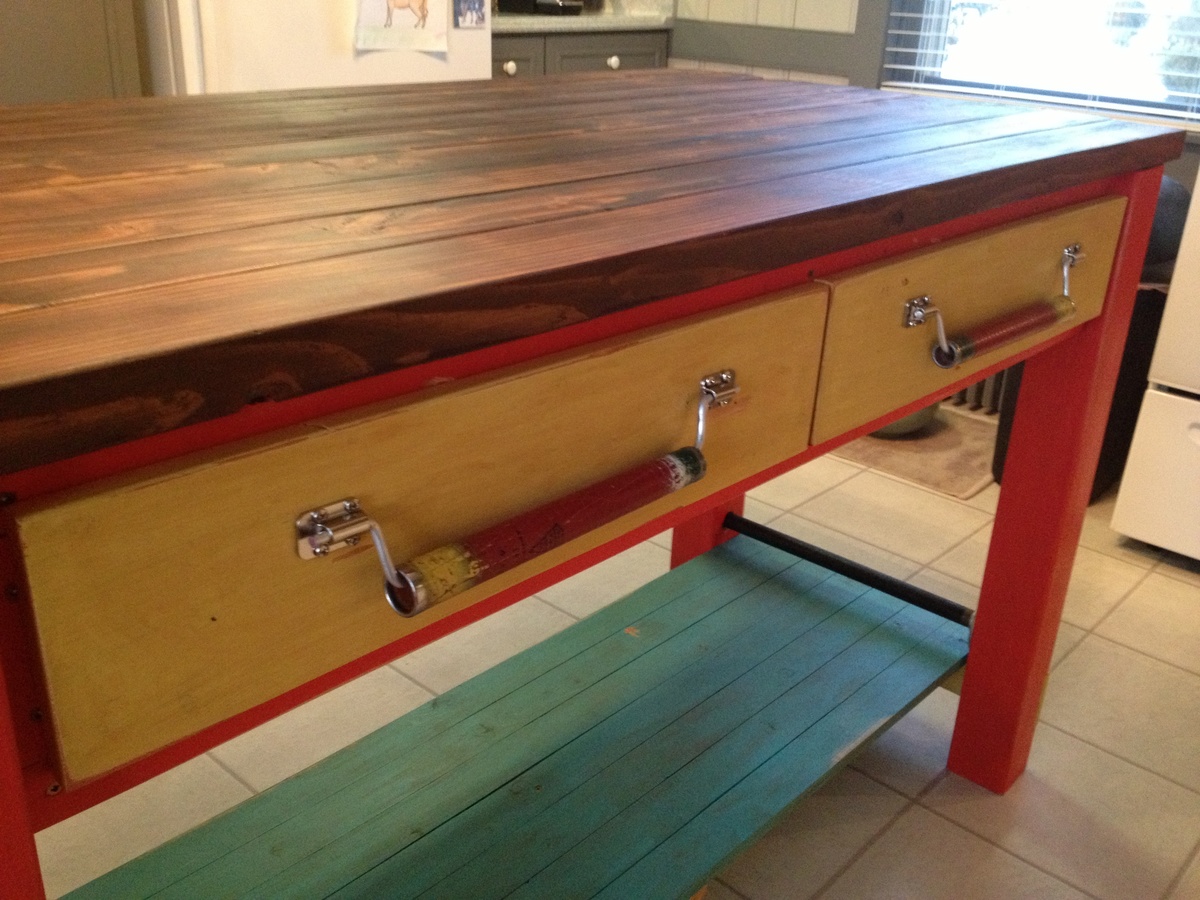
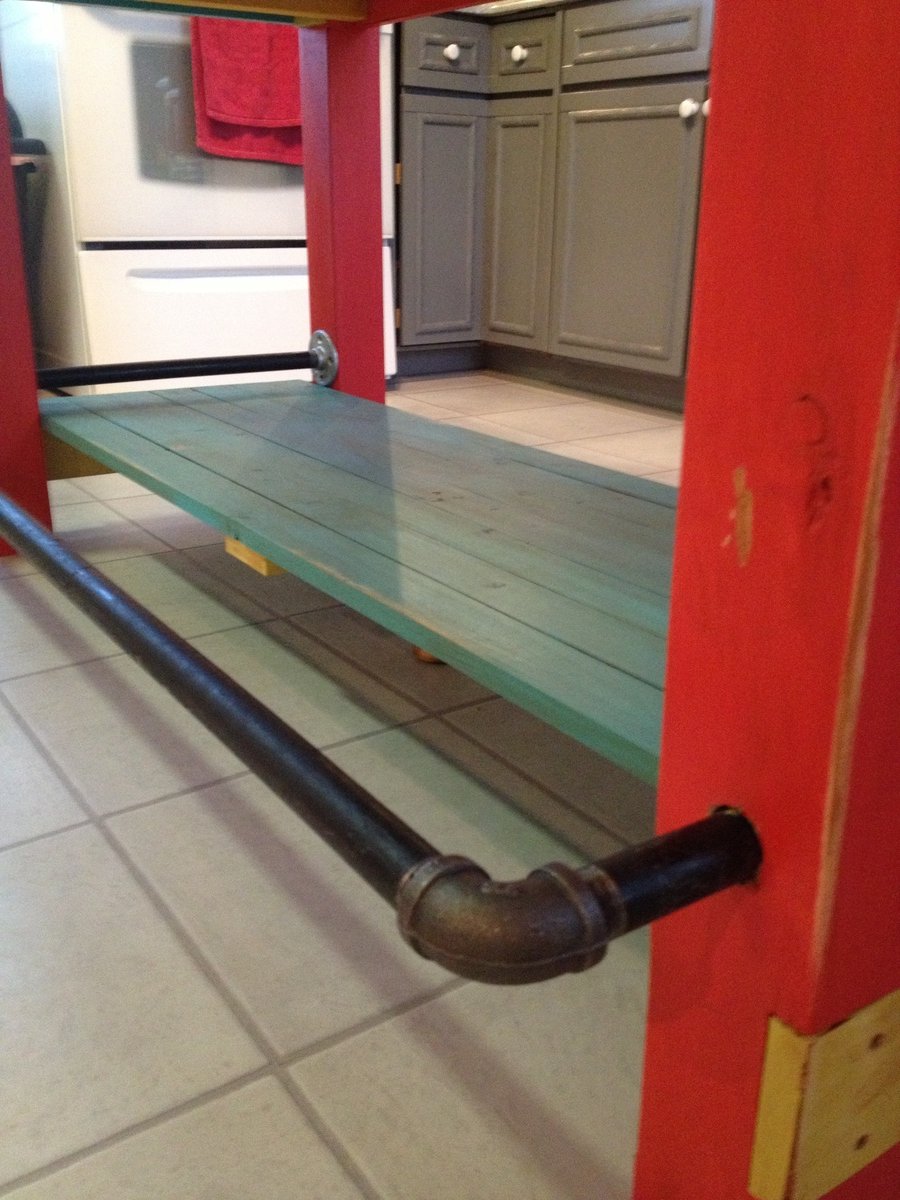
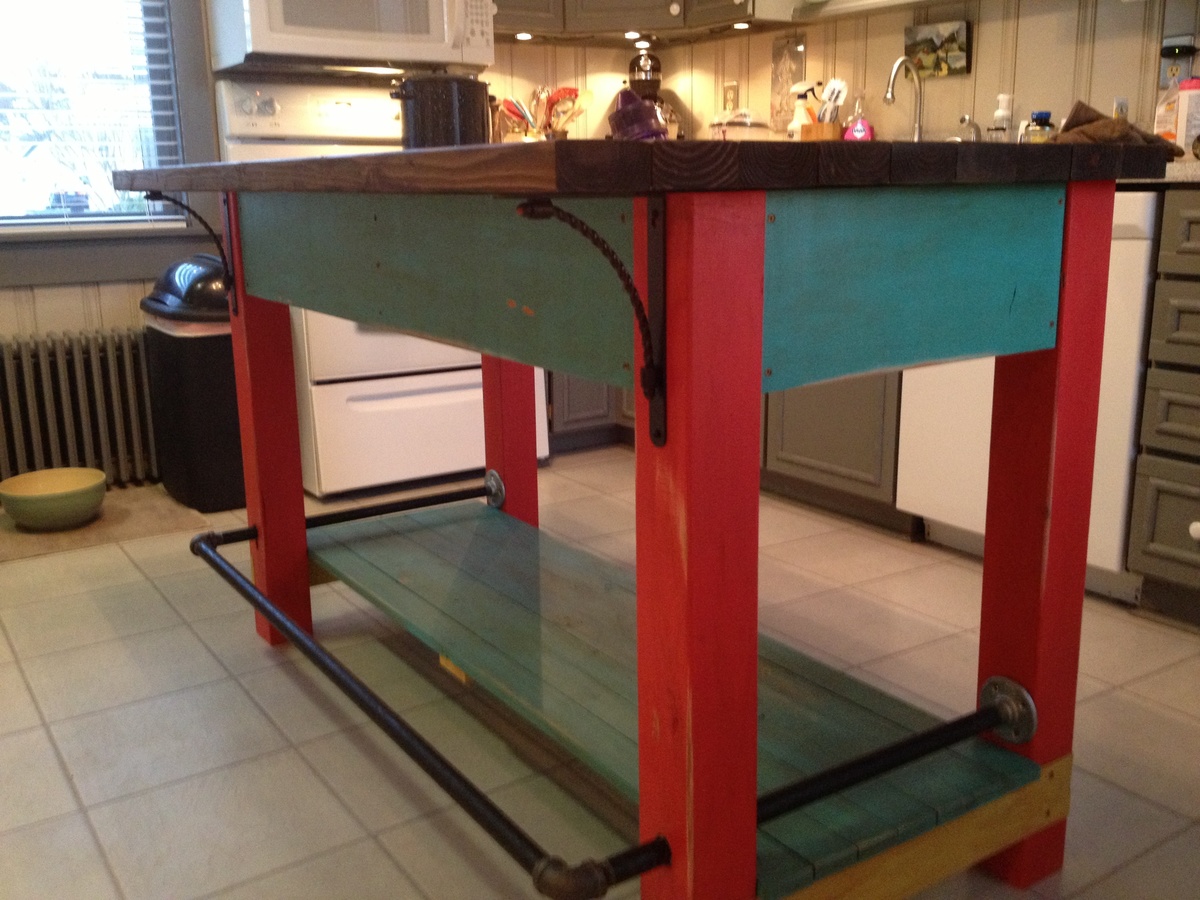
Croquet Island based on Michaela Island plans
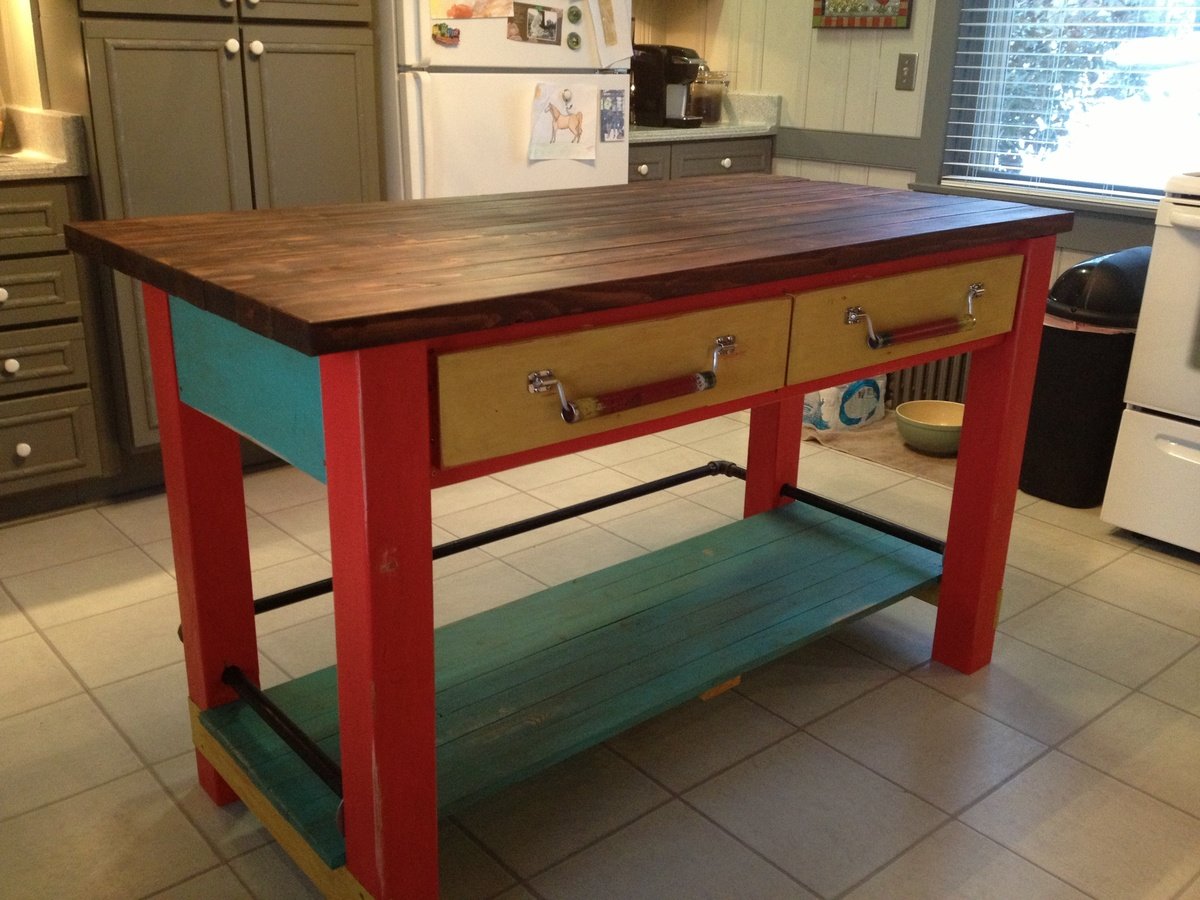
Using the Michaela Island plans, I modified them for this croquet-inspired island, complete with black iron foot rail, sewing spindle drawer-pulls, and iron-supported cantilevered top. The extra boards making up the overhang are also supported by a trio of 1/2-inch dowels drilled through several of the planks.
The top was stained using several colors, with sanding in-between, and finished with paste wax.
The bottom shelf is supported, albeit not visibly, using a croquet mallet head.
Built from Plan(s)
Estimated Time Investment
Week Long Project (20 Hours or More)
Finish Used
Paint, stain, paste wax
Recommended Skill Level
Beginner
Comments
Thu, 12/30/2021 - 16:46
How did you make the…
How did you make the countertop since it hangs over the edge?
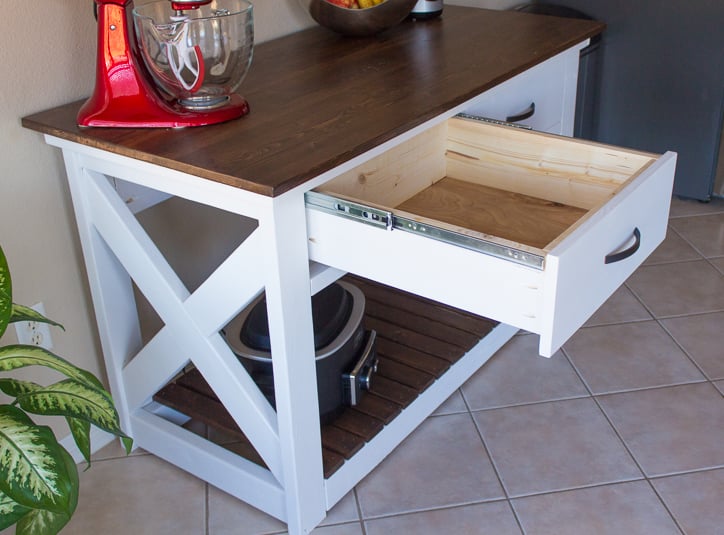
Rustic X Kitchen Island - Double
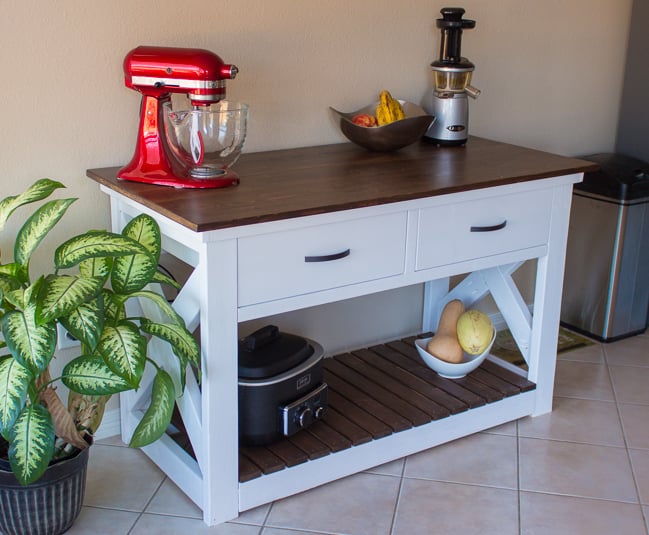
We changed the plans for this kitchen island a bit to best suit our needs. We removed the middle shelf and the bottom half of the center divider in order to create a large, open area for storage. We also extended the bottom slats to the full depth of the island, or 21".
The drawer depth was also increased to the full depth, or approximately 20". Instead of using 2x2 cleats for the drawers, we installed 20" self-closing drawer slides from Lowe's. This allows the drawers to be fully extended as well as have a soft-close feature.
The top measures 26 1/4" x 56 1/4" and was made by securing two pine panels together using pocket holes. We couldn't find an appropriate size at Lowe's, so we purched two panels instead. After sanding and staining, it is impossible to tell where the boards are joined together.
In the future, we might distress or add an antique finish the white base. Overall, we are very happy with the kitchen island. It's wonderful to have a little extra storage in the kichen!
Thanks Ana!
-Anna

Built from Plan(s)
Estimated Cost
$250 (mostly from buying way too much white paint).
Estimated Time Investment
Weekend Project (10-20 Hours)
Finish Used
Base: "Du Jour" Valspar Signature Paint+Primer in Eggshell.
Top and Slats: Rustoleum Dark Walnut Stain with Rustoleum Polyurethane in Clear Satin.
Top and Slats: Rustoleum Dark Walnut Stain with Rustoleum Polyurethane in Clear Satin.
Recommended Skill Level
Intermediate
Comments

Wed, 02/11/2015 - 23:58
This is awesome! I love the
This is awesome! I love the colors that you chose! Nice work!
Comments
Steve.Denoon
Sun, 04/25/2021 - 06:18
Plans
Are there plans available for this bench? It looks great