Community Brag Posts


Planked wood sideboard

This is now my fourth project, I built it as a gift for my sisters wedding, she was very pleased! She wanted something white so I went with a Annie Sloan chalk paint, which is pretty pricy I found out ($30-40 per quart) and her clear soft wax to finish. For the top I used a Drift wood finish and a weathered drift wood wax. Because is was a media center I just did fold down faces instead of drawers as in the plan and added some trim that I made on my router table to give it a more antique look. The Build was quite simple however the finishing to give it the right look took quite a bit of playing around!


Built from Plan(s)
Estimated Time Investment
Week Long Project (20 Hours or More)
Finish Used
Annie Sloan Chalk Paint and clear wax. Driftwood stain and weathered driftwood wax
Recommended Skill Level
Intermediate
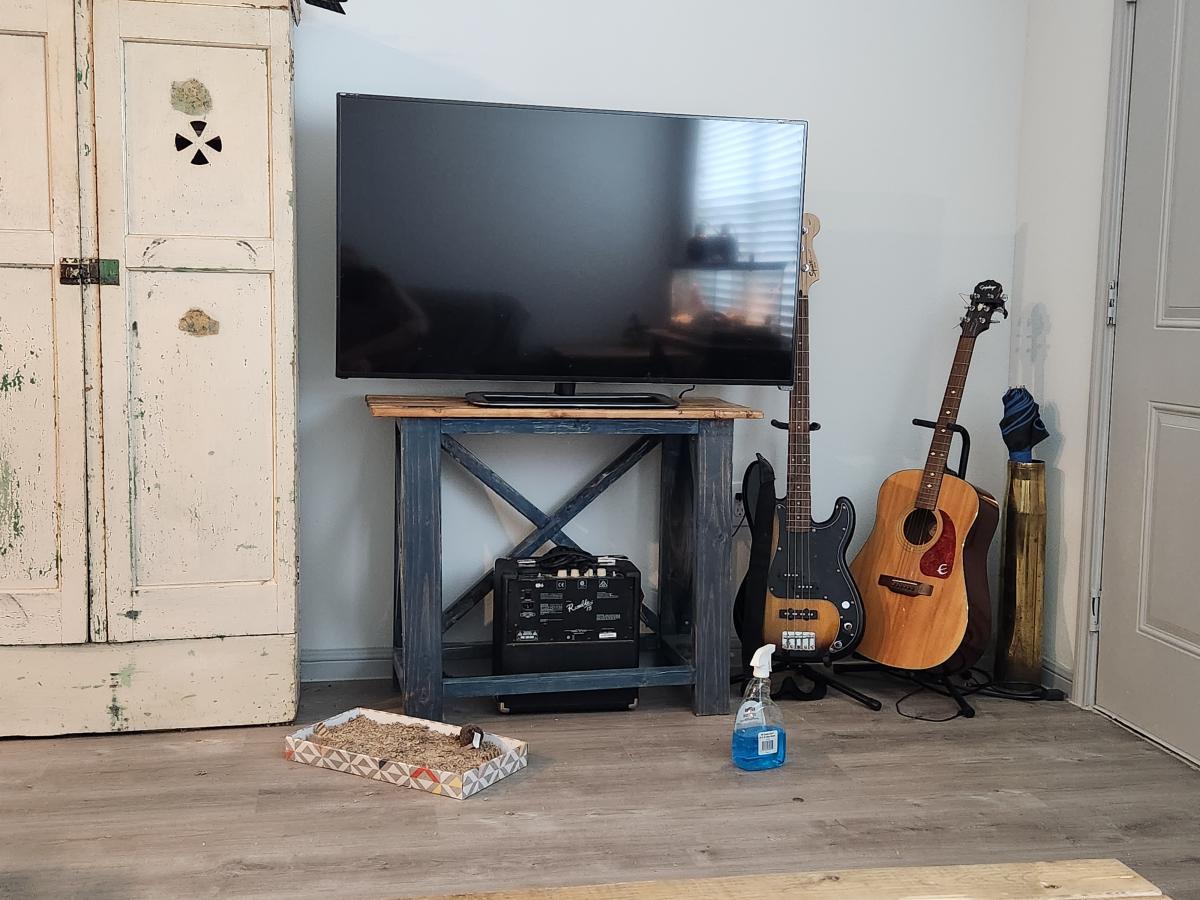
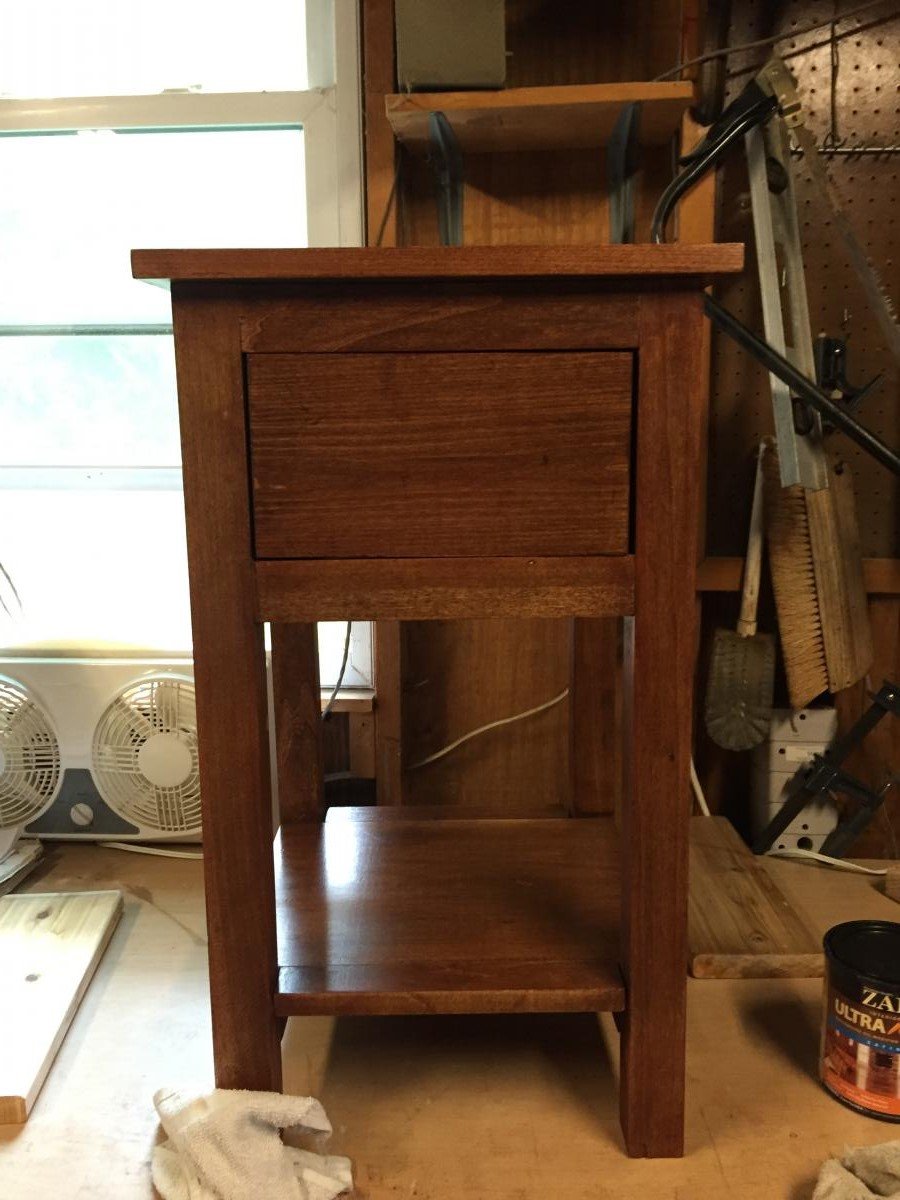
Simple Console Table for the Entry
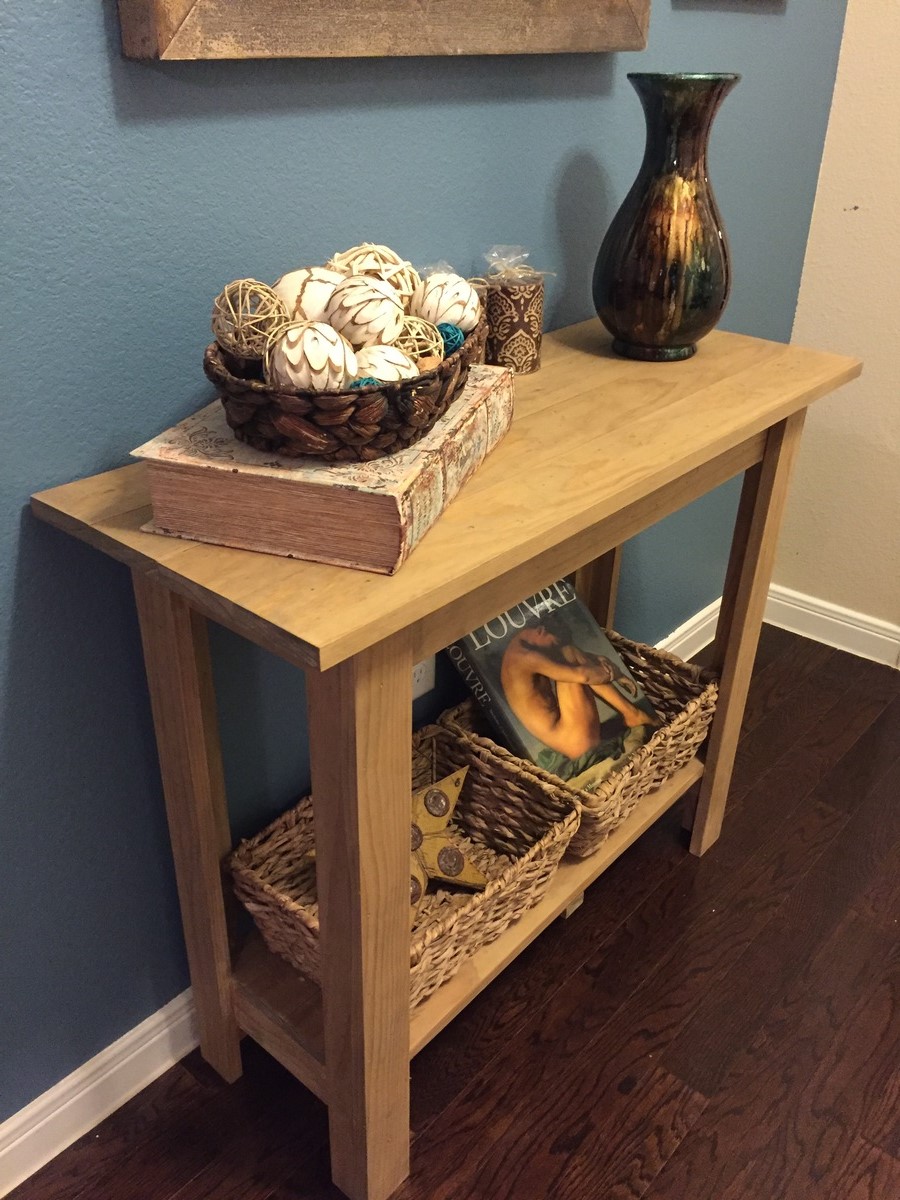
My dad and I built this together. It's perfect for the entry way in my home!
Built from Plan(s)
Recommended Skill Level
Beginner
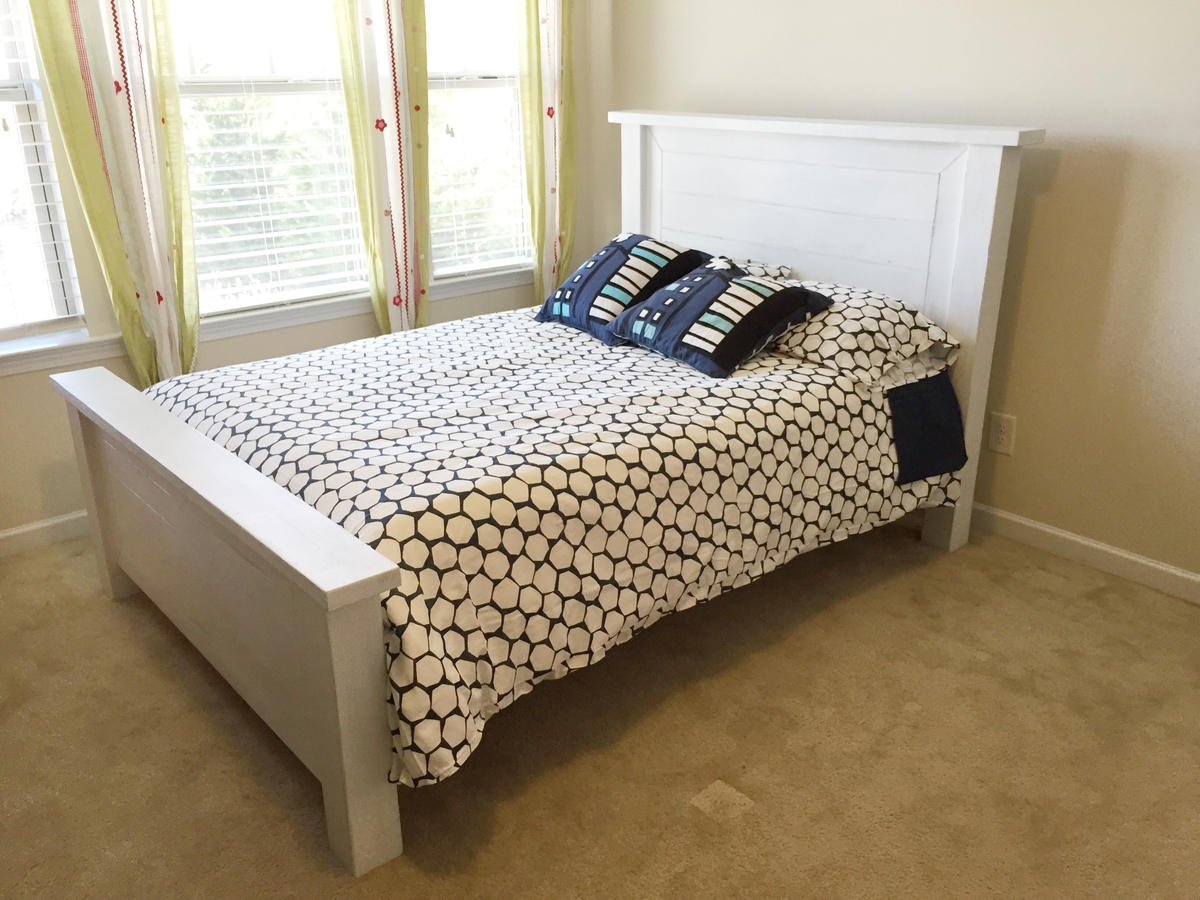
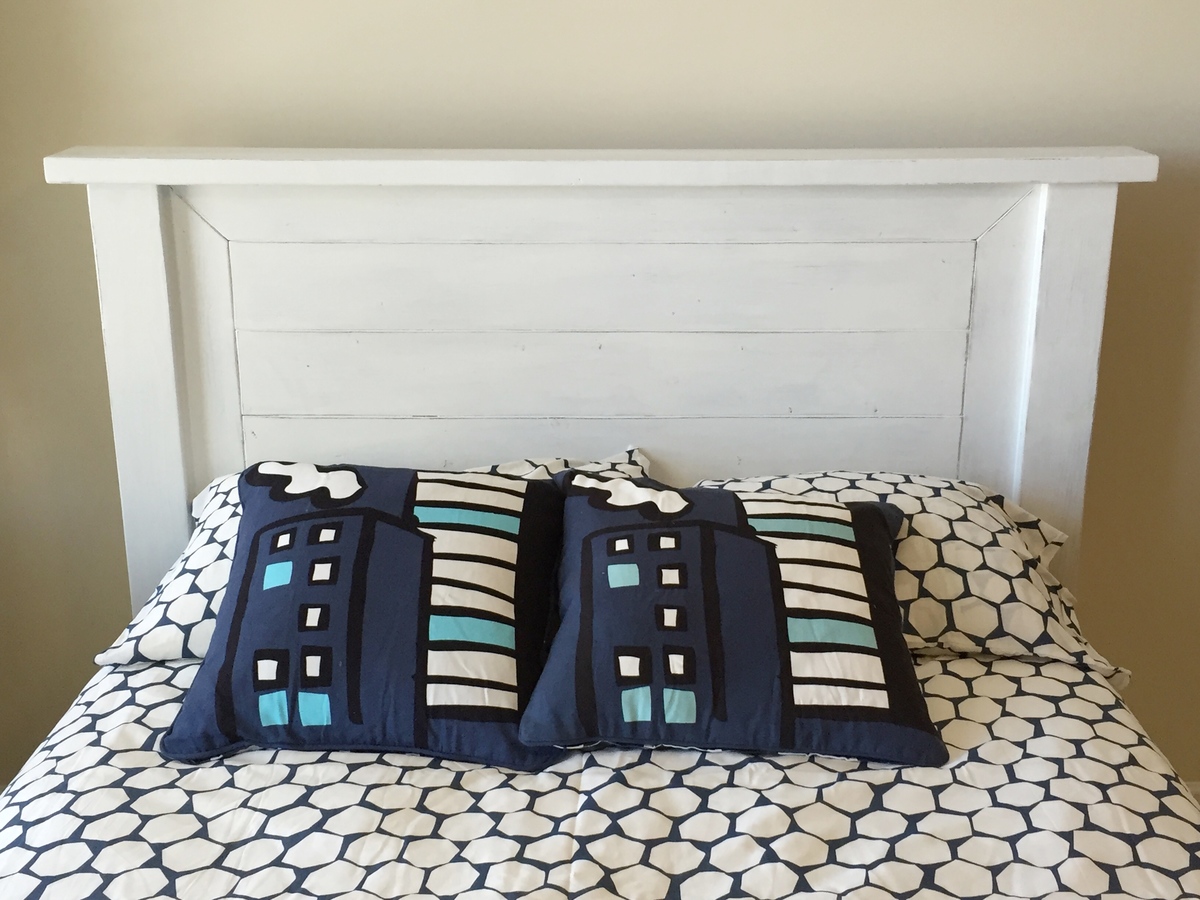
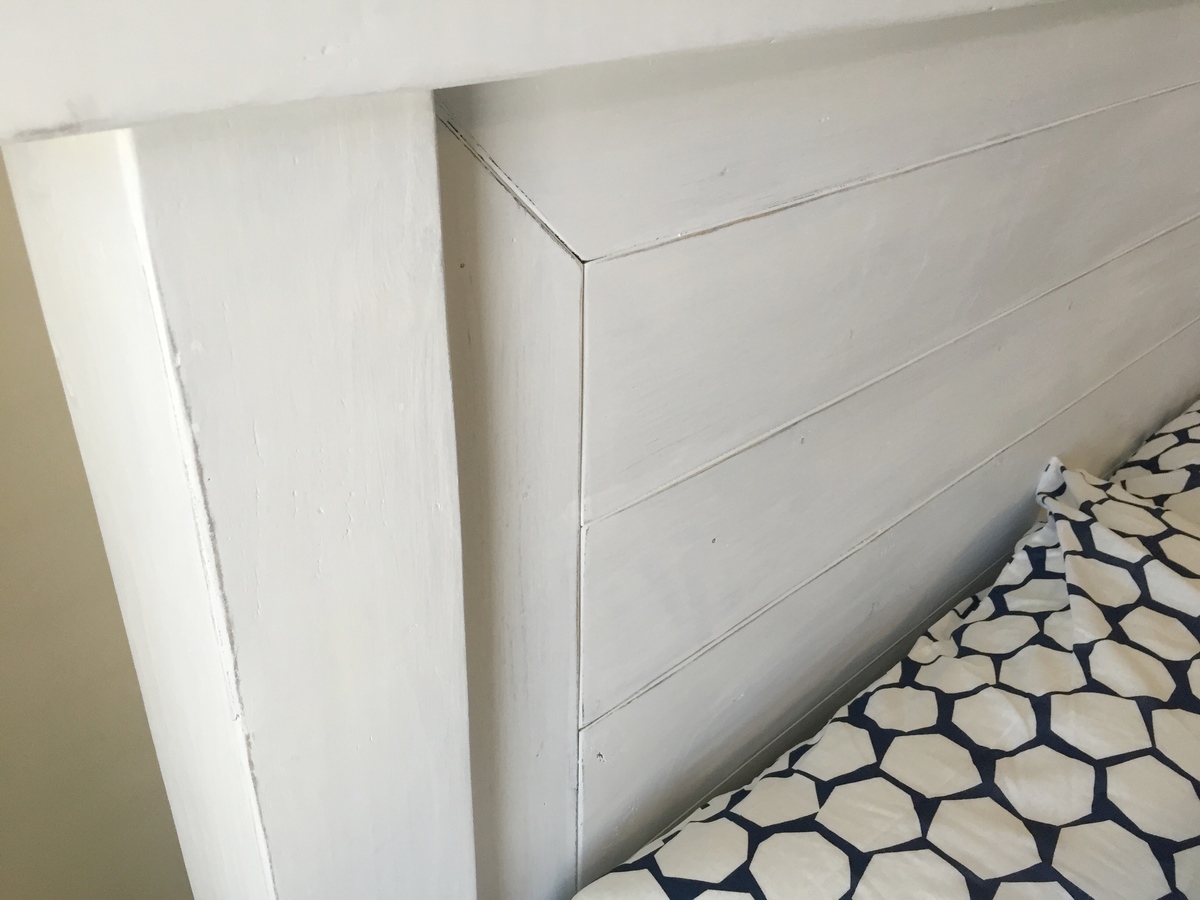
Our first new bed
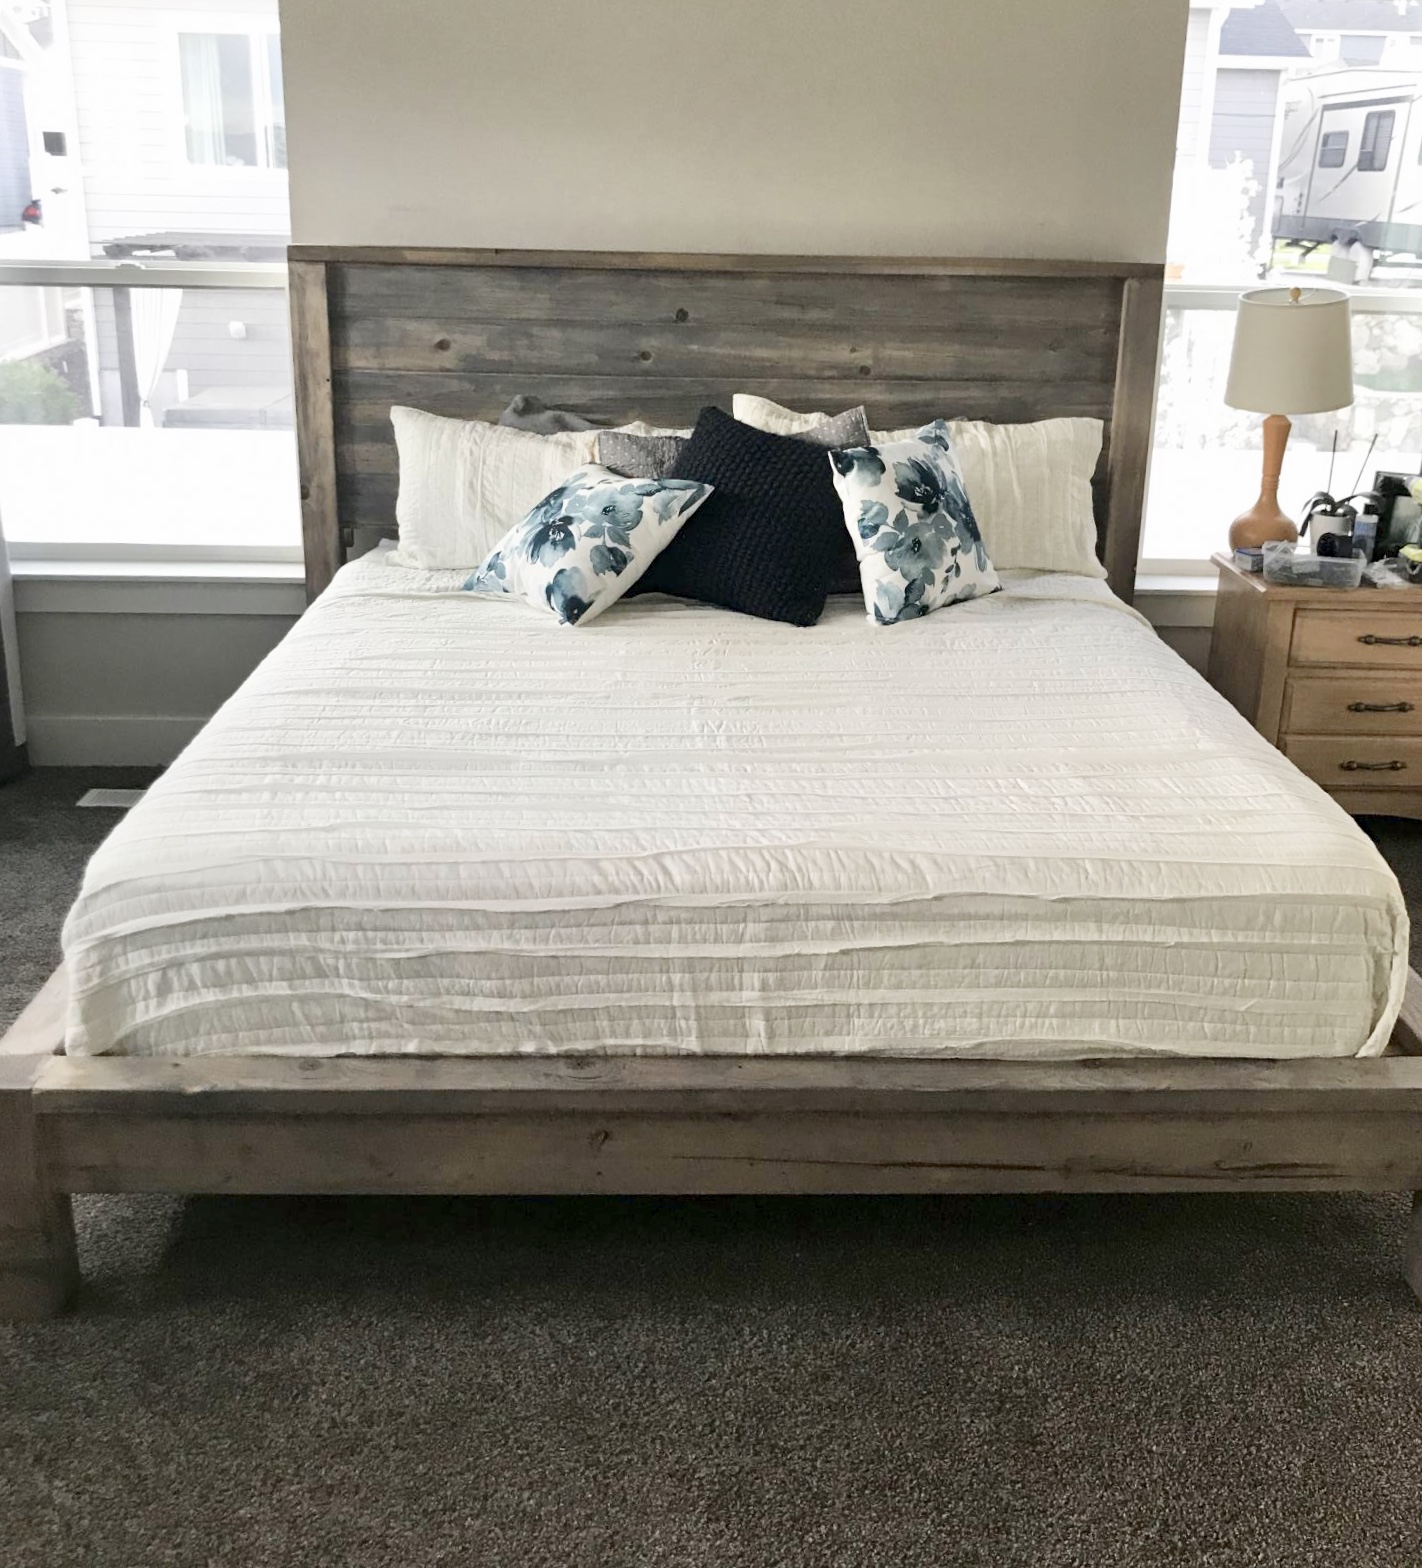
My husband and I have been married for 14 years and have never had a new bed. In fact we have been sleeping on hand me downs our whole lives. I completely fell in love with this bed plan and it was in our very tight budget! We are in heaven. We now have a beautiful farmhouse bed and even a new mattress. We couldn’t be happier with how it turned out.
Built from Plan(s)
Estimated Cost
$200
Estimated Time Investment
Day Project (6-9 Hours)
Finish Used
Varathane weathered wood
Recommended Skill Level
Beginner
Went crazy on rustic x
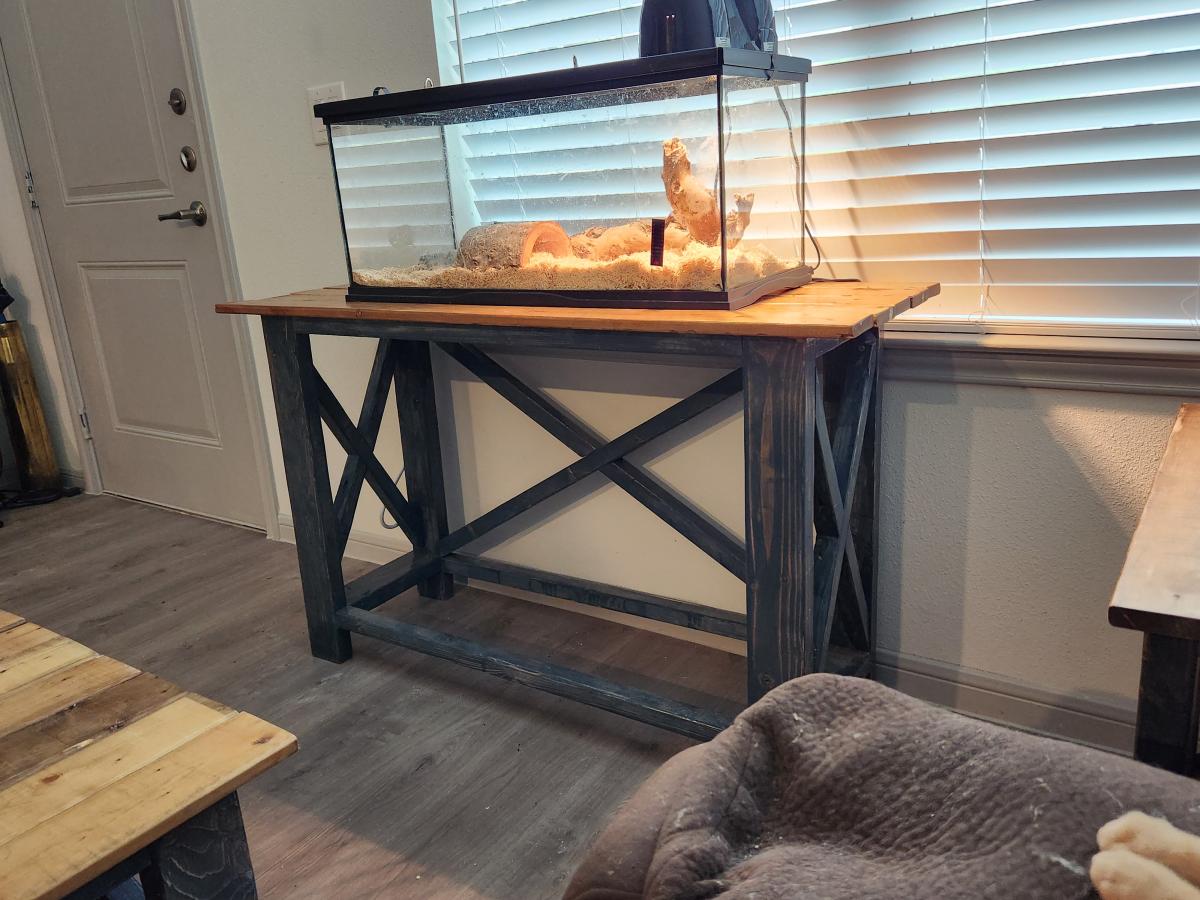
Lots of fun building all of this - very easy to do as well. Built a coffee table, 2 end tables, 2 console tables, and the book case. I changed a couple things up like doing 1x4 instead of 2x6 for the tops, and used the advice on aging/oxidizing the boards as well.
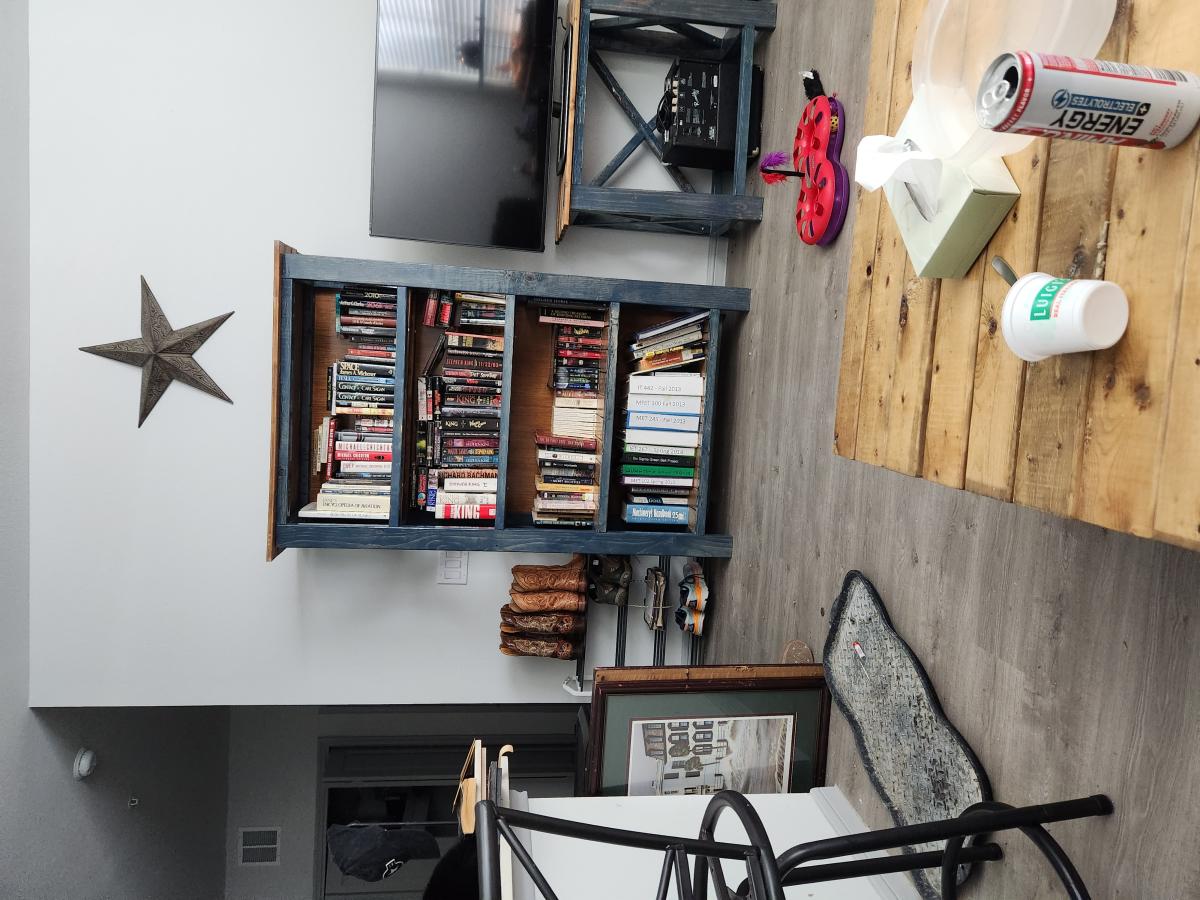

Built from Plan(s)
Comments
Wed, 06/14/2023 - 10:21
Fabulous pieces!
These look amazing and I love your finish choice! Thanks for sharing.
Modified Michaela's Kitchen Island
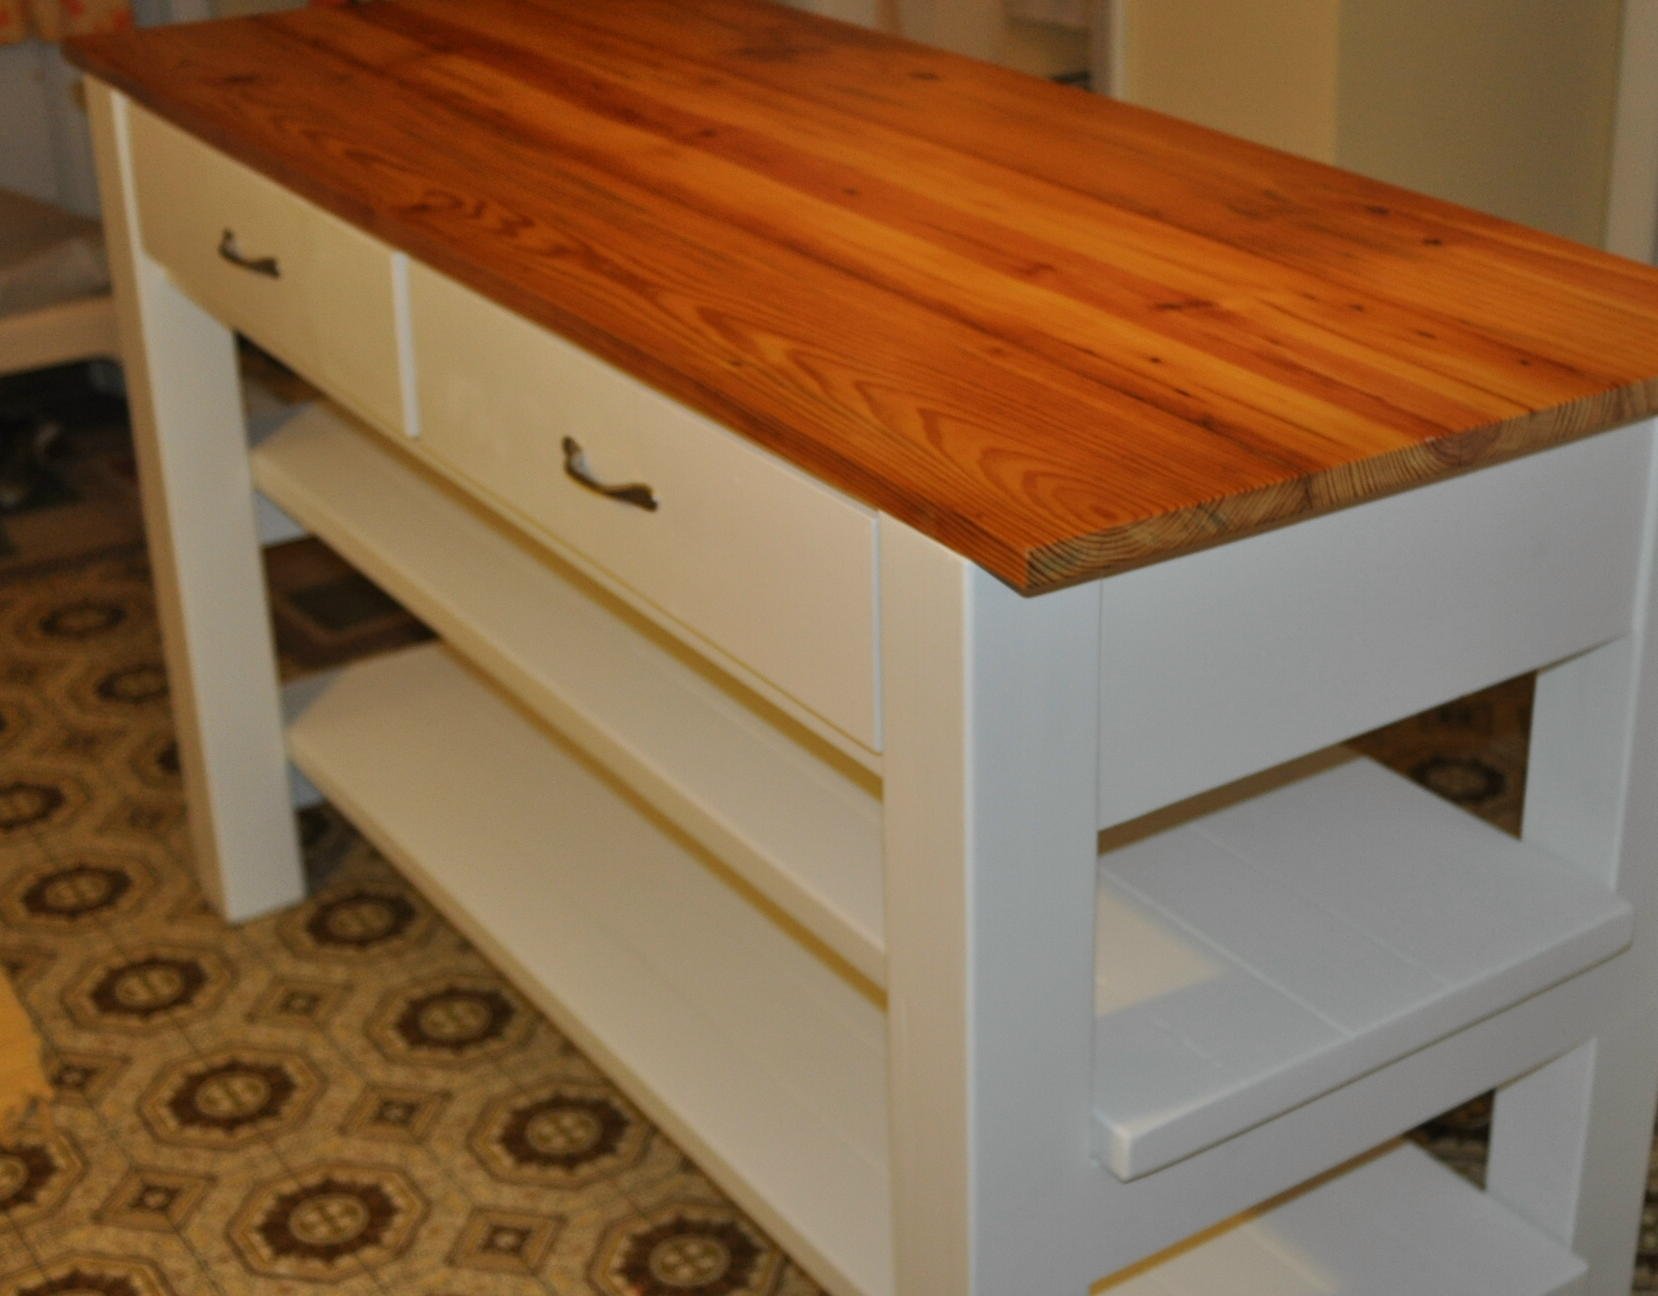
I tripped over some boards in my attic a few times before I realized how perfect they would be for my island! I planed, biscuited, poly'ed the boards and, along with a few other modifications, tada!! My new island! Love it. Now I just gotta get over the "new car smell" long enough to actually use it!

Built from Plan(s)
Estimated Cost
$150
Estimated Time Investment
Week Long Project (20 Hours or More)
Finish Used
White semi-gloss, poly
Recommended Skill Level
Intermediate
Comments

Wed, 02/08/2012 - 18:33
Beautiful!
Super job! You gave those floor boards a new life in a beautiful island. This is sure to become a family heirloom. :)
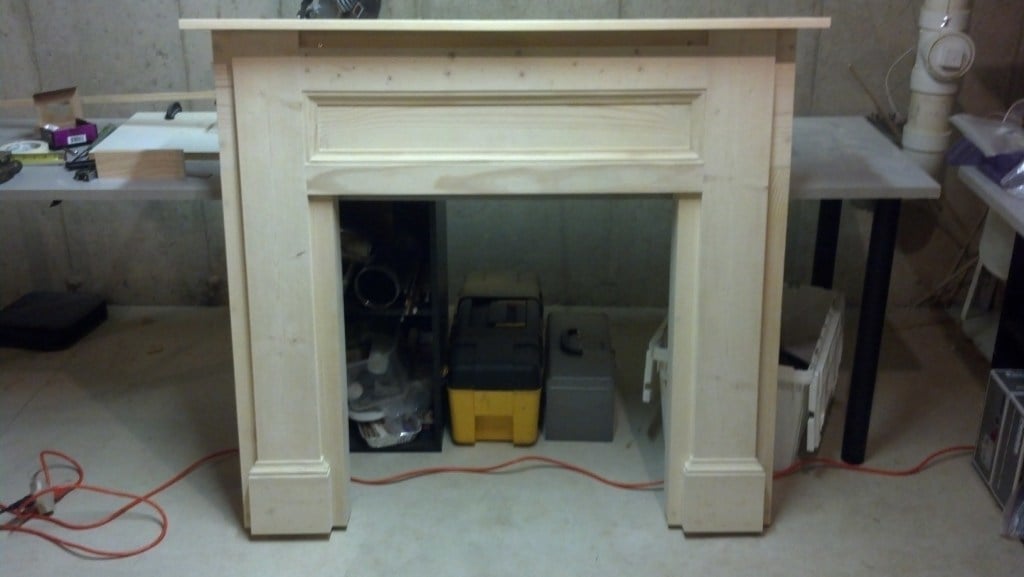
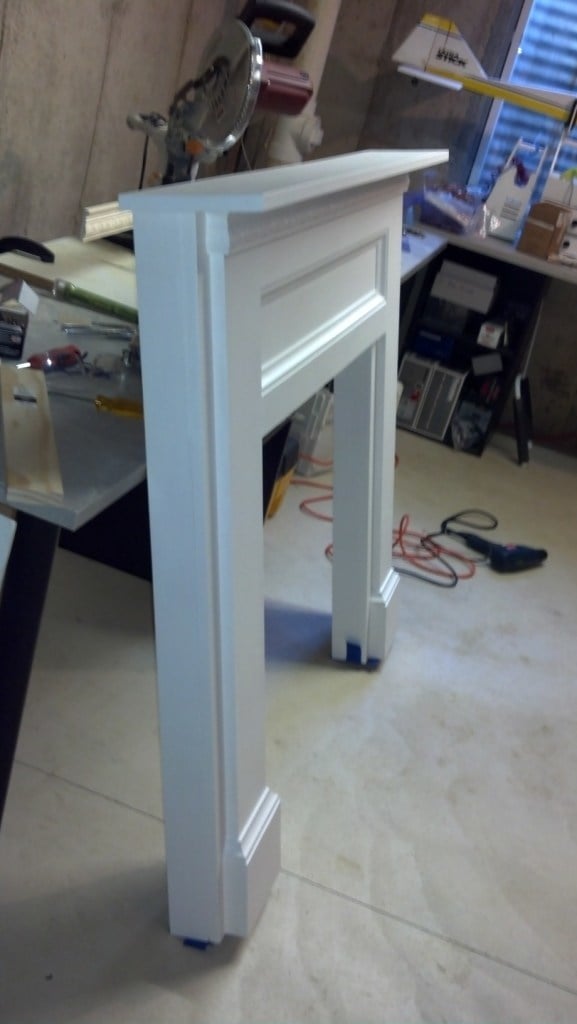
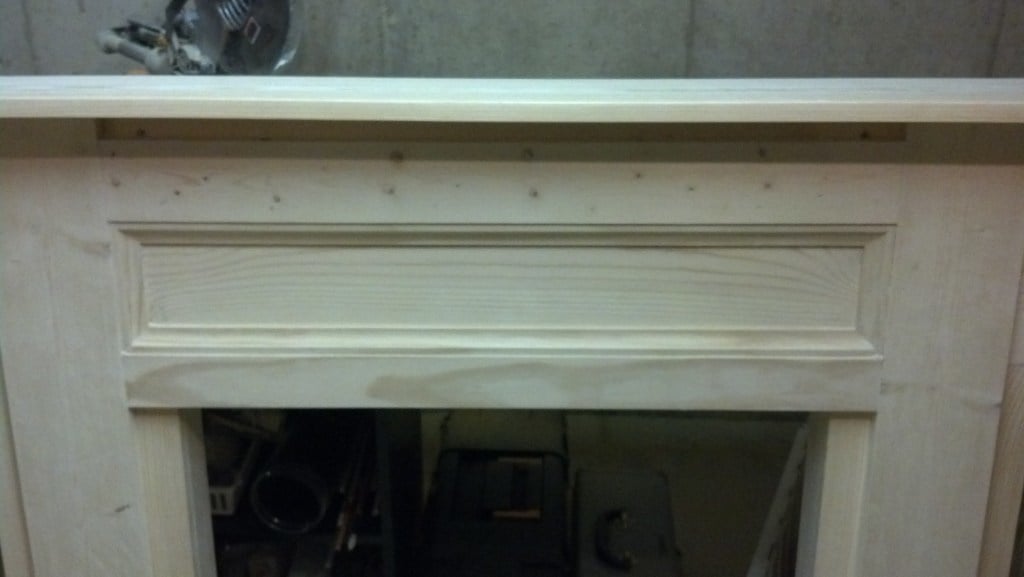
My faux fireplace build
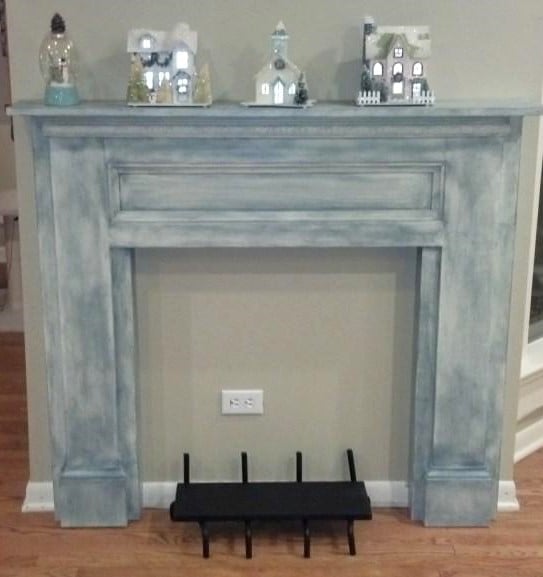
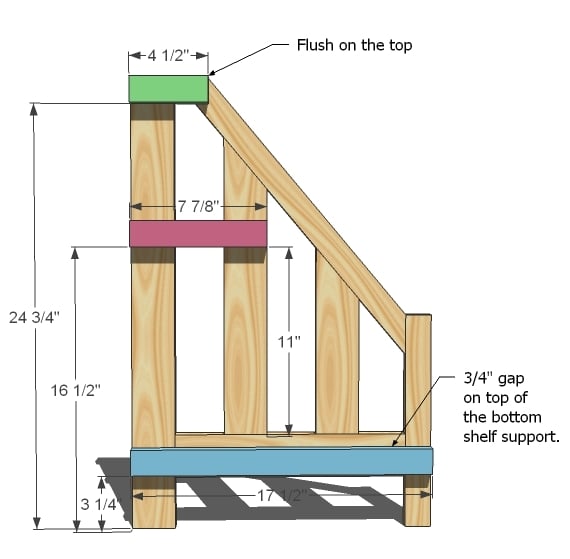
My daughter asked if we could build this together for her new apartment. We had fun putting it together over a month or so. I was easily able to duplicate the plans, even with my limited woodworking experience. I think it came out rather well. It was a lot of fun! We mounted it to the wall with a 1x4 board installed between the fireplace uprights and flush with the back edge of the mantle. I built a mounting bracket by overlapping two 1 inch thick, wide boards 50% and nailing them together. The width of the bracket boards were about 4 inches shorter than the mounting board on the fireplace to allow horizontal adjustment. I screwed the bracket to the wall. The bracket forms a pocket. The fireplace is lifted up and over the bracket so the fireplace mounting board slides into the pocket between the wall and the upper bracket board. I screwed the bracket a bit lower on the wall so the weight of the fireplace is supported by its legs. The bracket just keeps the fireplace snug against the wall. It worked great. Just be sure to screw the bracket into studs. I also removed the base board trim from the wall and cut it to fit around the fireplace. I also cleaned up an old fireplace log grate I had with a wire brush and flat black Rustoleum. I used a scrap piece of board painted flat black to put on the grate as a shelf for candles.
Built from Plan(s)
Estimated Cost
120.00
Estimated Time Investment
Week Long Project (20 Hours or More)
Finish Used
Two coats of latex primer, one light-colored latex base coat, blue-grey tinted glaze dry-brushed finish, two coats of satin polyurethane.
Recommended Skill Level
Starter Project
Rustic X Coffee Table
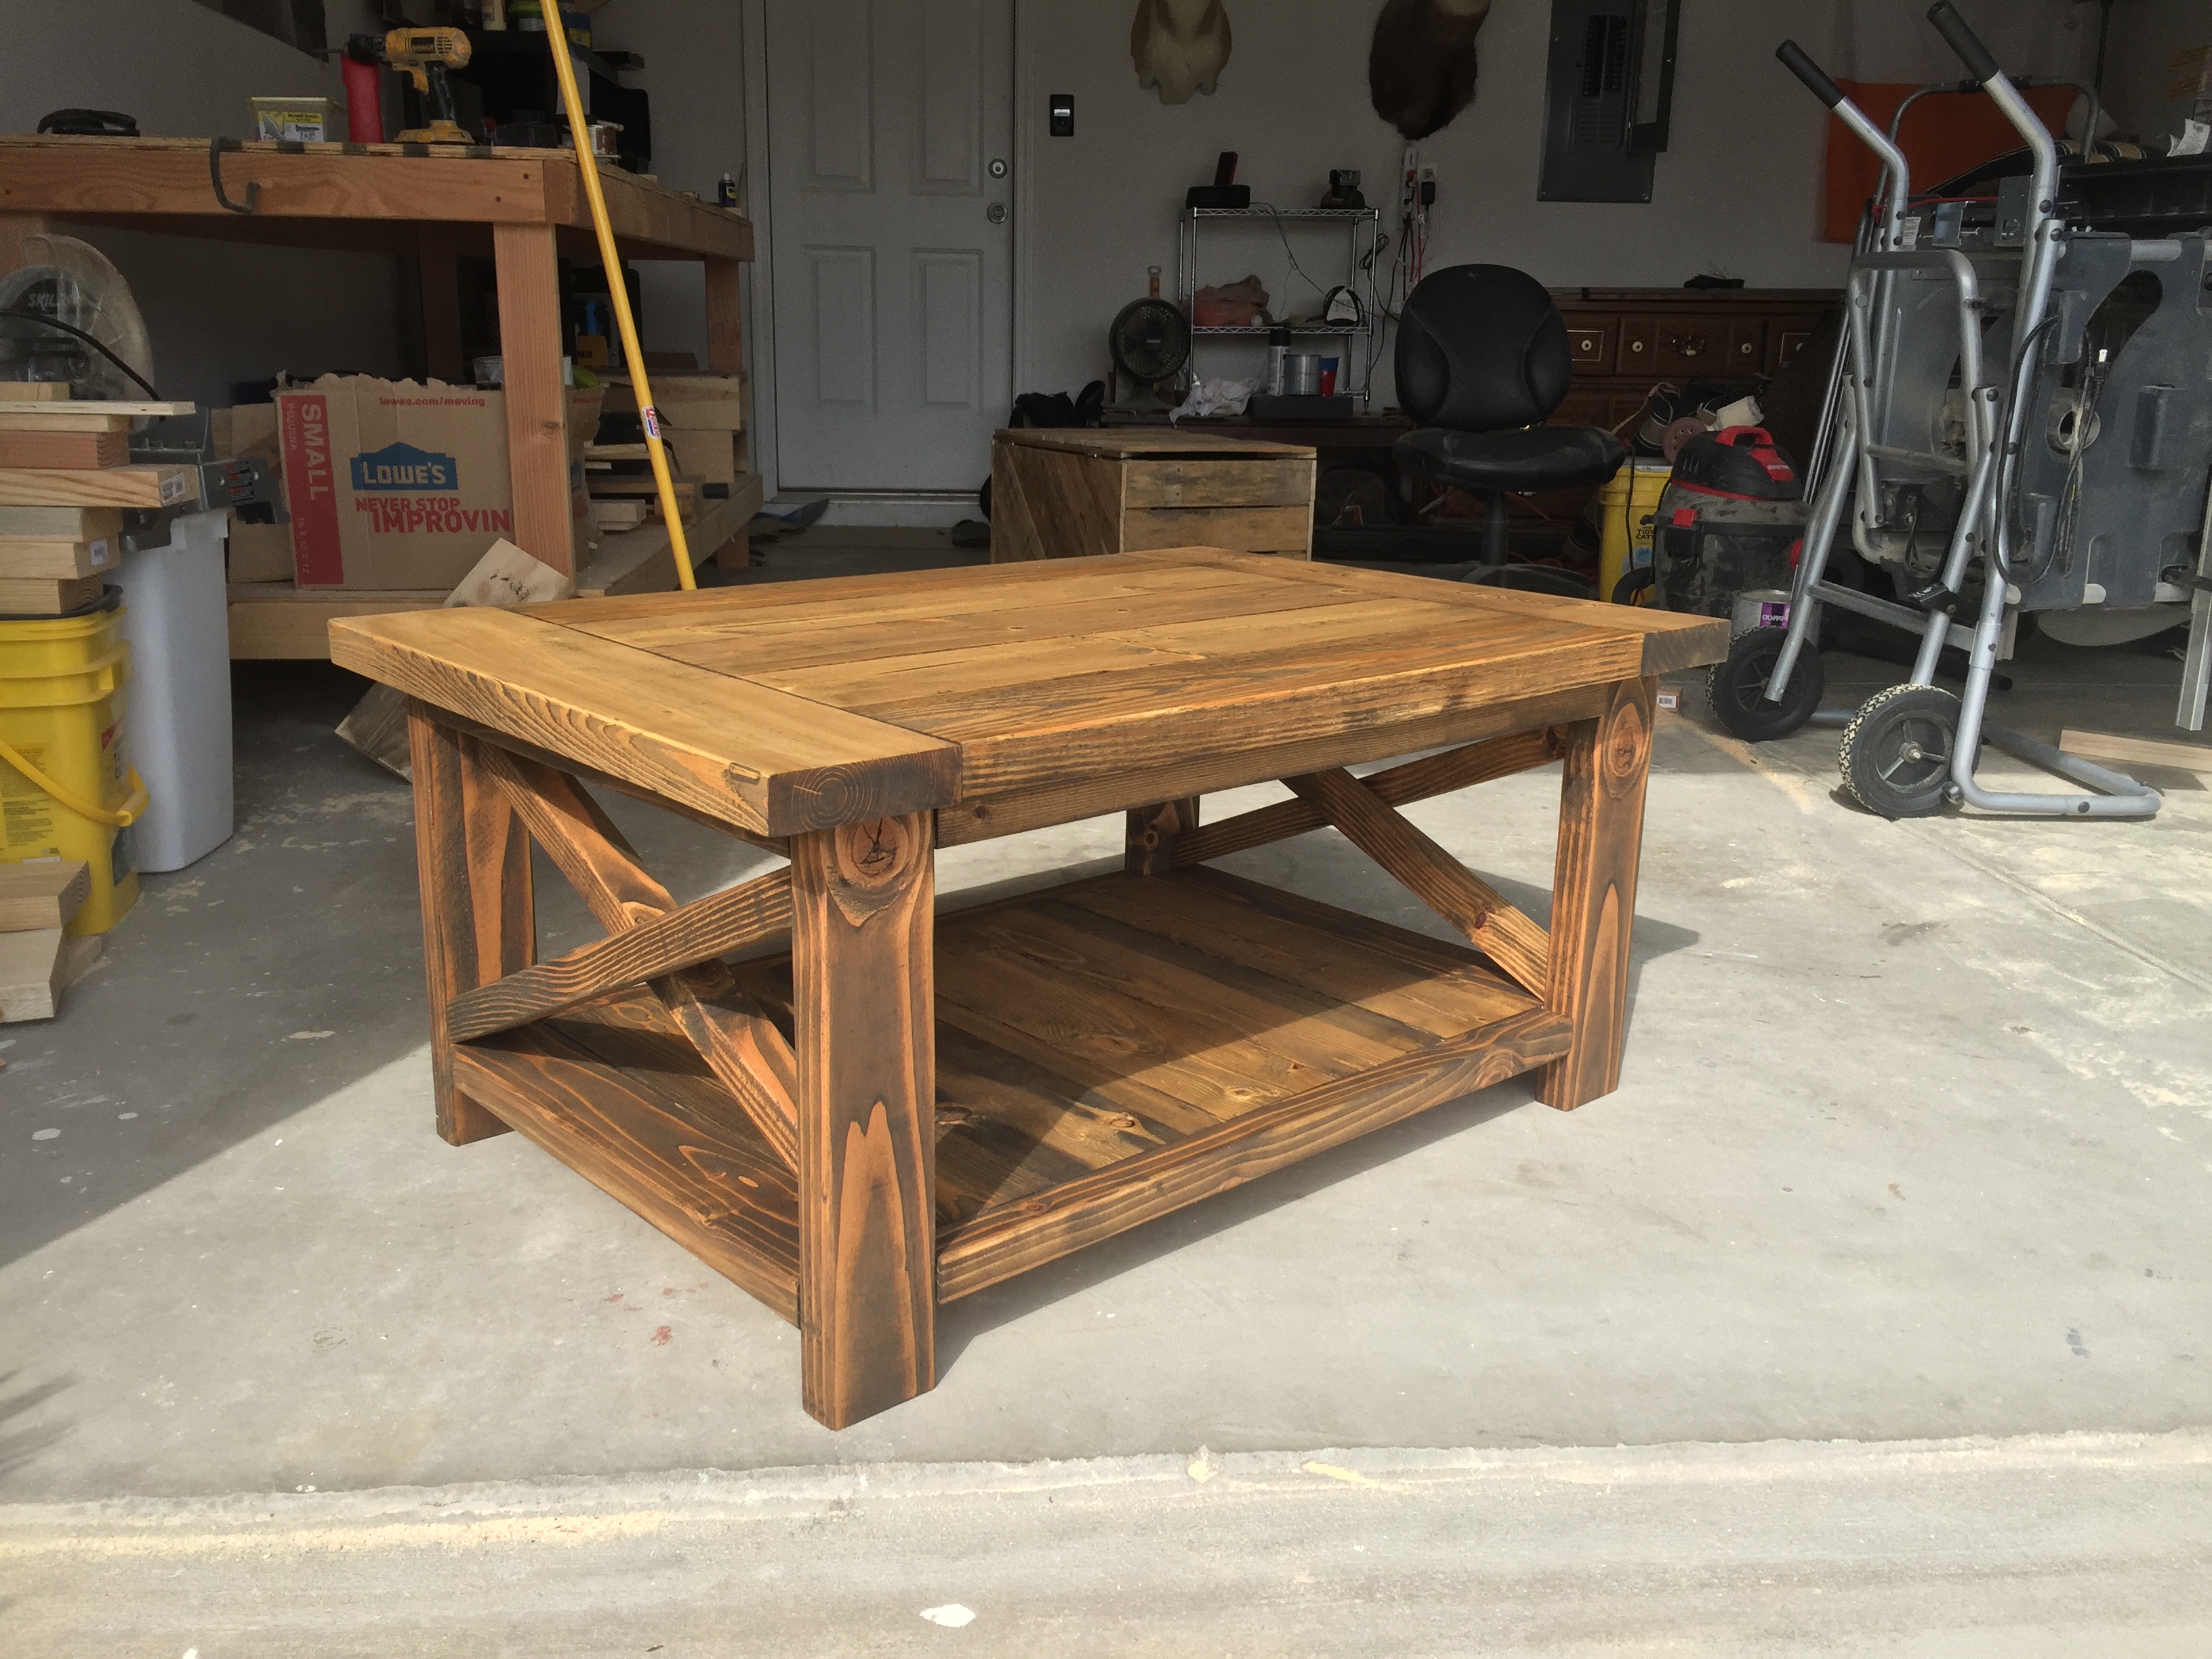
I changed the plans just a little and instead of using the 1x12's on the bottom I used some left over 2x6 scraps. I had to use the table saw to rip one board to fit. I personally think it gives it a better look. also the top of the table I added to butt boards to match the rest of the furniture in the house.
Built from Plan(s)
Estimated Cost
35
Estimated Time Investment
An Hour or Two (0-2 Hours)
Finish Used
Minwax brush on lacquer
semi satin
semi satin
Recommended Skill Level
Beginner
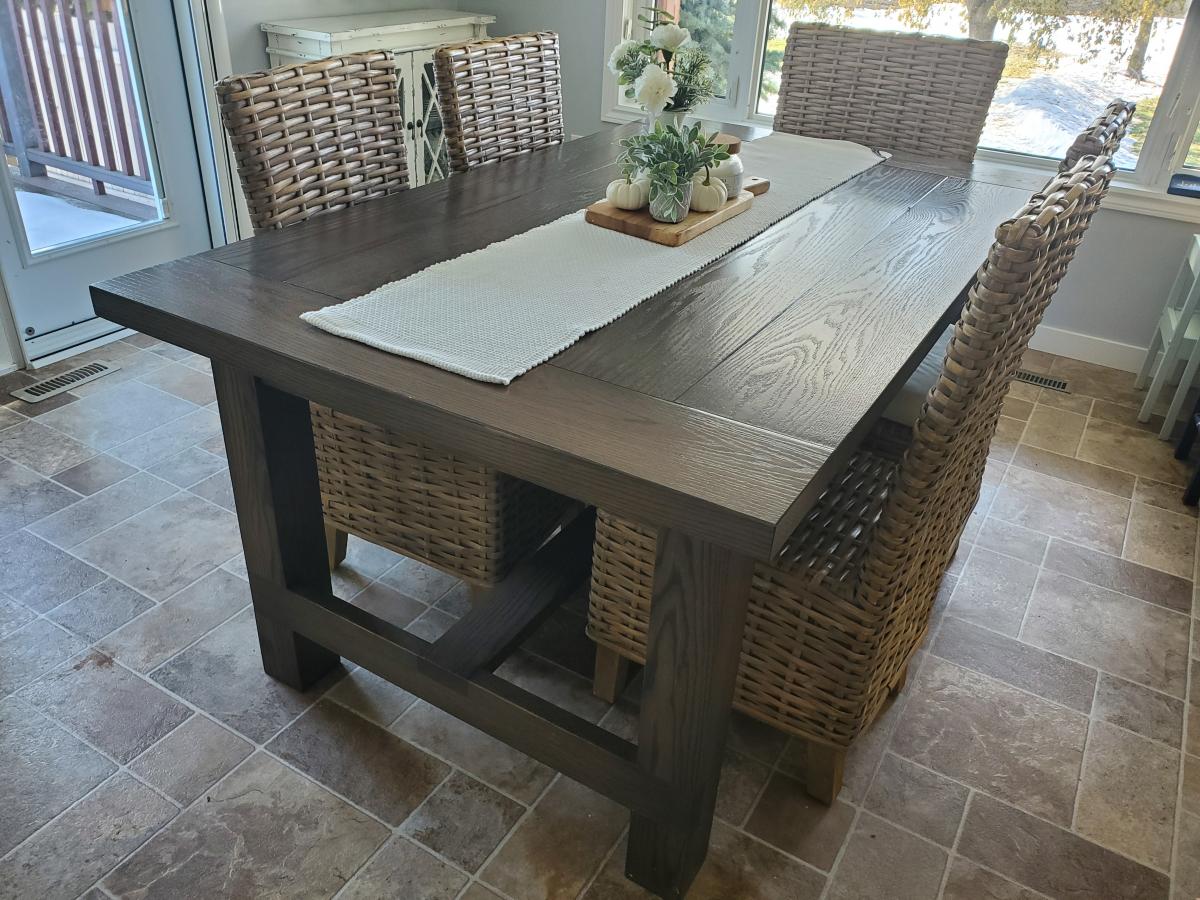
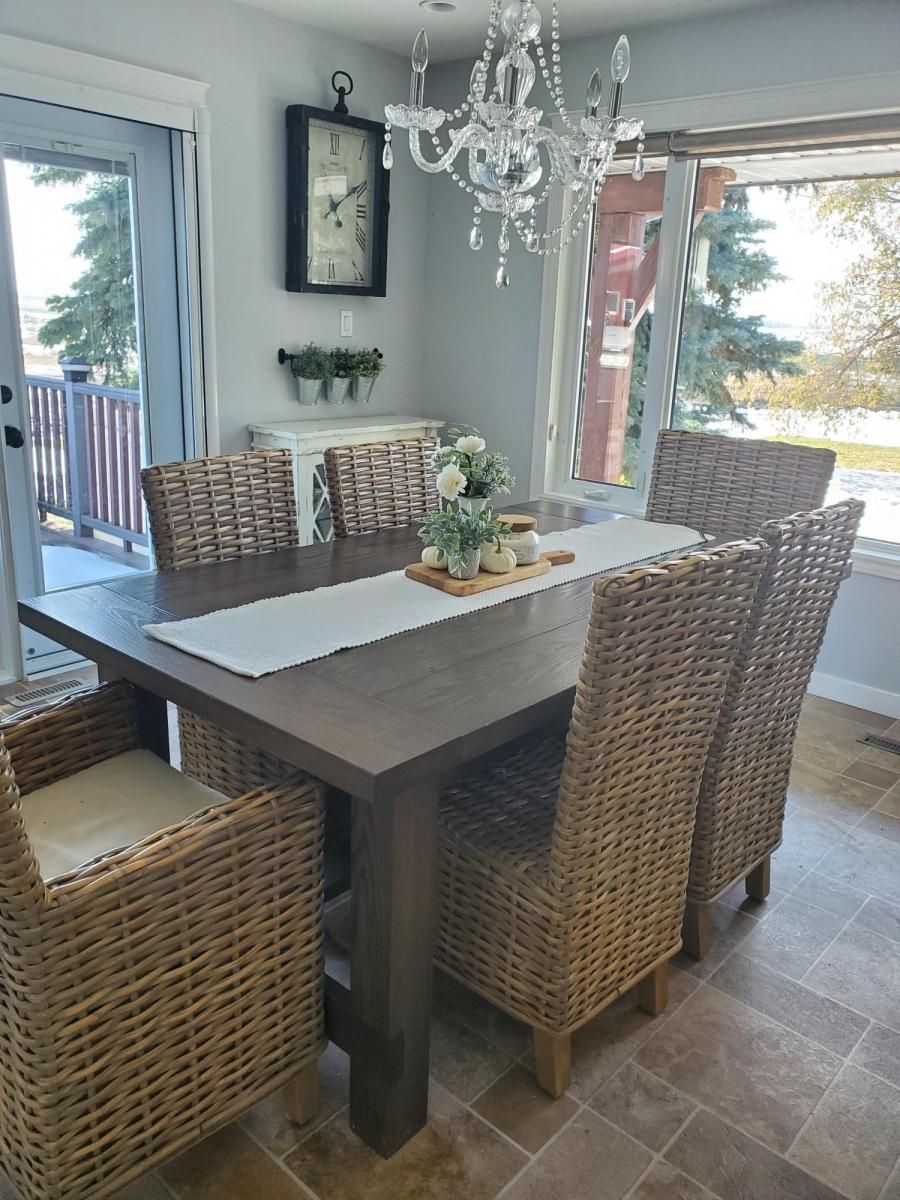
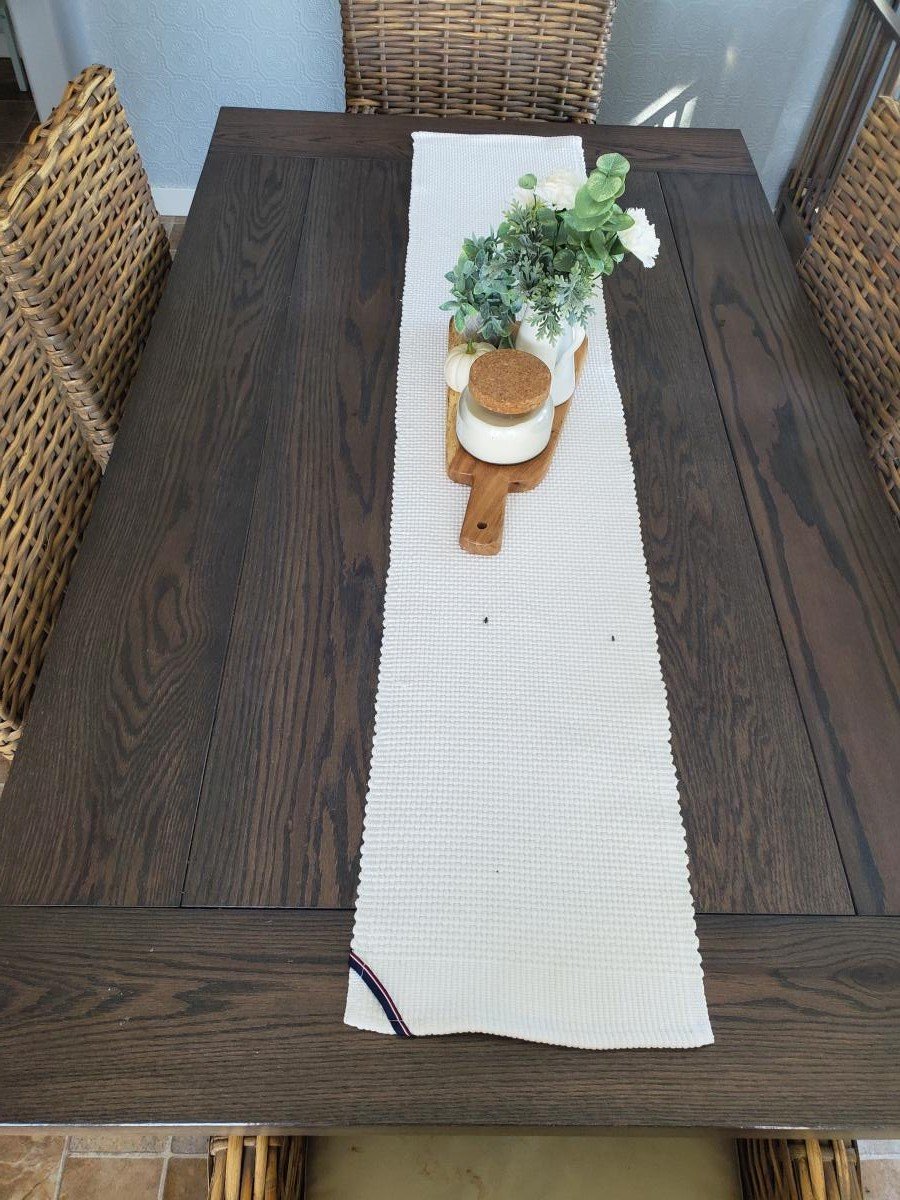
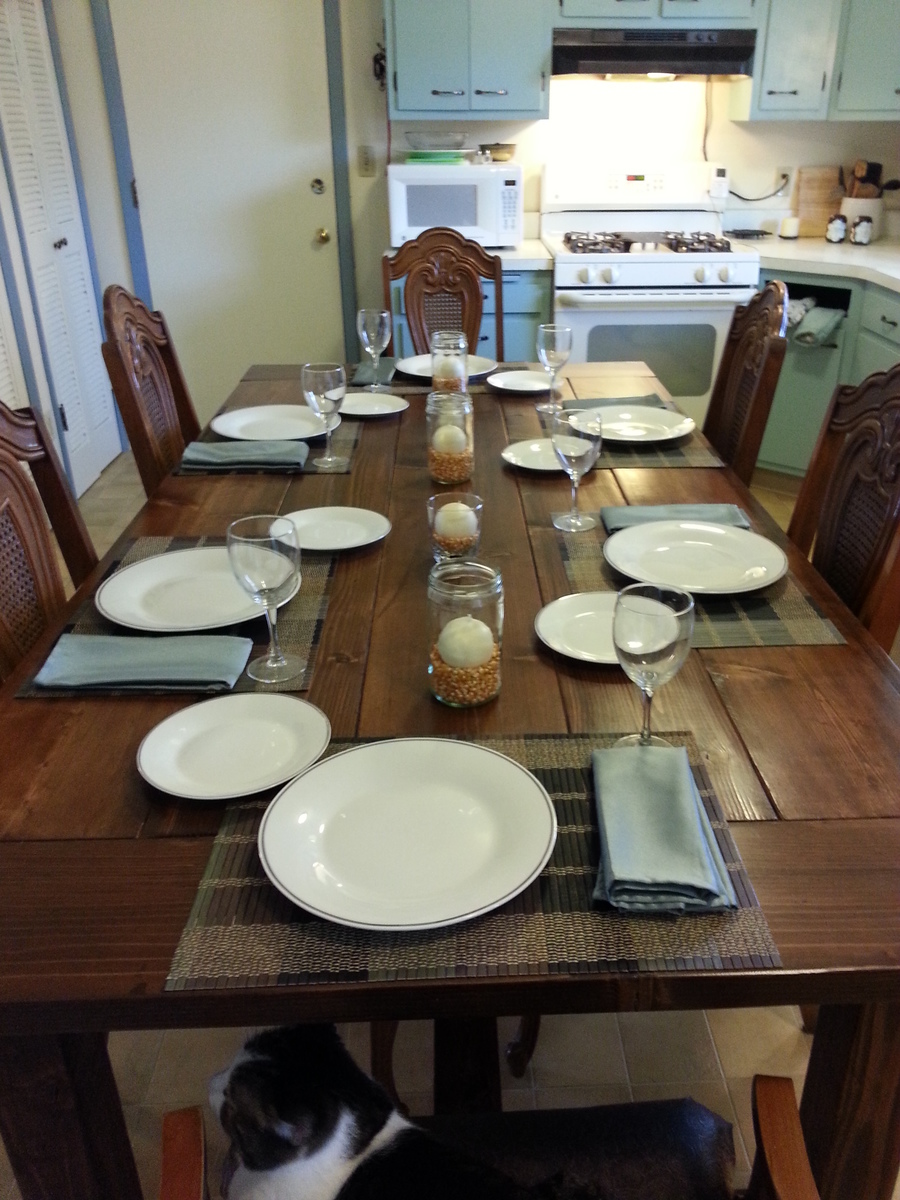
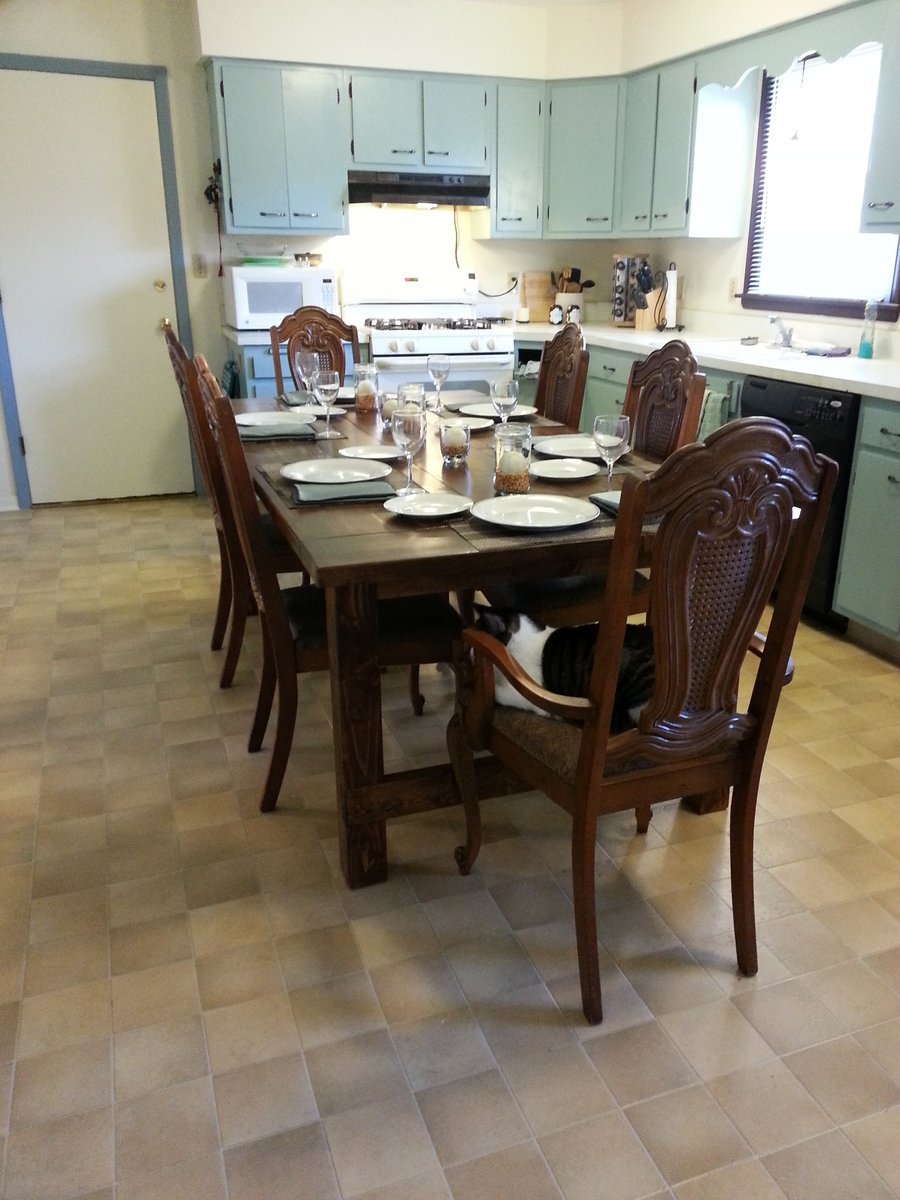
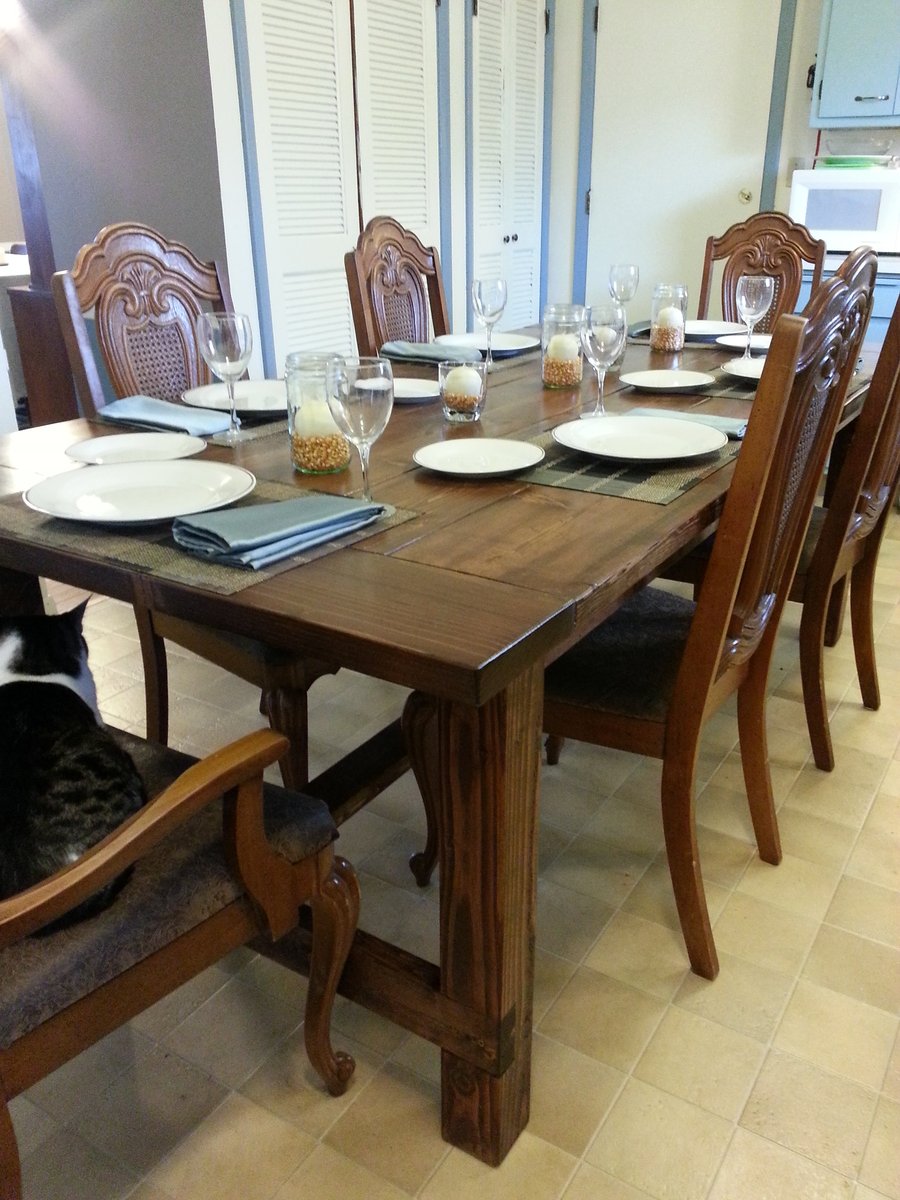
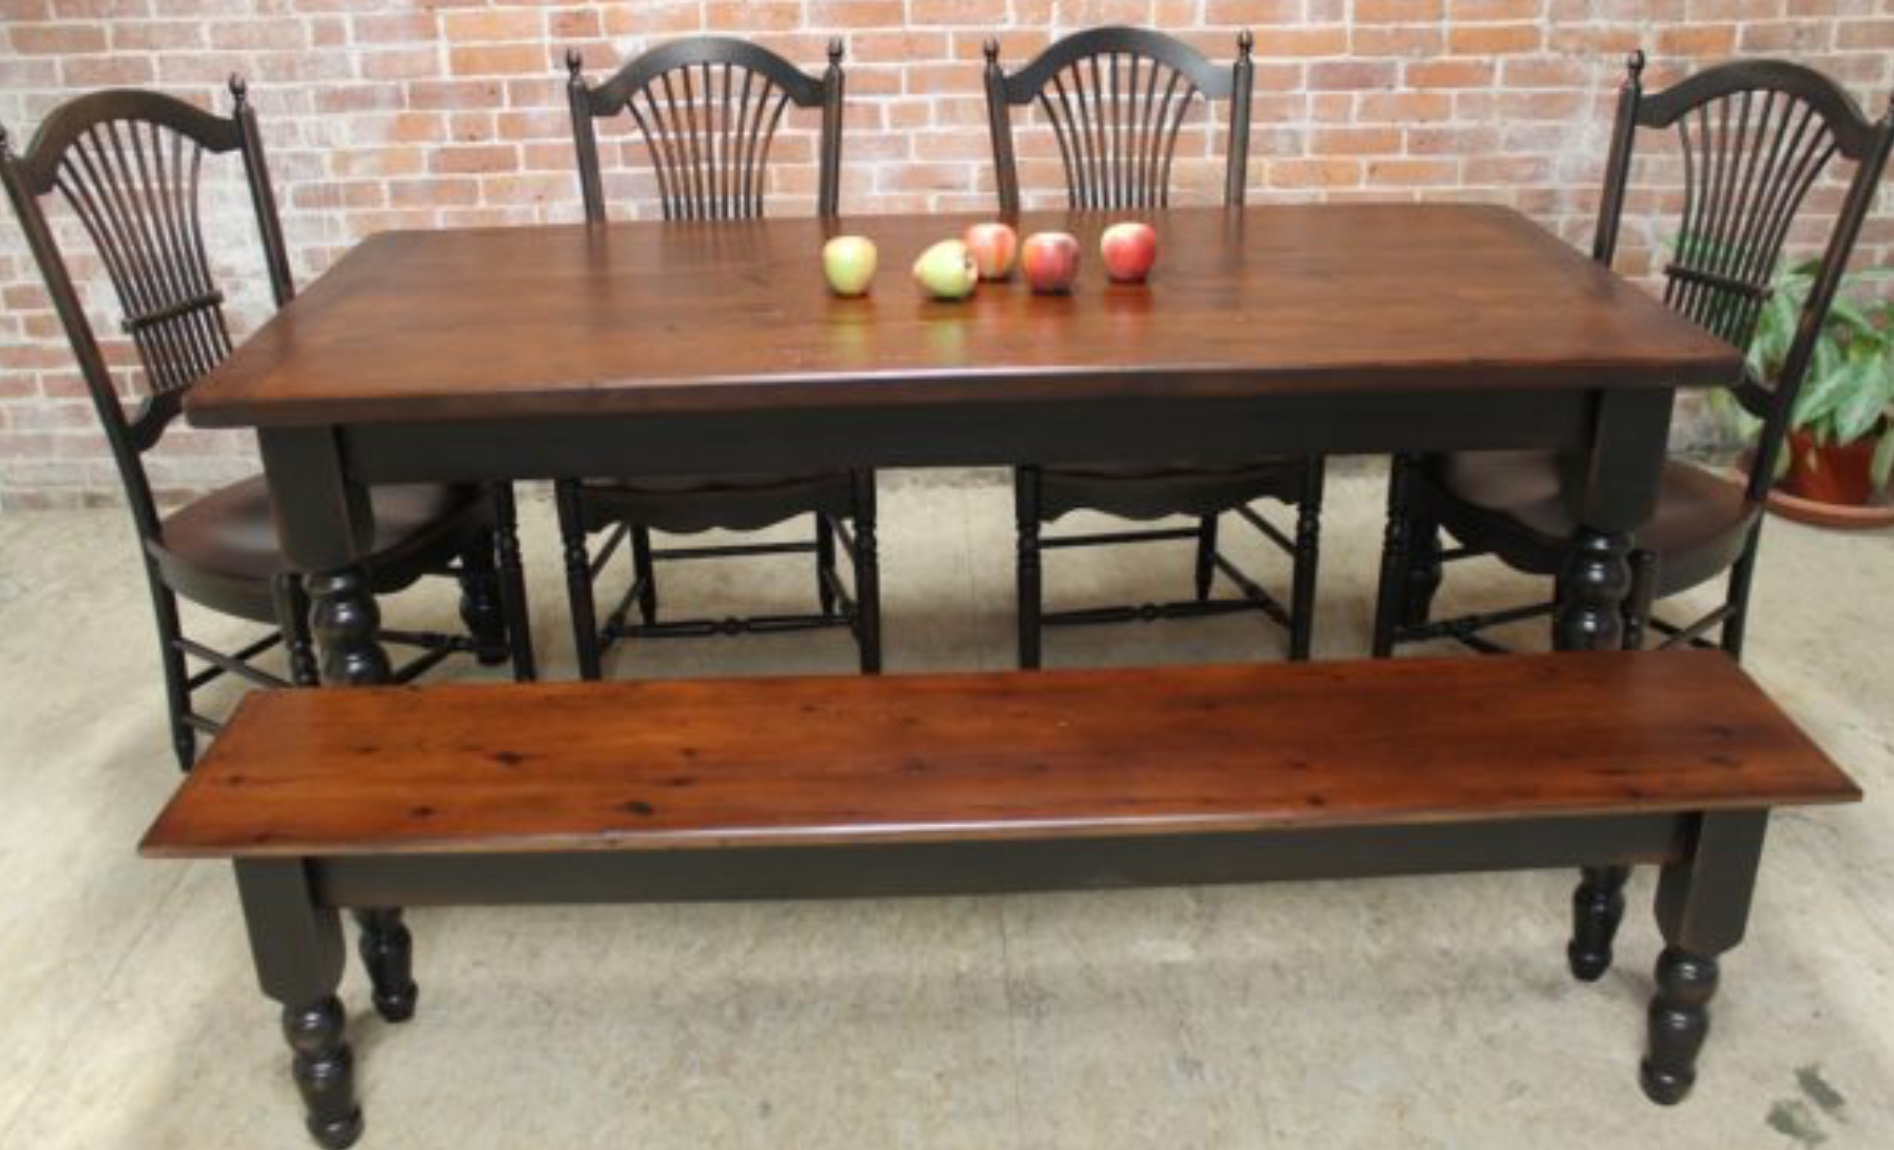
Farmhouse Table

I built this table a few years back when I was just starting off with my woodworking hobbies. It turned out beautiful thanks to the easy-to-follow plan from Ana! This is a gorgeous, sturdy farmhouse table that can look good in any finish, and in any home!
Built from Plan(s)
Estimated Cost
$300
Estimated Time Investment
Day Project (6-9 Hours)
Finish Used
I used a grey stain to get the color I wanted. I then lacquered it to get a nice hard finish that will stay nice and keep from dents for many years.
Recommended Skill Level
Beginner
Comments

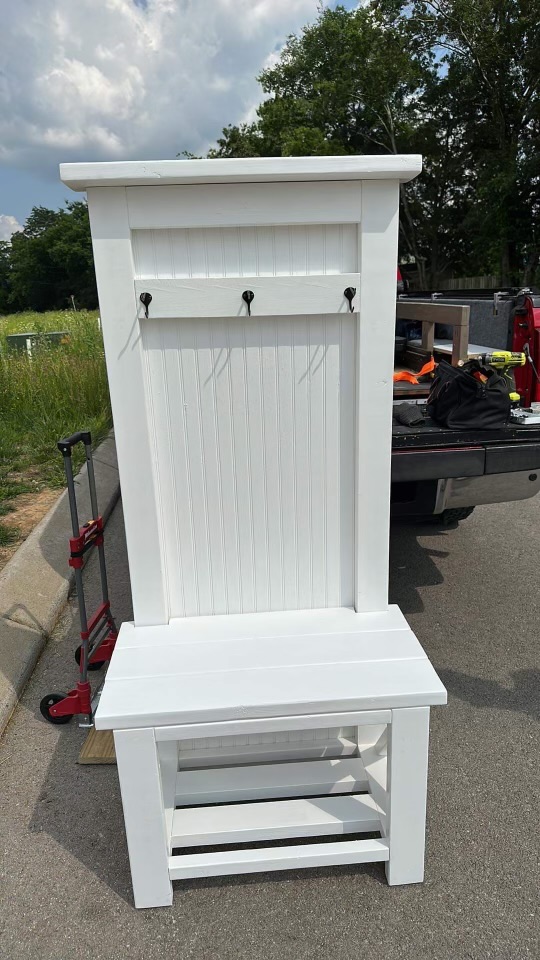
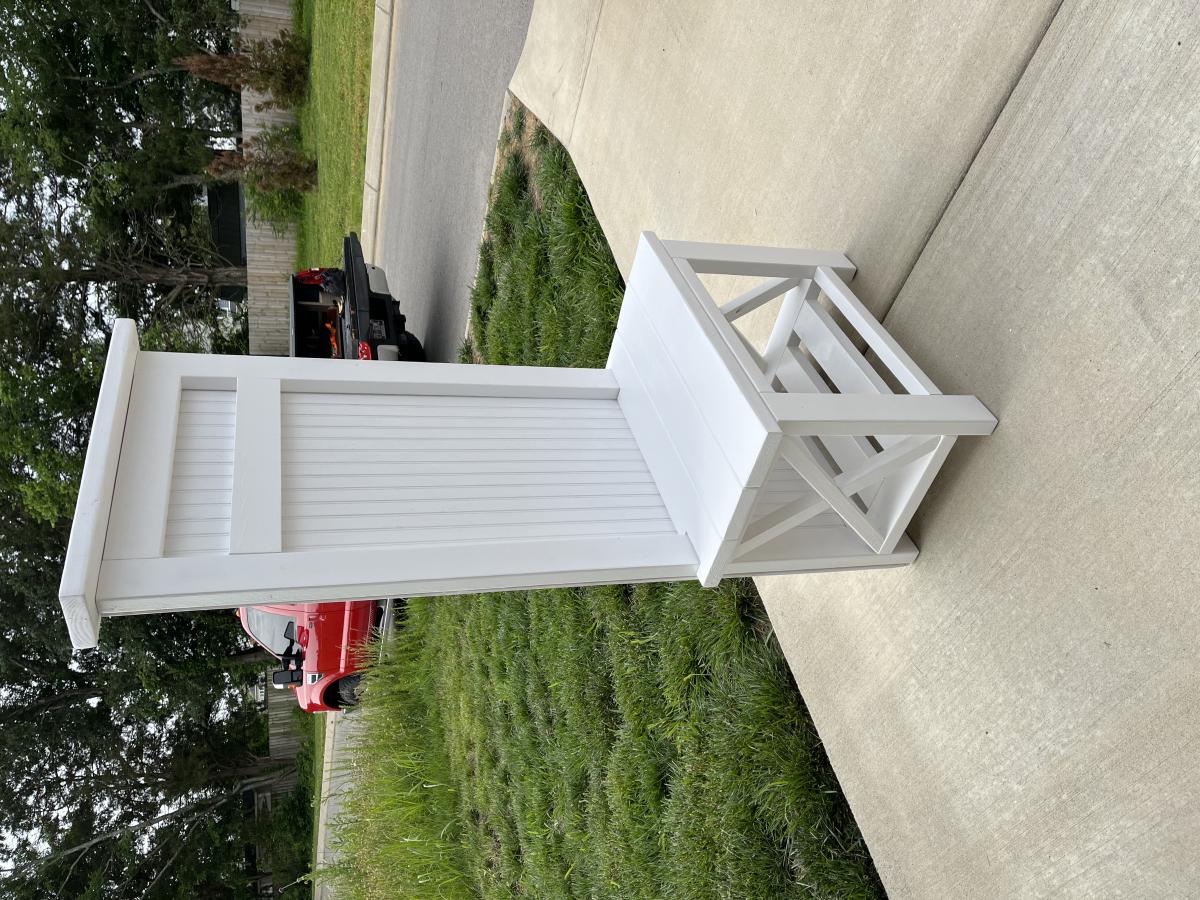
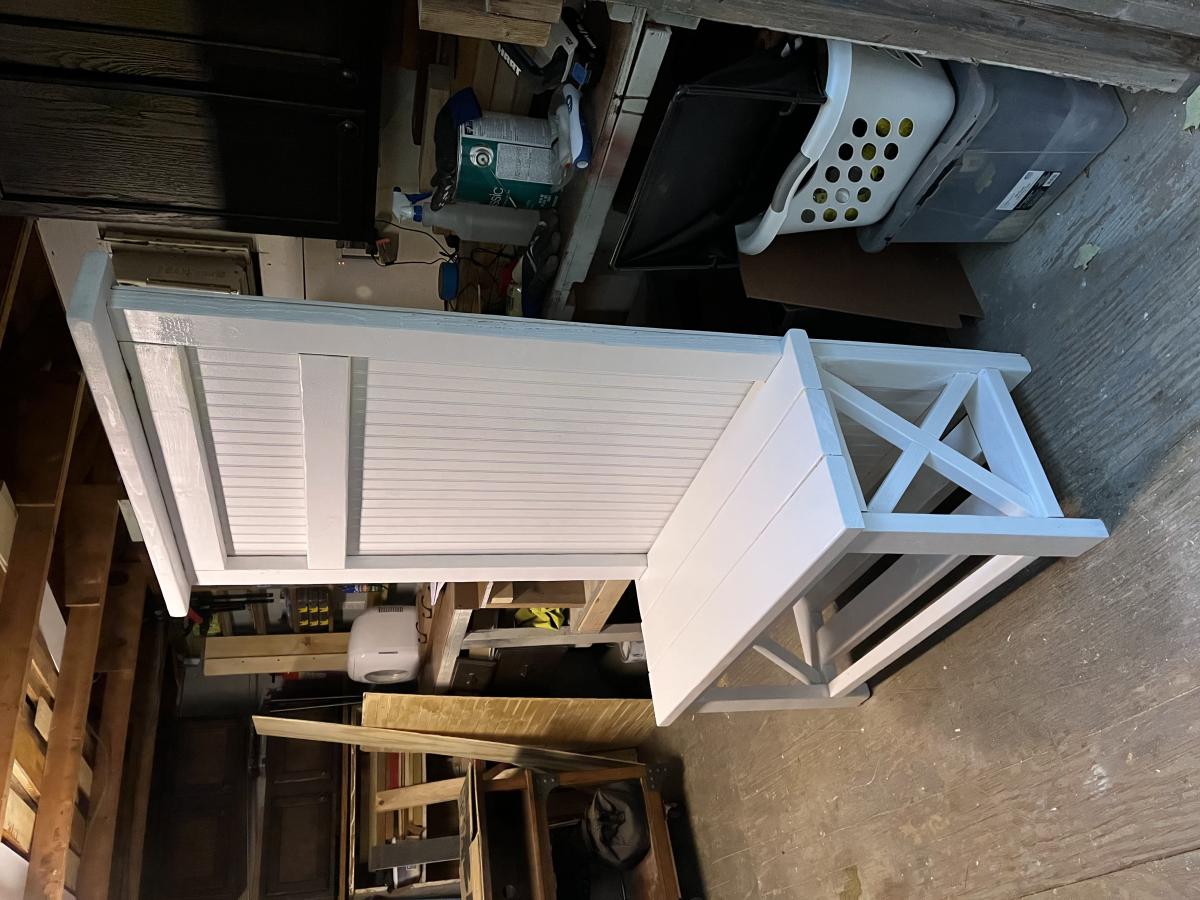
Halltree
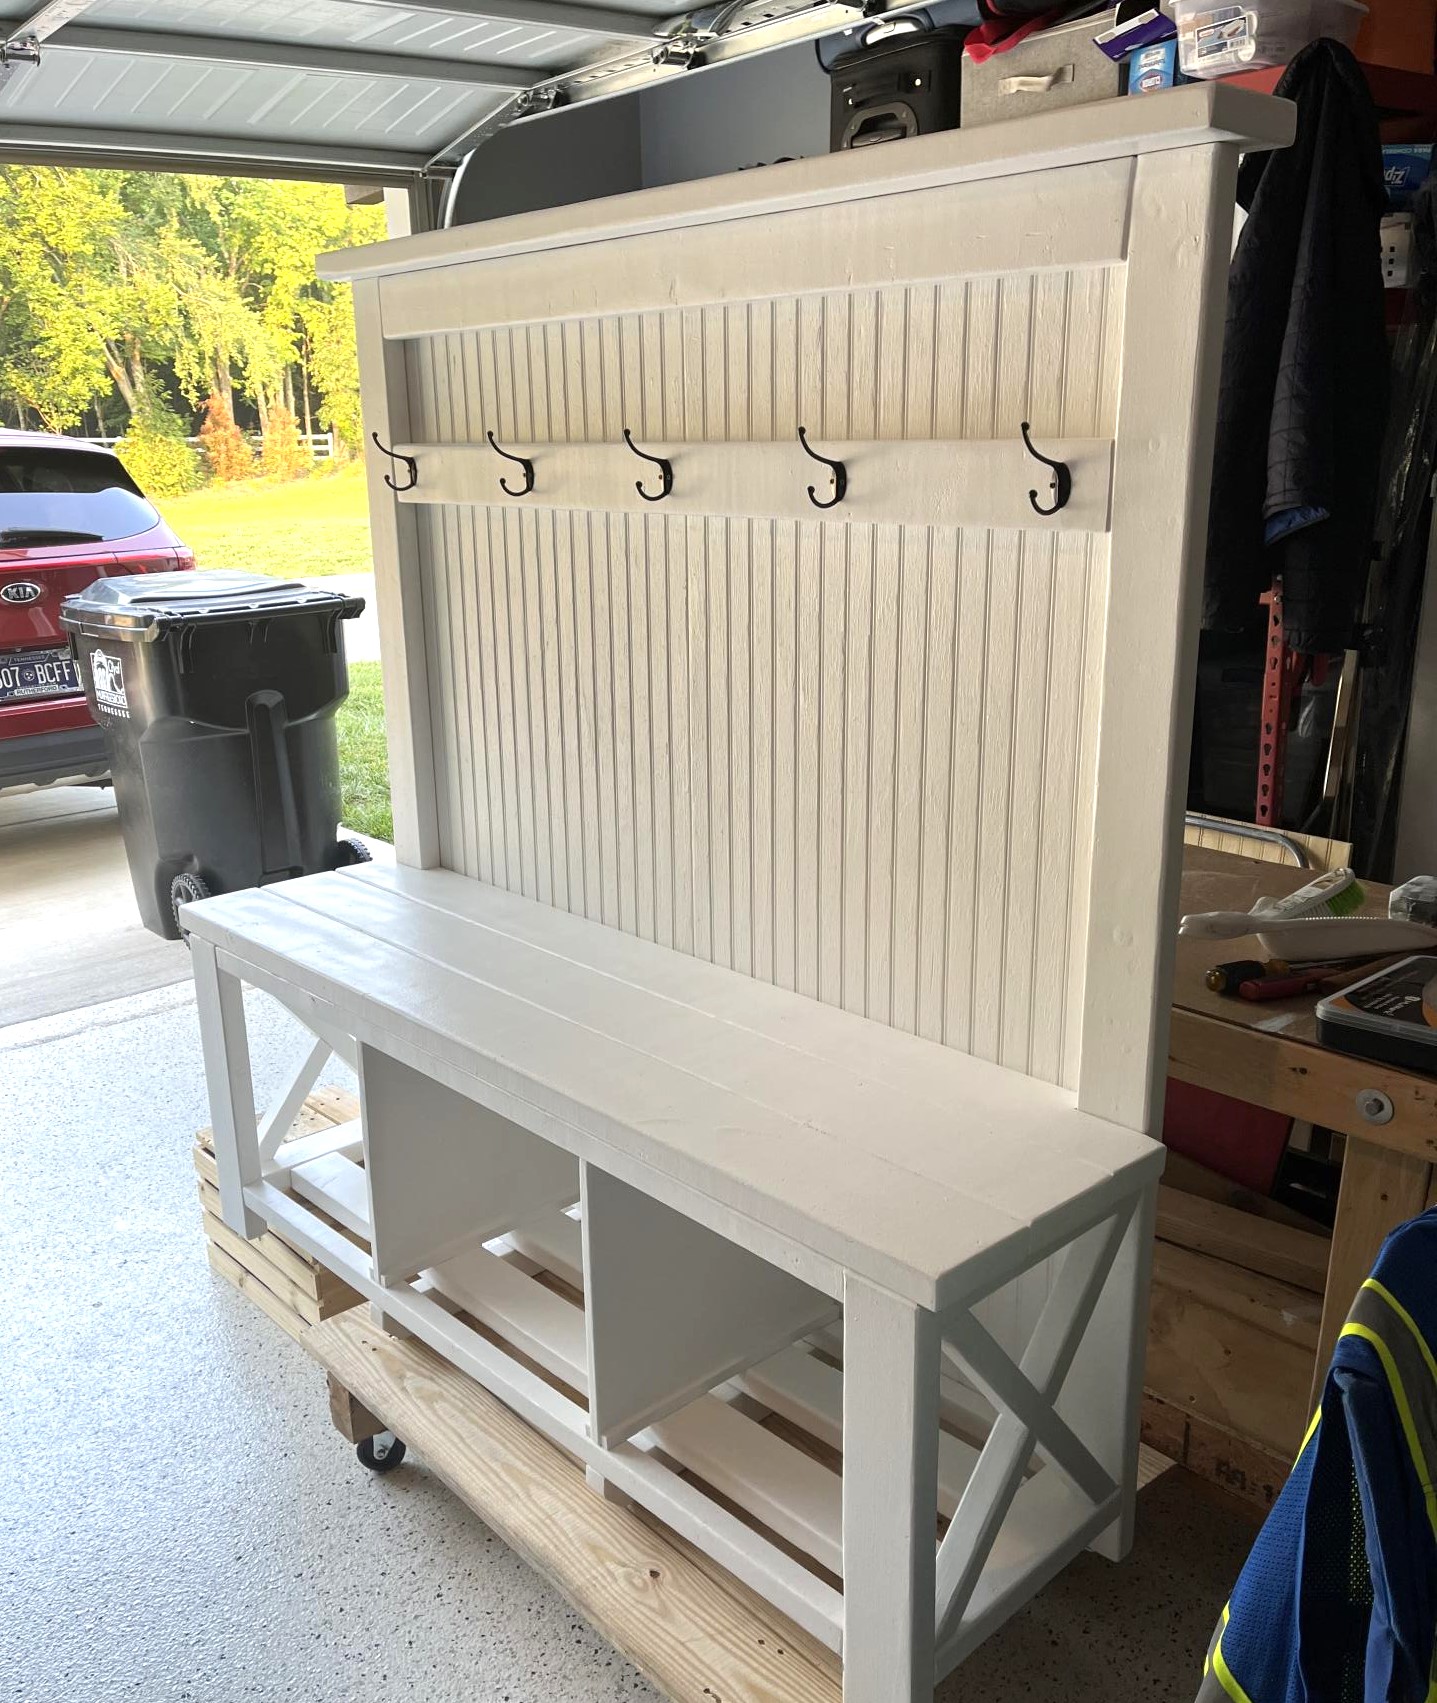
Thanks for being there, love your designs
Comments
Entry Cubbie Bench
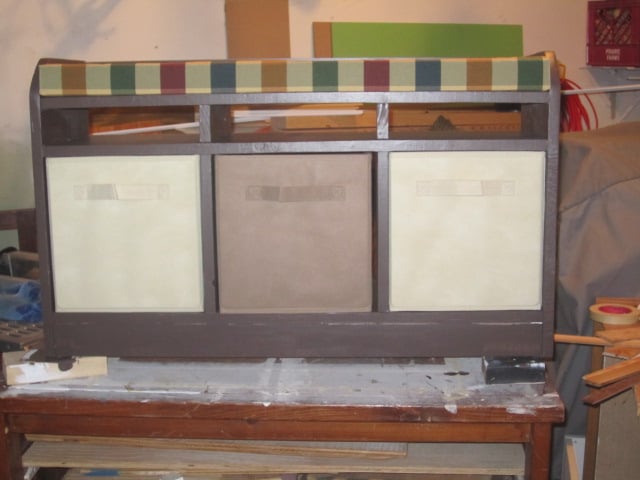
Bench for Grandma!
Built from Plan(s)
Recommended Skill Level
Beginner
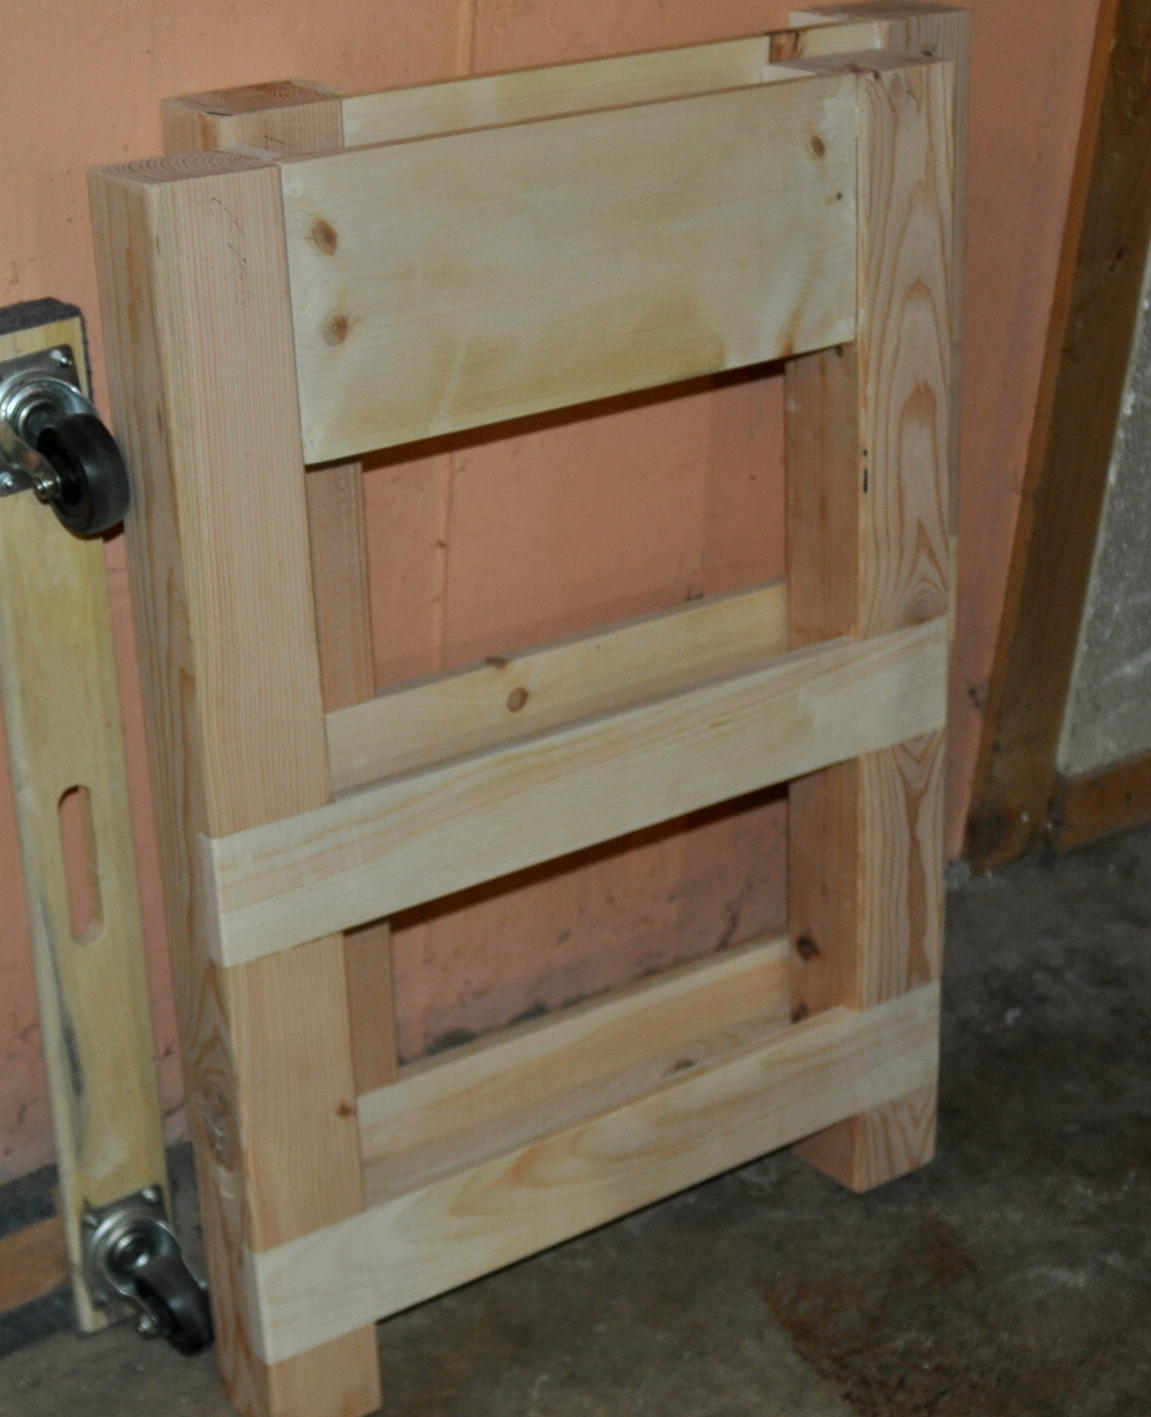
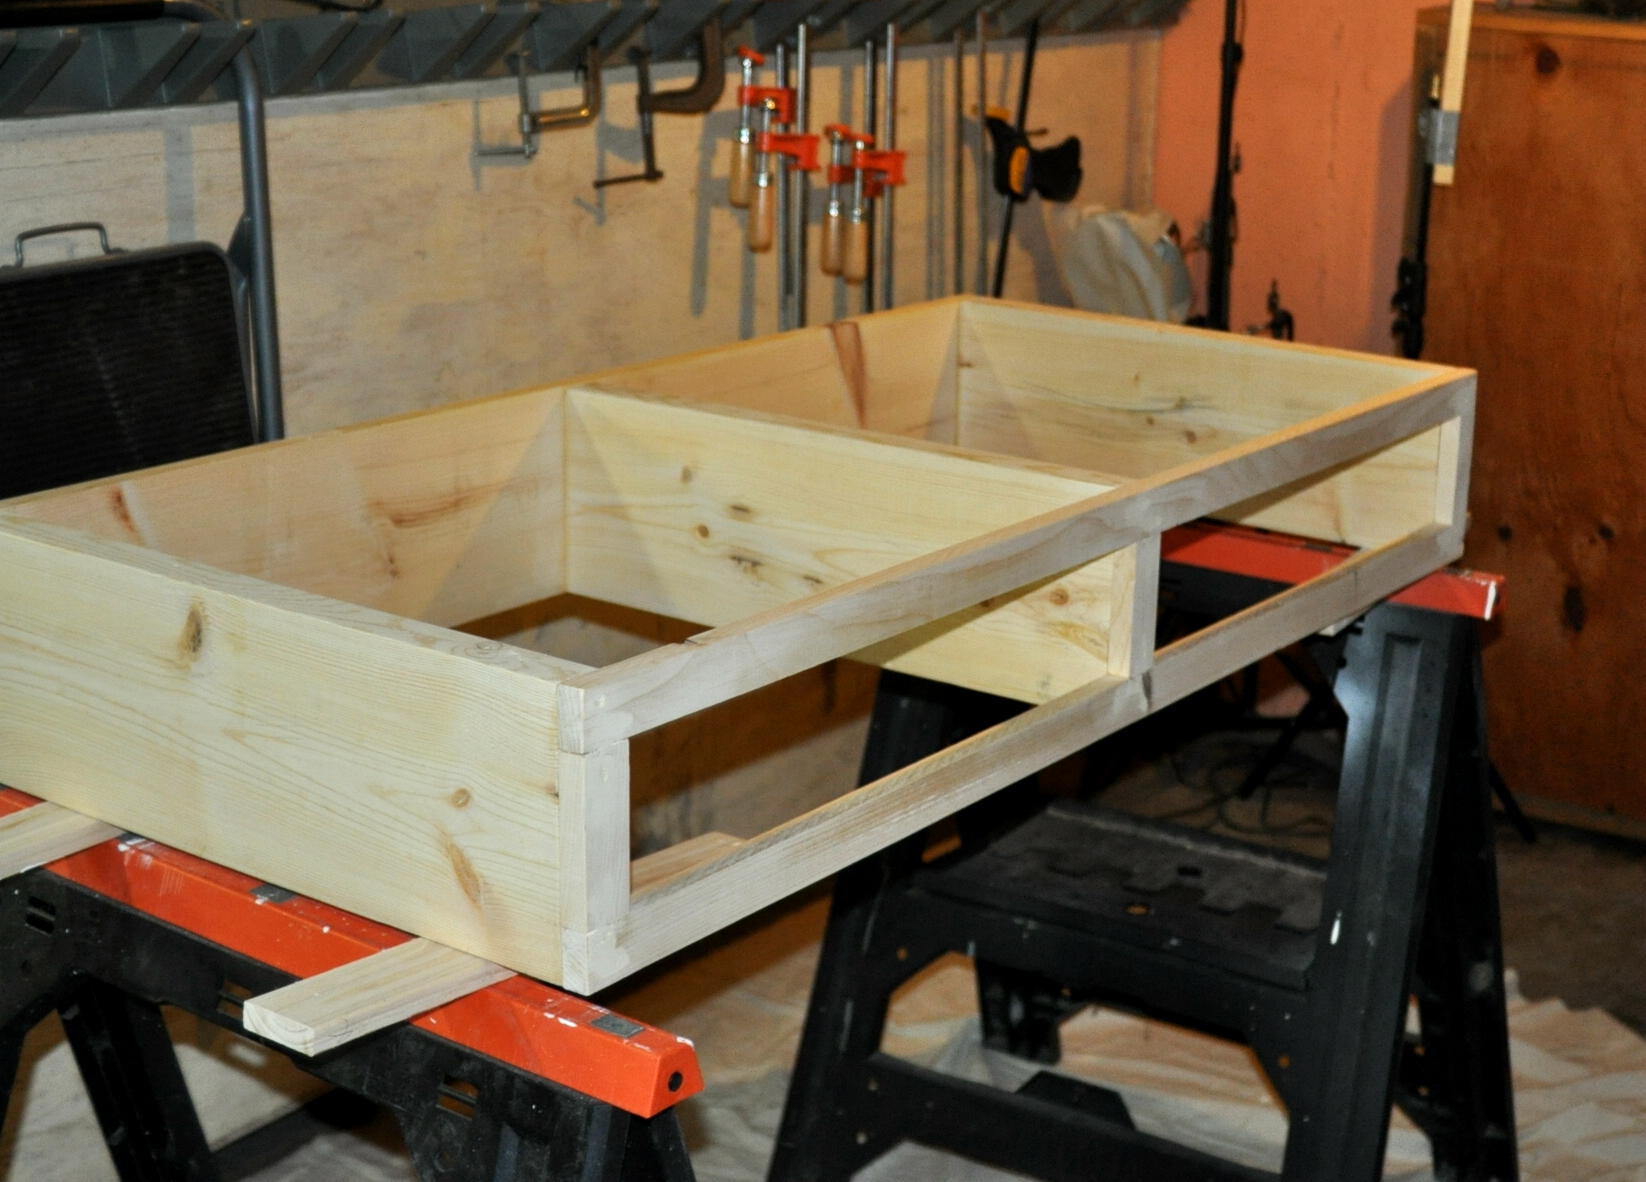
My FIRST build!!
This is my first build and I learned a lot along the way. I have to say I am very happy I used my scrap before I cut into my "real" wood. Definitely helped with the nerves!~~Sorry for the sideways photos can't seem to get them to straighten out~~
Built from Plan(s)
Estimated Time Investment
Week Long Project (20 Hours or More)
Finish Used
Minwax English Chestnut (2 coats)
Recommended Skill Level
Starter Project
Comments
Tue, 12/17/2013 - 11:20
Your first build!
Loved watching you build this table, Panda, and taking pictures for you to look back at! It turned out beautiful!! Can't wait for your next project! - Mom

Camp Loft Bed with Stair, Junior Height

This was a fun project for my husband and I! My 4 year old absolutely loves her bed. We have plans to add a curtain to the bottom to let her open and close it for her reading nook (or as curtains for her "stage")! :)
Built from Plan(s)
Estimated Time Investment
Weekend Project (10-20 Hours)
Recommended Skill Level
Beginner
Bedside tables
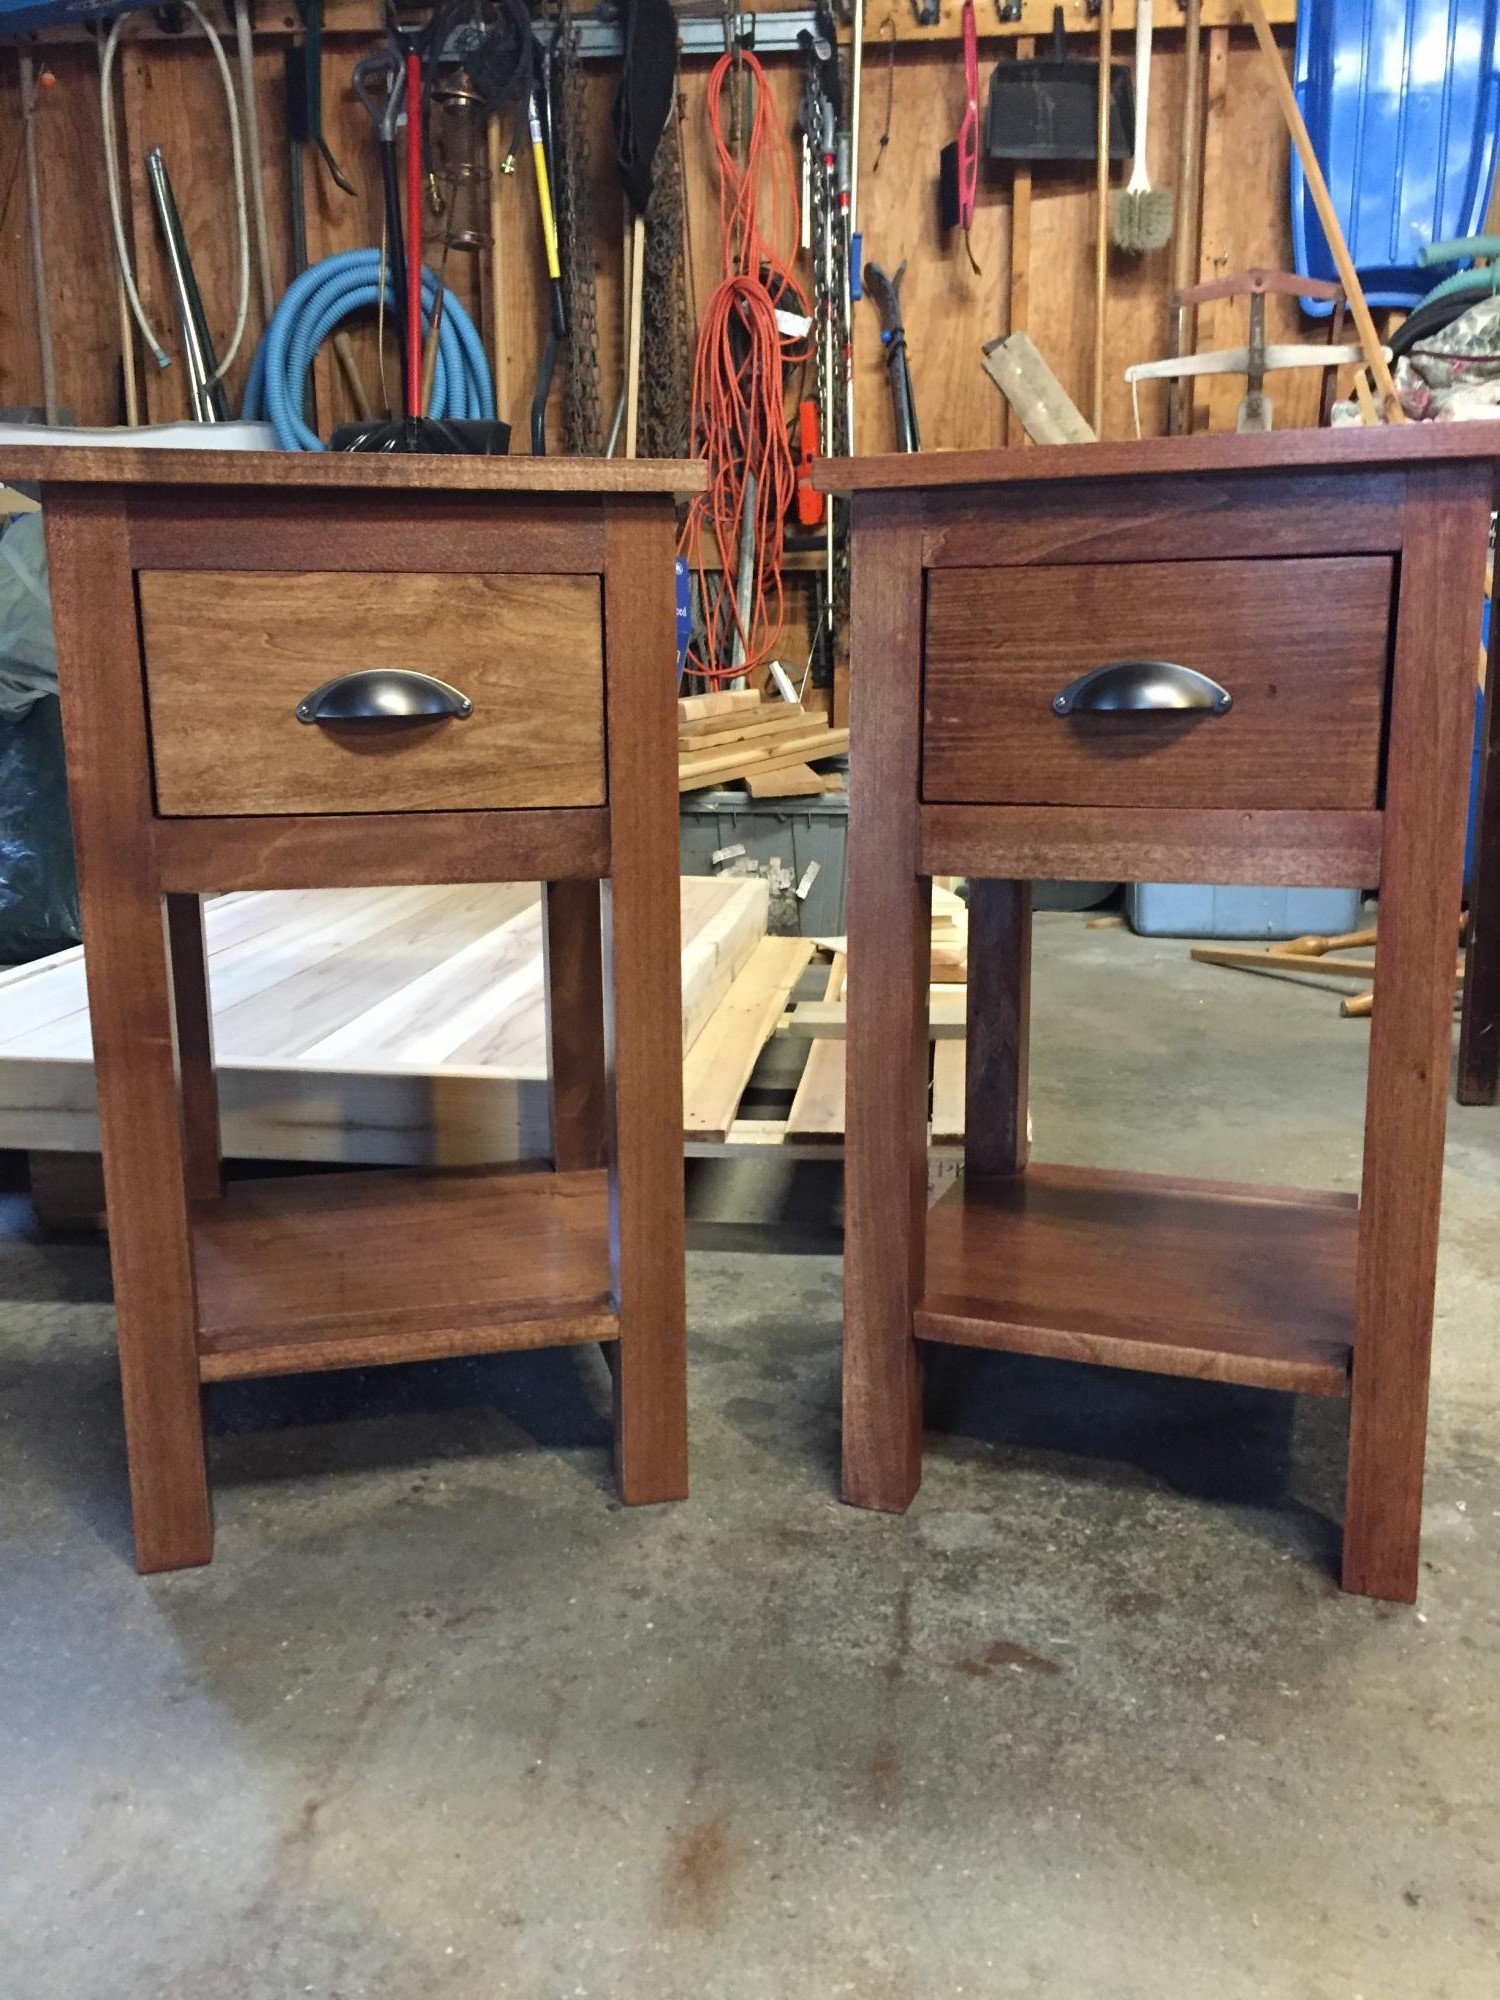
I made these for my daughter’s bedroom it was small and the wanted smaller tables to fit. It was my first attempt at drawers. They are pretty primitive. I use a router and drawer slides now.
Built from Plan(s)
Estimated Cost
$130
Estimated Time Investment
Week Long Project (20 Hours or More)
Finish Used
Minwax Red Chestnut
Recommended Skill Level
Beginner
Pedestal Table for Dining Nook

This is my first Anna White Plan build! I think it turned out pretty well. It's a variation on the Square Pedestal Table Plan. Obviously, I went with an oval top. The gussets are actually leftover shelf brackets from IKEA. We ordered too many for a different project. I had a lot of fun doing this one and it only took me about 8 hours total (not counting dry time for paint and poly) Hope you like it.
- Built by Bob G
Built from Plan(s)
Comments
Bunk Bed
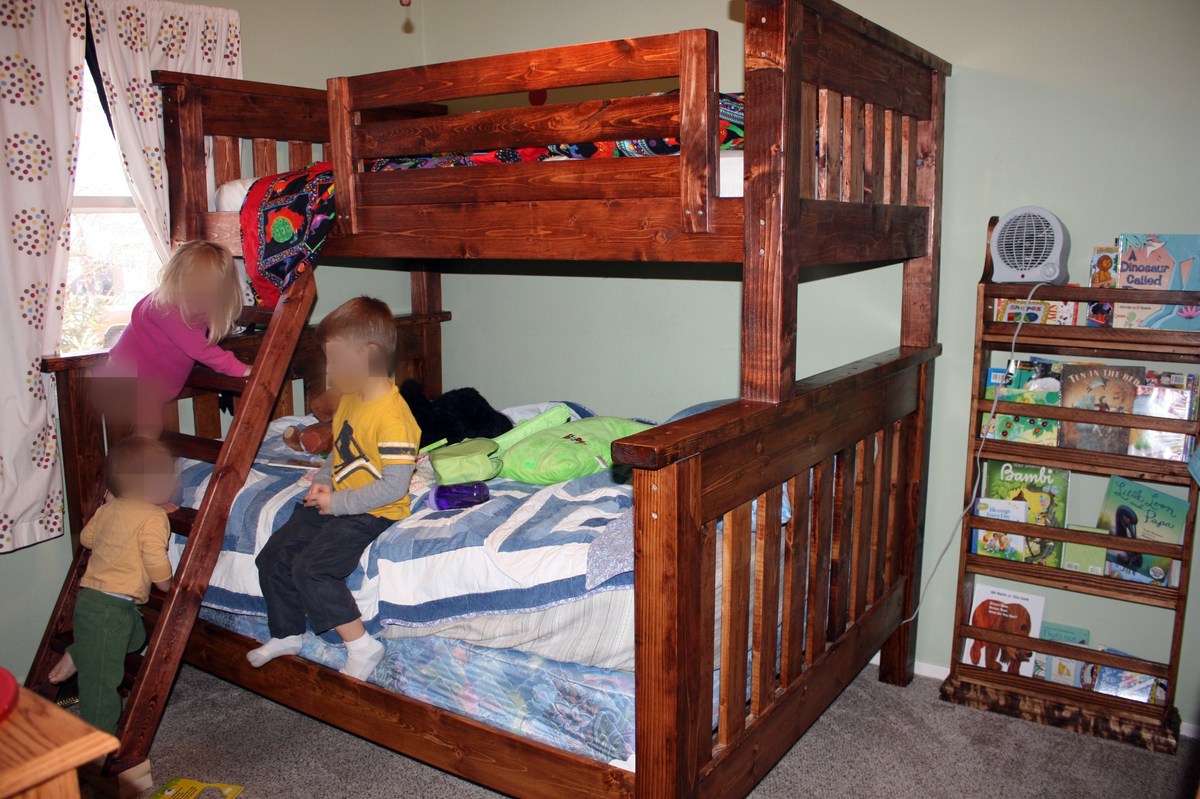
I am very happy to have completed the up portion of the bunk bed. The full size down was done quite sometime ago and I became sidetracked on other projects.
This is a sturdy bed and a favorite in my home. One day I even found my husband napping (hiding) on the top bunk.
The part that I like the best is when we graduate from bunk beds we still have two beds to use.
I also completed the ladder and it works, but I cut it just alittle shorter than the plan called for. Lets just put another on my to do list.
Built from Plan(s)
Estimated Cost
100-200
Estimated Time Investment
Week Long Project (20 Hours or More)
Finish Used
minwax, red oak stain. Minwax Poly
Recommended Skill Level
Beginner
Comments

Reclaimed Farm Table

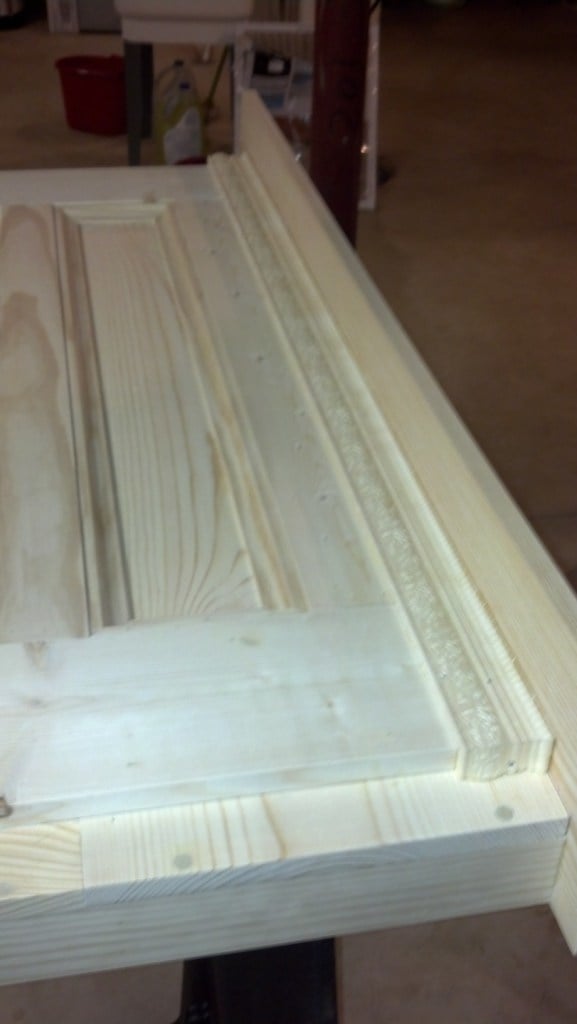
Started with a reclaimed old barn door and framed it with Ambrosia Maple, see atop the base of the Fancy X Farmhouse Table base.


Estimated Time Investment
Week Long Project (20 Hours or More)
Finish Used
(Top) General Finishes Arm-R-Seal (High Gloss and Satin)
(Base) Minwax Provincal and Polyurethane
(Base) Minwax Provincal and Polyurethane
Recommended Skill Level
Beginner
Comments
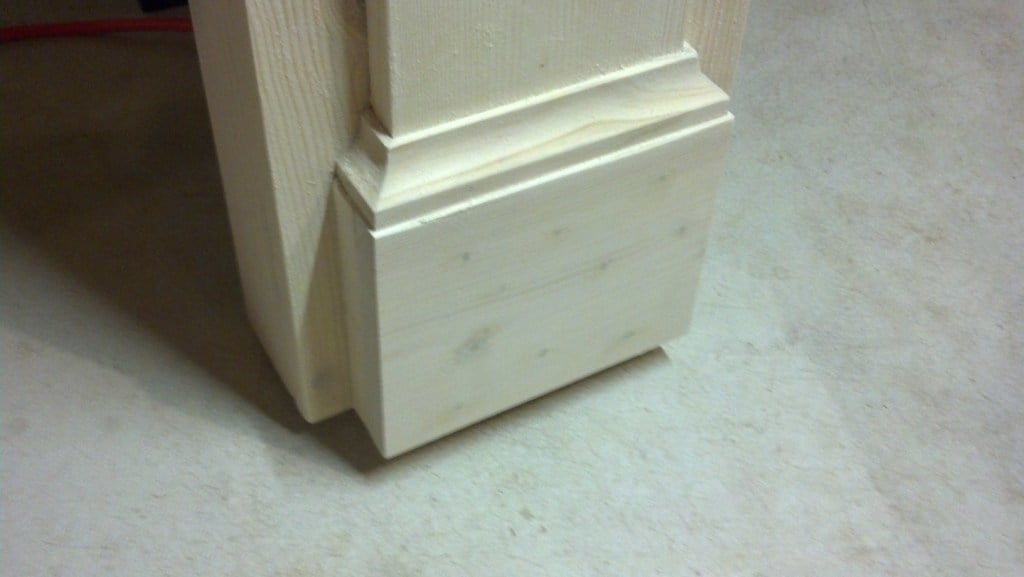
Full Size Bed Frame ("The Sofia")
Full size bed frame. Made from 4 by 4 posts. ! by 4 and 1 by 6 boards for footboard and headboard.
Side rails from 1 by 8.

Estimated Time Investment
Week Long Project (20 Hours or More)
Finish Used
Stained in Minwax Classic Gray and then painted white with 3 coats and sanding between each coat to give an antique look.
Recommended Skill Level
Intermediate
Sliding Door Console
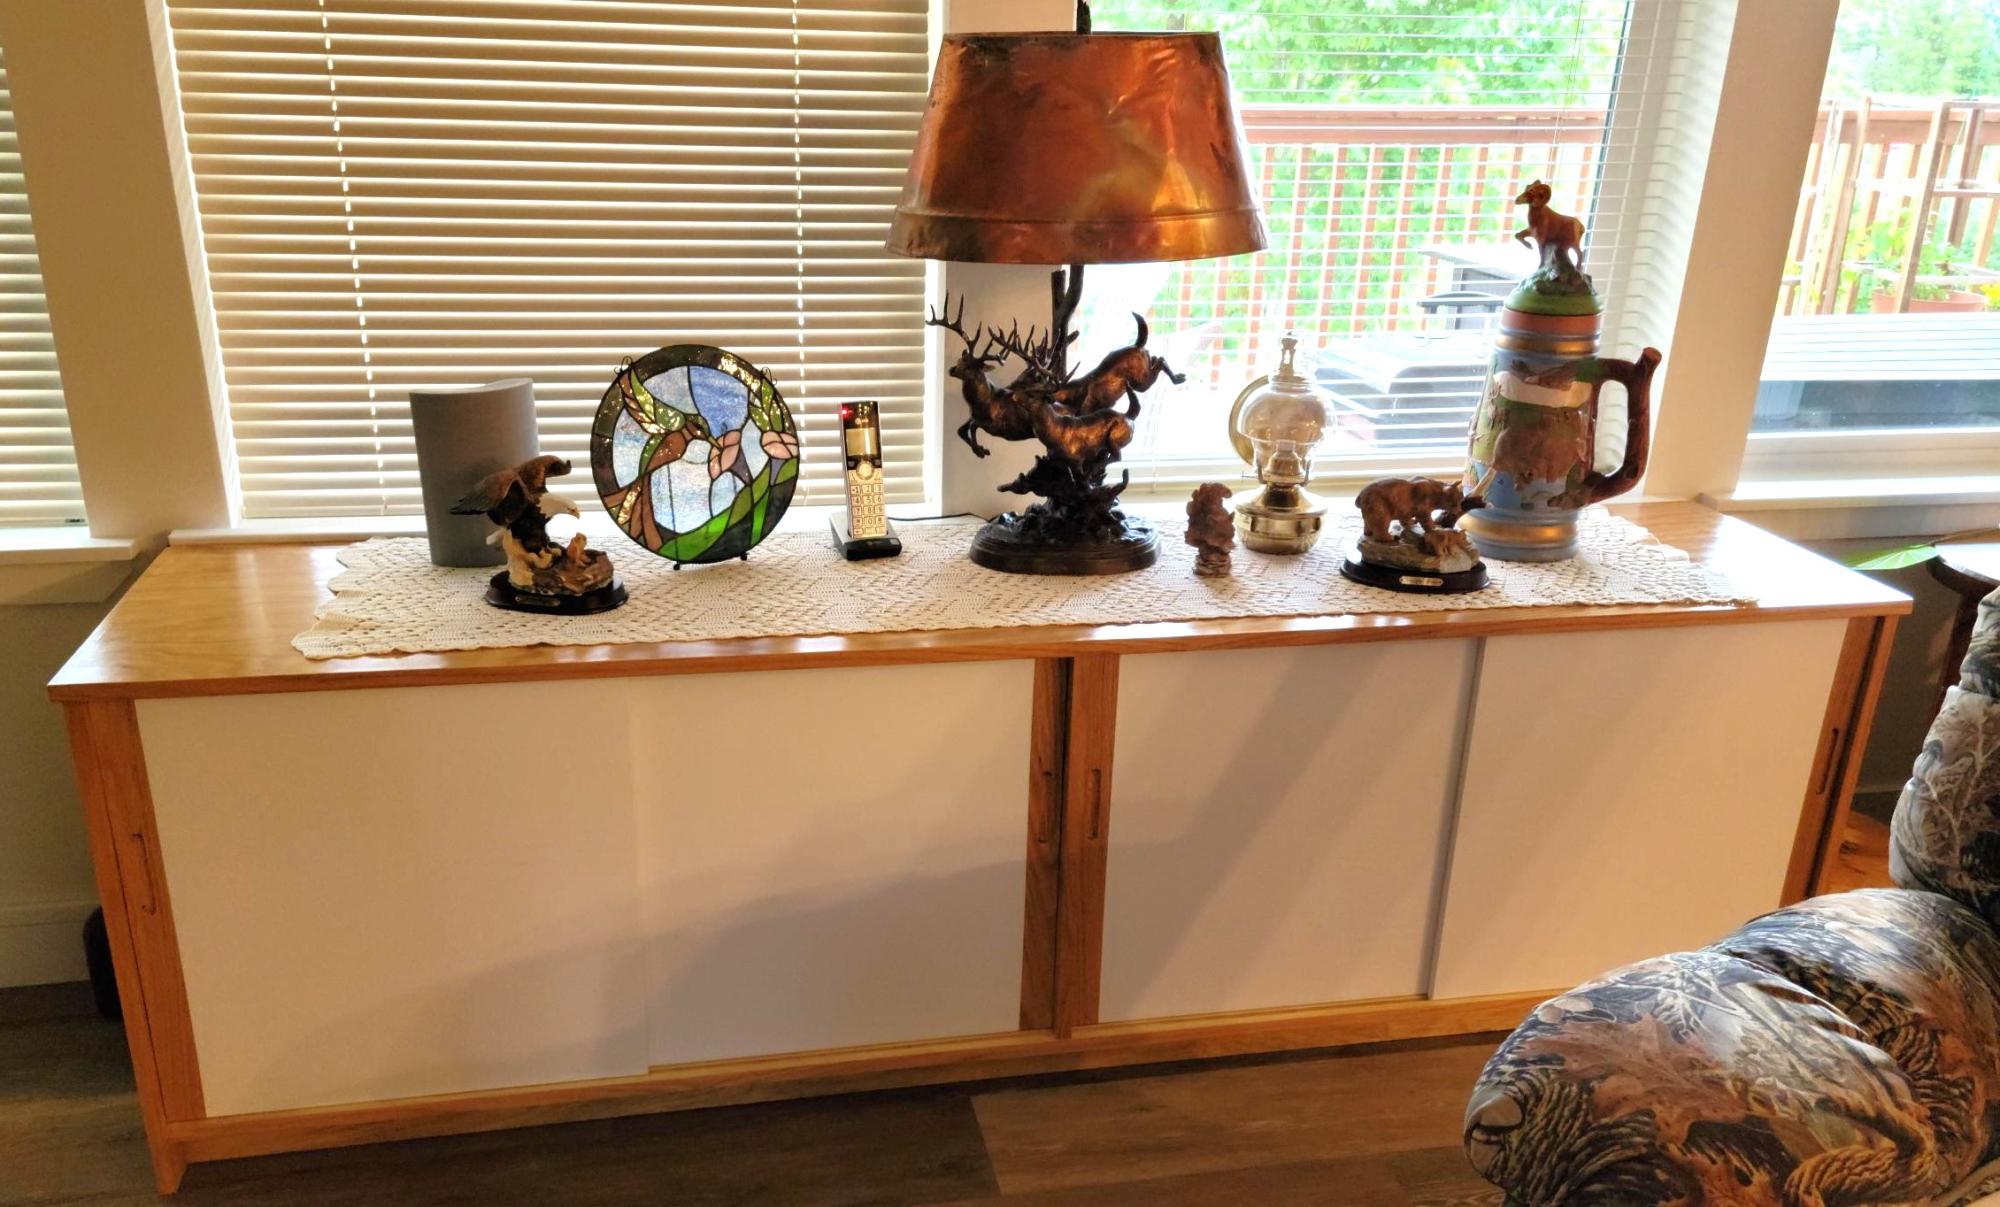
This cabinet was inspired by an Ana White project. My wife wanted more storage in our new home, and we had a sofa table at this location. But it was just a top, no shelves. I custom fit it to be flush with the window sills at the top and ends so it takes on a bit of a built in appearance. The top and bottom are oak faced plywood, all edges covered with iron on oak facing. As I was short of the expensive plywood, the ends, shelves and kick are doug fir plywood with a light oak stain; while not a perfect match gave a pleasing result that guests have not caught. The doors are 1/2" MDF, with a 2" solid oak end glued on where I routed the slots to open them. Slots are 1/4" +, 3/8" apart, and the top and bottoms of the doors routed to leave a 1/4" rail. The bottoms of the bottom slide slots have a slick poly tape in them, which really helps the doors to slide easily.
Sides and interior are brush finished with 3 coats of semi-gloss polyurethane, while the top has 5 coats. The MDF on the doors has one sprayed coat of white primer (oil based to avoid bringing up the MDF) with a final sprayed coat of mat finish enamel. I need to do one more step, light sand with 320 grit and paste wax the top to get that really fine finish.
While not as easy as Ana makes it look, it turned out pretty well. That hard part on a piece this size is getting all the pieces cut precisely, and I mean with less than 1/32nd difference, to provide a good fit. As it was I had to custom cut the oak opening ends on the doors to account for the small differences in widths at the top and bottom to obtain a nice fit against the sides. Next time I'll triple check all finish dimensions to make those small adjustments in parts before assembly, then triple check again for placement during assembly.
While I'll always see the small "errors", my wife is very pleased with the finished cabinet.
Al King, www.KingTechnologics.com
Built from Plan(s)
One piece kids kitchen
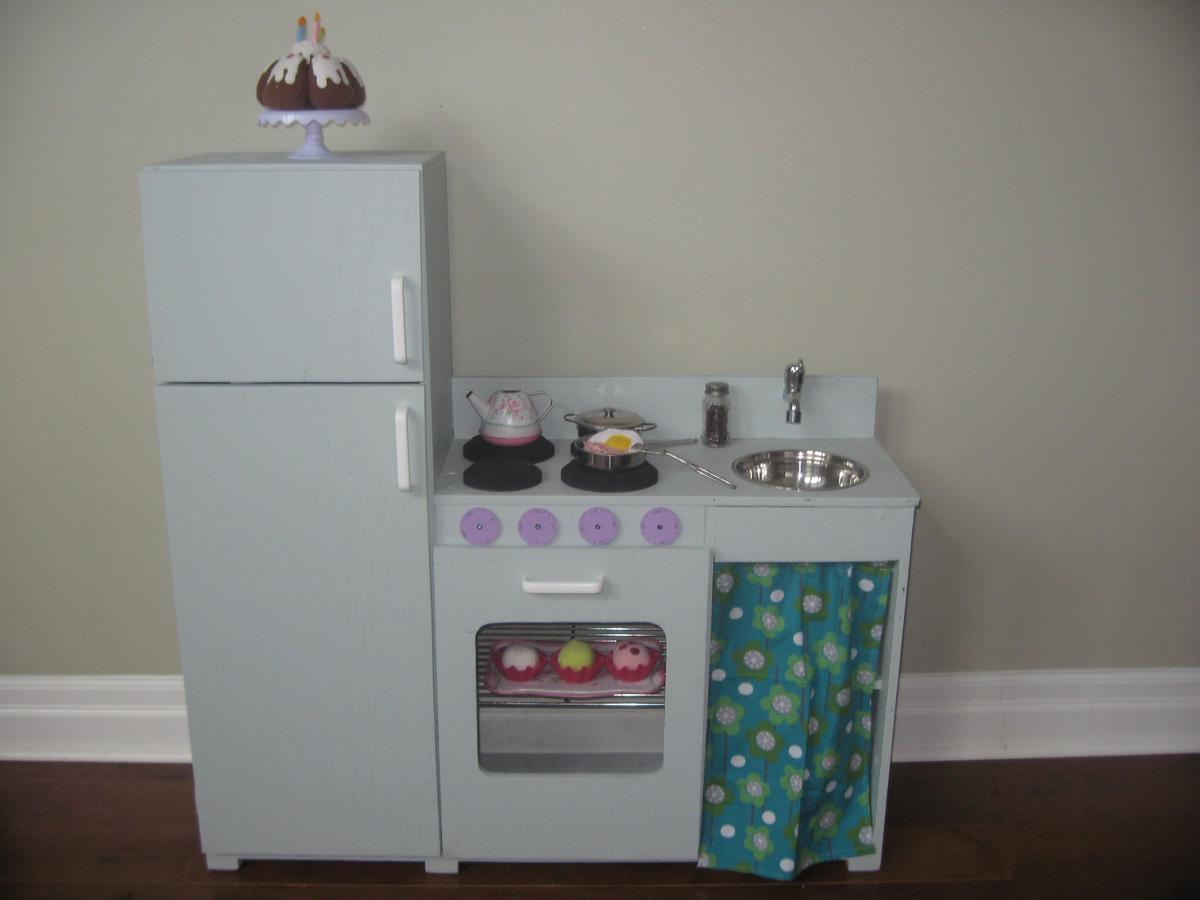
I actually used Ana's "Grace's kitchen" plans and modified them to make a single unit kitchen that was smaller to fit my space, after I was done this new project plan was posted! My kids love this kitchen and I love it's smaller size. I used all plywood scraps to make it, so the cost was minimal.
Estimated Cost
$15 for the accesories (tap, bowl, burners, dials, drawer pulls etc)
Estimated Time Investment
Afternoon Project (3-6 Hours)
Finish Used
2 coats of leftover eggshell latex paint.
Recommended Skill Level
Beginner
Comments
Thu, 05/24/2012 - 09:30
hi i like the diy fridge.
hi i like the diy fridge. i've been wanting to get one for my son soo bad
Comments
sgilly
Wed, 01/25/2012 - 14:41
How cute!
Both the bed and the baby girl! I'll bet you find her curled up in this bed.