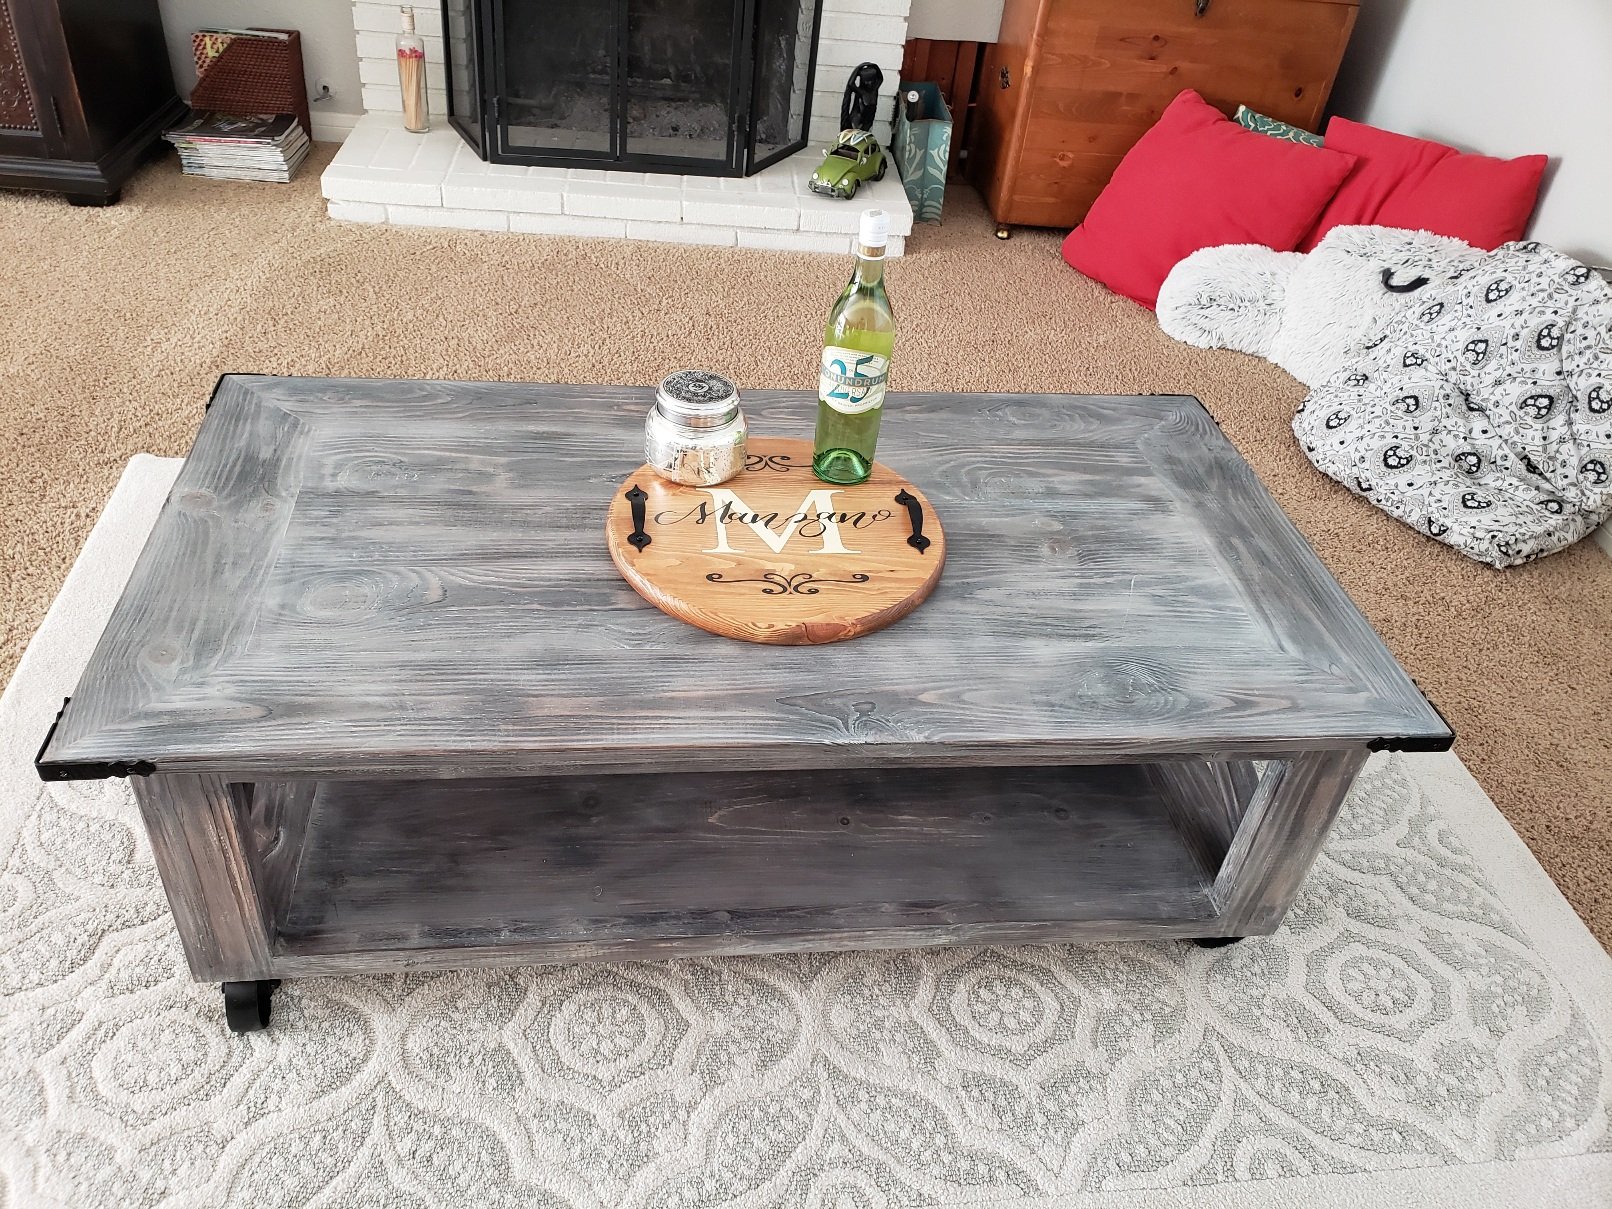
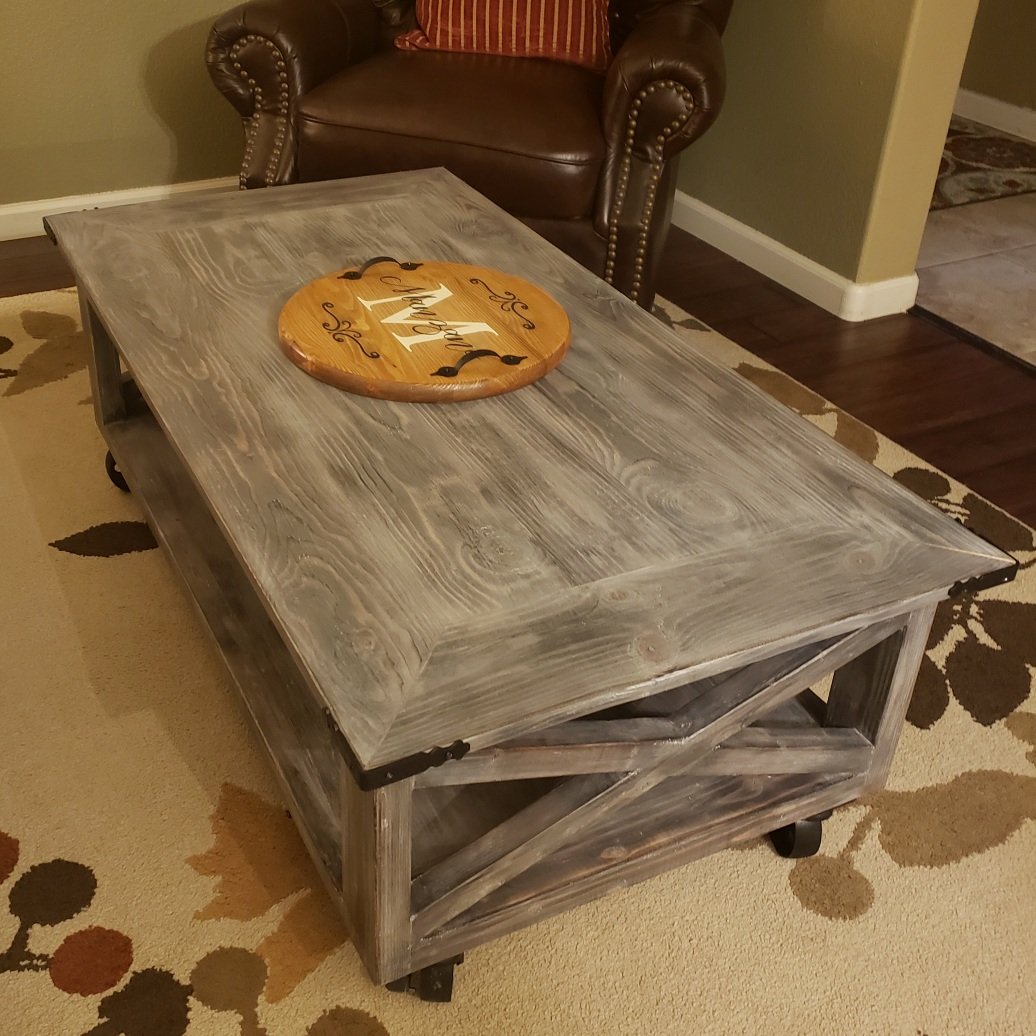
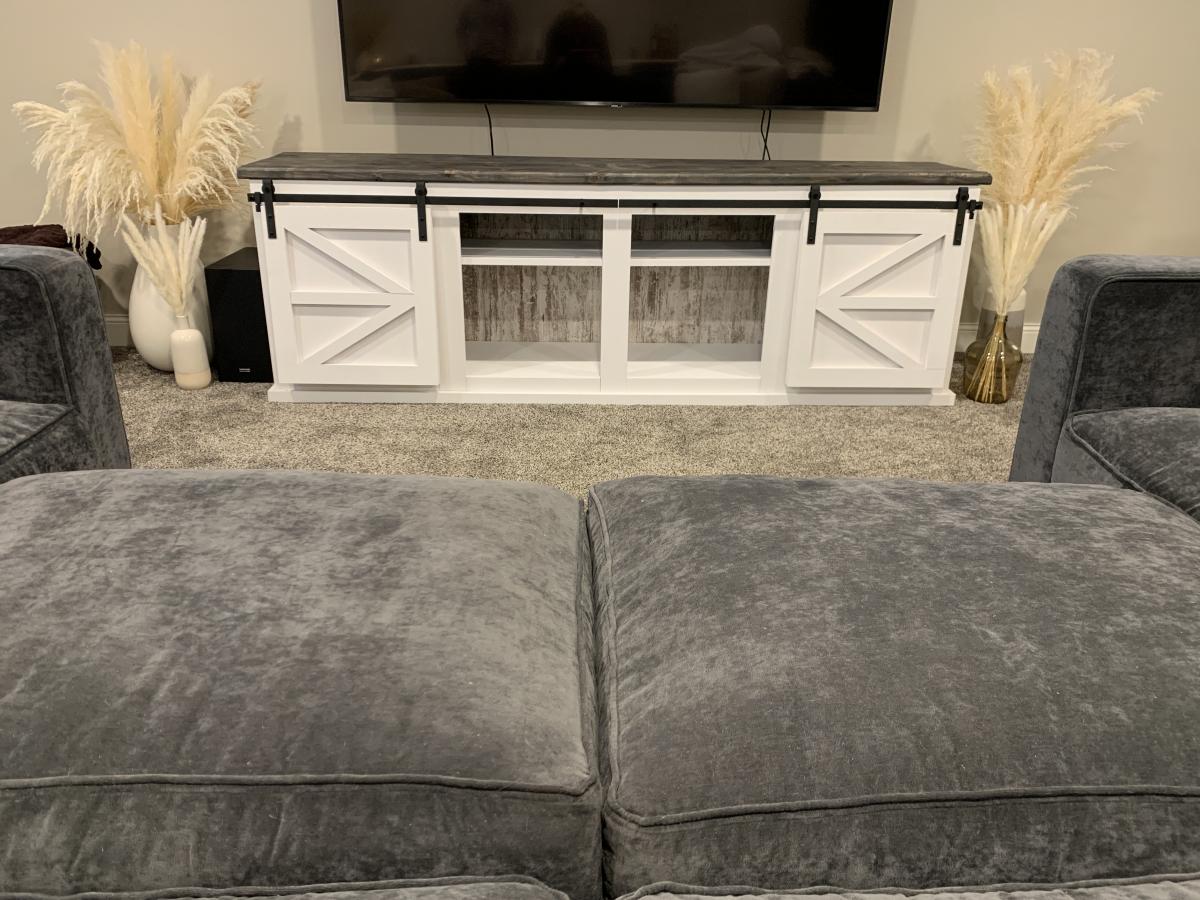
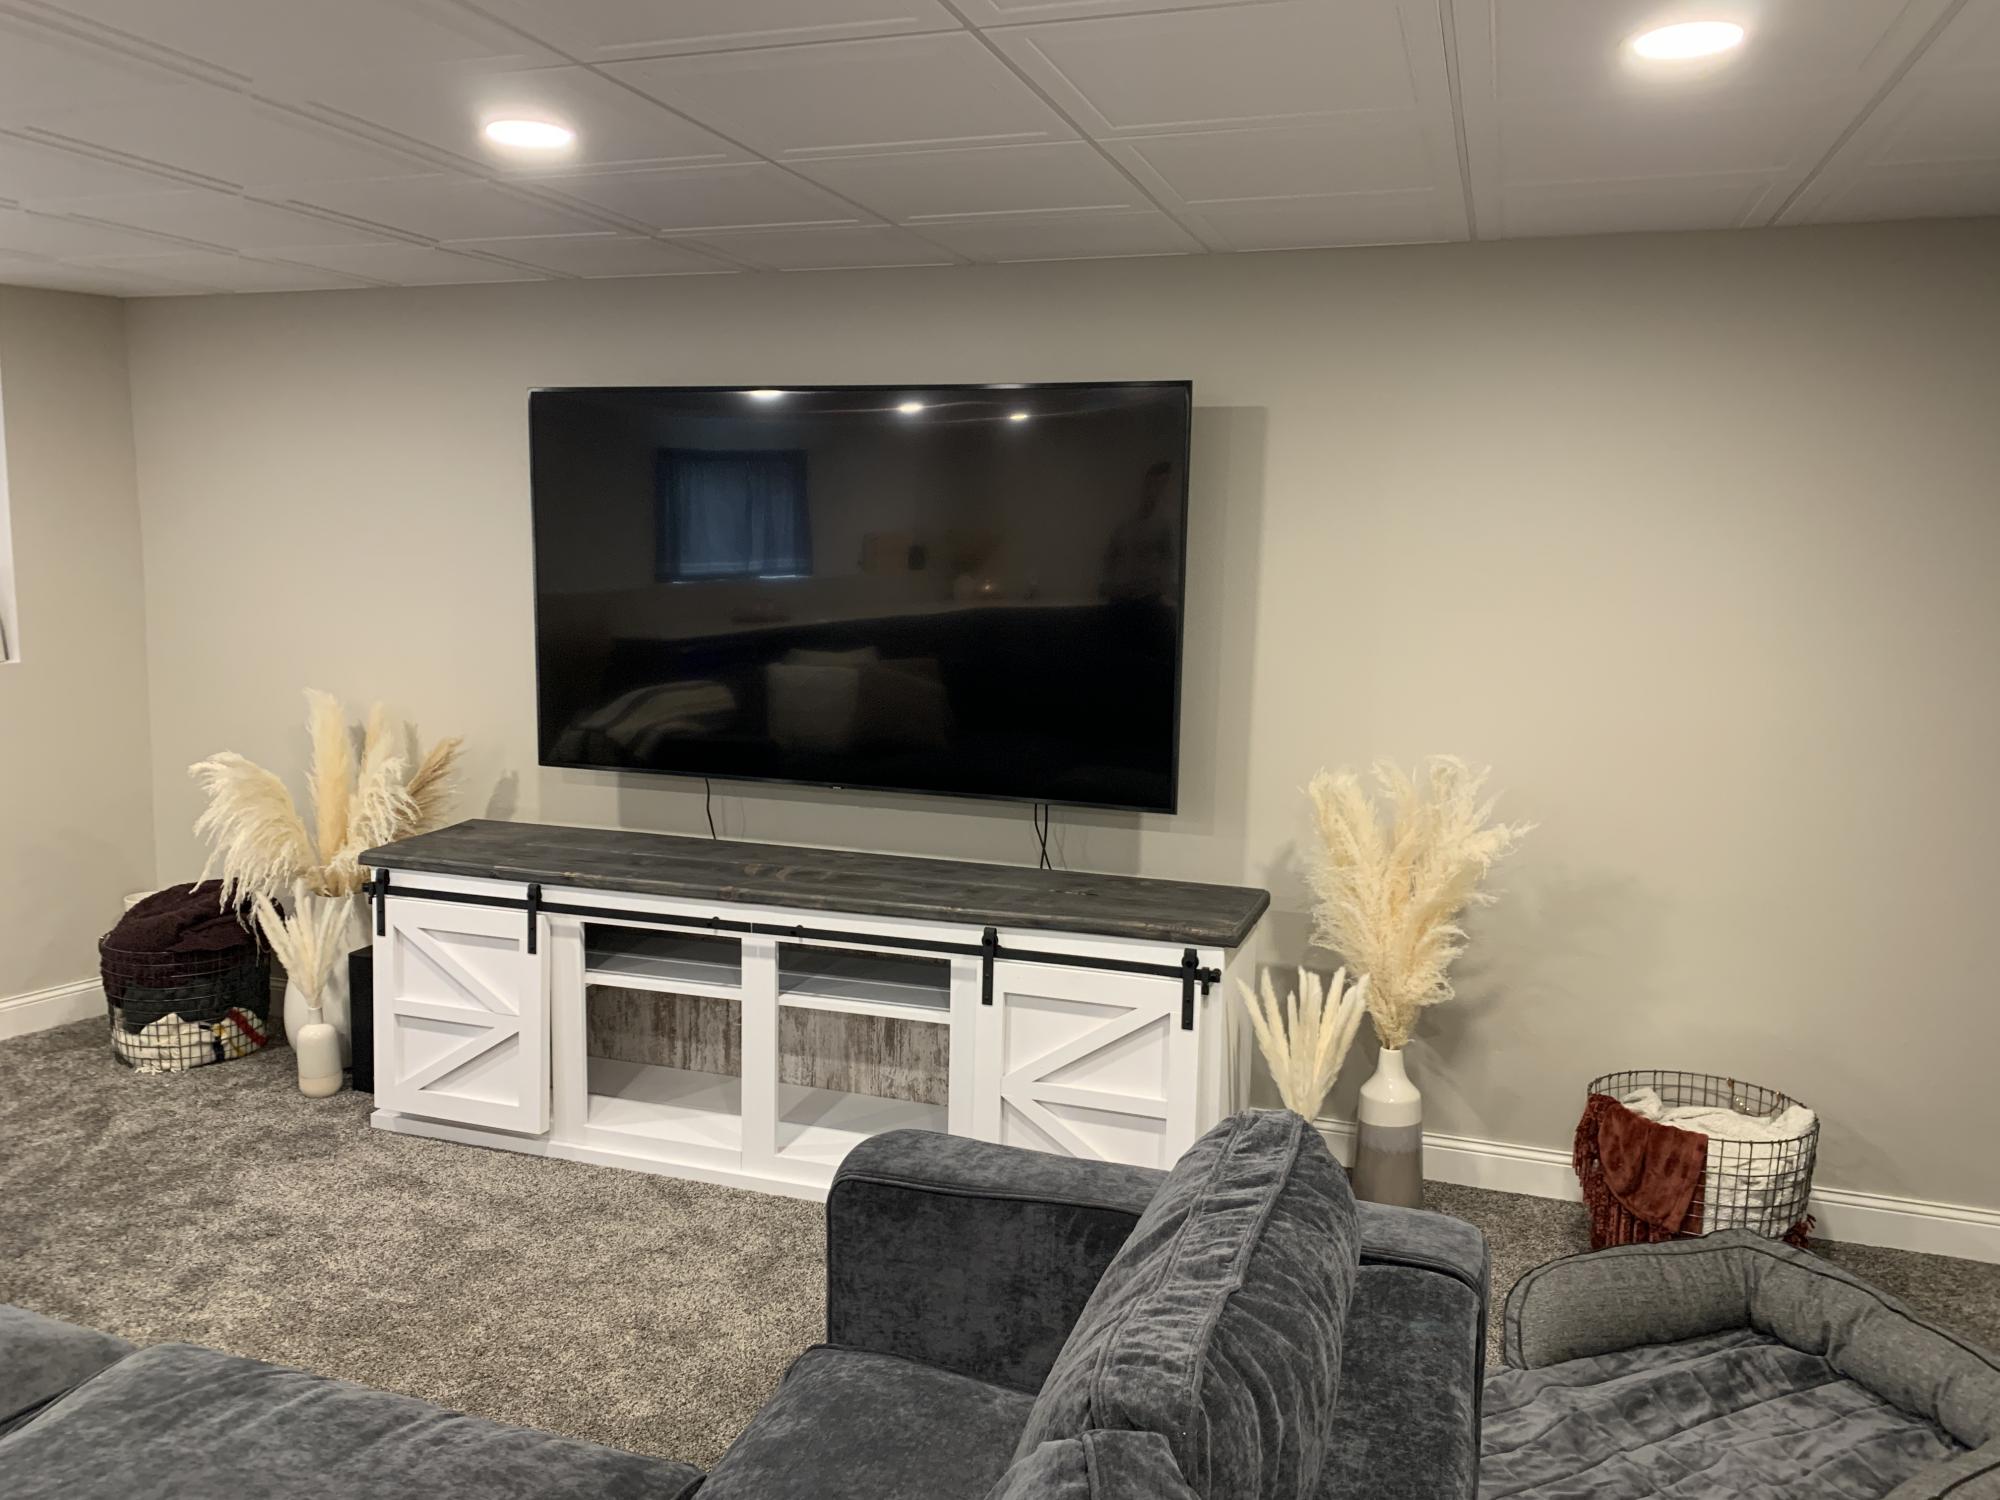
Community Brag Posts
Home made bar
![](/sites/default/files/259483DD-A842-4C62-B7E0-7B423F988B91.jpeg)
Based bar cupboard on kitchen carcass plans and then made the bar front as I went . The kitchen cupboard plans were easy to follow and I was really pleased with the results. This was a real hit at Christmas a really good base for mixing and even better folks brought bottles with them !!
![](/sites/default/files/370CB989-4C0B-4651-B3F9-B76D838926CF.jpeg)
![](/sites/default/files/DE006160-8599-44FA-A35C-8053874D7321.jpeg)
Comments
Front Facing Bookrack
![](/sites/default/files/Bookrack4_0.jpg)
My Husband built this rack using Ana's plans and made a few changes to put his own spin on it. Love this site, great way to get inspired and gain the confidence to actually START projects. She breaks things down in such a simple and easy to understand way.
![](/sites/default/files/Bookrack1.jpg)
![](/sites/default/files/Bookrack2.jpg)
![](/sites/default/files/Bookrack5.jpg)
![](/sites/default/files/Bookrack4.jpg)
First Project
This was my first ever project. Prior to this, I had used a hammer and drill, so I learned ALOT here. Thank you so much, Jenny for your wonderful detailed plans. You are just awesome. I'm convinced that if this had been designed by a man and the instructions detailed by a man, I would have never been able to do this for my granddaughters. My husband helped with the painting and whenever I needed extra hands and muscles, and I didn't do anything on moving day. The whole family pitched in to move it to their house and set it up. My oldest son helped me with the roof rafters, since I had a bit of a problem figuring those out, but other than that, I managed quite nicely with such wonderful instructions. I learned how to use all the necessary power tools, too! I changed the width of the stairs to 24 inches, rounded off the shelves, and added lights for reading, which can be regulated with a timer we purchased. Ella and Emily are very excited and absolutely love their room, now.
It was fun to challenge myself with this project. Again, thank you Jenny, and thanks Ana for your wonderful website and inspirations! You can see more uploaded pictures on my facebook page (I sited Ana's web page and Jenny's for appropriate credit). Just look me up (Deanna Carter in Georgia USA) on facebook and send me a friend request.
![](/sites/default/files/3154829694_1372817934.jpg)
![](/sites/default/files/3154829696_1372817934.jpg)
![](/sites/default/files/3154829695_1372817934.jpg)
![](/sites/default/files/3154829697_1372817934.jpg)
![](/sites/default/files/3154829698_1372817934.jpg)
Comments
Sun, 07/07/2013 - 17:37
Next Project?
Thank you all. Jenny, I told everyone it was because you said I could do it. A little bit of encouragement goes a long way. Hmmmm. Next Project? I would love to do so many things that I see on both web sites, but I imagine I will have to do at least 2 more bunk bed sets, since we have grandsons, Noah and Elijah who will be old enough for a set in a little while, and another grandson (Samuel) who will need a loft bed in a few years. I think I may use the same basic plan, but modify it to create a medival castle for the loft bed and a saloon bed for Noah and Elijah. Our oldest son is excited about Noah and Elijah's bed so he has already sketched the saloon bed and wants to do the building on that, but I hope I get to help. I REALLY enjoy this kind of work. Thanks again for offering your plan and inspiration.
In reply to Next Project? by deannac51
Fri, 07/19/2013 - 00:56
I'm so glad you have fallen
I'm so glad you have fallen in love with building! ...and now the project list just keeps on growing. I look forward to seeing your projects. There have been a few boy style versions of this bed that are awesome. I am currently pregnant and we recently found out we're having a boy; I just know a cowboy bed will be in my future! For some reason, beds seem to be a constant on my project list!
Sat, 07/20/2013 - 11:17
A new project
Now, THAT is exciting news! Congratulations on your new adventure of becoming a mommy to a son. Our children and grandchildren are our best projects! It is the most difficult one but most rewarding, though. Enjoy every minute. The time passes so quickly.
Sun, 08/11/2013 - 20:25
paint color
I don't know off hand what specific yellow it is, because my daughter has it at her house. She is using the same paints to color coordinate an accessory item for their room. I will try to get the name of it this week. OK?
Sat, 09/28/2013 - 11:22
Love!
Deanna, this is gorgeous! I showed my husband Jenny's plans & I think we'll be giving it a go for our girls in a few months (when our youngest is ready to transition out of the crib). Your style and paint choices are spot on to what I'd like to do. I searched for you on Facebook to see more photos but couldn't find ya! Maybe you can add me if you're still a member? My name is Erin Ens (California).
Mon, 03/17/2014 - 11:21
Adorable!!
This is so gorgeous! I love the yellow! Do you happen to have the PDF copy of the instructions? I cannot open the one provided on the main page? If you could email them to me I would greatly appreciate it!! [email protected]
Mon, 03/17/2014 - 11:21
Adorable!!
This is so gorgeous! I love the yellow! Do you happen to have the PDF copy of the instructions? I cannot open the one provided on the main page? If you could email them to me I would greatly appreciate it!! [email protected]
Harriet table and chairs
I am so happy with my work.. It has turned out perfect. I love them.
Comments
In reply to Cute paint job by CSaintD
Wed, 12/30/2015 - 04:25
Thank you
Thank you for your kind words and I am so excited that you took time to leave me a reply.
Kids table with chairs/storage
![](/sites/default/files/20201006_124644.jpg)
I love woodworking and trying different techniques...Thank you Ana for the detailed plans!..My niece loves it
![](/sites/default/files/20201008_135928.jpg)
Comments
Mon, 12/27/2021 - 22:21
Such a nice little set!
Awe, love this, it looks great! Thank you for sharing:)
Modified Subway Tile bookcase
![](/sites/default/files/subway%20tile%20bookcase.jpg)
The next part of the master bedroom makeover is finished! This is by far the most square project that I have done to date, and the first one that is built almost entirely with the kreg jig. I LOVE that tool--thanks Ana for letting us all know about it!
I modified this in length and width, and omitted the footer at the bottom. I built this (at Dh's suggestion) in such a way that it could be turned vertically. You would see a few of the pocket holes, but not much. Other than that, it was built to the plans.
Sanded, woodfilled, sanded, sanded...primed and painted. I used spray paint--Rustoleum this time. I am the world's worst photographer--it's just not my skill set!
![](/sites/default/files/subway%20tile%20bookcaseempty.jpg)
Fireman's Dog Bed
I needed a heavy duty dog bed for my puppy after he destroyed two regular dog beds. I used 4x4s, 2x4s and fire hose. He has not been able to destroy this one and he loves it.
Comments
Mon, 07/08/2013 - 15:48
Cool
I have a pit bull. Shes the sweetest thing but loves to chew up her own beds. She wont chew the shihtzus bed or the cats beds just her own. I'd like to see her try this one out.
;) Now if I could figure out a way to get my dad to give up one of his fire hoses. hehe
Great job, great idea
~Melody
Sideboard Table
![](/sites/default/files/IMG_5855.jpg)
So many great plans on this website! I am constantly looking to Ana's website for inspiration for my next project around the house. The inspiration for this piece was that we needed something to fit an odd space in our home. Looking through the site we found the perfect fit. We based our design off Ana's planked wood sideboard table with a few minor changes. First since we wanted to do a two-tone finish, so I added an additional piece to the top of the face frame to keep the look symmetrical. I also used two 2x10's for the table top instead of what the plan called for and beadboard for the inset panel in the doors and sides. I decided to use tongue and groove construction for the sides of the table and for the doors. A technique for building inset doors that has worked for me is to build the doors to the exact size of your door opening and use the table saw to trim the tops and sides to fit as needed. This way I am to achieve a very uniform fit that can be difficult to obtain otherwise (unless you are a pro, which I am not!) I finished the inside of the sideboard table with satin polyurethane, the exterior base and doors with sprayed high gloss paint. The top was finished with min-wax ebony and 3 coats semi gloss polyurethane. Everyone in the family was very happy with how this turned out.
![](/sites/default/files/IMG_5799.jpg)
![](/sites/default/files/IMG_5840_3.jpg)
![](/sites/default/files/IMG_5843_3.jpg)
![](/sites/default/files/IMG_5848_4.jpg)
Comments
Fri, 06/26/2015 - 19:21
this looks really great. I
this looks really great. I love the two tone colors. a nice stain + white paint is my favorite combo :)
Wed, 08/19/2020 - 18:32
hi do you happen to have the…
hi do you happen to have the dimensions and break down of how you made this particular one?
Amazing 2x4 Outdoor Sofa
![](/sites/default/files/C7C93106-6EB3-4328-AF25-93A178922447.jpeg)
We have wanted nice deck furniture since we moved into our house 22 years ago but just couldn’t justify the cost. I have made several projects from Ana’s website and I love her easy to follow and FREE plans! But this project was my favorite as you can see by the pics. I used cedar and my wife finished the furniture with stain. Thanks to Ana for providing these plans and helping a DIYer to feel proud!
![](/sites/default/files/5345FC2E-EB56-4998-86BC-655B07F188AE.jpeg)
Comments
Sat, 01/01/2022 - 12:57
AMAZING SECTIONAL!
WOW, that is stunning and so inviting, love the outcome! Thank you so much for sharing!
Mail Holder
![](/sites/default/files/front_0.jpg)
Ana gave me the courage to know that I could build something without a set plan. This was my first attempt at building something that I just envisioned in my head. Thanks Ana!
![](/sites/default/files/front.jpg)
![](/sites/default/files/bottom.jpg)
![](/sites/default/files/details.jpg)
![](/sites/default/files/top.jpg)
![](/sites/default/files/touched%2Bup%2Bhanger.jpg)
Adirondack Coffee Table
![](/sites/default/files/3154829897_1373294395.jpg)
One of my first projects, made from the Adirondack Coffee Table plan using 2x4's and 1x4's. Pocket holes, stain, paint, and sealer. Beginner afternoon project.
Comments
Country Table
![](/sites/default/files/20150618_220110.jpg)
Country Table - dark walnut stain and satin polyurethane coat.
Comments
Modern Outdoor Chairs (2x4s & 2x6s) w / Matching Tables
My mother had a cheap particle board sofa style table on her back porch that was coming apart. She said she'd like to replace it, so I told her I would her one.
I decided to make her a few end style tables to go with it as well.
Finally, I had seen these chairs and decided to make her a few of these also. I liked the Ana White plan, but I didn't like the idea of seeing all the screw holes, so I developed my own method using Kreg and my own assembly method that allowed me to make them strong, without seeing all the screws.
I (and my mother) were very pleased with the final project.
Comments
Mon, 06/10/2019 - 18:49
Nice set
Thank you for posting this! I built the chair as is from the plans but I realized it really needed a backrest. I like how you added one and if you don’t mind, I think I’m going to “borrow” your idea. I lucked out on the cushions-I got mine from Home Goods for $40. I don’t think everyone has a Home Goods near them though. Love the tables too!
Farmhouse Storage Bedroom with Drawers
![](/sites/default/files/Farmhouse%20Storage%20Bed%20with%20Drawers.jpg)
I started this bed months ago, thinking I would have plenty of time to get it done in a weekend. Ha! Well actually to tell the truth most of it was done in a weekend...but, maybe I should start at the beginning... Beware this is a picture heavy post, I tried to do collage photos as much as possible to cut back...
Comments
Mon, 01/03/2022 - 10:34
Awesome Storage Bed!
That is gorgeous, love the natural look and hardware choice!
Baxter's elevated feeding station
![](/sites/default/files/baxter%27s%20dish.jpg)
I saw Ana's plan for an elevated dog dish, but our little cockapoo (still a puppy) wasn't really ready for that height. So I made a basic box and cut out the holes in the top for the bowls. He is still growing, so when he's a little taller, I'm going to put tennis balls on the bottom as feet which will raise it up a little more. Thought I would dress it up with a quote I found somewhere online.
Used some leftover paint and glaze from making the pantry and finished the same way.
Valspar Antiquing Glaze
DIY LP Vinyl Record Storage Box with Wheels
![](/sites/default/files/3154829985_1373388609.jpg)
I have to say, there is something about listening to music on vinyl that just gives me the warm fuzzies! A little bit of crackle, fuzz and hum.. physically having to flip over the record to get to the next side, & listening to an album start to finish just has a nostalgic feel to me and I love it.
We’ve started quite the collection of LP’s and quickly found we needed some good storage for them. Since vinyl isn’t exactly the most popular form for listening to music, I just had to make my own.
I knew it had to have 3 things.. size to fit, wheels and easy of searching through records.
I had some scrap poplar plywood lying around, and just had to purchase some casters and furring strips to frame out the box. I even had an extra cabinet handle laying around to use.
I made it 12 inches wide by 16 inches deep, framed it out shaker style with furring strips and then stained it.. added casters and a handle ;)
![](/sites/default/files/3154829986_1373388609.jpg)
![](/sites/default/files/3154829987_1373388609.jpg)
![](/sites/default/files/3154829988_1373388609.jpg)
Comments
Tue, 07/09/2013 - 10:59
Cute upcycling
I love how you appreciate vinyls and gives things you have on hand new purpose. This storage box is nicely done.
I looked at your blog and went straight to the Upcycle tab, since that's where my interest lies too. I love seeing a "pile of useless" restored to use. =D
First time project
![](/sites/default/files/outdoor%20sectional%20w%20cushions.jpg)
This was my first attempt at making anything. Thank you to Ana for providing such easy plans and the encouragement to try something. I think I'm hooked!
Comments
Sun, 05/31/2020 - 13:21
Beautiful! where did you get…
Beautiful! where did you get the cushions from?
Toy zoo
![](/sites/default/files/20180120_193928.jpg)
My son has a very specific color scheme in his room (Go Pokes!), and finding something to keep his toys in, that looks like it belongs, is simply impossible. I chose to do it cheap and quick way, but it came out exactly like I hoped it would. I really liked the eyelets idea, and since I wanted the zoo to be movable and able to serve as a shelf, I just screwed them in directly into the top and bottom
![](/sites/default/files/20180120_204735.jpg)