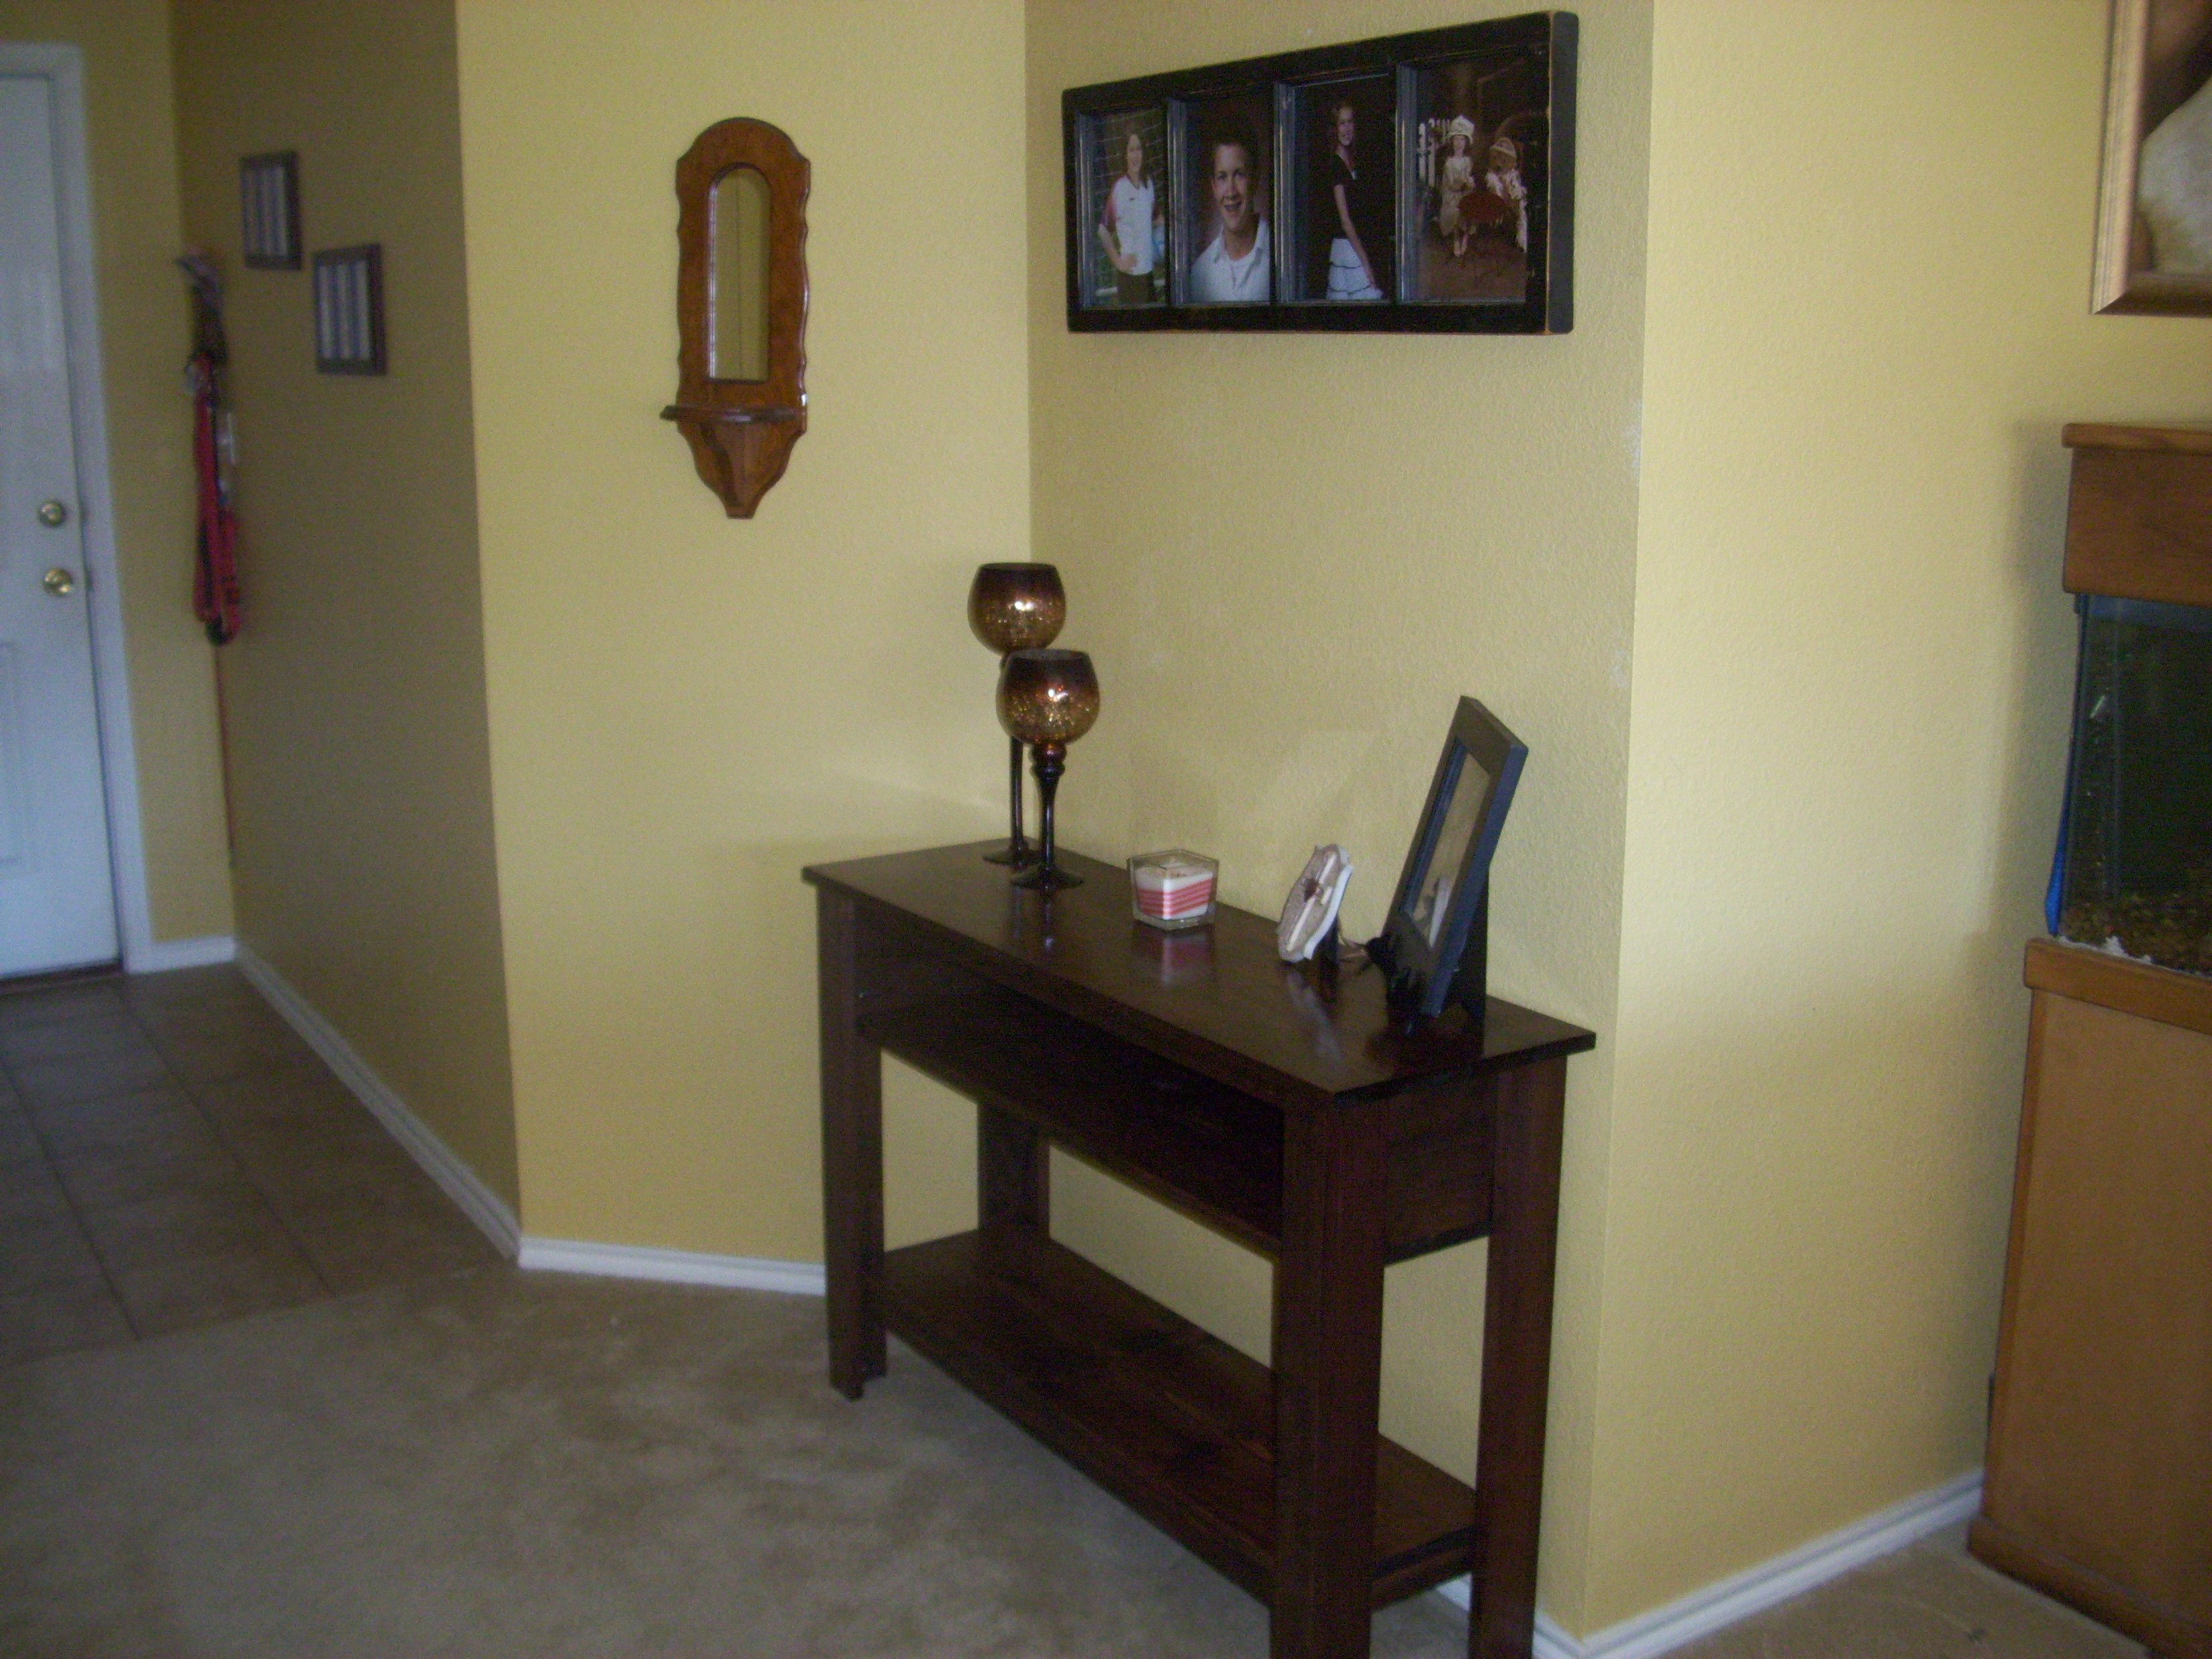
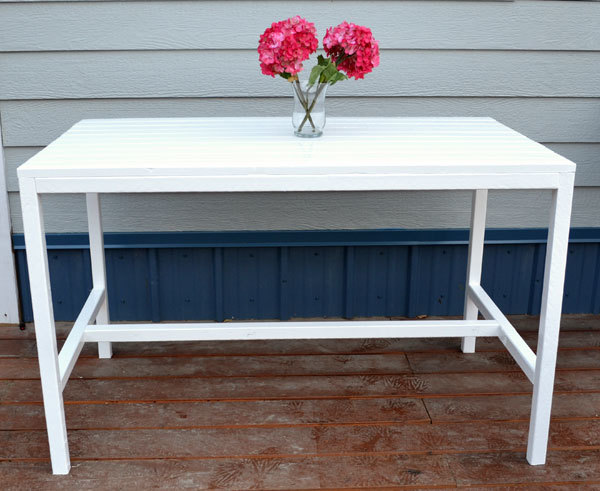
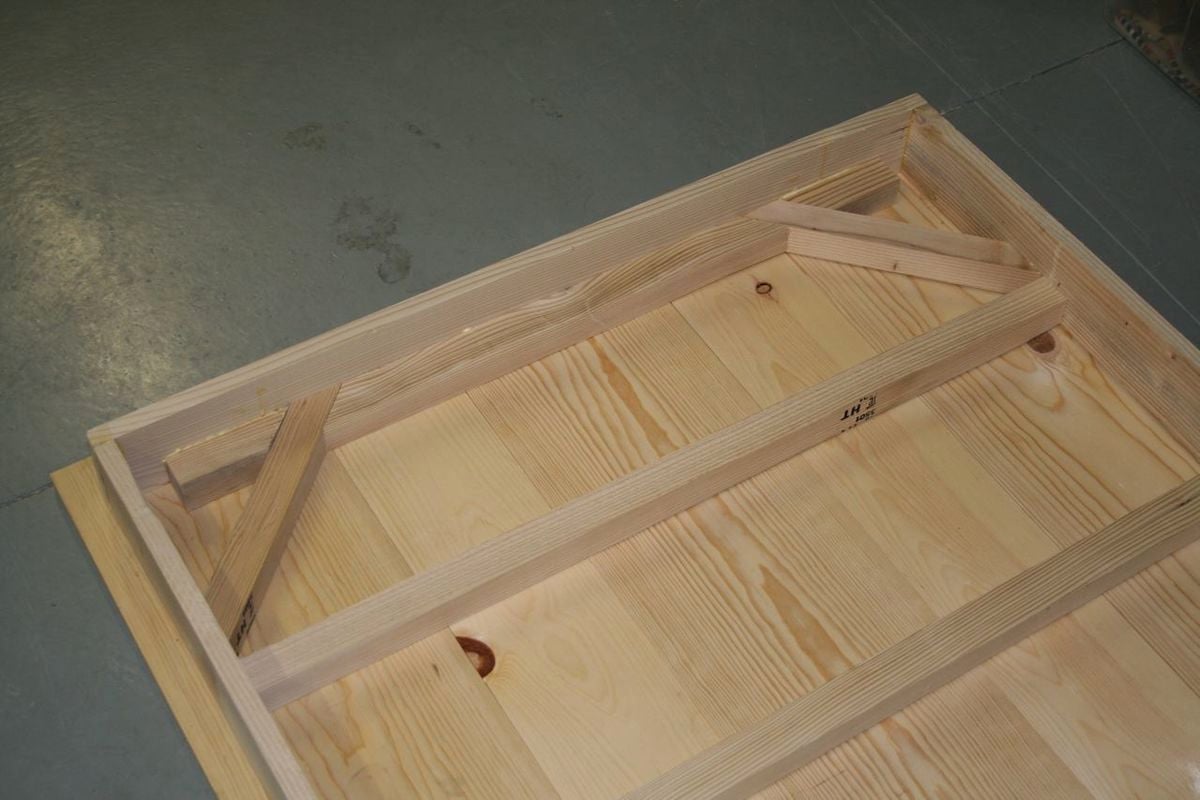
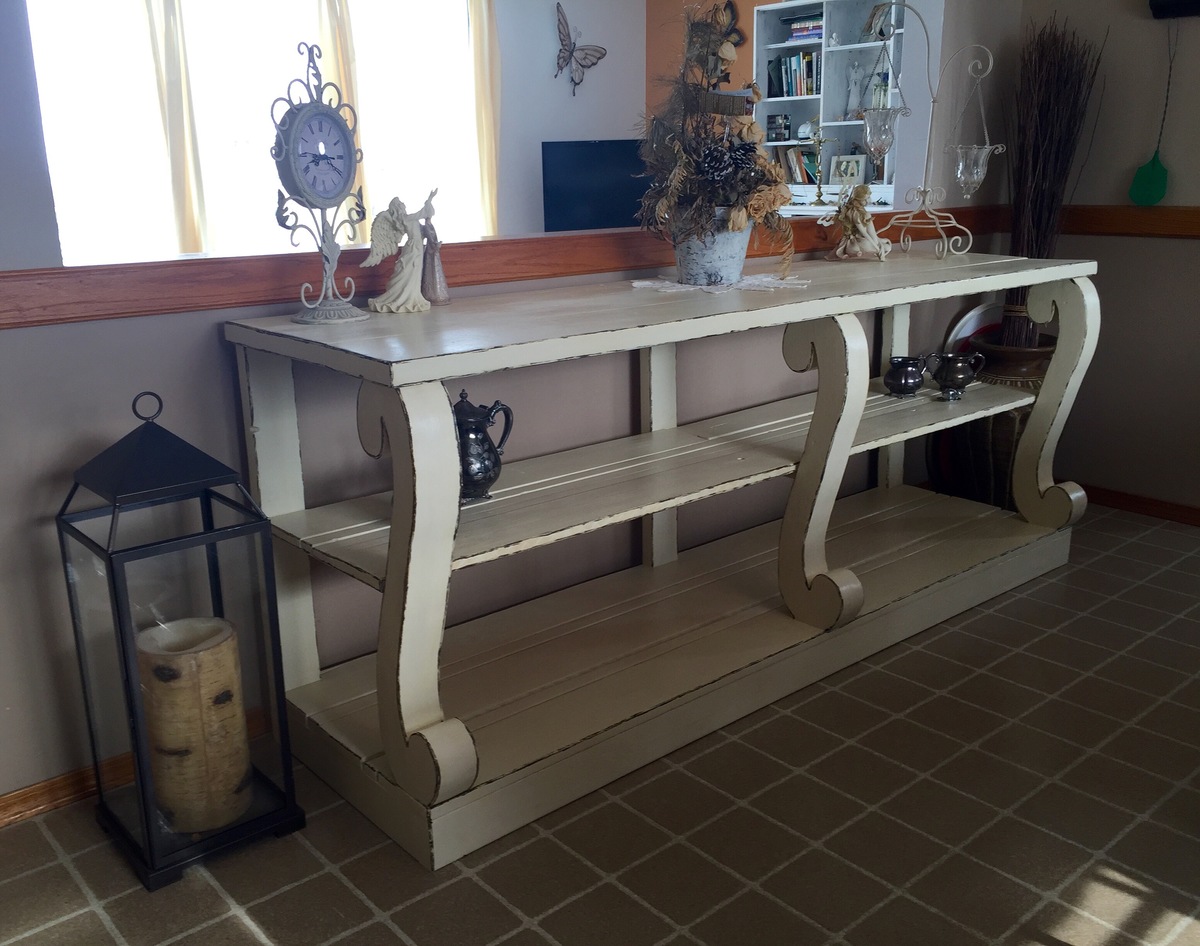
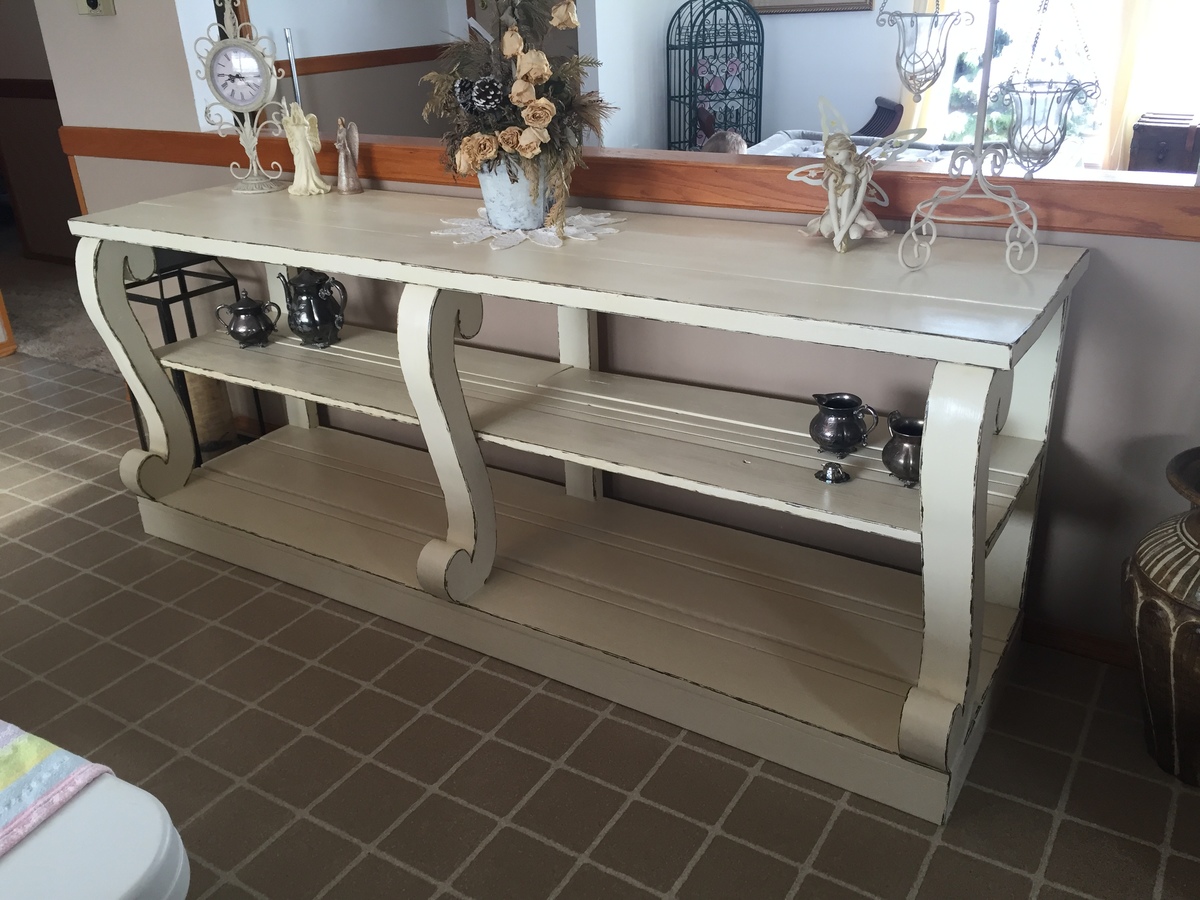
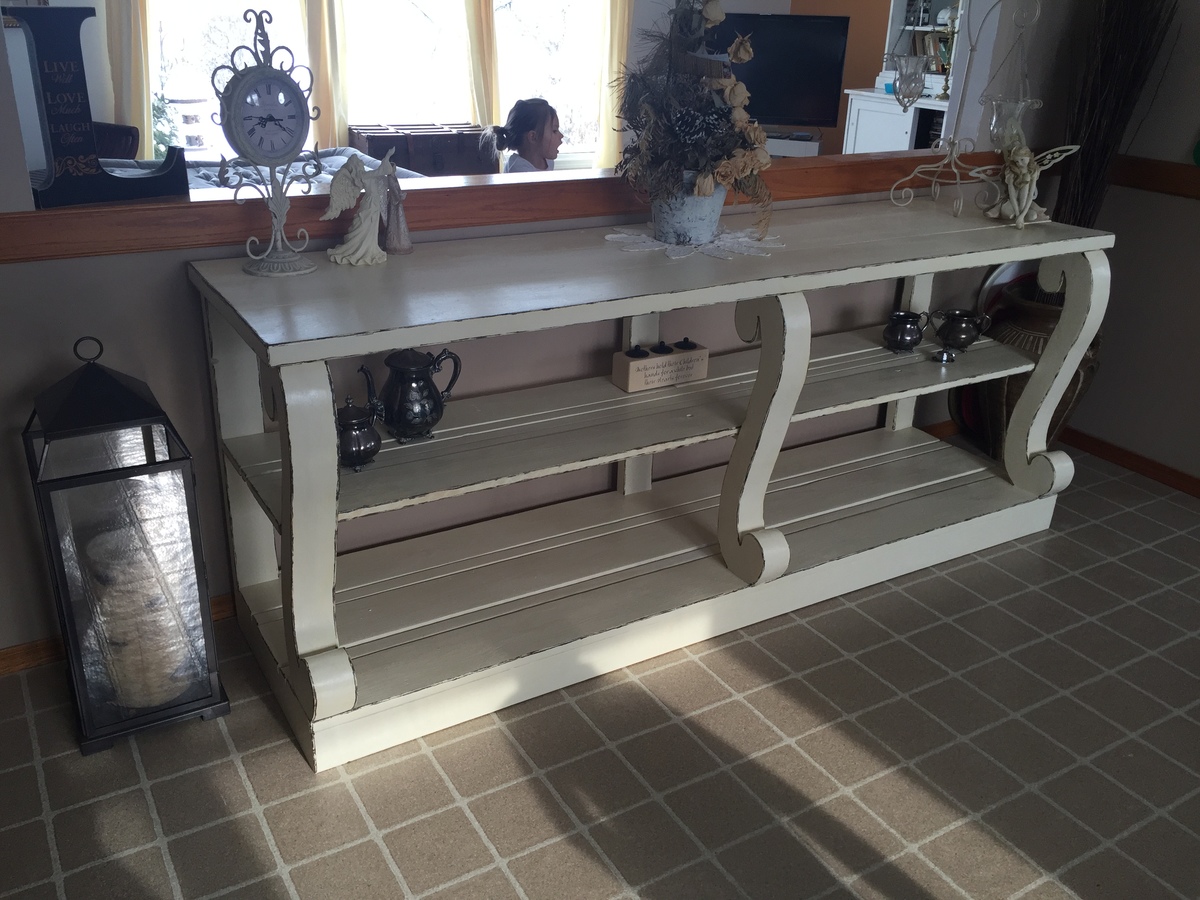
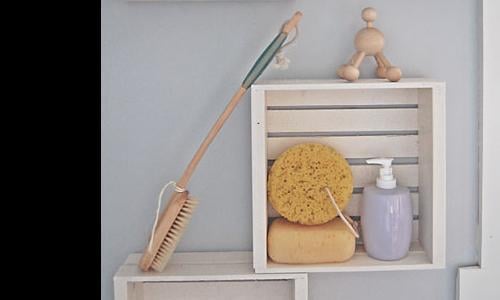
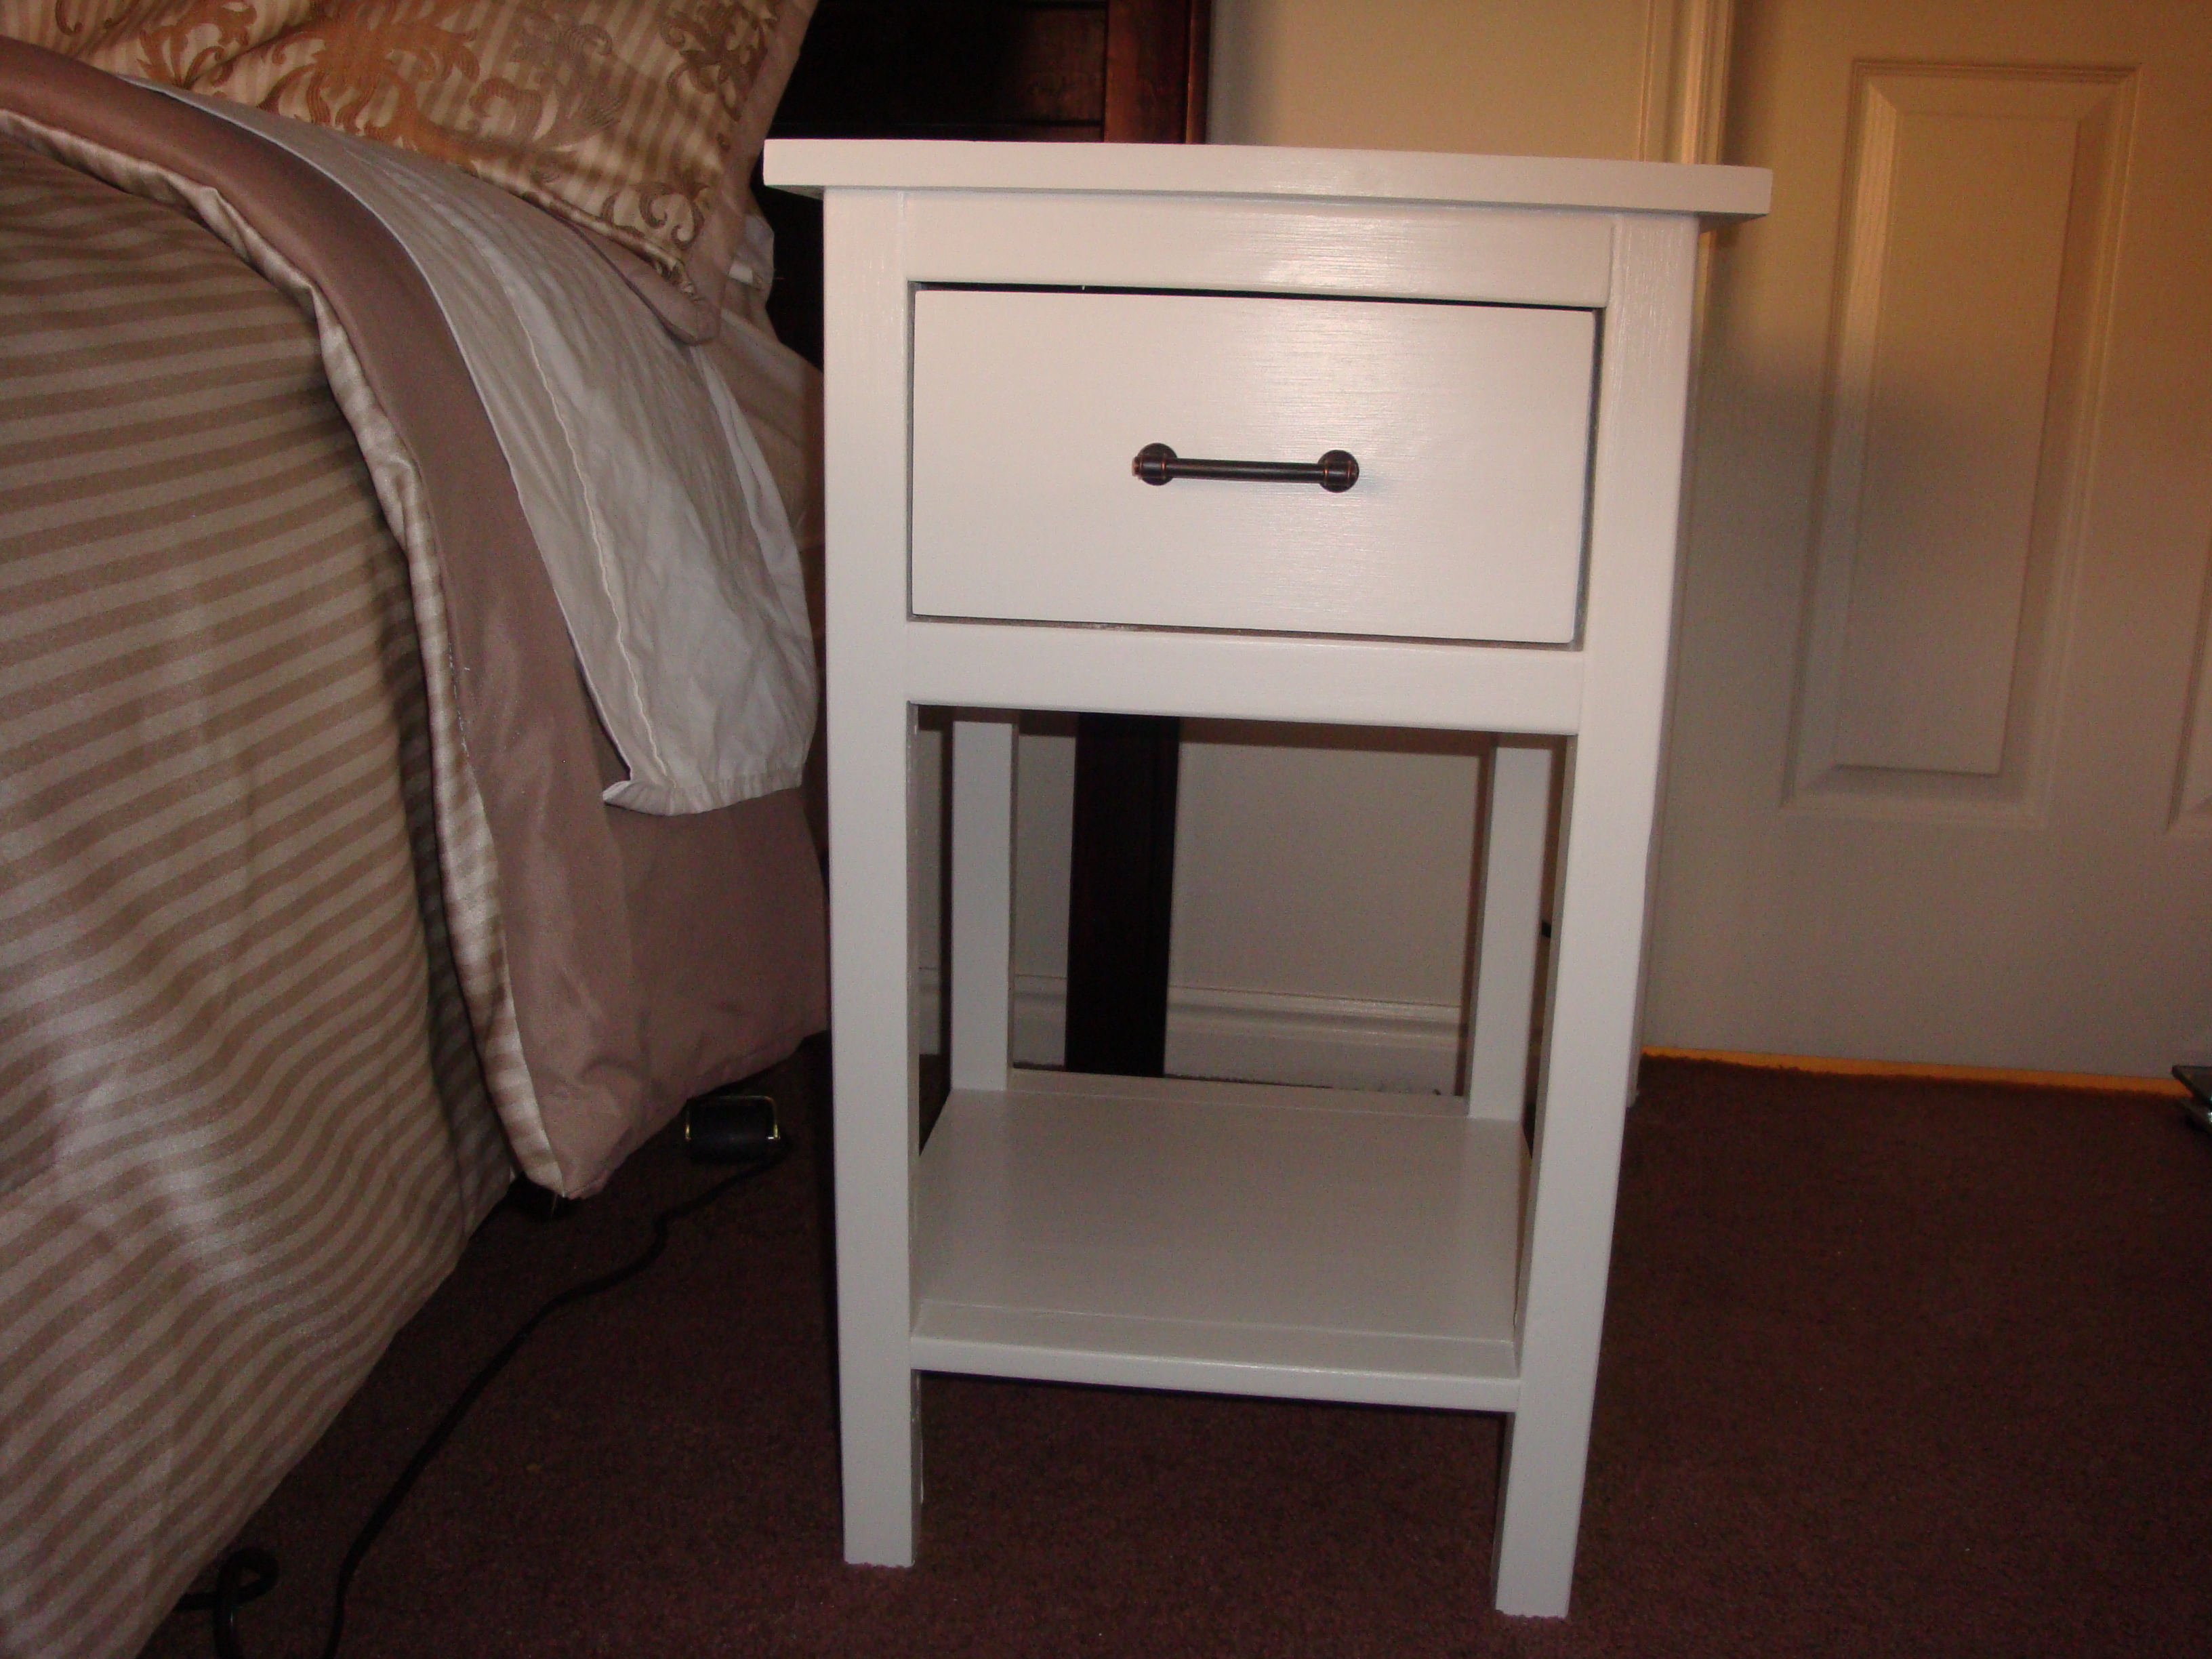
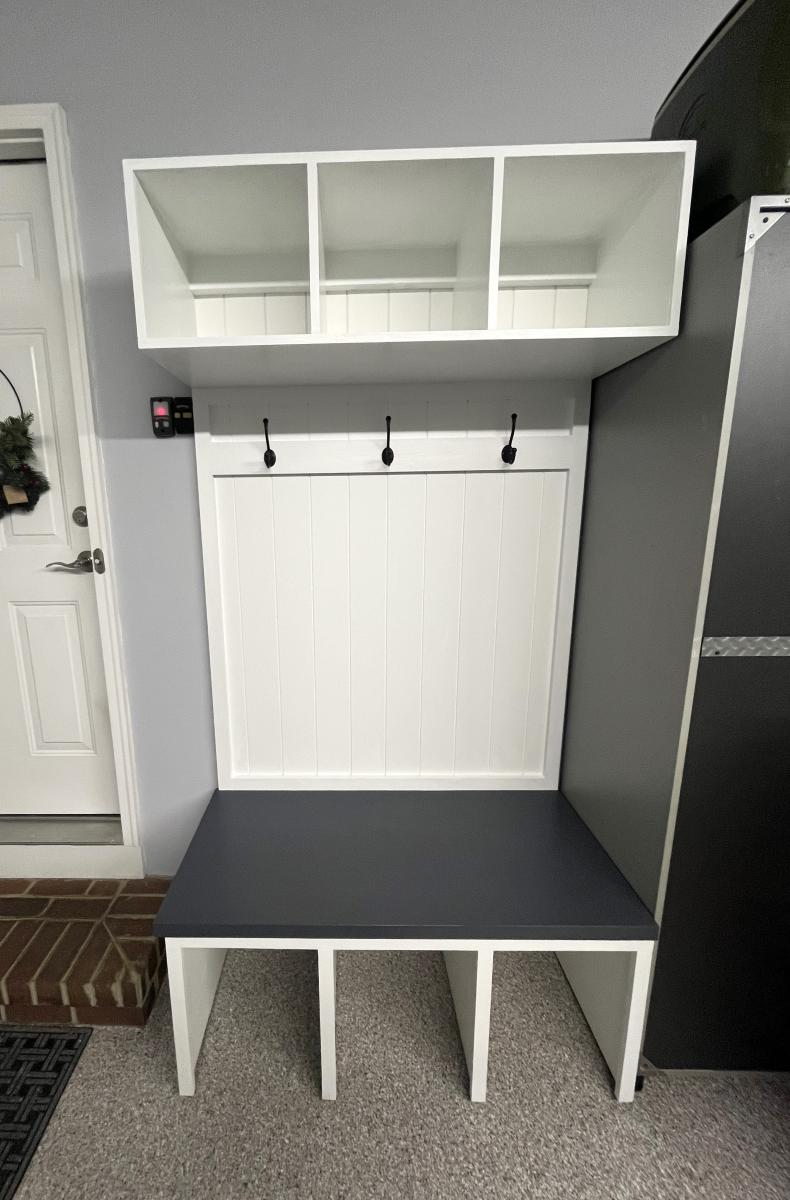
Community Brag Posts

Entry way Table

Submitted by MikeB on Mon, 11/28/2011 - 09:37

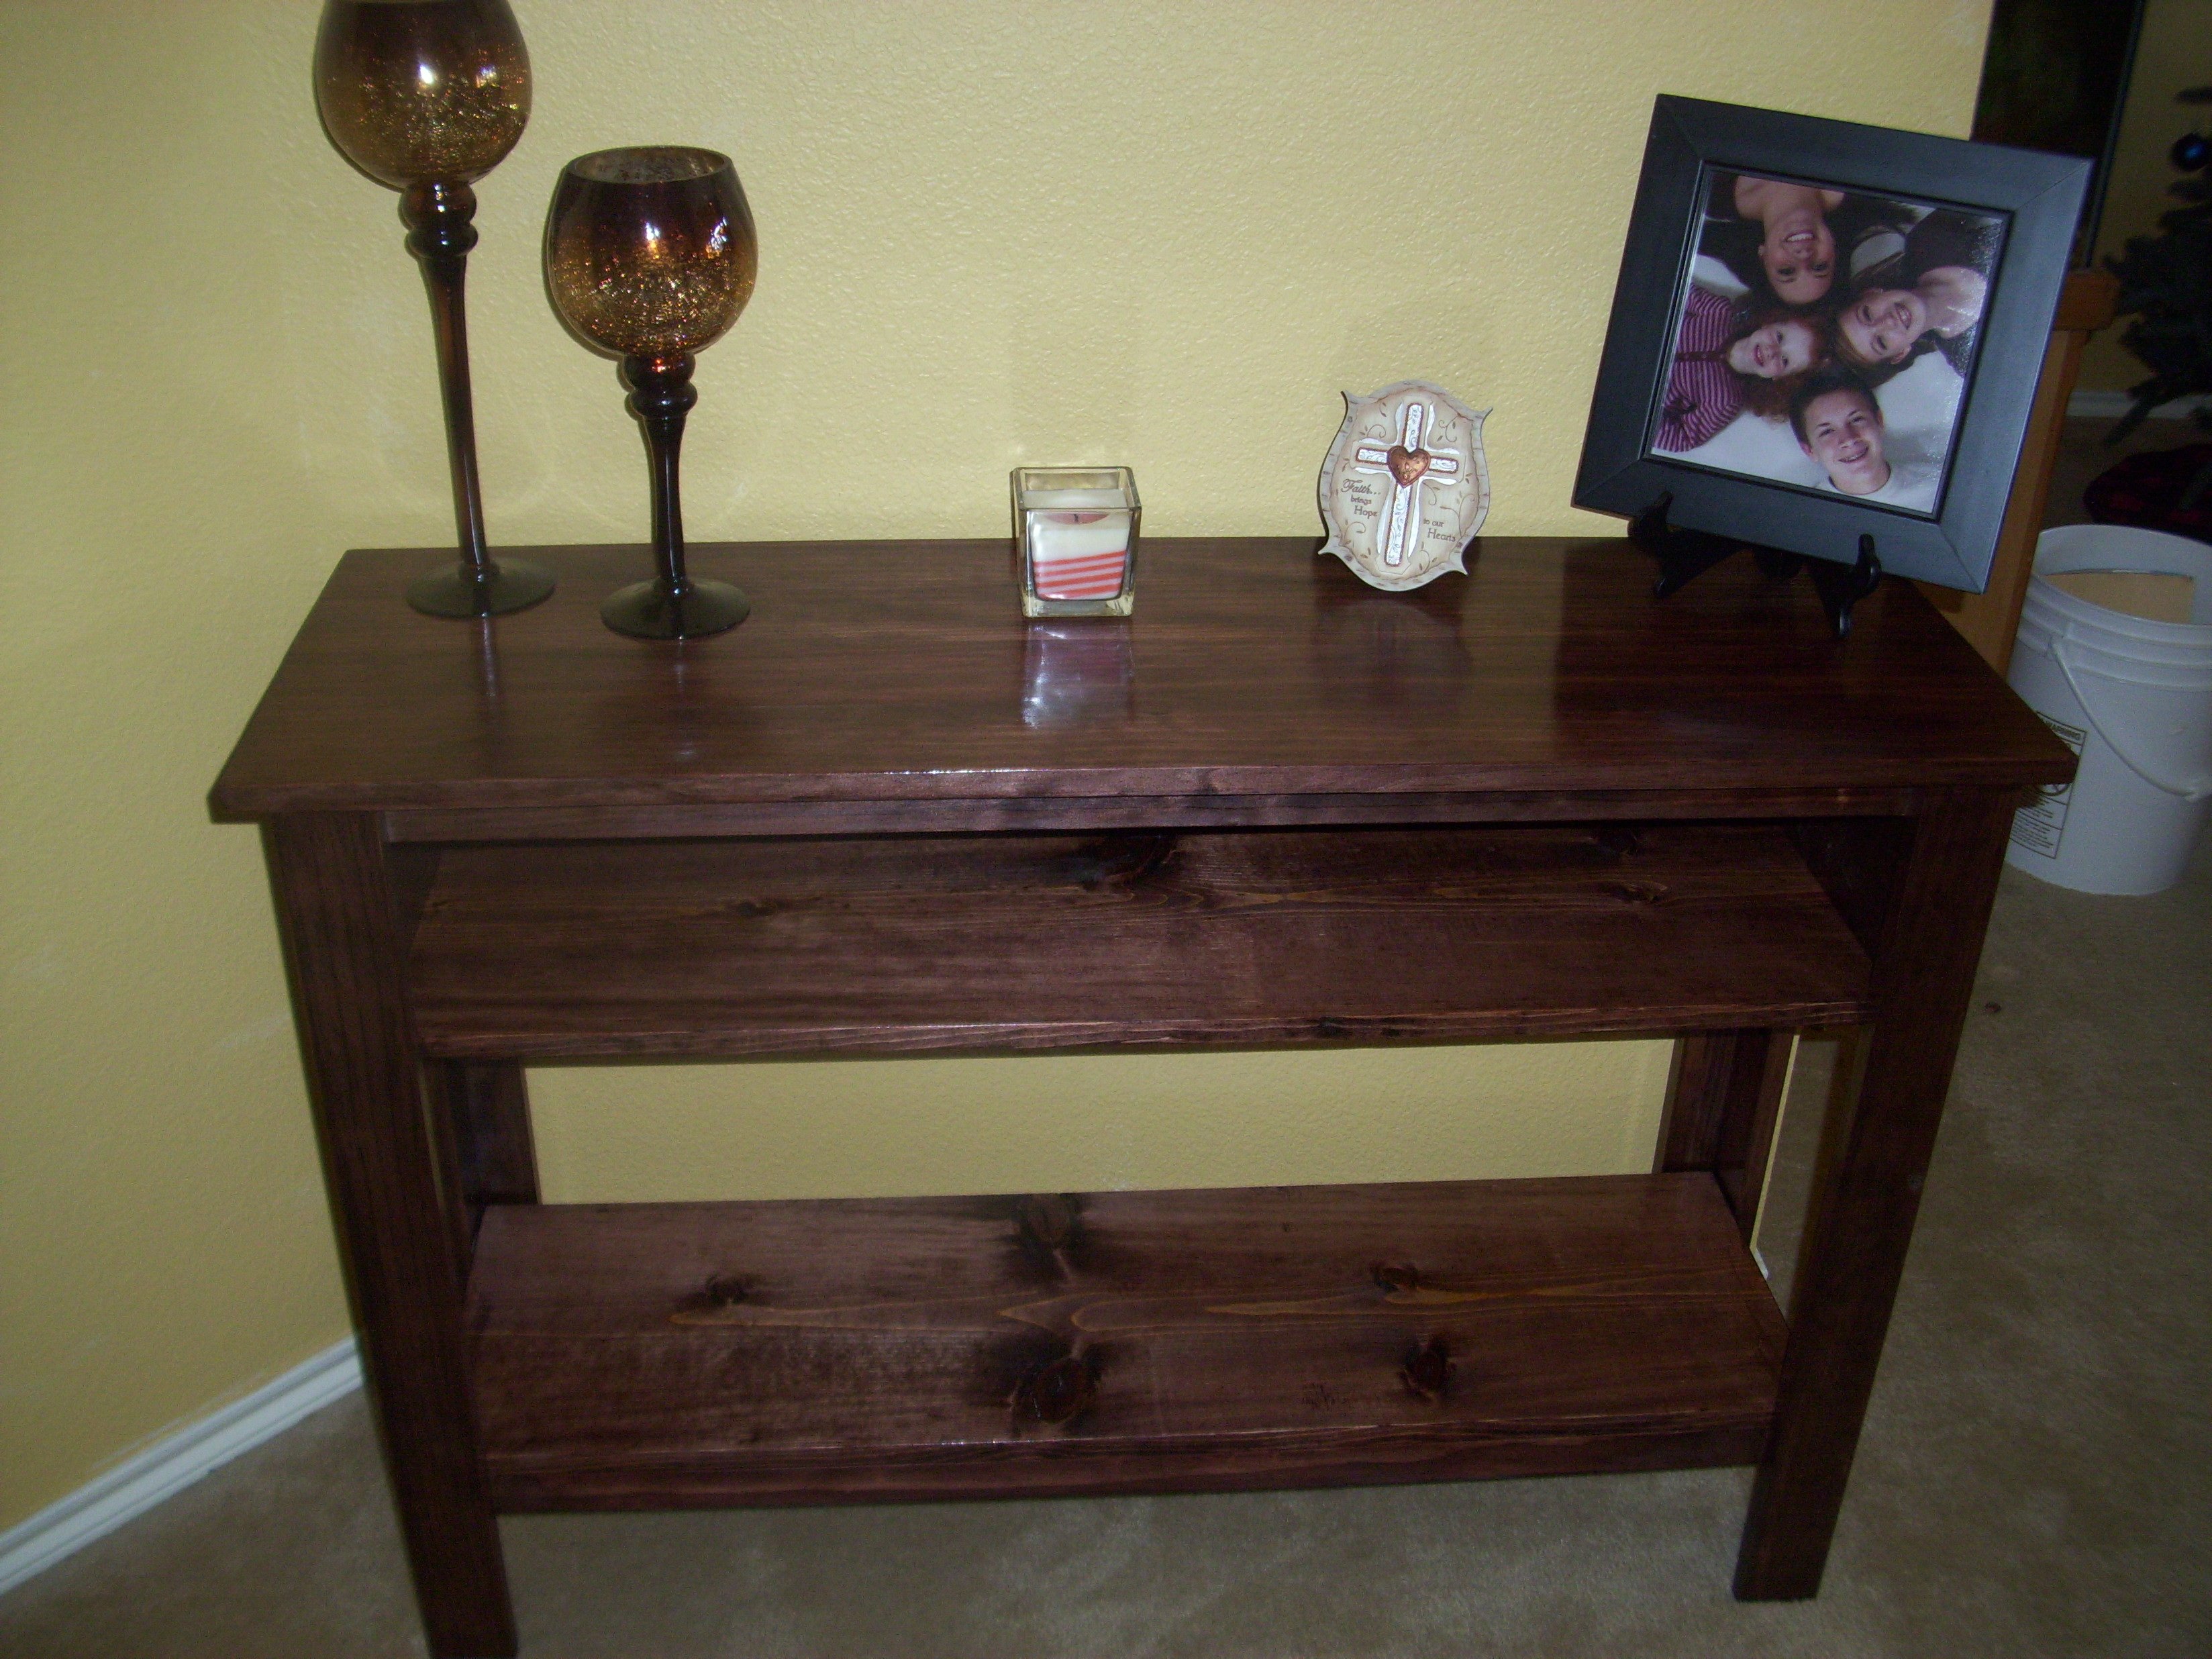
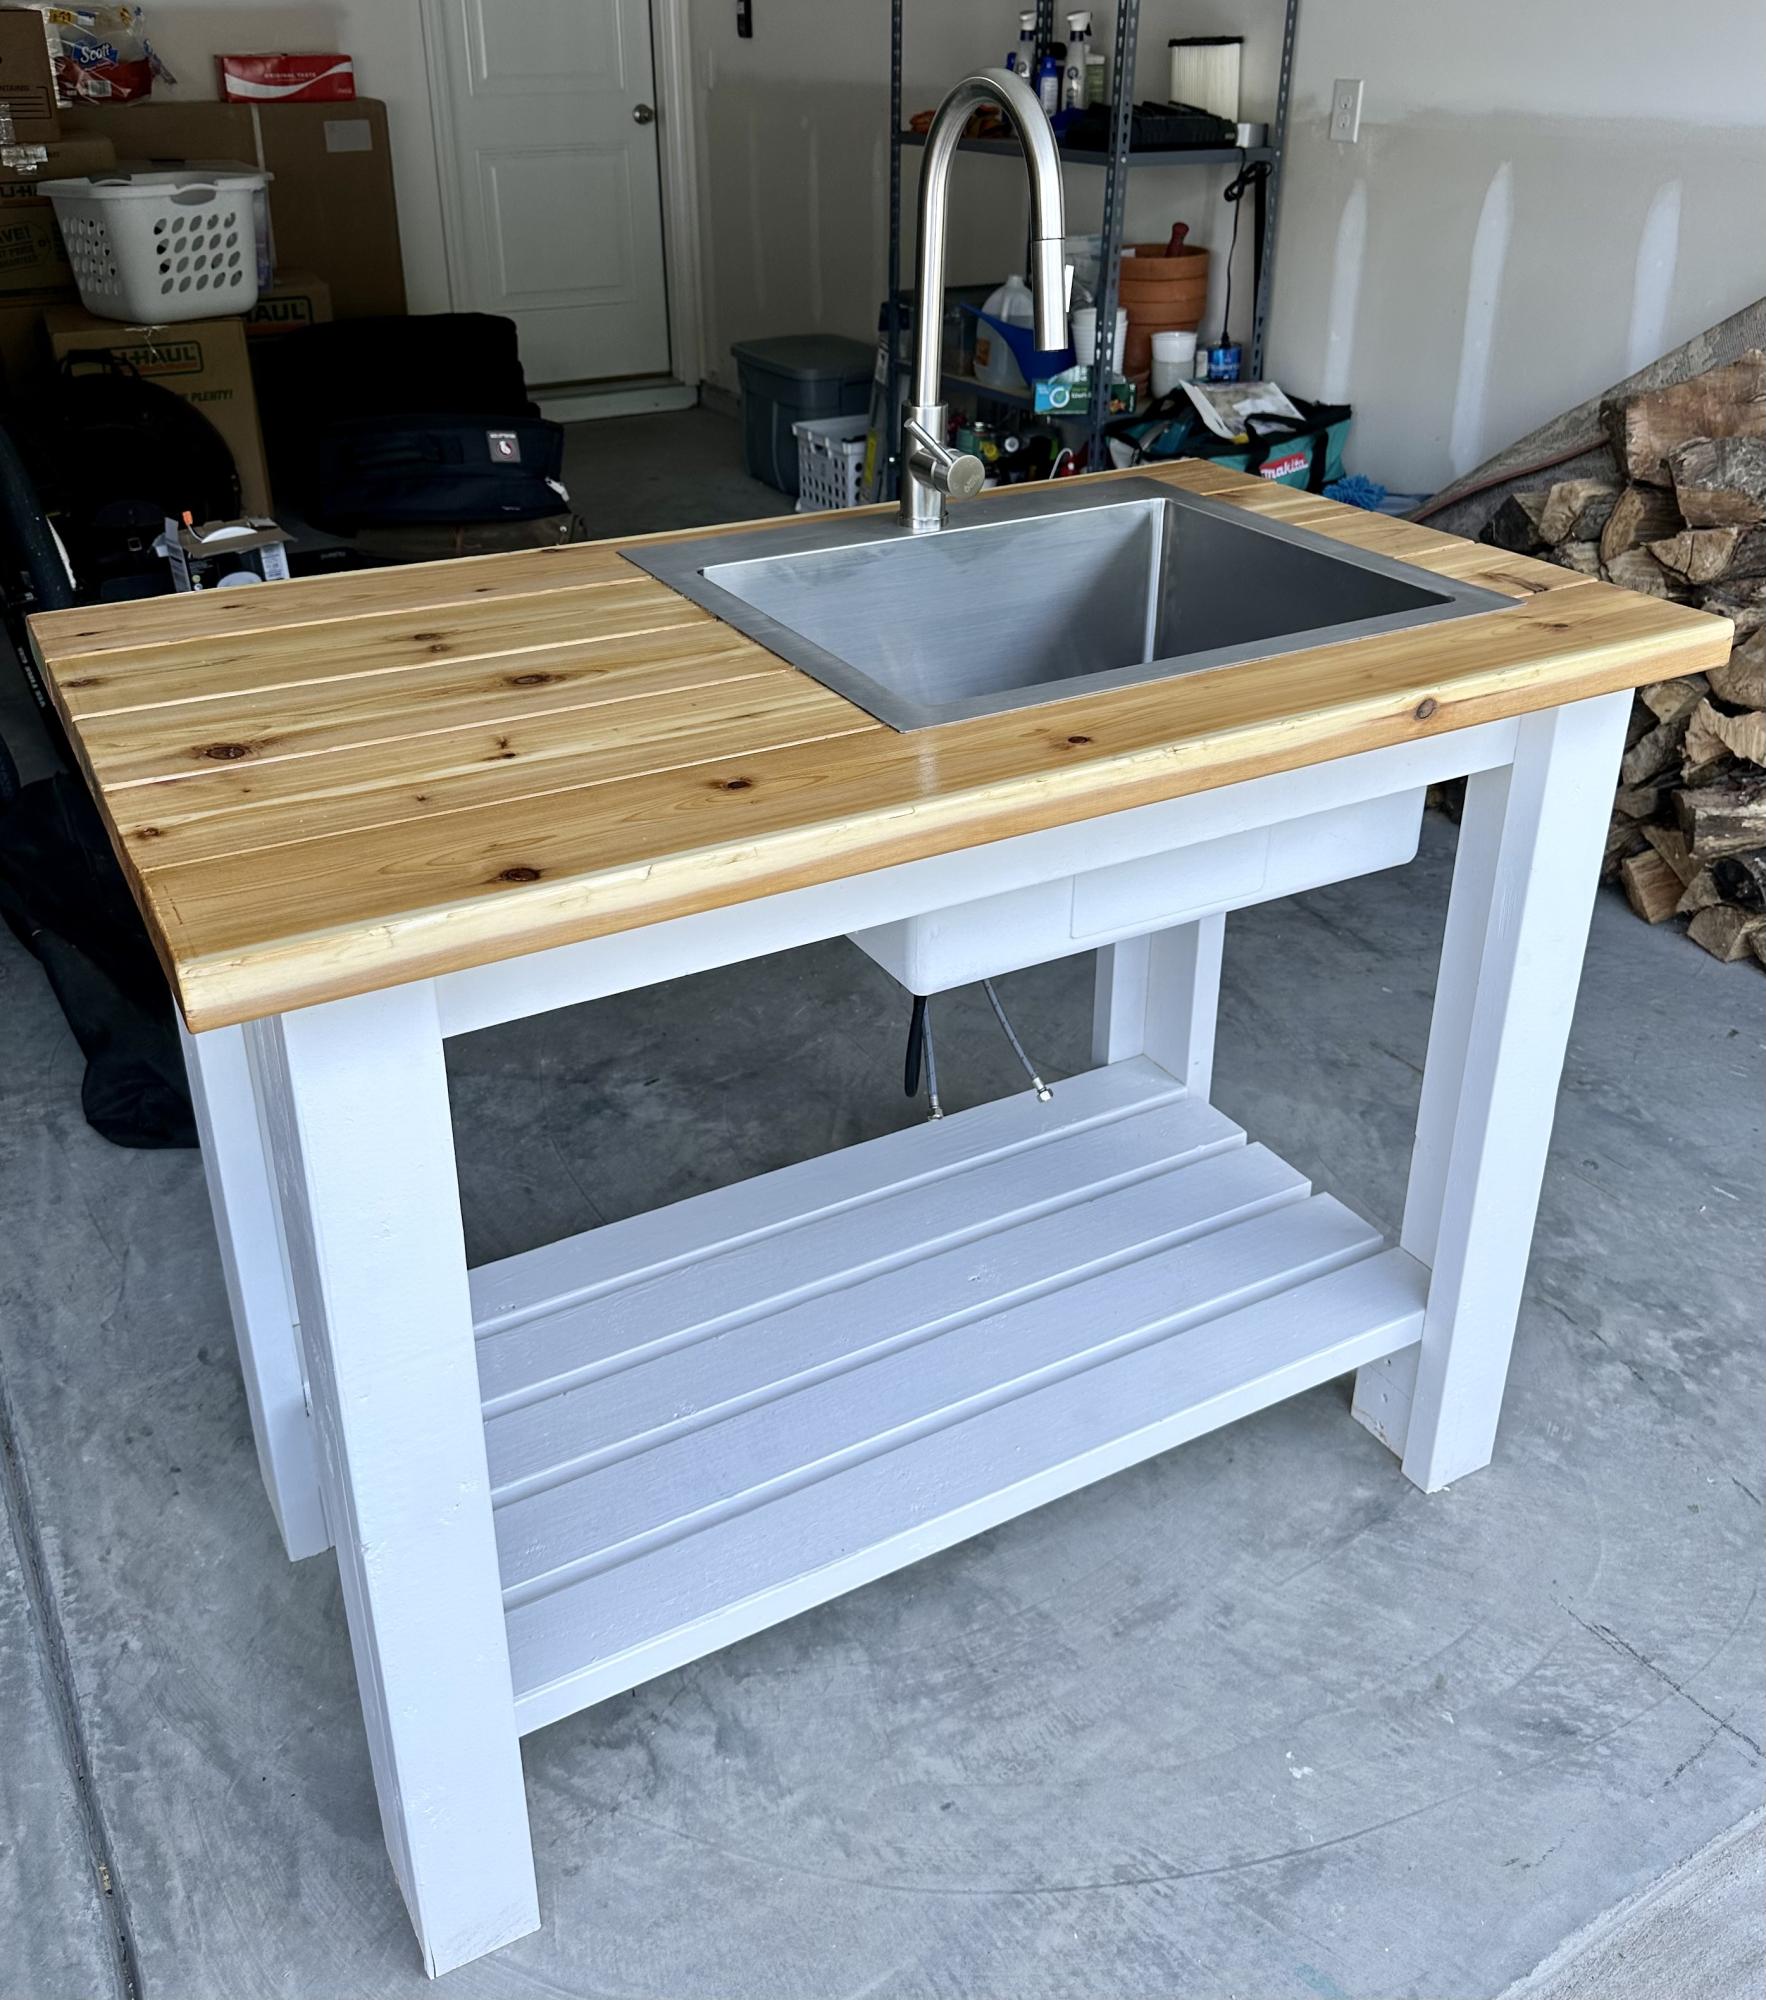
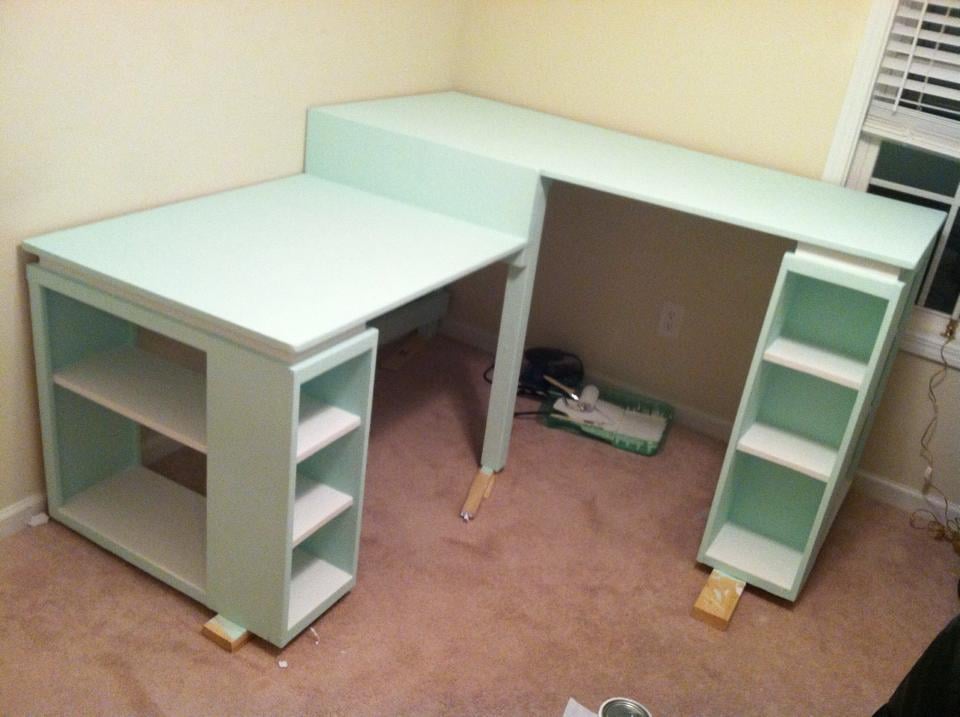
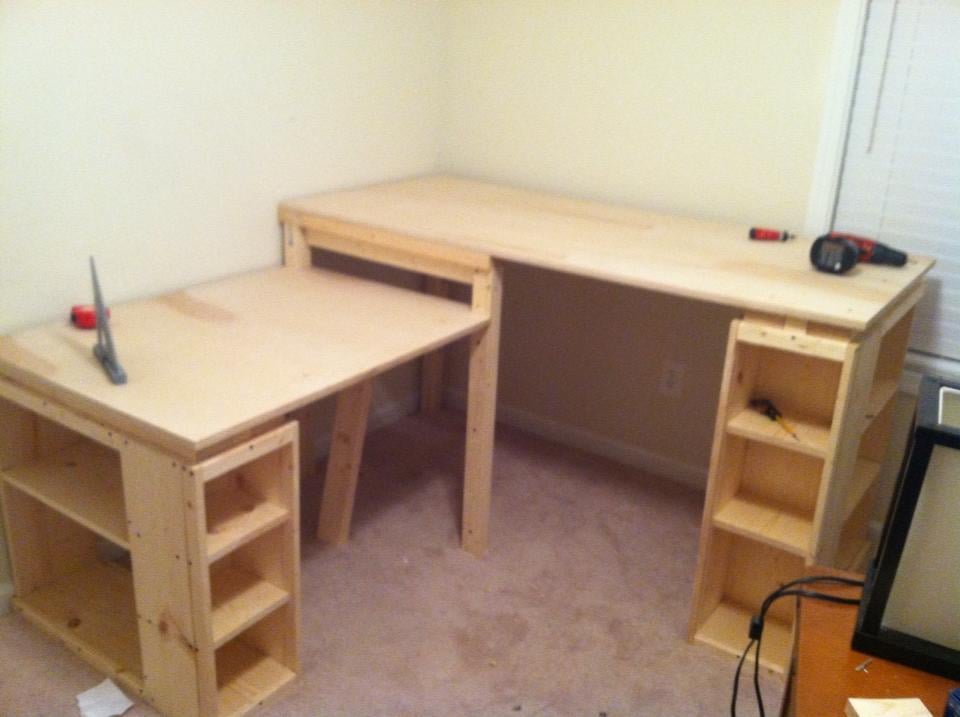
I used the narrow farm house table as my starting point. I added two shelves. I used select grade Pine for this project for all except the 1x12 that was used for the shelves. I didn't want to spend 30 bucks for the select grade 1x12 for the shelves, so I used whitewood for that. I used pocket holes to join the 4 1x4s that makes up the top. I sanded the joints to try to give the appearance that it is a single boards. Can't tell unless you really look close. I am pretty happy with the way it turned out. Biggest problem I had with this project was my 10 year old cordless drill. Batteries would only hold a charge for 4 or 5 pocket holes, so this project took me much longer then it should have. That's okay, I used the time waiting on the drill to charge to sand, and measure. That problem has been corrected with the Black Friday sale at Lowes. My next project is a desk for my daughter, I designed it myself, but would never have attempted something like this without this great website!!!

Built from Plan(s)
Estimated Cost
80 dollars
Estimated Time Investment
Day Project (6-9 Hours)
Finish Used
Minwax pre-stain conditioner, Red Mahogany 225 stain, two coats for minwax Polyurethane clear gloss. lightly sanded with 220 sand paper between 1st and second coat of polyurethane.
Recommended Skill Level
Beginner

Comments

Toddler bed

This site introduced the Kreg Jig which was a game changer as far as allowing me to give this a go. Thanks to the various posts for inspiration particularly Suzie_R. I added an off the shelf guard on the bed - photo to follow. I built the dimensions to fit a day mattress that I bought.

Estimated Cost
I expect that I spent around $100 on pine for the job and I made an initial investment on the Kreg Jig.
Estimated Time Investment
Weekend Project (10-20 Hours)
Finish Used
None until the chalk and crayons come out!
Recommended Skill Level
Beginner

Sturdy Workbench Sink

Submitted by Anonymous (not verified) on Mon, 05/01/2023 - 09:57

Used sturdy workbench plans with 2x6 cedar top for outdoor sink. Turned out much better than I expected!!

Built from Plan(s)

Comments

Princess Castle Loft Bed

We used the plans from this site to build this for our daughter. We did however make the bed part a bit more sturdy to ensure that no one would get hurt and to make sure it could support any weight. We added 4 2x4s across the bed like rafters and screwed the slats on top of them.

Estimated Cost
$350
Estimated Time Investment
Week Long Project (20 Hours or More)
Finish Used
Paint
Recommended Skill Level
Intermediate

Comments

Scroll Legged Console made by RW Creations

Submitted by Anonymous (not verified) on Wed, 03/02/2016 - 12:01

I found these amazing plans from Ana's website here.  Couldn't be easier!  I modified mine a bit to fit the space and used recycled pine wood for my project!  The Scroll legs I used my jig saw to cut them out with the great stencil provided in these plans.  I was really happy with the result, as I only had minor sanding to do to make them match up when I glued them together.  Since I was painting this piece I used dry wall mud over the seams on the legs to hide the joints (a lot less expensive than wood filler).  Since it was all recycled wood I had to do a lot of sanding but it saved me a lot of money!  So very happy with this project!  Thanks for again for the amazing plans!!!


Randi Wolf

RW Creations

Estimated Cost
$150-$200.
Estimated Time Investment
Weekend Project (10-20 Hours)
Finish Used
I stained the piece with a dark walnut stain. I then painted it a Chalked Ivory. Sanded the edges to bring the dark weathered look through and then sealed it with Varathane Triple thick polyurethane.
Recommended Skill Level
Intermediate

Comments

Swing set

Submitted by lazyLiz on Wed, 02/29/2012 - 10:21

I've finished my swing but my porch don't have enough clearance so I built A frame stand for it.

Built from Plan(s)
Estimated Time Investment
Day Project (6-9 Hours)
Finish Used
mahogany latex based exterior primer and paint in one
Recommended Skill Level
Intermediate

Comments

Ashley Doucakis

Fri, 04/19/2013 - 15:37

I love the idea of adding the A-frame considering that where i live there are no real trees to hang it on and building a porch where one doesn't already exist is a pain in the butt! Lol. How wide do you think we could go before it starts compromising the frames integrity? And how much weight can it hold?

Adirondack Chair with Fun Finish!

Submitted by Anonymous (not verified) on Tue, 07/11/2023 - 07:54

I love this chair. Thanks to Ana-White! I added a little pop to it. The red buttons are screw hole plugs I bought from one of the big box stores. A one inch strip of pine I painted red to coordinate with the blue.

Patrick


Pin For Later!

Adirondack Chair with Fun Finish!

Mini Farmhouse Bedside Tables

I made two of these bedside tables for our master bedroom and I LOVE how they turned out. Really like the white with my red mahogany headboard. These weren't too difficult to build. The only problem I ran into was trying to fit my drill in some of the tight spaces to get some of the screws in. I had to do a few of them by hand with a small screwdriver. I mostly used leftover scraps to build them. The tops are made of several boards kreg jigged together rather than one big piece. I was a little nervous about the drawer because I have never made one before, but it wasn't as bad as I thought and it came out just about perfect! yay.

Built from Plan(s)
Estimated Time Investment
Afternoon Project (3-6 Hours)
Finish Used
I used white primer and two coats of white paint. Still need to give them a couple of coats of polycrylic...
Recommended Skill Level
Beginner

Comments

JoanneS

Tue, 01/14/2014 - 16:39

Love this nightstand, it's the perfect size, not too big or too small. Your white finish looks great, and the drawer looks perfectly even. Great job!

ACEuhheartz

Sun, 02/09/2014 - 10:47

Awesome job with your drawer! I just finish build my mini table now and getting ready to cut up another woods for the drawer part, what size is your front drawer? Is it 11 1/4? What about the length? I want to make sure I measure it right before I cut em soon.

tricia.flores

Tue, 02/11/2014 - 18:29

Sorry, I just saw your questions! Yes the drawer front is 11 1/4 wide, and the length of the drawer is 11 1/2. I just followed Ana's cut list exactly for the mini farmhouse bedside table. Since you already have the table built you can measure the opening for the drawer to make sure it will fit.

Workbench

Submitted by Malka on Thu, 04/14/2016 - 04:19

Great workbench. Made slight modification, in extending the top 2x4s past the counter edge, and then connecting them with another 2x4 so I'd have a place to put clamps/tools. Also used 3/4 particle board, as it was significantly cheaper than the plywood my local hardware store had on hand.

Estimated Cost
$50
Estimated Time Investment
Afternoon Project (3-6 Hours)
Finish Used
None
Recommended Skill Level
Starter Project

Beginner Bar Stools

Submitted by pchireah on Sat, 07/14/2012 - 13:20

This was my first time building anything, since the tool box I made in wood-shop in highschool! I made the stools about 3" shorter than the plans to accommodate our low counter height. Otherwise, I really had no idea what I was doing, but learned a lot through the process. Also, I don't really have a great work space, other than the 10'x10' second bedroom in our NYC apartment. At least all the dust can stay in one place. Looking forward to my next project of an outdoor table for our terrace - I'm hooked!!! Thanks Ana for making this so accessible. Some of my friends now want to come over and build projects for their apartments too!

Built from Plan(s)
Estimated Cost
I have no idea. I had to purchase everything from saws to nails to wood glue and wood. Also I bought the wood in multiple stages. Wood in NYC is too expensive, but I probably spent around $100 on wood for all three stools.
Estimated Time Investment
Day Project (6-9 Hours)
Finish Used
on the top, Antique Walnut gloss stain and poly in one, sanded down after the fact and Ultra Pure White, paint and primer in one - two coats.
Recommended Skill Level
Starter Project

Farmhouse Table

Plans were modified to change length of table to 8' and so that benches tuck under for winter storage. 5/4 cedar was used for table and bench tops-5/4 cedar was only available locally in 4" and 6" widths so we modified top slightly and made benches to match

Estimated Cost
$120
Estimated Time Investment
Day Project (6-9 Hours)
Finish Used
Tung oil and Spar Urethane
Recommended Skill Level
Beginner

Simple Outhouse

Submitted by Anonymous (not verified) on Thu, 06/18/2020 - 13:45

We used the plans from the Simple Outhouse to make a space to hold our porta potty. The door is a repurposed barn door and I think it looks amazing! These plans were perfect for us as we were able to build it in panels and reassemble on our property by the lake. Some screened windows to allow for ventilation and light were the finishing touches. Thanks Anna for the simple to follow plans!

Built from Plan(s)
Estimated Cost
$200 Canadian
Estimated Time Investment
Weekend Project (10-20 Hours)
Finish Used
We used pressure treated wood for the base and deck. For inside, we repurposed some scraps of composite decking. Painted with exterior latex "driftwood".

My Greenhouse

I went from a 6 x 8 Harbor Freight Greenhouse to this one 10 x 12. I added a few windows...

Built from Plan(s)

Comments

Seasonal And Holiday

Mini Media Stand

Submitted by Aisha on Thu, 08/23/2012 - 18:53

The minute I saw this mini media stand I knew that I would have to make it for our playroom. I tweaked the measurements slightly since my wood sizes were slightly different from Ana. This was a pretty easy build for me and I would consider myself a beginner.

Estimated Cost
$100 for wood and hardware
Estimated Time Investment
Weekend Project (10-20 Hours)
Finish Used
Two coats of Varathane's Ipswich Pine and two coats of semi gloss poly.
Recommended Skill Level
Beginner

Comments

Joni

Fri, 08/24/2012 - 07:19

I can't believe that this plan only came out 2 weeks ago, and you have already created and posted this! It is awesome, and your stain/finish looks amazing. I love your modifications, and your stain & cabinet handle choices.

Sewing/cutting table

Submitted by drc3924 on Thu, 06/19/2014 - 19:53

This has become my dream sewing/craft desk!! This project took about a week from start to finish (with work days in between). The shorter portion of the desk is used for my machine and sewing. The taller portion is used as a cutting table. The plans (dimensions) were tweaked some to get the perfect heights for me :).

Built from Plan(s)
Estimated Cost
$200
Estimated Time Investment
Weekend Project (10-20 Hours)
Finish Used
After sanding I painted 1 coat of interior primer the about 2-3 coats of mint flat interior paint. I decided not to add a clear coat just because I wanted to use my amazing desk ASAP!!!
Recommended Skill Level
Intermediate

Comments

tamaralyn79

Wed, 03/25/2015 - 06:31

Your desk is GORGEOUS!!!! It's exactly what I've been looking to build for my space. I would love to know how you modified the plan to make it.

TaylorMade1205

Wed, 03/25/2015 - 07:23

I also wanted to comment on the thread shelf you build, that is really awesome, you can see all your colors right in front of you. Mine are in a drawer and I have to pull the whole thing out to see what I need. This is really giving me ideas.

kchess

Fri, 09/04/2015 - 08:45

Would you please send the plan instructions (with measurments).  It is perfect for me as I sew and embrodery both and have two machines.  

Corner computer cabinet

Submitted by Anonymous (not verified) on Thu, 09/22/2016 - 11:23

Flip down tray added for computer keyboard.

Built from Plan(s)
Recommended Skill Level
Beginner

Comments

Mud Kitchen

We live in the south so we opted for treated wood. We weren’t able to locate all the connectors to combine sink sprayer and water hose so we ended up just getting another garden hose and sprayer. Works just as well. We used Smokey Mirror exterior stain to add some color. Didn’t have all the tools handy so we opted for a farm style sink that sits on top of the wood. Kids loving it so far, they have been playing non stop. Thanks for the great plan.

Built from Plan(s)
Estimated Cost
60
Estimated Time Investment
Day Project (6-9 Hours)
Recommended Skill Level
Beginner
Back