Outdoor DIY Grill Station
I saw this table and nesting grill station on your FB page. I changes it up a little bit, but the concept is perfect for my back yard deck.
Dharris
Built from Plan(s)
I saw this table and nesting grill station on your FB page. I changes it up a little bit, but the concept is perfect for my back yard deck.
Dharris
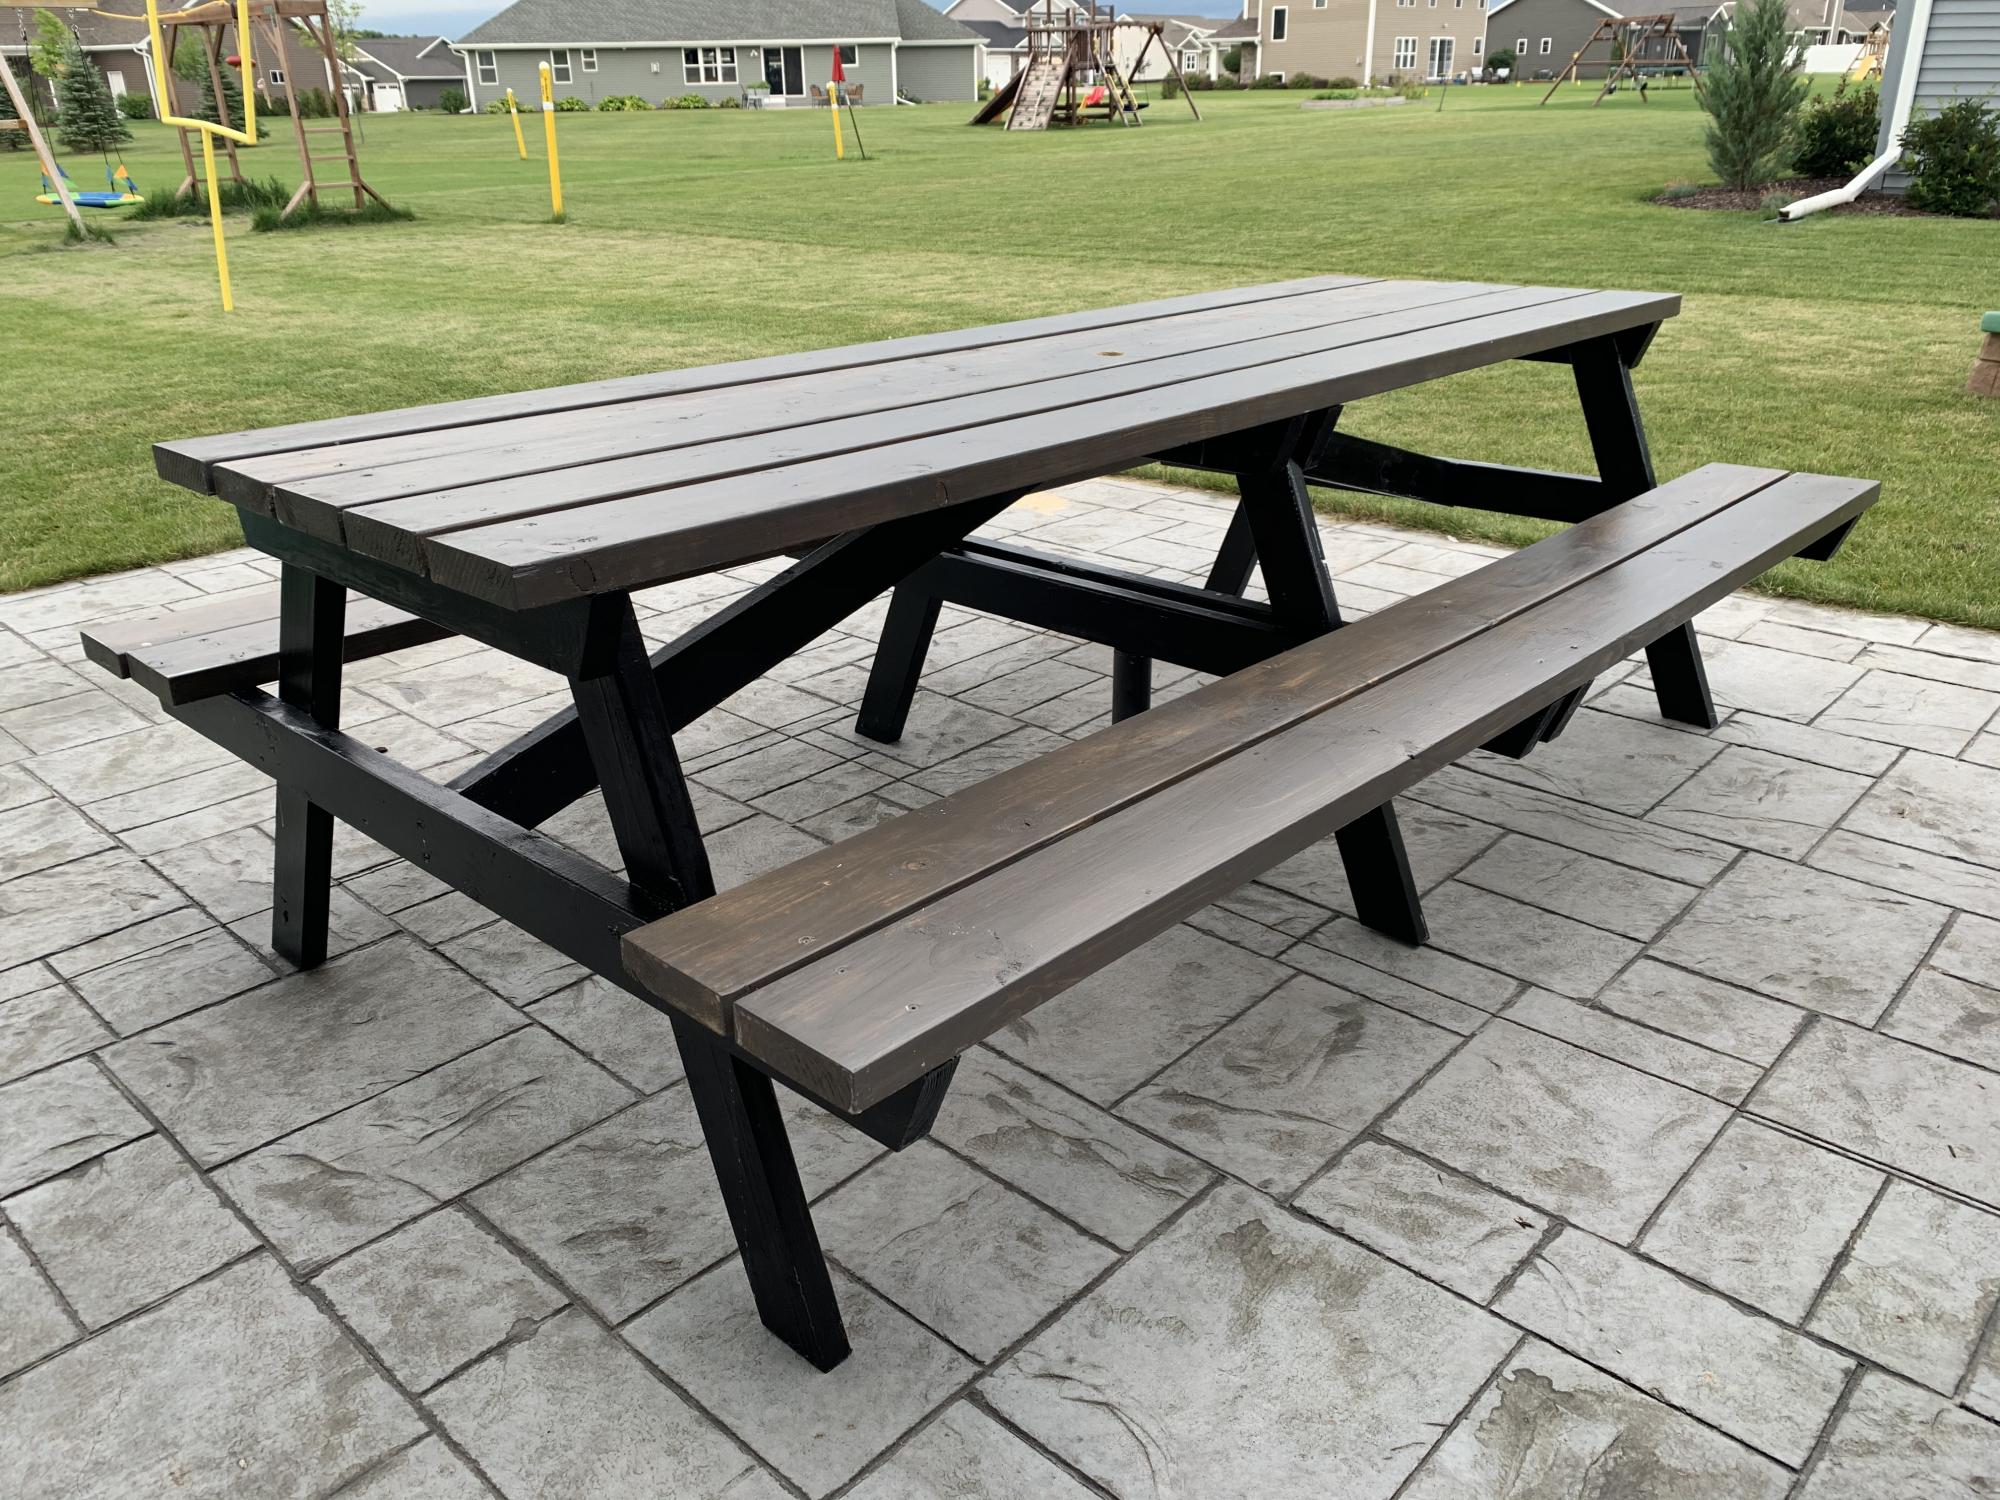
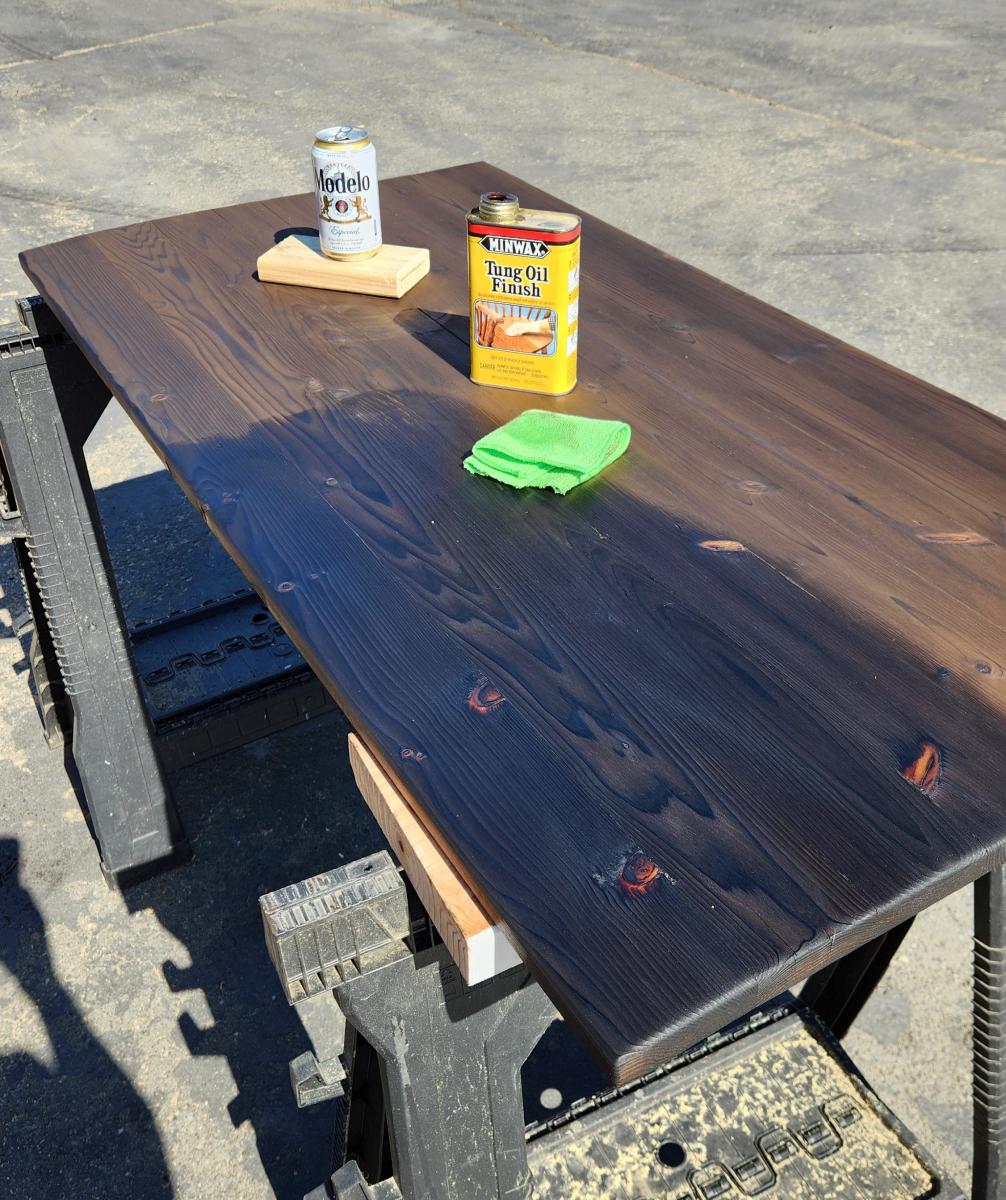
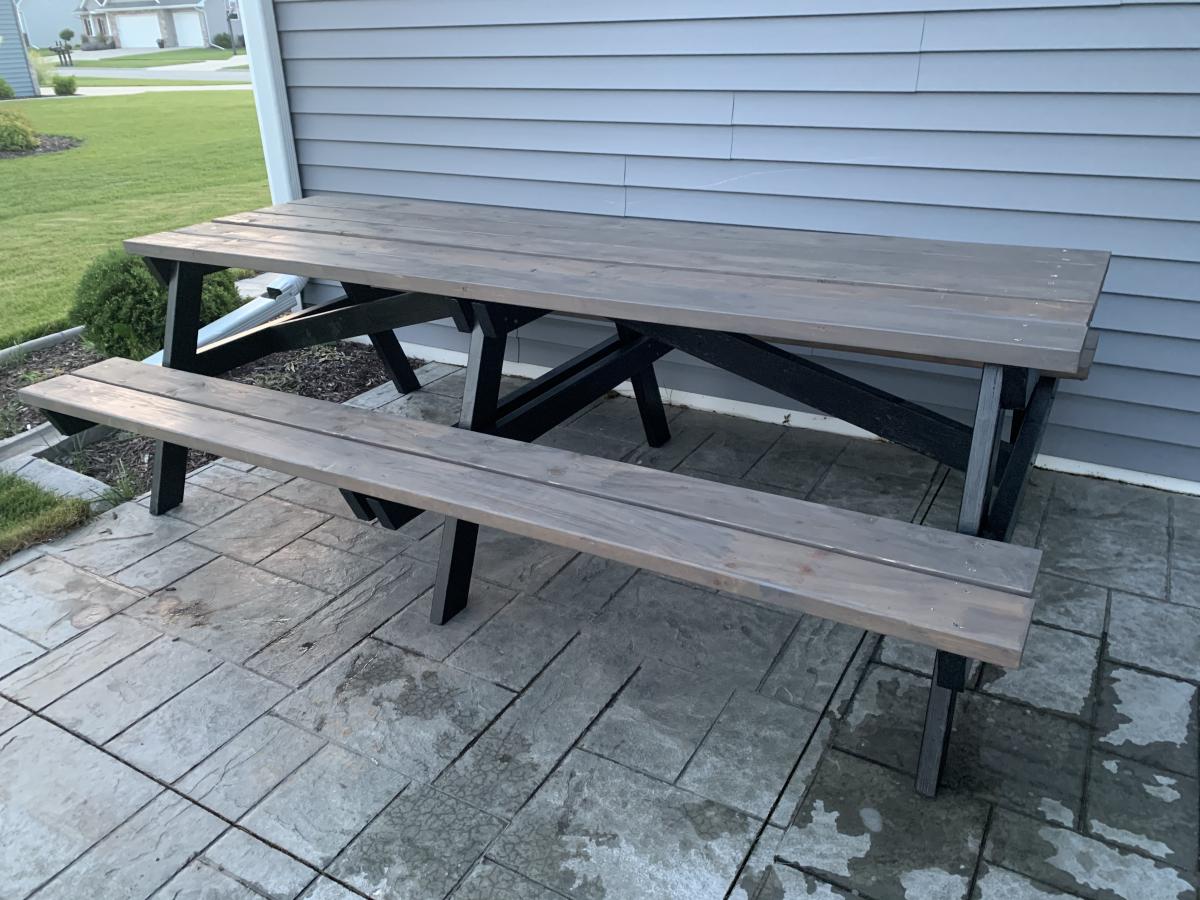
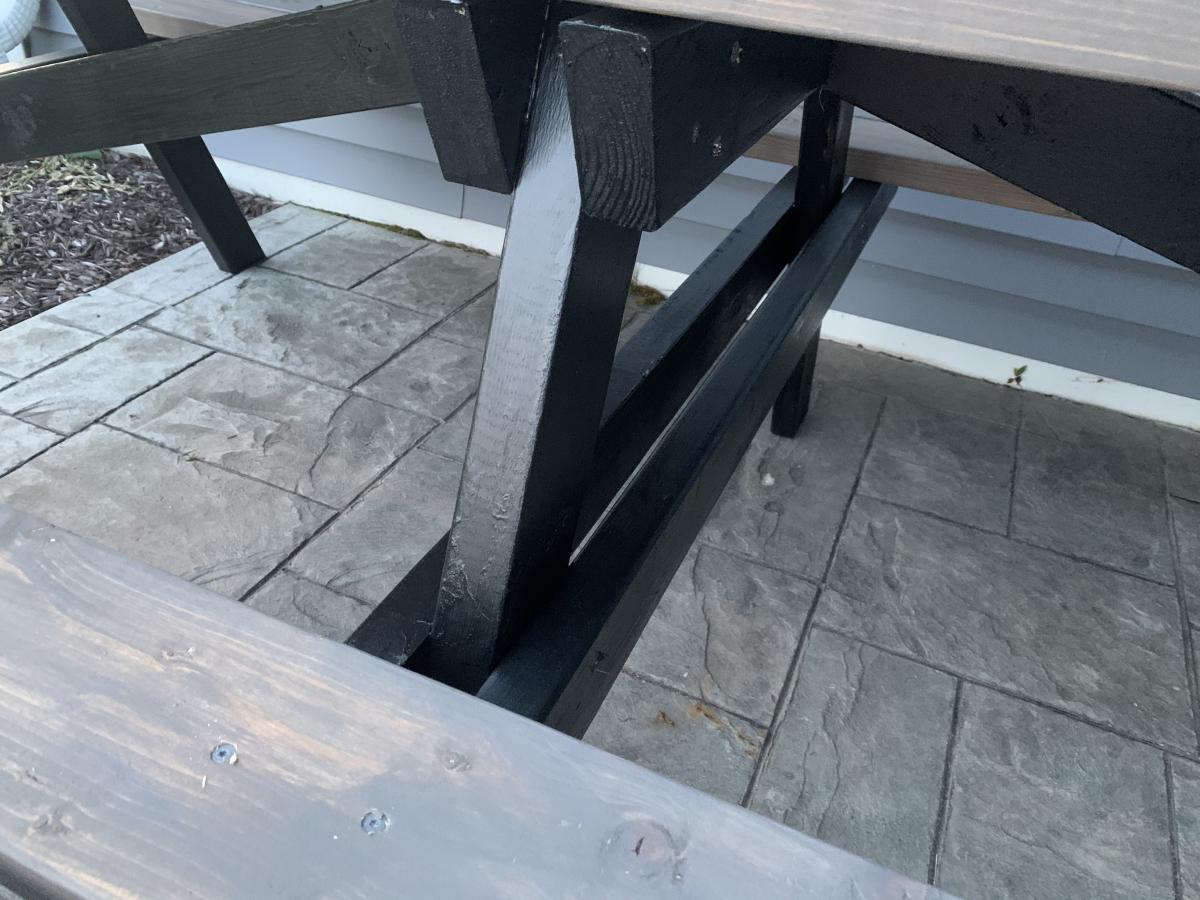
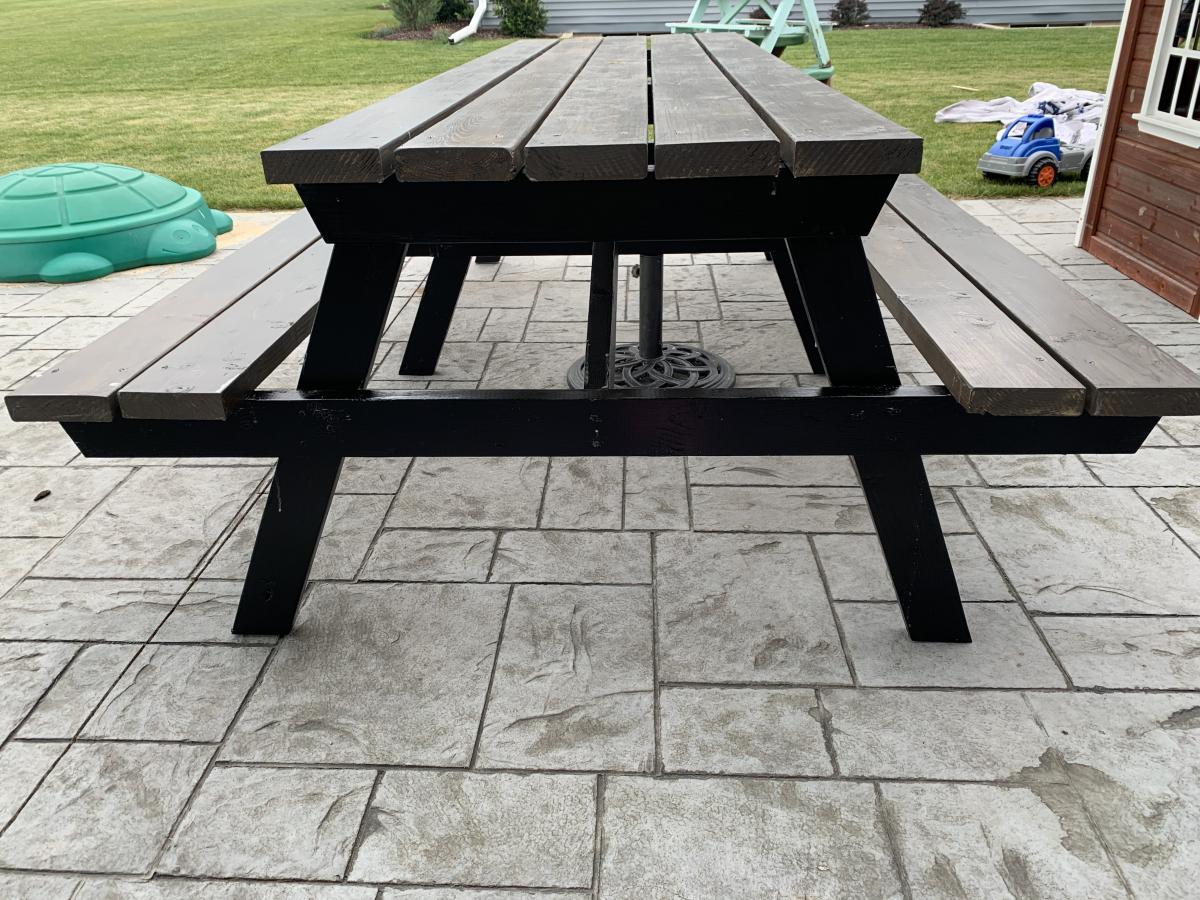
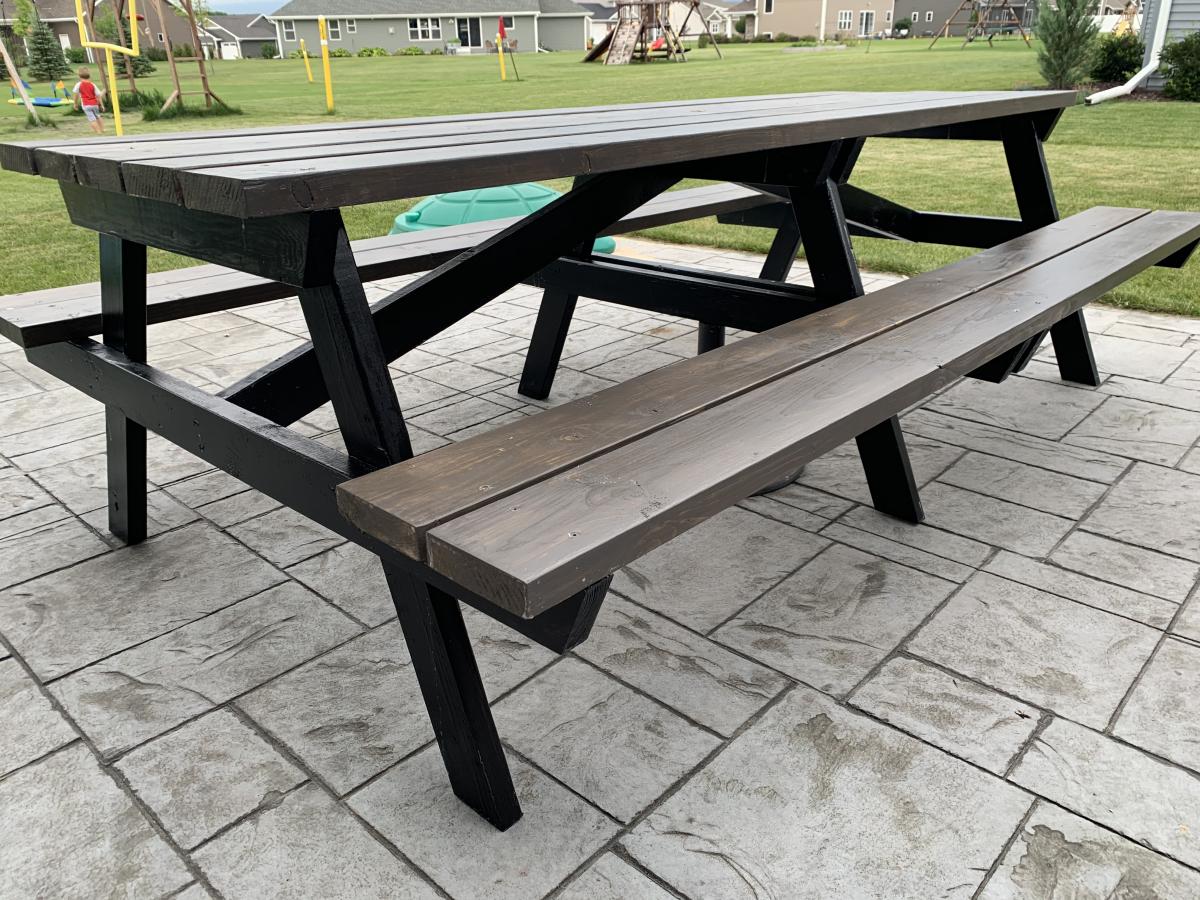
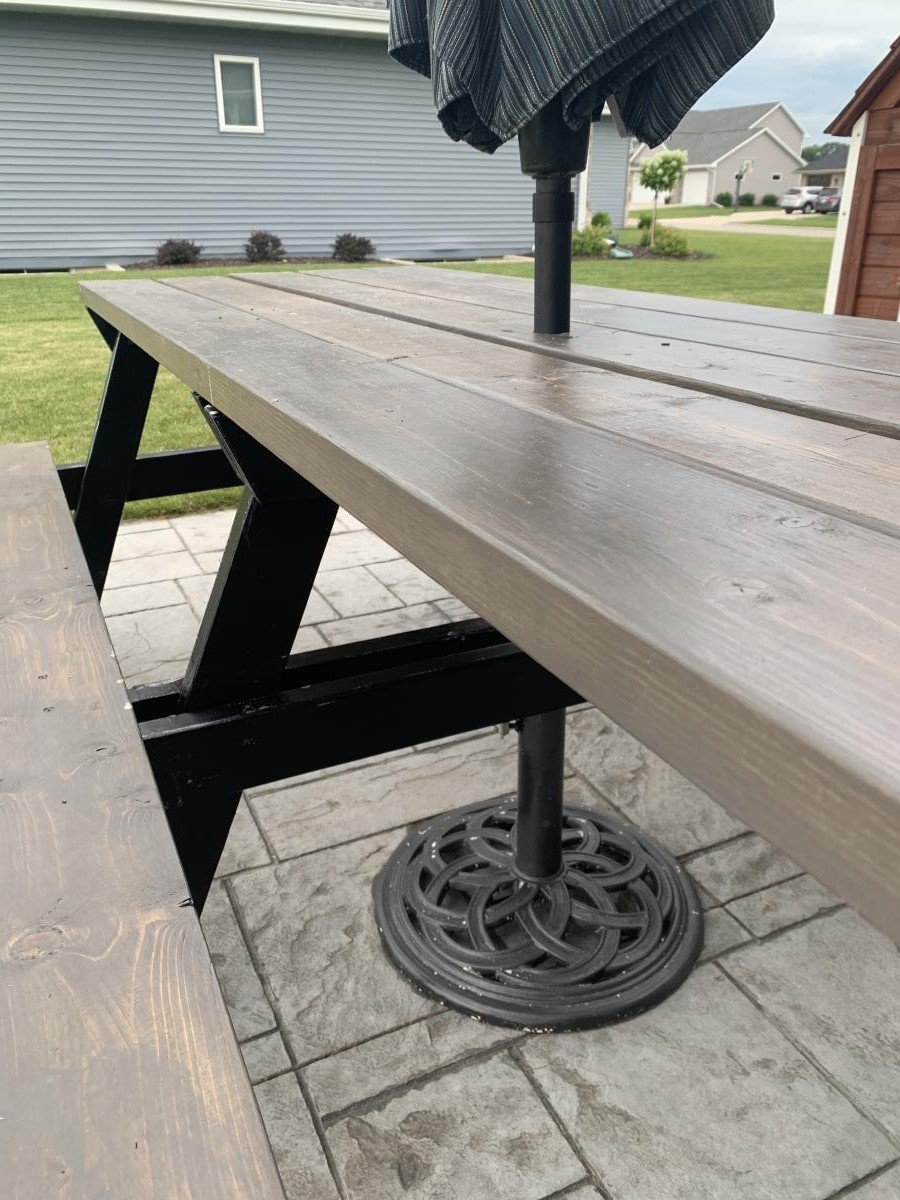
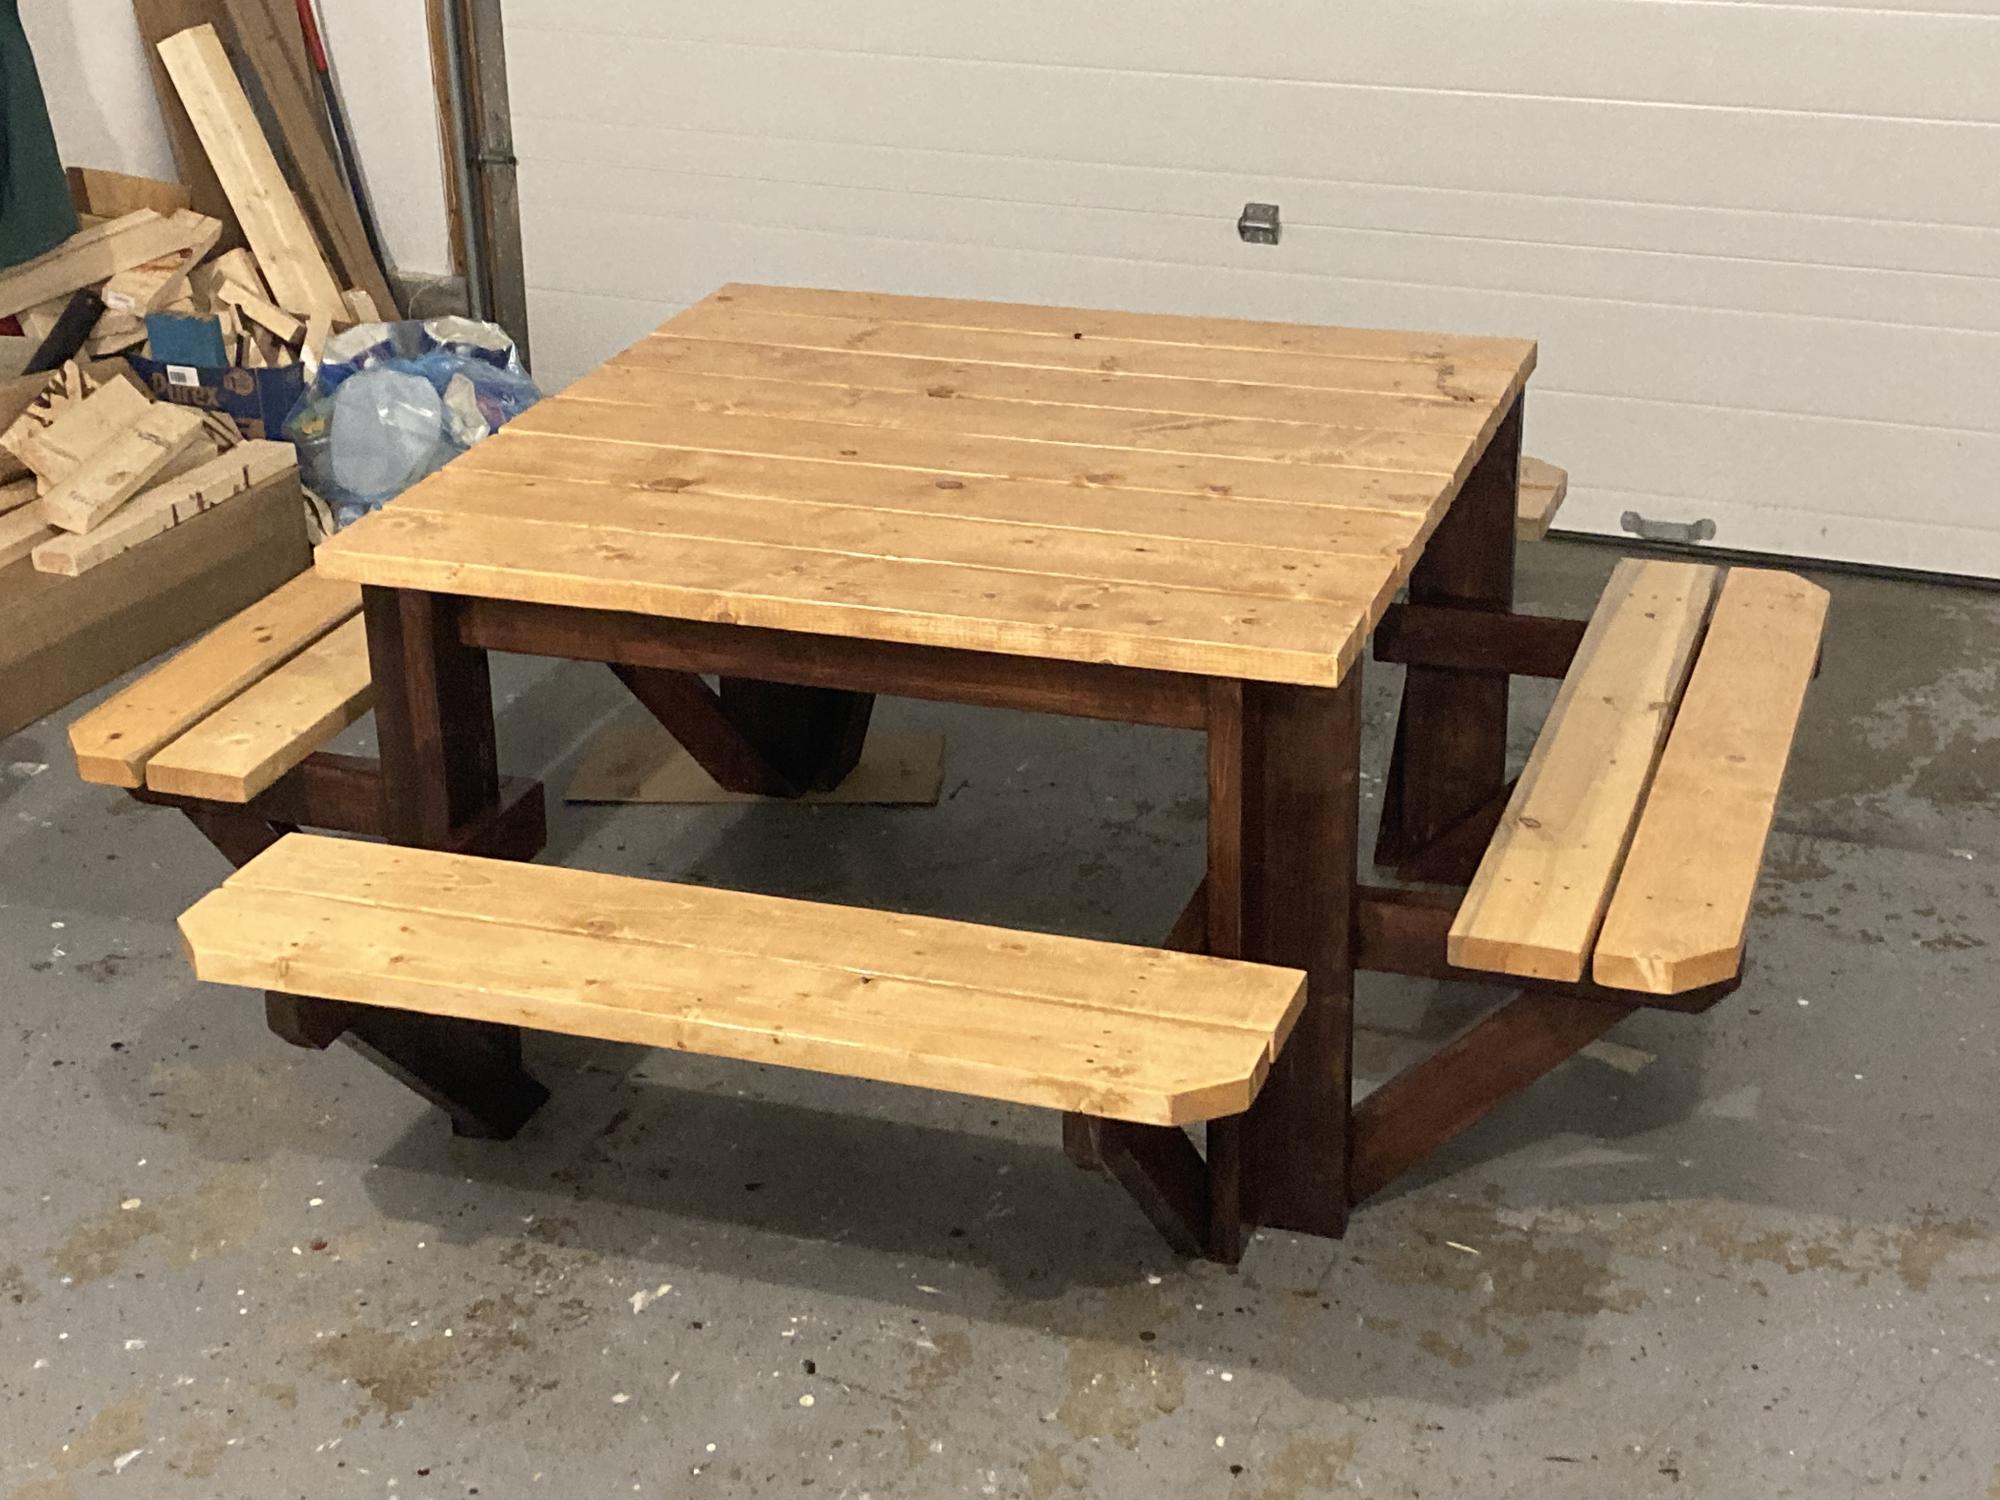
This picnic table was a quick build and turned out amazing. I modified the center base support by adding an extra table top support and seat support board to the opposite side of the center legs to give the table symmetry to accommodate an umbrella hole. I also shortened both cross supports by an inch to make sure the base wouldn’t be longer than the top boards. The space between the center table support boards and seat support boards is the perfect size to fit a standard umbrella. I used a 1 3/4” hole saw to make the umbrella hole. The build and stain/paint took me about 5 hours but additional time is needed to properly seal the table. I used untreated pine. Treated pine may give the table longevity but it would also add a lot of weight to an already heavy table. This was a relatively easy and quick build and is a great size to fit my whole family plus a couple guests! I’m happy with how it turned out and would recommend this build to anyone looking for a budget friendly and simple patio table.

Sat, 07/18/2020 - 13:17
Thank you Abby!!! Your picnic table turned out amazing, I love the added umbrella modification!
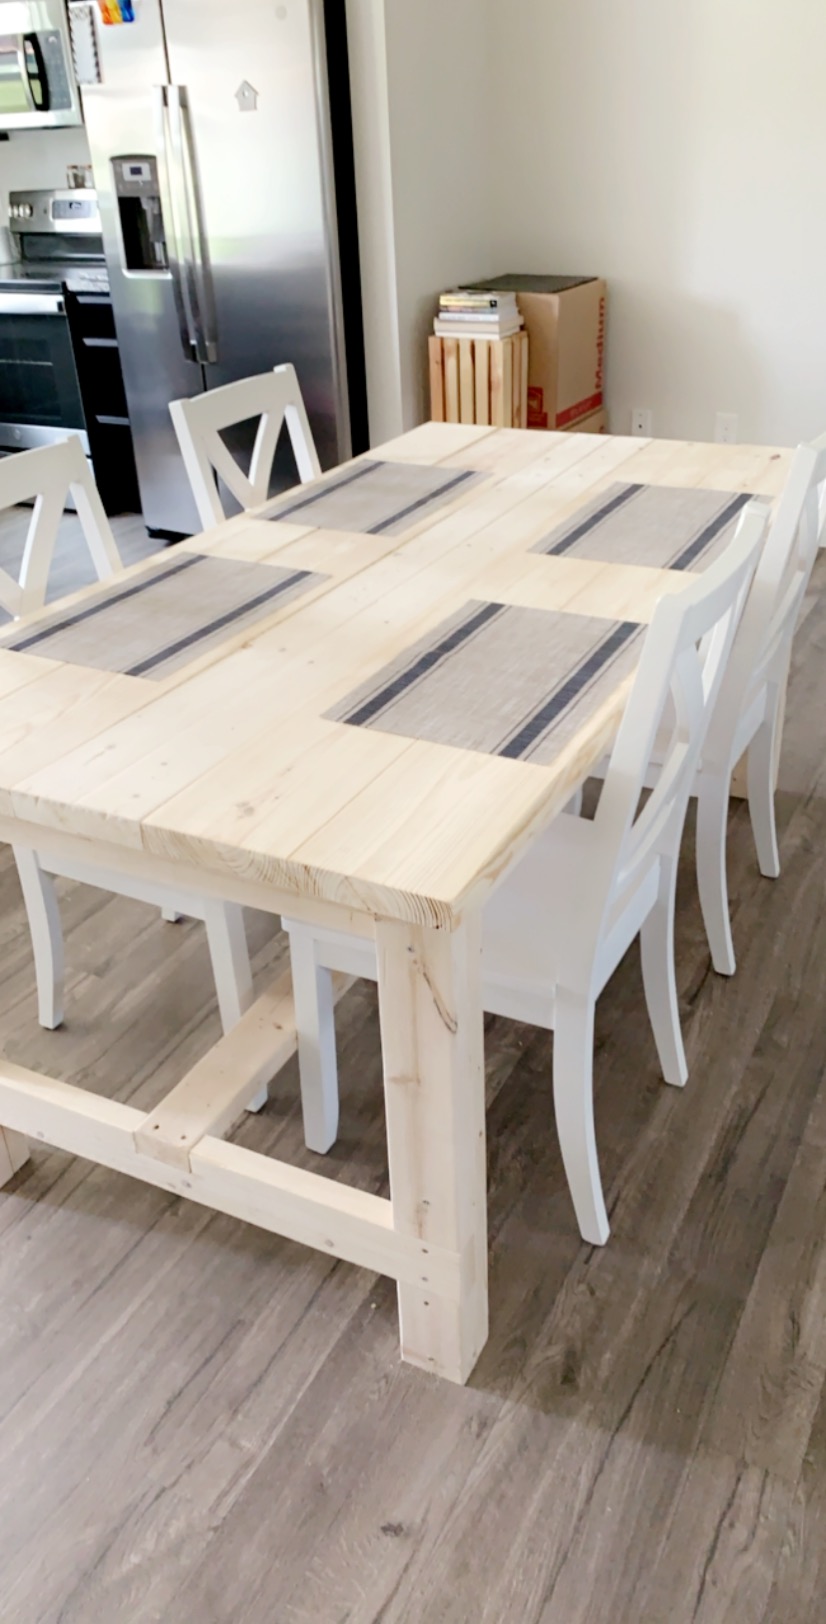
Had to make modifications for size, errors, and personal preference, but we love this table! Still deciding on all white paint or a 2-tone finish. Also- first time using a Kreg jig. What an amazing tool.
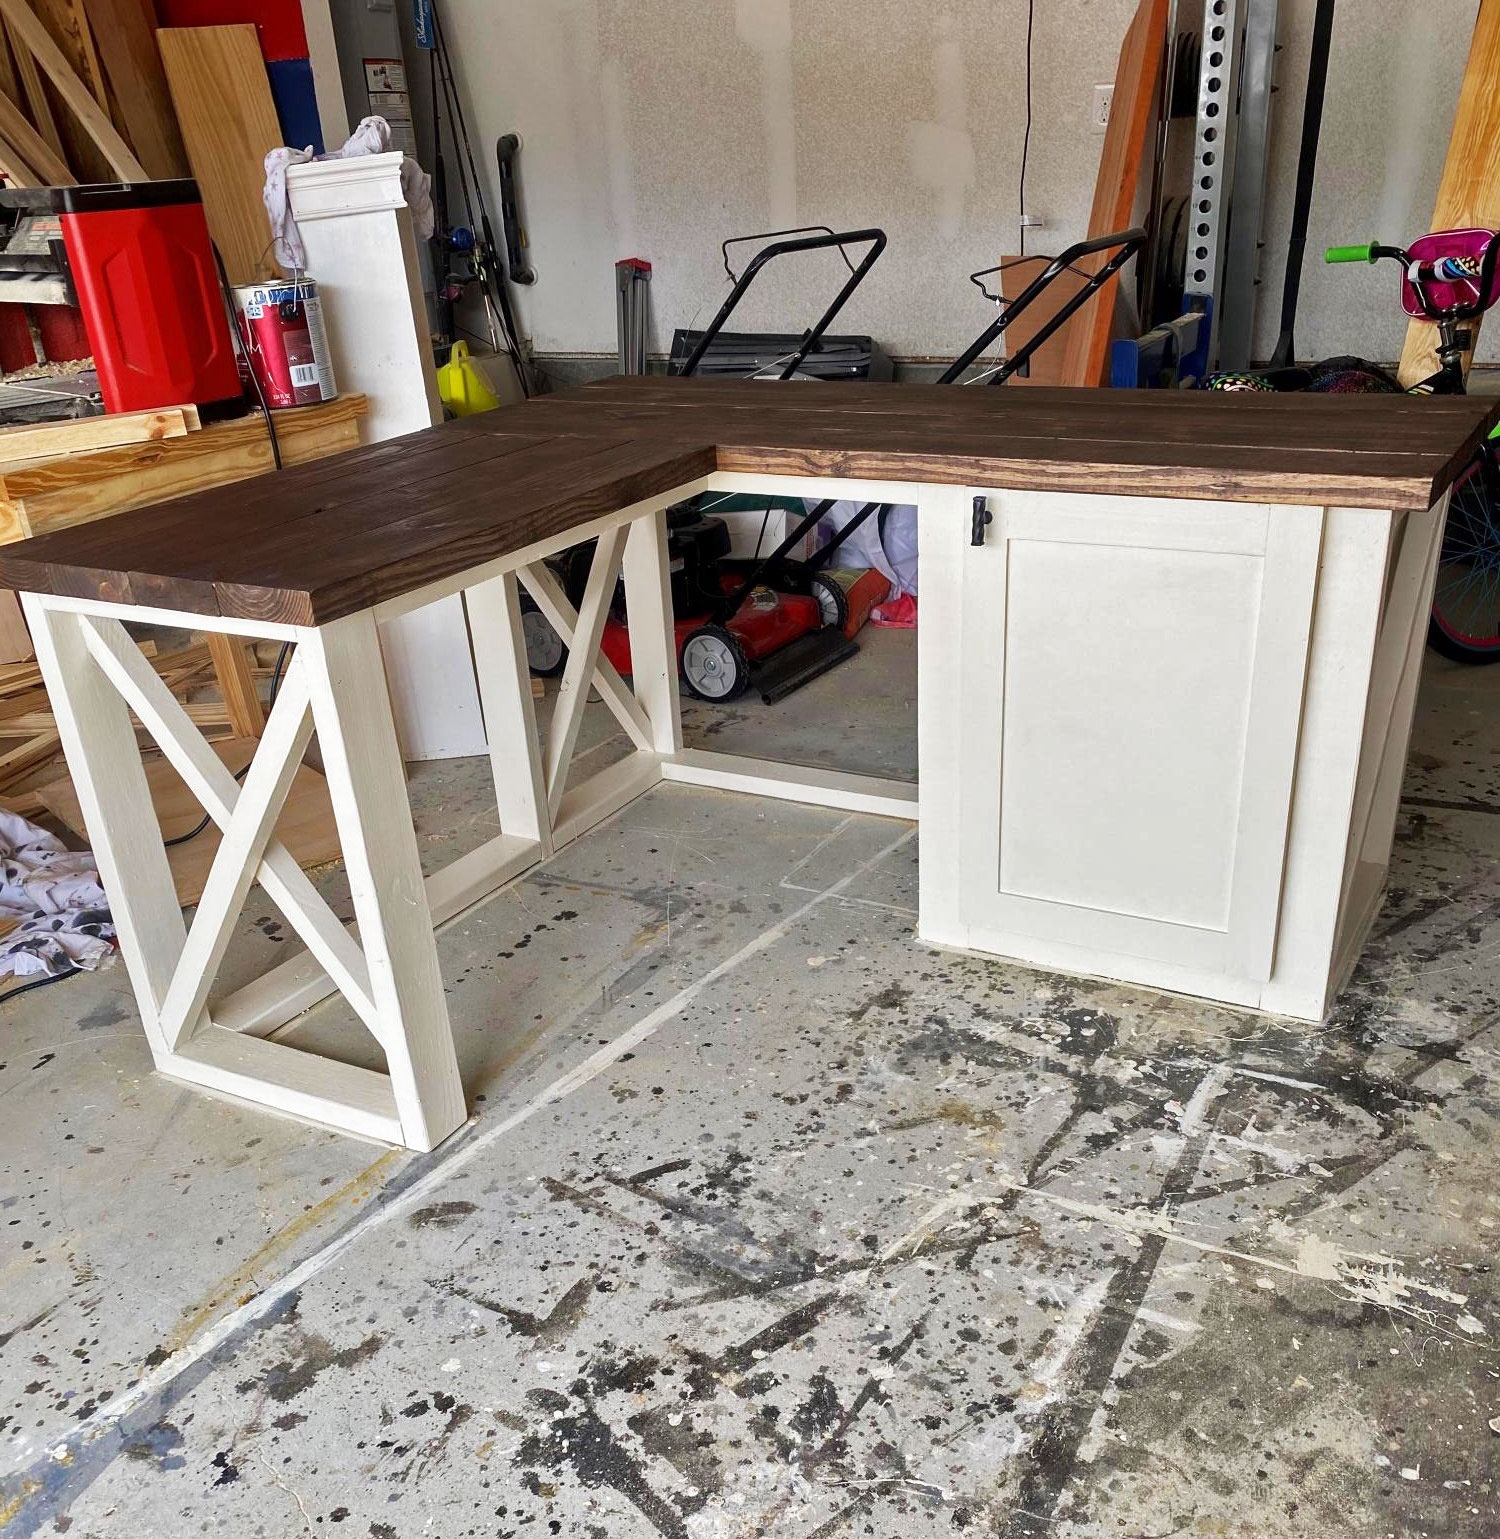
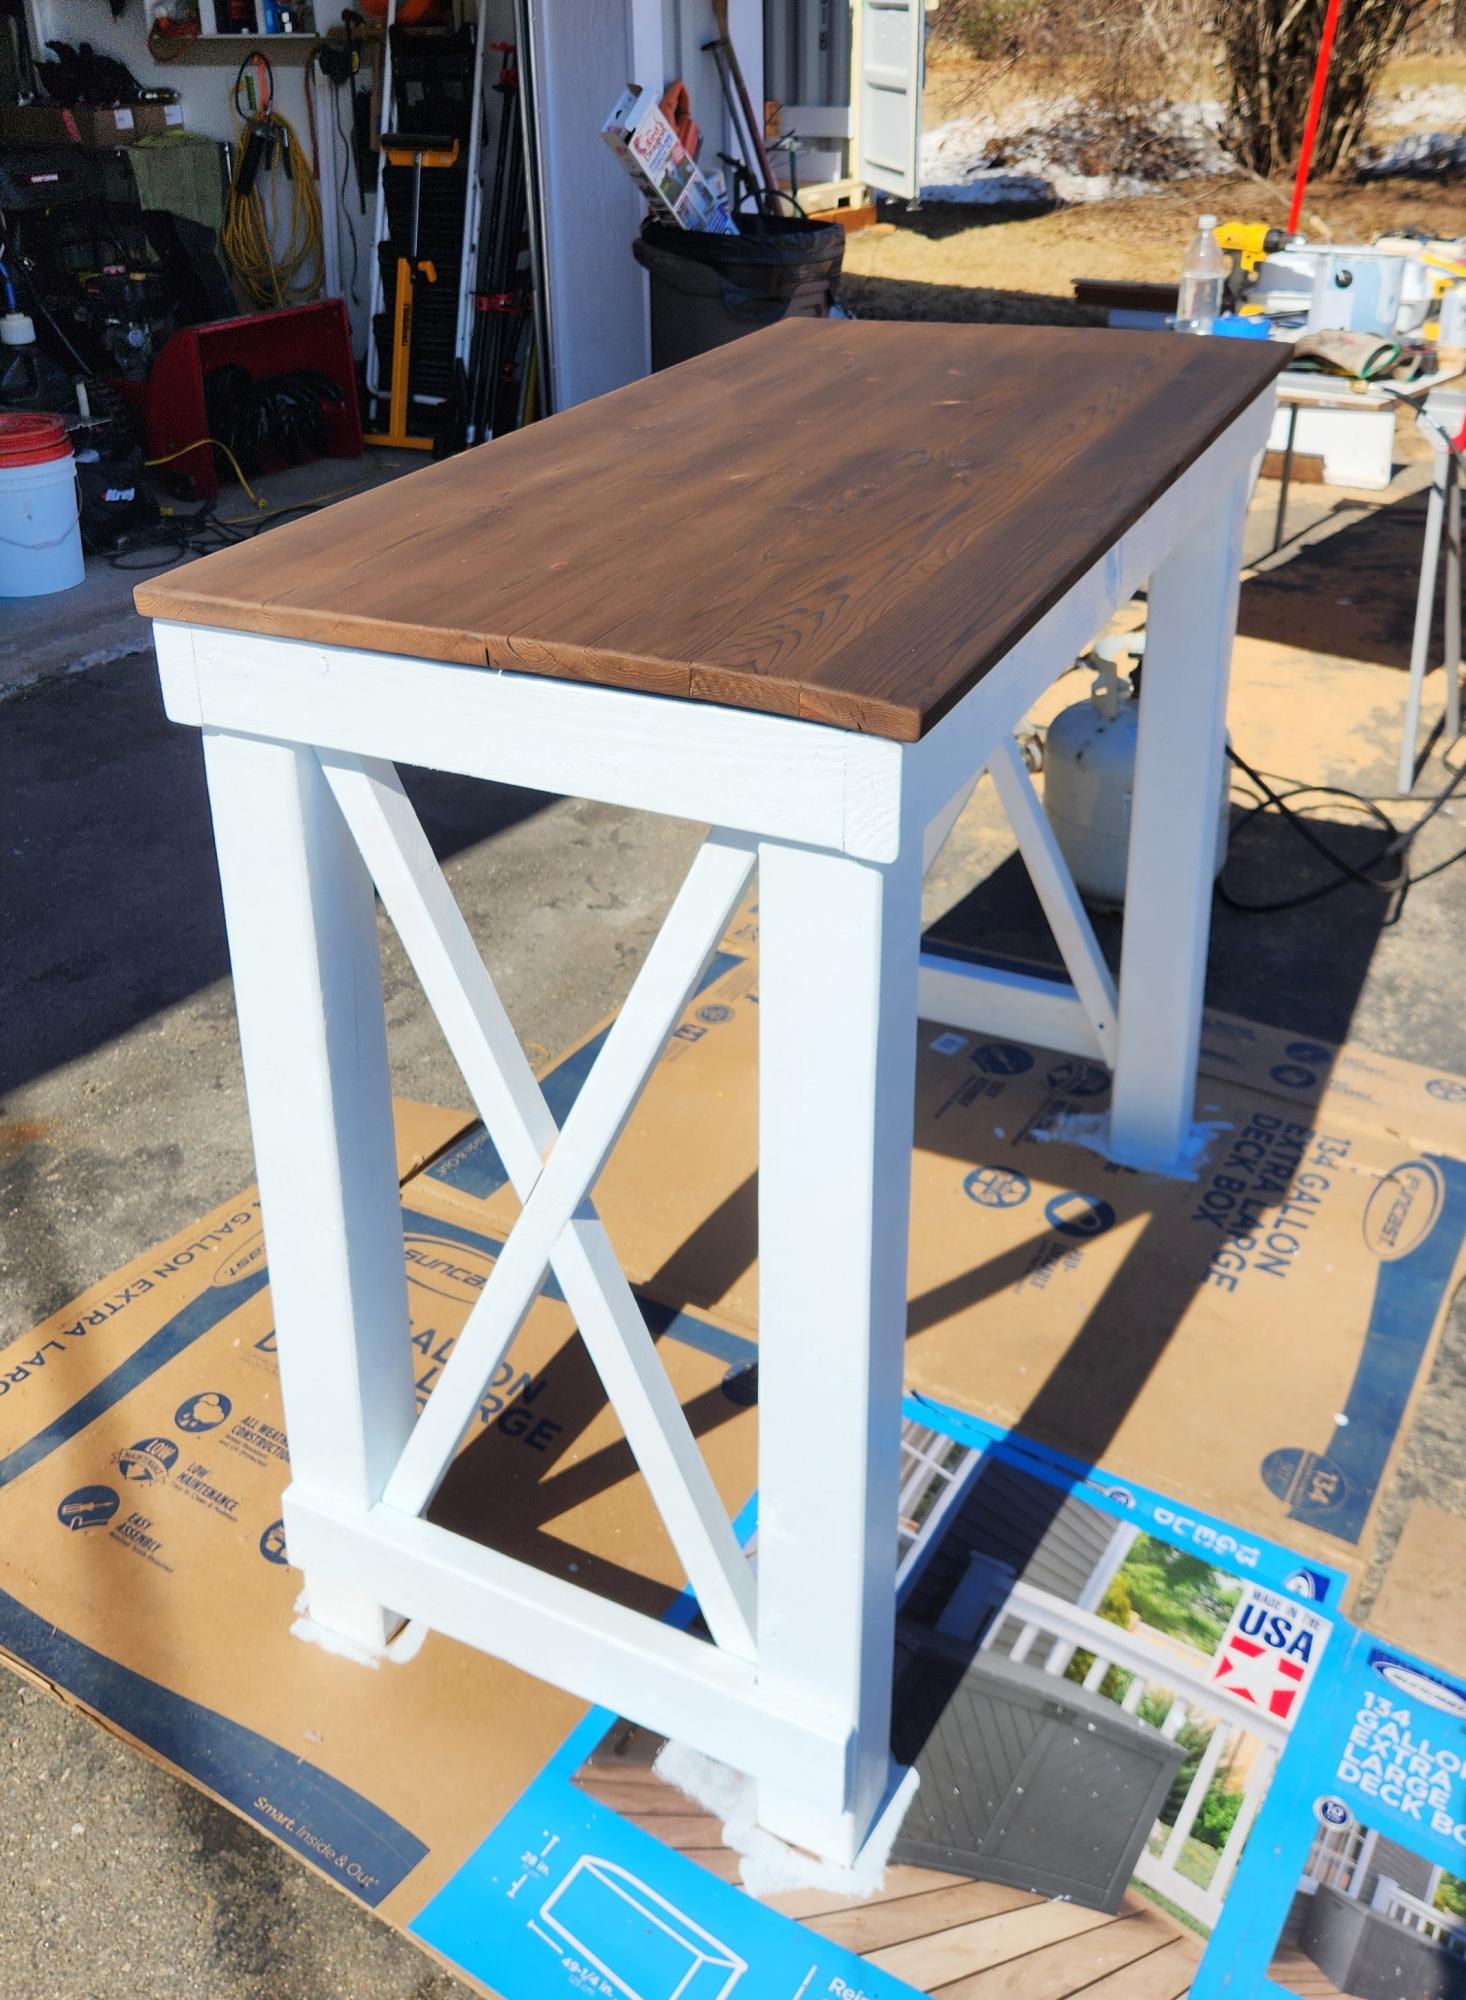
Put a twist on the farmhouse desk plans
Wed, 12/09/2020 - 11:03
This is beautiful, love the finish! I would love to see it in it's space!:)

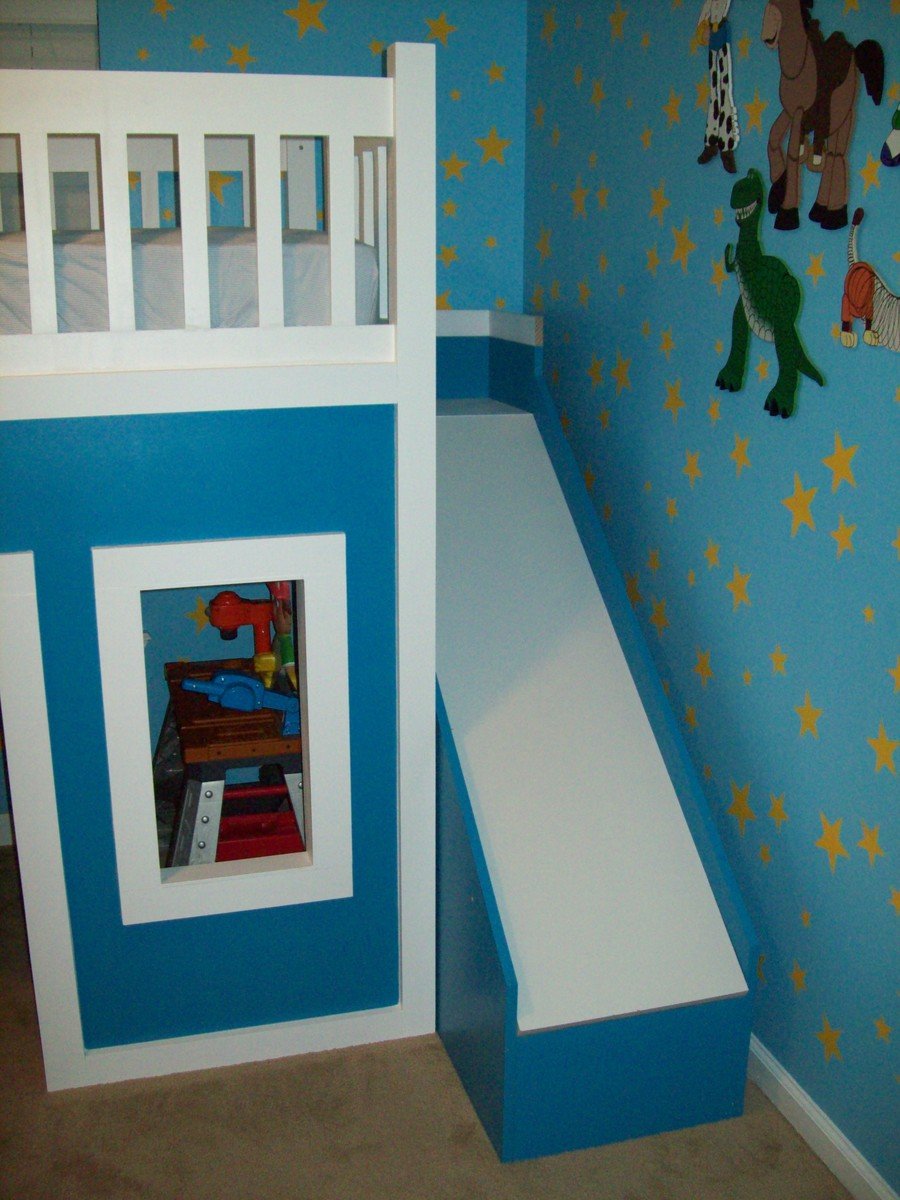
My son was about to turn 3 and I really wanted to redesign his bedroom as a birthday surprise. We went with a Toy Story themed room, he just loves Toy Story.
I started off by painting the walls blue with yellow stars like Andy's room in the movie. I added some custom painted art work and then it was off to find a cool playhouse bed. My husband and I were shopping around and we could never really find what we were looking for in the store. So we decided to build one ourselves using plans from this website.
I used the playhouse loft bed and the playhouse loft bed stair plans, for the bed and the stairs. I used the castle loft bed plan as inspiration for the slide. The project took us about 5 weeks from start to finish. We both have full time jobs and we did most of the work on the weekends. I looked at each plan very carefully and made notes. I had to modify the stair plans slightly to fit the space where we wanted to put the bed. The stairs look narrow, but they work just fine. My husband and I can both use them to get up in the bed. The stairs feature hinged stair tread with built in storage. We built them like that at first, but then later decided to make them stationary stair treads, with plywood. I didn't like the way the hinges looked and the top stair was so deep that I was worried my son would fall in there and get stuck. The storage idea was neat, but his safety was more important to me. The bed turned out really nice and VERY sturdy. Both my husband and I are able to get up there with my son (not at the same time).
Another modification that I made was instead of slats to hold on the mattress, I used a piece of plywood. I wanted the roof in the playhouse to look finished, and I didn't want to see his bedding hanging down from the slats. I painted the top of the plywood white, where the mattress goes to blend in with the slats, and the other side was painted blue to match the walls inside the playhouse.
I did modify the playhouse front facade to have 2 windows and one door. I like the symmetrical look. The total project cost about $400. I used birch plywood and select pine boards, and about 6 quarts of paint. I noticed AFTER we had finished the bed using the birch plywood, that Home Depot had cabinet grade plywood on a random end cap, that was just as nice for $12 less a sheet. If I could do it all over again, I would definitely use that!. I wanted the paint to have a nice smooth finish, without having to do a lot of sanding or patching.
We had Home Depot cut the plywood to the dimensions we needed. I had my husband cut the rest of the wood dimensions listed in the plans, and then I painted all of them before we put the pieces together. I used a small roller and self priming paint. The paint finish looks great. After assembling the bed I can not imagine what I would have gone through trying to paint it after the fact.
The slide was a bit tricky, I looked at the plan for the castle loft bed and attempted to use those dimensions, and for the most part they worked. But when we went to assemble the slide, we did end up recutting some of the wood to different dimensions. I used a piece of the melamine coated closet shelf material for the slide.
It is already finished in white and its nice and slick, like a slide should be! I hate MDF, but for this it seemed the best fit. We cut the top edge at an angle to meet up with the slide platform. PLEASE BE CAREFUL with this material. After it was angle cut the edge was razor sharp and I sliced my fingers up. Once it was installed it butted up perfectly to the slide platform, and the edge was hidden and not a danger. But use caution during the install.
Clamps are your friend! We used Kreg clamps for everything. They kept the wood in place while we were screwing the parts together. The coolest thing that my husband came up with was clamping two identical pieces for plywood together, and drawing the template for the slide support walls. Then he used his circular saw to cut them out. We ended up with two mirror image pieces. They looked awesome. I left them clamped together when I sanded the edges as well.
We really didn't have any building experience other, than building tables and chairs for children, We got the deluxe Kreg jig kit and a miter saw on Craigslist for $50 each and they were both practically brand new. This was the first time we had ever used a Kreg jig and we are both addicted. That thing is the bomb.
We locked my son out of his room for a week while we assembled everything. We had the big reveal at his birthday party and all of the guests were excited to see it after seeing my facebook teaser posts of our progress. There were 8 kids up there at one time and the bed did not budge. They all enjoyed the slide. I did the planning and paint and my husband did an awesome job making all of the cuts and sanding everything. We are both very proud of the final product. My son love his new big boy bed.
DISCLAIMER: This bed is not recommended for a child under 6 years old. My son is mature for his age and we monitor him carefully.


Mon, 01/21/2013 - 12:41
This bed is awesome. My boyfriend and I want one just like this for are son. Did you happen to write out all your dimensions? I would love to make this bed for my son.
Mon, 10/20/2014 - 03:10
I also would like to know the finished dimensions of your project. What is the hight, length, and depth?
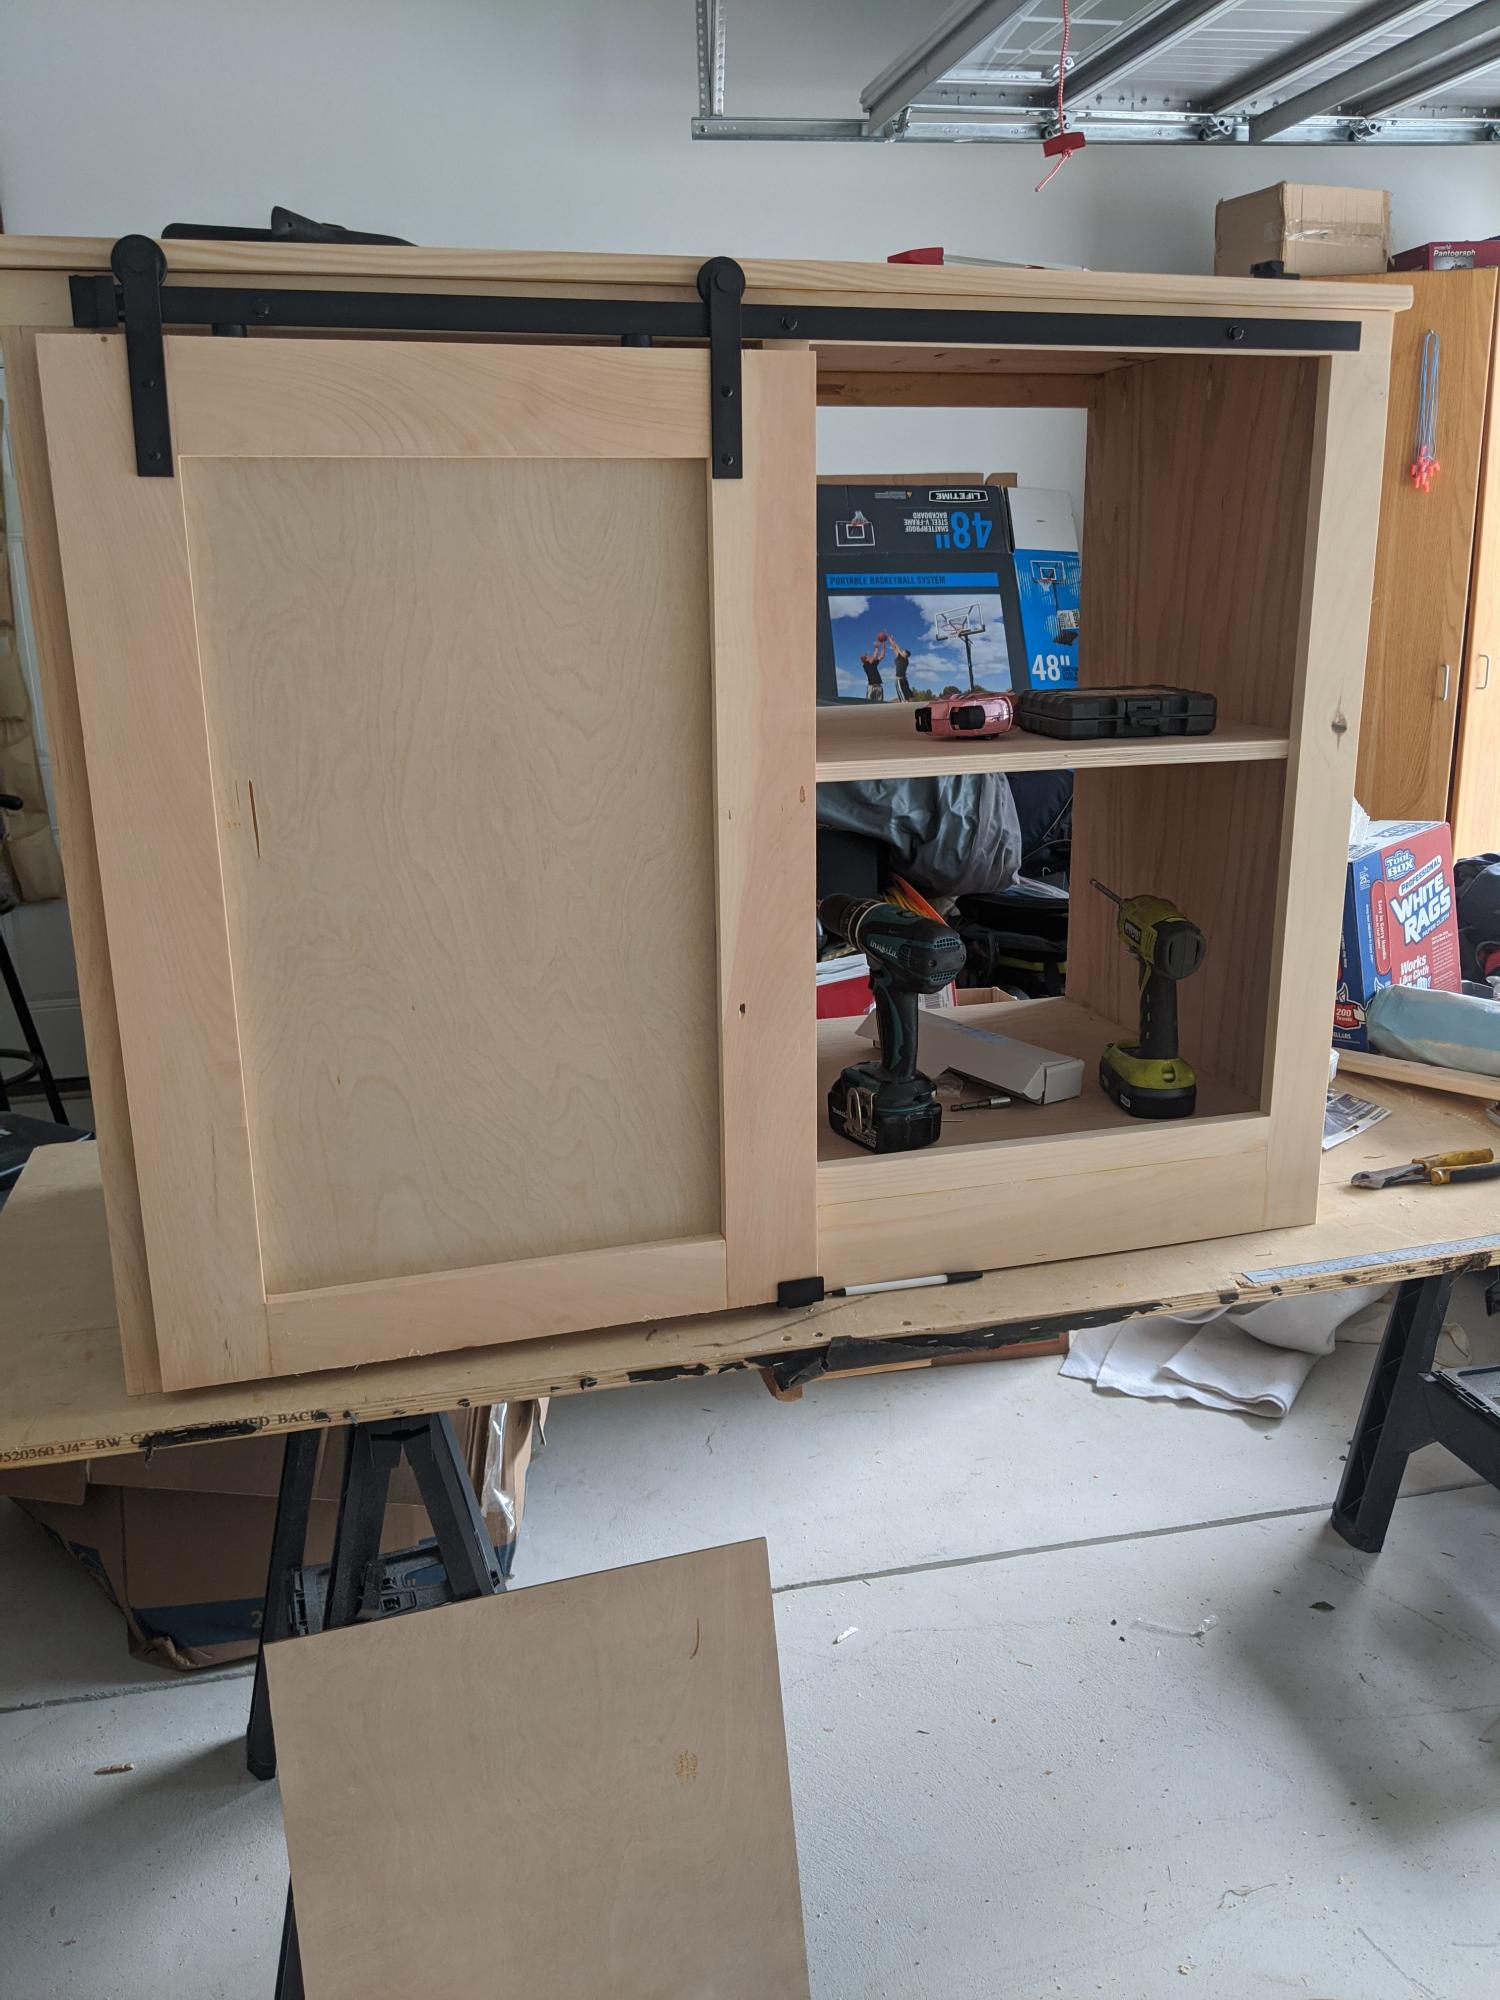
I was able to make this cabinet using your plans and it went absolutely flawless! Thank for all that you do!
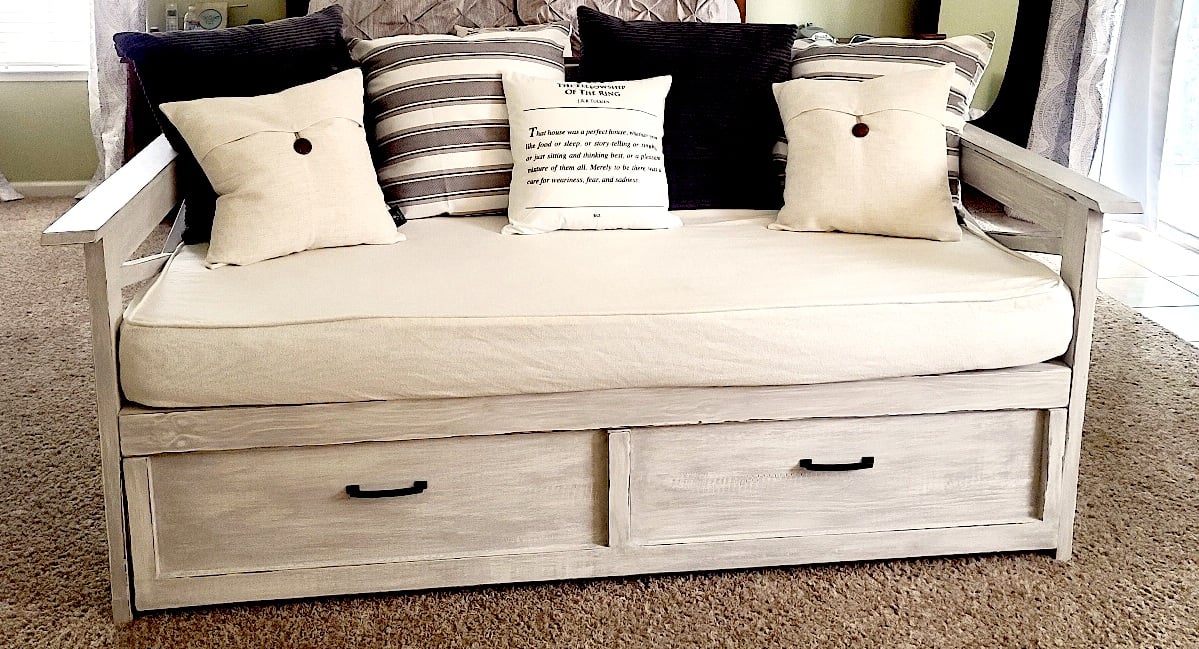
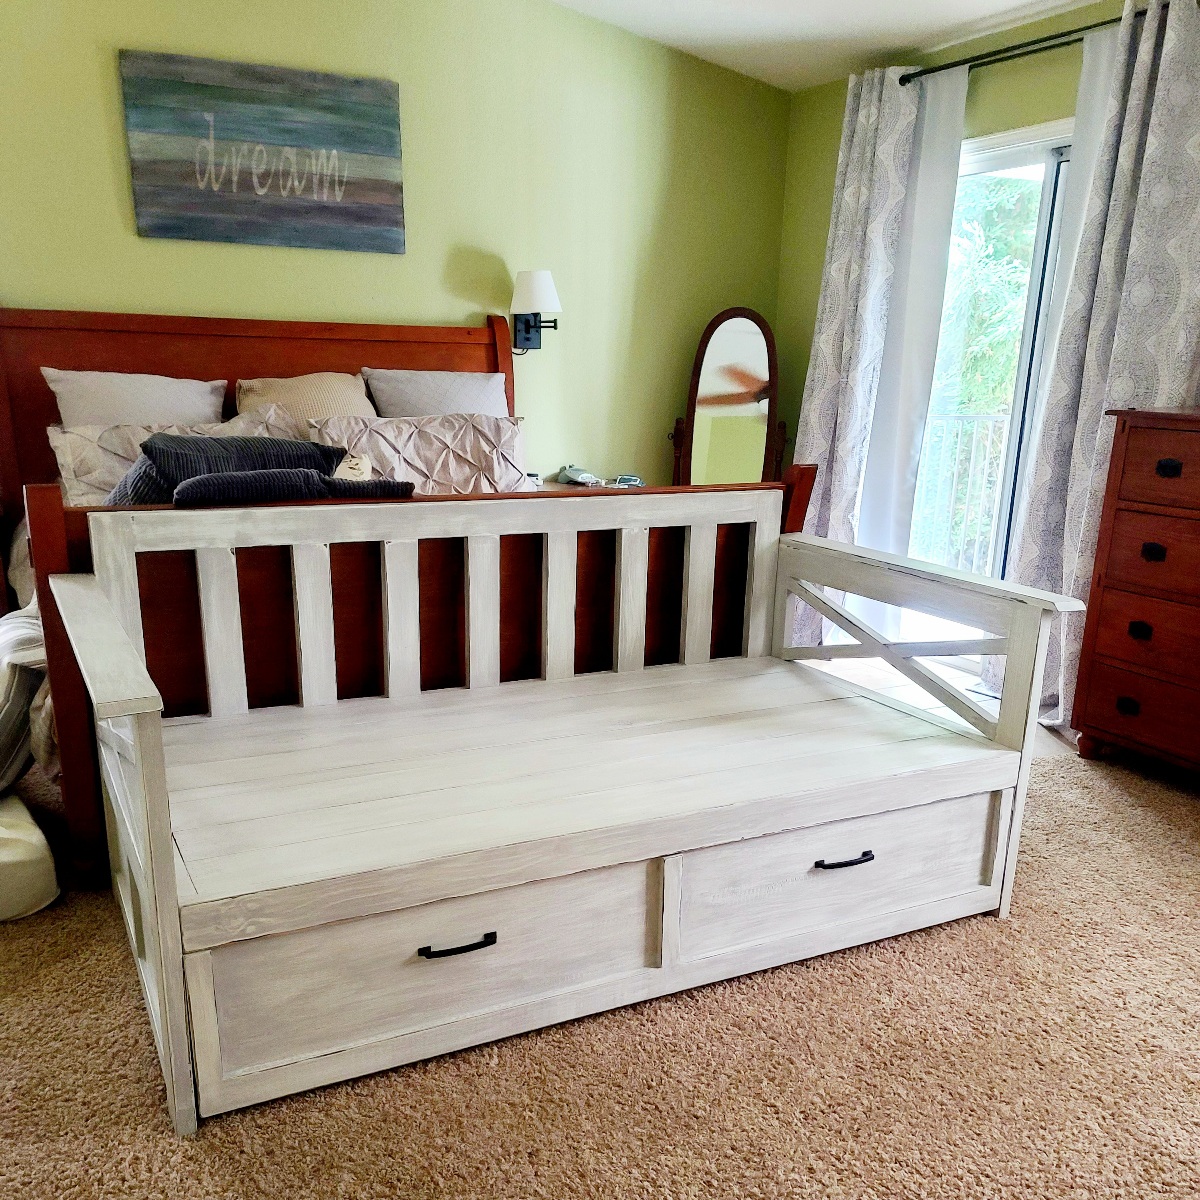
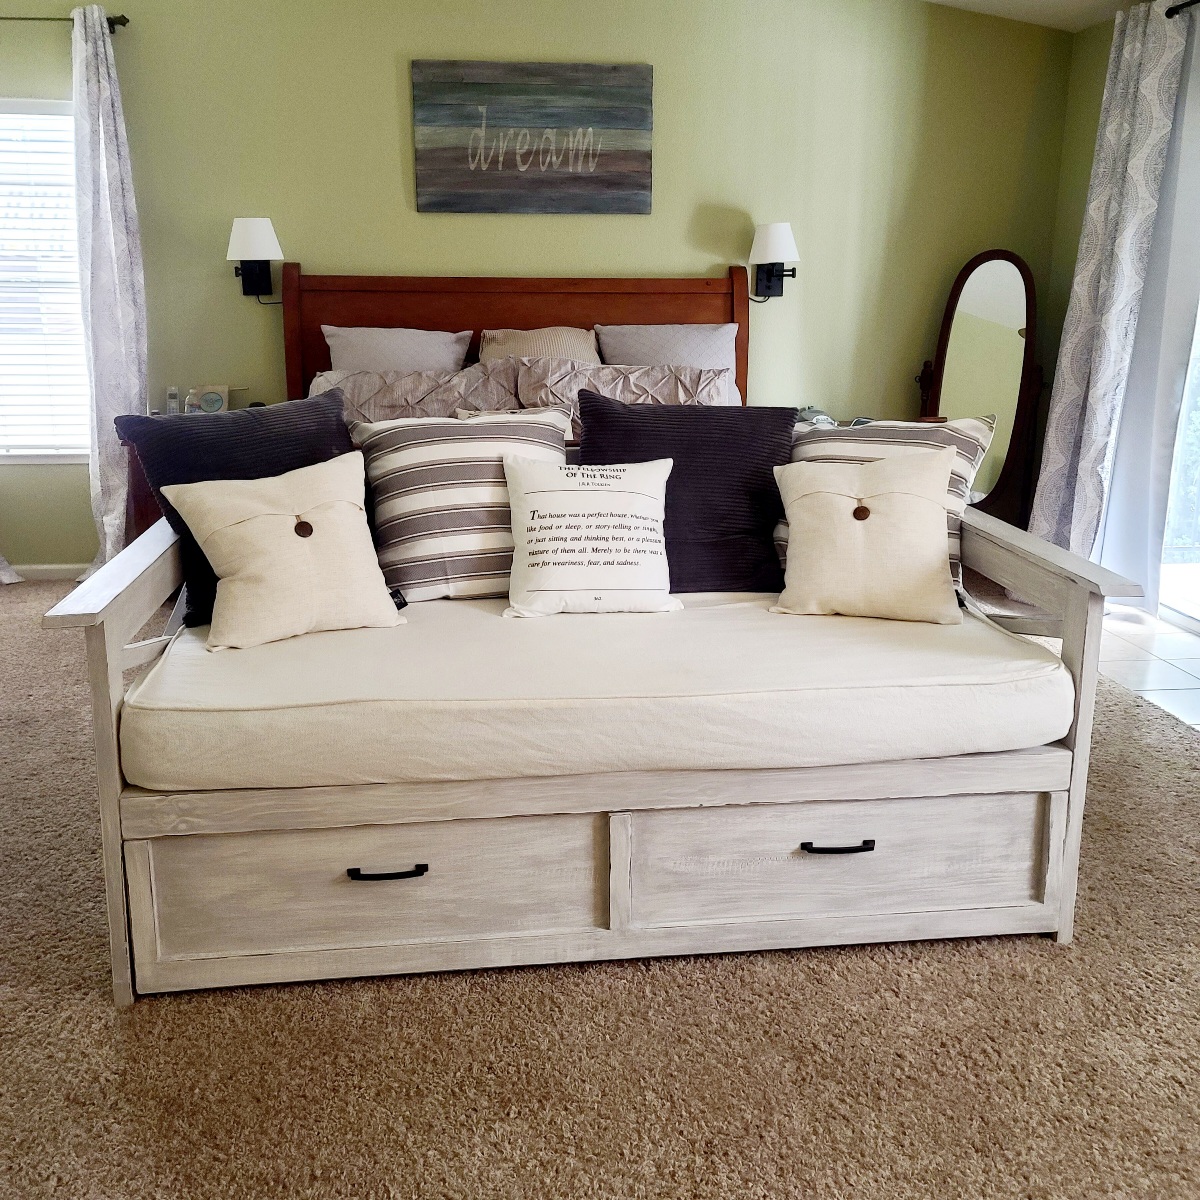
Great plans for a really useful storage daybed! I modified the plans to include a slat back and rustic x sides, as well as changing the Trundle drawers to a single drawer to fit my exercise equipment. I finished the daybed with stain and chalk paint in old white and Paris Grey distressed for the perfect shabby chic look!
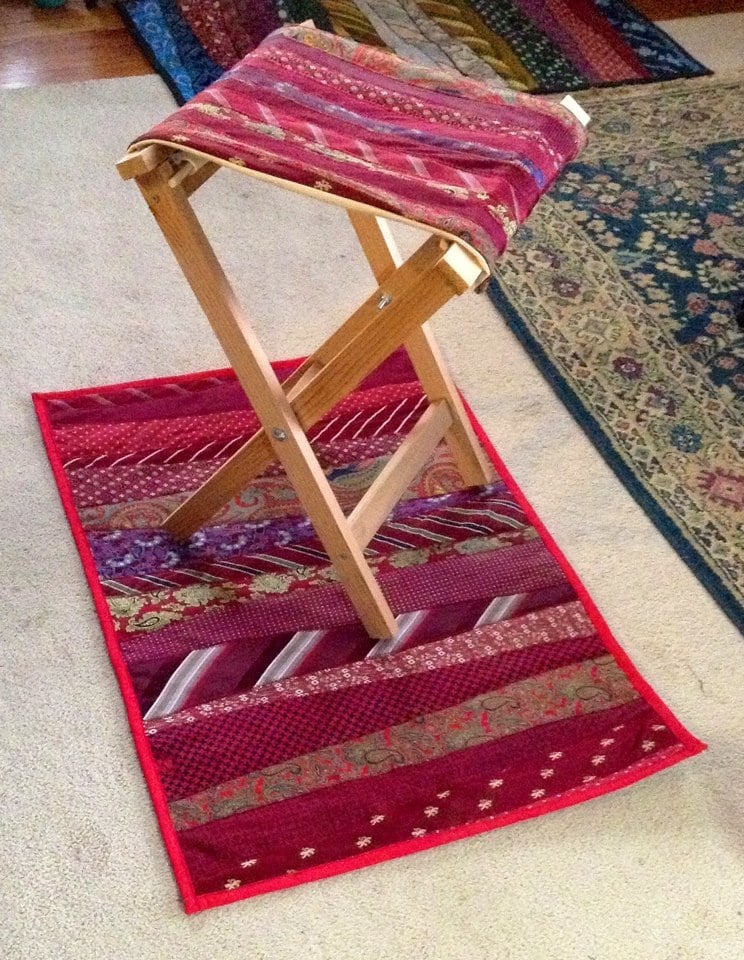
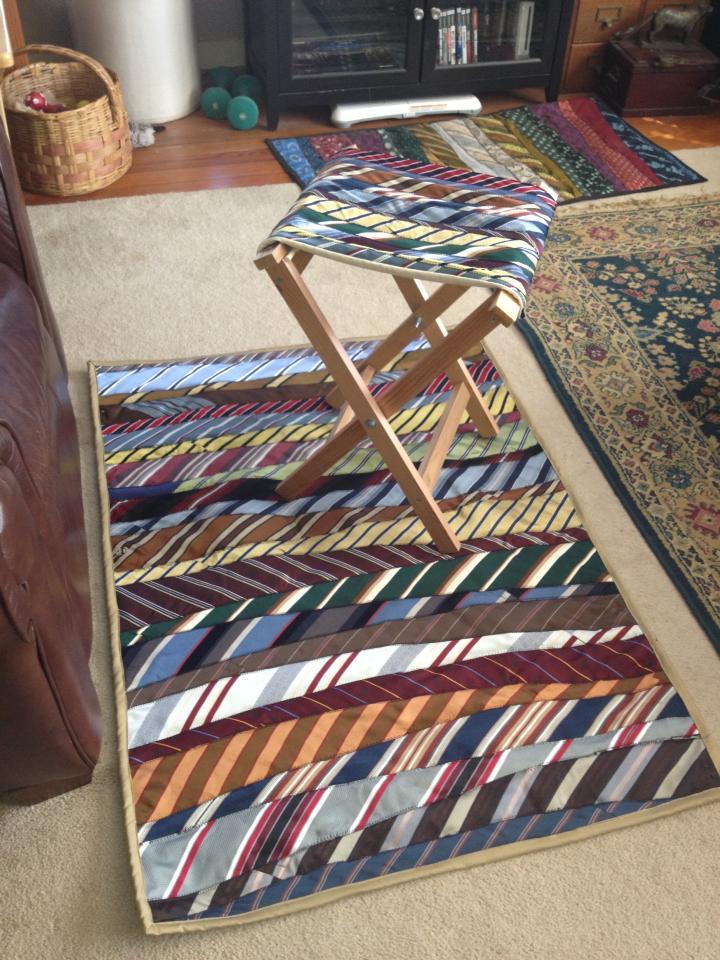
I zigzag stitched vintage neckties to plain canvas and used these directions to construct the stool frame. I used 1 5/8" screws.

Fri, 02/15/2013 - 19:23
Cool idea! Now I'm going to be looking for ties at rummage sales!
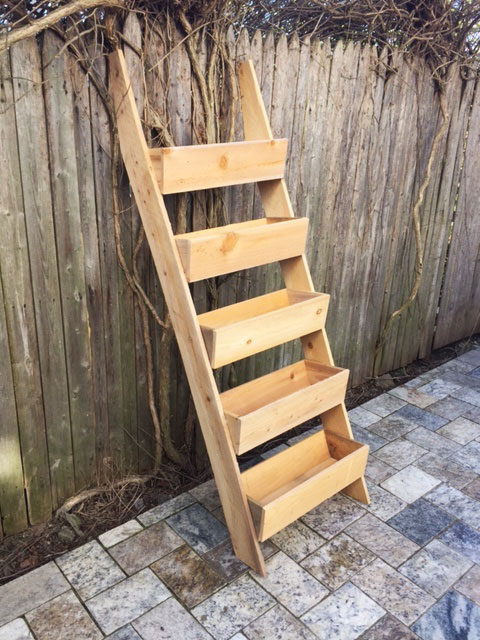
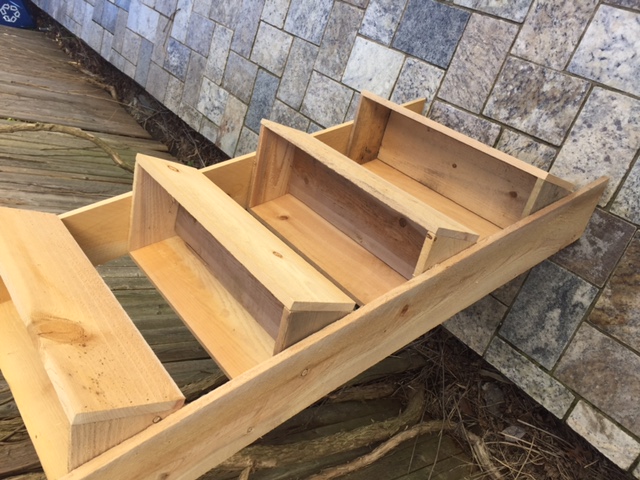
Instead of the 2X6, we used an additional cedar board to complete the sides and the ends of the planters. This was more cost effective and still provides enough support to hold the planters. This is a great alternative to the more expensive items we found online. We will be building multiple to put in an unused space in our yard. Great project!!

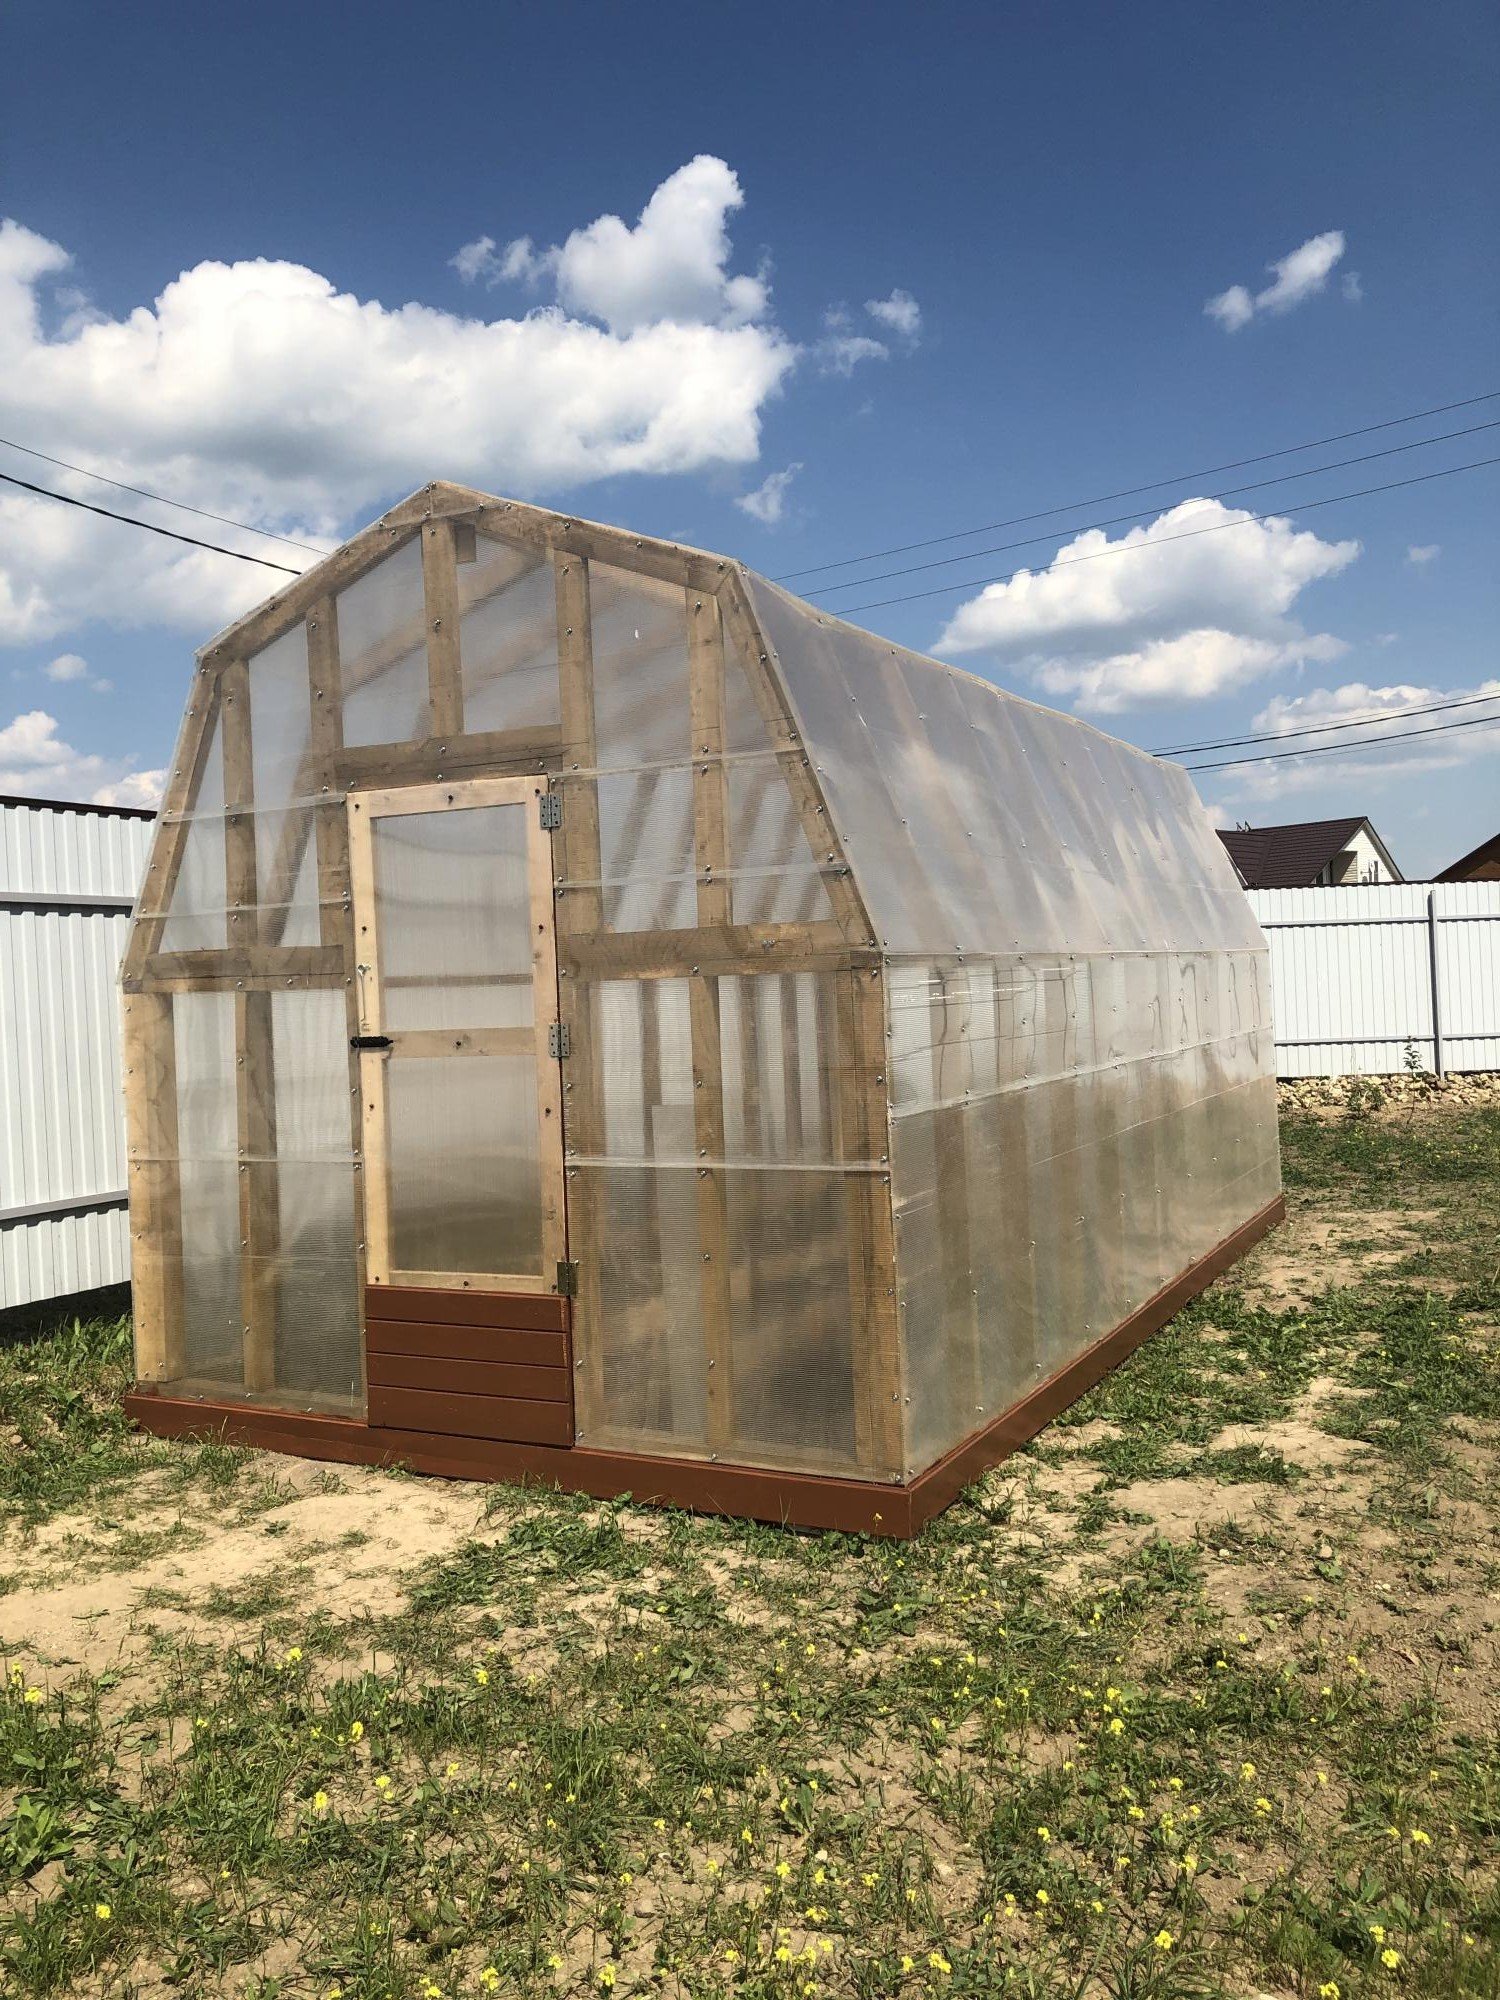
This was my first attempt at building a greenhouse. I wanted my cucumbers to be able t climb high so I made the house higher than the plans showed. It's also a little larger too. Since I am in Europe my dimensions are in meters. The overall size is 3 x 6 meters. I also built it on top of 100mm x 100mm lumber (the equivalent of 4x4's). It took 5 sheets of 6mm thick polycarbonate in 2 x 6 meters.

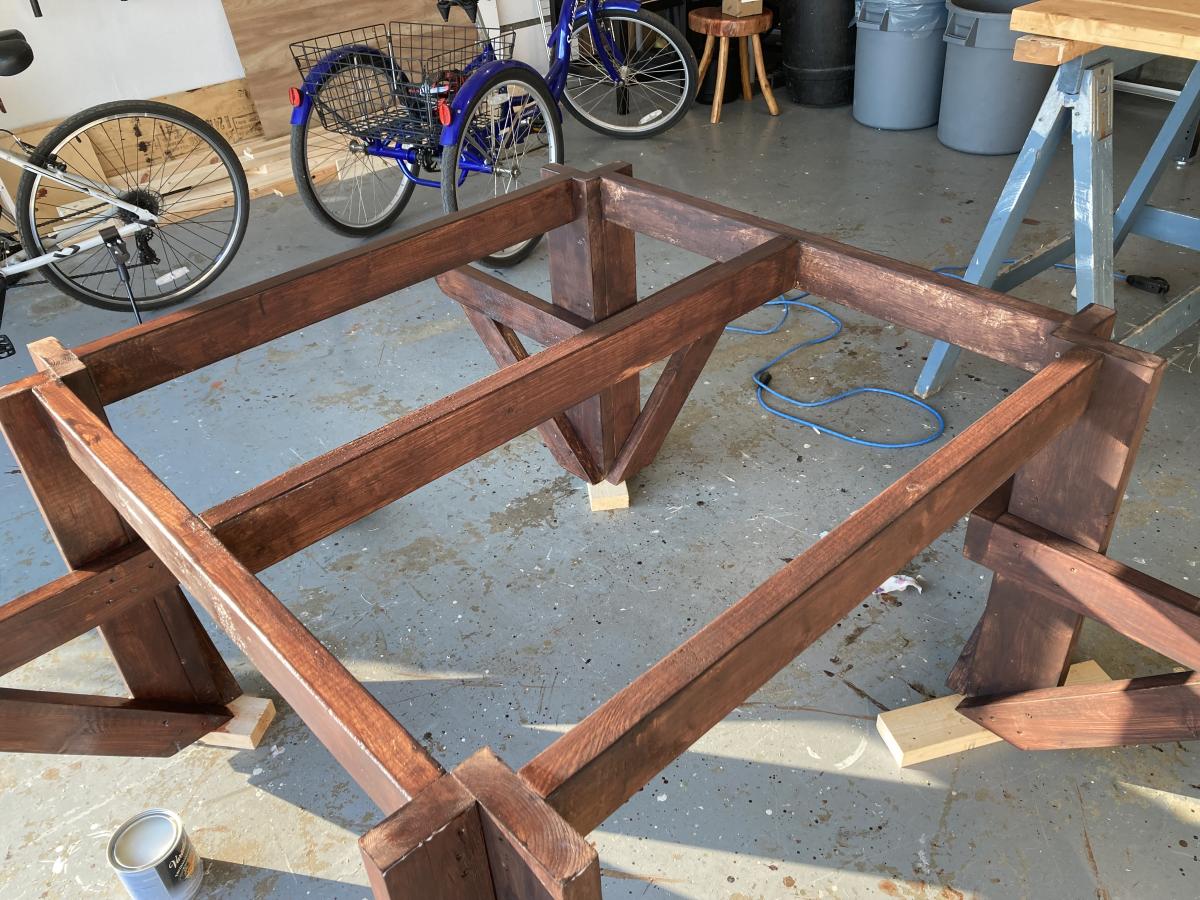
Enjoyed this project although with the price of lumber it was a little expensive to build. The only modification I made was to put a cross brace in the centre of the table top. That allowed me to attach the top boards a little more securely as some of them were a little bowed. I'll add a better photograph once I get it out of my garage and on to the back deck. It is a little heavy.
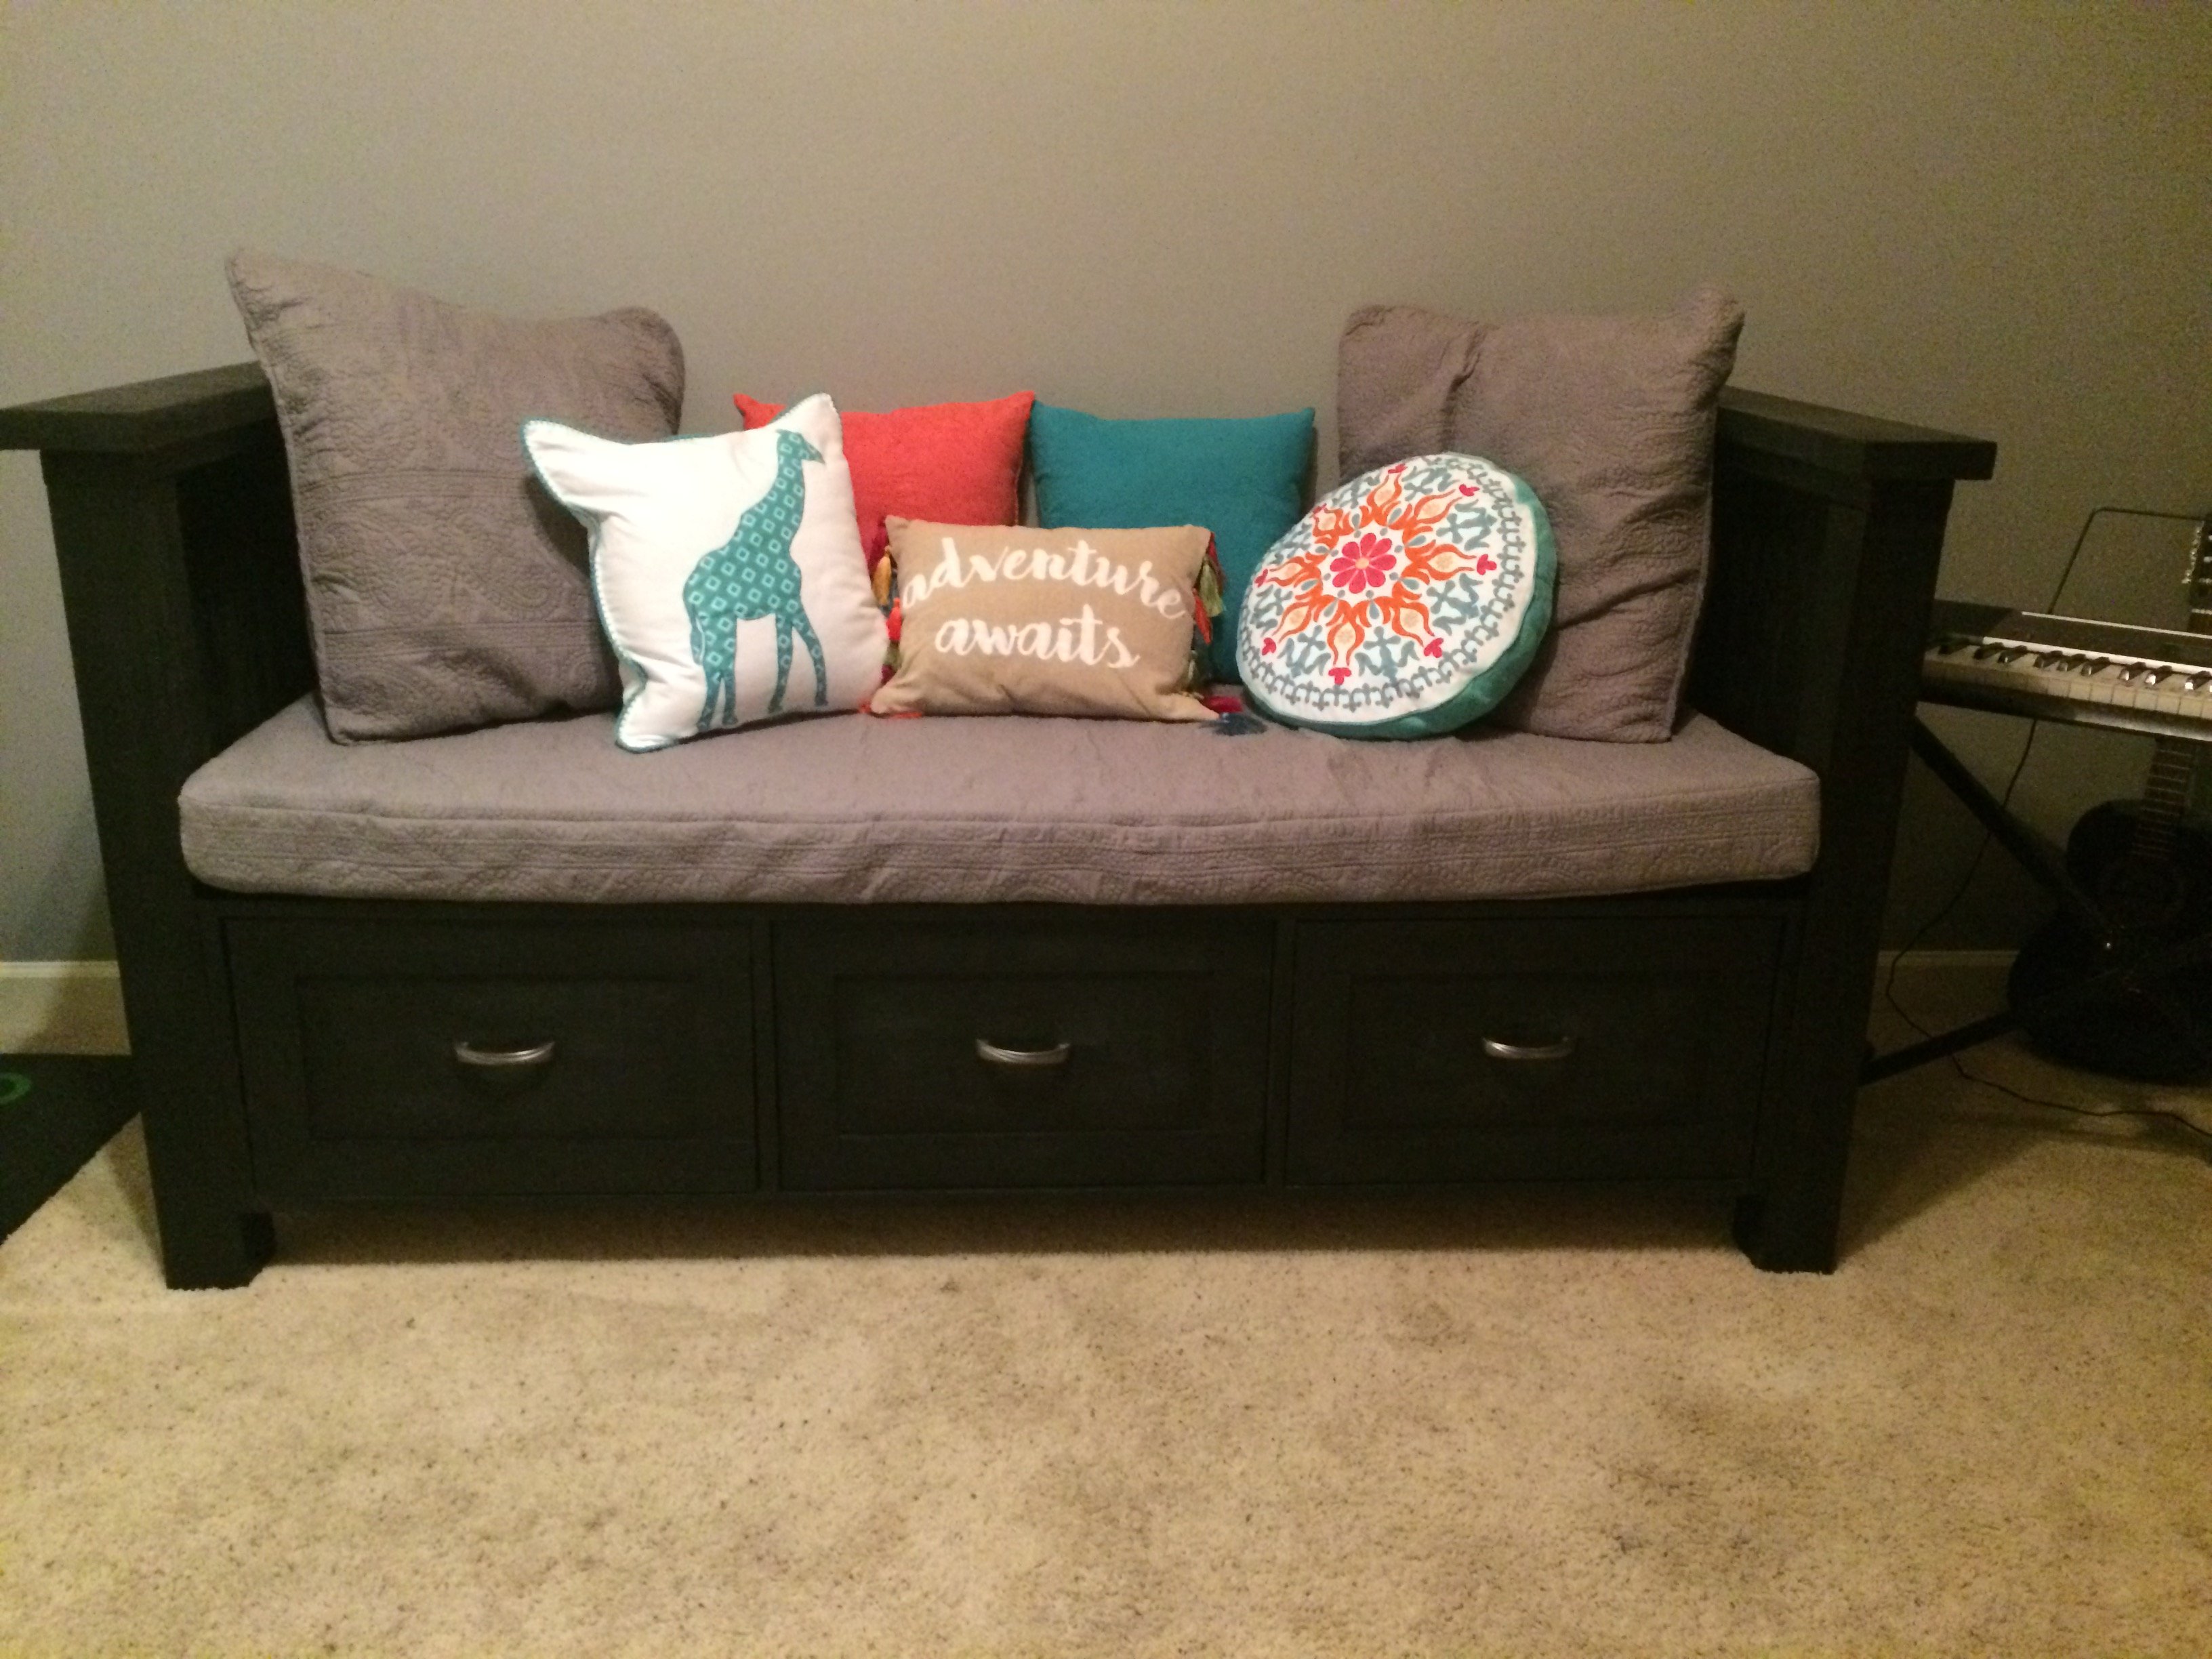
This was my 2nd woodworking project, so I was very pleased with the results. I wanted more seating and storage for my office area. I liked the look of the Farmhouse Storage Bed, so I decided to modify the plans and turn it into a bench. I made the seating area 30" wide and 68" long. Instead of headboard and footboard, I made 2 sides that were about 40" tall (36" 4x4 plus the 2x4 and 2x6). I made 3 24" deep drawers and left the back side open so that I can store electronics that need to be charged in them with the cords hanging out the back of the drawers. It was a lot of fun to make, and I know that my family will enjoy it!

After seeing the patio table with beer/wine cooler, I wanted to build this for my brother and wife who recently bought a house. I asked them if they were interested and of course they said yes. I modified the original plans by adding a 2x4 on each side of the cooler to make the table wider. I also made the legs out of 4x4 vs the 2x4s that were originally called for. I used redwood and then stained it and used a varnish for the final coating. I probably wouldn't use the varnish again for an outdoor table, because it looks like it should be an indoor table vs outdoor. Overall, I'm pleased with the results and the best part about it, I get to enjoy it every time I go over for a BBQ.


Wed, 07/03/2013 - 13:04
Awesome table, do you happen to have the measurements you used. I'd like to make the same table but I need the lumber yard to make the cuts.
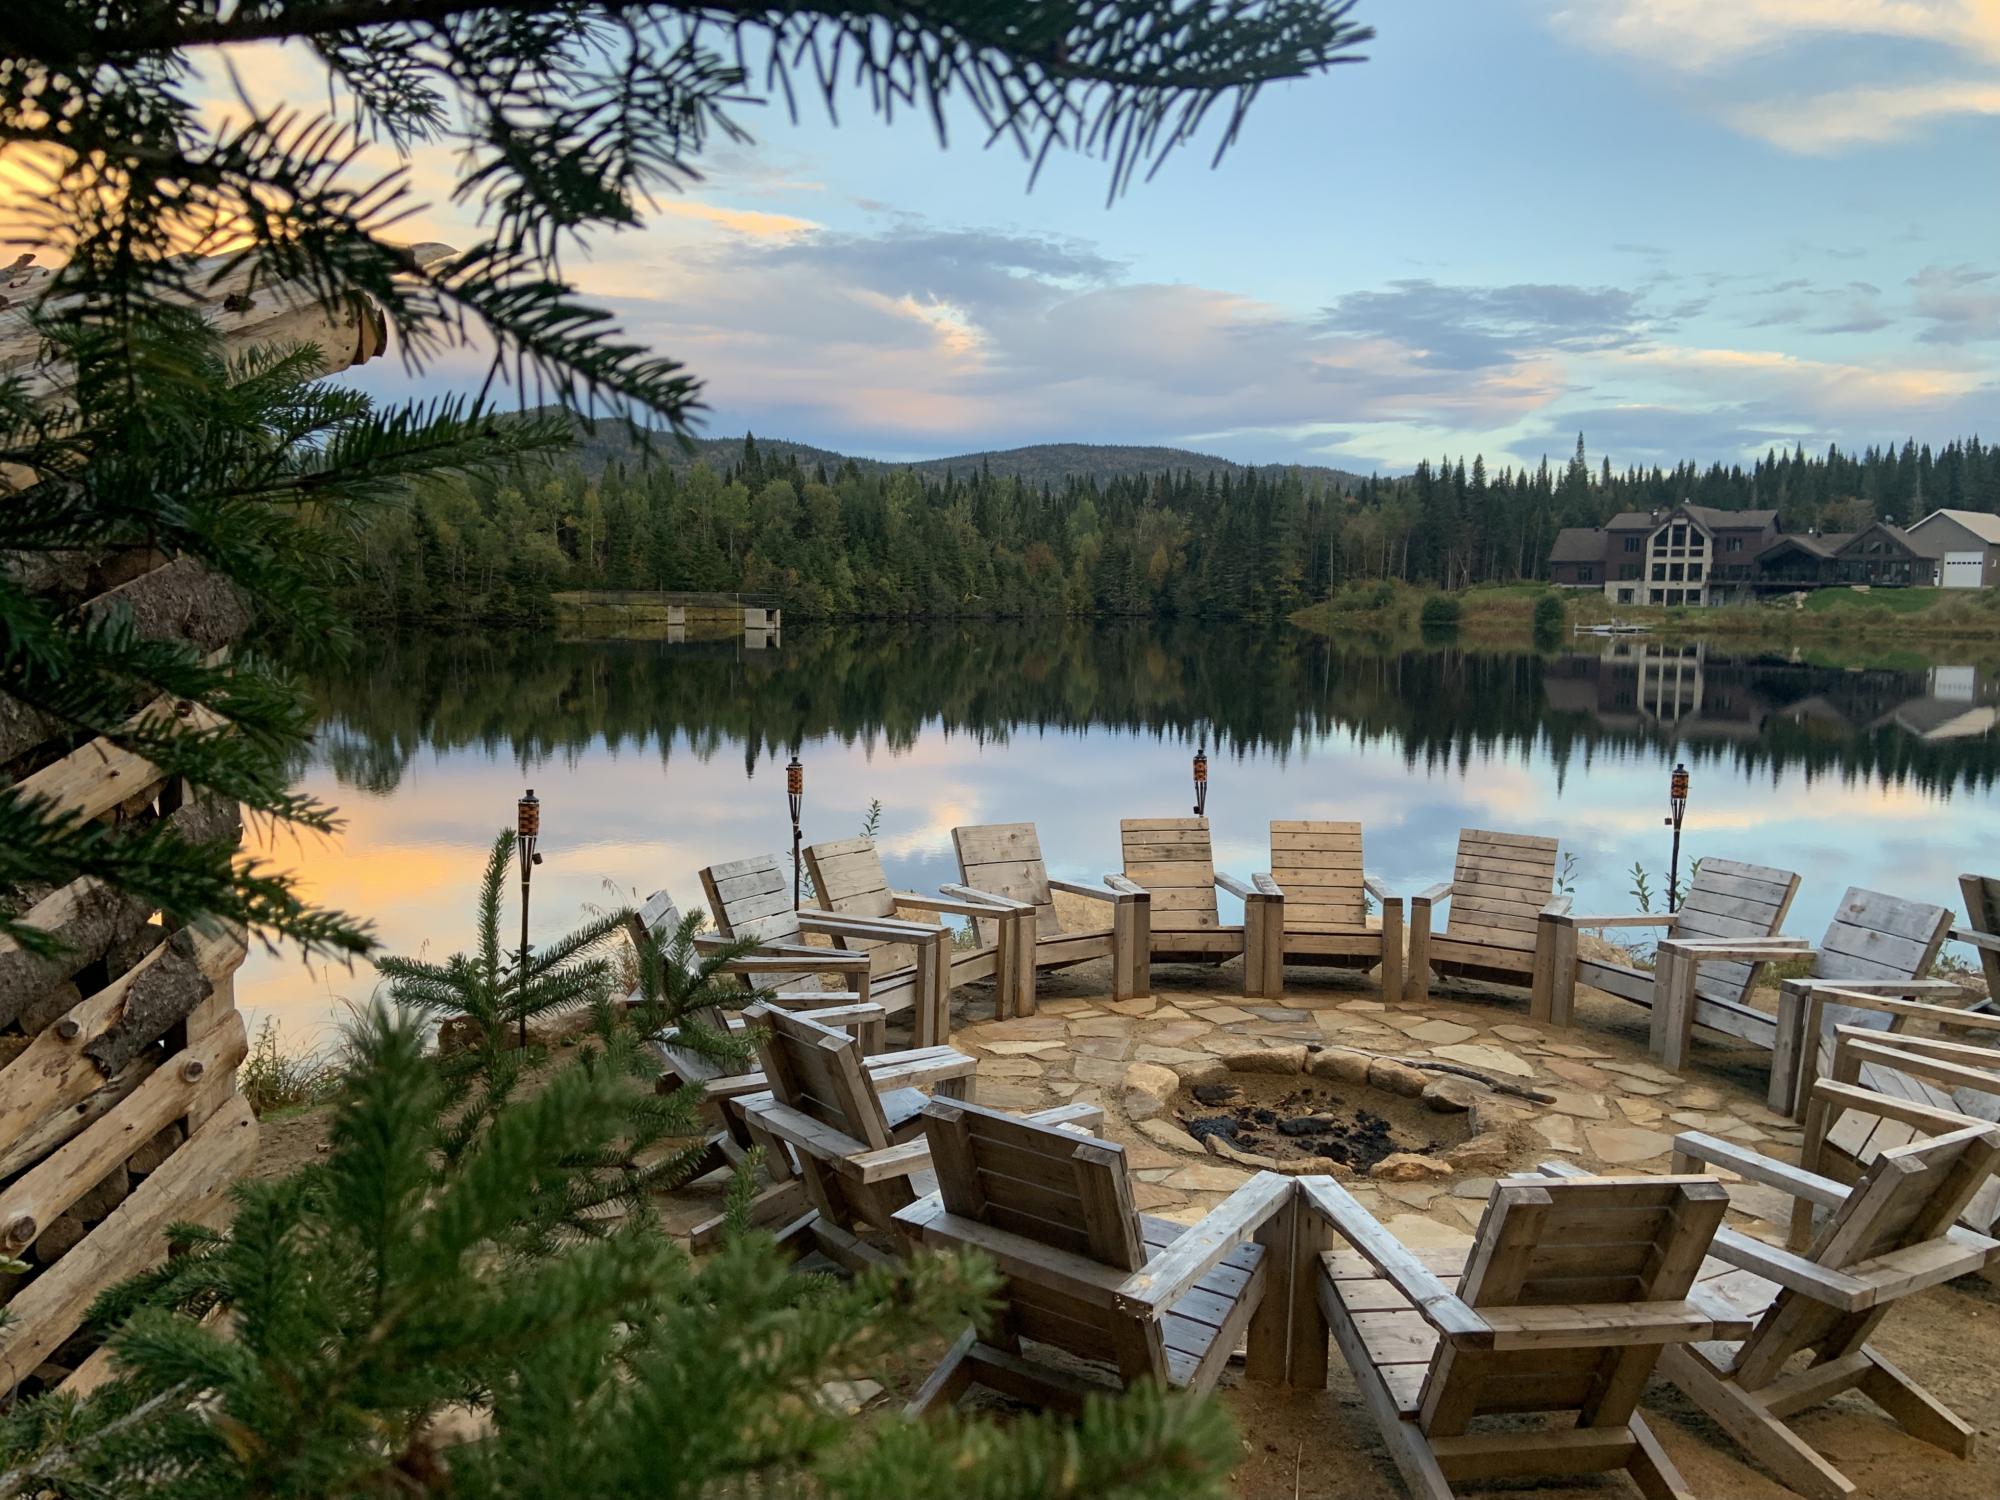
We have a contemporary house on a lake and the standard Adirondack chairs were not fitting in this setup. However, Anna’s modern Adirondack chair plan was just perfect for what we were looking for. The chairs are comfortable and the result is amazing! Thanks!!
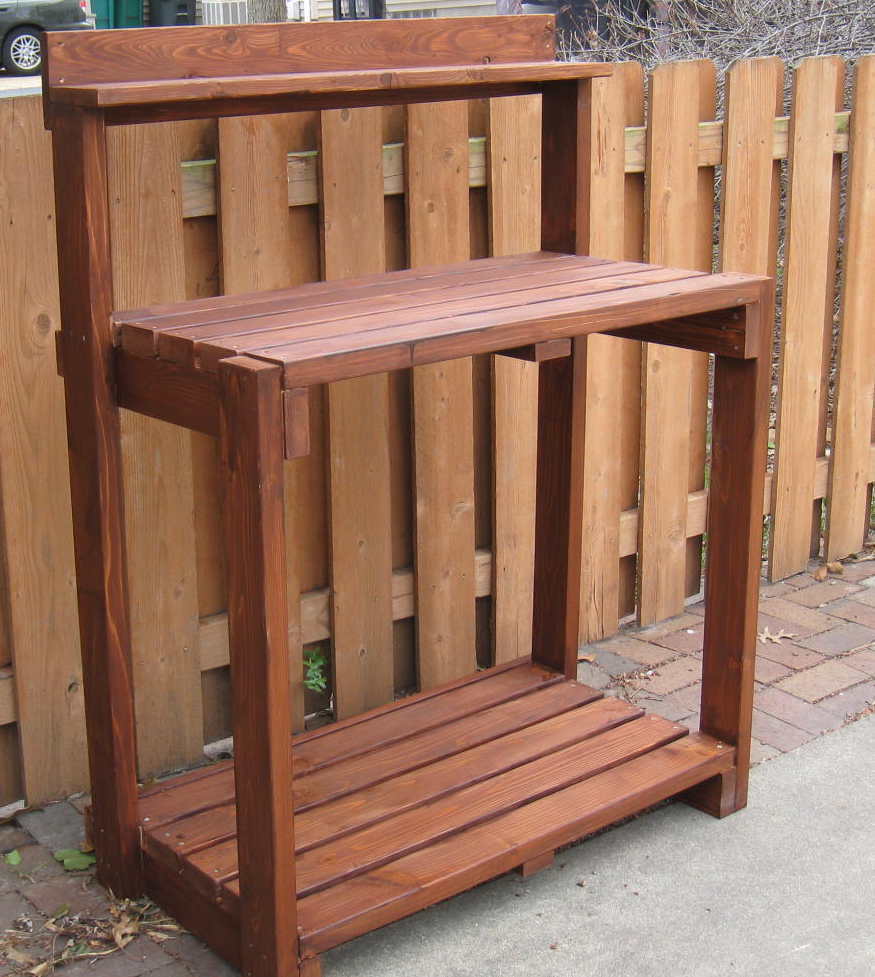
The plans are great. This went together really fast. I am cheating a little here, it is not quite complete; I need to add the side blocks on top and my wife would like a another panel added to the front at work height level, just for looks. But the overall look won't be changed. I struggled some with finishing (I usually do). A couple spots have runs I didn't see. One will be covered by the front panel I'll add,but another needs sanding.
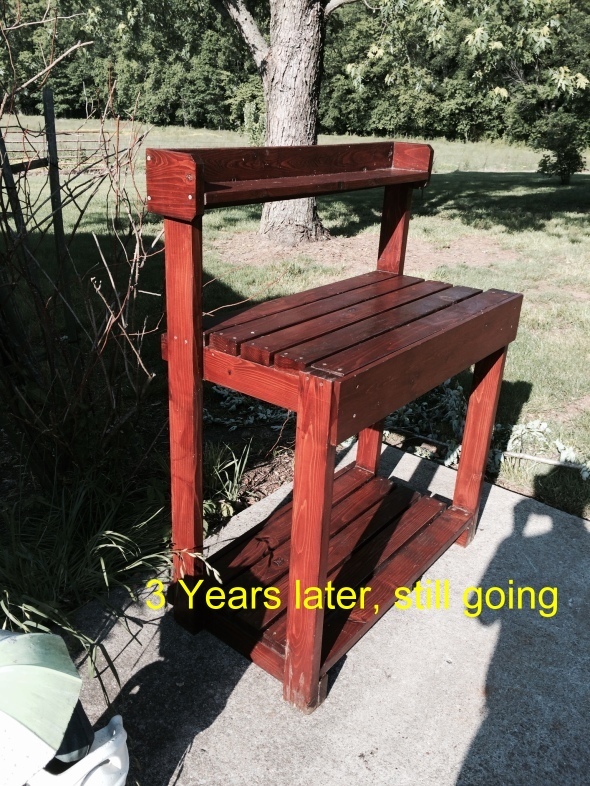
Just for fun I added a picture of the bench 3 years later. Its held up well to a lot of use and a lot of sitting out in the elements.
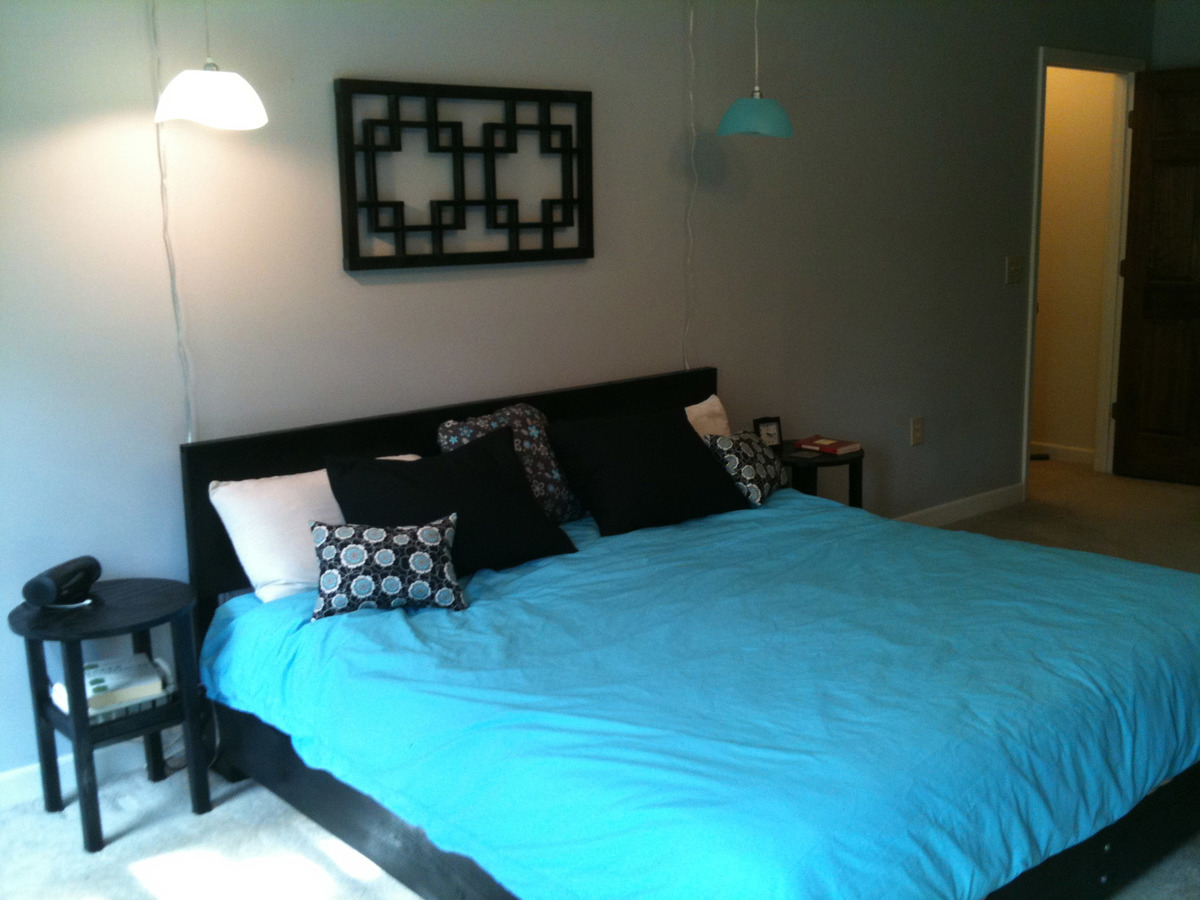
I've been on a building spree lately, and one of the things I have been wanting to do was change the look of our bedroom. We had a nice, traditional sleigh bed that we had since shortly after we got married(13 years ago), but really hadn't done much with our room since. We talked about platform beds, and I toyed with making the west elm one for a while. Finally hubby went out of town and I could get to work.
I decided to use 2x6s instead of 1x6s for a few reasons:1)It's a king bed and I wanted a heavier feel, 2)the 2xs were way straighter and way cheaper than the 1xs at my local store!
Just fyi--be sure that yo take into account the fact that you are using 2xs when you take your measurements! I was sloppy there and had a few tense moments when I thought I would have to do two sides over, but I made it work. Our mattress fits, but not as it is supposed to. I should know better by now, but live and learn.
The frame came together great. The legs look like they are separate, but I ended up going with that look and making it deliberate.
Headboard: I used Ana's plans for the low modern cut out, but without the cut out. I used scraps! Yay! The structure is the same, but I used 2x3s for the legs and 2x2s for the interior frame. I happened to have a piece of 1/4" ply sitting around that was the perfect length and used it for the front. Then I used two shorter scraps for the back.
Finish is valspar glossy black spray paint. I like spray paint. A lot. I use it for everything.
Squared art: I originally wanted the squared headboard, but ditched the idea because I lean against my headboard while I have that first life-affirming cup of coffee, and it looked two uncomfortable. Then I picked up the latest issue of the Do It Yourself mag, and they showed a room where there were two painted decorative screens on the wall very similar to the this pattern. I was super excited, because I knew I had plenty of scraps for this one. I started out with the kreg jig, but then decided that since the piece didn't need to bear any weight, I would use glue. Glue it was, and it went together fine. If you measure, there are some...creative differences in the squares, but most people won't notice. Impatience is my biggest downfall!
Finally--duvet cover is two 8.00 queen sheets sewn on three sides. The small pillows were what sparked the color scheme. I wanted the whole duvet cover to be that fabric, but it came from my stash and has been discontinued. The side tables are my own very convoluted plan, and were also made from scraps(I had a LOT of scraps). The lights are two 2.00 plastic bowls from Big Lots, with a hanging bulb-type fixture that I purchased from Pier One. I'm still on the lookout for a different shade, so those may change, as they are not quite long enough for me.
Now, it's time to turn the rest of the room into the same century and get rid of the mish-mash of broken old stuff that we have. Bookcase and dresser are next up.
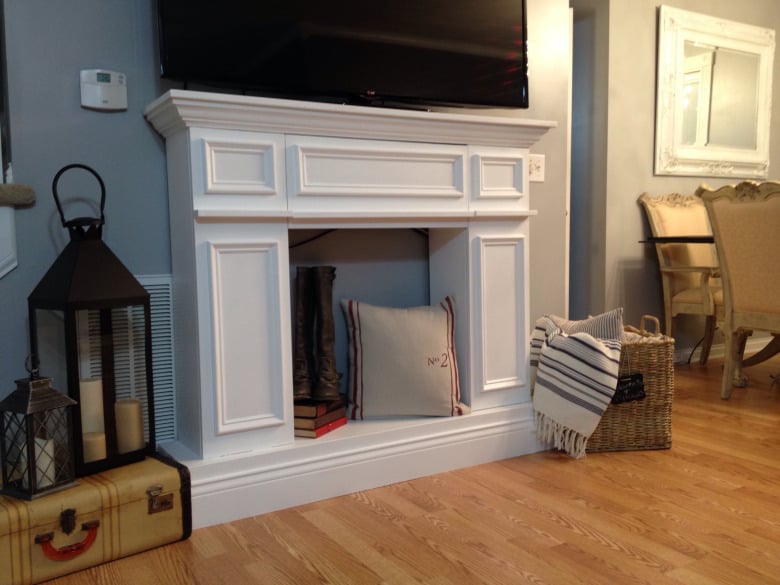
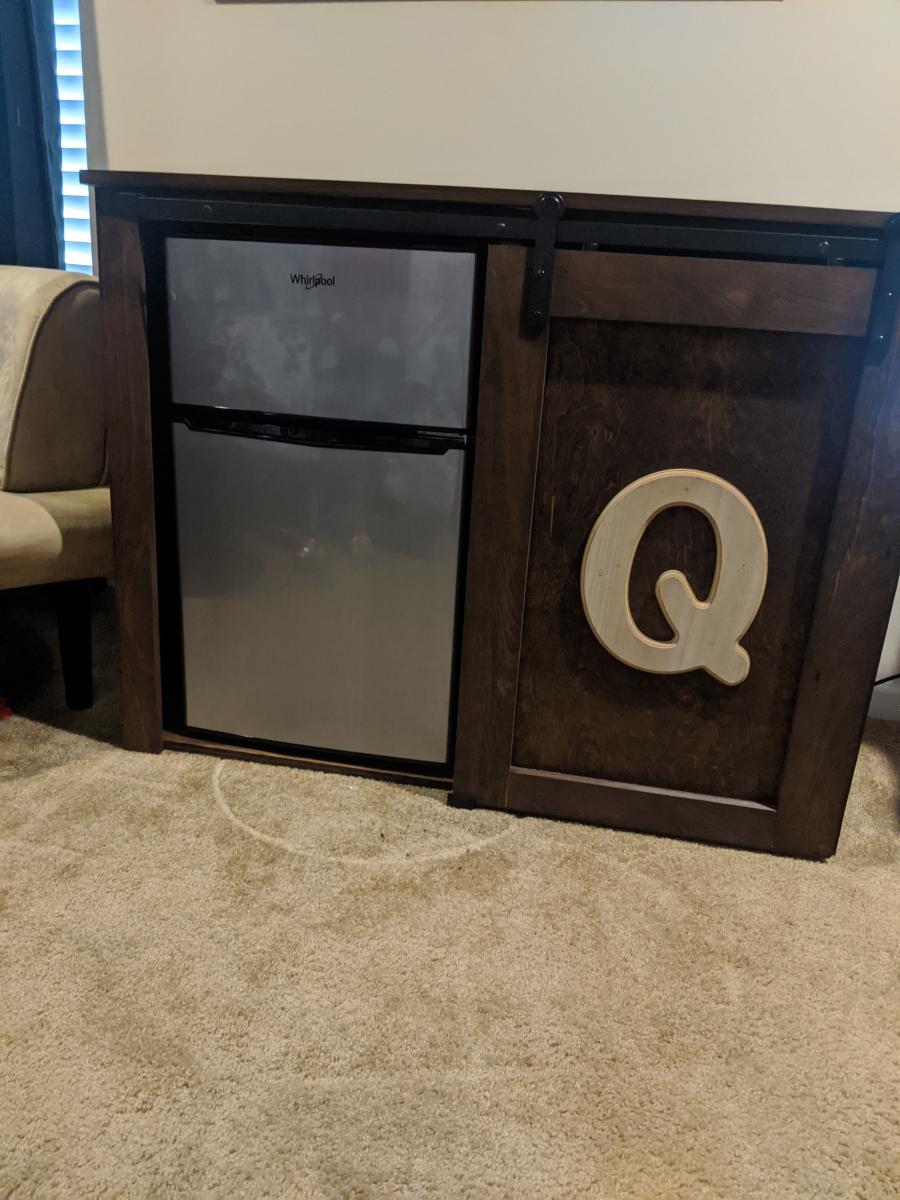
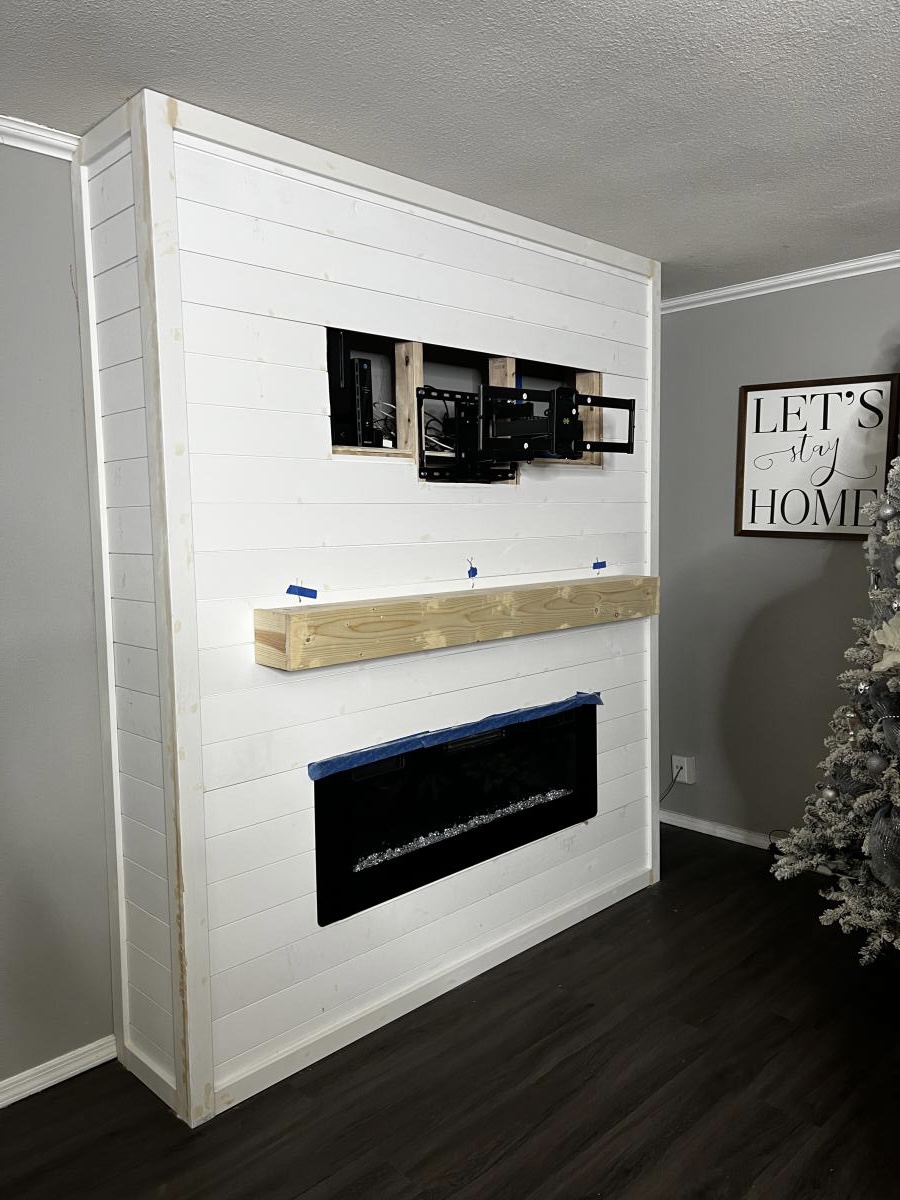
Modified from Ana White's Faux Fireplace with Hidden Storage Plan

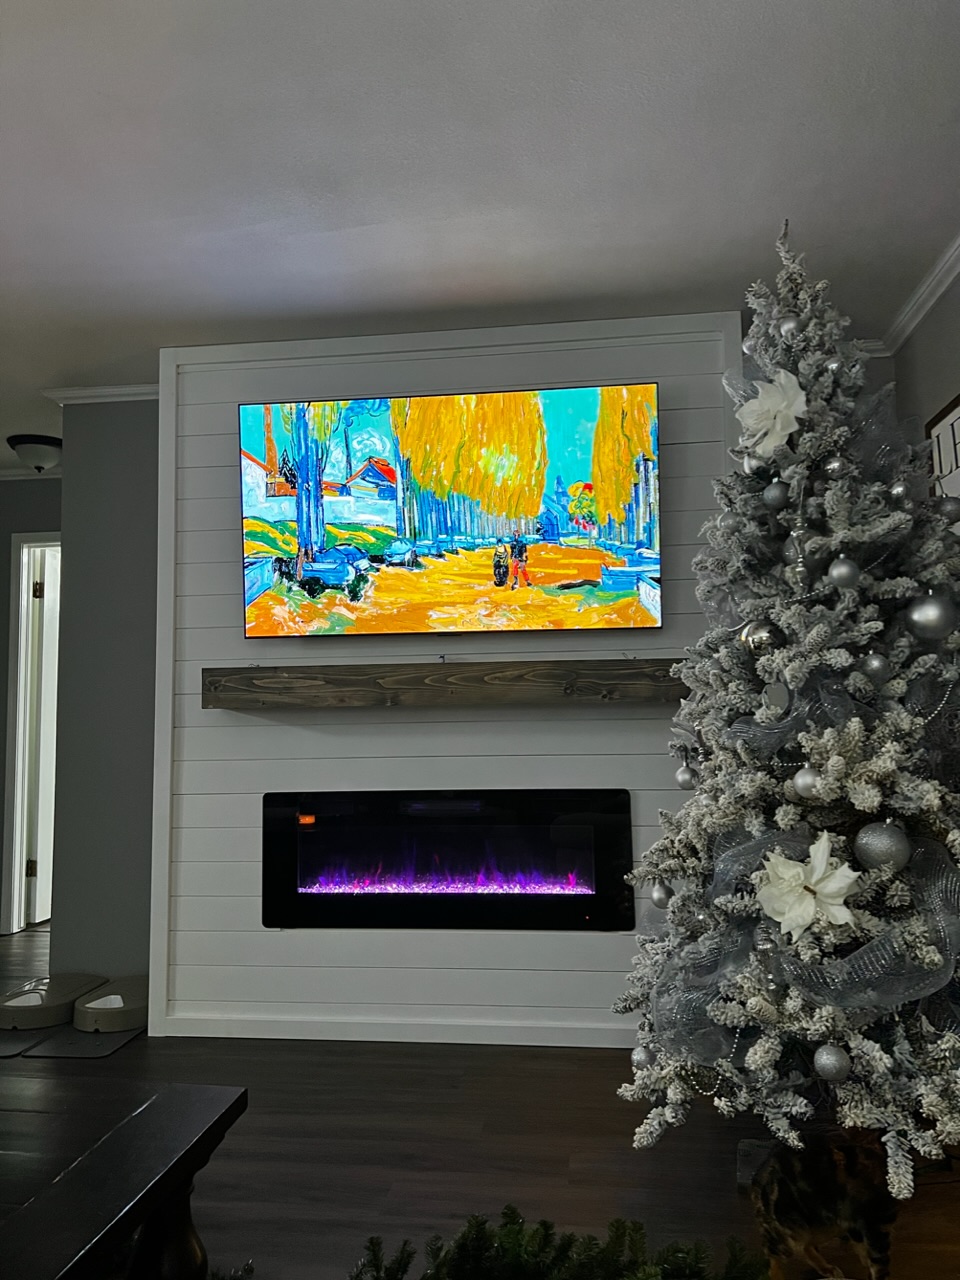
We did the Easiest Shiplap Fireplace in a weekend, thanks to Ana’s plans. I convinced my husband to help me build this by upgrading to a 65” tv and adjusting the dimensions. We also built a shelf behind the tv to hold our receiver and Xbox that is hidden when the tv is in place. Ana’s tutorial was amazingly and gave us the confidence to finally build something that’s been on our list for 2 years!
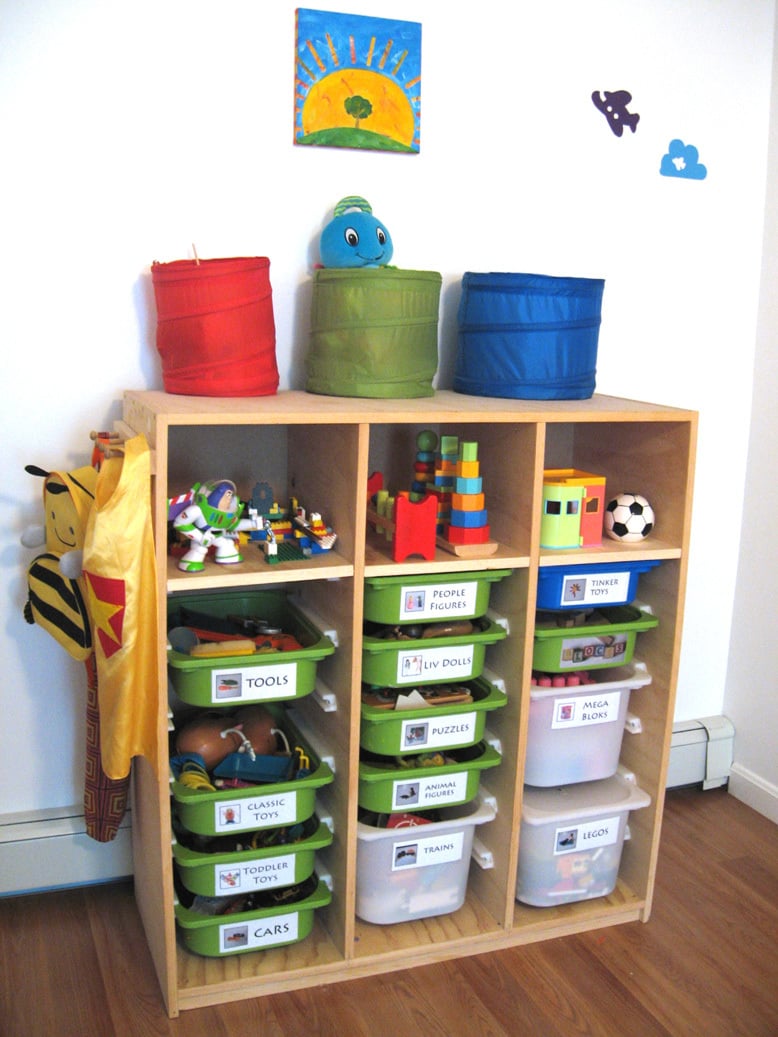
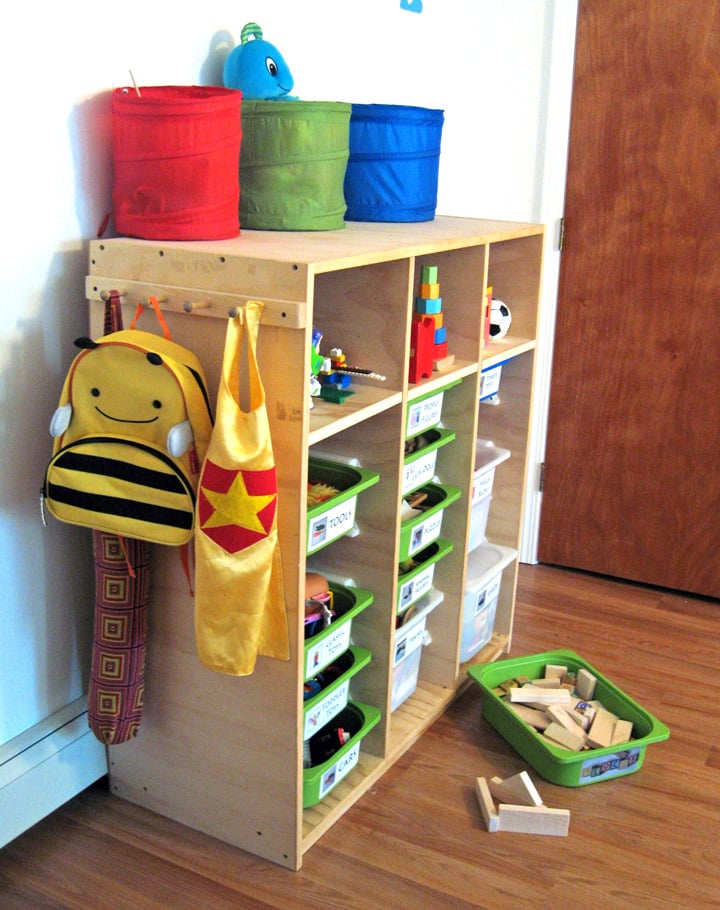
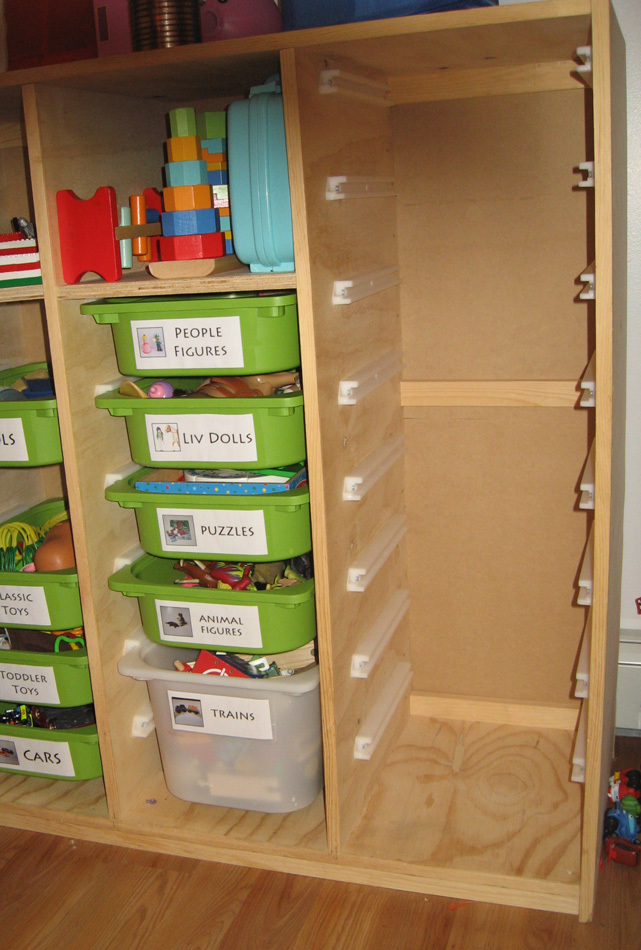
I had been asked a few times for these plans, but as someone else posted a similar one, I'll just stick to a blog post for now and describe my differences. I made this shelving unit January 2010, just after I found out of I was pregnant with my third child, and it's been a lifesaver since then. I desperately needed a toy storage solution (and purging), as shown in the 'eek' kids closet below. I didn't like the shape of triangular Ikea ones, as they spanned more floor space than I cared to give up. Plus, I wanted a place to put *almost* all of my kids toys, so I wanted it to be tall. I'm so glad we did, since we've moved twice (also, 'eek') since than, and it's made packing and unpacking the kids toys super (SUPER) easy. At first, I was afraid that the kids would go crazy and just tear down every bin at once, but it hasn't happened yet. Unlike the other plan that was posted, I used white sliders that ikea sold. I'm not sure if they still sell, as I don't see them online. It cost an additional $24 (they were $1/2), but seemed worth the extra money. I didn't have a router and wasn't particularly confident with our table saw skills. Plus the Ikea version had some really thin areas that made me nervous that it would break easily. I tried to keep it easy and just had to line up and screw the sliders in. Now that I'm a little more confident with a table saw, I'd give the router style a-go. I used two sheets of cabinet grade plywood, each costing about $30. I ripped down some pine boards to cover the front edges, which made the unit look loads nicer. However, I wish I would have used maple, instead of pine as they got dented almost immediately. Not a big deal though. The three shelves were sort of an afterthought, but turned out to be great for puzzles and other type toys. I didn't use backing or cross supports initially, but put some in after we moved. You can see them in the last picture below. The heater in our temporary house caused the slightly-bent sides to become very bent sides. That caused the drawers would spontaneously fall out, which was always quite the shock and disappointment. I put in some supports in the back, which I wish I did initially as it would have made manufacturing easier. Also, If I were to go back, I would put one cross support in the front-middle, as the boards are so tall, it needs something to help maintain the shape in the front. I've found that even in a perfect fitting slider, really heavy buckets would bend just enough to flex out of them to crash... so don't plan on filling one of the large buckets with matchbox cars and sticking it on the top. Regardless, we've learned our lessons, made it work better, and has been a huge success in our house for a while now.

In reply to Very nice by Supermom77 (not verified)
Tue, 10/04/2011 - 19:42
Haha, I guess a little. Picking up when they aren't motivated is an ongoing battle. However, I did find having a specific place to put items with labels helped a lot, albeit with screaming. Actually the labels would probably be the best motivation of all of it.
The ideal is to have the kids only play with one bin at the time, but with more than one kid, that theory very quickly gets muddled... One child wants to play with one toy and one wants play with another, then "lego houses can't be broken down" and "polly pocket is using those blocks for the house" and so on. So it's more of a end-of-the-day(week/month/year haha) pick-up routine.
However, there seems to be a light at the end of the tunnel. My oldest (almost 6) seems to have caught on that the faster she picks up, the sooner she can move onto other activities besides playing (coloring, playdough, etc.), and is starting to pick up as soon as she's done without us even asking. I think getting an allowance has also helped with that.
That was way more than I thought I was going to comment, but I guess it goes to show you should never ask a Mom her opinion on something, unless your ready for a lecture :)

Thu, 10/13/2011 - 21:44
I love that your labels have pictures on them! I thought I should have done that way back when since my children are too young to read. Easy to find and easy to put away. Good job, Mom!
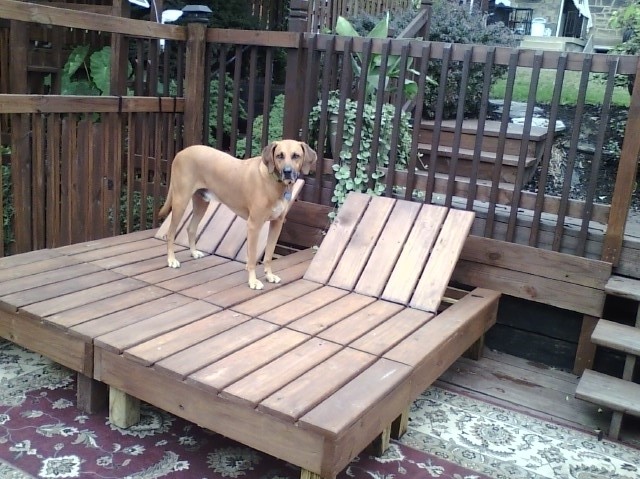
I had an idea in my head of what I wanted for deck seating/lounging in my mind but just couldn't seem to get to the "nitty gritty" of creating workable plans. Then, while googling through images of double loungers I stumbled onto Ana's site. Wow! I felt like a fish that had just found the water! With the detailed plans generously provided for a double lounger I was able to create my "vision" with just slight modifications. The loungers are actually two chairs and two ottomans that fit together or come apart depending on how much "togetherness" the situation calls for. And best of all - almost all the materials were left overs and cut pieces from another deck and fencing project. For cushions (not in this photo) I used two inexpensive "Hide A Mats" folding beds from Costco that I covered with waterproof duck fabric. I can't thank you enough, Ana, for taking the time to share your talent so freely. I'm truly grateful. As is Jake, the Redbone Coonhound, who insisted on being in the photo!
Tue, 10/04/2011 - 22:46
Beautiful job! I really need to create these for our backyard too, and Buck, our treeing walker coonhound :) lol. Jake is a cutie!
Tue, 10/04/2011 - 22:46
Beautiful job! I really need to create these for our backyard too, and Buck, our treeing walker coonhound :) lol. Jake is a cutie!
Thu, 10/06/2011 - 06:18
I would have never thought to break it up into a chair and ottoman. Brillant! I love that idea!
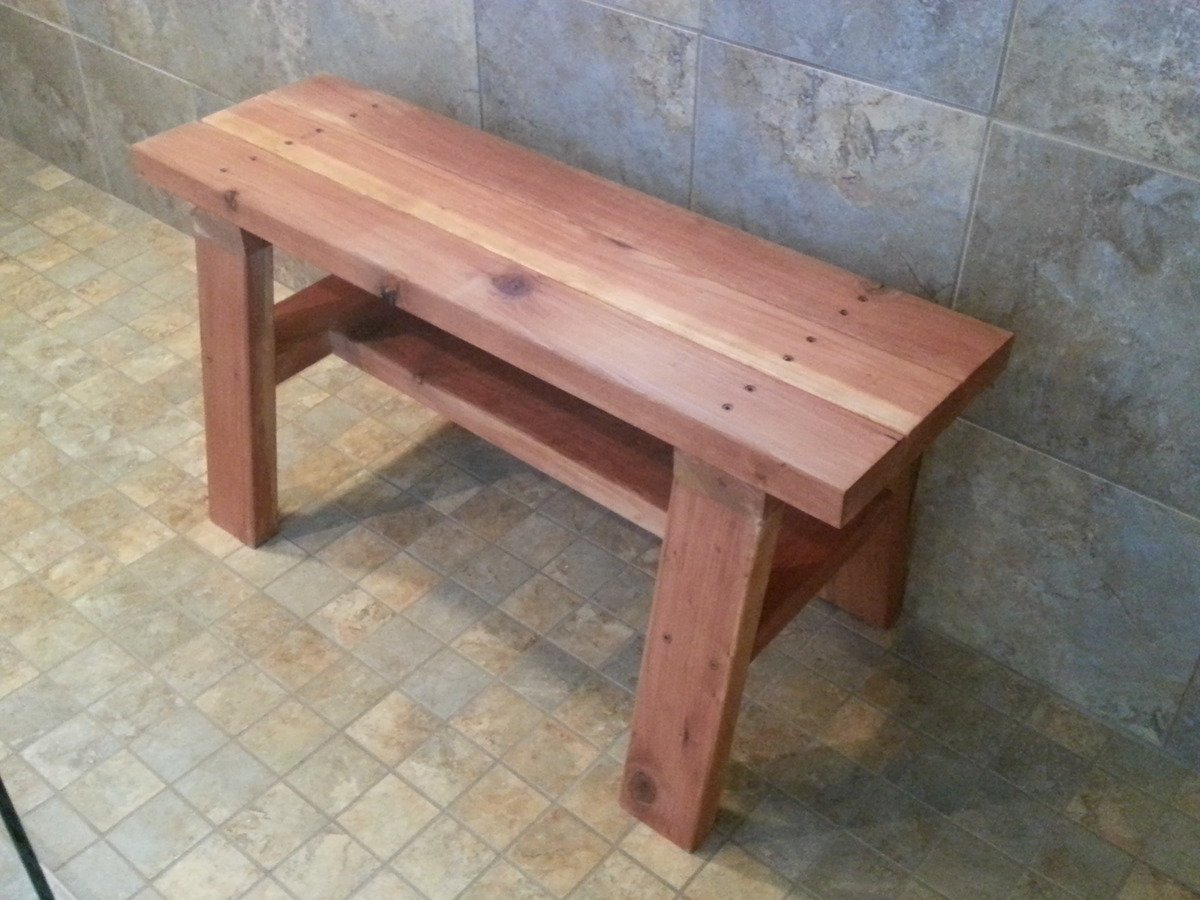
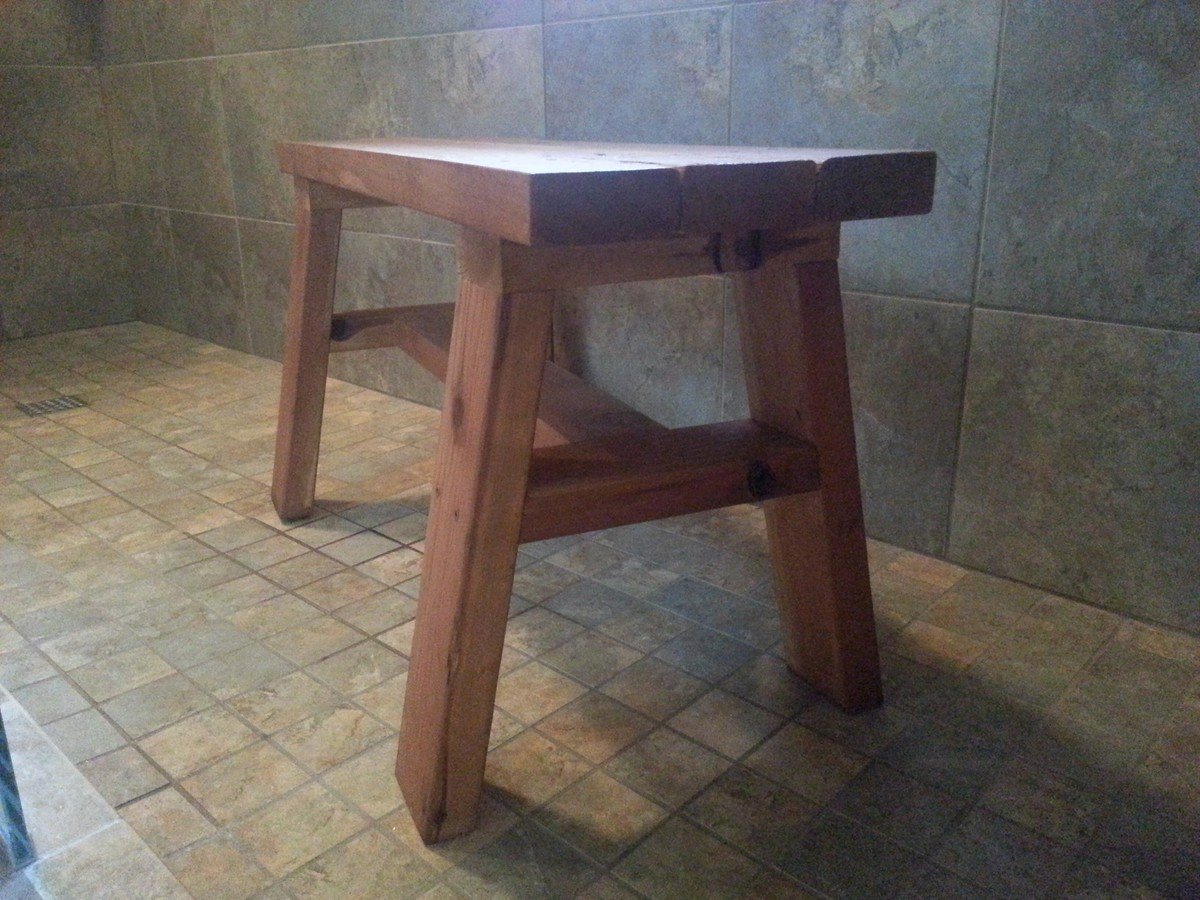
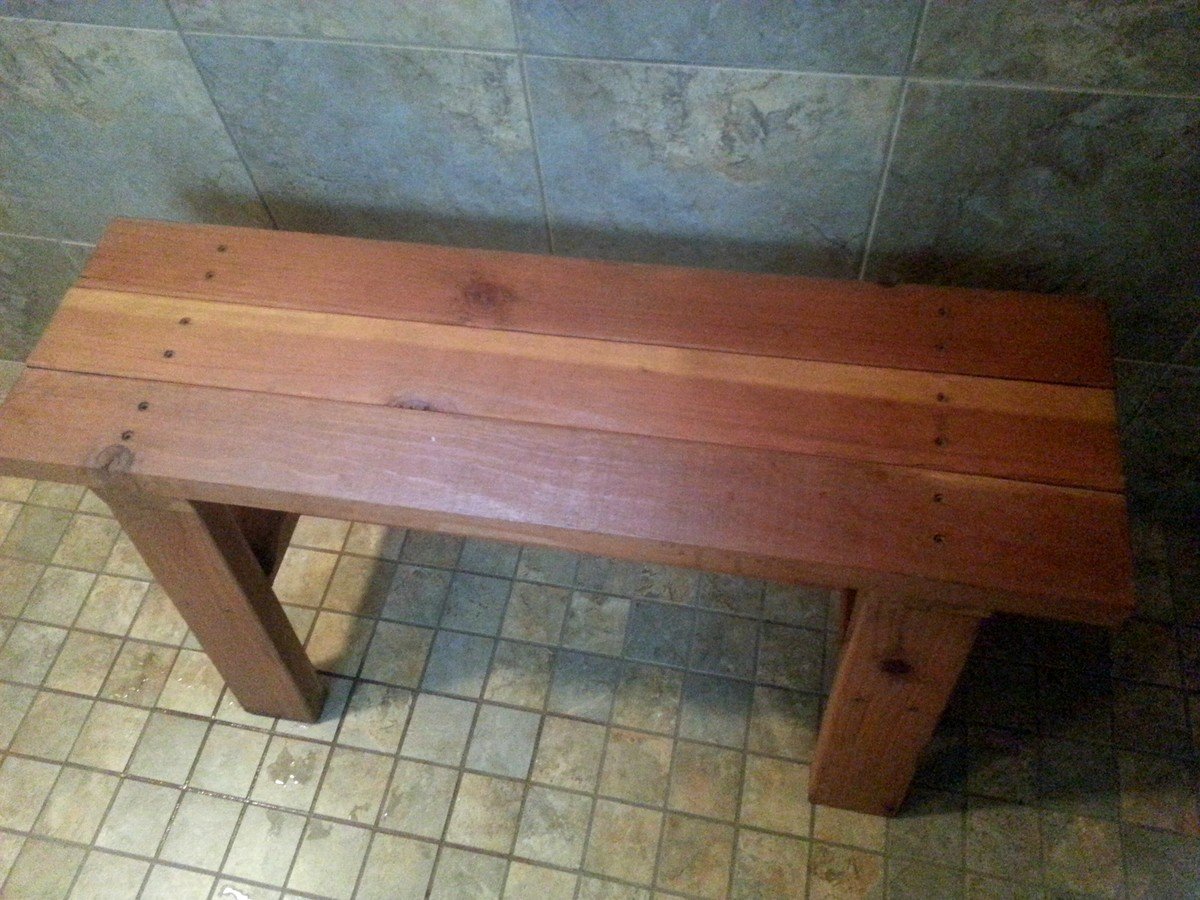
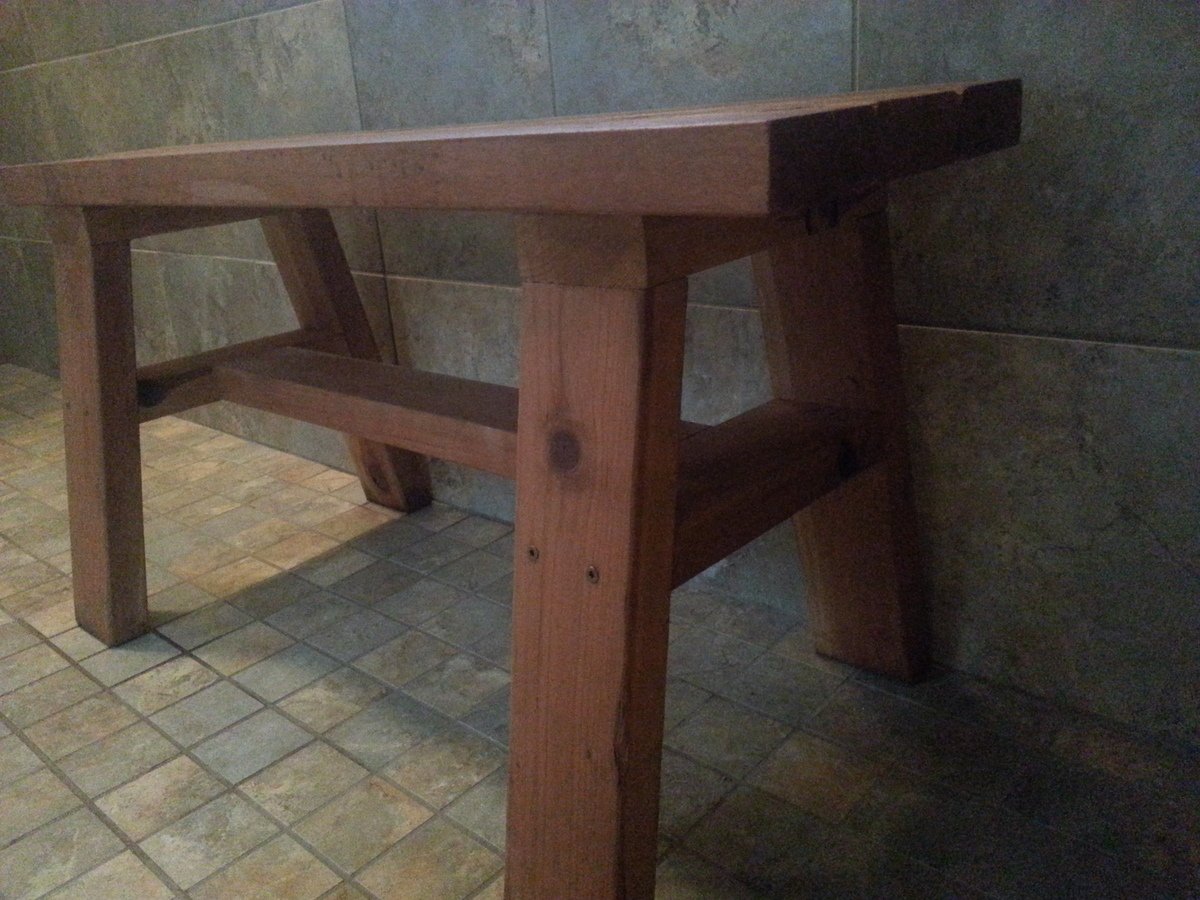
I wanted to build a small shower bench. I used the Providence Bench Plans and just made it a bit smaller with a few adjustments. This bench is 35" long and 18" tall. I did not use the cross supports on the bottom because it was so short. Also, you will see that I turned the bottom stretcher and side supports flat/horizontal. I put the screws for the seat boards through the top down just because this was the easiest way for me to do it. The plans did not show in detail how to attach the seat boards from the underside. It just said "finally, the seat boards." I guess they probably used a pocket jig. I bought a pocket jig and used it in the couple of places, but this was my first time using it. I used brown, coated decking screws in the places I did not use the pocket screws. This was my first attempt at building anything and my first time to use a pocket jig. I used a natural wood stain and Behr Weather-Proofing since it will be in a wet area.