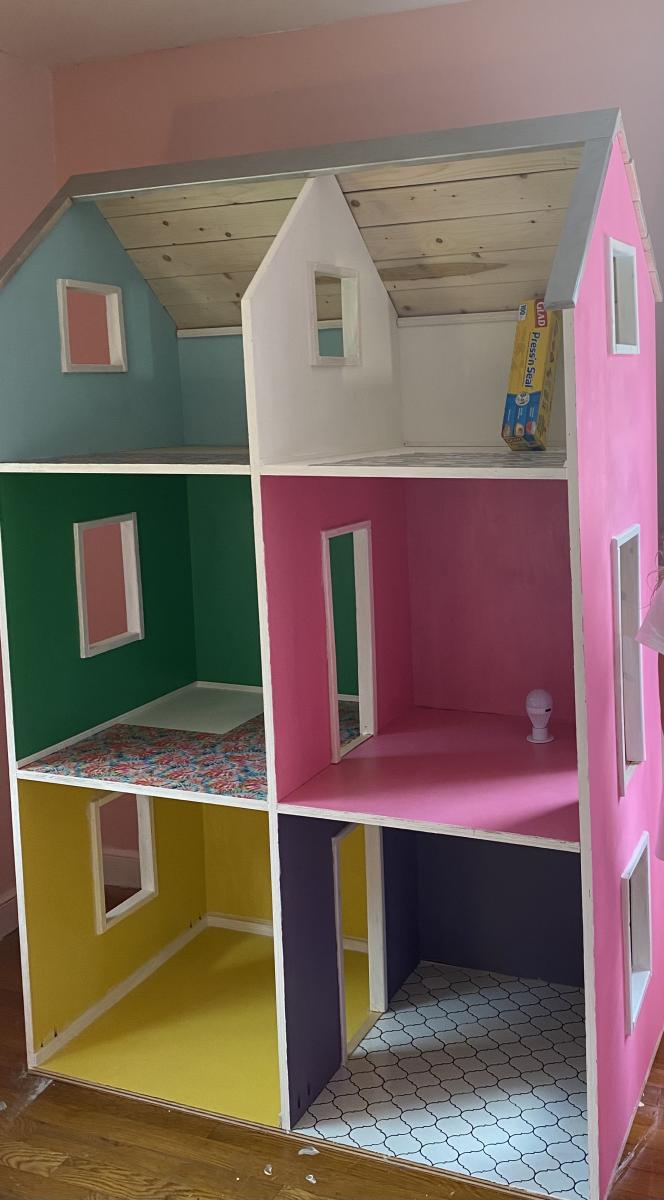
American Girl Doll House

This was what I built for my daughter during quarantine! I had never used a Kreg Jig before and now I love using it!

Built from Plan(s)
This was what I built for my daughter during quarantine! I had never used a Kreg Jig before and now I love using it!
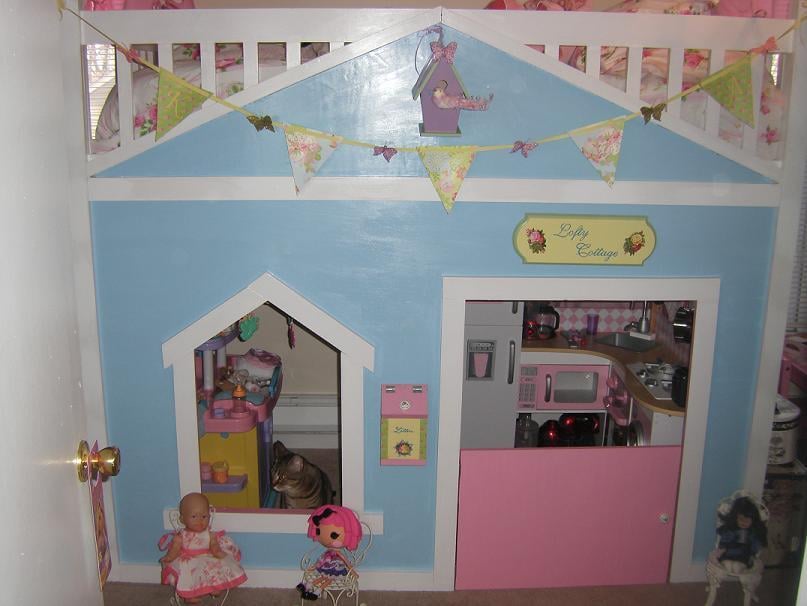
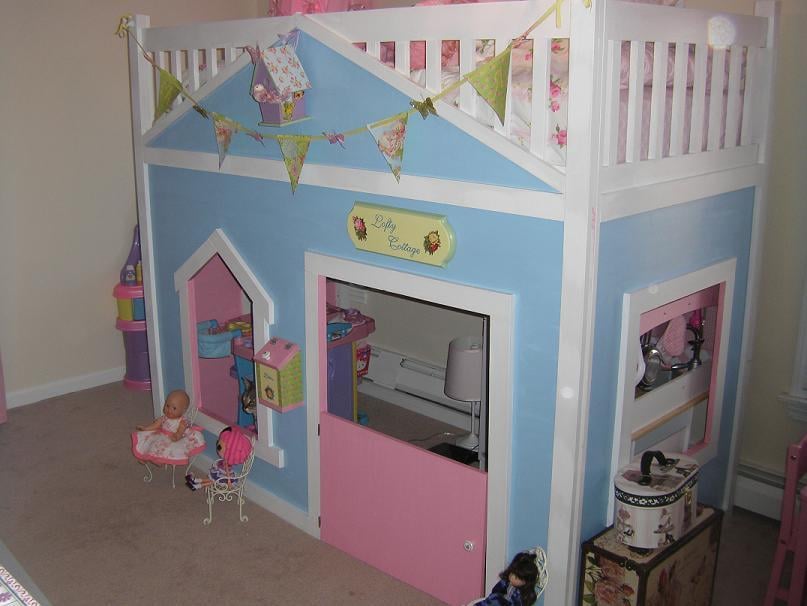
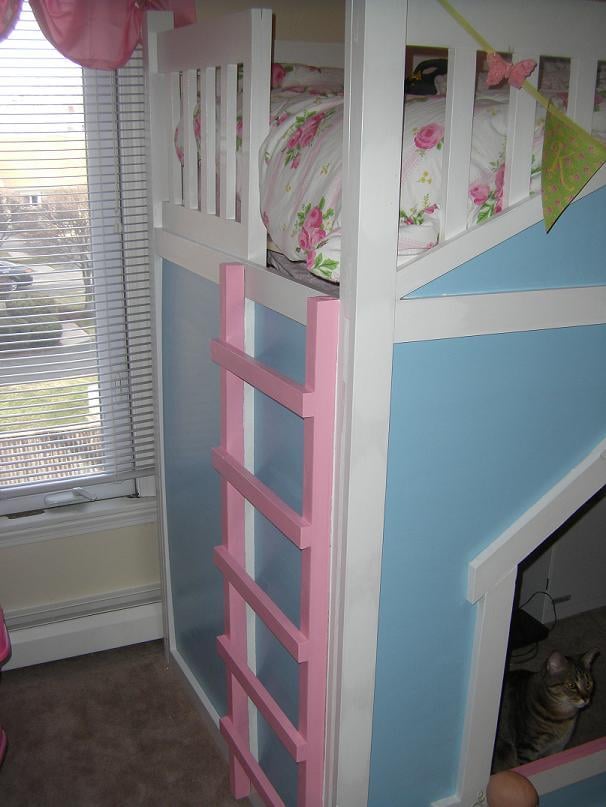
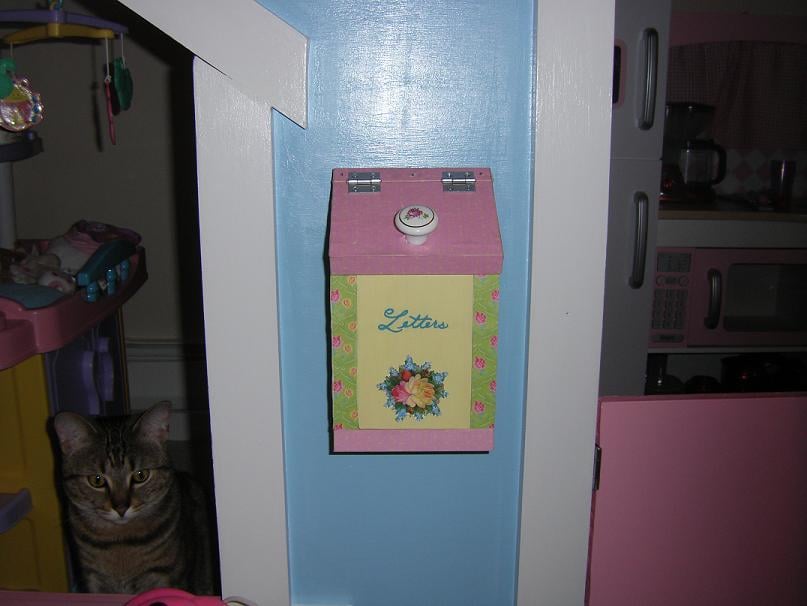
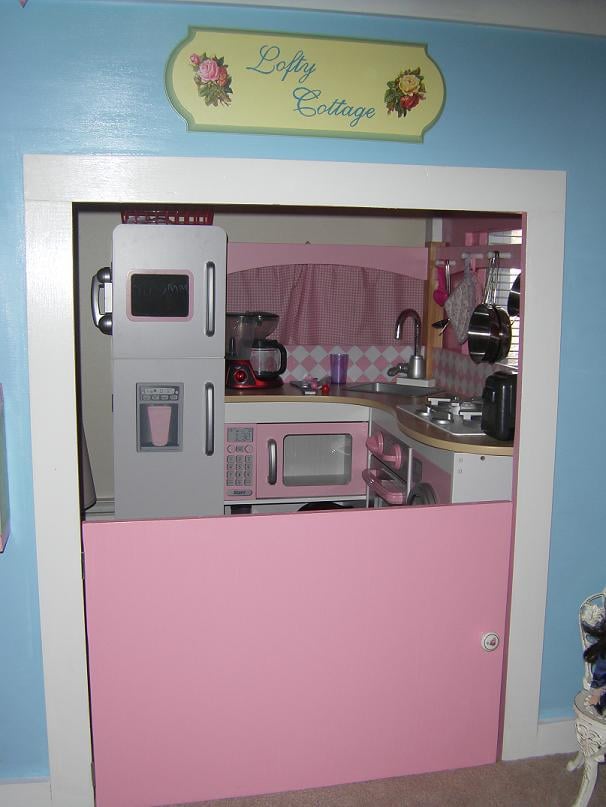
This is my first KOW project...I built the playhouse loft bed for my daughter, Kayla. She named it Lofty Cottage. I used leftover pink paint from painting her table and chair set for the inside of the playhouse. I made the letterbox from scraps and the half-door from the door cutout. I added hardware that matches the hardware on her other furniture. I made the banner by hand and hand painted the birdhouse and the sign. She loves it! Thanks for the great plans Ana! Can't wait to start on something new now!
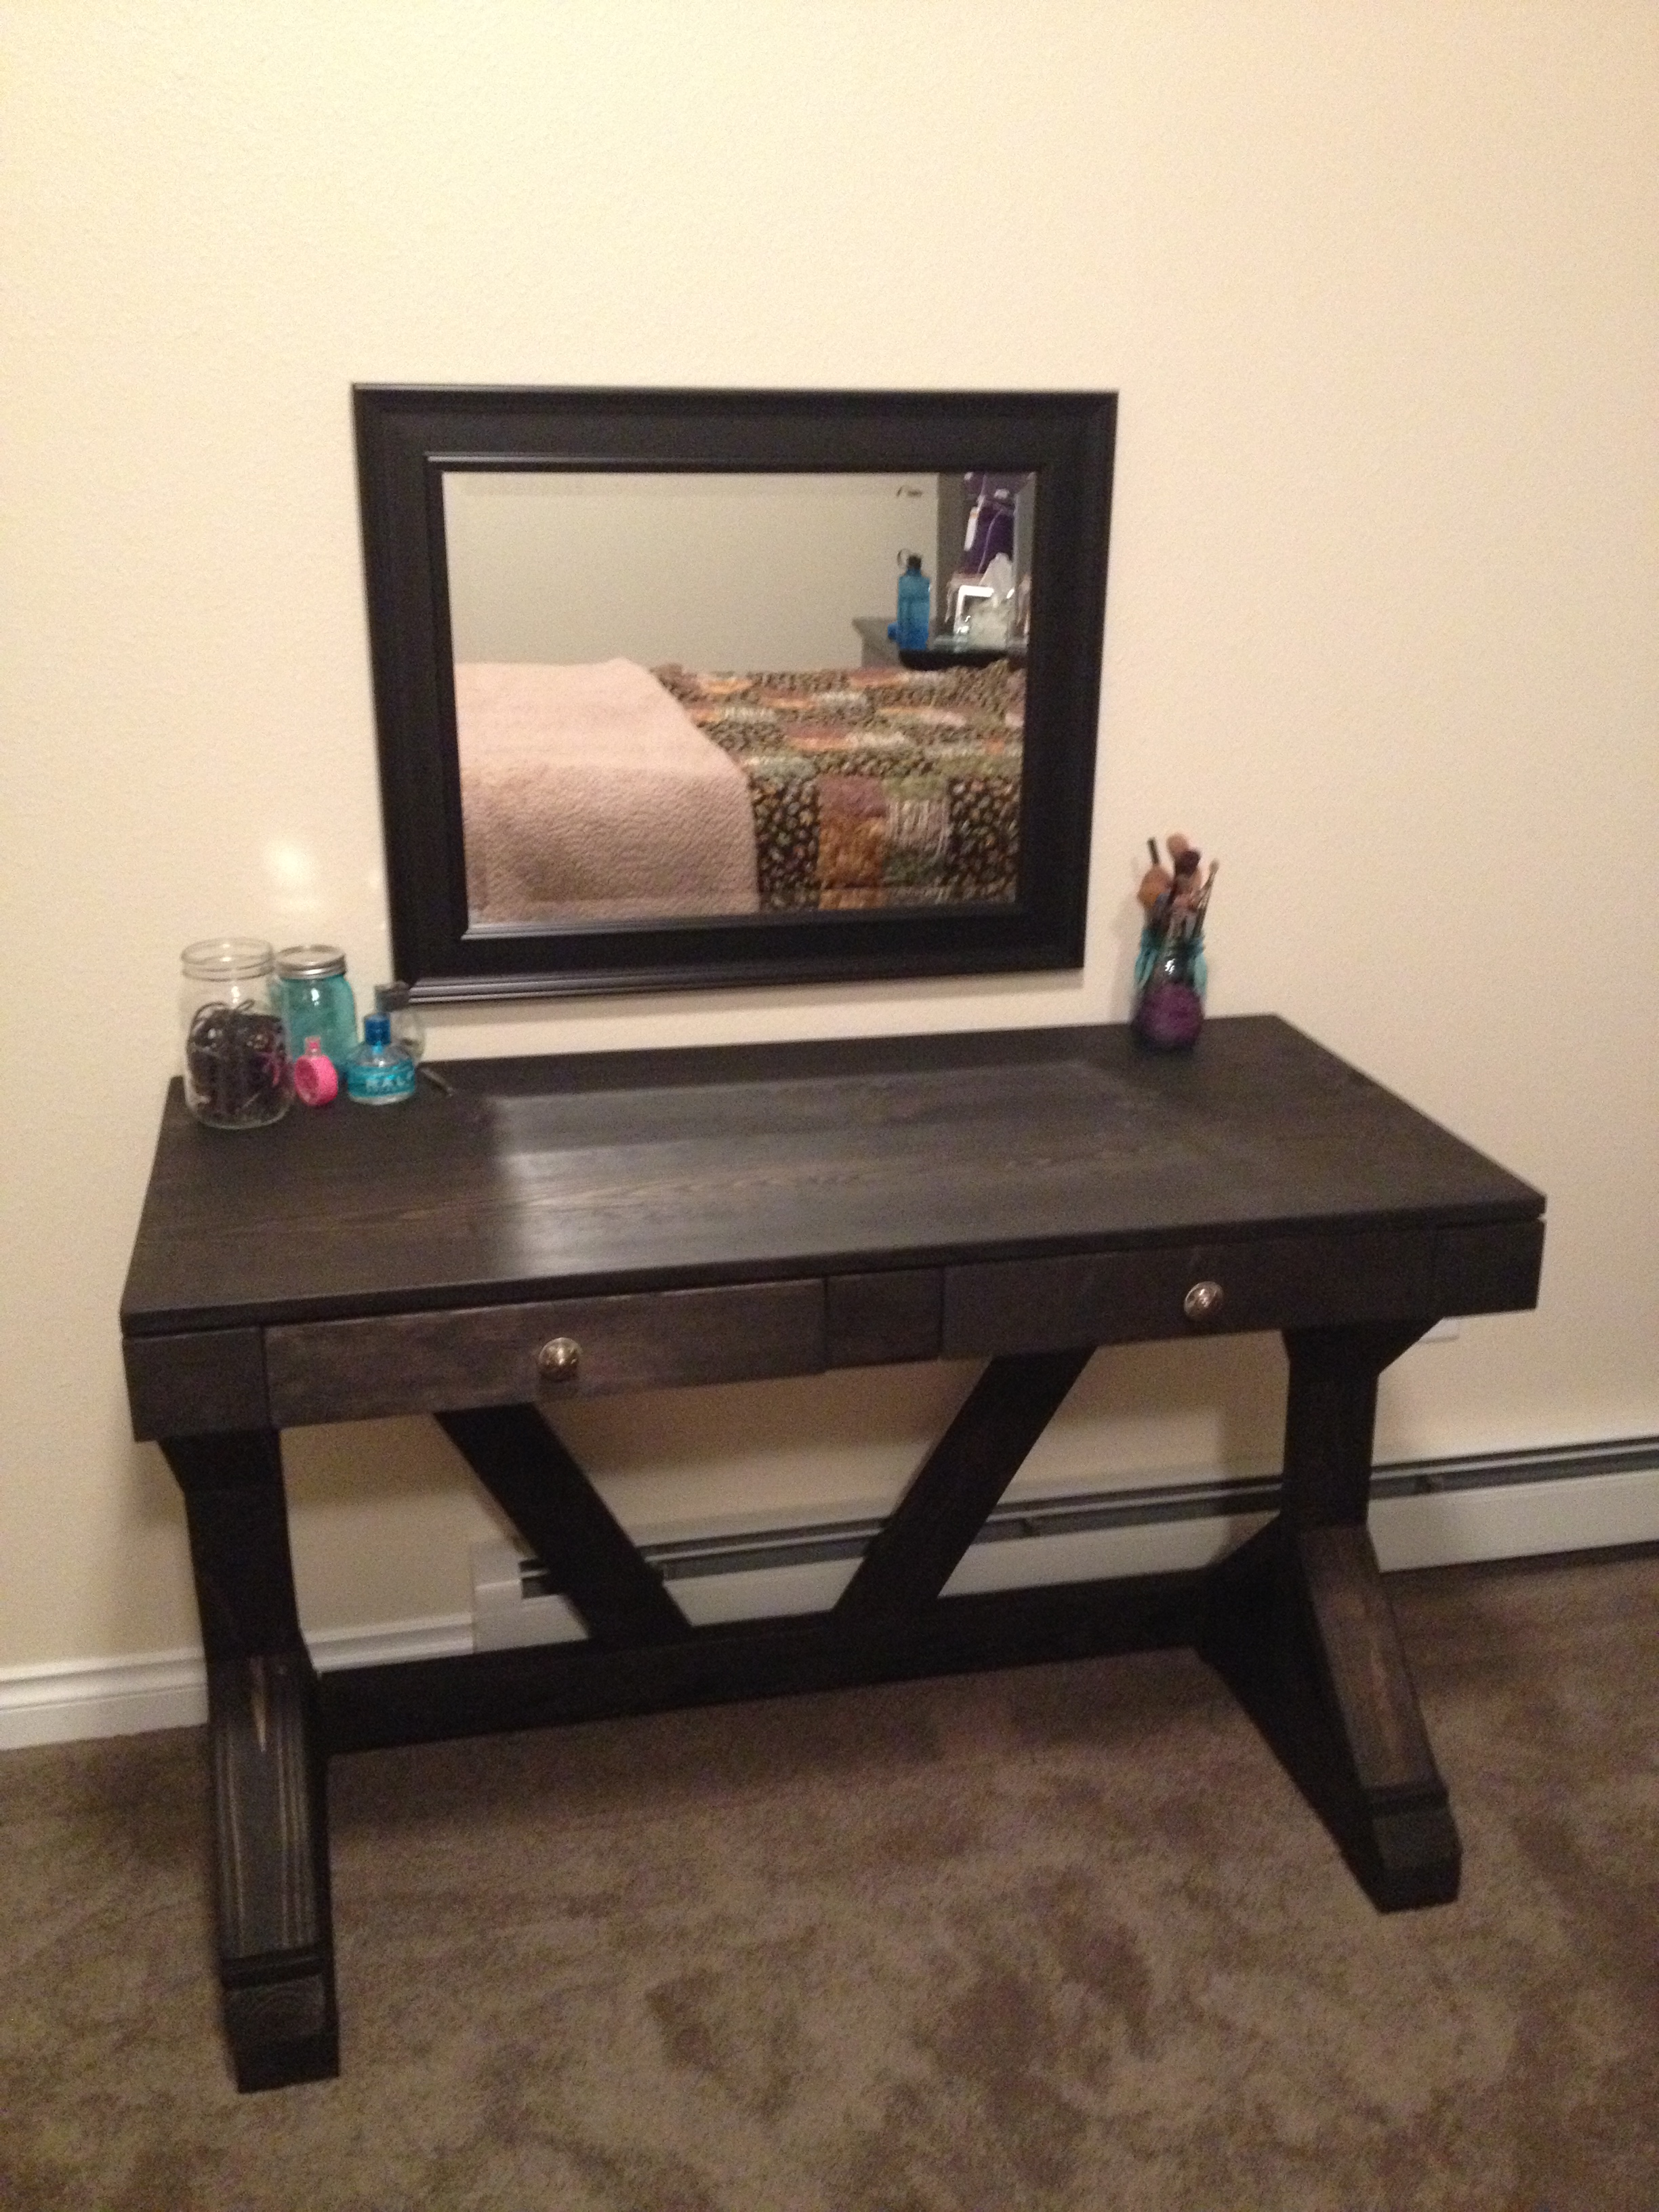
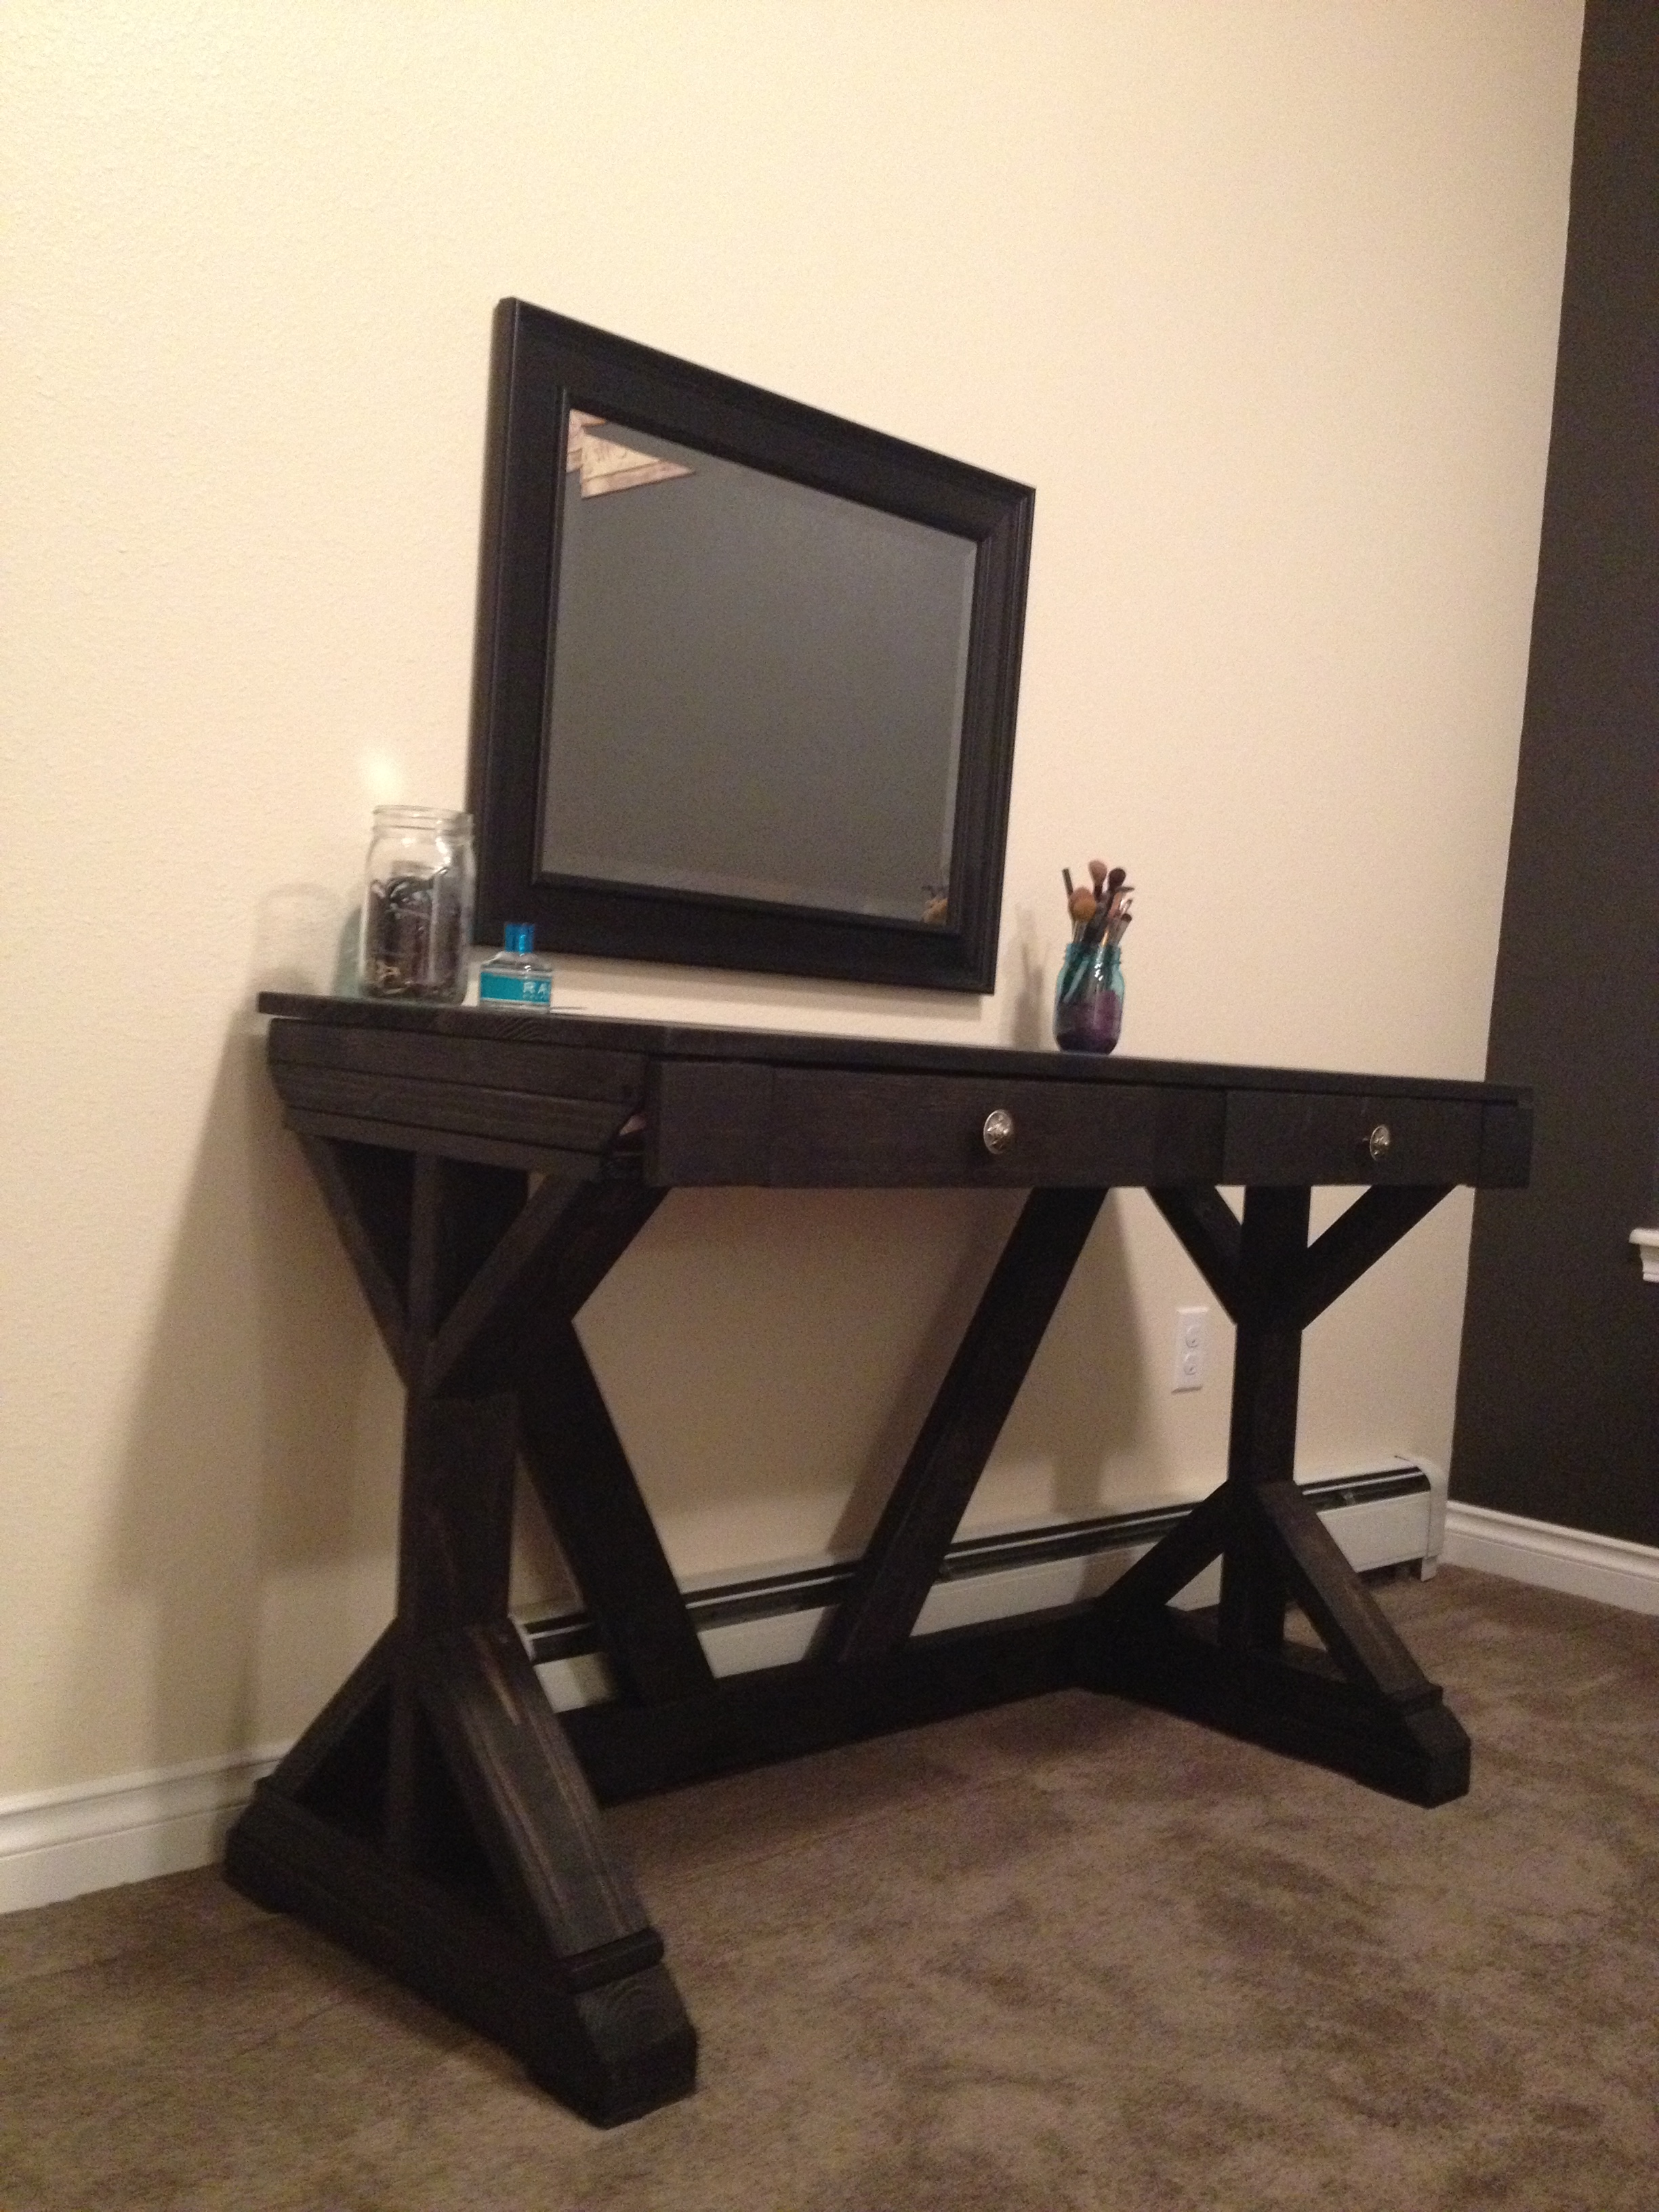
This was the first plans we used from Ana White and it turned out great. Modified the desk to be a little shorter and have dual drawers in the front.
Wed, 09/23/2015 - 20:24
Your desk looks great...well done! I'm diggin your drawer modifications. Would be able to share your plans for this addition? Thanks!
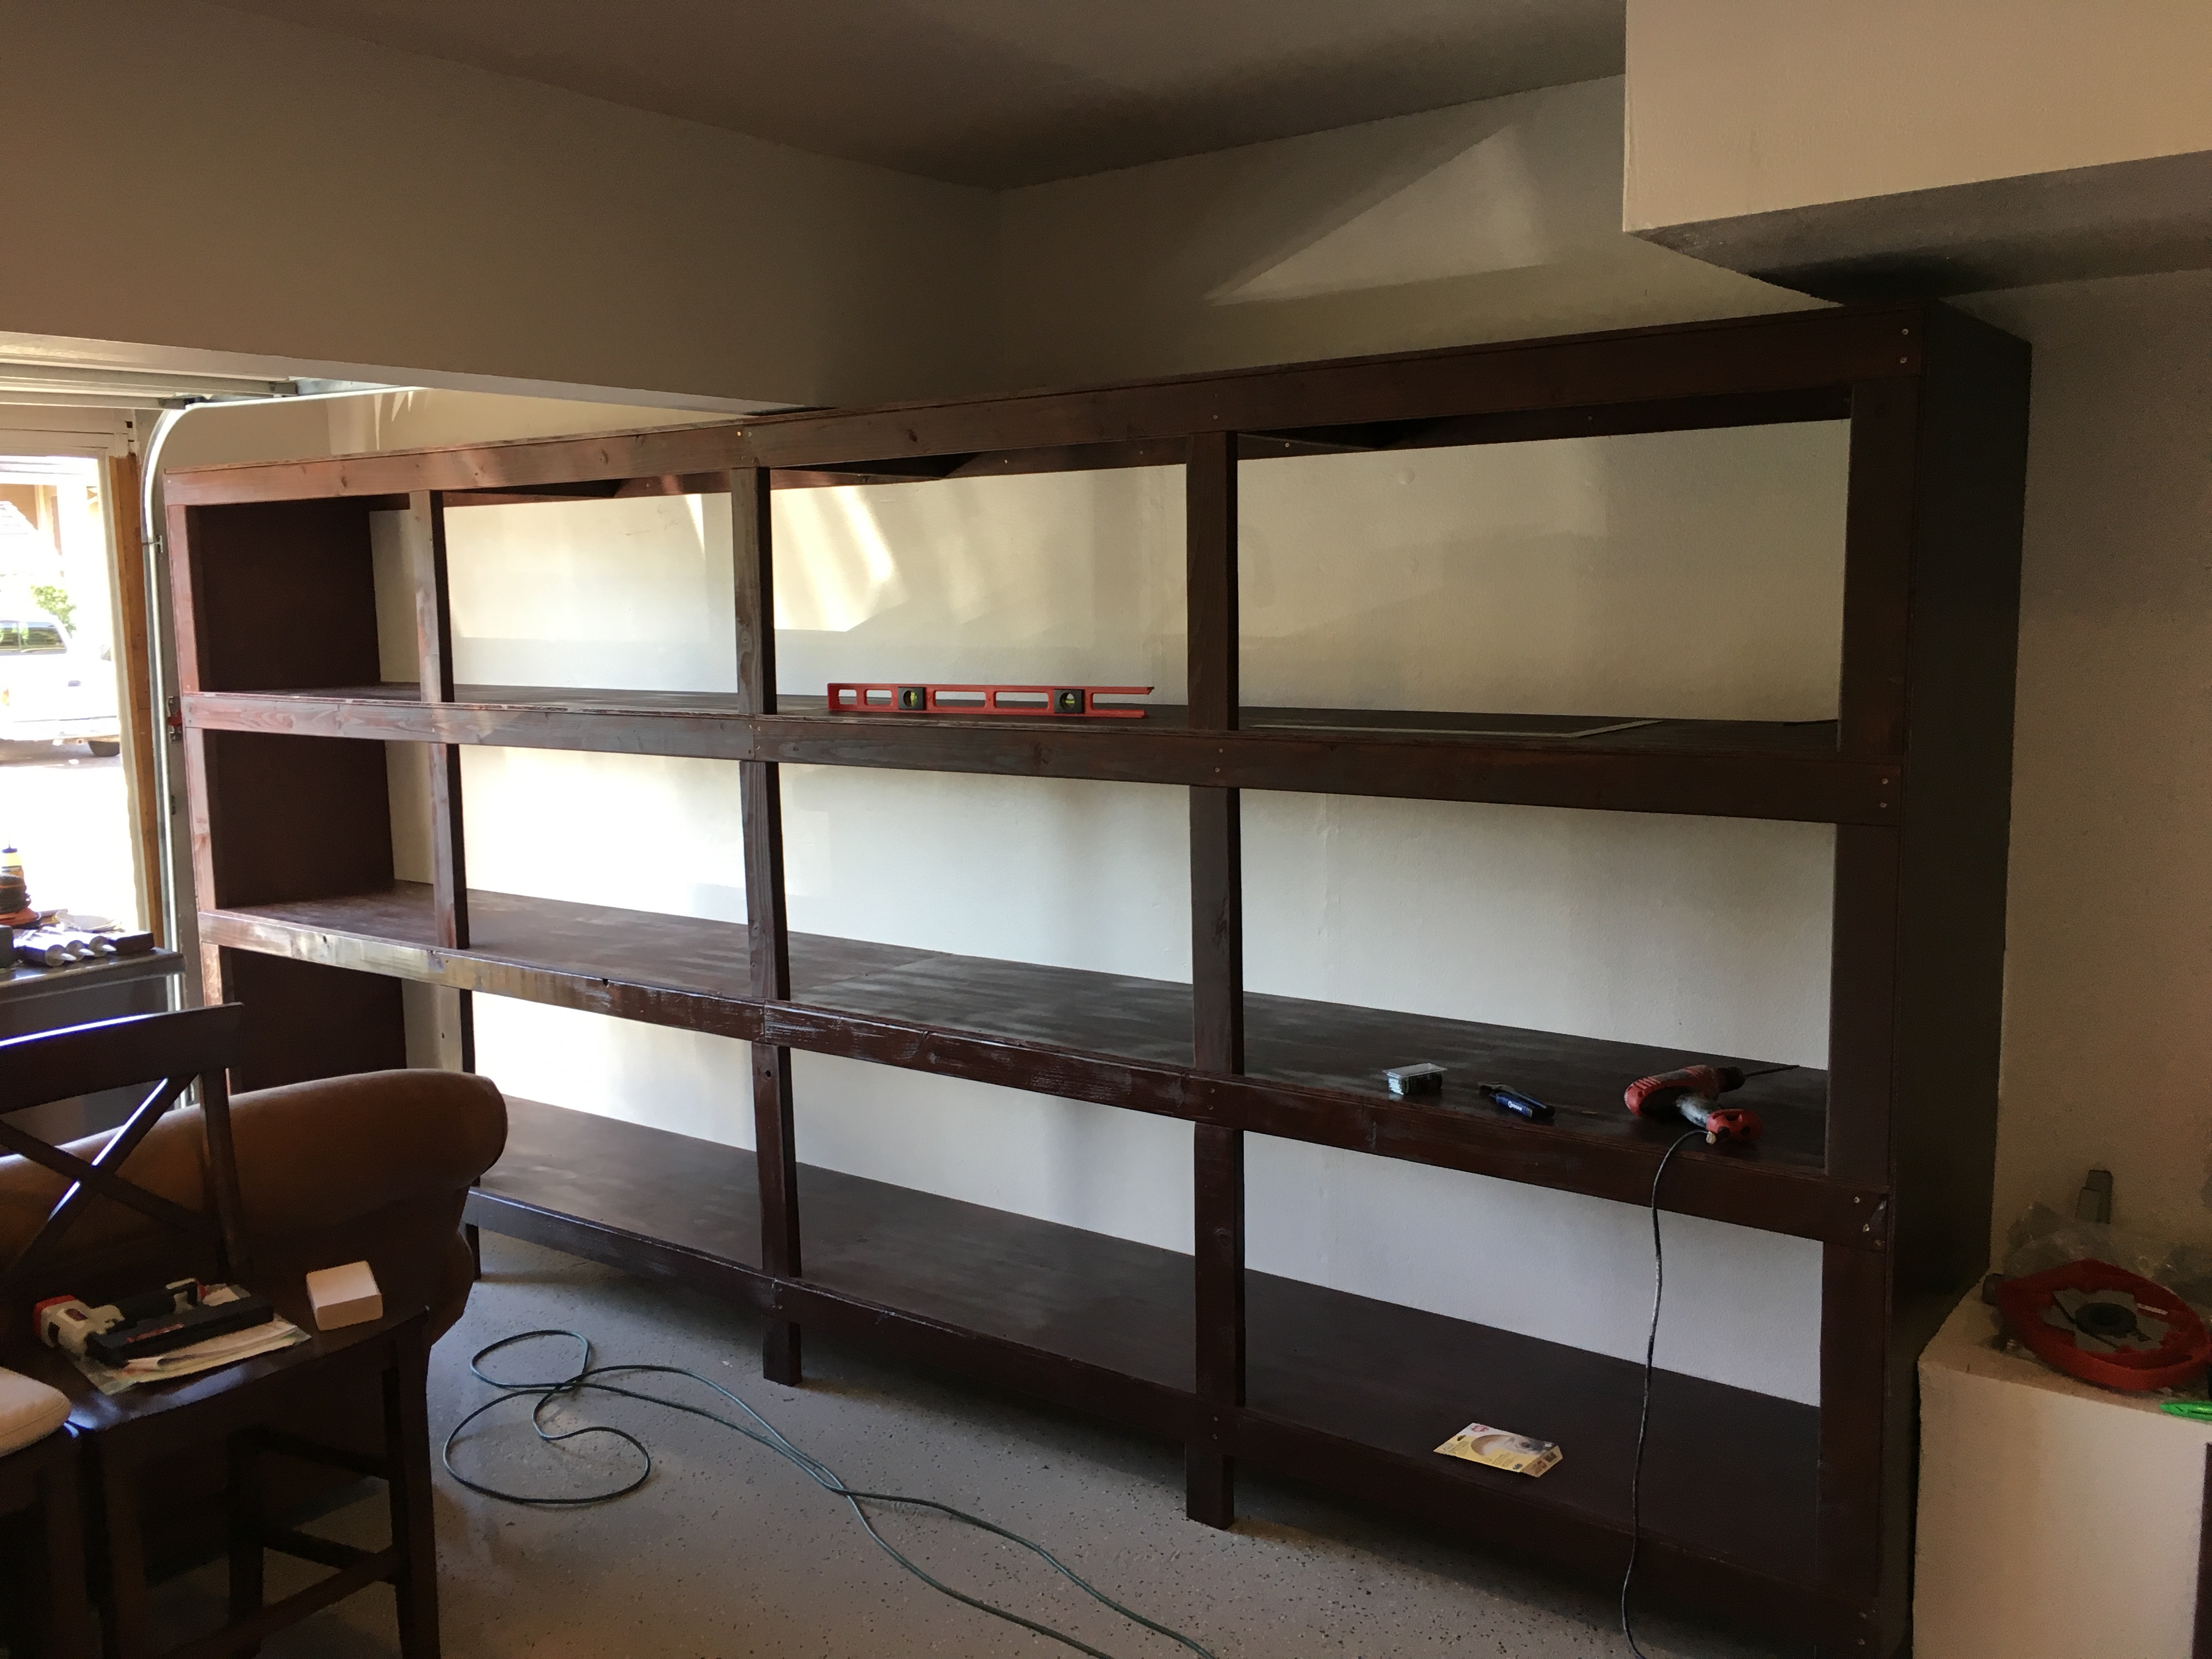
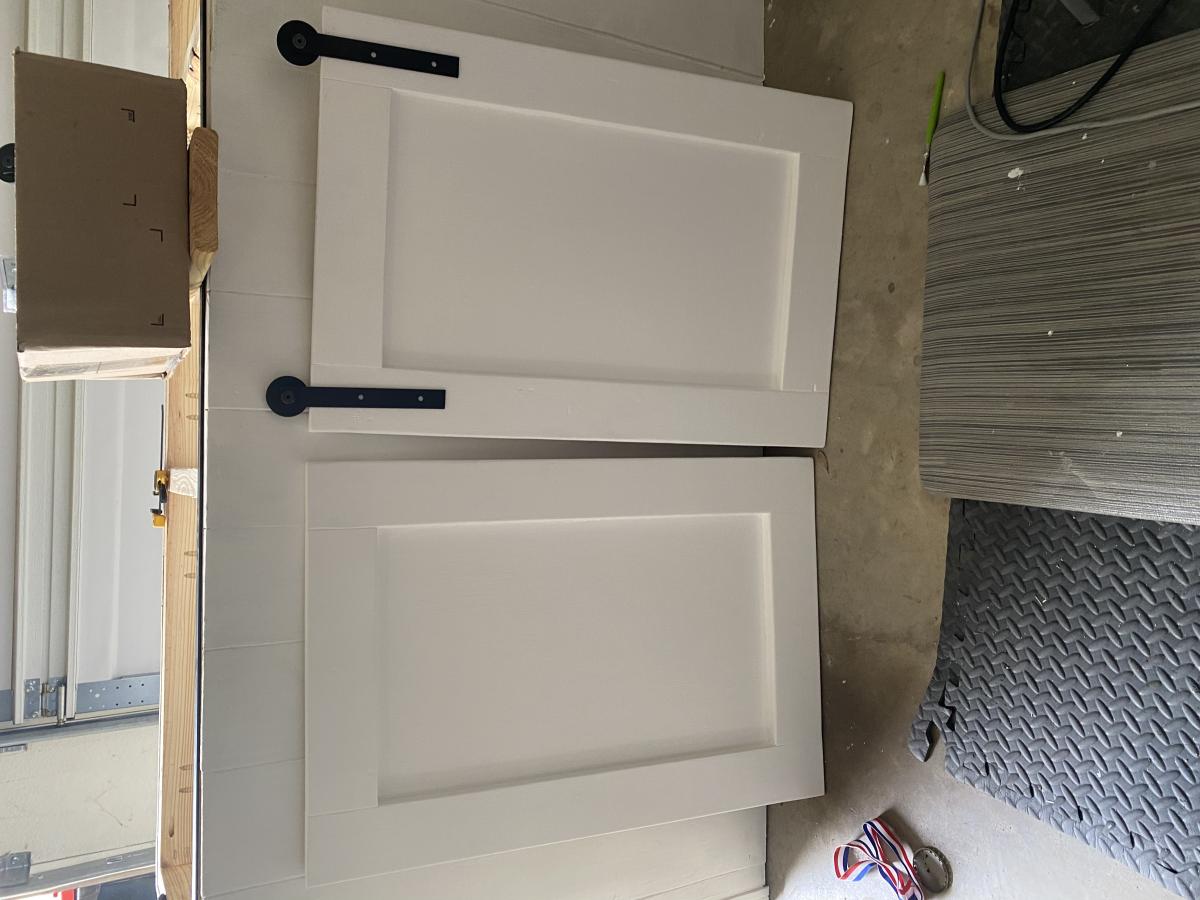
Changed the plans around some so that we can install shaker style doors later on.
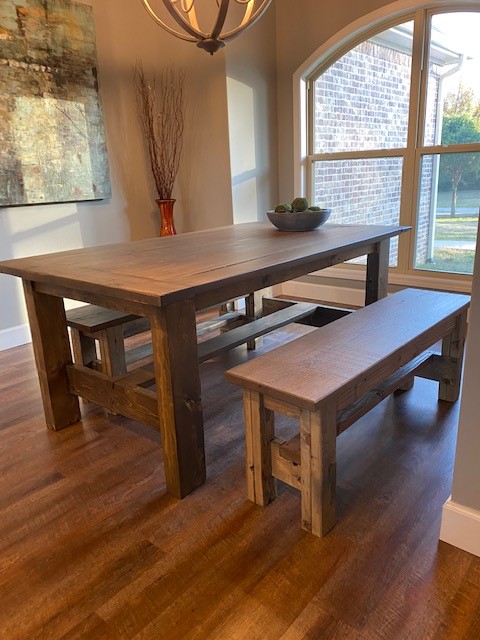
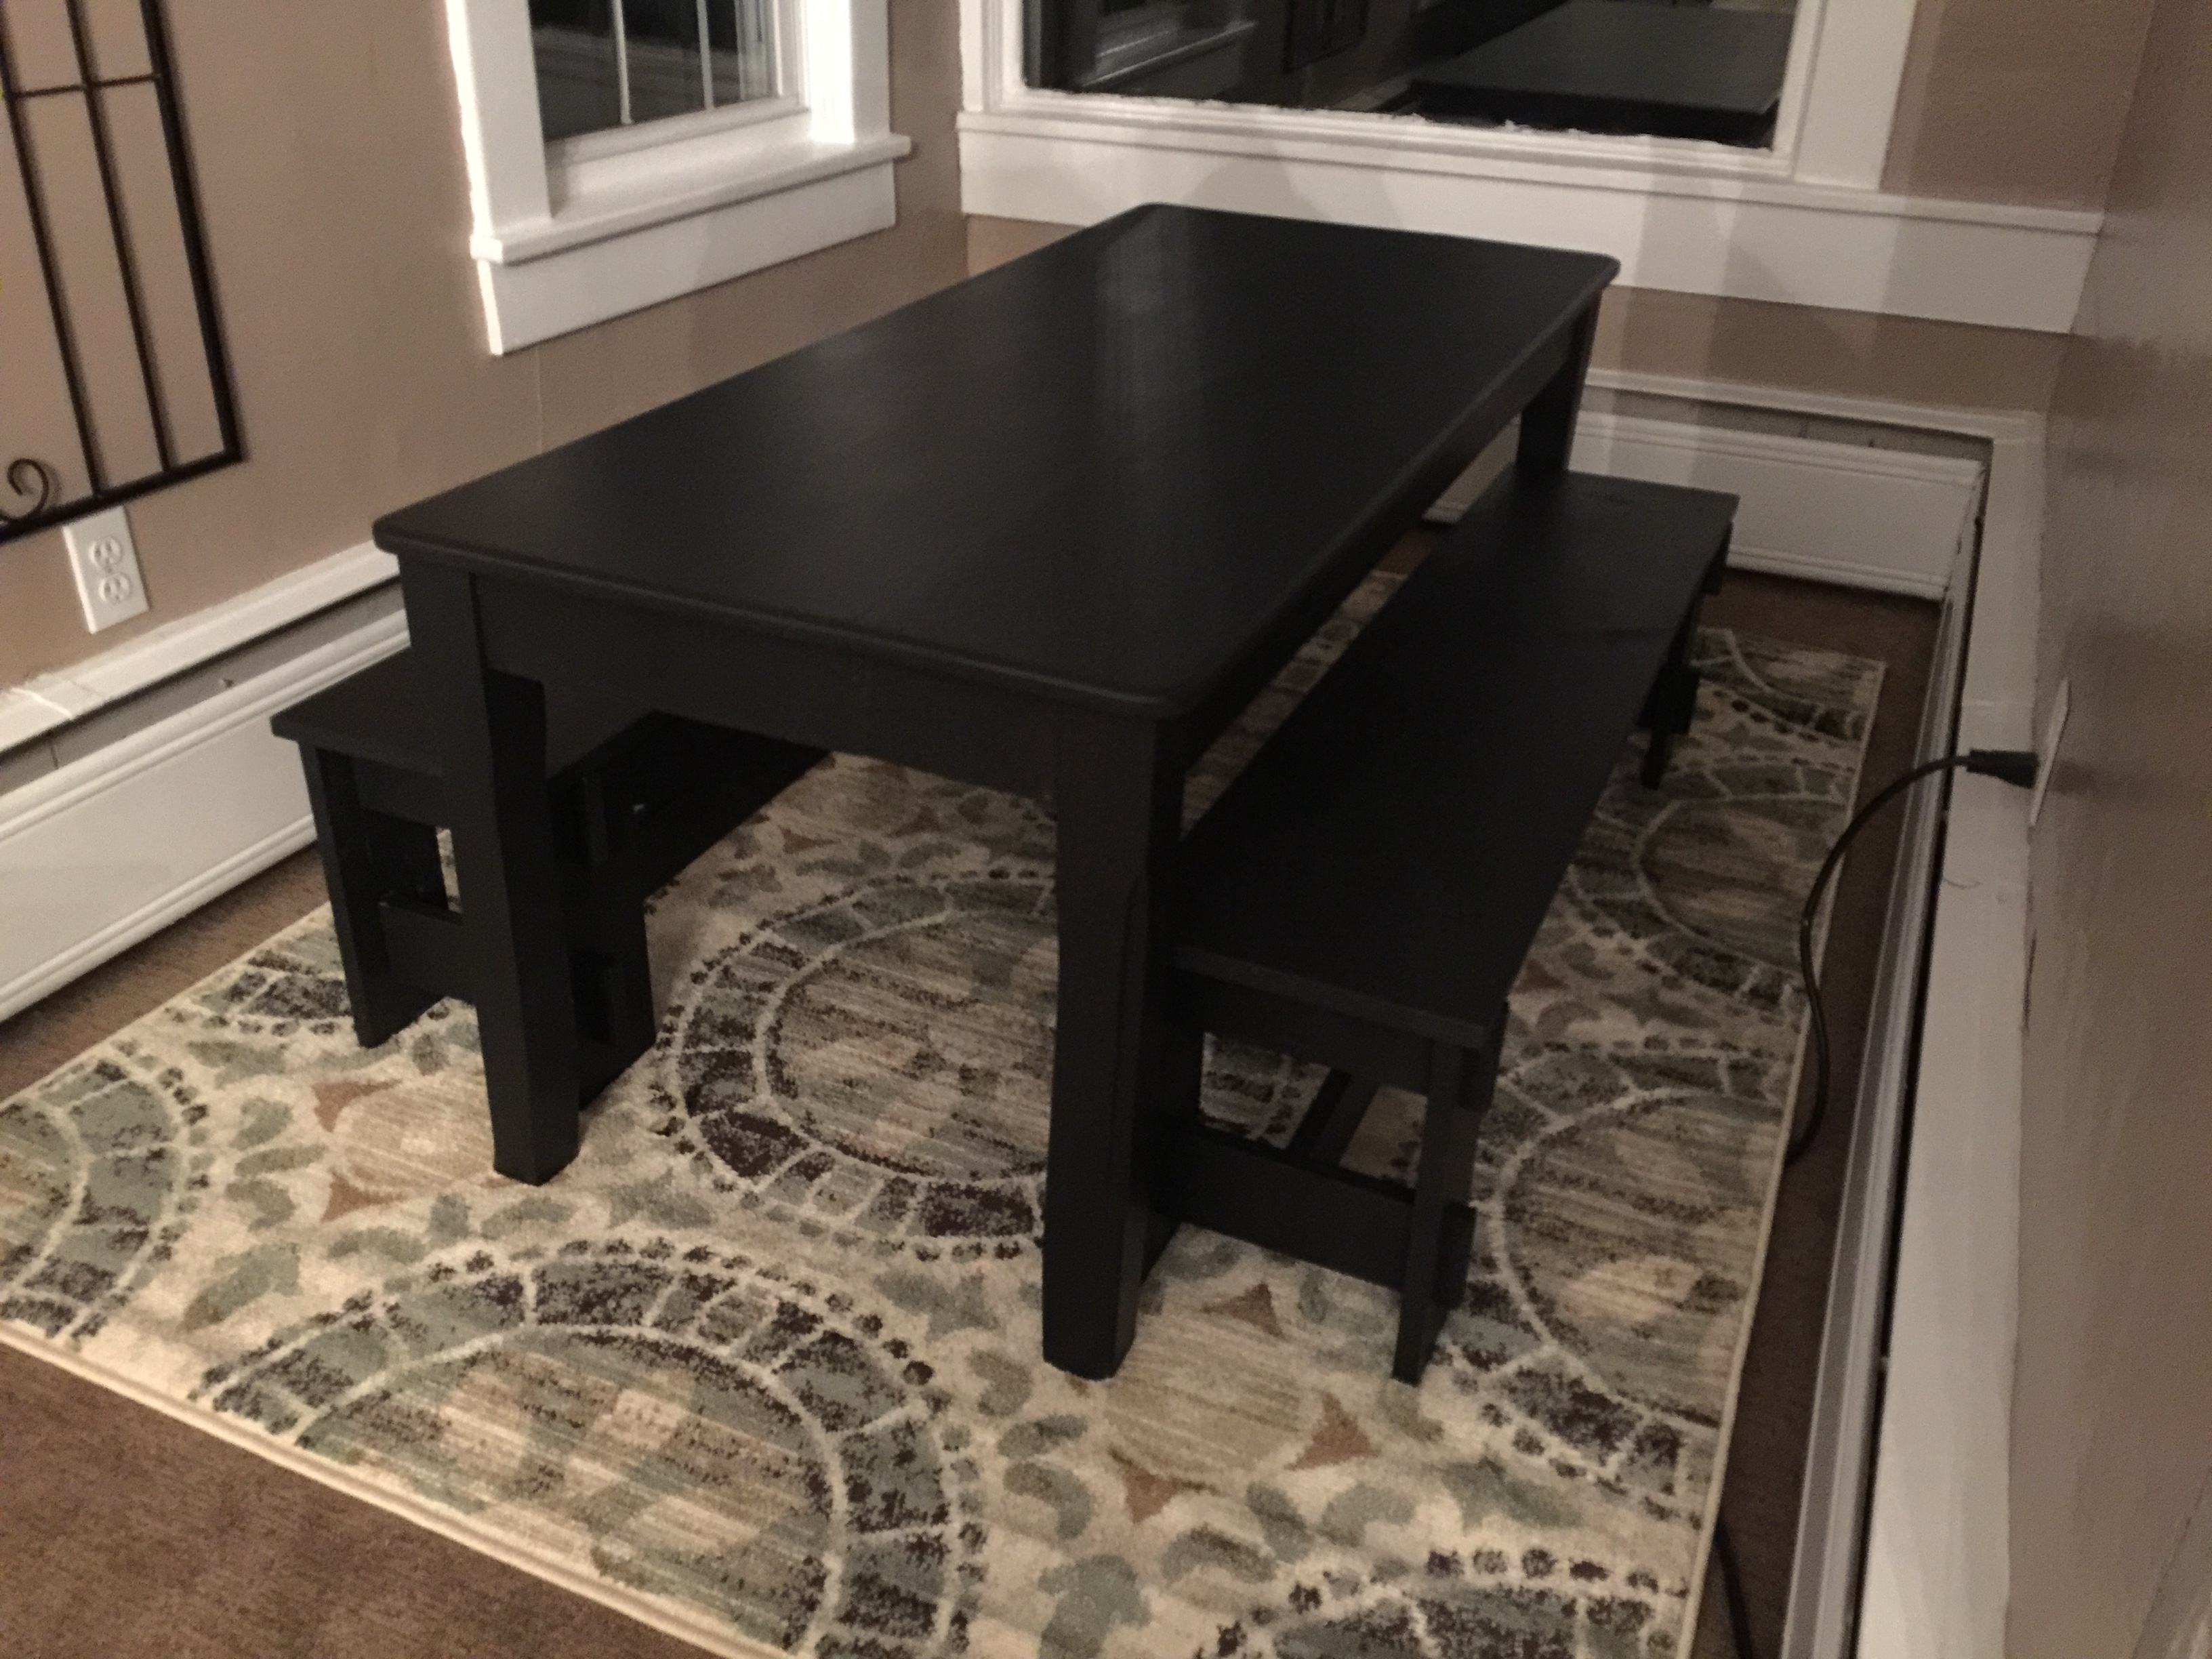
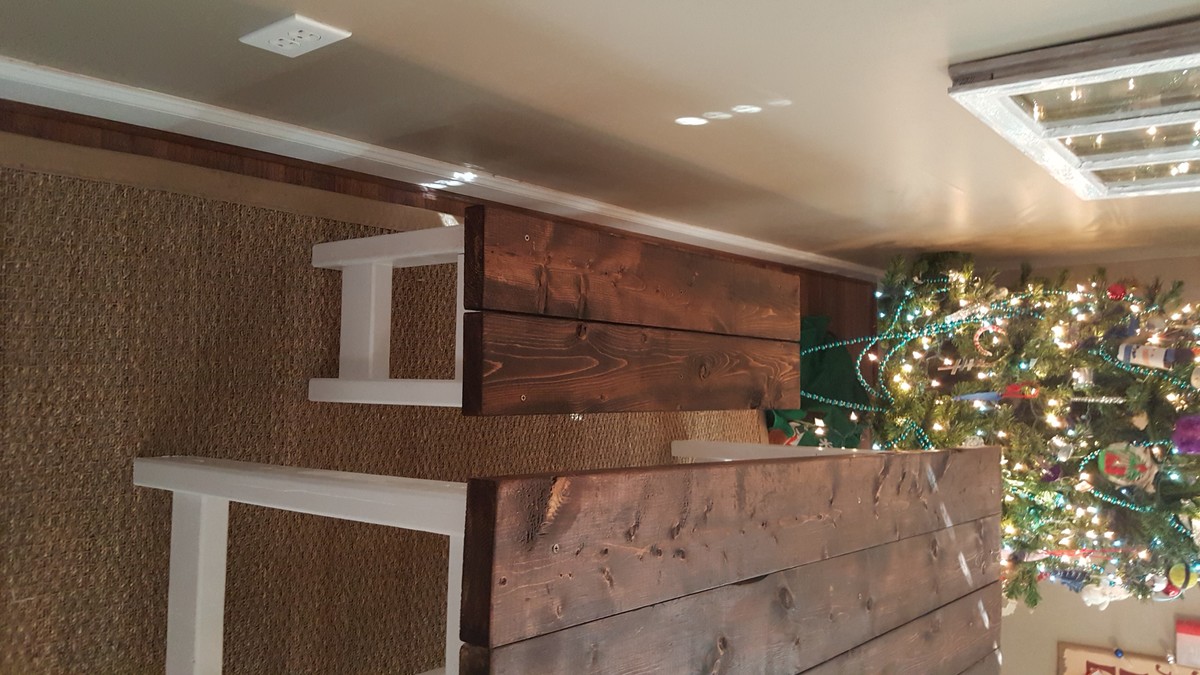
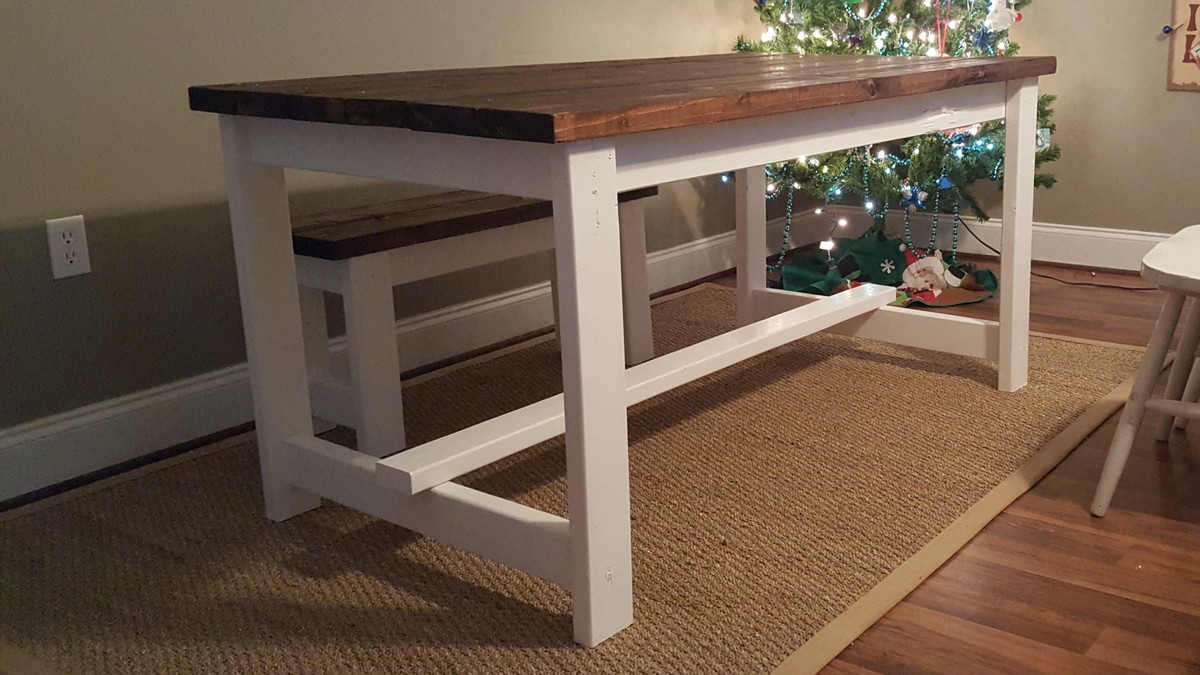
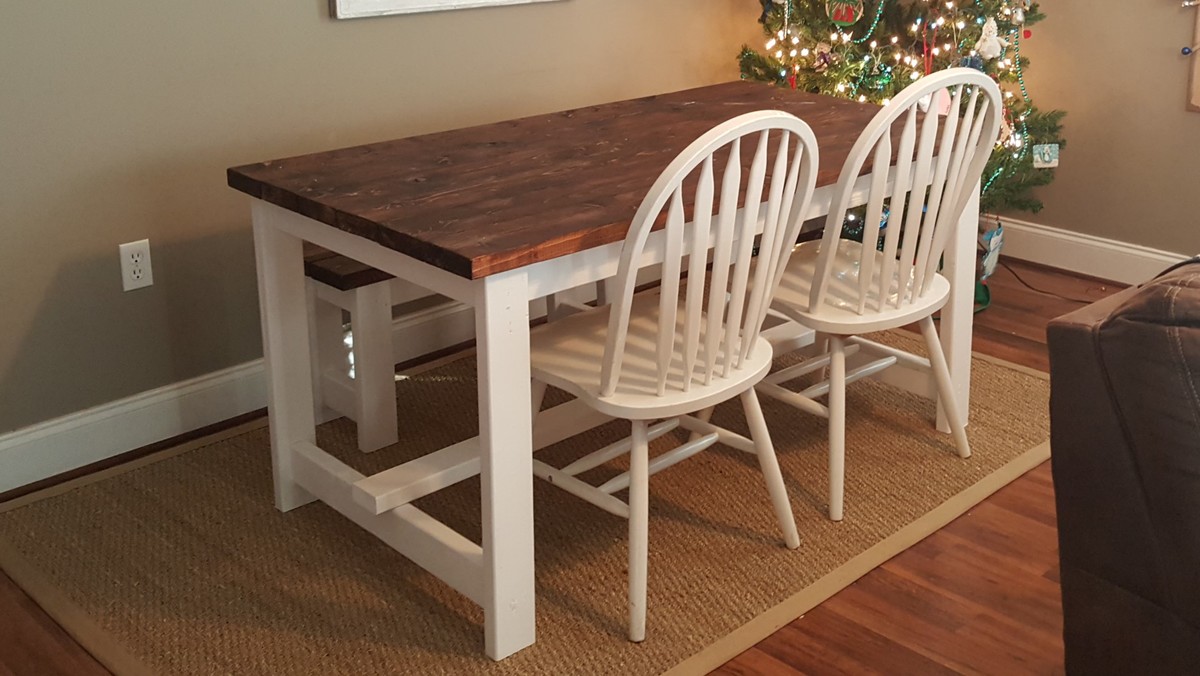
Anna made it easy to build. I did change a few things to fit my dining room but I think it turned out great.
Thanks Anna
Shawn Roleson
Tue, 11/16/2021 - 12:29
You did a stunning job on this build, thank you for sharing!

Wed, 11/17/2021 - 09:52
Love the chunky legs on this table! Beautiful job, thank you for sending in a brag post!
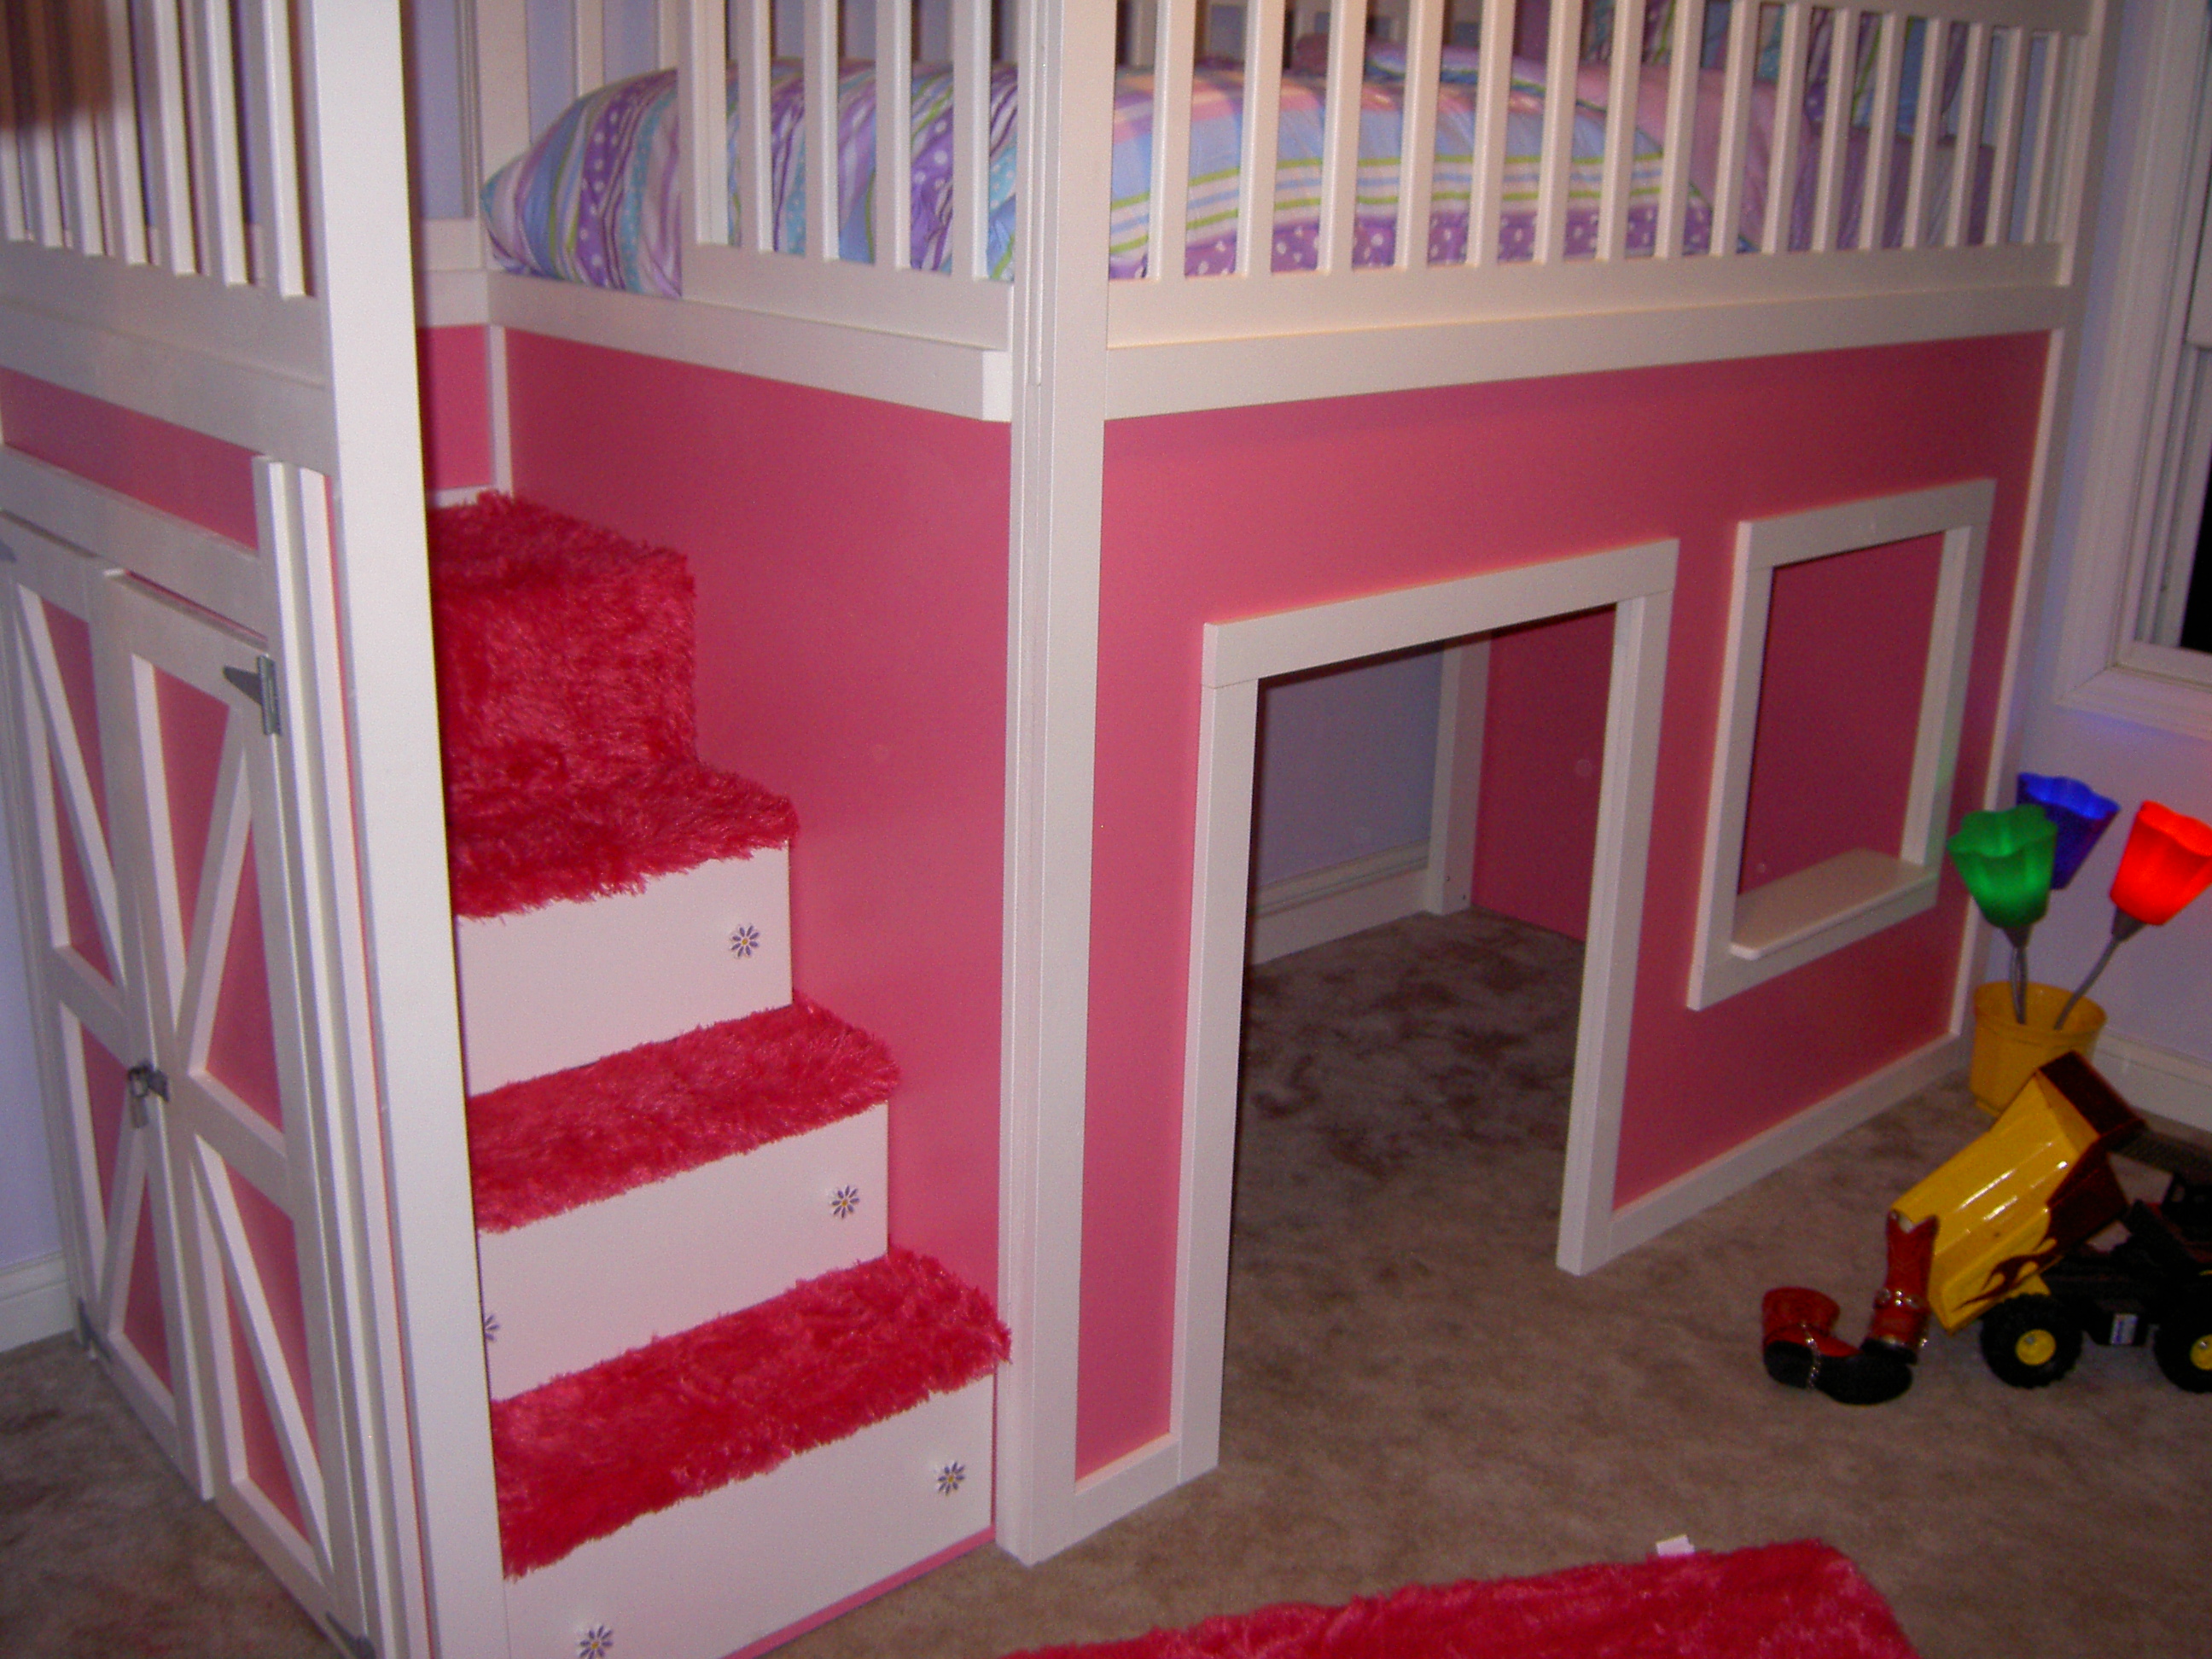
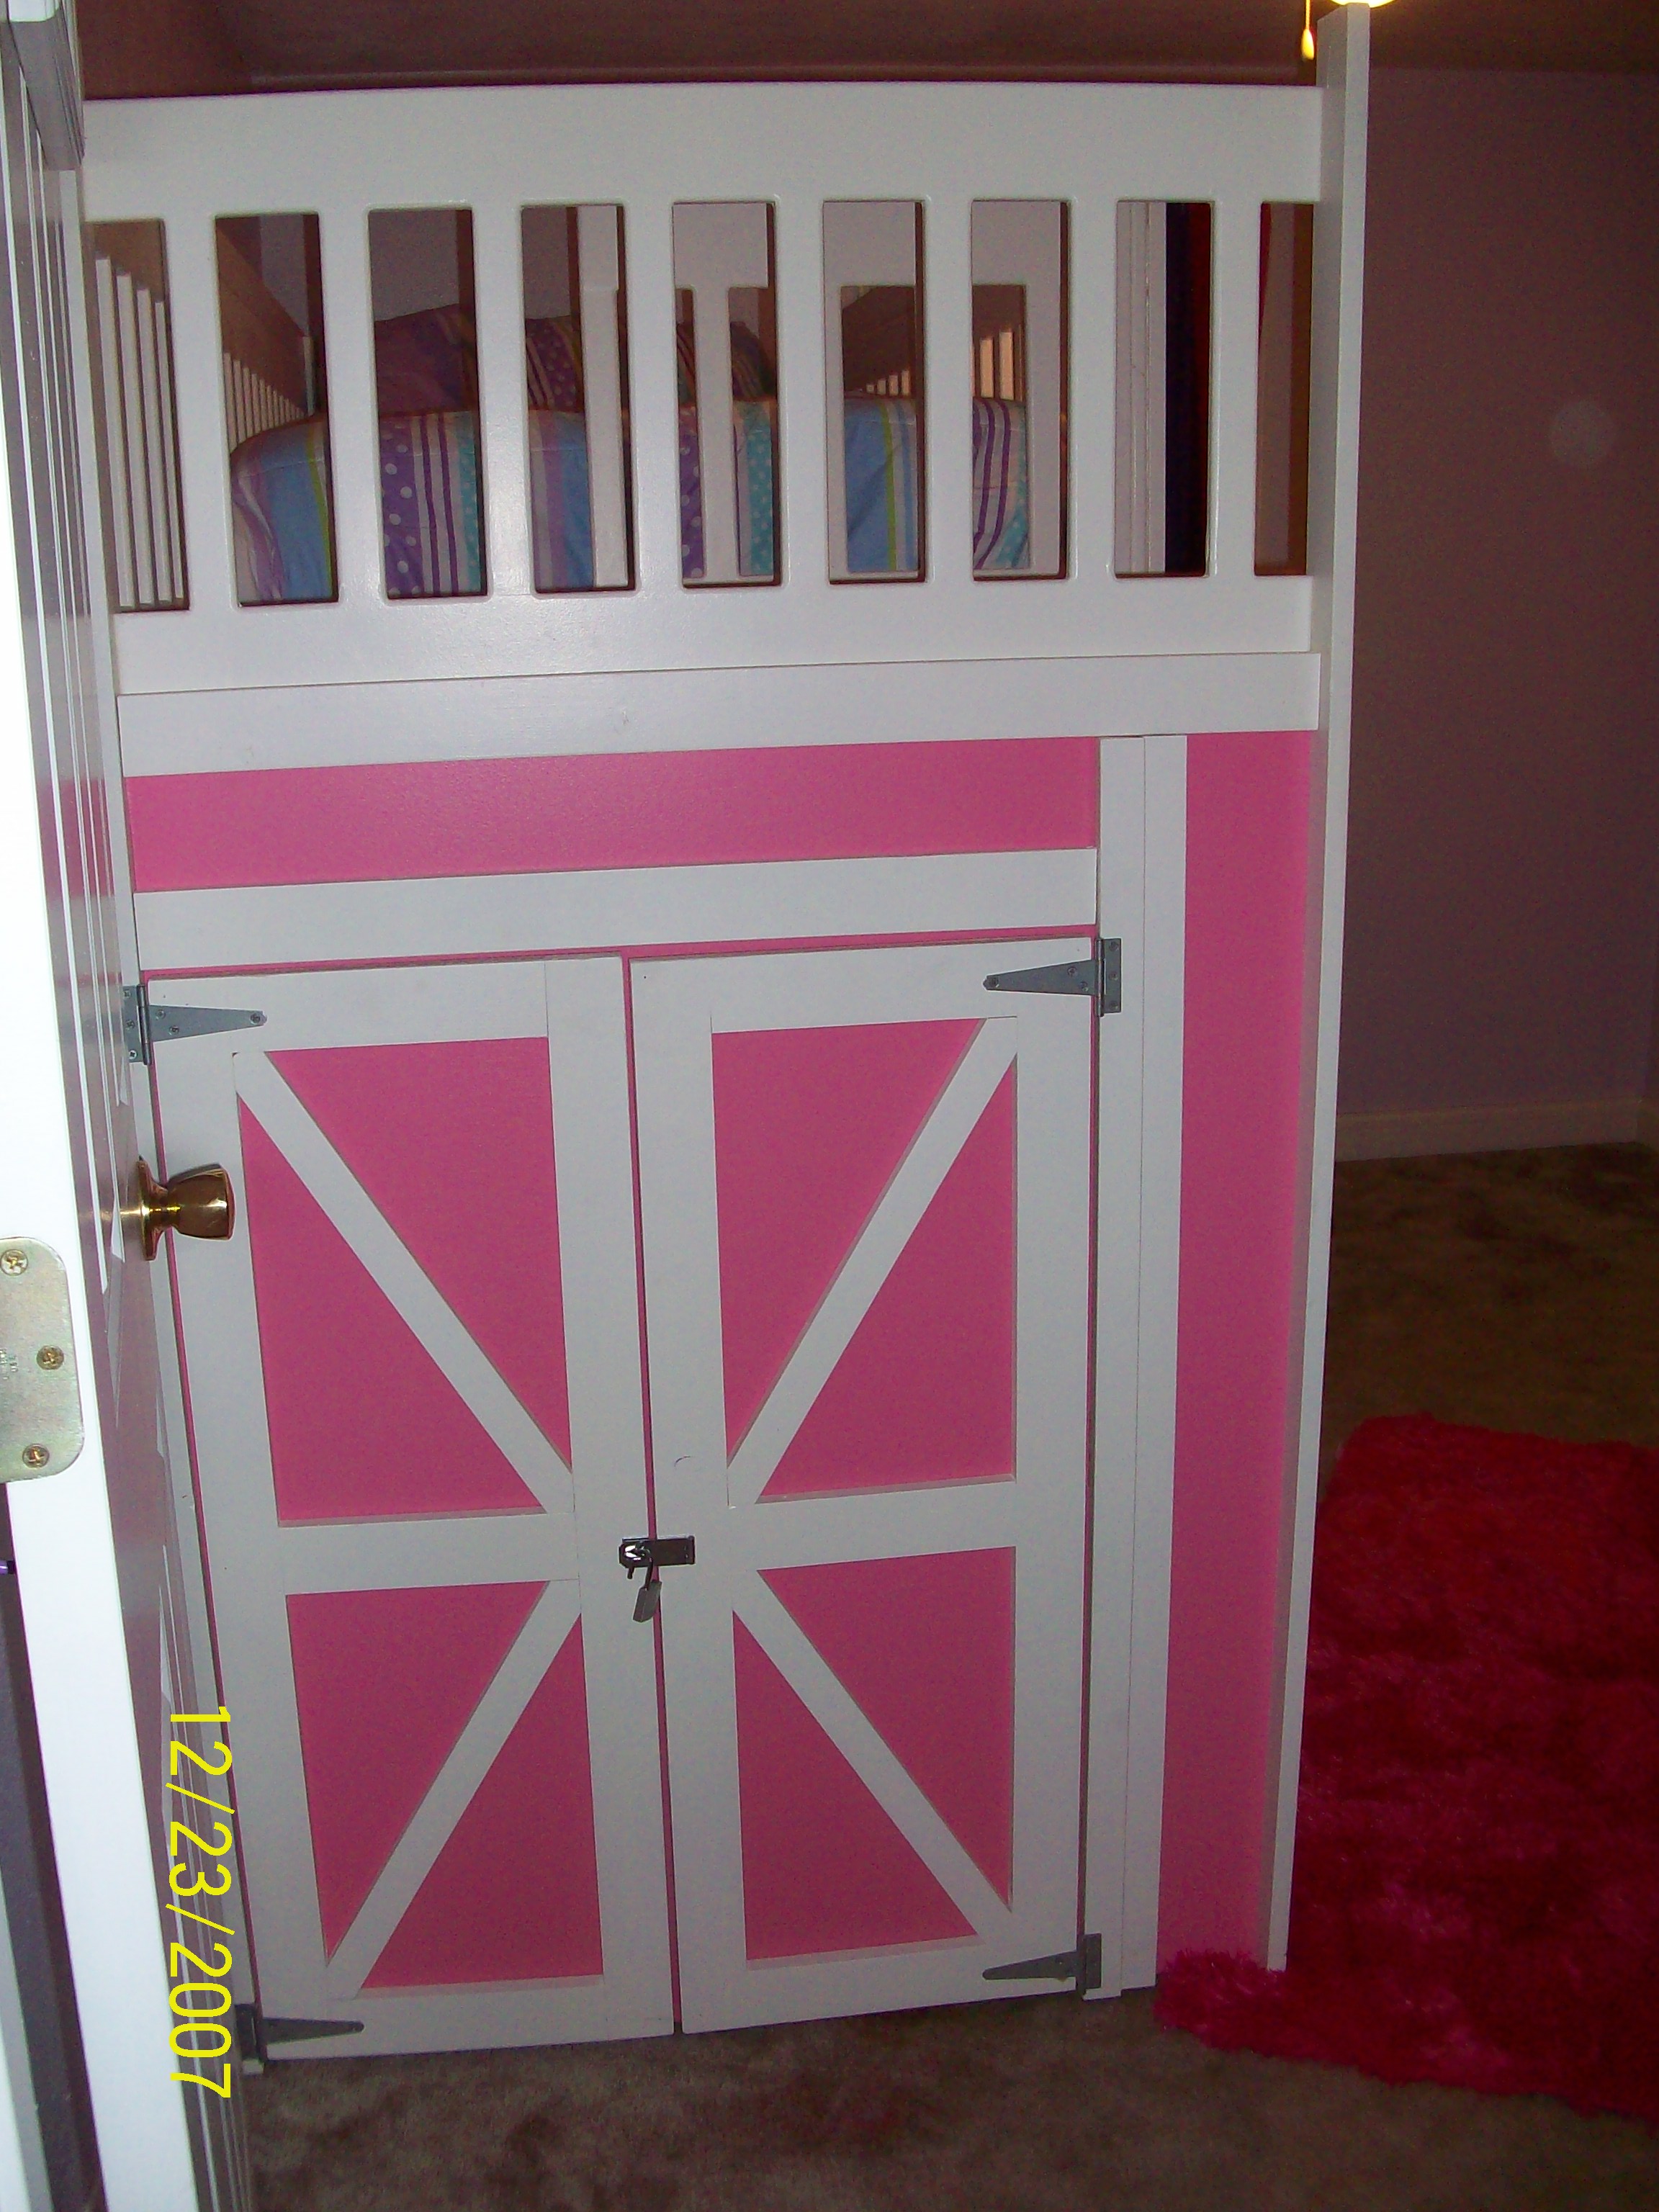
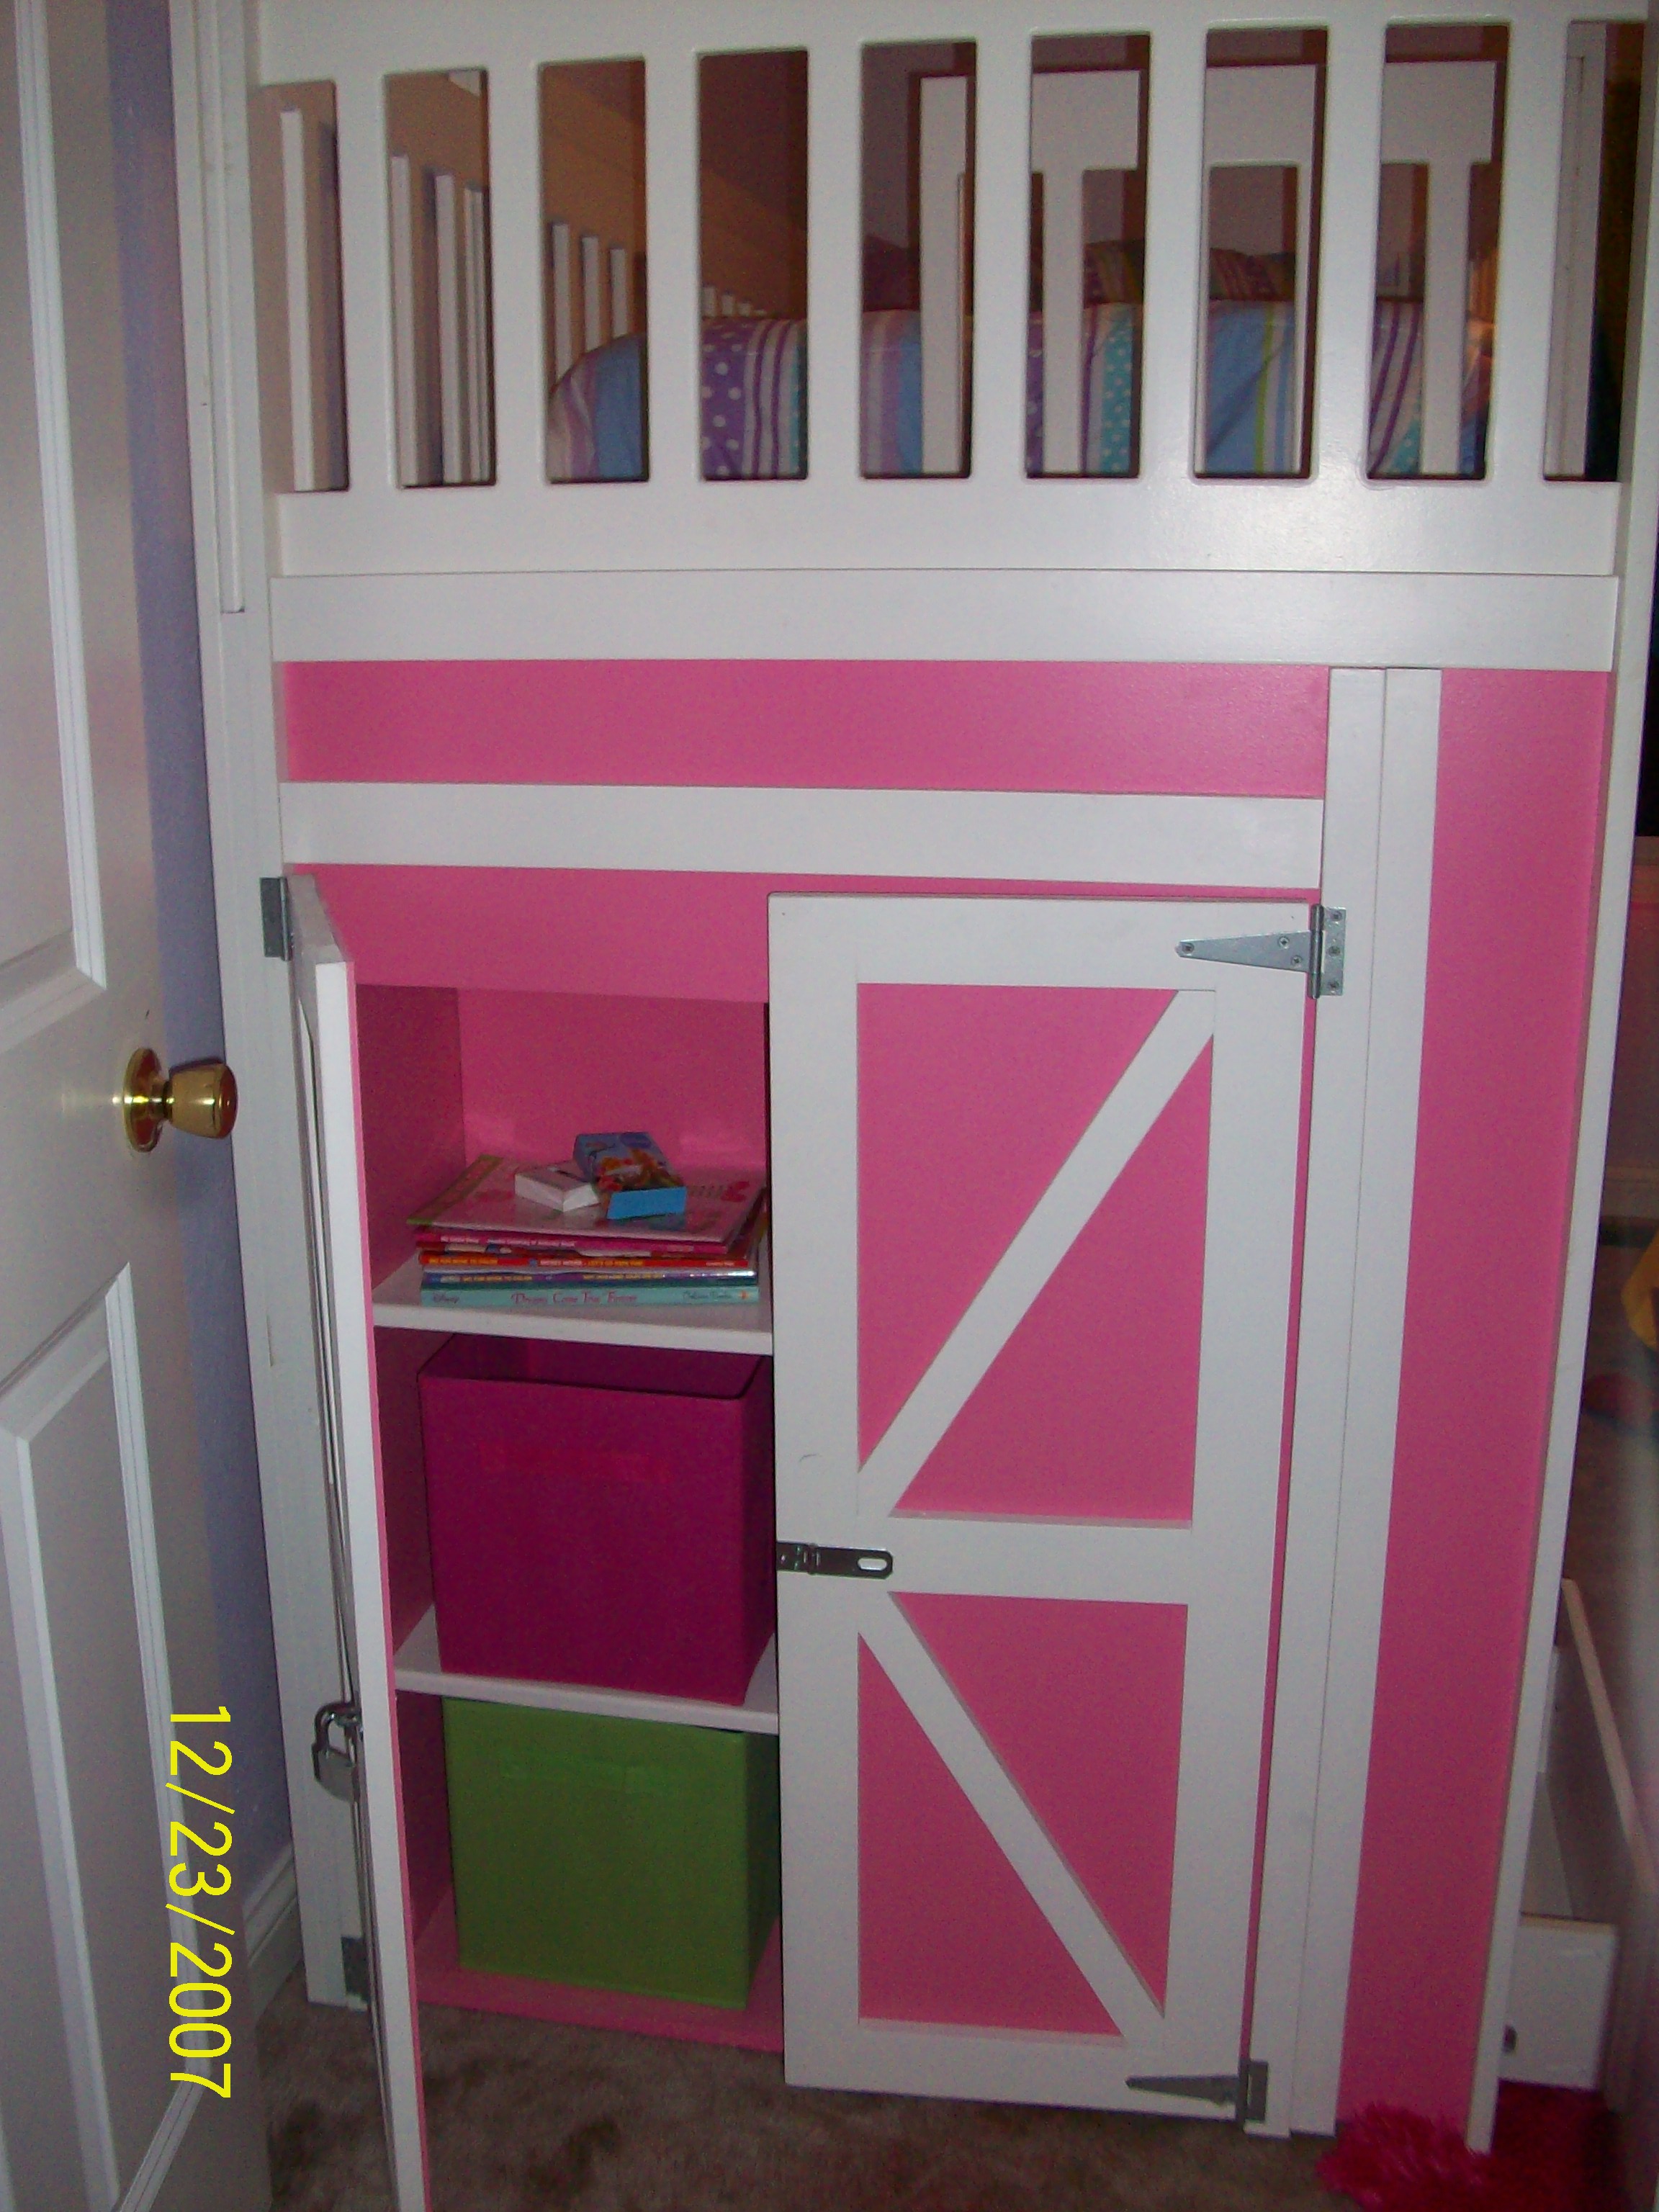
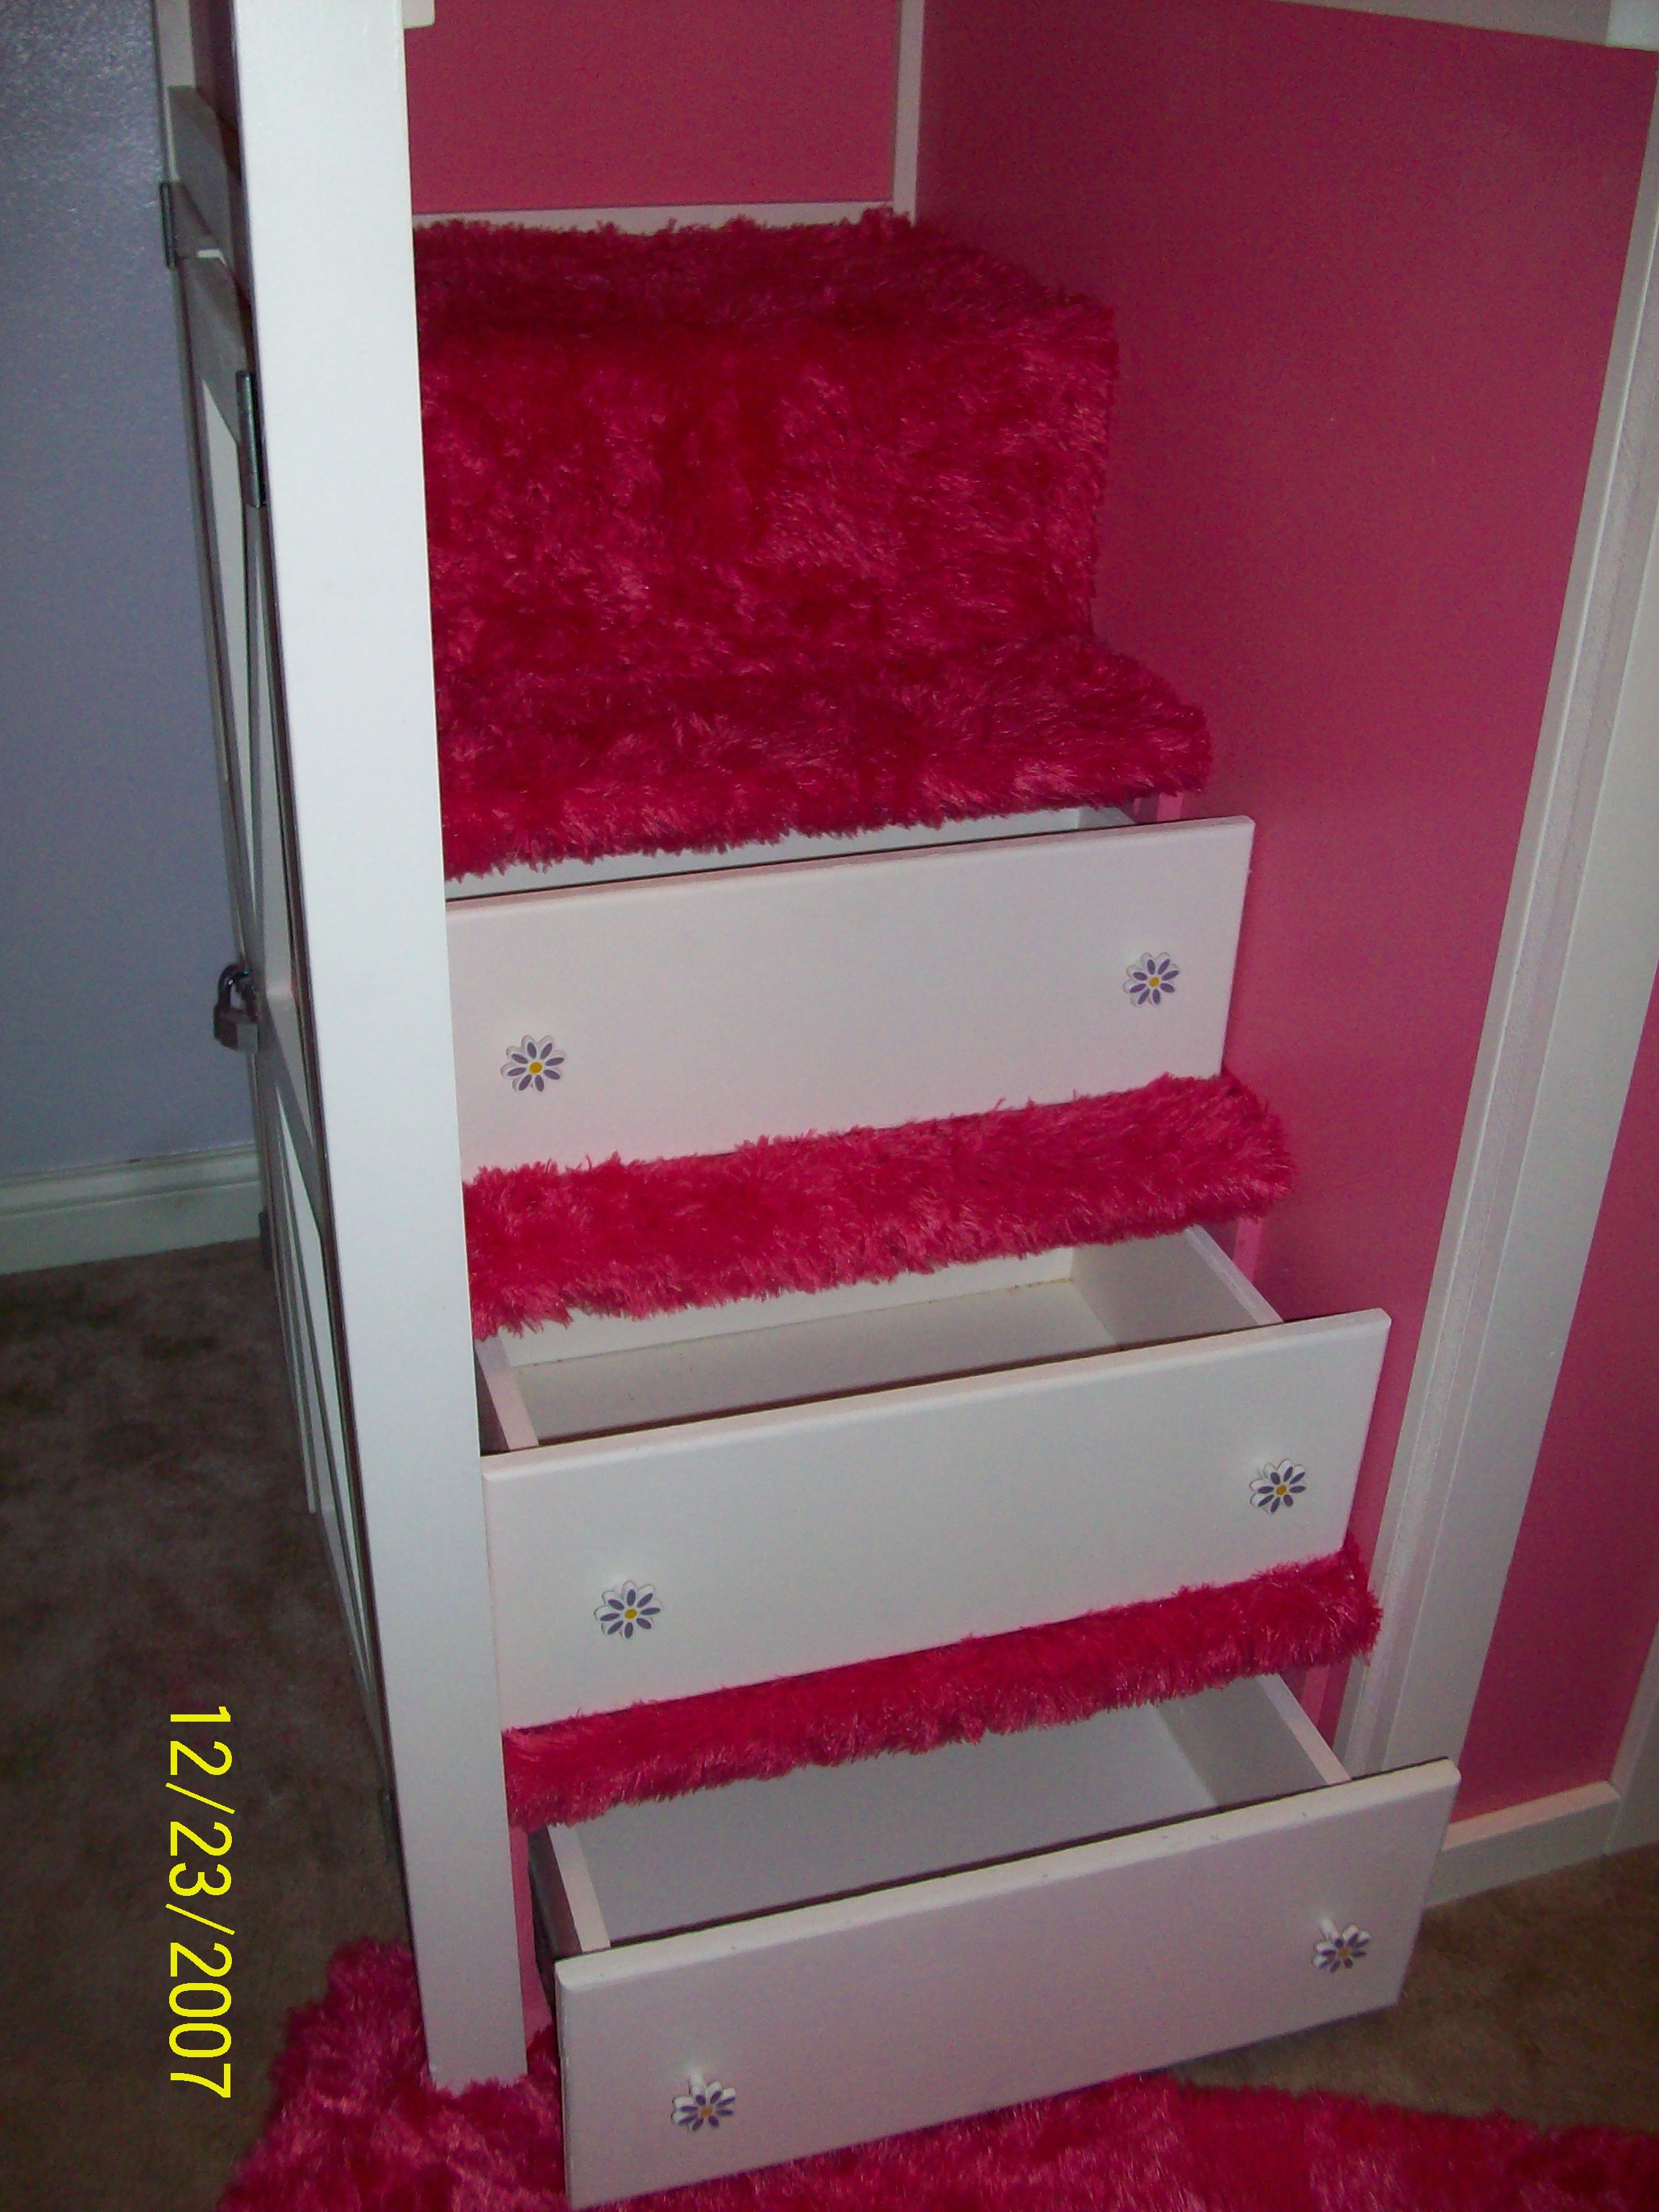
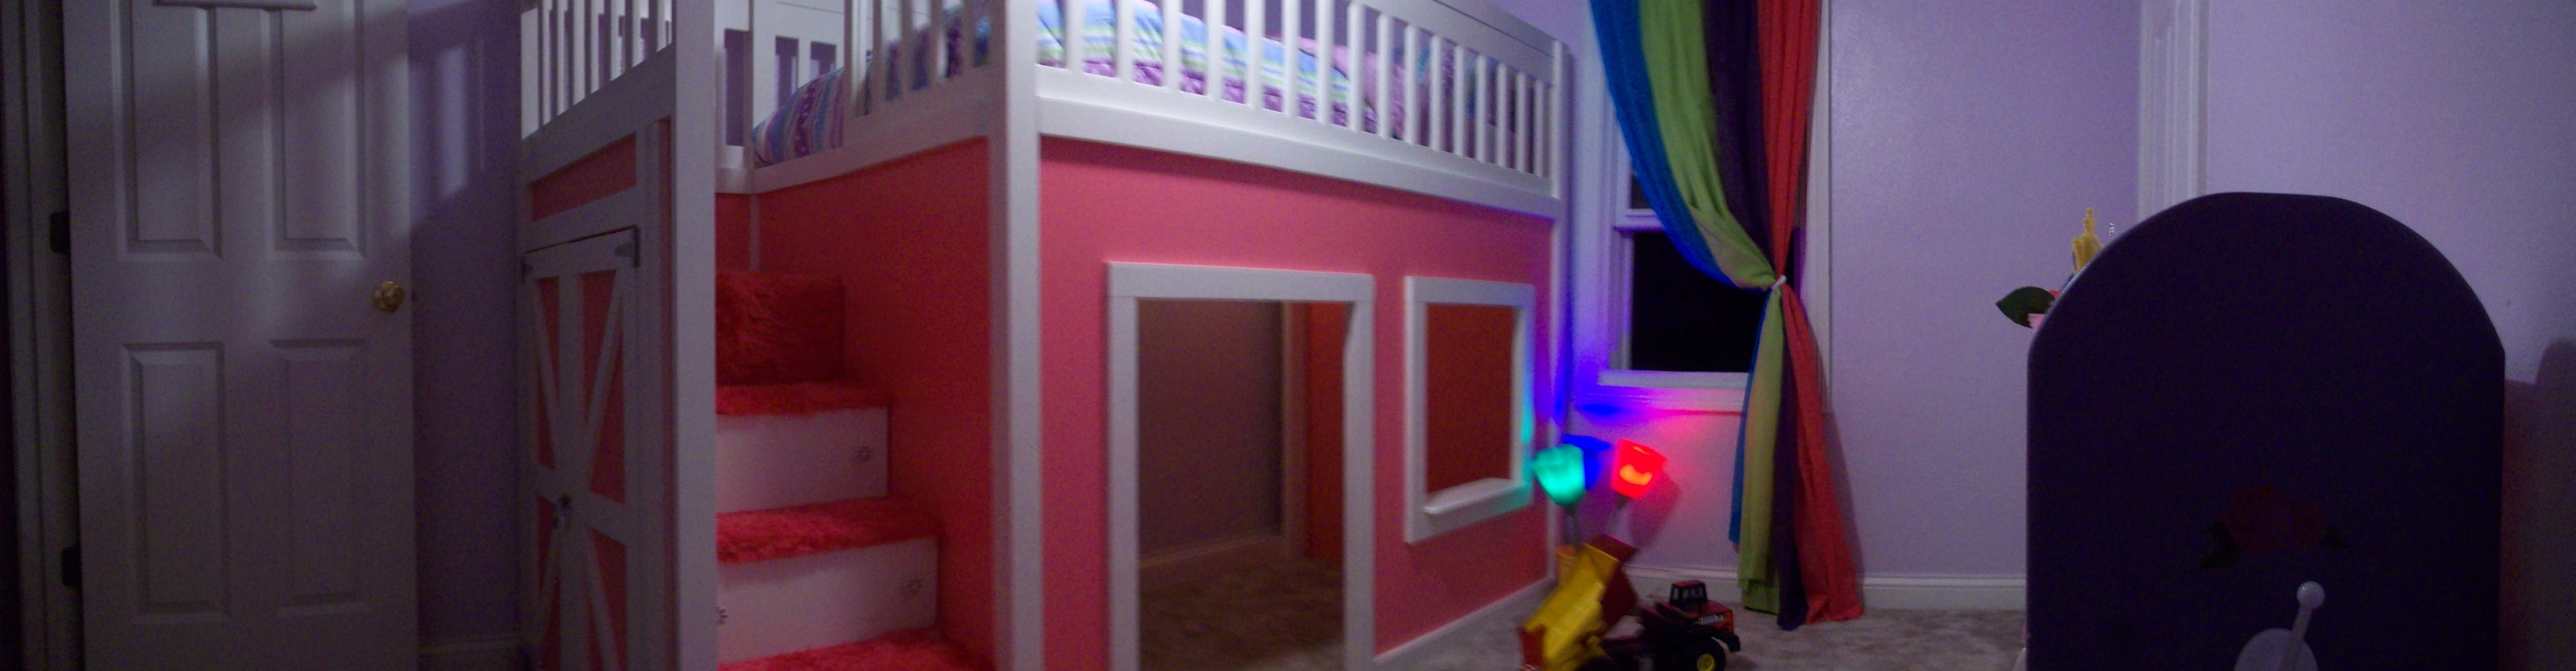
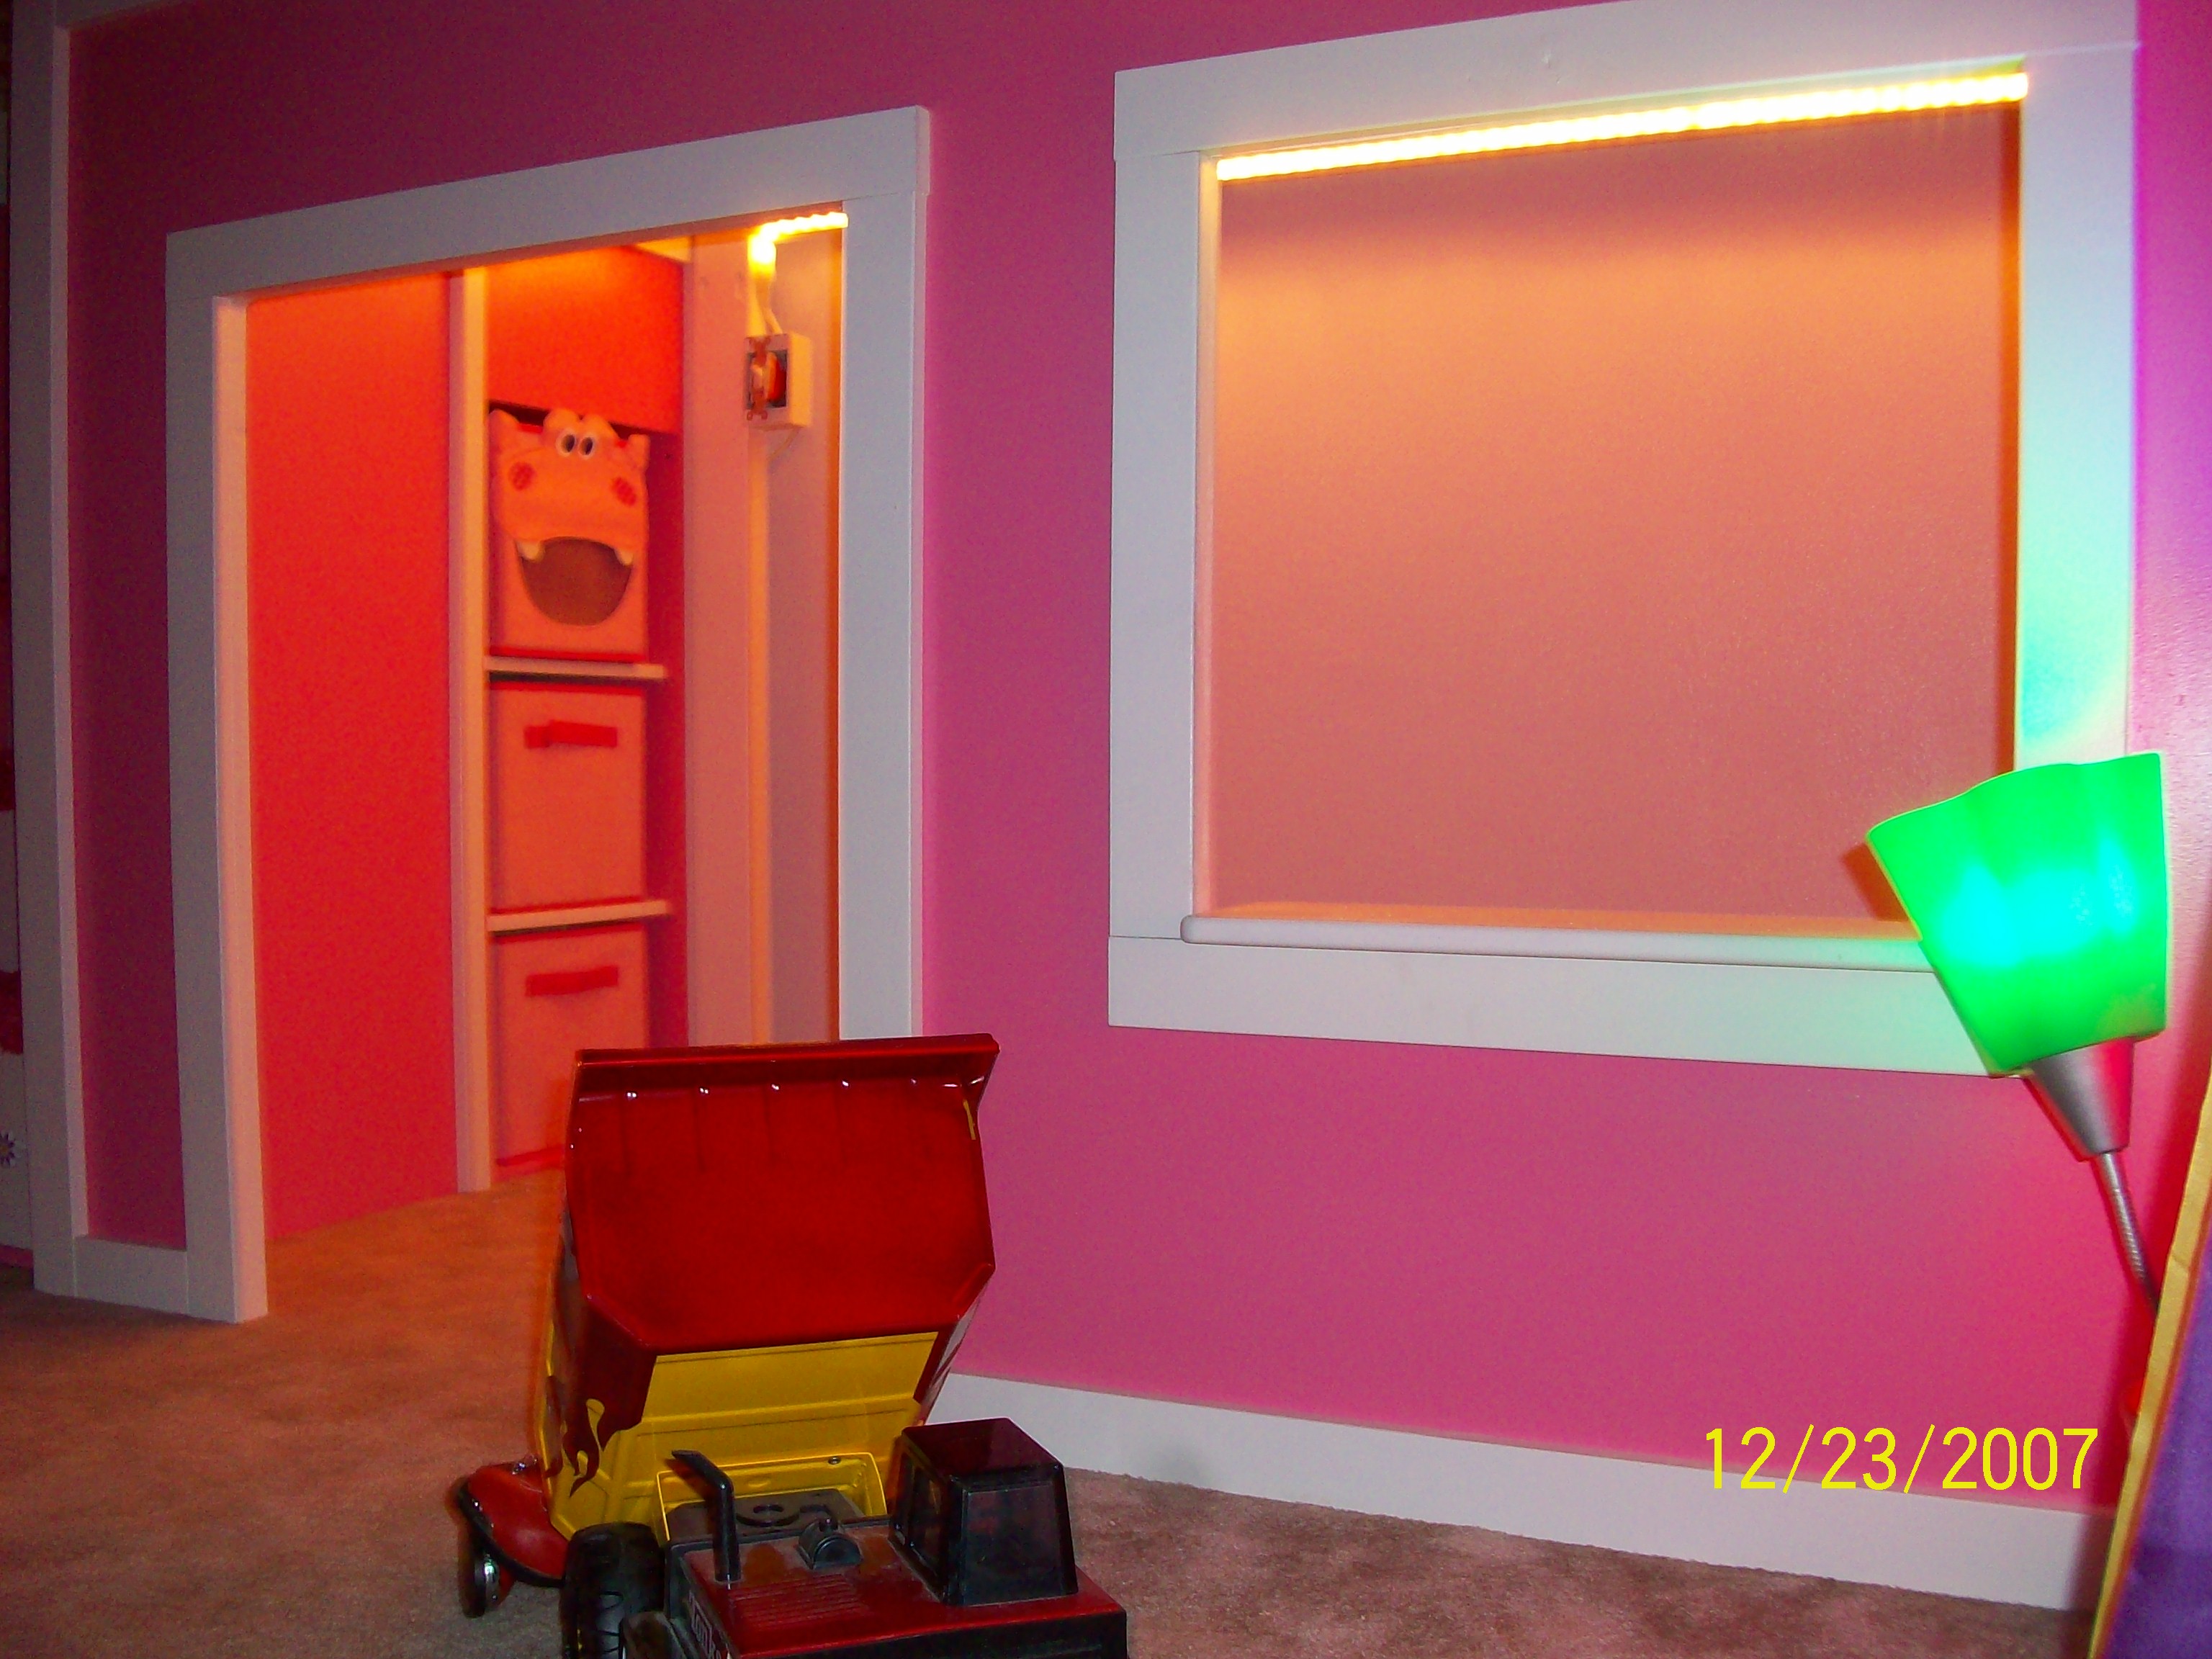
This is my daughters new bed. We modified the plans to fit what we wanted. I added drawers to the stairs. Then put shelves behind the stairs. Added doors so we can hide the shelves. We used rope lights inside to add light with her own light switch.
PS Don't mind the date on the pictures. Forgot to change the date.

I scaled down the large rustic x bench plans to create seating for my grandkids at the new kid's table.

Wed, 05/20/2015 - 08:46
I really like that bench. Especially how beefy it looks scaled down like that.
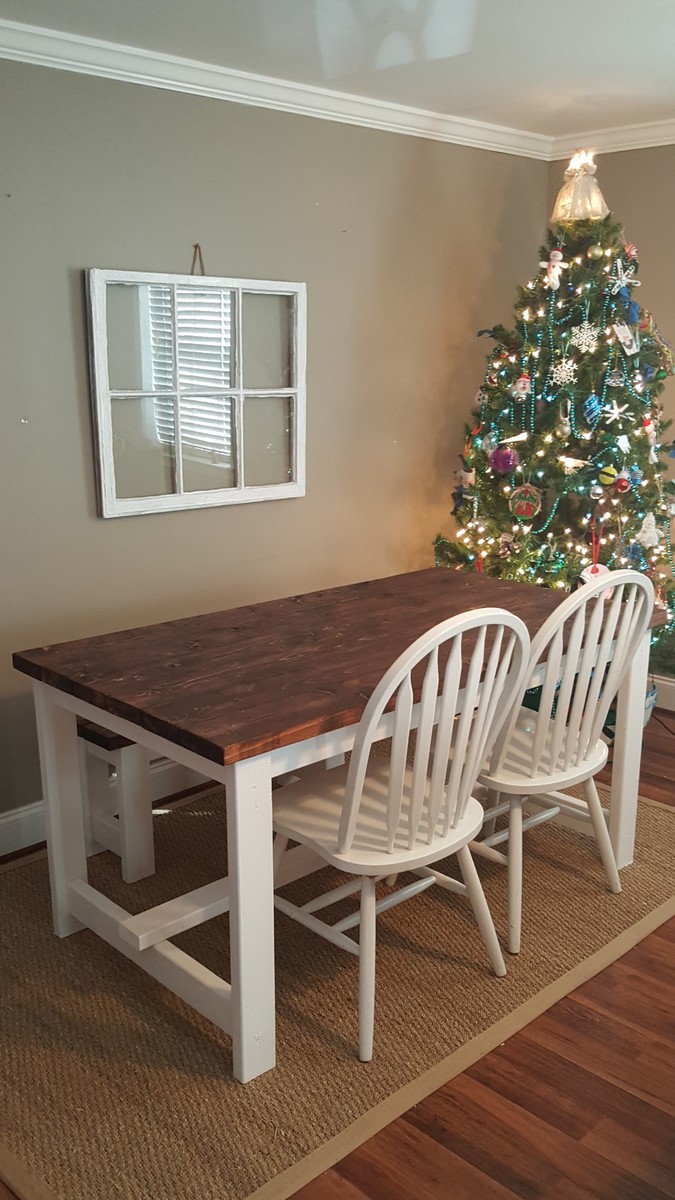
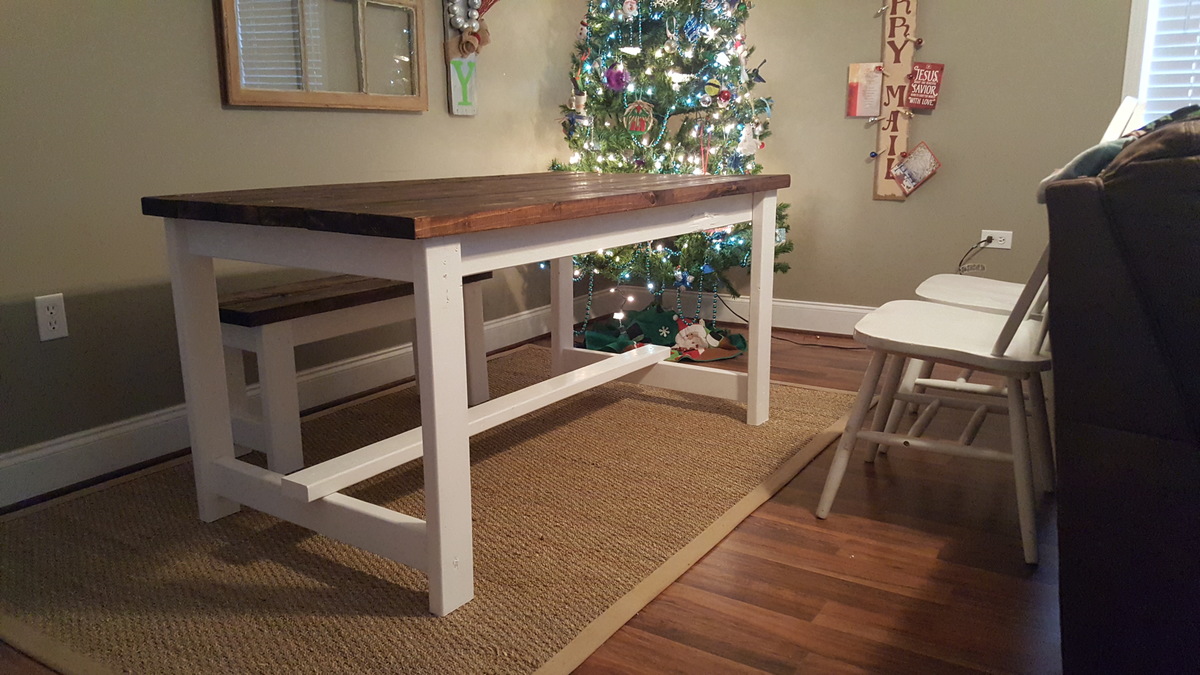
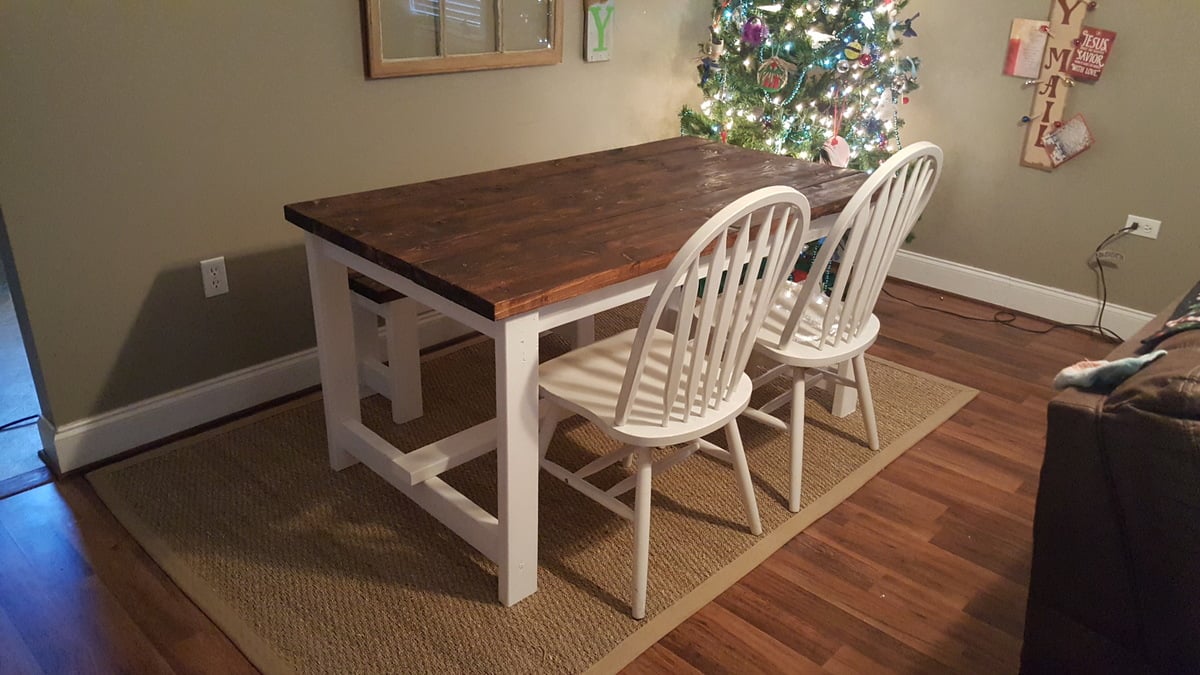
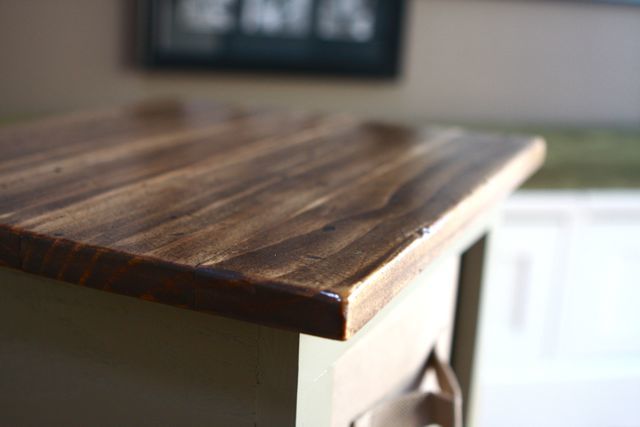
I got the plans from Anna White $50 beginner farmhouse table build. Changed from a 6 ft table to a 5 ft. Built in a few hours but took longer to paint than anything because it took 2 coats.
Thu, 12/28/2017 - 16:23
Hi,
I really like the colour you chose! Did you use "SPF" lumber or something else? I am using SPF, so I am curious to see what the stain will look like once dried, etc.
Thanks again,
- Mike
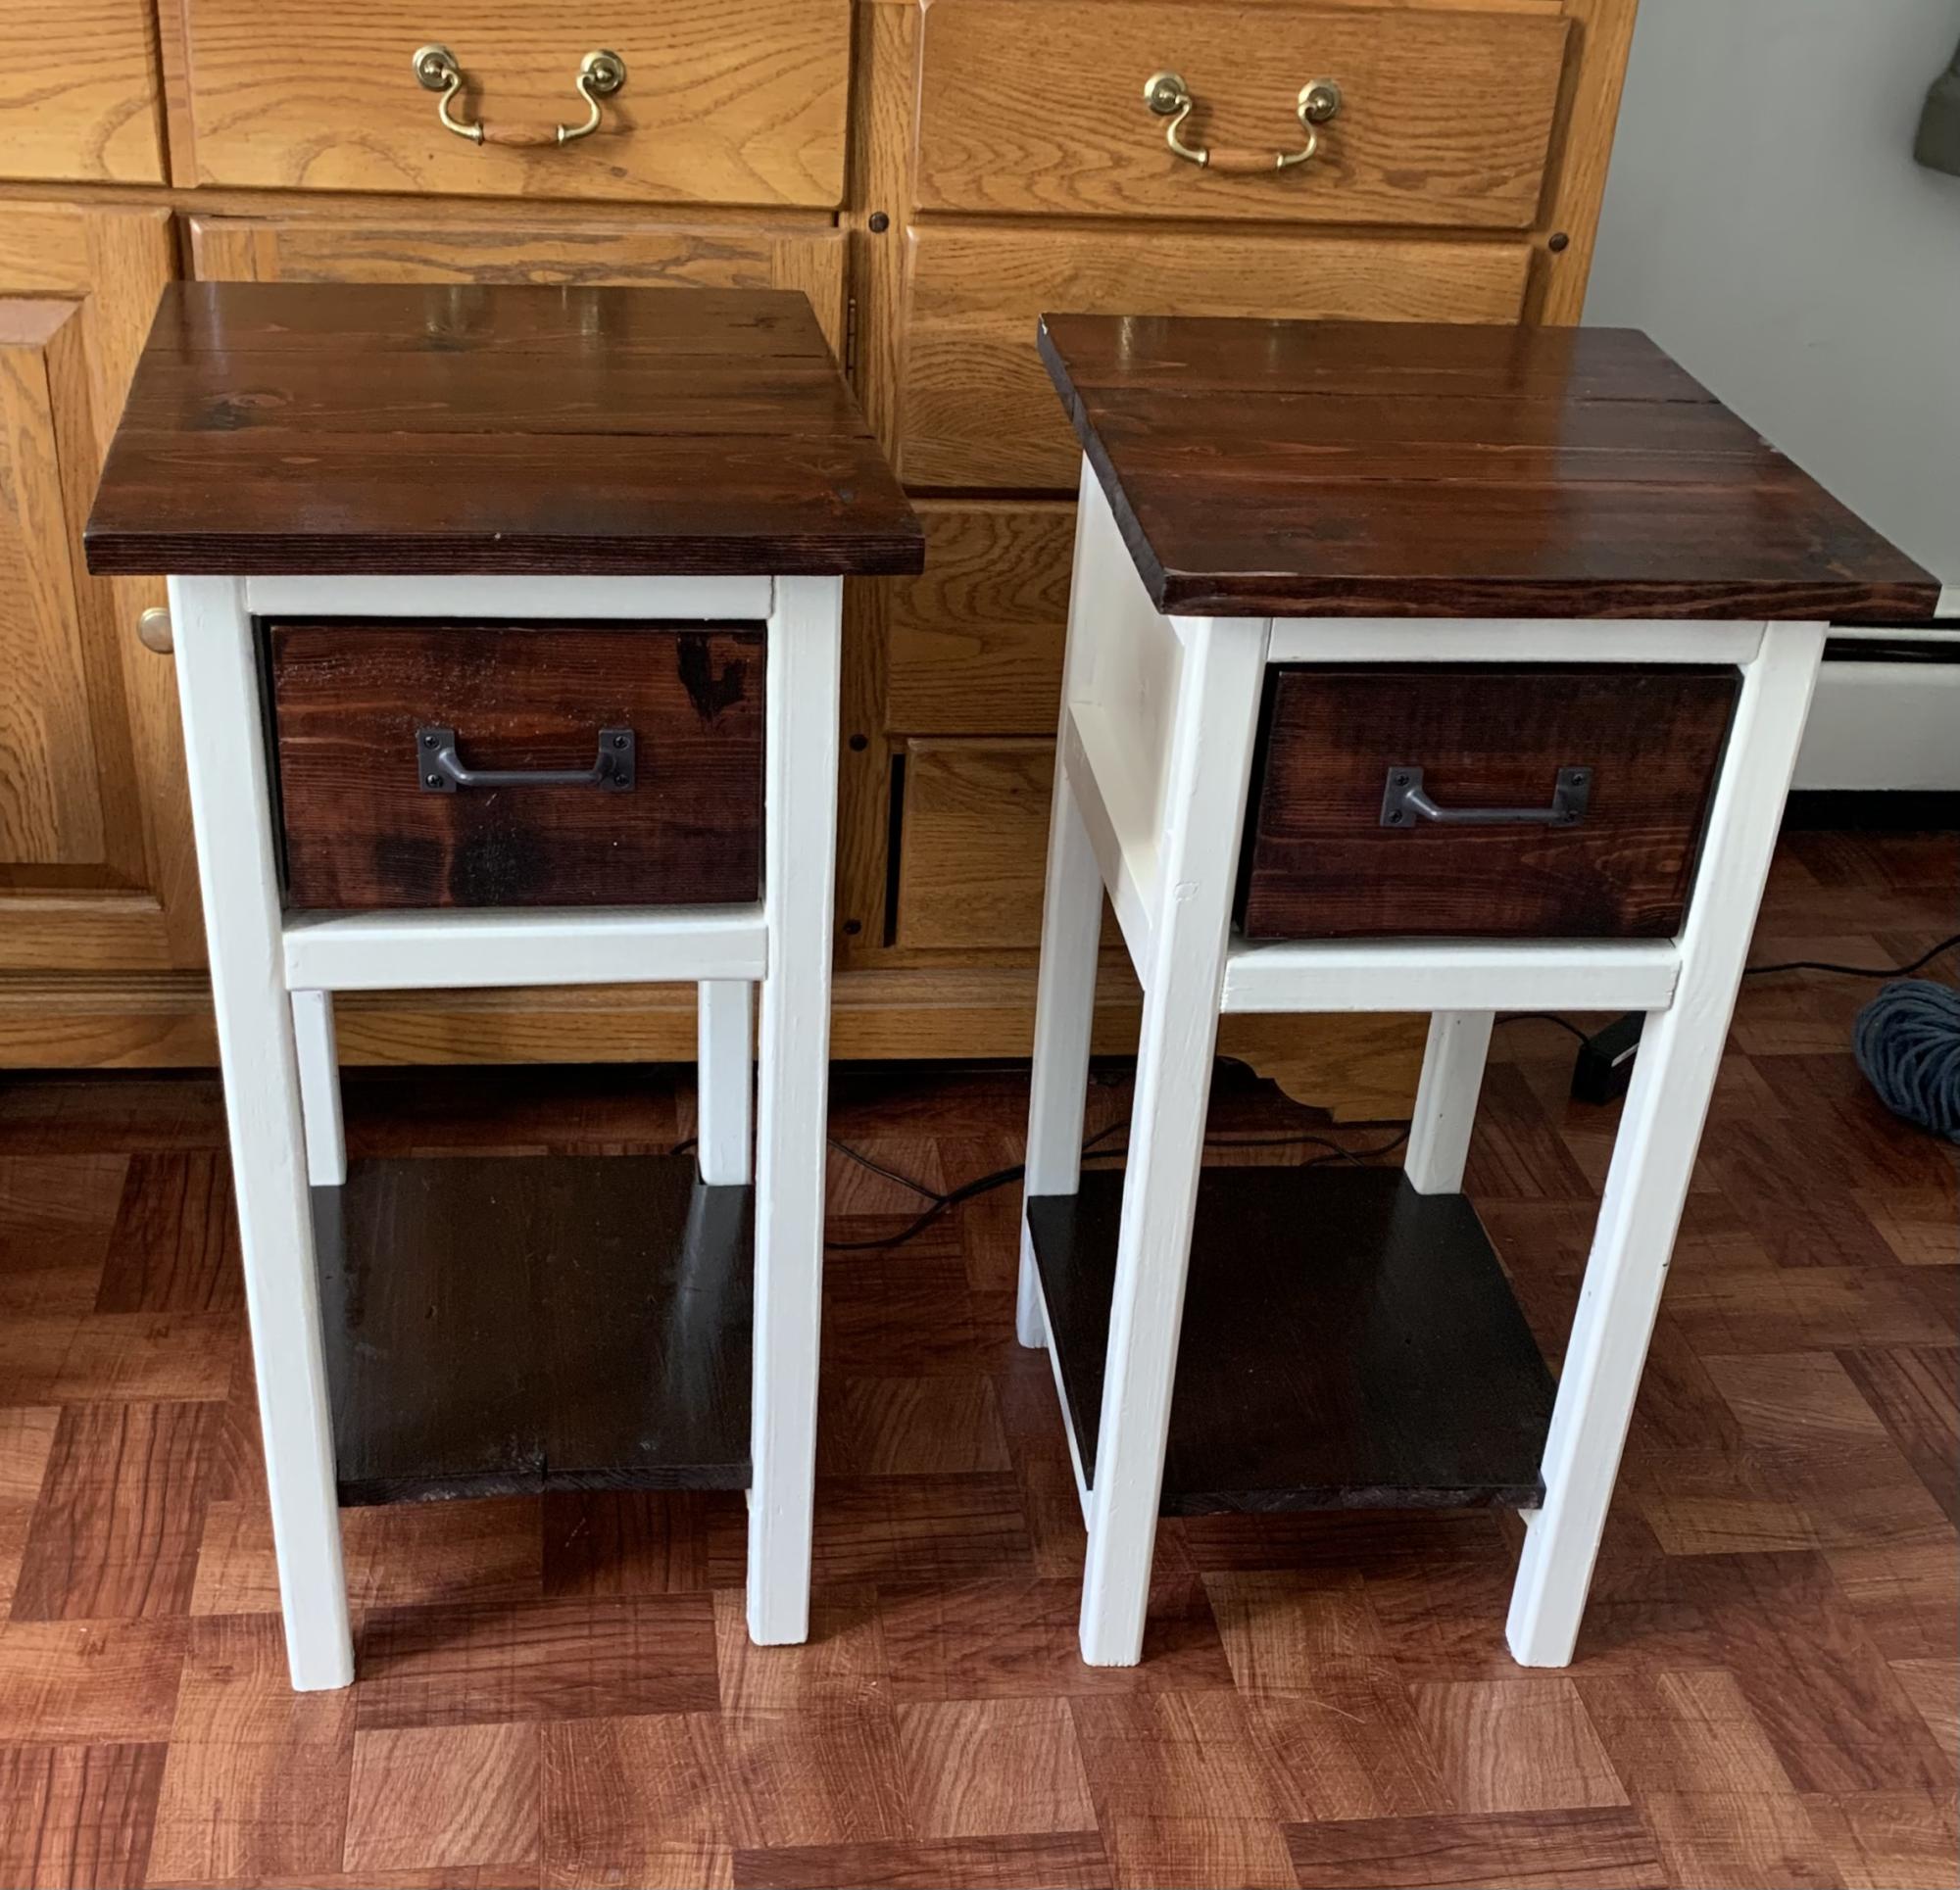
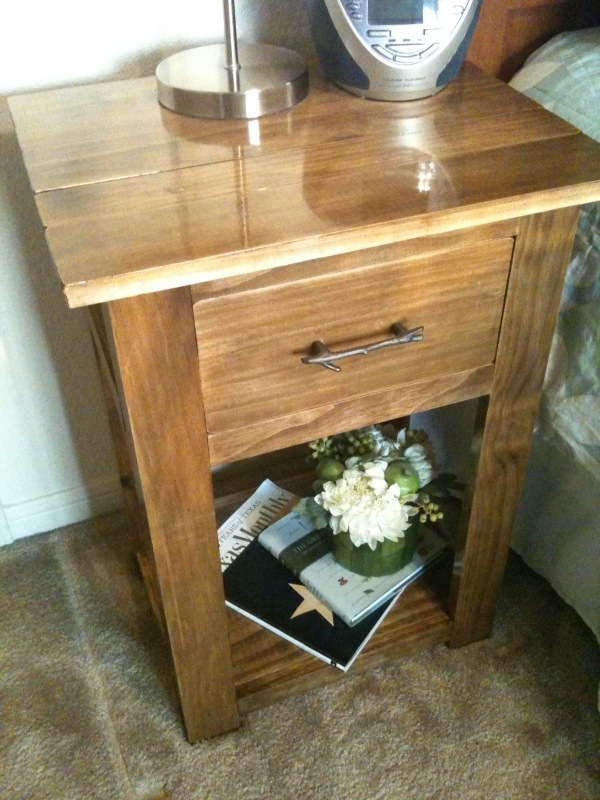
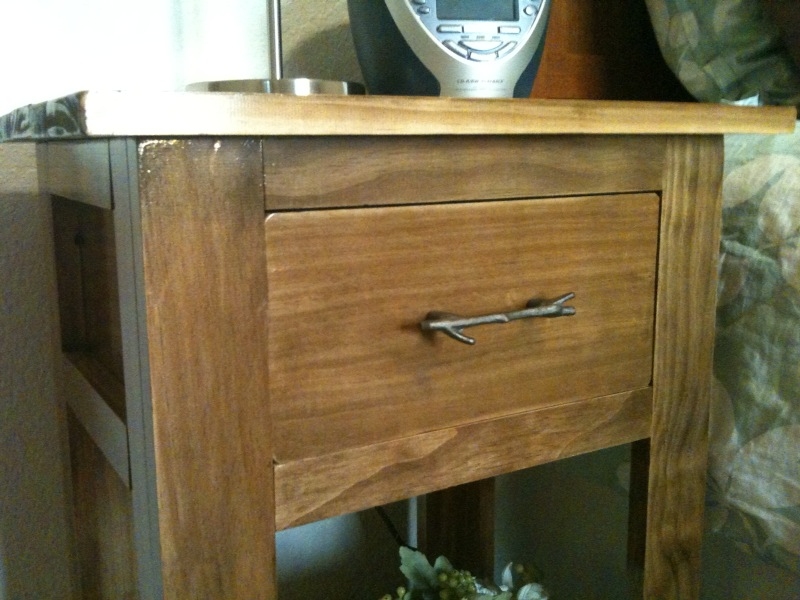
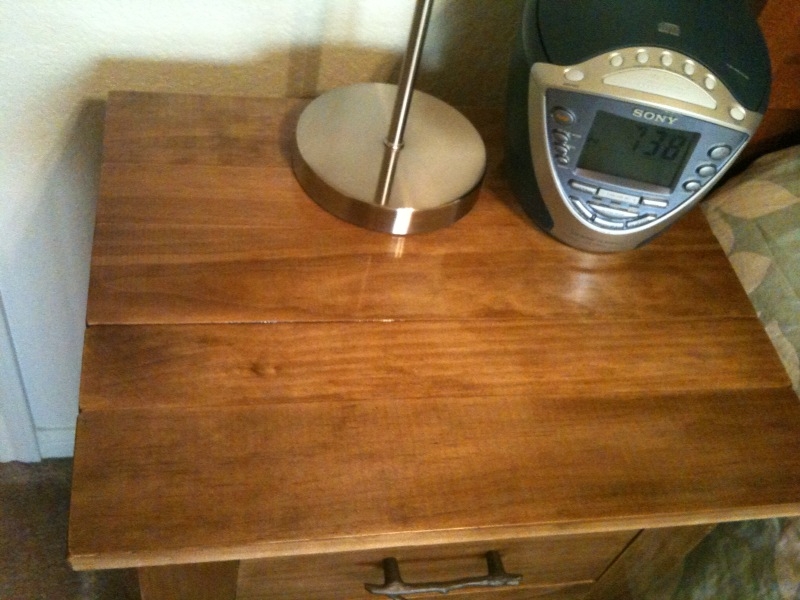
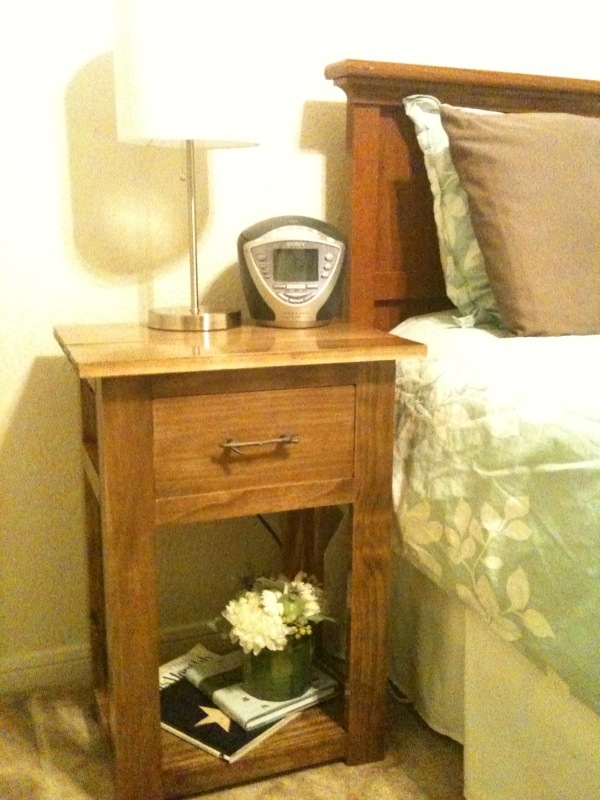
I have previously made side tables for our master bedroom but after two grown kids came back we had to move to the smaller of the two bedrooms we have. So here’s my 13” width version !
Nice easy build, thanks again Ana. Took longer to figure my new measurements for my cut list than actually building them!
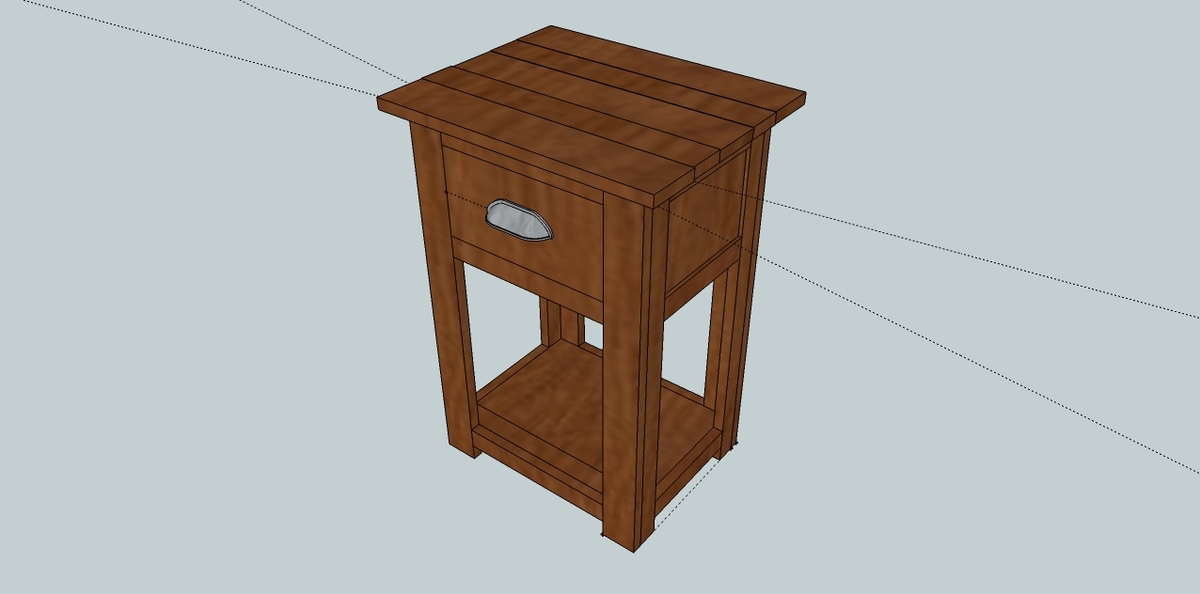
I absolutely love the way these turned out! I drew up an example in Sketch-up using Ana's plans for the Simple Nightstand as a starting point.
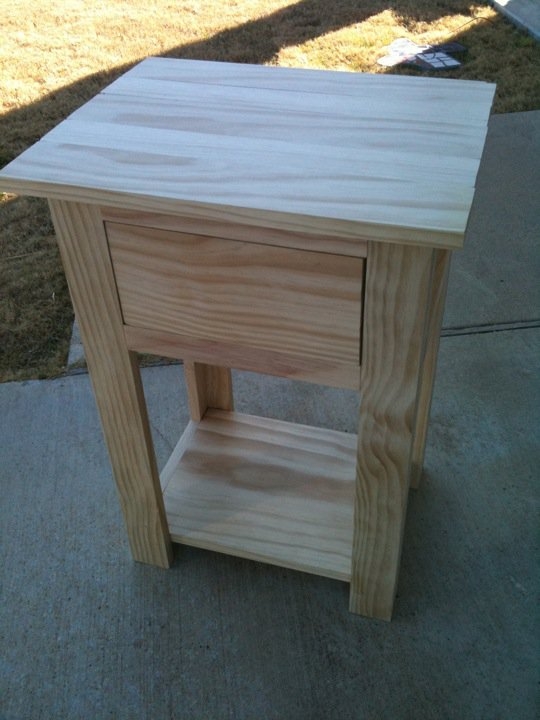
This took me longer to build than I expected -- maybe because I was working from scraps and had to figure out what would fit where along the way. Also, I initially cut all the side pieces with parallel cuts. Oops. So I had to re-do them all.
For more info, check out my blog post!
Great plan! I curved the edges with a French curve and a bench sanding disk, and then used a router on all exposed edges. I used a dremel router table with a small bit for the small pine pieces and a full sized router for the two main platforms. If I were to do it again I’d be far more careful with angle accuracy.. I think my miter saw is a little off. My table saw was spot on for the plywood cuts. I also used smaller wheels and only have spinners on the front, preventing collision.
This is my 1st wood project and I wouldn’t have tried it without your plans, thank you!
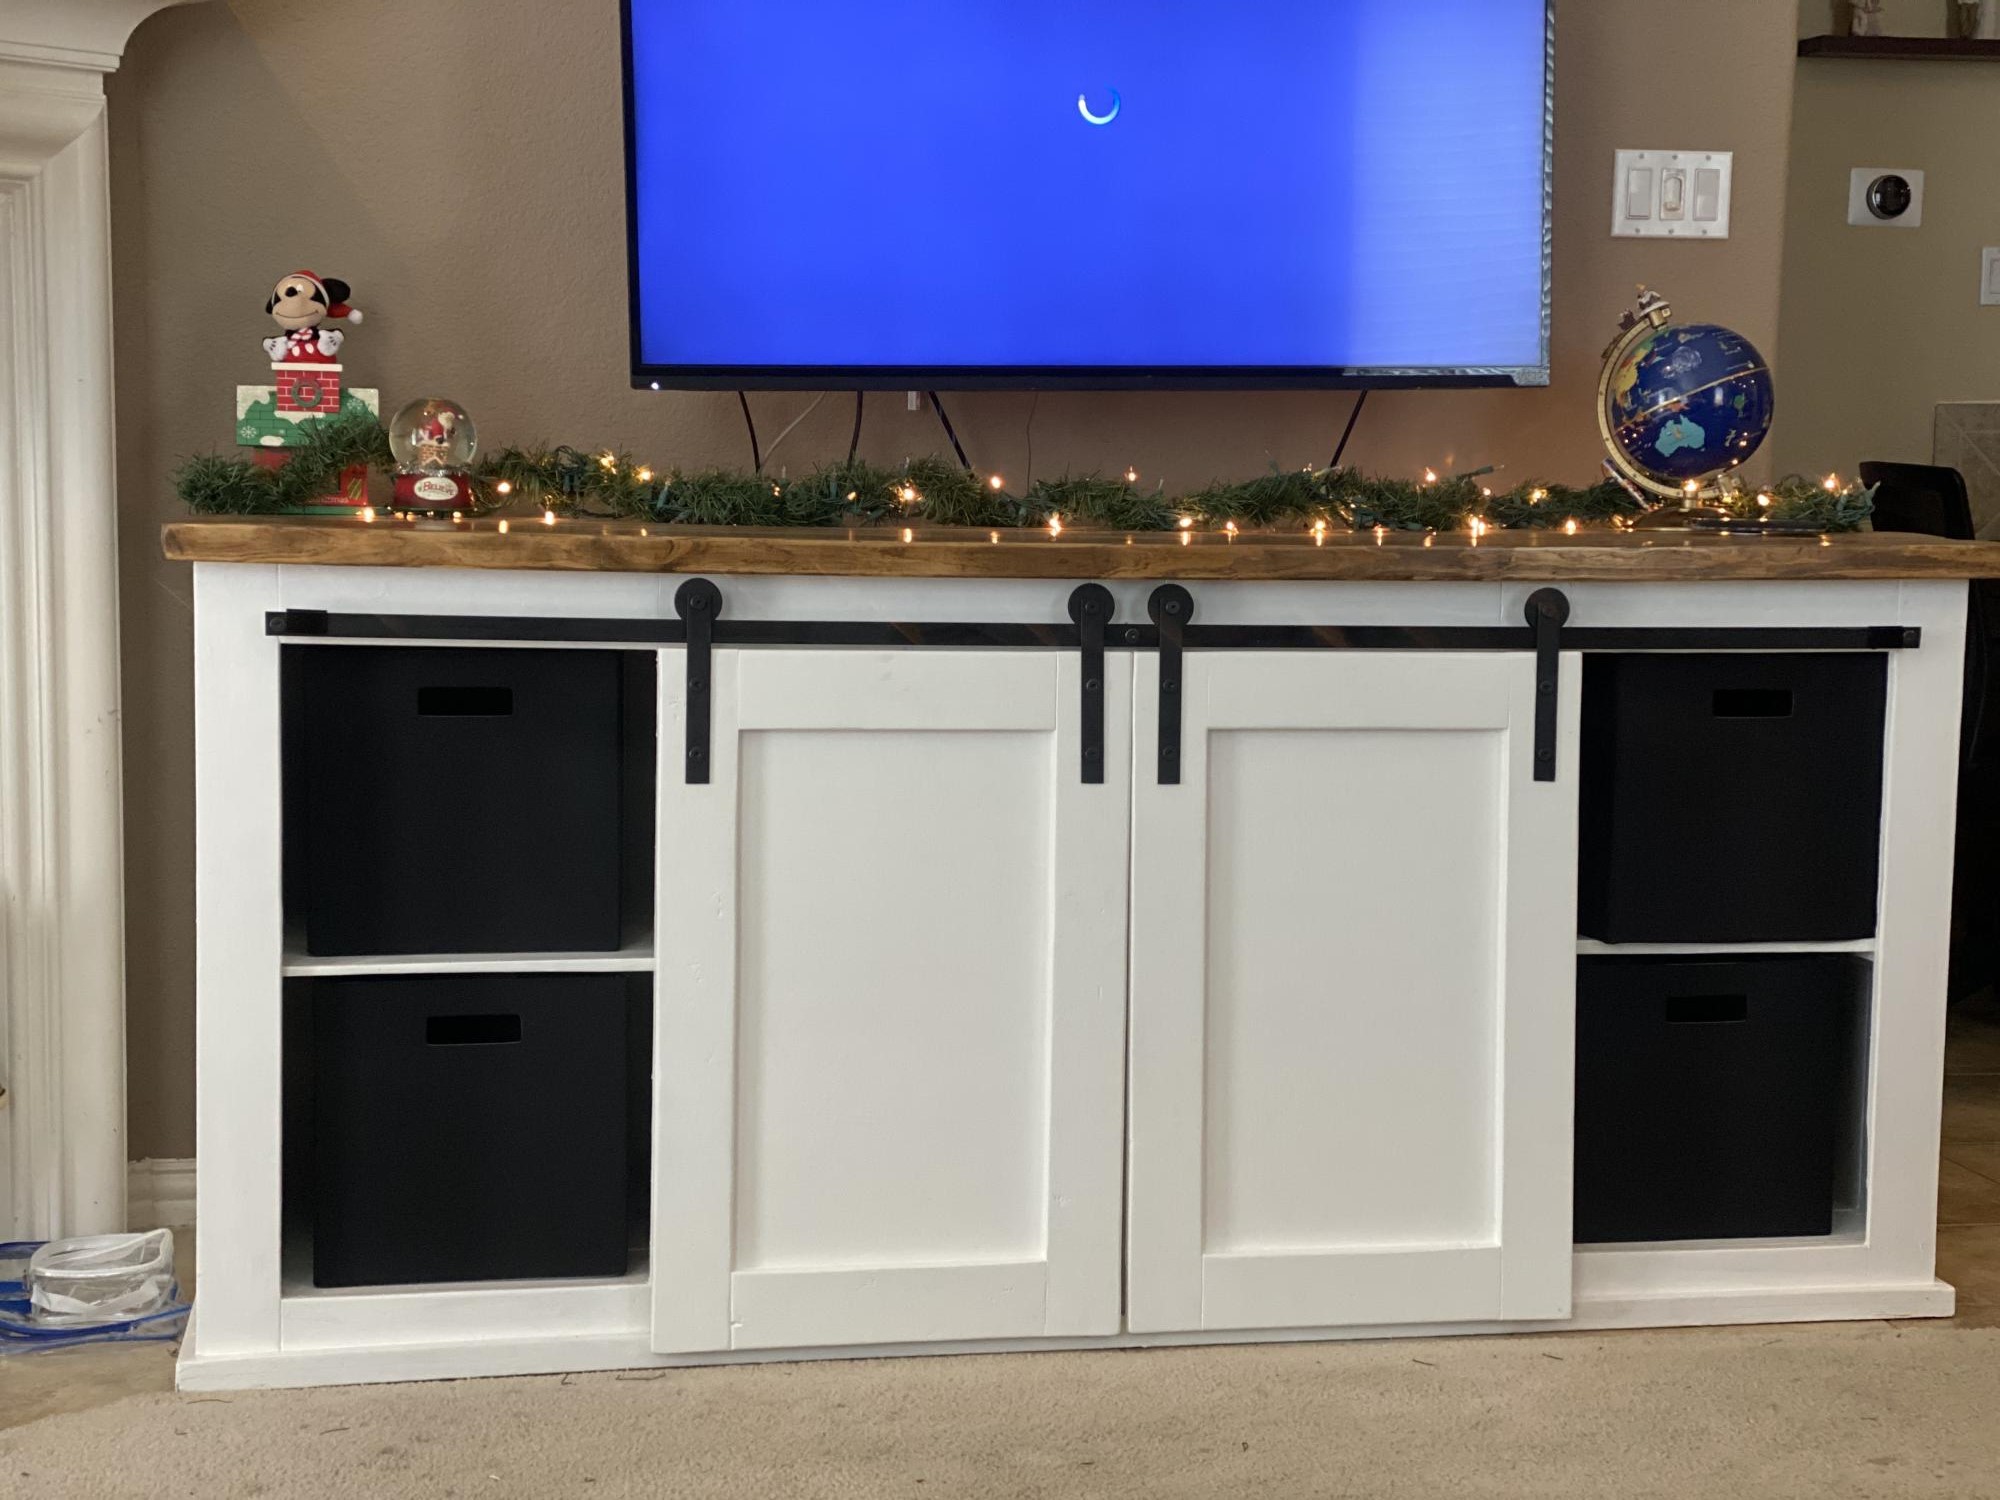
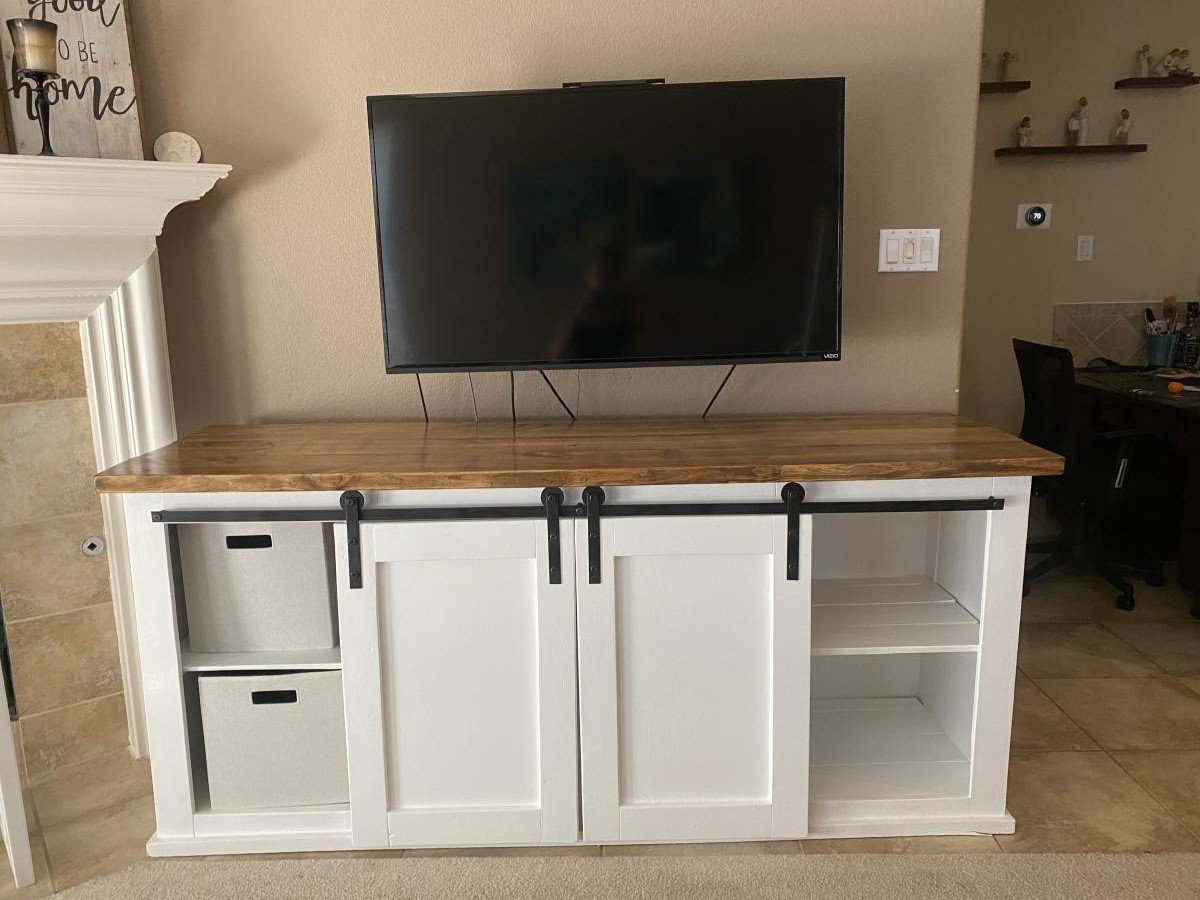
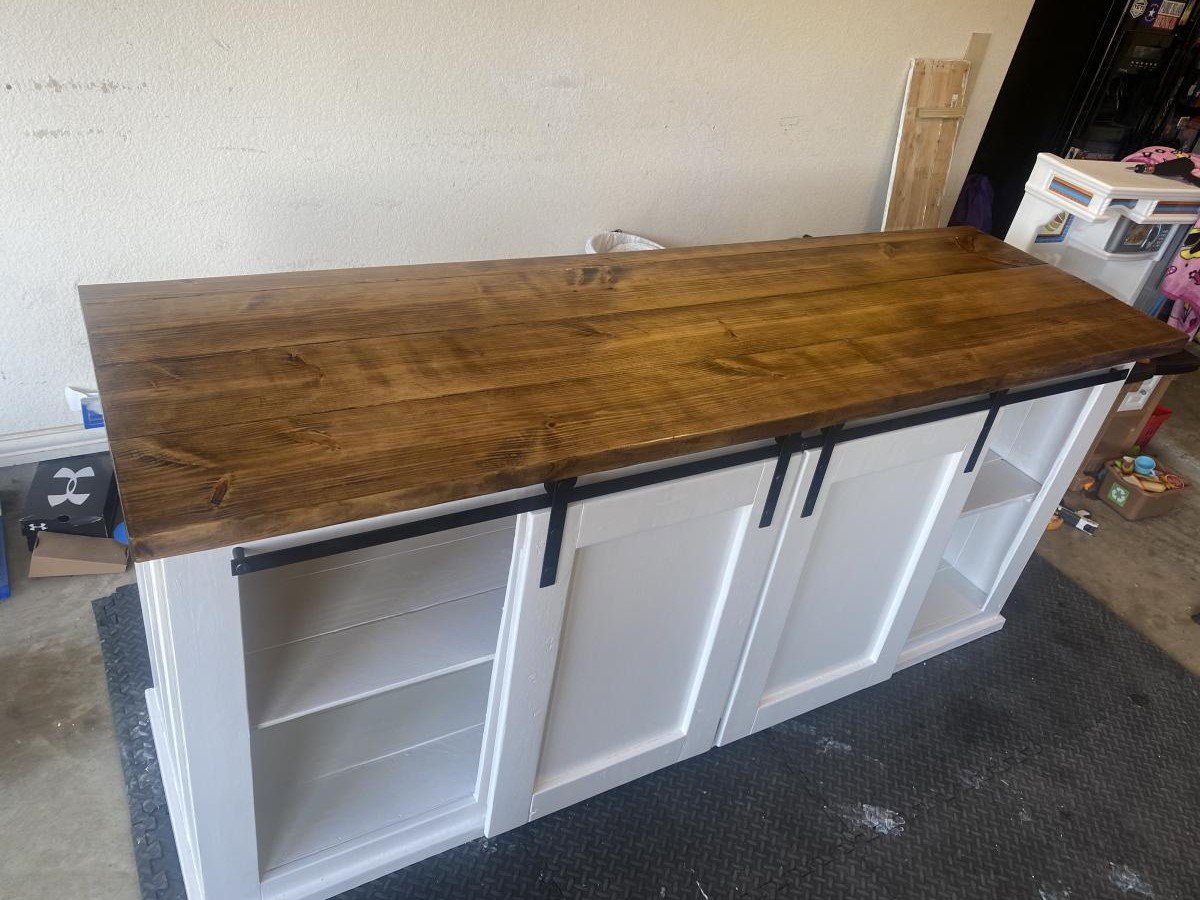
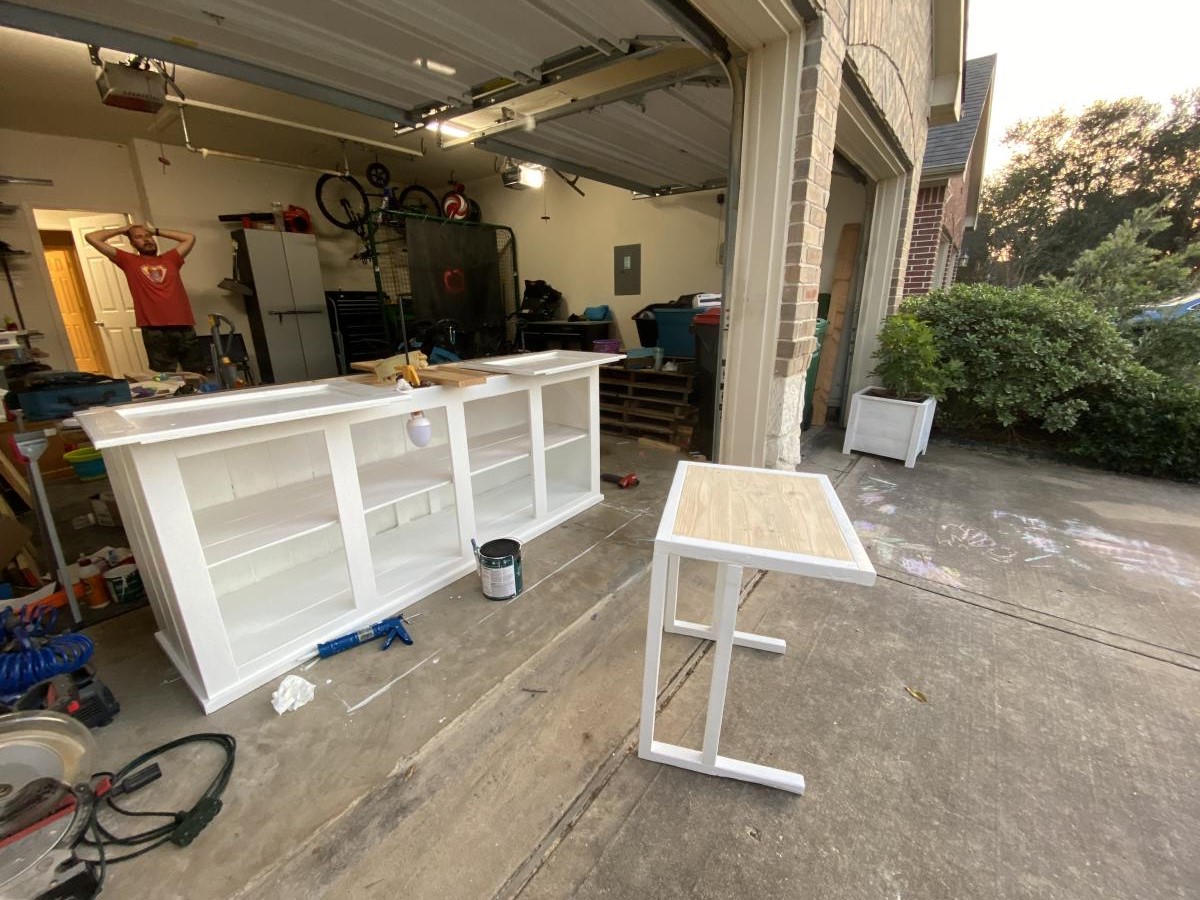
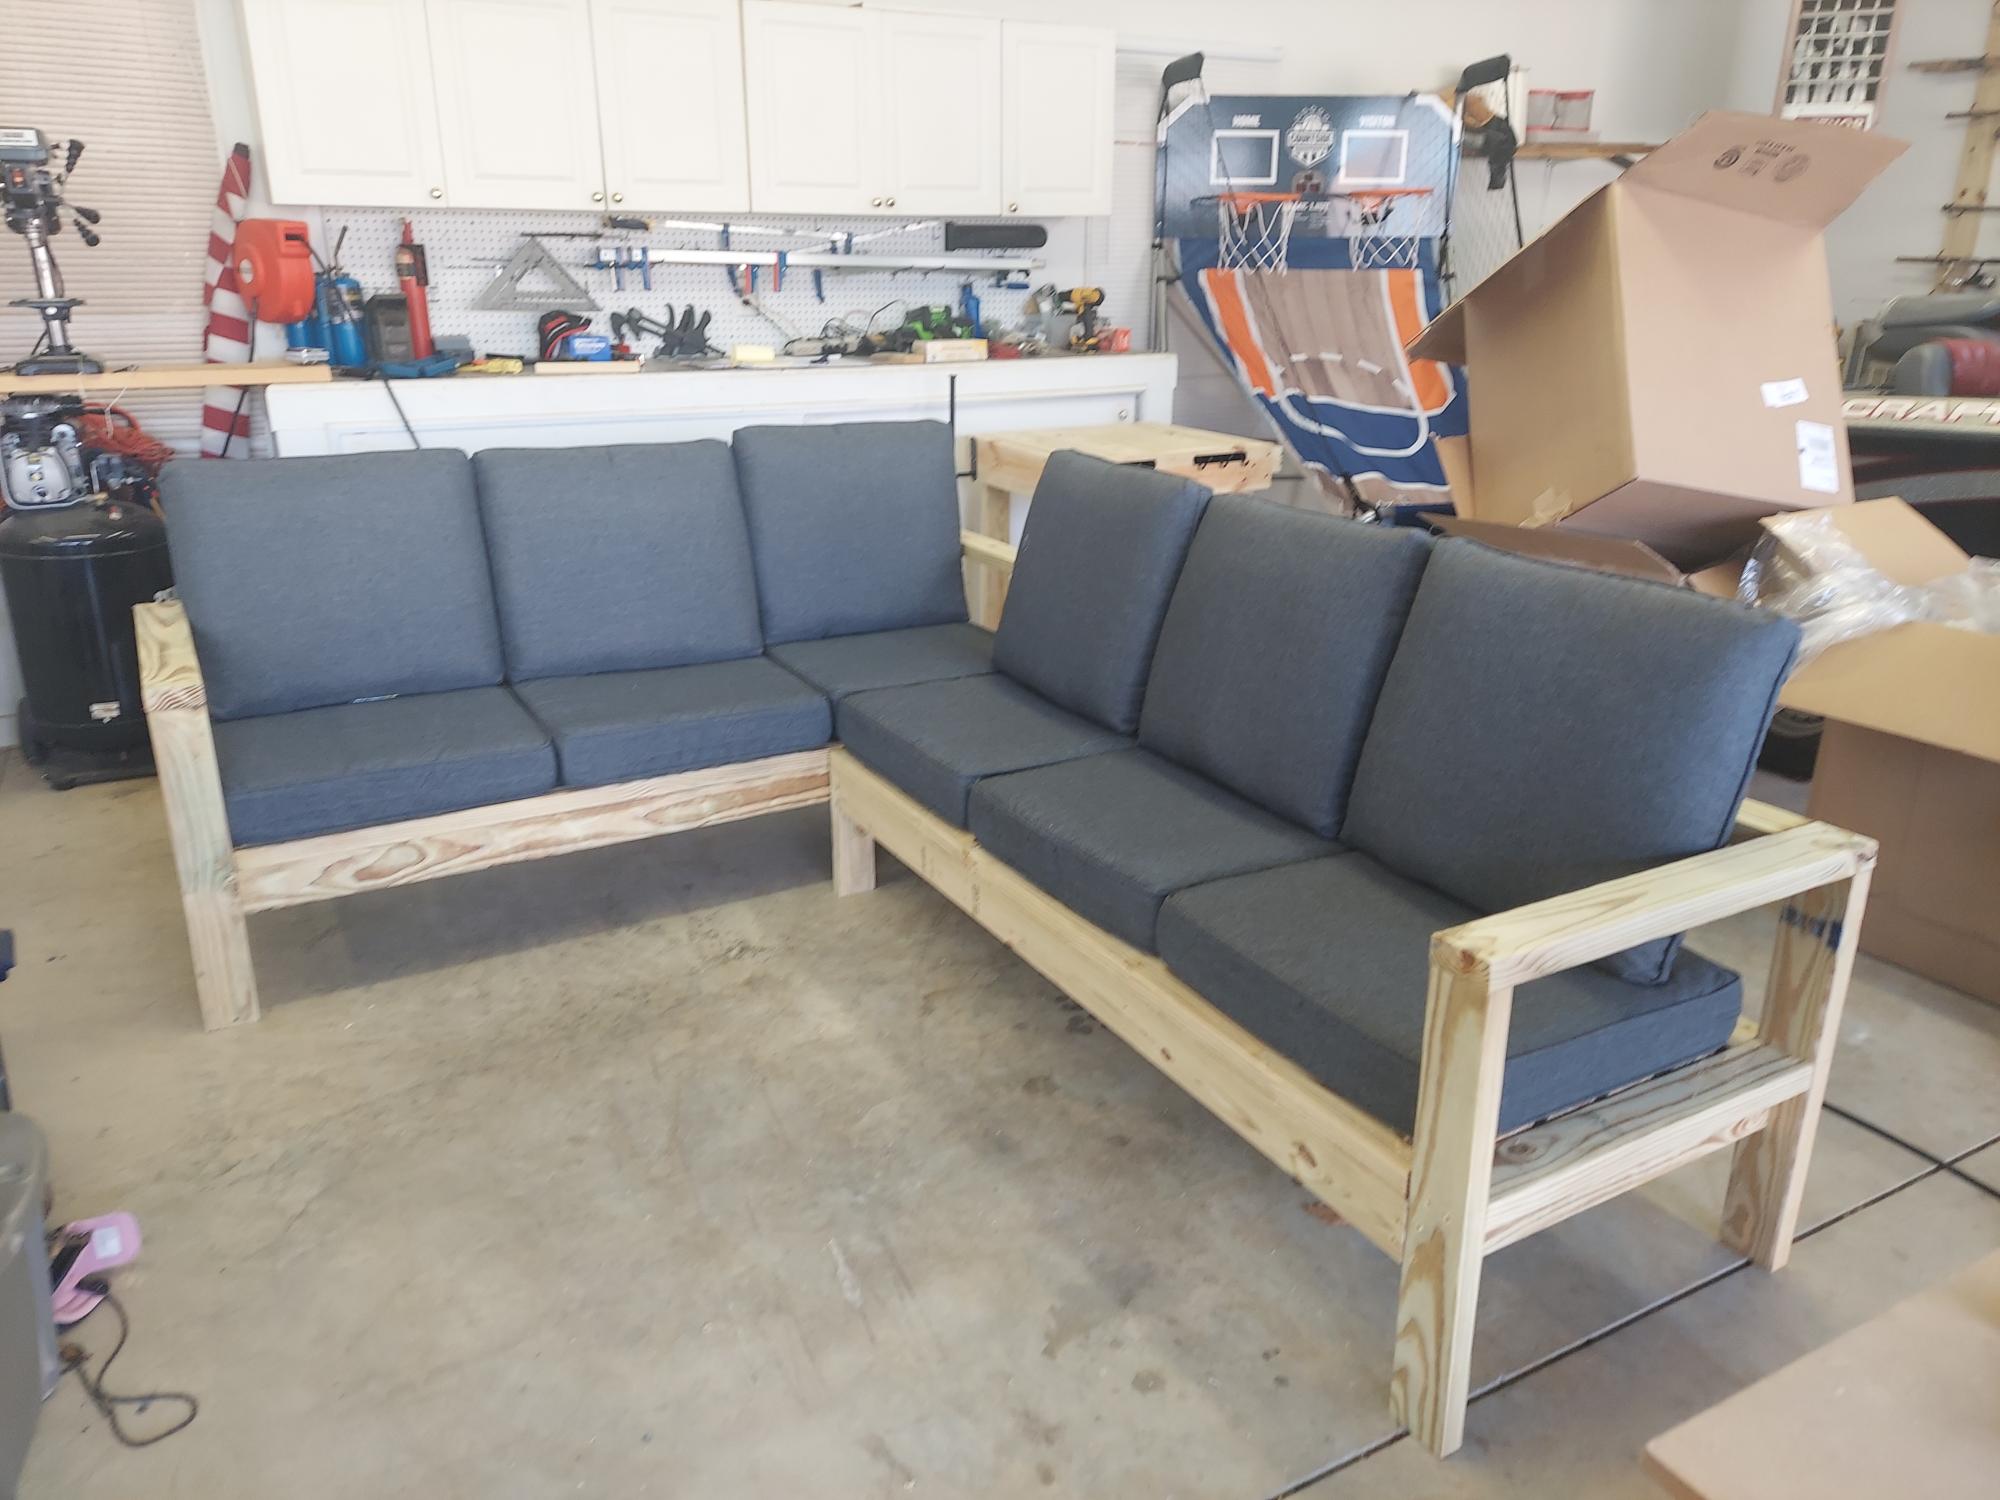
Took about 3 weeks between work and 3 kids. (My 2 year old wanted attention and pulled down what I put up in one pic) I also made some planter boxes in the middle to complete something and a side table that slides under the couch to test the finishes on before I completed this massive entertainment console.
When I saw another builder's little bathroom tower in the brag blog last week, I knew I needed one for my powder room! Ever since we installed a pedestal sink several years ago, we've had nowhere to put extra toilet paper. With this little tower, that problem is (finally) solved!
I built it will materials I had on hand. Oak plywood I ripped to 11" for the sides and shelves, 1x2 pine for the face frame, and a variety of pine for the top glued and screwed together with my Kreg jig.
The only purchase I made for this tower was the two fabric baskets from Target for about $12, I think. The fact that they fit is not a happy accident -- I built the unit around the basket dimensions.
While it is inspired by Ana's storage tower plans, I definitely went out on my own to make it work with the materials I had lying around.


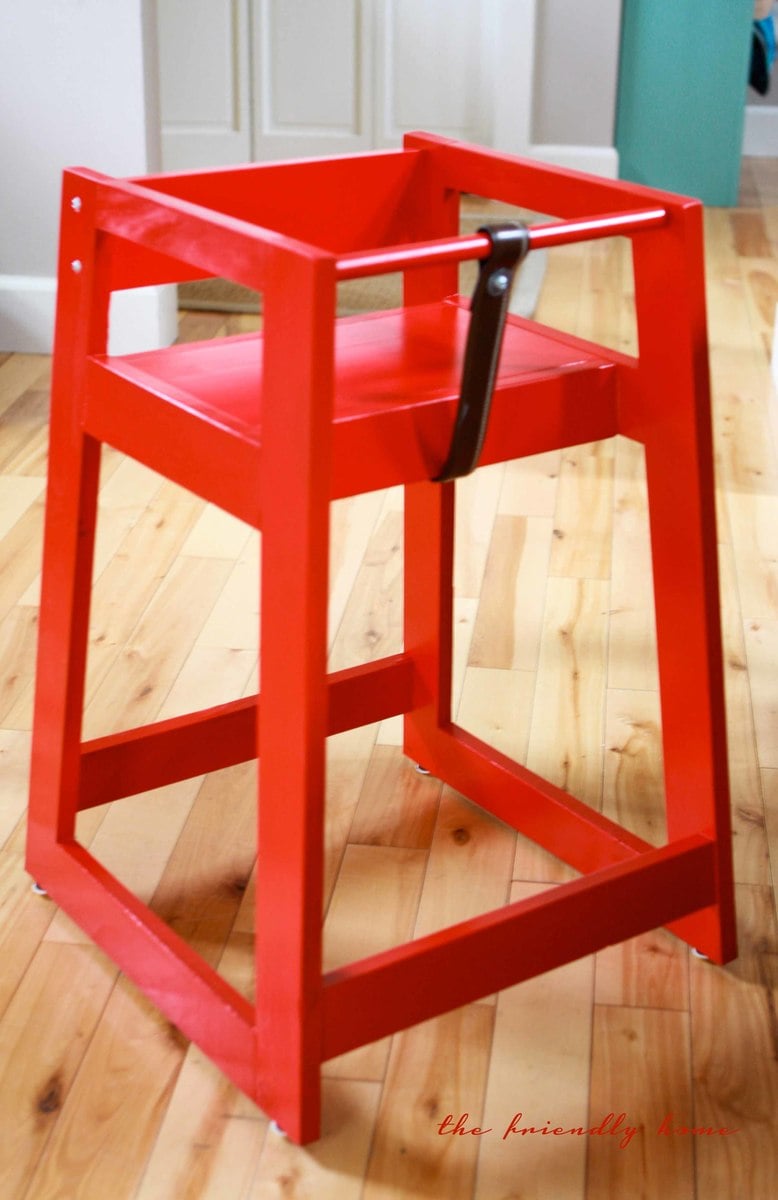
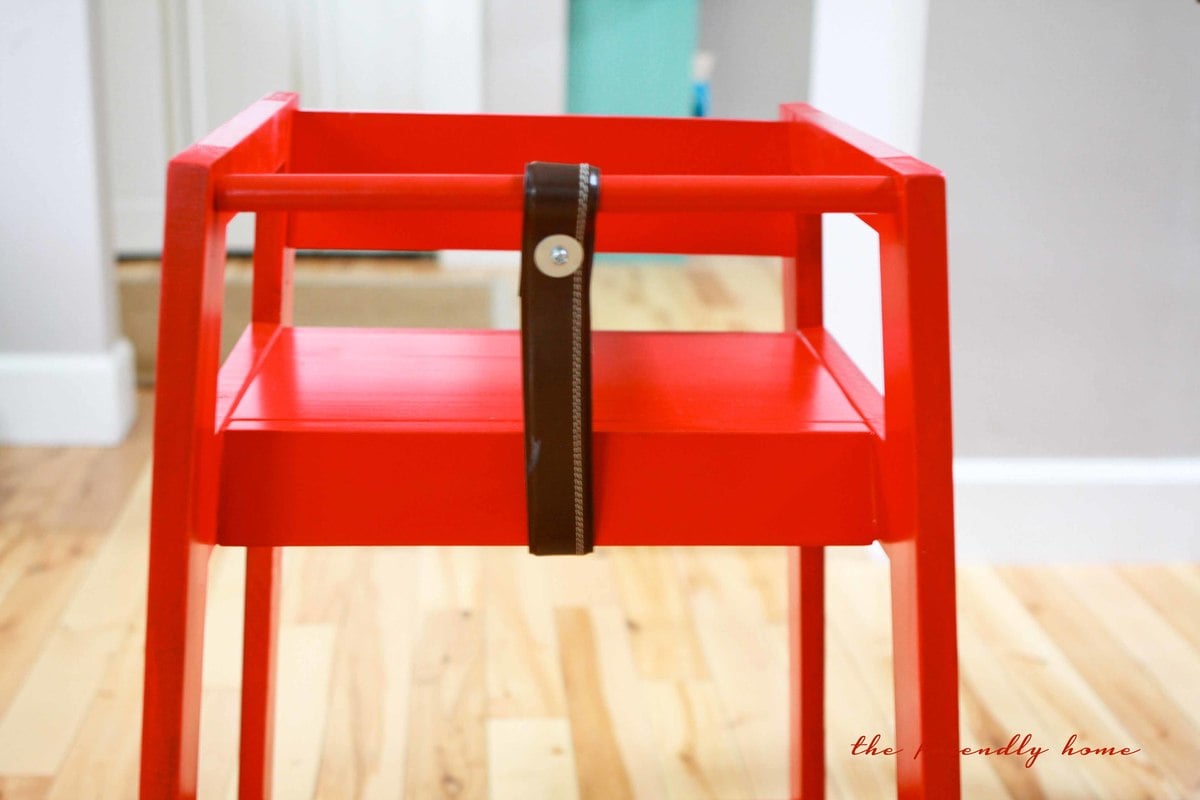
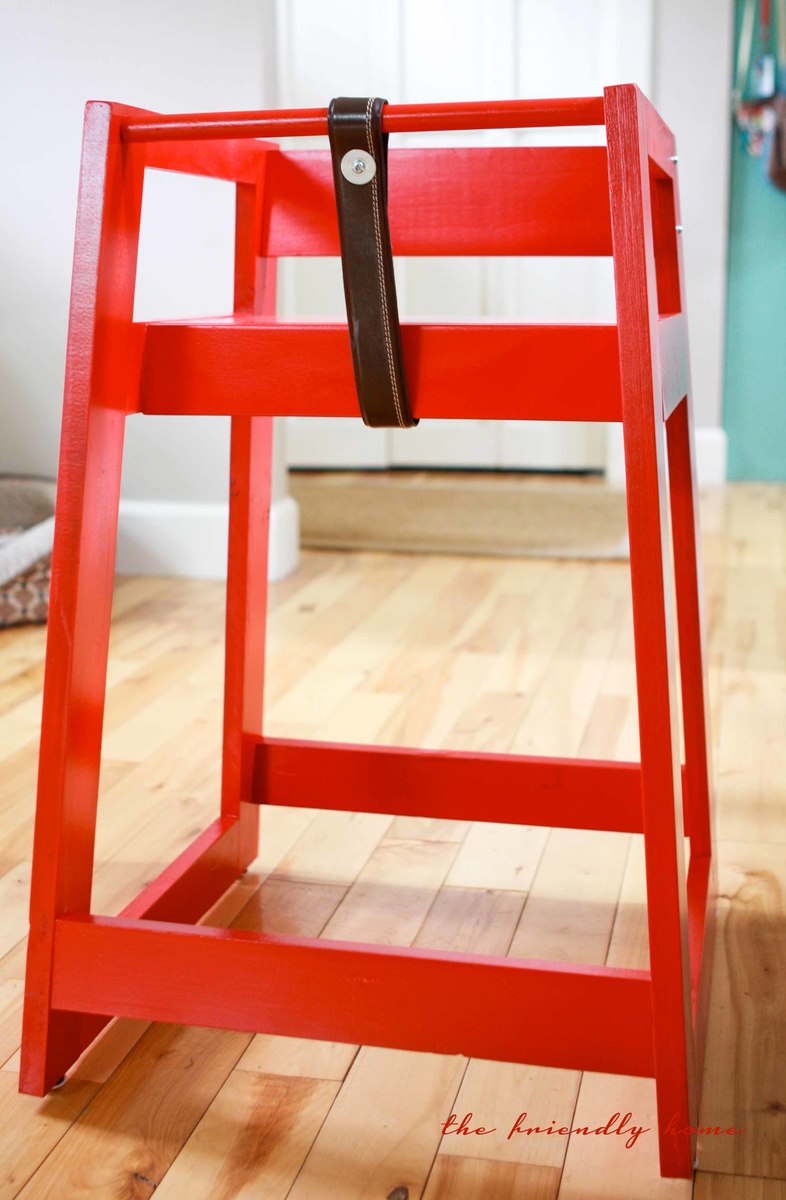
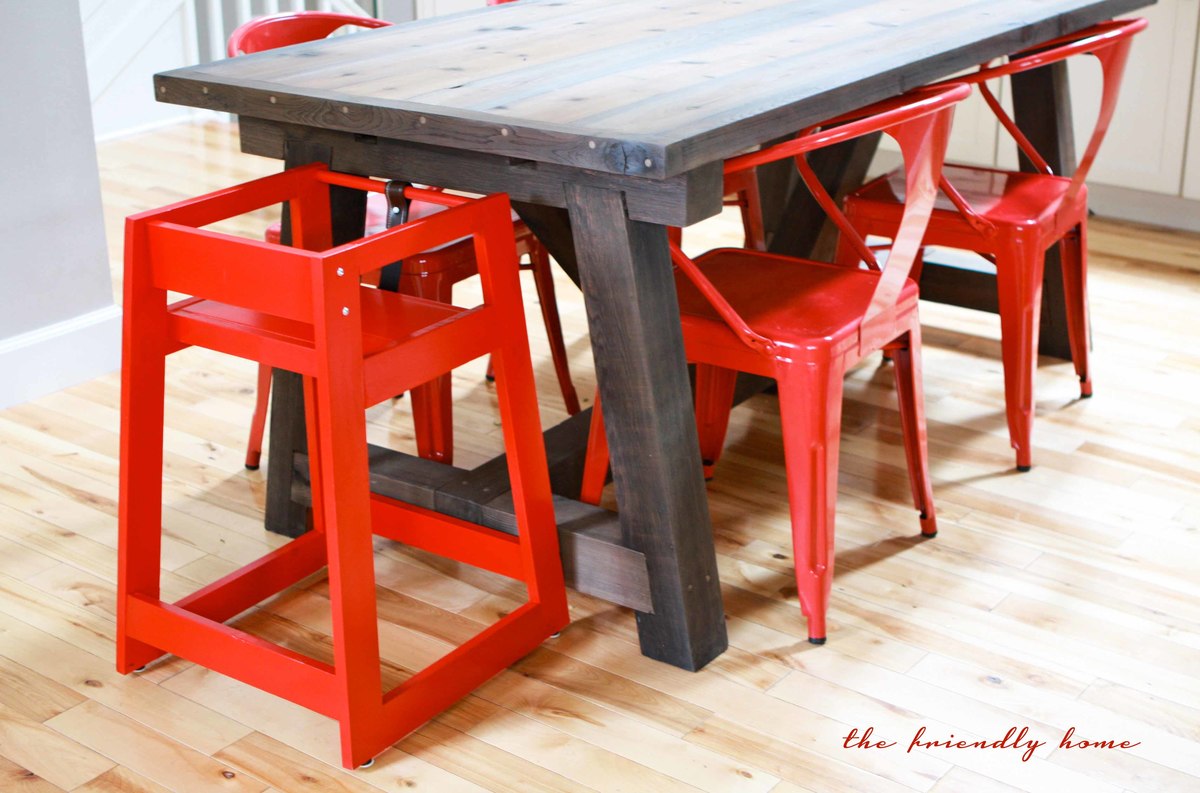
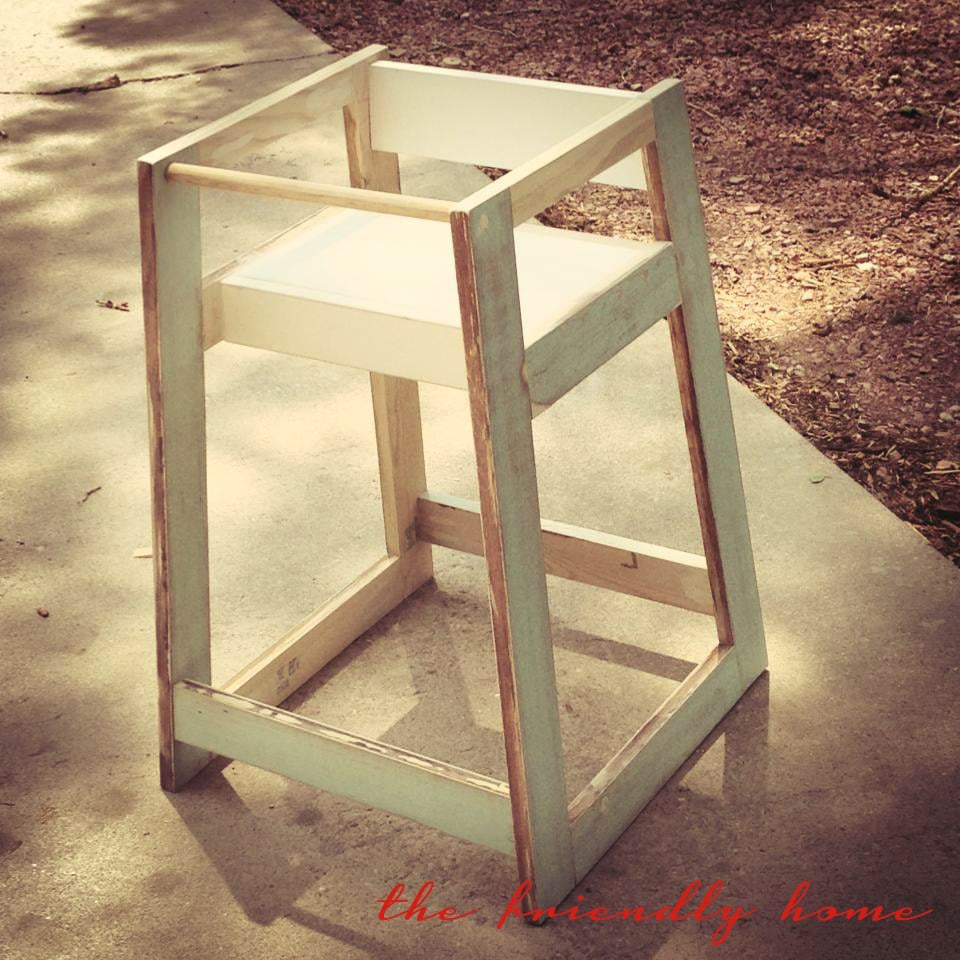
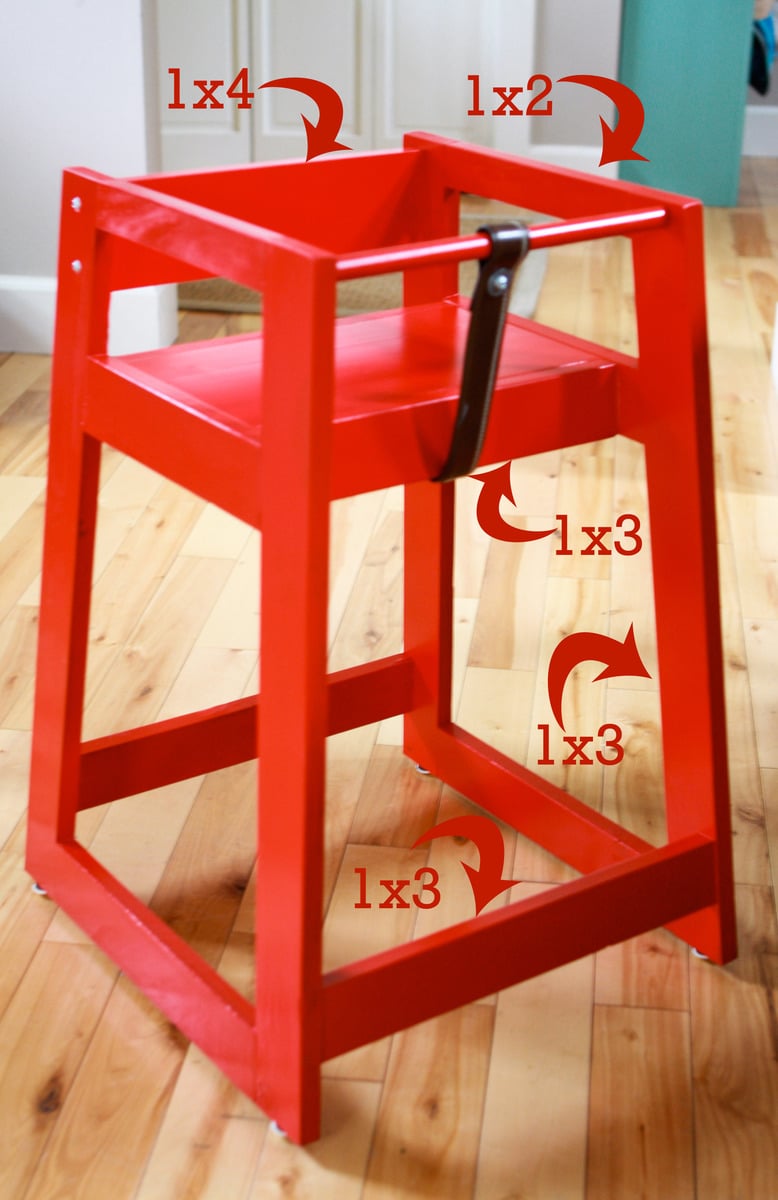
LOVed building and painting this. Although using European wood is a headache as of course the standard wood sizes are different. ... always 4-6 mm off... so all my things are crooked. I don't care though and it is my new favorite chair. I used ArchiTect blue exerior color, two coats, and pine wood.
I am grateful for Ana White's metric conversion chart in the book I now have but when going to the hardware store here, I am confronted with numerous standard wood sizes that are not the same as in the US!

Friends of mine are having a girl and needed a bookshelf for the nursery. Loved the simplicity of this design and wanted to see in an antique white finish. Great plans and design.
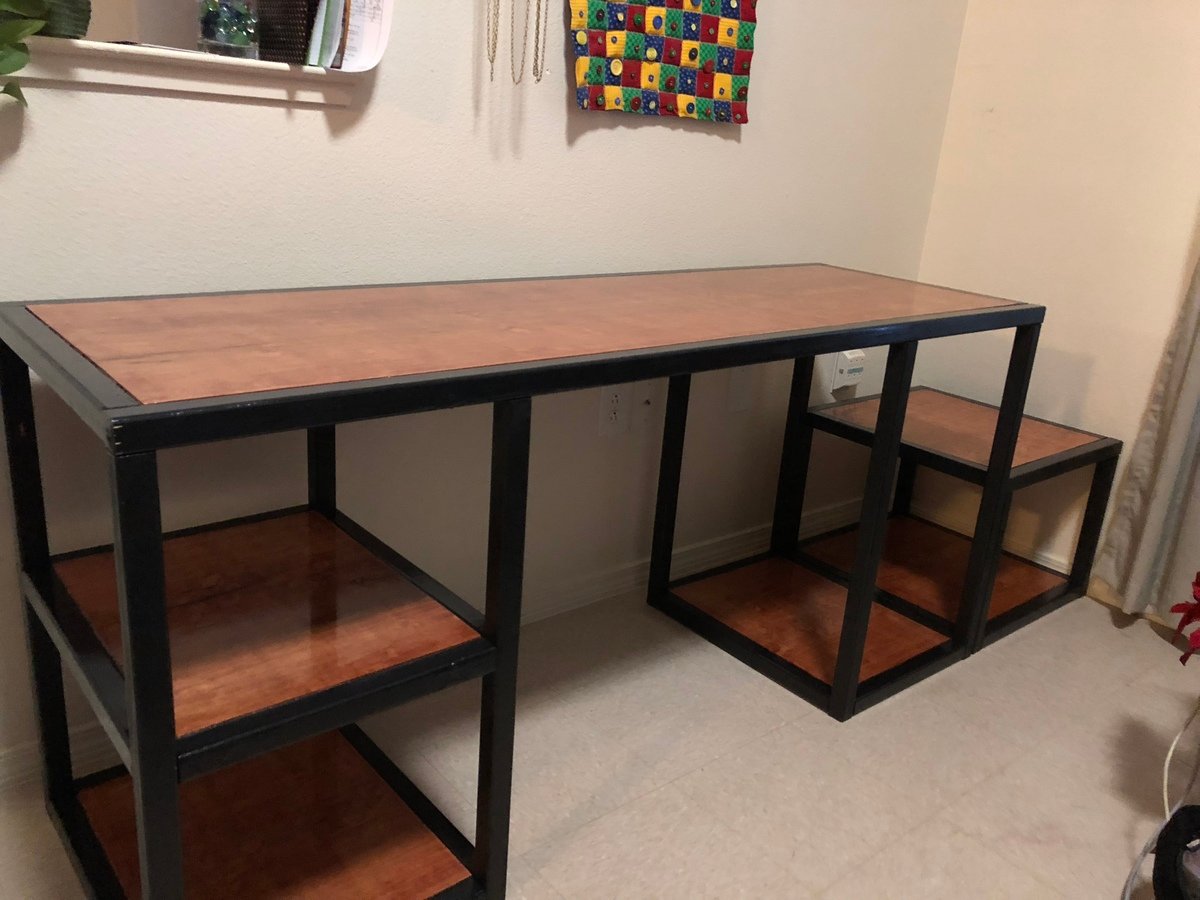
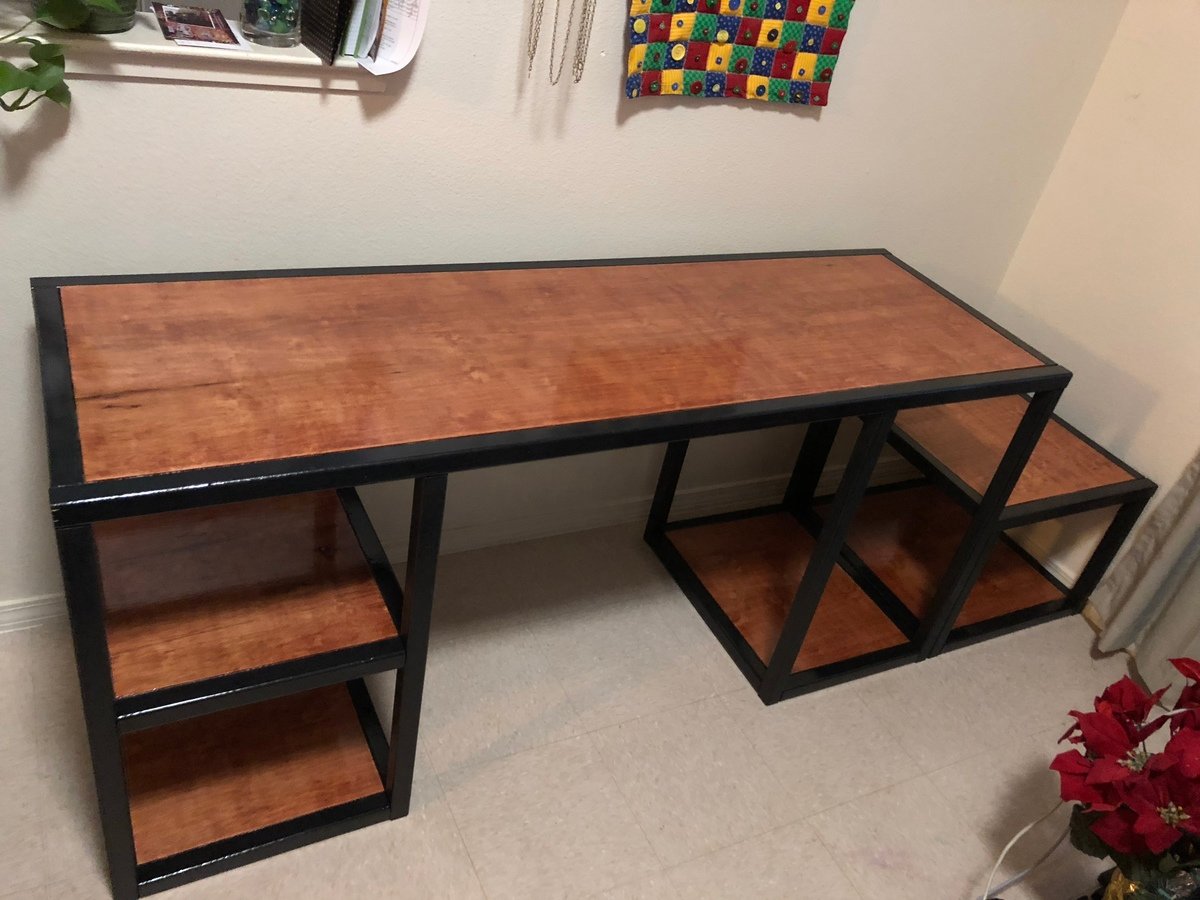
I added an additional detached shelf so we can change the setup anytime. I also increased the space between the two main shelves to 30 inches and extended the depth to 22 inches overall. I left one shelf off to make room for the computer tower. The top is made from maple with a gunstock stain. This desk will mainly be for my kids gaming station.
Built this for my daughter in law for Christmas. Turned out awesome. Plans and directions were great!
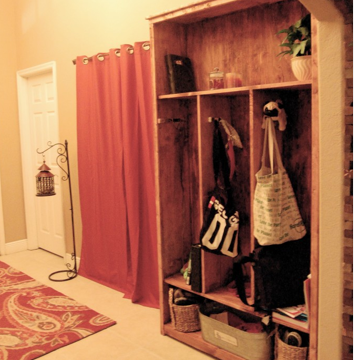
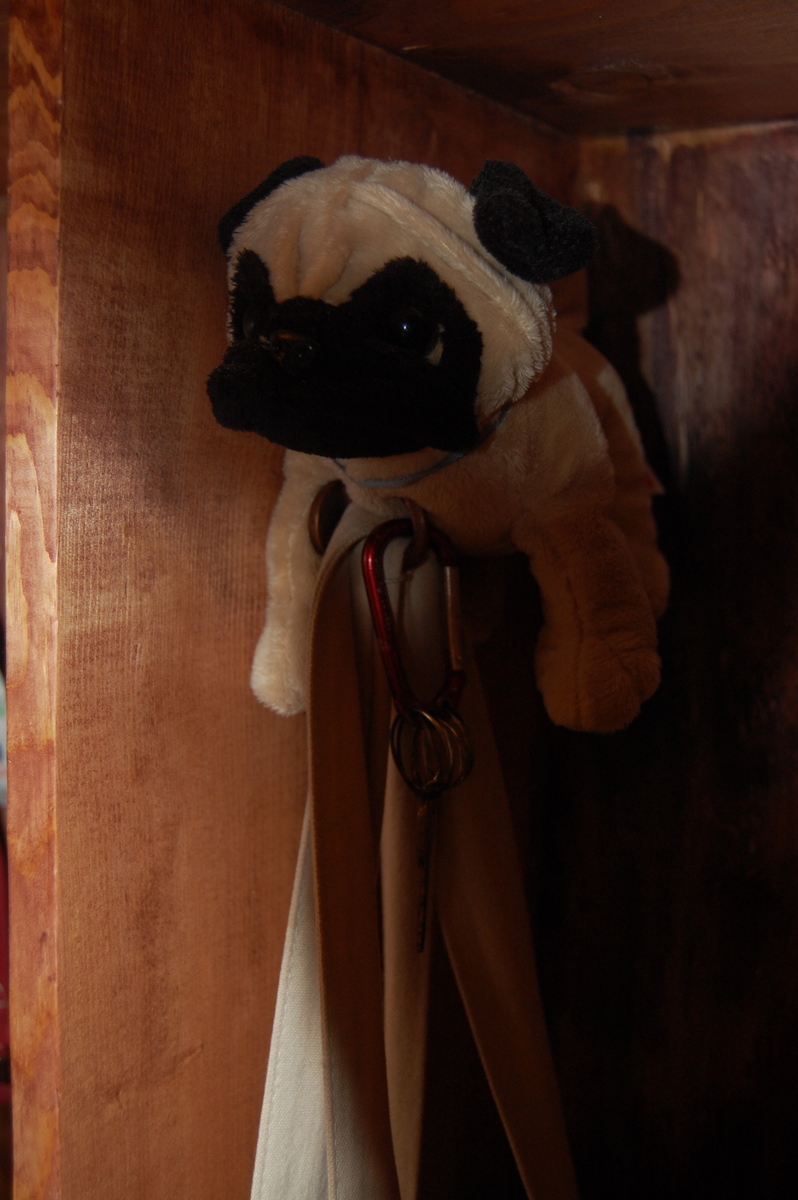
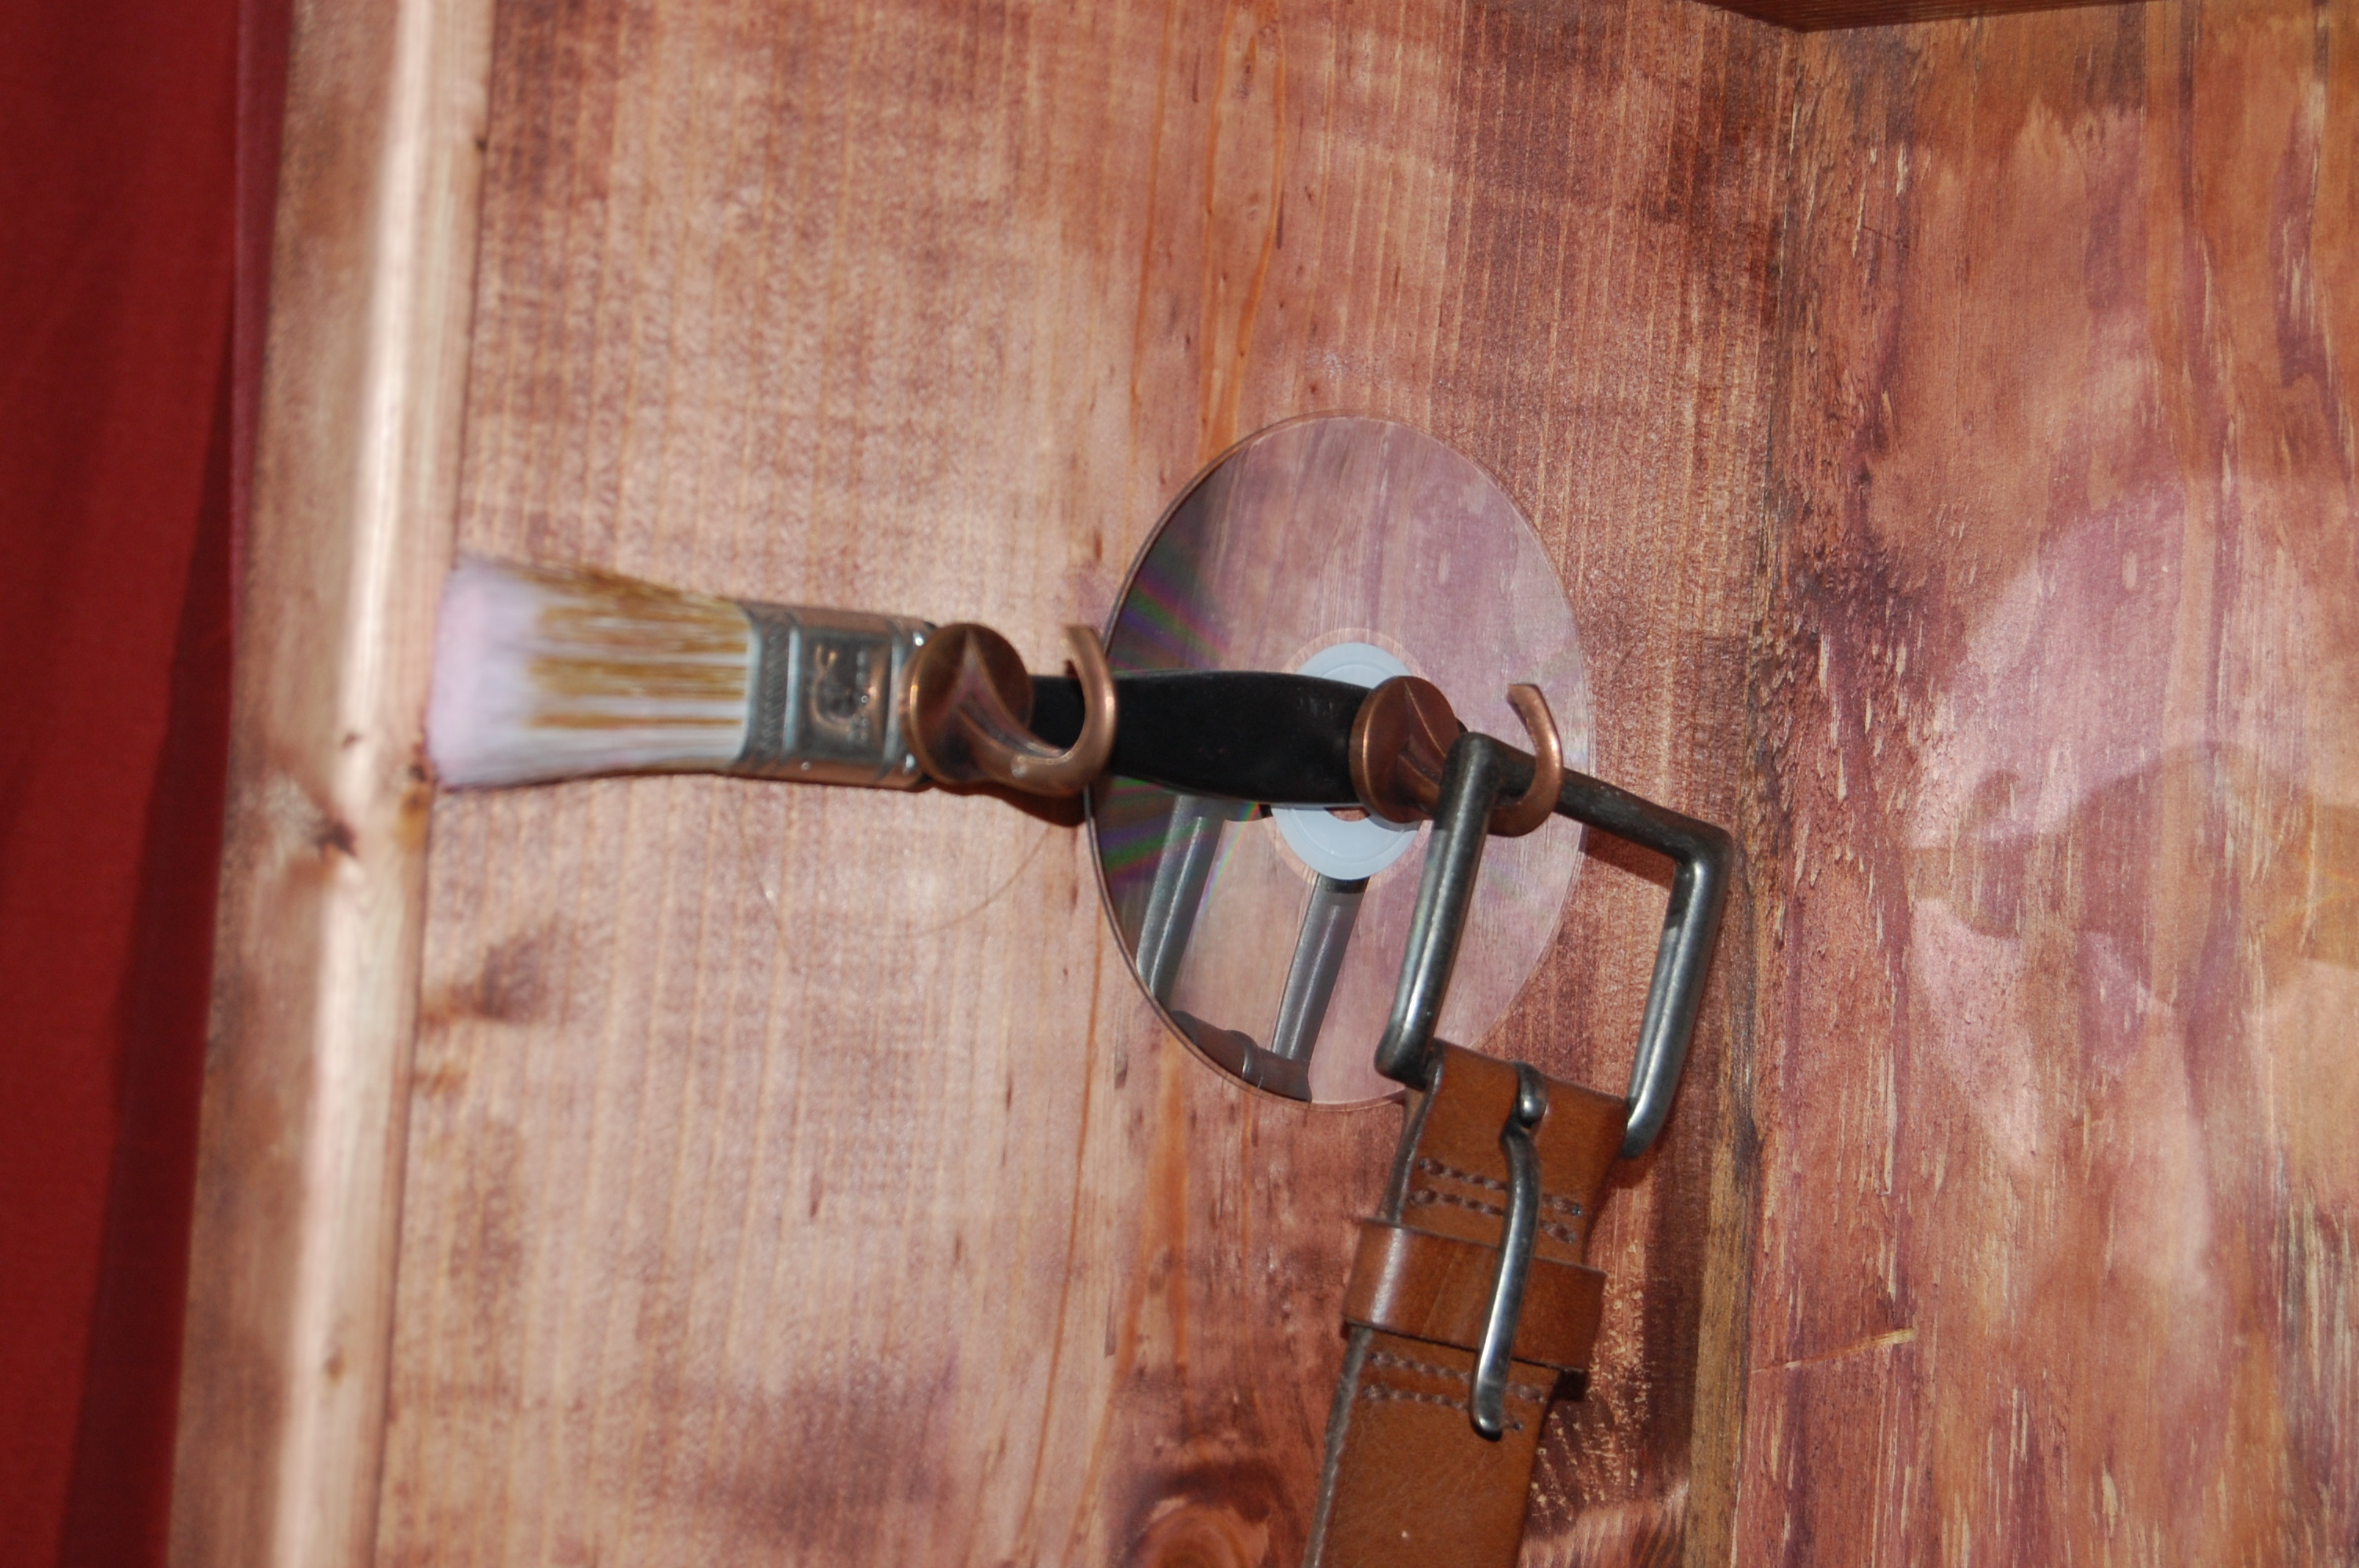
I built this locker system with a twist. I personalized the lockers by drilling the hooks into a cd and paint brush for my son because he is so artistic, a bone holds two hooks for my doggies' cubby, and my daughter has two hooks in a stuffed animal which represents her love for animals.
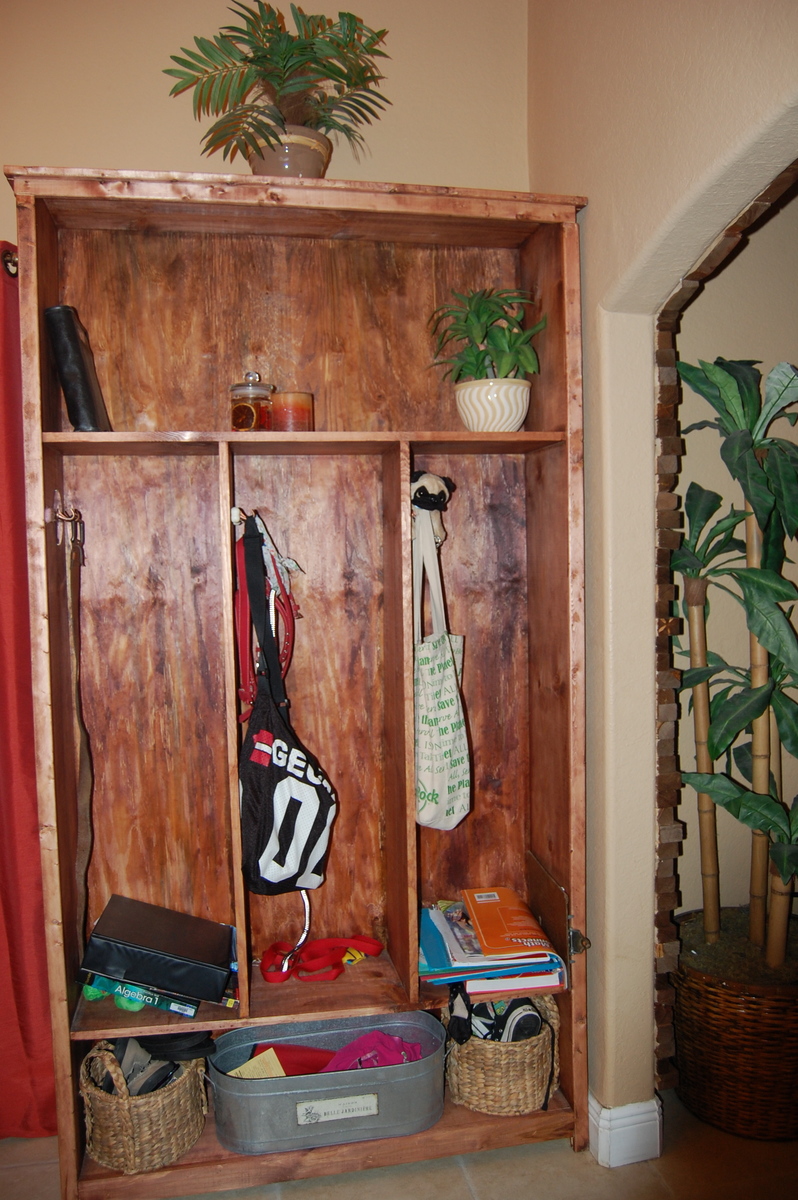
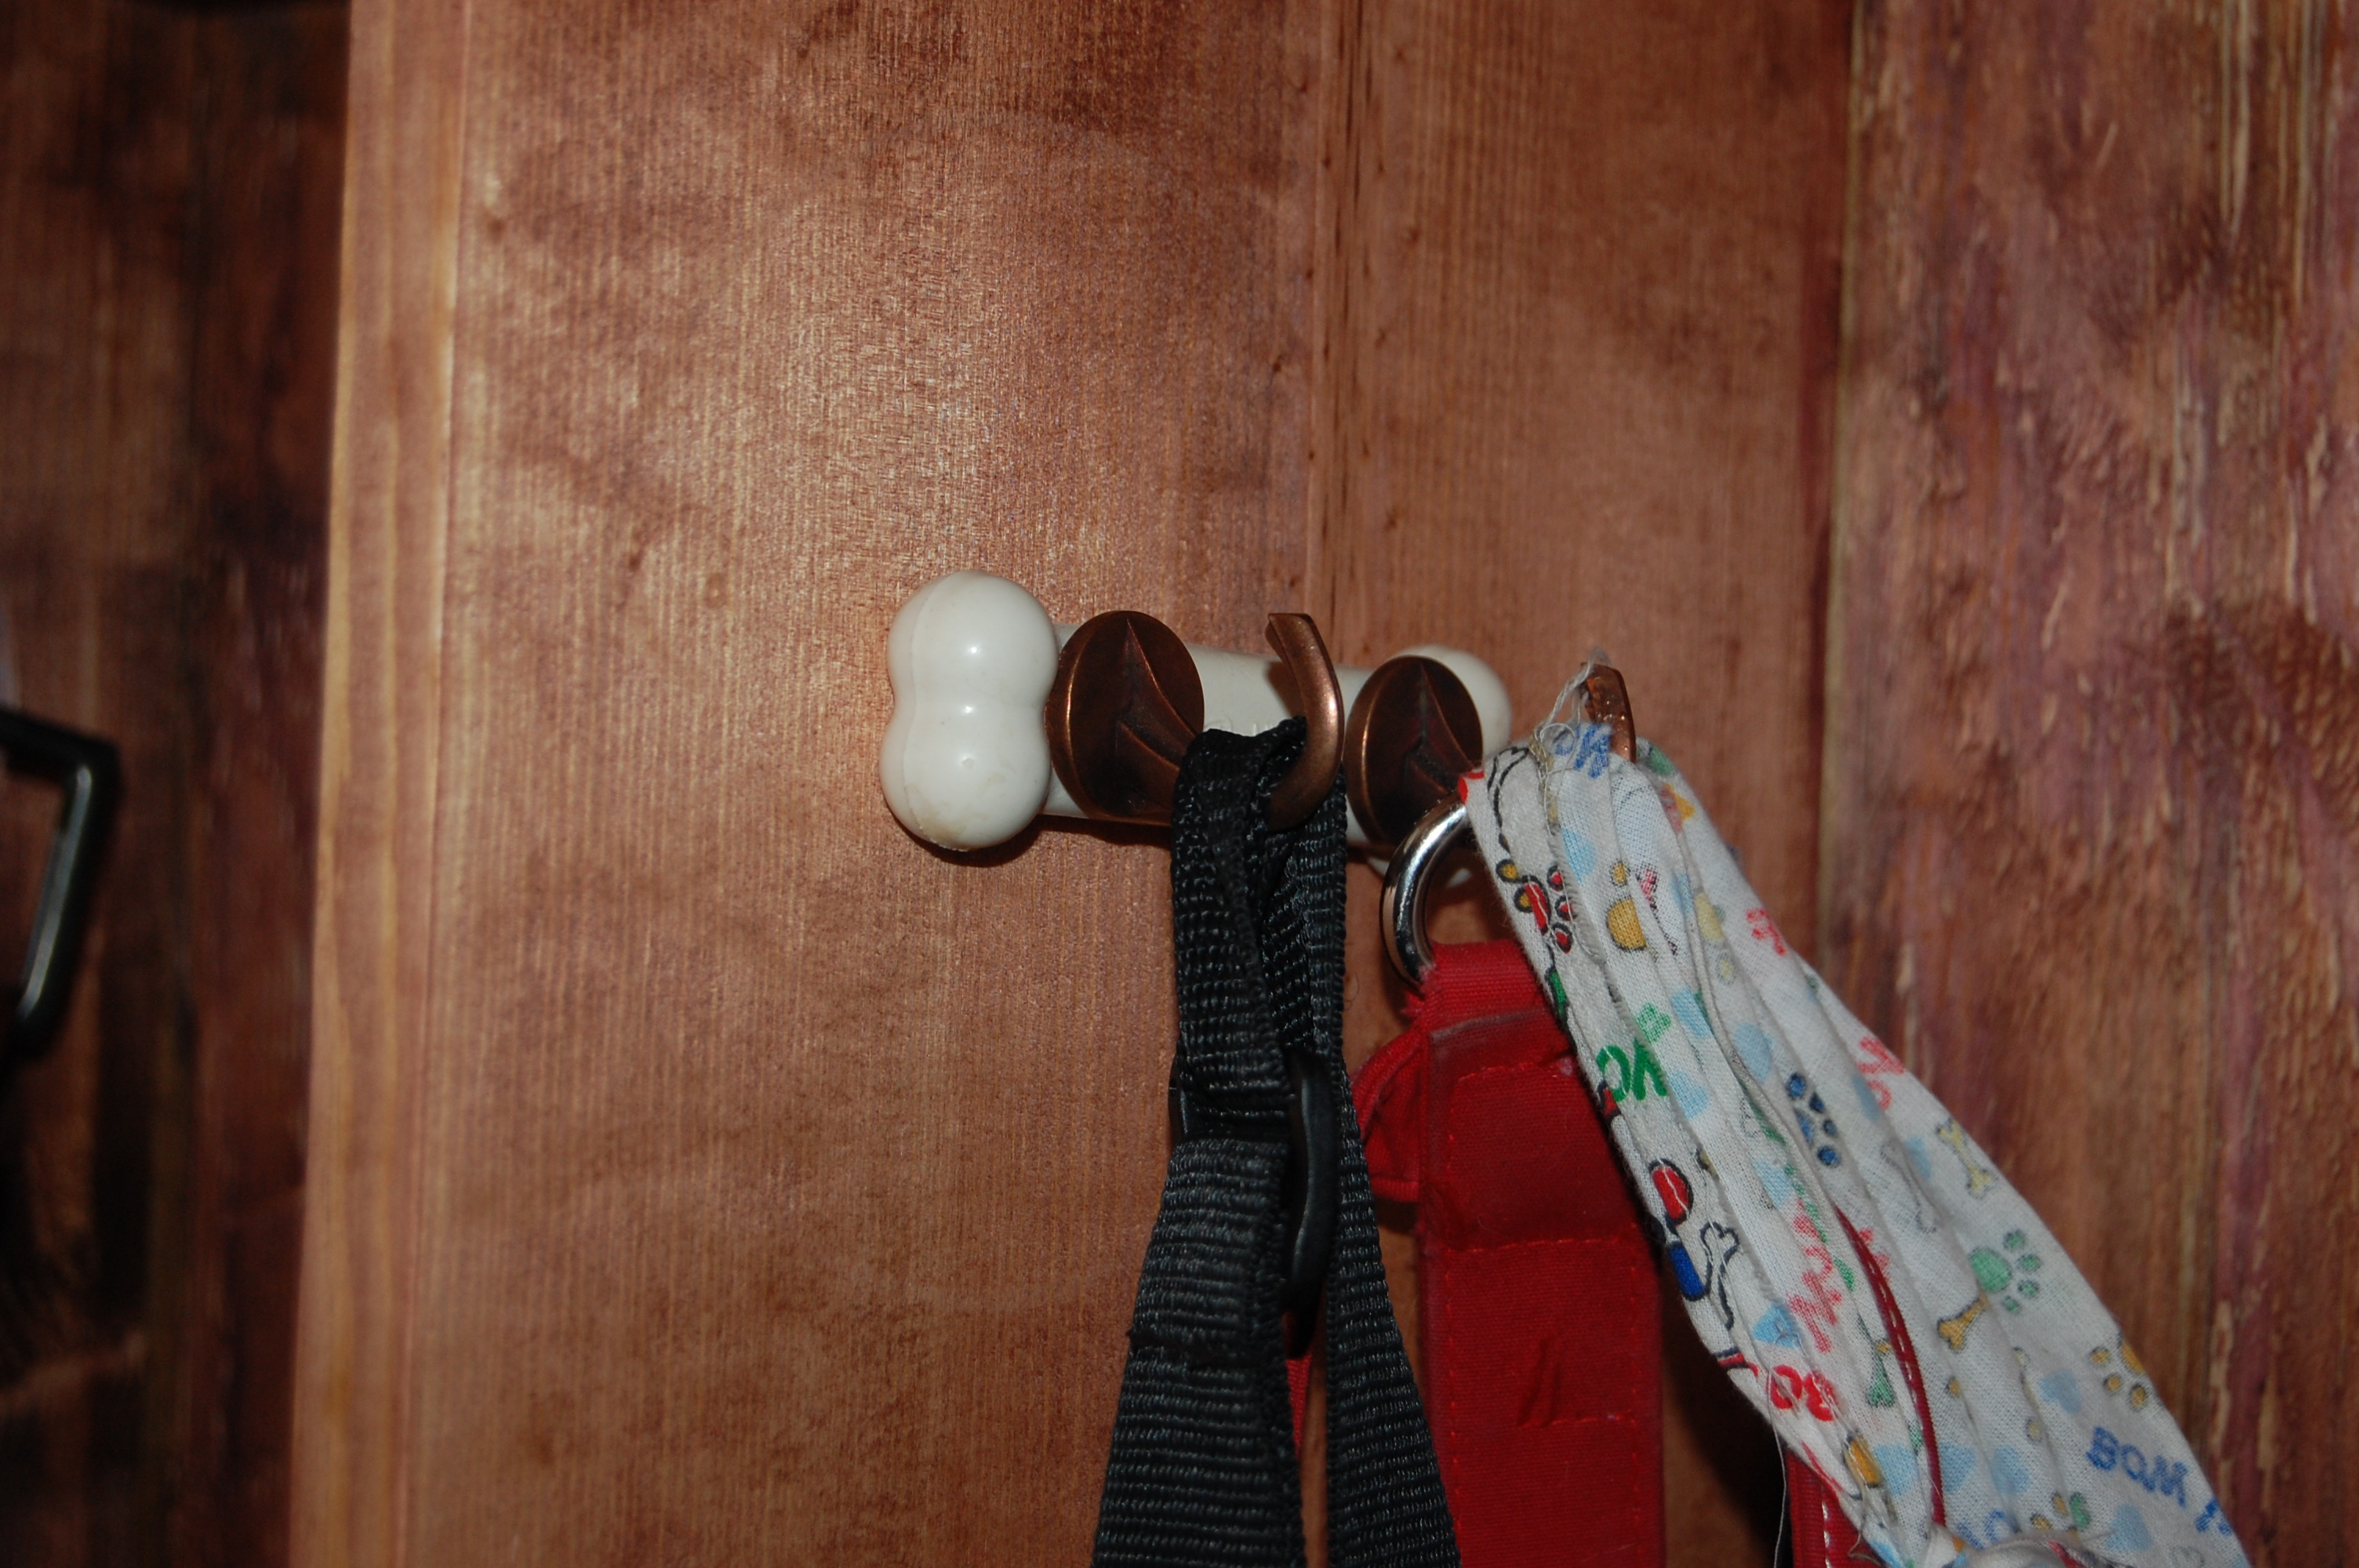
(I don't know why my picture is horizontal, it shows up fine on my computer).
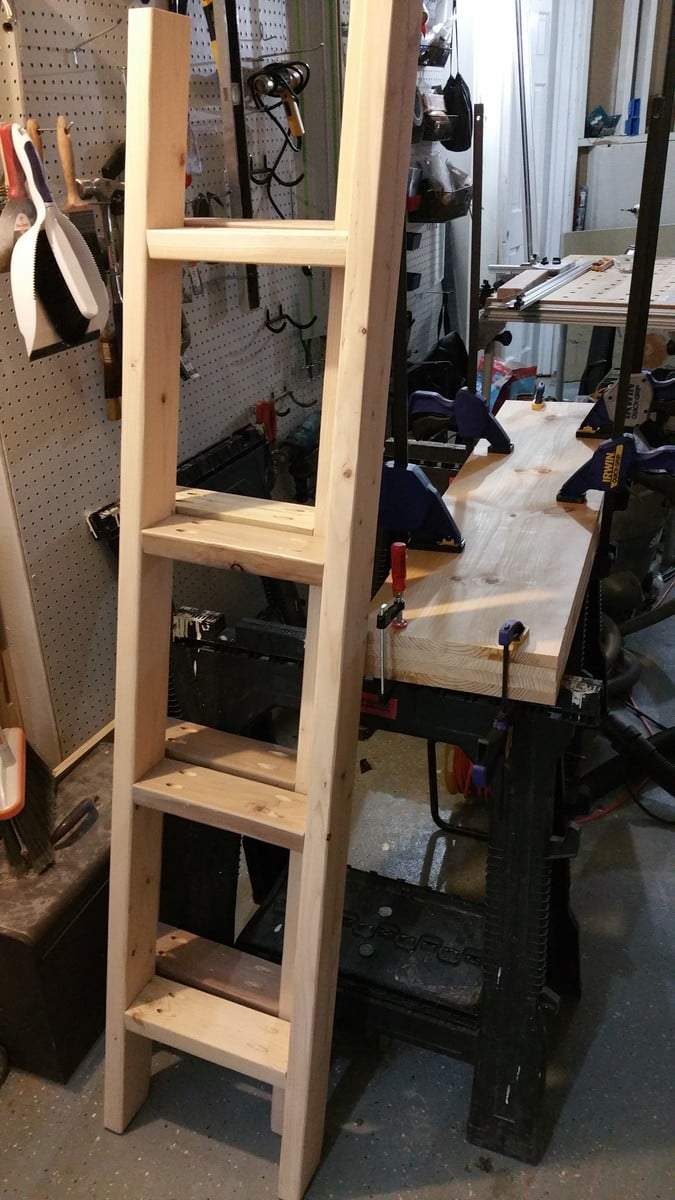
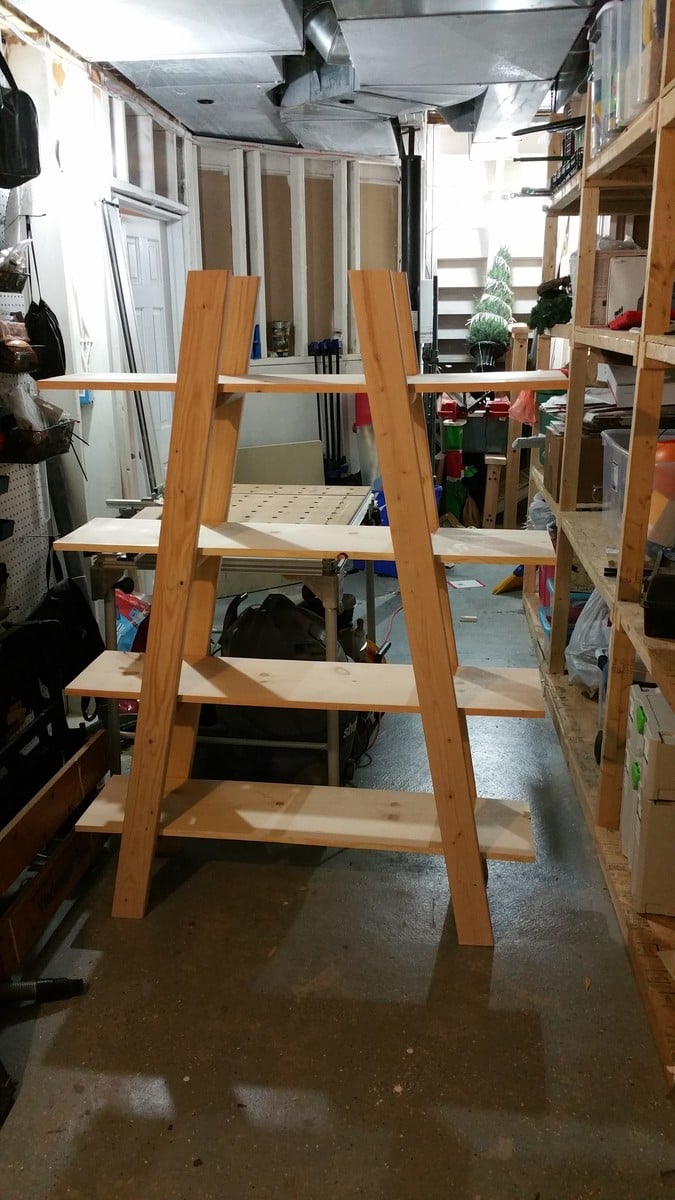
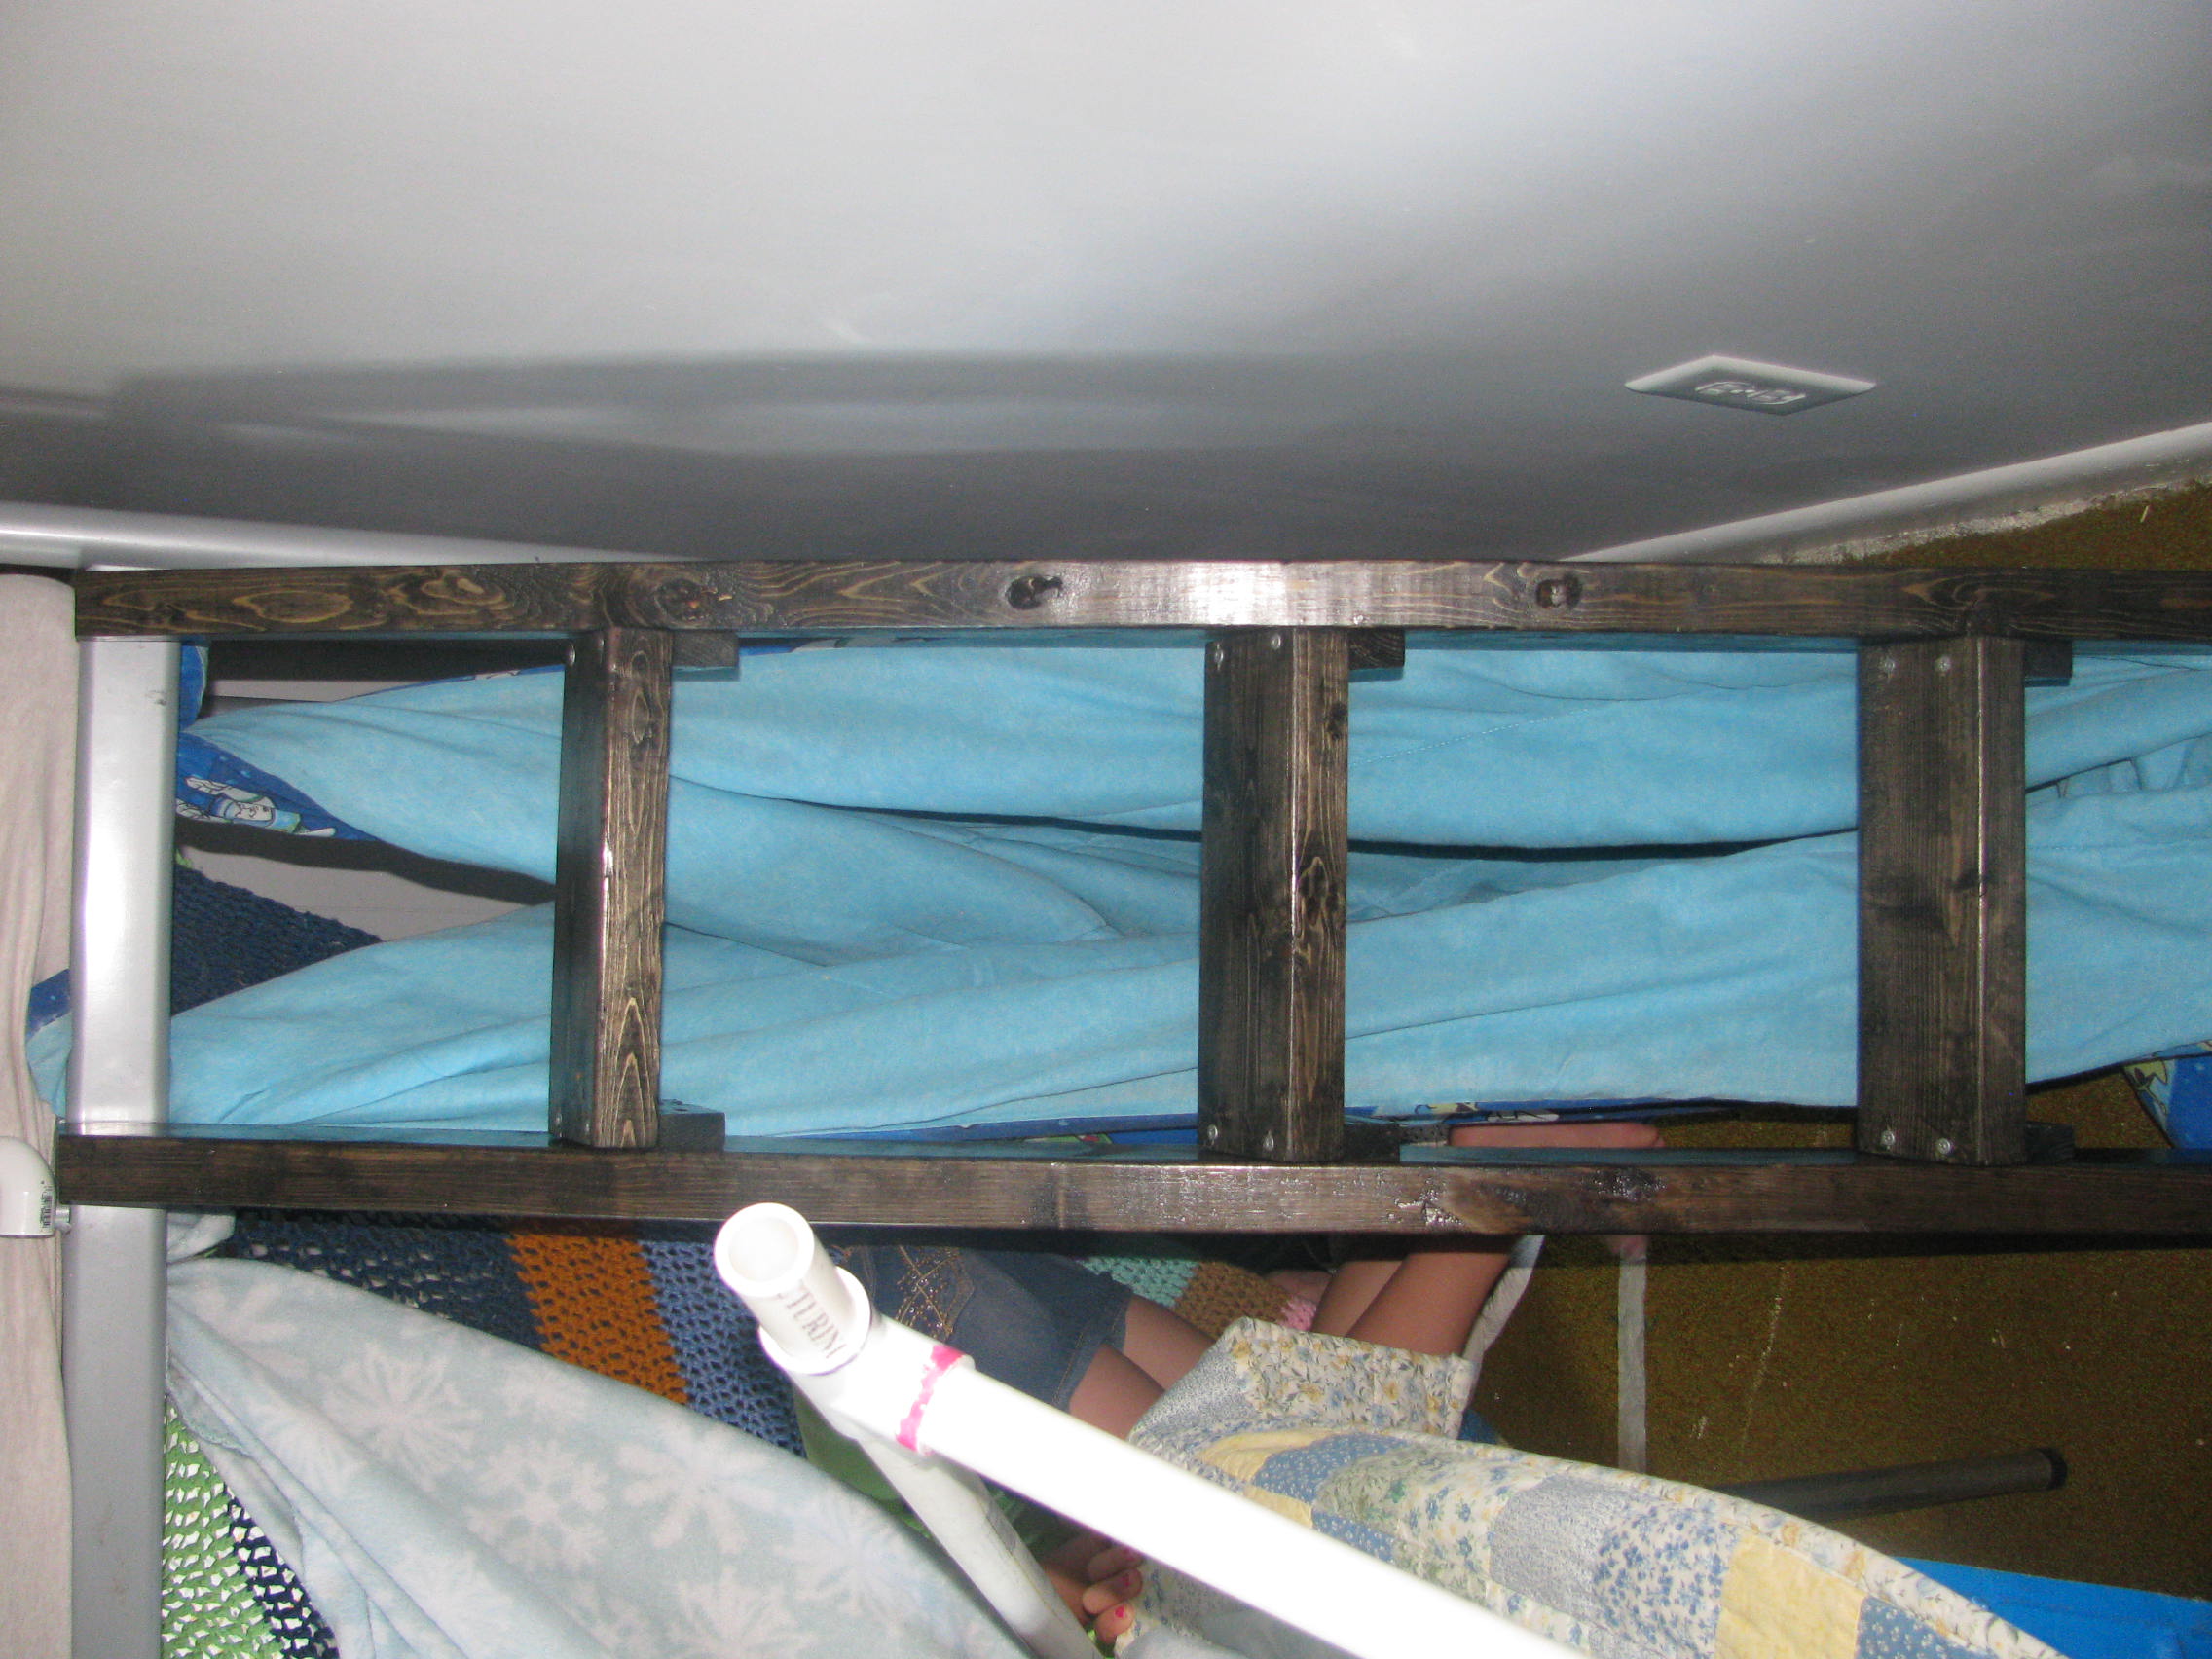
In redecorating my oldest son's room, we needed him to have a loft bed, but all the commercial loft beds are too tall for his bedroom. So then, we thought we would re-work his current bunkbed. In order to use it as a loft bed we had to remove the bottom support rails and that meant we needed a new solution for a ladder (because it was part of the support system). After looking through the site, I decided that this ladder was the best for our needs. The ladder went together smoothly. We had to modify the directions just a bit to make it the right size. We put a set of U-brackets on the end of the ladder to put over the bunk bed. We also drilled through the bed frame and into the ladder for additional support.
Wed, 10/30/2013 - 12:14
Hi there! I'd like to rework my daughter's bunk bed like you did, but struggling to figure out how to raise it. I also need to build a new ladder. Can you offer any guidance on this? Thanks!

Comments
Ana White Admin
Sat, 11/06/2021 - 17:43
So cute!
Love all the paint colors and wood ceiling!