Community Brag Posts

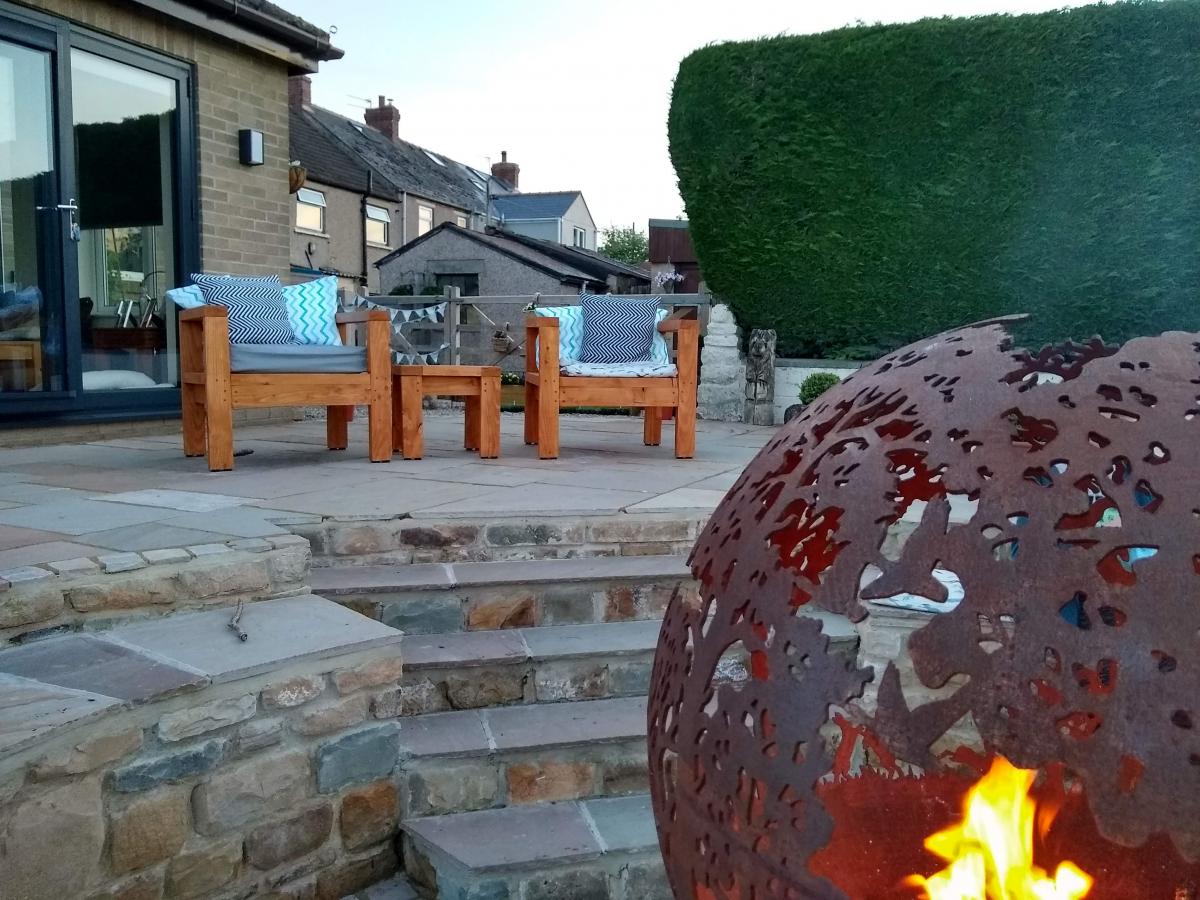
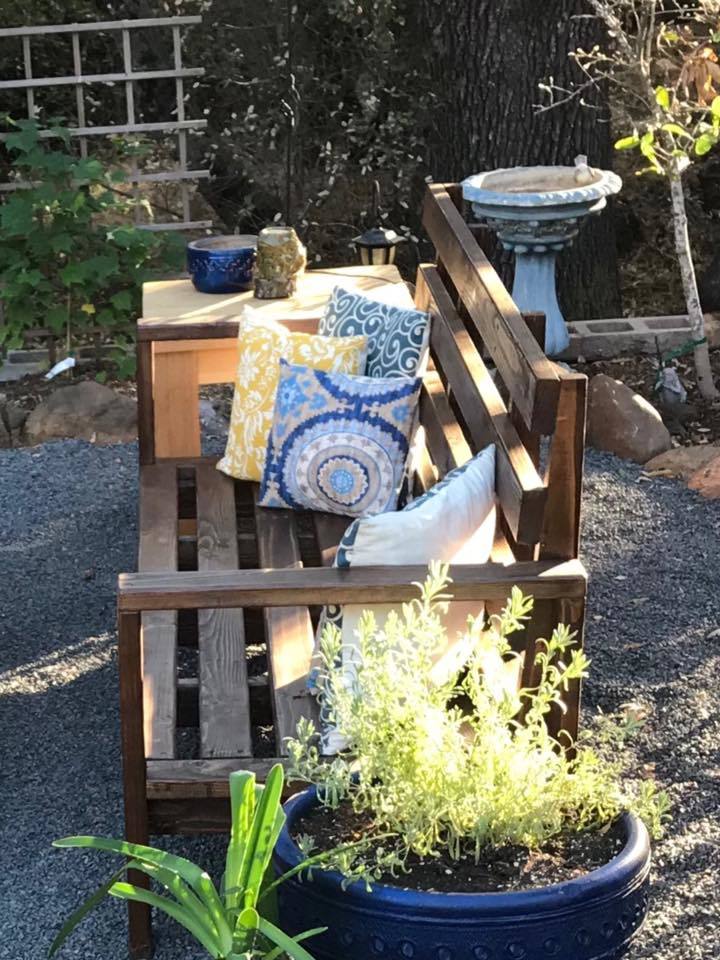
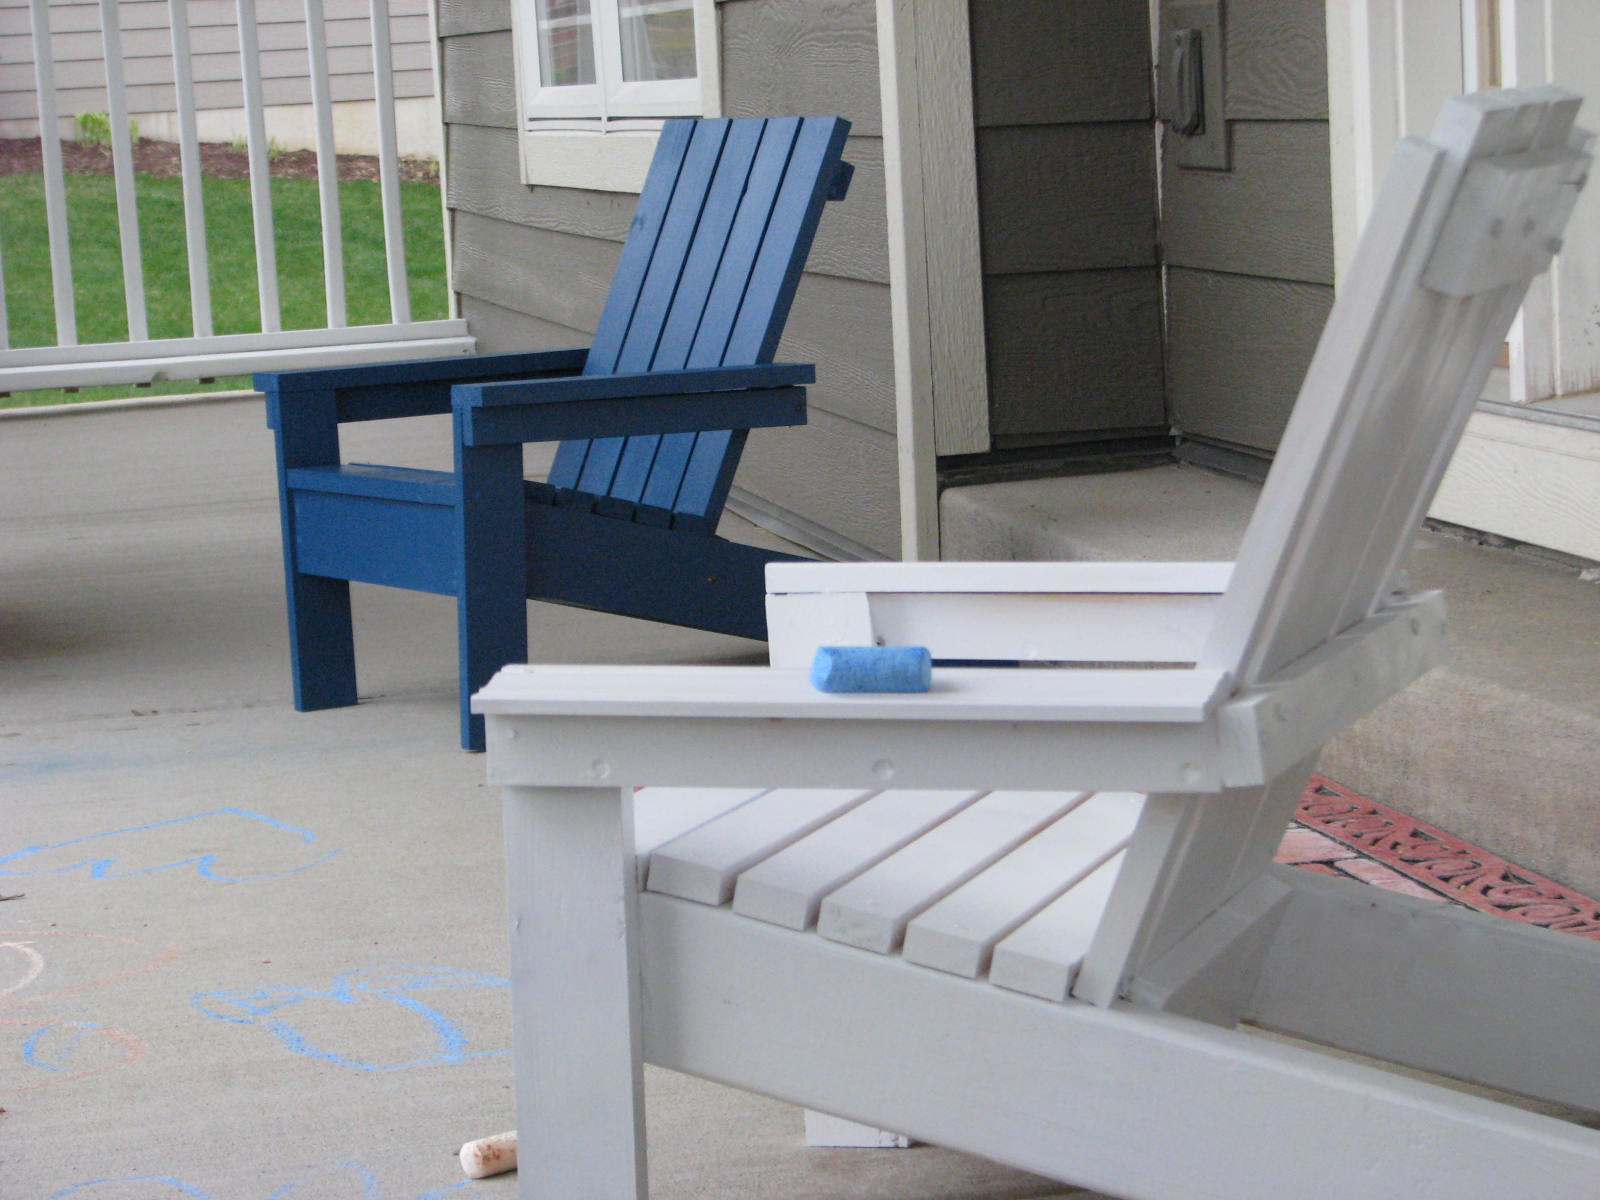
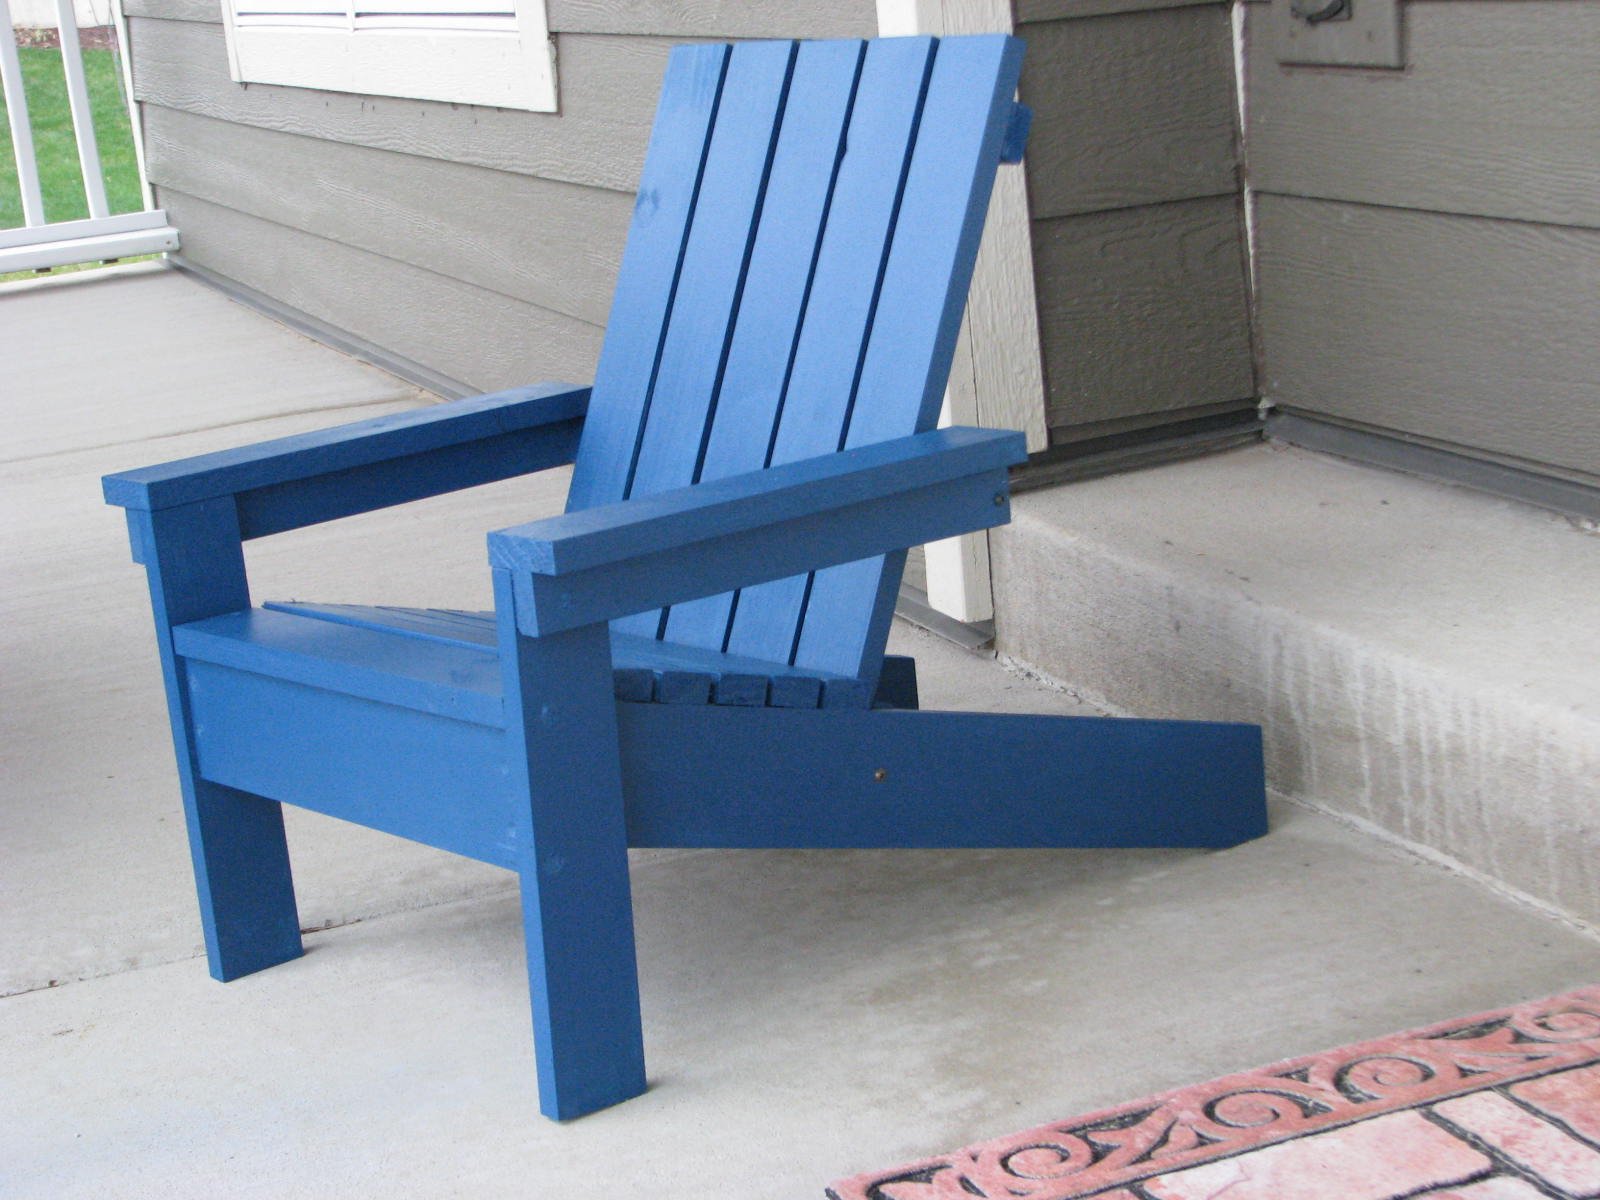
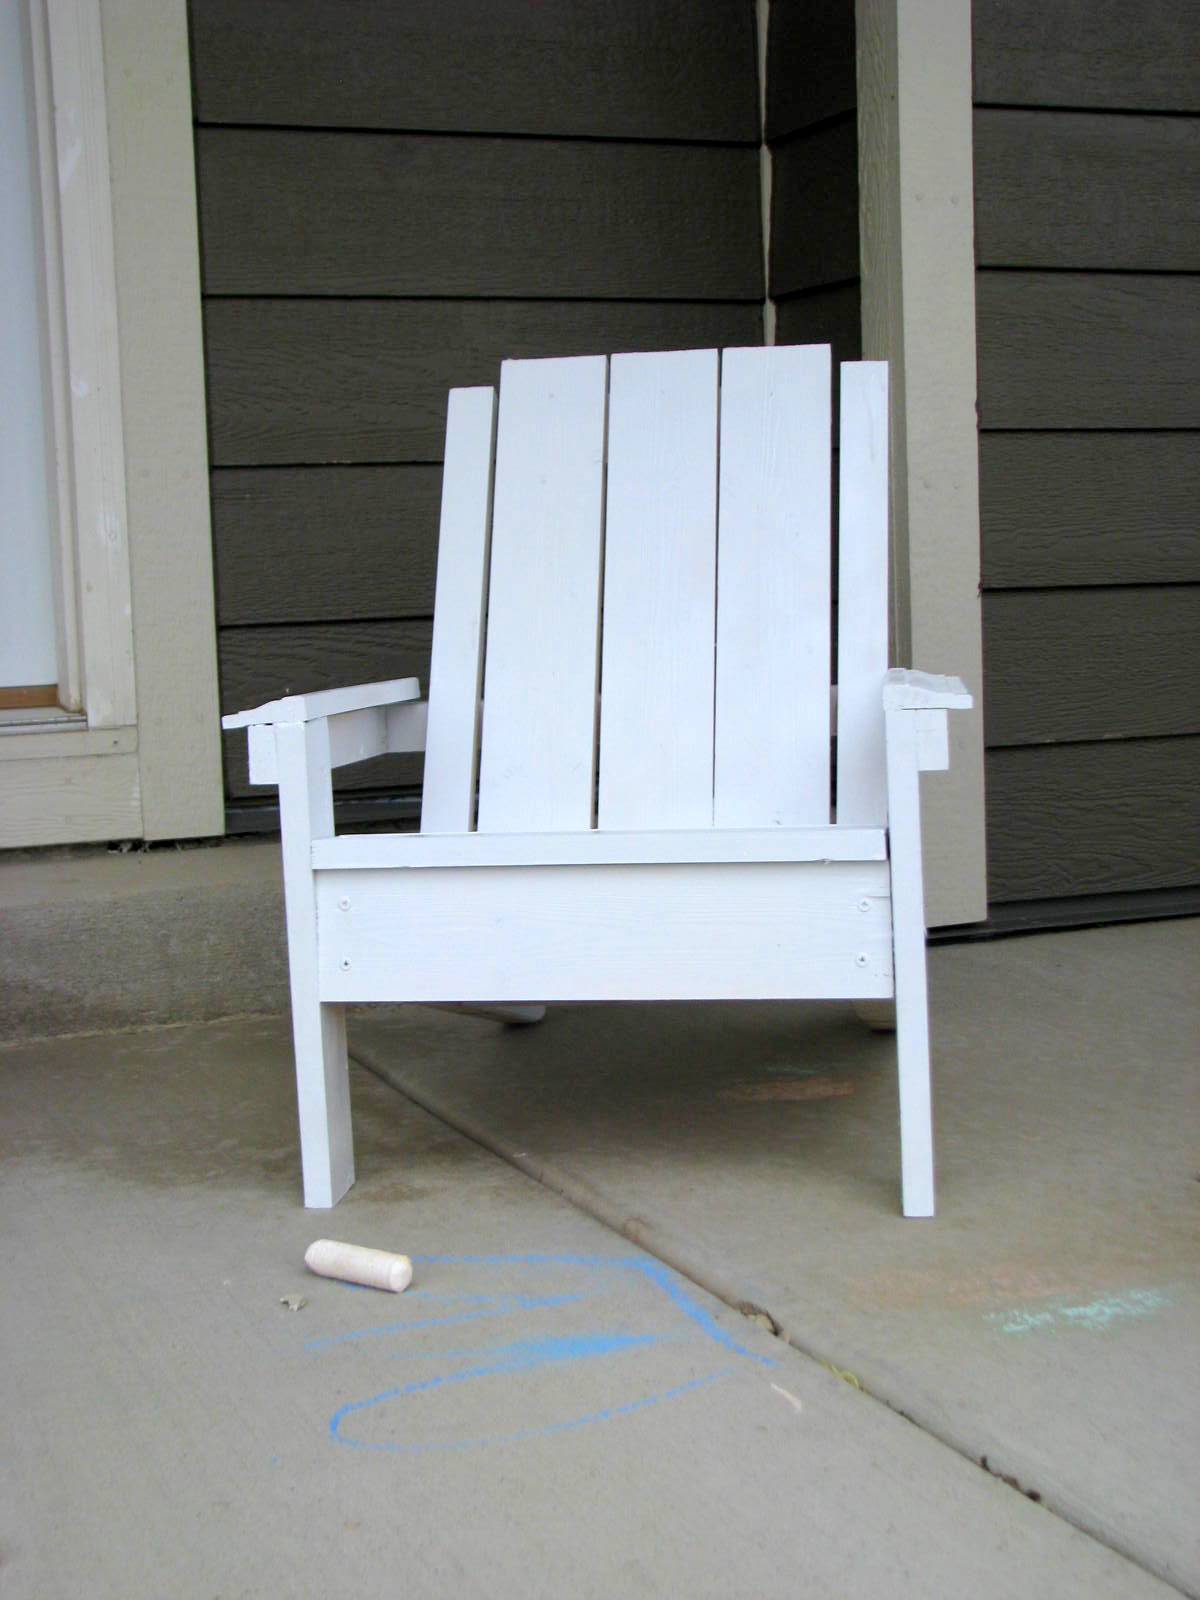
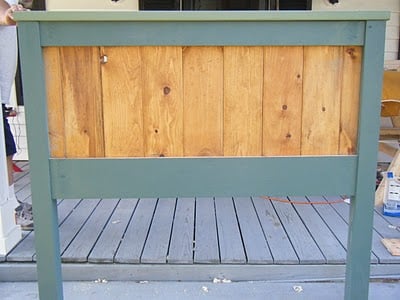
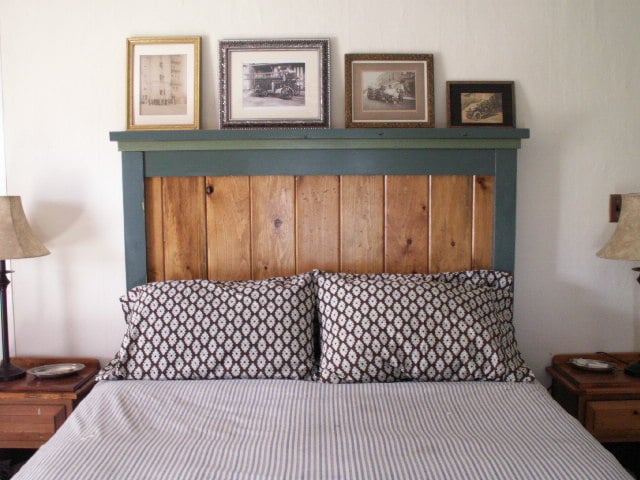
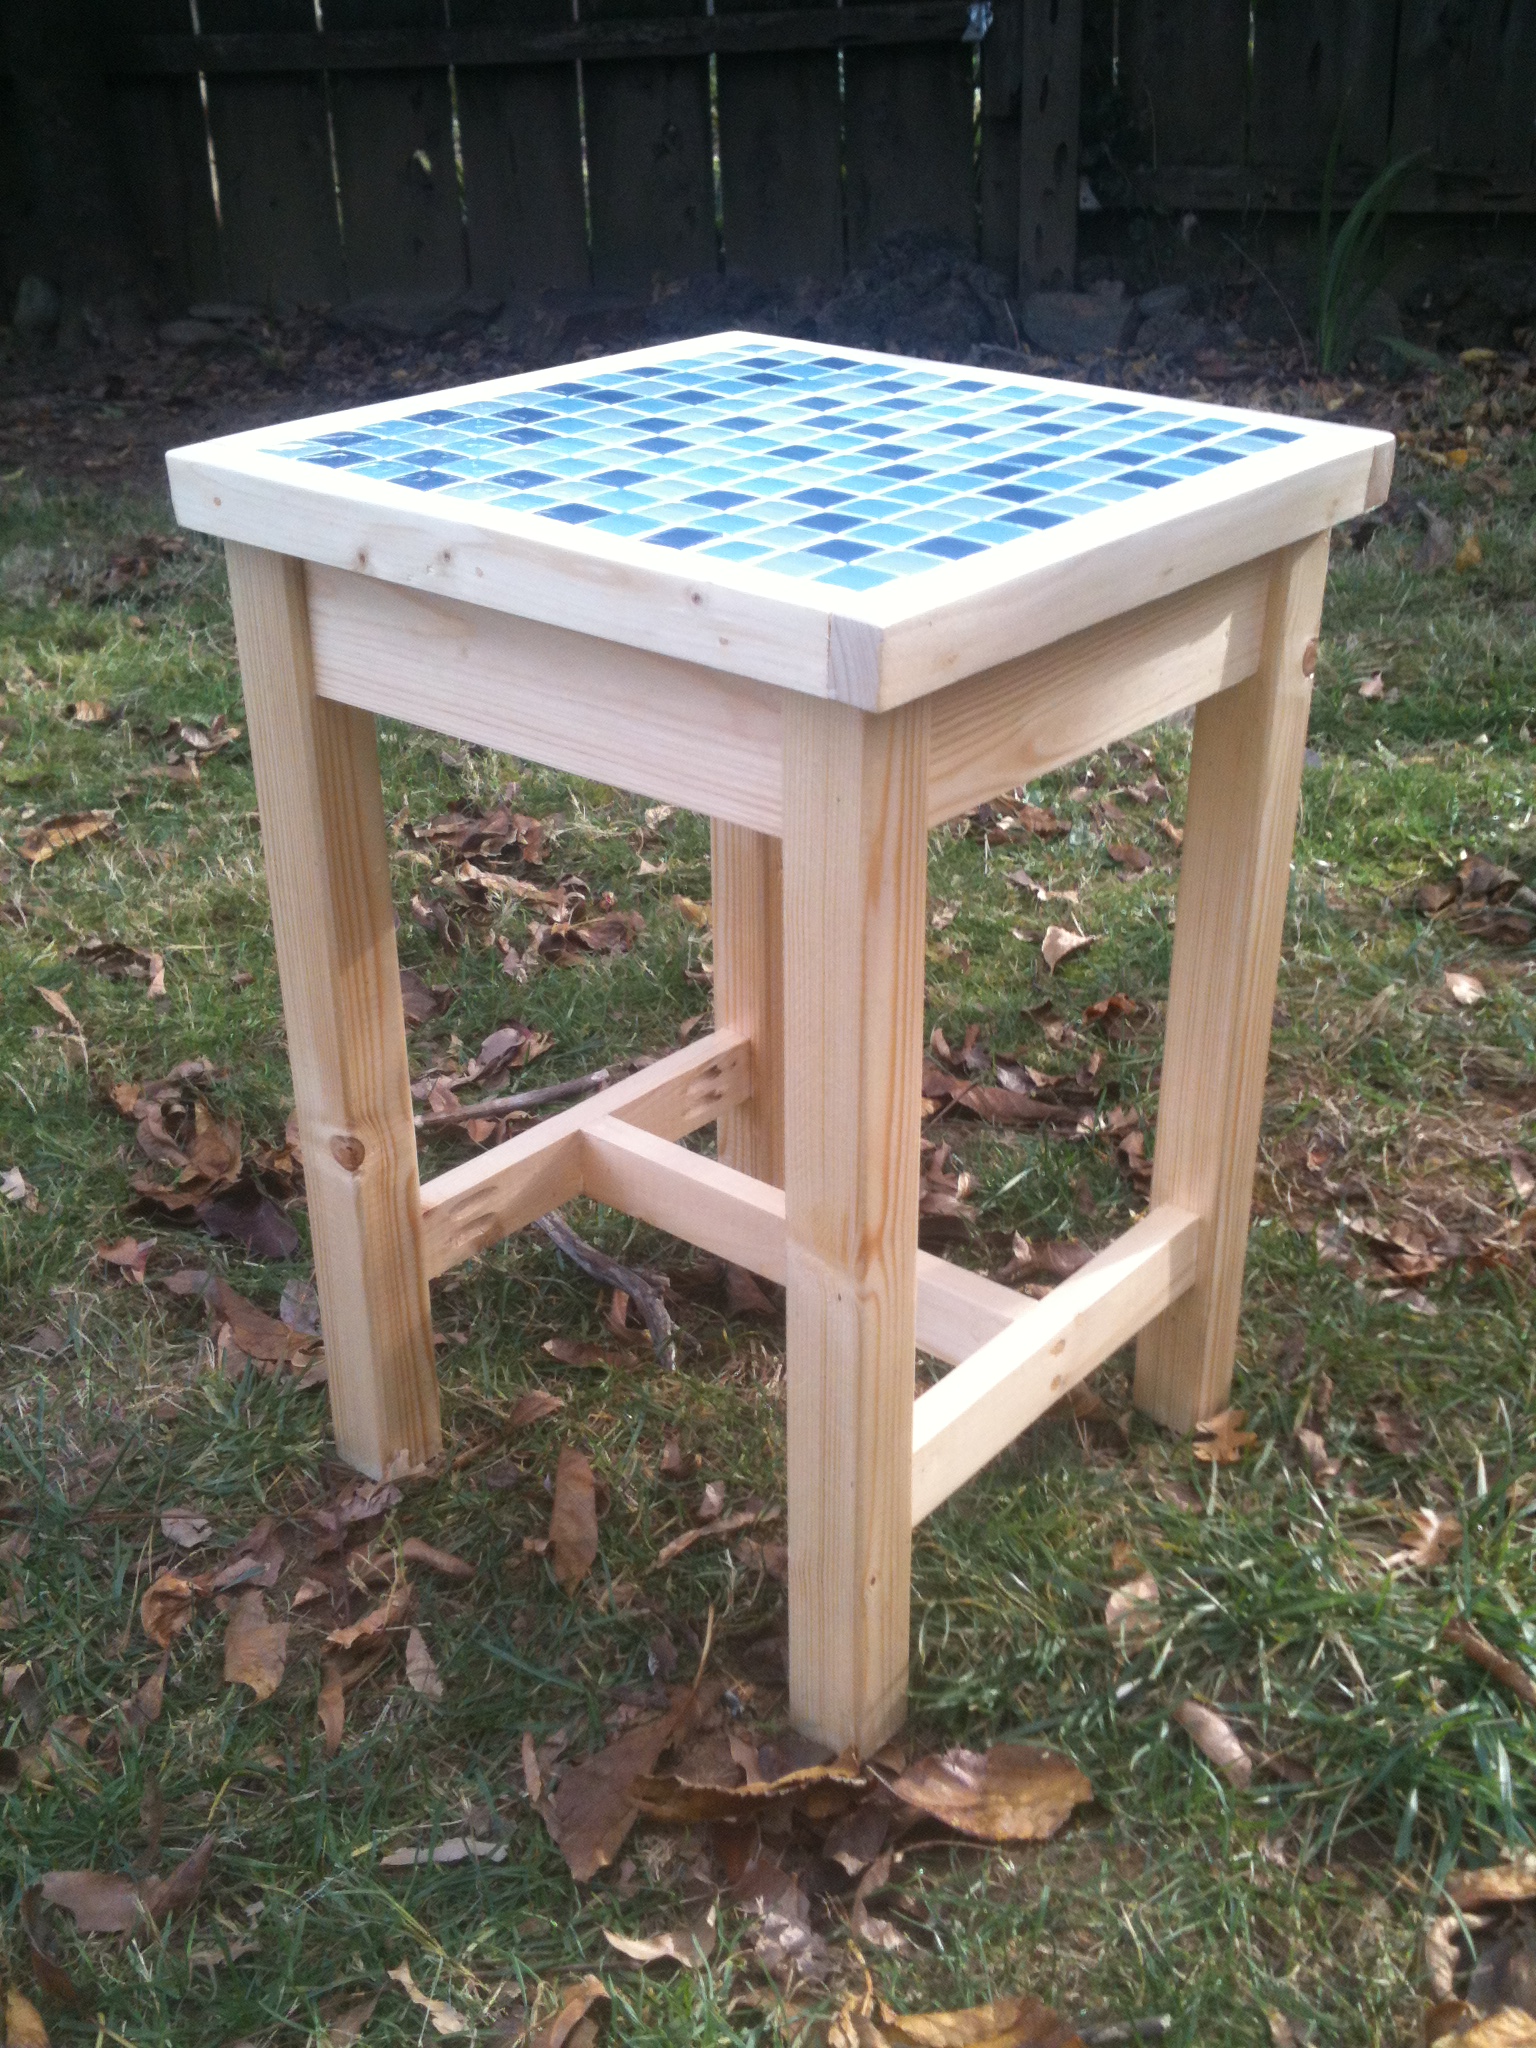
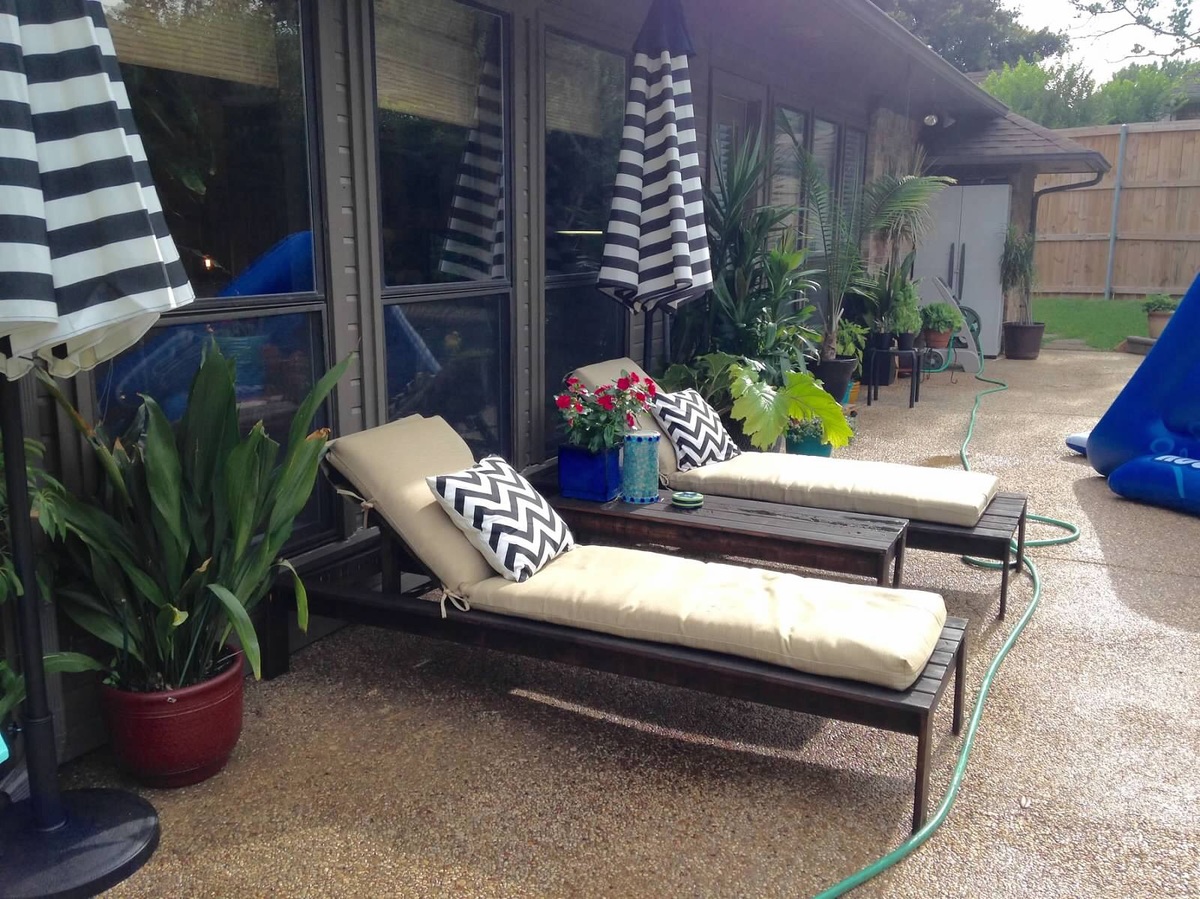
2x4 Outdoor Chairs and Side Table

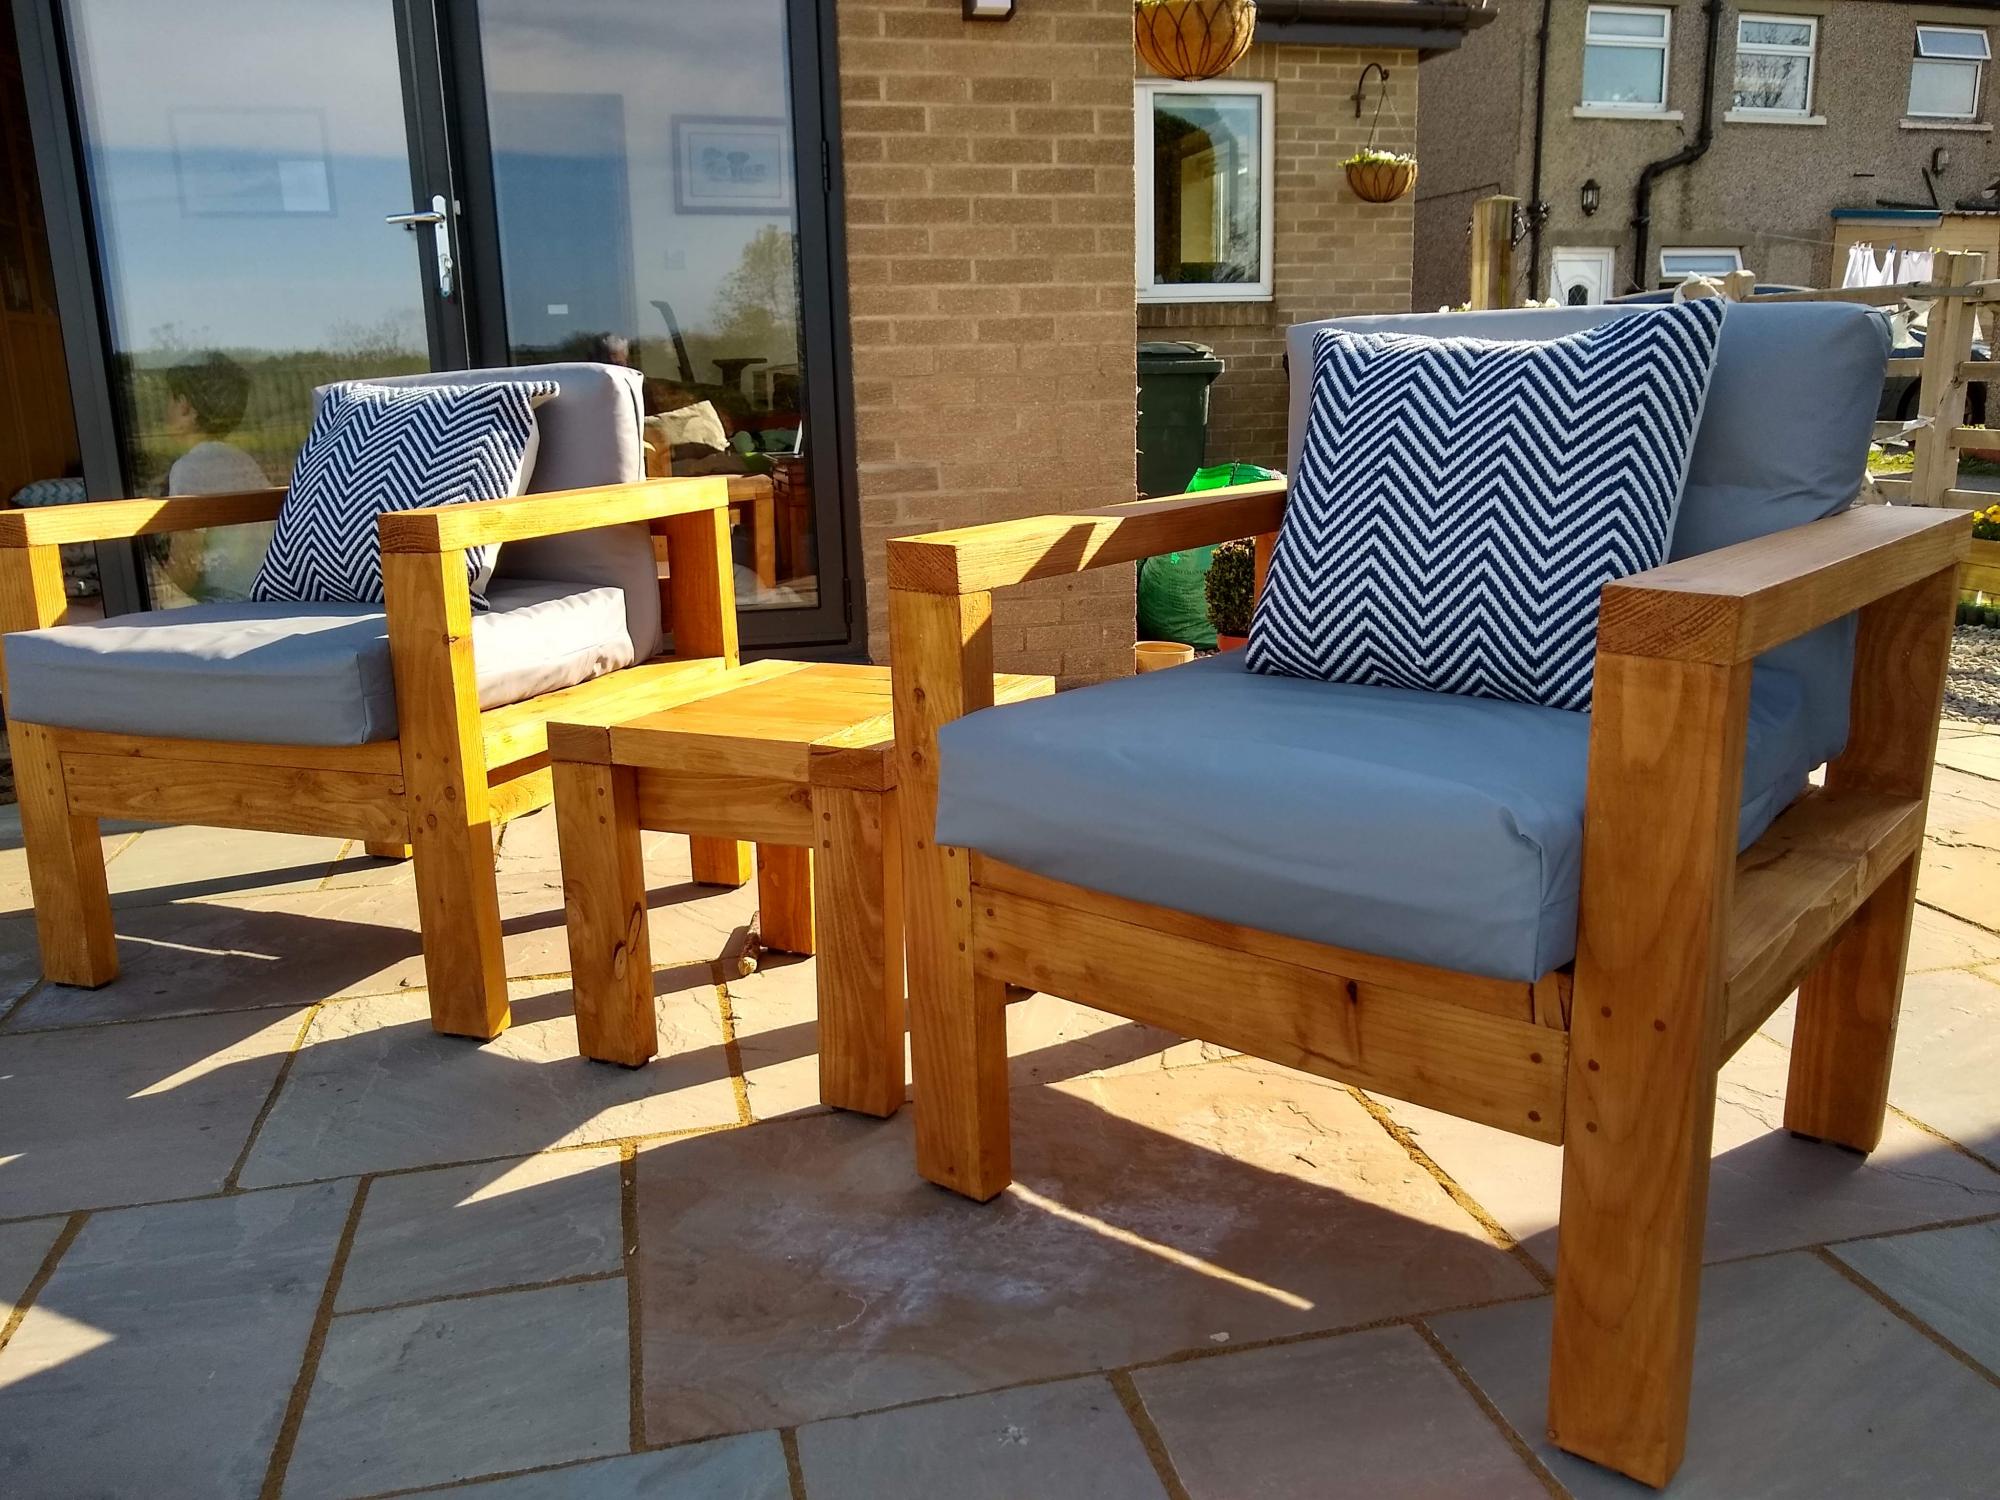
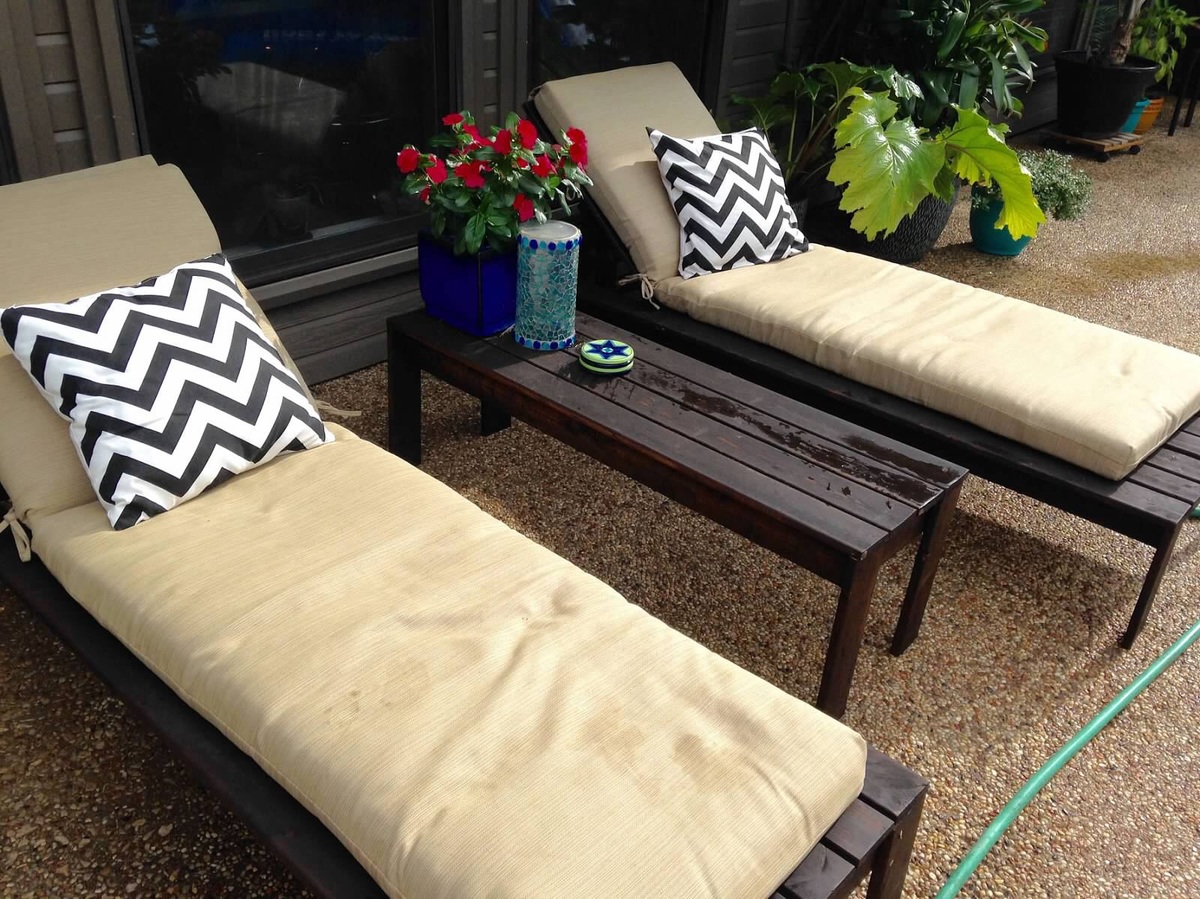
I built the 2 chairs and side table using Ana's plans. Wood in the UK is perhaps not as cheap and ubiquitous, so I managed to get hold of some rough siberian larch to build them. After what seemed like a lot of sanding I started cutting. I've used stainless steel screws and have used a plug cutter on a mahogany board I had to plug the screw holes. I really liked the contrast and neatness that this has given the project. I also used some rubber feet to raise it off the ground and try and reduce any water damage. The side table is reduced in size from the 2 foot version in the plans, this was easy enough once I'd worked out the impact on all of the other measurements. My wife has commented that I should have used less wood in my next project as they are very heavy, they certainly aren't going anywhere! My wife did produce the lovely grey cushions that you see in the pictures.

Estimated Cost
120
Estimated Time Investment
Weekend Project (10-20 Hours)
Finish Used
Used a wood preserver followed by a coat of stain to obtain the light finish seen
Recommended Skill Level
Intermediate

Comments

Jeep Bed

Submitted by papamike on Mon, 07/05/2021 - 17:15

I hope this is OK to add here. It's not an Ana White plan, so moderator please delete if it is not allowed. I made this bed for my grandson. I bought a plan online and modified it from a twin to a full size bed. The dome light and running lights work as night lights. A motion sensor light activates if he crosses the door to illuminate the ladder. Front tire is made as a step so his parents can climb in and read to him. The whole thing is on EZ Sliders so they can move it away from the wall to make the bed.

Estimated Cost
$150.00
Estimated Time Investment
Weekend Project (10-20 Hours)
Finish Used
Latex paint.
Recommended Skill Level
Beginner

Comments

Over Toilet storage shelf

Submitted by Anonymous (not verified) on Mon, 10/04/2021 - 14:30

I made this less wide then the plans to fit in my small bathroom. Thank you for these wonderful
Plans!

Comments

Green House

Submitted by Anonymous (not verified) on Thu, 07/13/2017 - 08:31

I built this amazing green house following your plans!  My wife and I moved our family from the city to an amazing 5 acre homestead out in the country here in Wisconsin. We are super happy that we will be able to keep our new garden going longer!  Thanks so much for the plans!

Built from Plan(s)
Estimated Cost
We spent about $800 for the frame and plastic panels. Then we spent another $250 for the reclaimed barnwood siding. We found the door at a reclamation site for $25.
Estimated Time Investment
Week Long Project (20 Hours or More)
Finish Used
I followed Ana's plan pretty closely. This was the first building I ever built from scratch. It was a little difficult to get the foundation level. But I figured it out. I used pressure treated 6x6s on top of gravel. I was able to screw the actual walls down to the 6x6s.

I'm actually building a second building from these plans to use as a chicken coop. Once it's done I will post photos.
Recommended Skill Level
Intermediate

Comments

Seasonal And Holiday

Playhouse kitchen from Modern Vertical Slat Top Console

Submitted by LauraLaura on Mon, 05/27/2013 - 17:21

I've been looking for a simple design for a consol table that I could easily modify to fit in my kids' club house. This one fit the bill perfectly! I also happen to have a pile of 2x4s left over from a closet demo, so I wanted to use those up. I basically built 2 of the consol tables, letting the 2 outer-most horizontal beams extend across and 25.5 inch space and connect the two consols. Then I put in a middle beam and that created the perfect space to set some catering pans in it. Also, I only had 2x4s so I used those for all the pieces, making the gaps a little wider than the original design. And lastly, because I didn't quite have enough wood, I shortened the vertical beams. If you look at the picture, all of this will make more sense! Thanks for the inspiration and direction! ps - I have no idea how to rotate the photos. Sorry!

Estimated Time Investment
Afternoon Project (3-6 Hours)
Finish Used
none yet, but I think I need to paint it or something so it doesn't rot outside.
Recommended Skill Level
Starter Project

Wood Toy Box

This is a great beginners project. I wanted something that would match my living room and still be functional for my daughter to get her toys out . We have a full tutorial at our blog.... www.Ahouse-2-Home.com Also , if you have any questions please feel free to leave us a comment! Thanks!

Built from Plan(s)
Estimated Time Investment
An Hour or Two (0-2 Hours)
Finish Used
Chestnut stain
Recommended Skill Level
Beginner

Comments

ImTheNana

Sun, 01/25/2015 - 07:15

Is there another source for the plans? The linked site is down.

2x4 Rustic Outdoor Bench

Submitted by Anonymous (not verified) on Thu, 11/09/2017 - 09:46

Submitted by Carla Santiago on Facebook - 


We did a bench, I got your plans off Pinterest. We just put a slight slant to the back and we love it. Thanks for the great plans.

Built from Plan(s)
Recommended Skill Level
Beginner

Kitchen Island, Trash Can Storage

Submitted by Anonymous (not verified) on Thu, 11/11/2021 - 21:46

I absolutely love this kitchen island/trash storage/prep station. I had so much fun building this with my father in law who is a professional carpenter. I had built several other projects, but with this project and his help, I feel that I can finally say I am an "advanced" builder :)

I had so much fun with this, and I can't believe how it turned out.

Comments

Kid's Adirondack Chairs

Submitted by tlcbbp on Sun, 04/24/2011 - 16:43

The first one I built (the white one) was a terrible failure because I rushed through it and didn't read directions! Also, I used only scraps that I had on hand. The blue one went smoothly because I used the right materials and took my time.

Built from Plan(s)
Estimated Cost
12 - 15 dollars
Estimated Time Investment
Afternoon Project (3-6 Hours)
Finish Used
The blue paint is oops paint from Lowes & the white is spray paint
Recommended Skill Level
Beginner
Seasonal And Holiday

Tall trellis from coat tree plans

Submitted by bar1812 on Thu, 06/25/2015 - 18:38

I could not find a big enough, awesome enough trellis in stores, so I built my own out of cull lumber [the stuff on super-clearance no one else wants] for about $12 and a left-over post pocket. Thanks for the inspiration!!

Estimated Time Investment
Afternoon Project (3-6 Hours)
Finish Used
ebony stain and spar varnish to hold up to the elements
Recommended Skill Level
Beginner

Comments

Planters- modified

Submitted by Anonymous (not verified) on Mon, 03/07/2022 - 06:14

Used your youtube instructions for the square planters and revised them to create these! Thank you so much for your video it helped me so much. I was trying to make a small backyard for my dog at my condo without breaking any rules not to have a fence. Gary loves it!

Comments

DIY SLIDING BARN DOOR

To date this has been my favorite and fullfilling DIY project!! Skills were learned, $$ was saved and it looks fabulous!!!   It wasnt easy but it wasn't impossible.  April WIlkerson provides a detailed tutorial on her website along with a fantastic youtube video on her channell. I hope this inspires someone else to take on this challenge!!  If you have any any questions please feel free to ask me!!  Enjoy.

Estimated Cost
$100
Estimated Time Investment
Week Long Project (20 Hours or More)
Finish Used
Minwax Special Walnut, Minwax gray, ragged white followed with a satin poly.
Recommended Skill Level
Intermediate

Extra-Large Wood Pet Kennel End Table

Submitted by Anonymous (not verified) on Sat, 01/02/2016 - 17:24

I followed Ana's plan exactly, but increased the dimensions to the standard XL crate size (42L x 28W). The base is painted gloss white and the top is stained espresso.

Built from Plan(s)
Estimated Time Investment
Week Long Project (20 Hours or More)
Finish Used
Gloss latex for the base and Minwax espresso stain on the top.
Recommended Skill Level
Intermediate

Queen Farmhouse Headboard

Submitted by sharon-l on Sat, 10/22/2011 - 04:54

We eventually will build the rest of the bed, but for now we needed a headboard. Hubby helped me with this one, since it was large, I loved having an extra pair of hands. This headboard is reversible, so if our tastes change, we can unbolt it and flip it over to the side that is just stained and polyurethane. Pretty neat! This headboard is extra tall, because we have our bed frame up on risers, and we wanted a picture shelf but didn't want it interfering when we sat up in bed to read or what-not. Hubby used the router to make grooves in the top before we attached it, so our pictures wouldn't be crashing down on our head! Our metal bed frame comes just shy of the outer edge of the legs of the headboard, so when we build the rest of the bed, the side rails will meet the edge exactly. We placed the headboard behind the bed frame to mark where to drill the bolt holes and attached the headboard to the frame with 4 inch long, quarter inch wide bolts with washers and nuts. Two on each side.

Built from Plan(s)
Estimated Cost
$50-$60 just paint and lumber. We had some supplies left over from previous projects, including screws and the ship-lap boards.
Estimated Time Investment
Weekend Project (10-20 Hours)
Finish Used
We painted and distressed the boards, then applied stain to the distressed parts. We coated the entire thing with three coats of polyurethane.
Recommended Skill Level
Intermediate

Comments

rustic baby crib

Submitted by KL728MX on Tue, 01/05/2016 - 12:32

my wife and I had our first son, Mason, over the summer and I was in love with the idea of building his crib. It was a lot more work than I had anticipated but it was well worth the hard work. it came out beautifully. I made a 2X4 spacer that we can remove as he gets older to lower the mattress height. i used all pine lumber for the crib.

Estimated Cost
$250
Estimated Time Investment
Week Long Project (20 Hours or More)
Finish Used
rustoleum American walnut
Recommended Skill Level
Intermediate

Finished the amazing playhouse loft bed

Submitted by gftl33 on Tue, 11/05/2013 - 12:27

My granddaughter is so in love with her loft bed! She feels so special, and she is! Thanks for such wonderful plans.

Estimated Time Investment
Week Long Project (20 Hours or More)
Finish Used
I created the brickwork by using 1/4 " tape 3 colors of paint sponged on to create 3 dimensional looking "bricks". Added trim at seams, mitered corners around window and door. Fabulous house!,,
Recommended Skill Level
Intermediate

Comments

JoanneS

Tue, 11/05/2013 - 14:05

Love this project! It is absolutely beautiful! Your paint details and trim work make it a castle! :)

Miter saw cart modified

I have enjoyed my miter saw cart for years. My sweet hubby gifted me with a table saw but I was nervous to use it without support for large pieces of wood and needed better storage. So... I modified my cart by adding a back leaf and making the shelf adjustable with two sets of cleats for the height of both saws.

Built from Plan(s)
Estimated Time Investment
An Hour or Two (0-2 Hours)
Finish Used
Discounted paint from the oops cart at Home depot.
Recommended Skill Level
Beginner

Comments

Adirondack Table with modified top

Submitted by stacynabby on Mon, 12/19/2011 - 14:09

I used the design for the adirondack side table, but modified the top to have glass tiles. I just used a 12x12" sheet of glass tiles from the blue store to create the top. The wood is just clear poly. This is my Mom's Christmas present.

Built from Plan(s)
Estimated Time Investment
An Hour or Two (0-2 Hours)
Recommended Skill Level
Beginner

Comments

Kristan (not verified)

Tue, 12/20/2011 - 14:19

AWESOME!!! I'm inspired by this to take your design and turn it into a mobile chess table!!! soooo pretty!!

keyetta

Fri, 01/06/2012 - 03:30

Hey i love your rendition of this table, would like to use the same rendition, only thing i cant figure out is what you did under the tiles, did you use plywood or places the tiles on top the regular wood pieces

claydowling

Fri, 01/06/2012 - 07:05

Plywood, particle board or MDF is what should be under the tiles, not solid wood. Better yet would be a plywood bottom with a thin cement board or hardibacker over it. If you put it over solid wood, expansion and contraction of the wood will pop the tiles loose over time, and probably sooner than you like to think about.

Single Lounger

Submitted by adburleson on Tue, 02/16/2016 - 12:23

I loved the simple look and have admired similar loungers at Pottery Barn.  Even if I had the money I feel it's a waste to pay for what they charge.  I knew there were plans somewhere to make something similar for a fraction of the cost.  So happy I found this site!

I have many tools at home so I needed to purchase the lumber, hardware (screws, hinges, etc.), stain, and sealer.  I would say it was about roughly $100/chair (rounding up) - not including the cushions.  Those I found at Lowe's for about $60/each.  

I haven't made anything like this before so I made the first one and took my time.  I really enjoyed the process and thought the instructions were simple to follow.  I have some skills and basic knowledge so I didn't feel like this was too difficult.  I love the way they turned out!  I did the 2nd chair the following Saturday.  It took most of the day including the finishing.  I only took a few hours to put one together.  If I had help, would have been less, no doubt.  I plan to make a double lounger to match these soon. 

I will agree with some of the other posts that the legs seem a little "flimsy."  I went ahead with the orginal plan and they've held up with no problem for a year in the Texas summer heat with lots of activity and use - including our dogs!  So, I guess it's just fine.  I may use something sturdier for the double lounger since it would hold more weight.

I highly recommend these loungers to cut costs!  Also, the plan is not too difficult for anyone with little experience.

Estimated Cost
I had to purchase the wood, hardware, stain, and sealer. I would estimate about $100 a chair (rounding up). Which is a LOT less expensive then purchasing something like this! The lounge cushions came from Lowe's and were about $60/each.
Estimated Time Investment
Day Project (6-9 Hours)
Finish Used
We used Rustoleum stain - Kona. My personal favorite.
Recommended Skill Level
Beginner