Community Brag Posts

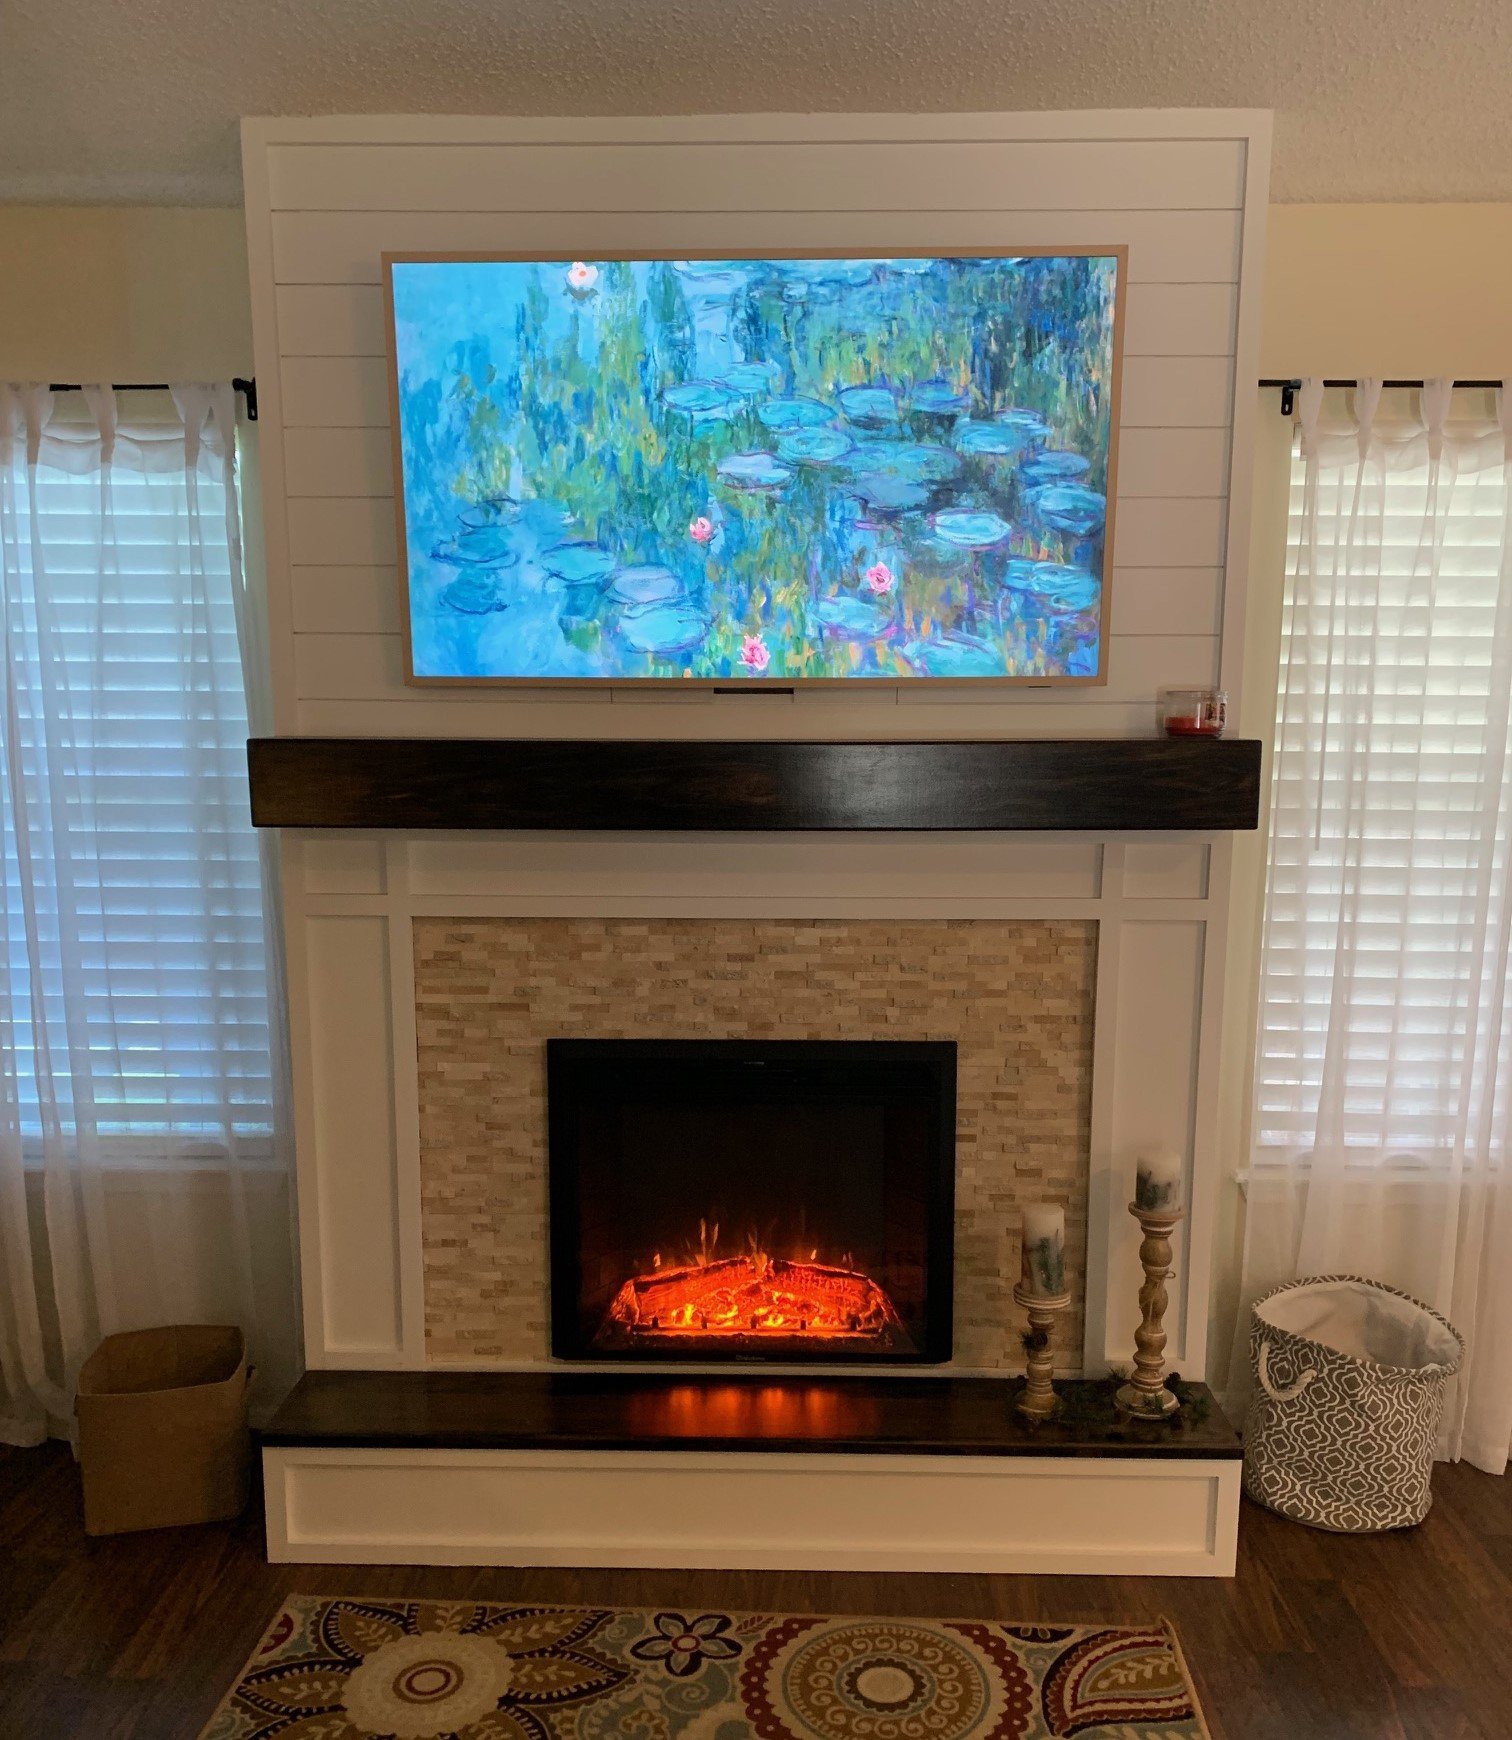
Fireplace with recessed TV mount
Submitted by medicscott on Thu, 02/16/2023 - 07:46

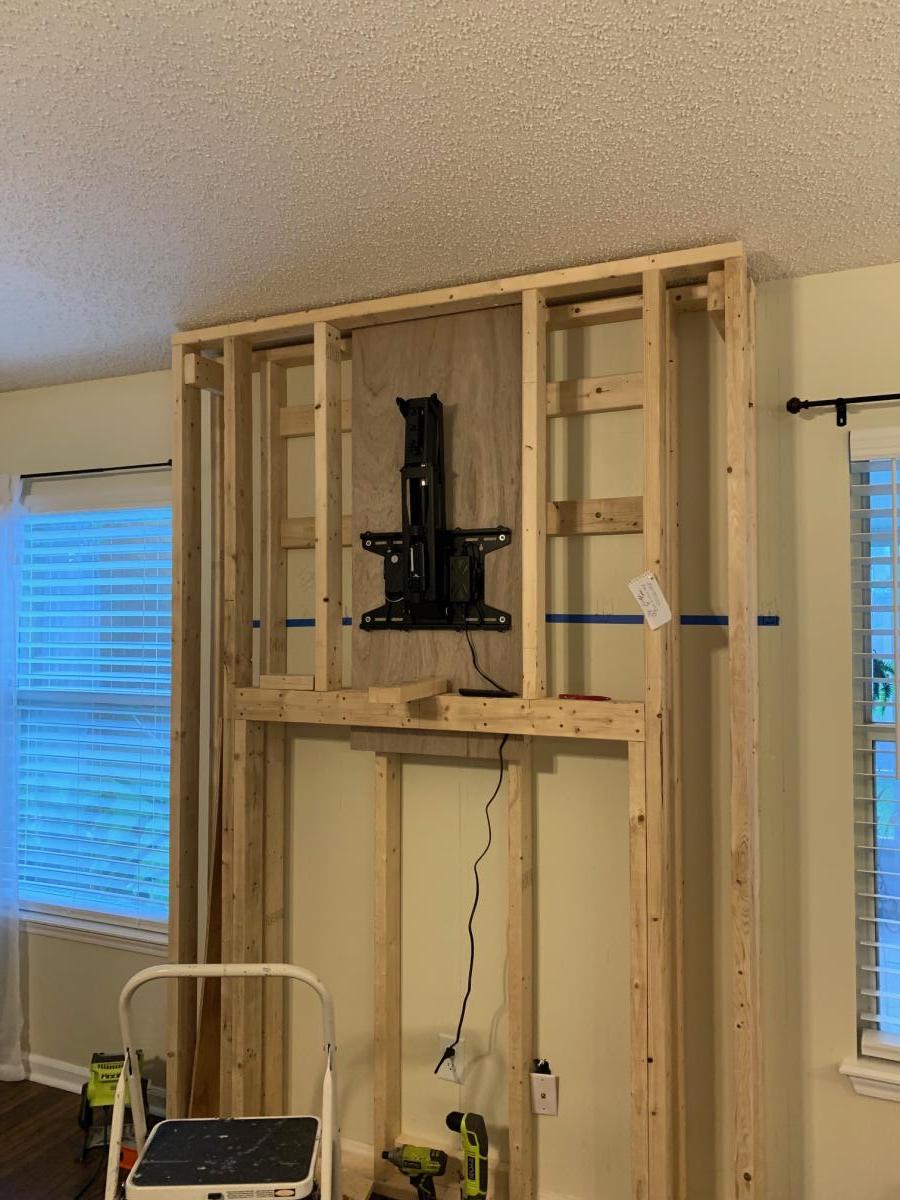
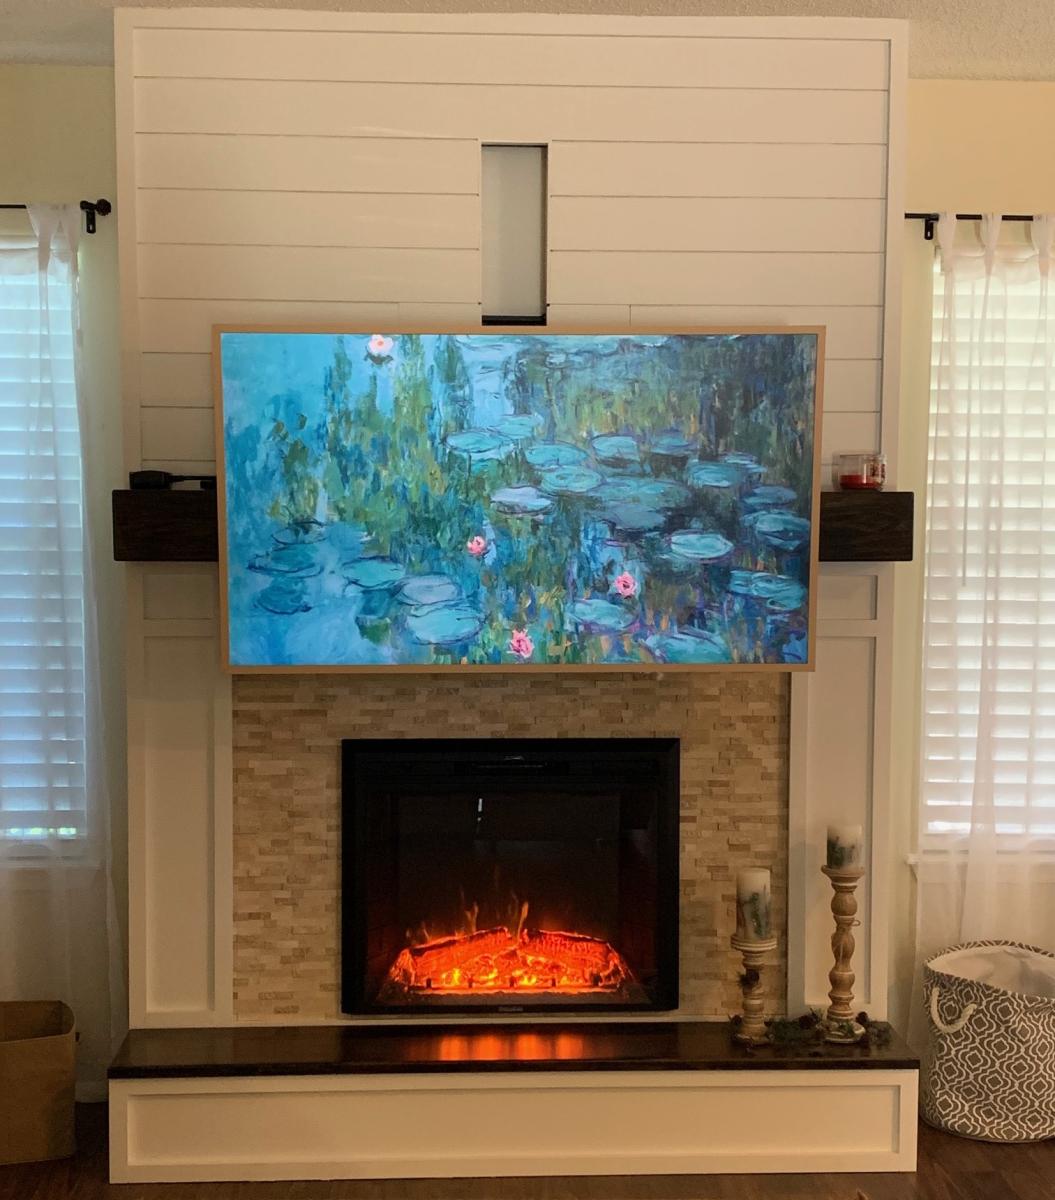
This is a very custom fireplace that I built for my wife as a 40th wedding anniversary gift. It is built around a Samsung 55” Frame TV and a Vivo motorized mount. The motorized mount allows the TV to be lowered to a better viewing height than the standard above mantle position which is usually too high for comfortable viewing.

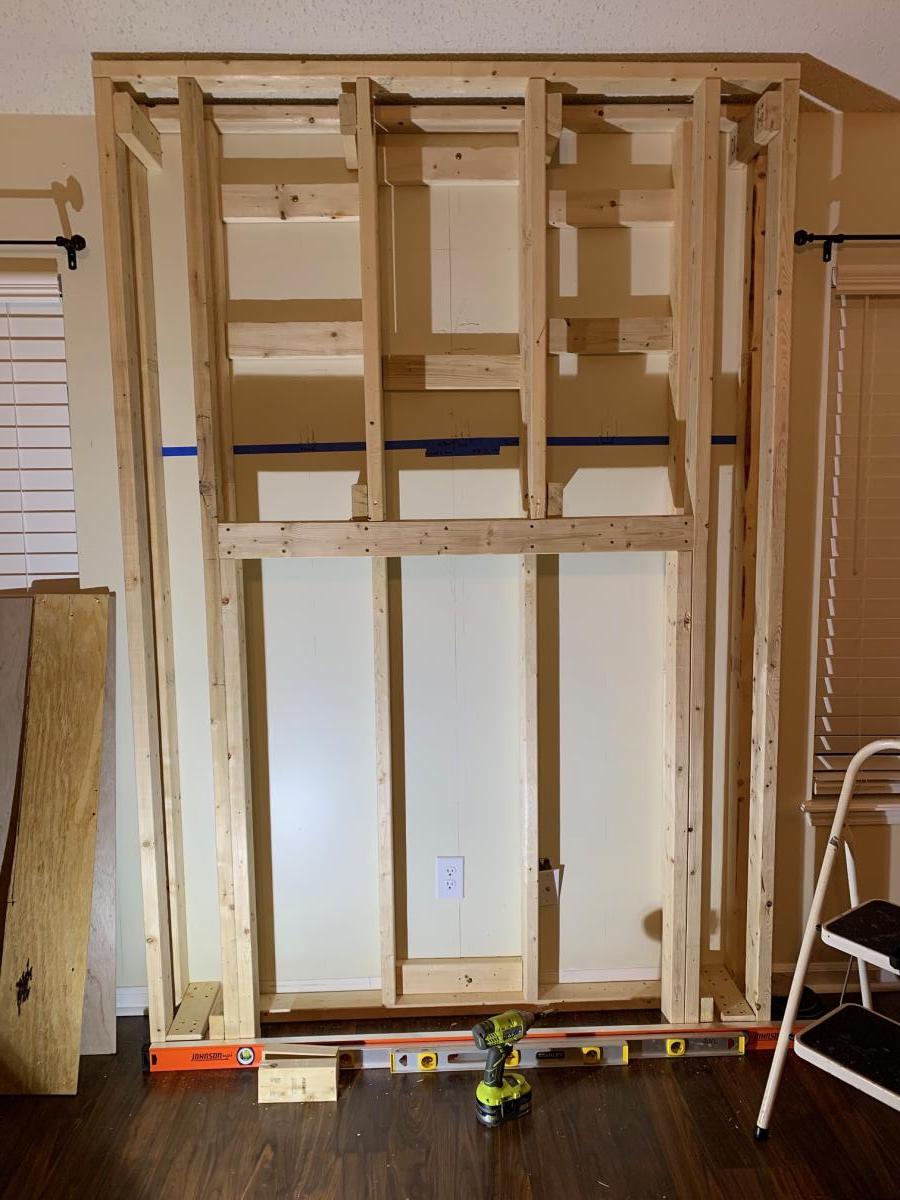
In order to maintain the flush mount effect with the TV in art mode, I recessed the mount into the fireplace. That required building a “back” frame for the TV mount then the outer frame for the surround. I covered the outer frame with ½” OSB then ship lap. The mantle and hearth is made from Poplar with walnut stain and Polyurethane satin top coat. The hearth opens for storage.

This was sourced from several different plan sets with a lot of customization and input from the Technical Support Staff at Vizo-US.
Comments

Ana White

Thu, 02/16/2023 - 09:46

Happy Anniversary!
This is a beautiful, well thought out project.
I was hoping someone would do the recessed mount, and you nailed it! It's so much better with the tv flush like yours.
Also love the motorized mount.
Thank you very much for sharing photos.
Ana

Hidden Puzzle Table

Submitted by Anonymous (not verified) on Fri, 03/10/2023 - 12:02

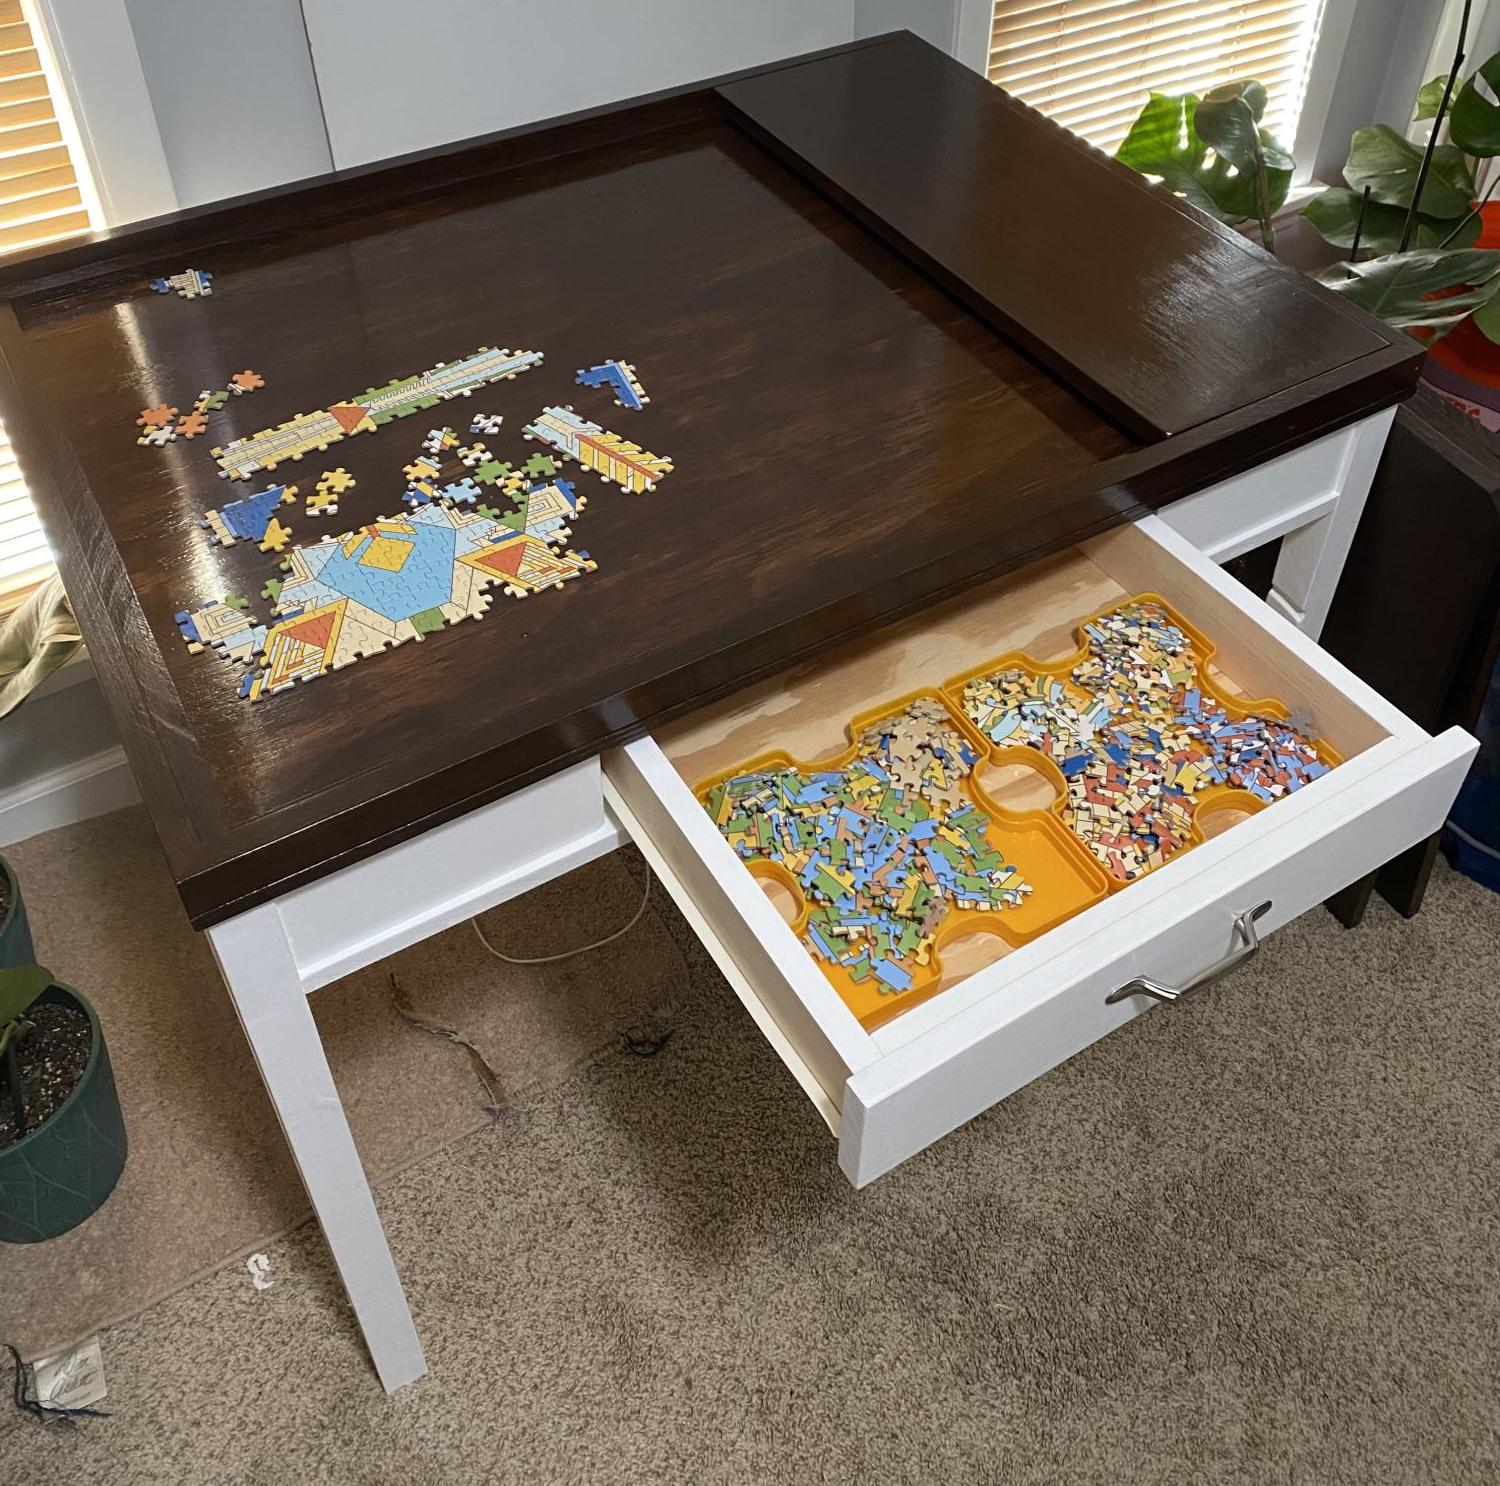
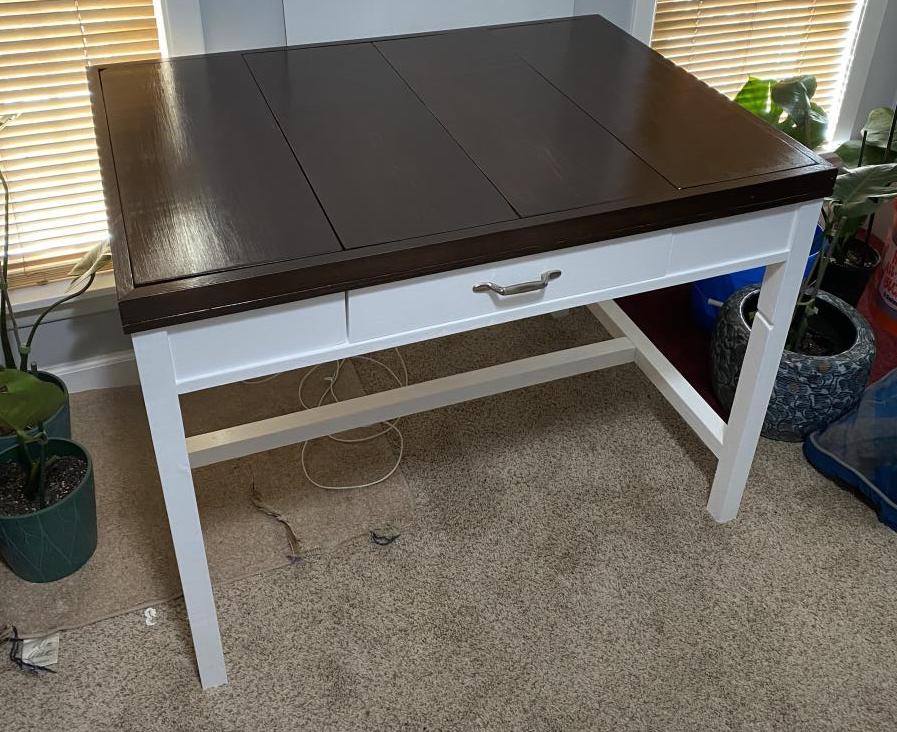
I wanted a table that would protect my puzzles from puzzle piece eating dogs, so I used this Ana White desk plan and built a frame on top to hold the cover panels. The drawer is perfect for holding puzzle pieces during a build.

Comments

Outdoor hangout using 2x4 and fence boards

Submitted by sylvialh on Sun, 06/16/2019 - 18:13

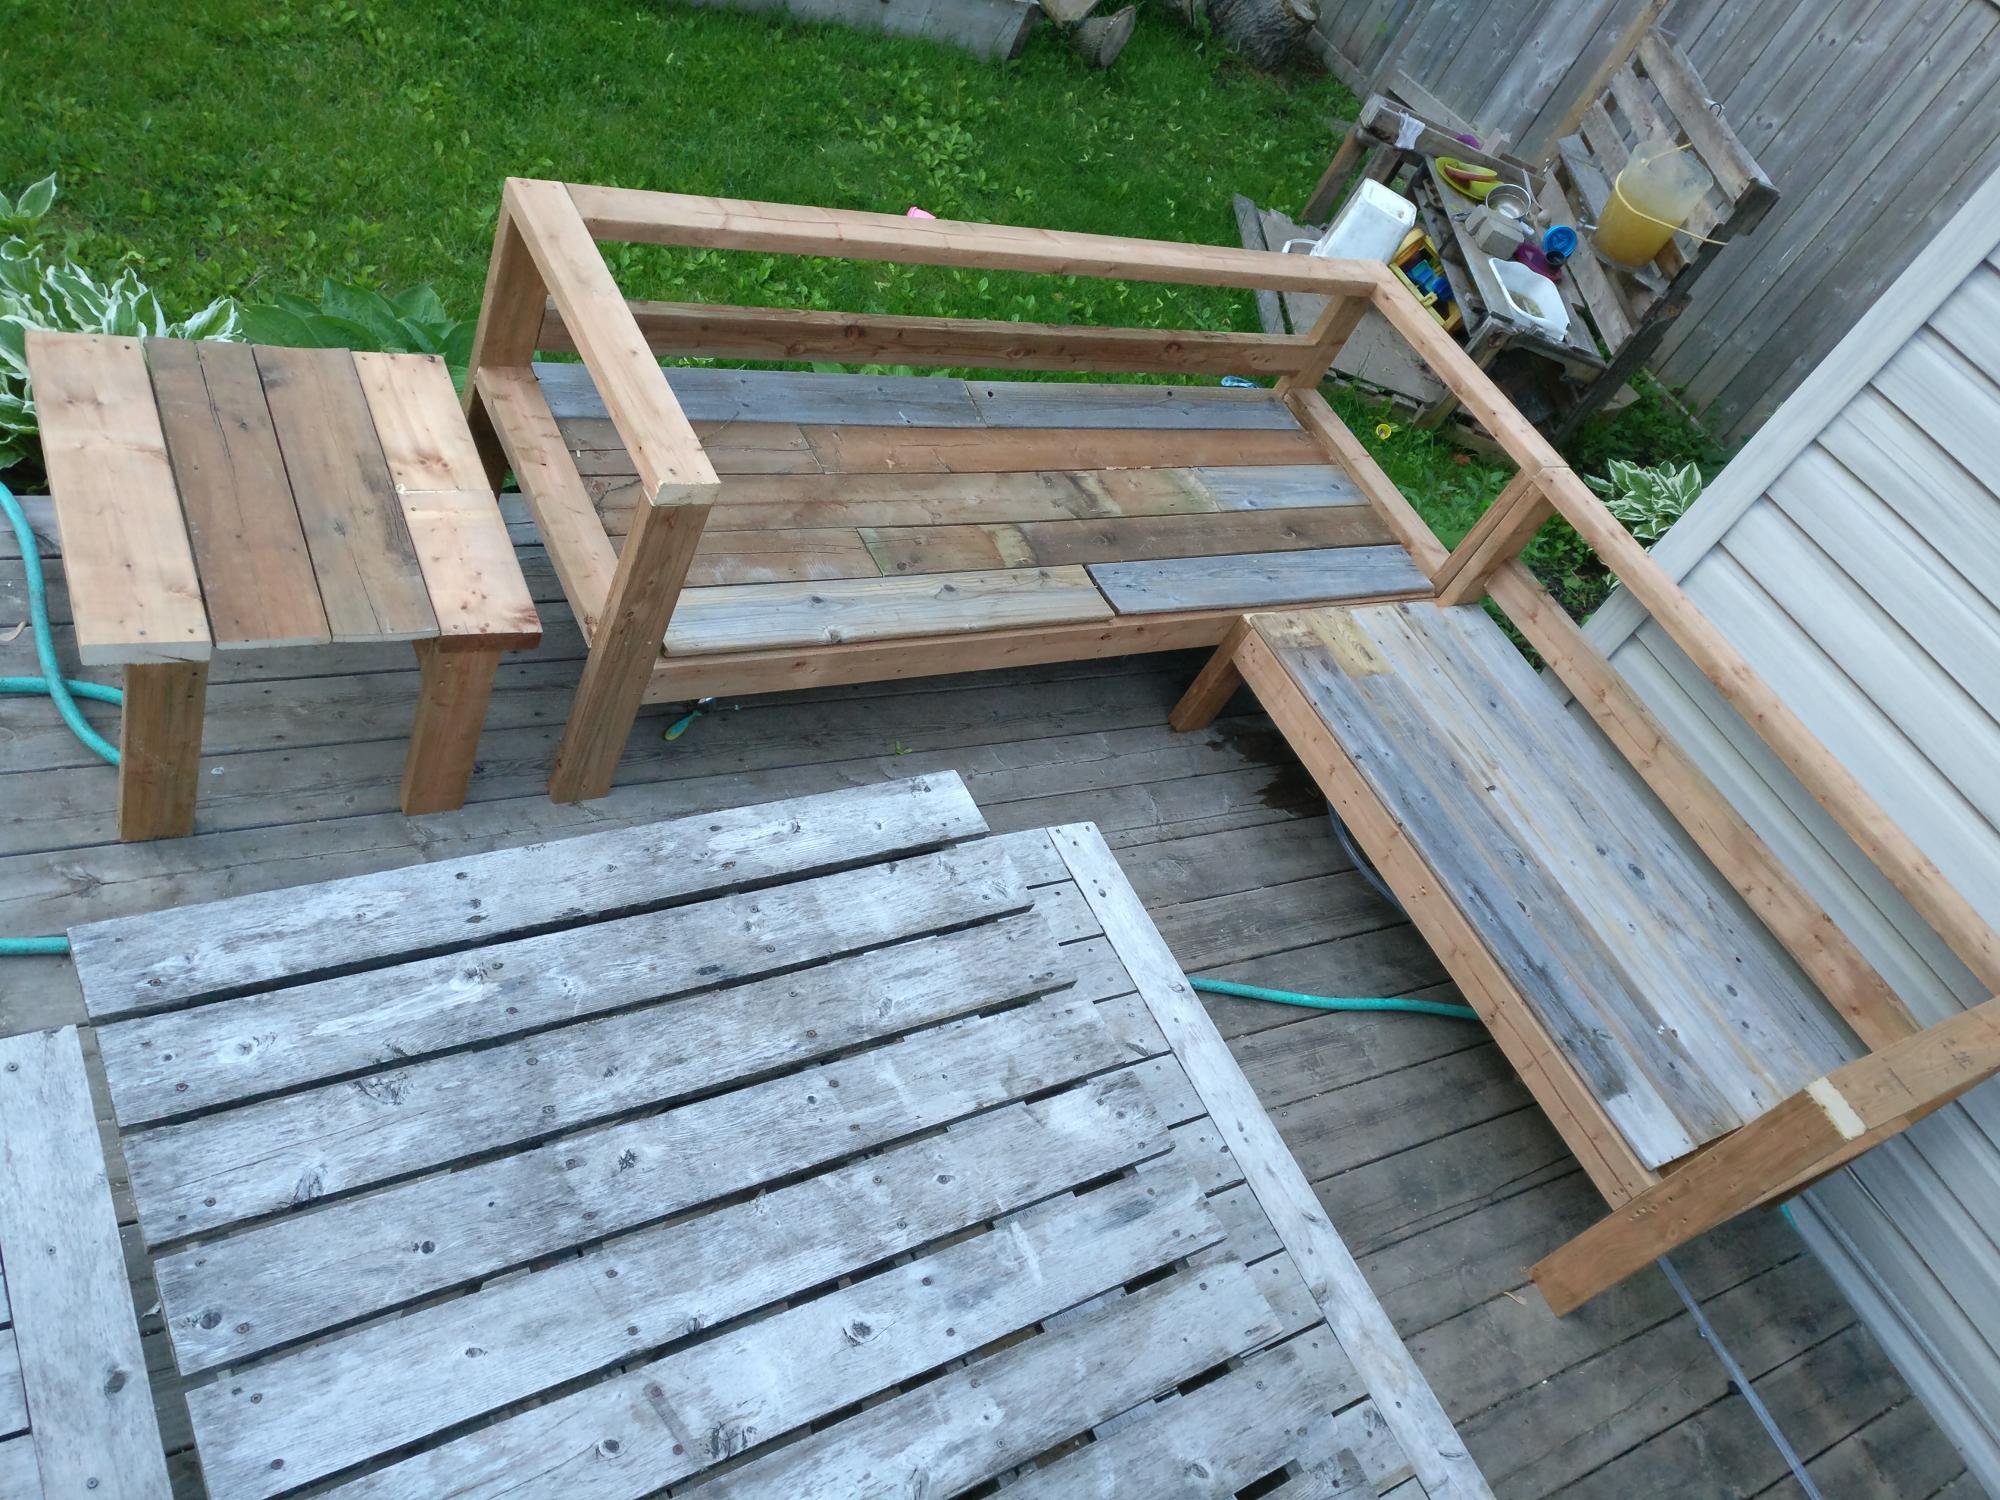
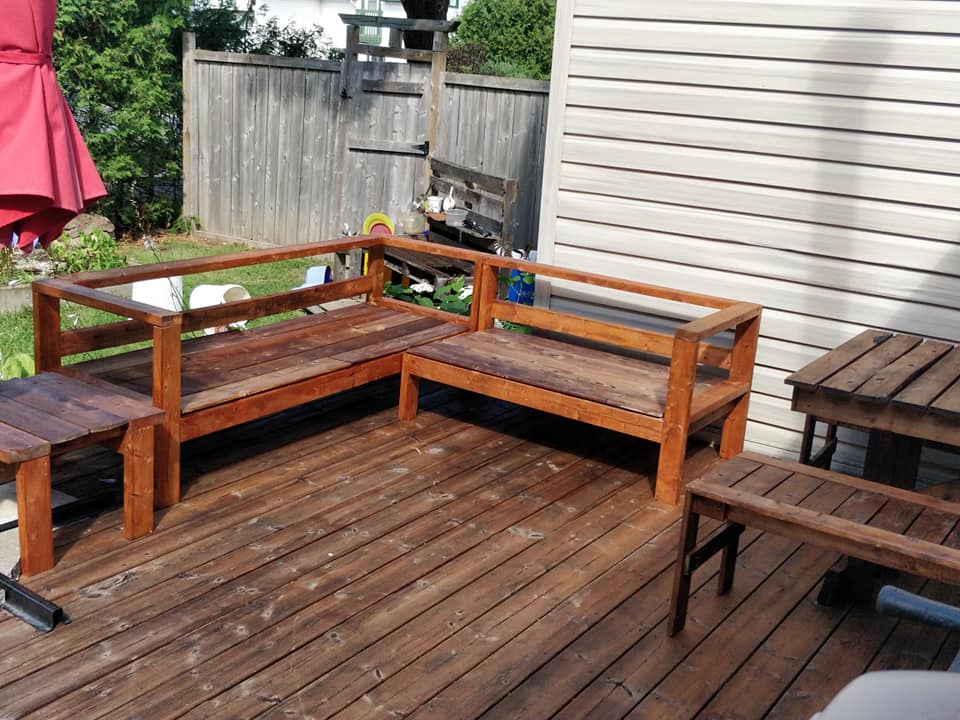
Bought enough lumber for one sofa but ended up using old fence boards for the  decking so had enough lumber to make the sectional and a shortened coffee table. 

Great way to save some cash even if u have to buy the fence posts. 

Added a reinforcing piece to the one armed sofa between the legs using a kreg jig to stabilize the legs a bit more. 

Waiting on my foam from Amazon to finish off this project!

Used inspiration from the beer/wine cooler patio table and made the middle of the table removable to add a buck underneath later. 

Note the 5 year old patio set, also an ana white project from back in the day!

Super quick build!

I did find that the measurements for customizing it for your cushion size seemed about 1.5 inches too big for all the depth pieces so I sized down but I haven't received my foam yet so maybe I'm wrong but Smth to think about. I didn't want my cushions to slide around so I took that into consideration when building. 

Estimated Cost
60$ CAD for the high density foam for each sofa (3x24x72) plus throw cushions for the back.

11 2x4x10 - cost varies depending on cedar or PT
Fence boards were reused

Outdoor Fabric to cover the foam
Estimated Time Investment
Afternoon Project (3-6 Hours)
Finish Used
None yet
Recommended Skill Level
Beginner

Upholstered Coffee Table/Ottoman

Submitted by Anonymous (not verified) on Wed, 01/27/2016 - 10:15

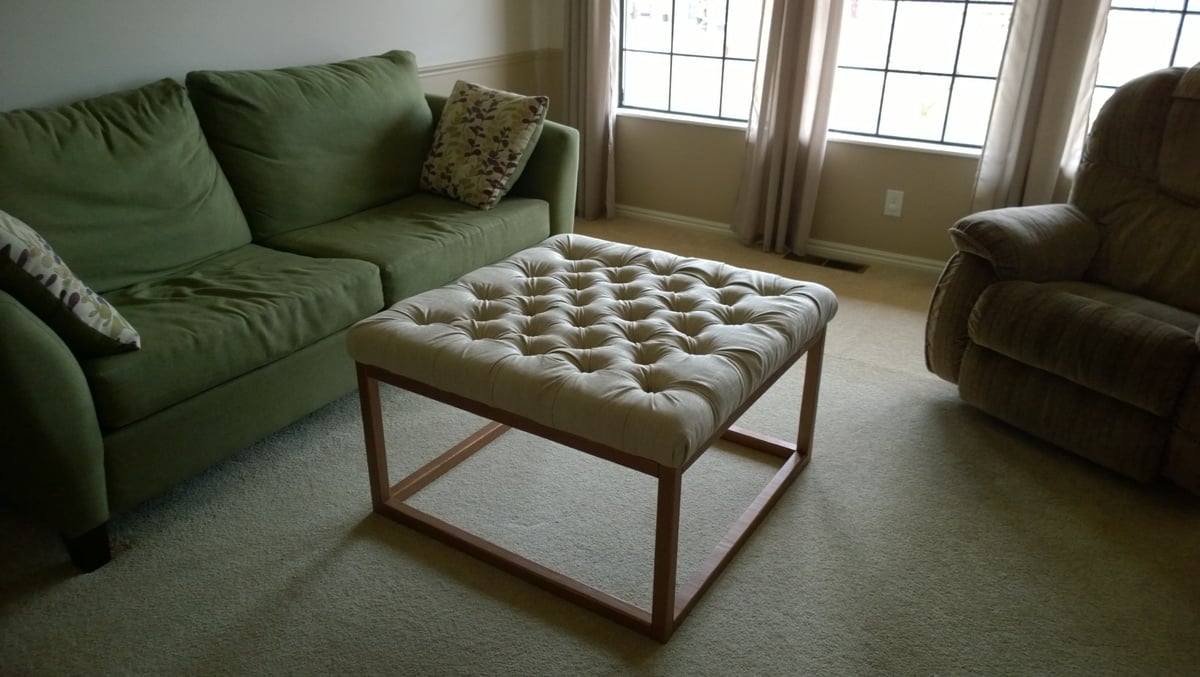
I built the plans exactly as given (minus the top of course) but in hindsight I would have reduced the height by three inches to accommodate for the three inch height of the upholstery foam. I am still very happy with it!

Built from Plan(s)
Estimated Cost
$100 approx.
Finish Used
For the base, I painted them with Rustoleum's Hammered in copper. (The quart, NOT the spray paint) I did two coats. When applying, go quickly and don't over brush the paint. I did spray on a light clear matte finish to tone down the shiny finish of the paint.
Recommended Skill Level
Beginner

Comments

My first (half) project- built-in cabinets!

Submitted by LE1066 on Tue, 12/10/2013 - 21:11

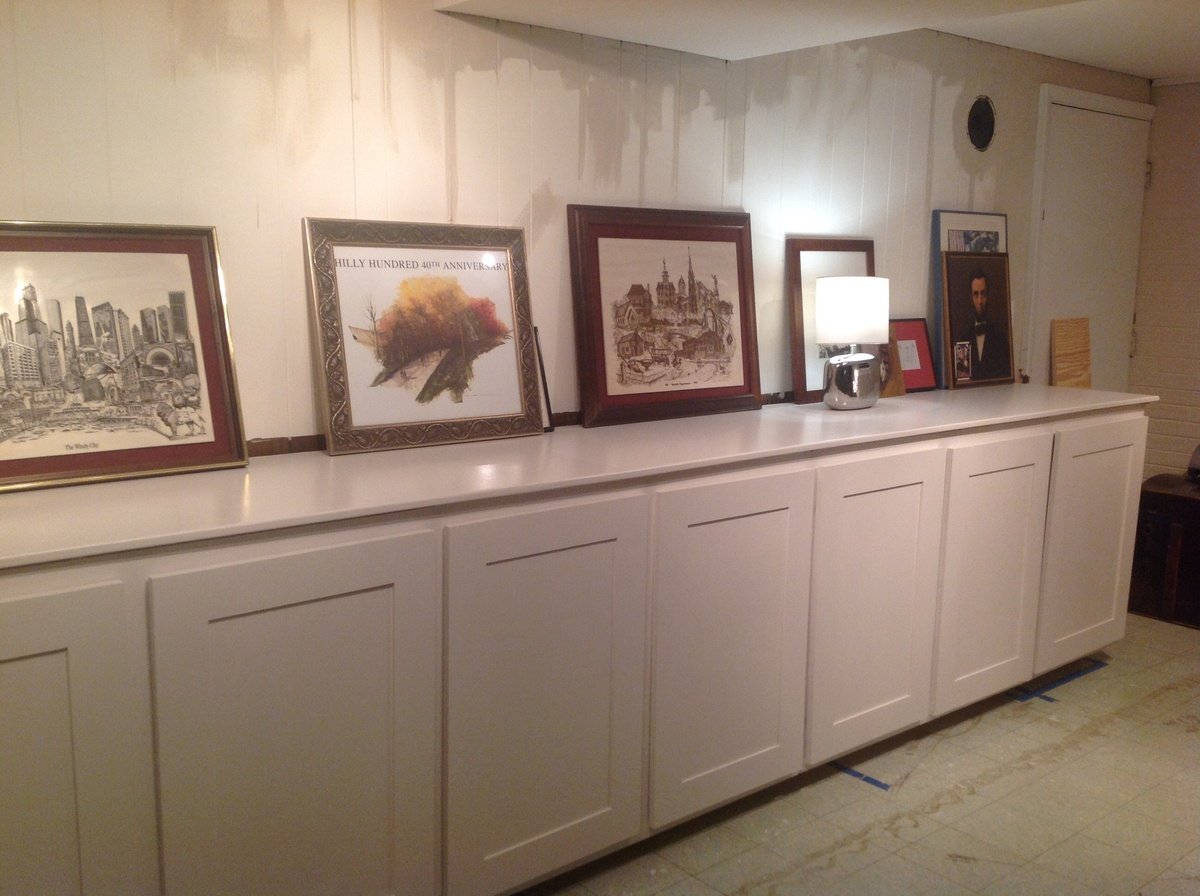
Using the base cabinets 101 post and other members' ideas and tips, I built these nine cabinets. It's my first project, and I'm very pleased. I live in a 1960's split level with nearly zero storage space... Until now. Next step is to top them with bookshelves, and add some decorative molding. Will start cutting wood once the temperature allows me to set up my sawhorses in my driveway again. Can't wait. Might make something really quick for my husband between now and Christmas. Thanks Ana and everyone else- I'm inspired.

Estimated Time Investment
Week Long Project (20 Hours or More)
Finish Used
Flat white paint inside, then sherwin Williams proClassic enamel for doors and outer surfaces. Sanding between coats seems to be important.
Recommended Skill Level
Beginner

Comments

mezzopiana

Wed, 12/11/2013 - 05:59

You may just be my inspiration for building something very similar for my kids' playroom. Very, very good-looking storage you built there! Well done - especially for a first build :)

Reese

Thu, 12/12/2013 - 07:16

Wow! They look So Good! I'm so impressed that this was your first build. Is the top just plywwod also? It looks so smooth and glossy i can't tell. How much did it end up costing?

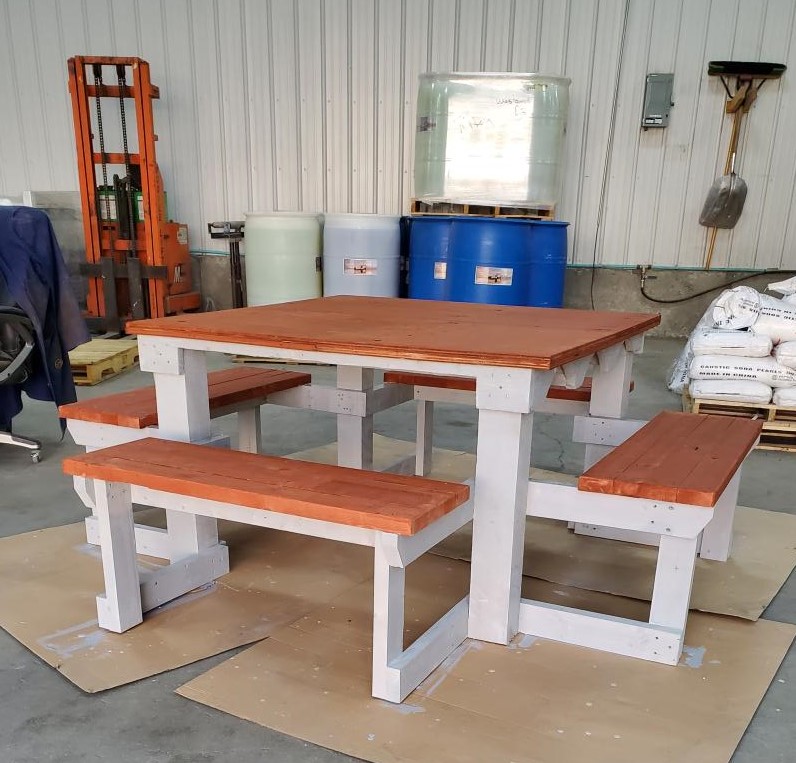
4 sided picnic table

Submitted by Anonymous (not verified) on Fri, 06/16/2023 - 13:59

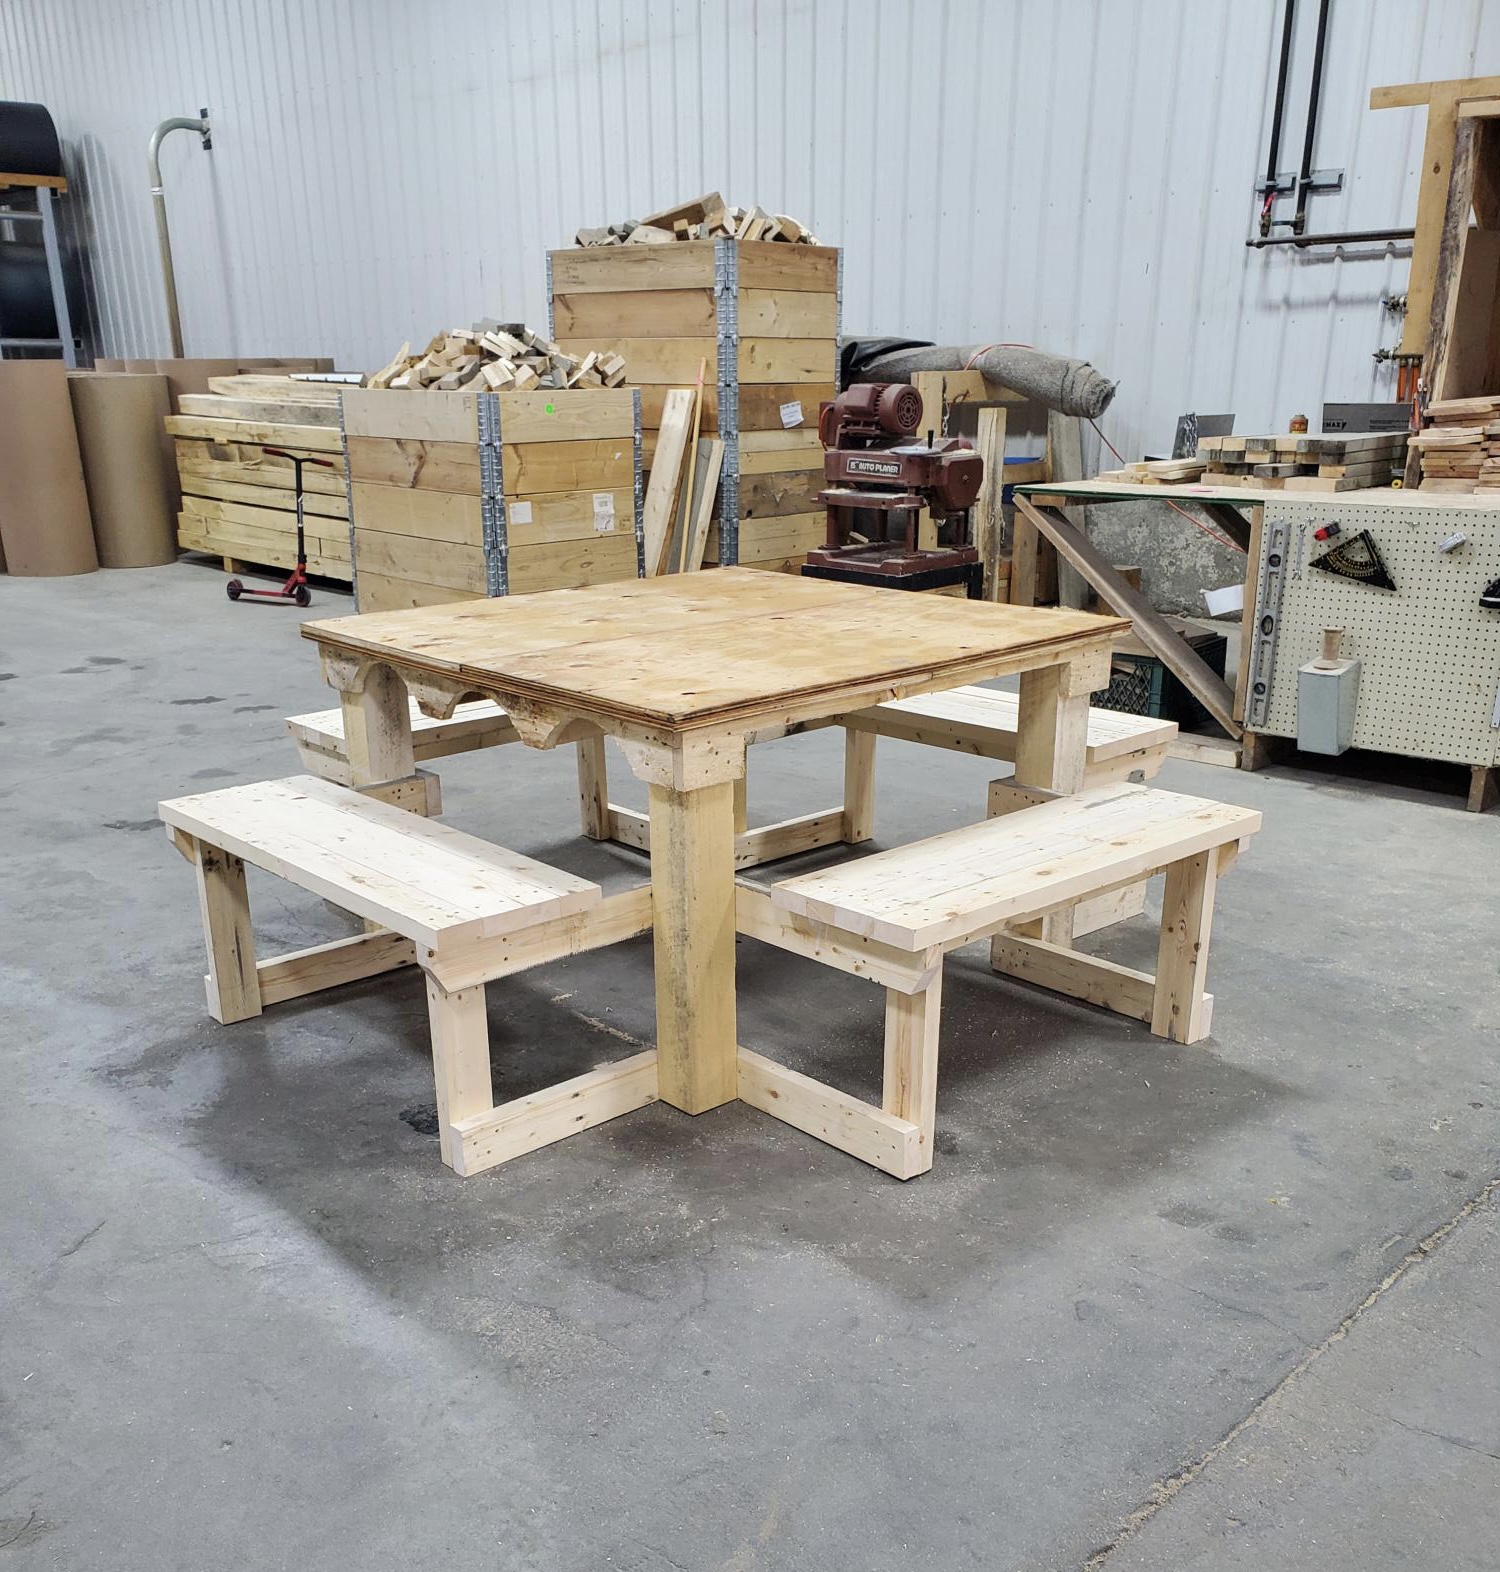
4 sides for the whole family to sit.

Built from Plan(s)

Comments

Seasonal And Holiday

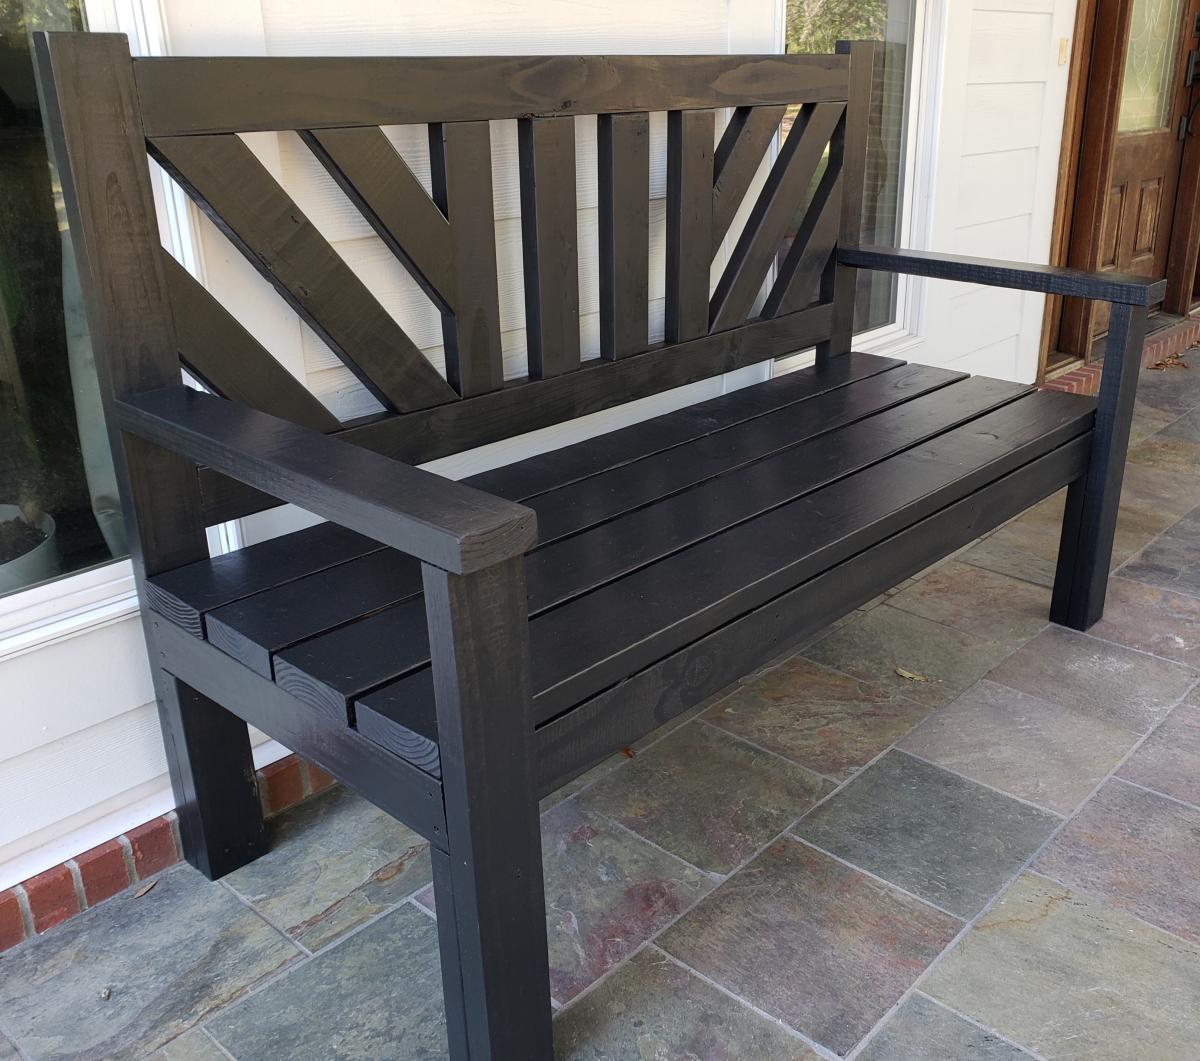
Large Porch Bench

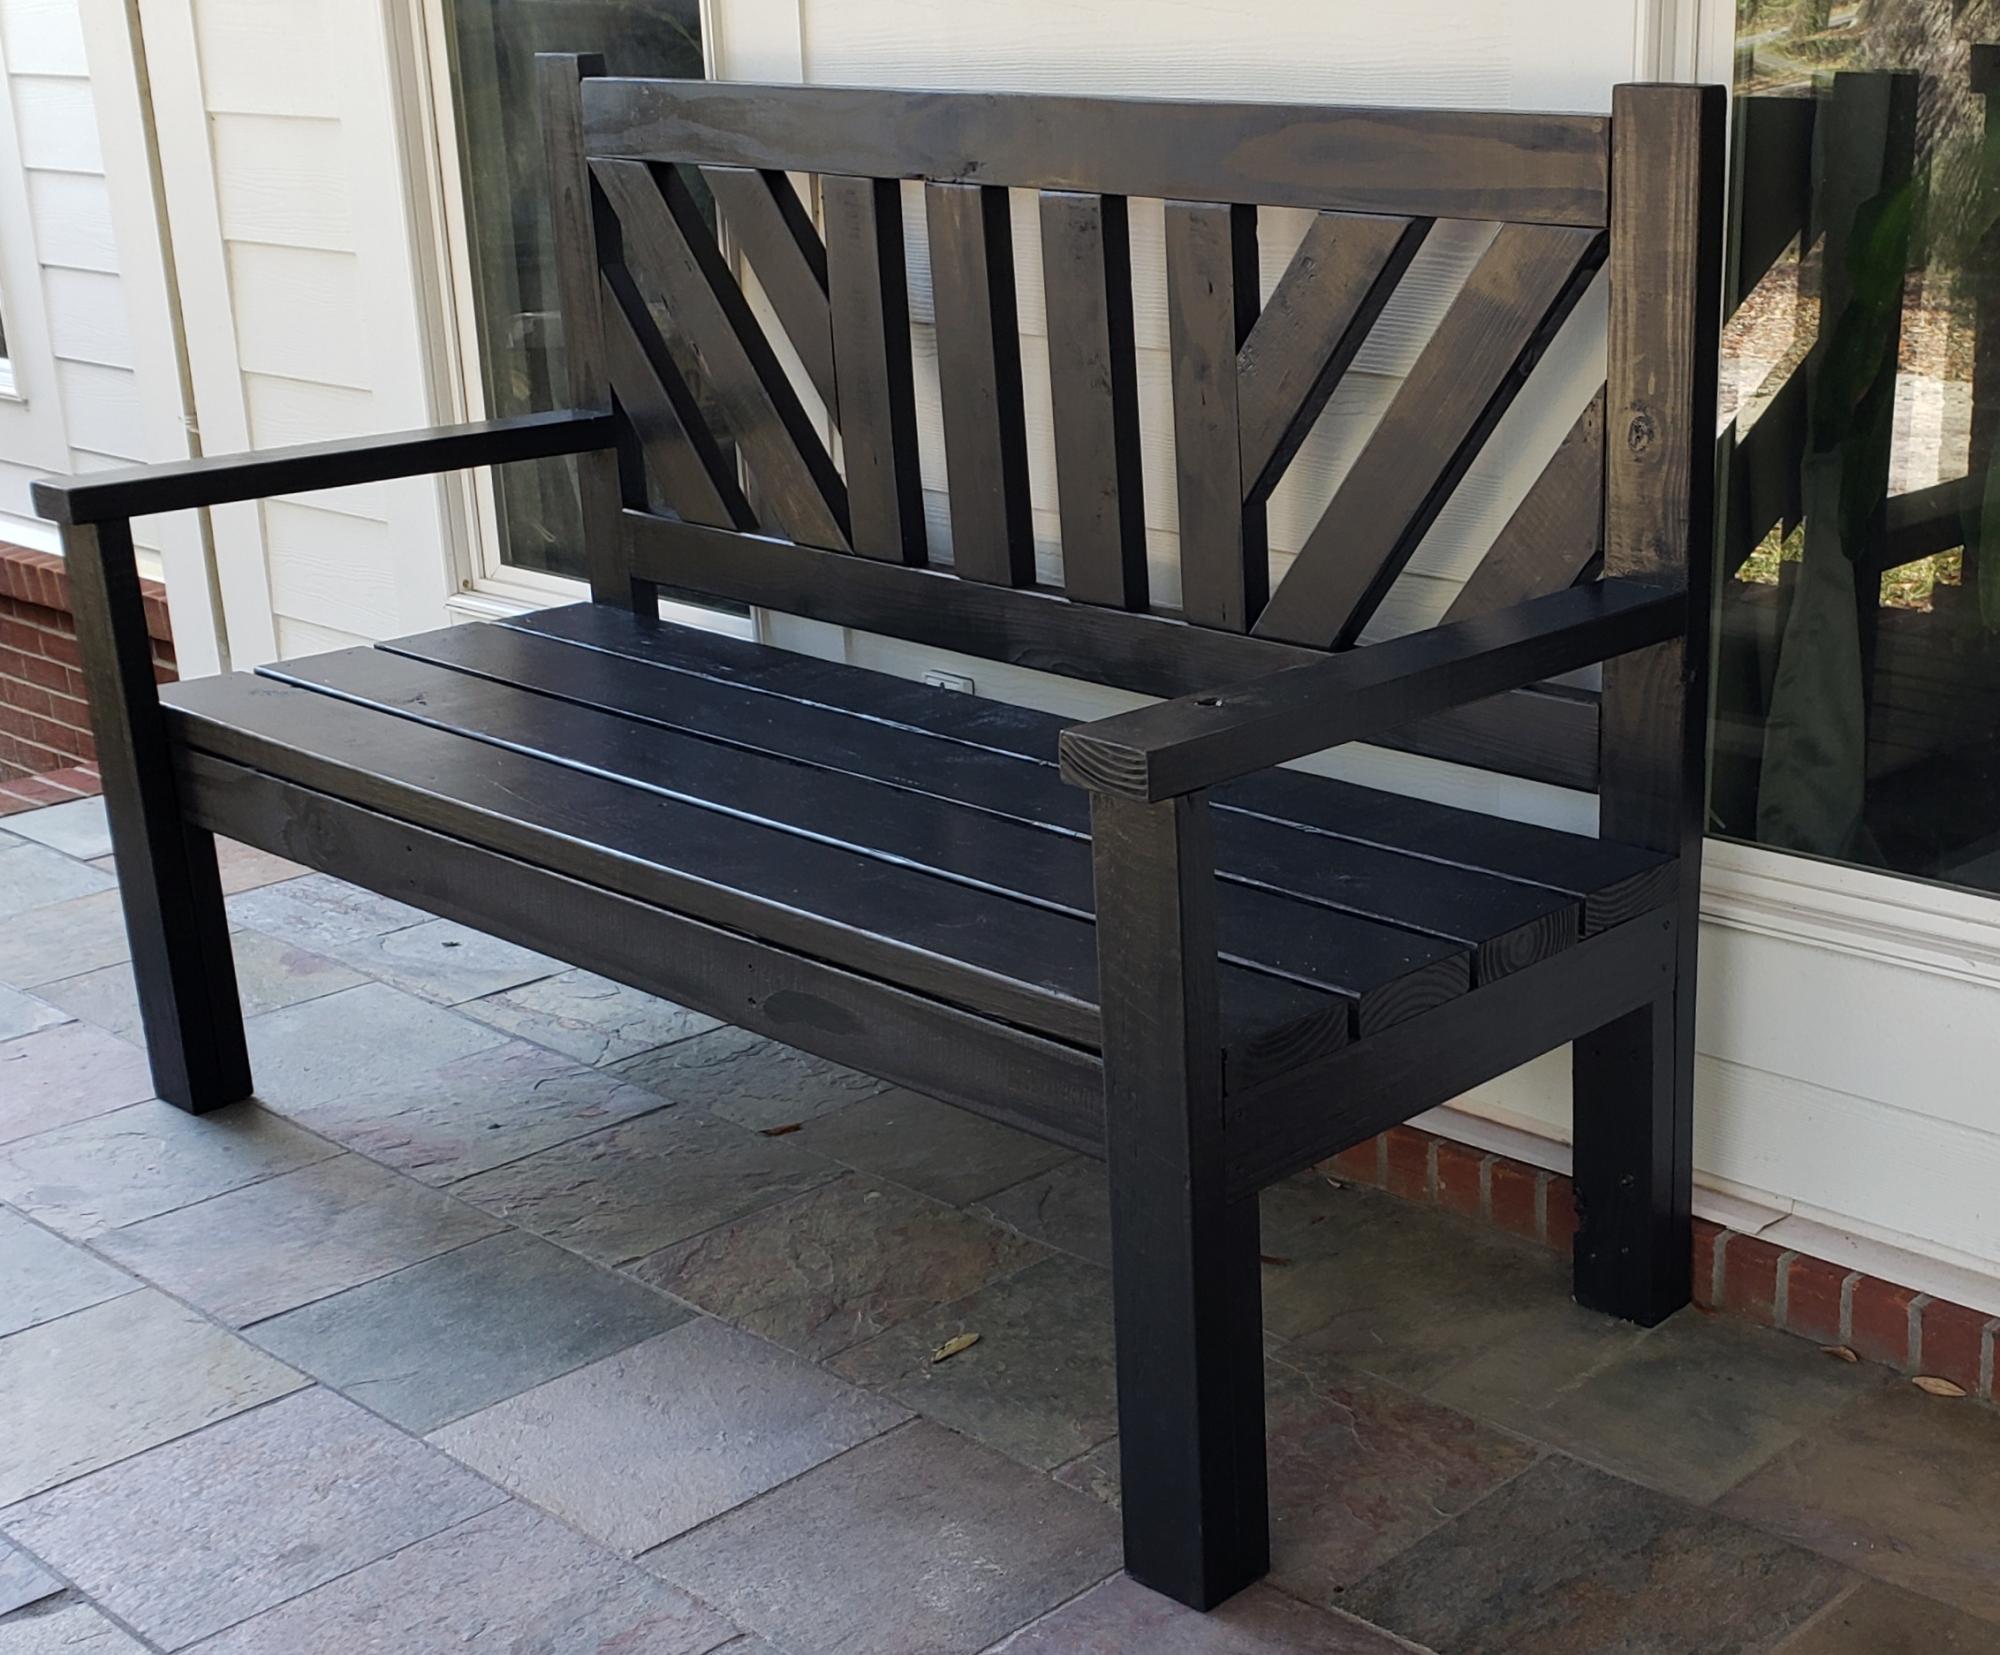
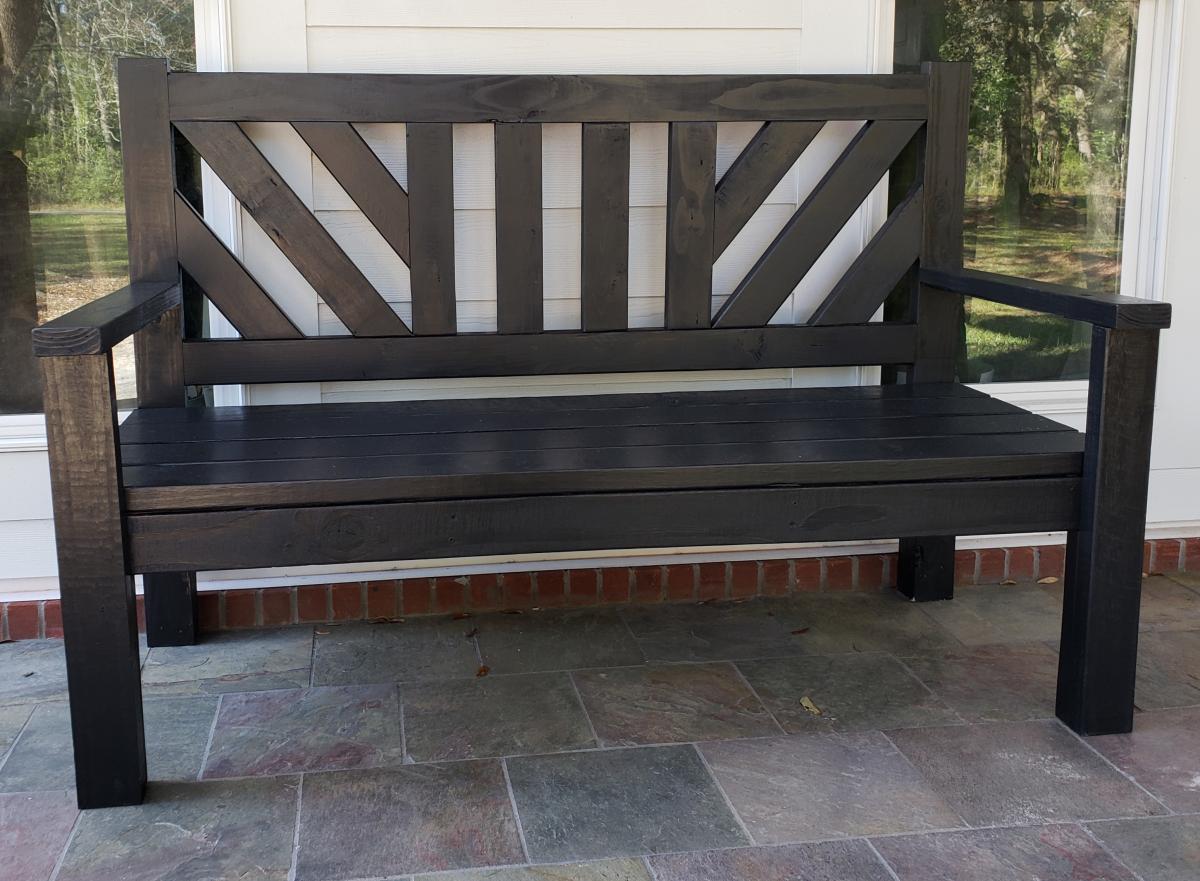
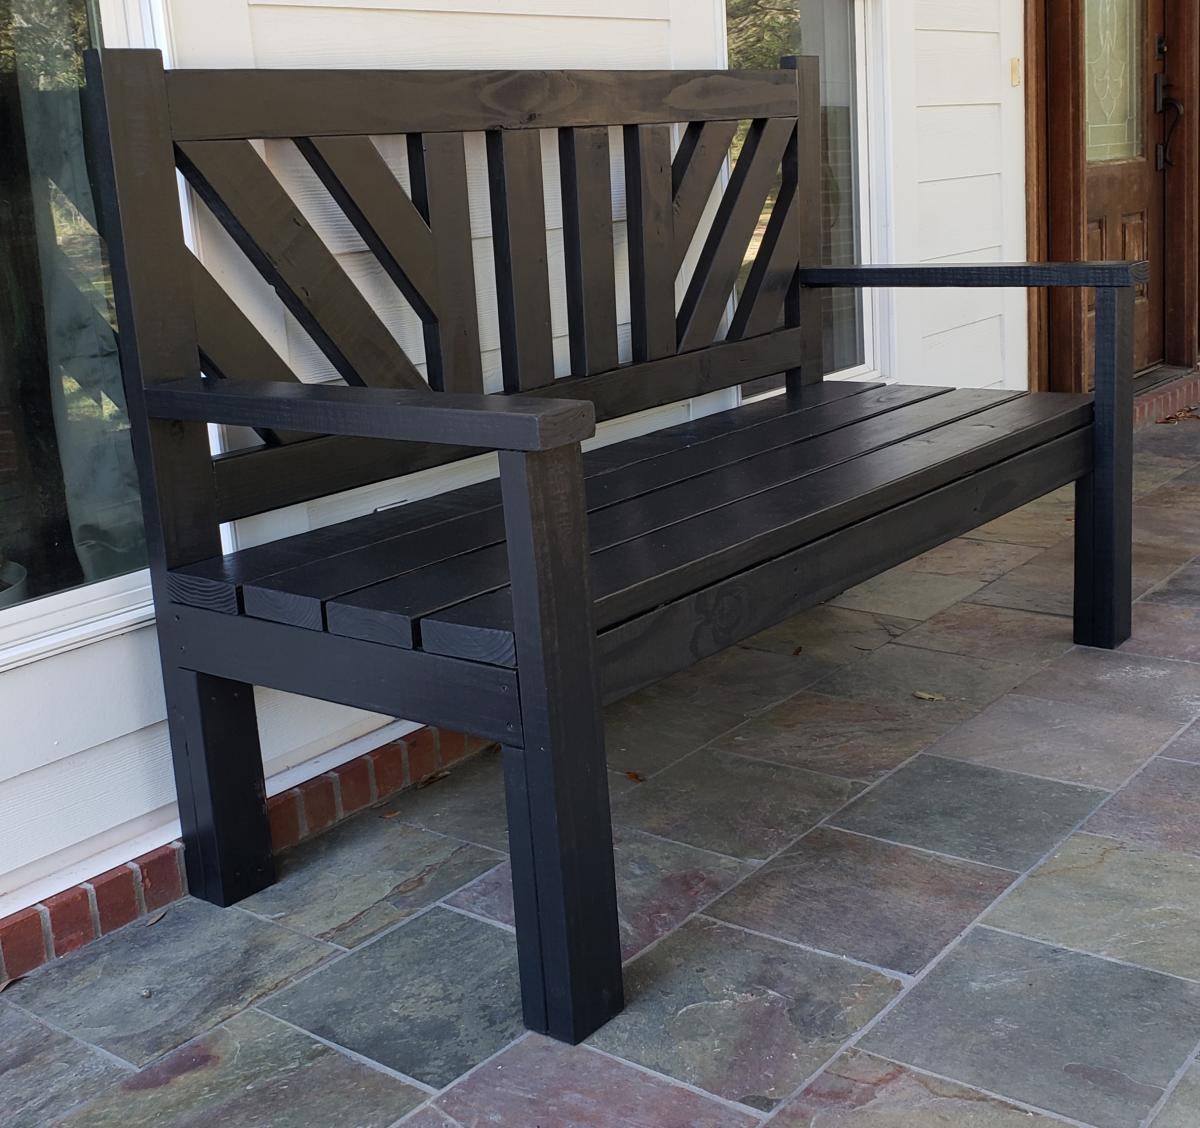
Submitted by kwildman on Thu, 11/14/2019 - 18:55

I used untreated pine for this project and painted with benjamin moore exterior paint. 

I modified the back a little and I love how it turned out.  I also added an extra brace against the back of each leg that fits under the seat for more support. 

Very easy to build.  I love the plan.

Estimated Cost
75
Estimated Time Investment
Weekend Project (10-20 Hours)
Finish Used
Black exterior paint
Recommended Skill Level
Intermediate

Comments

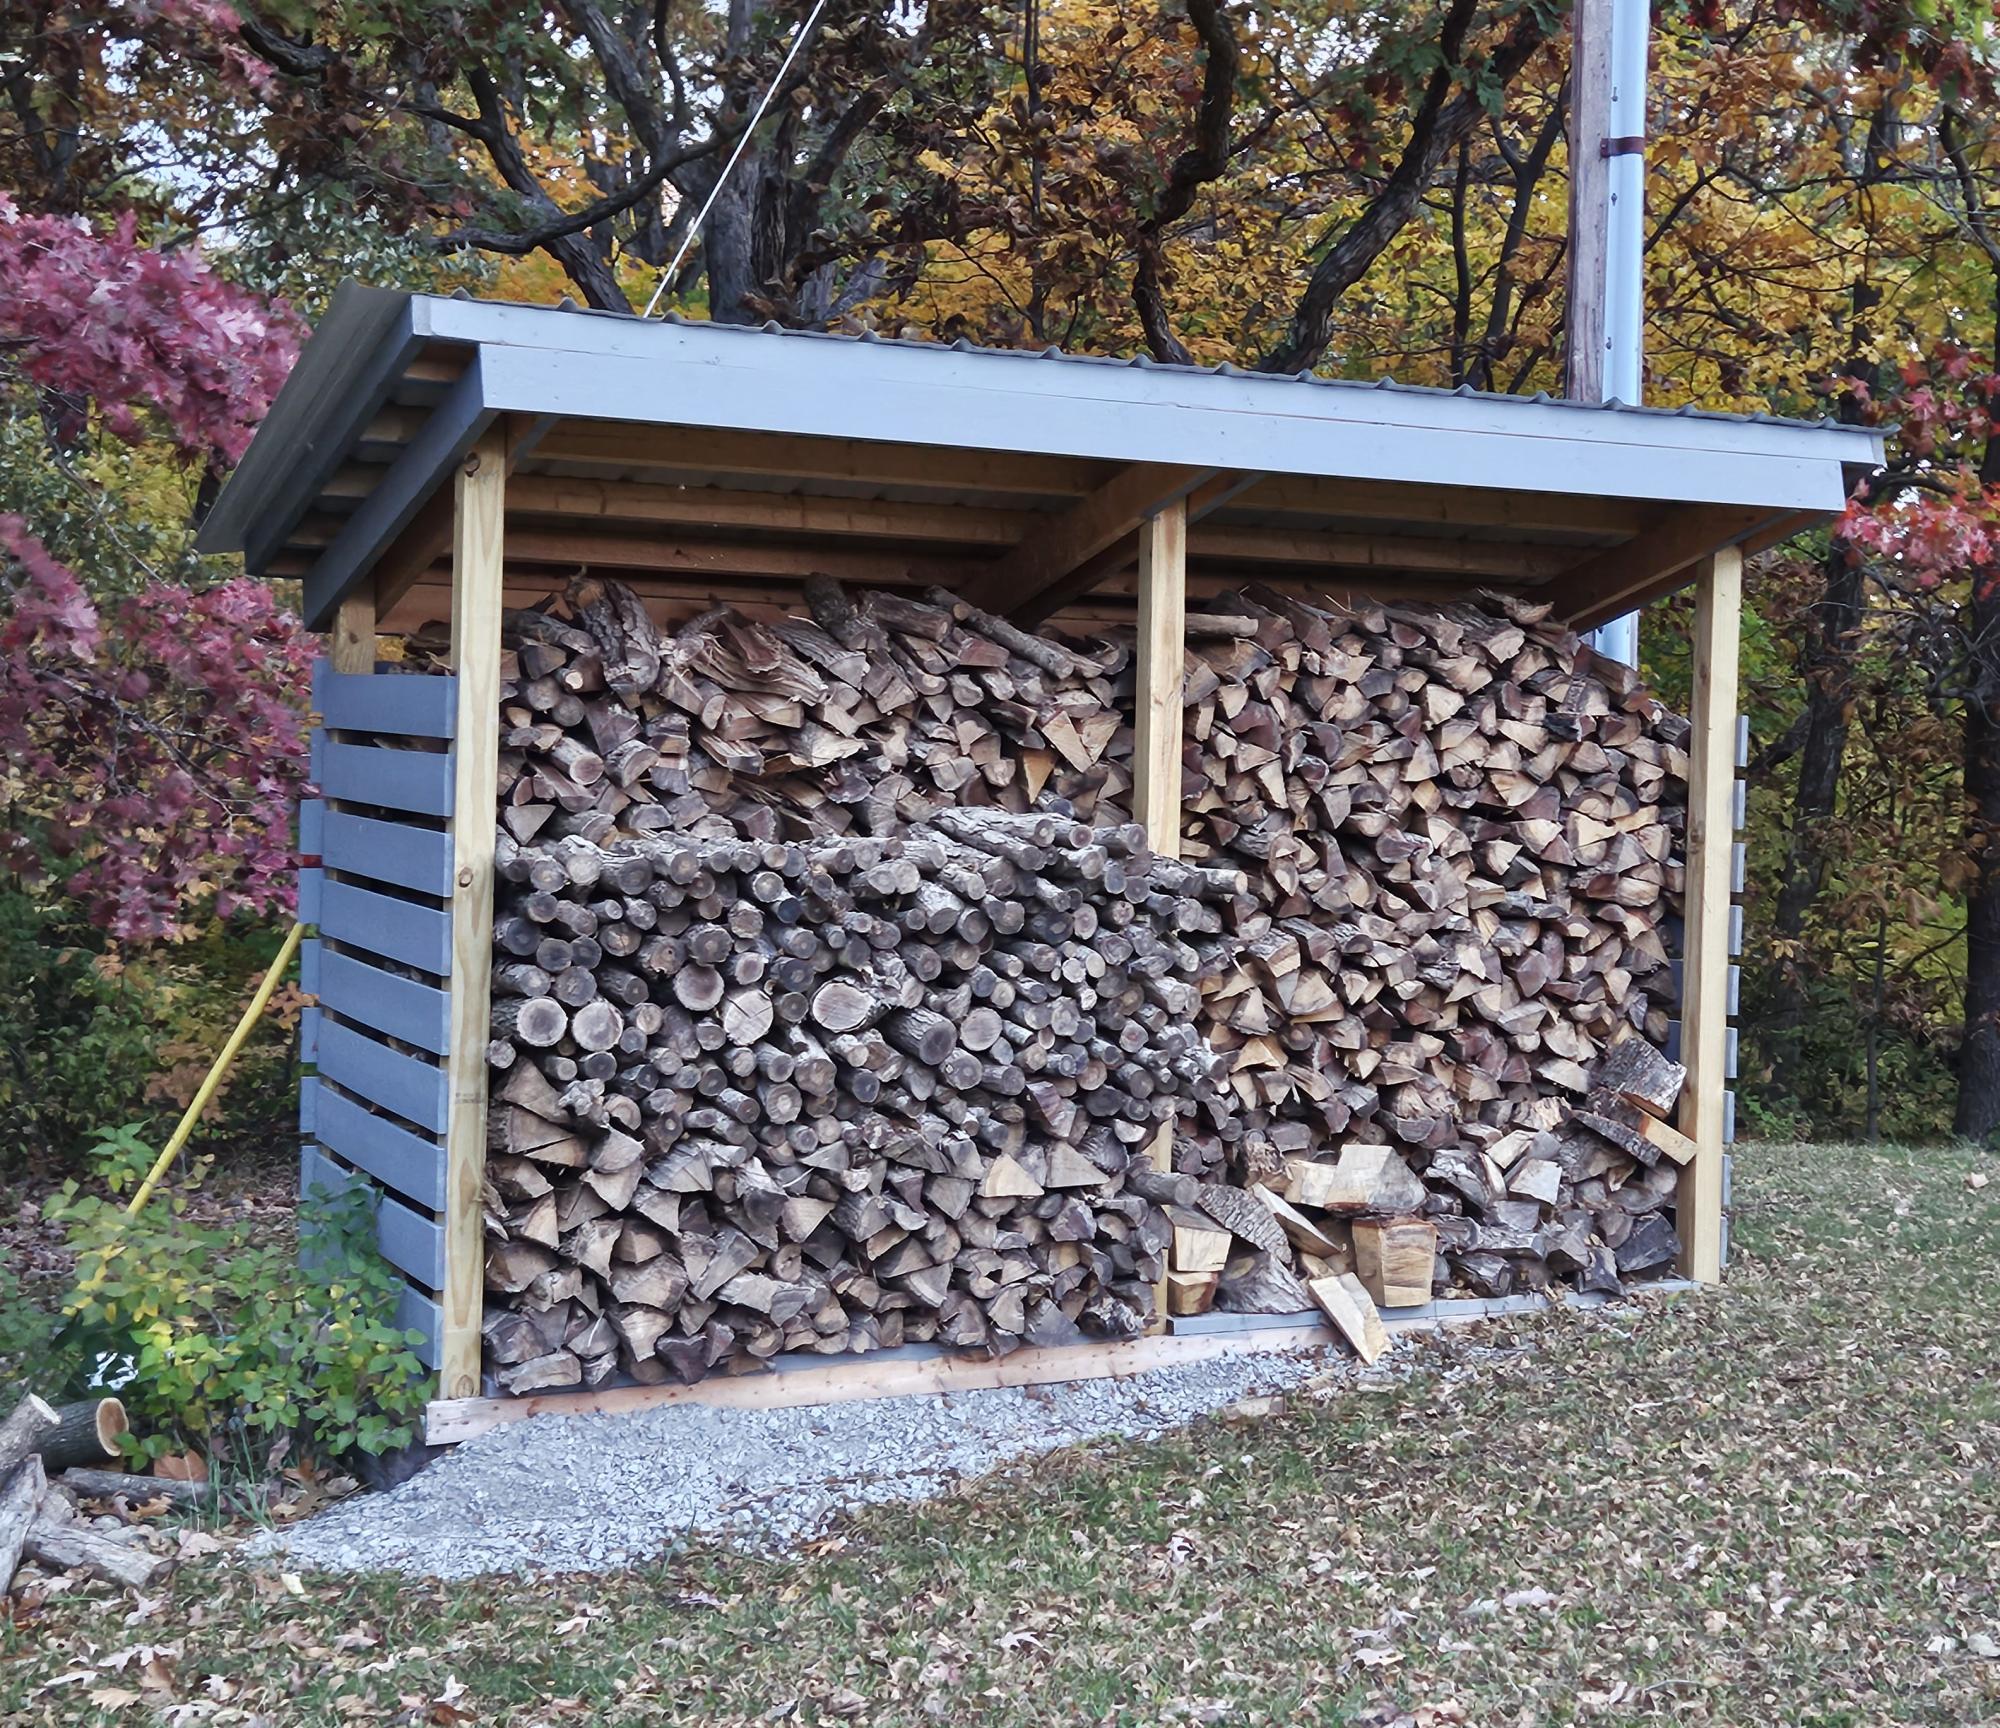
DIY Wood Shed

Submitted by Anonymous (not verified) on Sun, 10/29/2023 - 19:18

I am a mathematics teacher in Central IL. I teach a class called Geometry in Construction. I had my math students build this wood shed in pieces at the school, then I brought it home and put it together with a few of my son's friends. The students enjoy a math class that gets to go to the wood shop to apply their math skills to a wood working project. I am proud of my students hard work and dedication.

Shari Bruyn (I'm old, so I do not have Instagram or a blog page. lol)

Built from Plan(s)

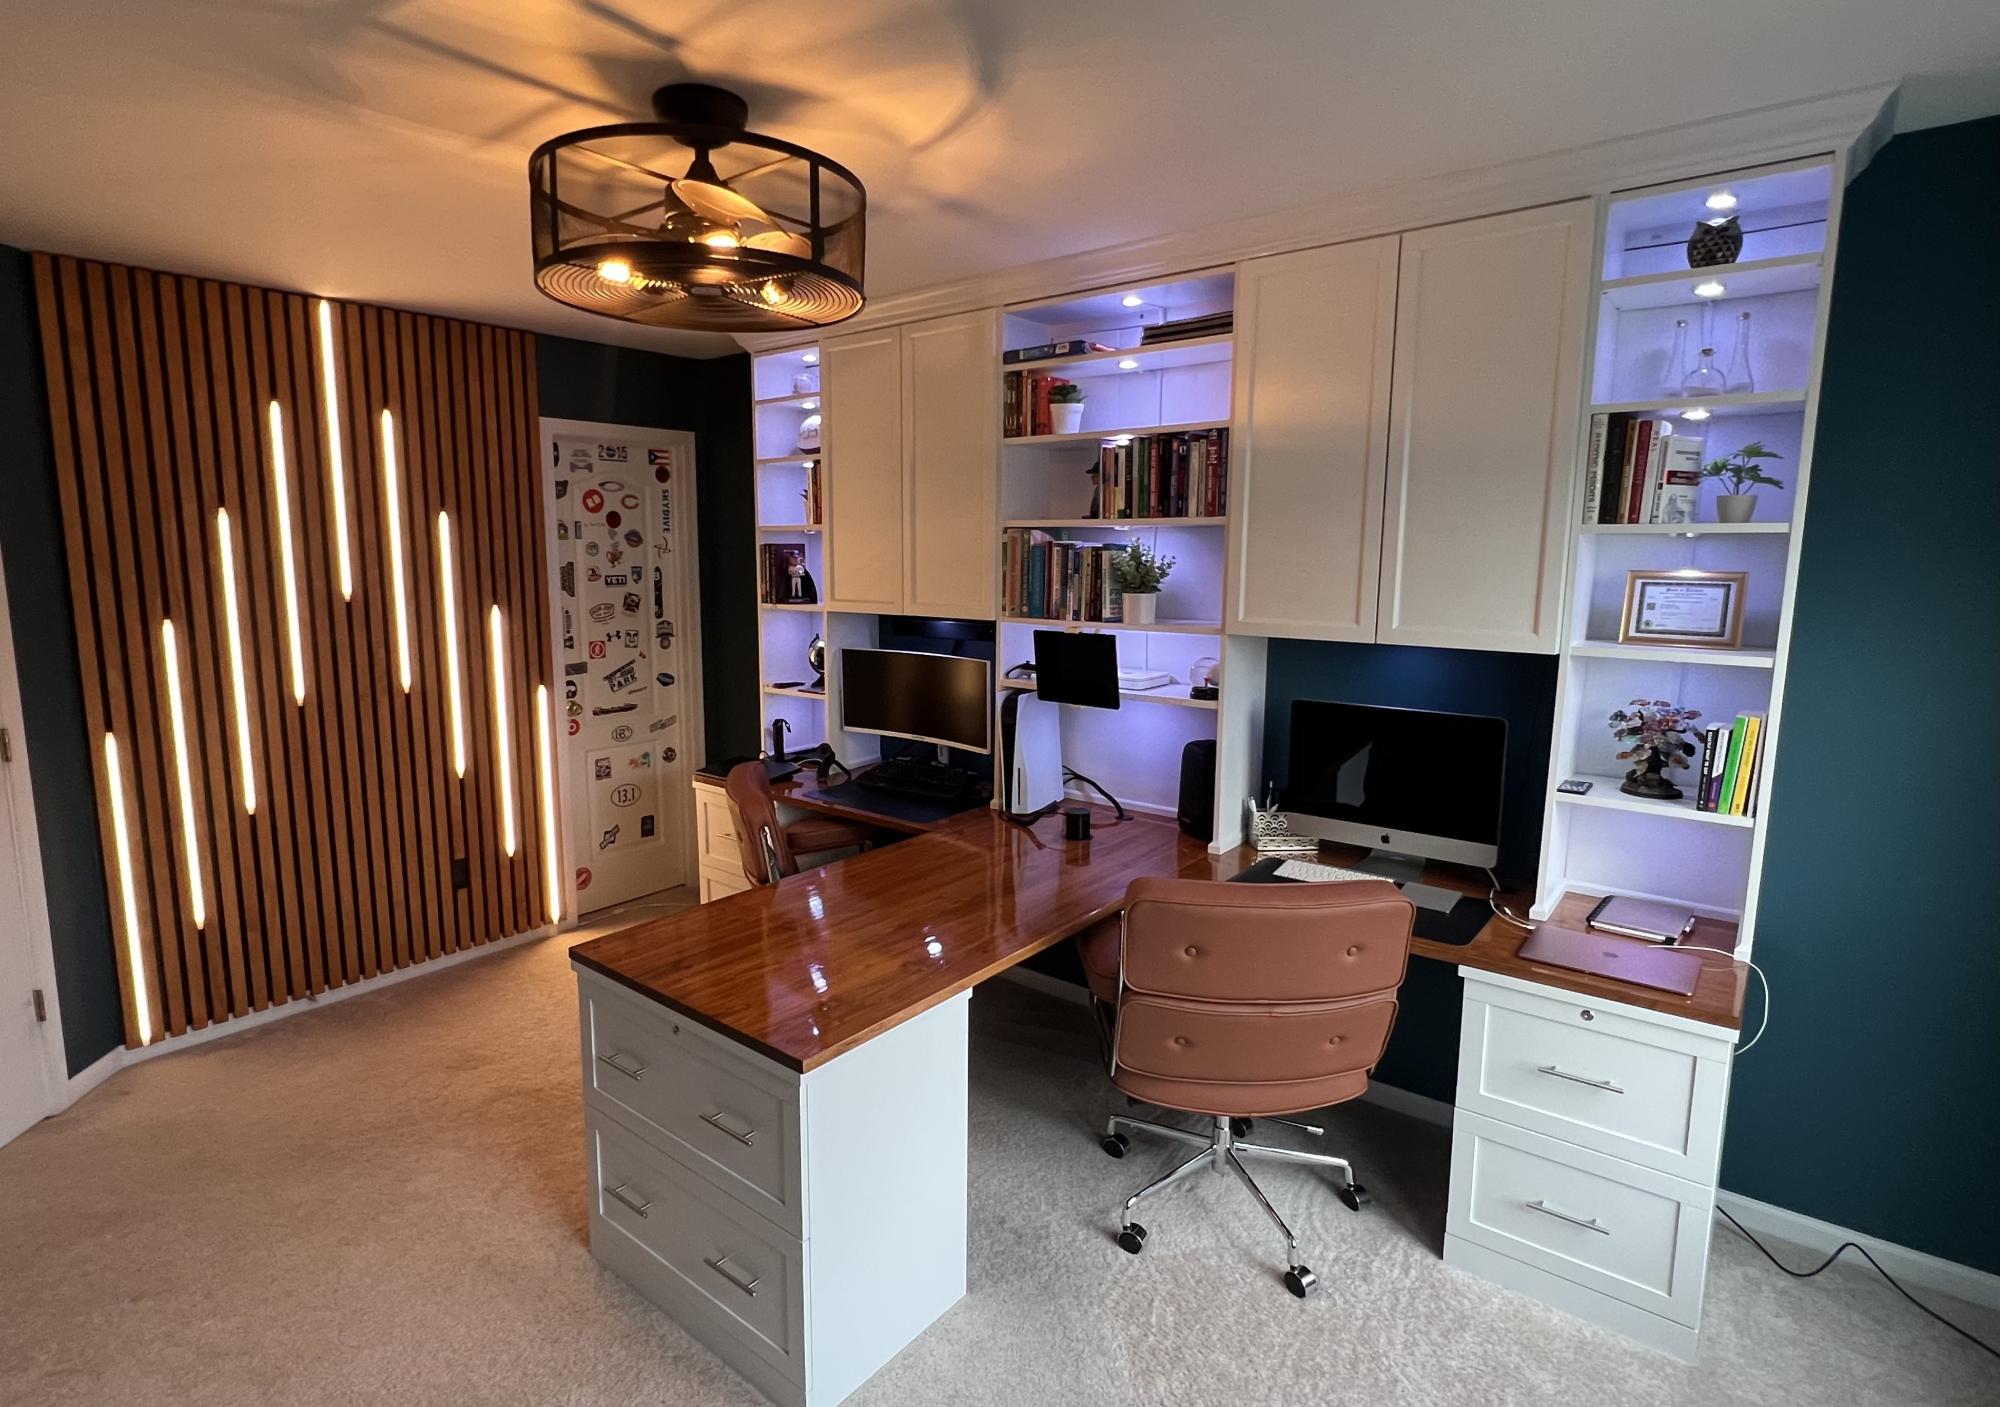
Modular Desk System

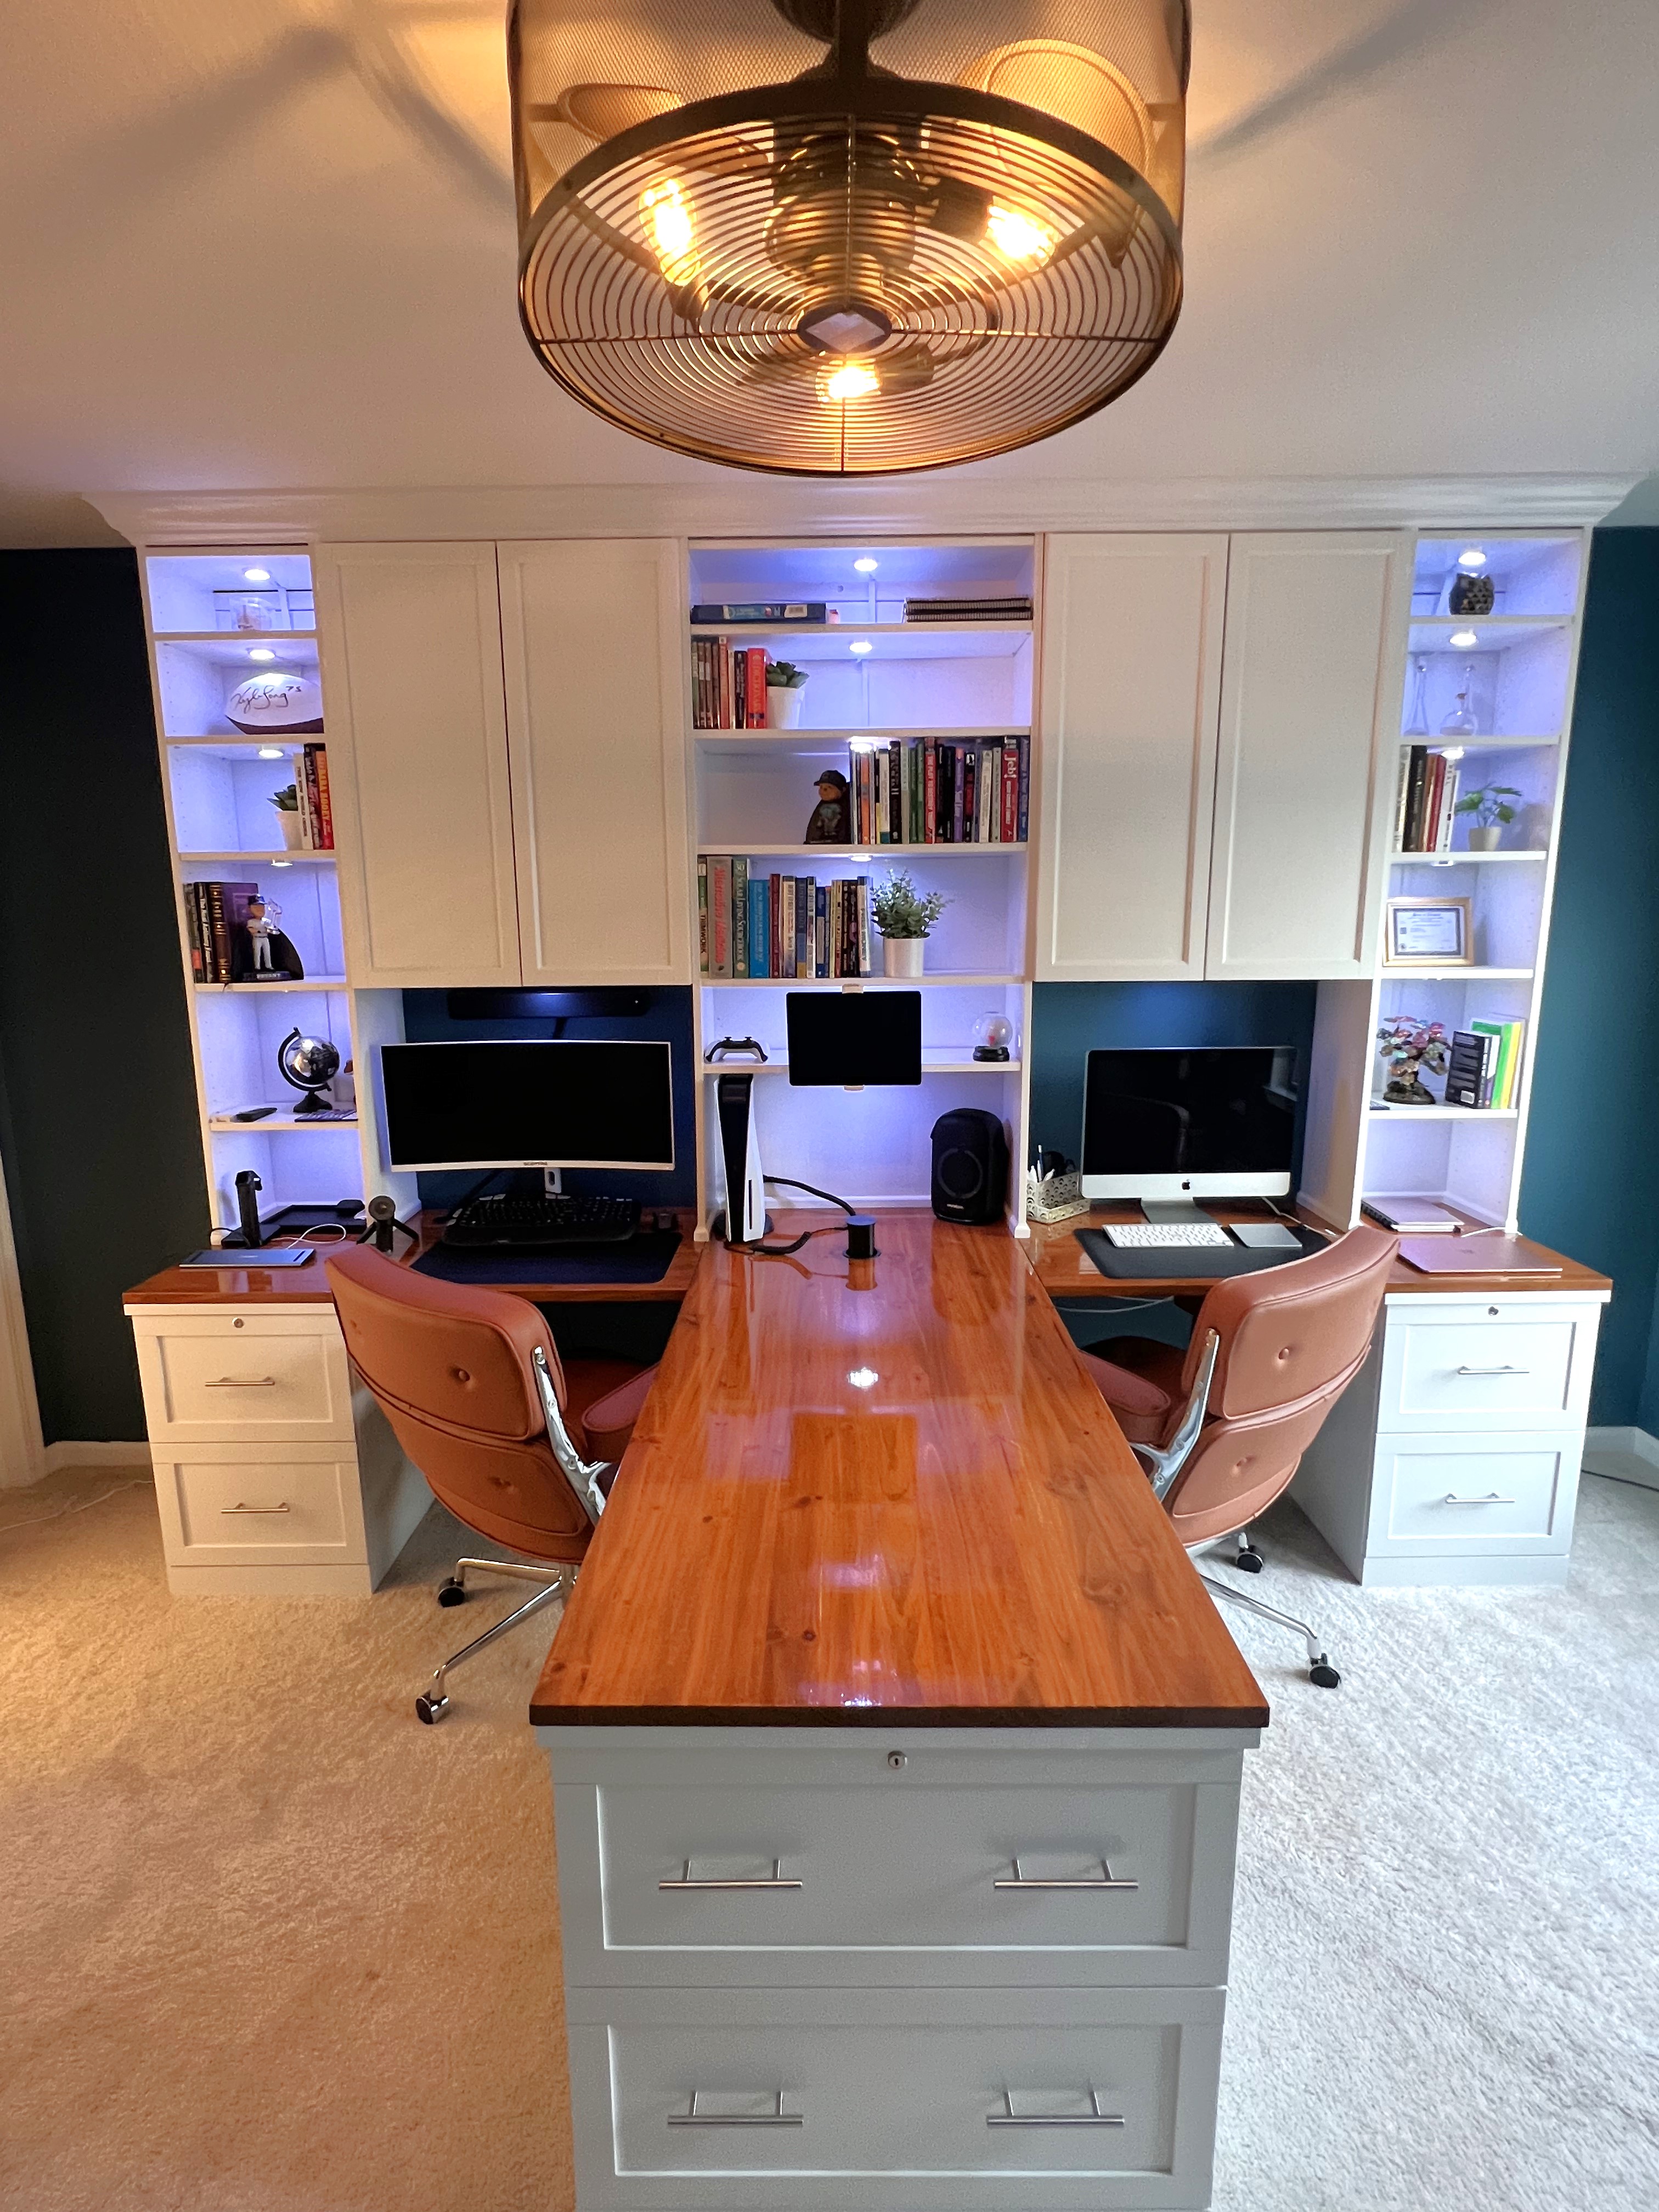
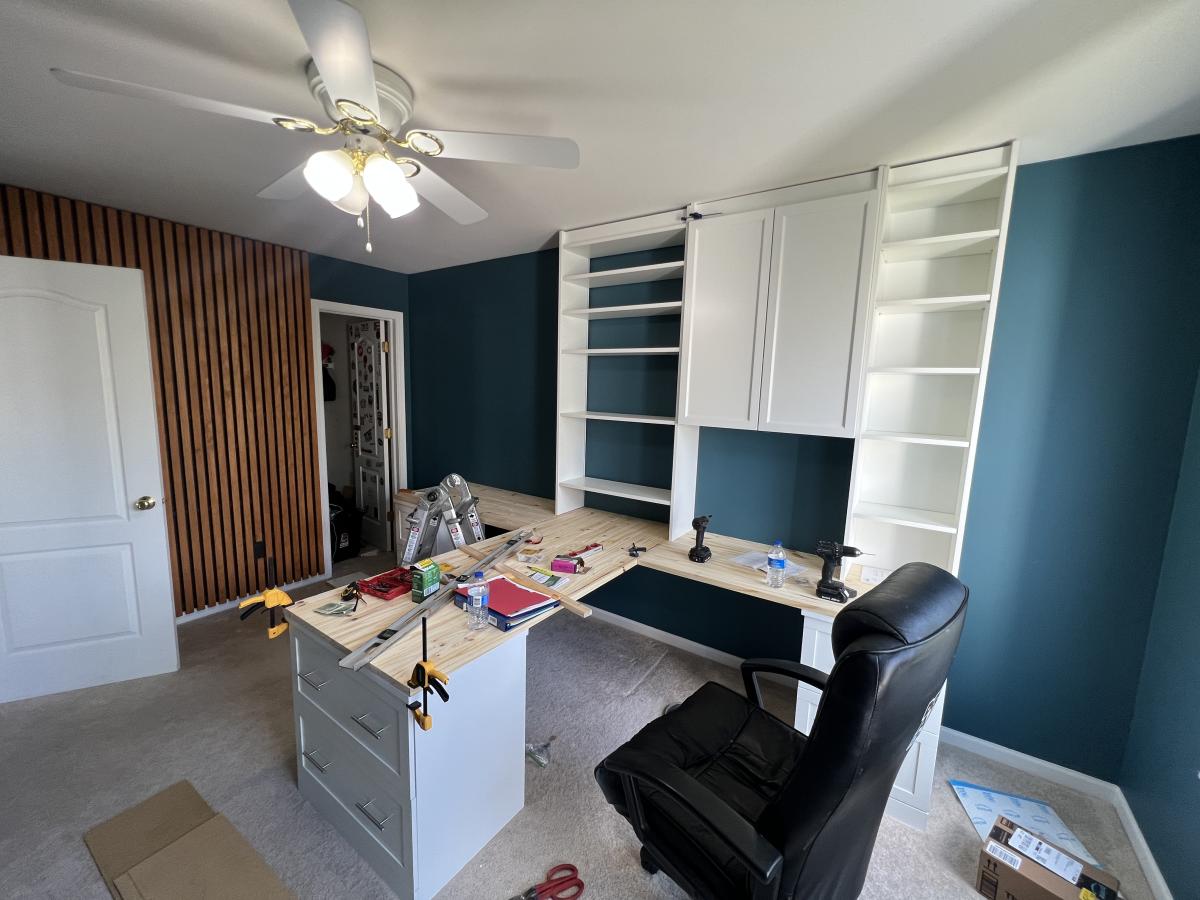
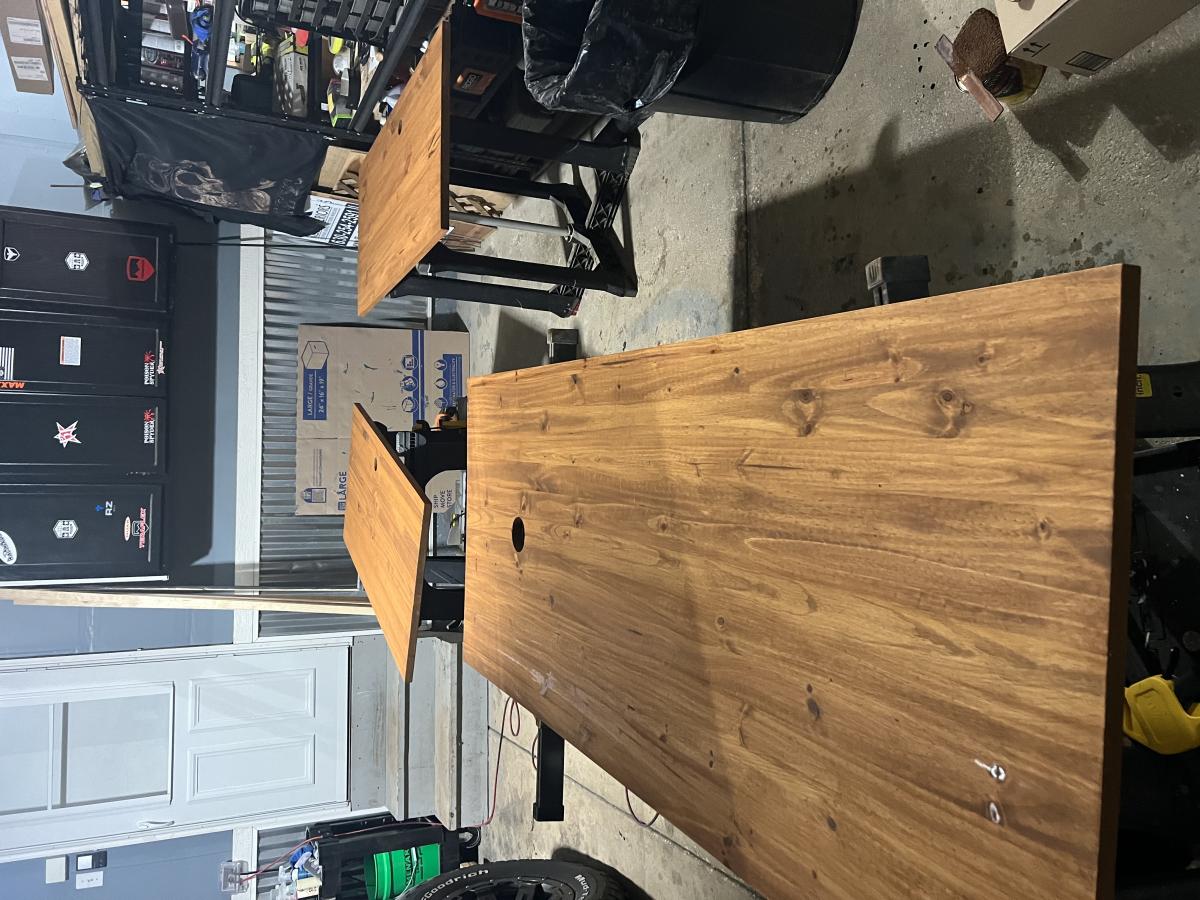
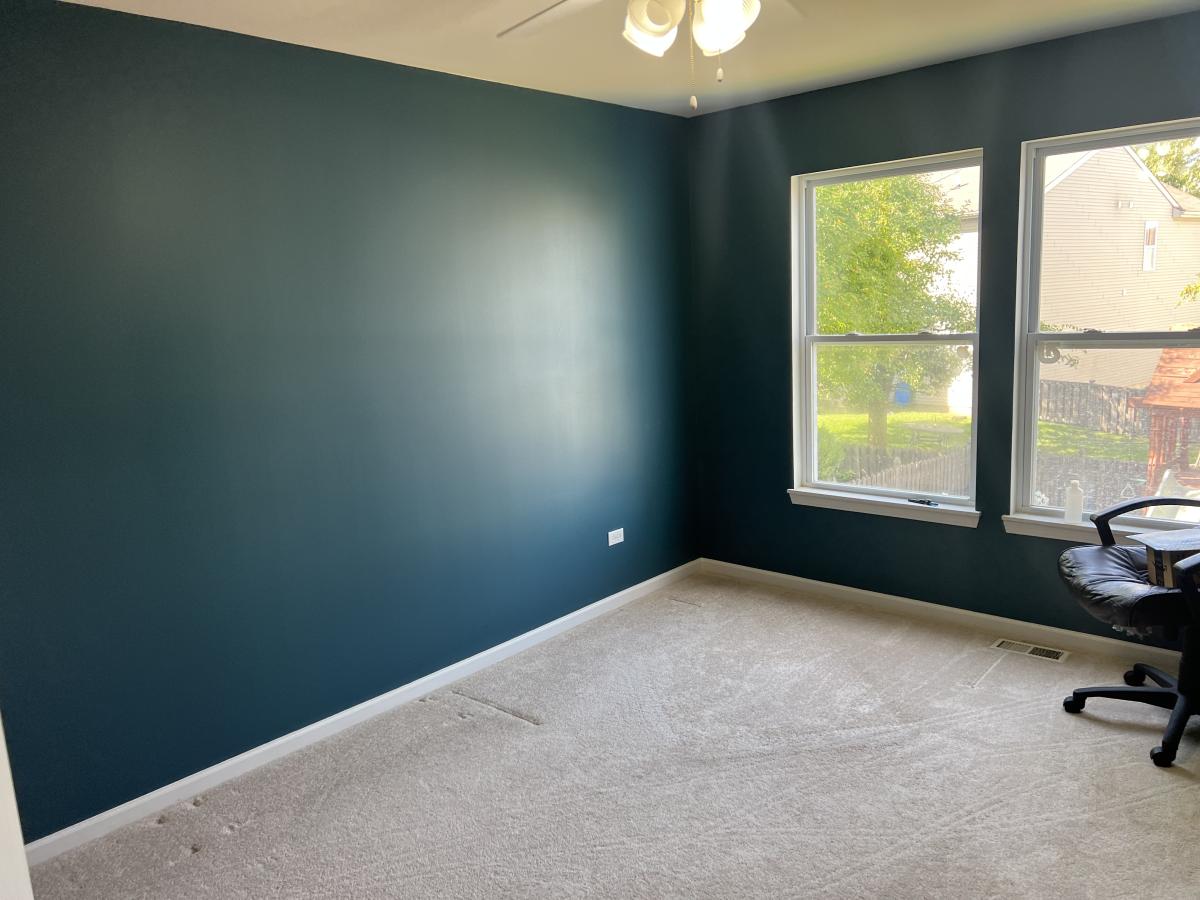
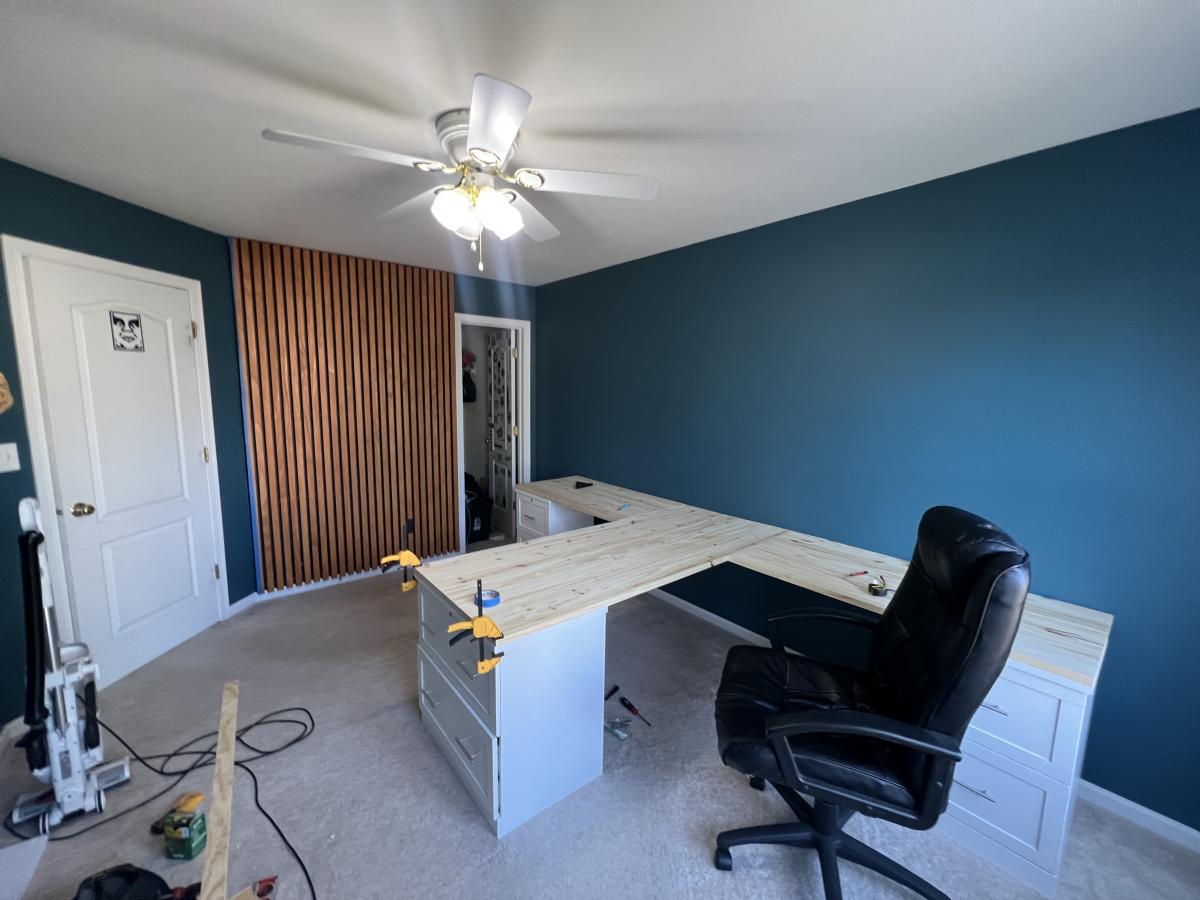
deskMy home office remodel was inspired by a post from Ana White a few years ago. For this project I ended up using IKEA bookshelves and cutting the tops off and flipping them upside down. I used some crown mounding to cover the base of the cabinets on the tops. The desk top bases are file cabinets I found at the office supply store and the desk tops are edge glue pine. Overall I think I only had to make 8 cuts for the entire project. Saving me a ton of time and money. Thank you Ana for all of the wonderful post!
Mark Danreiter on Facebook

Farmhouse King Bed- Beetle Kill Pine

This was our first build and it was quite a big project to take on to start with. We had so much fun and learned so much along the way. 

Our biggest lessons were to hand pick our wood and make sure we get the straightest pieces possible. We had to wrestle some wood to make this bed work!  Clamp everything especially when using large bolts as the pieces would pull apart from each other. We even used a ratchet strap at one point becuase our small clamps weren't cutting it. I'm sure there's a better way and we'd love to hear about it but we made what we had work. We also had to figure out how to attach the side rails and at what height. We ended up using 3 4-inch screws on each end to screw them into the posts.  

We love this bed not only because it was a labor of love but because its such a solid beautiful piece. 

Estimated Cost
$200
Estimated Time Investment
Week Long Project (20 Hours or More)
Finish Used
Minwax Polycrylic Water based - 4 coats, sanded using a 220 grit sanding block in-between each coat.
Recommended Skill Level
Intermediate

Comments

Huffaker6971

Sun, 08/18/2019 - 13:47

This is exactly what I've been looking for. Are there plans for this build?

sxewhodey

Sun, 03/01/2020 - 11:29

Very nice! I love the lighter wood too, but my wife likes the darker stain, so we compromised in the middle for the finish. Why  arethe post always so red? I can appreciate the natural tendency of nature to add color, but the 4*4's are always red-er in color. Do they always use a different pine or certain part of the tree for those?

Outdoor Wooden Cooler

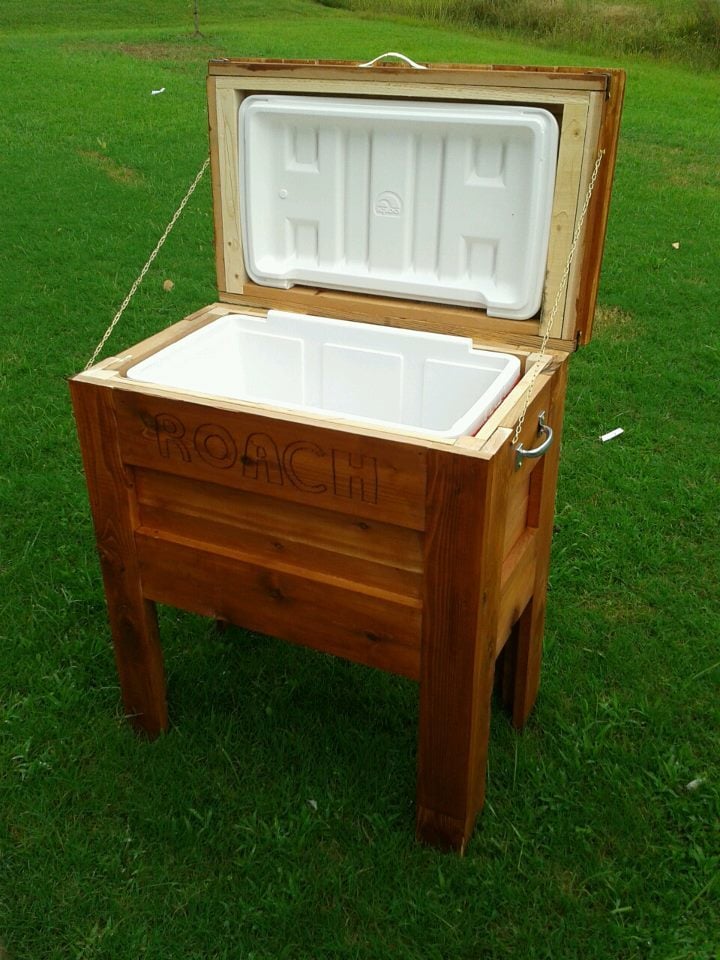
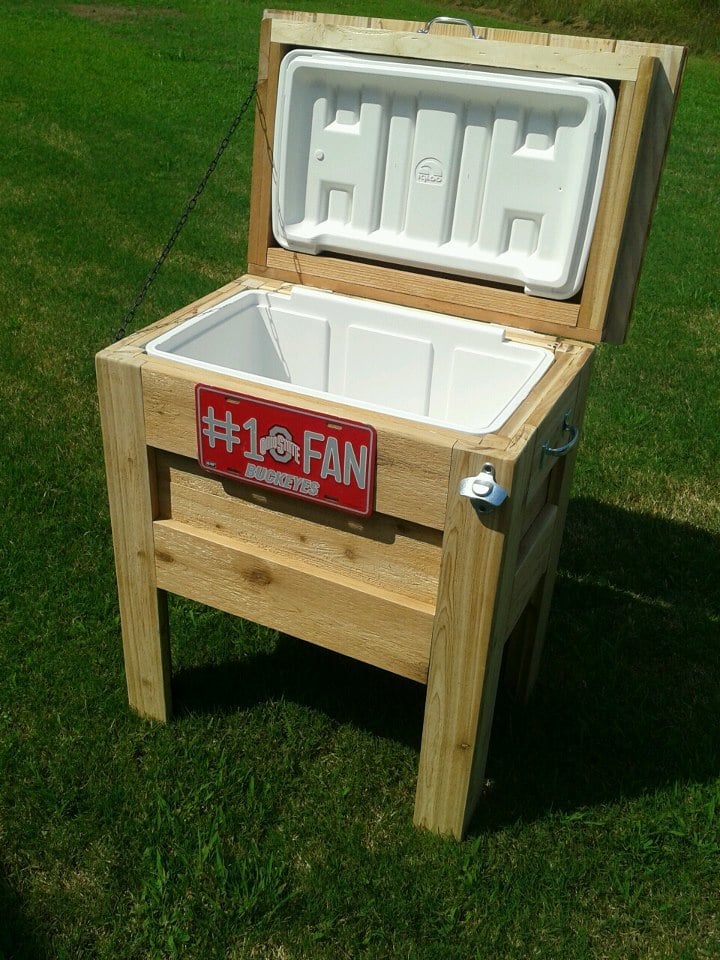
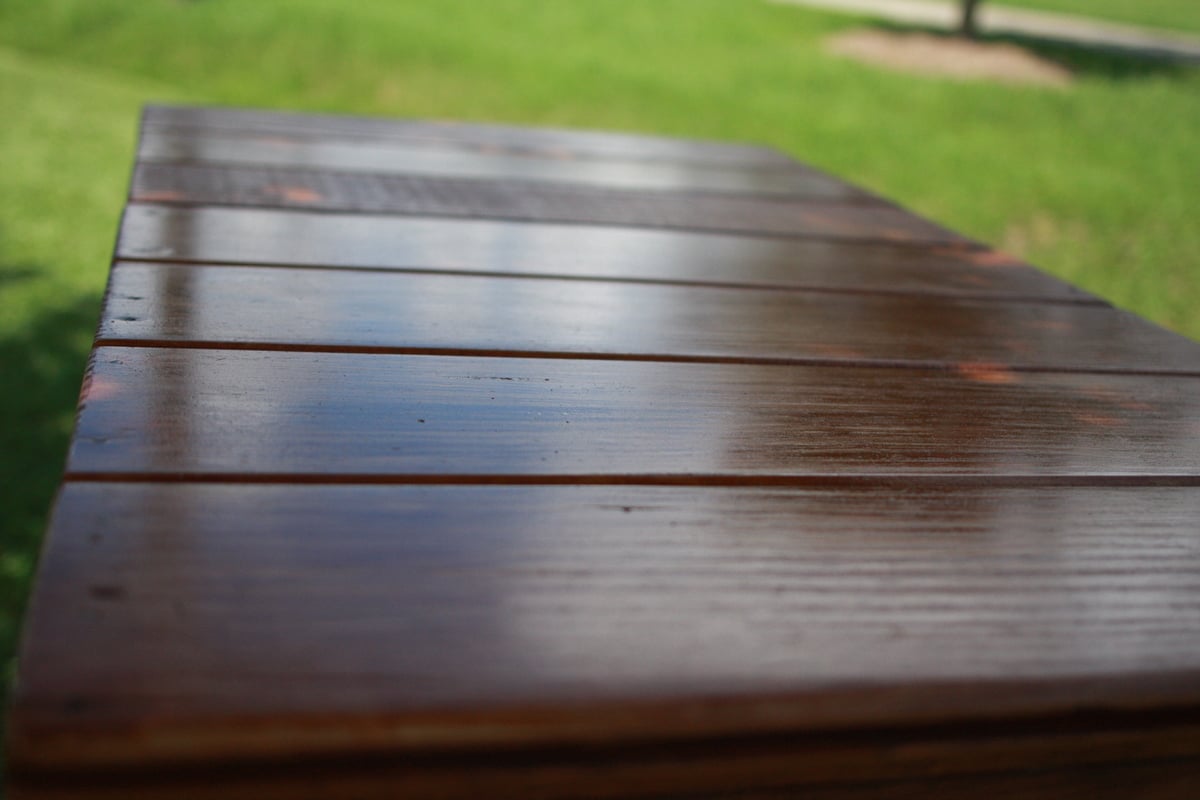
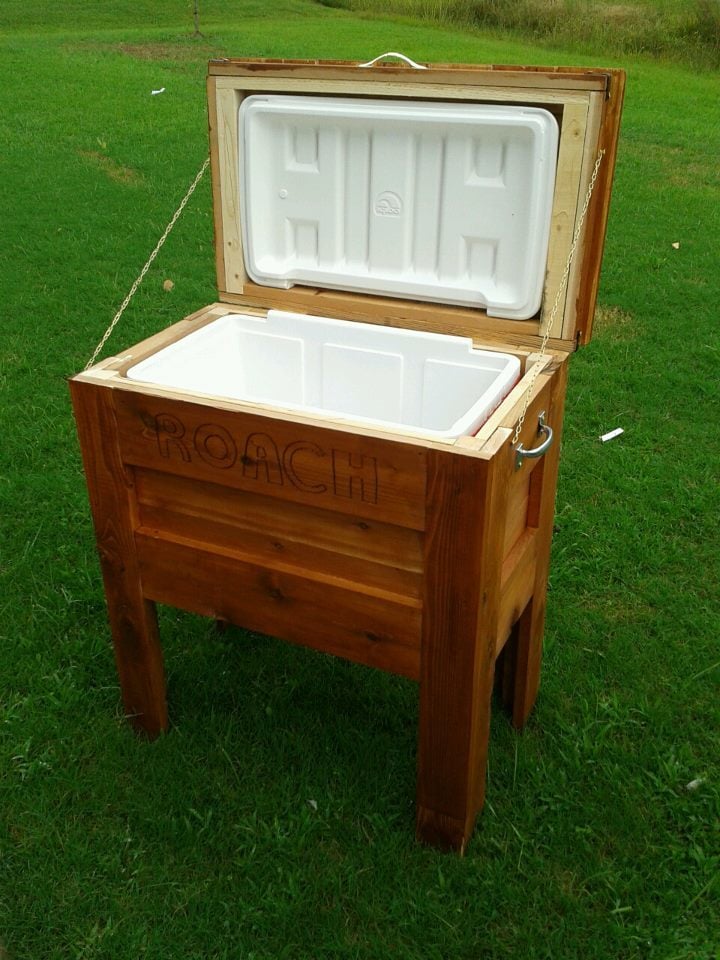
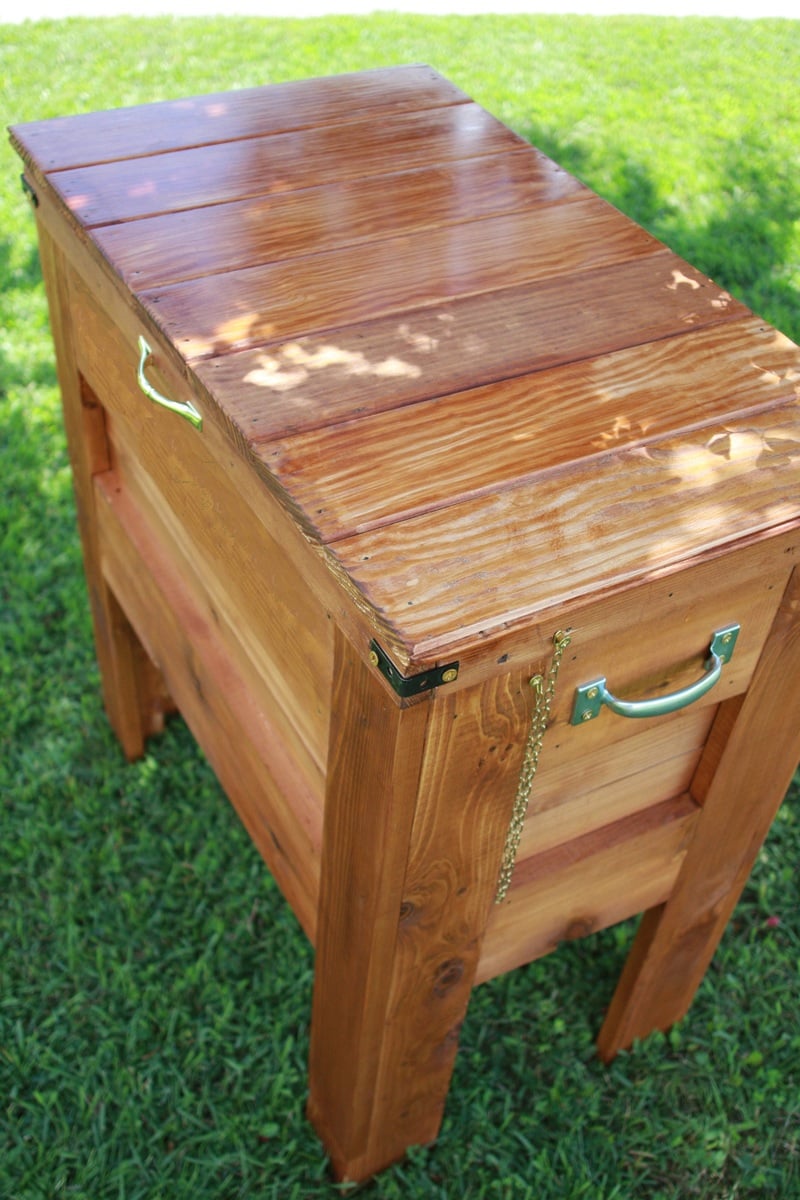
An Outdoor Wooden Cooler is the perfect way to accent any deck, patio, or garage. Can be made from Cedar, Pressure Treated, Cyprus, etc. Sizes can vary from small 28 qt coolers to Large 120 qt coolers capable of holding hundreds of drinks. These coolers can be themed for your favorite sports team, favorite hobby, or anything of your choice. Engraving or wood burning is available.

Built from Plan(s)
Estimated Time Investment
Weekend Project (10-20 Hours)
Finish Used
Stain, painted, distressed, etc.
Recommended Skill Level
Intermediate

Comments

sgilly

Fri, 08/31/2012 - 09:52

Well, actually, two. My beer loving son-in-laws would love this, and Christmas is coming! Do you happen to have any "step-by-step" directions you'd be willing to share? I can figure out the dimensions but it would be really helpful to read - or see - the components and how you put it all together.
Thanks for sharing!

Adam_Scheetz

Fri, 09/28/2012 - 11:41

I had to make a new page because of some password issues. Thanks for comments. I have no plans yet, I've built so many it's sort of muscle memory now. Shoot me an email at [email protected] and perhaps I can help.

And no, the lid style I like is nothing more than some tongue~n~groove boards cut to length, attached with pocket holes and nailed to the lid frame. Tongue~N~groove is optional of course, you could just use regular boards.

sgilly

Fri, 09/28/2012 - 11:58

I really appreciate your response. And, I did indeed send you an email!
I have a bunch of cedar milled and planed by one of my son-in-laws. He'll be thrilled to see that I've made something he can use for his favorite beverage!

Bar Height Farmhouse Table / Benches

Submitted by Anonymous (not verified) on Tue, 11/15/2016 - 12:07

I wanted to say thank you for the inspiration.

I took the general idea, made it bar height and my own preferred size and beefed it up by doweling together the top pieces.

Given the size, I made the top removable with threaded inserts as well as the removable support beams below.

For the benches, I wanted something sturdy and a look that was similar to the table.  I added in a nickel support rod for the foot rest for both strength and a nice look.

All in all this project took a lot of time, probably more so with my perfectionist ways and wanting to  make the finish perfectly smooth.  It's like glass, which I just love against the dents and dings of the wood.

Some of the challenges were wood that warped.  After putting together the bench tops, the wood warped quite a bit, nothing that a few clamps couldn't undo but a pain nonetheless.

Using black stain really brought out a nice look and I'm taking that same look to the new trim and door that are going into the dining area as well.


I've not seen a bar height (not counter height) table in a full dining table size before, it's what I wanted and I couldn't be happier with the results.   Was it worth all of the time?   That's hard to say, I really love it, but it took a long time to get it to be exactly what I wanted it to be.

Thanks!


Estimated Cost
$180 in lumber, $200 for stain/poly/sandpaper/steel wool/Kreg jig/screws. $20 for furniture screws that look sharp and allow the table base to be easily disassembled. Another $20 for threaded inserts and machine bolts to hold the top to the base.
Estimated Time Investment
Week Long Project (20 Hours or More)
Finish Used
Ebony Minwax oil based stain and Satin Poly.
Pre-stain, one coat of stain, wipe after 5 min, three coats of poly using steel wool (00) between each coat.
Recommended Skill Level
Intermediate

Garage Storage Cabinet

Submitted by AndyH on Tue, 08/05/2014 - 18:57

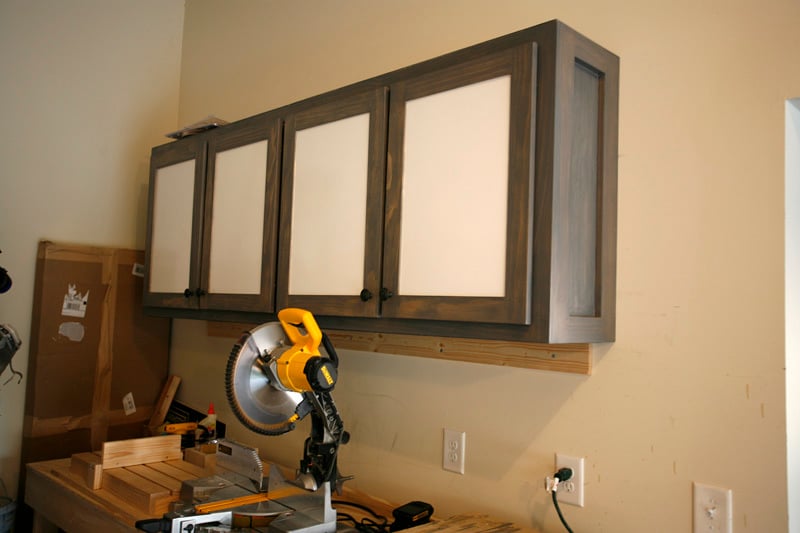
First part of garage storage system complete. 7.5 foot cabinets with whiteboard marker board doors inserts.

Next step to build new bench with storage cupboards to keep dust out and a central dust extraction/containment area.

Then put some tool board and a charging station above the two outlets.

Estimated Cost
$100
Estimated Time Investment
Weekend Project (10-20 Hours)
Finish Used
Minwax Classic Gray
Recommended Skill Level
Beginner

Comments

TaylorMade1205

Wed, 08/06/2014 - 05:51

What plans did you use to build the cabinets? I'm currently re-doing my garage and I was looking for something like this.

AndyH

Wed, 10/08/2014 - 19:20

Hi.  I drew the plans myself to make it fit the space I needed.  Happy to share the google sketchup file with you if you want to send me your contact (if that is allowed on here!).  Sorry for the delay in replying but not logged on here for a while. 

SAWL27

Sun, 12/13/2020 - 05:04

These are perfect for what I'm working on. Do you still have the plans that you're willing to share?

Garden Enclosure

This was a fun project.  The plans are written so that many of the boards don't need to be cut.  It's made from cedar that (thank goodness) was on sale.  I made the raised beds twice as deep as was called for in the plans because I wanted to minimize bending while I garden.  That added to the cost of the lumber and the soil.  I also like the way it looks.


I found it helpful to measure and cut the boards as I went.  This was crucial for fitting the door.  The most difficult part for us was working with the hardware cloth and trying to make it as smooth as possible.


It has been effective keeping deer and rabbits out of the garden.  Things that can fly in are another issue.  

Built from Plan(s)
Estimated Cost
>$500
Estimated Time Investment
Week Long Project (20 Hours or More)
Finish Used
None
Recommended Skill Level
Intermediate
Seasonal And Holiday

Vertical planter

Submitted by Anonymous (not verified) on Sat, 04/01/2017 - 18:45

This planter was so easy to build! super cute, fun, spring project.

Estimated Cost
$30.
Estimated Time Investment
An Hour or Two (0-2 Hours)
Finish Used
I Painted the 2x4's. I left the cedar as-is.
Recommended Skill Level
Beginner

Chicken coop

Submitted by Anonymous (not verified) on Tue, 03/09/2021 - 07:44

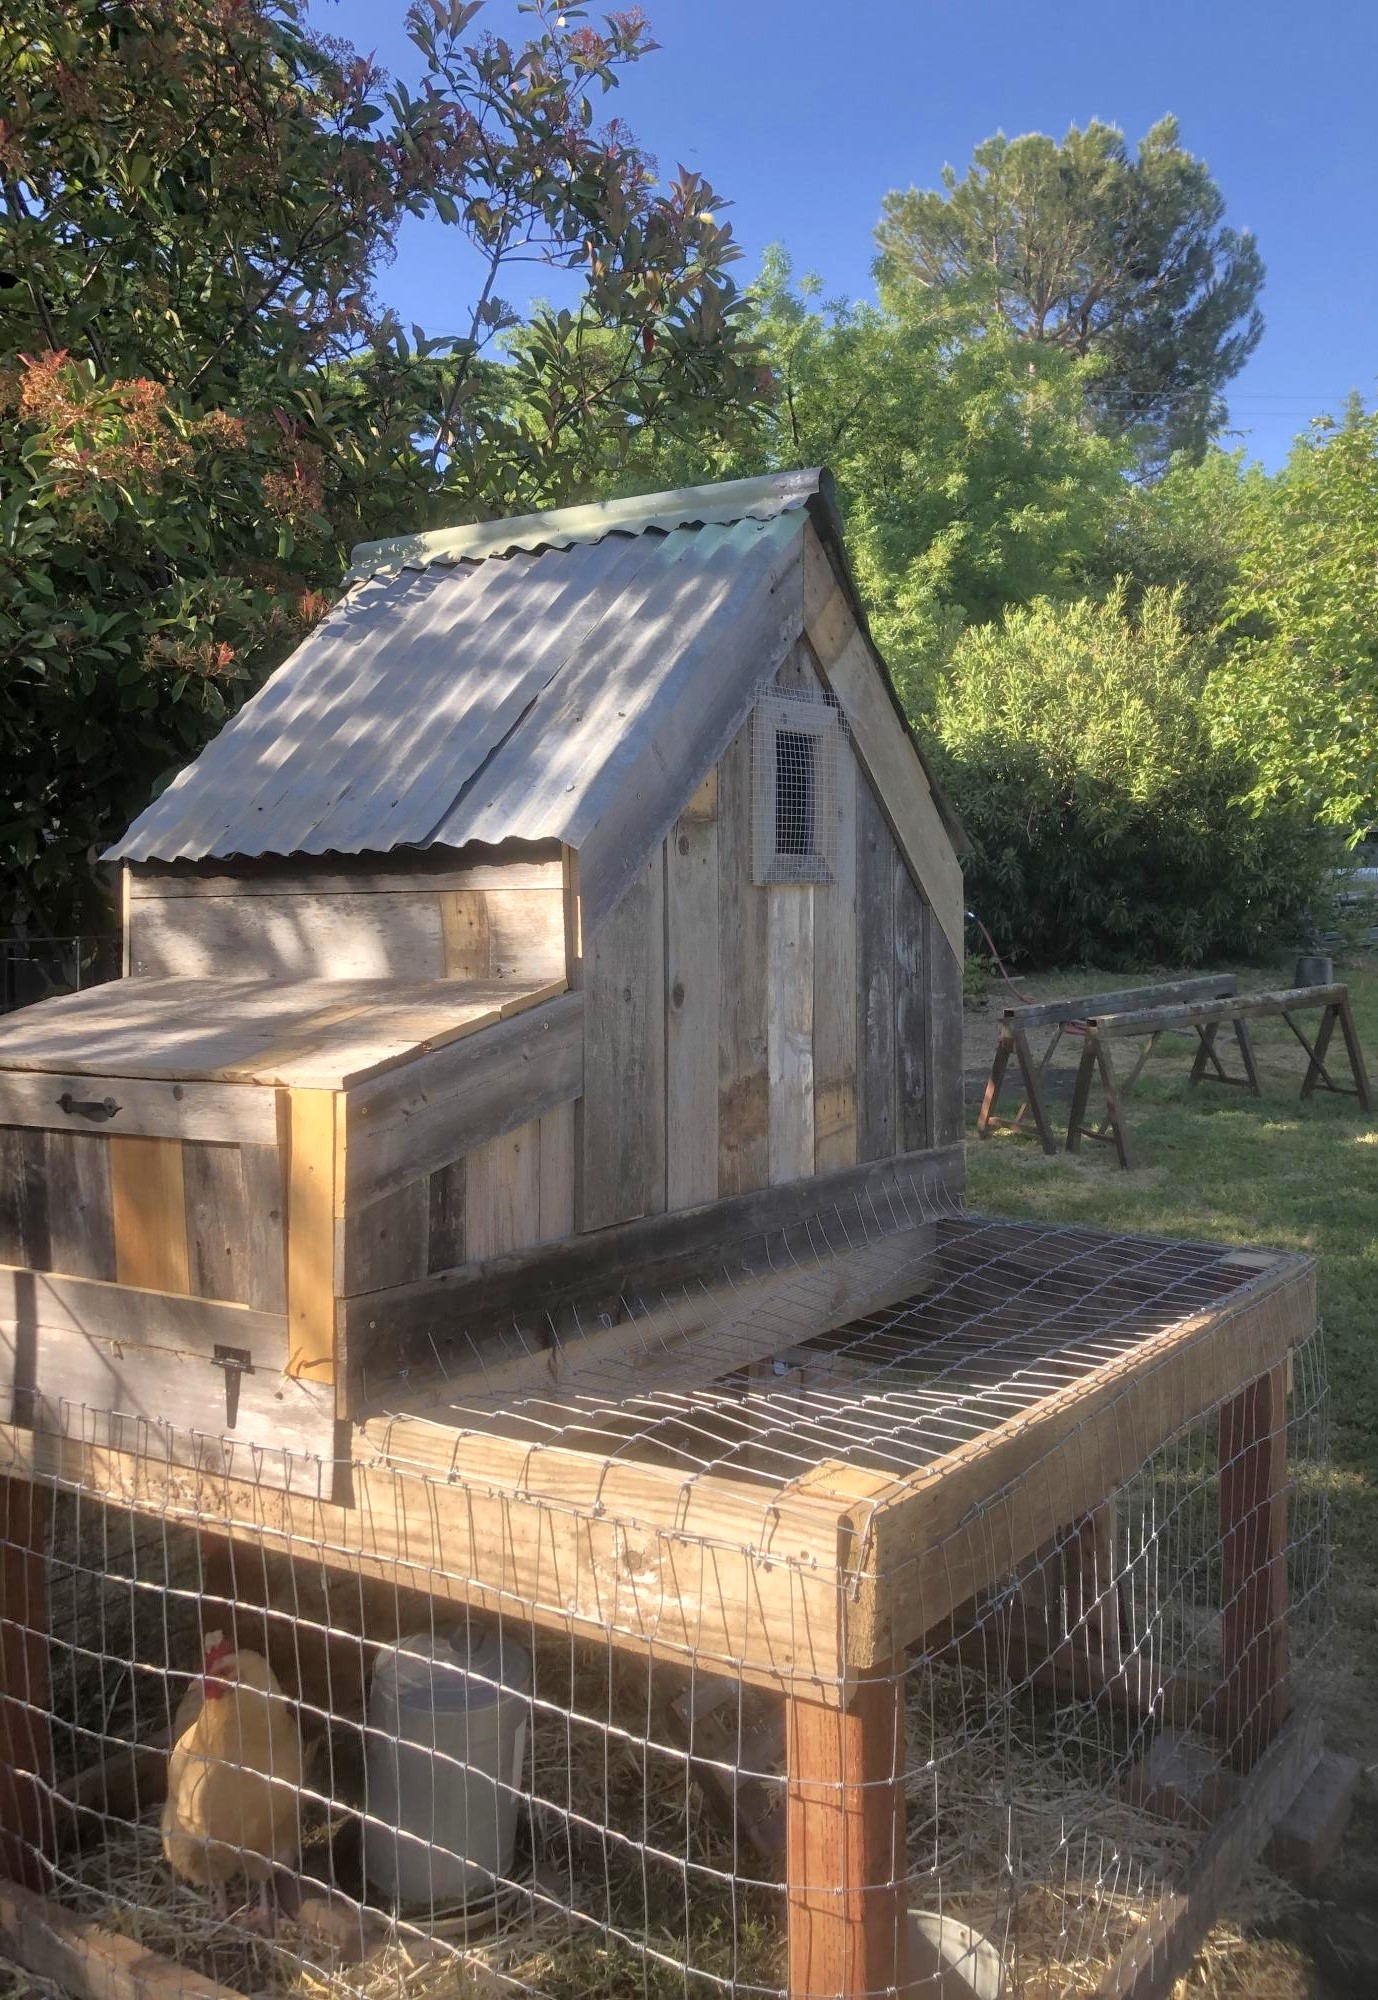
This is a coop I built from plans on the site. I modified by covering the ply with old cedar boards and used tin for a more rustic look. I opted not to add the planter just covered it with wire.
Love your plans! So easy to follow!

Estimated Cost
Since I used recycled materials the overall cost was about $50
Estimated Time Investment
Weekend Project (10-20 Hours)
Finish Used
I just did the outside like a jigsaw puzzle. Cutting to fit as I went. Be sure to use nails or staples that do not protrude the inside when attaching siding.
Recommended Skill Level
Intermediate

Loving These Shelves

Submitted by woody311 on Thu, 01/15/2015 - 18:51

I changed the plans a little bit to add on the extra shelf on top as well as making the shelves an inch narrower than the plans. The project was actually pretty easy and really only took me about a days worth of work.

Estimated Cost
$160
Estimated Time Investment
Day Project (6-9 Hours)
Finish Used
None
Recommended Skill Level
Beginner

Comments

My Mother's day gift (Chicken Coop)

Submitted by Bondgirl8 on Wed, 06/02/2021 - 19:44

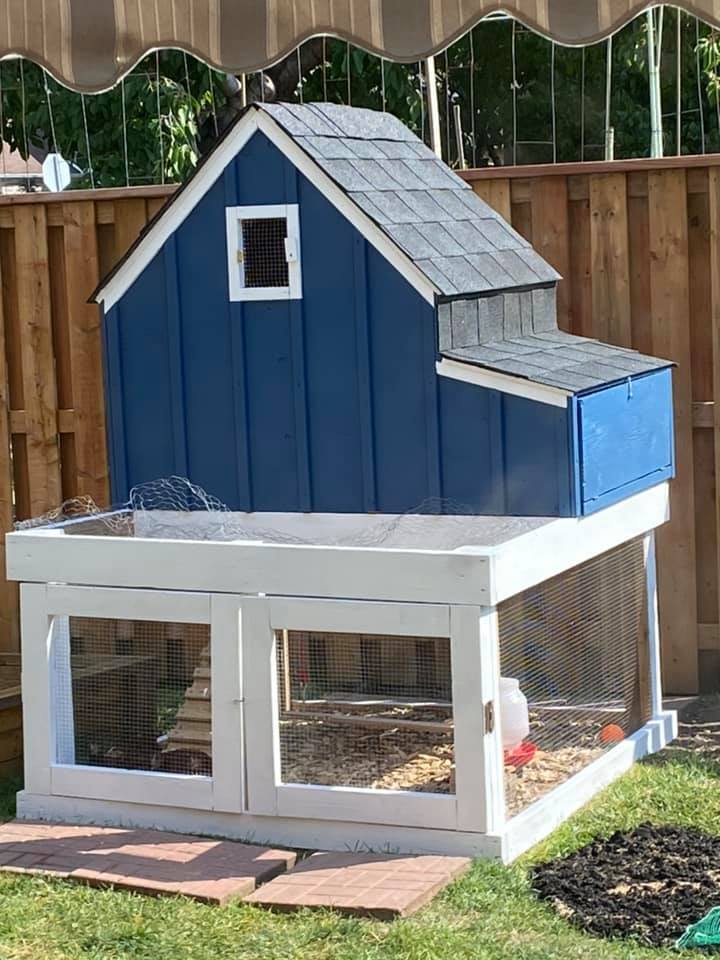
I printed off your instructions and I had all the wood in the garage already. My husband and son finished this in a day and a half. I love it! I painted it. Still not sure what I want to do instead of the planters. I like that idea but I like to have access if I need to clean it. I love all the ideas on this site.

Estimated Time Investment
Weekend Project (10-20 Hours)
Recommended Skill Level
Advanced

Comments

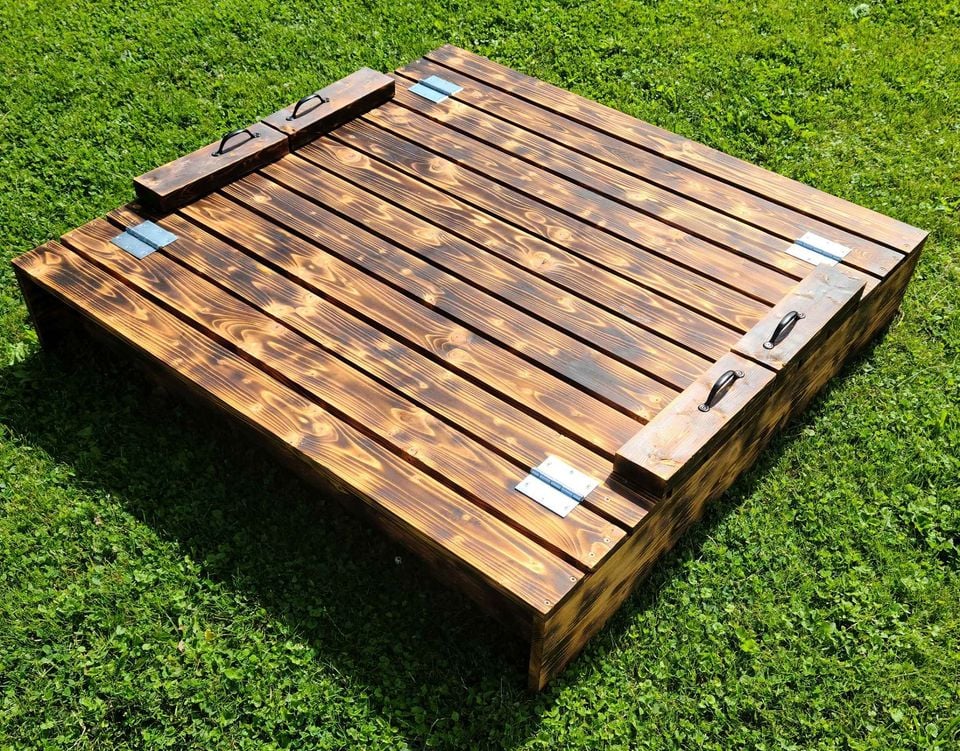
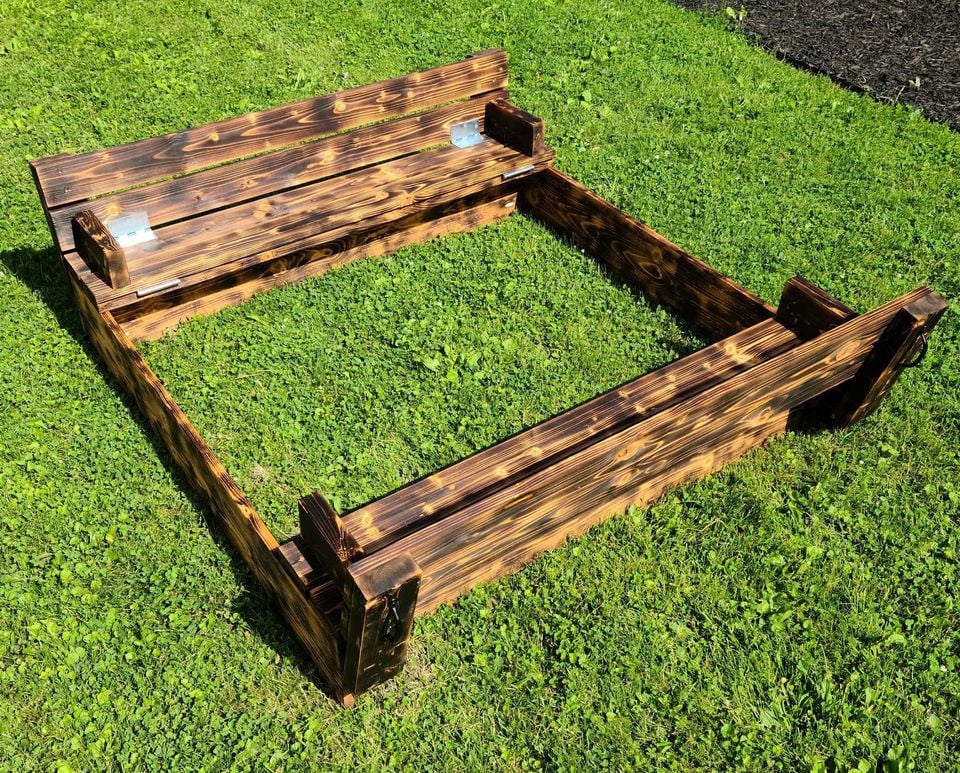
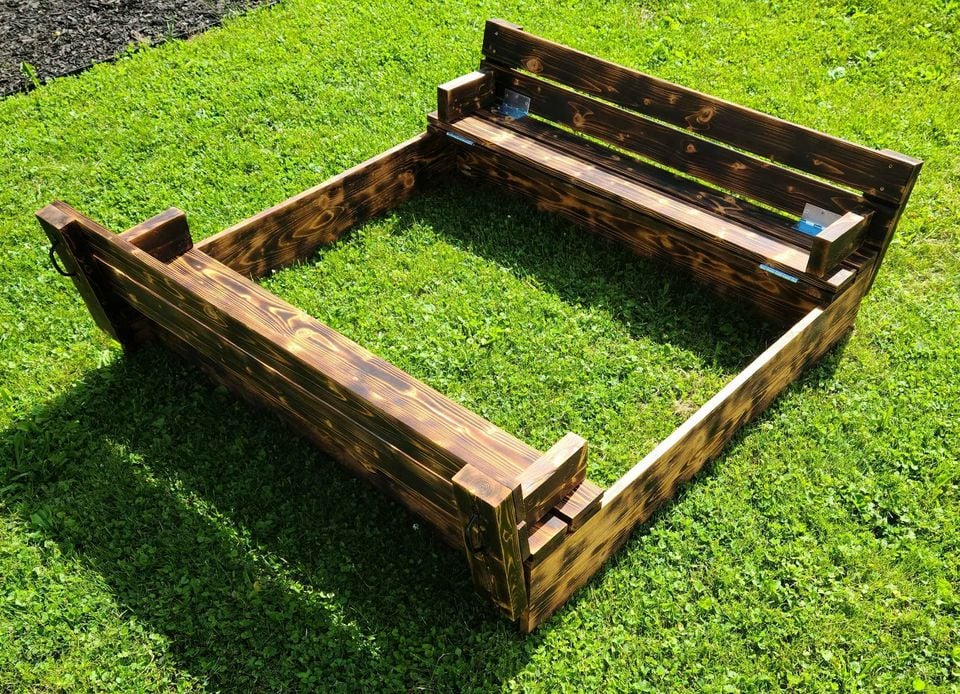
Sandbox with Benches

Burnt and stained with a semi transparent mahogany water sealer

Built from Plan(s)
Estimated Cost
$120
Estimated Time Investment
Afternoon Project (3-6 Hours)
Recommended Skill Level
Beginner

Comments

Magnetic White Board Organizer Wall

Submitted by Christian on Mon, 05/13/2013 - 10:24

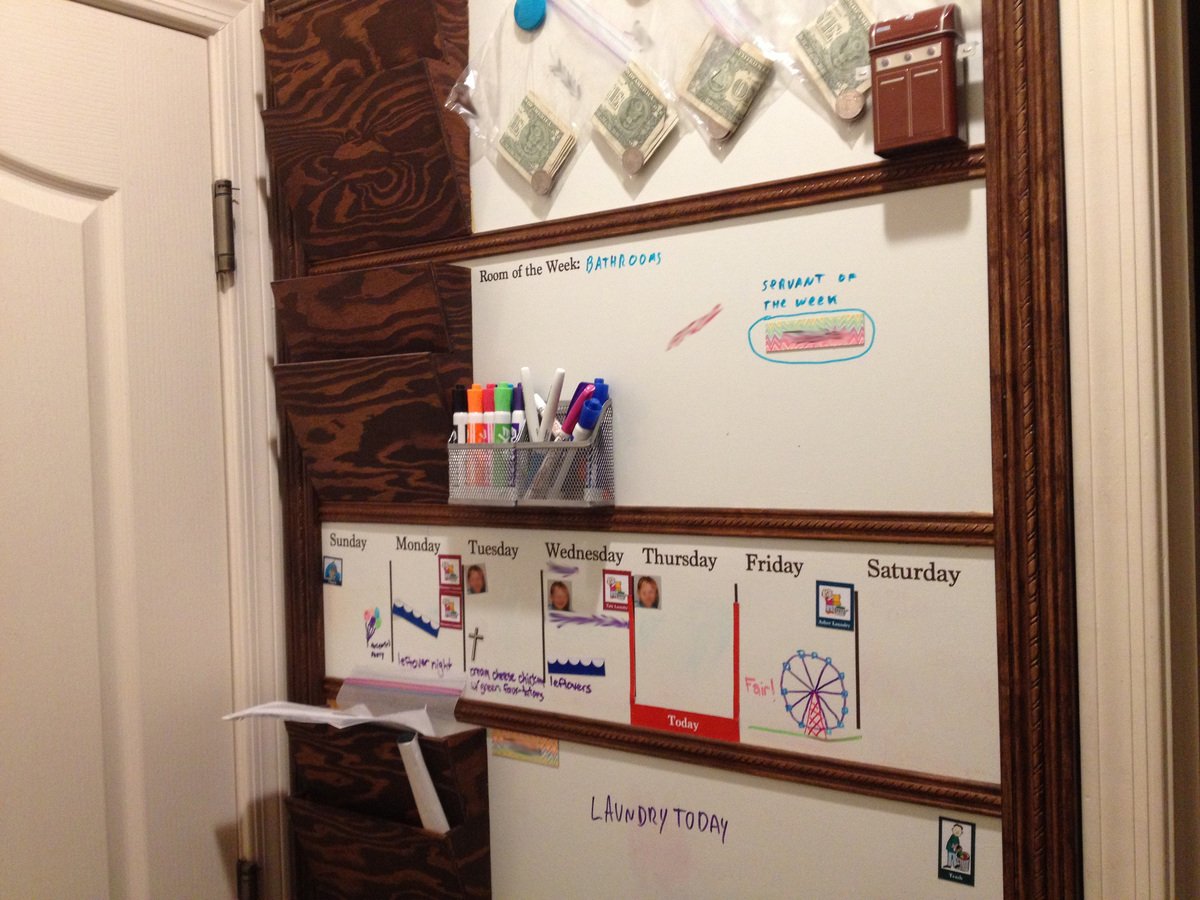
Easy project that has helped us stay more organized. We use Cozi to maintain the calendar, but this allows us to highlight things that the kiddos need to know during the week. We keep the chore schedule, laundry schedule, meal plan, and out of routine activities on the week calendar so the kids can tell what is going on at a glance. The allowance is also hanging up at the top as an incentive to get their respective jobs done for the week. I used galvanized sheet metal glued onto a 1/4 inch plywood base and coated it with whiteboard paint. This allows it to be magnetic and easily written on. Love the letter holder for homework and important paperwork.

Things we have used it for so far:
Activity schedule (swimming lessons, soccer practice, etc.)
Meal plan
Unusual activities (parties, movie night, etc.)
School stuff (project due, spirit week, etc.)
Chore schedule
Laundry Schedule
Room of the week: what part of the house gets a deep clean this week.
Servant of the week: which kid is the designated helper for non-chore activities when an extra hand is needed.

We are still figuring out all the ways to use this to good effect, but the kids really like being able to see what is coming up in the schedule for the week.

Estimated Cost
$100
Estimated Time Investment
Weekend Project (10-20 Hours)
Finish Used
Whiteboard paint
Minwax Walnut Stain
Spray Acrylic to whiteboard marker proof the wooden parts.
Recommended Skill Level
Beginner
Back