Community Brag Posts

Dresser/Changing table

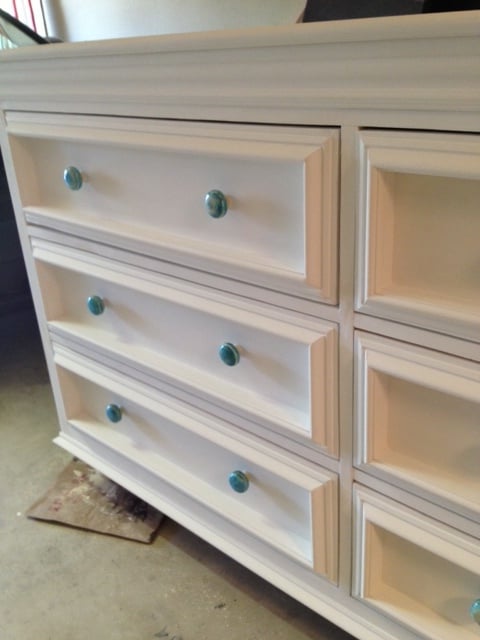
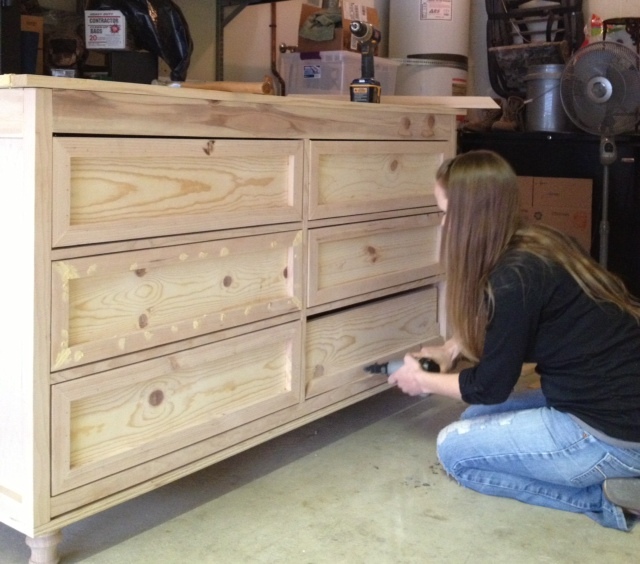
Similar to a previous poster, I was inspired to build this project to use as a combo dresser/changing table for our first child's nursery. It took quite a few days worth of work (spread out over a couple of months altogether) but I finally finished the bulk of the work a few days before entering the third trimester of pregnancy, phew! I think we'll enjoy this piece for years to come, thanks Shane and Ana for the plans! (Please excuse the poor lighting and ugly garage, we haven't set up the nursery yet so the dresser may be living in the garage until we do!)

Built from Plan(s)
Estimated Cost
$300ish
Estimated Time Investment
Week Long Project (20 Hours or More)
Finish Used
Annie Sloan Chalk Paint in Pure White. Love this paint but it has a very matte finish on its own and will need to be waxed for protection that I'm waiting until the pregnancy is over to finish.
Recommended Skill Level
Intermediate

Comments

Custom Garage Shelves

Submitted by Anonymous (not verified) on Tue, 01/16/2024 - 17:19

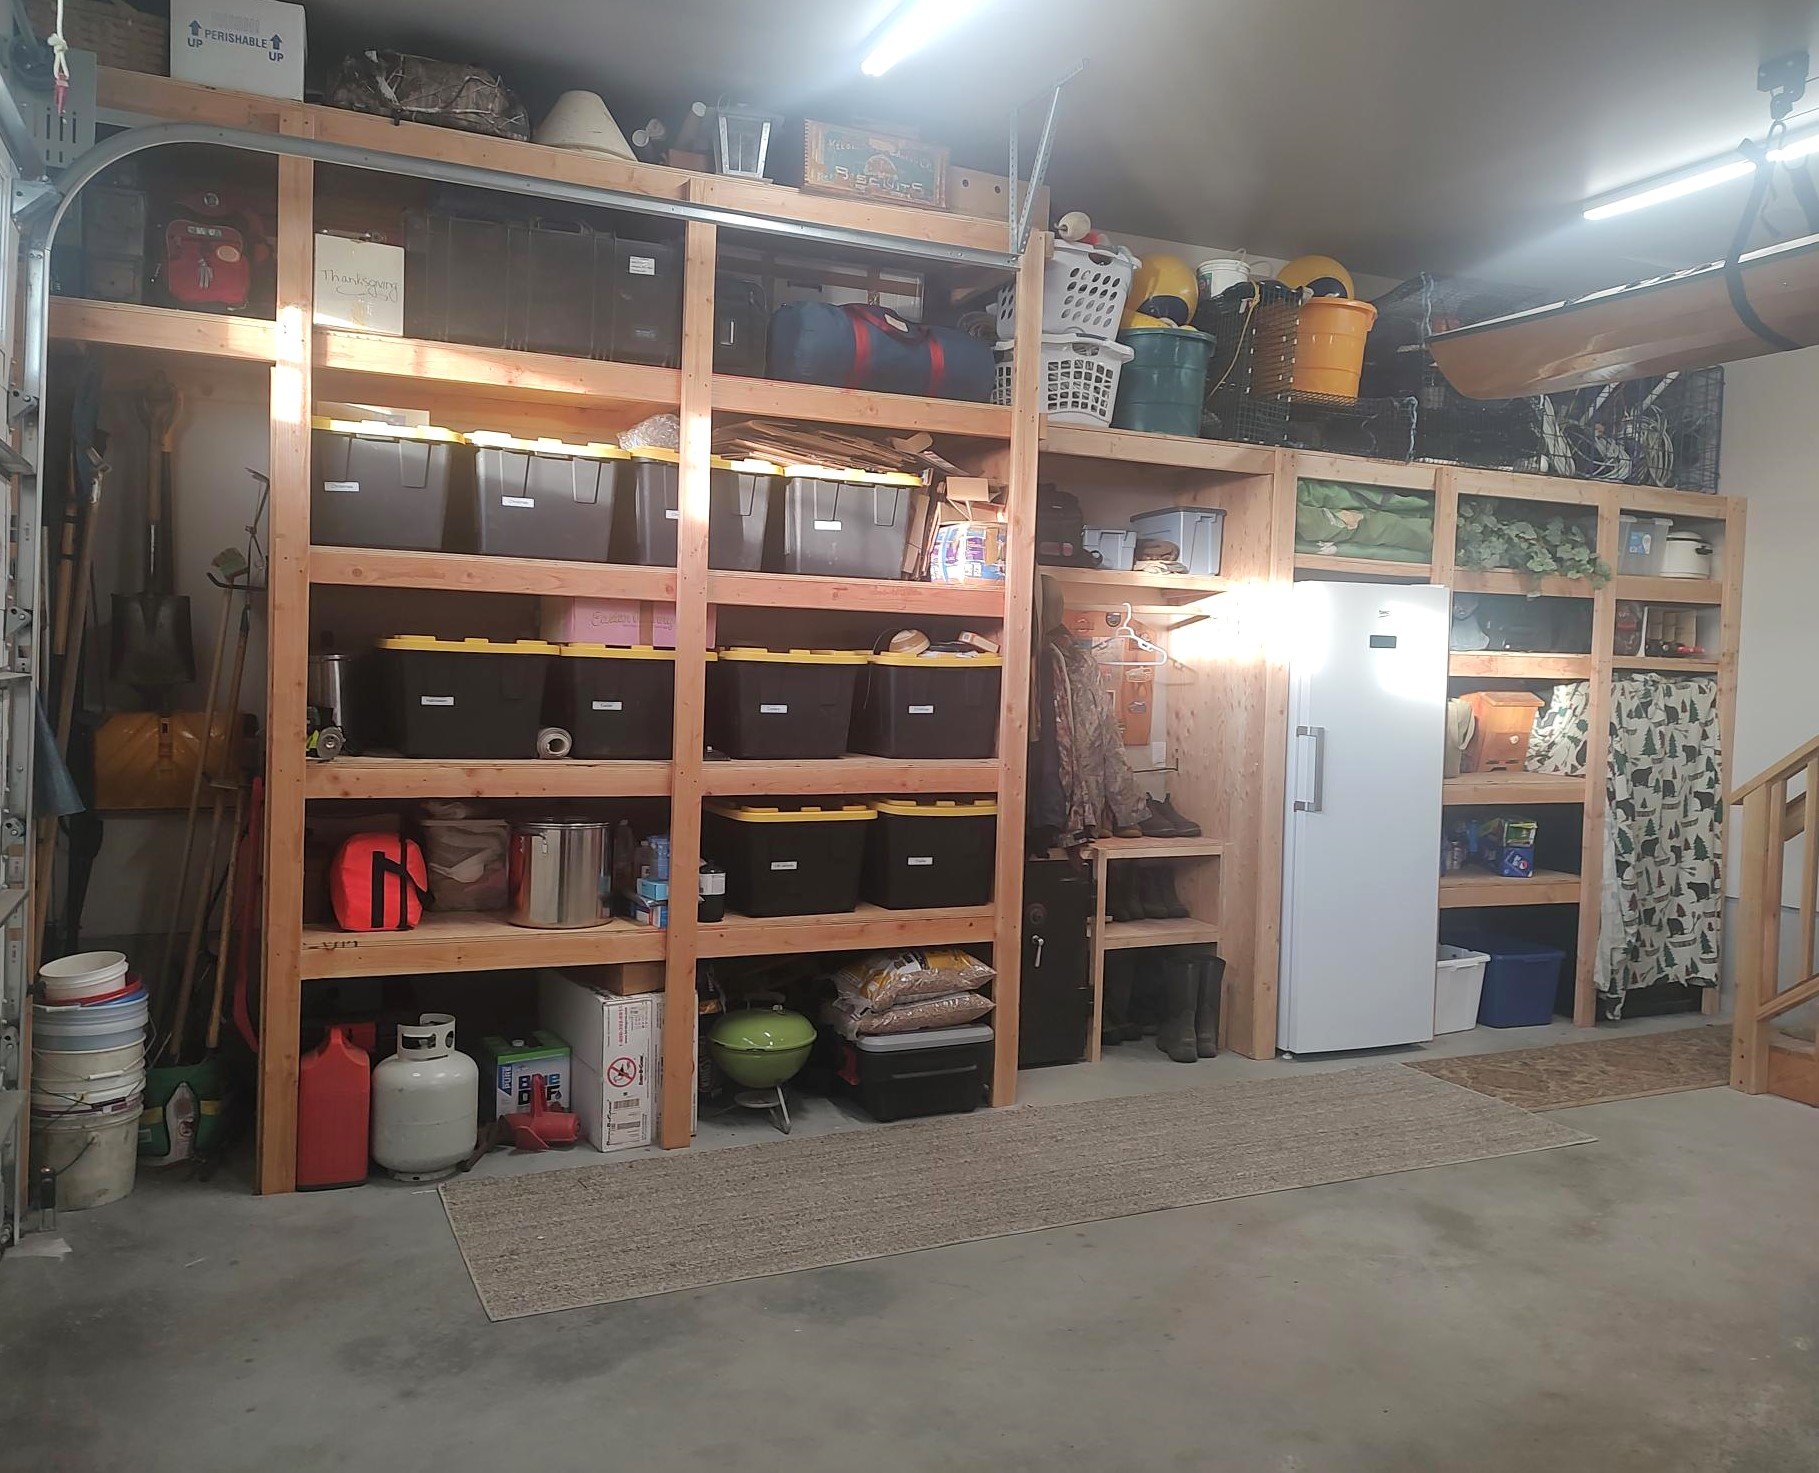
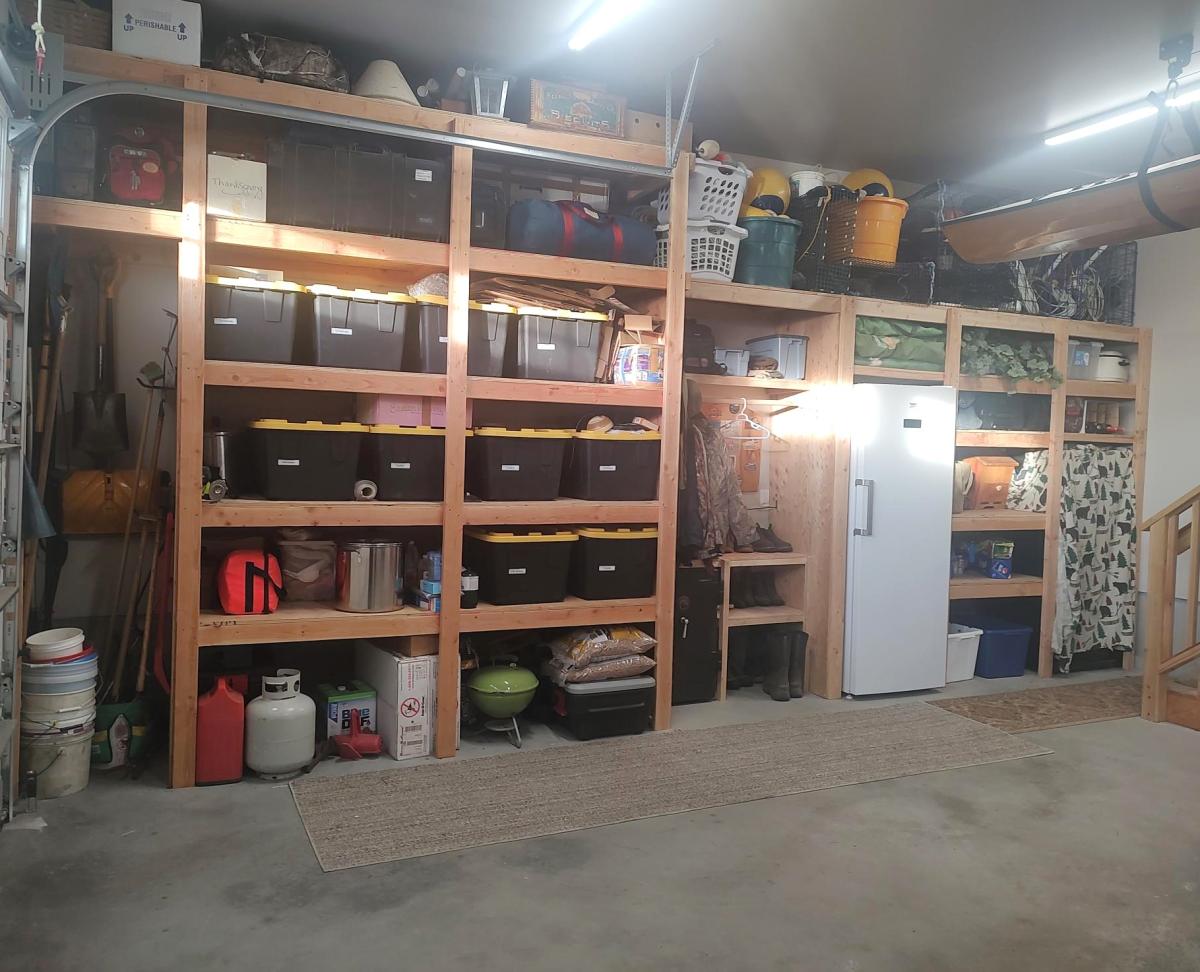
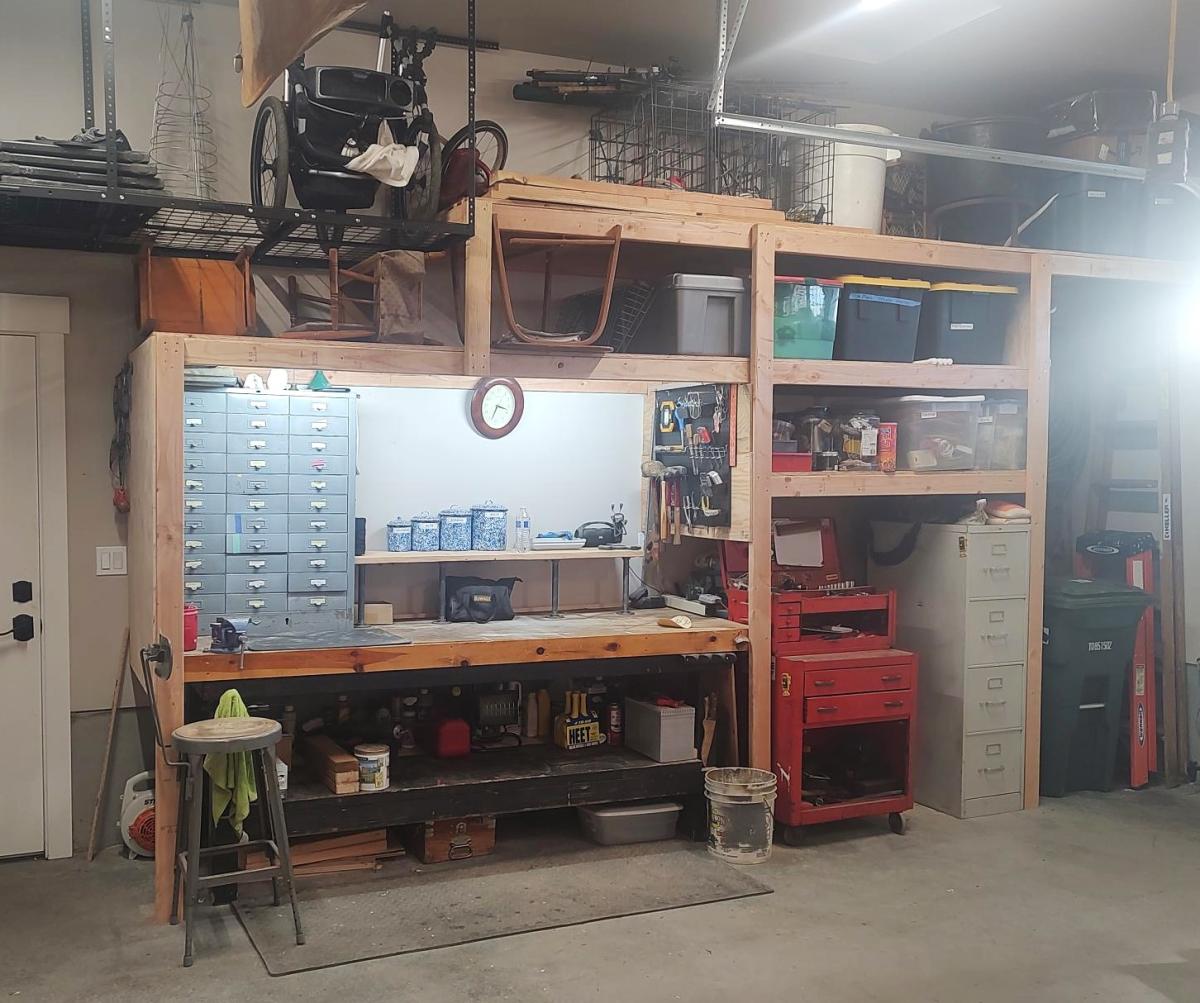
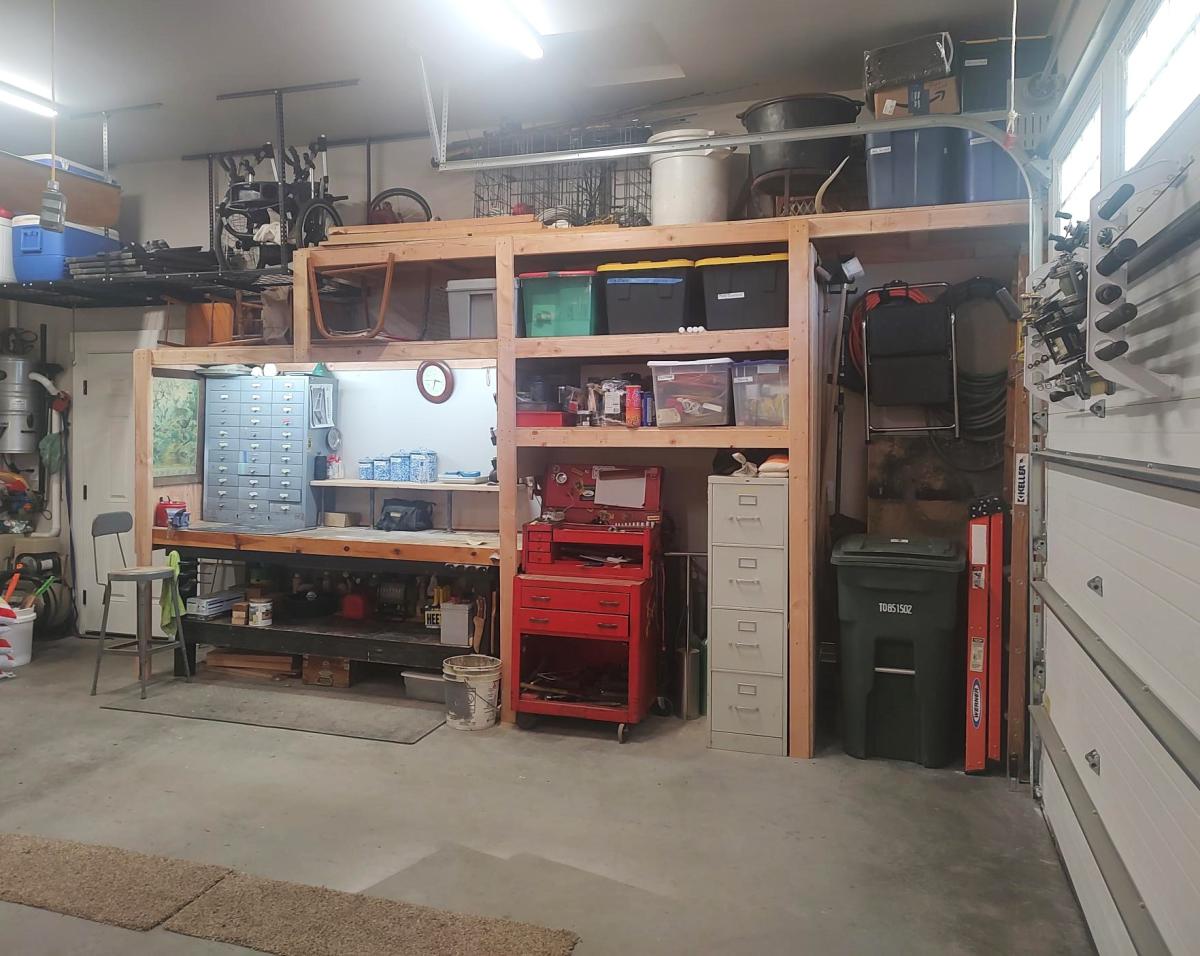
I just finished shelves on both sides of my garage using your video.  I built a coat rack and boot rack.  I also made space for tall items like tools and ladders near the garage door.  I had to also build in a gun safe, freezer and my work bench.  Everything came together and now I have everything in bins on shelves. 

Gary Hoffman

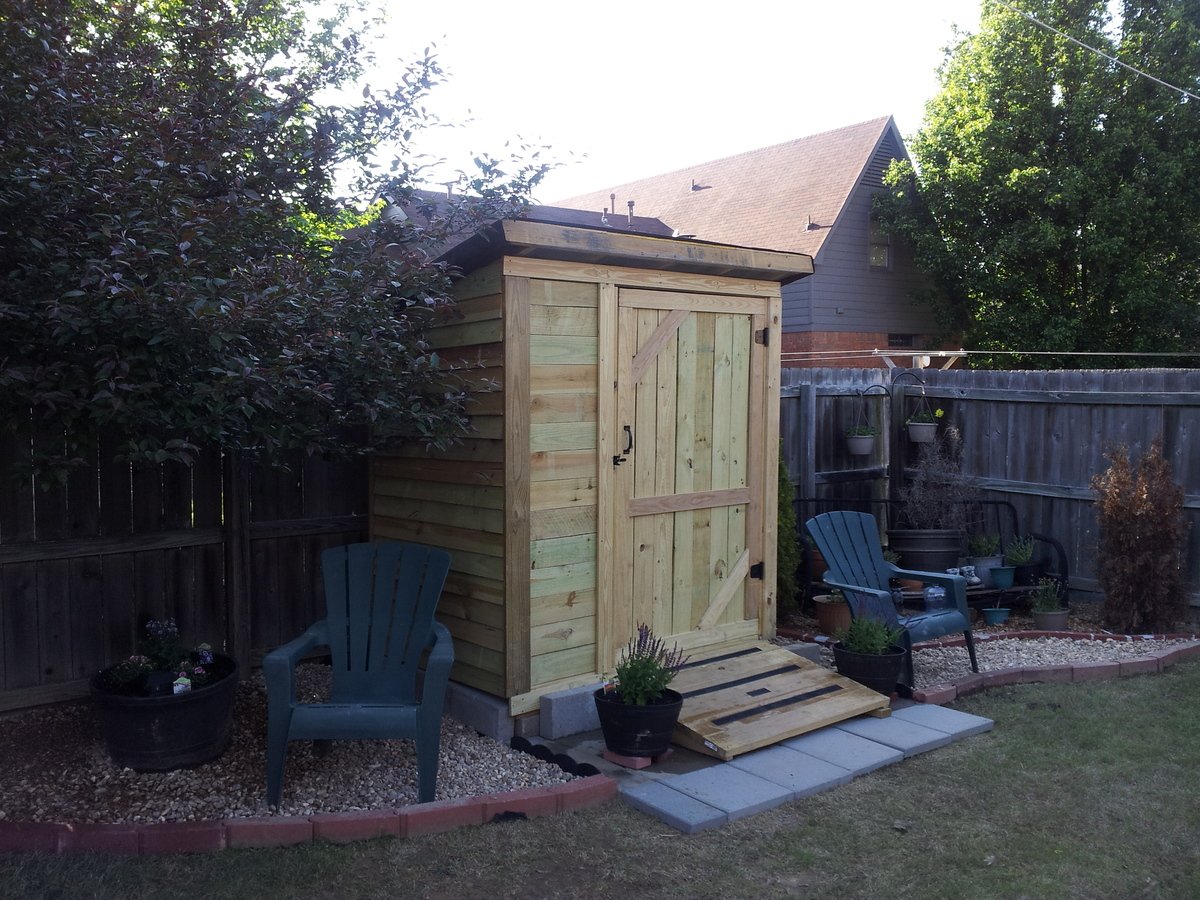
LOVE MY SHED!!!

Submitted by Storm on Wed, 05/21/2014 - 20:41

I saw this storage shed plan and loved it. I did make a few changes because I needed a 4' x 8'. I also built a shed floor to secure it too so I built the shed frame using 2x4's.
I also put the lower ends of the side walls in the rear to assist with water runoff.
Because I wanted the option to add shelves on the left side I decided to put one larger door on the right front only and added some contrast by vertically placing the pickets on the opposite side. I'm presently waiting for my shingles to arrive. After that I'll stain it. I really enjoyed putting this together, learned a lot.

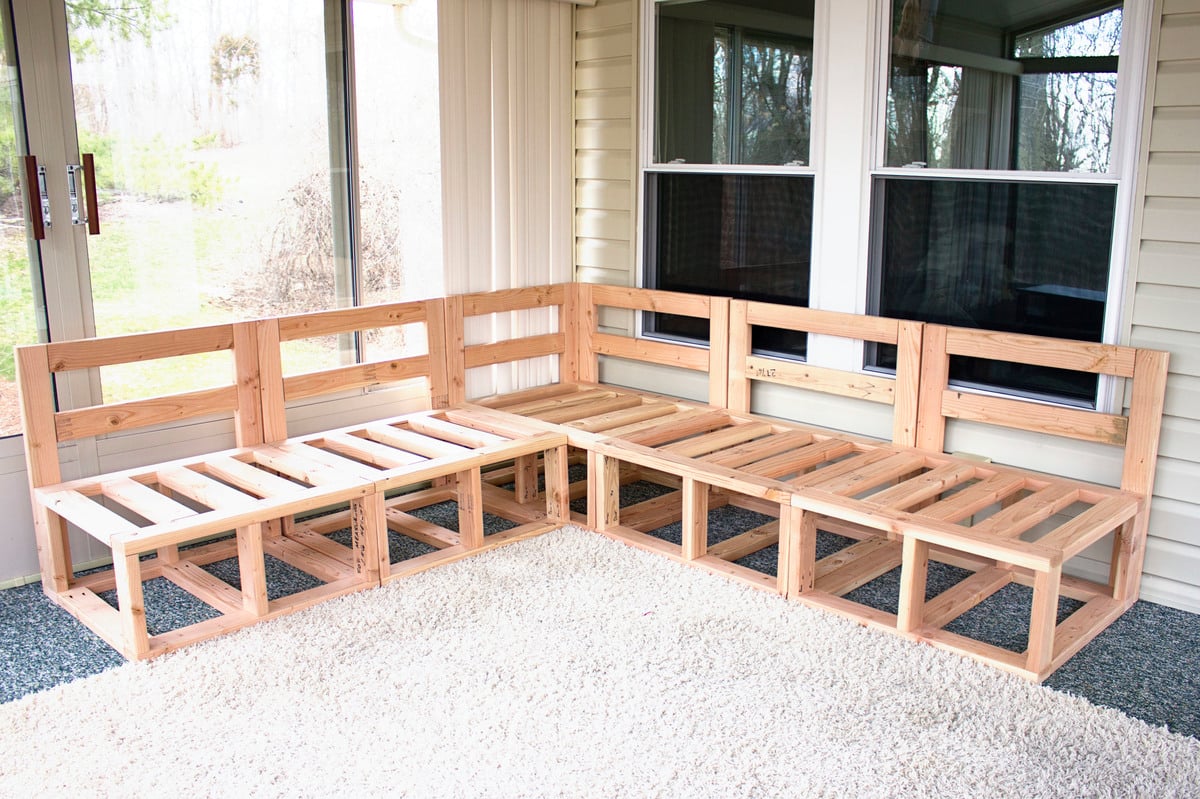
My next project will be the outdoor sectional. I'll be making 5 pieces, 1 corner and 5 armless pieces. Can't wait to start.
Happy building,
Keep Safe

Built from Plan(s)
Recommended Skill Level
Beginner

Comments

jakeaharper

Wed, 08/03/2016 - 06:03

I absolutely love this shed and the way you altered the design with one door. Can you please send me the measurements you used for this project? I would love to build this for my yard!

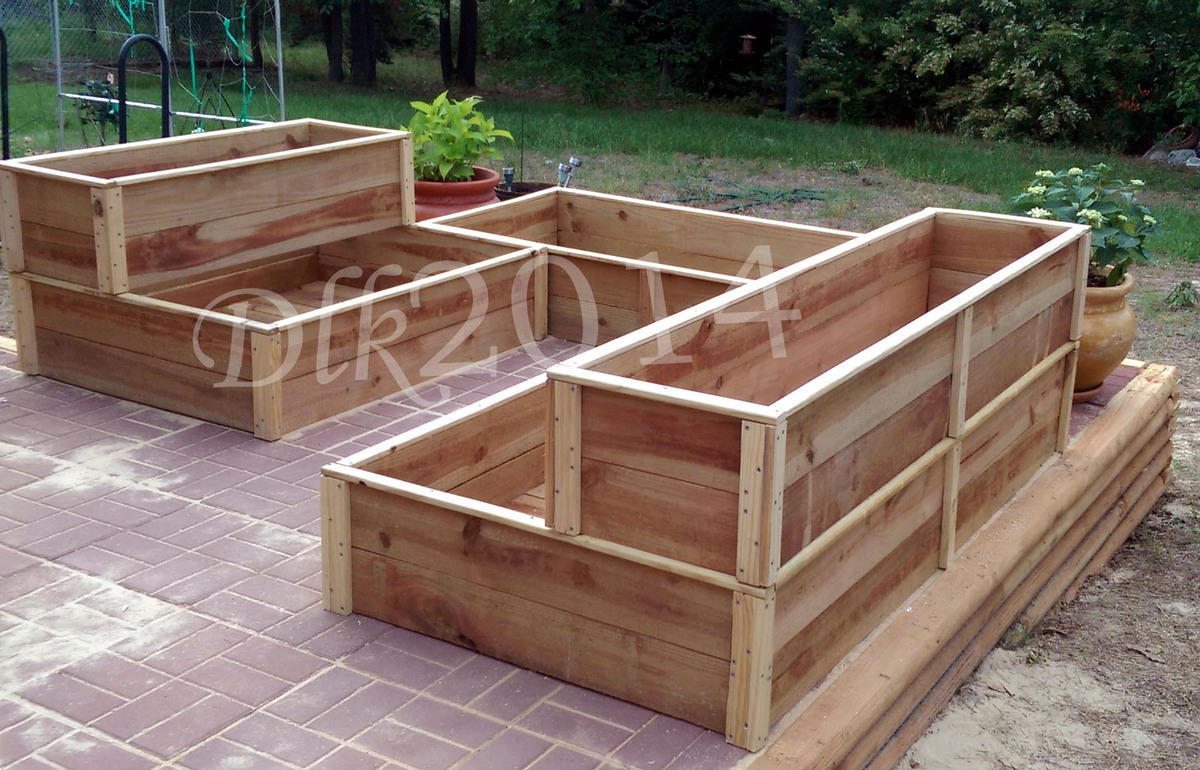
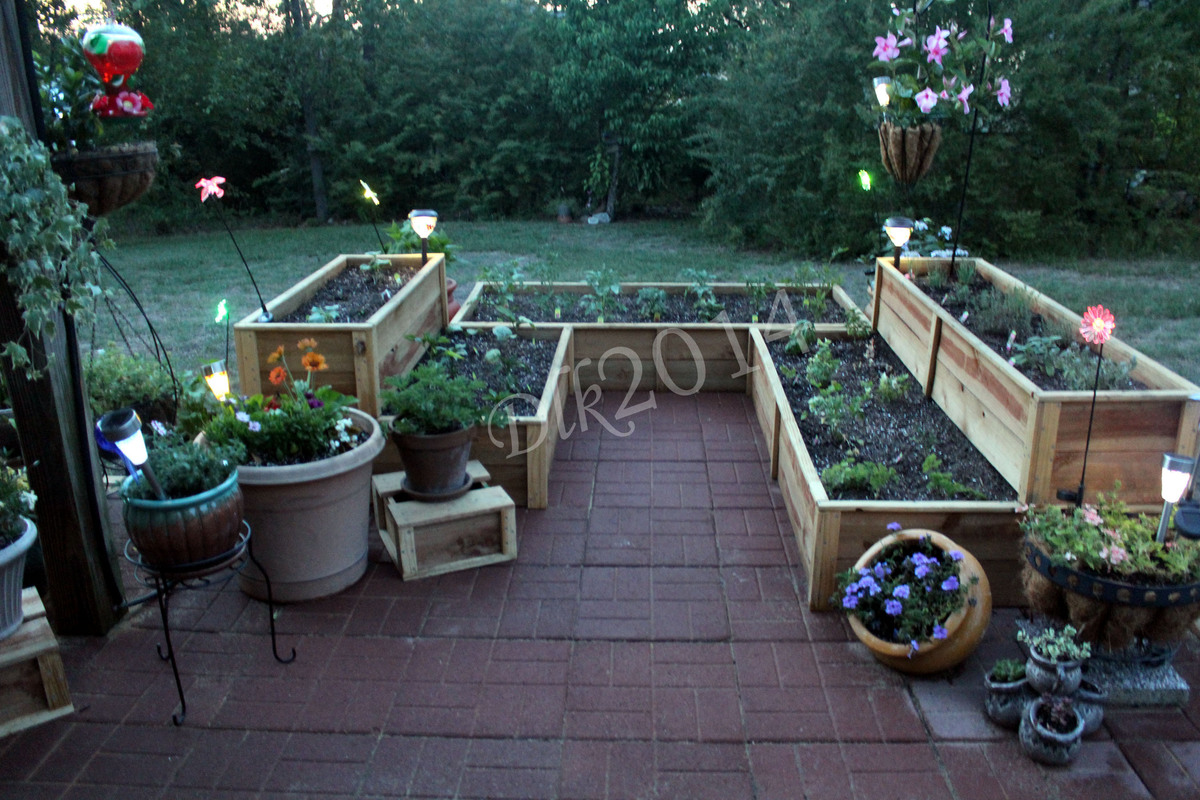
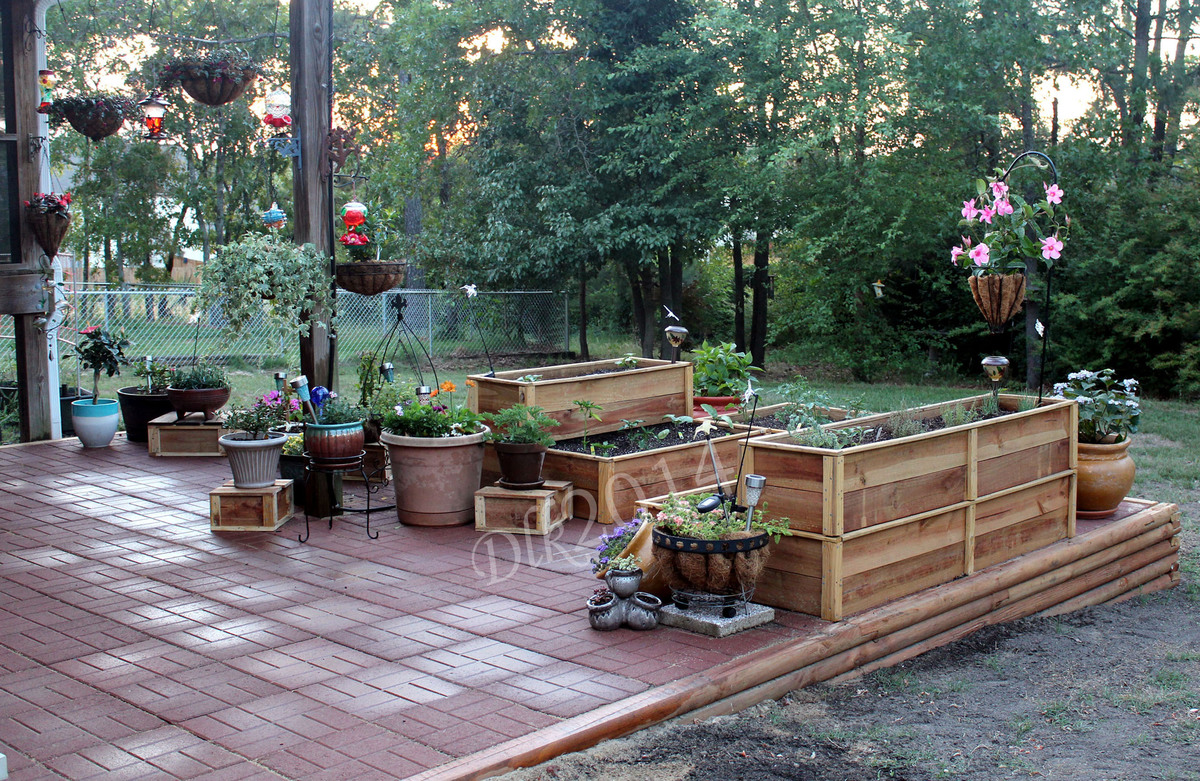
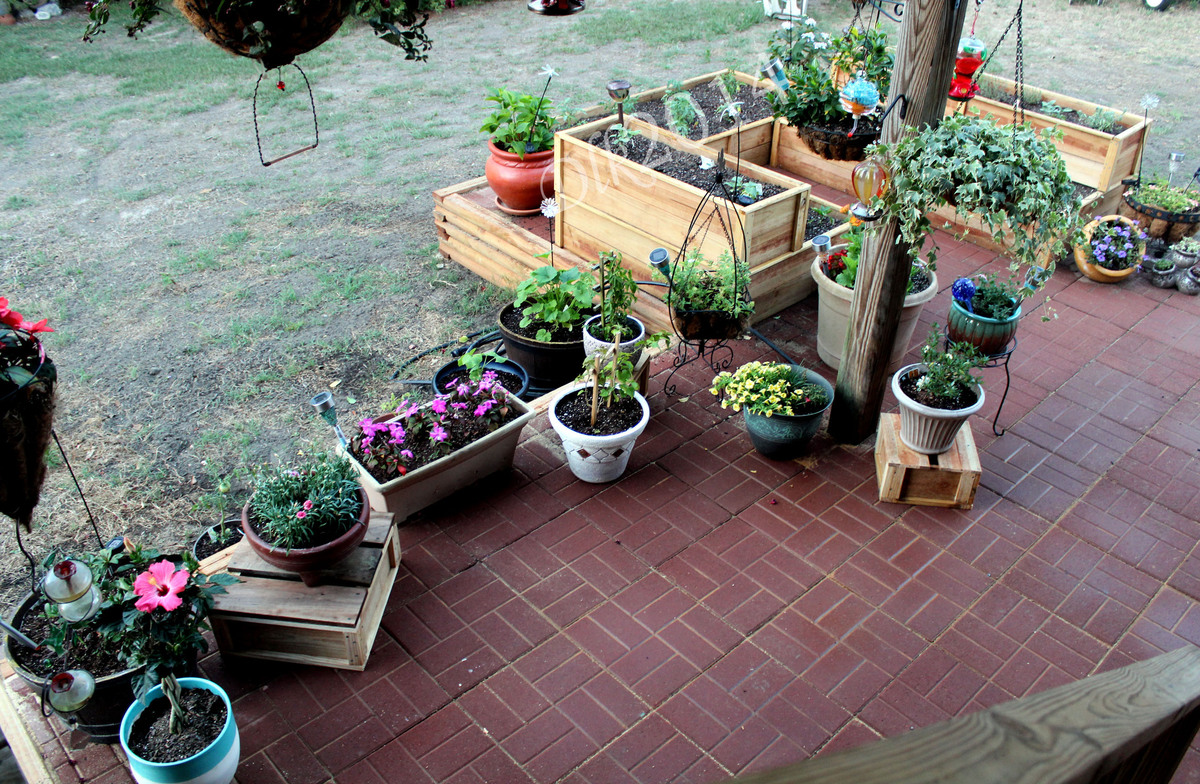
Raised Garden Beds

Submitted by Deekra on Sat, 06/07/2014 - 16:31

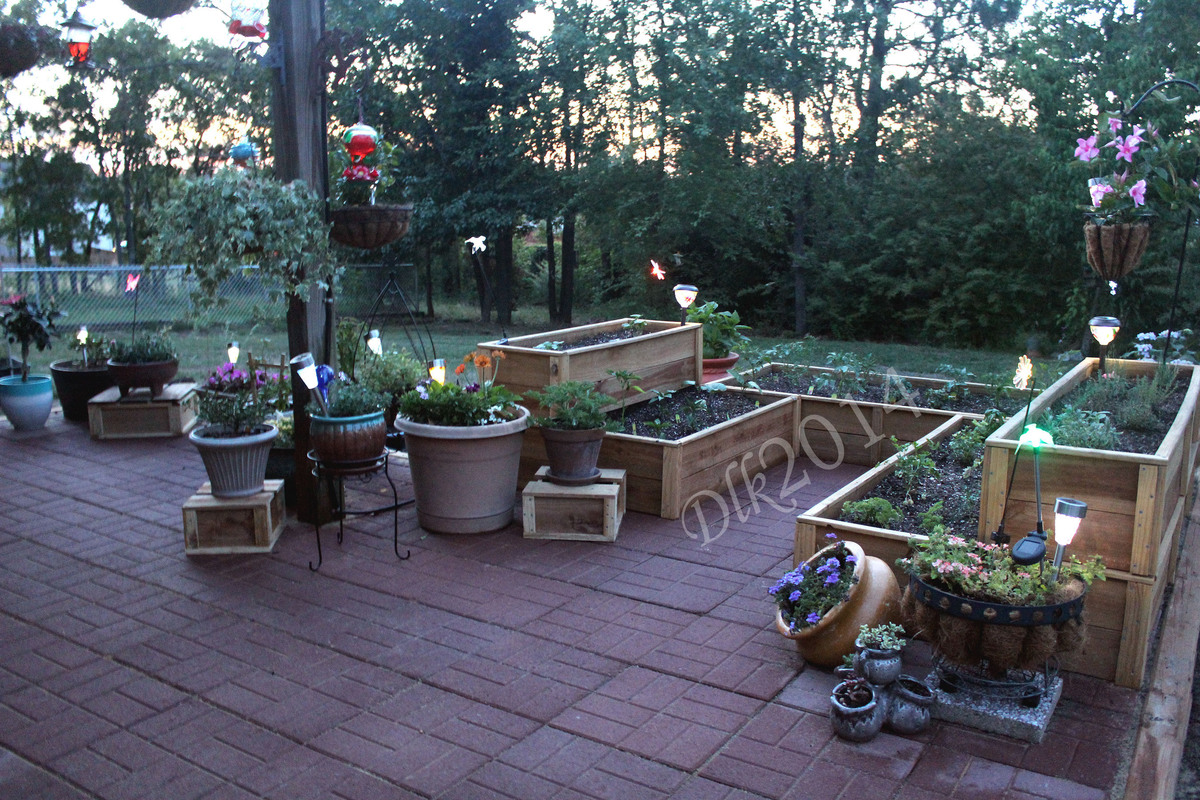
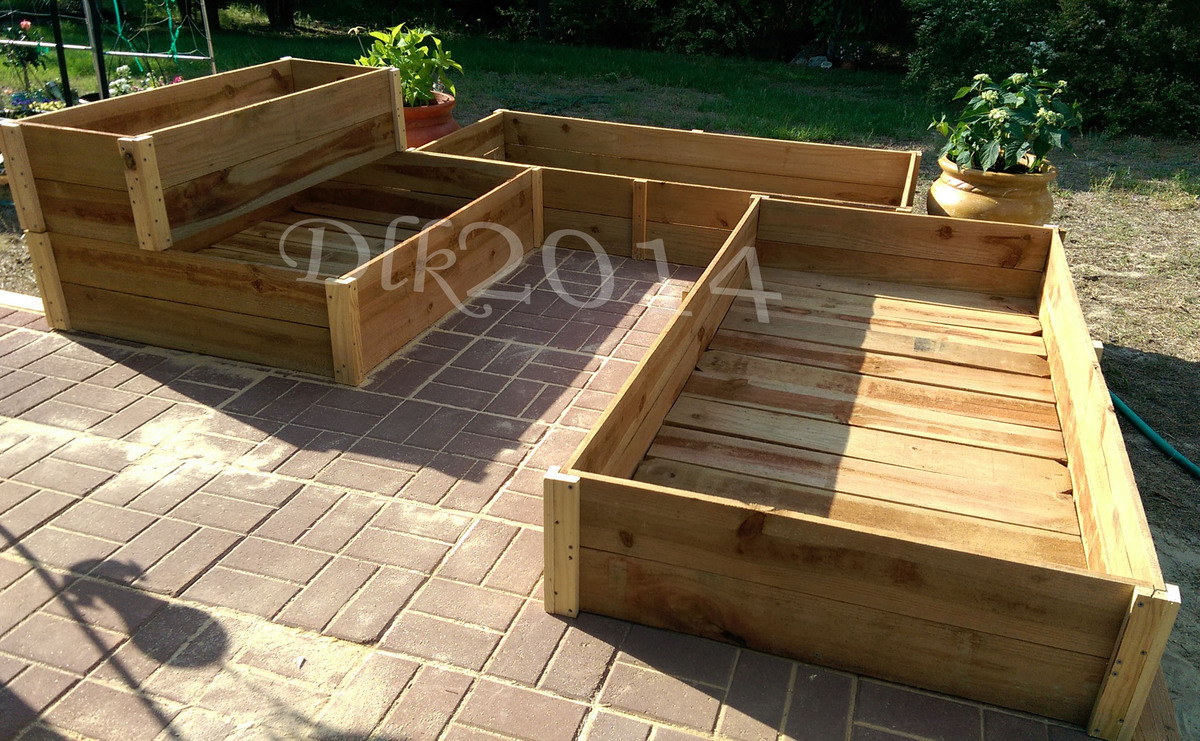
I used the basic Raised cedar garden bed plans with a few alterations. I made them different sizes, stacked one on top of the other for some dimension in my garden and secured them together from in inside.

Estimated Time Investment
Week Long Project (20 Hours or More)
Recommended Skill Level
Intermediate

Comments

Hidden Desk

Submitted by Anonymous (not verified) on Sat, 10/08/2016 - 12:24

I shrunk the size and dumbed down the plans to fit my skill level.

Built from Plan(s)
Estimated Cost
175
Estimated Time Investment
Weekend Project (10-20 Hours)
Finish Used
Walnut
Recommended Skill Level
Intermediate

Comments

Texastia

Mon, 10/10/2016 - 09:08

I love what you did! It looks so great! I prefer this style, which is more simplistic than the other. Great work!!


Jessi_ites

Tue, 10/11/2016 - 14:56

Thanks! I wish I would of set up an account before I posted so I could get notifications.  I honestly didn't think anyone would notice it :)

Jessi_ites

Tue, 10/11/2016 - 14:58

I am so excited that people noticed this :)  Is there any way of putting this under my account?  I didnt make an account until today and I would like to get notifications.   I have my project on my facebook page and can prove that I made it with other pictures. Thanks!

crstorm

Mon, 01/20/2020 - 07:44

I would love to see this in a farm-house (rather than rustic) aesthetic along with drawers under the seats for extra storage. Maybe on casters with a fold up extension on the other side? So many ideas running through my head with this!

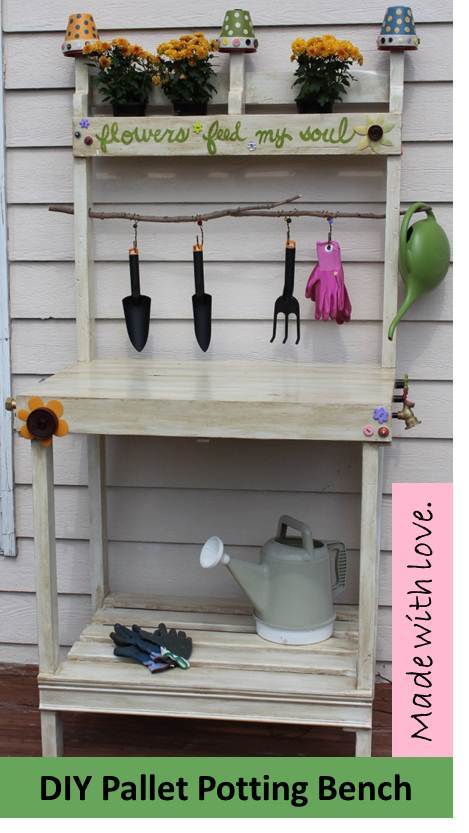
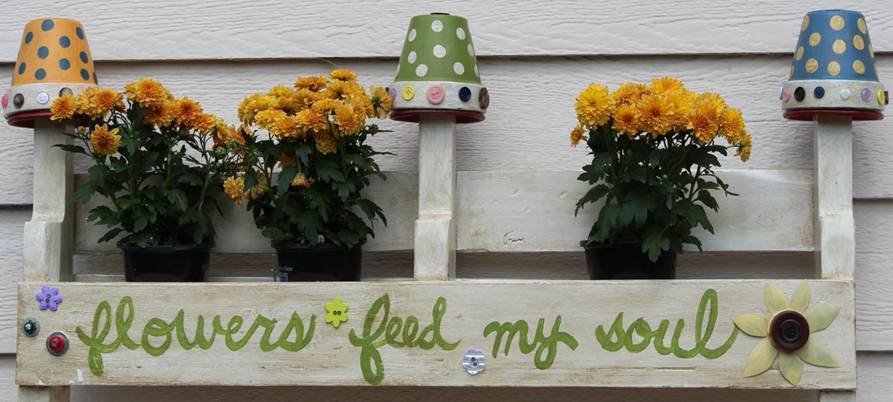
Cute DIY Pallet Potting Bench

Submitted by shampbel on Wed, 09/12/2012 - 20:33

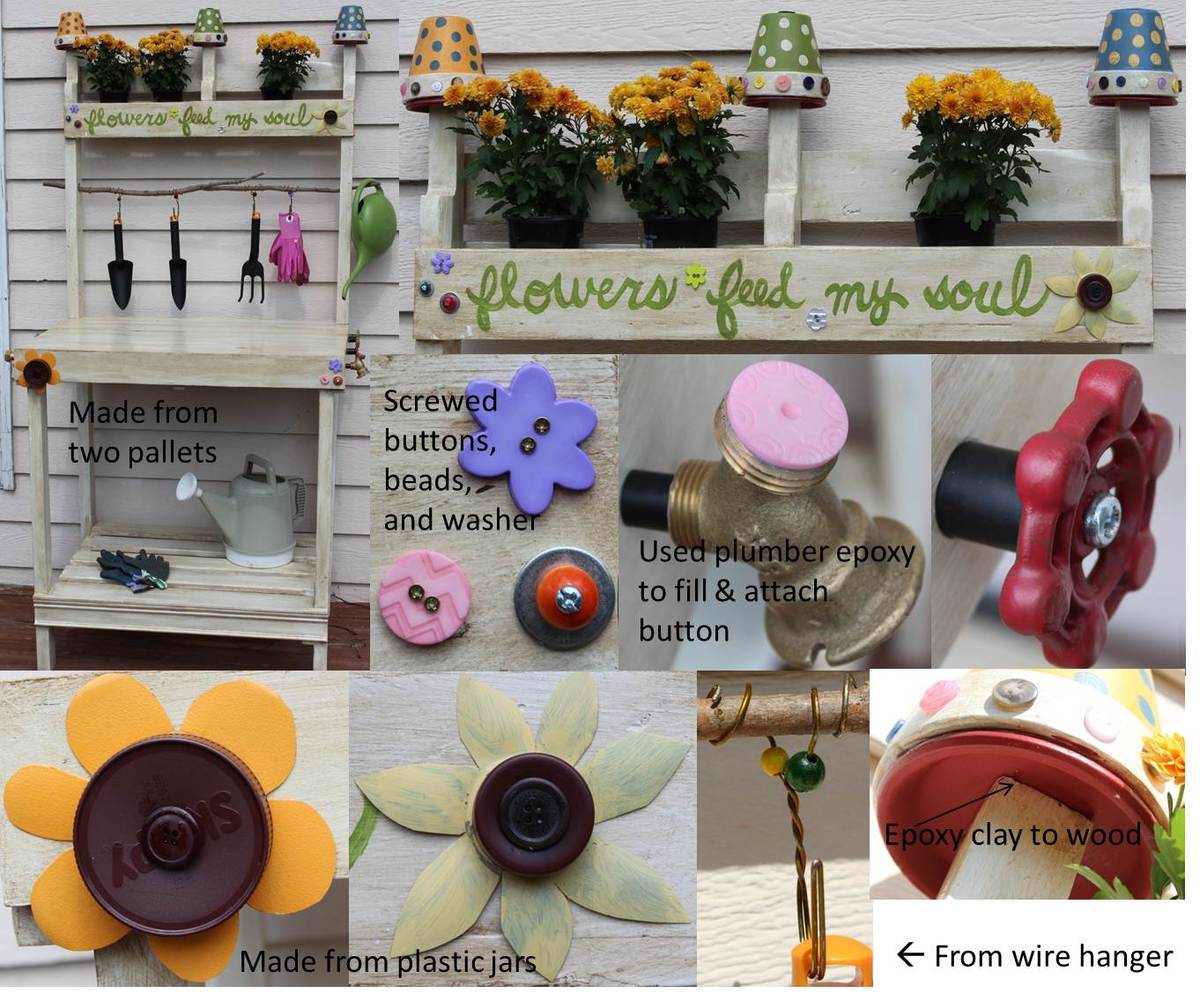
Made from 2 pallets, 2 x 6 x 8, leftover trim from my house, wood branch from my backyard. Attached shelf with pocket holes.

Accents:
-Handpainted lettering; painted prior to glazing entire piece
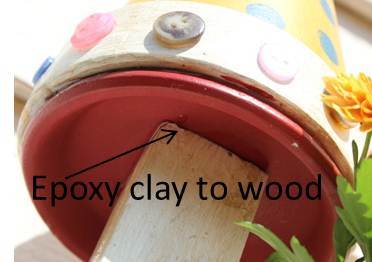
-Finials made from 4.25 inch spray painted and glazed clay pots and saucers coated with Valspar clear finish and attached together with epoxy; buttons attached to pots with E6000 adhesive
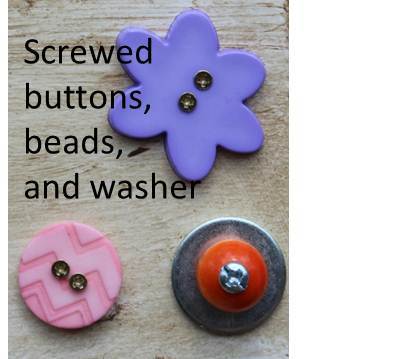
-Buttons attached mostly with small screws; a few with holes too small for screws were attached with epoxy
-Plastic flowers made from mayo and water bottles and lids; sanded, primed, spray painted, coated with Valspar clear coating; attached with screws
-Faucet knobs sanded, spray painted, glazed and attached with screws
-Plumbing pipe filled with plumber epoxy puttty; insert screw into putty before it hardened, then screwed into wood
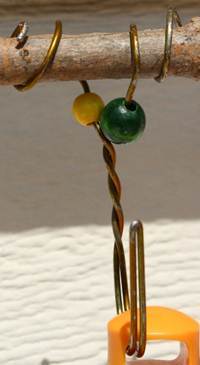
-Gardening tool hooks made from pant wire hangers with a few beads attached; wire simply wrapped around tree branch

Not sure that I will use pallet wood again since difficult to pull apart pallets, uneven and some split boards could not be used, and required tons of sanding for those boards that could be used. I think I paid more for orbital sanding pads than the cost of buying new wood. Will use pallet wood for other non-furniture projects not requiring a perfect finish.

Estimated Cost
$40.00
Estimated Time Investment
Week Long Project (20 Hours or More)
Finish Used
Kids distressed with hammers, sanded with 80 grit, Kilz Primer (1 coat), Sherwin Williams Exterior White Latex Paint (1 coat), Behr Glaze tinted with Brown Latex, Spar Urethane (3 coats)
Recommended Skill Level
Beginner

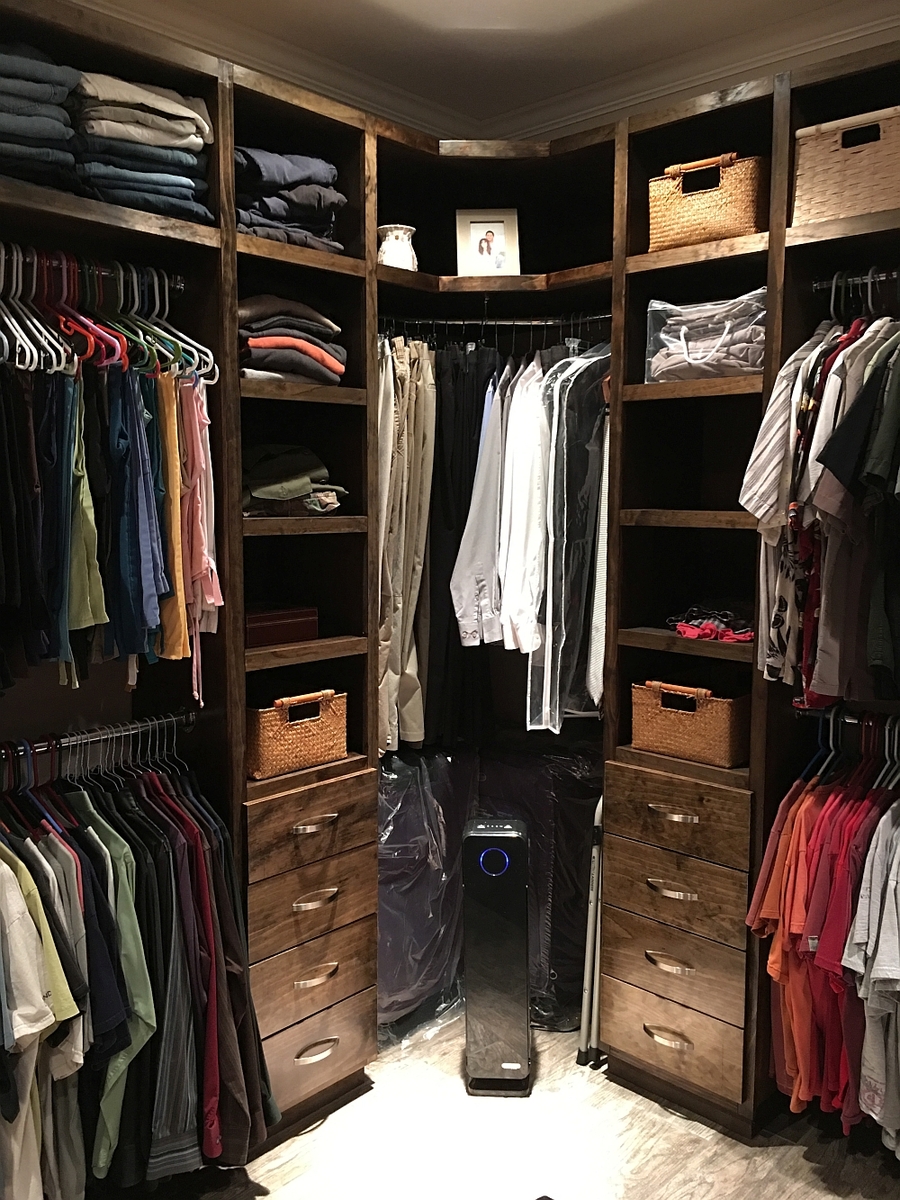
Walkin Closet for my Wife

Submitted by Indy69 on Mon, 10/24/2016 - 09:52

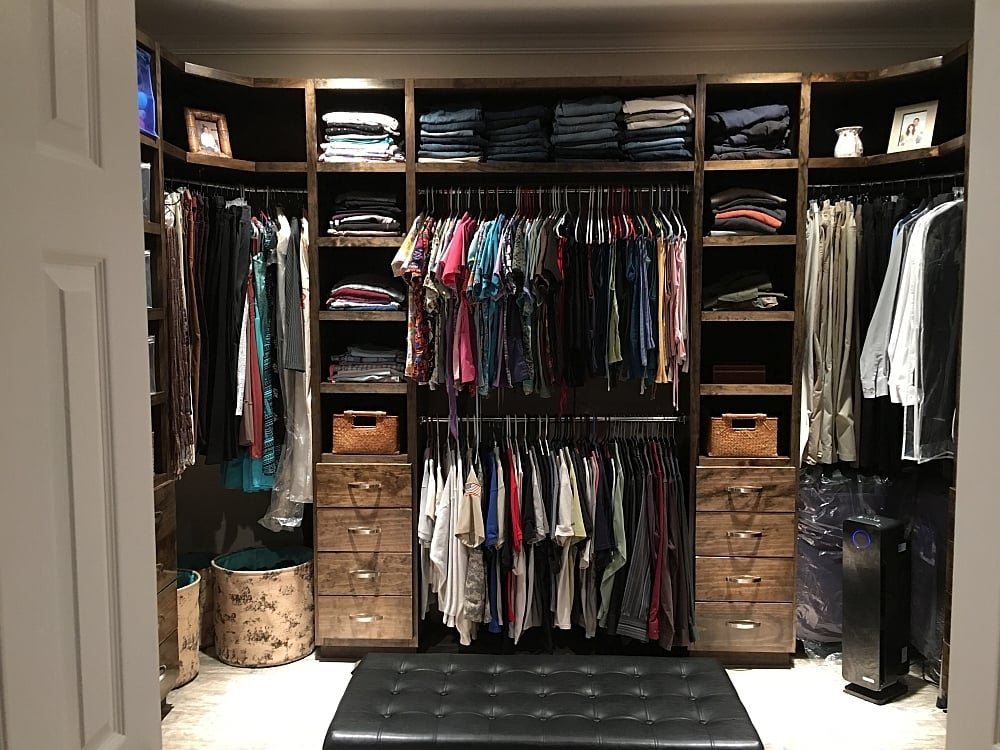
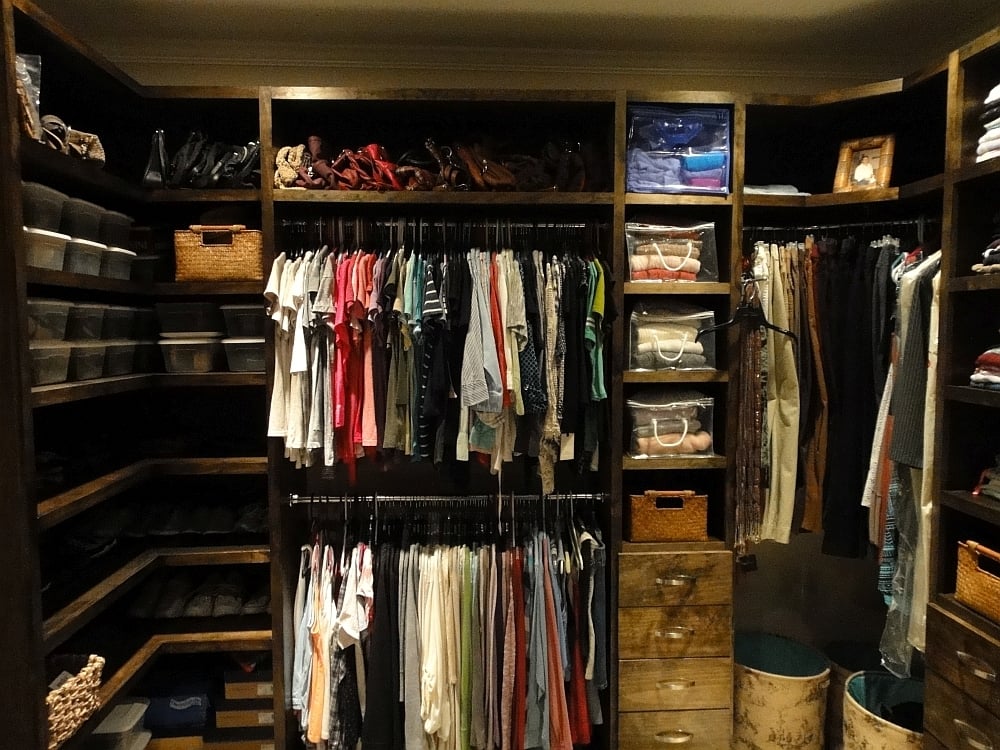
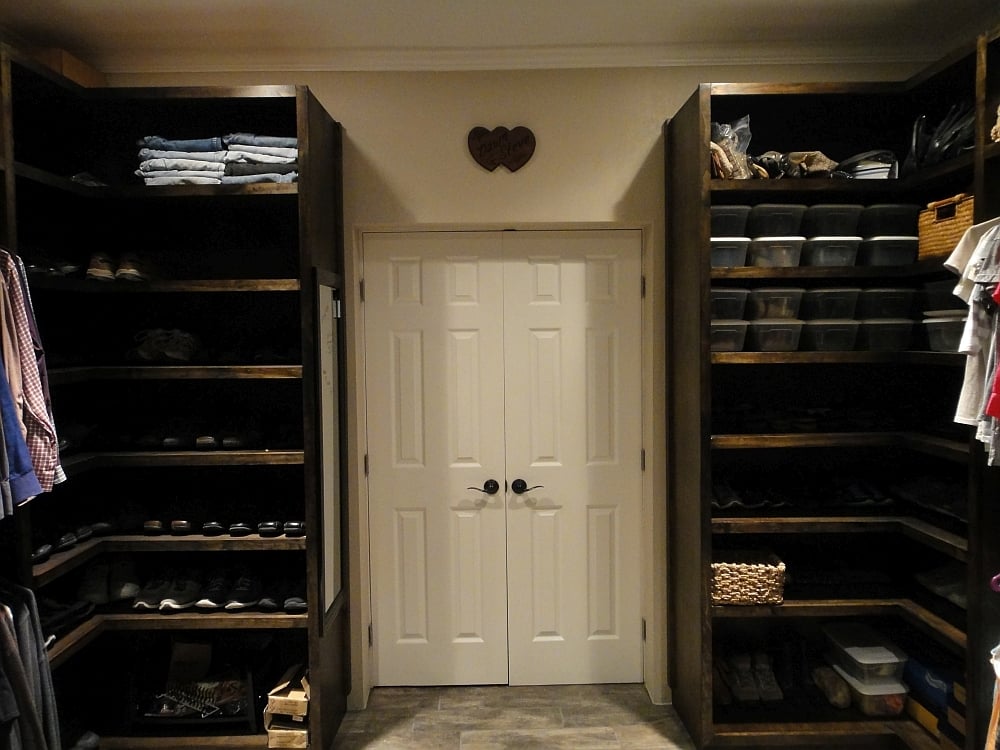
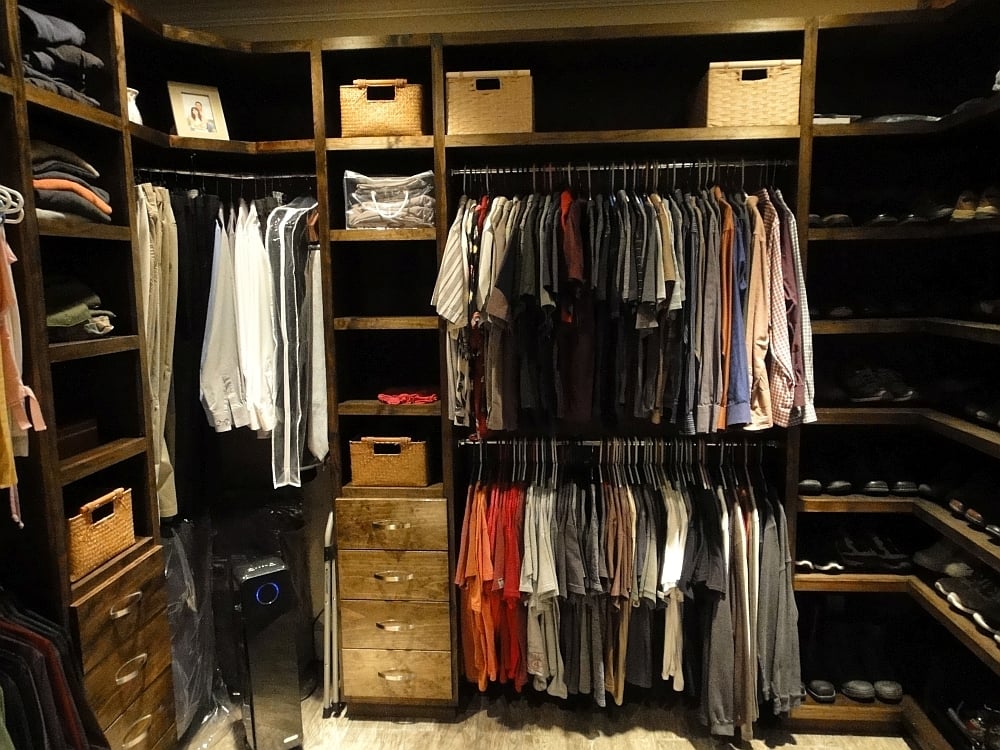
I built this closet system based on the plans here.  So easy and so basic, just putting them all together to make a very nice looking closet setup.  I used 12 sheets of birch plywood, and premium select 1x2 pine.  All stained in Minwax Jacobean and satin clear througout with semi-gloss clear on the drawer fronts.

For the rods, I used chainlink top bars, which cost $6 for a 10' piece, and used #0000 steel wool to buff them out and then polished them.  For the 45 degree corners, I used 1" electrical conduit, and placed two 45 degree bend in each piece, and again steel wool and polished them as well. 

For the drawers, I used soft-close slides.  When using these, I highly recommend installing the rear brackets as well, as they make installation so much easier.  16 pairs of soft-close drawer slides with brackets cost $120 for all of them on Amazon.


Estimated Cost
Under $1,000
Estimated Time Investment
Week Long Project (20 Hours or More)
Finish Used
Minwax Jacobean in satin and semi-gloss
Recommended Skill Level
Intermediate

Comments

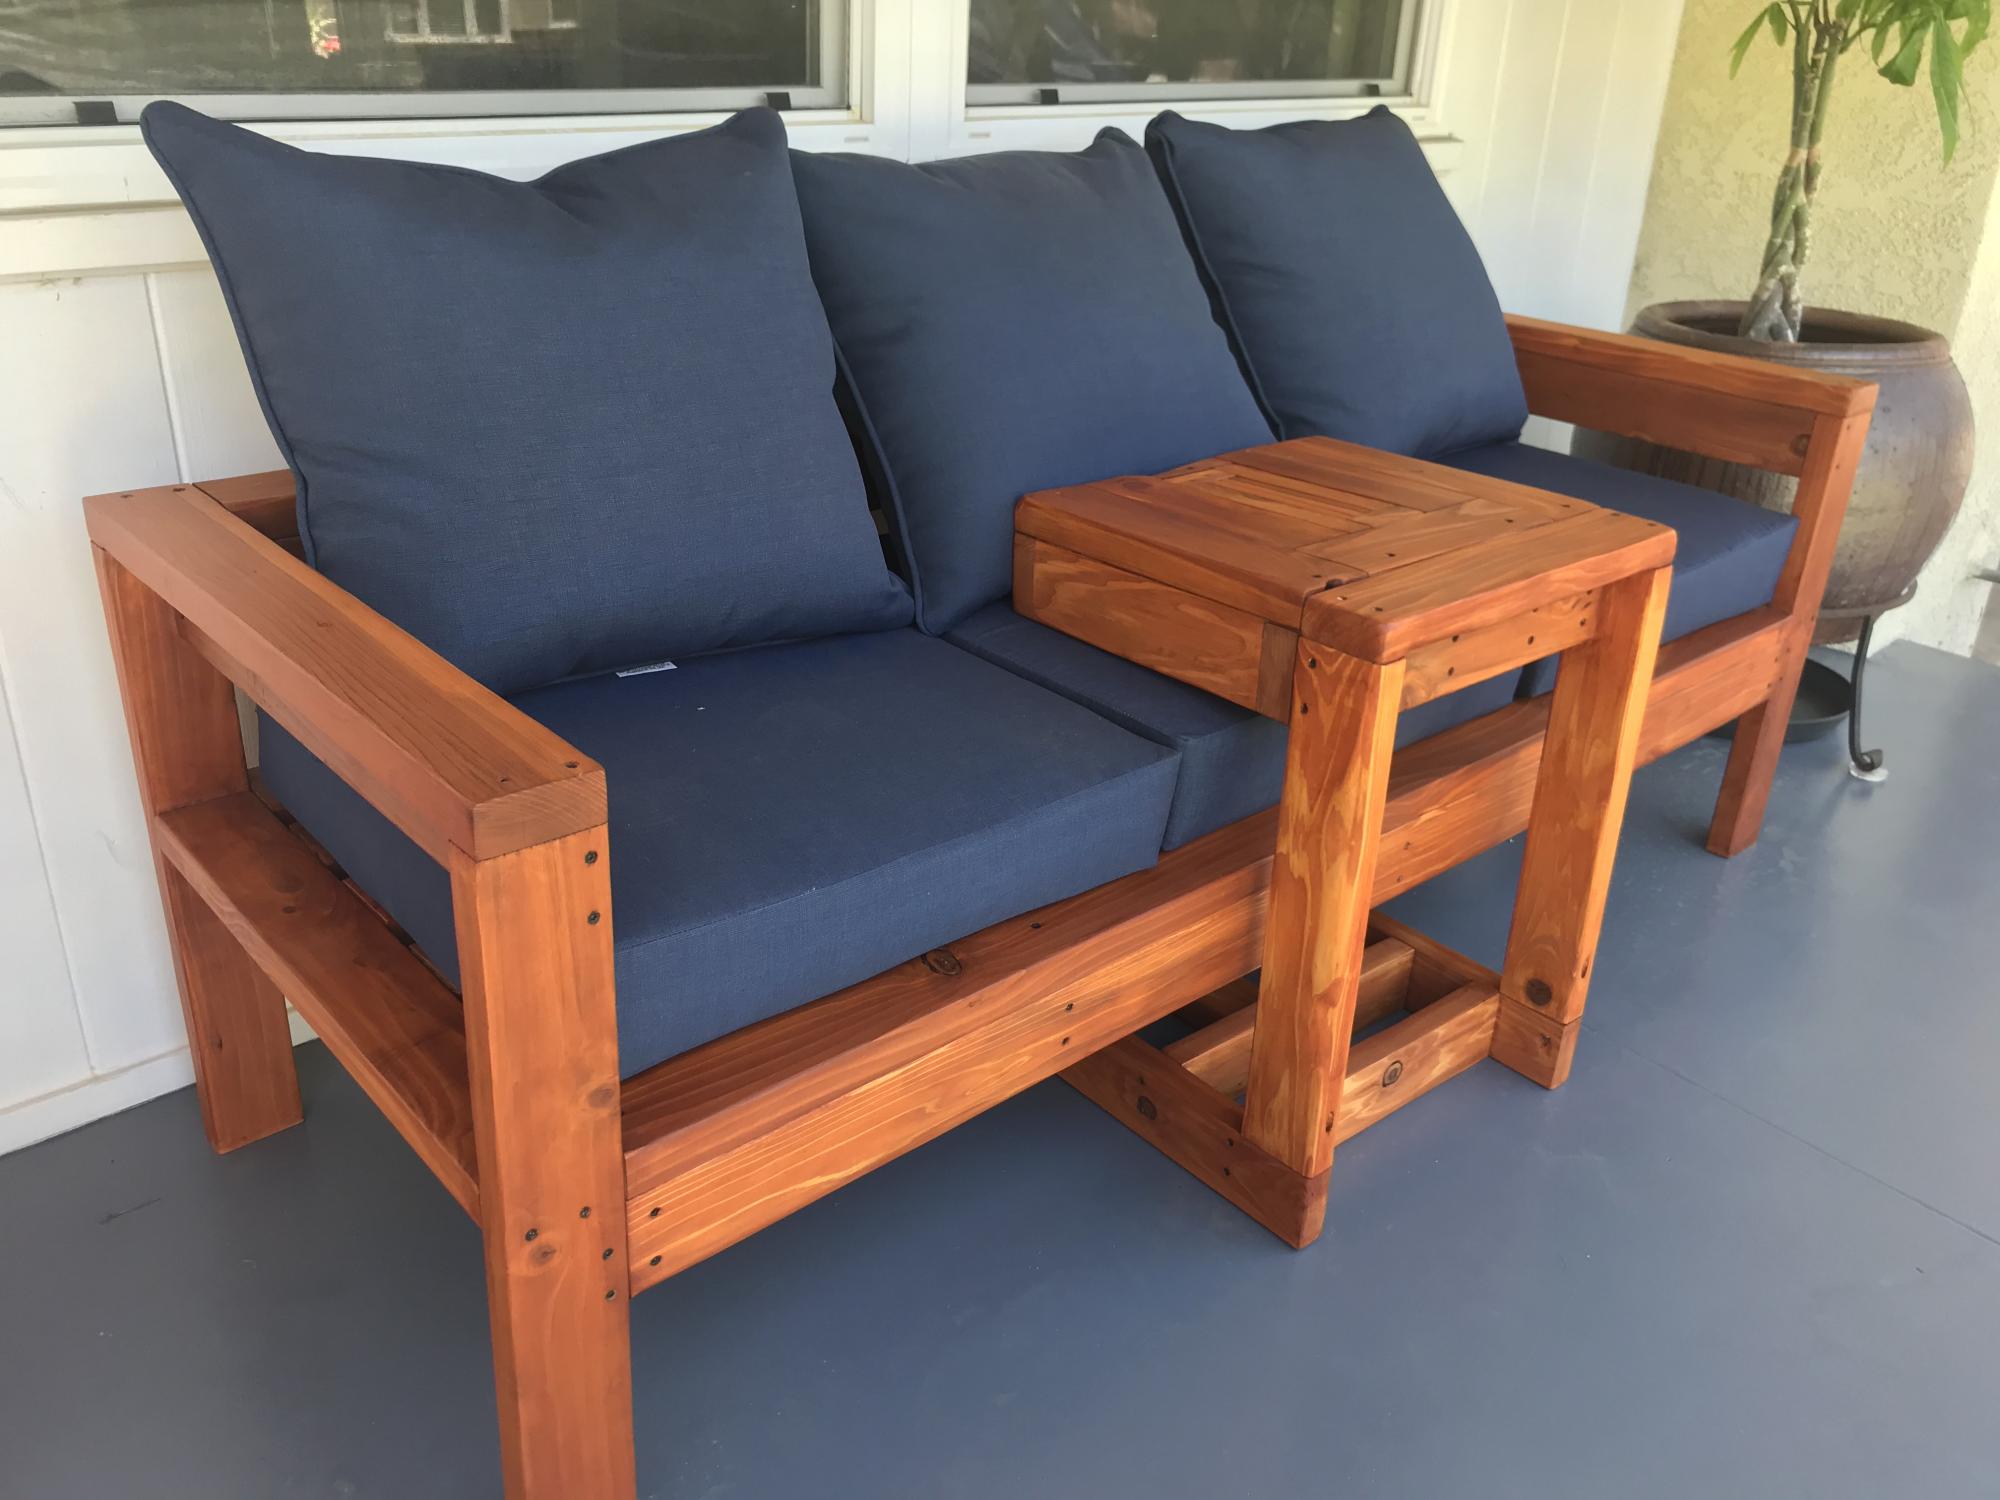
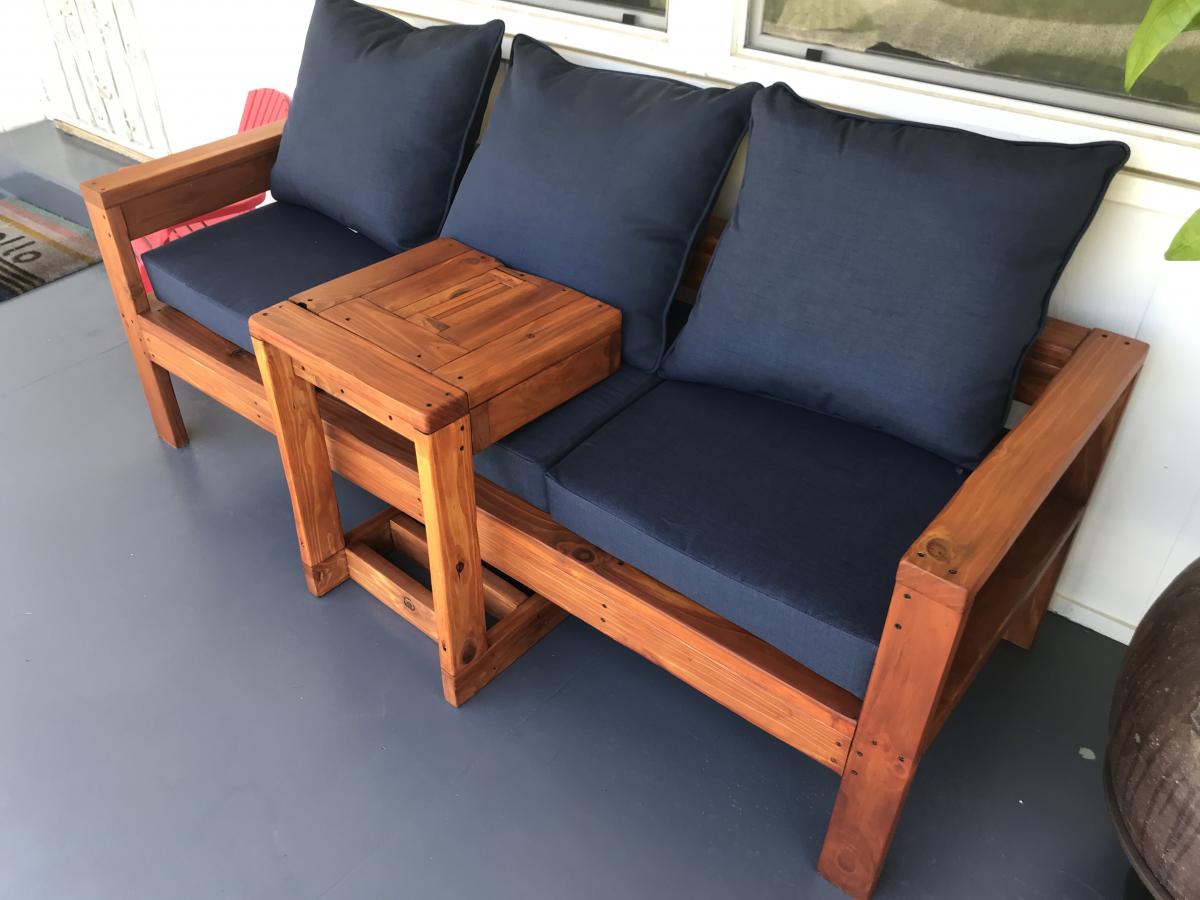
DIY sofa couch / slide in coffee table

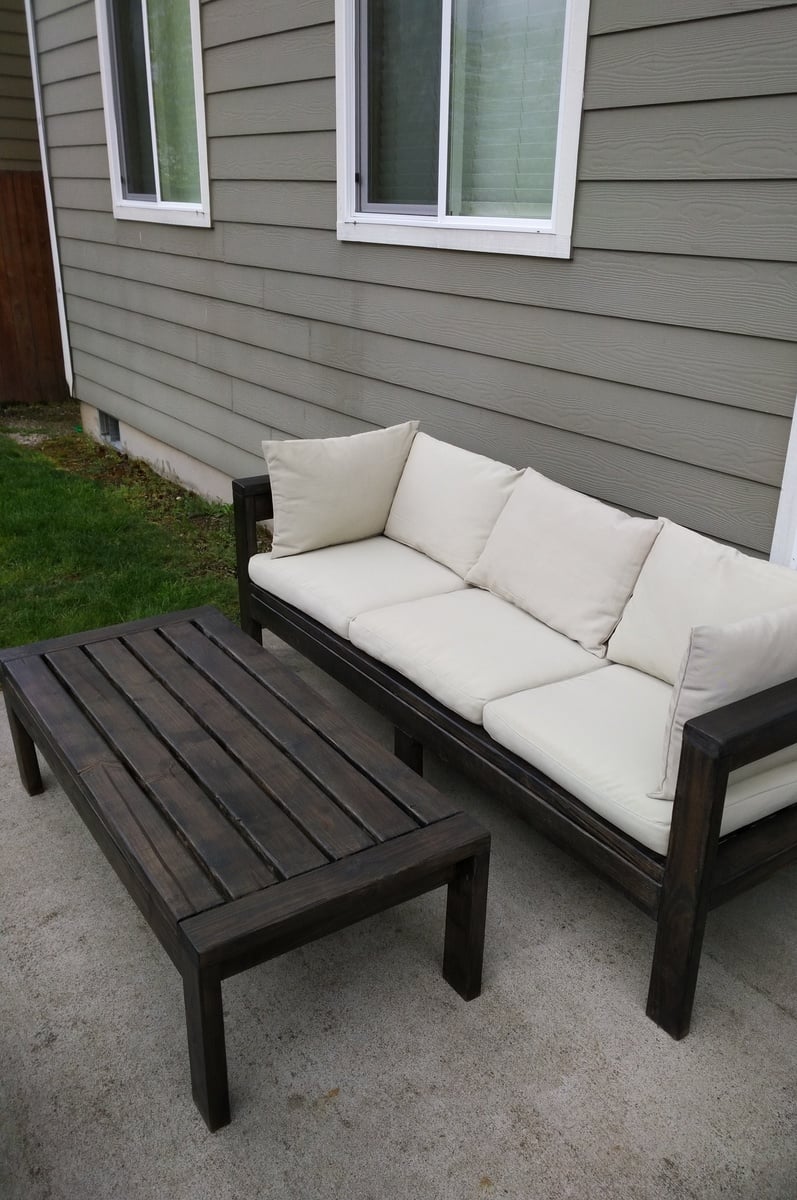
Ana has great instructions, definitely have been using her alot. During the pandemic picked up a couple new hobbies and tools. I did the sofa couch from her plans. The coffee table I created off the whim but used her basic instructions on how to make table tops / benches. These came out super nice, surprised me and my wife :)

Estimated Time Investment
Weekend Project (10-20 Hours)
Finish Used
Sanded several times varying 120 / 180 / 220. Stained with Valspar semi-transparent natural redwood naturaltone.
Recommended Skill Level
Beginner

Comments

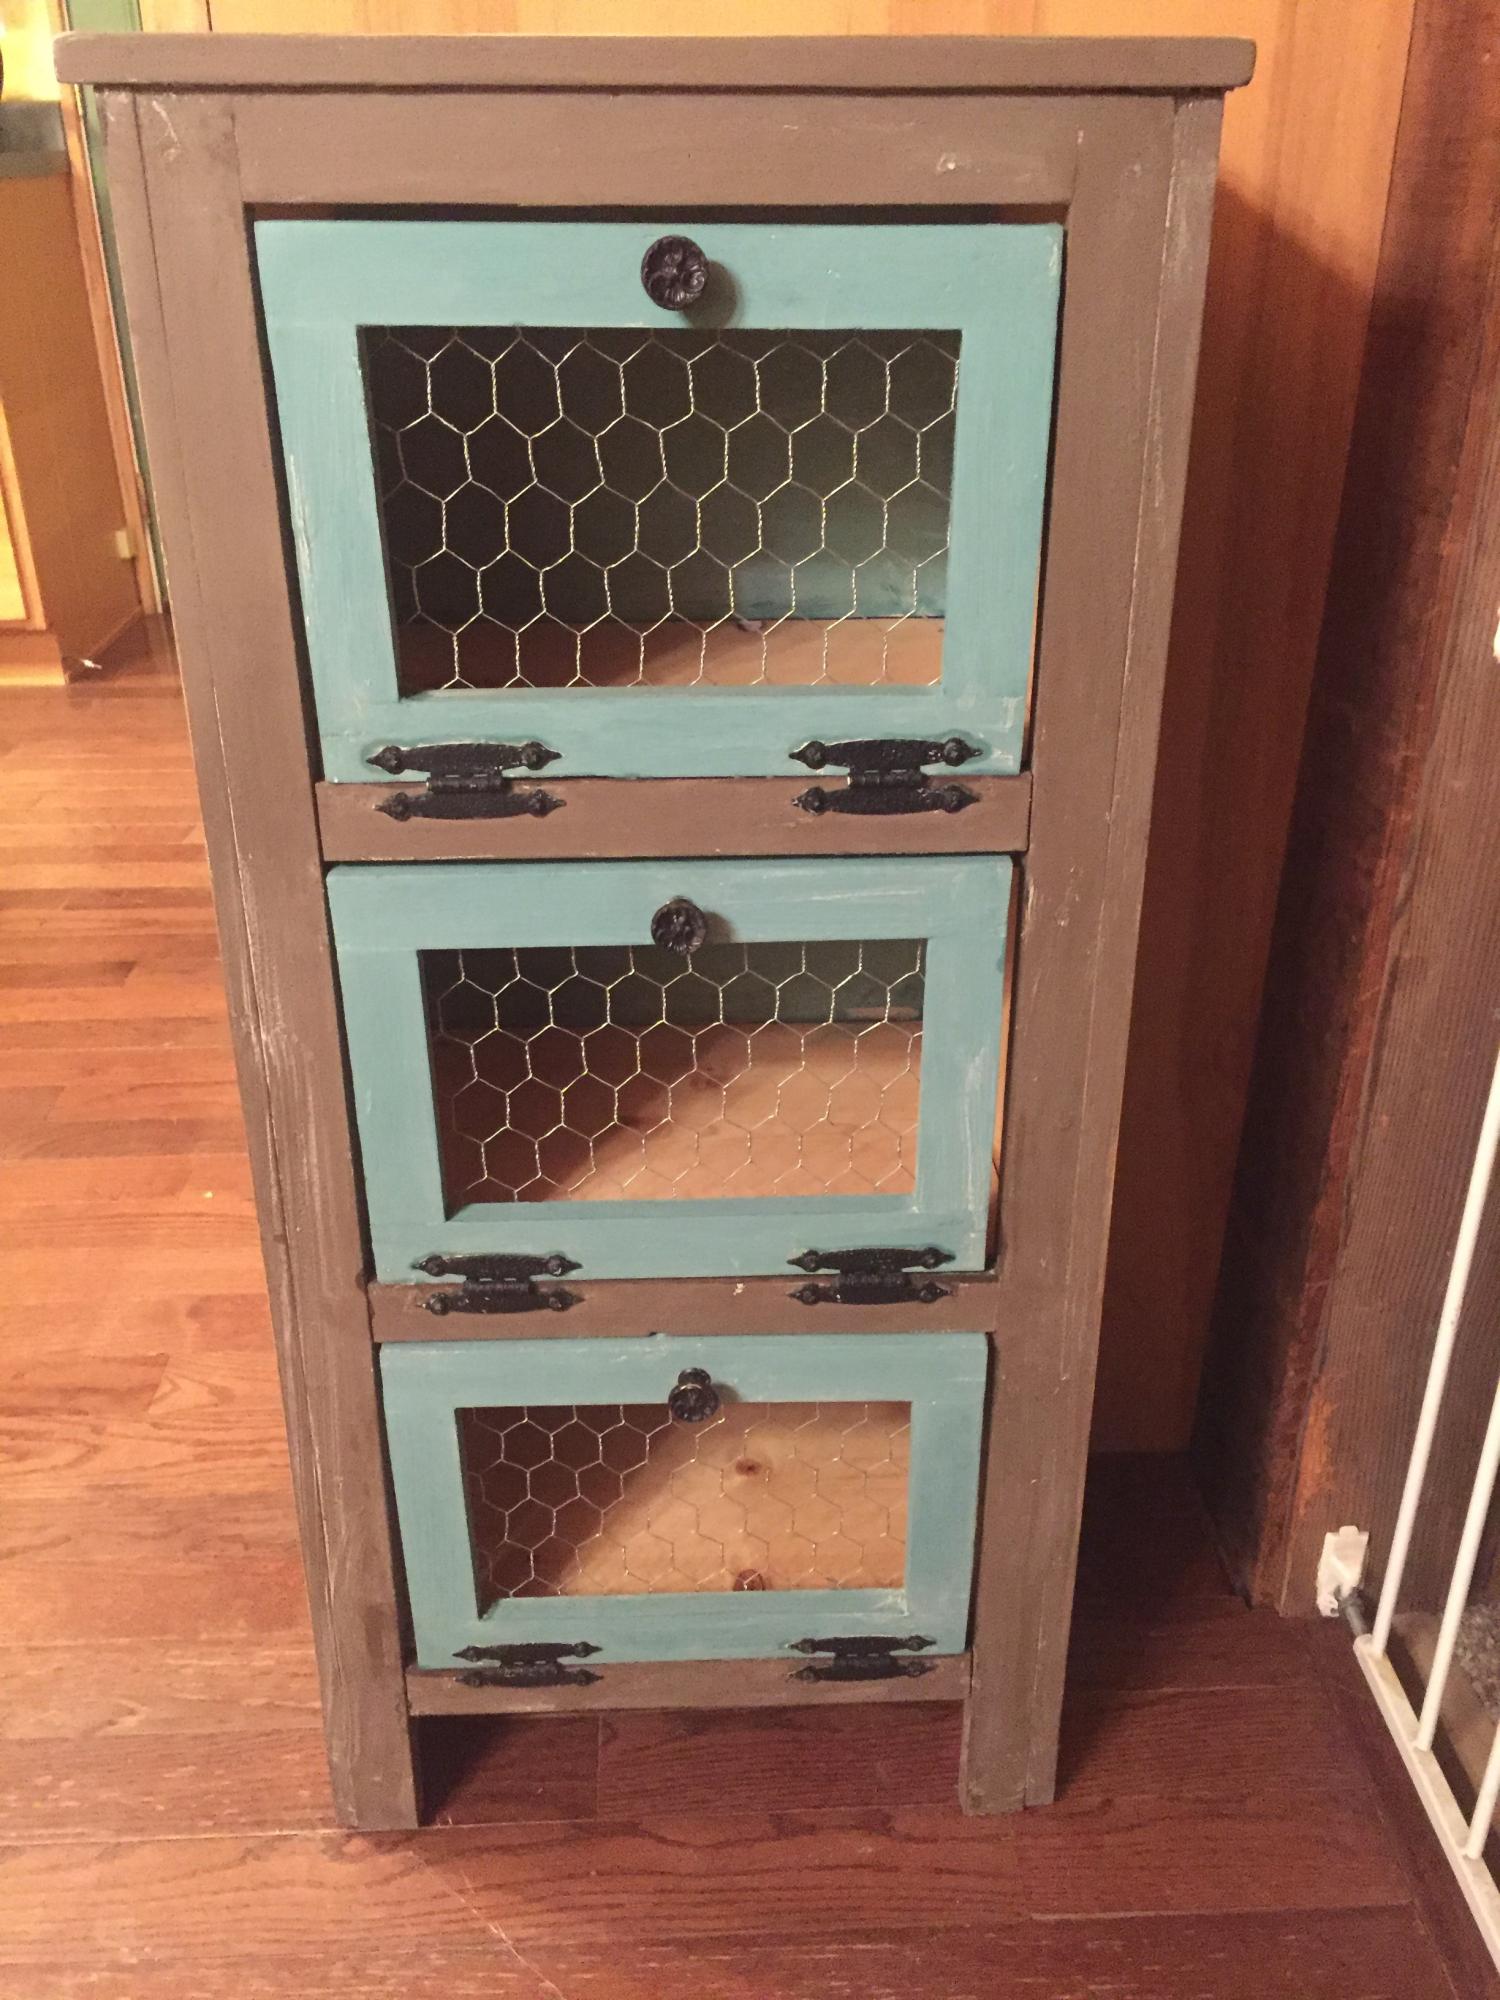
vegetable produce bin

Submitted by Anonymous (not verified) on Fri, 11/25/2016 - 00:54

The plans seemed ok for me. I used all scrap lumber I had laying around. I bought a kreg jig in the middle of this project, after watching one of Ana's vidoes's about pocket holes. That is one reason why I built the 3 doors all twice, but also swapped out the top piece of the bin 3x's before I finally settled. In other words, I really struggled with this, but I was so excited to perservere and have this completed!  

I haven't wanted to make one of these for a long time. Thank you so much for the site and all the plans! I love all your work and your style. 

Built from Plan(s)
Estimated Cost
used all scrap wood, bought hinged so maybe $10
Estimated Time Investment
Weekend Project (10-20 Hours)
Finish Used
chalk paint-seafoam and chocolate
Recommended Skill Level
Beginner

Outdoor Deck Tables

Submitted by Scott-F on Sun, 10/11/2020 - 18:34

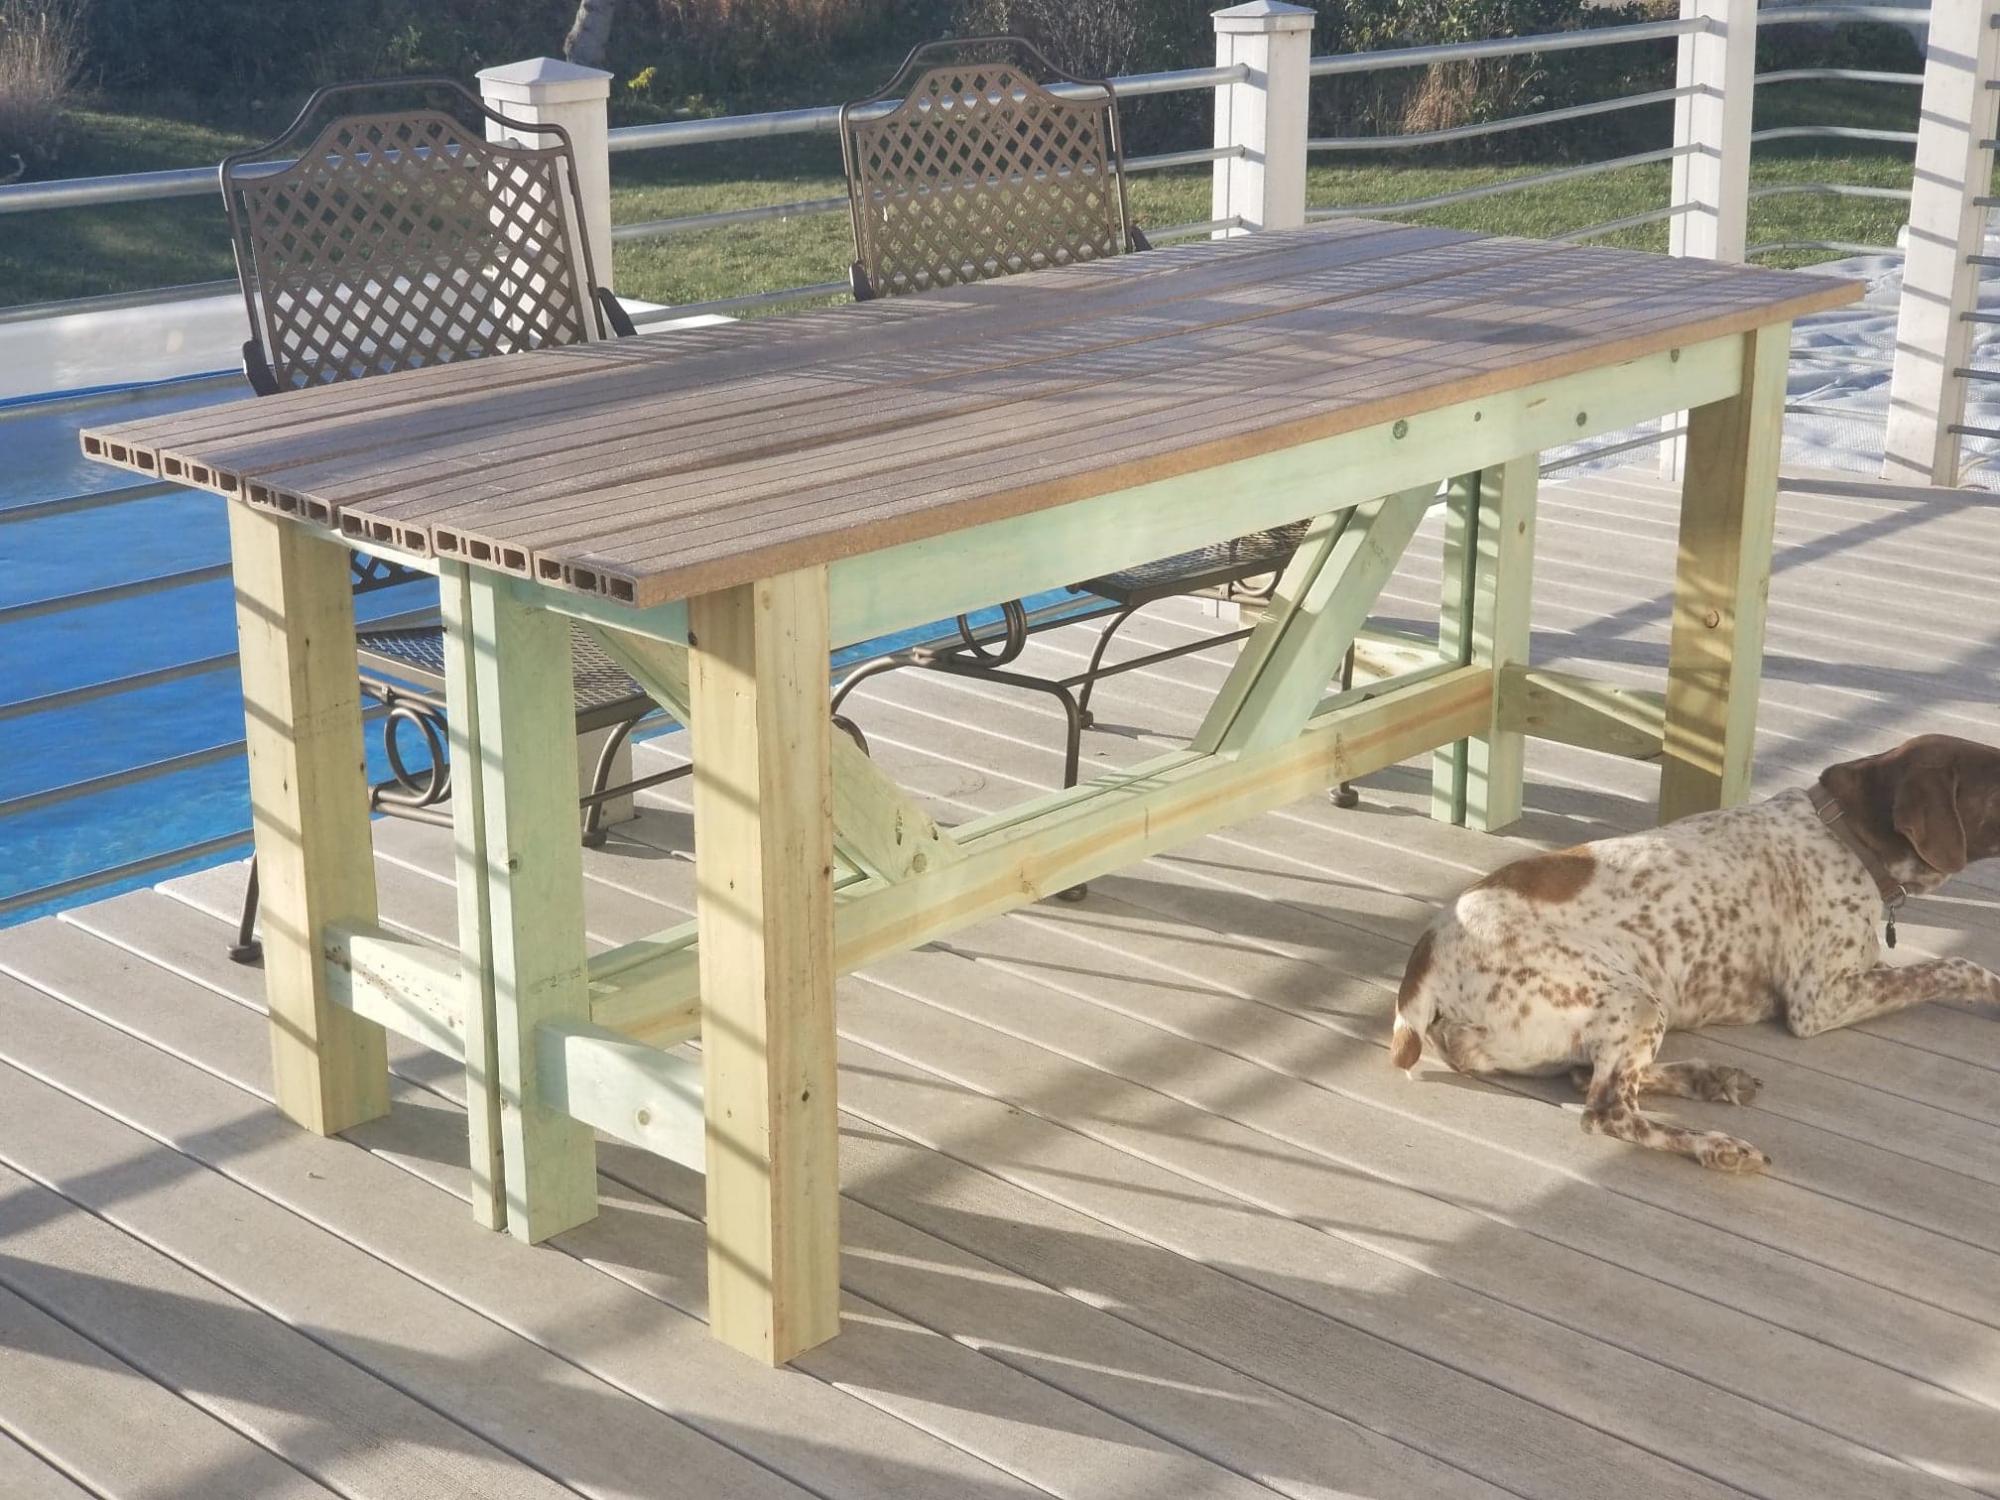
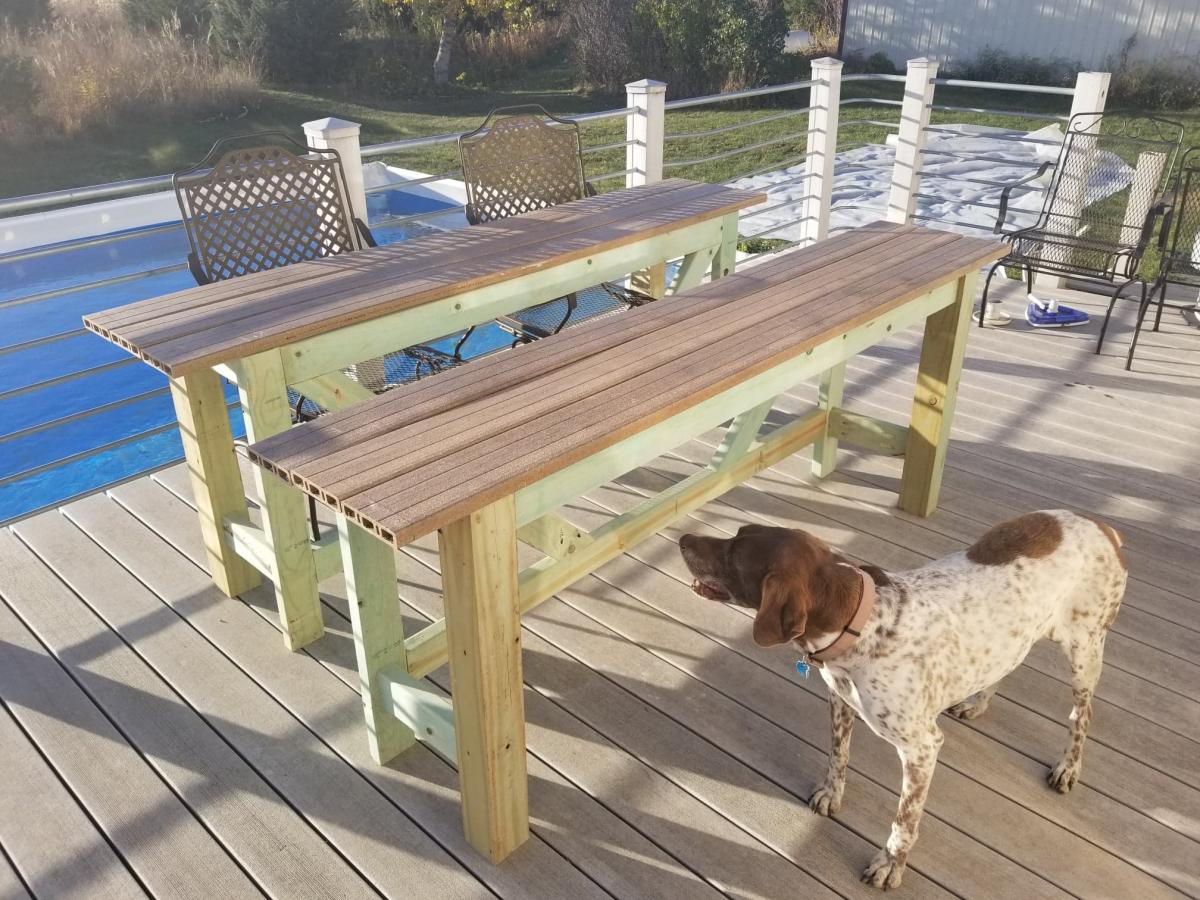
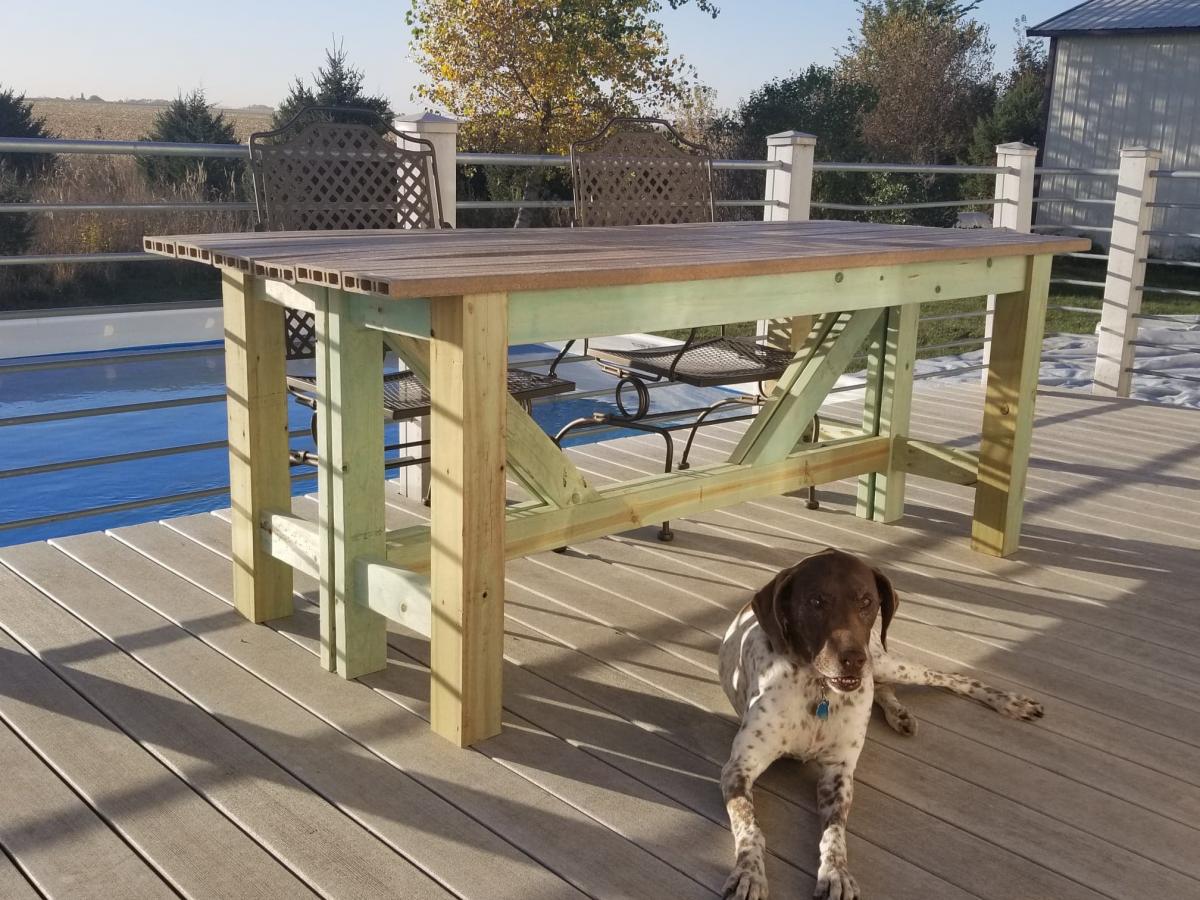
My wife and I were looking for a dining table for our deck. We looked at a few to purchase but could not decide. I wanted something that would not take up a lot of deck space. When the Facebook post for the "Outdoor Bar Table" came up, it inspired me to try to build a similar table. I already had purchased a Kreg HD pockethole jig for a project I never got to (At least yet), so I figured construction would be pretty simple.

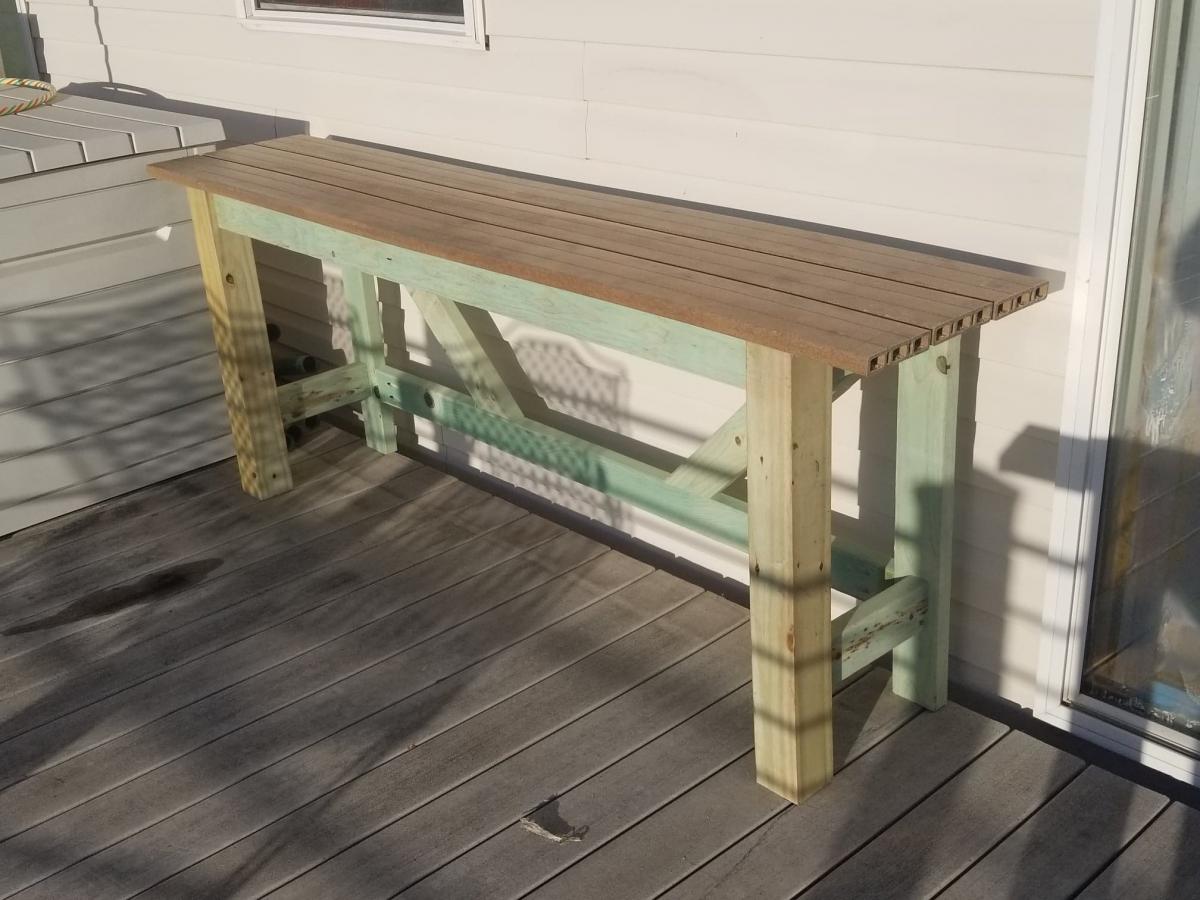
I should say my tables are loosely based off of Ana's plans, they served as a good reference. I lowered the table to 30" to match our existing deck chairs. I decided to actually build 2 half tables, so that when we were not using the table they could be set to the side of the deck. The back of each table is constructed with 2x4s so when the tables are put together it maintains the 4x4 look.

For the tabletop I had extra composite deck boards that I never used for the deck, so the depth of each half table was based on using 3 deck boards, with a 1/4" gap between each deck board. I used the same hidden fastener method I used on the original deck, so the deck boards are secured from under the table.

This being my first pocket hole project, there are a couple of small mistakes. 1) On the 45 degree trusses cut all 4 at the same time, then did the pocket holes. I missed the fact that I needed to drill 2 of the pocket holes on the opposite side. 2) I built the 2nd table back on top of the 1st table back so they matched. but I got mixed up when assembling the 2nd table so the pocket holes that should have been on the side facing the other table back, are facing the opposite side.

I did use Treated lumber for the table frame, and some of the pieces were still pretty wet, so we will wait until next year to paint the base.

We really like how they turned out, and that we still have almost all of our deck space when the tables are in the "Stored" locations.

Built from Plan(s)
Estimated Cost
$85
Estimated Time Investment
Afternoon Project (3-6 Hours)
Finish Used
None as of yet, Plan on painting after treated wood dries out
Recommended Skill Level
Starter Project

Comments

Sandbox with seats

Submitted by Anonymous (not verified) on Mon, 02/13/2017 - 22:09

This was my first project ever. I had a lot of fun and it didn't quite turn out right but next time it will be perfect.

Built from Plan(s)
Estimated Cost
$65
Estimated Time Investment
Day Project (6-9 Hours)
Finish Used
Thompson water seal in cedar
Recommended Skill Level
Beginner

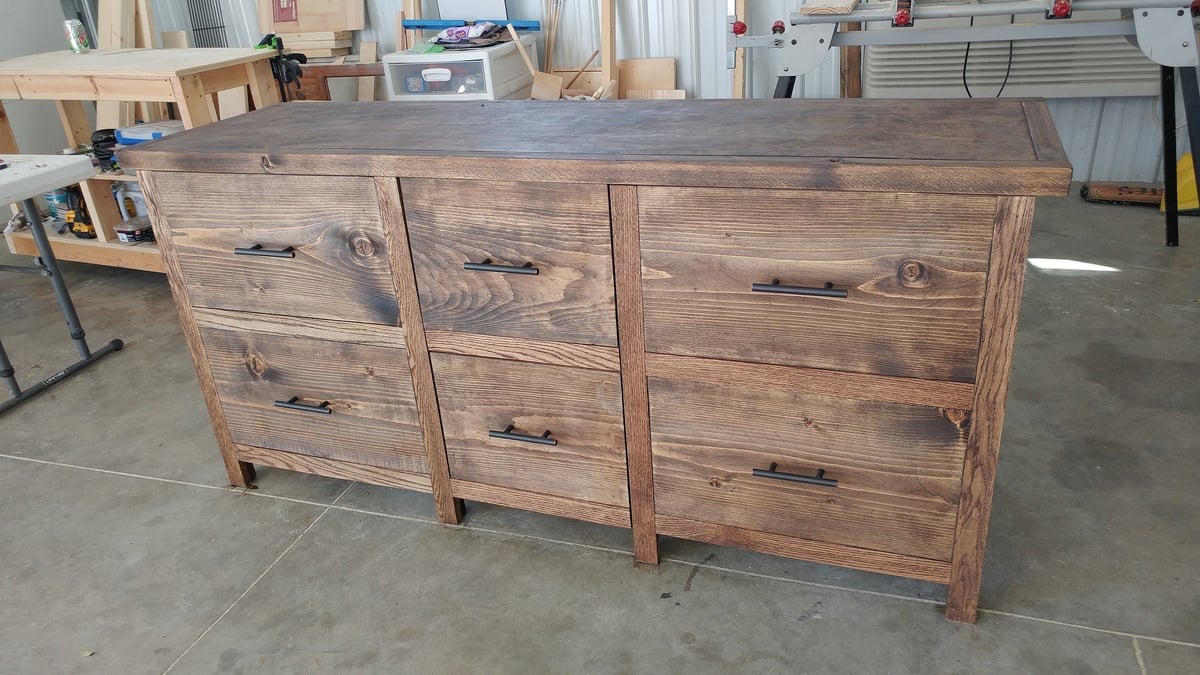
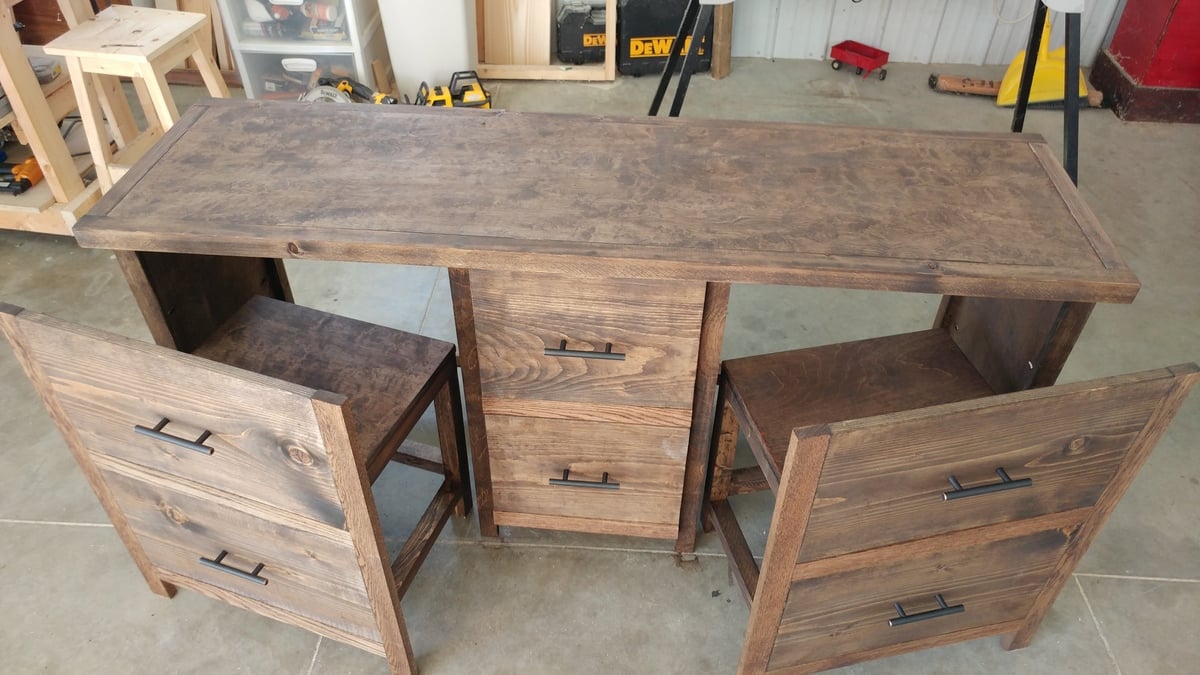
Rustic Sideboard / Buffet Table

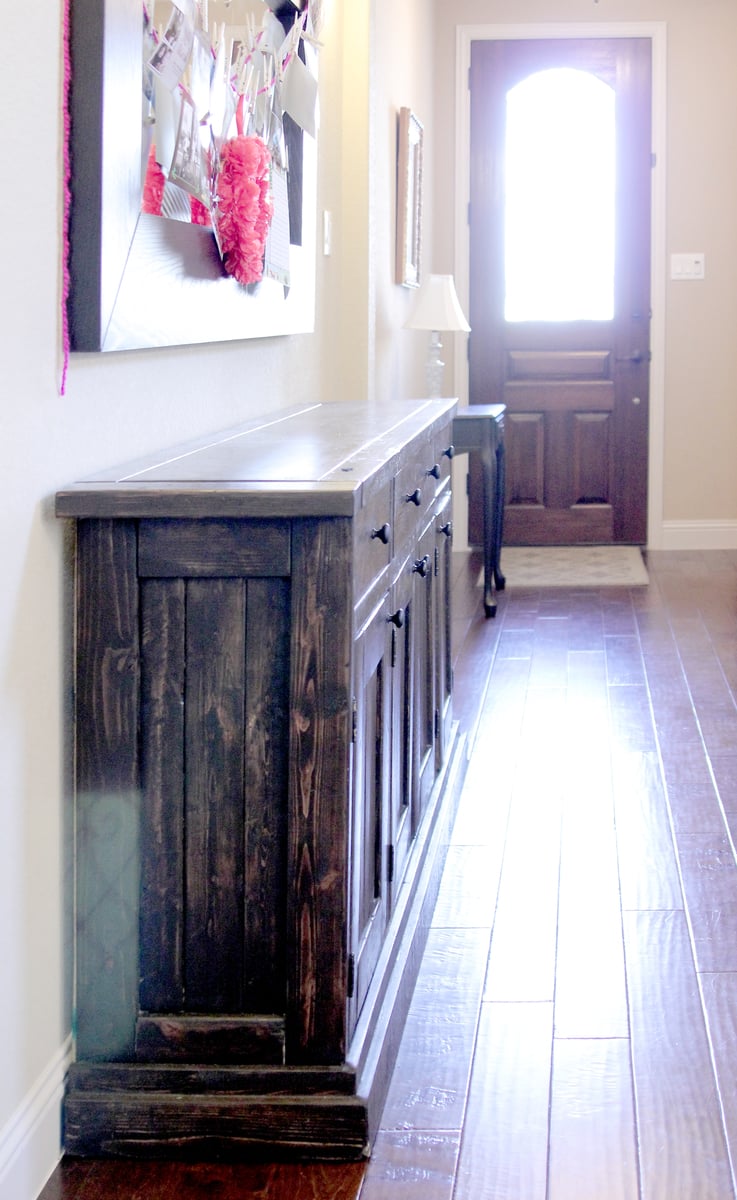
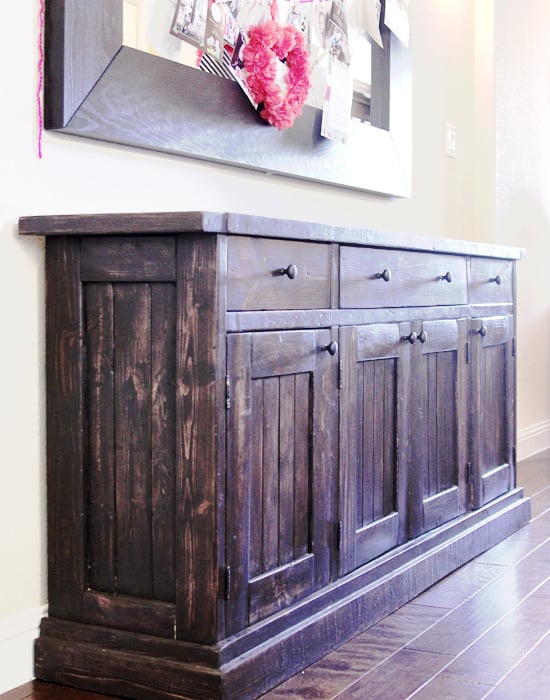
This was our second project (though I'm proud to say that I was able to put the bulk of it together all by myself...and that's because of the miracle of the Kreg Jig pocket hole kit!)

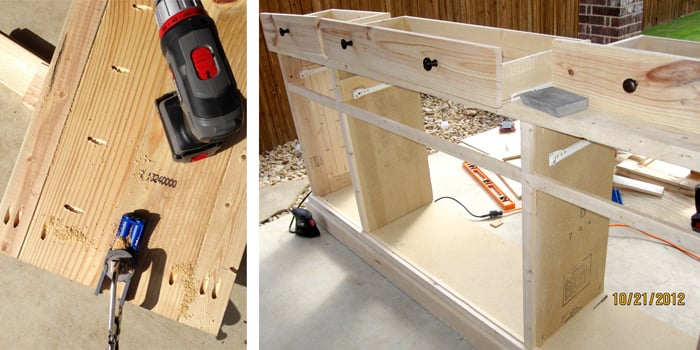
First I had to modify the plans so that the sideboard wasn't as deep (about 16" deep...so just a couple/few inches off the original plans). Then we bought the wood. My husband helped me cut most of the pieces, and then I started drilling pocket holes. It felt like it took forever! But once that was done, I was able to put it together so quick...like an IKEA furniture! BUT! I really should have checked for SQUARE better than I did, b/c once it REALLY started coming together, things were a little off kilter... Thank goodness my husband had the patience to SAND THE HECK out of the bottom of the poor thing to level it back out. :P

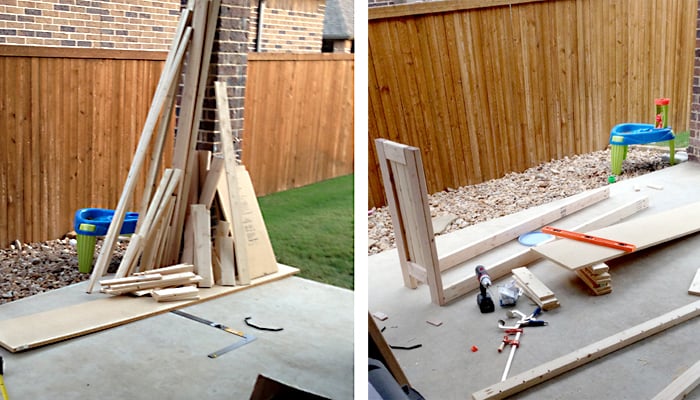
The door fronts took forever...and the drawers took a while to fit in correctly (all of which my hubs did). We had left our lumber on the patio, and the second day it got rained on. It might have helped if our lumber didn't get wet (to help keep things straight and square).

The things that took the longest: squaring, leveling, doors and drawers, and the base molding (I ended up using a 2x4 and 1x2 to build my own base along the bottom...we wanted to stain the wood instead of paint it, and didn't want to pay the $$$ for paintable molding).

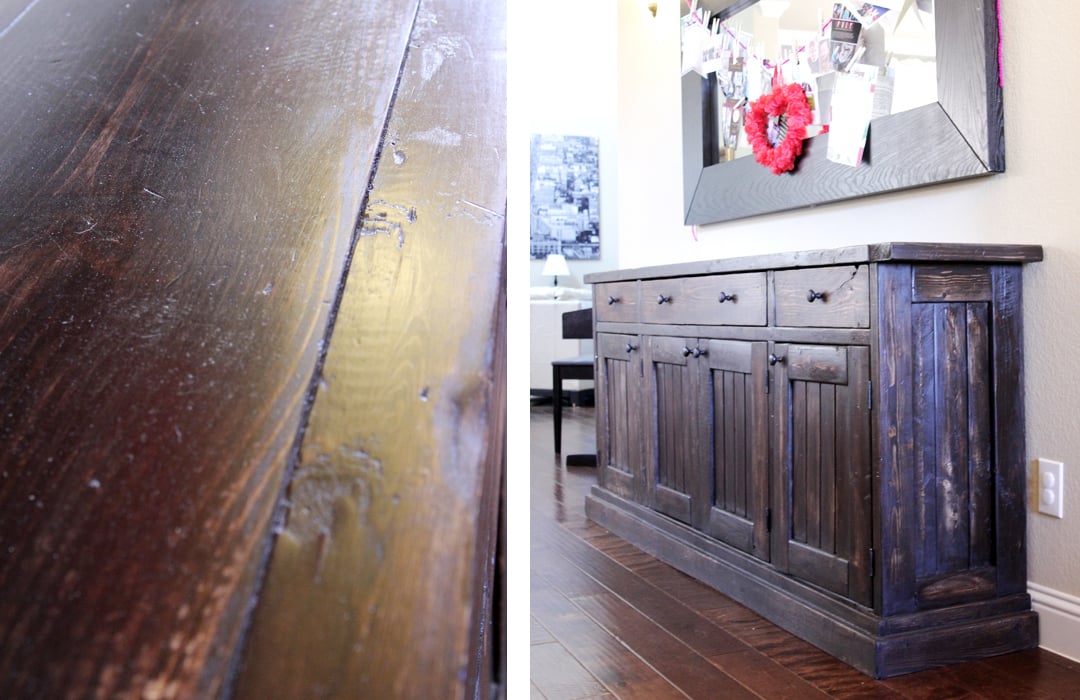
I used the same Rustoleum Dark Walnut stain that I had used on our Farmhouse Table...but I didn't shake it enough before using it, then left it on longer than I should have, so it is much darker than our table. Eventually may want to paint over it since it was so hard to get stain in all the nooks and crannies.

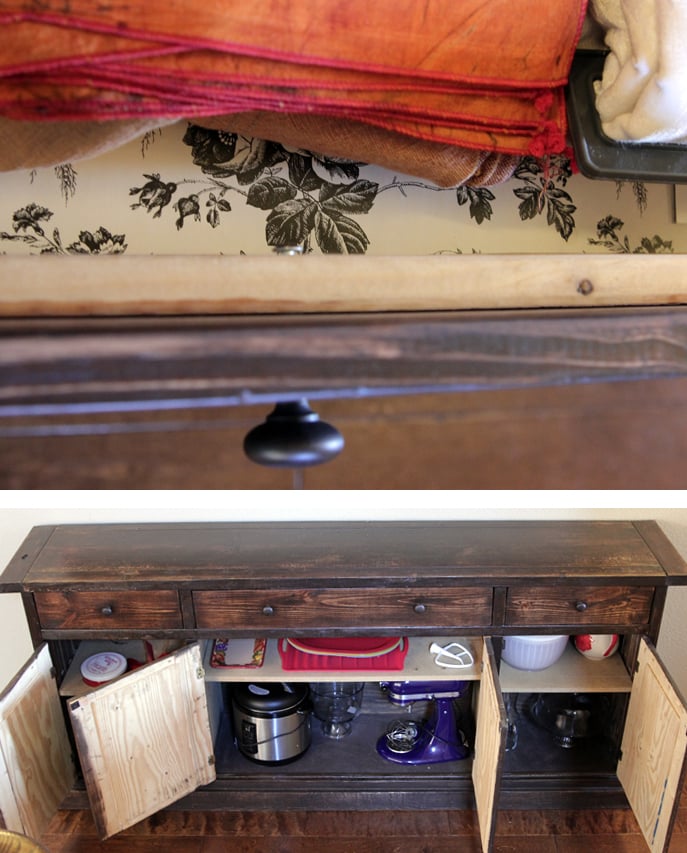
I didn't think to stain the inside of the doors. I will have to go back and paint it someday. We used particle board for the bottom and inside shelf (much cheaper than plywood). I tried staining the bottom piece, but it just soaked in the stain. So I used some dark brown spray paint instead. Worked like a charm. Planning on painting/covering the shelves one day, too.

OH! AND, I couldn't find the wider "bead board" (or whatever it is that everyone else used on their sideboards), so we used plywood as a backing, then attached some thin Poplar boards on the front for the appearance of planked boards. VERY painstaking. Would recommend a different method for that part.

(Timing: We started building this around the beginning of November, brought it in and used it before it was finished...then finished it a couple days before Christmas. Just the other day I added some drawer liners).
Built from Plan(s)
Estimated Cost
$200-300 for lumber.
Estimated Time Investment
Week Long Project (20 Hours or More)
Finish Used
Rustoleum Dark Walnut
Deft Clear Satin, 1 coat.
Recommended Skill Level
Intermediate

Comments

hillarylouise

Wed, 02/06/2013 - 15:20

I saw your comment on my blog and had to come take a peek! It sounds like it was a challenging project, but you did a fantastic job. Beautiful!

Pot holder

Submitted by Anonymous (not verified) on Tue, 01/12/2021 - 06:21

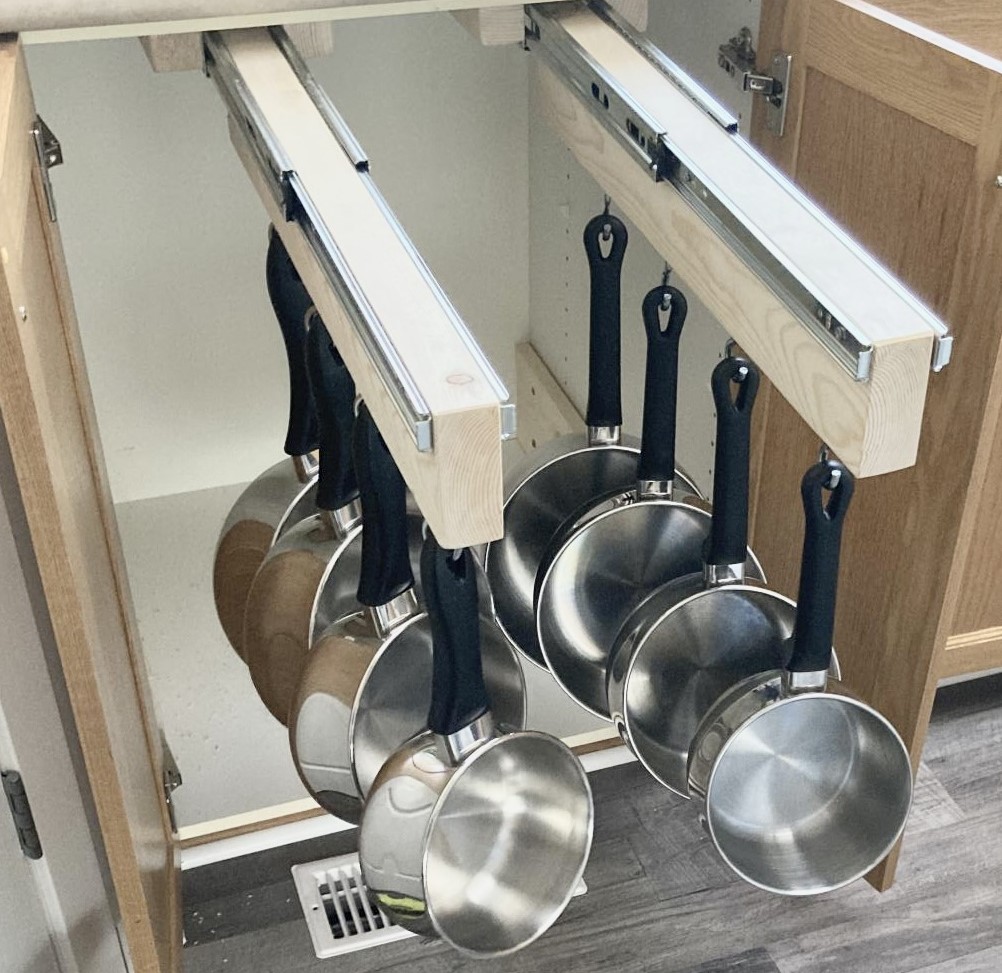
Working off your idea. Added another holder. There will be a bottom drawer for bigger stuff.

Built from Plan(s)
Finish Used
Will be painted
Recommended Skill Level
Starter Project

mega coop

Submitted by Anonymous (not verified) on Sun, 03/26/2017 - 13:42

milled a bunch of cedar with the intention of building adirondack chairs, but we got chickens instead :)

Estimated Cost
$50 in hardware milled all the wood
Estimated Time Investment
Day Project (6-9 Hours)
Finish Used
just going to let it weather naturally
Recommended Skill Level
Intermediate

Mobile Kitchen Pantry

Submitted by webjr on Wed, 01/07/2015 - 19:56

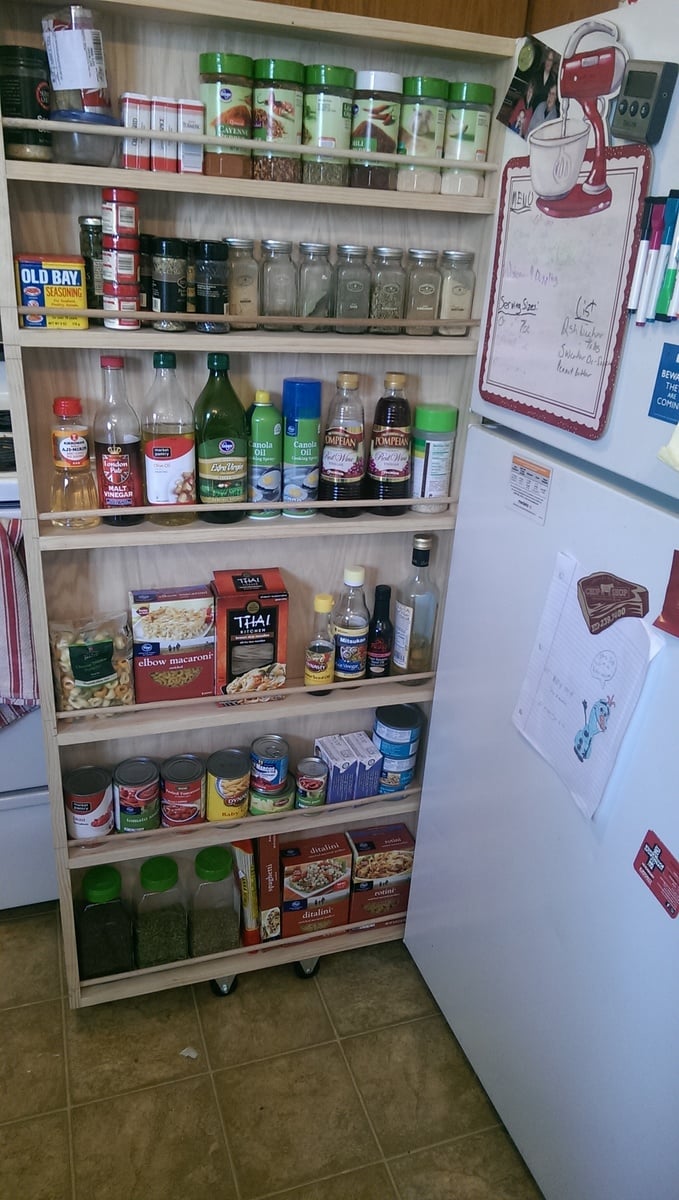
I made a version of the "DIY Rolling Pantry - Classy Clutter" project, but I sized my shelves differently than in the original photo. This is an easy starter project for just about anybody. It is full of counter-sunk butt joints and can be constructed in a single afternoon or evening.

We couldn't apply any finish because it is too damn cold.

The frame is 59"x26" to match the size of my fridge (minus the door). Add in the casters on the bottom and it matches my fridge perfectly.
Materials Used:
- 4, 1x4" select Pine boards
- 1, 4'x8' sheet of Red Oak plywood
- A bunch of 1 1/2" wood screws
- A bunch of nails

Estimated Cost
$50
Estimated Time Investment
Afternoon Project (3-6 Hours)
Finish Used
None at the time. It is too cold to finish in my garage shop right now.
Recommended Skill Level
Starter Project

Comments

webjr

Thu, 01/08/2015 - 13:33

To be perfectly honest, other than some stuff in shop class in middle school and the quick work table in my garage, I hadn't done any woodworking in my life. I have the tools, but I never just sat down and did it. It was a learning experience. I can't wait for my next project.

Outdoor Sofa

Submitted by Anonymous (not verified) on Sun, 04/23/2017 - 15:02

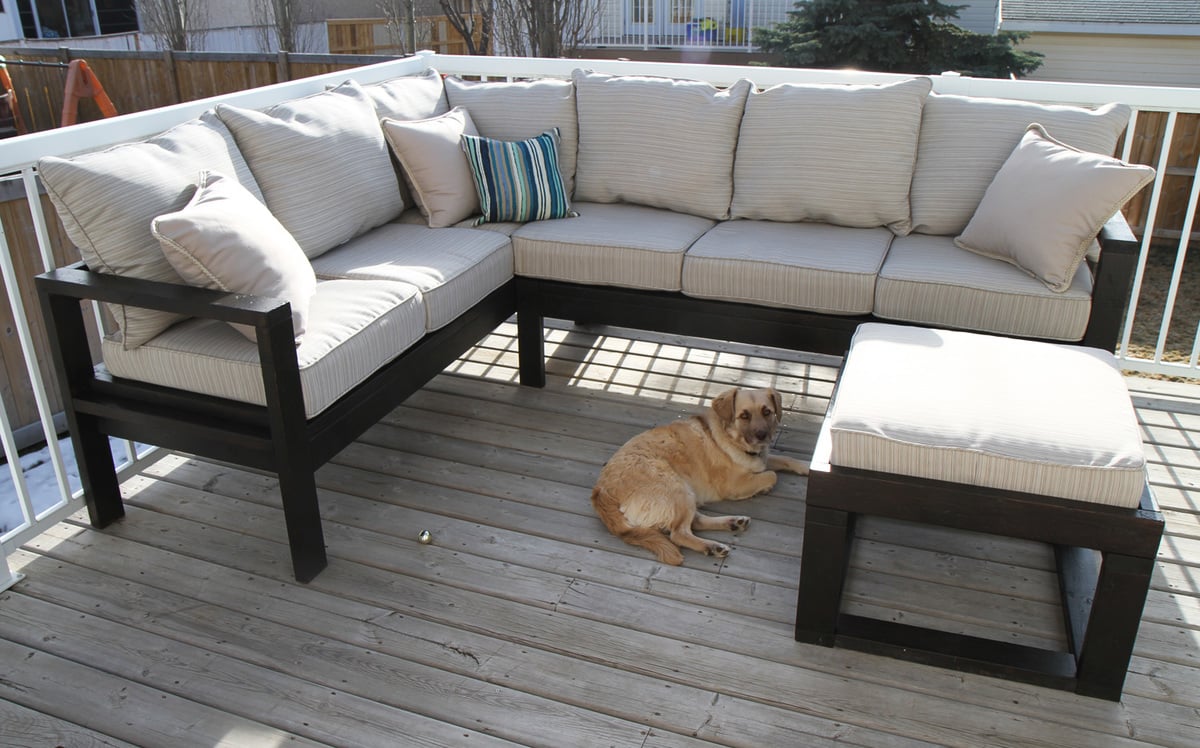
Modifed slightly to make a sectional.  Used extra cushion for an Ottoman.  Added an additional board behind/beside cushions to hold them firmly in place. (2x2)
Purchased 9' boards instead from our lumberyard.  Cushions from Lowe's, throw pillows from WalMart/Canadian Tire. 
 

Estimated Cost
Approx. $700

Cushions from Lowes (7 sets at $80)
Estimated Time Investment
Weekend Project (10-20 Hours)
Finish Used
Minwax Dark Walnut / Old Master's Dark Walnut Gel Stain
Recommended Skill Level
Beginner

Outdoor Sectional

Submitted by jwhipp on Thu, 04/11/2013 - 11:38

We followed the outdoor sectional plan from Ana Whites blog to create this outdoor sectional. First we bought the cushions and custom built this sectional to fit the cushions. We used 2x4's and the kreg jig for pocket screws, then covered the base in beadboard and some pine trim, gave it a good sanding and a nice paint job.

Estimated Cost
900
Estimated Time Investment
Week Long Project (20 Hours or More)
Finish Used
bead board and pine trim
Recommended Skill Level
Intermediate

Comments

Juanita_r

Thu, 04/11/2013 - 15:12

I just want to curl up there with a book and spend the day on that lounge, so pretty & inviting. where did you get the base and back cushions, they are a great colour?

jwhipp

Fri, 04/12/2013 - 05:46

Thanks! We built the frame according to Ana's design (customized dimensions for our cushions) and then covered the base in bead board and used pine trim around the edges. The cushions are from the Frontgate Outlet in Cincinnati.

TV Stand with 2 different stains

Submitted by Anonymous (not verified) on Tue, 06/06/2017 - 19:28

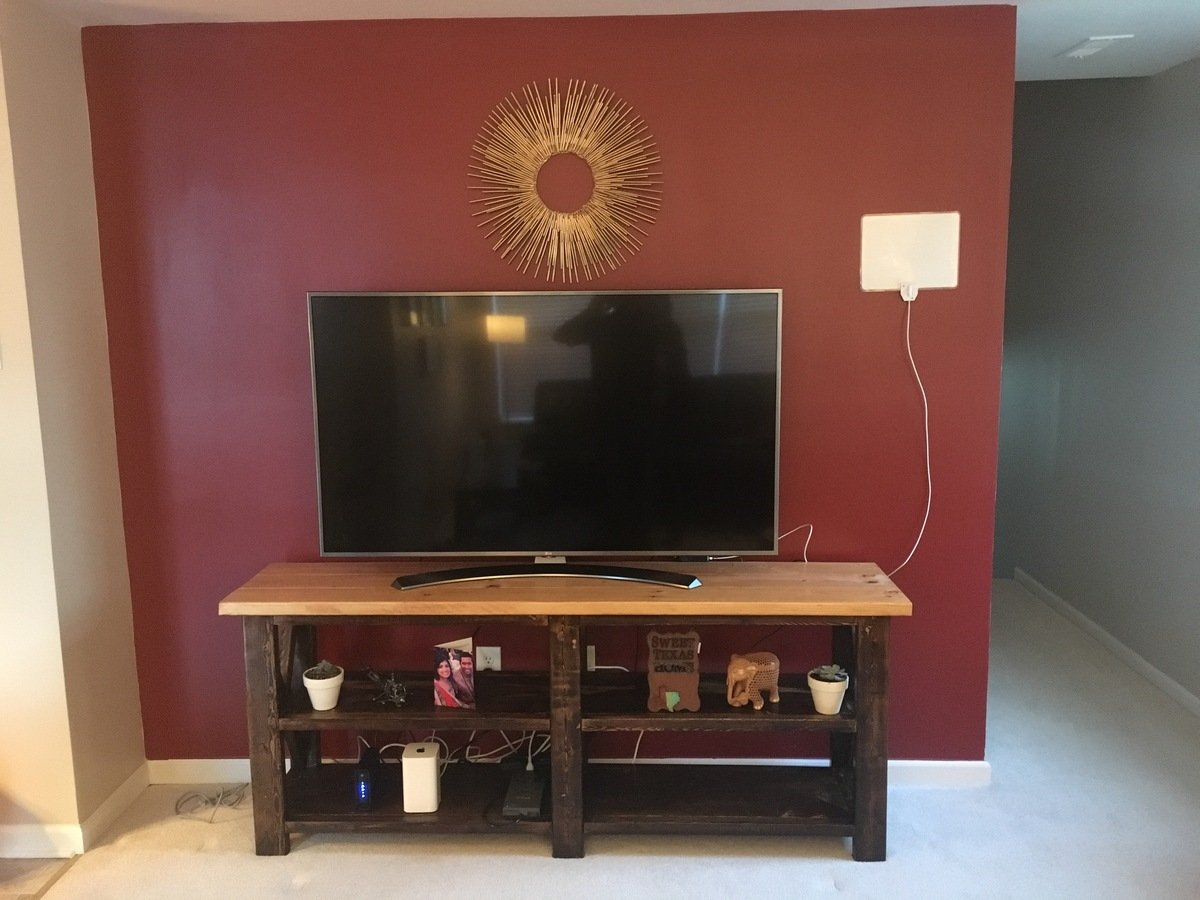
Wife picked this plan for our TV stand for our new TV. Took 2 weekends to make and total cost was ~ $100.

Followed the build instruction from this website except for the "X" on both sides. I do not own a miter saw to cut all the differrent angles. Hence I cut the 60 degree angles using circular saw and speed square and put the x togetter by creating dados 3/4" deep on the center of both the 2x2 member of the X using a router.


For stains, we used Minwas Expresso for the bottom and the top we used Golden Pecan. 2 coats of stain folloed by 2 coats of high gloss polyurethane. 

Built from Plan(s)
Estimated Cost
~$100
Estimated Time Investment
Week Long Project (20 Hours or More)
Finish Used
1. Minwax Golden Pecan Stain
2. Minwax Expresso Stain
3. Minwax High Gloss Polyurethane
Recommended Skill Level
Intermediate

4x4 Truss Beam Table

Submitted by Anonymous (not verified) on Mon, 10/04/2021 - 13:07

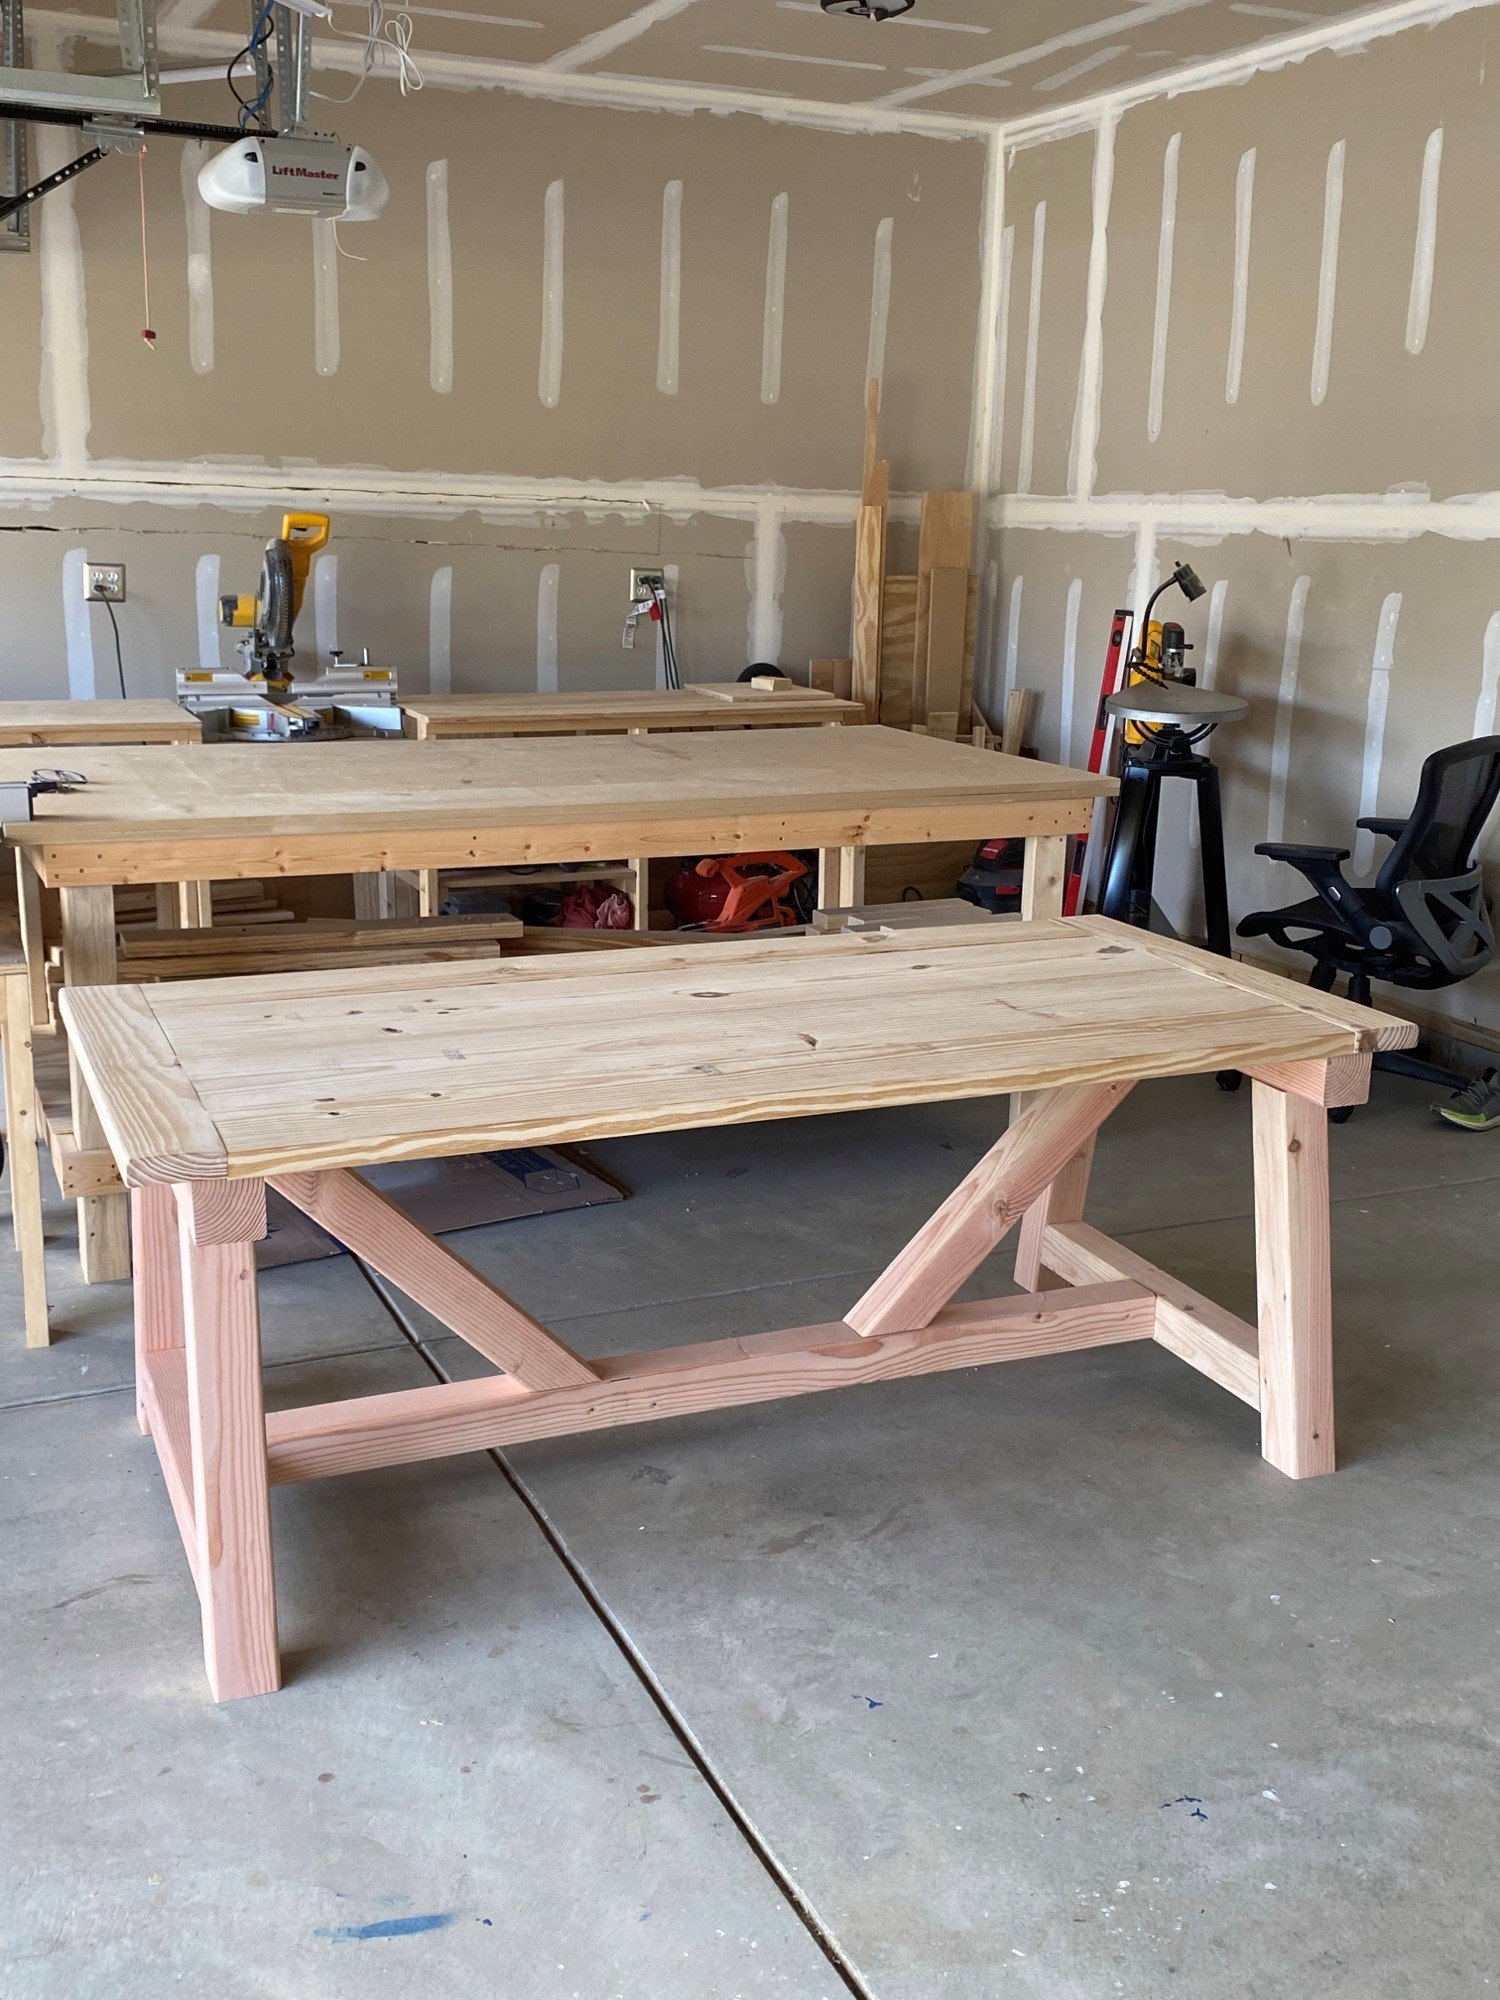
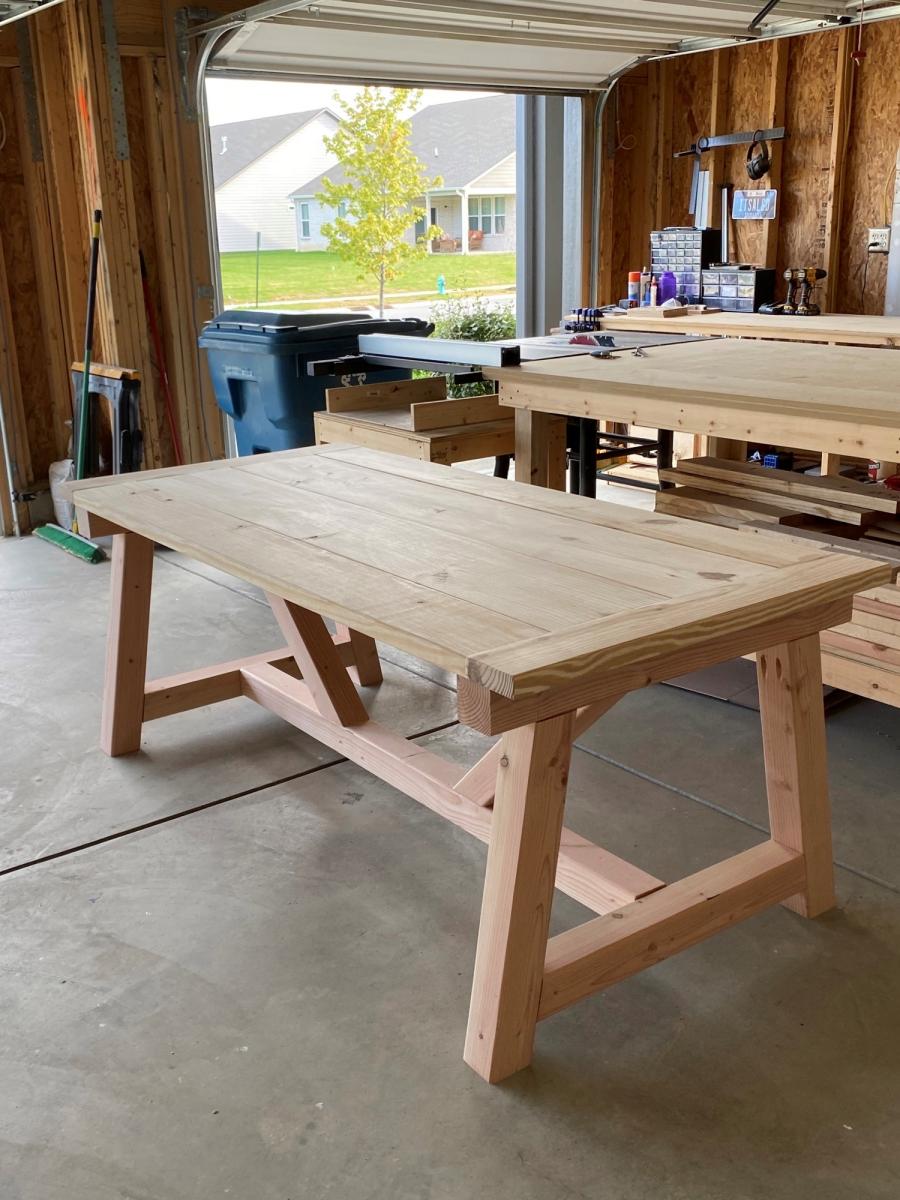
I followed the plans for the 4x4 Truss Beam Table and it turned it out great! I definitely recommend the Kreg Jig HD for the 4x4's. I used non HD Kreg screws for the table top.

It's much easier to build it upside down to ensure you get all your pocket holes underneath. Also, use duct tape to keep the 45 degree angle posts clamped as it's much easier when screwing together.

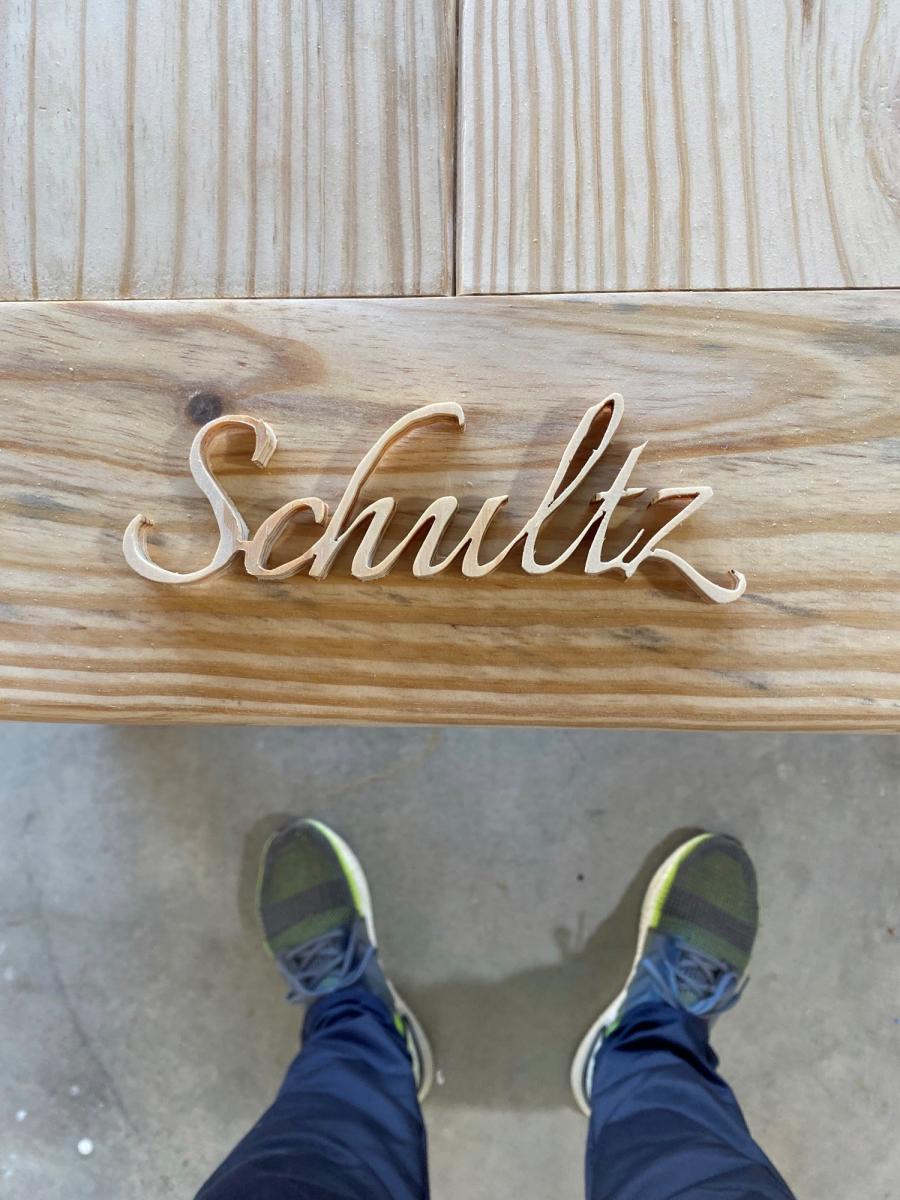
As a bonus for the family I built it for, I cut their name out with my scroll saw and added as a personal touch for the piece.

Built from Plan(s)

Comments

Outdoor Sofa and Table

Submitted by Don Ellery on Wed, 07/19/2017 - 11:42

I enjoyed making this outdoor sofa and table combo from Ana's Ryobi series.  An inexpensive and easy project that we just love!  All construction grade 2x4.

Estimated Cost
$80
Estimated Time Investment
Afternoon Project (3-6 Hours)
Finish Used
Behr premium exterior "Slate"
Recommended Skill Level
Beginner