Community Brag Posts

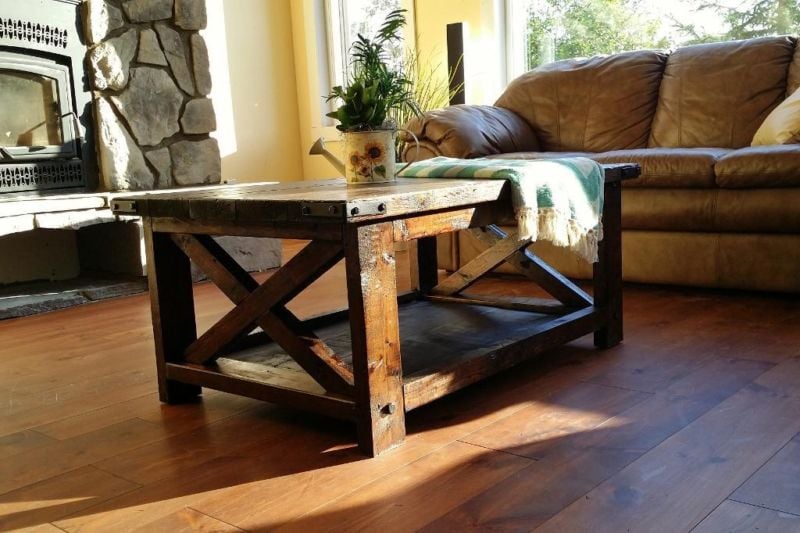
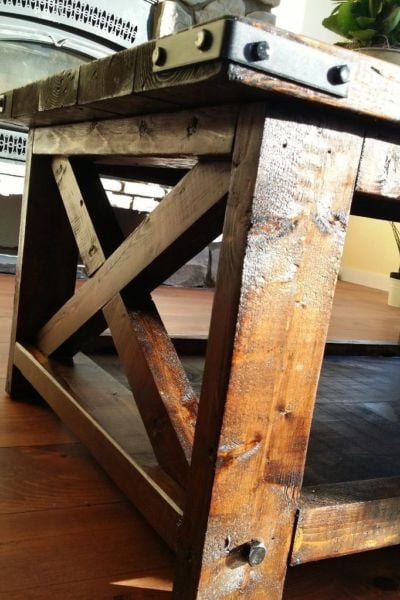
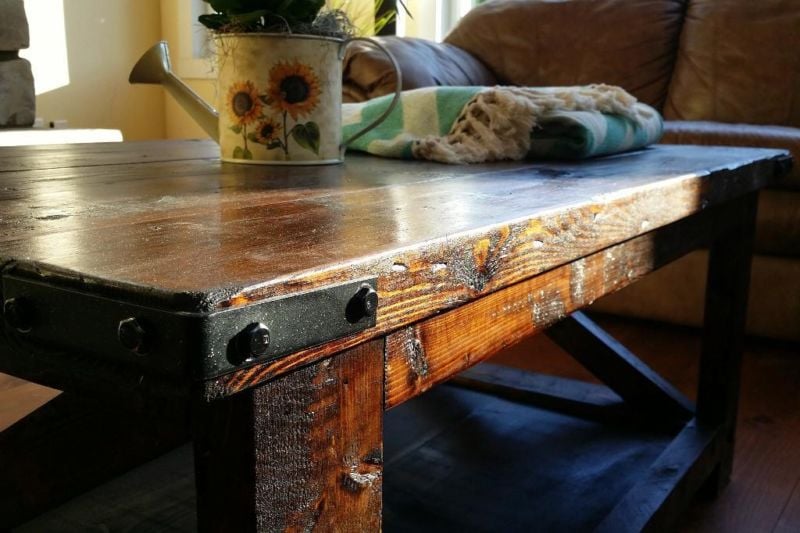
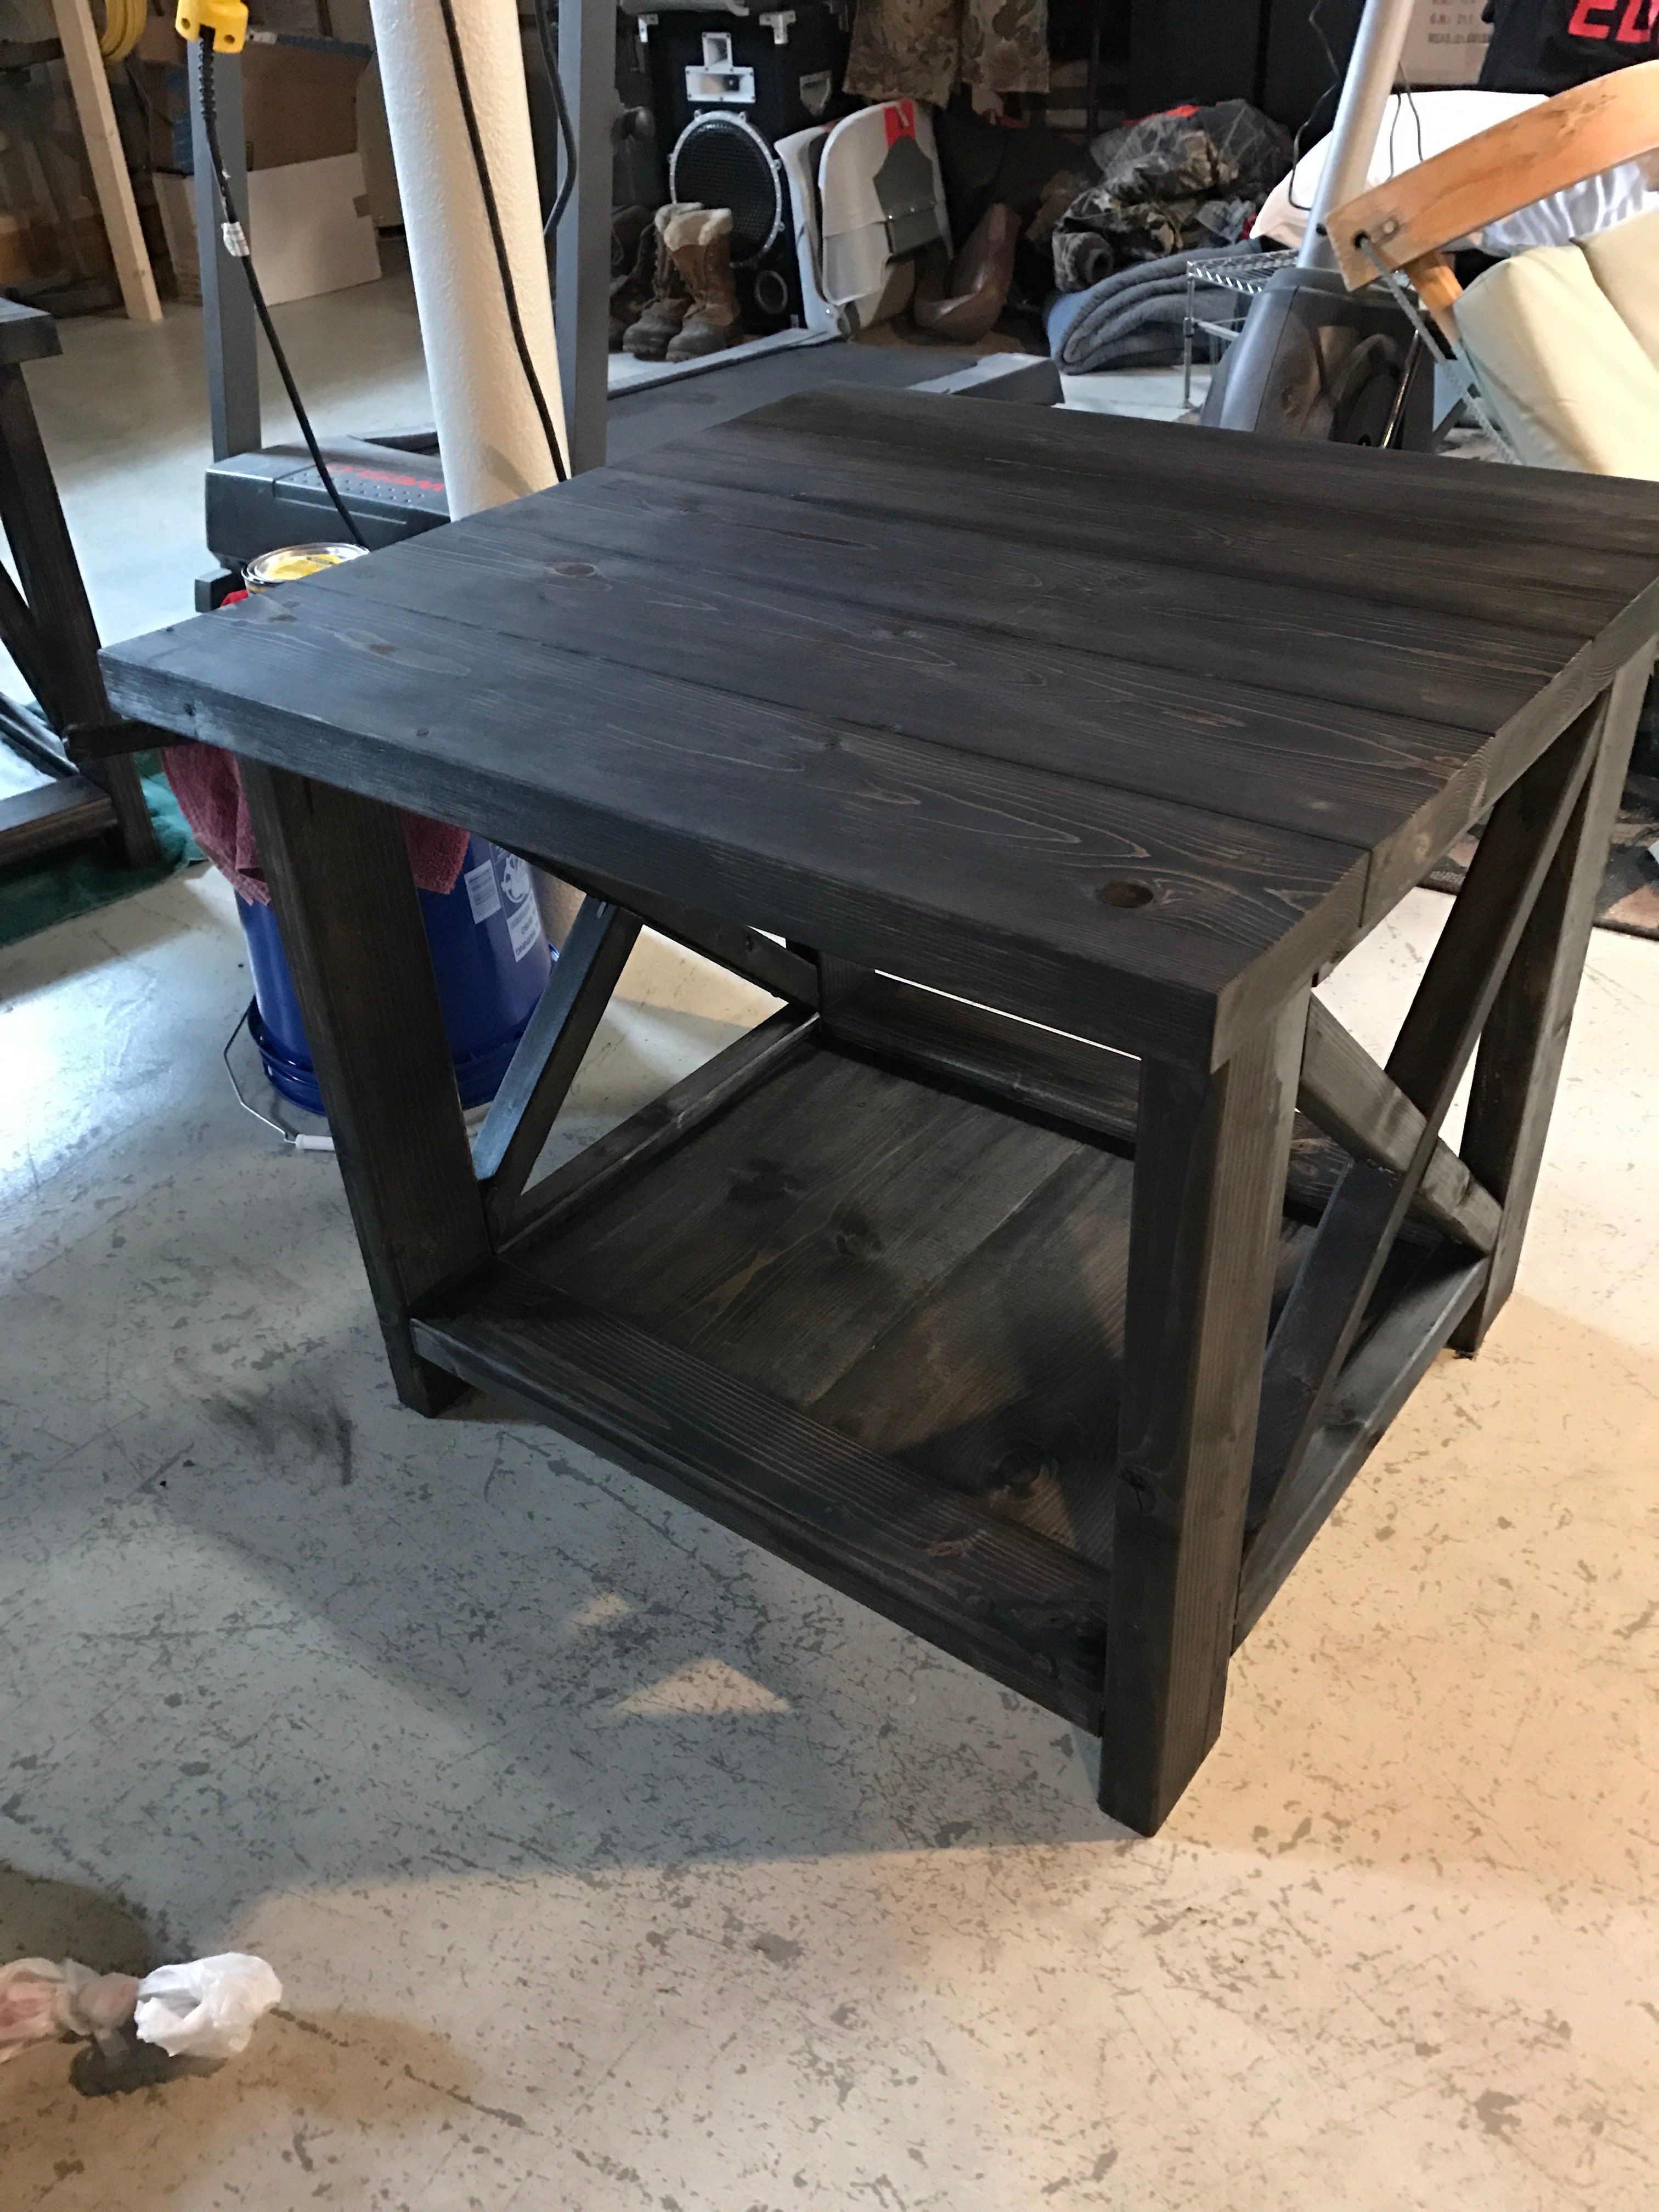
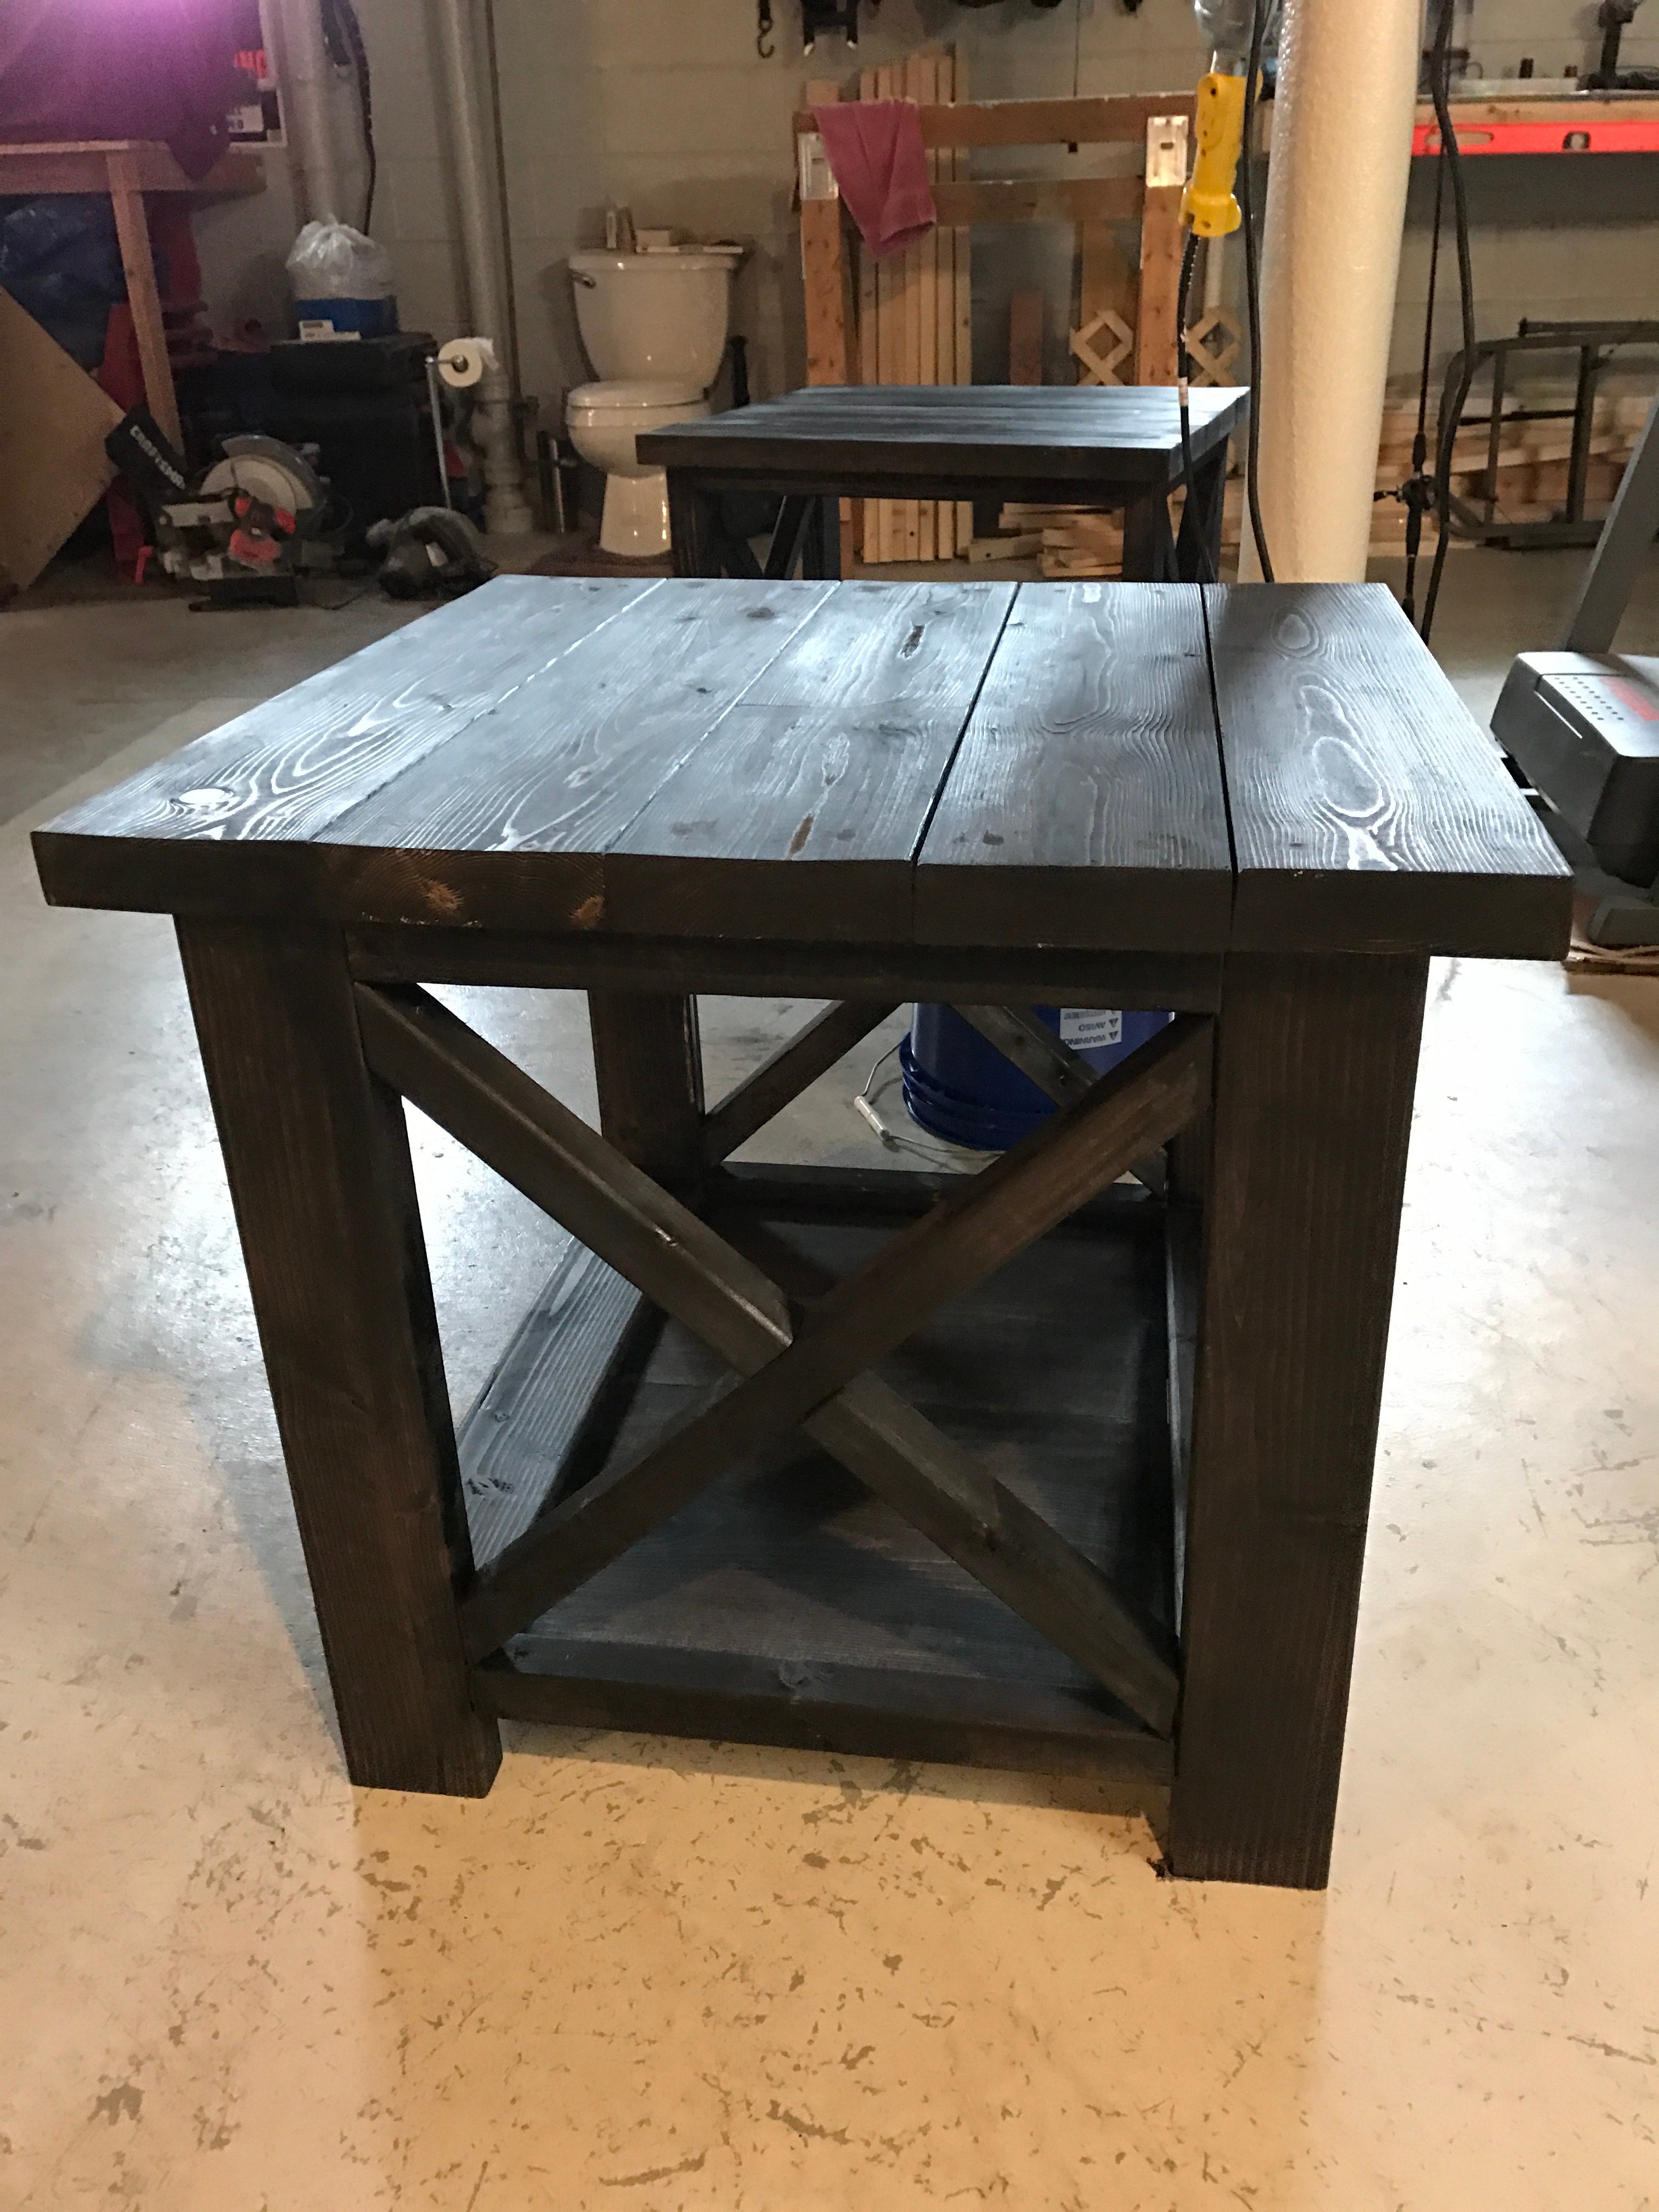
43" Rustic X Coffee Table
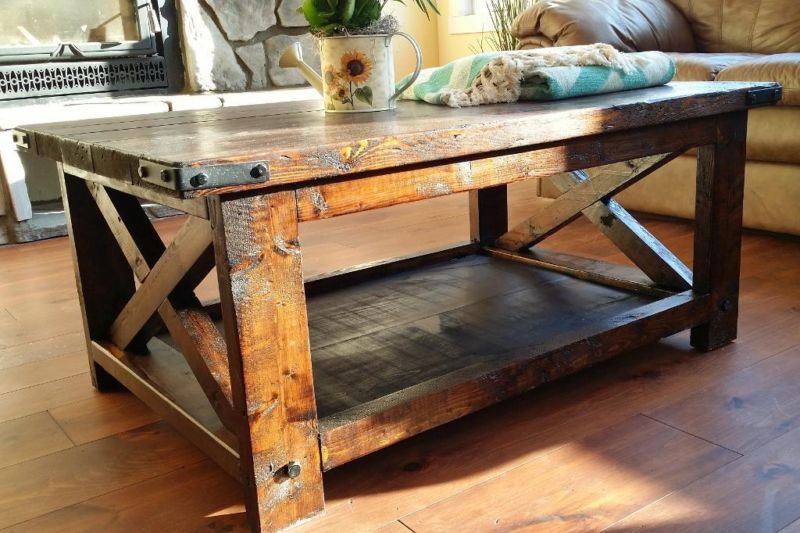
This was my first build of this Rustic X Coffee Table and I really liked how it turned out! This one was modified to 43" long, same height and width. I love all the Rustic X pieces in this collection! They have been a favorite.
I finished the table using black tea, steel wool and vinegar, followed by Minwax's Dark Walnut stain and topped off with a Satin oil-based Polyurethane.
To see my other projects, make sure to visit my facebook page (only after you have spent enough time on Ana's site!)
www.facebook.com/simplyrustik
Built from Plan(s)
Estimated Cost
$90
Estimated Time Investment
Day Project (6-9 Hours)
Finish Used
Pre-Stain: Black Tea followed by Steel Wool and Vinegar Solution (7 days old)
Stain: Dark Walnut (Minwax)
Varnish: Satin Polyurethane
Distressing: Physical distressing performed before Pre-stain.
Stain: Dark Walnut (Minwax)
Varnish: Satin Polyurethane
Distressing: Physical distressing performed before Pre-stain.
Recommended Skill Level
Intermediate
Comments

Thu, 12/18/2014 - 17:46
This looks awesome! I love
This looks awesome! I love the look! Thanks for sharing!
-Ana
Mini farmhouse nursery table
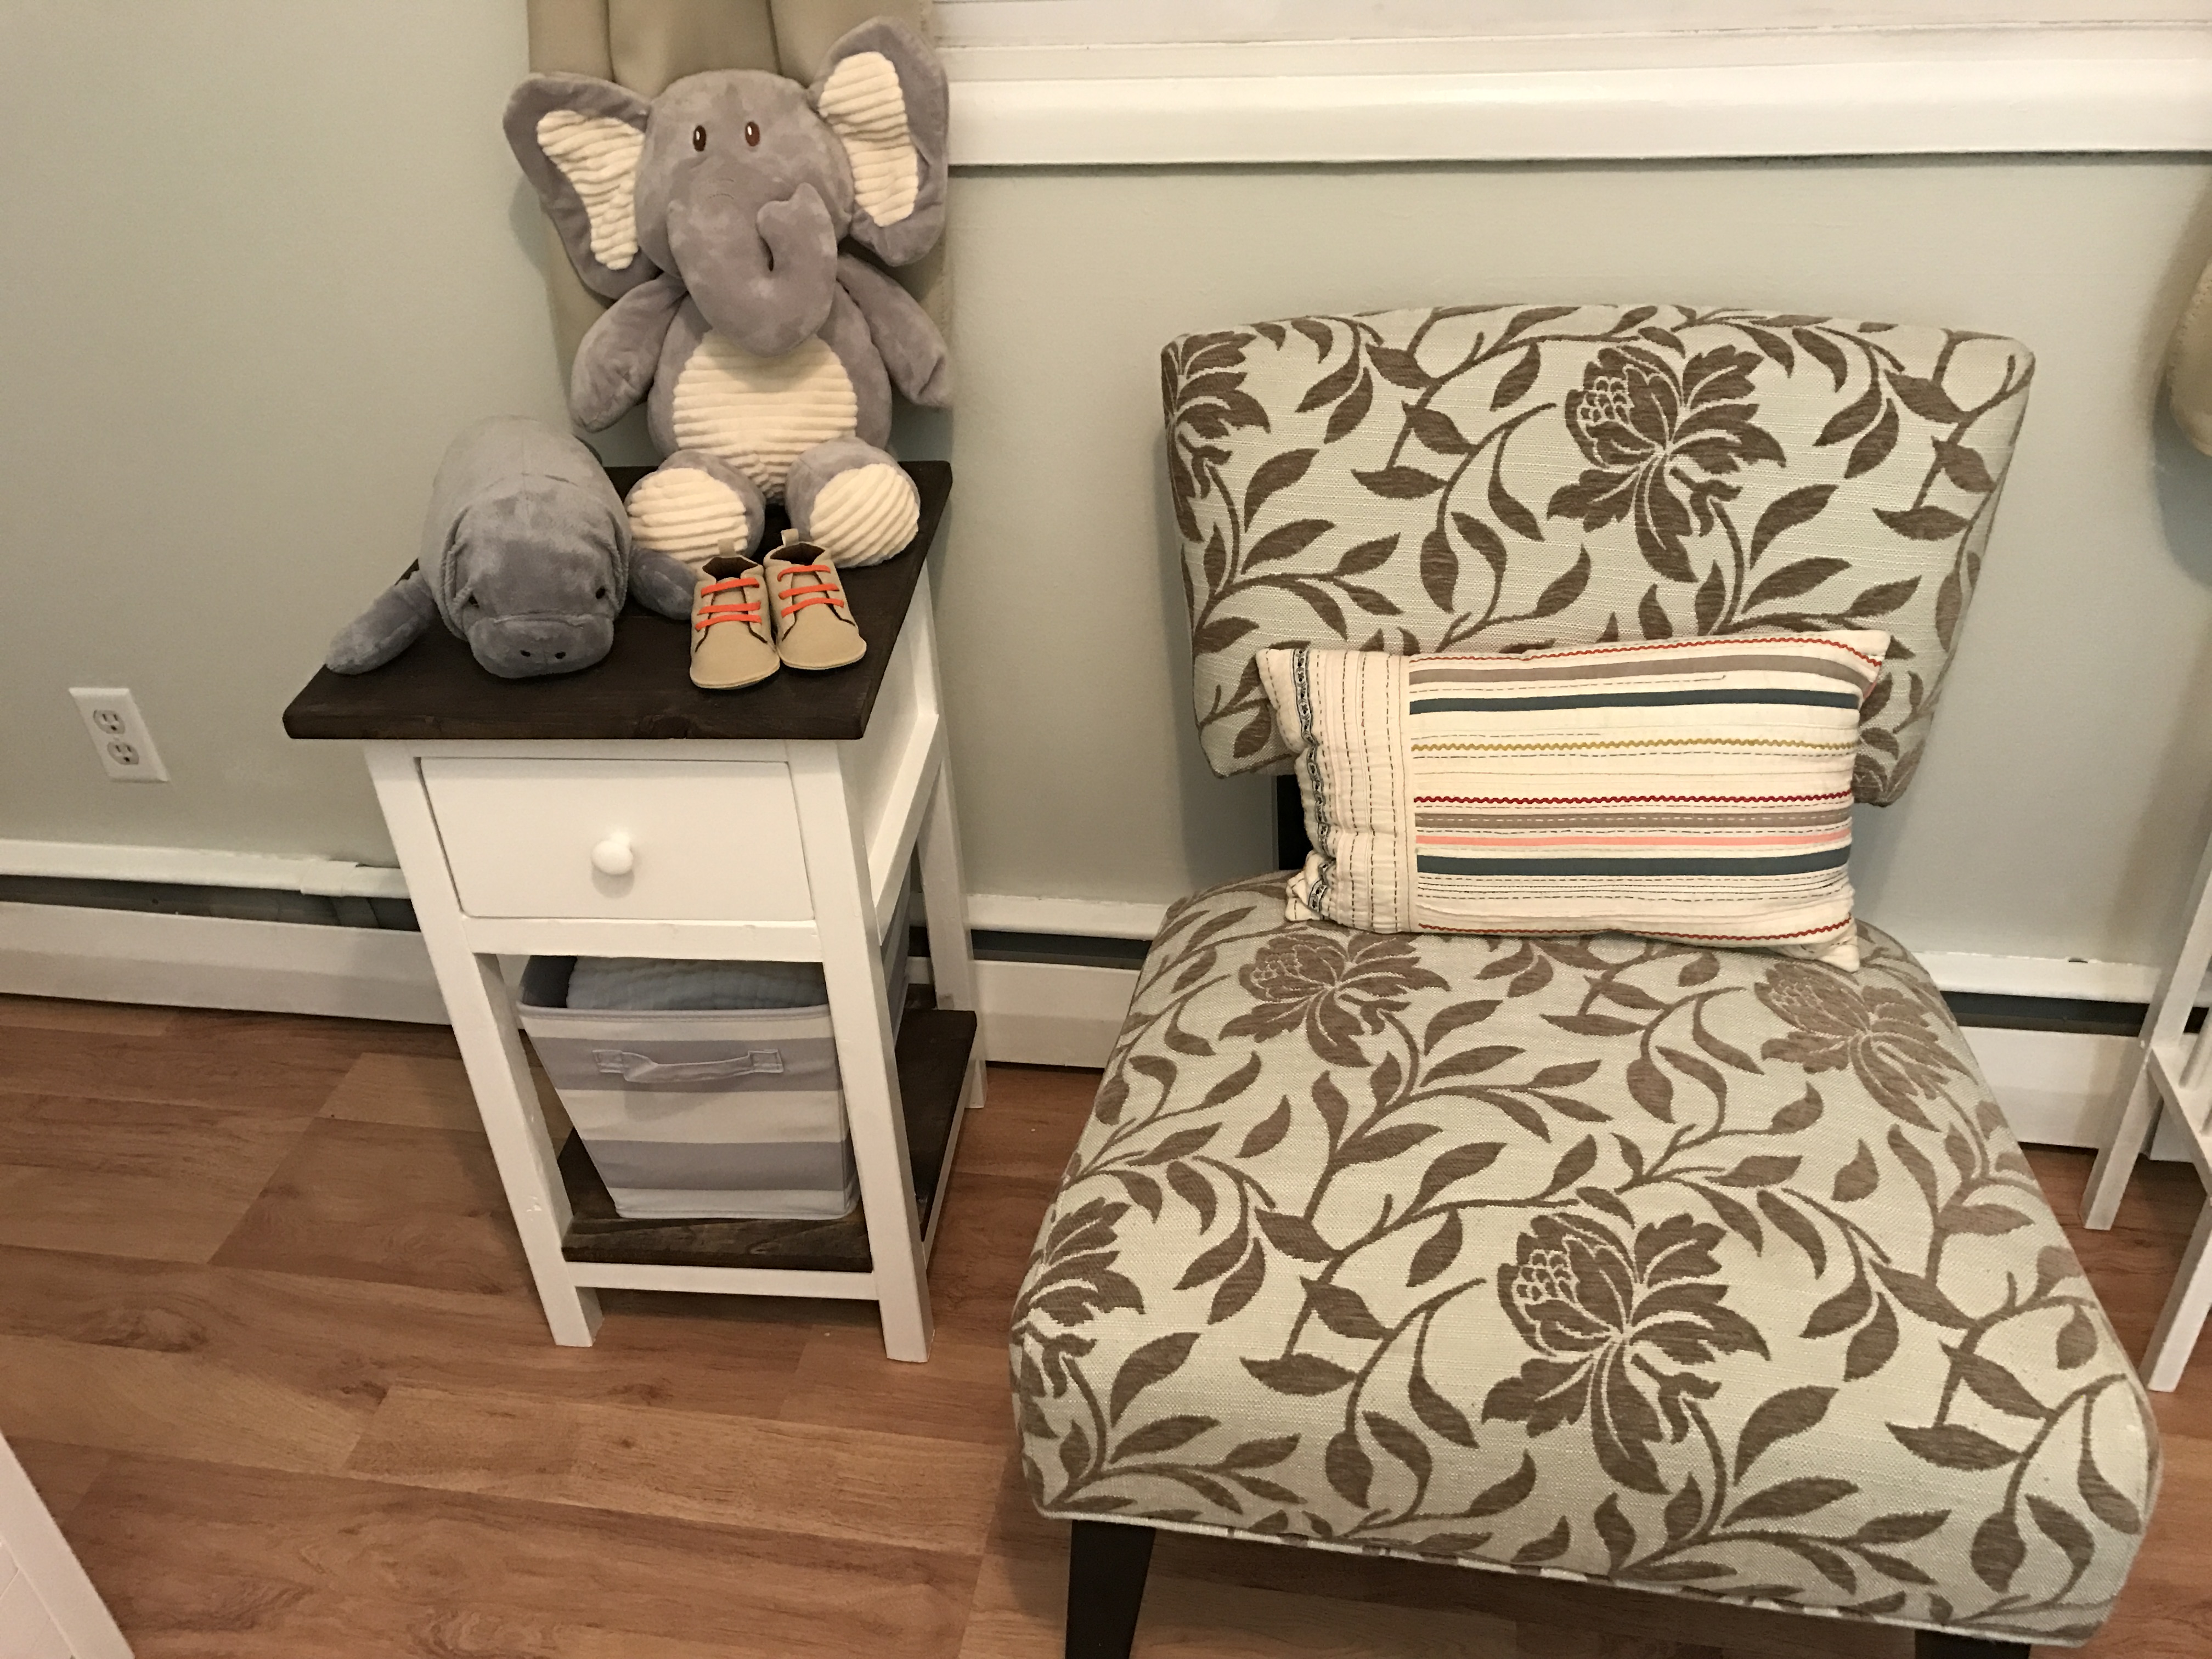
Needed a small table for the nursery and this was perfect!
Built from Plan(s)
Estimated Cost
35
Estimated Time Investment
Day Project (6-9 Hours)
Finish Used
Paint and minwax stain
Recommended Skill Level
Beginner
Pub table
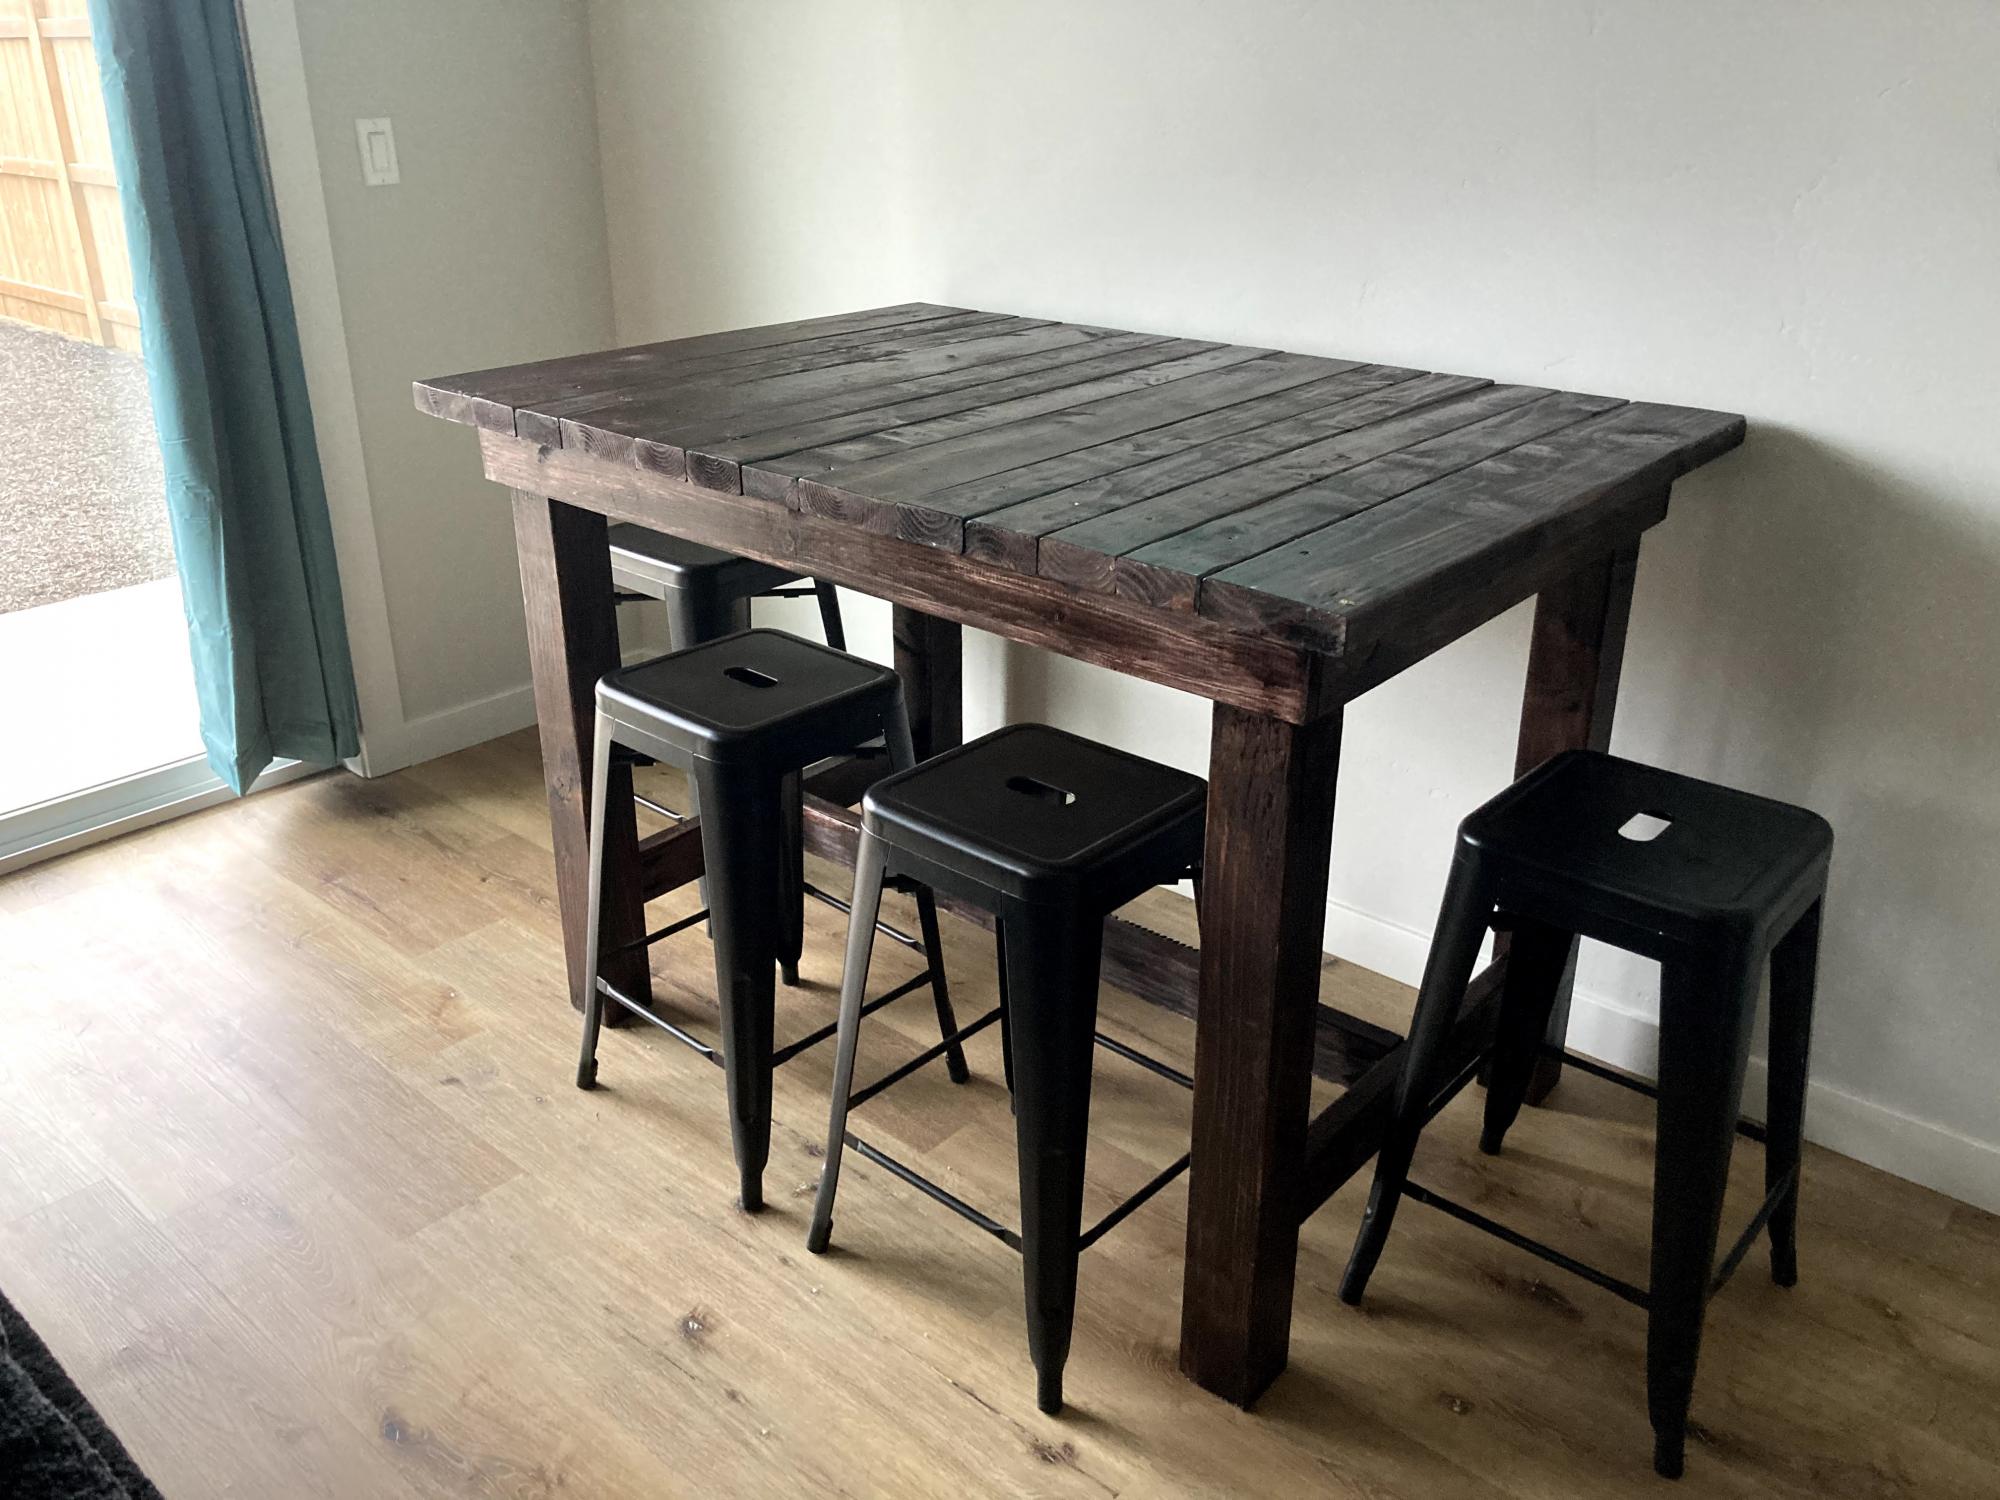
Easy weekend build. Turned out great. Needed a small table for my small space. Stain turned out fine, but I tried the poly/stain combo and don't like how it applies. Will go back to stain then poly in the future.
Estimated Cost
$60
Estimated Time Investment
Day Project (6-9 Hours)
Finish Used
Kona stain/poly combo.
Recommended Skill Level
Beginner
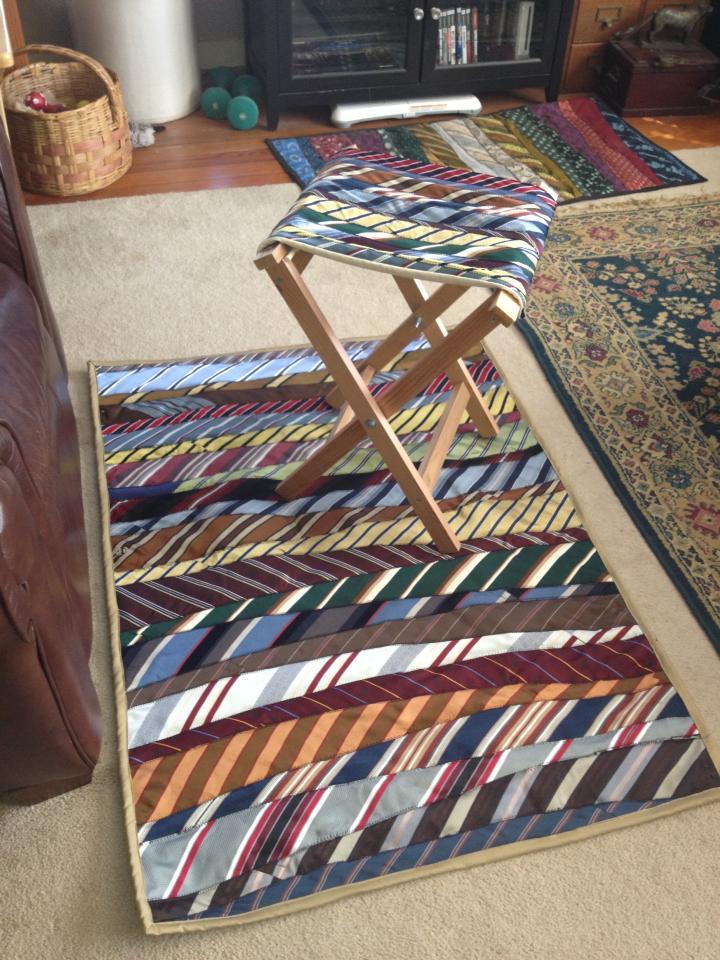
Necktie folding stool
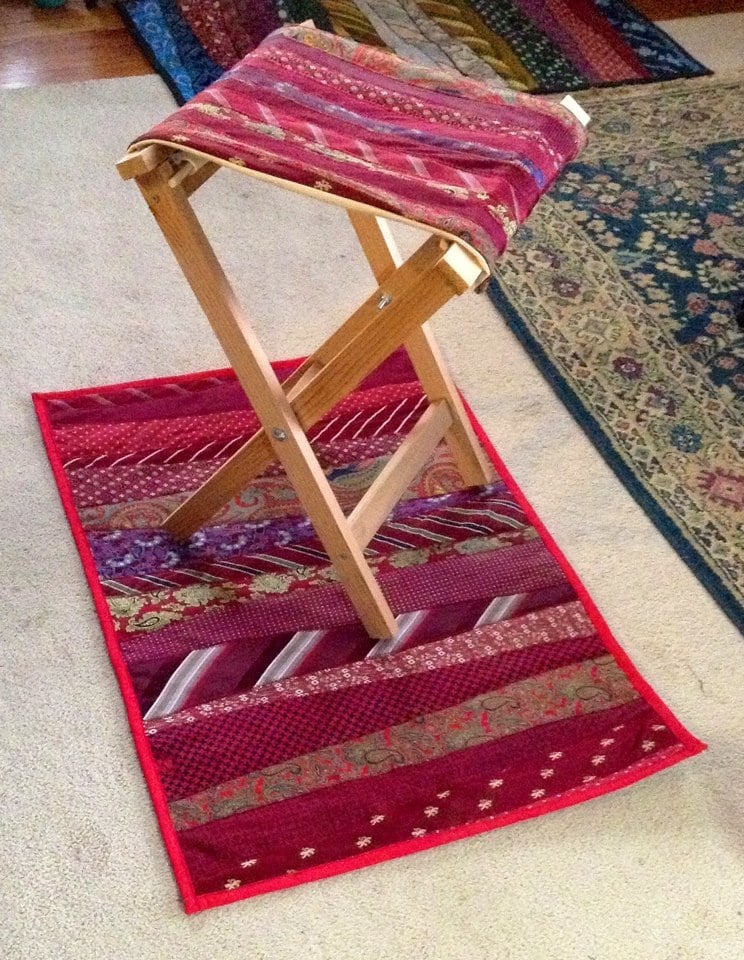
I zigzag stitched vintage neckties to plain canvas and used these directions to construct the stool frame. I used 1 5/8" screws.
Built from Plan(s)
Estimated Cost
$15
Estimated Time Investment
Afternoon Project (3-6 Hours)
Finish Used
none
Recommended Skill Level
Intermediate
Comments


Fri, 02/15/2013 - 19:23
Cool idea! Now I'm going to
Cool idea! Now I'm going to be looking for ties at rummage sales!
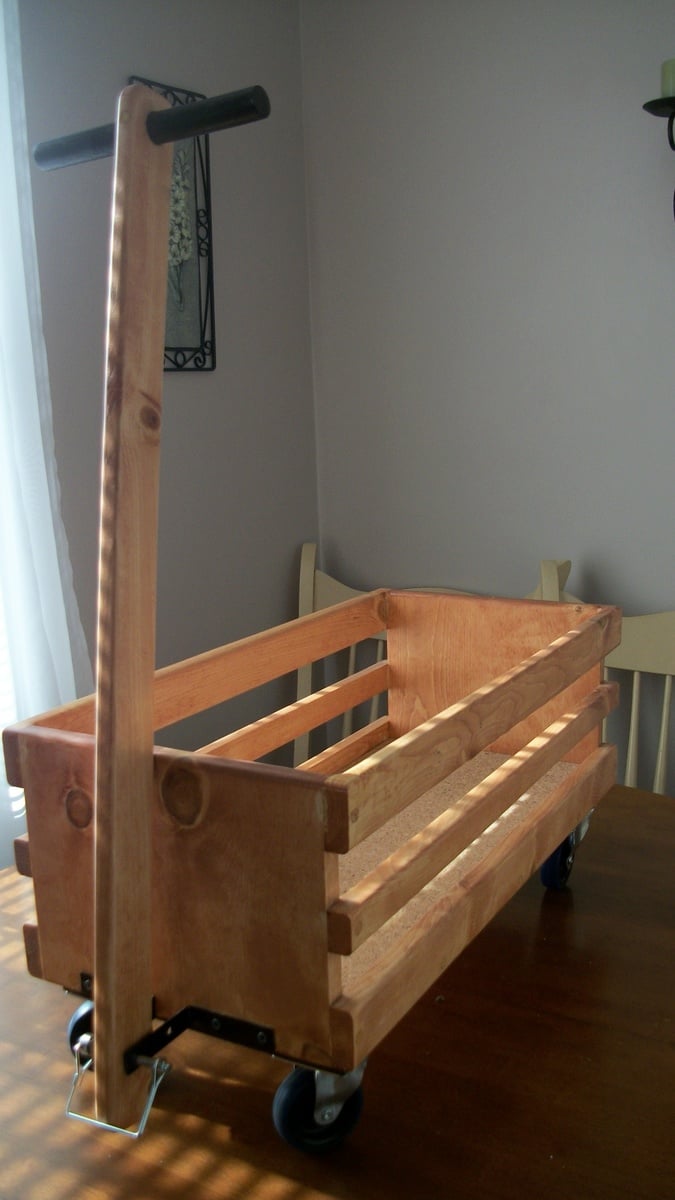
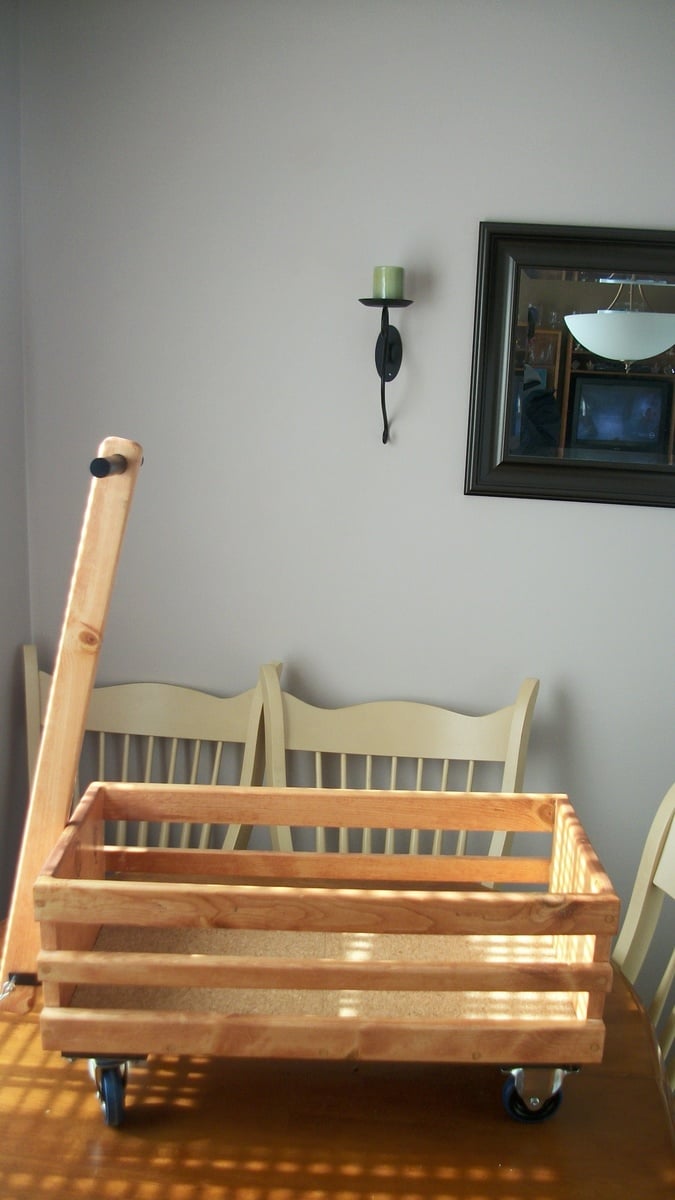
Wagon
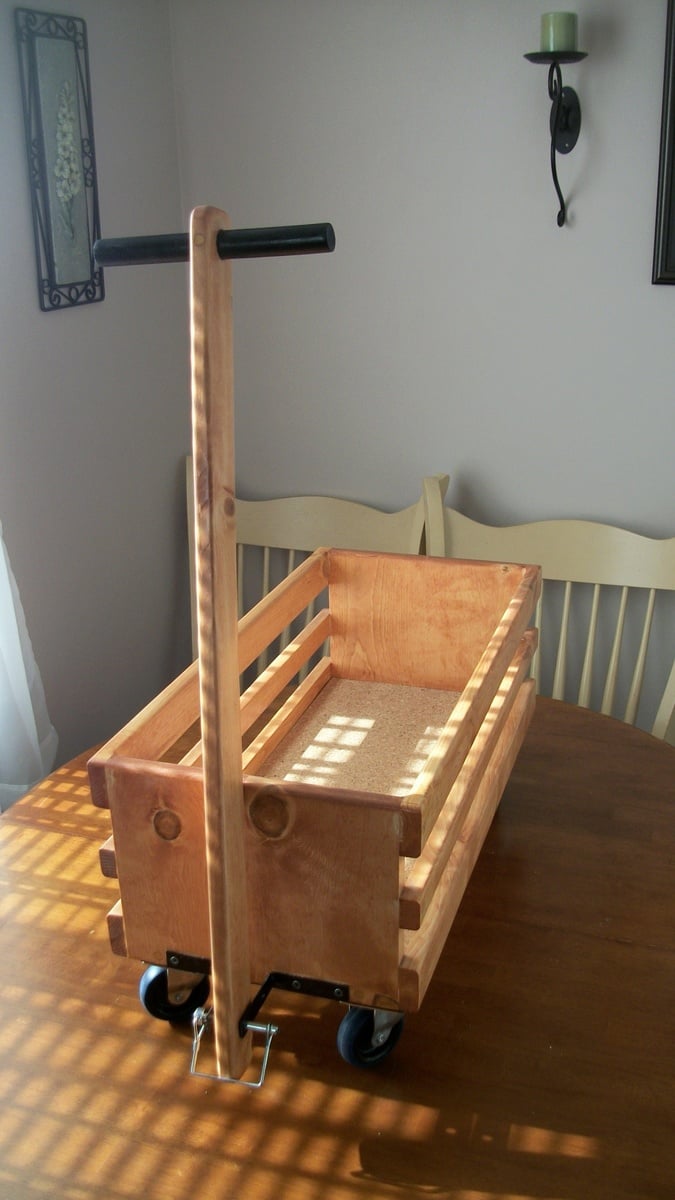
Based this wagon on plans found on Ana White's site. I built this for a 2 year old girl of a co-worker. She is right now using it to pull around her dolls.
Built from Plan(s)
Estimated Cost
$25
Estimated Time Investment
Day Project (6-9 Hours)
Recommended Skill Level
Beginner
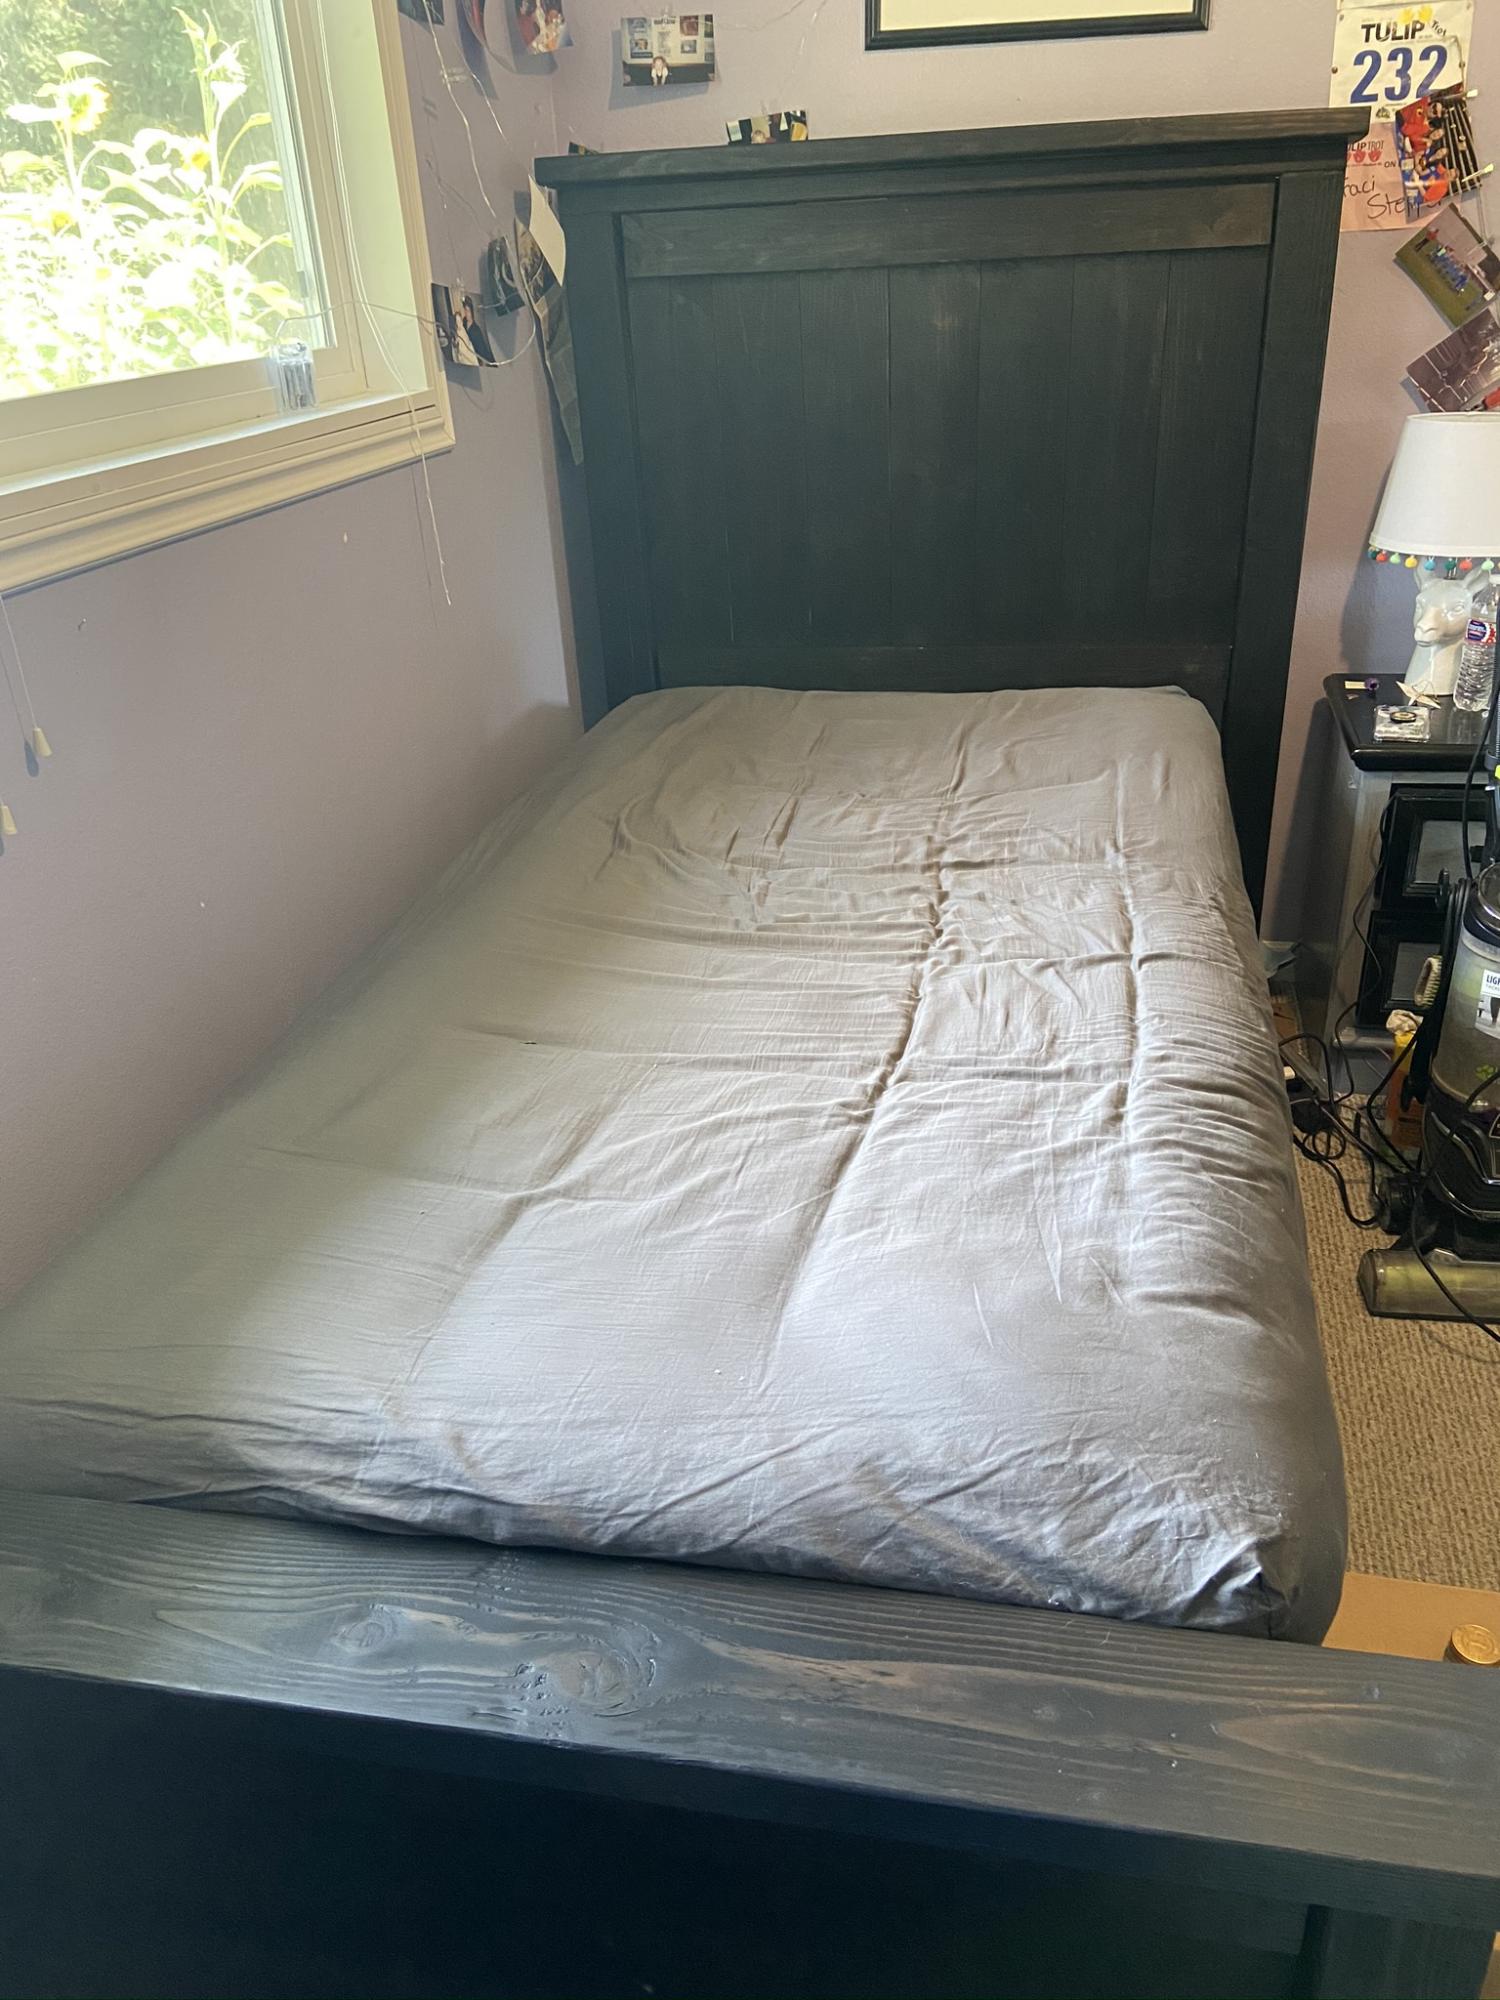
Farmhouse Bed
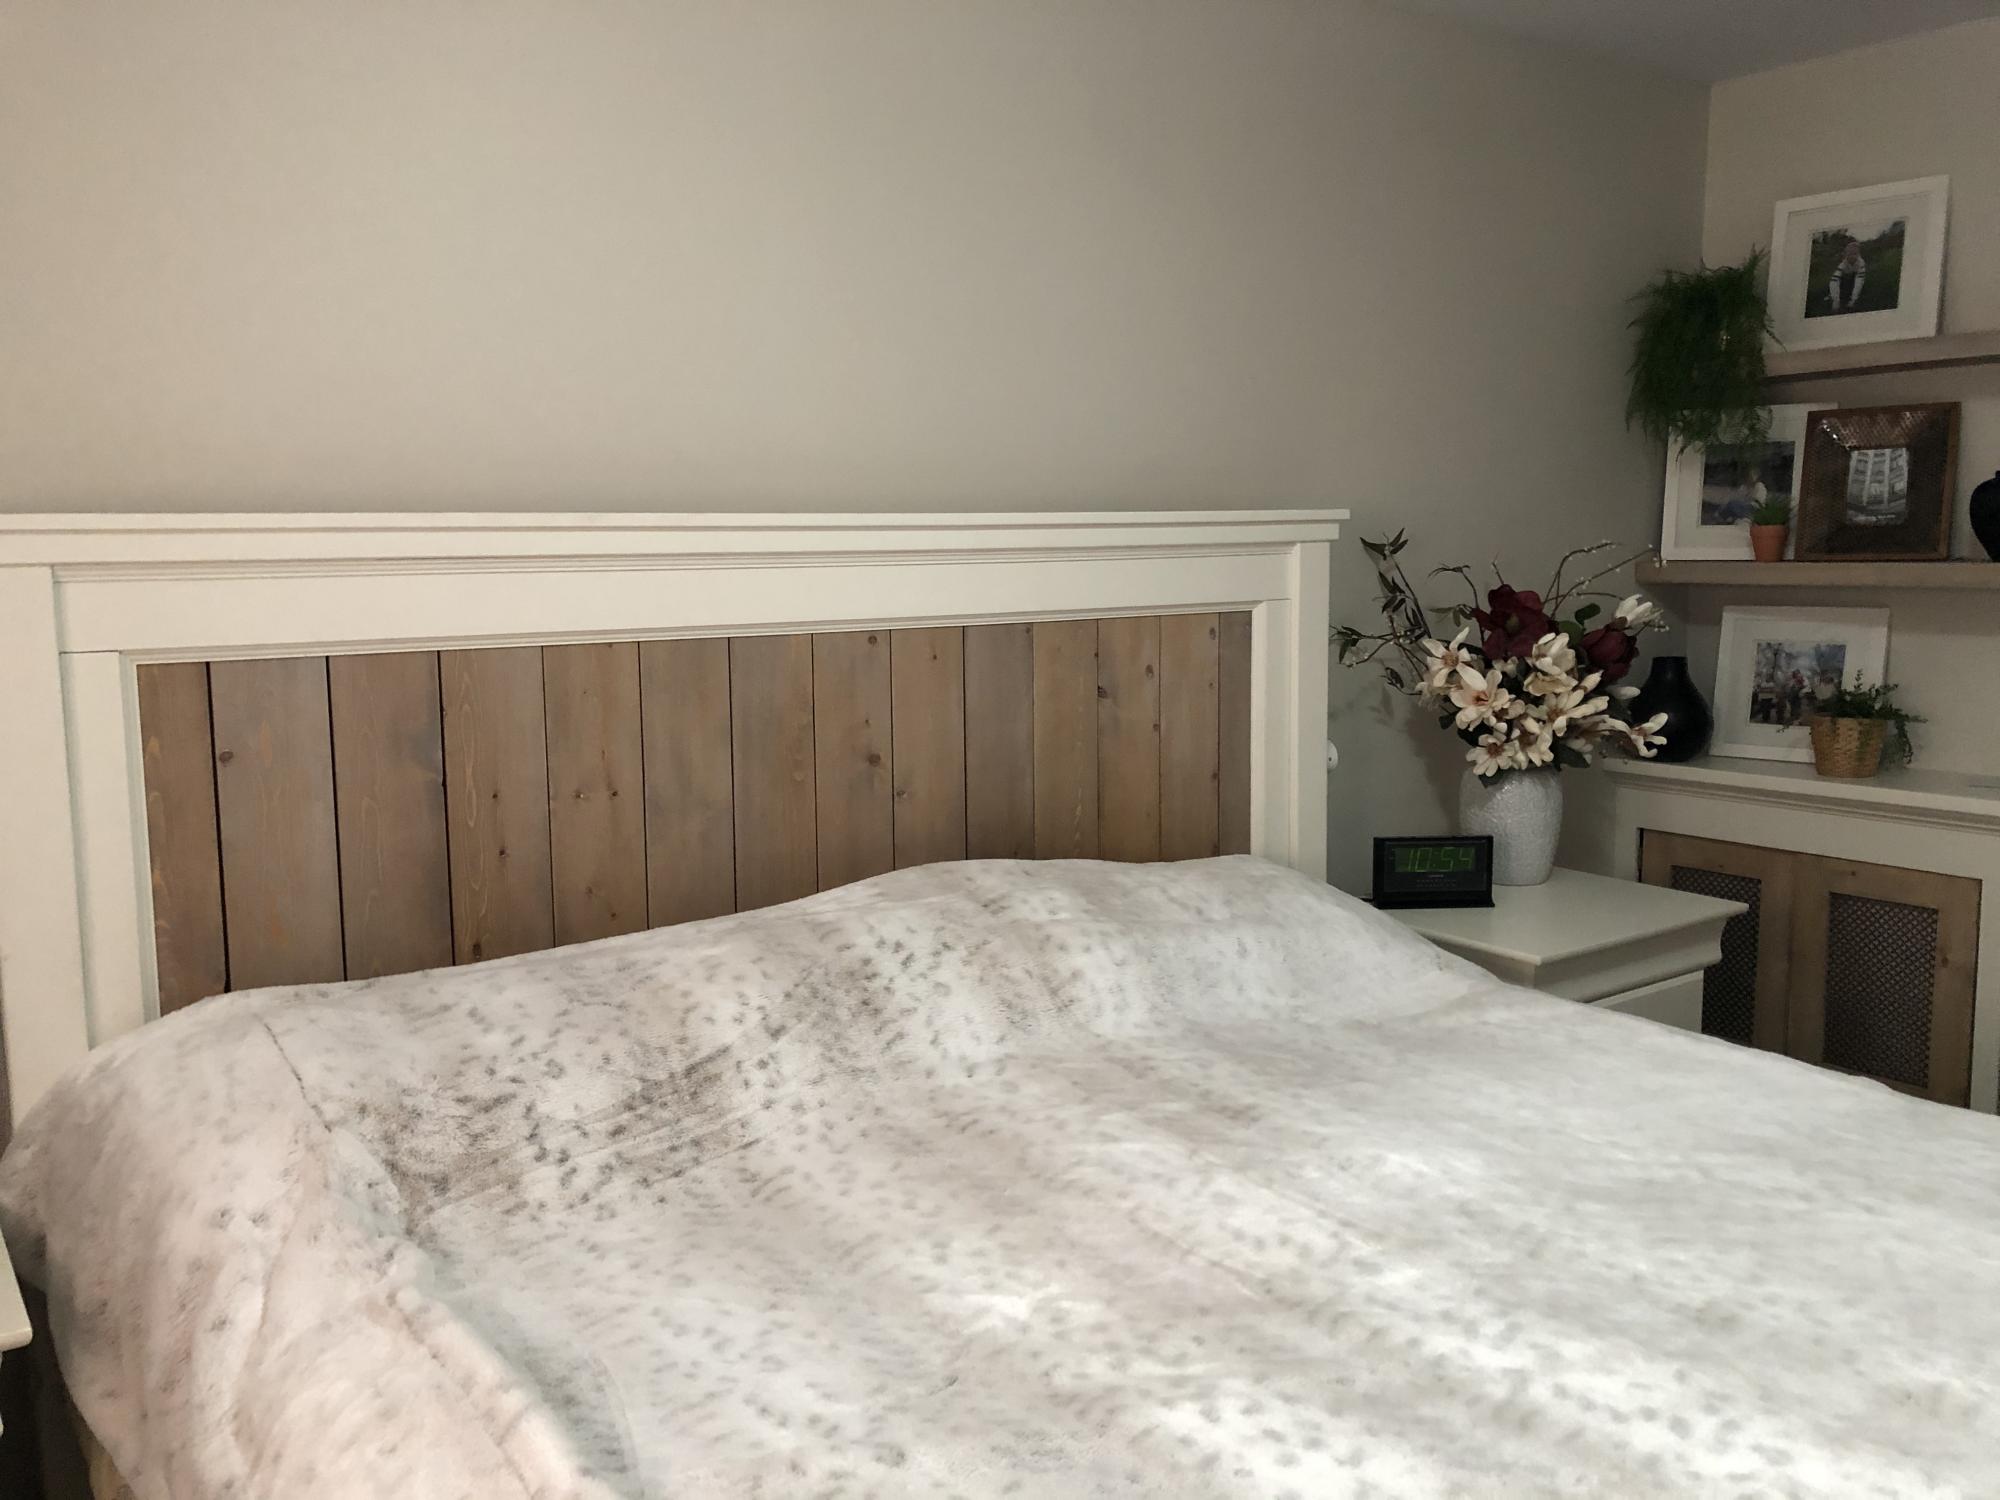
Thank you Ana White! This is the first piece of furniture I built! Finding your plans opened up a whole new world for me!
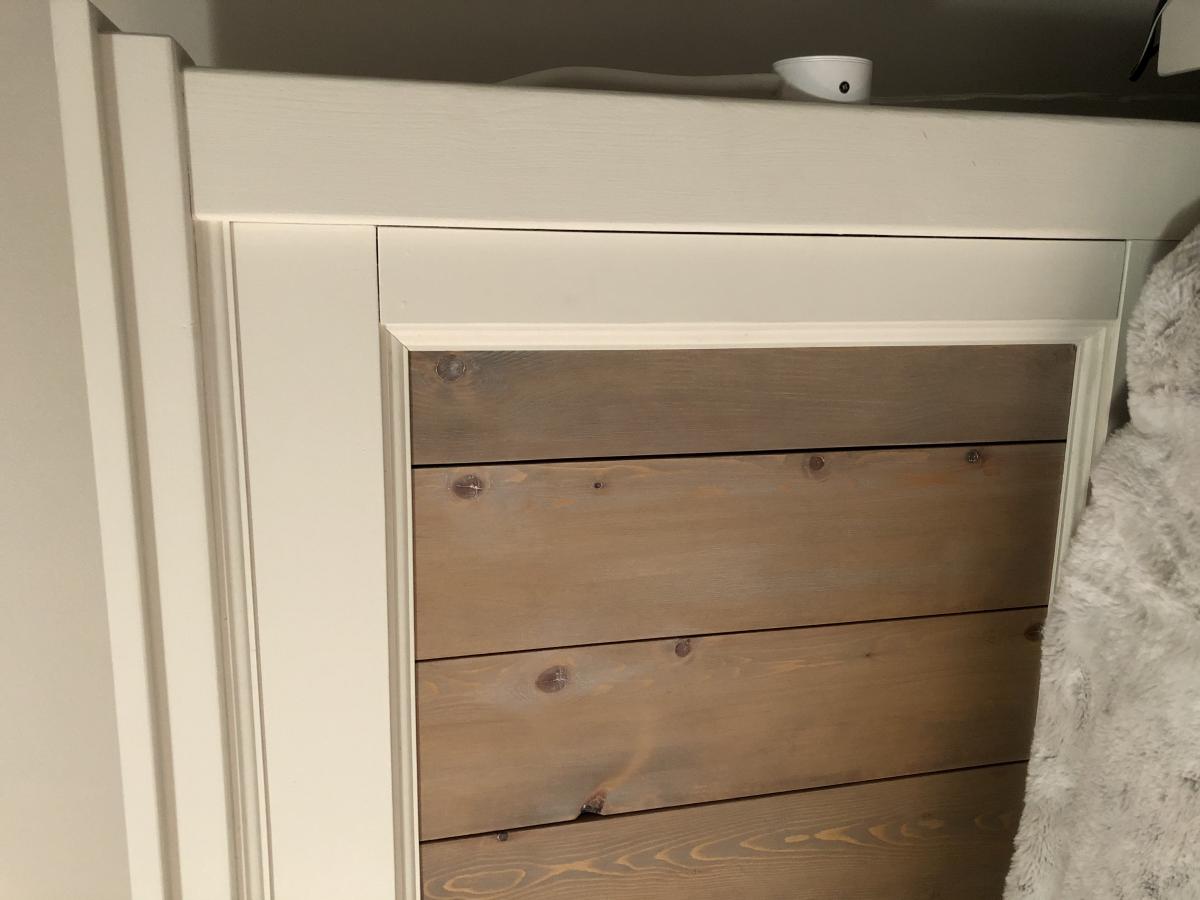
Finish Used
Painted in Benjamin Moore dove white matte furniture paint.
Pine panels are wood conditioner, minwax special walnut, minwax weathered oak. Then a combination of wax mixed with a bit of the white paint used on the rest of the bed.
Pine panels are wood conditioner, minwax special walnut, minwax weathered oak. Then a combination of wax mixed with a bit of the white paint used on the rest of the bed.
Comments
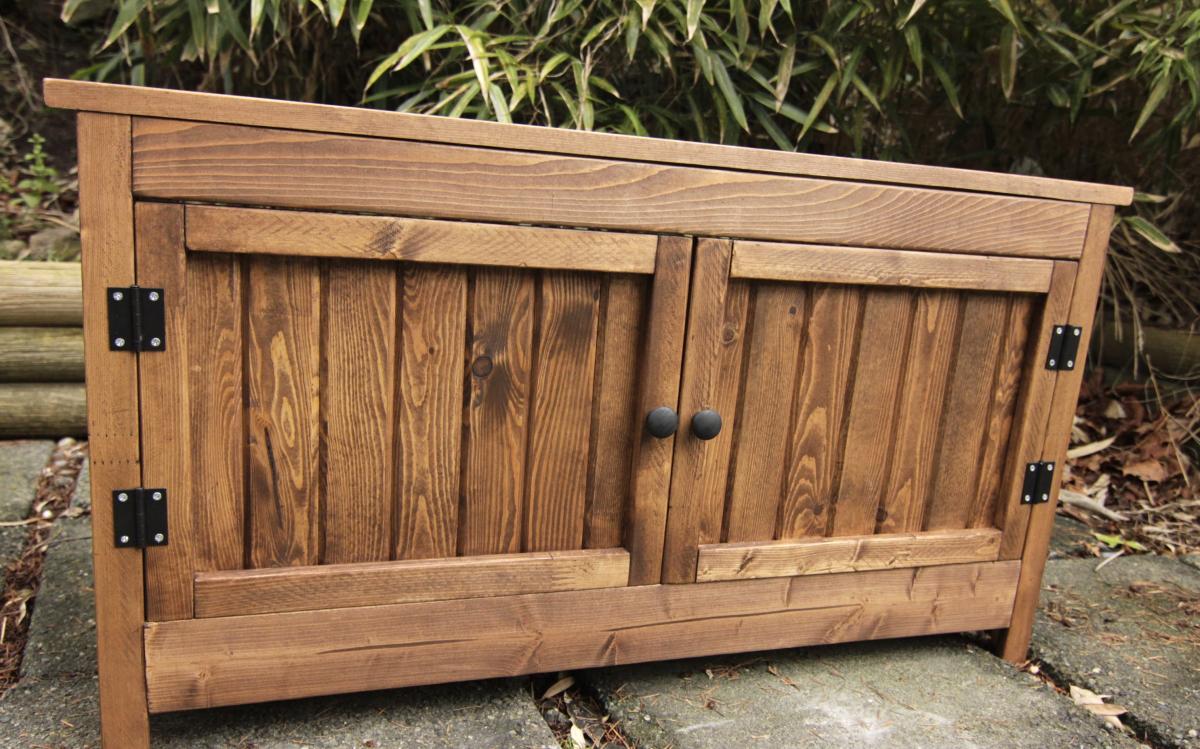
First Project - Modified Kentwood Nightstand into Bench for hiding a Litter Box
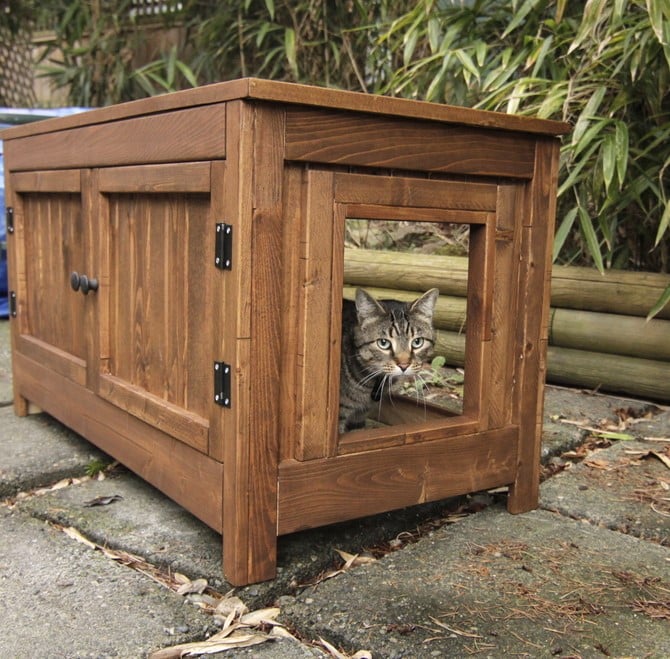
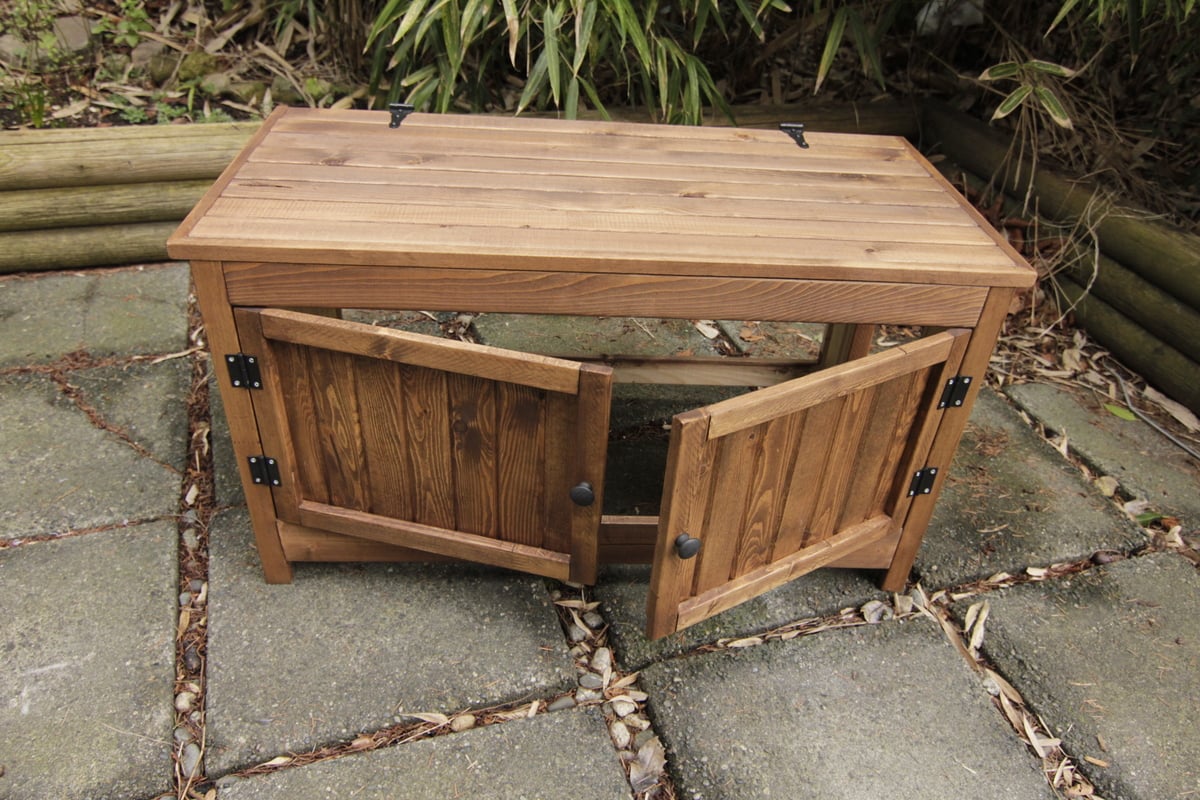
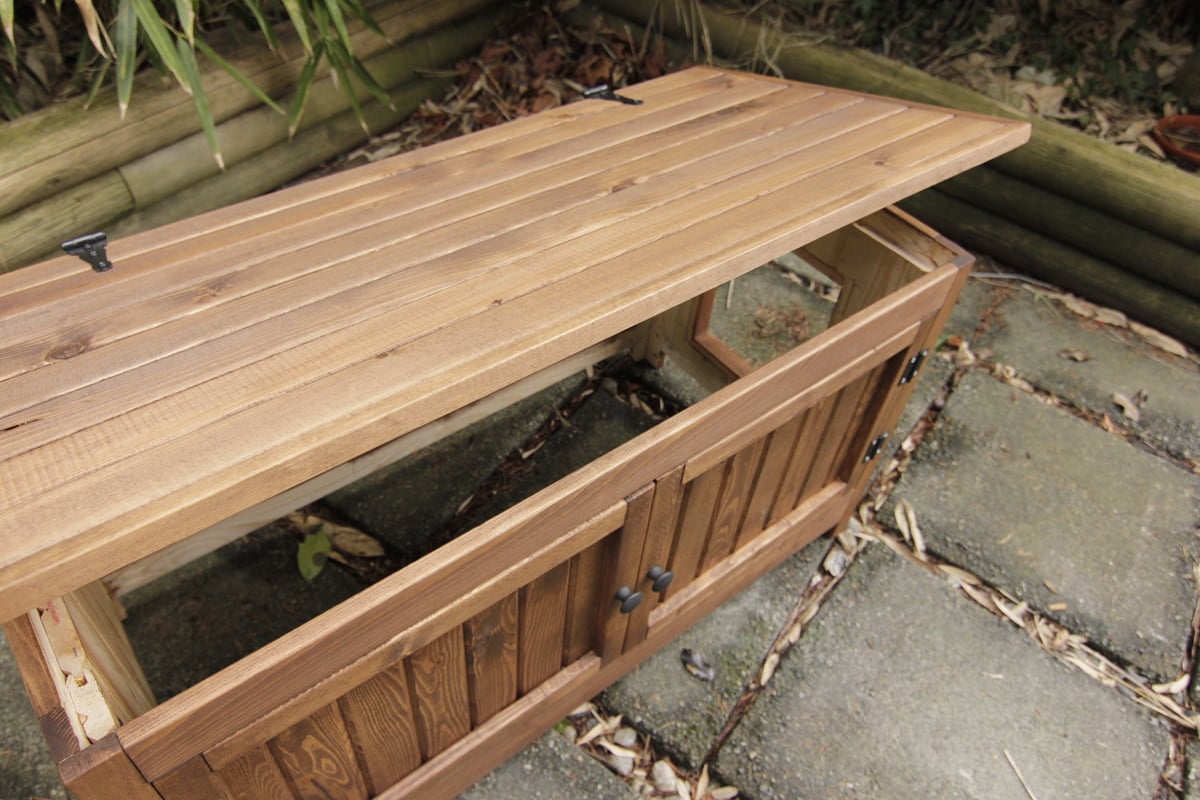
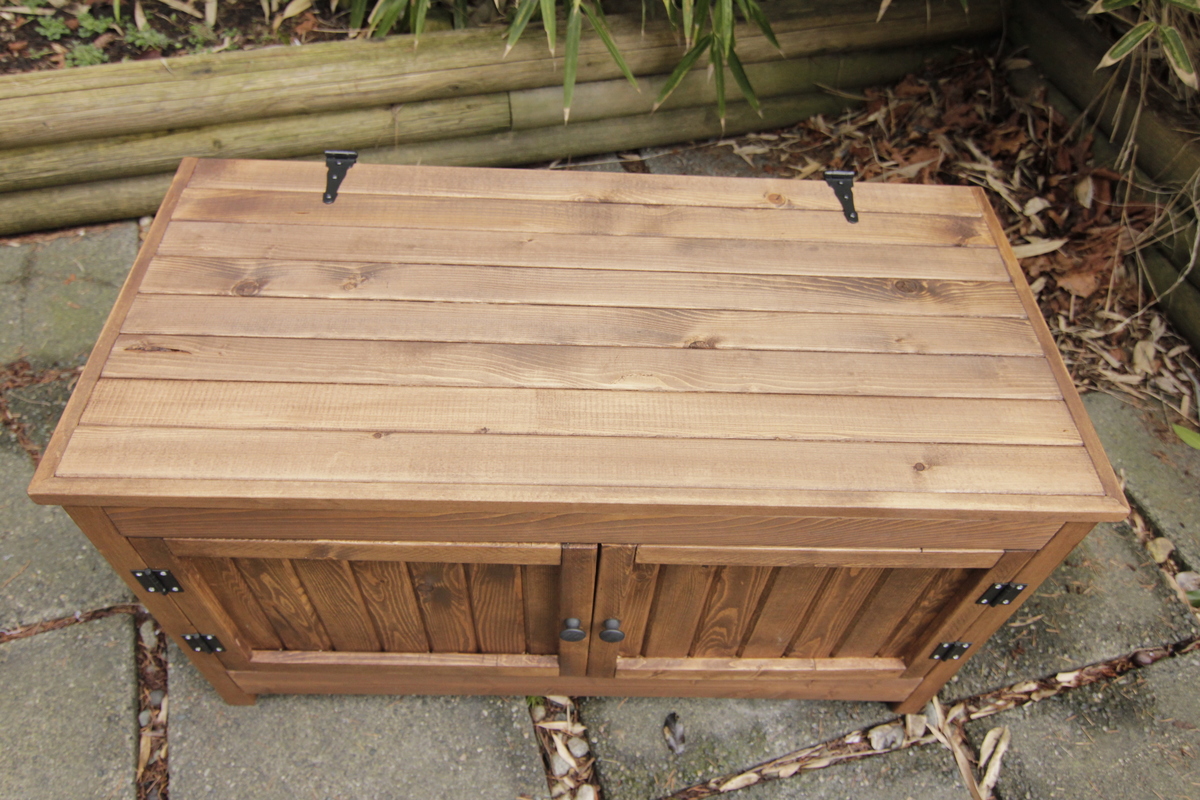
A while back I saw some posts on how to convert Ikea furniture into a litter box hider, which I thought was a great idea. Then I stumbled across the "Shanty-2-Chic" blog and the Kentwood Nightstand (and then of course Ana's site). I LOVED the stand and thought it'd be great to modify that plan into a bench version, so I could hide the litter box. I loosely followed the original plans and modified them to suite the dimensions of the litter box. I also wanted a lid that would lift so I could easily clean the litter box. I also cut a hole in one end so the cats could get in and out. I loved the look of the door on the Nightstand version, so I made two to fit the bench shape. I made one door first, then re-measured for the other door so that they would fit perfectly (good thing I did as the second one ended up needing to be a little longer than the other). In the photos I haven't added the bottom of the box yet, but I'll use L-brackets, attach leftover 1x3 as a border, then lay down old ikea shelves I had kicking around. The shelves will actually work out quite well as they have a laminate finish - making it easier to clean. I have a little carpet square to lay in there are well to catch the litter before the cats walk out. I intend to get a cushion for the top, so that my guests can sit on it when we're hanging out in the kitchen. I won't tell them they're sitting on top of the litter box :) Over all the project took me a really long time, but that was partly because I didn't have all the right tools, was often working in my living room (due to rain and working late at night), and I'm super anal about measuring! I'm really really happy with the way it turned out! P.S I bought the $20 Kreg Jig and must say that I LOVE that thing.
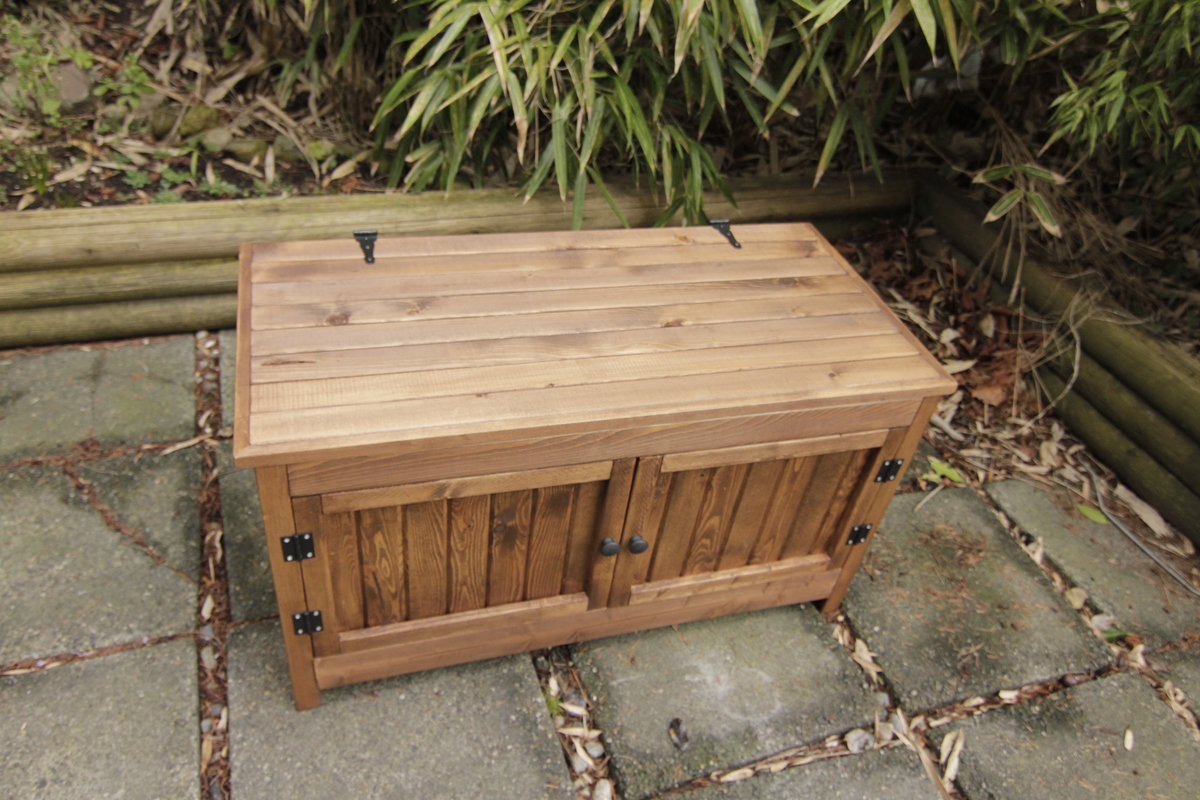
Built from Plan(s)
Estimated Cost
$100
Estimated Time Investment
Weekend Project (10-20 Hours)
Finish Used
1) Rust-Oleum Varathane Wood Conditioner (pre-stain)
2) Rust-Oleum Varathane Wood Stain in Dark Walnut
3) Rust-Oleum Varathane Water - Based Wood Finish (for the inside of the box).
I used wood conditioner on the exterior of the box, let sit for about 1/2 hour then painted on the stain with a sponge brush. I wanted it dark to I left the stain on for a while.
I don't like shiny finishes so I didn't treat the outside of the box, however I did use it on the inside to prevent the wood from absorbing any smells.
Recommended Skill Level
Beginner
Comments
Mon, 02/18/2013 - 17:20
Great Idea!
I really like this idea, I have to put the cat box in the farthest corner of my kitchen also. This is a great idea I hope you dont mind if I use :) Thanks for sharing
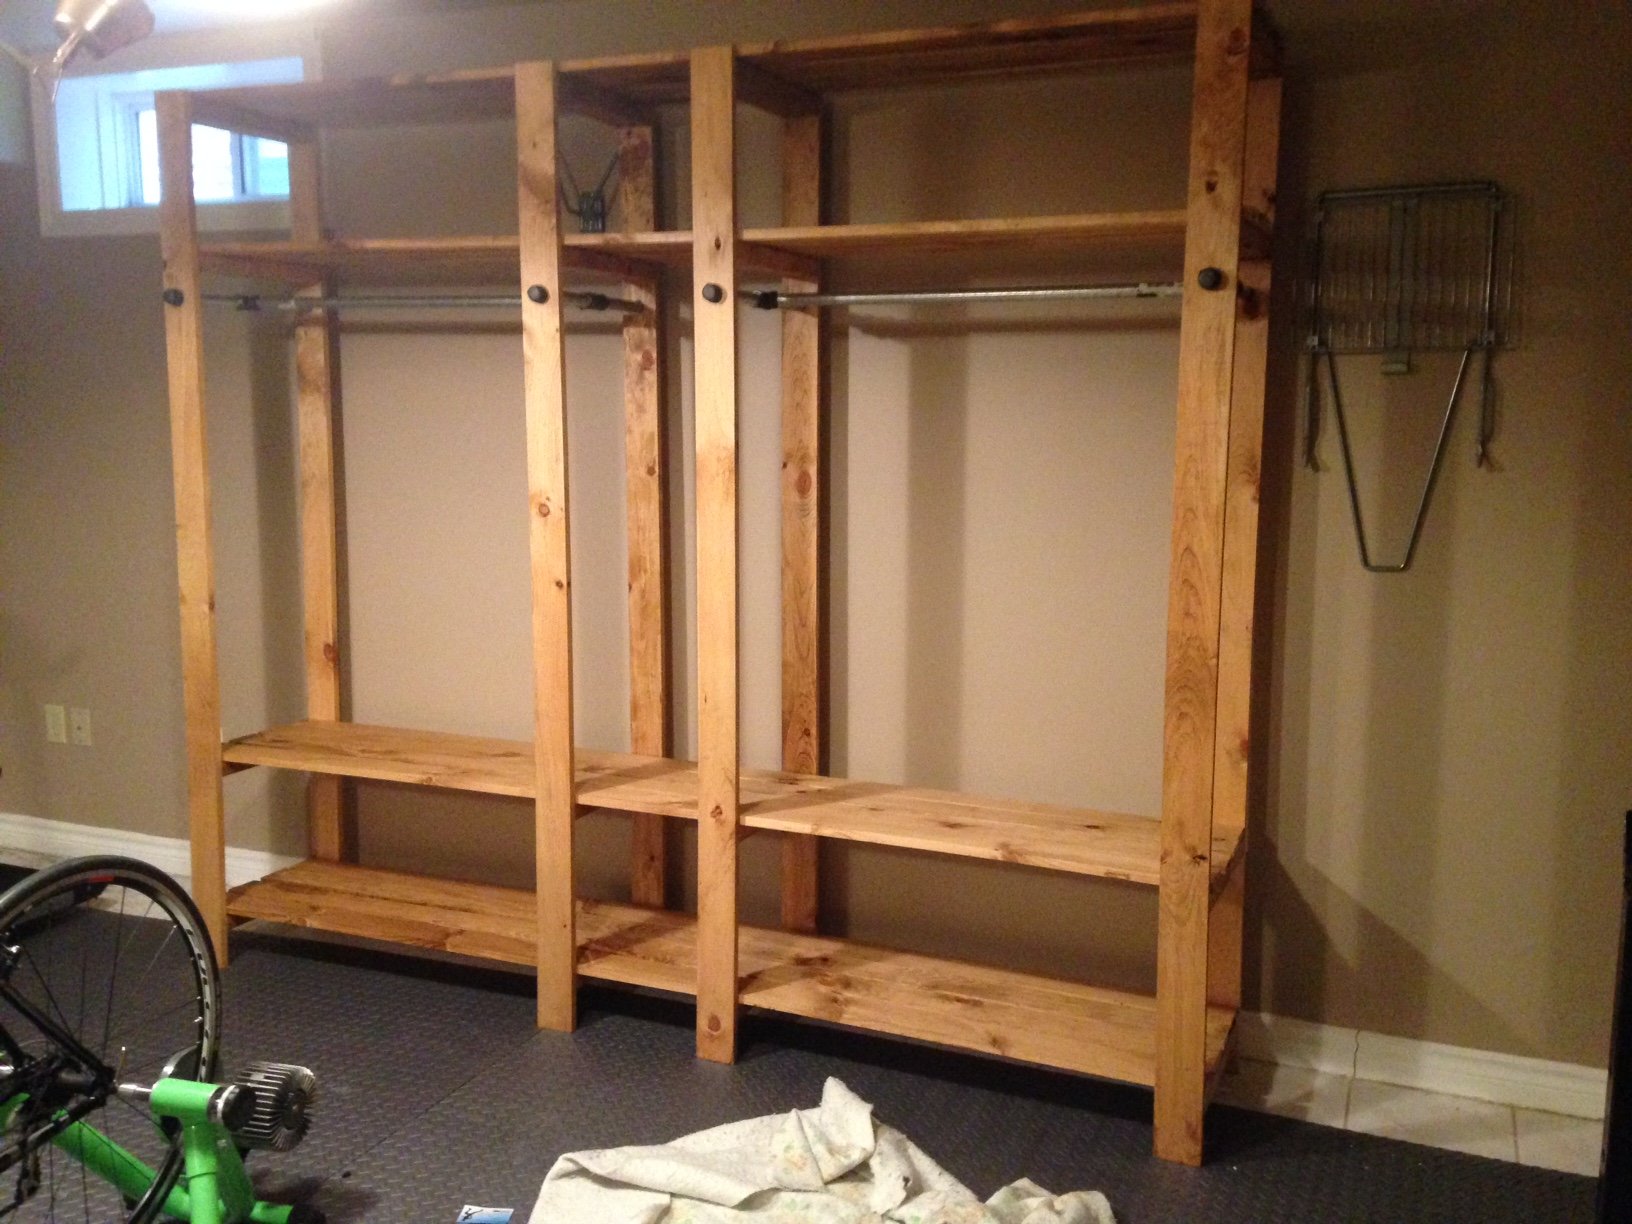
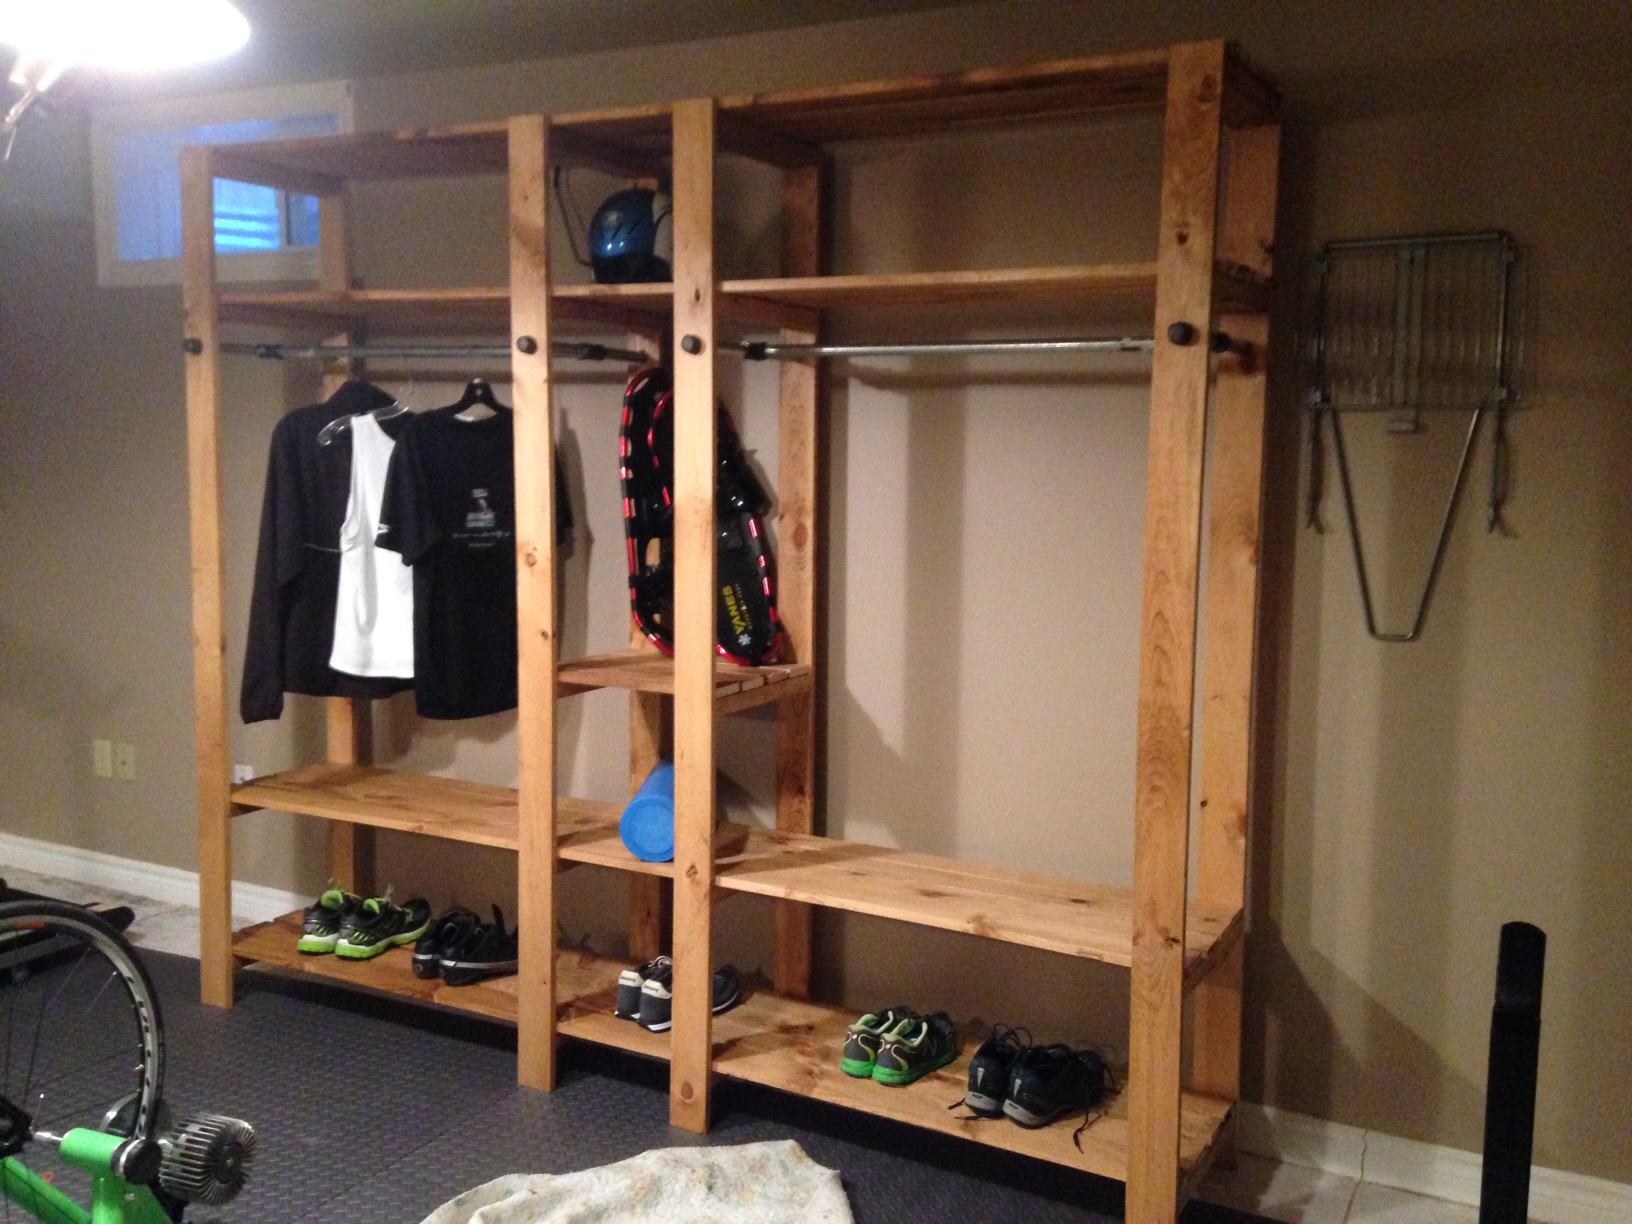
Industrial Closet System
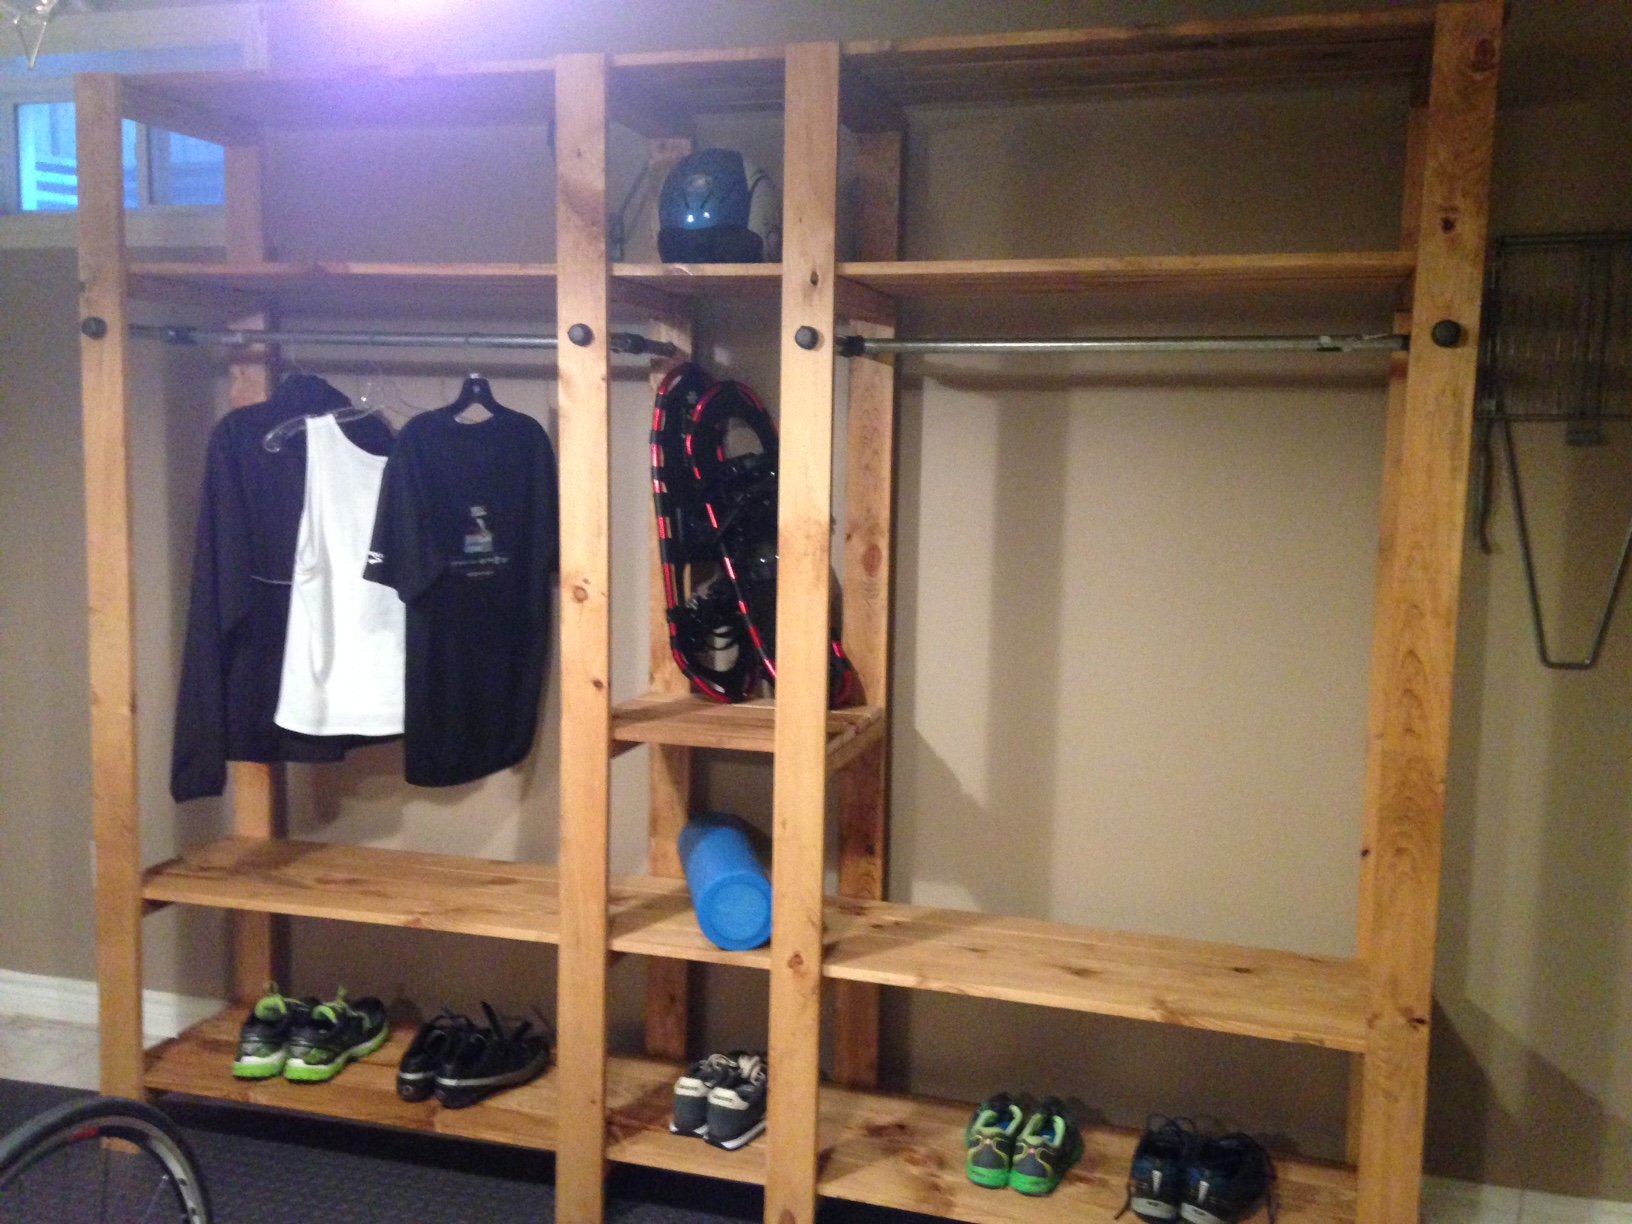
I built this closet system for our basement gym as a Christmas present to my boyfriend. He loved it!
I stained all of the boards before building as suggested in the plan - it definitely saved a lot of time and stress. After cutting and staining, and I brought all of the pieces downstairs to build.
The actual building went relatively quickly, but without perfectly straight boards, the shelves themselves were a little tricky. I also just nailed the shelf boards down with wood glue rather than screwing them in to save time - it's still sturdy and secure.
The length of the closet is about 8 feet long, so the middle shelf is about 1 foot and the two rod shelves are about 3.5 feet long.
Built from Plan(s)
Estimated Cost
$300 Canadian
Estimated Time Investment
Day Project (6-9 Hours)
Finish Used
Minwax Golden Oak
Recommended Skill Level
Intermediate
Comments
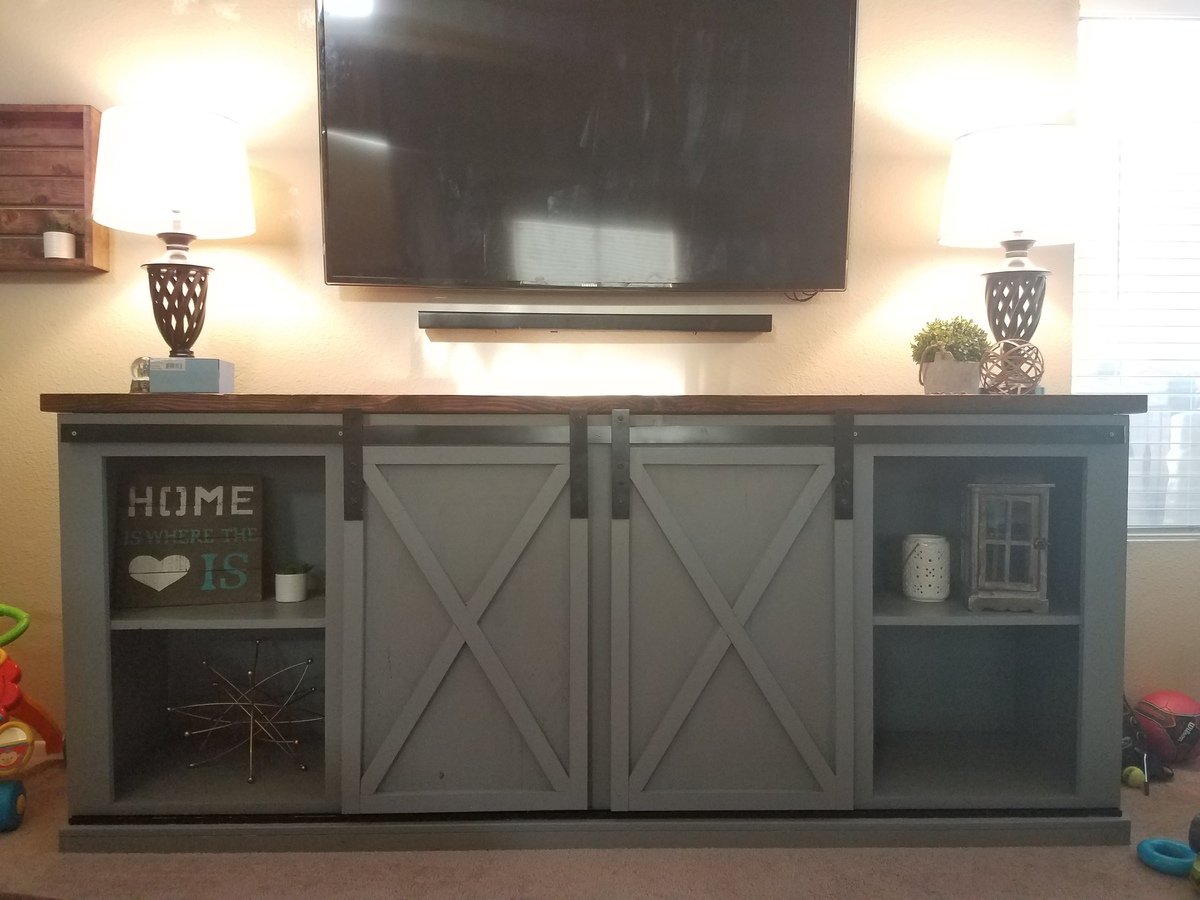
Anna-white.com
This was pretty easy and inexpensive to make. I'm going to make the coffee table this weekend, but converting it to a chest with a lift top. Purchased some cantilever hinges for that on Amazon for about $35. Will post pics of that once it's done. Sorry the photos came out sideways....They keep uploading that way even though they are right side up on my iPad......
Estimated Cost
$35 each
Estimated Time Investment
Weekend Project (10-20 Hours)
Finish Used
Ebony stain with satin clear topcoat. Only one coat of each. Stain wiped on, purdy brush for clear.
Recommended Skill Level
Intermediate
Mud Room
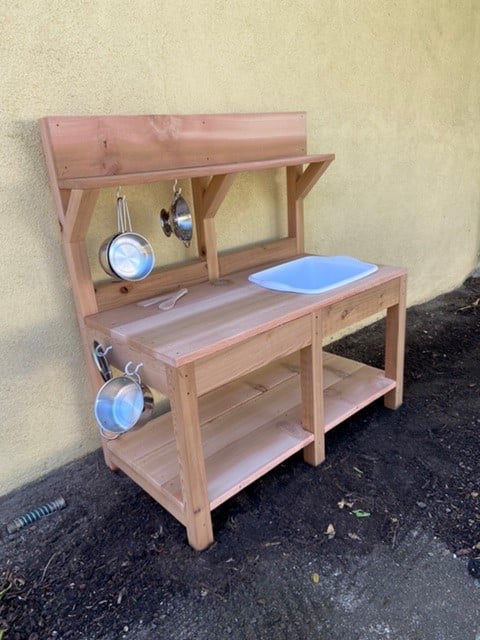
This was so easy and fun! We splurged a bit on nice cedar because apparently the cedar mills are down due to covid so the less expensive fencing isn’t so readily available. The hubs helped me rip down the larger boards, then I cut and assembled it all. Not including the buying and ripping, this took me maybe 4 hours to complete and we ended up with a beautiful kitchen for my daughter’s 5th birthday! Thanks for these super easy to follow plans!
Built from Plan(s)
Estimated Cost
$150
Estimated Time Investment
Afternoon Project (3-6 Hours)
Finish Used
None
Recommended Skill Level
Beginner
Comments
kids Bench
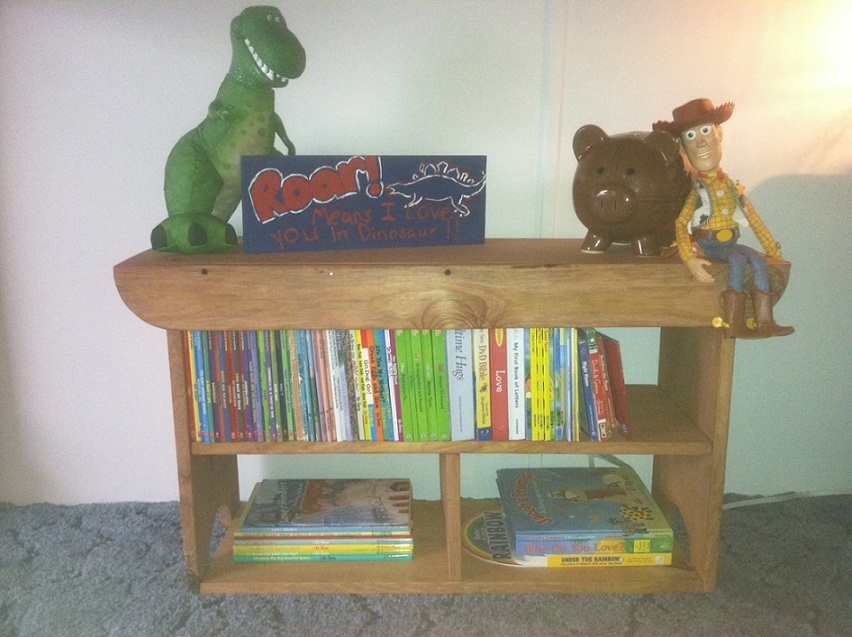
This is my husband's second project. He actually made 2 this weekend, one for my son and the other for my nephew. He lowered the bottom shelf to allow more room for books. He used a cherry stain. We love how it turned out-functional and nice to look at. I would say about 2 1/2 -3 hours to complete the project.
Built from Plan(s)
Estimated Time Investment
Afternoon Project (3-6 Hours)
Finish Used
Cherry minmax stain 235
Recommended Skill Level
Beginner
Comments
One Piece Play Kitchen
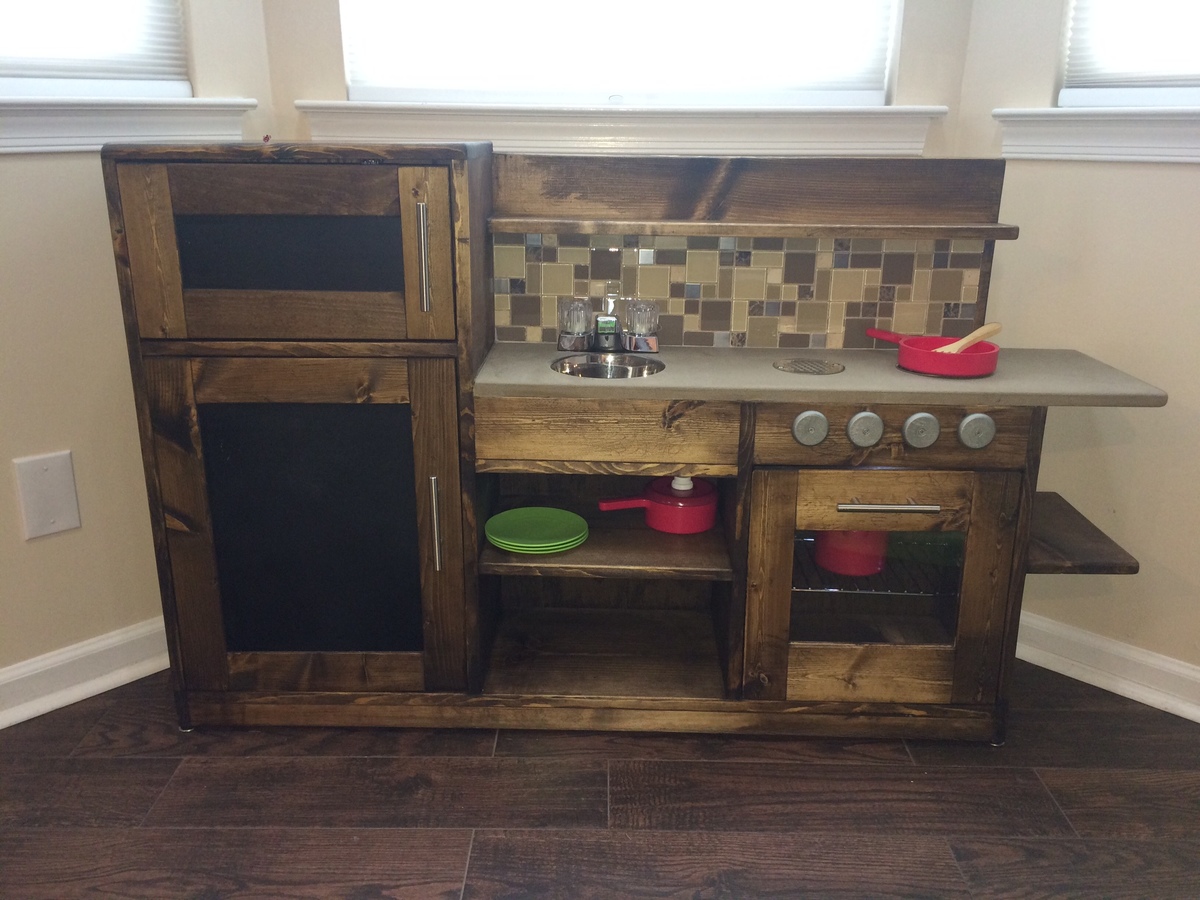
Thank you so much for the plans Anna. My two year old absolutely loved this Christmas present. I used drains for the stove tops and added a wire rack to the stove and tiled the backsplash.
Built from Plan(s)
Estimated Cost
$125
Estimated Time Investment
Week Long Project (20 Hours or More)
Finish Used
Dark Walnut Stain, Chalkboard and Magnetic Paint (Doors), Multicolor Textured Paint (Counter) and Metallic Paint (Stove Knobs)
Recommended Skill Level
Starter Project
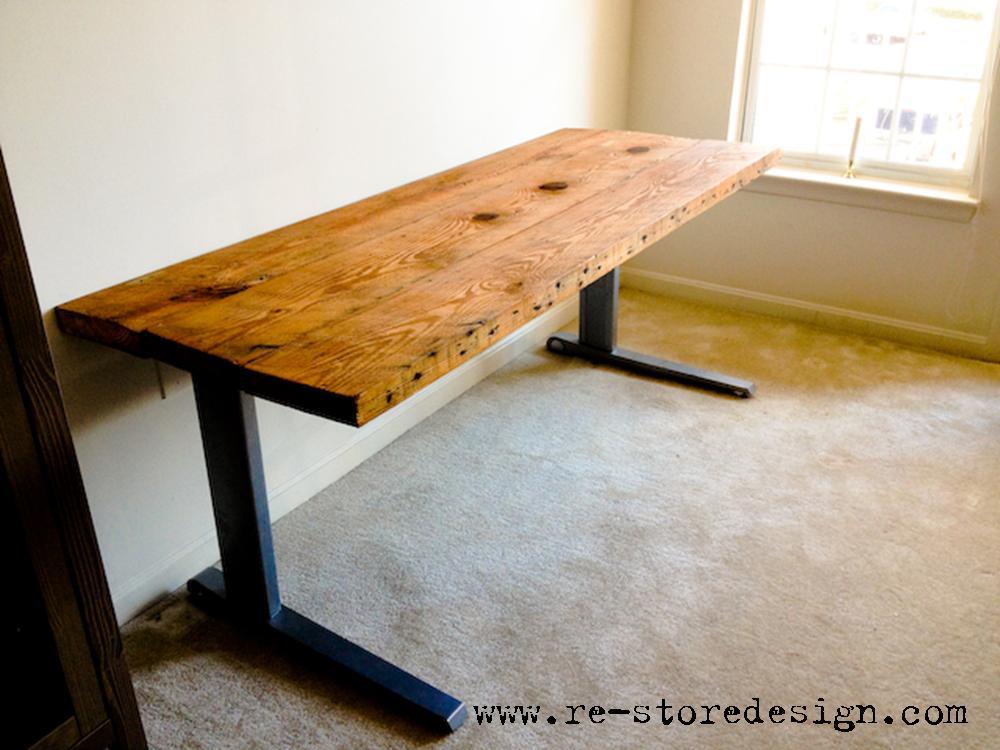
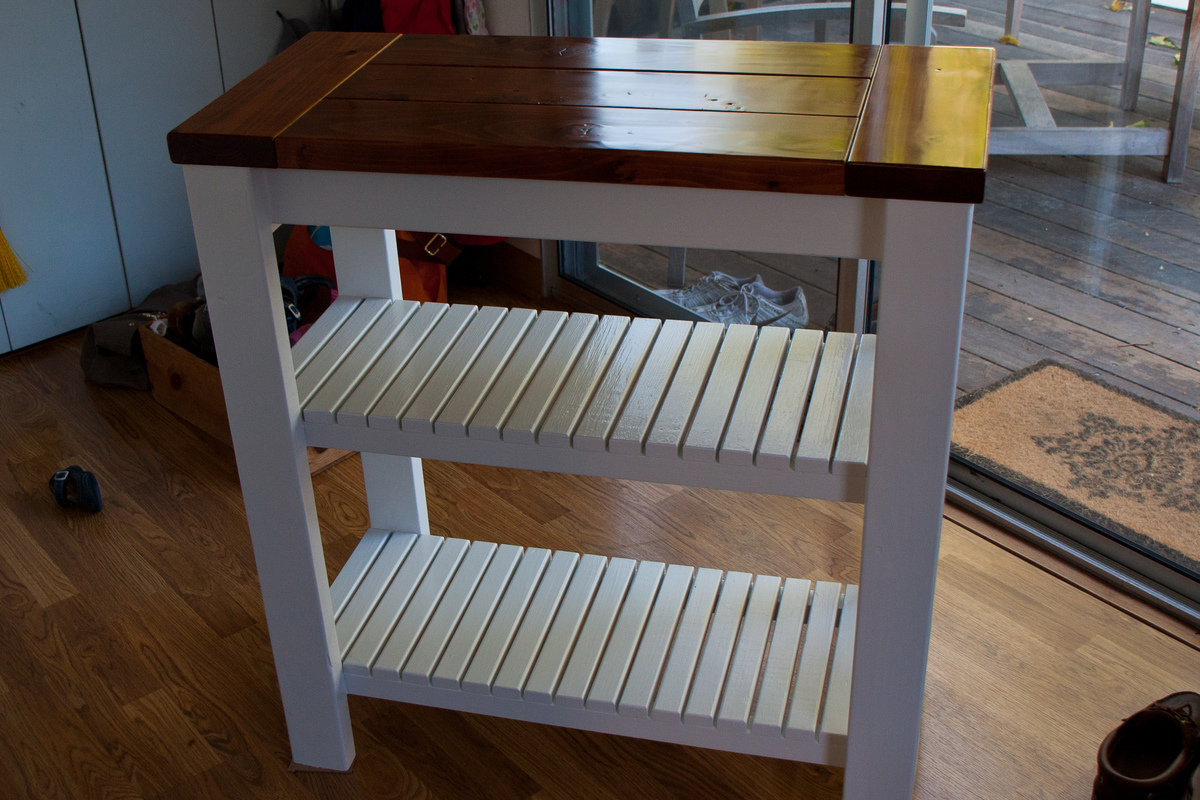
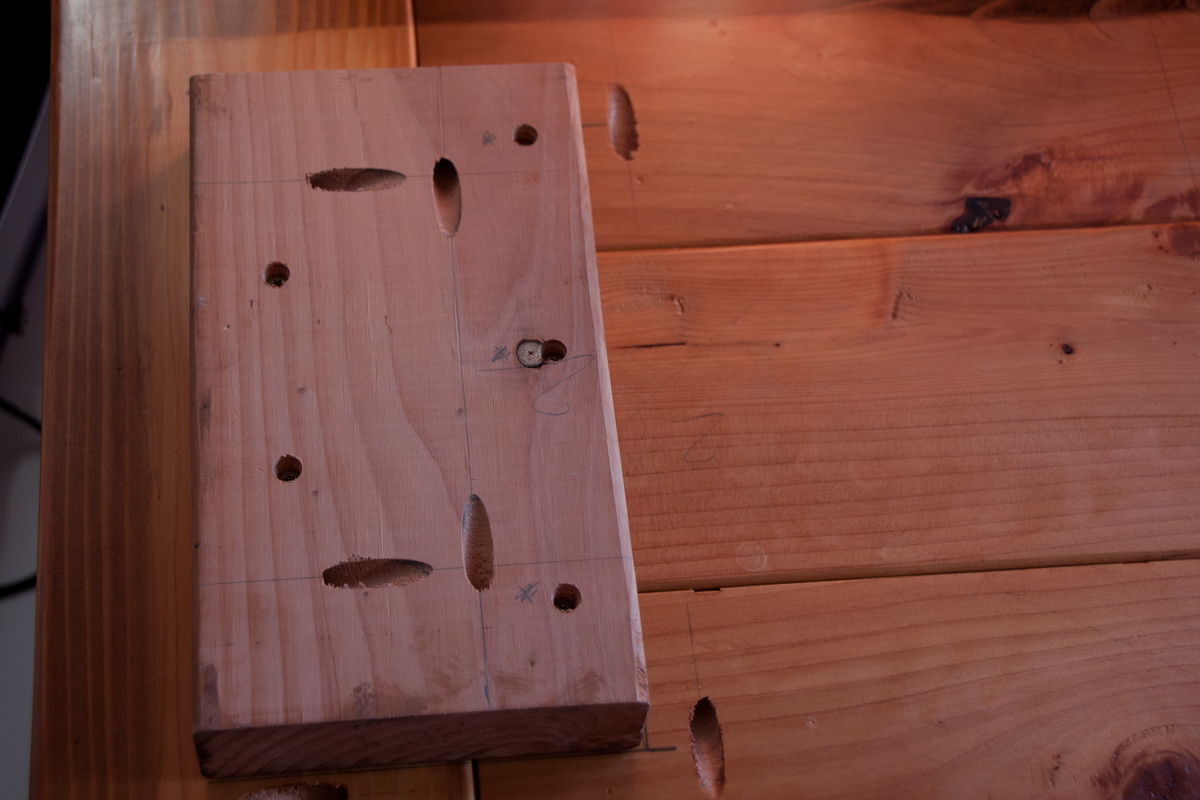
Kitchen Island

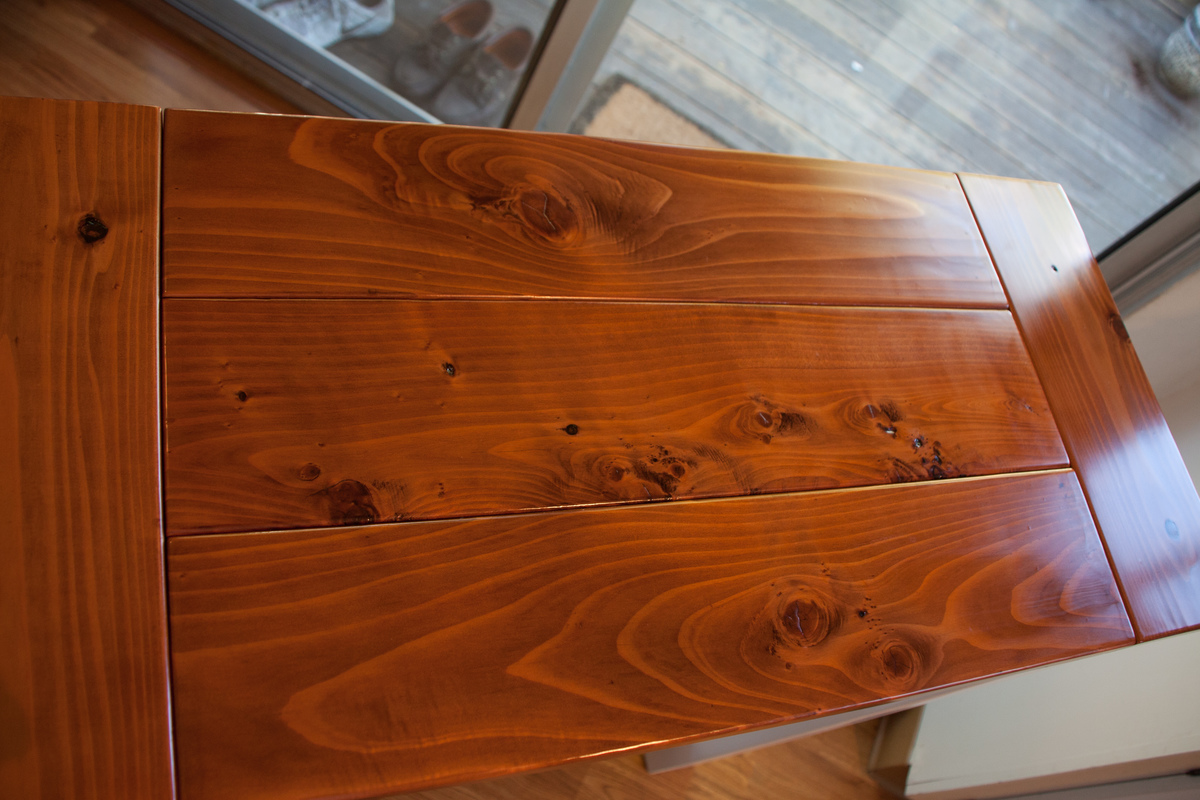
This was a great project. We needed a more functional small desk next to our kitchen door so I built one based on Ana's Kitchen Island plan. I wanted a table top which shows the beauty of knotty wood and I'm happy with the redwood (2x6) I've chosen. The body is cheap whitewood (2x4 and remaining pieces of the 2x6 redwood for the short sides) and the racks are furring strips (pine) 1x2. I modified all the dimensions to fit the available space. I also decided to use 2x4 (instead of 2x6) for the long sides to not lose too much height for the actual rack space. The "rails" of the racks are 2x2.
The tabletop was heavily sanded (100 to 400), stained with Minwax Honey (~5 minutes), and is enjoying about 5 layers of satin polyurethane (sanded in between). I wanted the redwood to shine and just add some depth with the staining. A couple of fruit flies were driving me crazy and took a couple of baths in the fresh poly. :)
The body has a double coating (sanded in between) of white latex paint. The thickness of the paint was pretty annoying and I realized after I was done I should have considered a thinner.
This is my first actual furniture piece (after building a headboard) and I very much enjoyed building it. Ana's plans are a pleasure to follow / get inspired by and I'm happy to have found a new hobby.
Let me know what you think!

Built from Plan(s)
Estimated Time Investment
Day Project (6-9 Hours)
Finish Used
white latex paint, minwax honey stain, minwax satin polyurethane
Recommended Skill Level
Beginner
Comments
Thu, 02/21/2013 - 22:25
The wood finish on the top is
The wood finish on the top is absolutely gorgeous!!!!!!!!! You did a fantastic job!
In reply to The wood finish on the top is by Pam the Goatherd
Fri, 02/22/2013 - 20:57
Thank you
Thanks Pam, this is very kind of you.
Toy Chest/Deacon's Bench
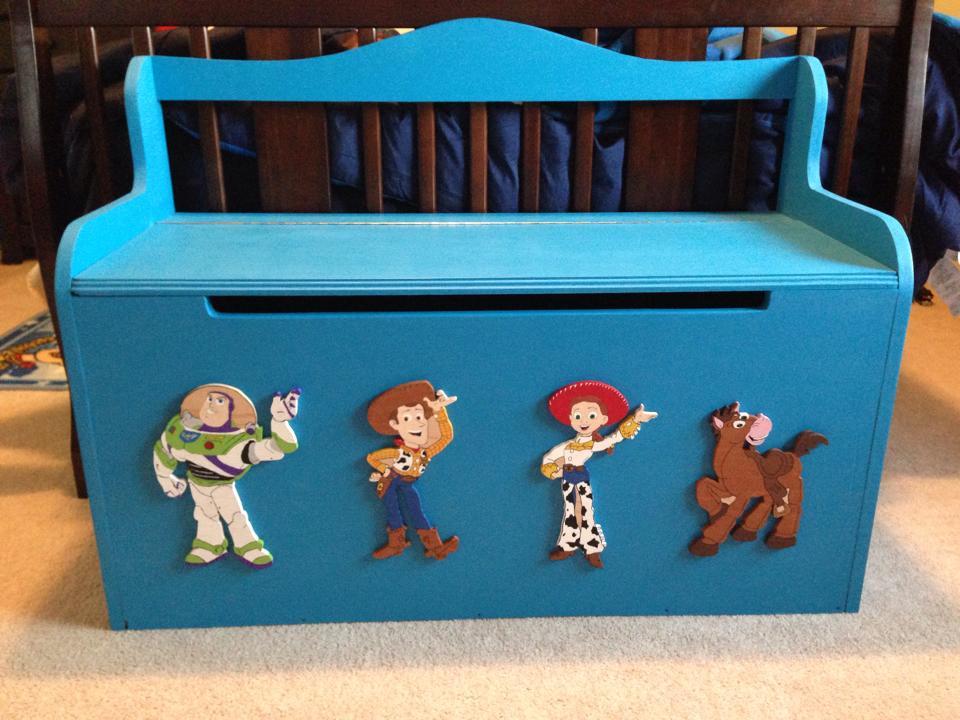
Just a quick box I put together for my son's toys. Cut the front part out to prevent finger bangs, added a routered edge to the front lid and hand cut and painted the charaters for the front. Nothing too complex.
Estimated Cost
$100
Estimated Time Investment
Day Project (6-9 Hours)
Finish Used
Just a paint to match his room theme. Semi Gloss interior.
Recommended Skill Level
Beginner
Comments
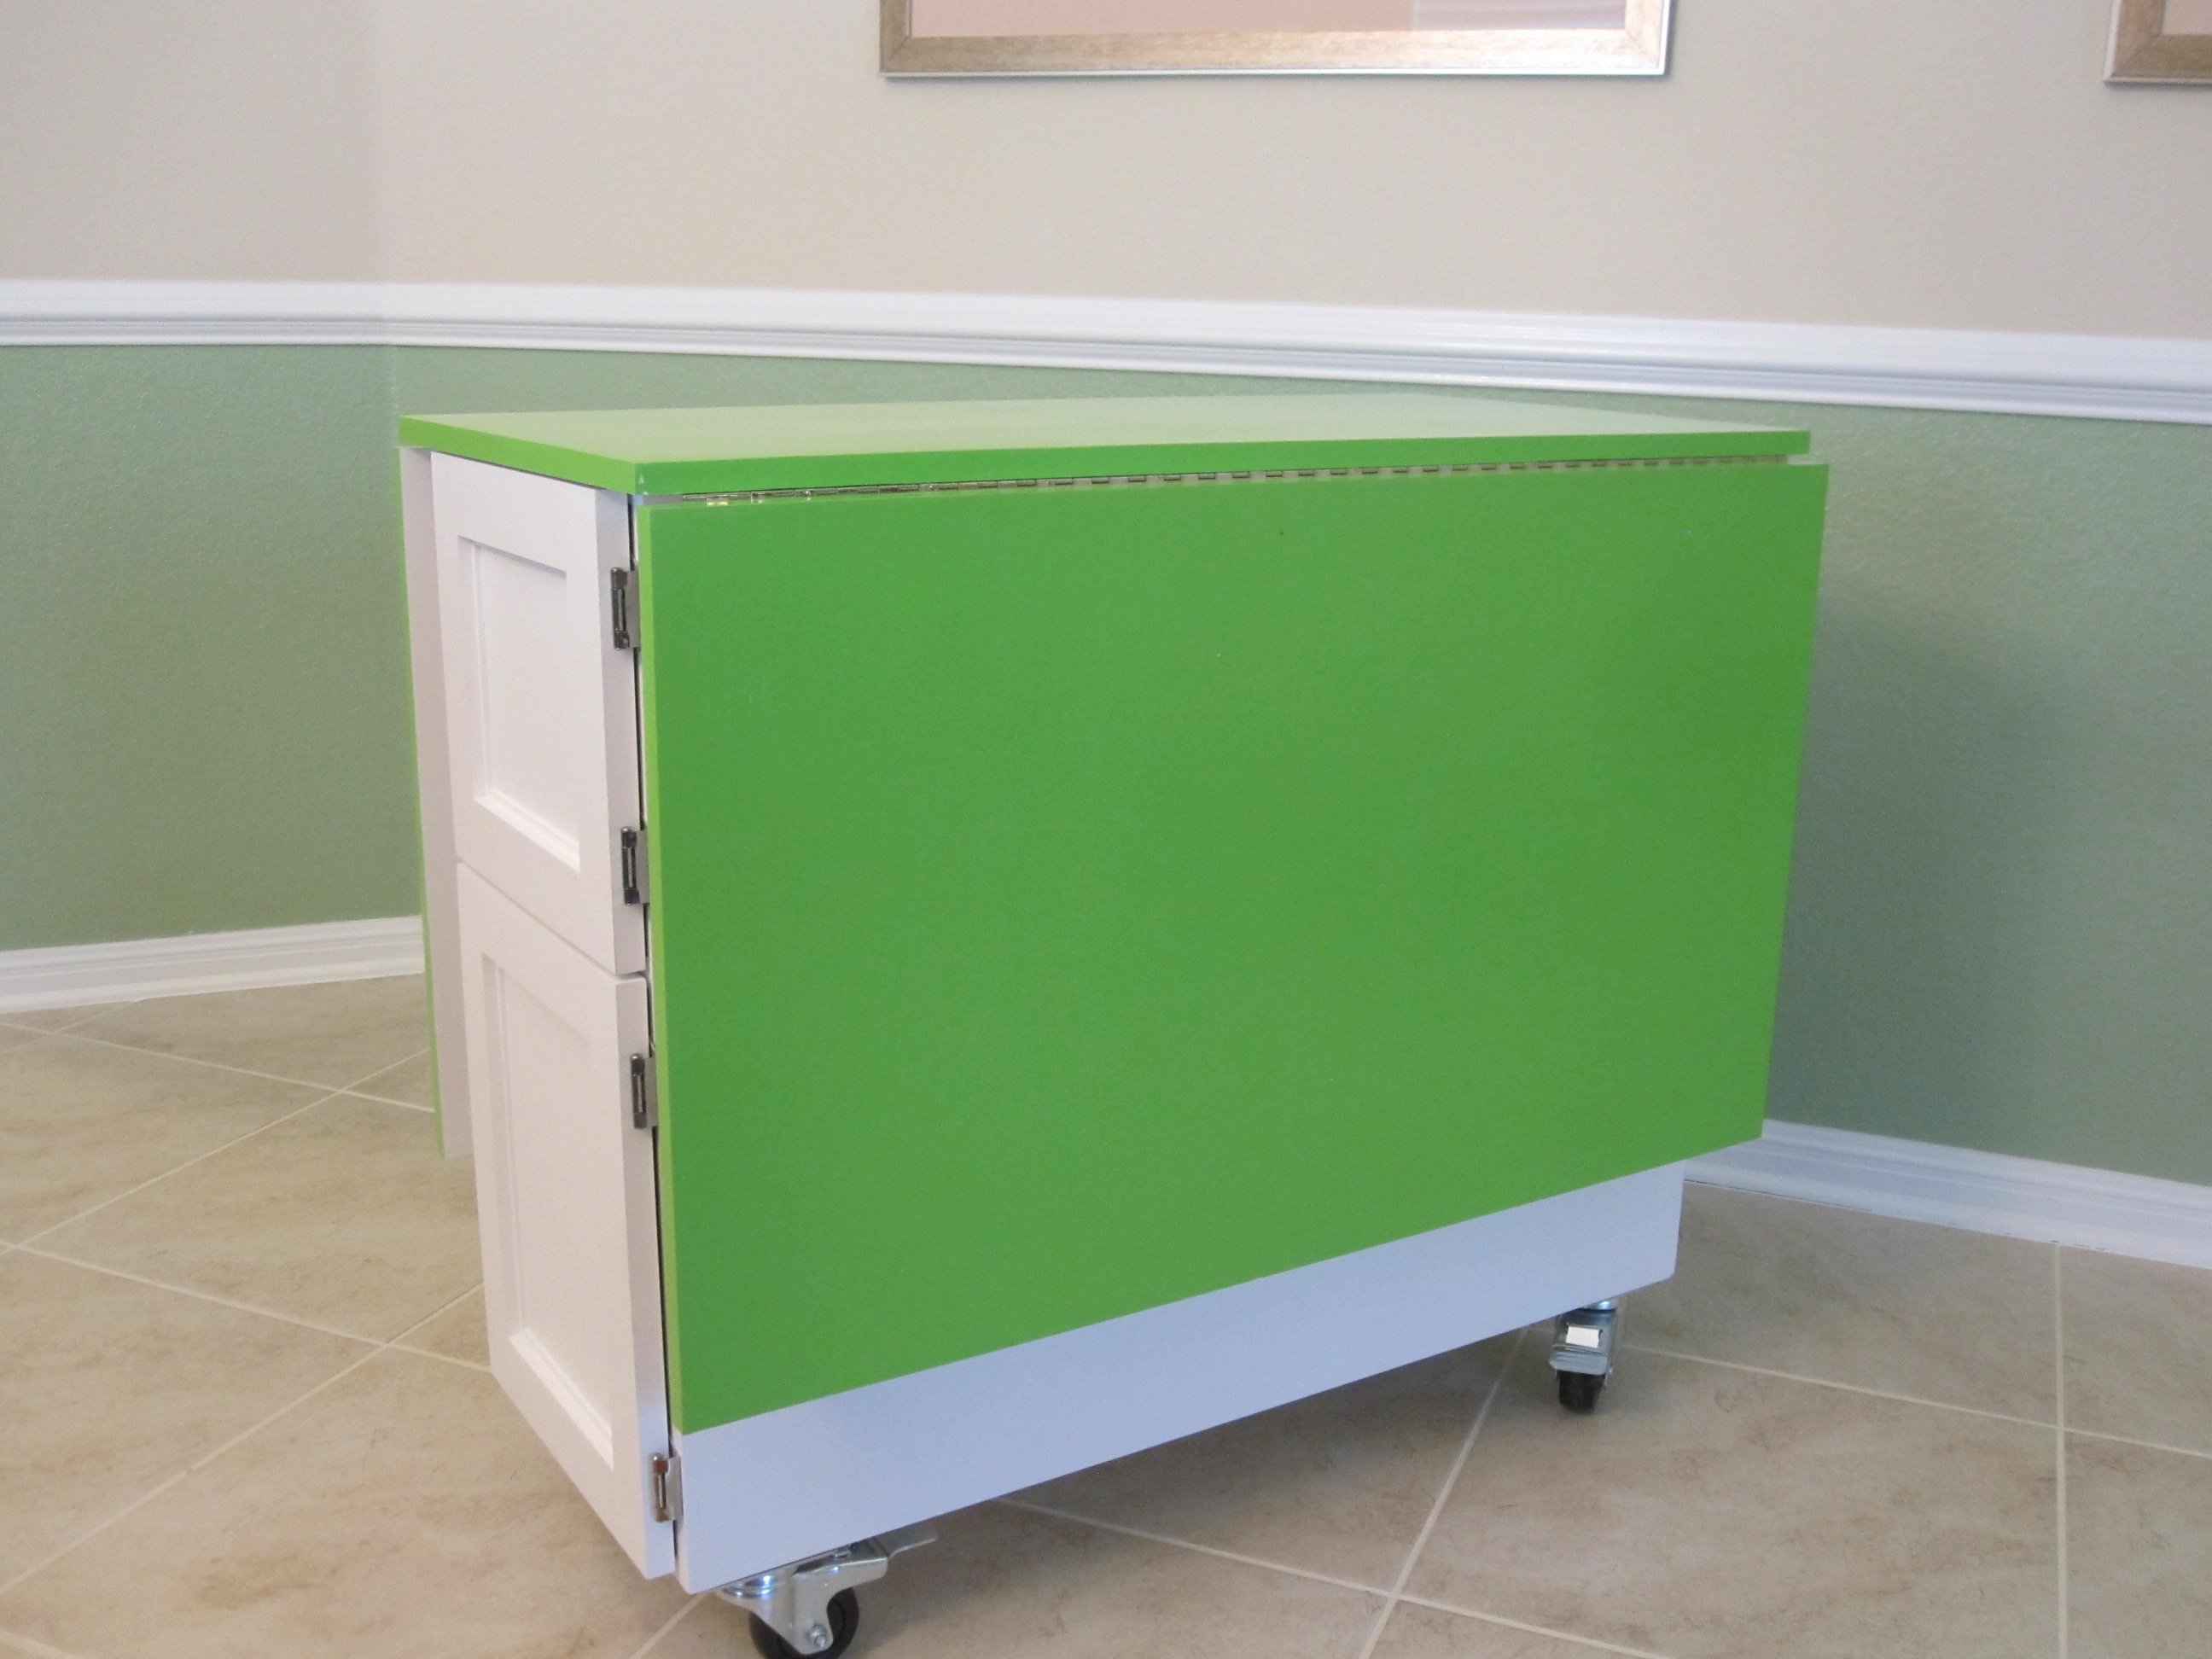
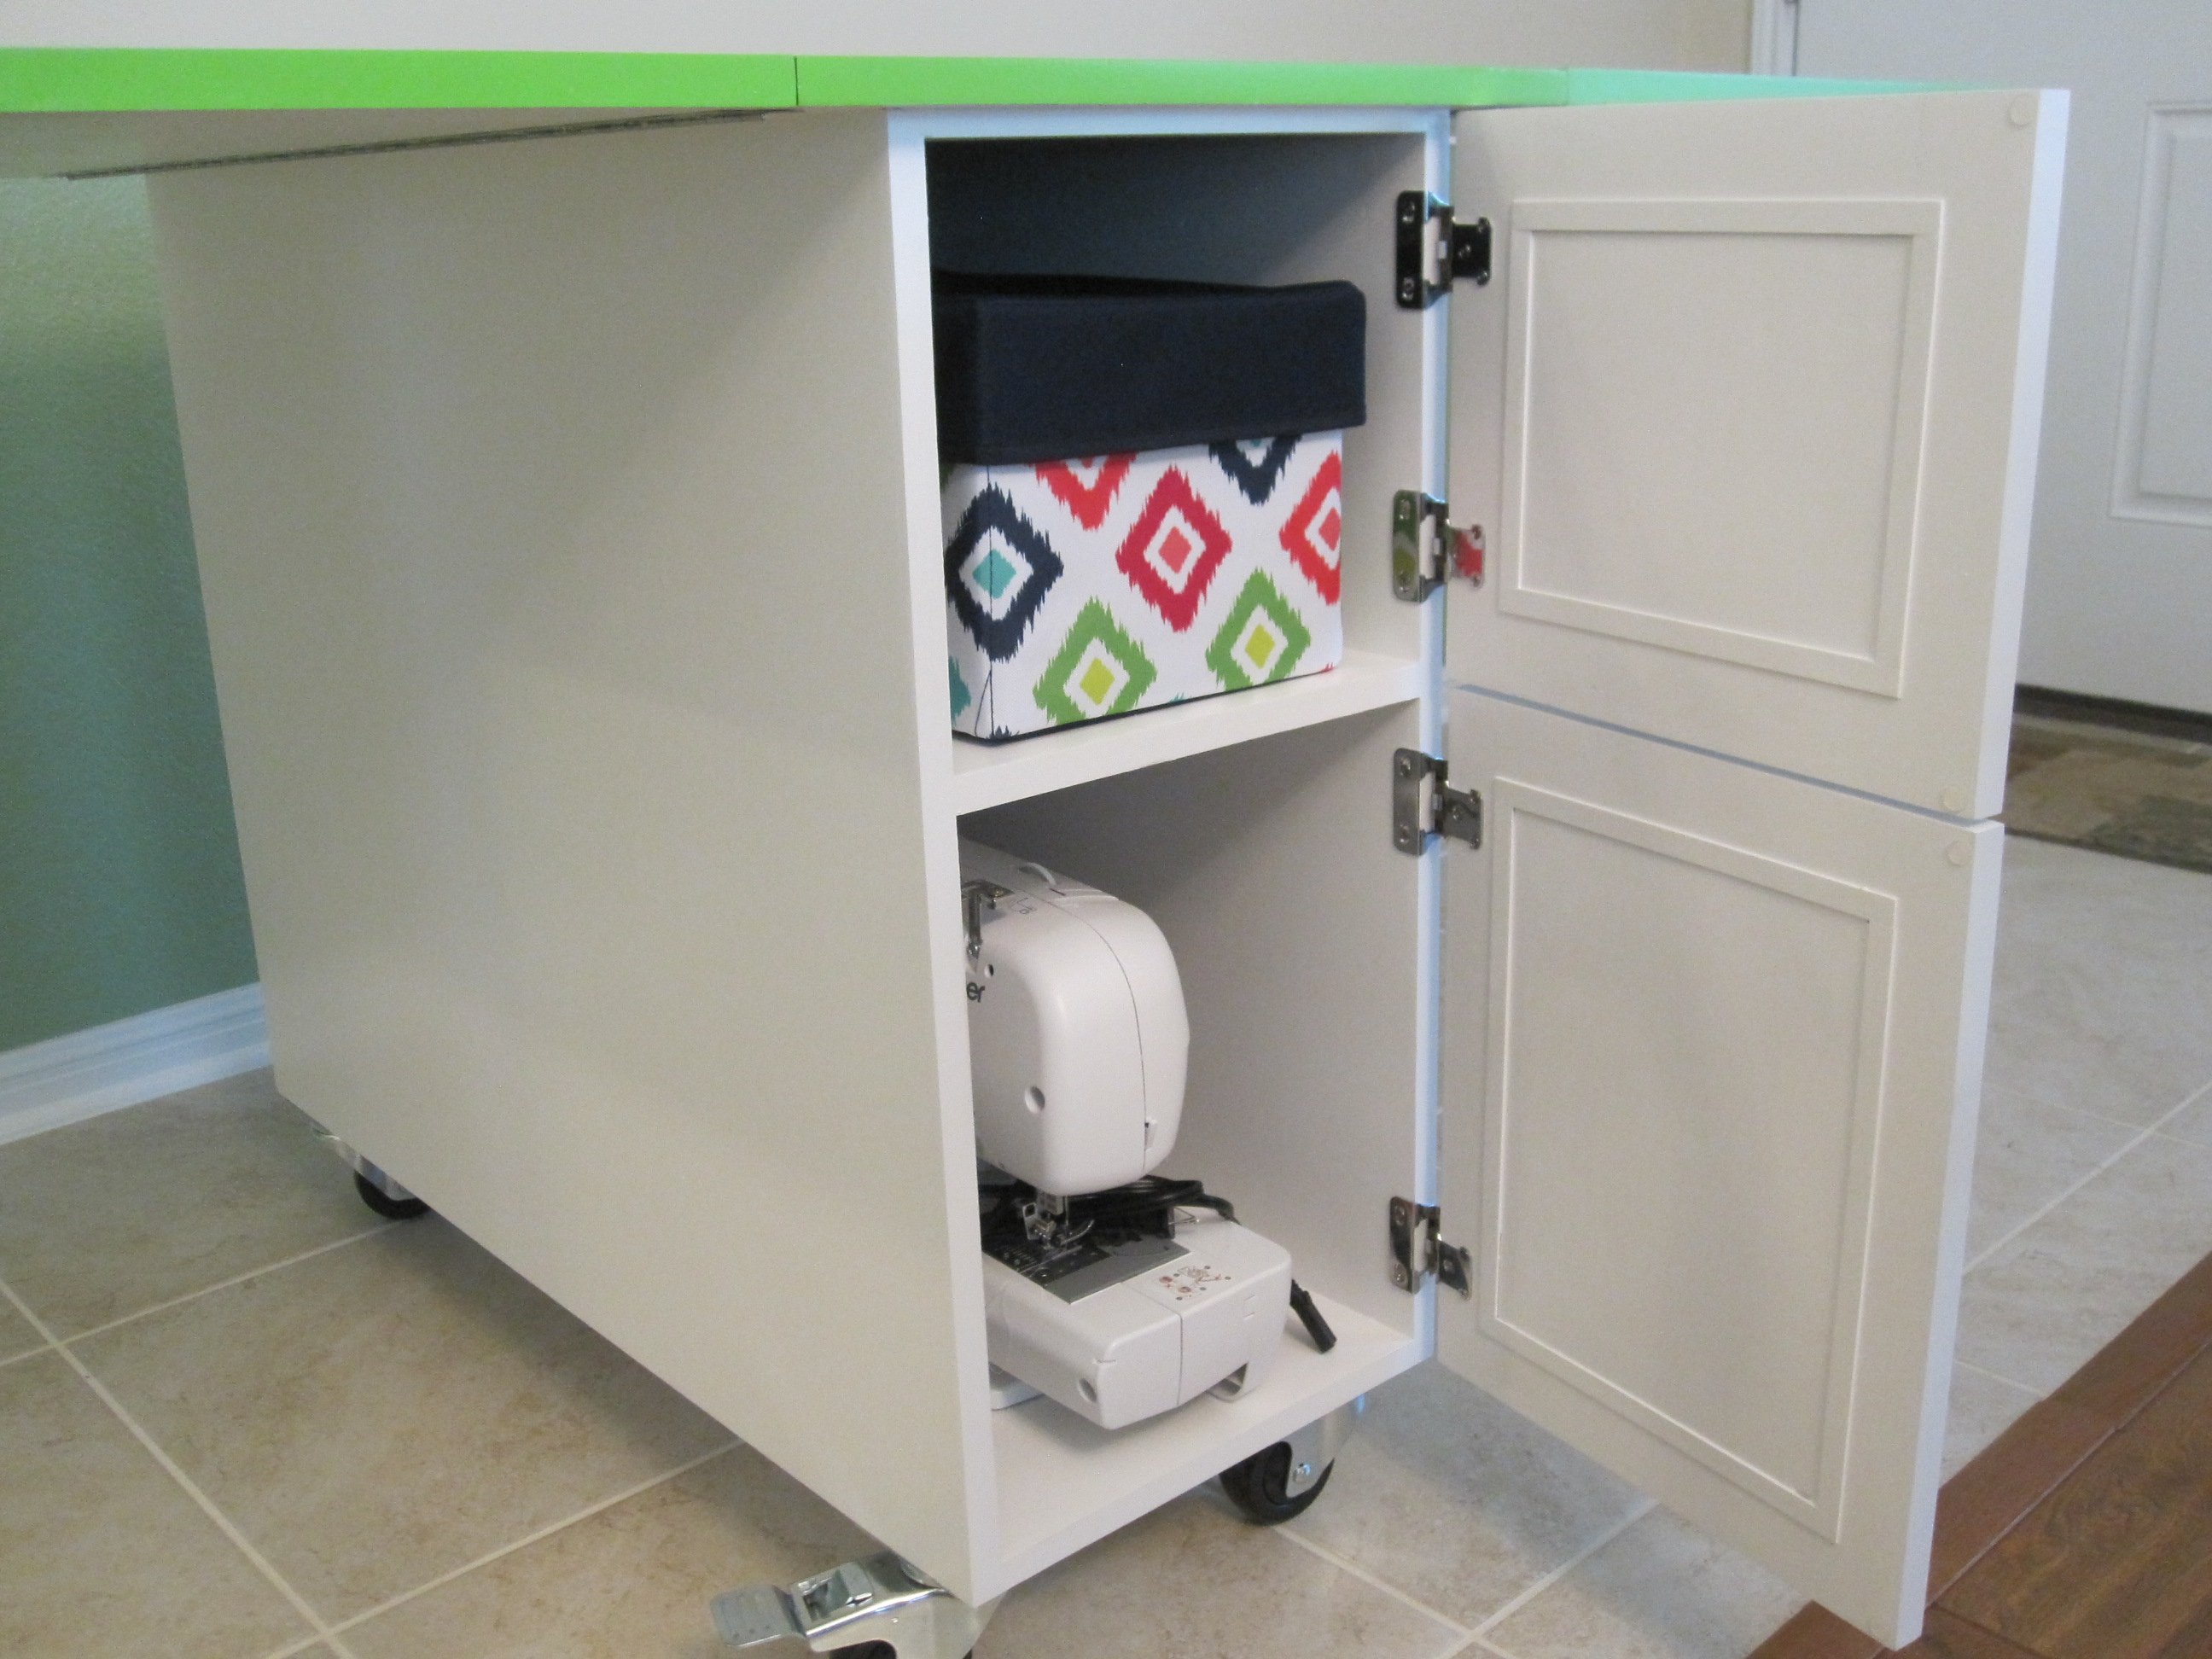
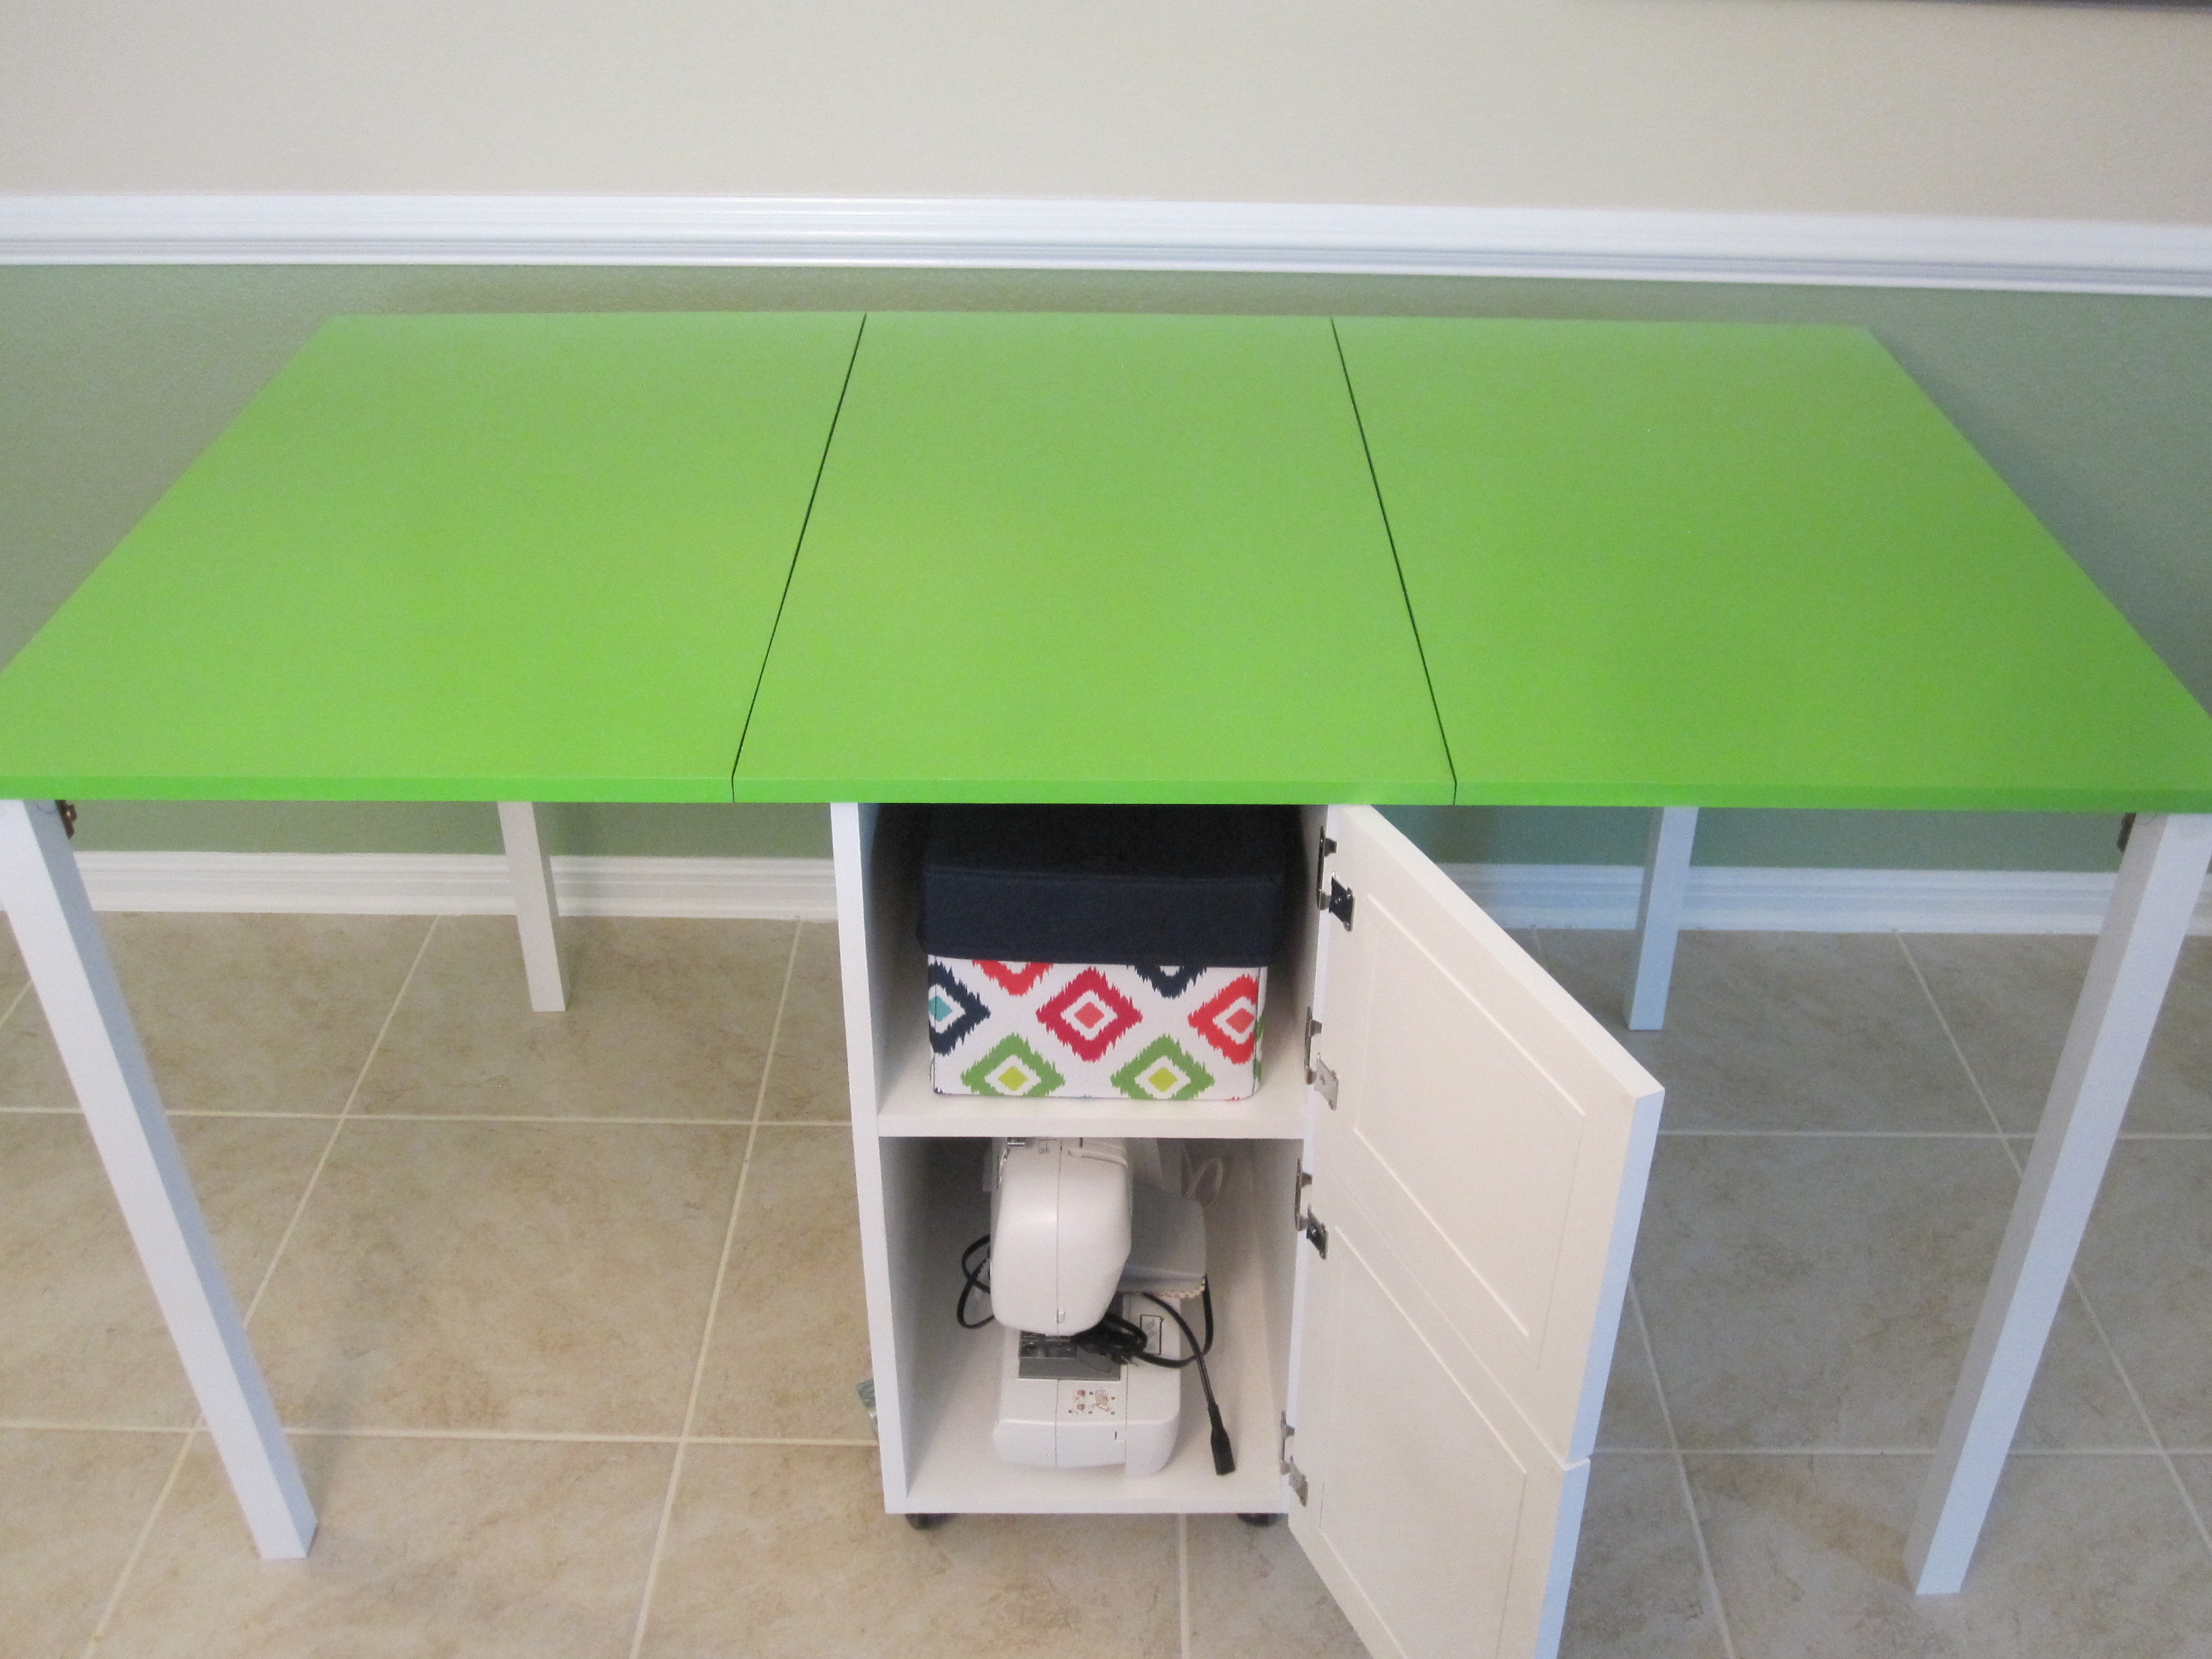
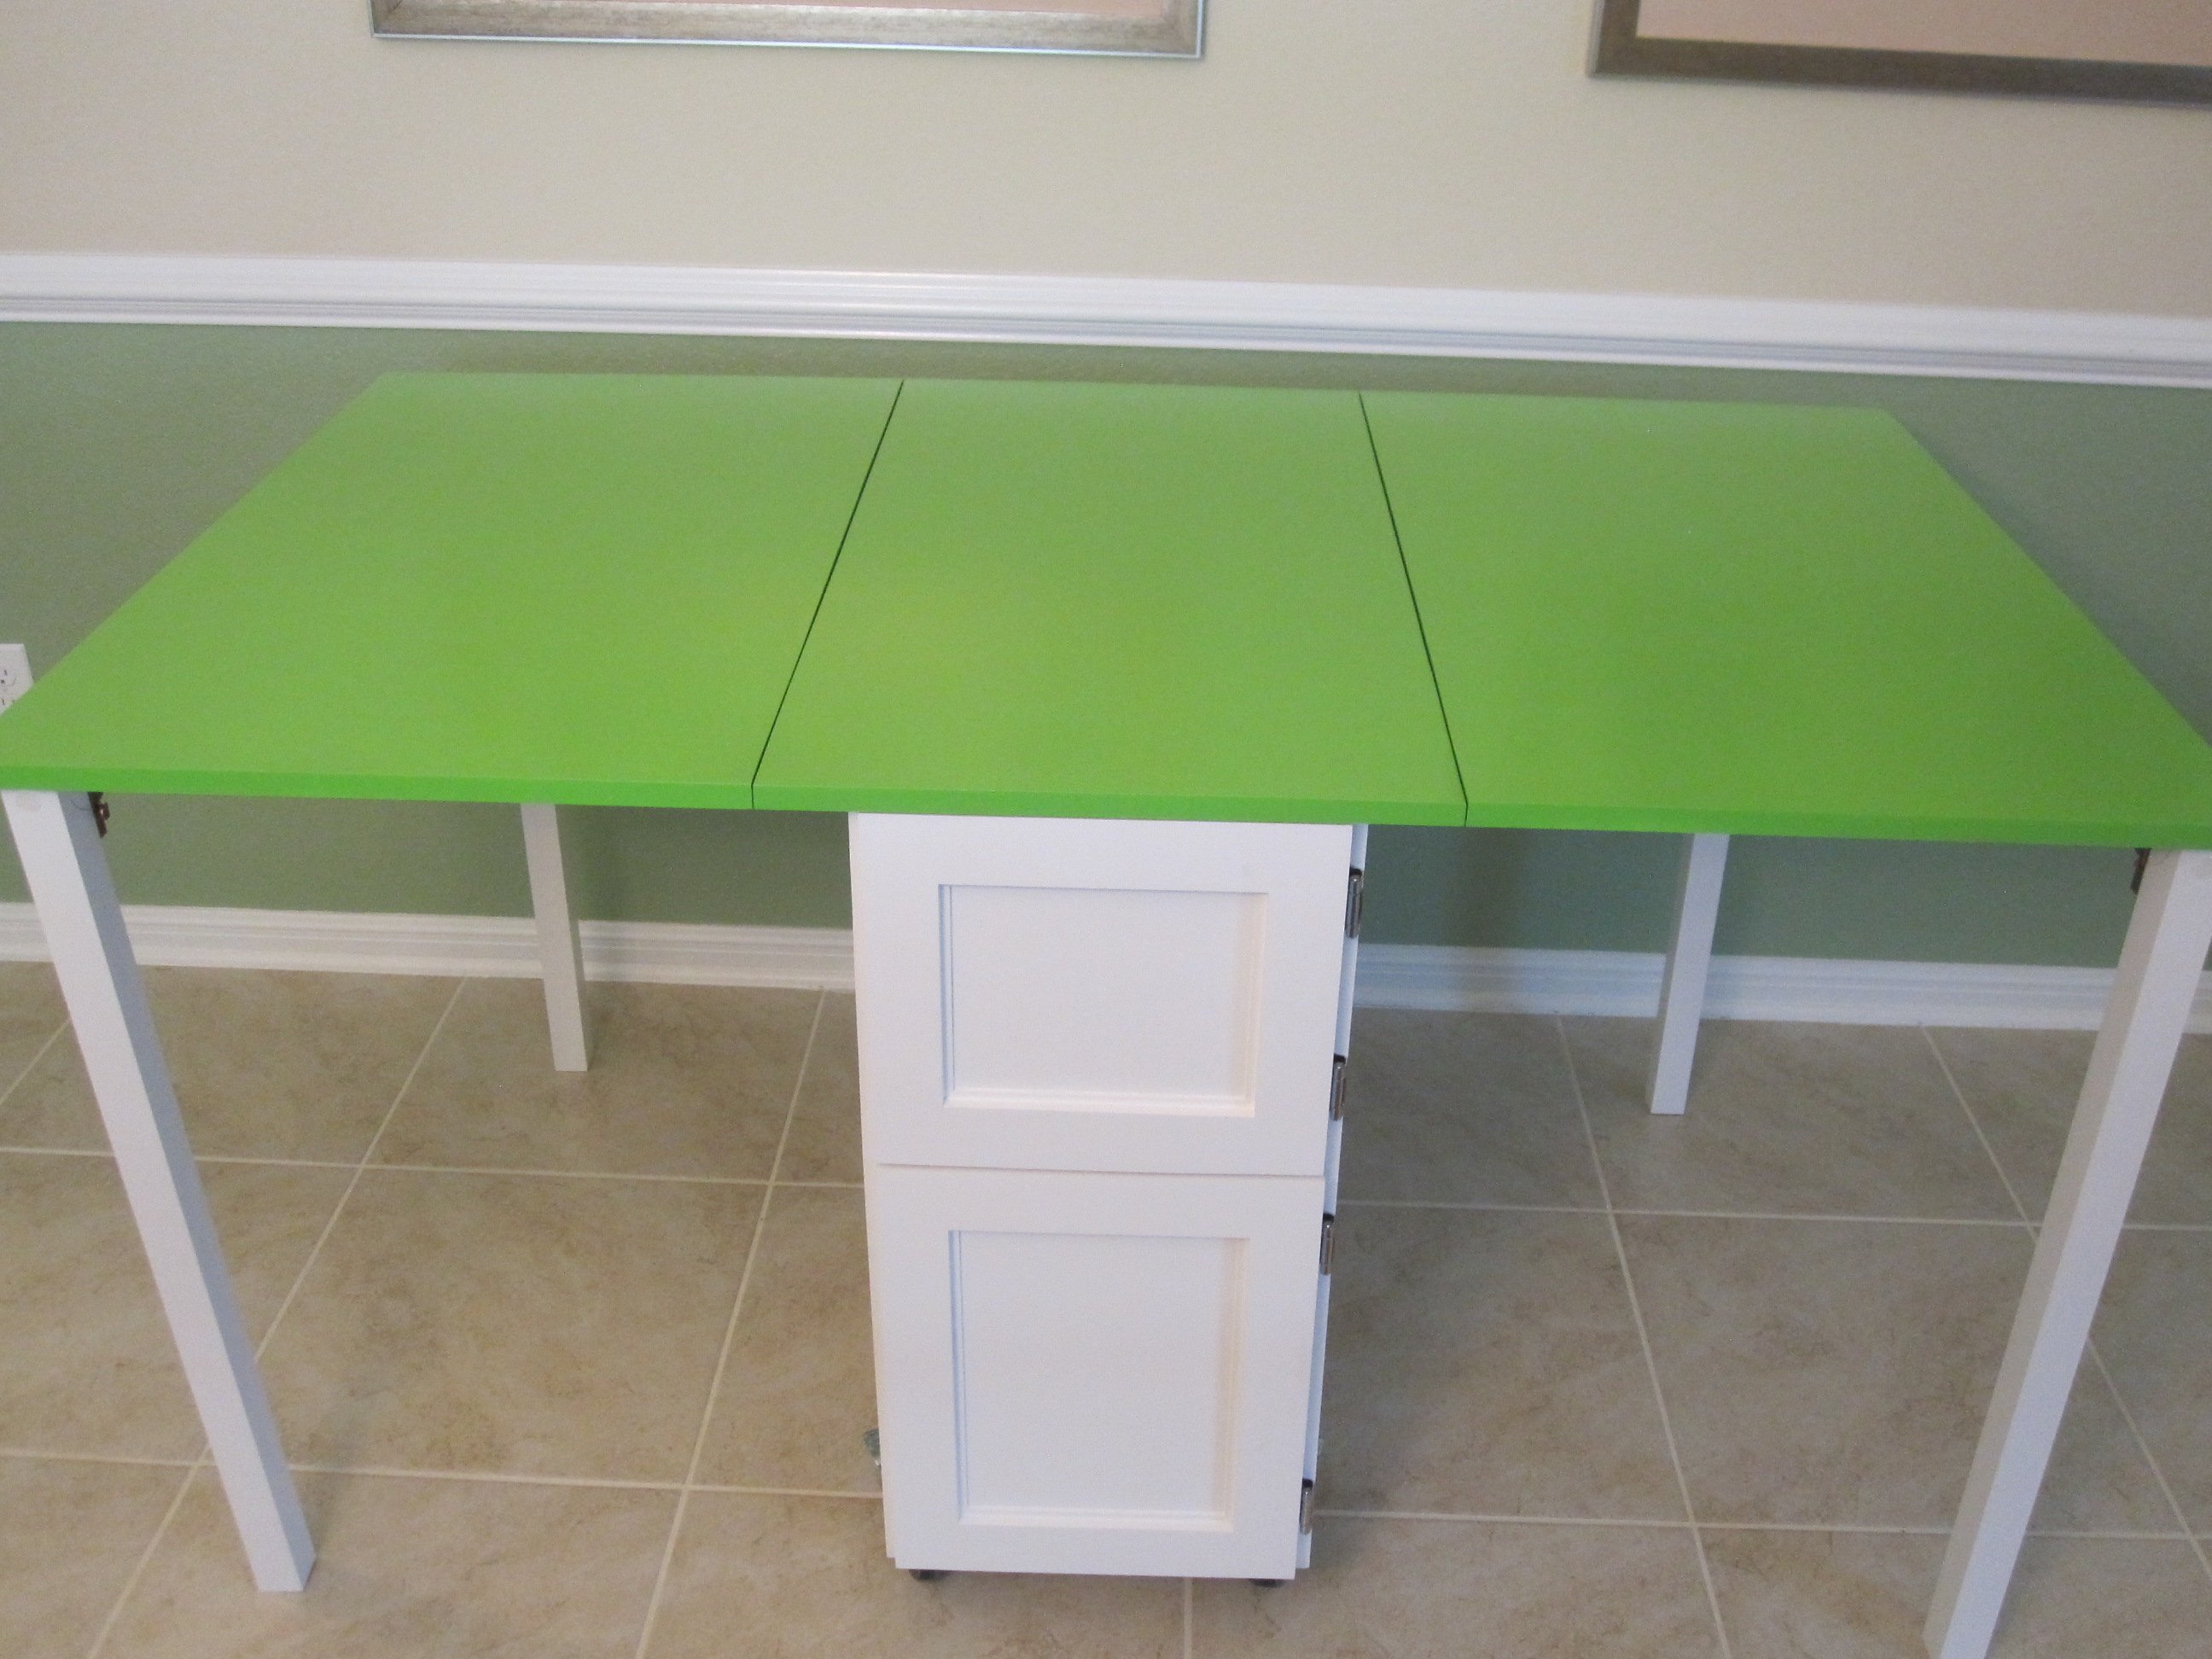
Penney's Sewing Table
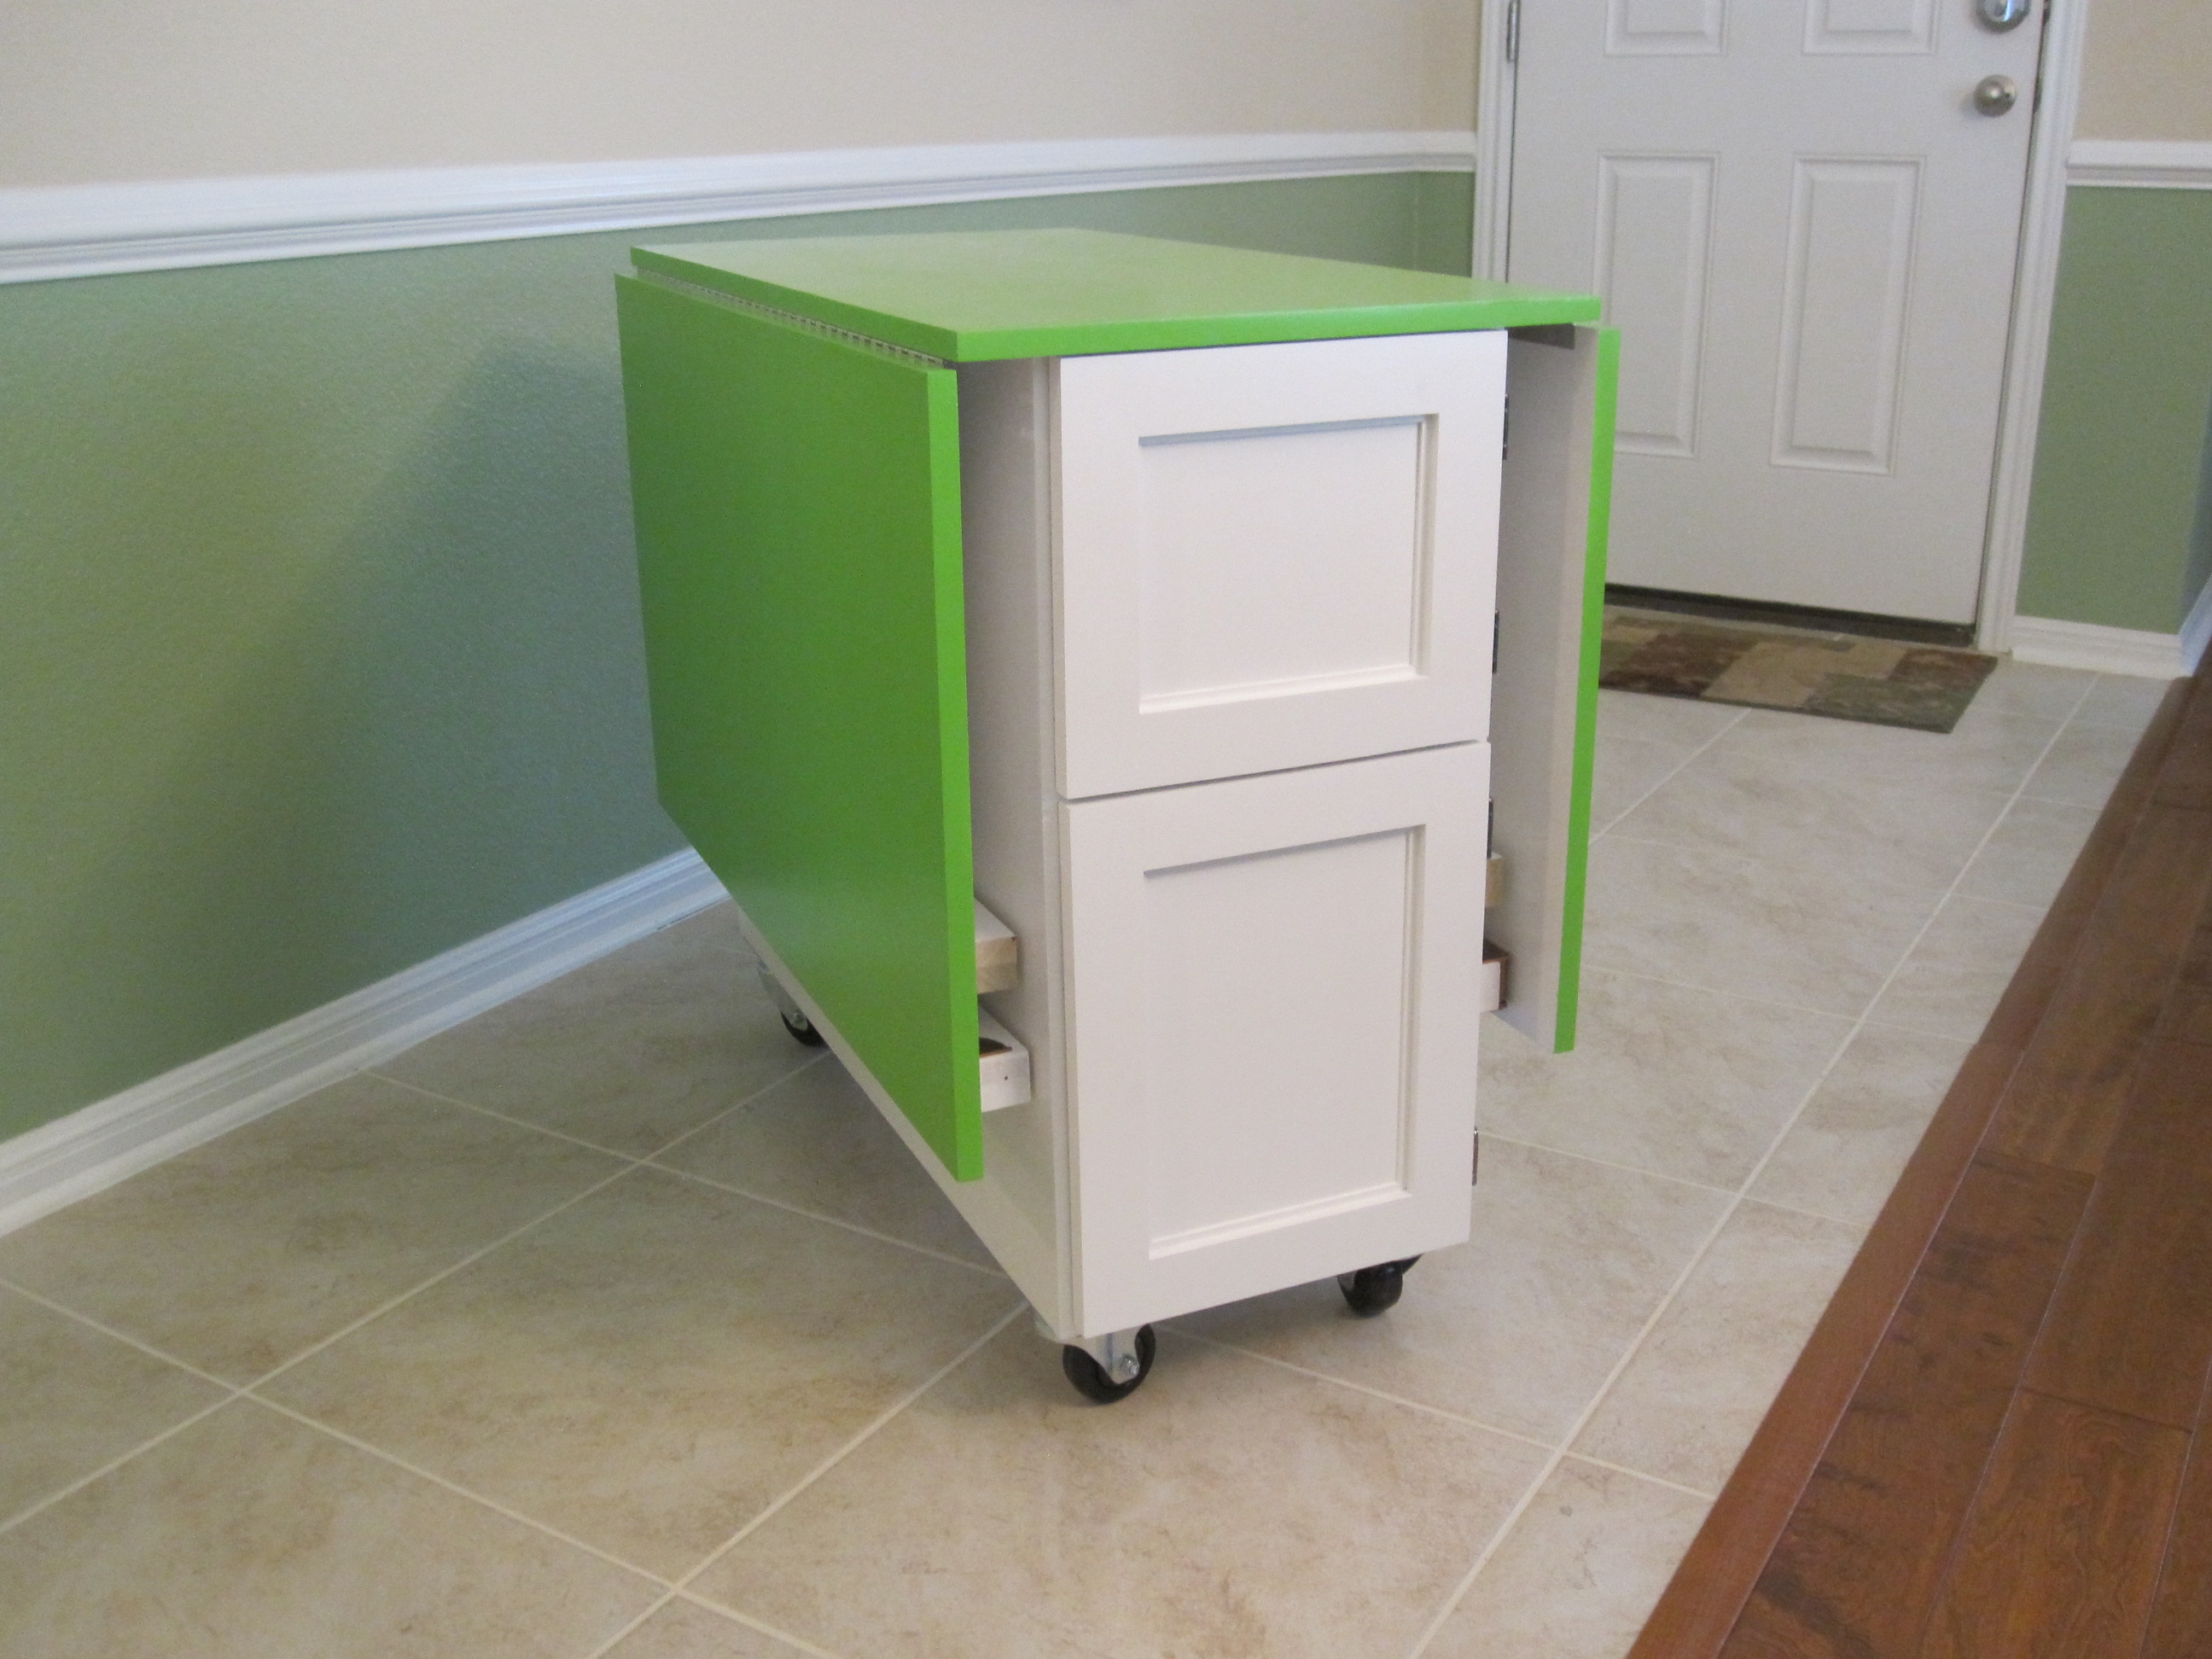
Built the sewing table for my wife Penney. It has a work surface that is 36" x 60" and is 32" high.
Used 3/4" Baltic Birch and used premium pine to add edge banding. Used 1/4" plywood for a back to the sewing table to add strength and I think helps the look of the table. My Kreg Jig was used everywhere possible when assembling the case. Used full length piano hinges with #6 x 5/8" screws to attach the leaves to the table. Made the doors using premium pine with a plywood panel. For the legs, I used folding, locking leg brackets from Lee Valley to attach the 1-1/2" square poplar legs. The casters are 3" double-locking from Woodcraft.
Went a little over budget, but it turned out very nice and she loves it.
Thank you for the easy to follow plans.
Built from Plan(s)
Estimated Cost
$275
Estimated Time Investment
Week Long Project (20 Hours or More)
Finish Used
Benjamin Moore Advance Paint semi-gloss. Sprayed 3 coats using HVLP sprayer of both white and green. Used Benjamin Moore Fresh Start Primer - 2 coats sanding between the coats.
Recommended Skill Level
Intermediate
Comments
My built in bookcase based on the Extra Wide Console Bookcase
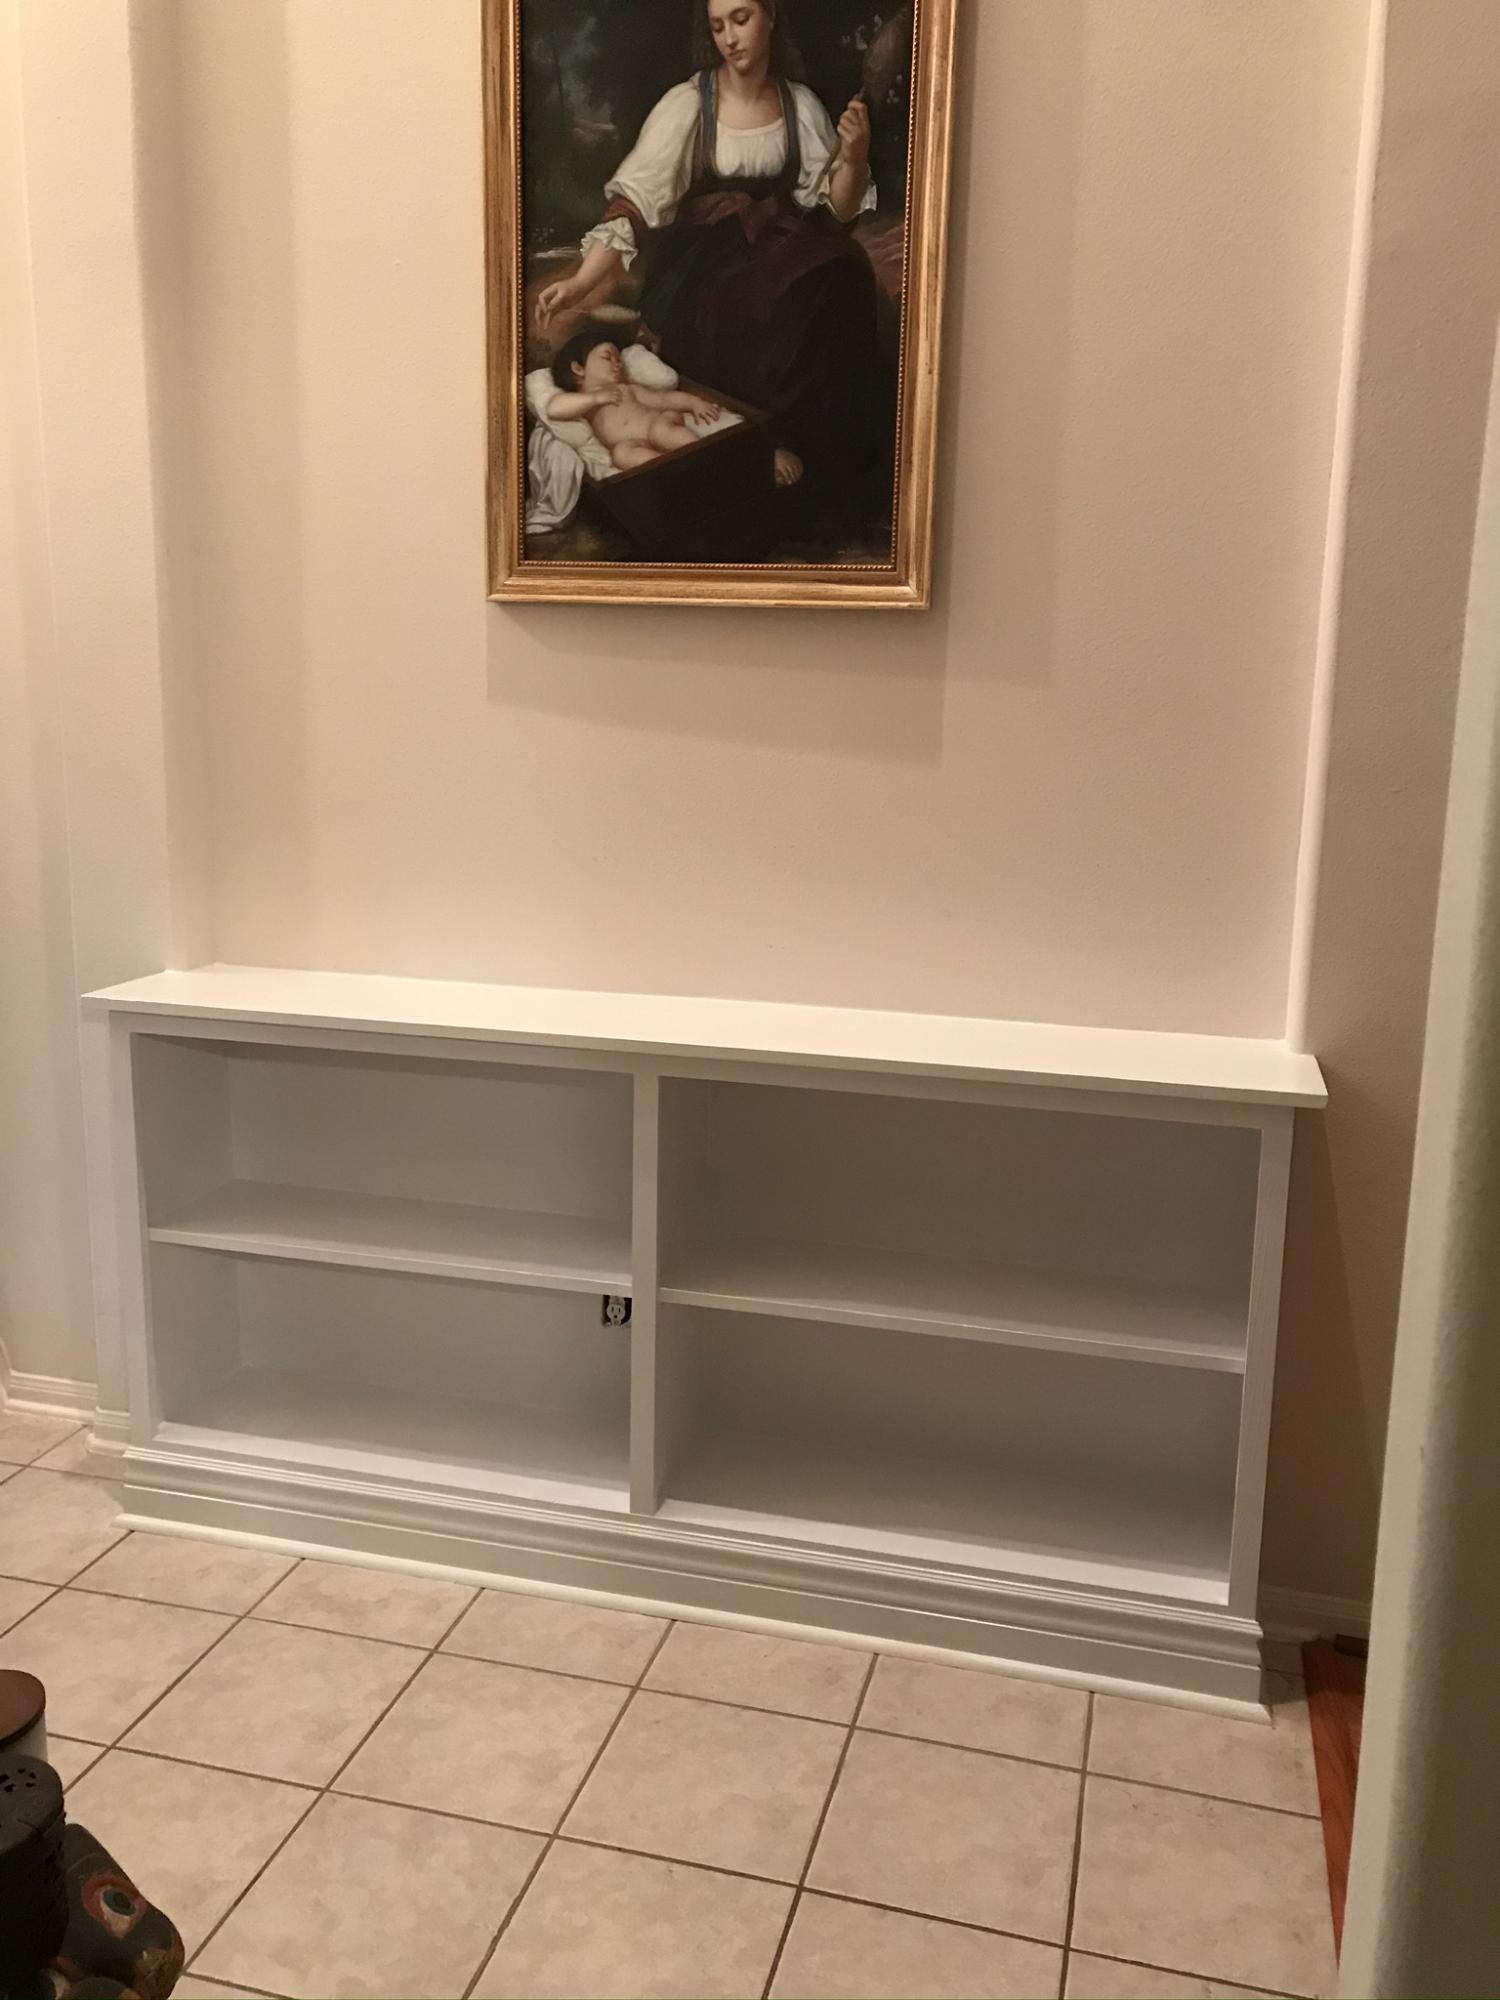
I used the Extra Wide Console Bookcase plans as inspiration for my built in bookcase. I made the top width 75" with the base width at 72" to fit snuggly in the little nook in my foyer. I didn't put a back on it since I attached it to the wall. I did anchor it with several screws to both columns. Also, instead of using the small additional piece on the top, I used an 1x8 and a 1x6 to make the top. I used my Kreg jig to attach the two board together along with some wood glue.
Very tickled with the results. Once the paint is good and dry, my photos, key bowl, and coin jar along with lots of books will be put on it.
Built from Plan(s)
Estimated Cost
I had left over paint, spent about $110 for the kiln dried pine wood and mouldings.
Estimated Time Investment
Day Project (6-9 Hours)
Finish Used
White enamel paint
Recommended Skill Level
Intermediate
Comments
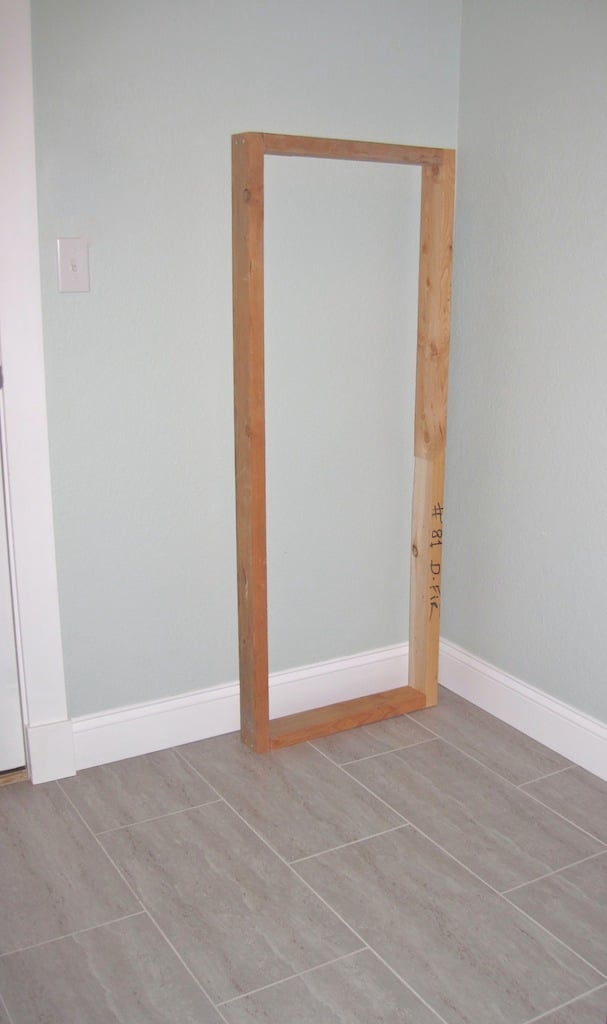
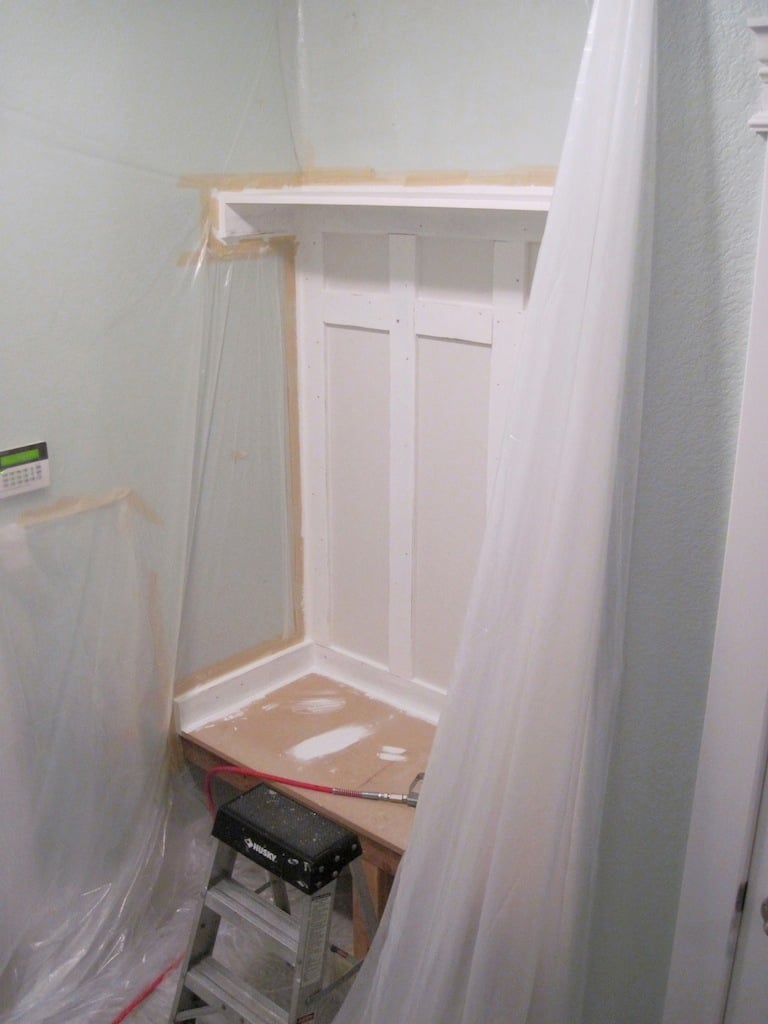
Mudroom Bench
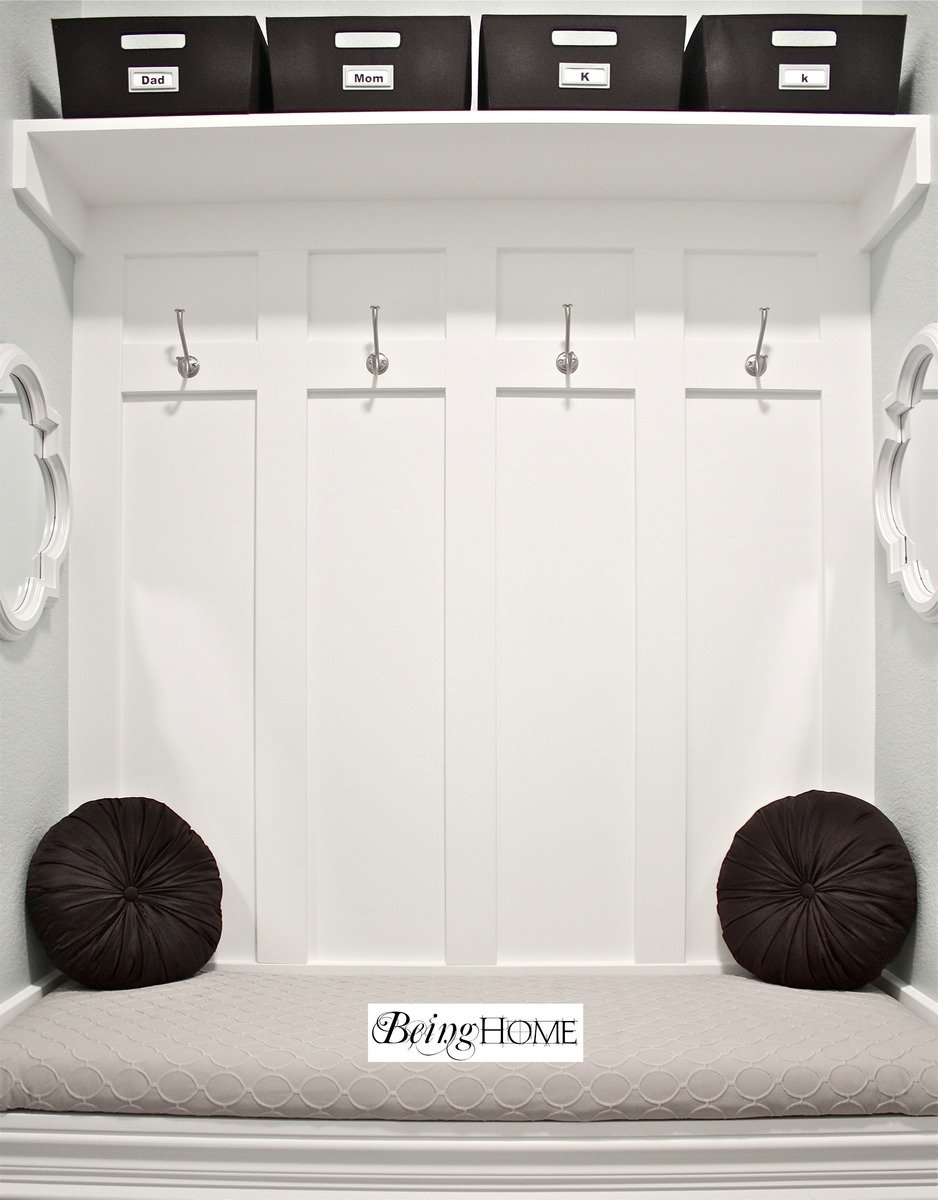
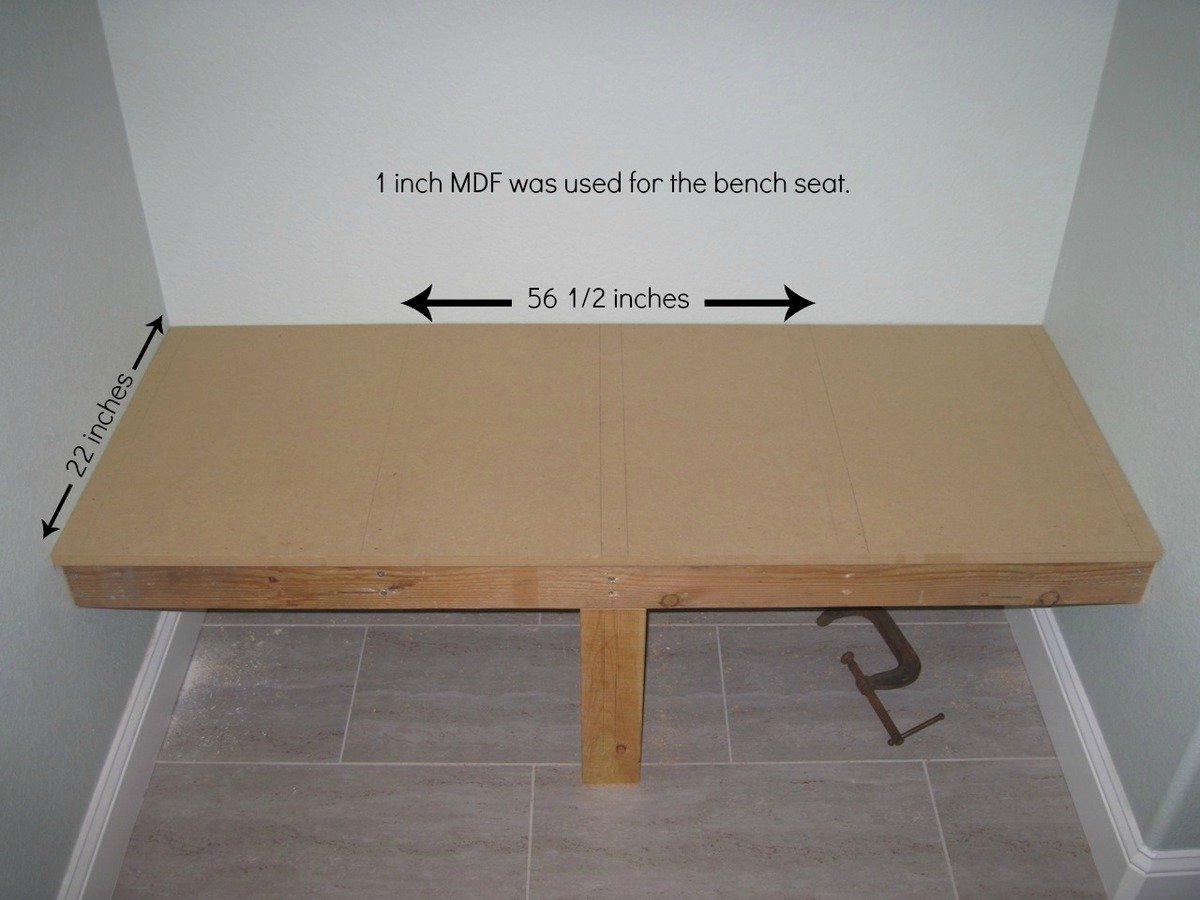
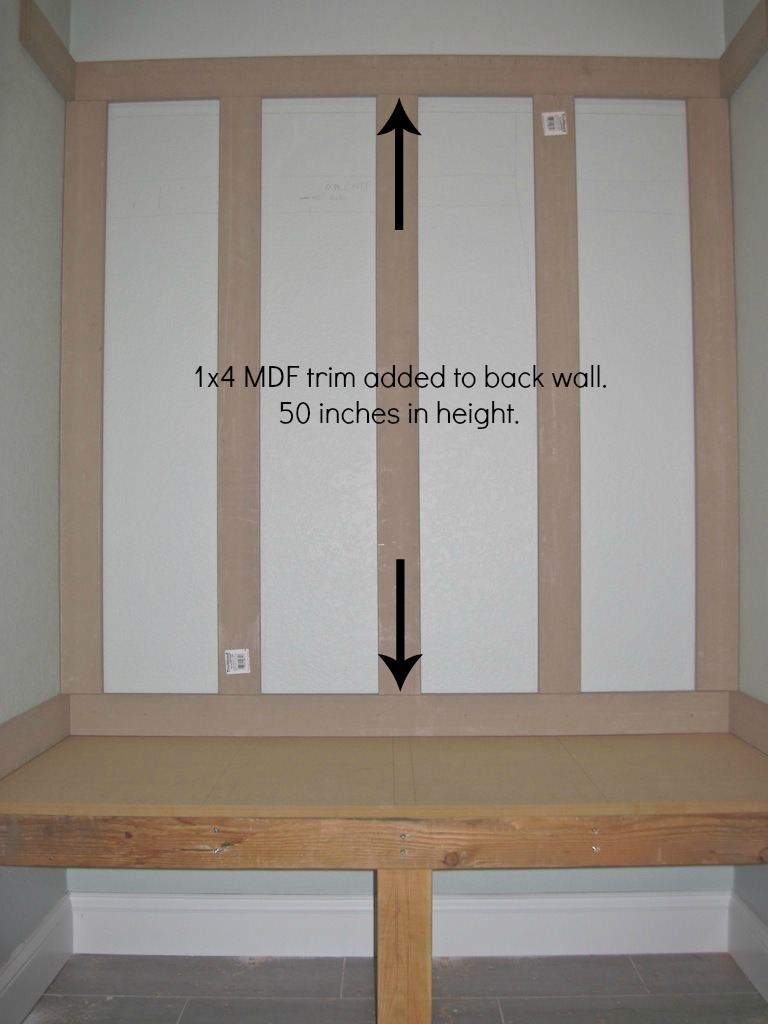
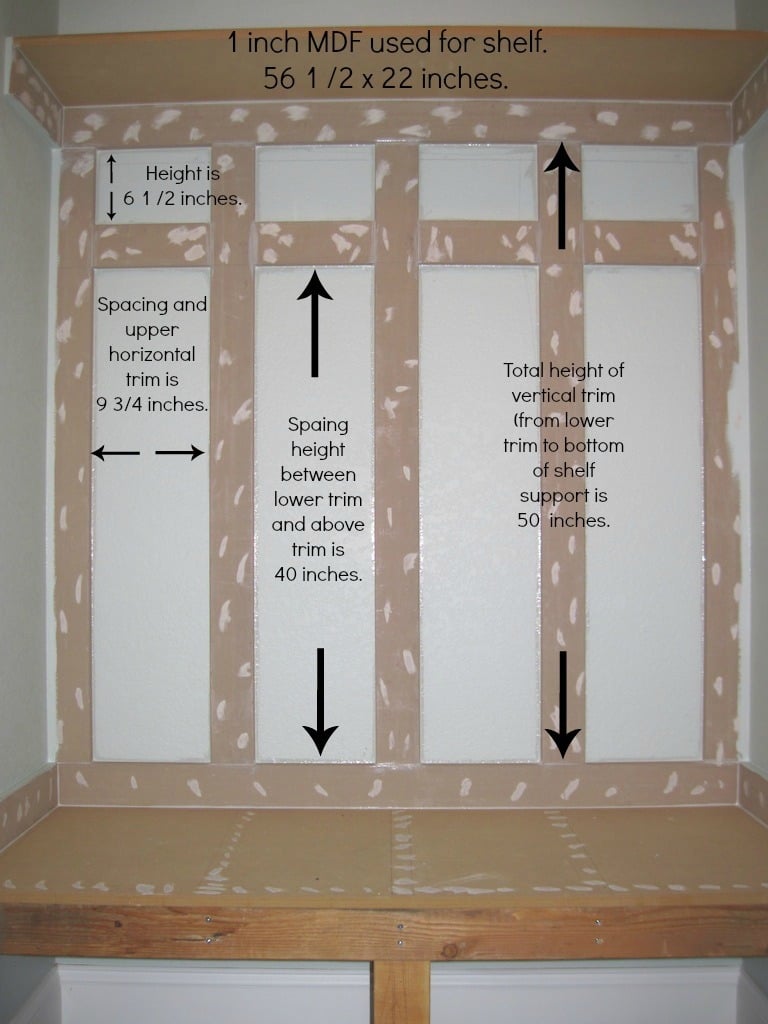
With much needed seating in the mudroom, an unused space (nook) was used to build a mudroom bench and shelf. No plans were used. I basically looked on-line and mentally drew up an idea of how I wanted the final product to look.
There were some setbacks such as not like the knock down textured walls (after partially painting the bench). I ended up covering the textured walls with hardboard and repainted.
A bench cushion was made for added comfort and style.
Complete tutorial for the bench is here and the bench cushion tutorial is here.
Thank you.
Julie
Built from Plan(s)
Estimated Time Investment
Weekend Project (10-20 Hours)
Finish Used
Behr Ultra (paint and primer in one) in ultra white finish.
Recommended Skill Level
Beginner
Comments
Thu, 05/16/2013 - 13:48
Mudroom Bench
Thank you so much for the idea and plan. I used it to turn an extra laundry room that we have off of our garage into a much needed mudroom. The most challenging project I have ever done before is hanging blinds. But with your help and some from the Home Depot employees, I did it! Our family is more than happy with it. Thanks!!!
Comments
MamaofThree
Sun, 06/08/2014 - 07:17
Parts
Hi. Can you tell me where you got the wood and the legs for this project? This is so beautiful! I'd love to make something like this!