Community Brag Posts
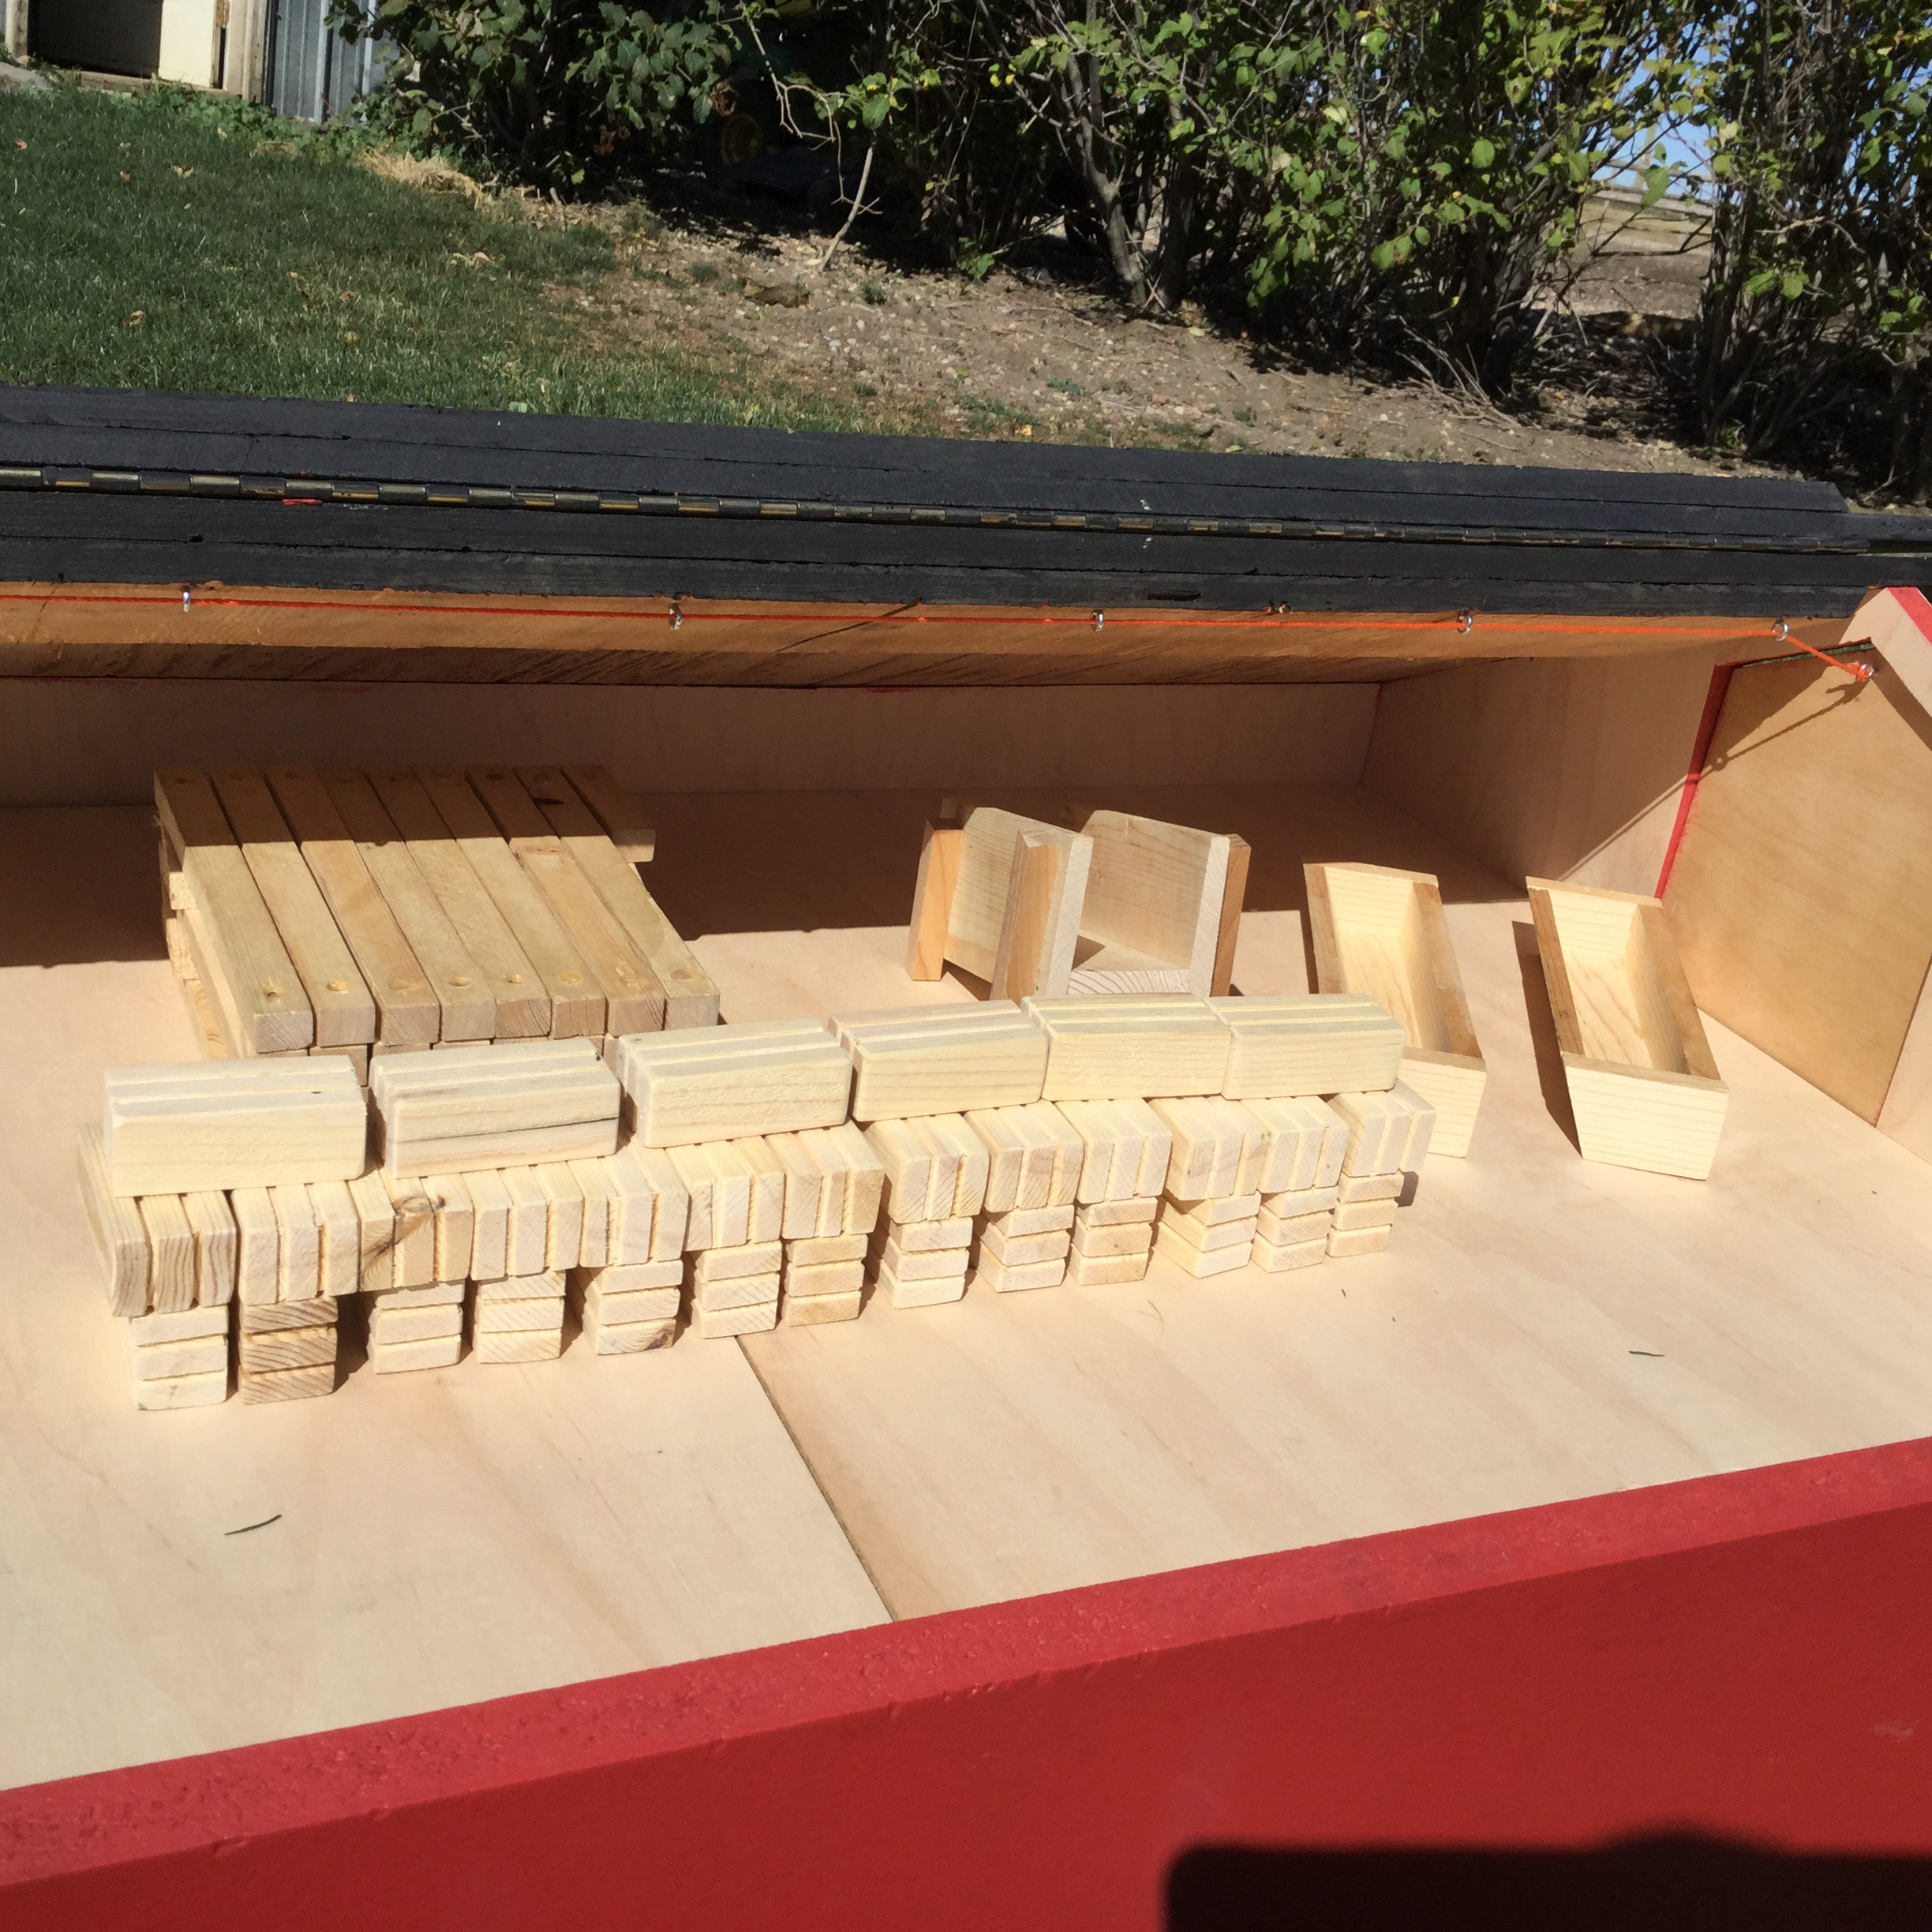
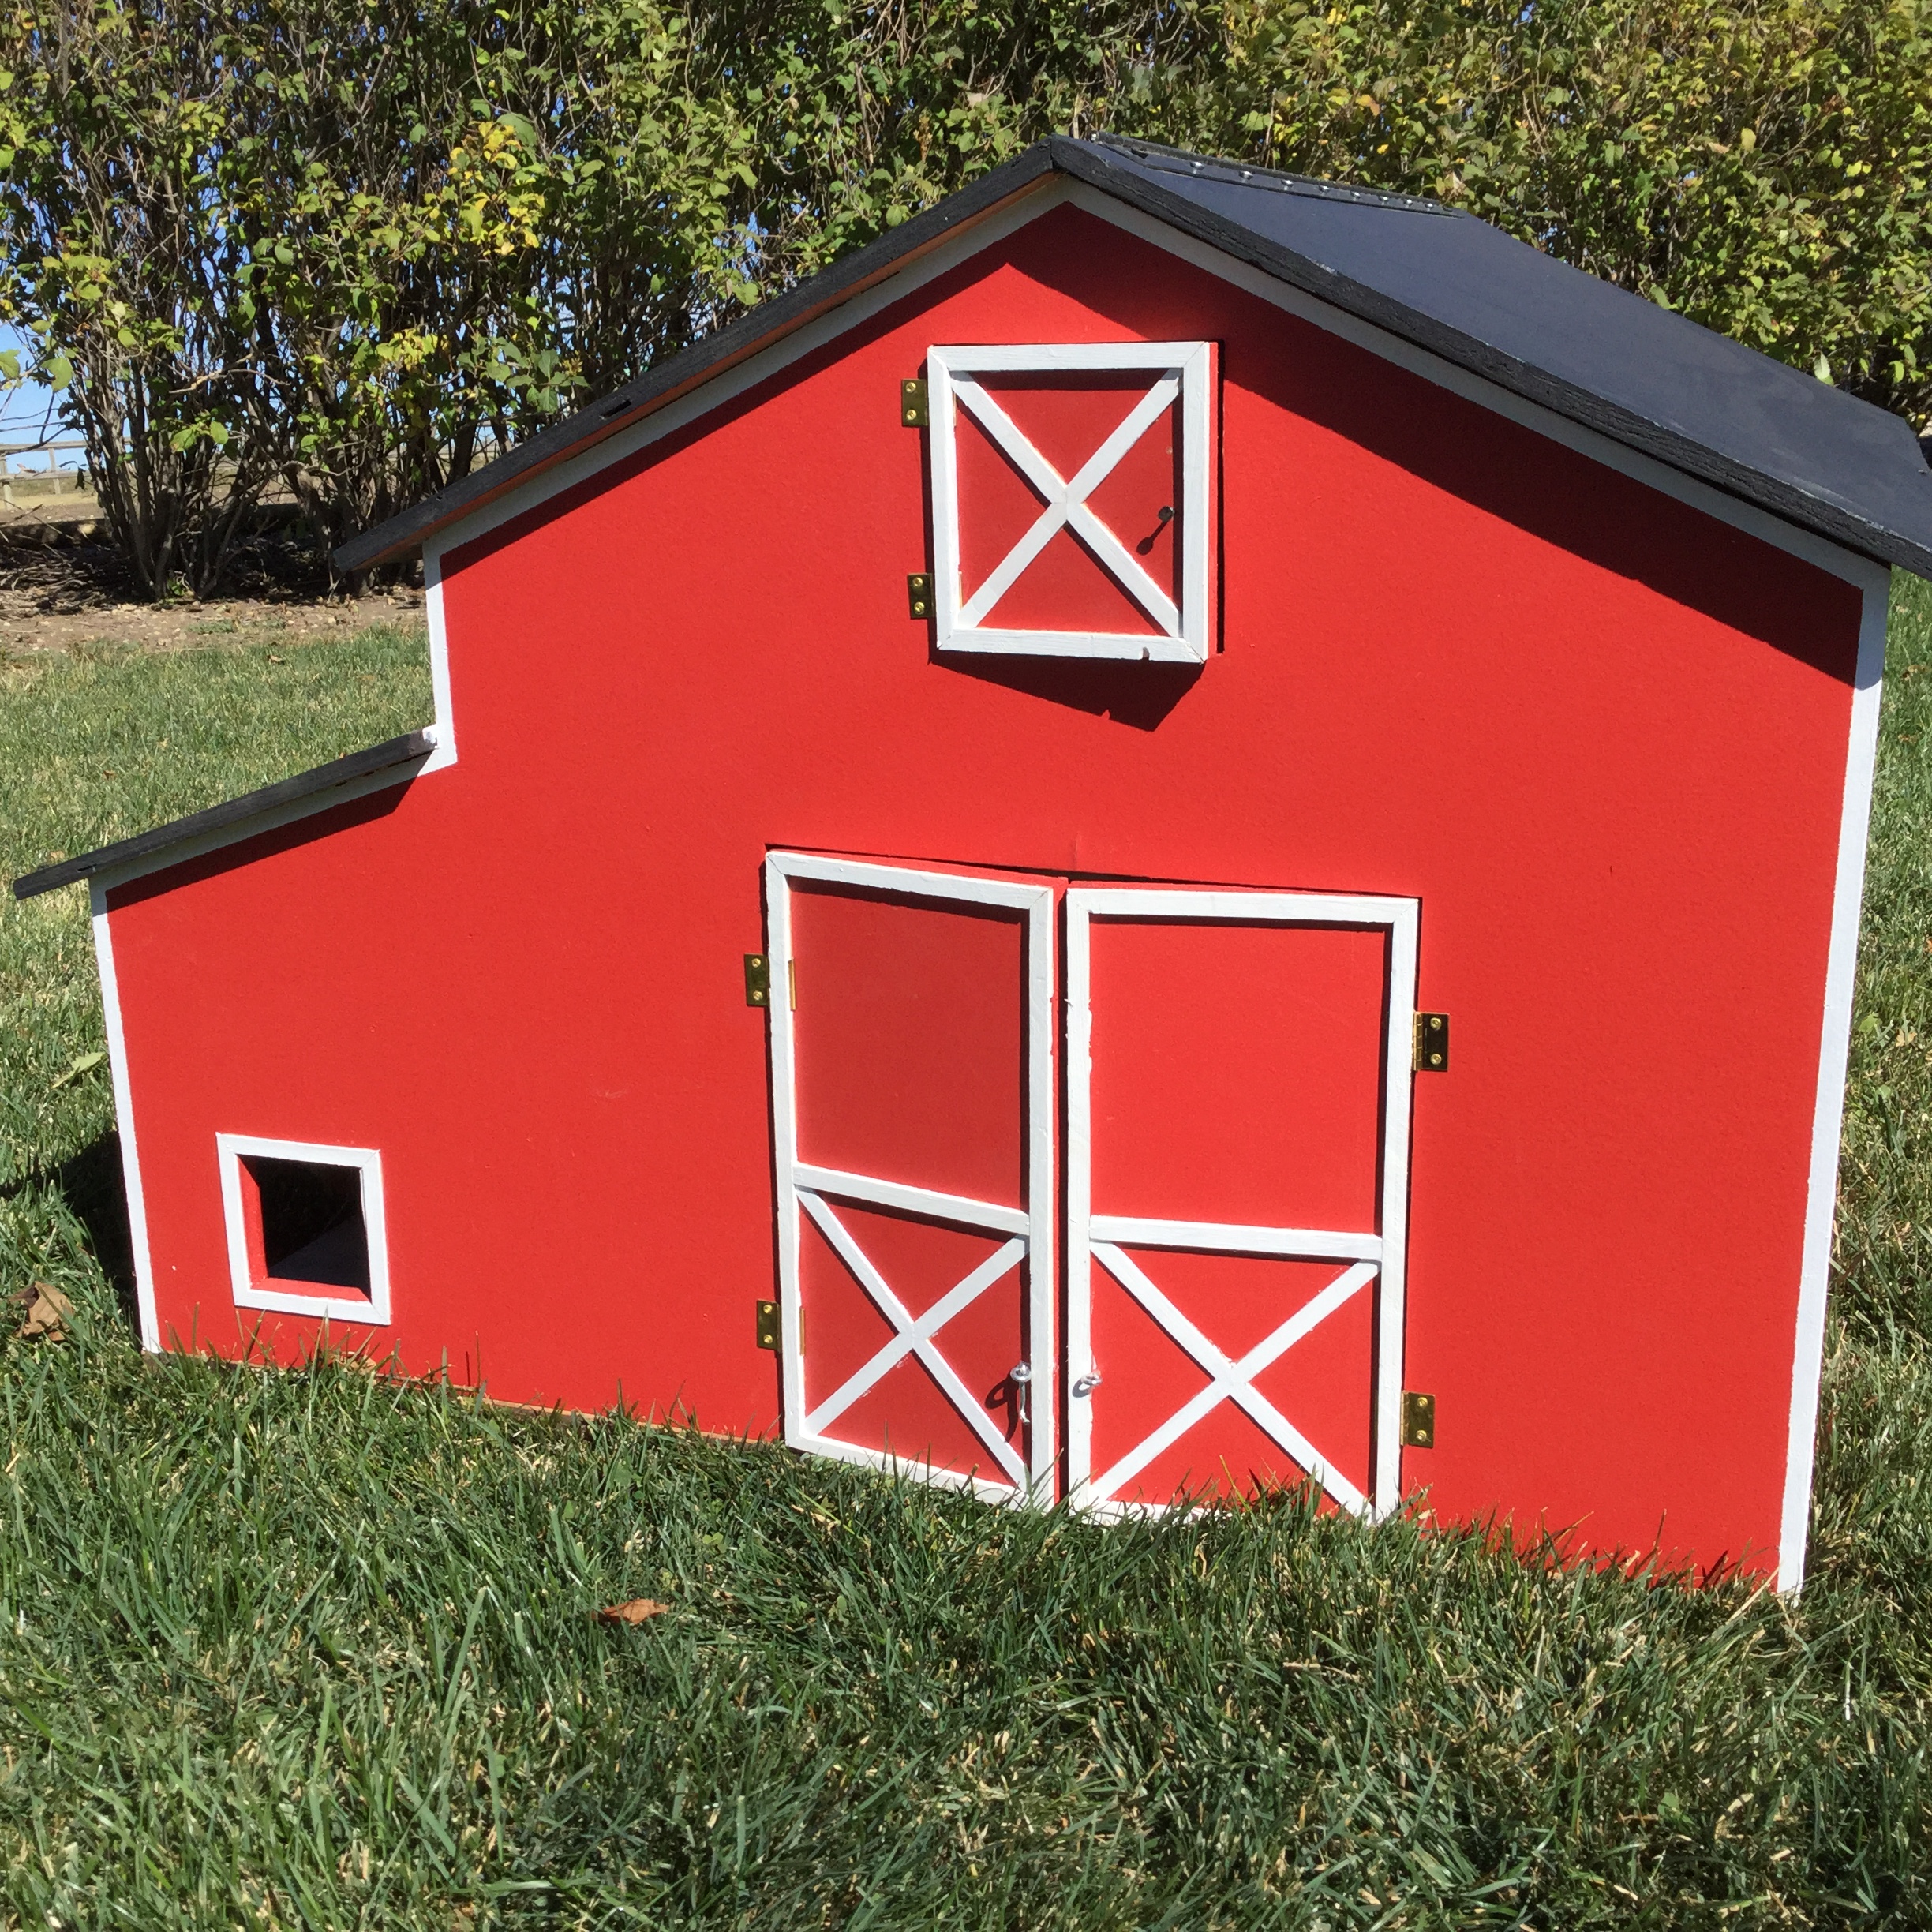
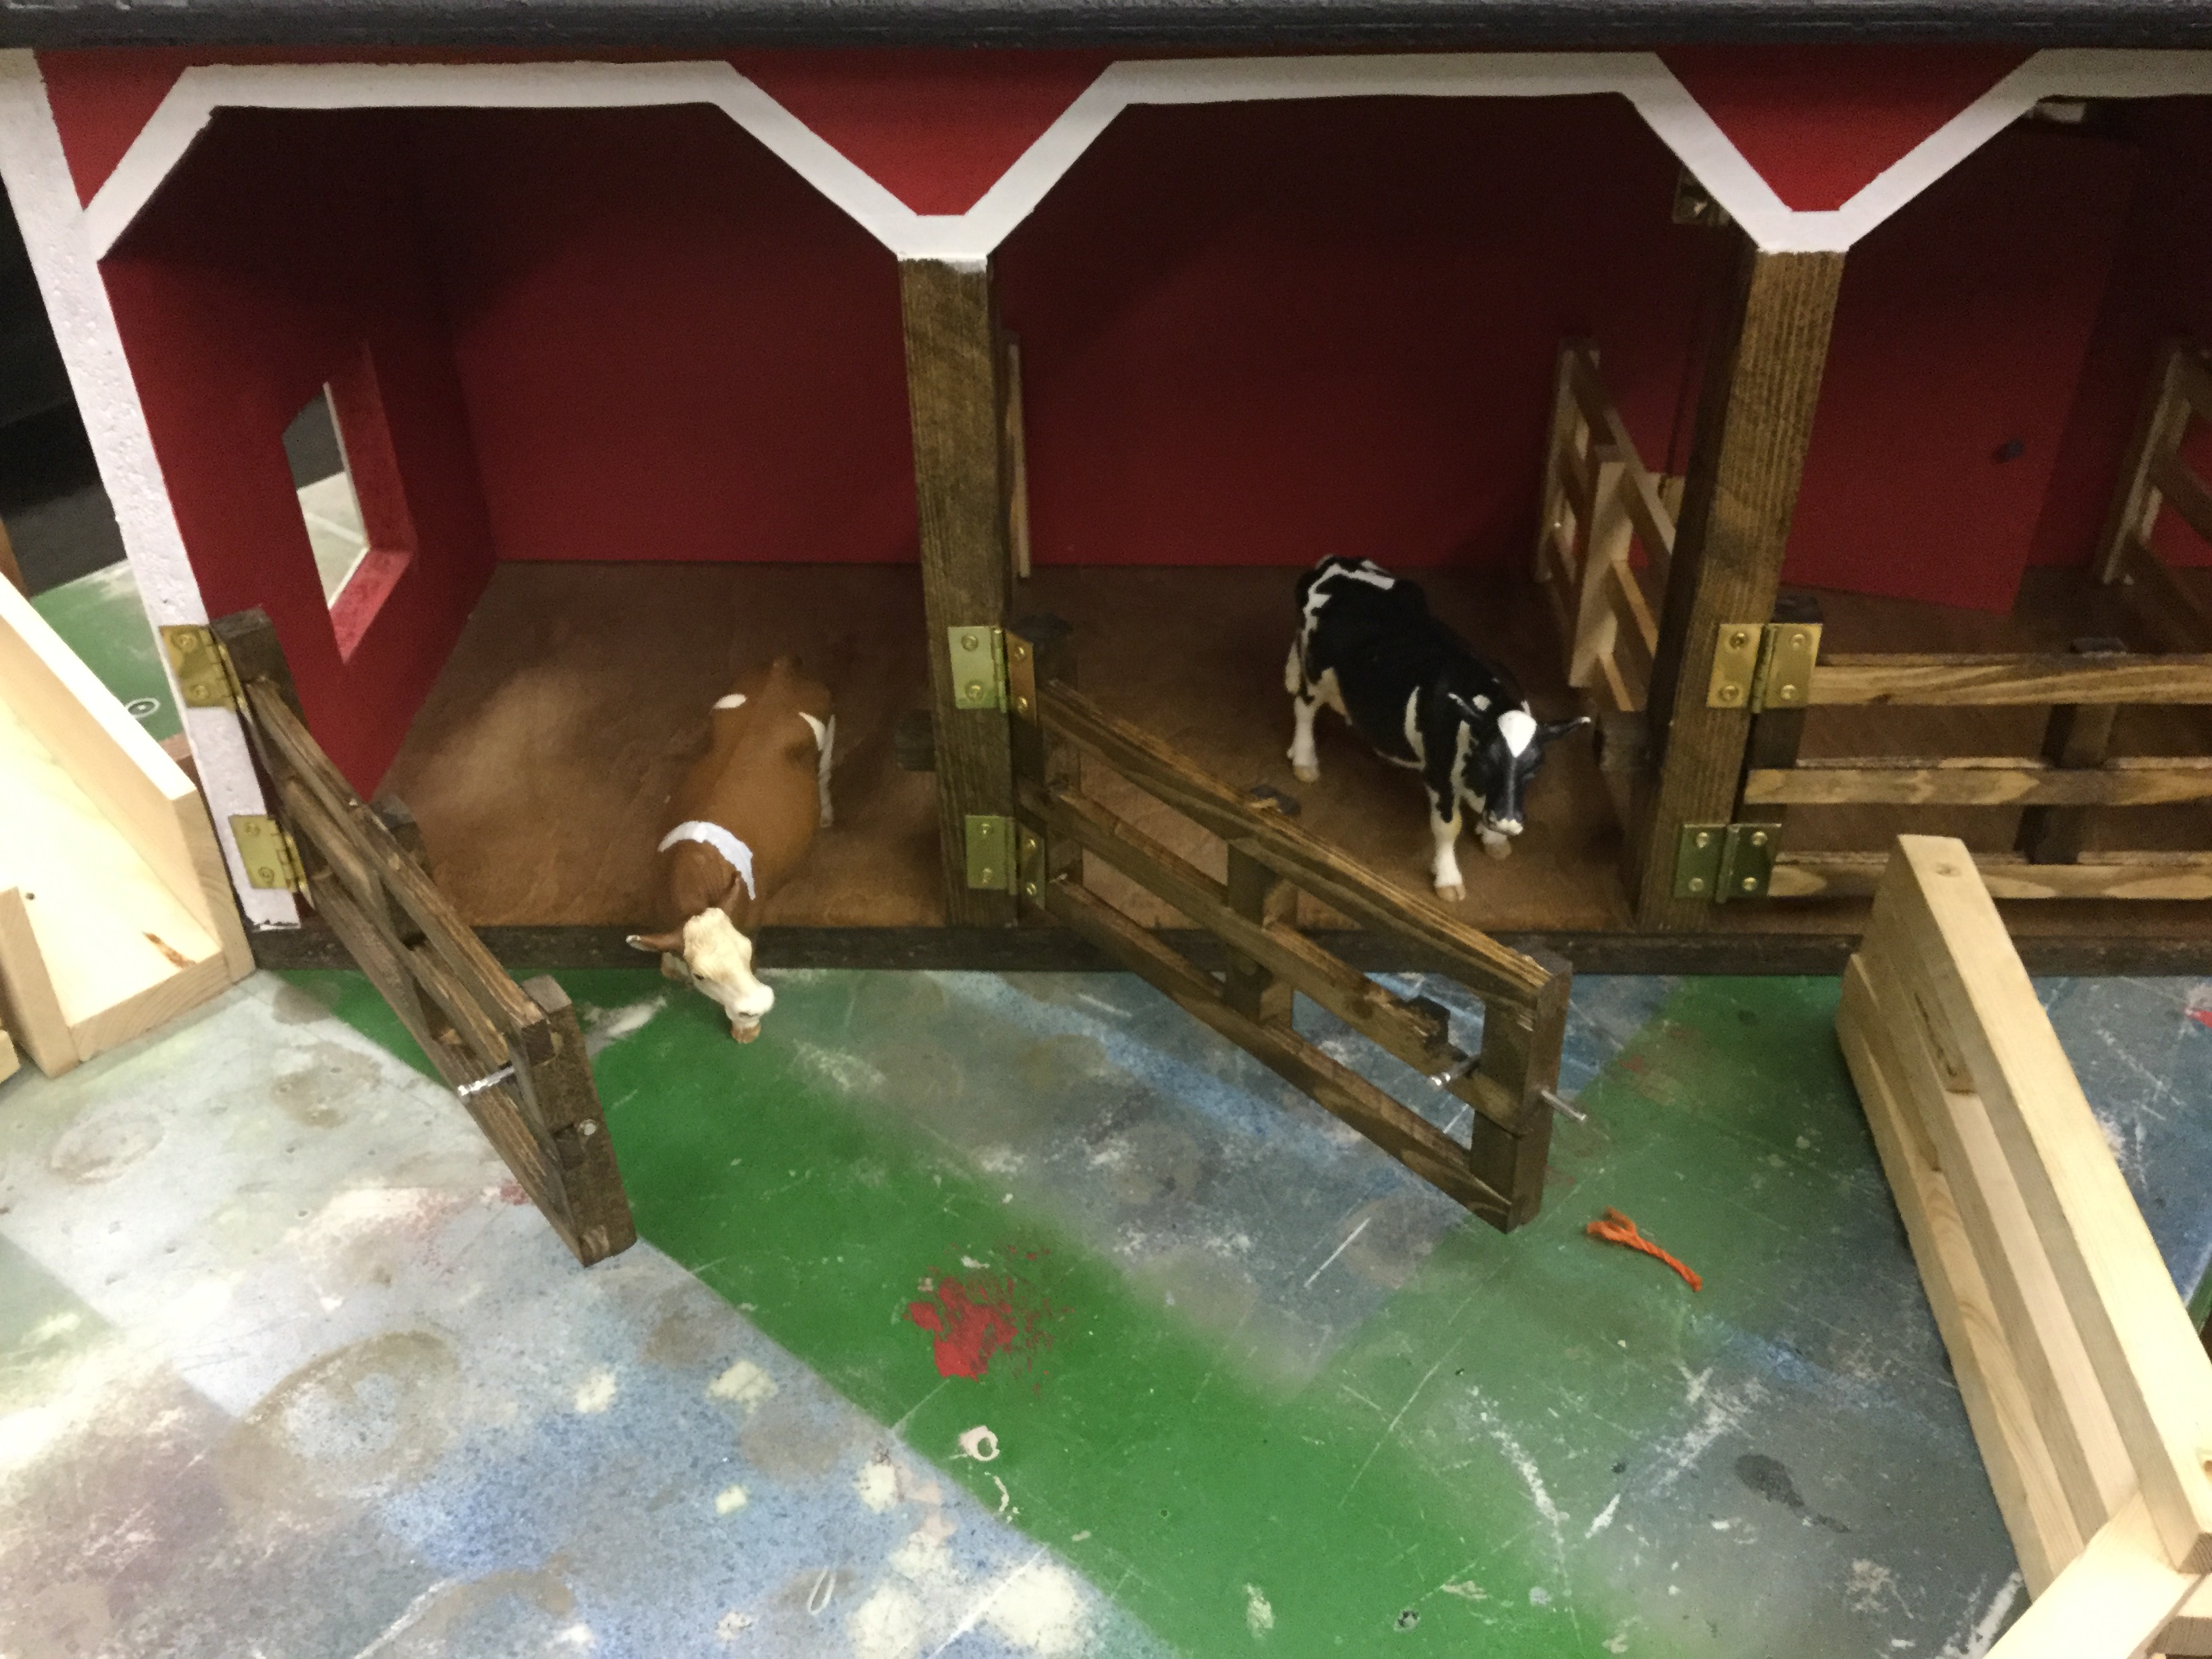
Barn with lean to
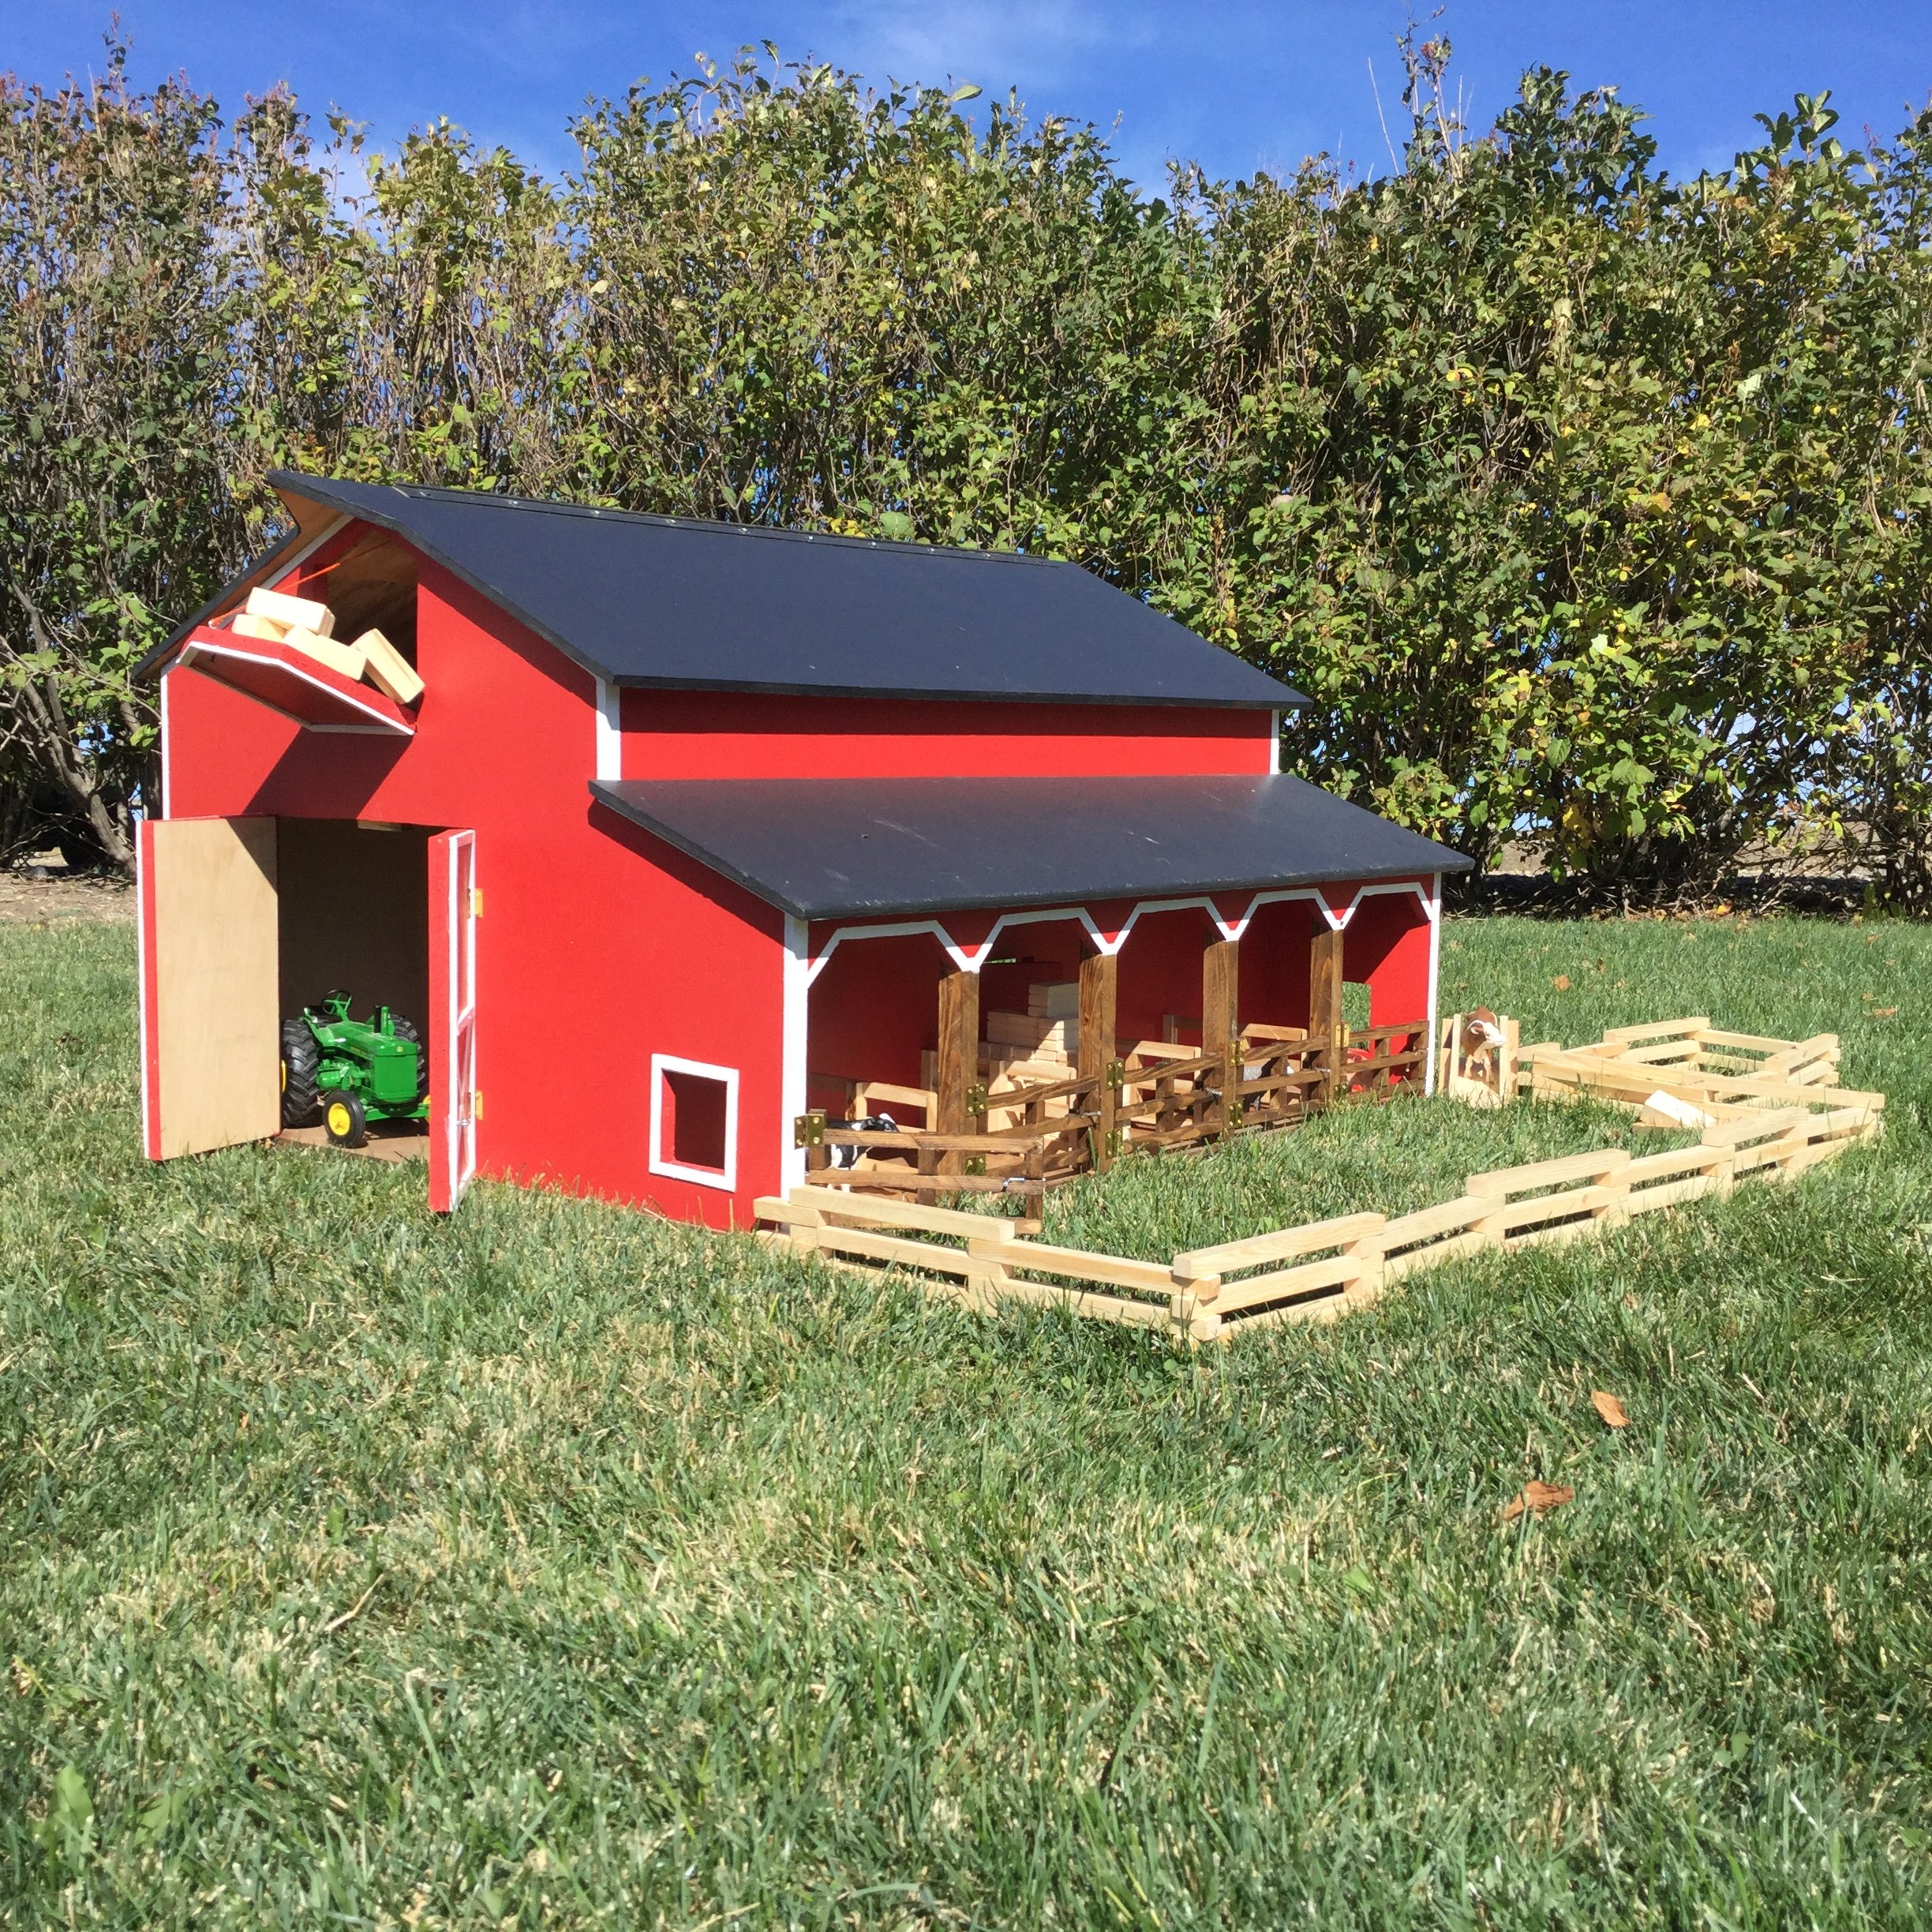
When we wanted a barn for our children to play in and use for their farm we discovered that nothing could be found to fit our fancy online. So with the use of some pictures of old barns and basic ideas we started on our very first wood project. Our tools consisted of a sawzal a table saw and cordless set of tools. Many hours later we have this to show for it. We used lots of scrap wood and bought only the hinges, latches and one sheet of plywood so our costs are skewed from someone trying to do it with new material.
Estimated Cost
$50 and possible as high as 120 for new material
Estimated Time Investment
Week Long Project (20 Hours or More)
Finish Used
Paint and clear coat. Some of the trim is painted which requires taping to get the crisp edge.
Recommended Skill Level
Beginner
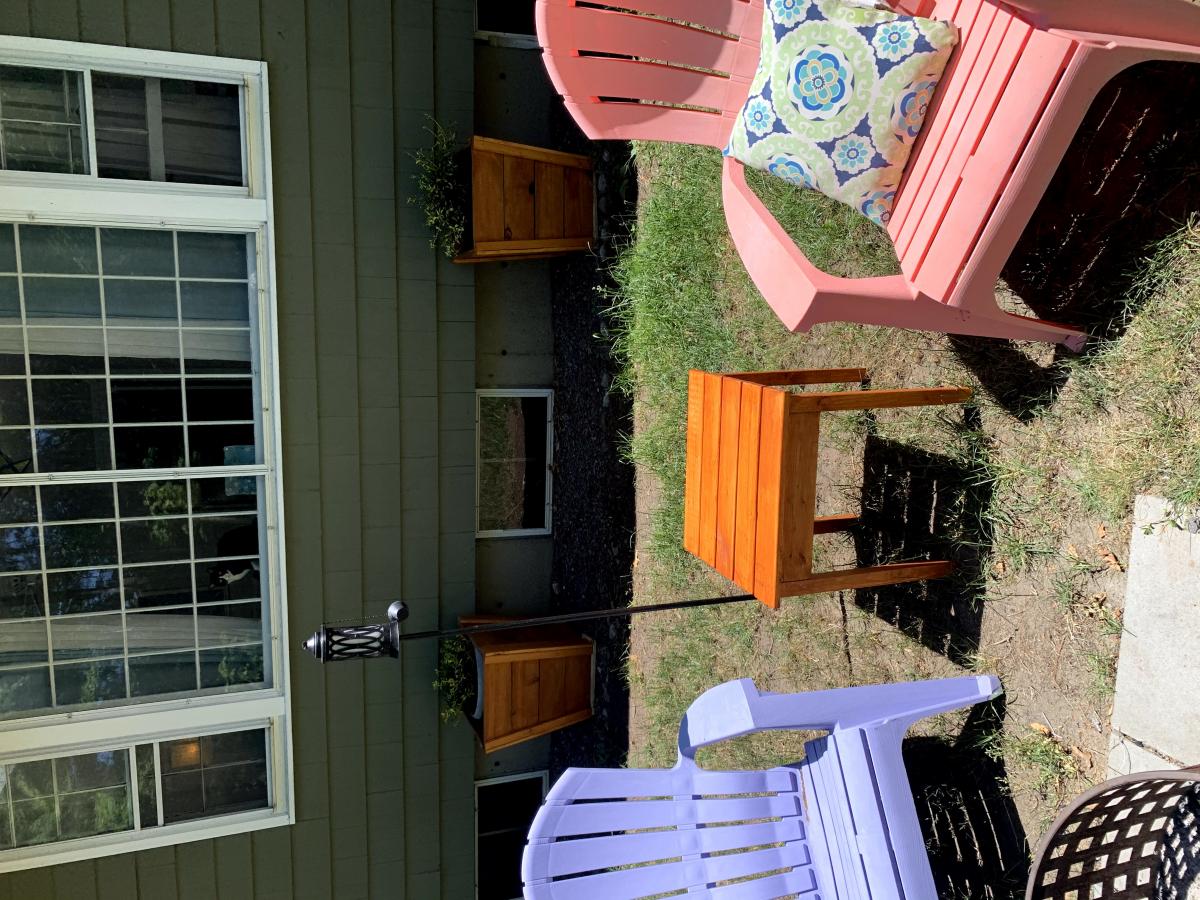
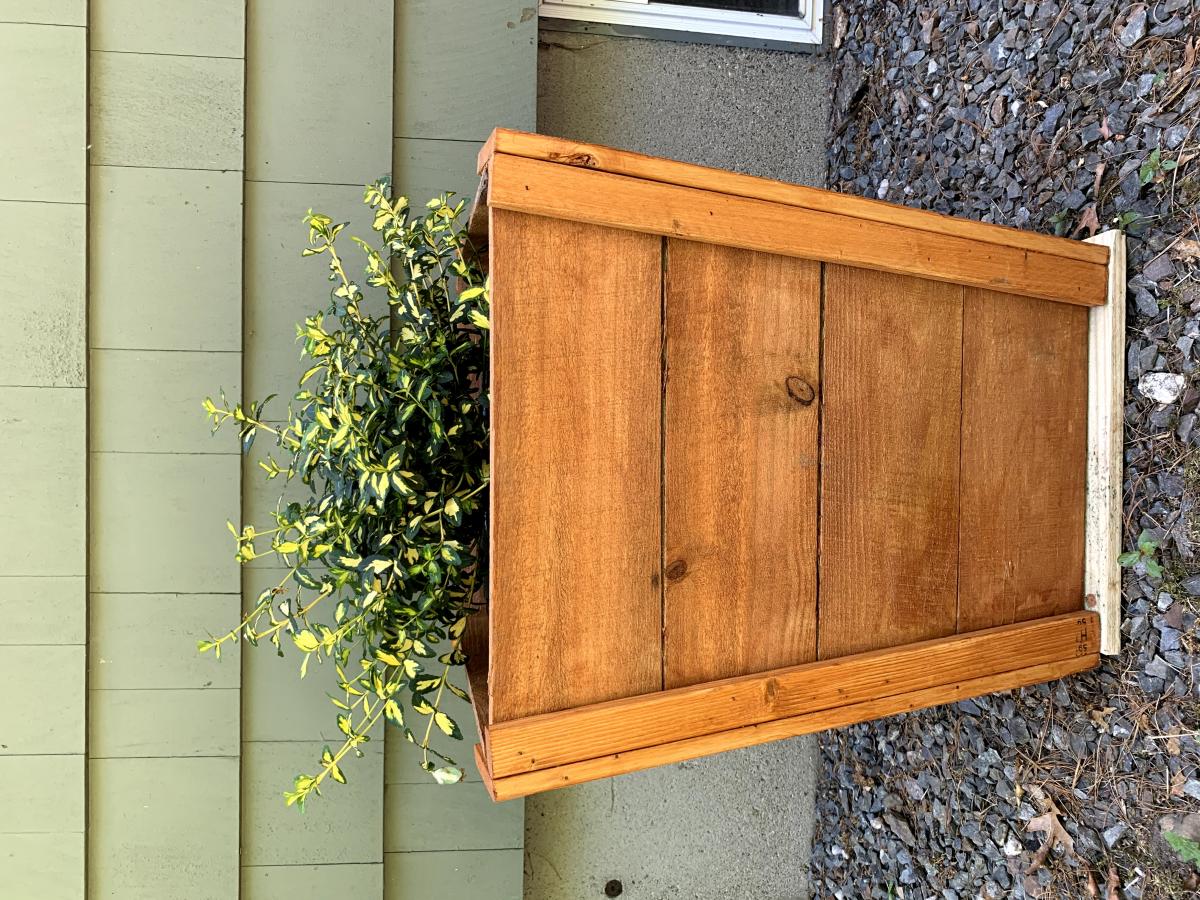
Tall planters (yay!)
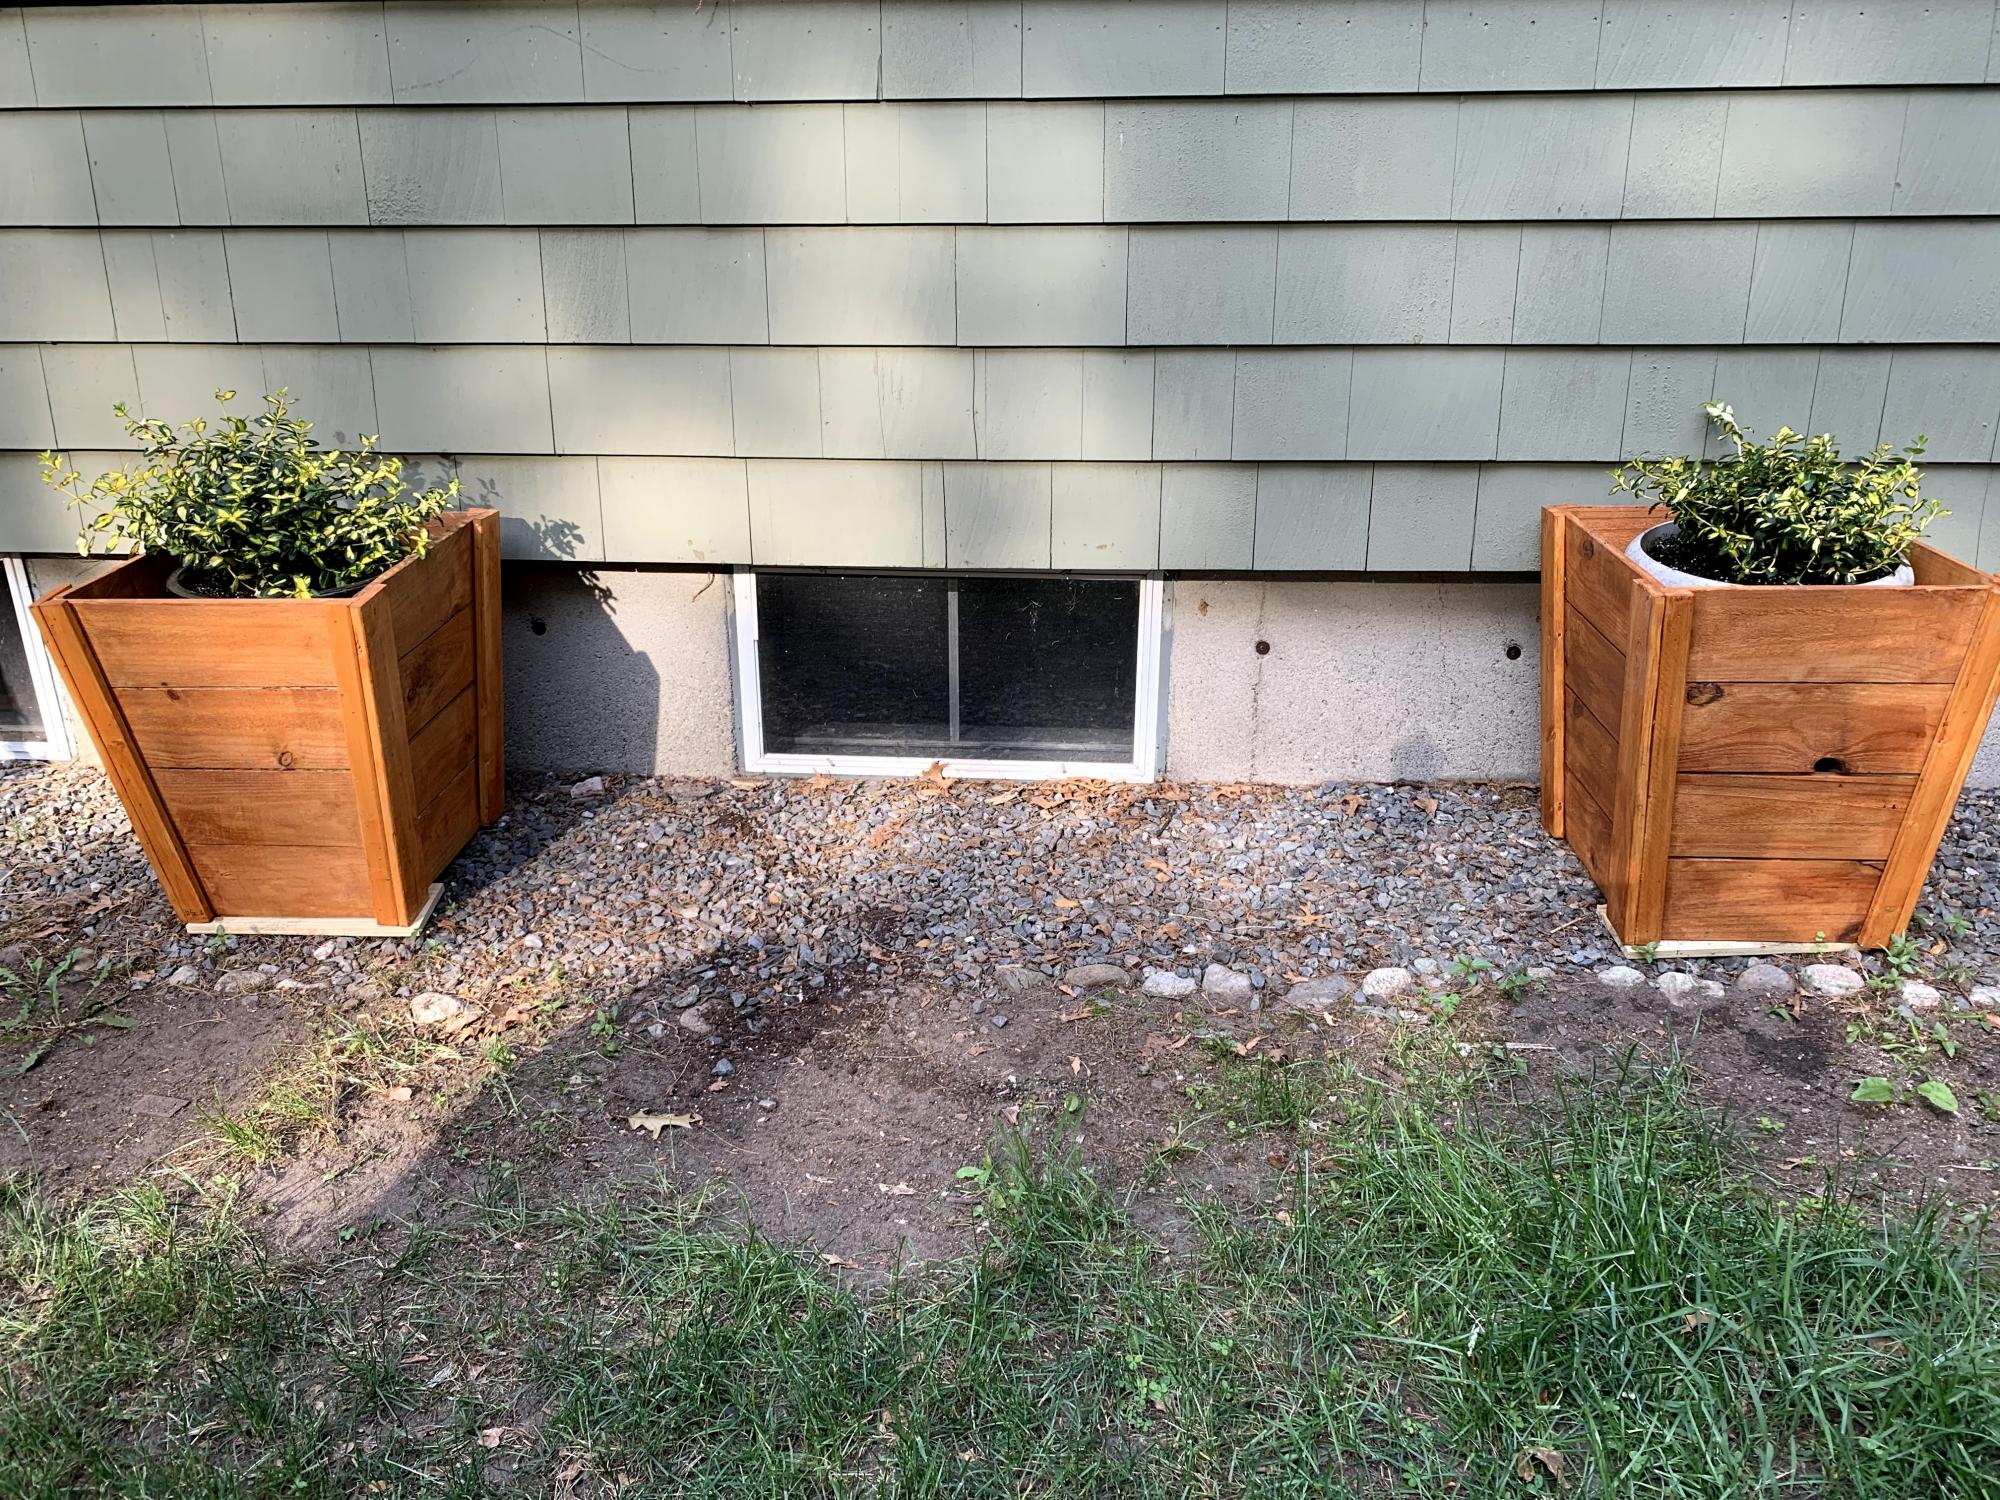
Made the tall planters to her exact measurements. Used fence pickets but stained them with an orange cedar stain. Put 'em near the fire bowl (and near a quickly made set of AW's Adirondack side tables). Took me a full day to measure, cut, nail and stain. I'm a novice so, this project challenged and pleased me! #speedsquareangles
Estimated Cost
40.00
Comments
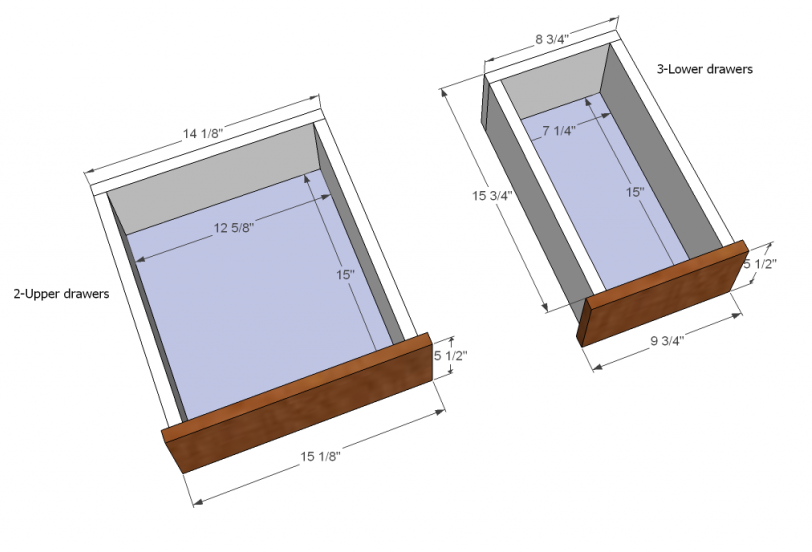
Farmhouse Bedside Table
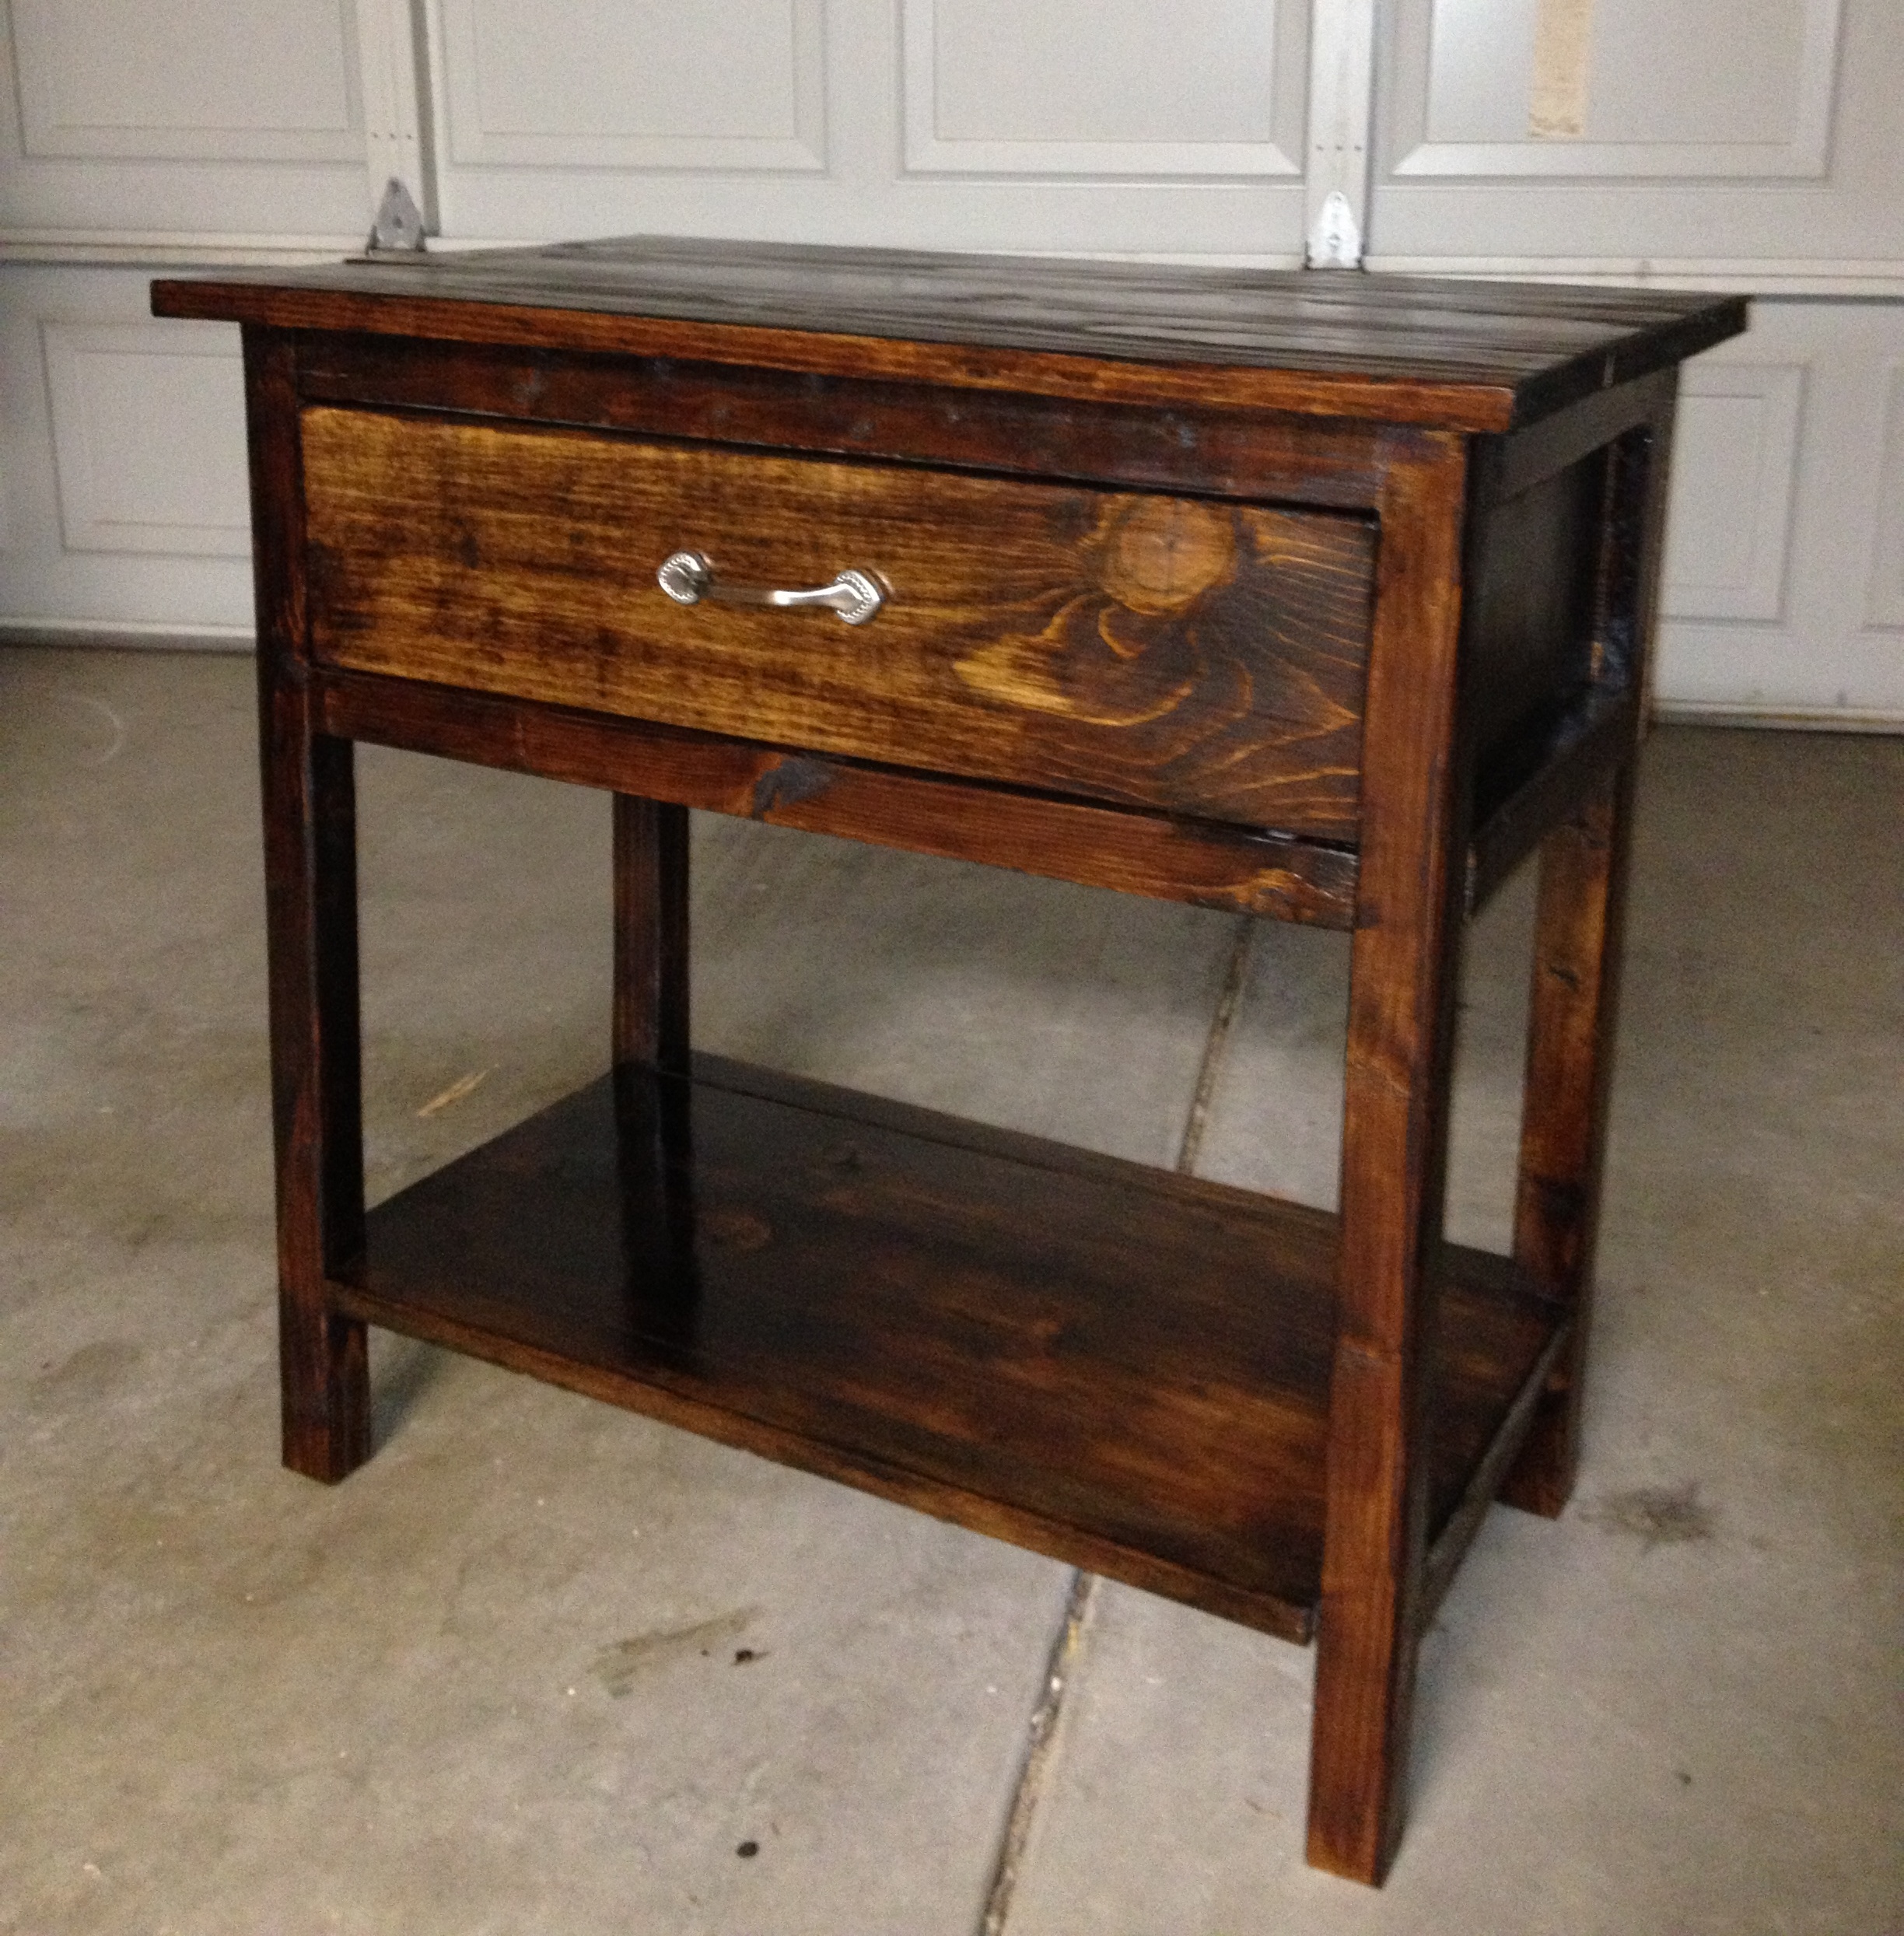
This was my first DIY furniture project!
The materials cost less than $50! Of course, I did buy some fun new
power tools!
Thanks to http://ana-white.com for the great plans!
I learned quite a lot from this. The nightstand will go in our guest room but the next project will be Master-Bedroom-Worthy! I’ll try to share what I learned with you here so you can avoid my mistakes.
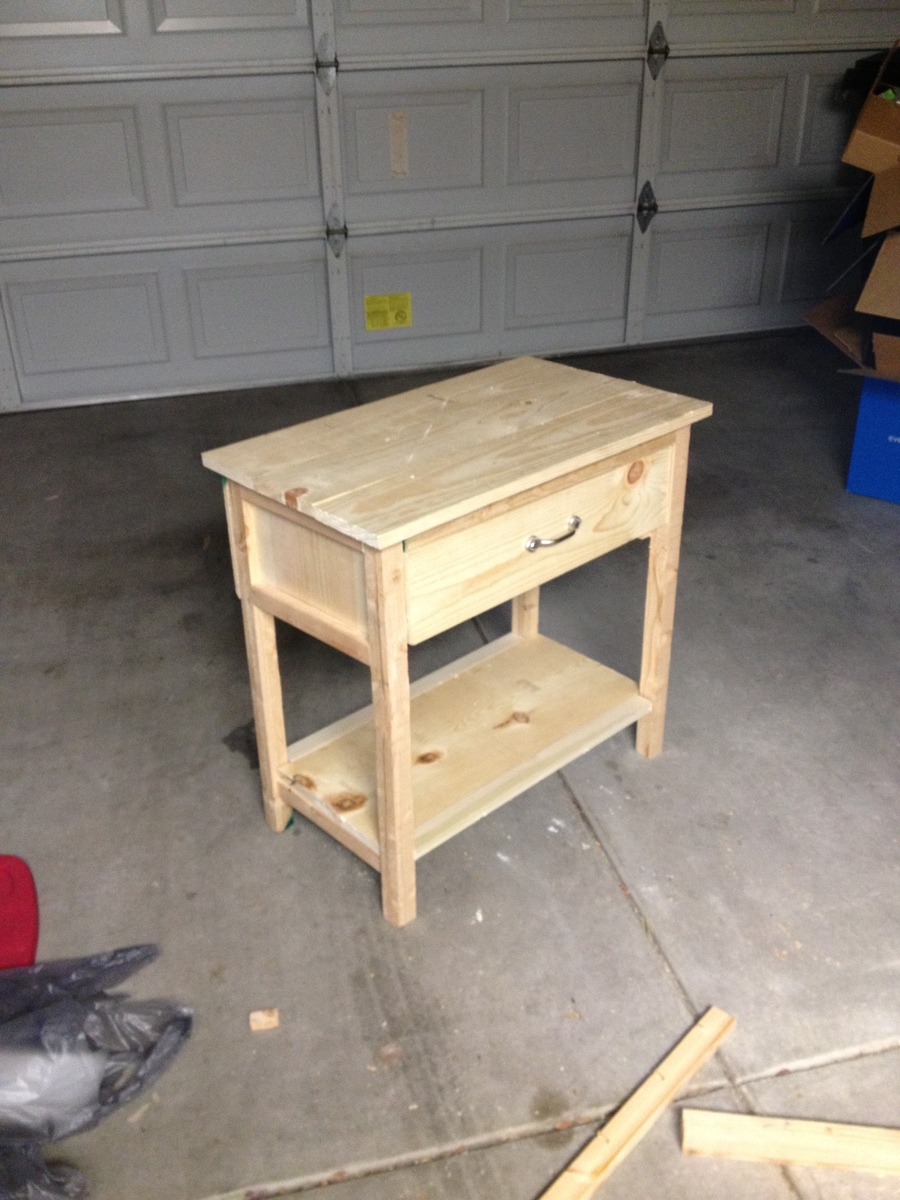
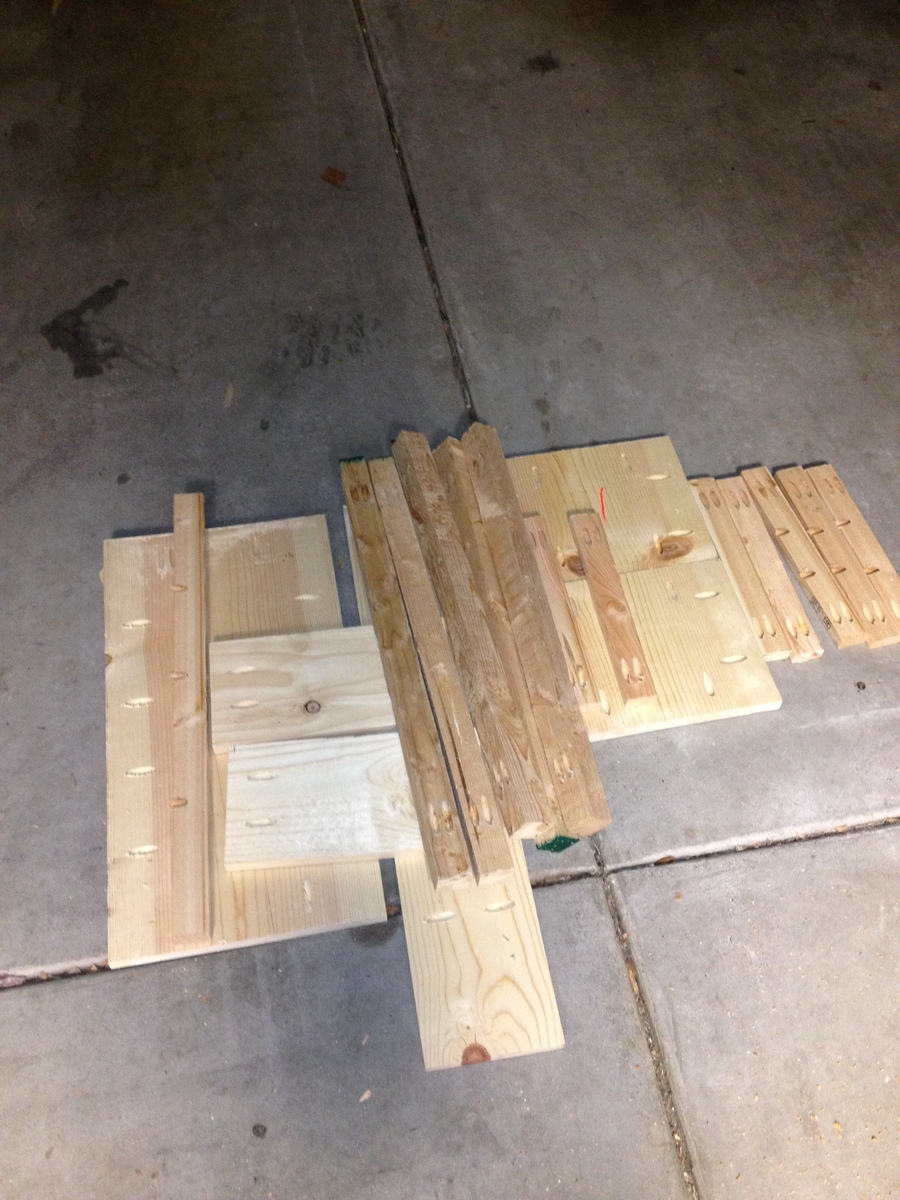
I cut all my pieces first. I used super cheap wood because I wasn’t sure how good I’d be at this. Needless to say, they weren’t all exactly straight so my “squaring up” didn’t work out quite as well as I’d hoped.
Lesson: buy straight boards
Then I went crazy with the Kreg jig and drilled all my pocket holes. I tried to use pocket holes for all the connections.
Lesson: just follow the directions
Another thing I'll do differently next time -- I'll sand and finish all the parts at this point before assembling the piece.
I can't wait to try my next project! Thanks Ana!!!

Built from Plan(s)
Estimated Cost
$50
Estimated Time Investment
Day Project (6-9 Hours)
Finish Used
Polyshades Espresso - two coats
Recommended Skill Level
Beginner
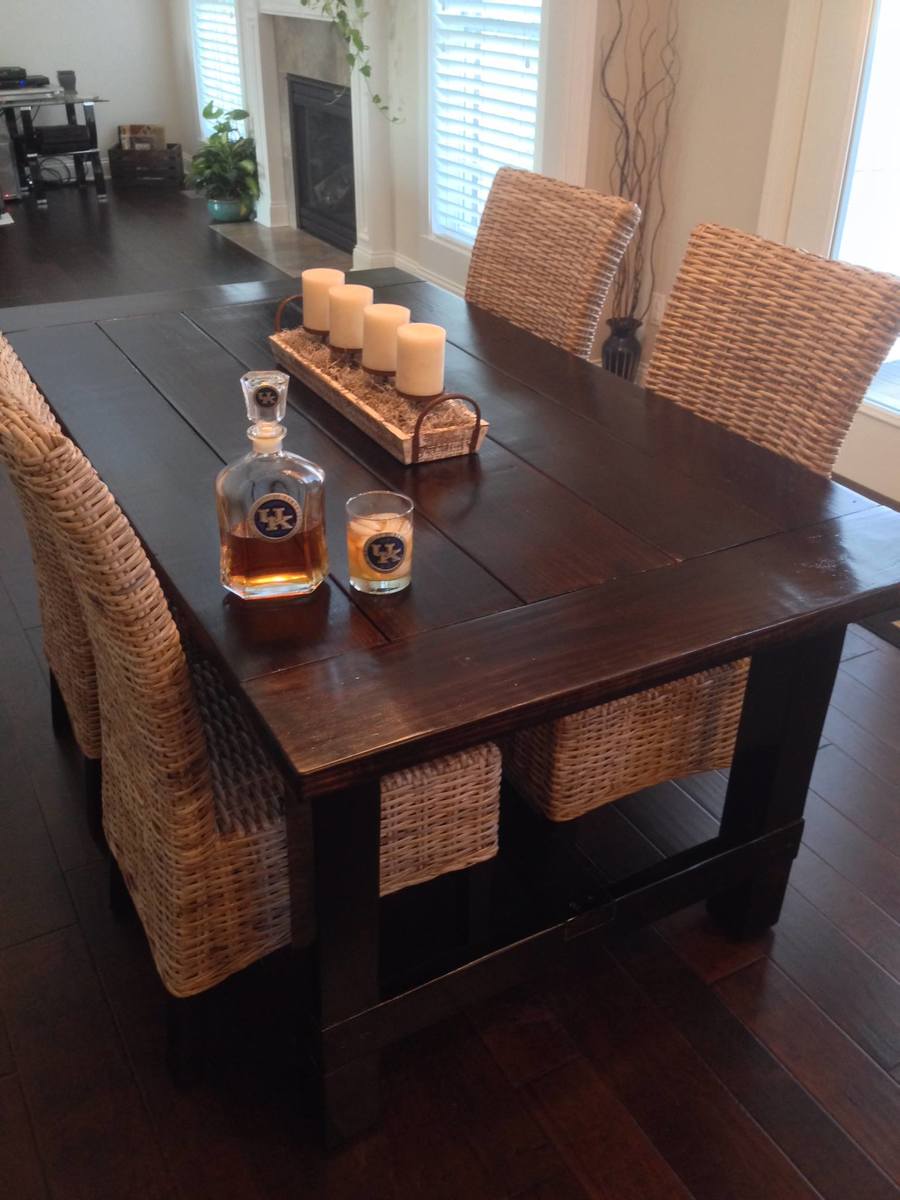
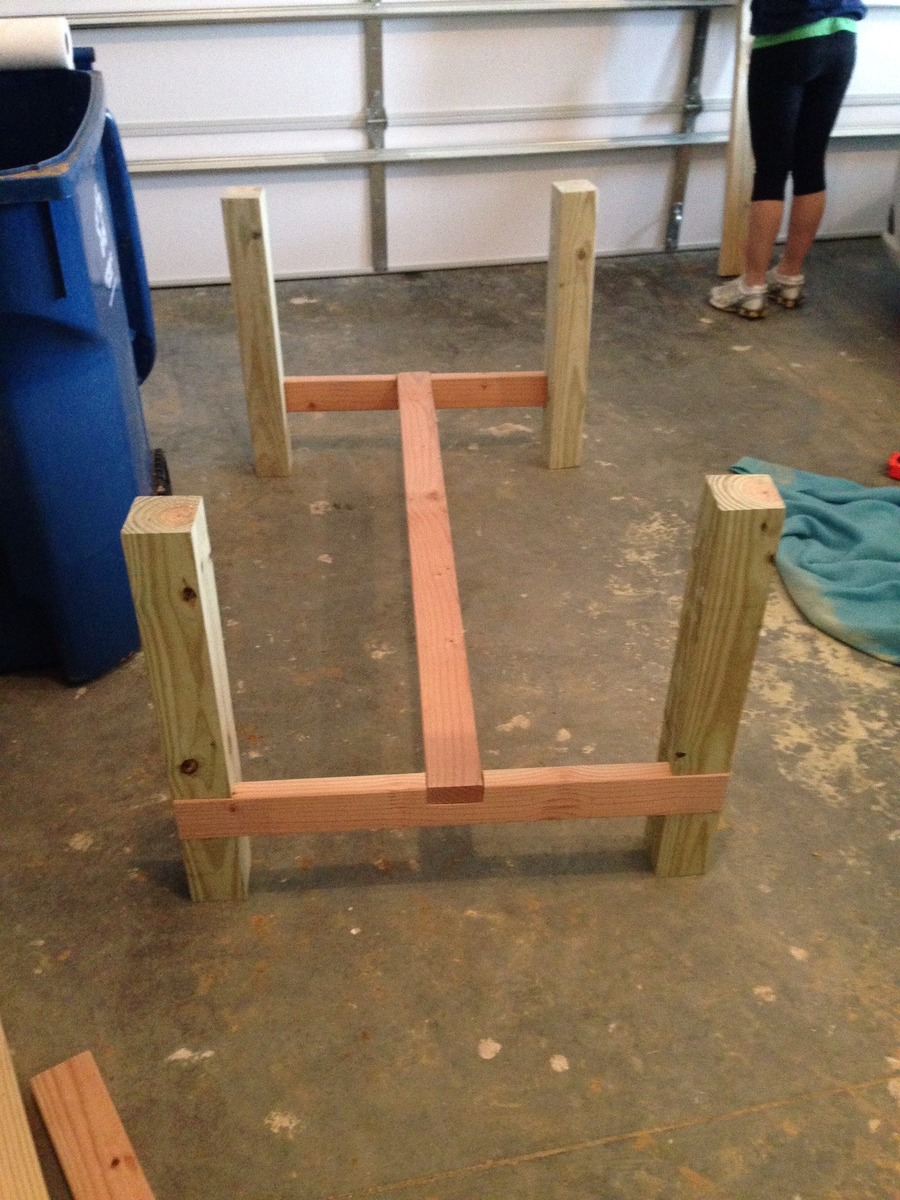
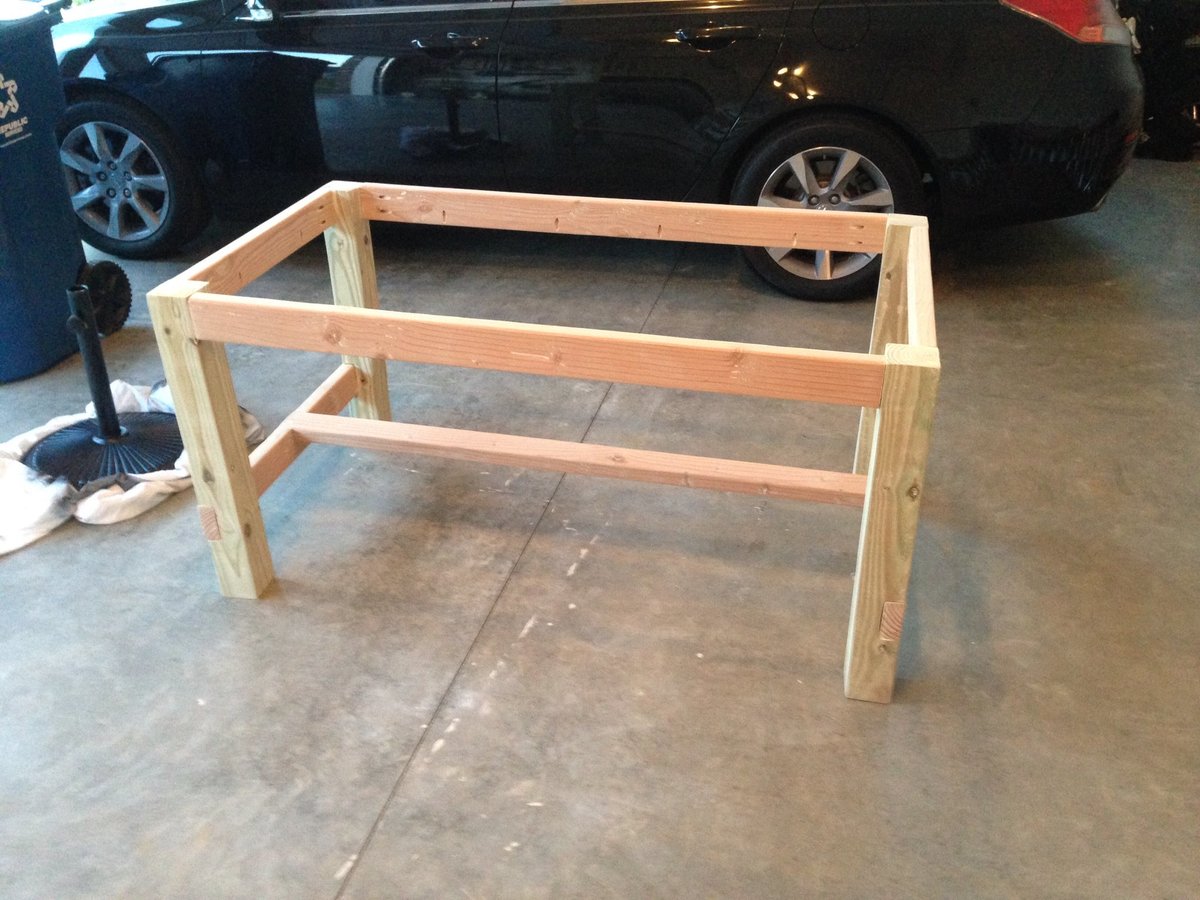
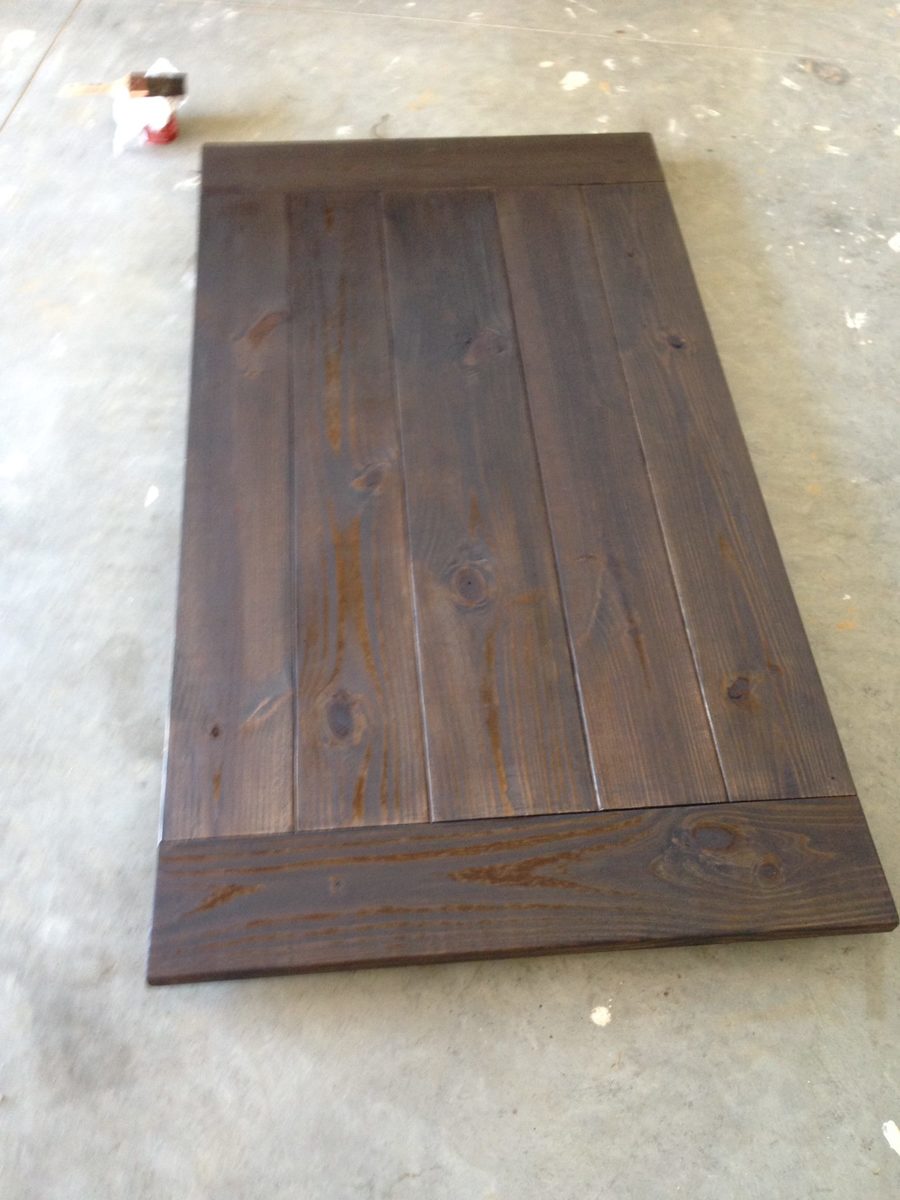
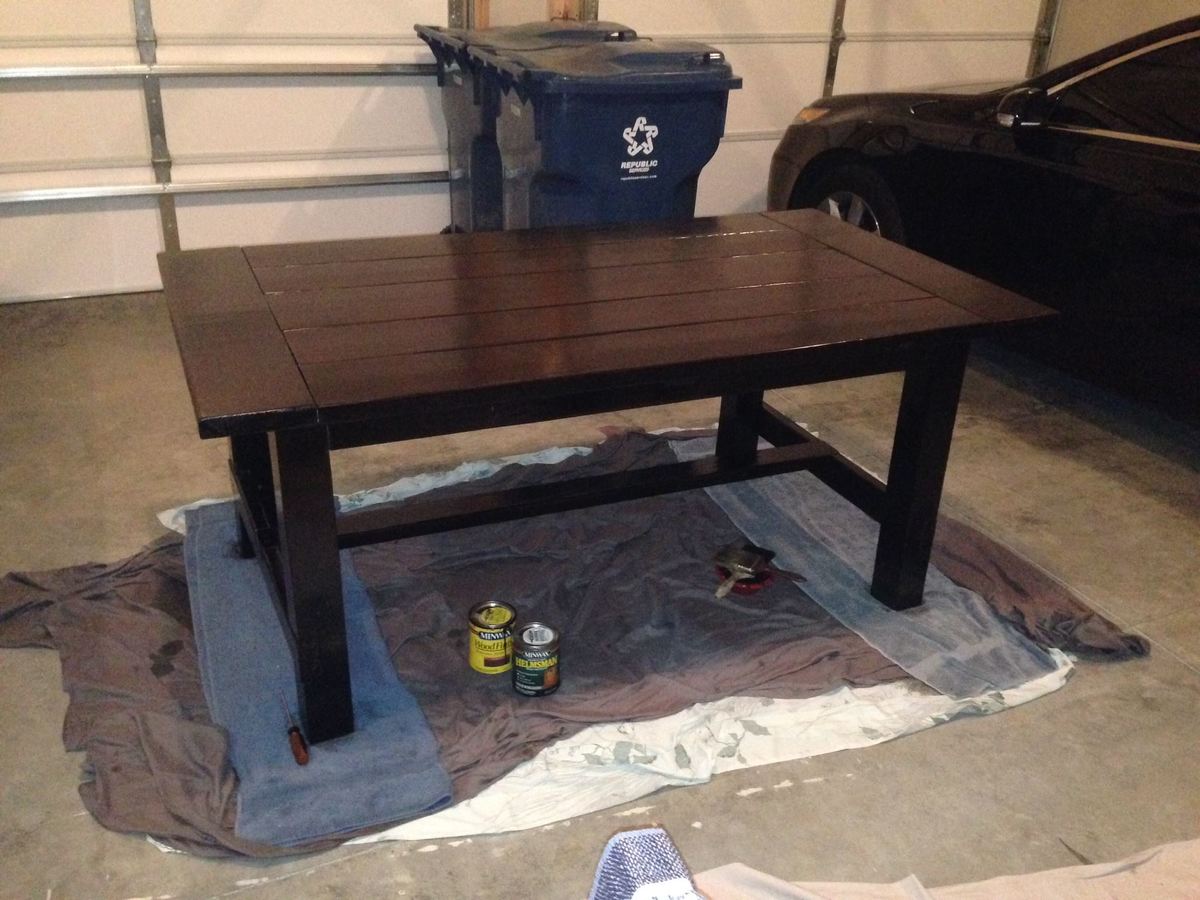
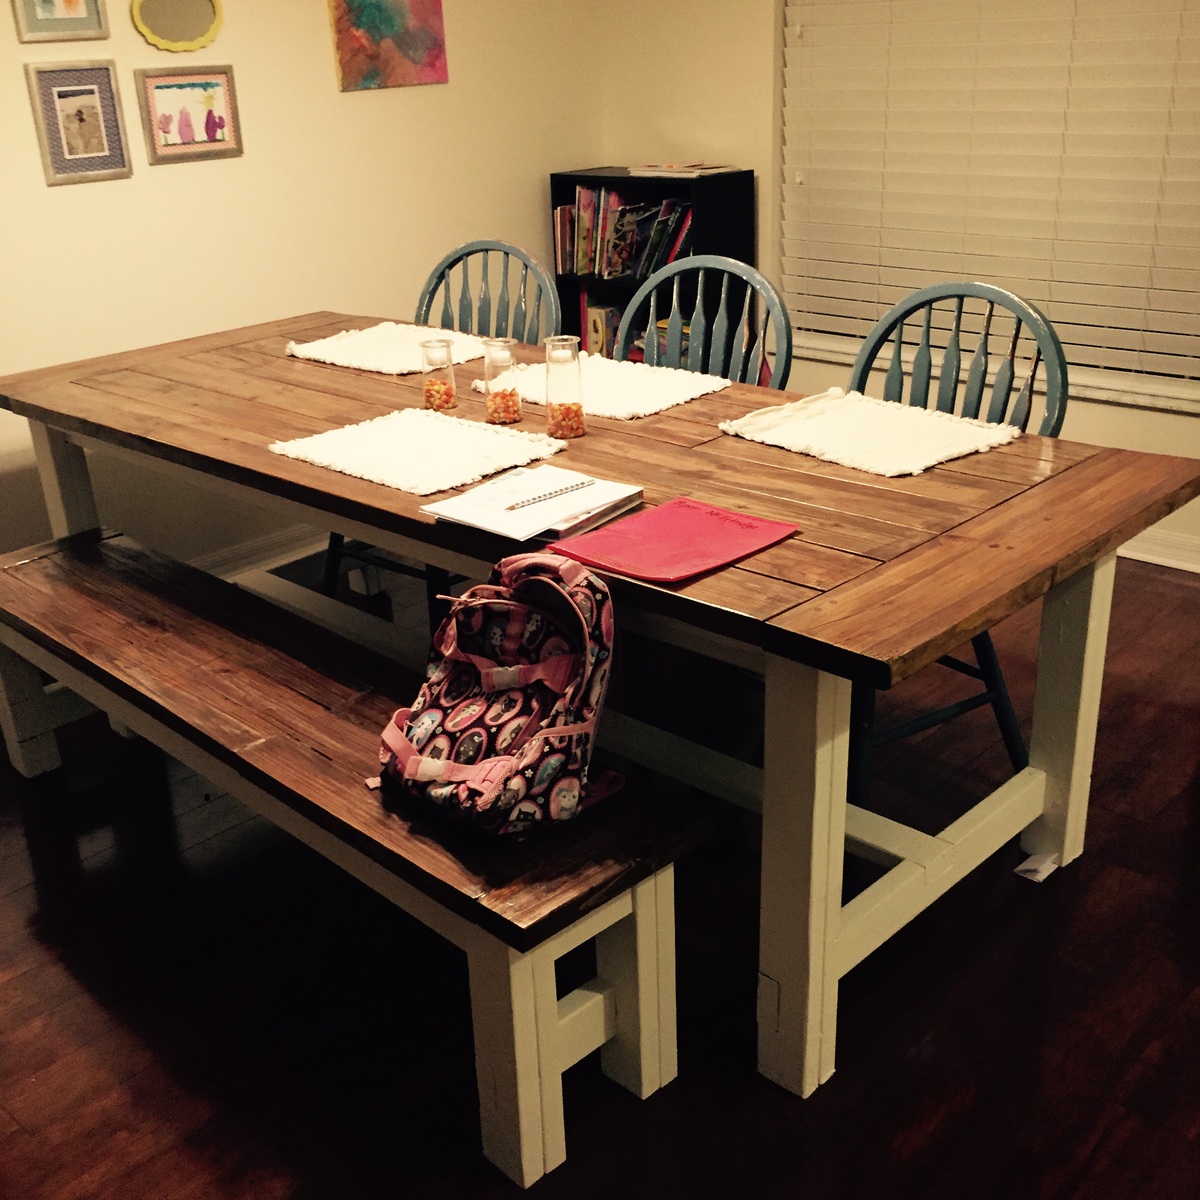
Farmhouse Table
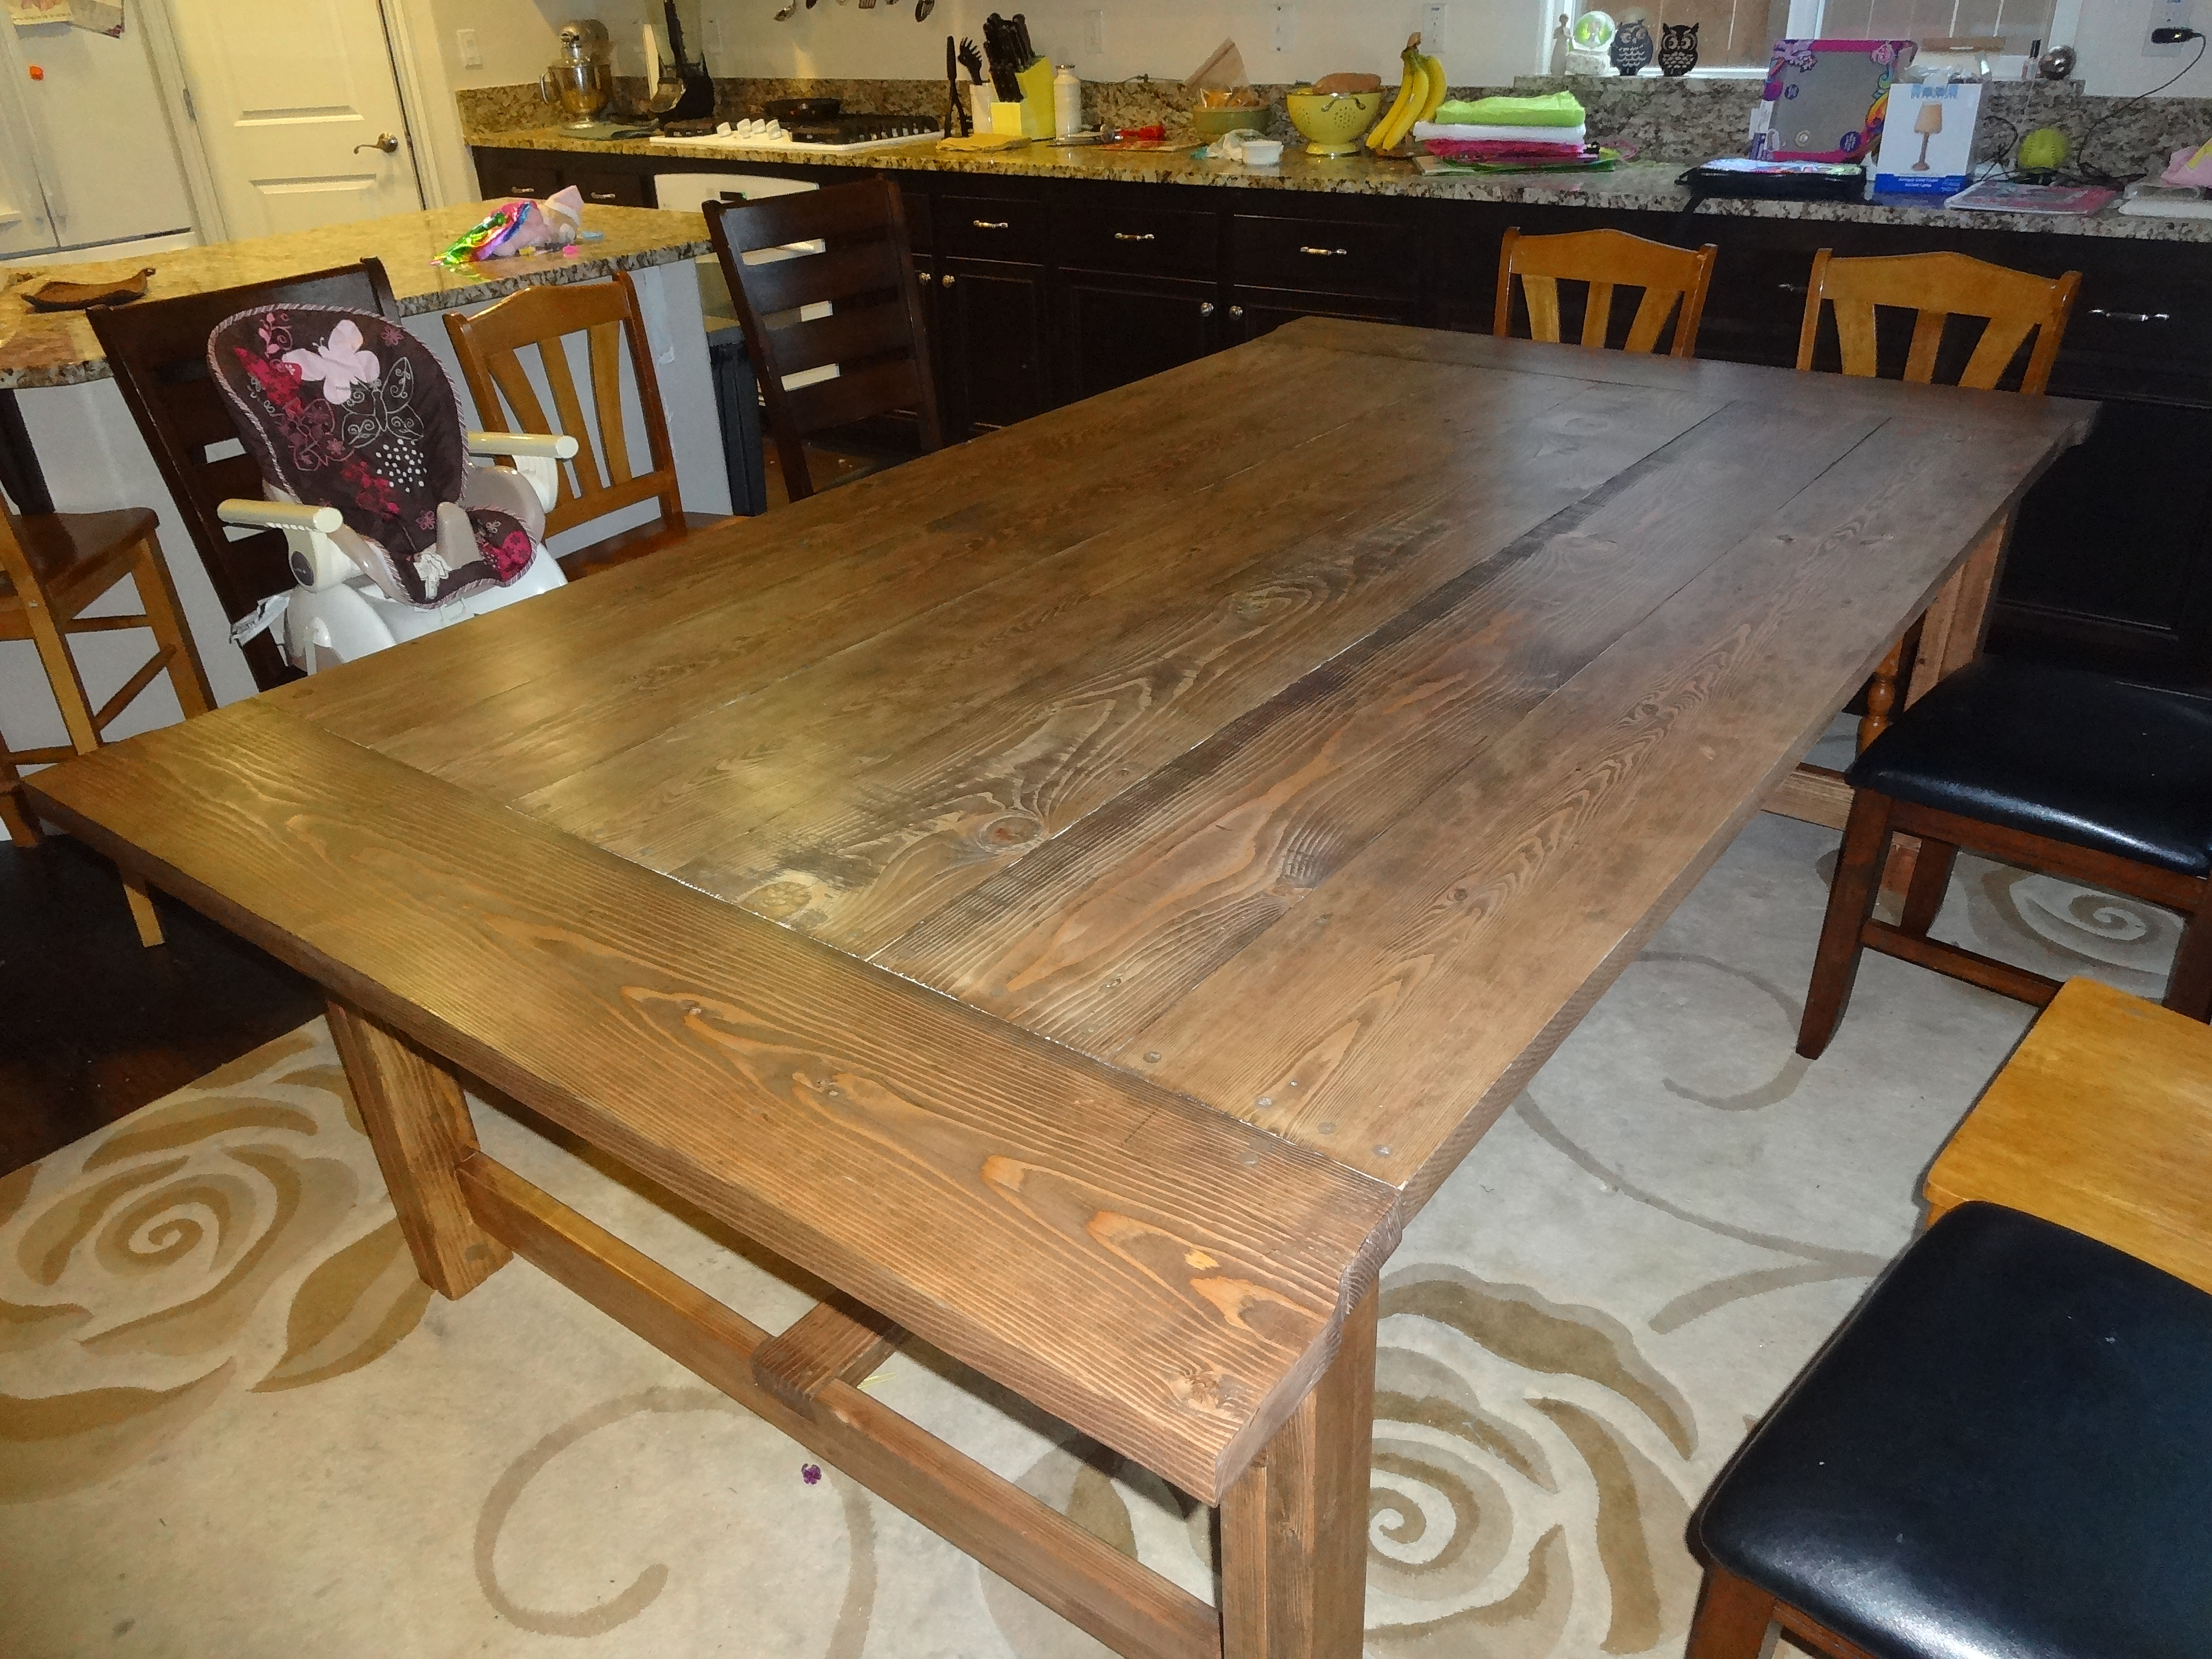
This is only the second project I've done, and I think it turned out great. I modified the measurements so that it fits 3 on each side and 2 on each end, 10 total (but it can seat more; the table is huge).
All I have is a band saw and a drill, and that's all I needed! The legs and support are Doug Fir from HD. The top is all 2x10's that I bought at a lumber yard so that they would have it kiln-dried and have the edges re-sawn. The only 2x10's I could find at the big box stores were green.
I finished it by sanding with 100 grit paper (I read not to over-sand doug fir for staining purposes), stained with one coat of Special Walnut (two coats on the breadboard ends), and 4 coats of satin poly.
This table is a tank. So glad I assembled it indoors, as we would have had trouble getting it in the house after it was all put together!
Built from Plan(s)
Estimated Cost
$200
Estimated Time Investment
Week Long Project (20 Hours or More)
Recommended Skill Level
Beginner
Leaning Ladder Desk - Made By Tara Holmes 2017
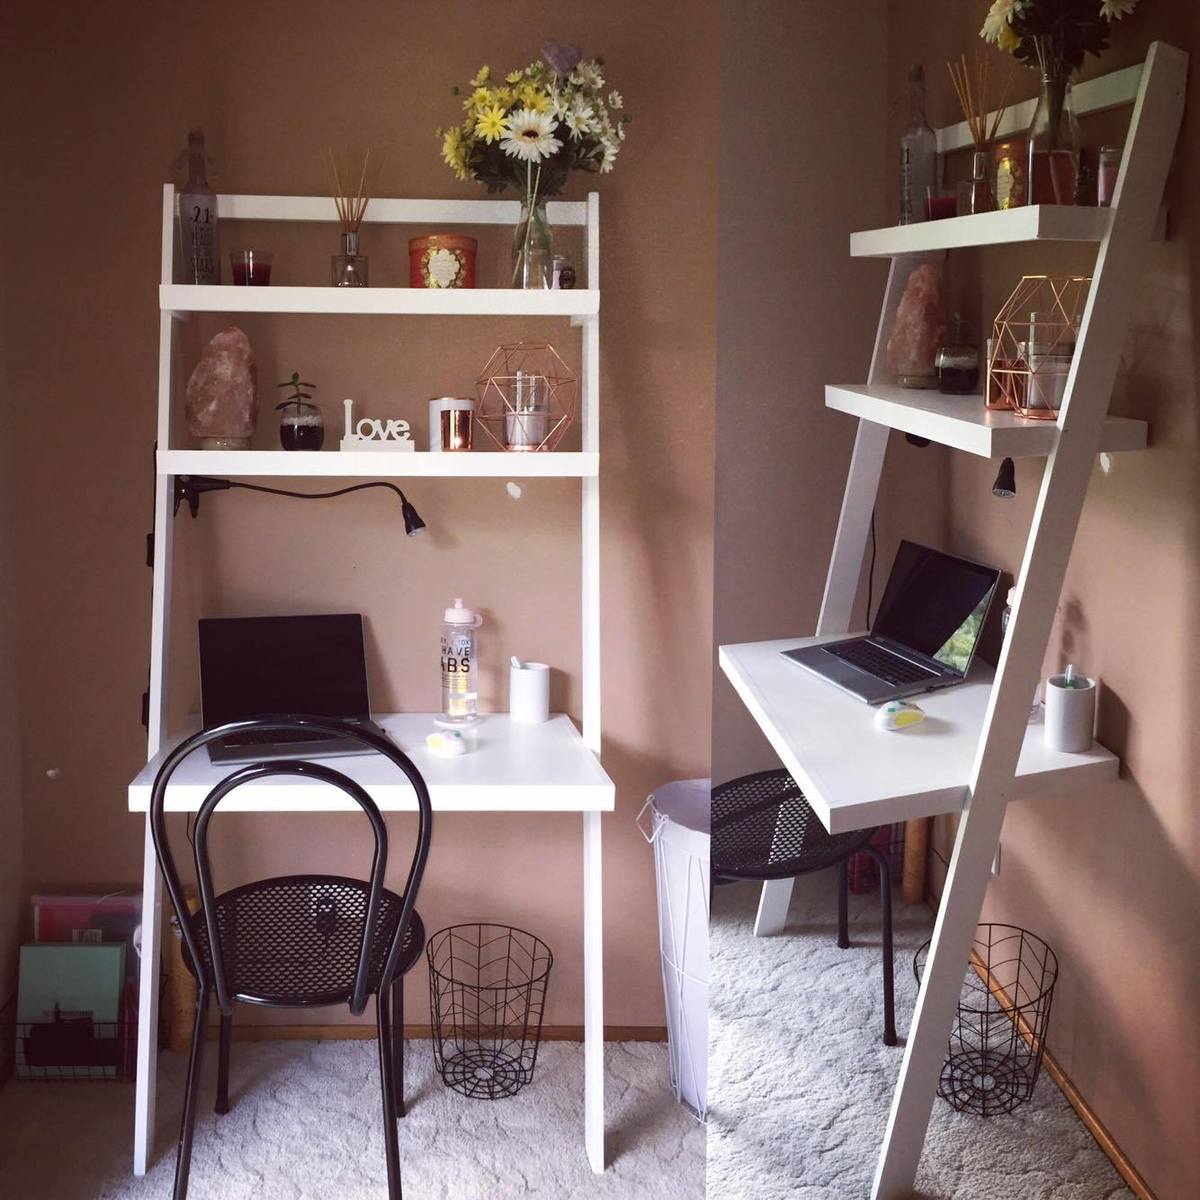
Leaning Ladder Desk - Made By Tara Holmes - Australia - 2017
Estimated Time Investment
Weekend Project (10-20 Hours)
Recommended Skill Level
Beginner
Comments
Workbench
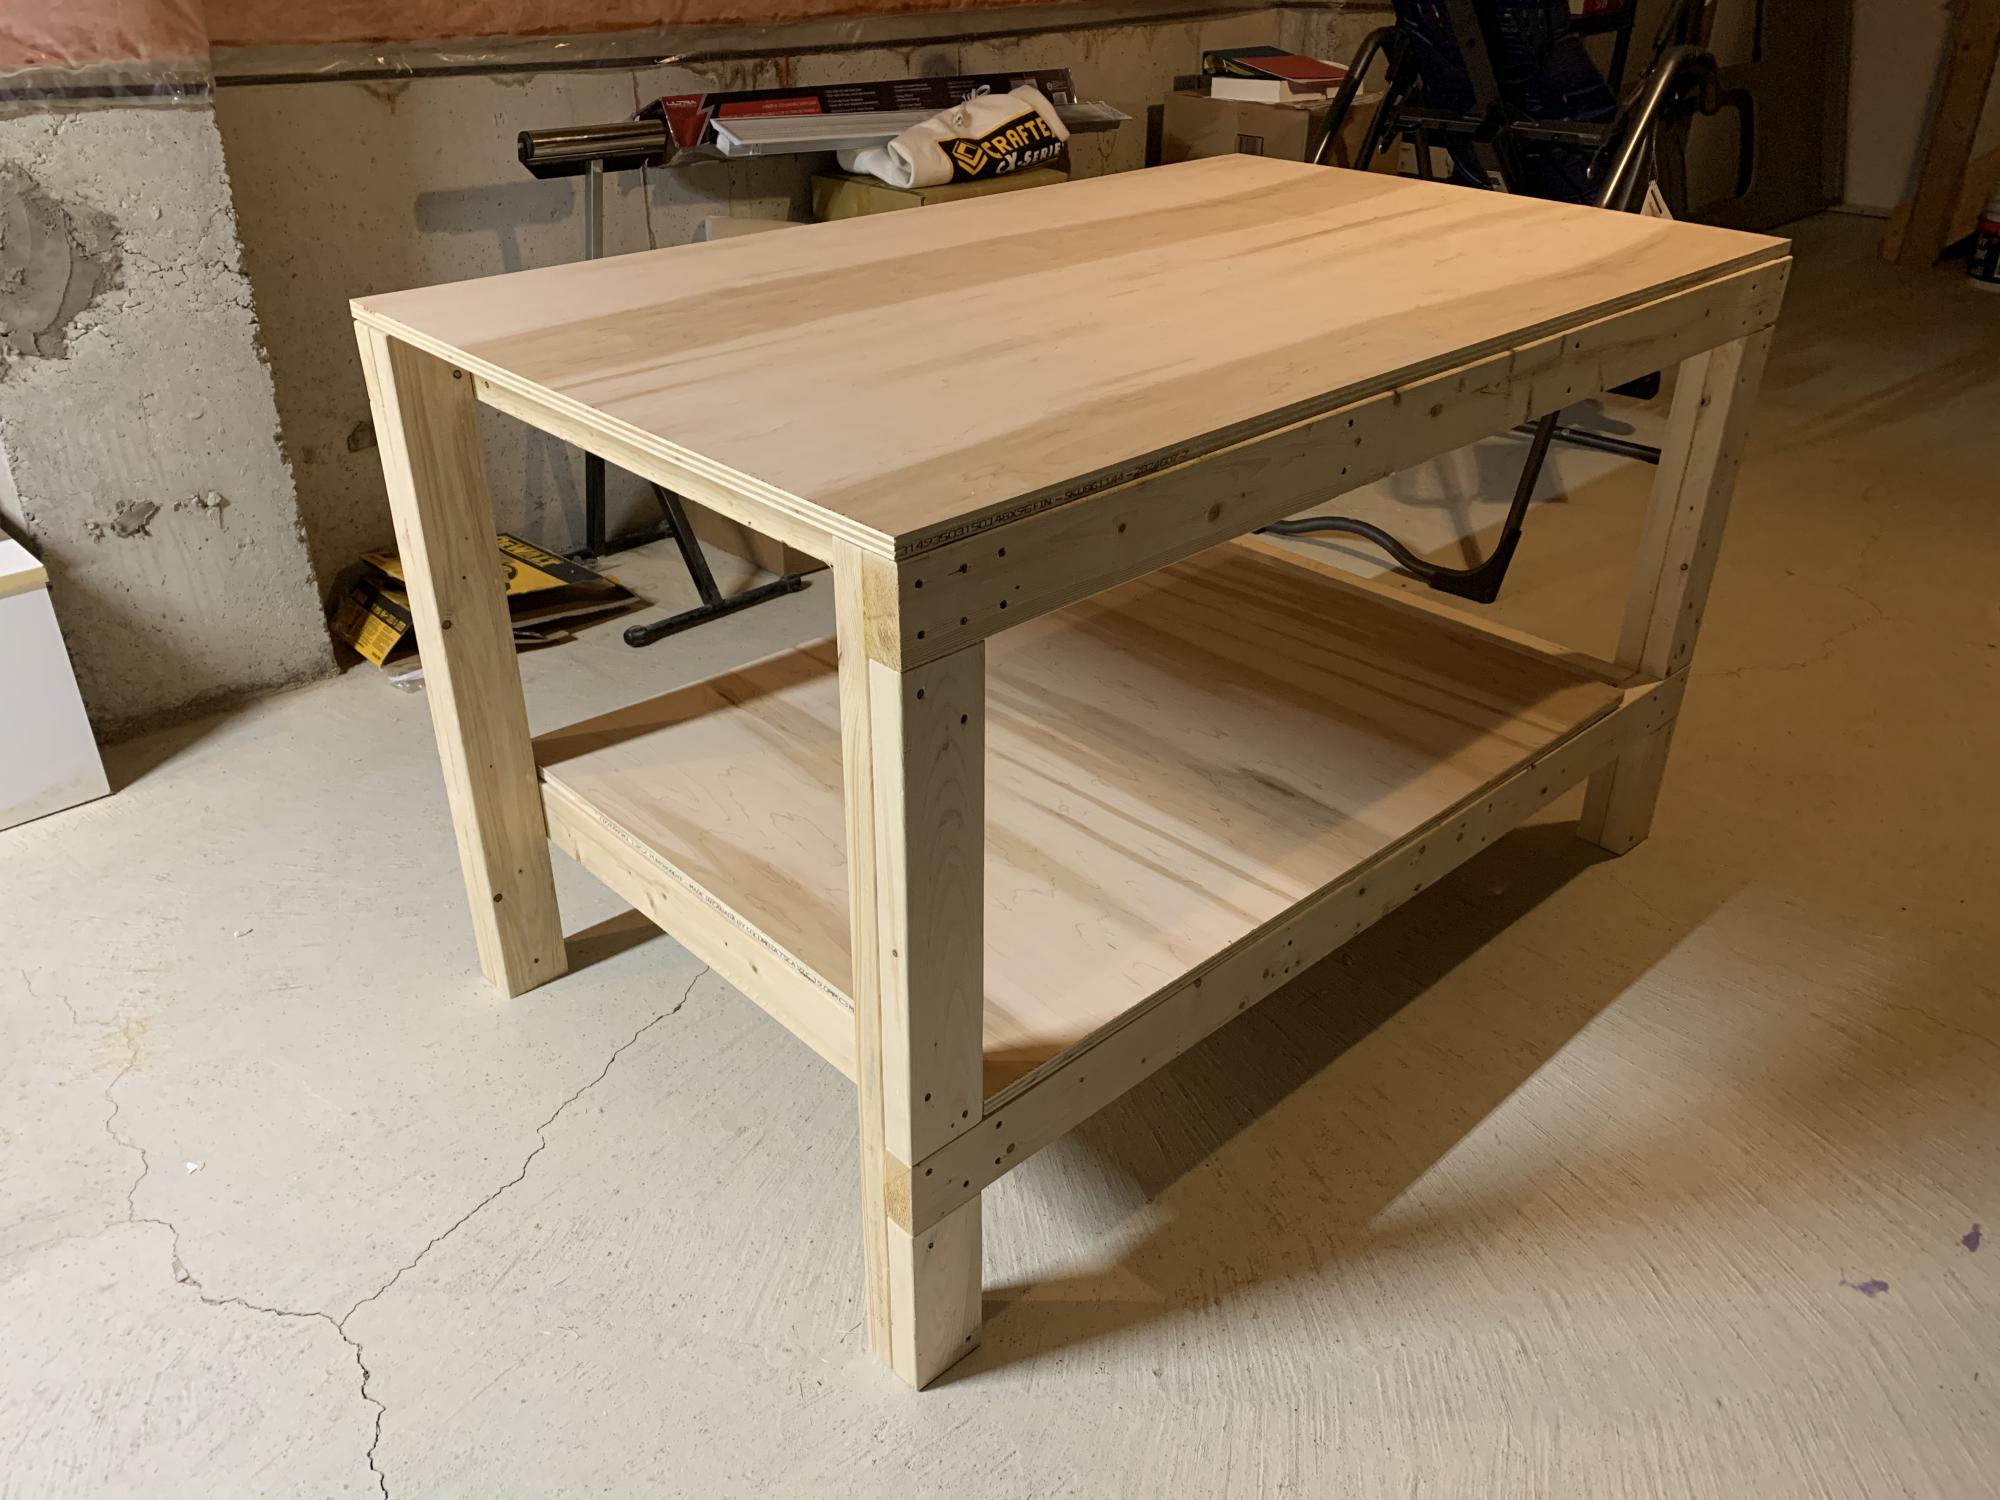
Thanks for the simple plans Anna, they worked out great!. I resized the table to make maximum use of the material, still within the same quantity you specified in your plans. I glued the legs along the lengths of the table, and kept the table top and shelf screwed in, for easy dismantling, if necessary.
Finally I added pop down heavy duty wheels allowing me to move the table (not shown in this pic) easily. When the wheels are not being used they pop up, making the table very stable. The height of the table is about 1/2” lower than the table saw, making it an ideal outfeed table as well.
Great design, and fun build.
Estimated Cost
Cn$148 (went with a finished 3/4” 4x8’ ply board)
Estimated Time Investment
Day Project (6-9 Hours)
Finish Used
None
Recommended Skill Level
Intermediate
Comments
craftsman chalkboard
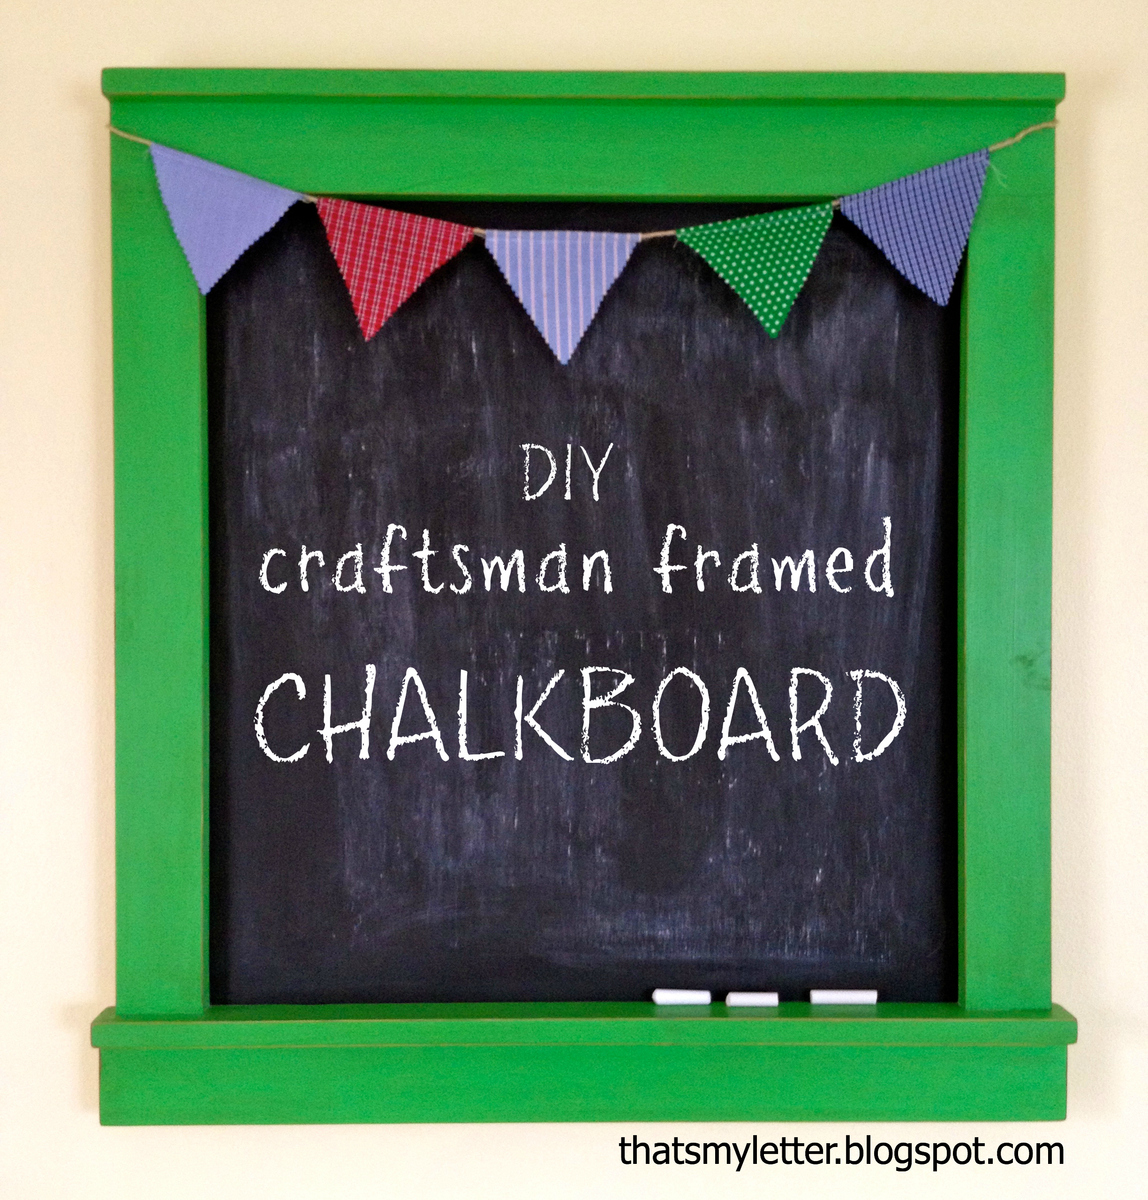
I used scrap 1x2 and 1x3s, added a piece of chalkboard painted plywood to make a fun wall decor for my kids. I resized Ana's plans to fit my scraps, all dimensions are listed in my post link.


Built from Plan(s)
Estimated Cost
$0
Estimated Time Investment
An Hour or Two (0-2 Hours)
Finish Used
1. Two coats Glidden lucky shamrock
2. Minwax Early American stain
3. Minwax clear satin poly
2. Minwax Early American stain
3. Minwax clear satin poly
Recommended Skill Level
Beginner
Comments

Mon, 01/21/2013 - 15:09
Chalkboard
I saw the brag post and was motivated to make my own chalkboard today. I was in a need of a message center and thought chalkboard would be a perfect addition. I was at home and had no scraps of wood and no chalkboard paint! Normally, that would be a problem!
Luckily, I had an old wood crate, paint, and non-sanded grout! Voila...enough to make a chalkboard message center! Thanks for the motivation!
Here is a link to the finished product!
http://re-storedesign.com/2013/01/21/wood-crate-message-center-diy-chal…
Next time I am in my shop I am going to make a craftsman style chalkboard for my studio!
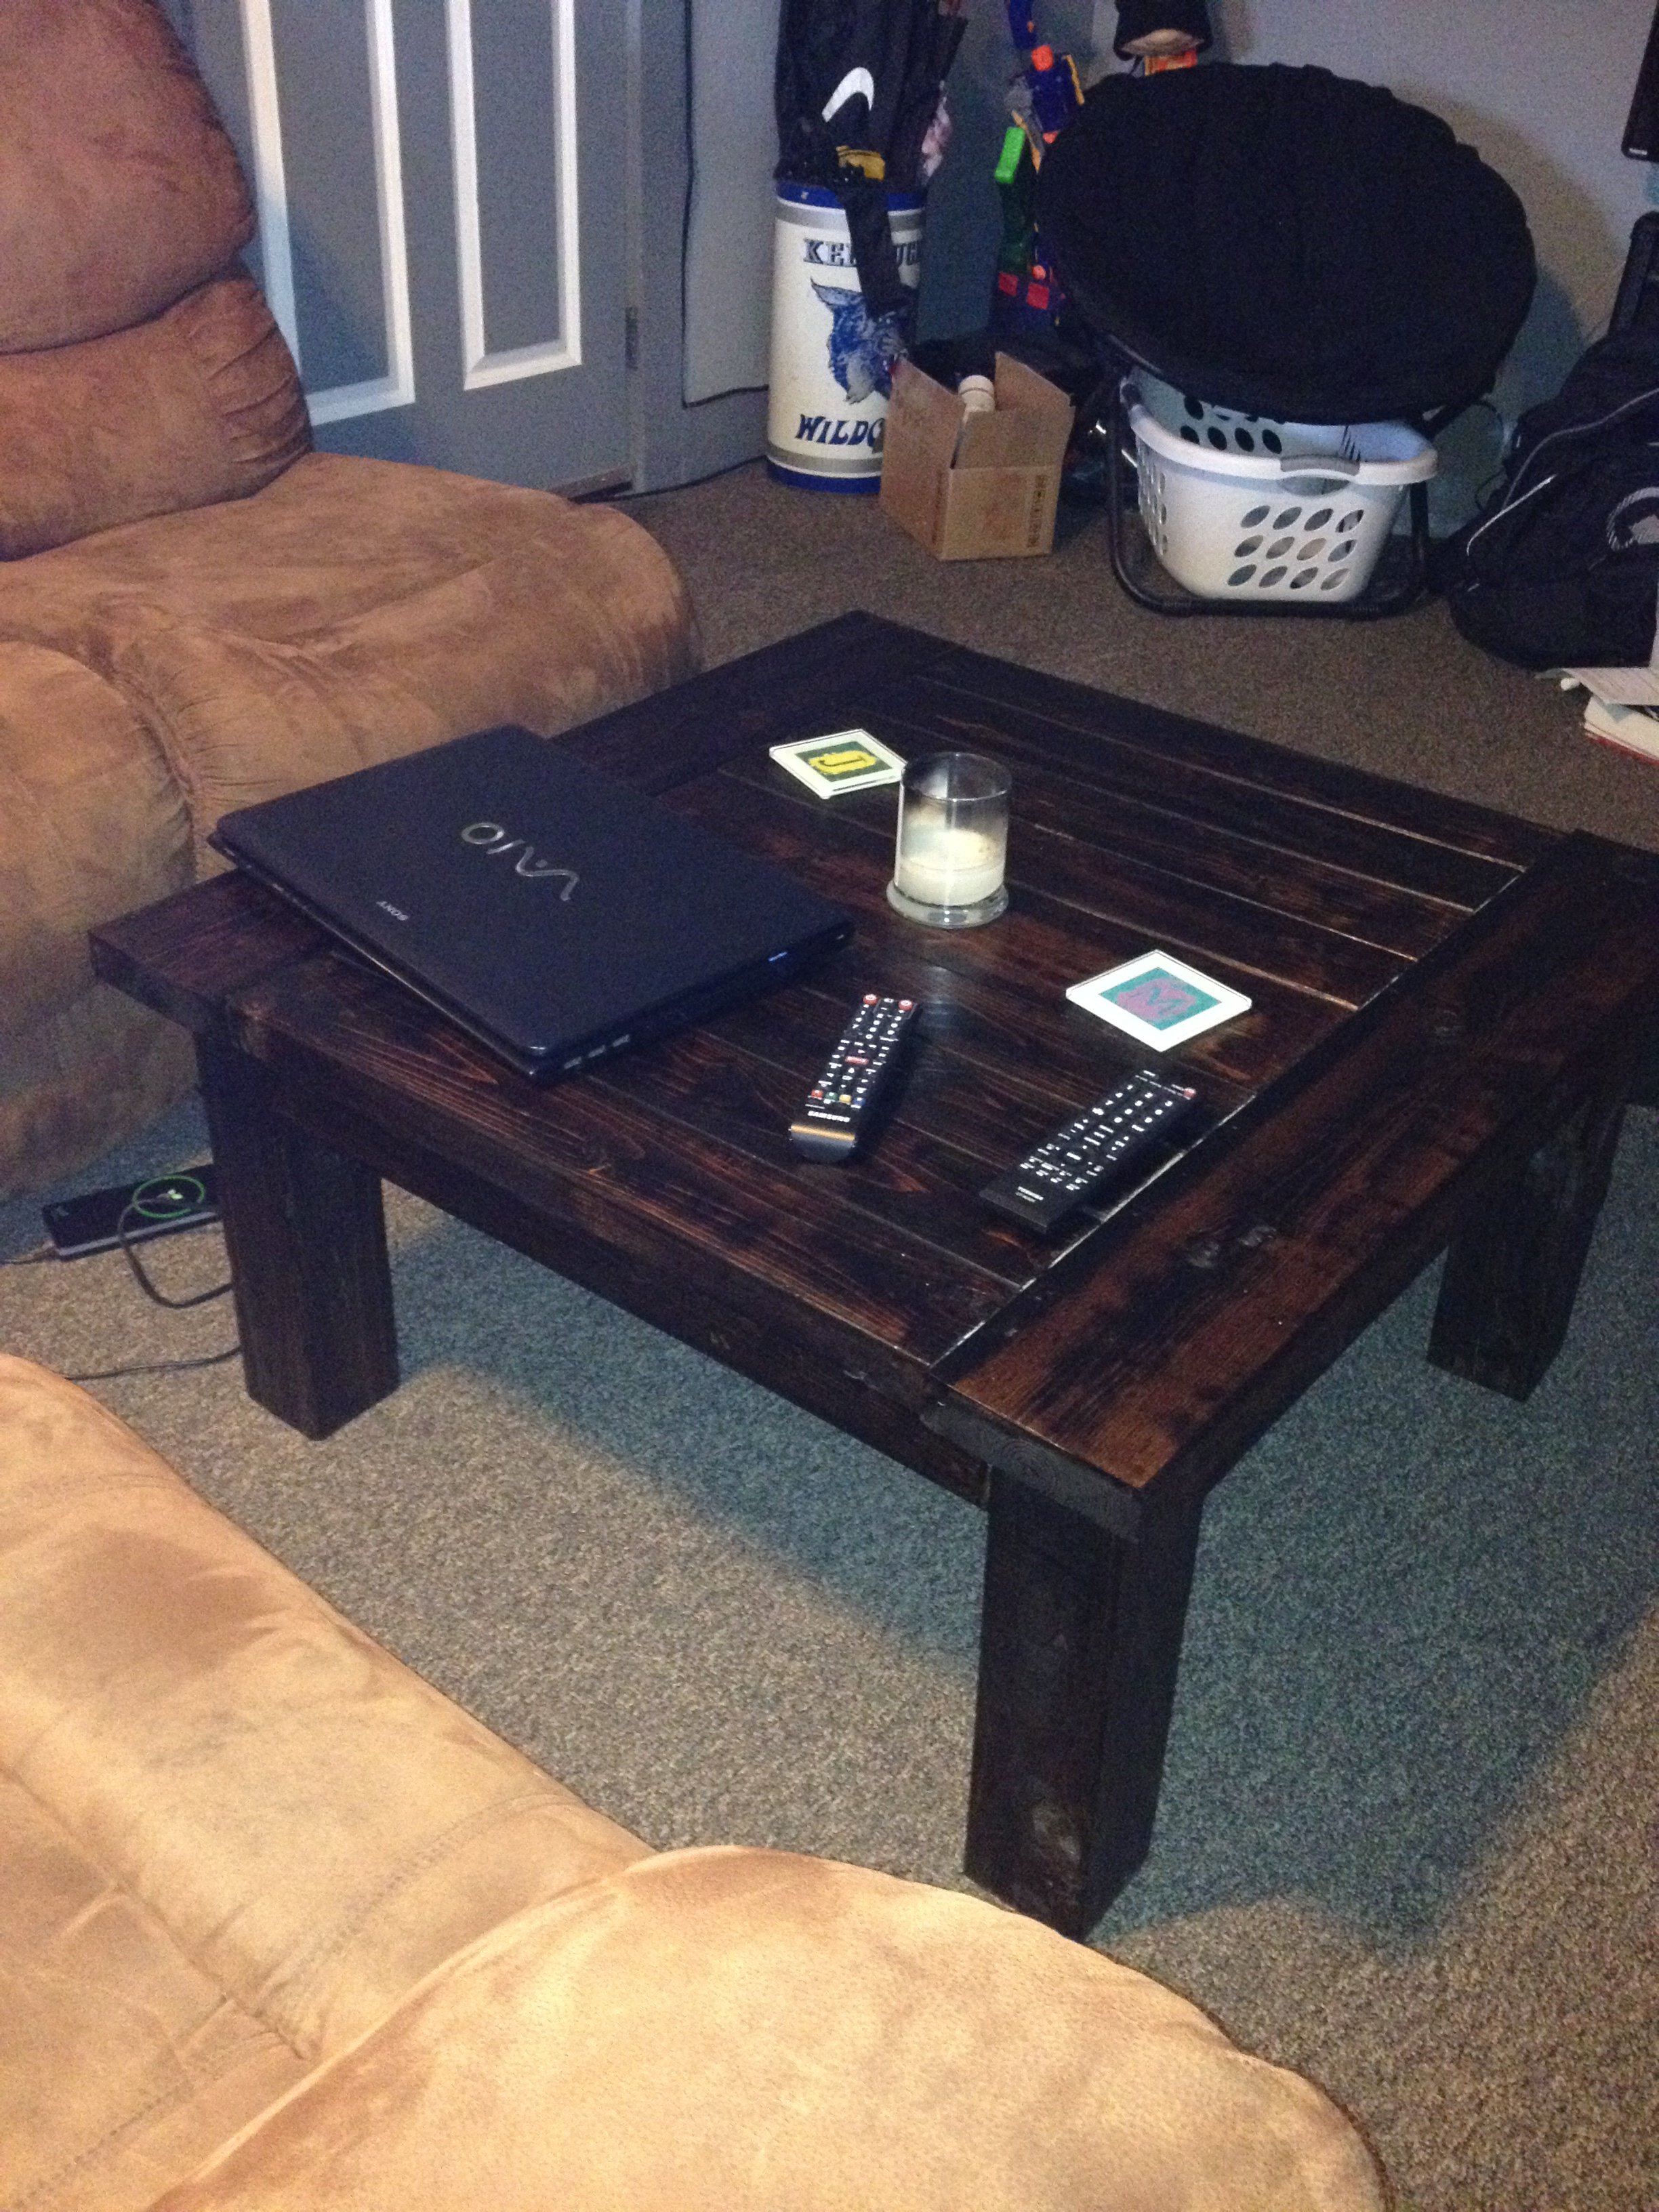
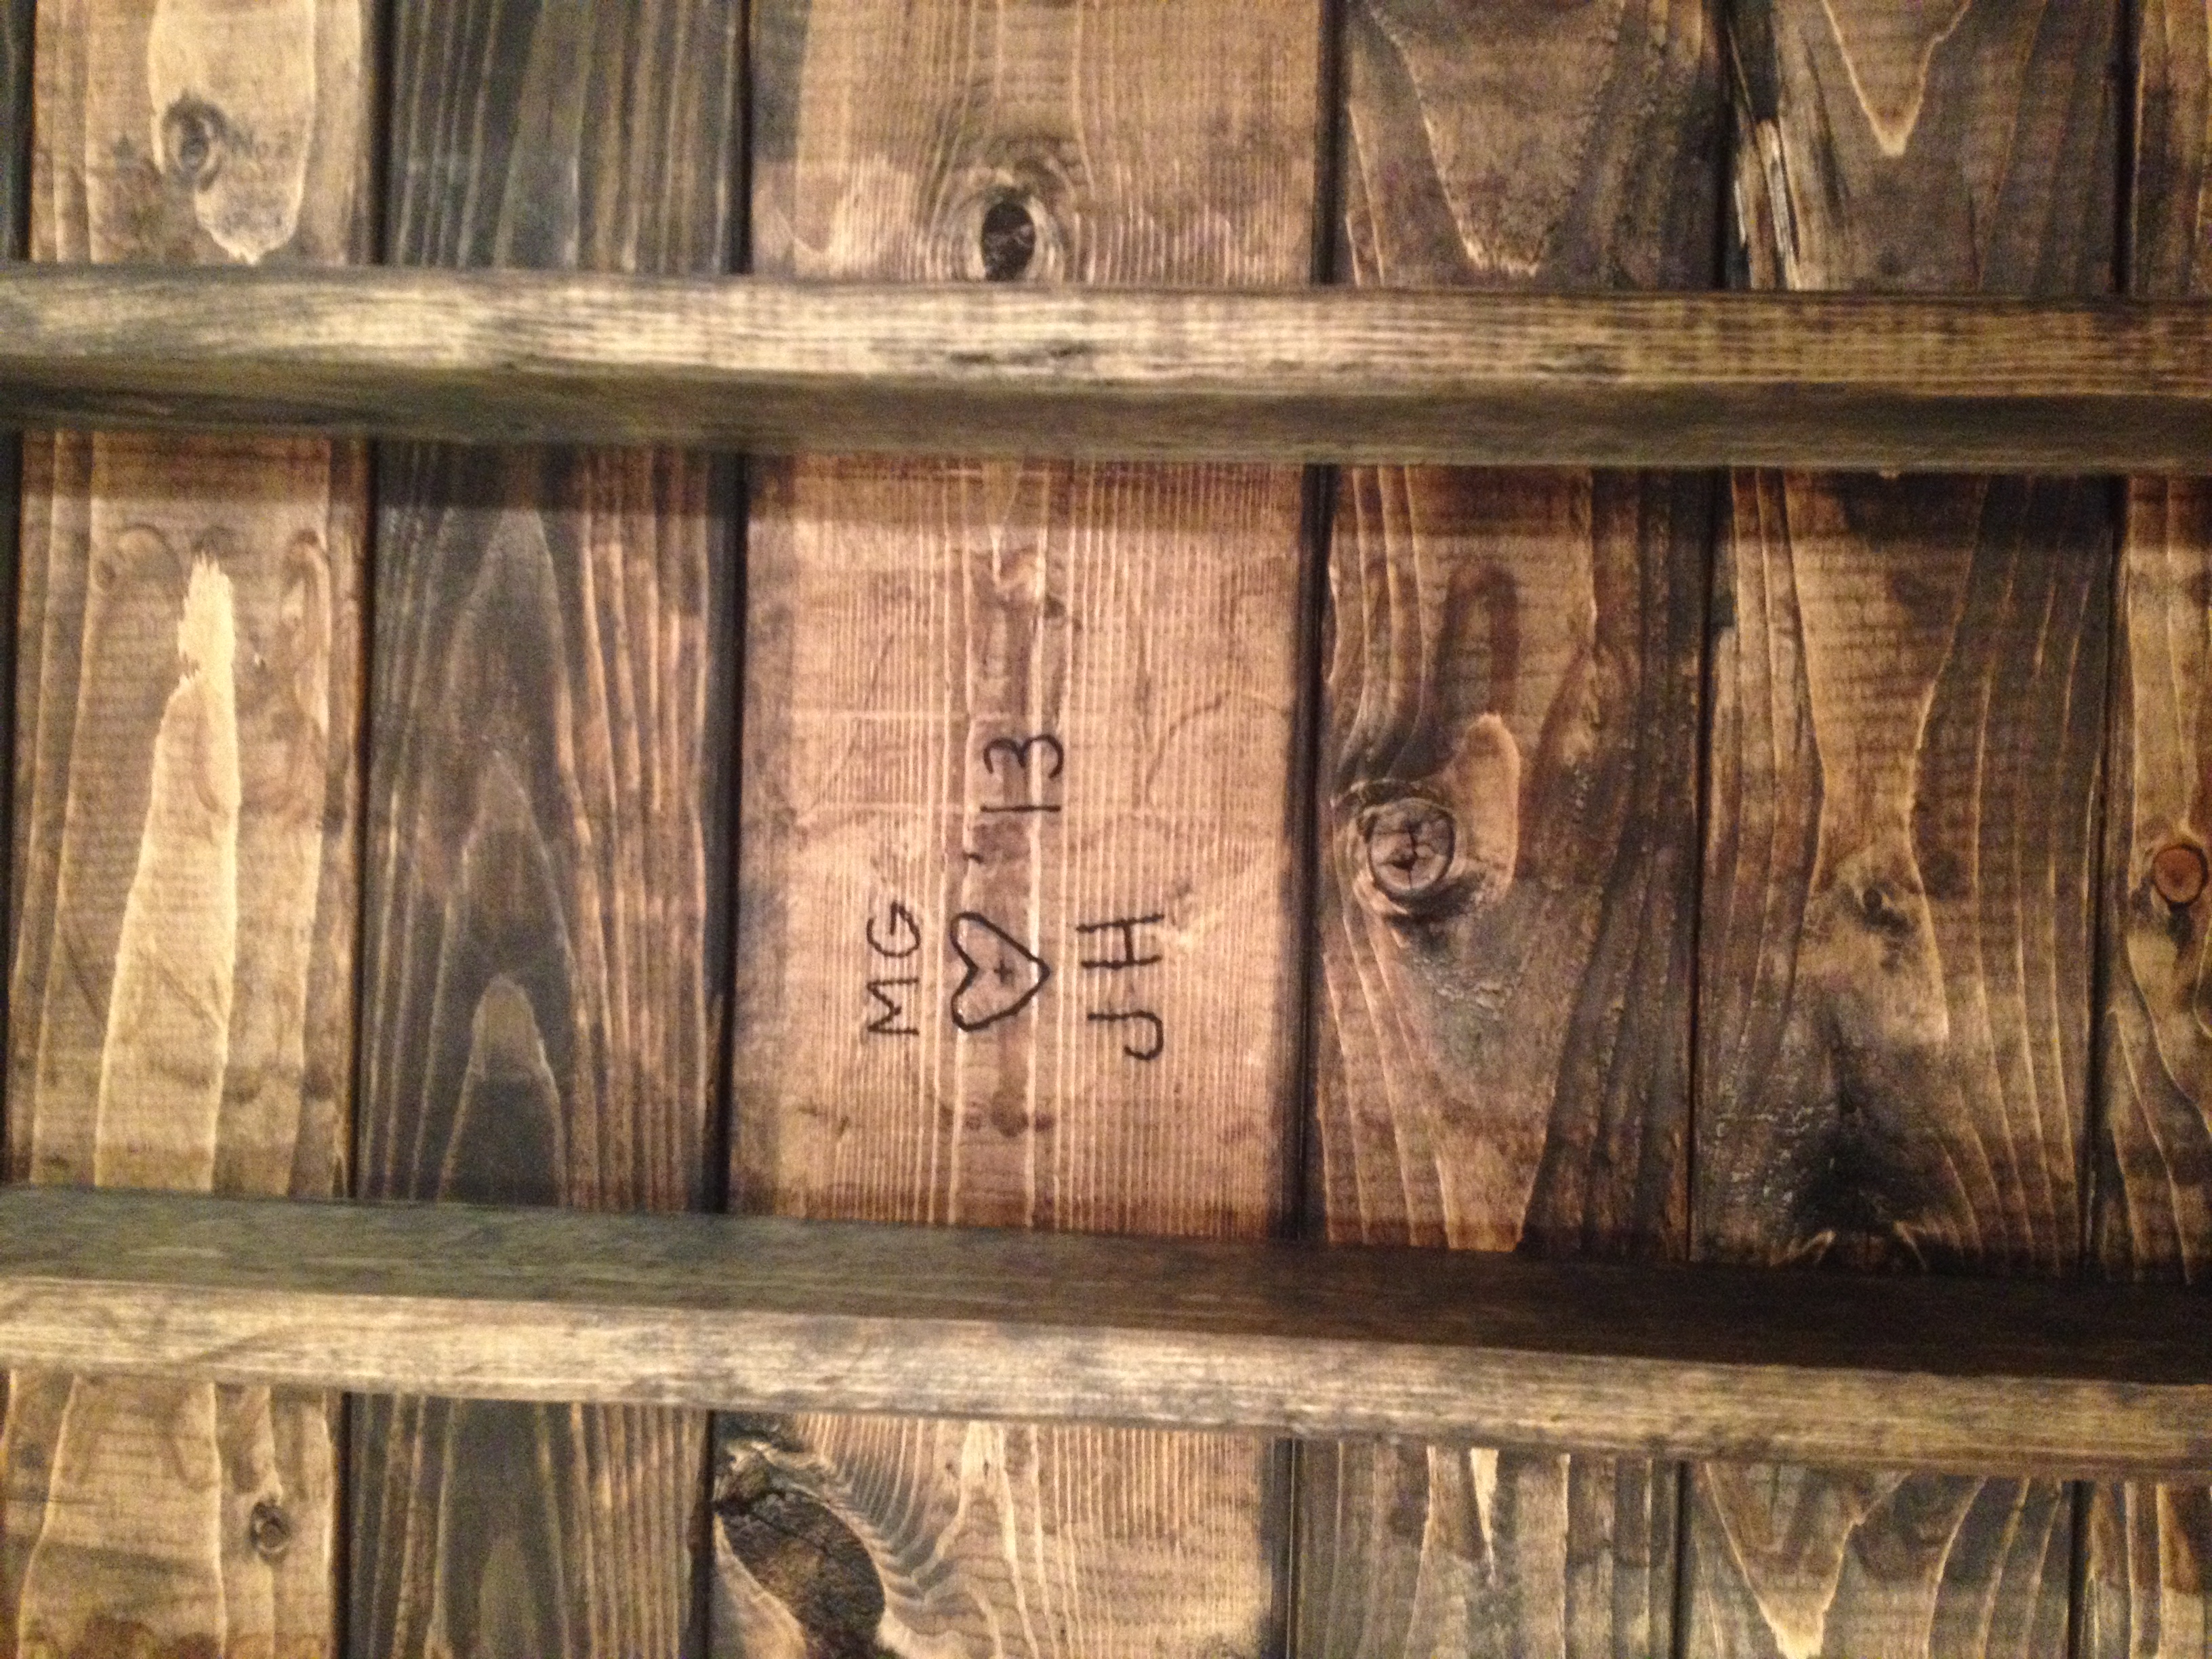
Tryde Coffee Table
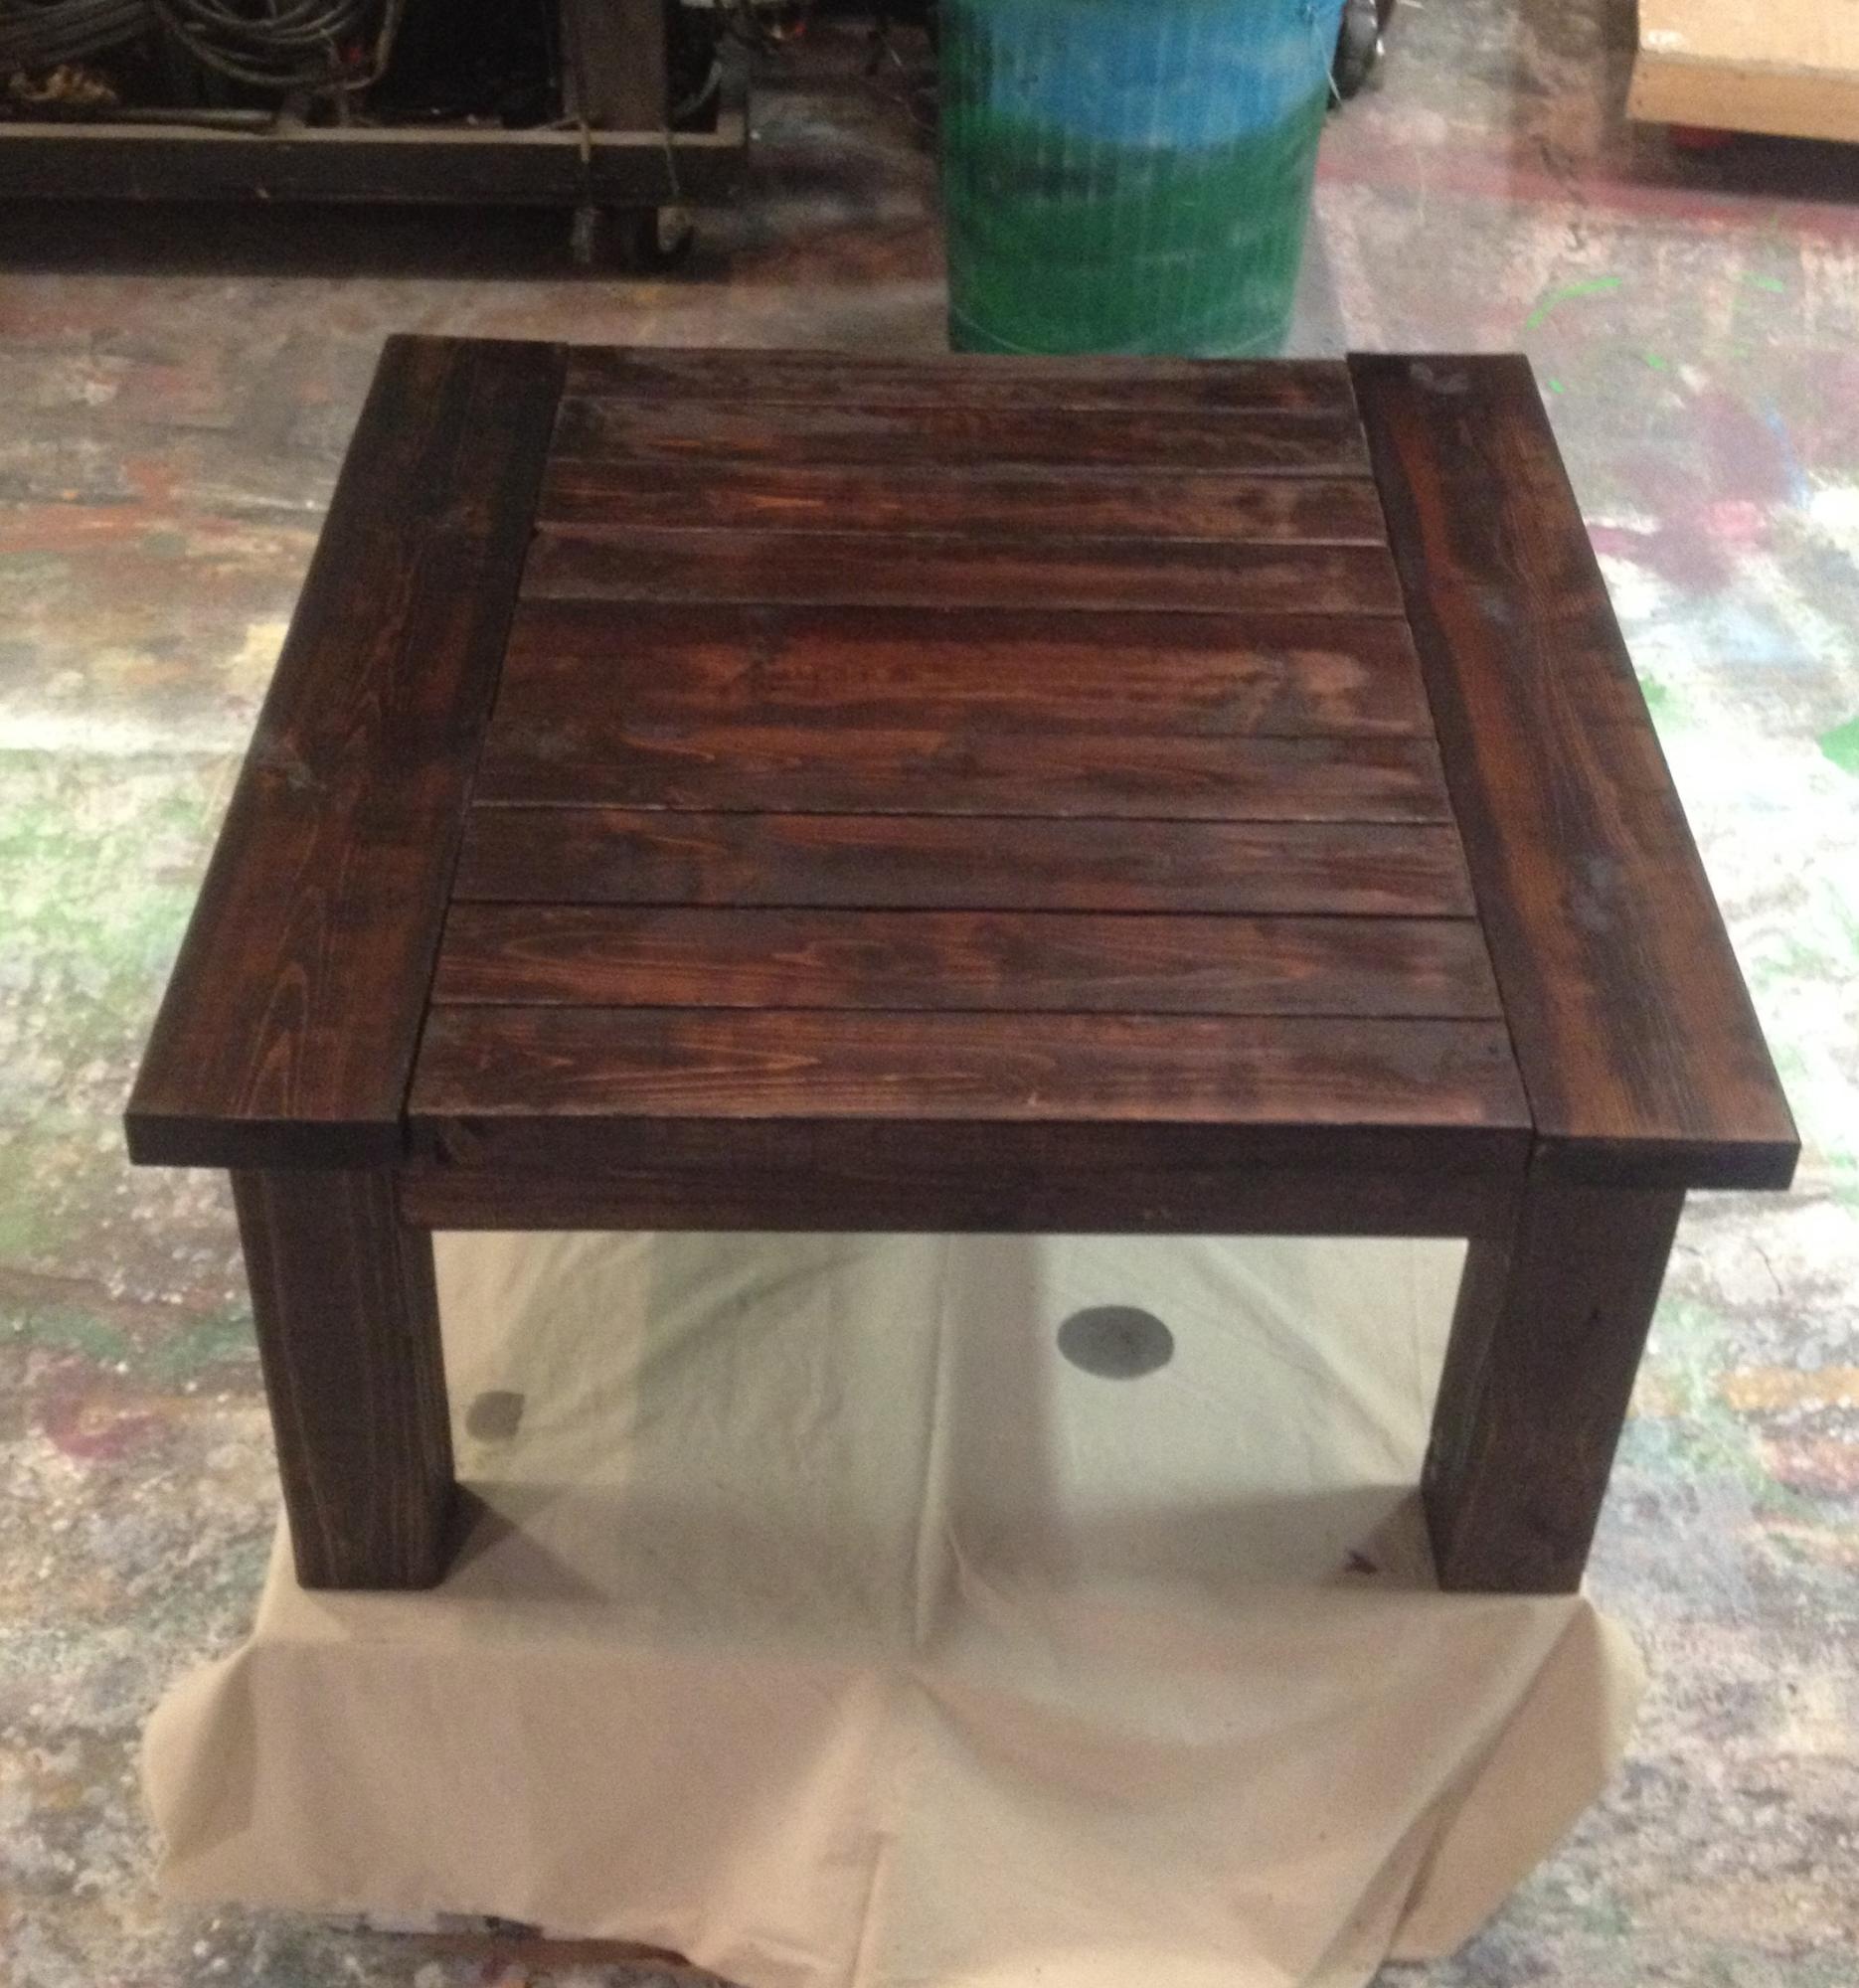
We took the origional plans and used that as the basis for ours. We re-designed it for our size needs on Vectorworks, a design program that we usually use for working in theatre. We bought all of our supplies at Lowes for around $80. Fortunately for us we have a fully stocked scene shop avaliable for our projects. We built it one day then the next we sanded it and stained and sealed it. Its a nice heavy table that we LOVE. we wanted a project to make something nice that will last forver, but still be cheap because we are on a college budget. We used an engraver to put our initials on the table so one day we can show our kids what we can do.

Built from Plan(s)
Estimated Time Investment
Day Project (6-9 Hours)
Recommended Skill Level
Intermediate
Comments

Fri, 11/14/2014 - 13:40
Great Job on this! Love the
Great Job on this! Love the dark stain that you chose!
Outdoor Loveseat & Table
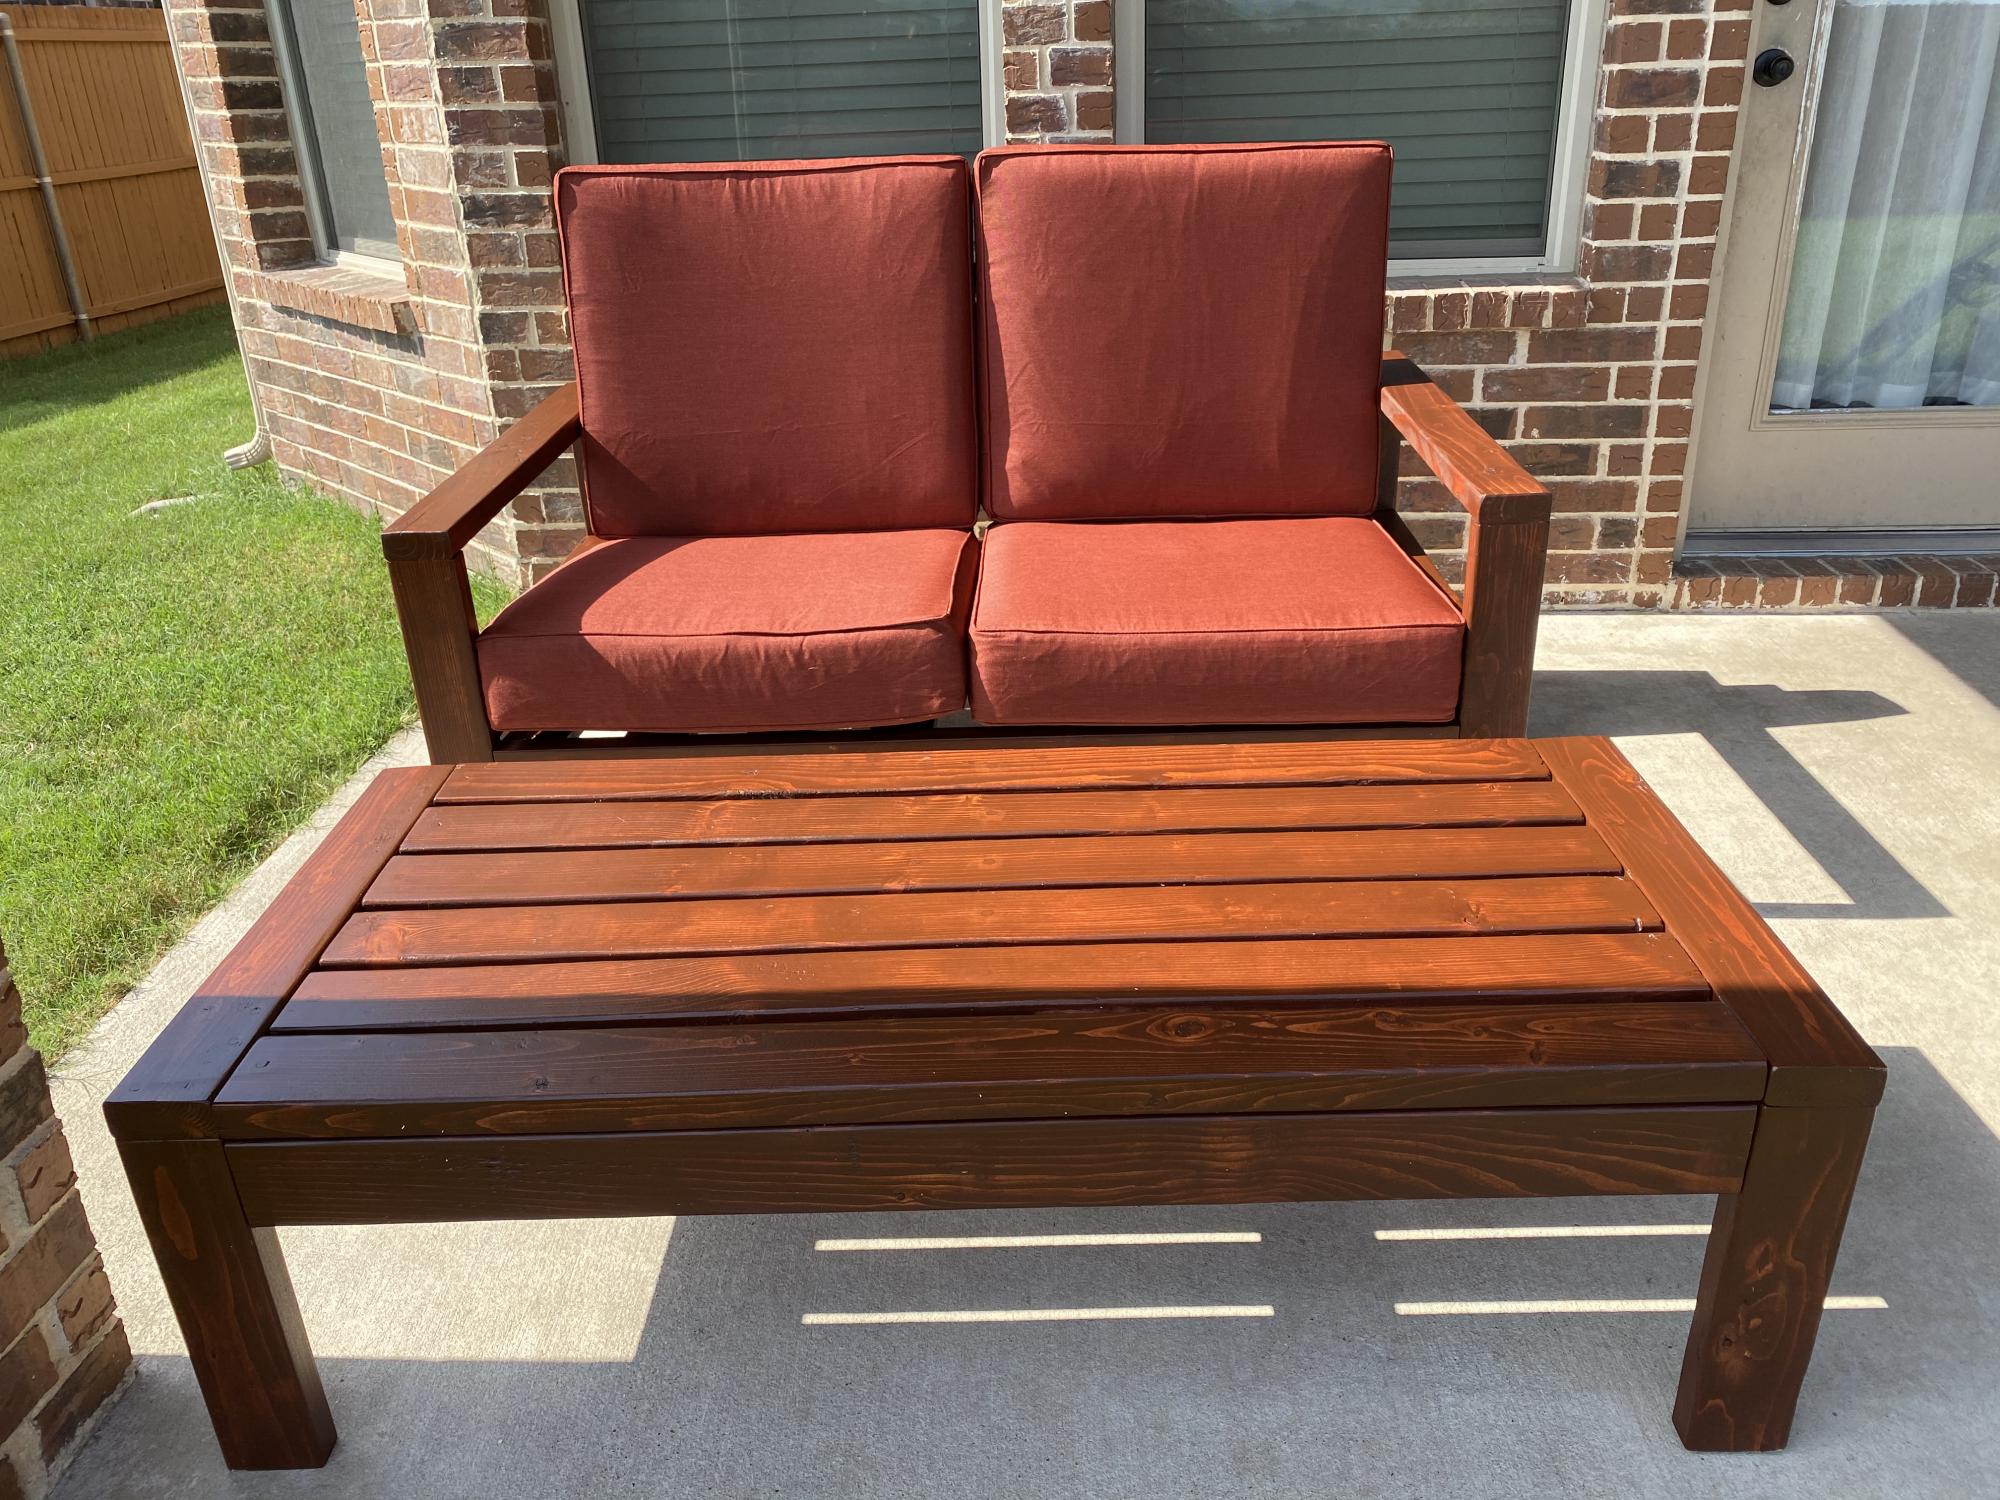
Tired of cheap store bought chair getting blown around in the Texas winds. If these piece get blown off the patio I’ll be looking for the Wizard of Oz.
Built from Plan(s)
Estimated Cost
400
Estimated Time Investment
Week Long Project (20 Hours or More)
Recommended Skill Level
Beginner
Comments
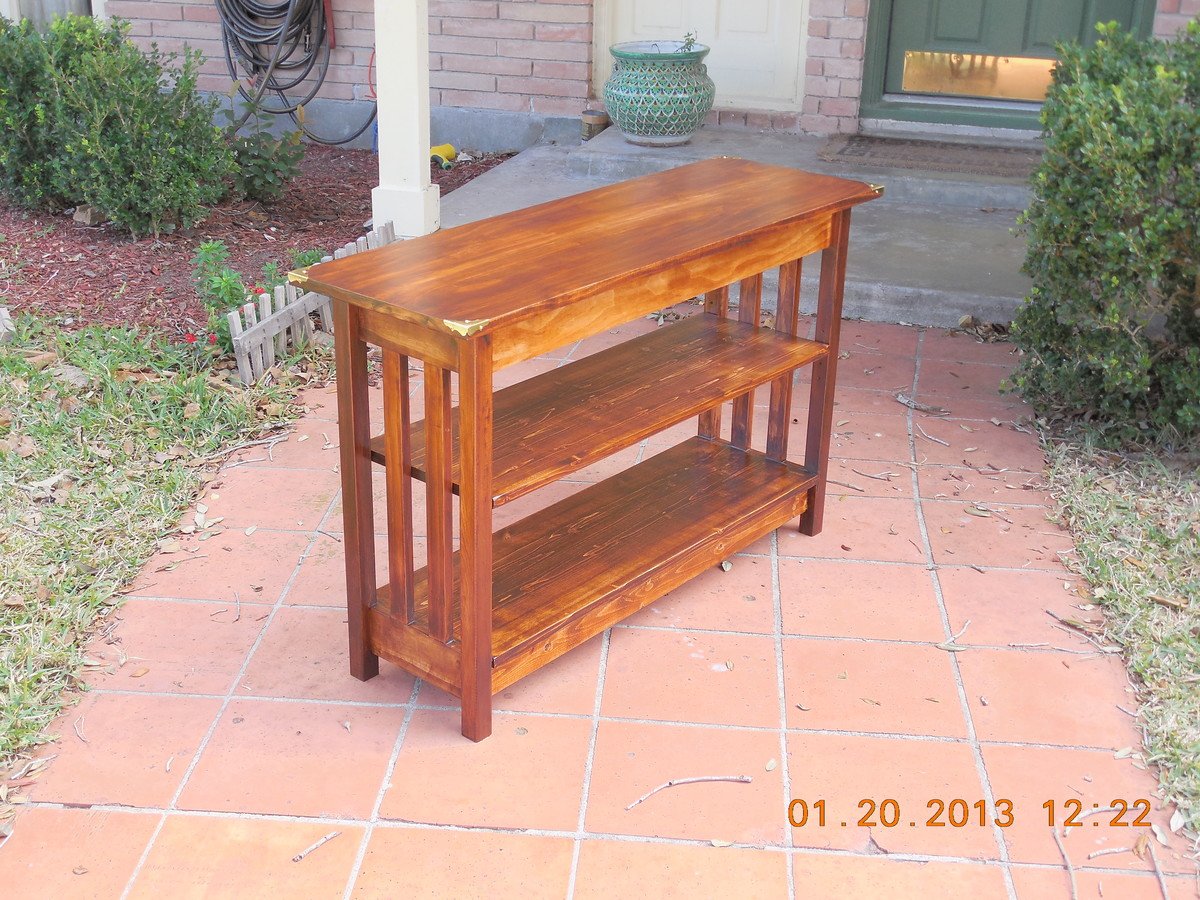
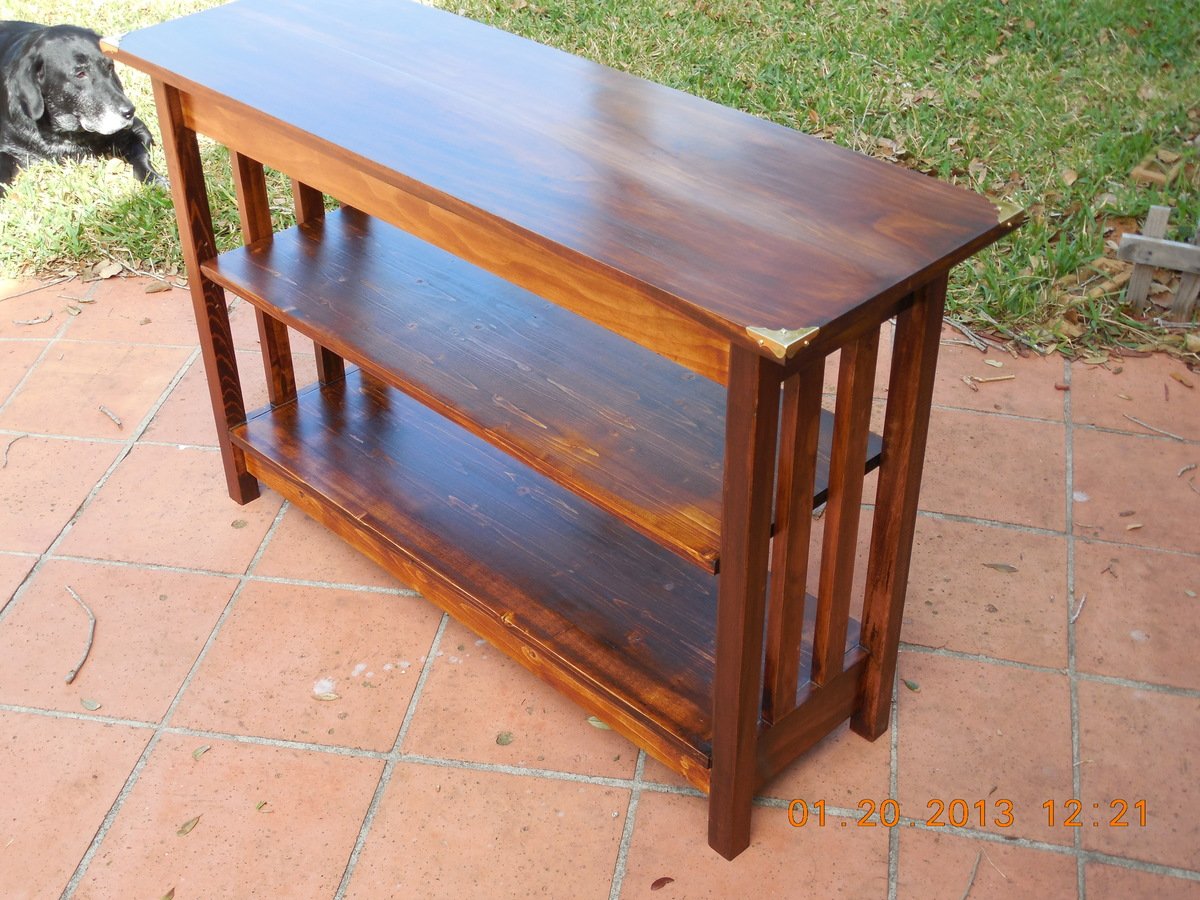
My Version of LL Bean Mission Underwindow Bookshelf
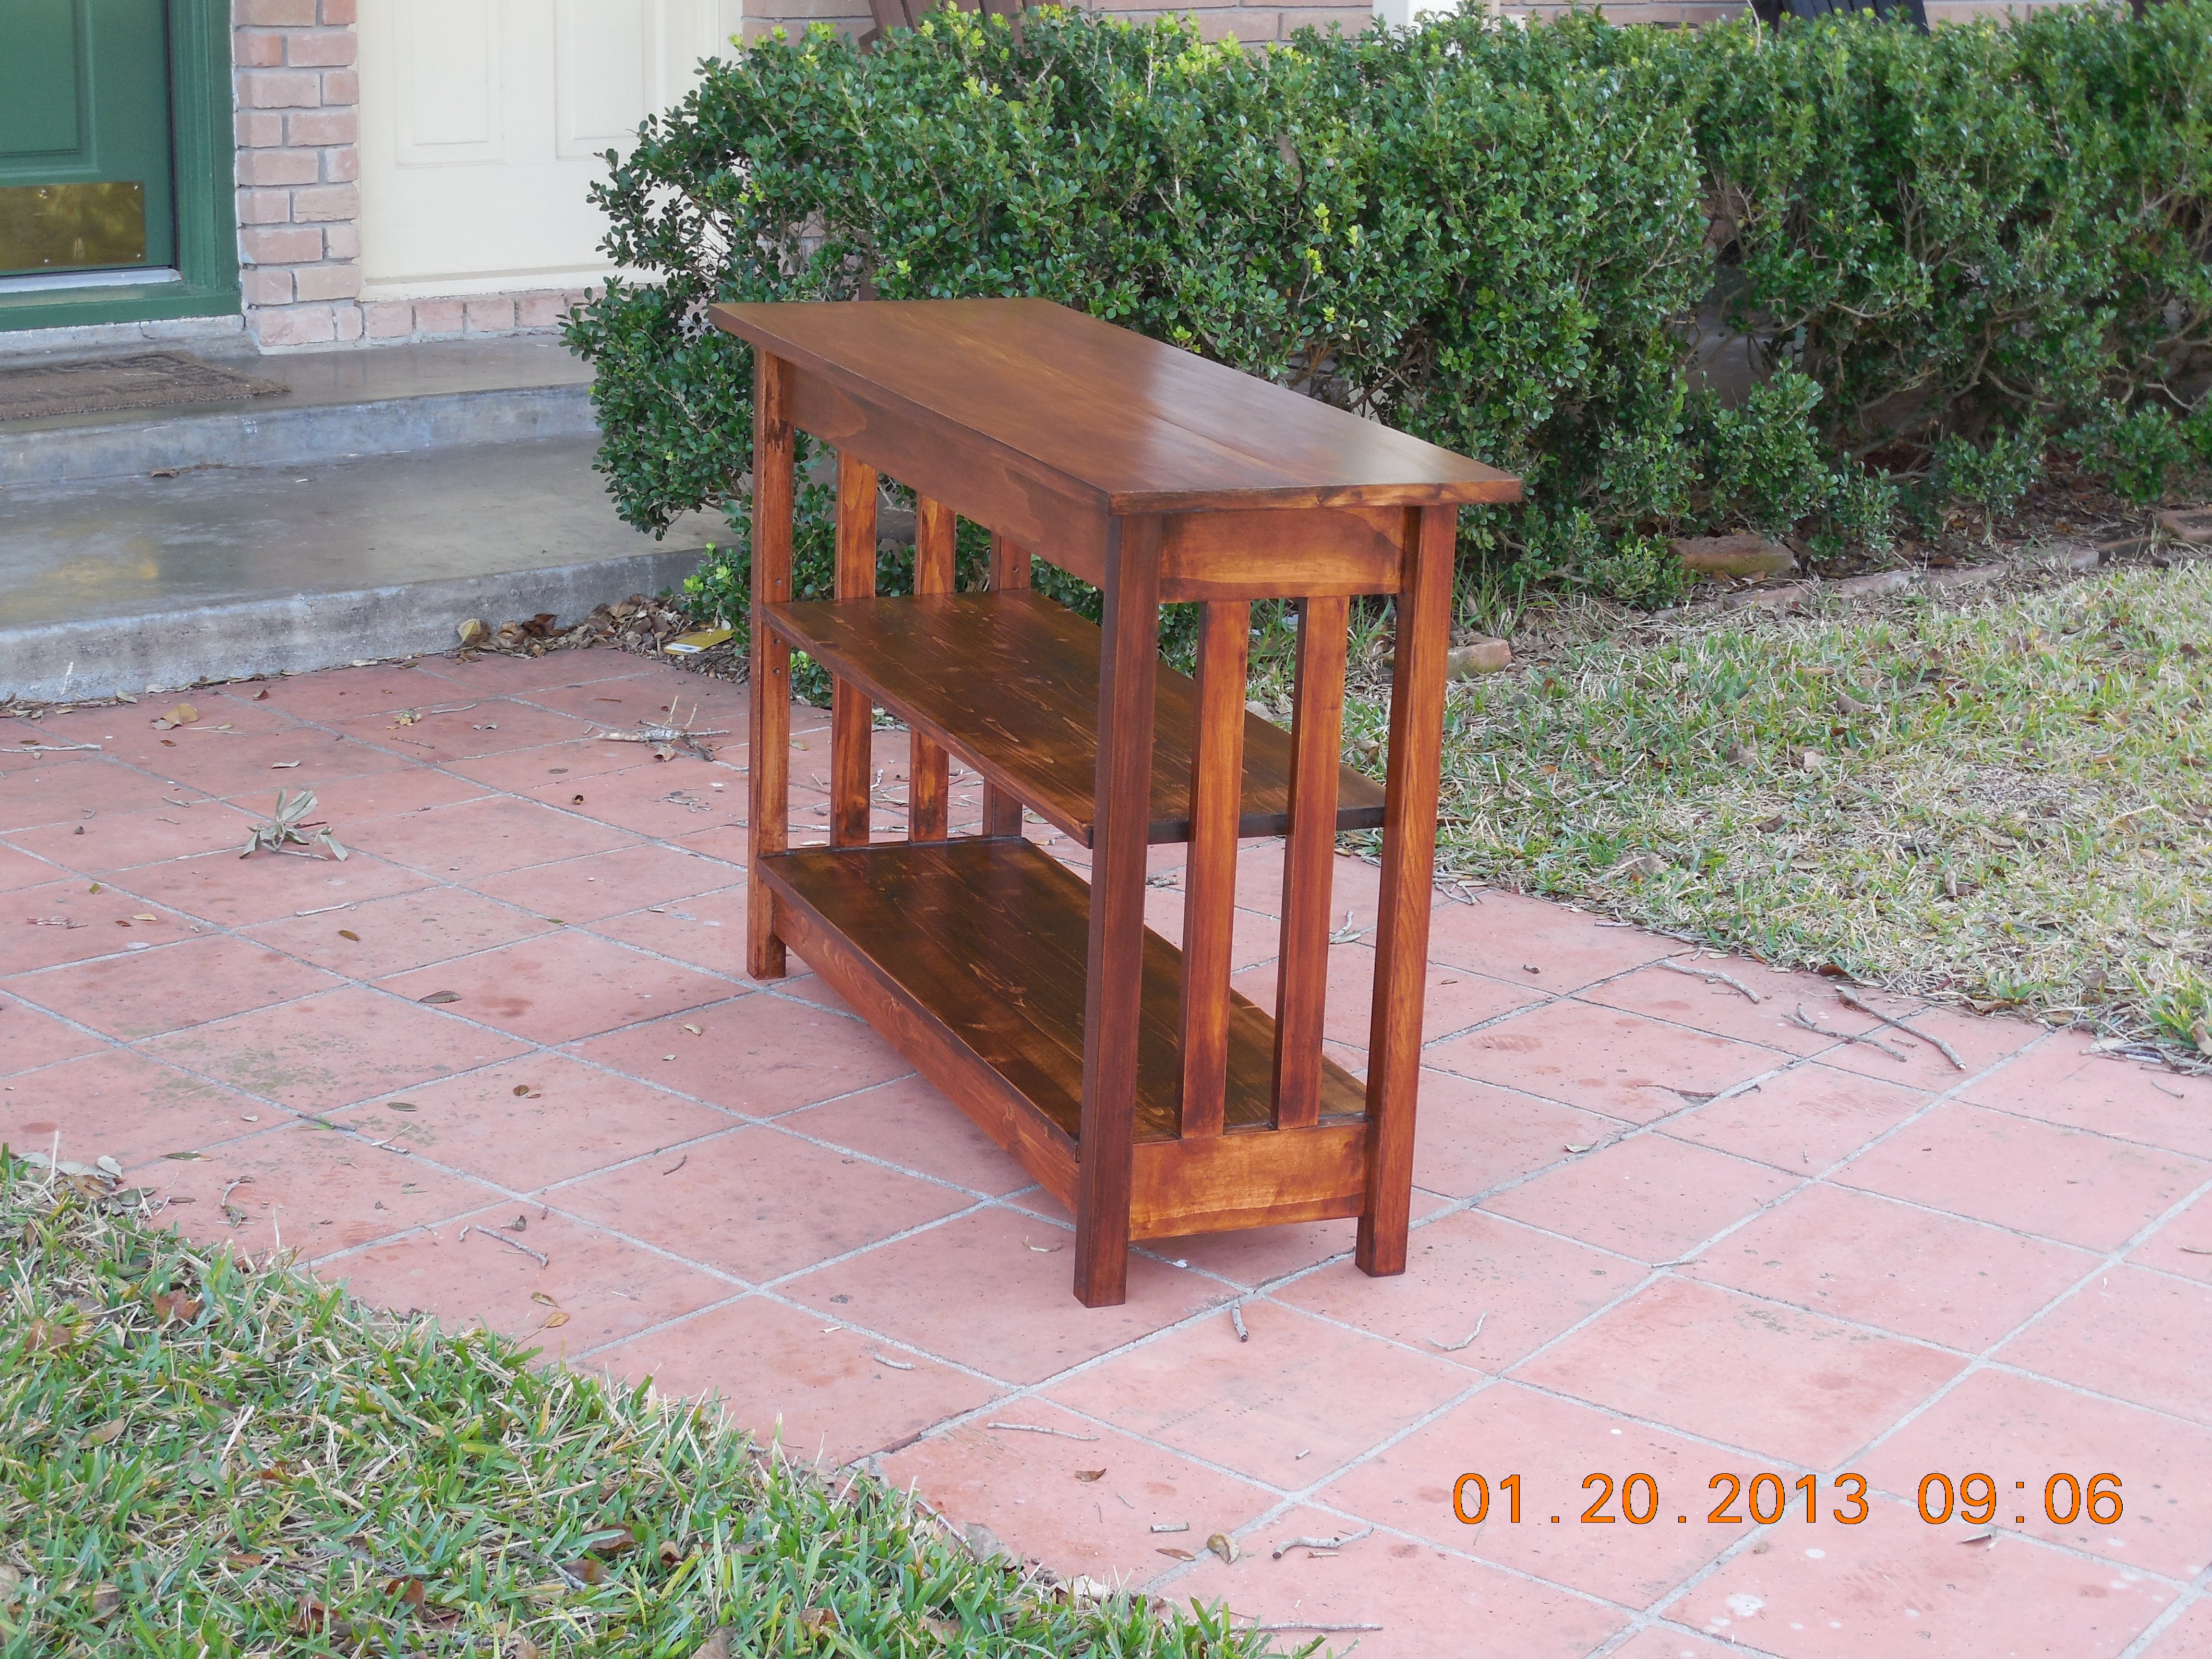
A good friend of mine came to me a week ago and said she needed a console table to fit under her apartment window. She then whipped out the LL Bean catalog and on page 34 was the Mission style Underwindow Bookshelf and that is what she wanted. I told her I would give it a try and a few days later you see the final result in the photos.
It came out larger than the LL Bean catalog version as mine is 44" long, 28" high and 14" wide. You can see the catalog offer at this link: http://www.llbean.com/llb/shop/13930?feat=504183-GN3&page=mission-under…
The center shelf is adjustable up and down about 4" and I added brass corner protectors.
I think it came out looking pretty good. Especially when you consider it cost at least $100 less than the catalog and it is not a kit.
Estimated Cost
$99
Estimated Time Investment
Weekend Project (10-20 Hours)
Finish Used
Sanded to 320 grit level on all visible surfaces and 150 grit on others. Rust-oleum Ultimate Wood Stain in Golden Mahogany with some Kona mixed in to darken it a bit. I used two coats of the Rust-oleum polyurethane on the top and the remainder of the piece was finished with two coats of Minwax Antique Oil Finish.
I did use pre-conditioner but it did not relieve the blotching. I was not happy with the finish and think pre-conditioner has a lot to do with the problem.
I did use pre-conditioner but it did not relieve the blotching. I was not happy with the finish and think pre-conditioner has a lot to do with the problem.
Recommended Skill Level
Intermediate
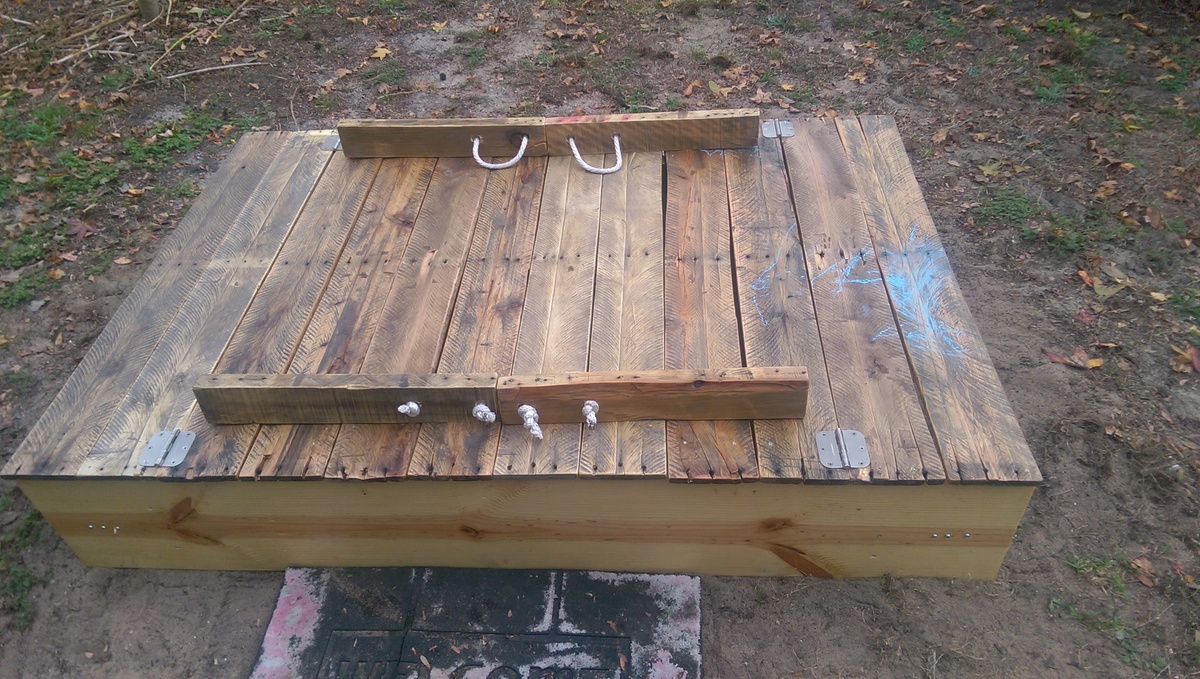
pallet wood covered sand box
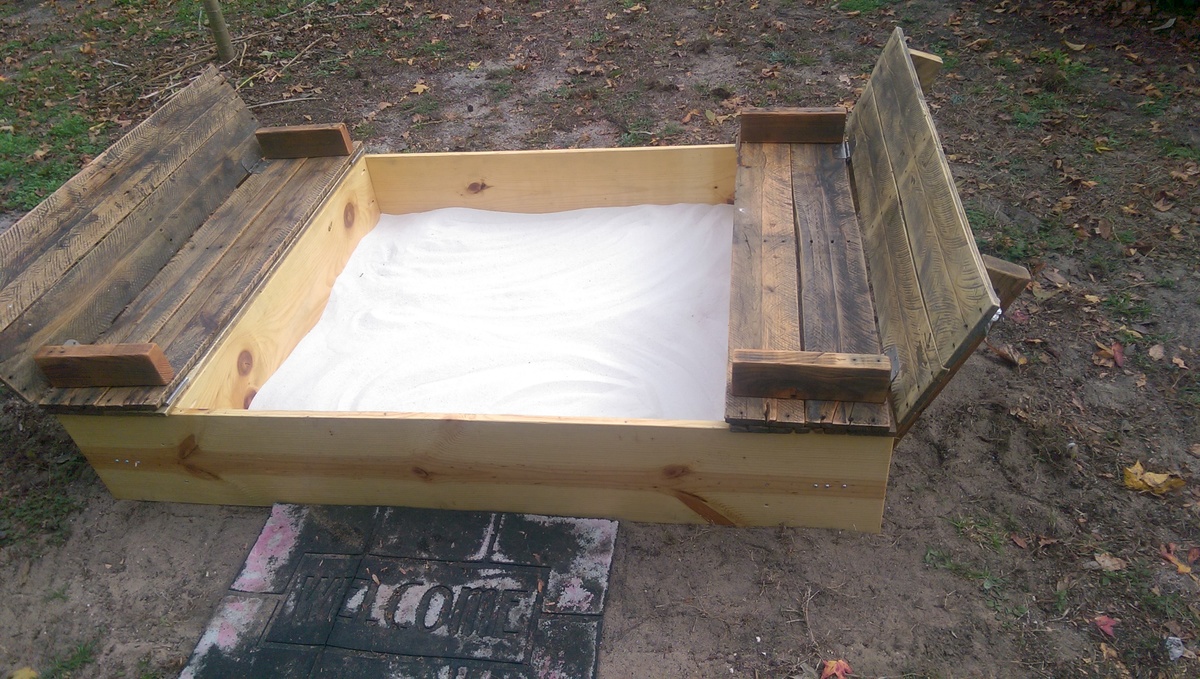
I used the same plans as posted but I tweaked them to work for the pallet wood that I ripped and sanded and stained with outdoor polyurethane. I also moved the short boards in so the box is smaller and added beams to support the bench separate. Because of Florida bugs and ants I also screwed a painting tarp to the bottom and punctured it several times for drainage to try and prevent bugs and weeds. The plans were so simple and I had so much fun making this.
Built from Plan(s)
Estimated Cost
50$
Estimated Time Investment
Week Long Project (20 Hours or More)
Finish Used
Just sanded and clear satin polyurethane outdoors coating. The product will look different depending on the pallet wood used.
Recommended Skill Level
Beginner
Christmas Tree/ 12 Days of Xmas
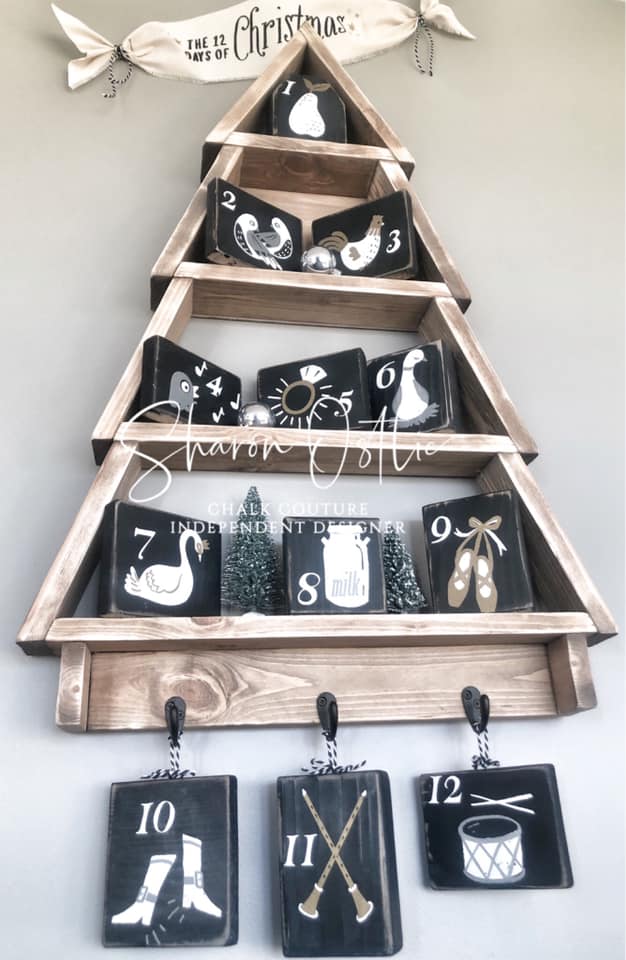
We saw this project a few months ago and I knew I had to add it to our holiday decor. Once it was built, it took a few weeks to figure out home to decorate it and came up with the 12 Days of Christmas using a Chalk Couture design. Still learning, had a few mishaps with the brad nailer, but I'm super happy how it came out!

Built from Plan(s)
Estimated Cost
$20
Estimated Time Investment
Day Project (6-9 Hours)
Finish Used
Minwax Special Walnut, and then sanded most of it off. The blocks were painted with Waverly Ink and distressed. The design is from a Chalk Couture transfer.
Recommended Skill Level
Intermediate
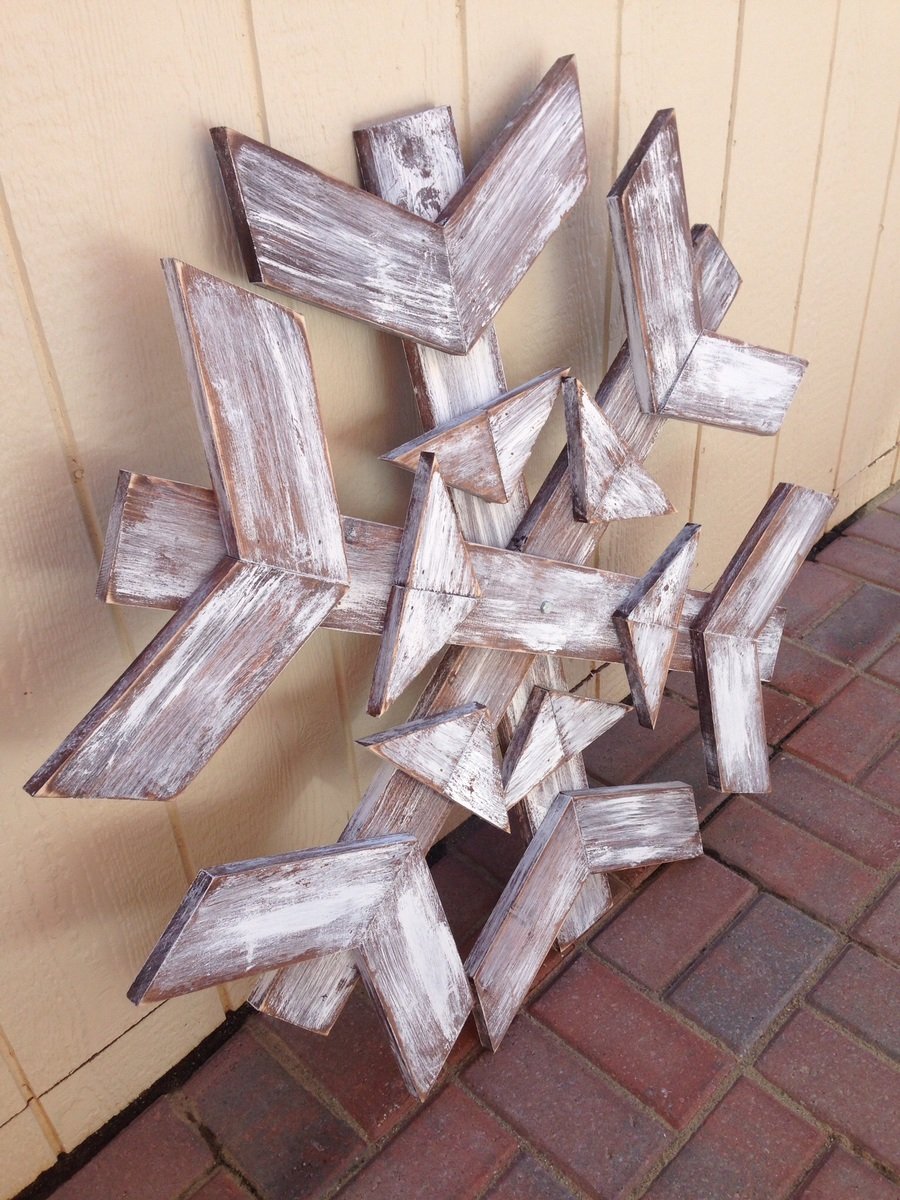
Snowflake

Made this snowflake for my front porch for the holidays. Easy build and inexpensive.

Built from Plan(s)
Estimated Cost
10.00
Estimated Time Investment
Afternoon Project (3-6 Hours)
Finish Used
Stained dark walnut with white dry brushed over
Recommended Skill Level
Beginner
Comments

Stacy daybed
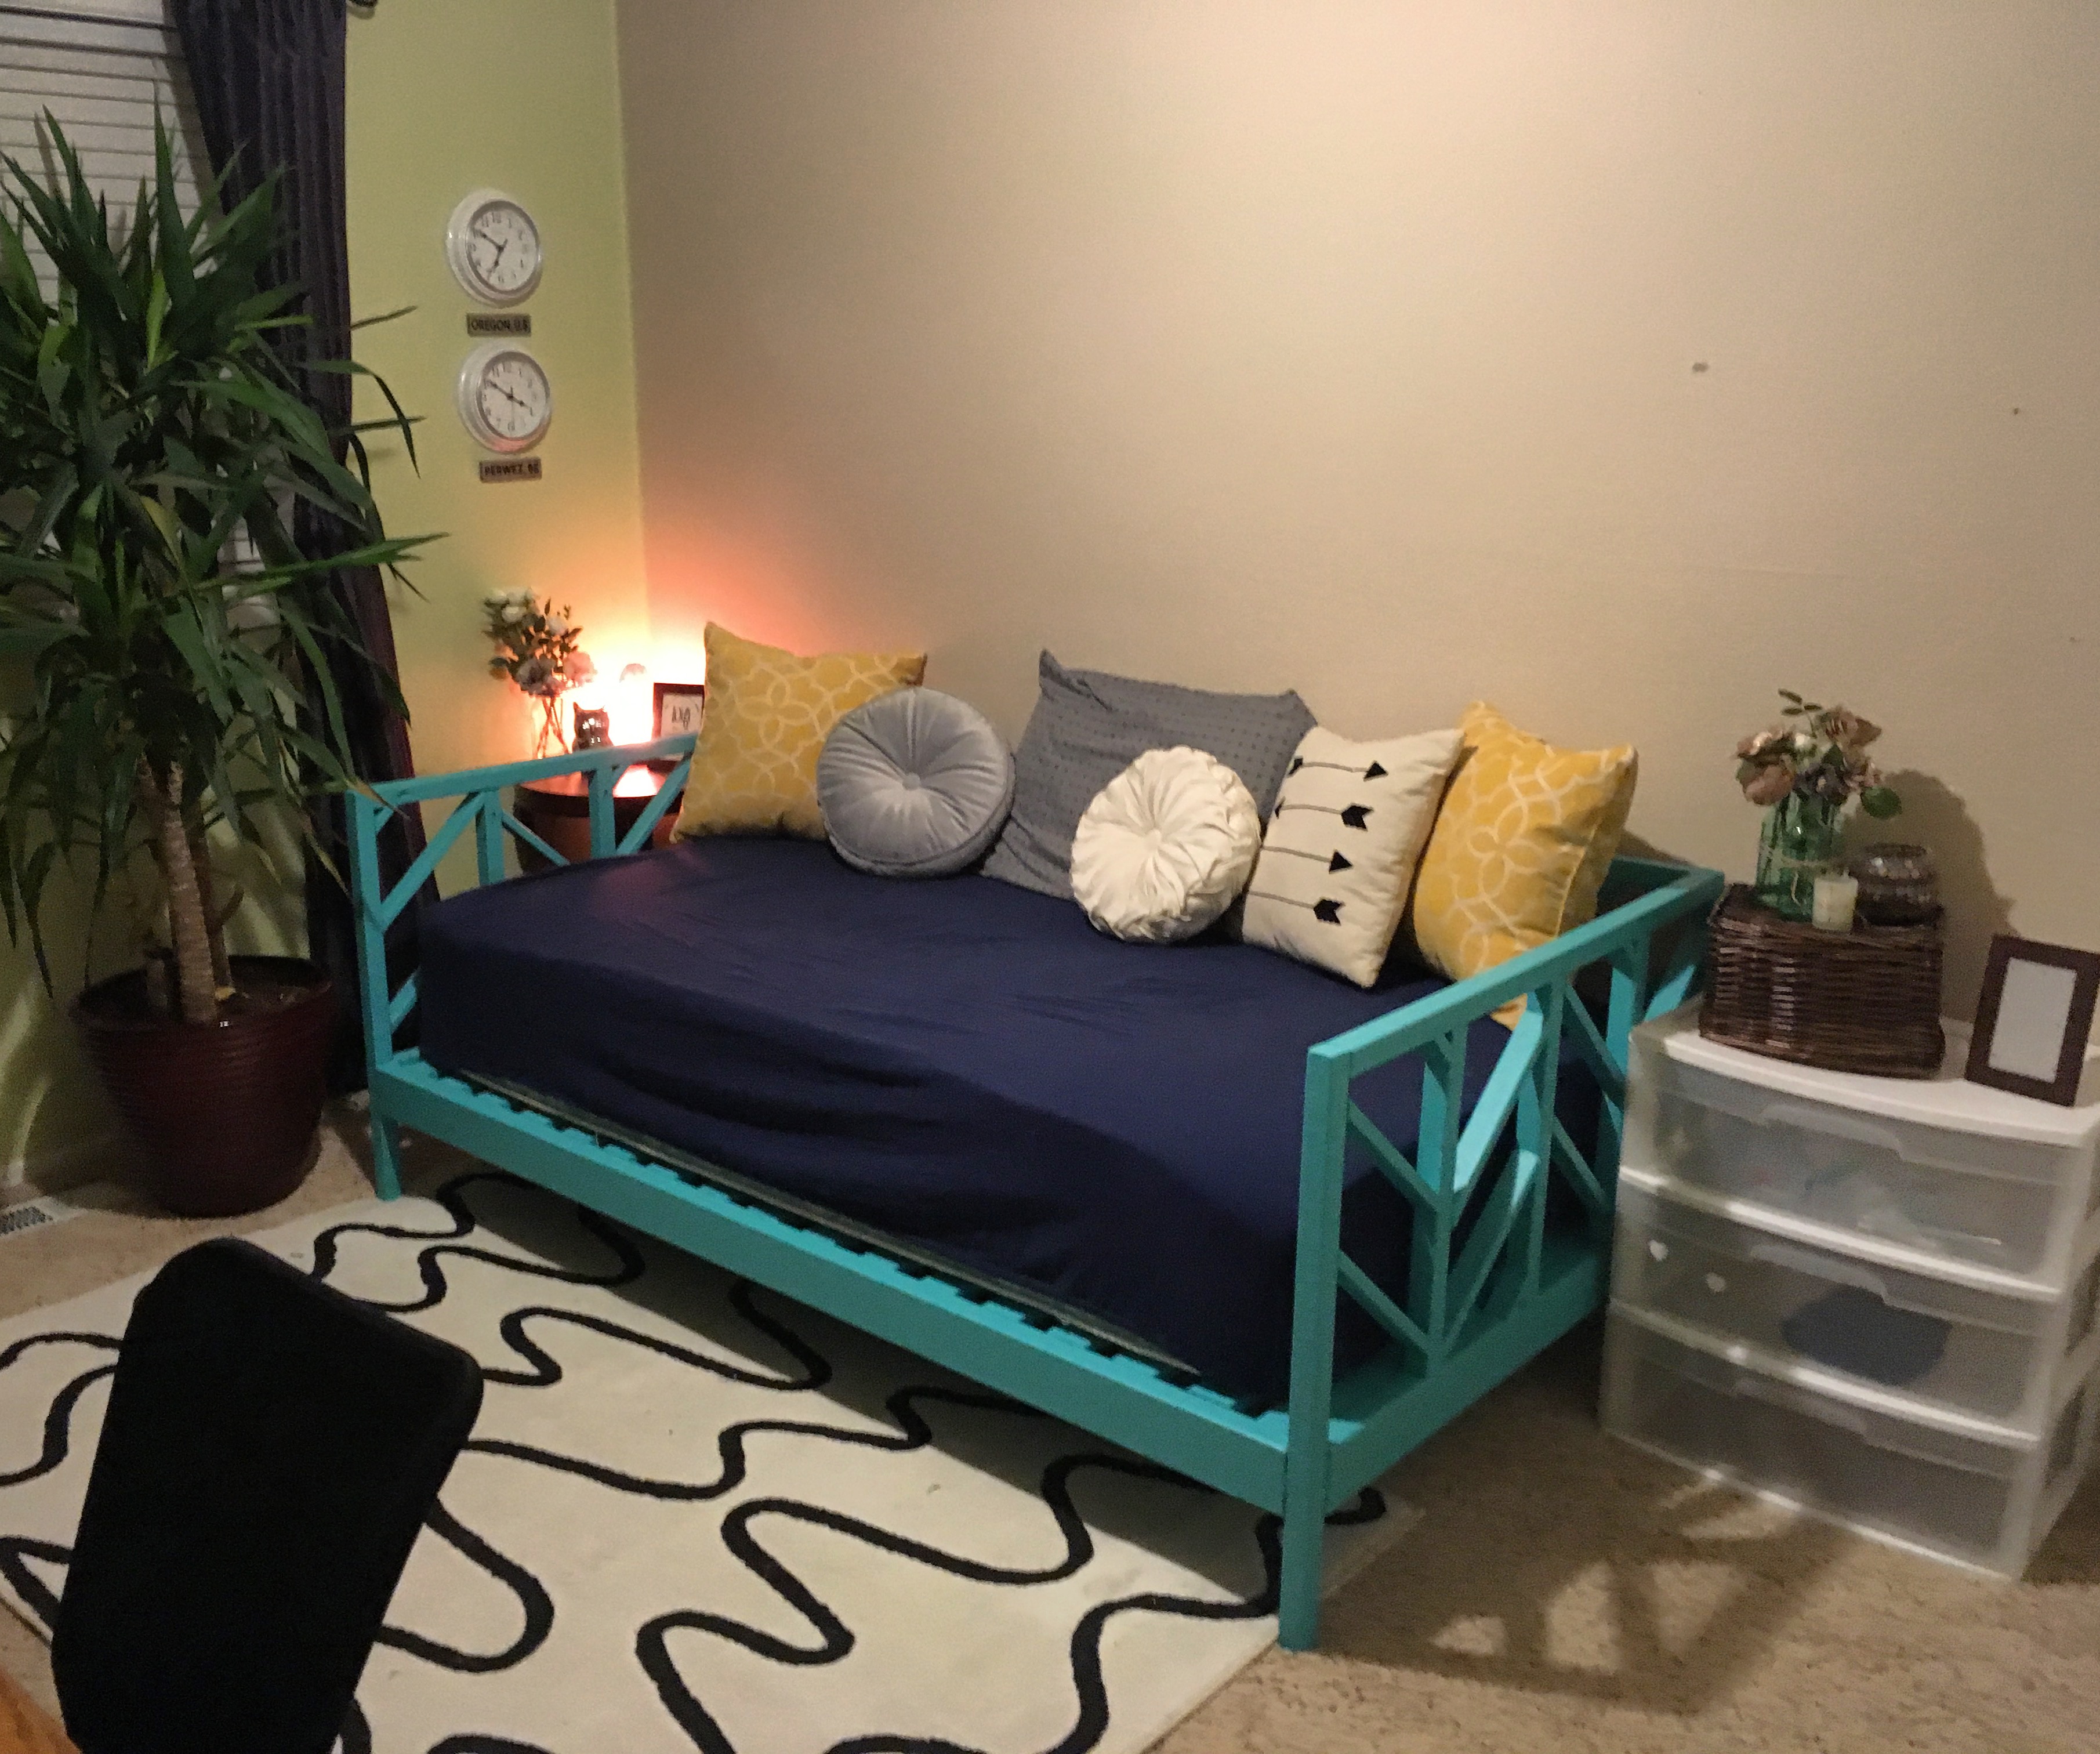
Followed the plans exactly. Seems sturdy and looks great. Our exchange student will love her new bed! Thank you!
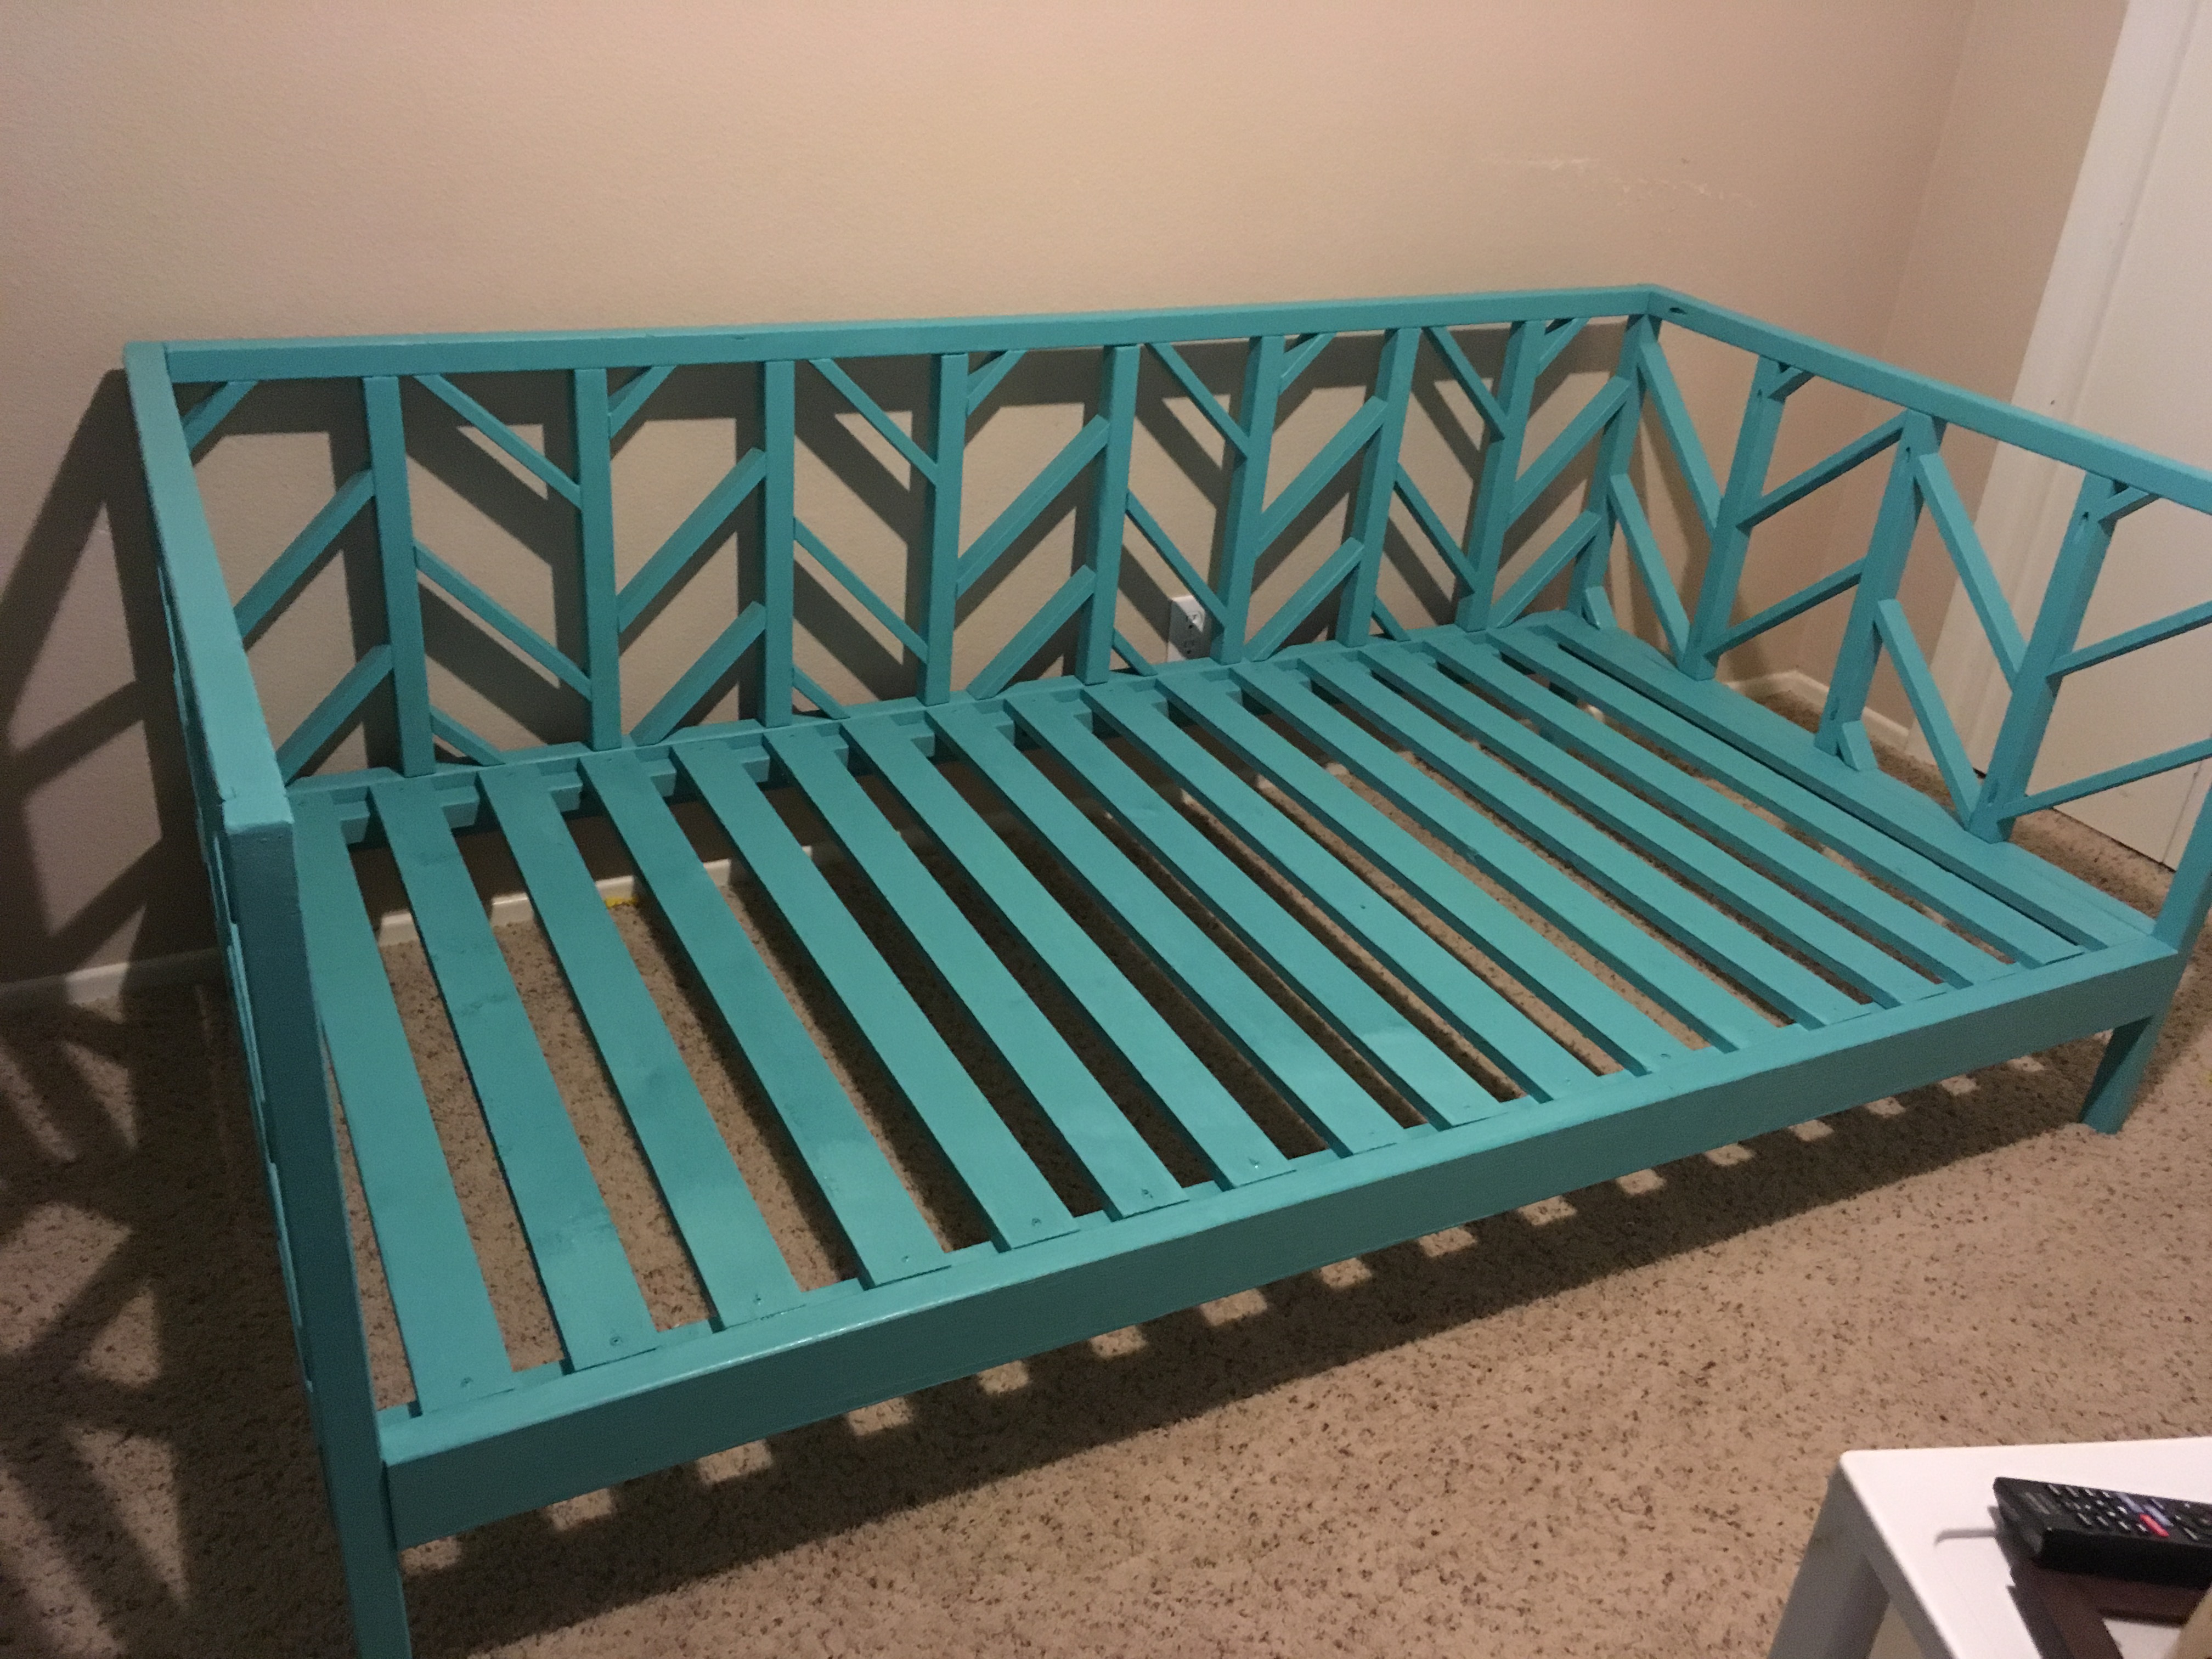
Built from Plan(s)
Estimated Time Investment
Week Long Project (20 Hours or More)
Recommended Skill Level
Intermediate
Farmhouse Console Table - Modified
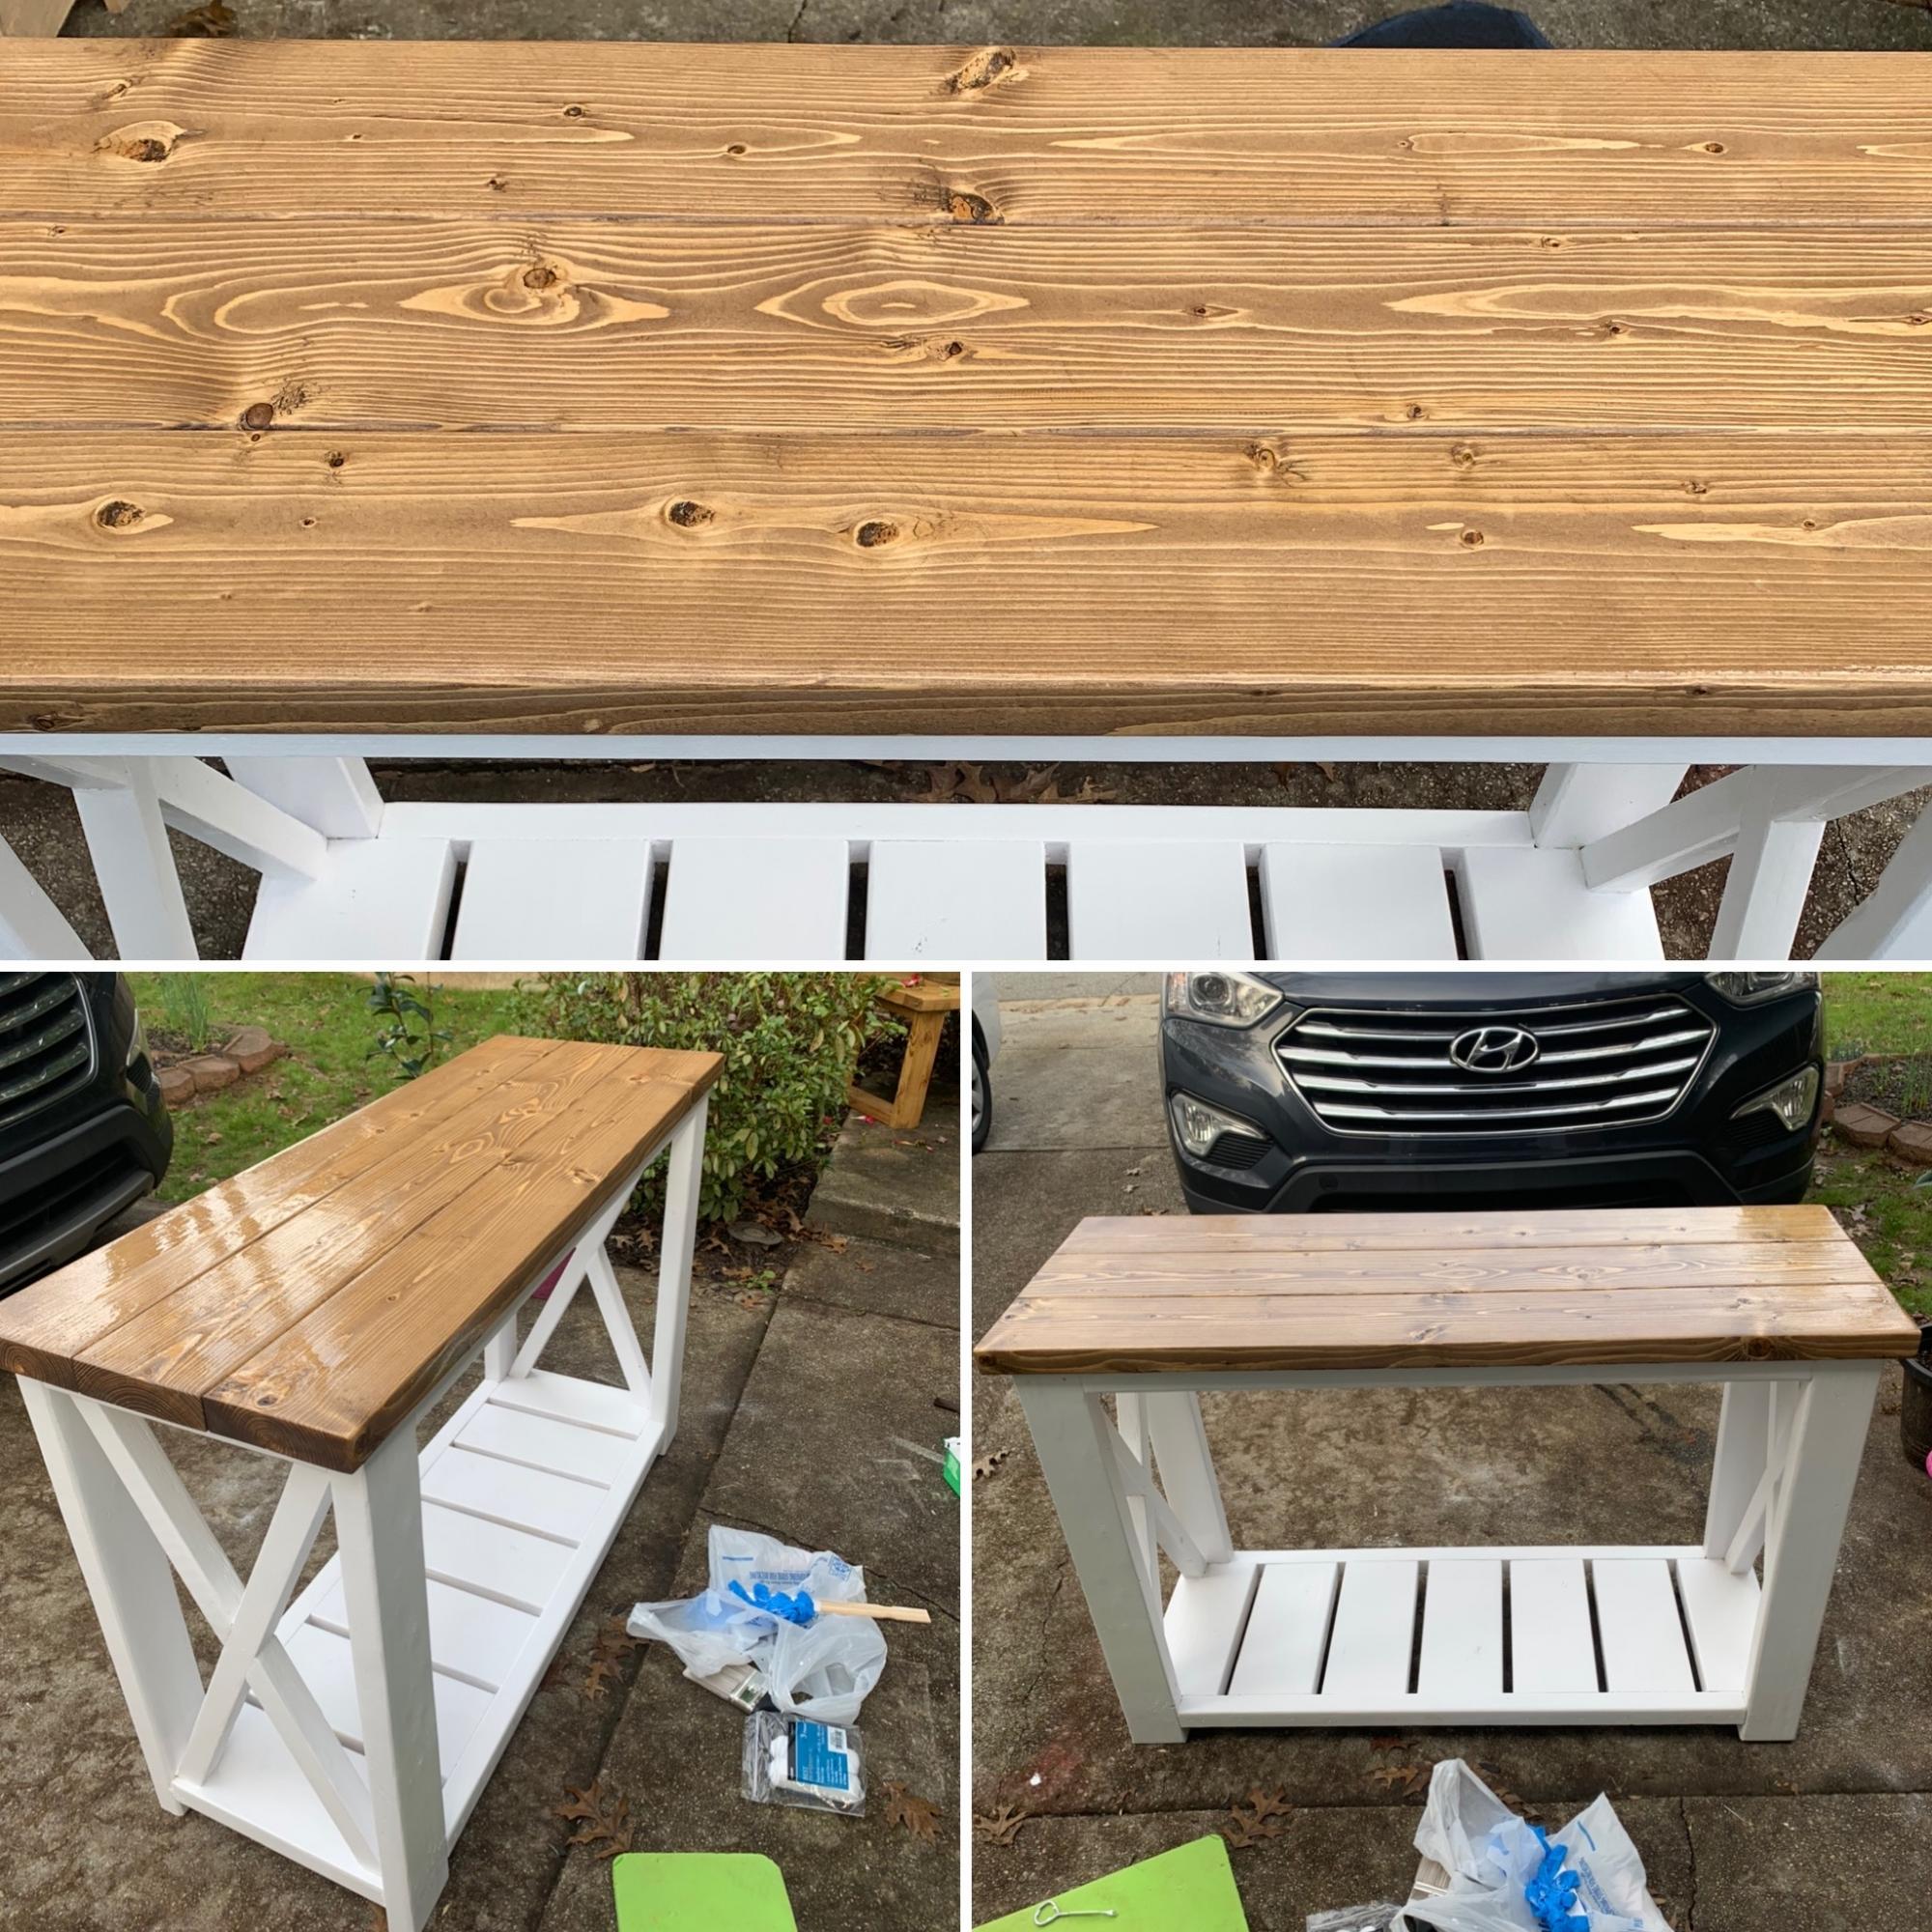
I Modified the plan to eliminate the middle shelf and shortened the length to fit as an entryway table.
Built from Plan(s)
Estimated Cost
$68
Estimated Time Investment
Day Project (6-9 Hours)
Finish Used
White alkyd for bottom then conditioned the top before staining with special walnut then once dry used weathered oak. Sealed with oil based polyurethane.
Recommended Skill Level
Beginner
Comments
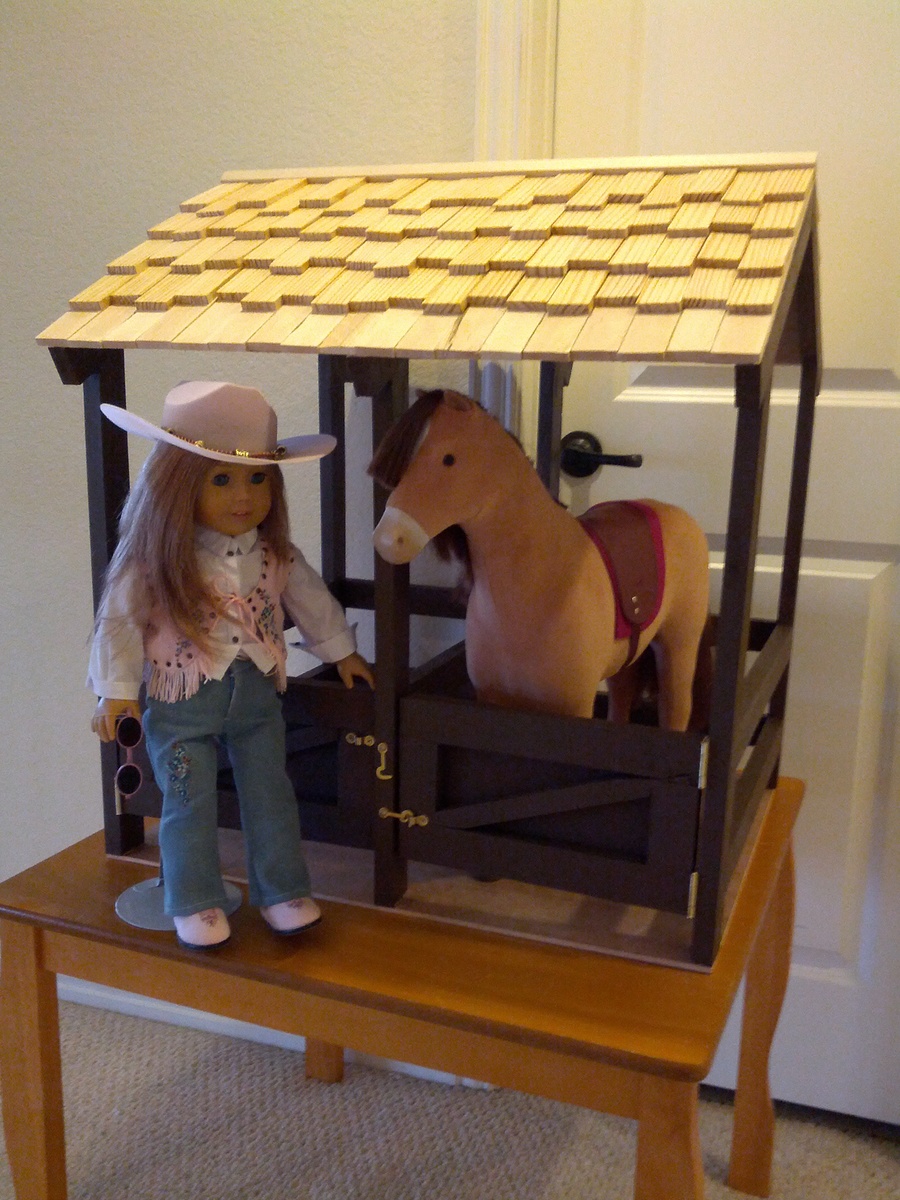
American Girl Doll Horse Stable

So.....my Daughter has this American Girl doll, and she loves it. Then she saves up $75 to buy this HUGE Horse...why? I have no idea, but she loves it.
At Christmas time, Ana White was so kind to post diagrams for building a Horse Stable and with a few minor changes (shingled roof, golden hooks, some stain) I built it with my new Kreg jig (that was my Christmas gift from Santa).
Hope you enjoy the pictures . . .
Ana - Thank you, I enjoy your site and you certainly will be hearing from me in the near future.
Thanks for all you do :-)

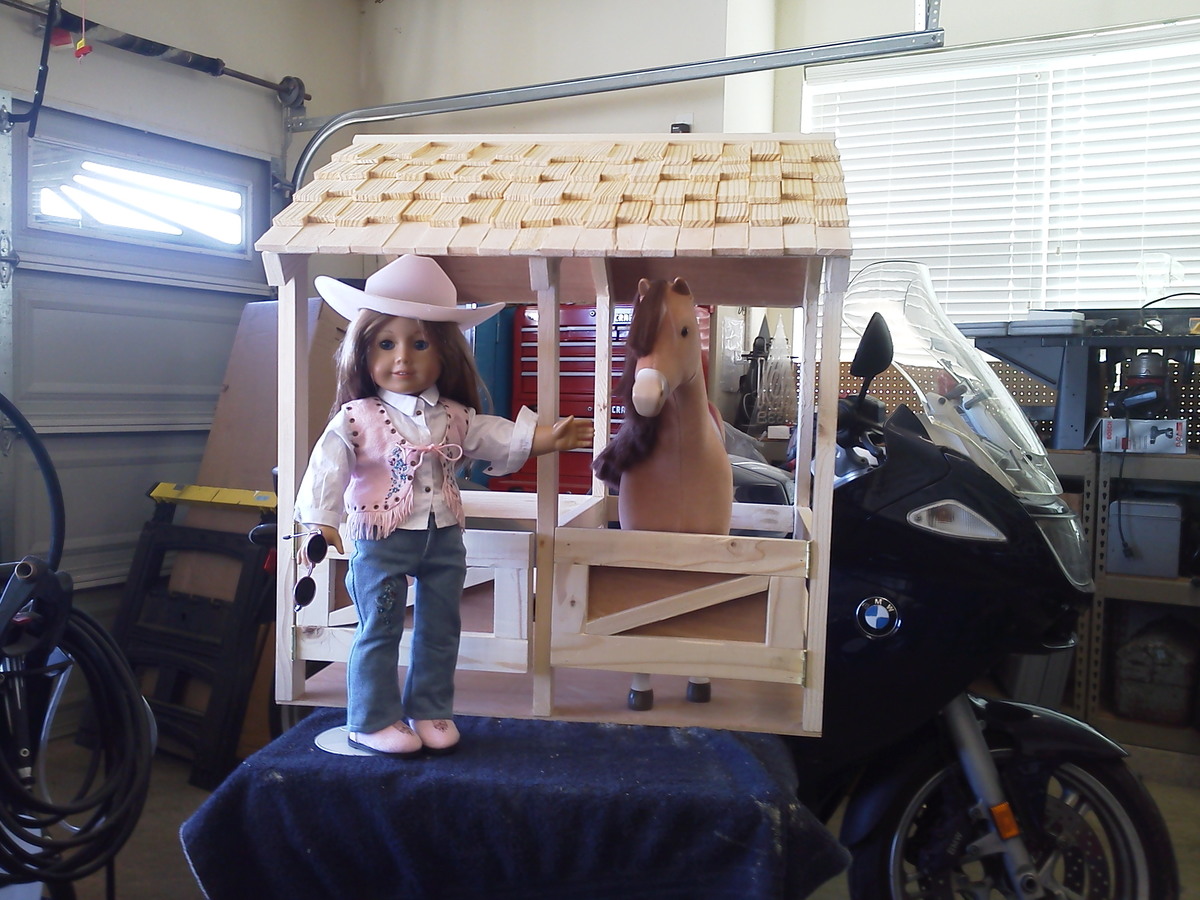
Built from Plan(s)
Estimated Cost
$40.00
Estimated Time Investment
Weekend Project (10-20 Hours)
Finish Used
Dark Chocolate Brown stain, shims for roof.
Recommended Skill Level
Beginner
Comments
Sat, 01/26/2013 - 09:59
Shingles roof
I love your modifications. What a great idea to use shims for the roof! I might have to copy this. Great job.
Sat, 01/26/2013 - 10:15
Oh I love this!!!! I can't
Oh I love this!!!! I can't tell you how giddy up happy I am to see the horse stable! Love the roof and the gold hardware too - so cute! Thanks for sharing, truly made my day!
Sat, 11/23/2013 - 19:18
Oh those shingles!
Oh, I'm in love with the shingles!
My daughter is getting her third AG doll, Saige, for Christmas and my sisters are getting her the horse too. Well, you can't have a horse without a stable too, right?
I've got all the supplies to build the stable and now all I have left to figure out is how you attached the shims to the plywood for the roof. Any suggestions would be fantastic and much appreciated!
Guest Bedroom Closet
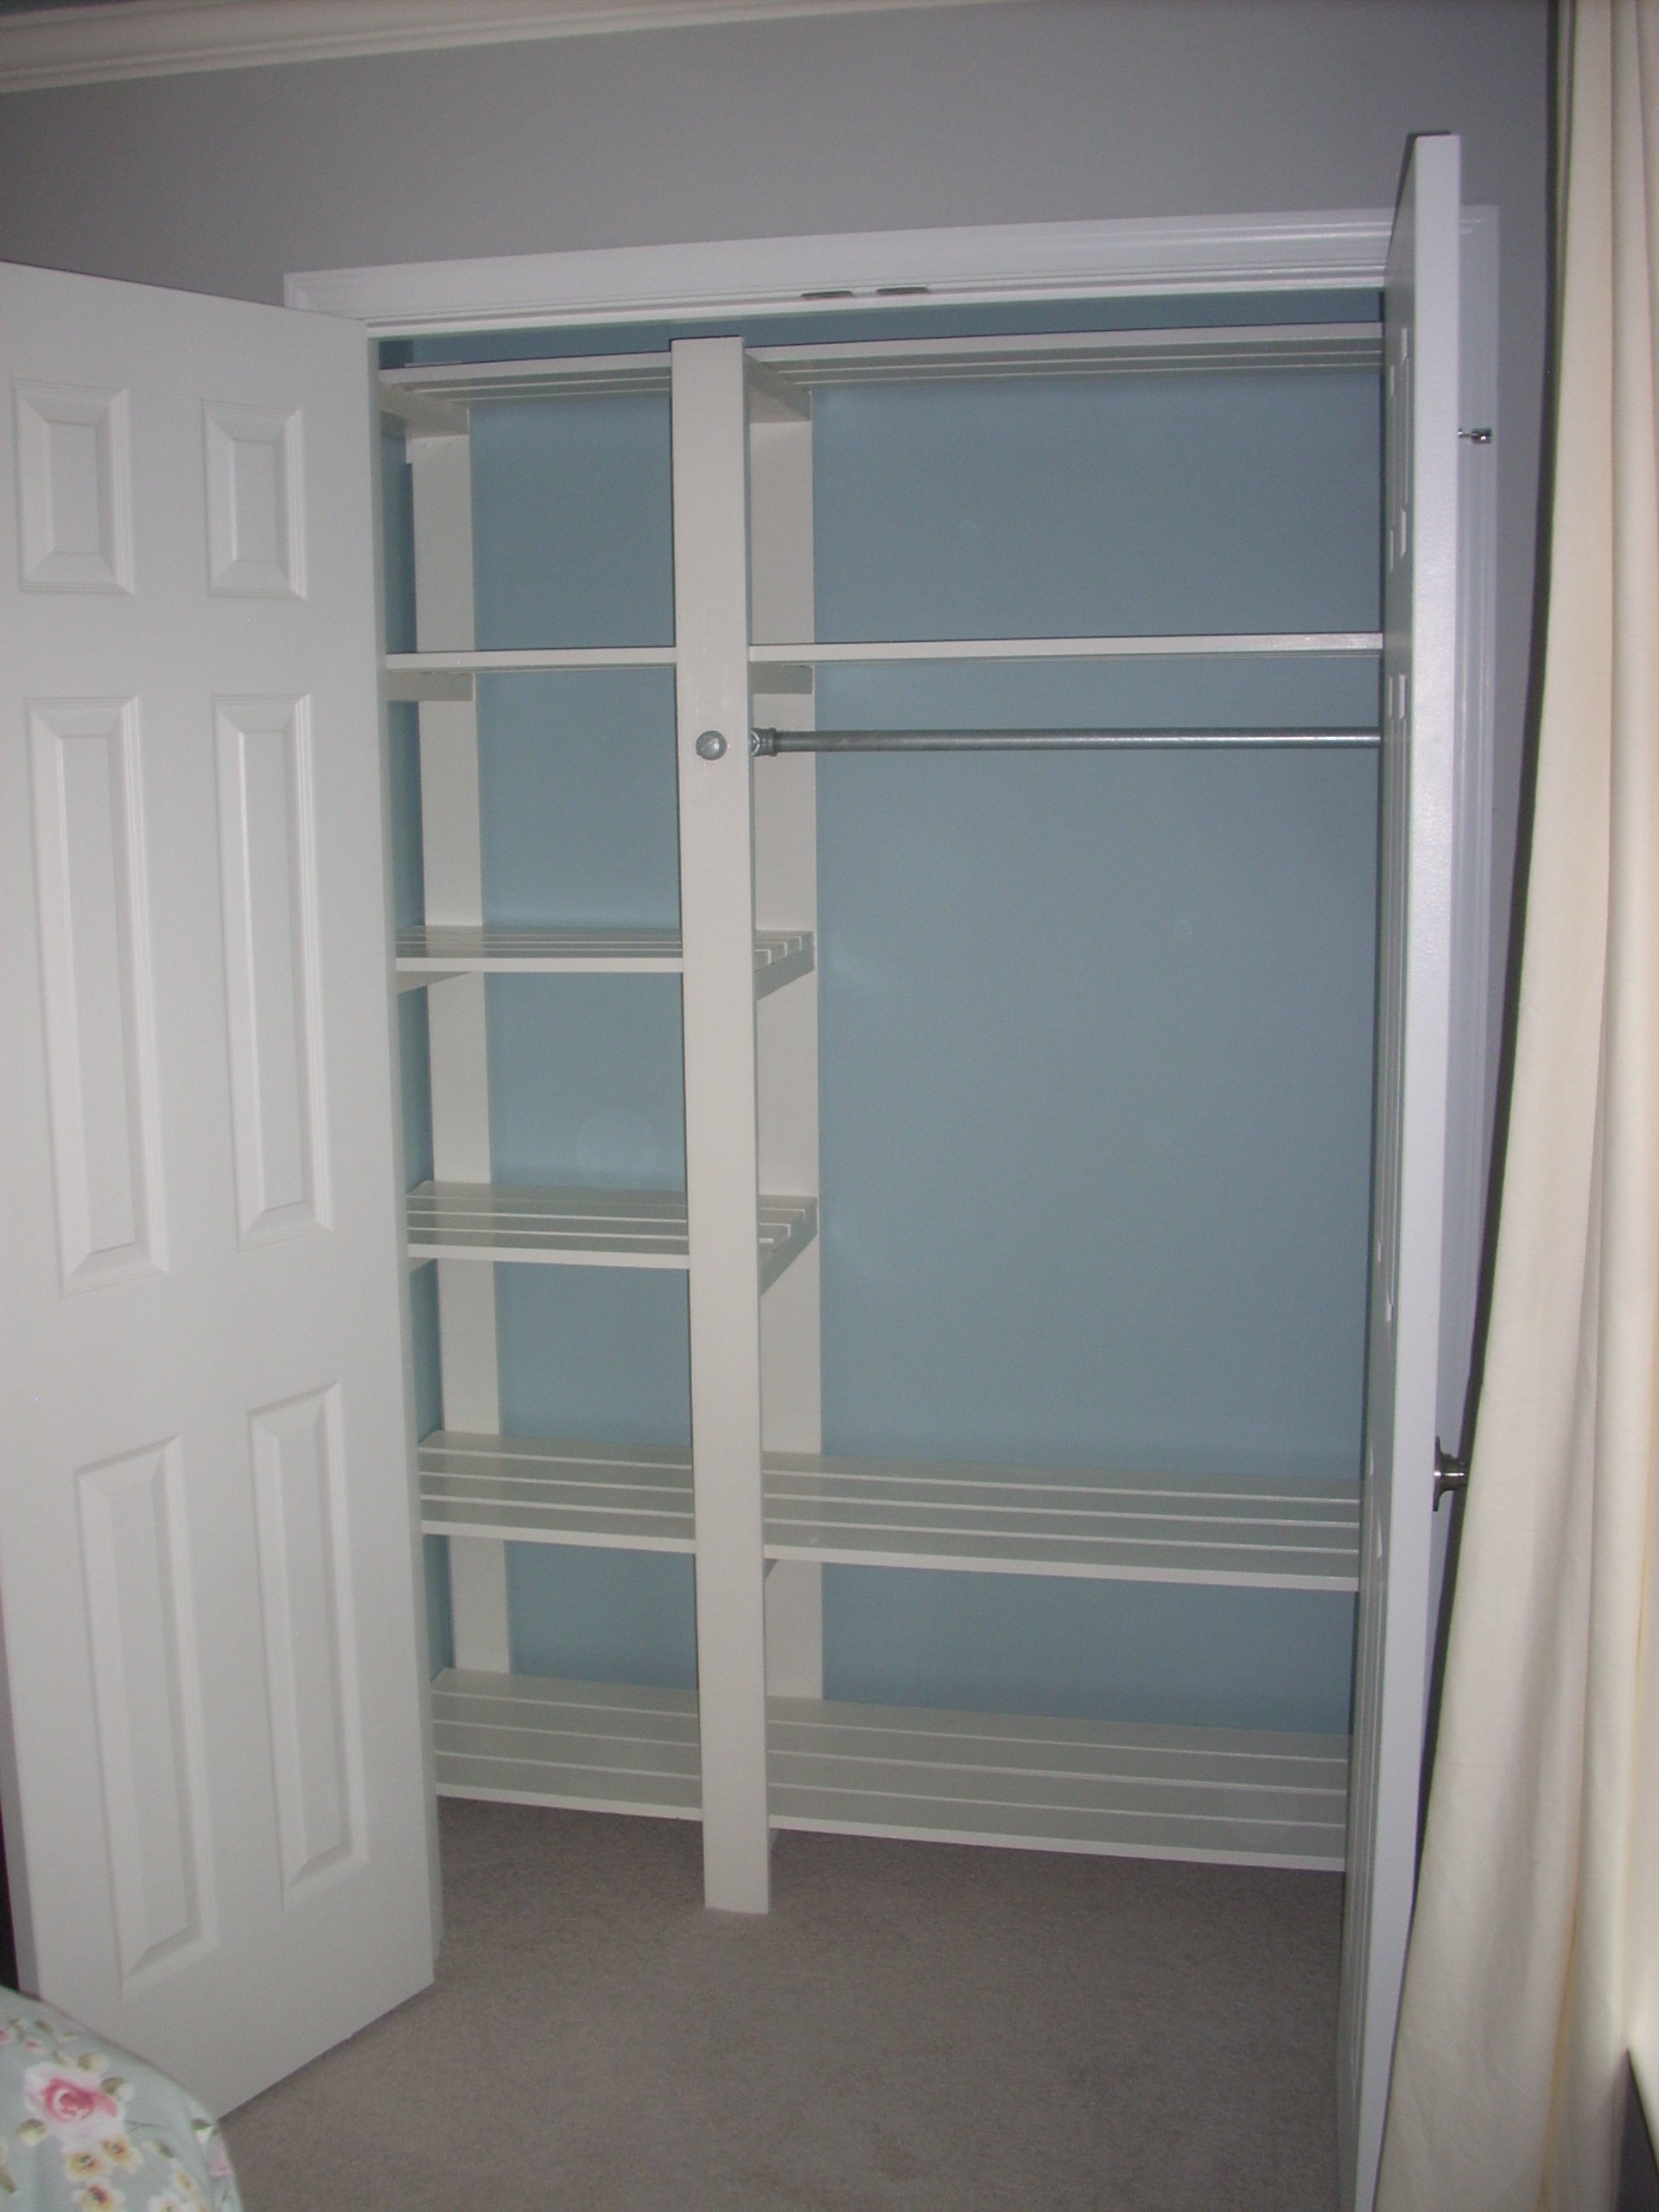
Modified width to fit the closet. Prep work of sanding and painting took longer than we thought it would; assembly inside the closet was simple but definitely a challenge in the small space. At 81", the top shelf was higher than intended so had to remove front slat in order to be able to use it - will make the next one slightly shorter. But love the final product and am now on a mission to get all the cheap wire shelving out of the house!
Estimated Time Investment
Weekend Project (10-20 Hours)
Finish Used
white paint; filled in the screw heads with wood filler.
Recommended Skill Level
Beginner
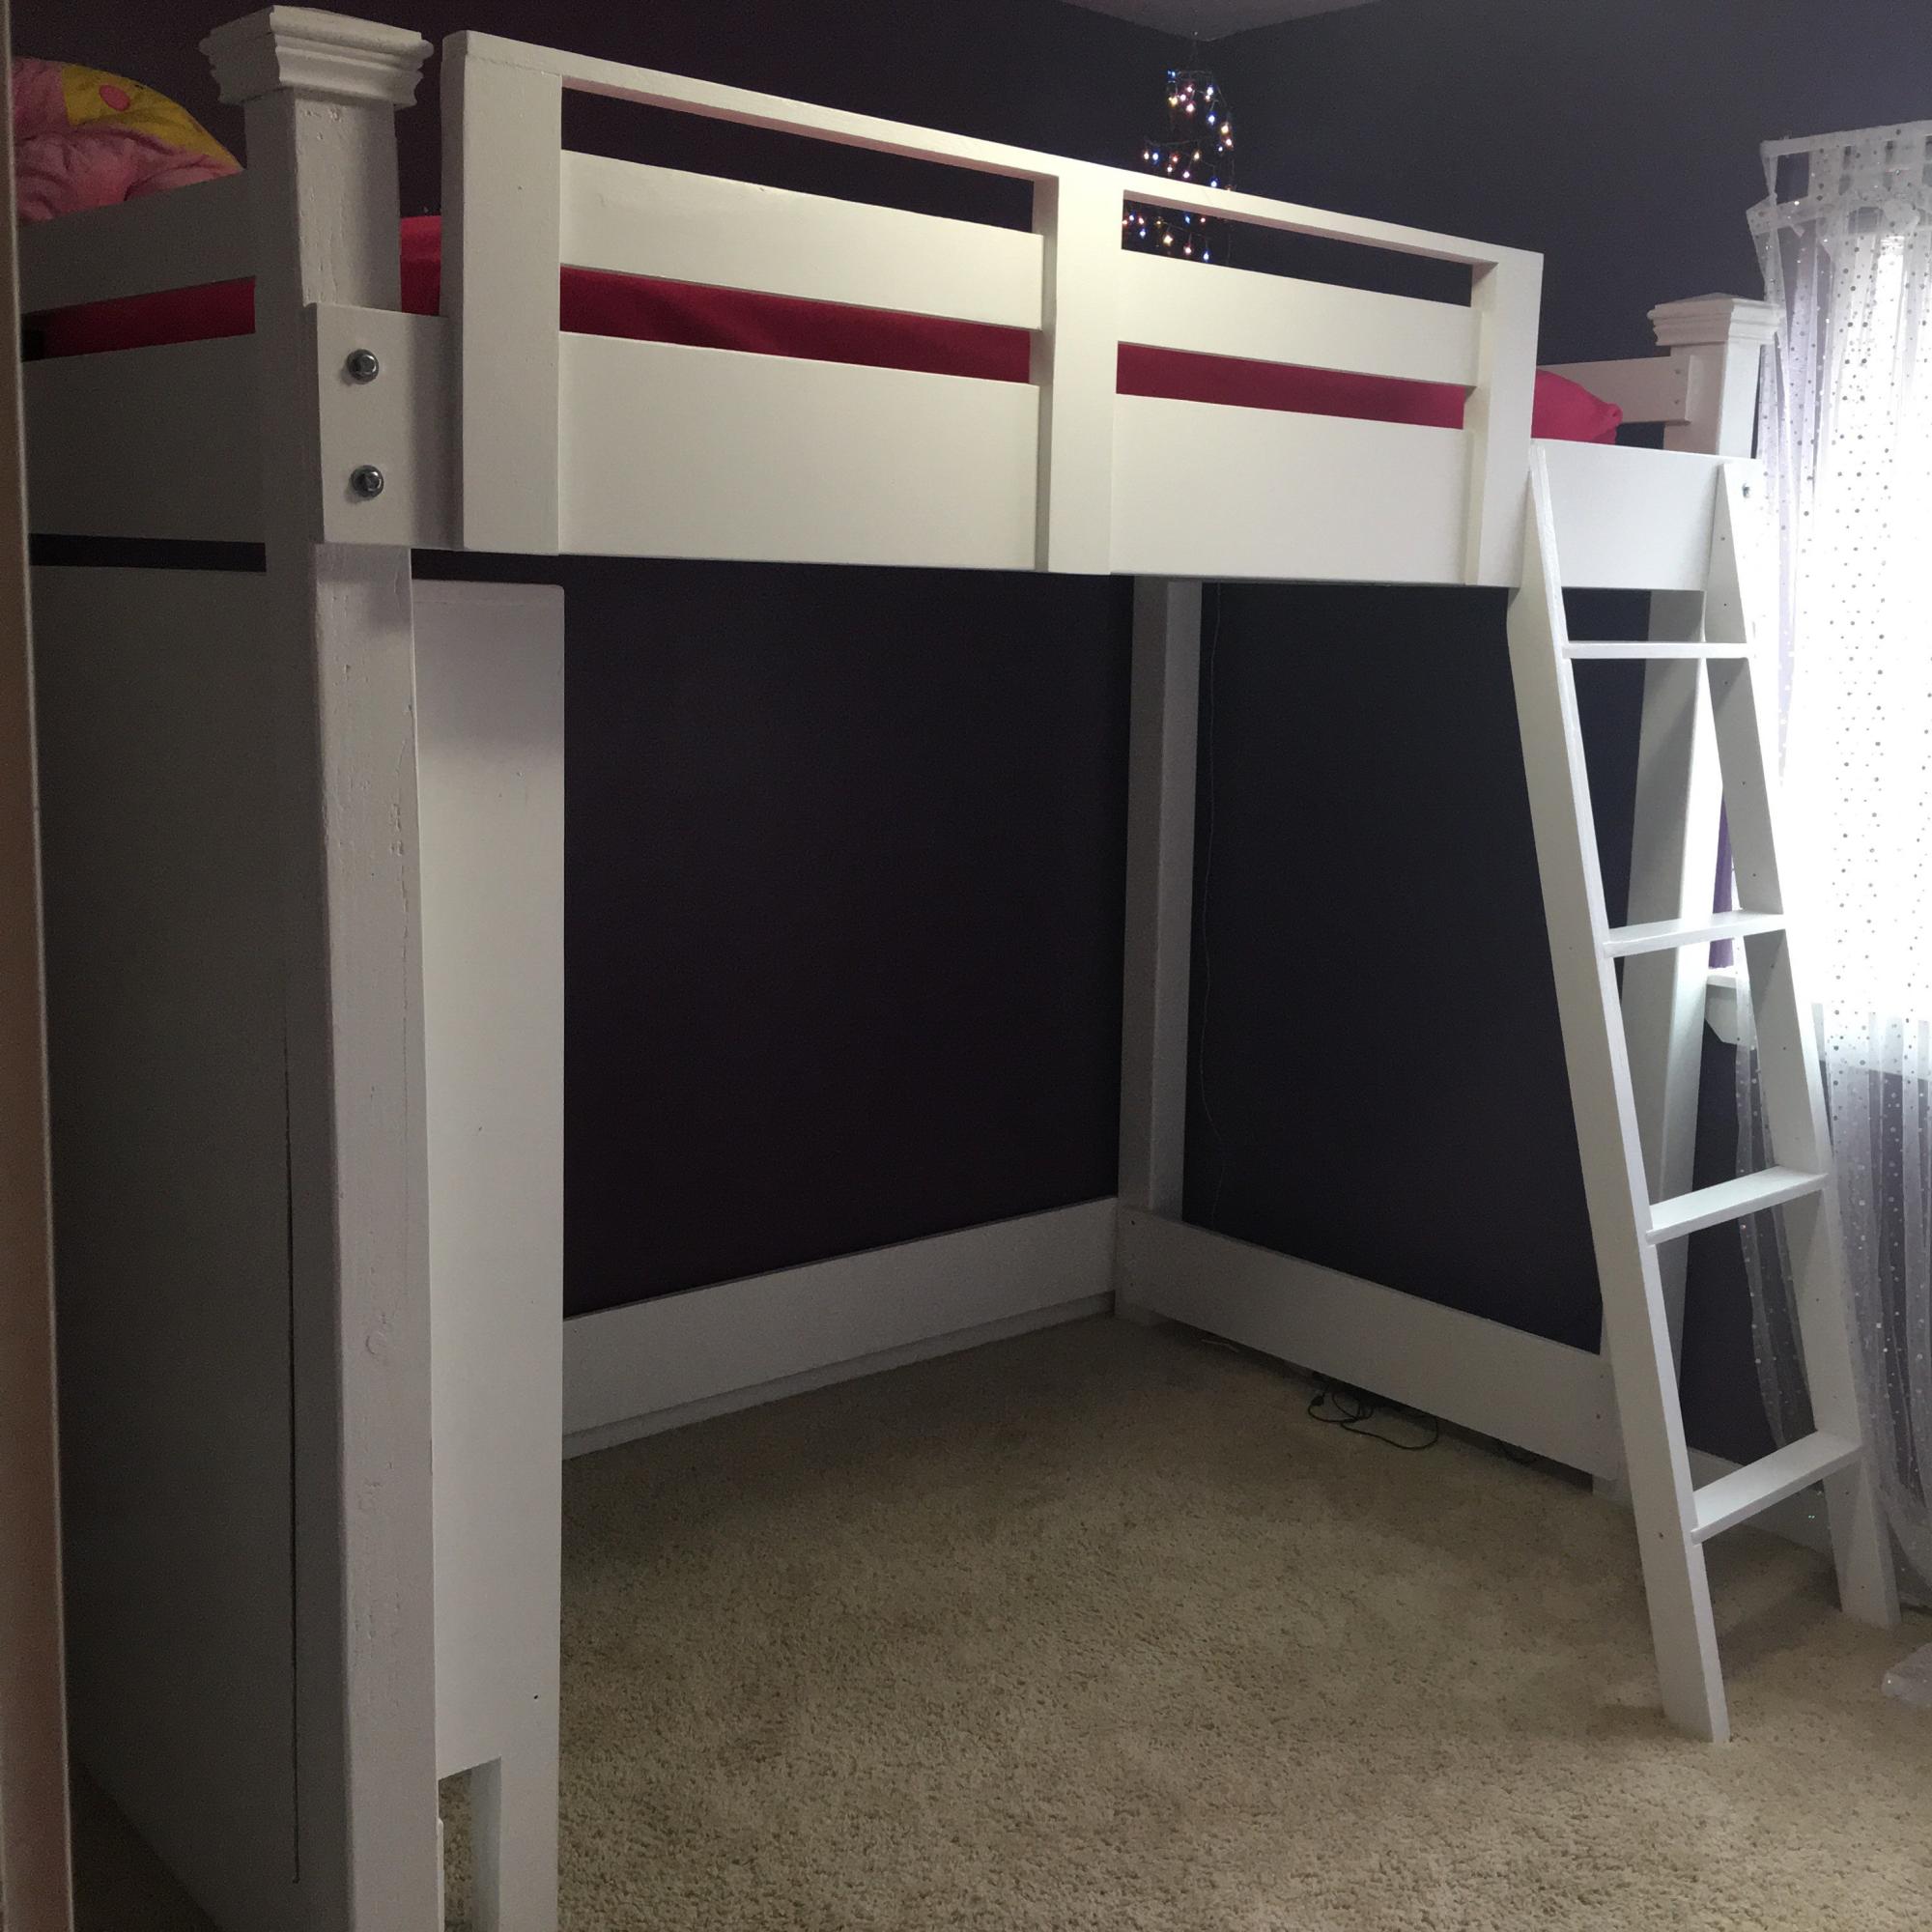
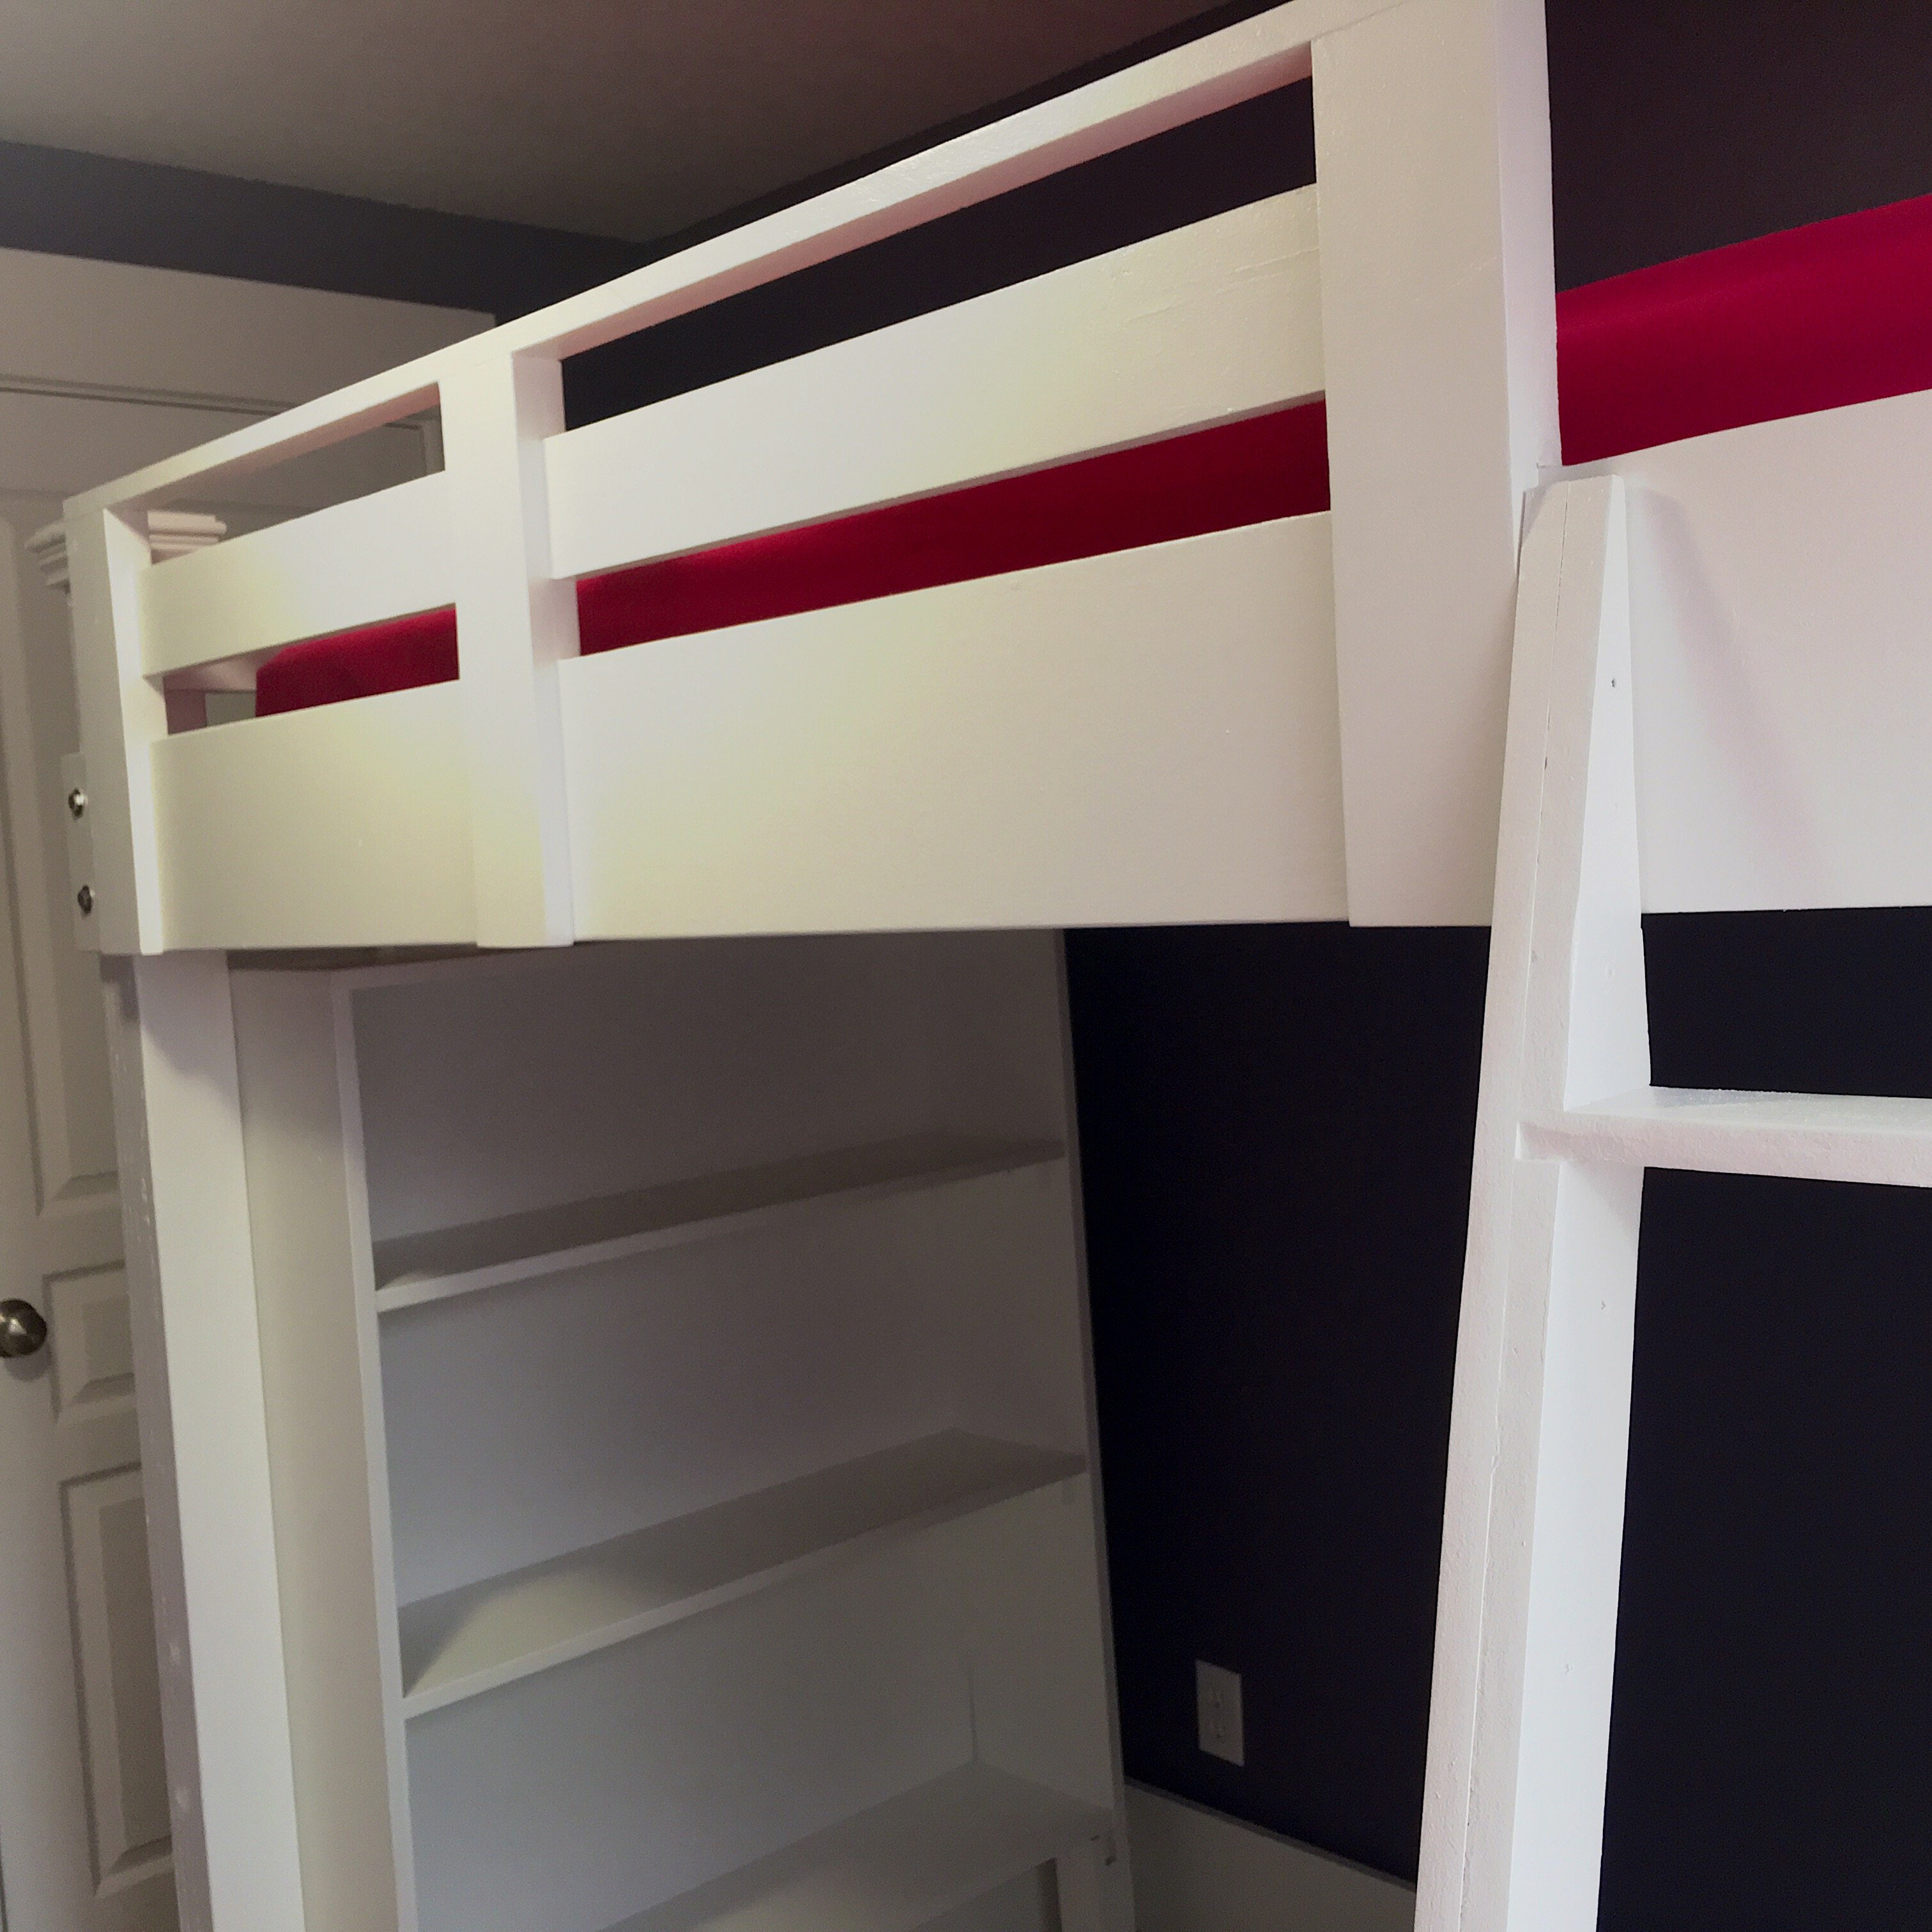
First built ever
This is the first project I have ever built. It was super satisfying to make.

Built from Plan(s)
Estimated Cost
150
Estimated Time Investment
Day Project (6-9 Hours)
Finish Used
Shellac (amber), Cabot exterior black, Helmsman clear gloss varnish
Recommended Skill Level
Beginner
Comments
Mon, 12/14/2020 - 09:53
Great first project!
Awesome space, thank you for sharing your first project, love the finish!