Community Brag Posts

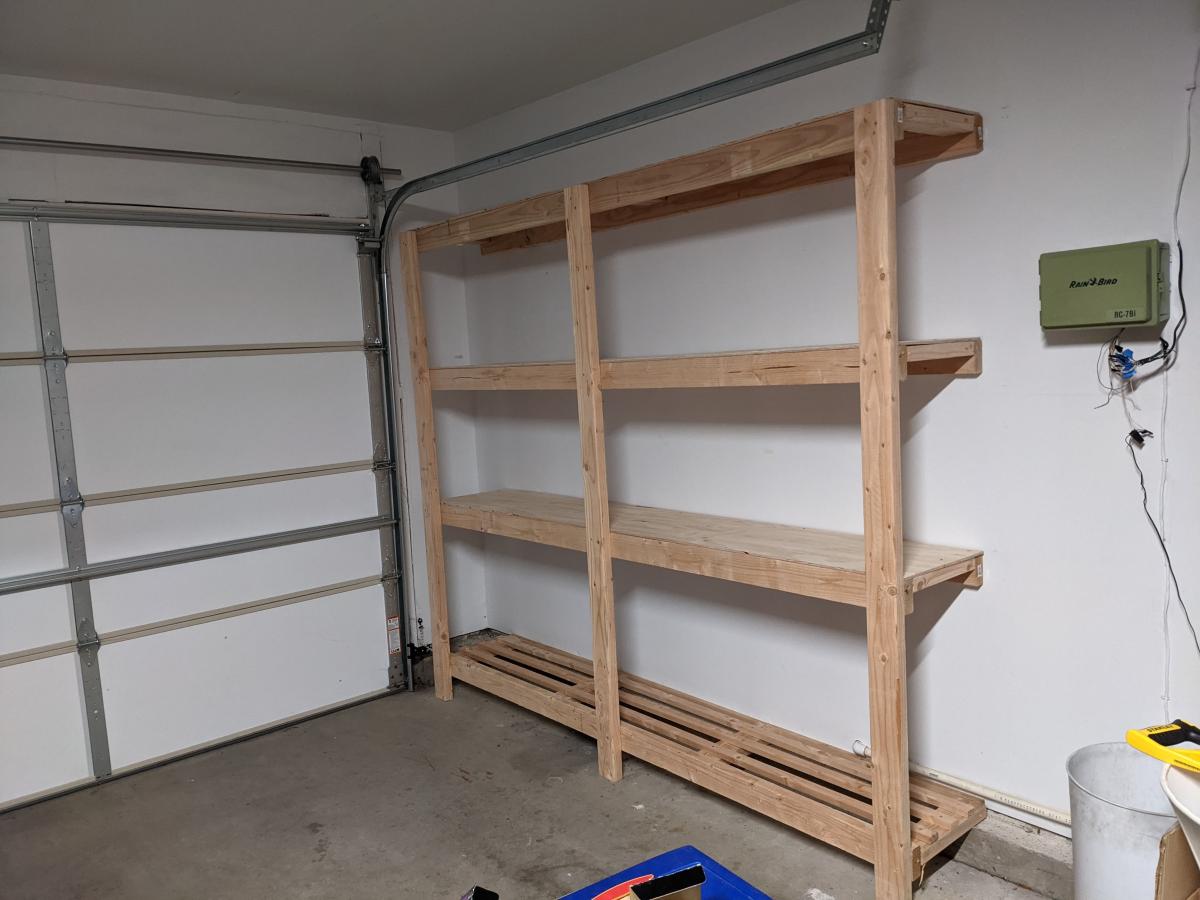
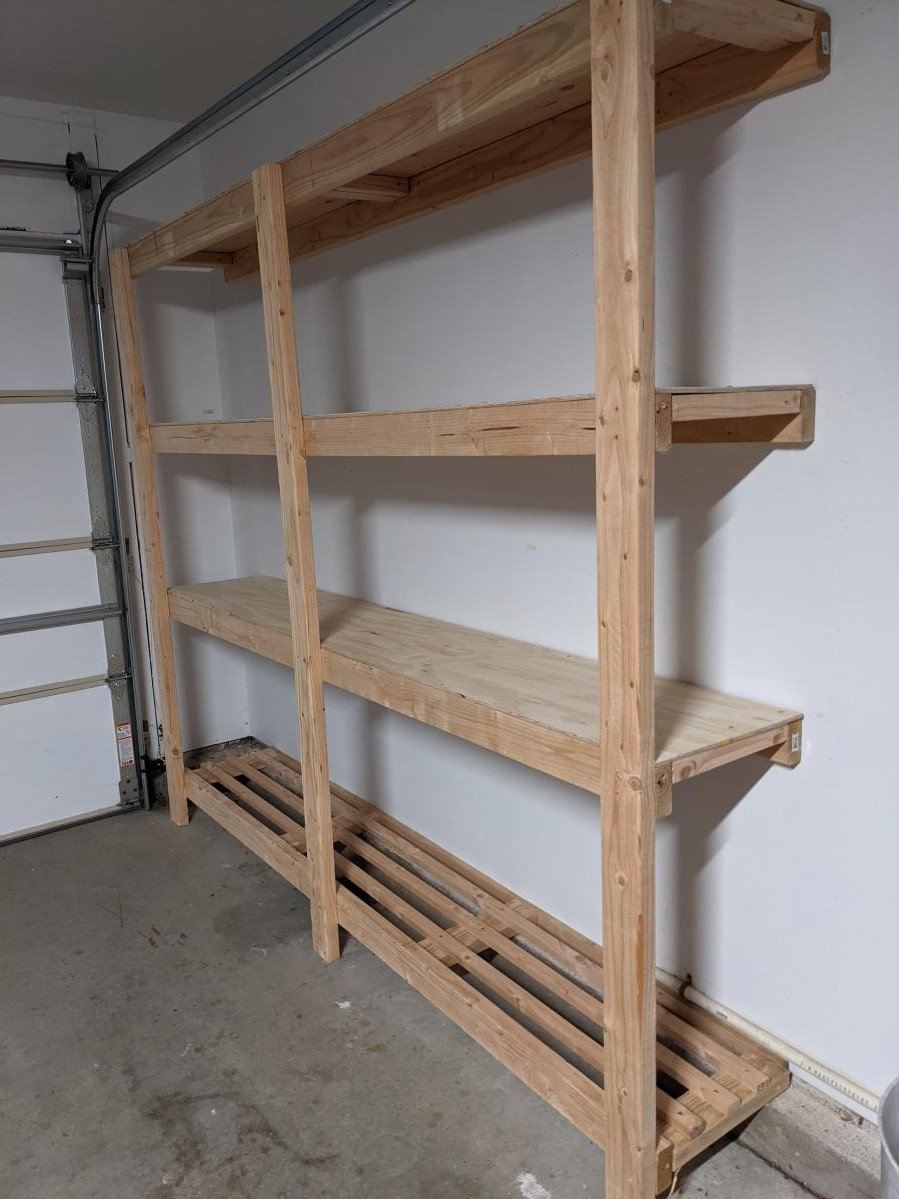
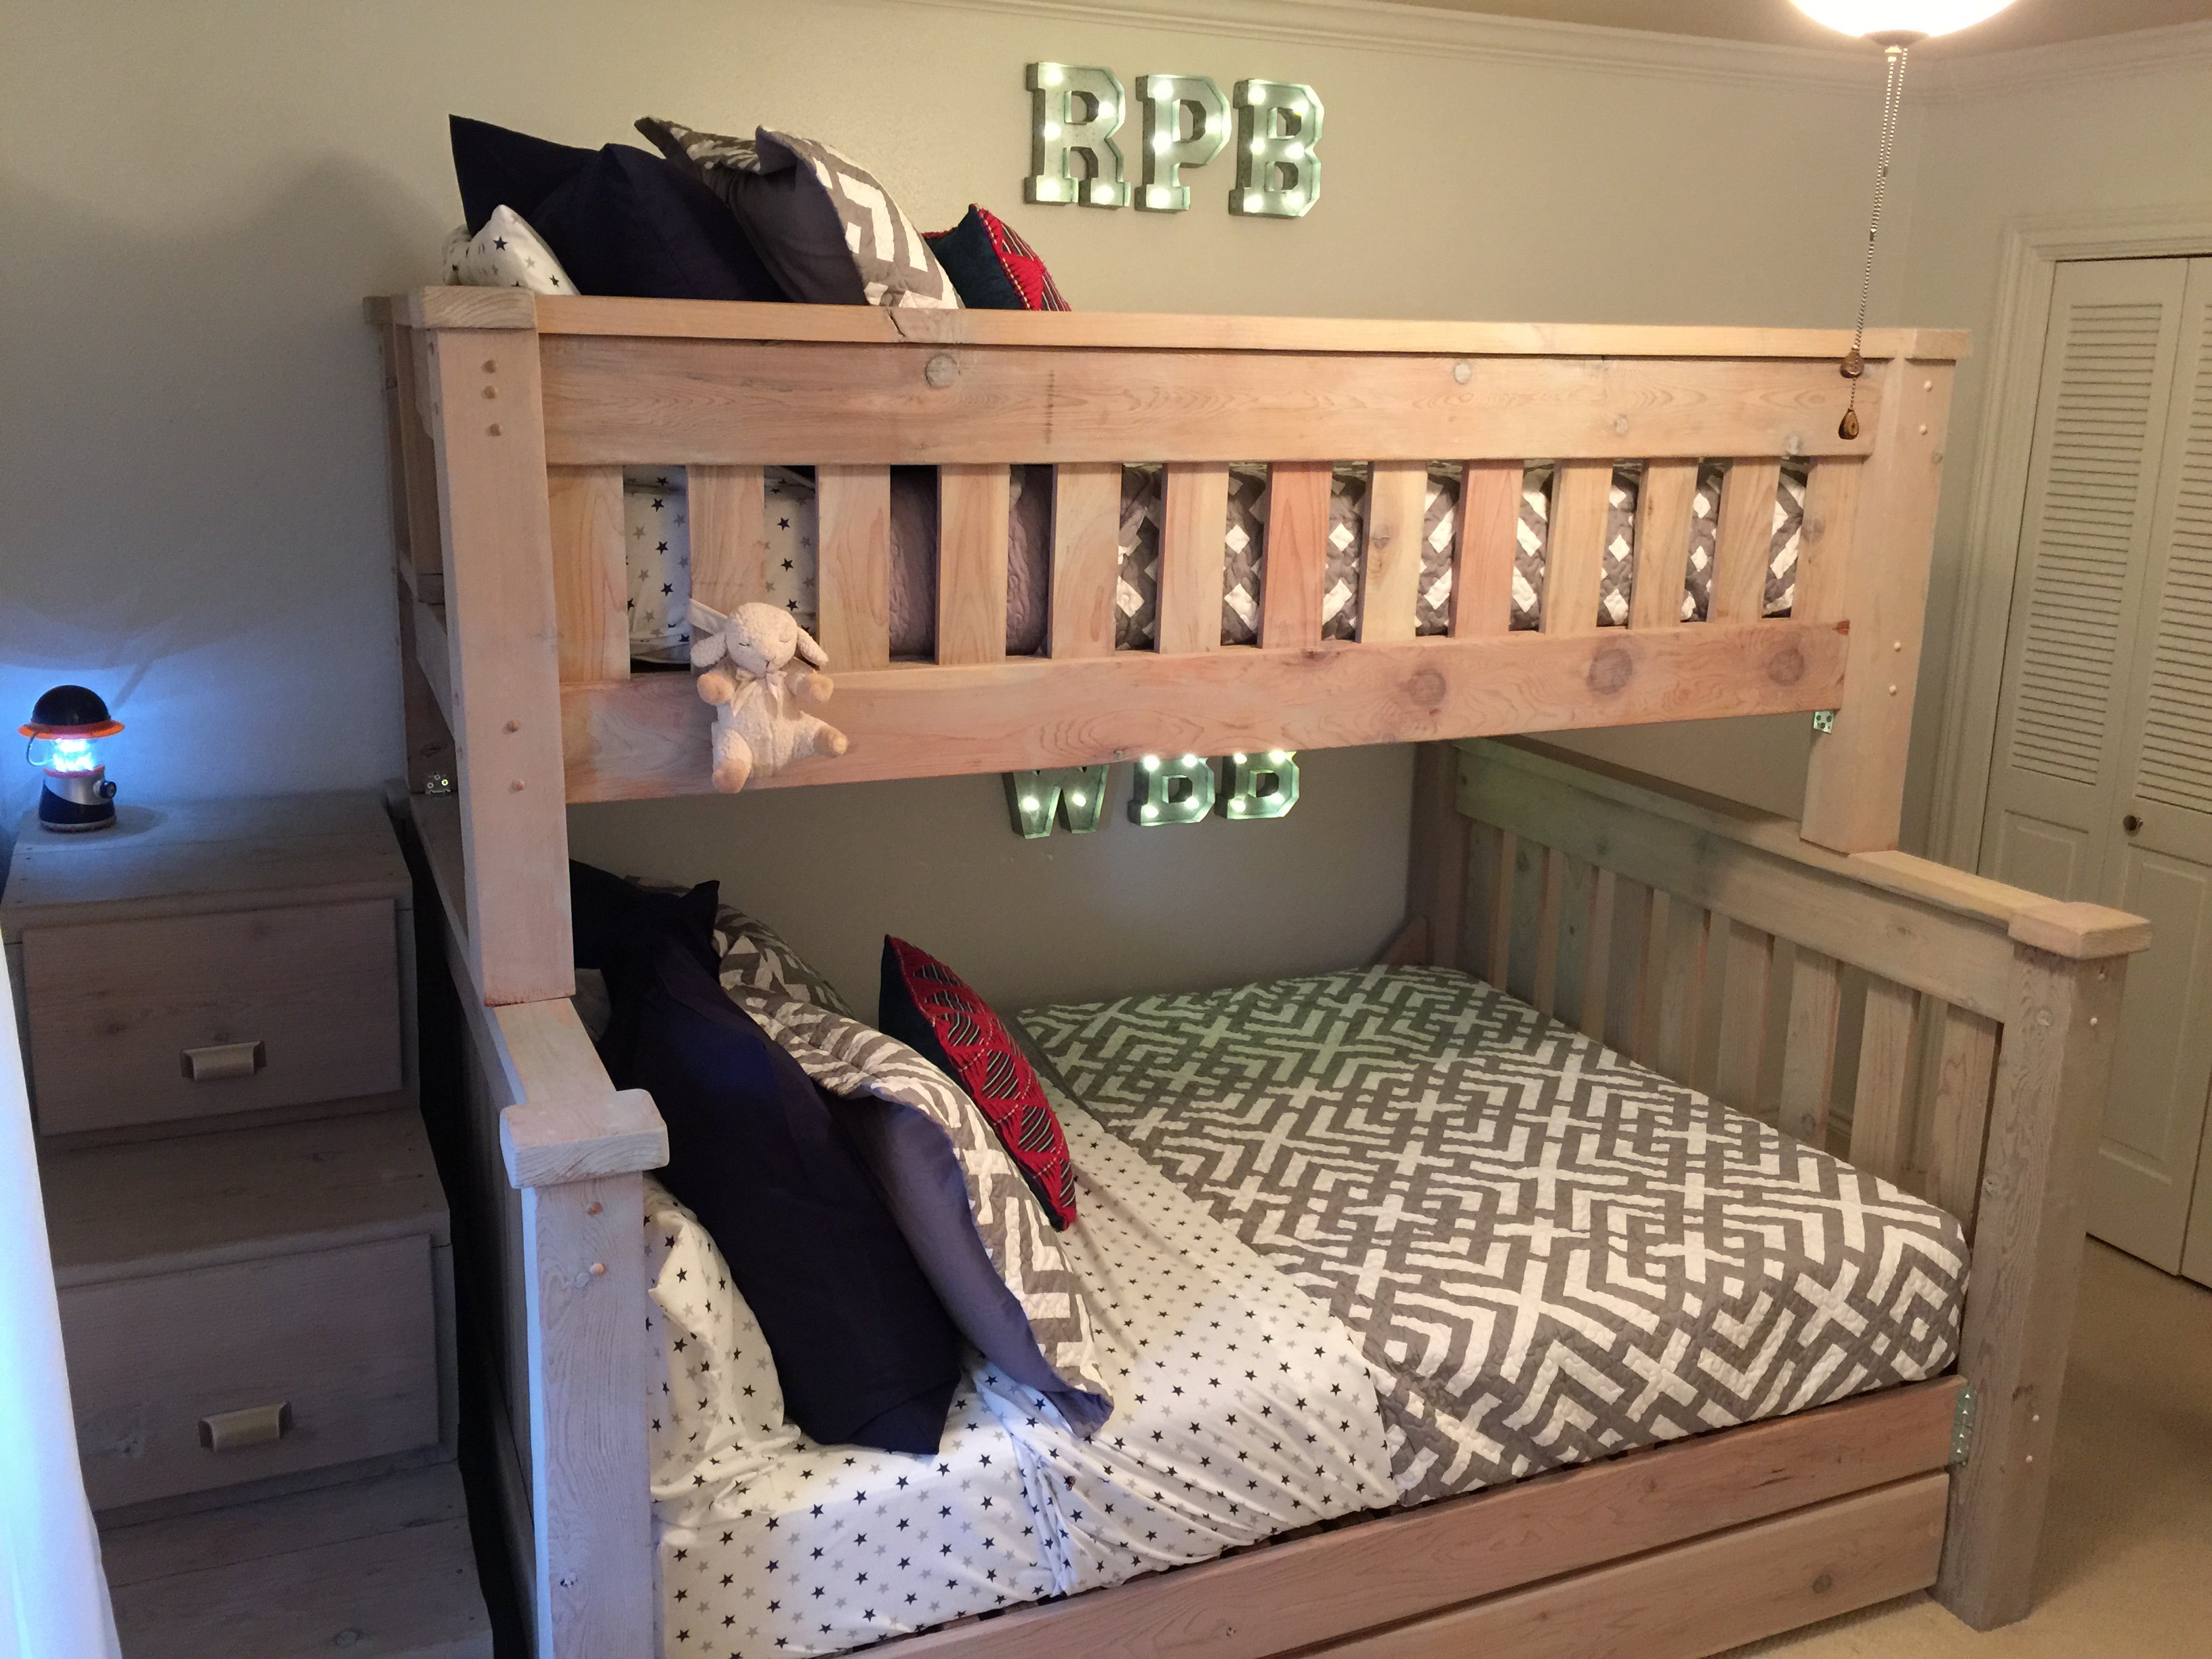
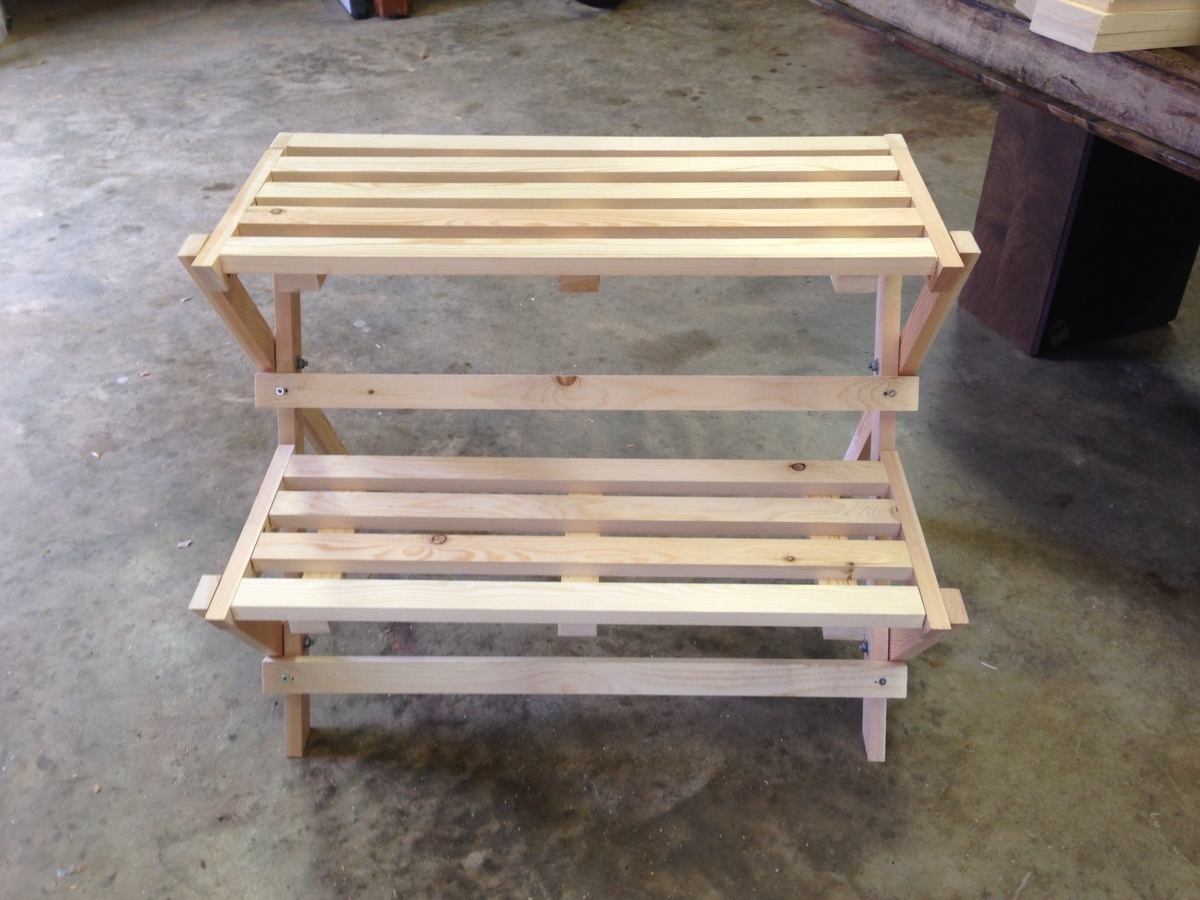
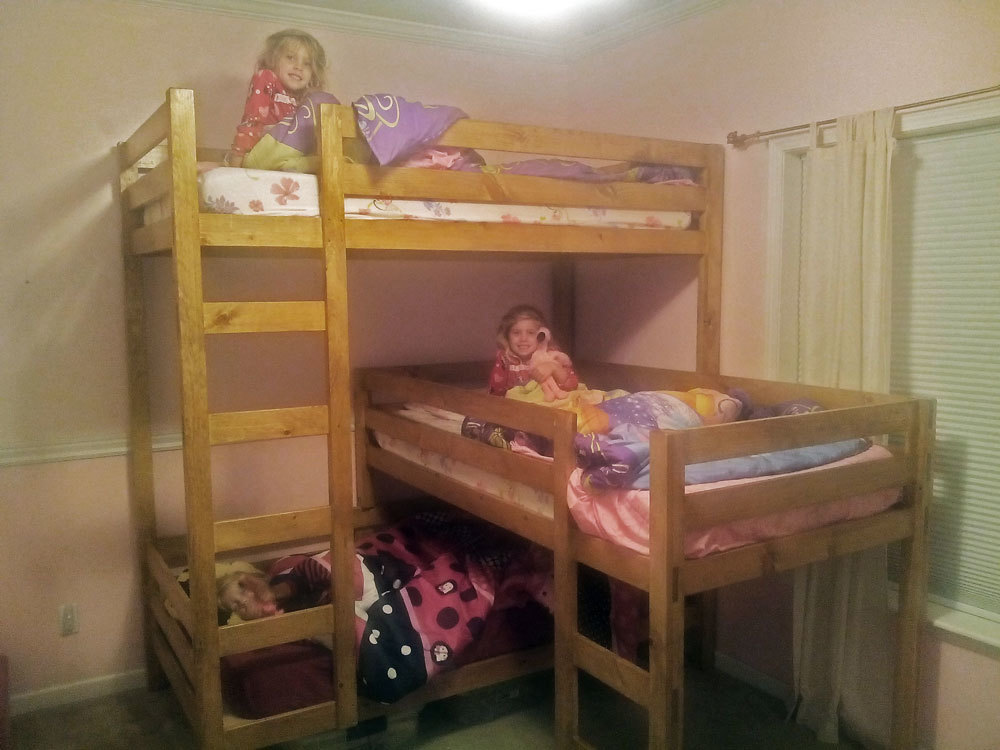
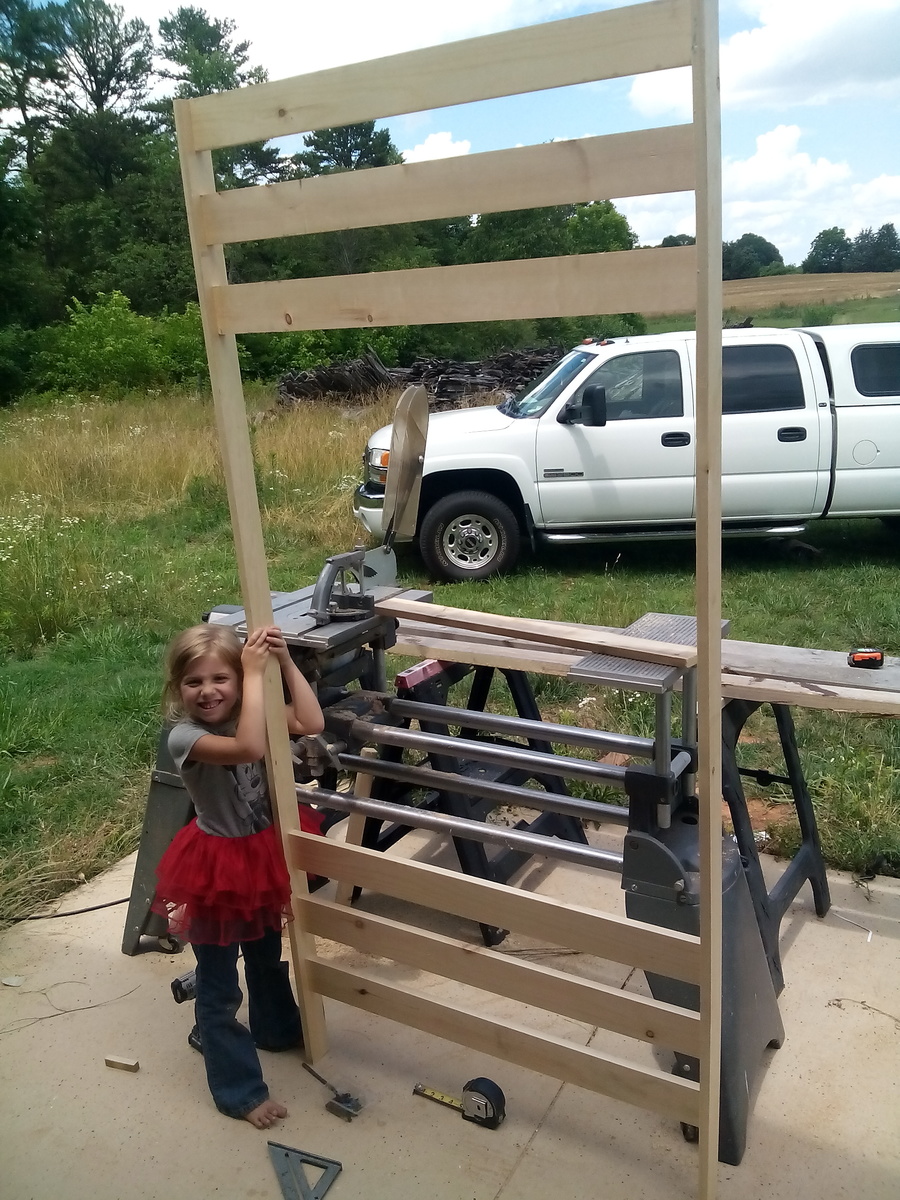
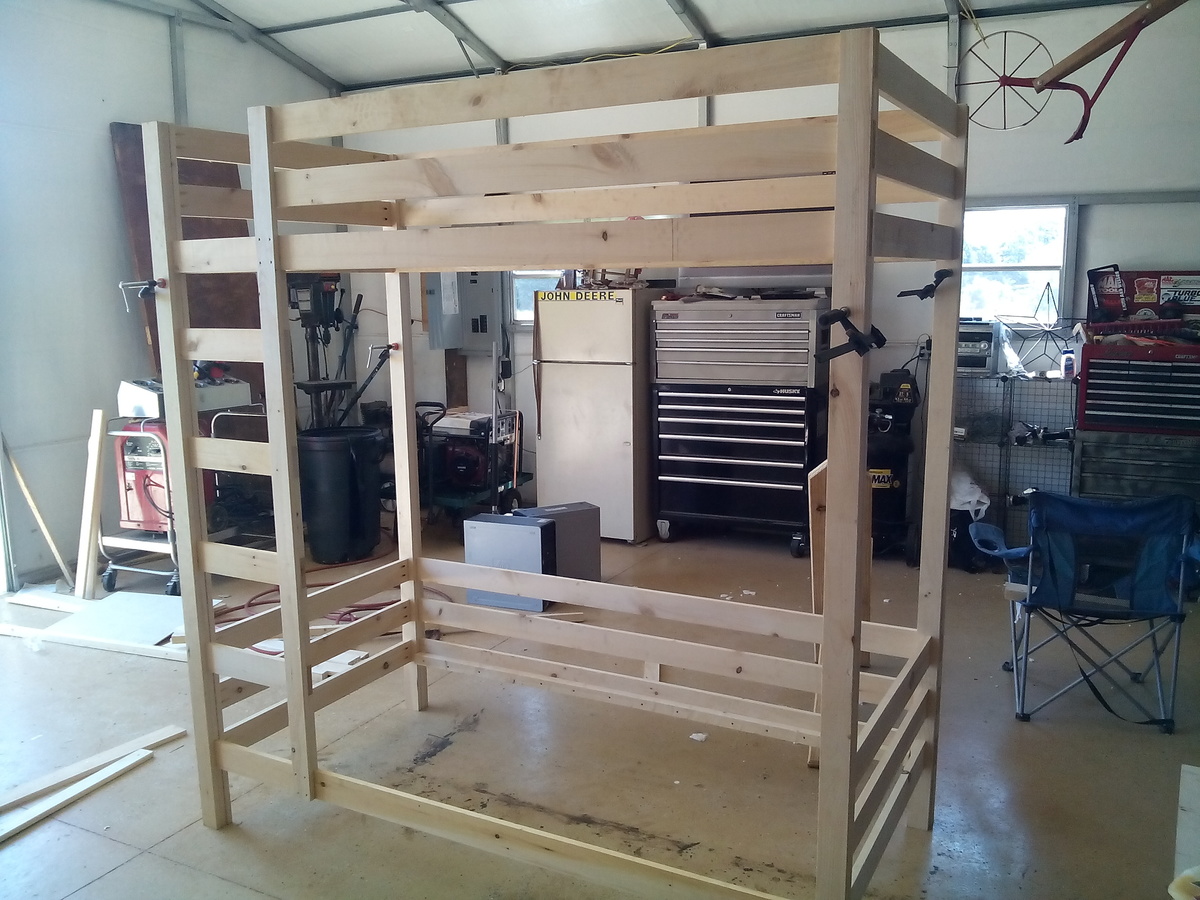
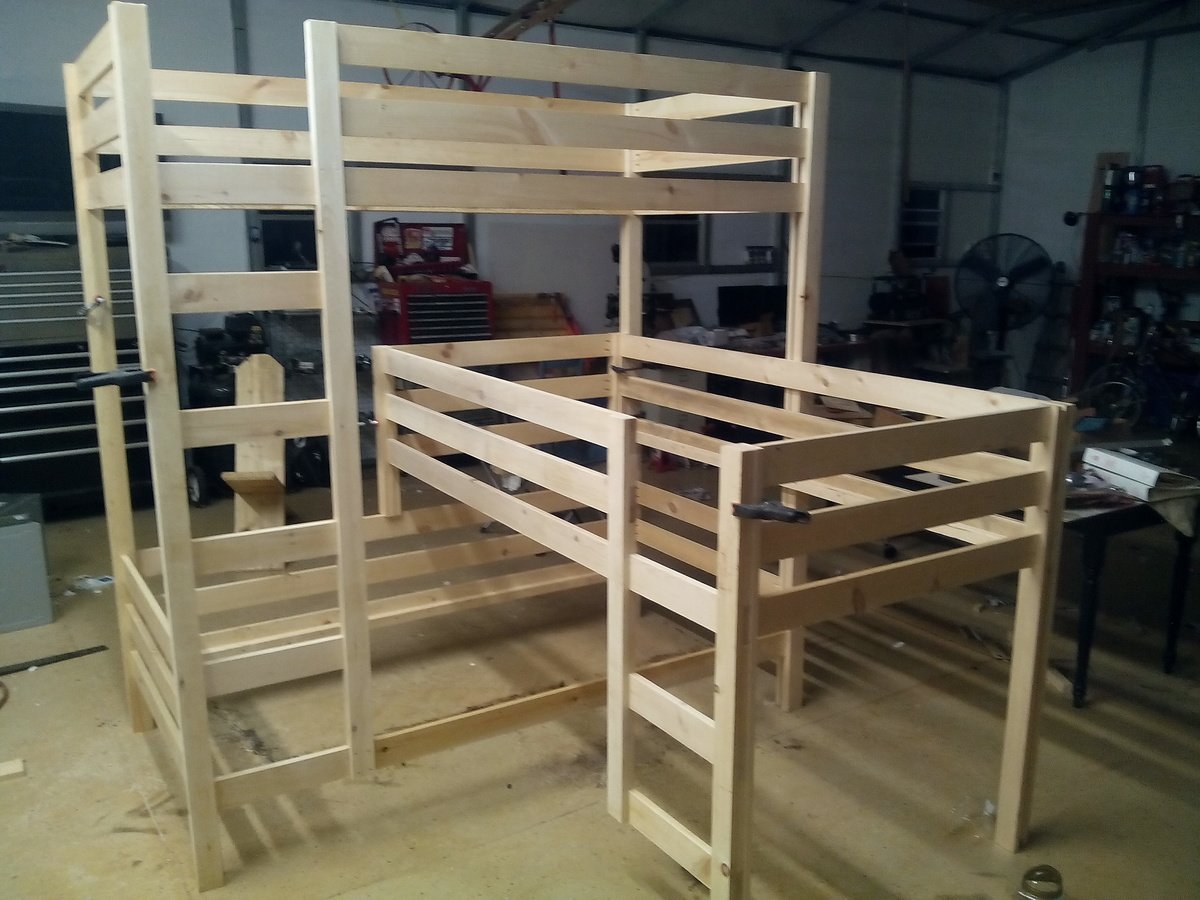
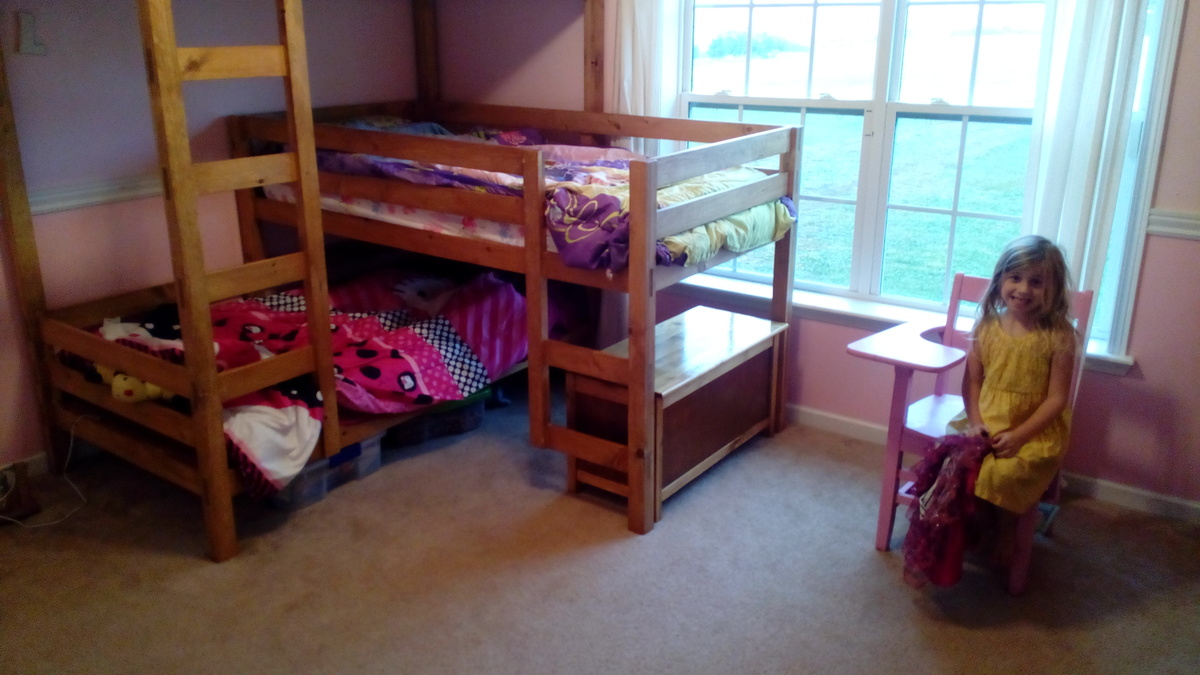
Simple Bunk Beds - My First "Ana" Project!!

Submitted by margjack on Fri, 04/29/2011 - 07:17

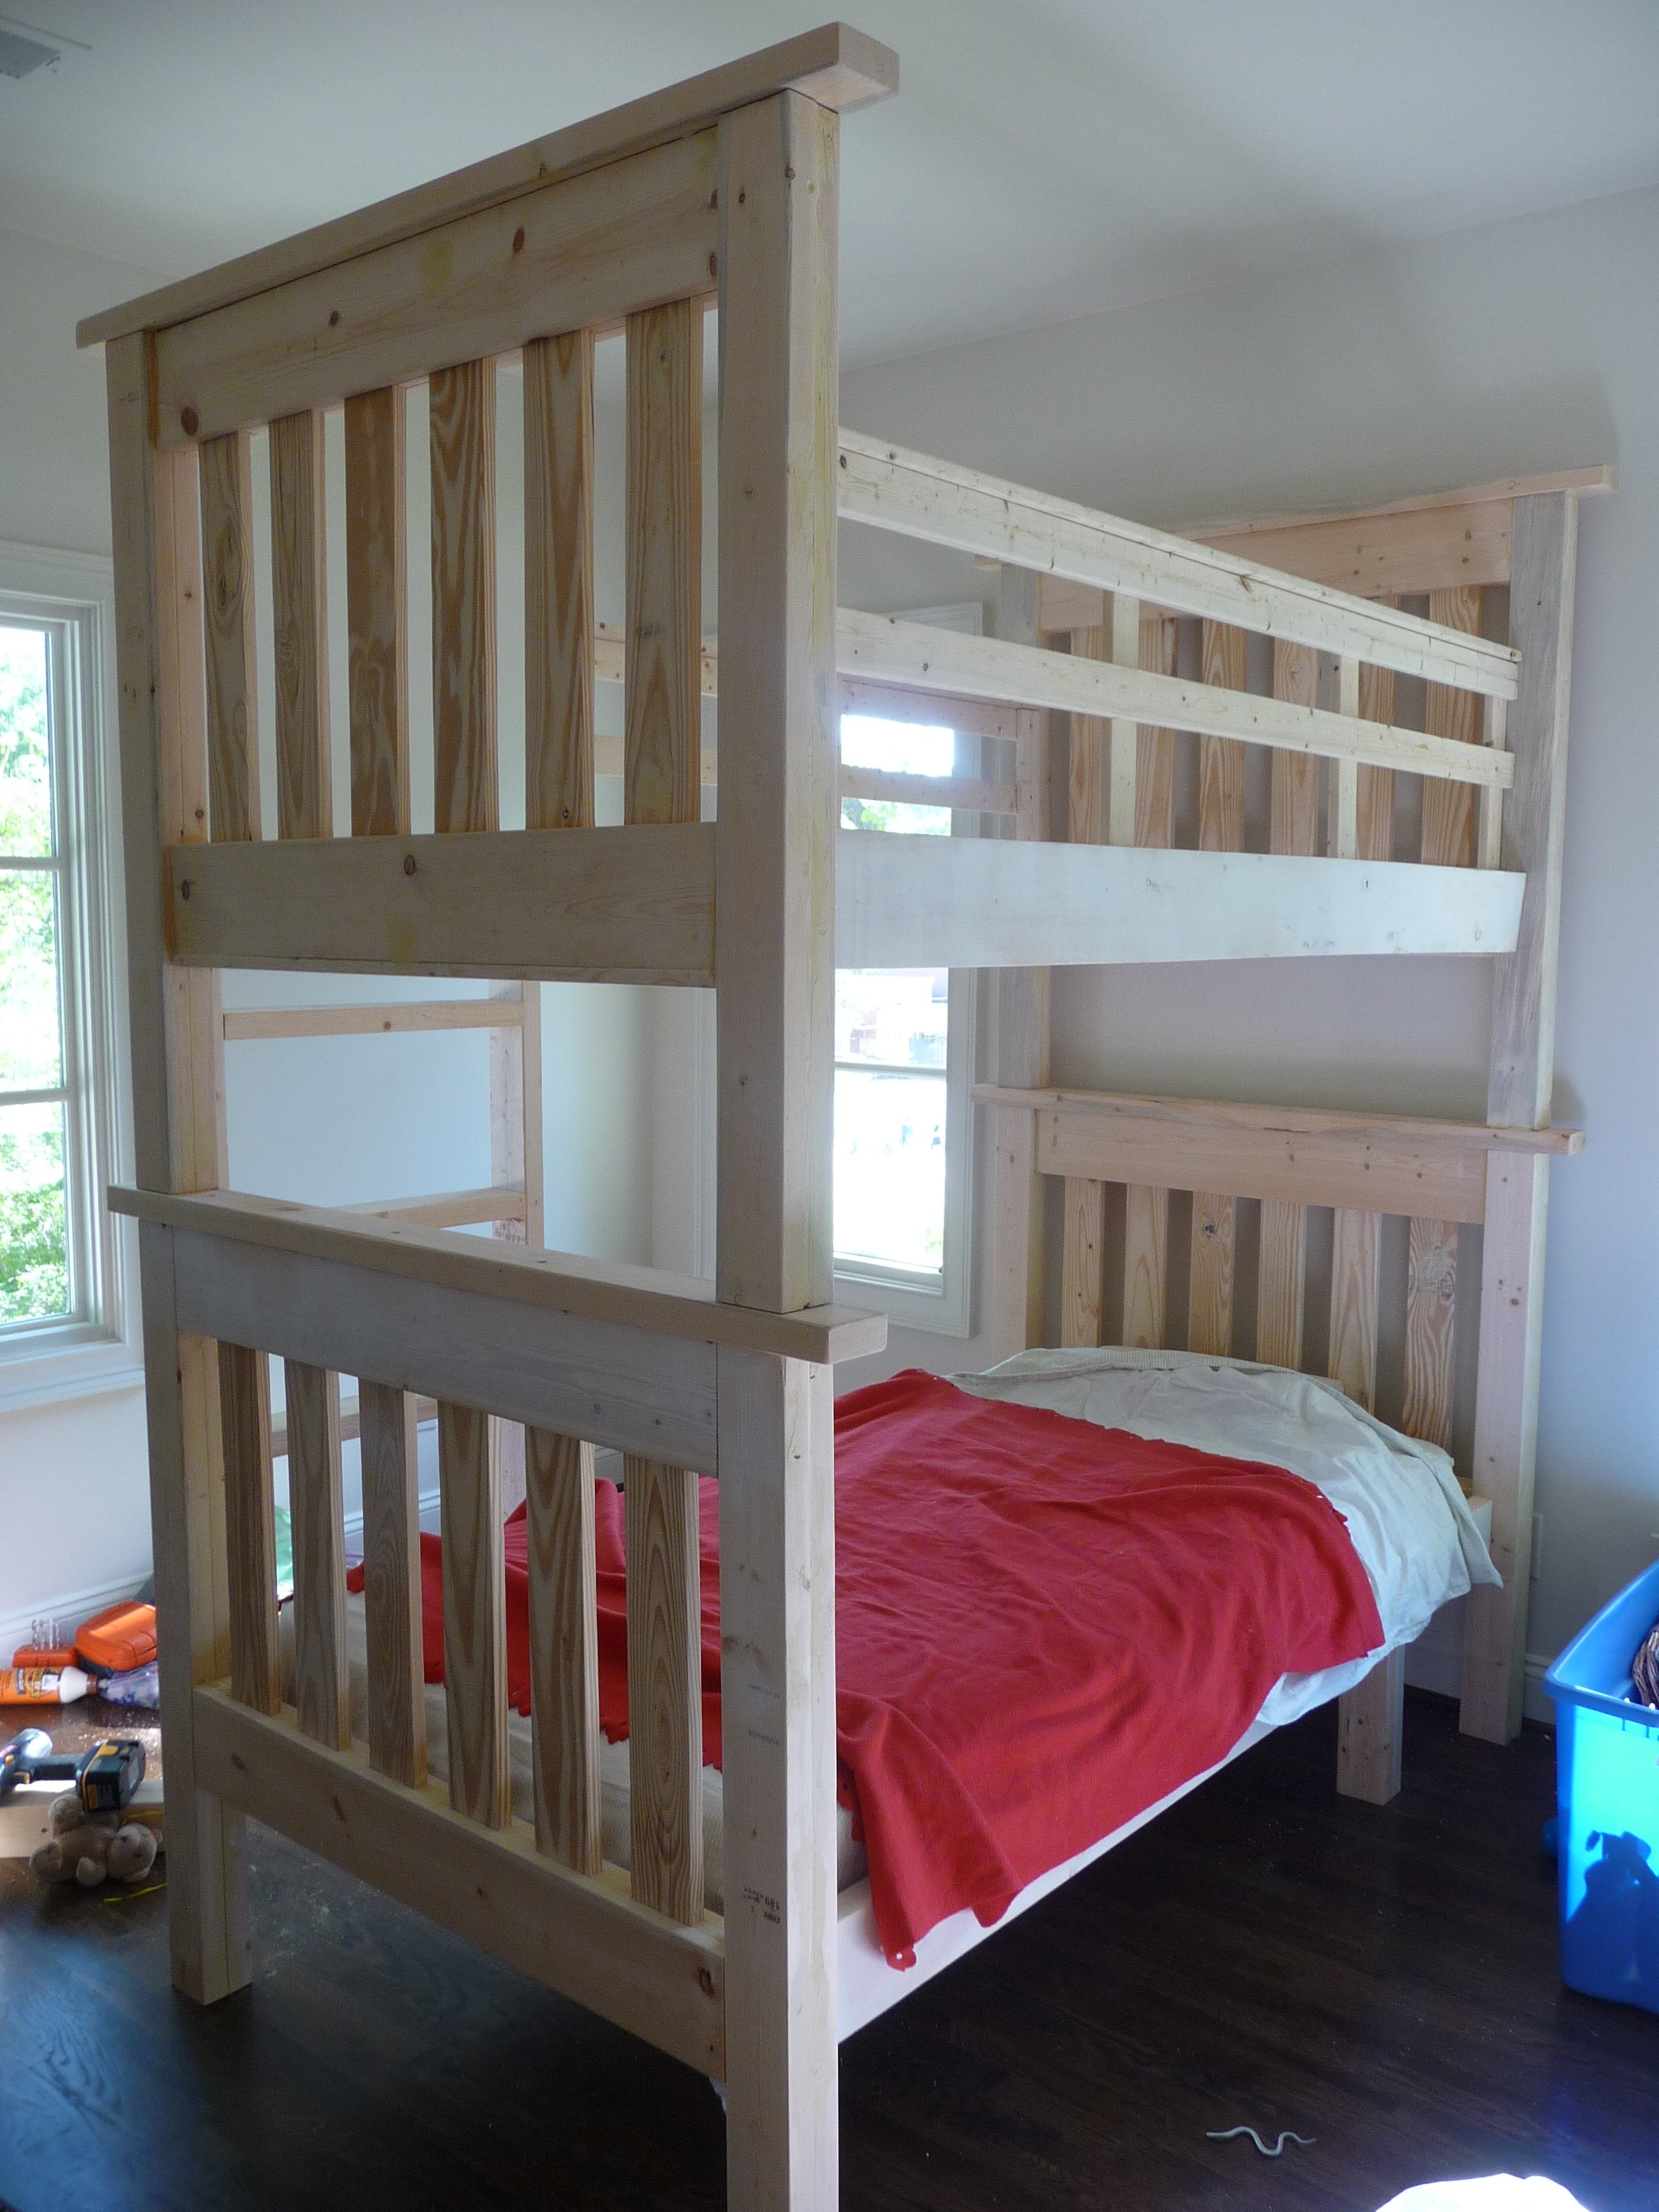
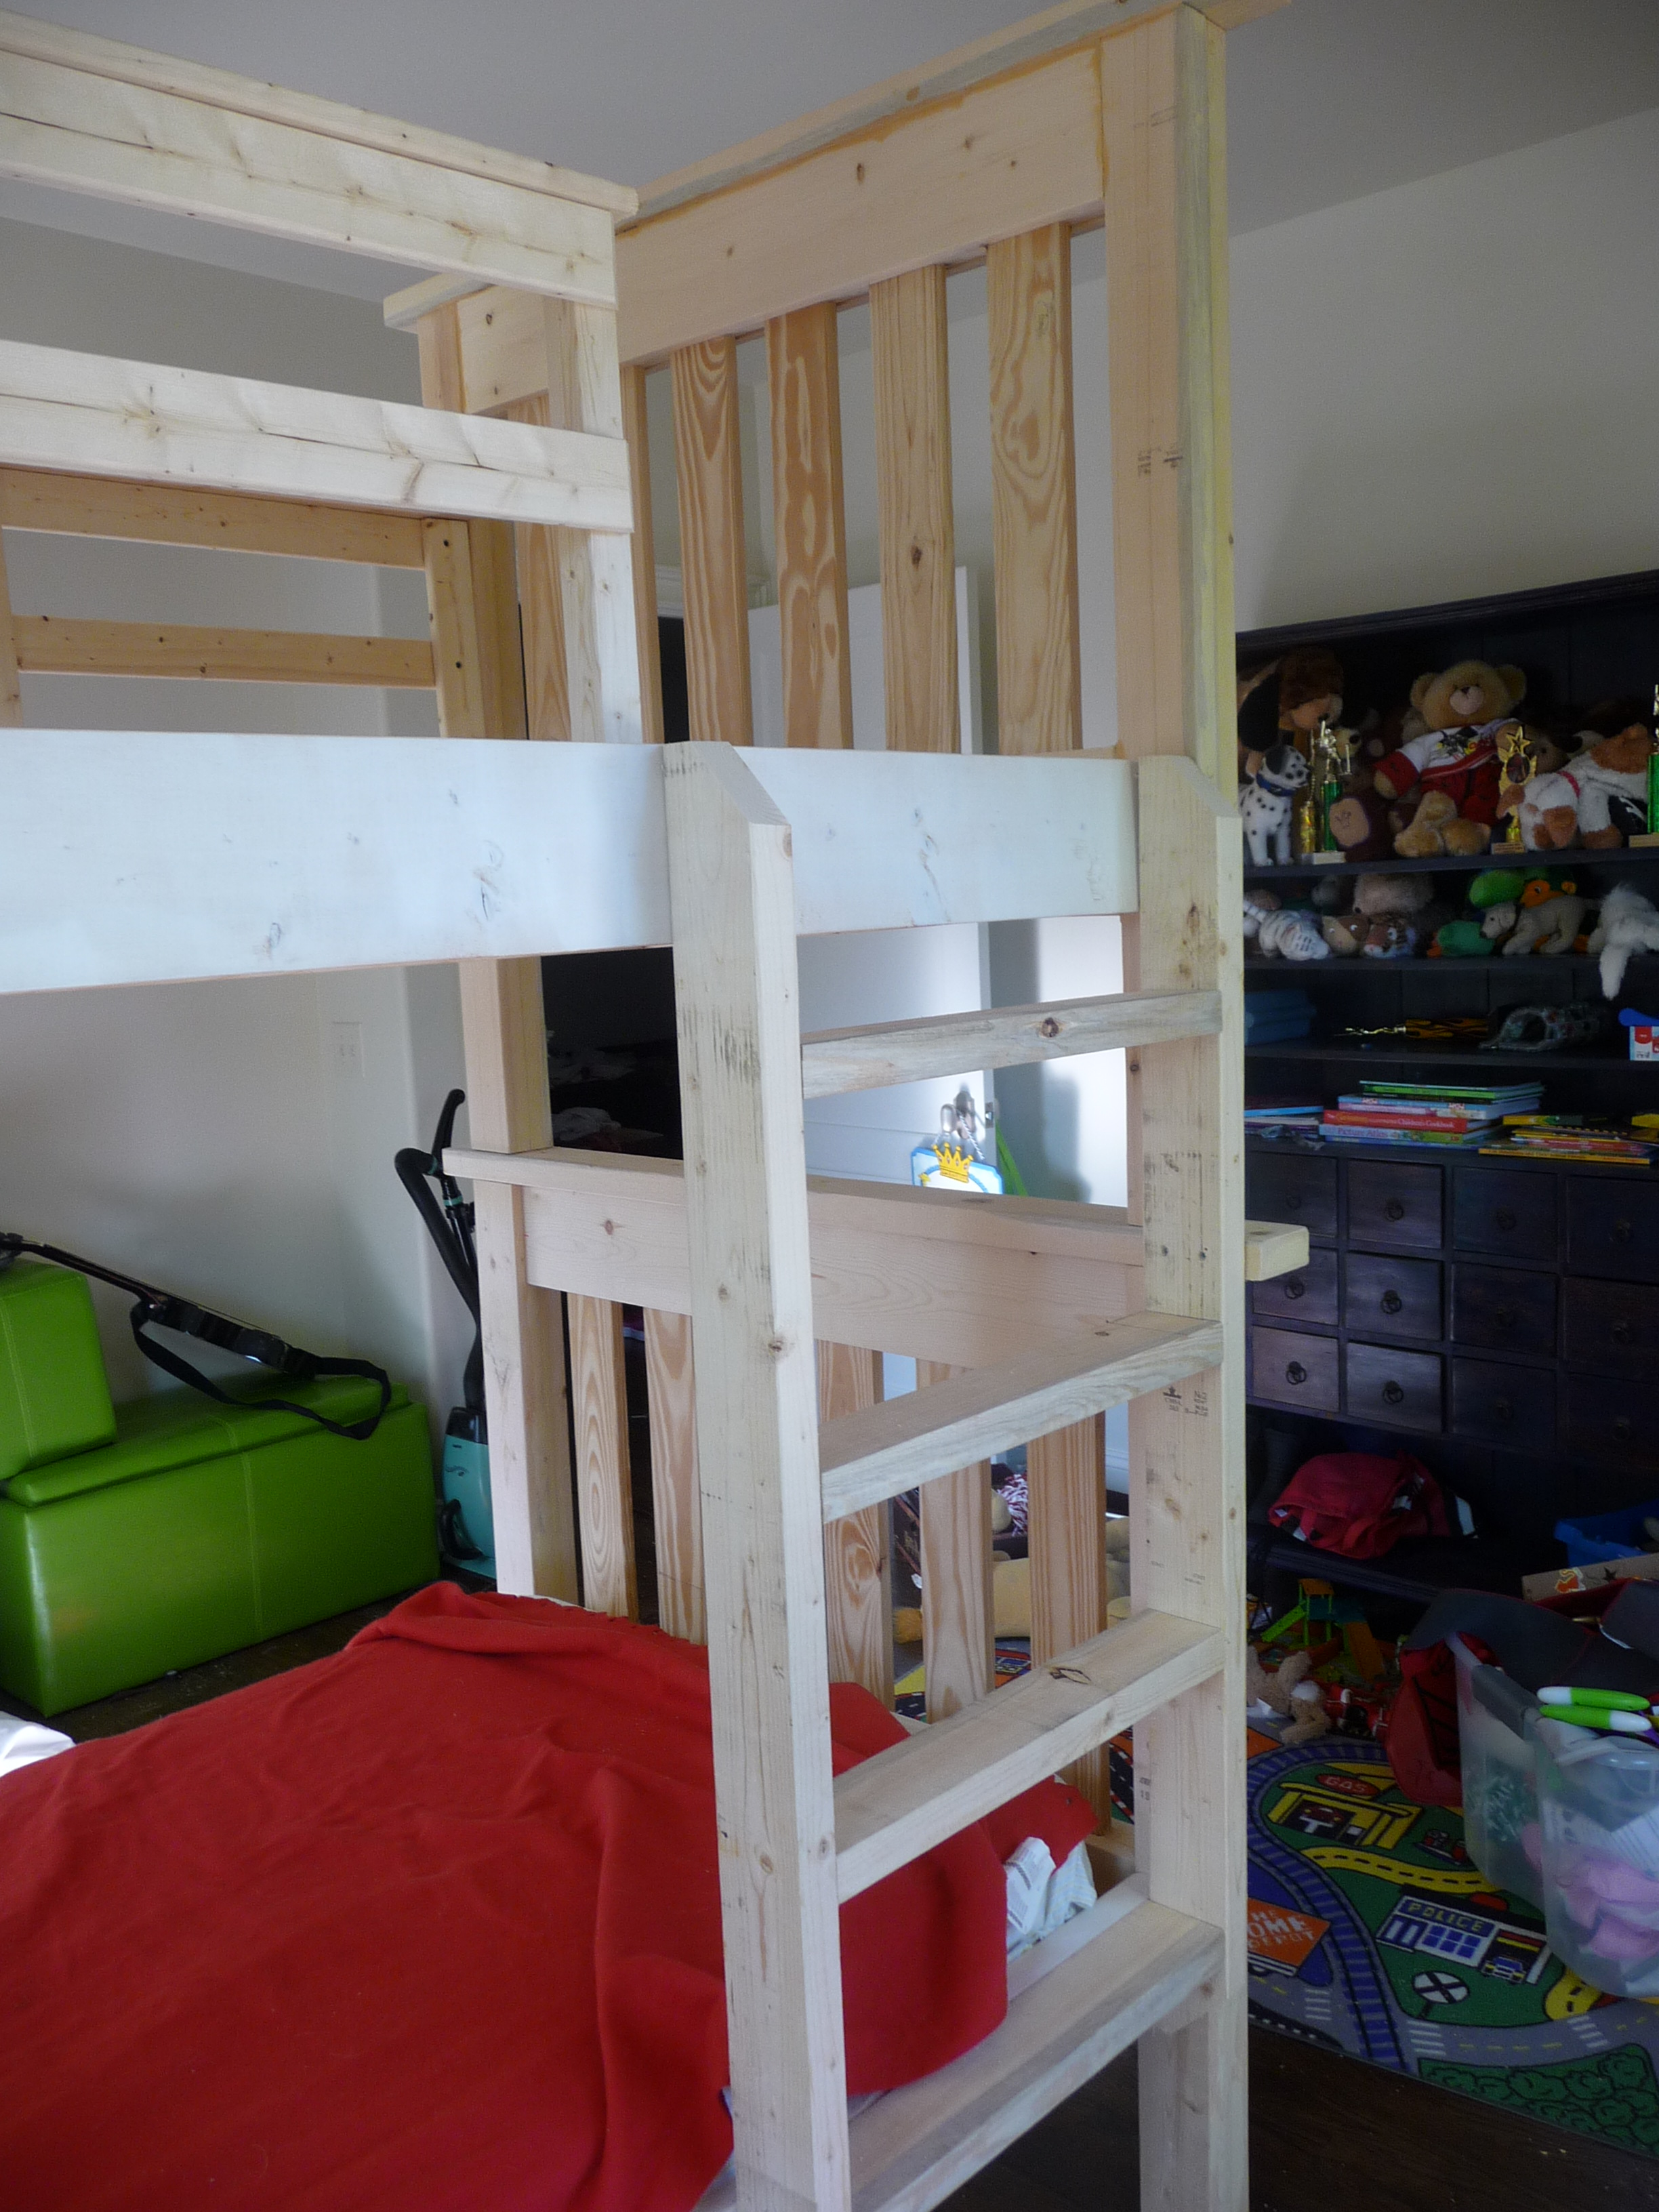
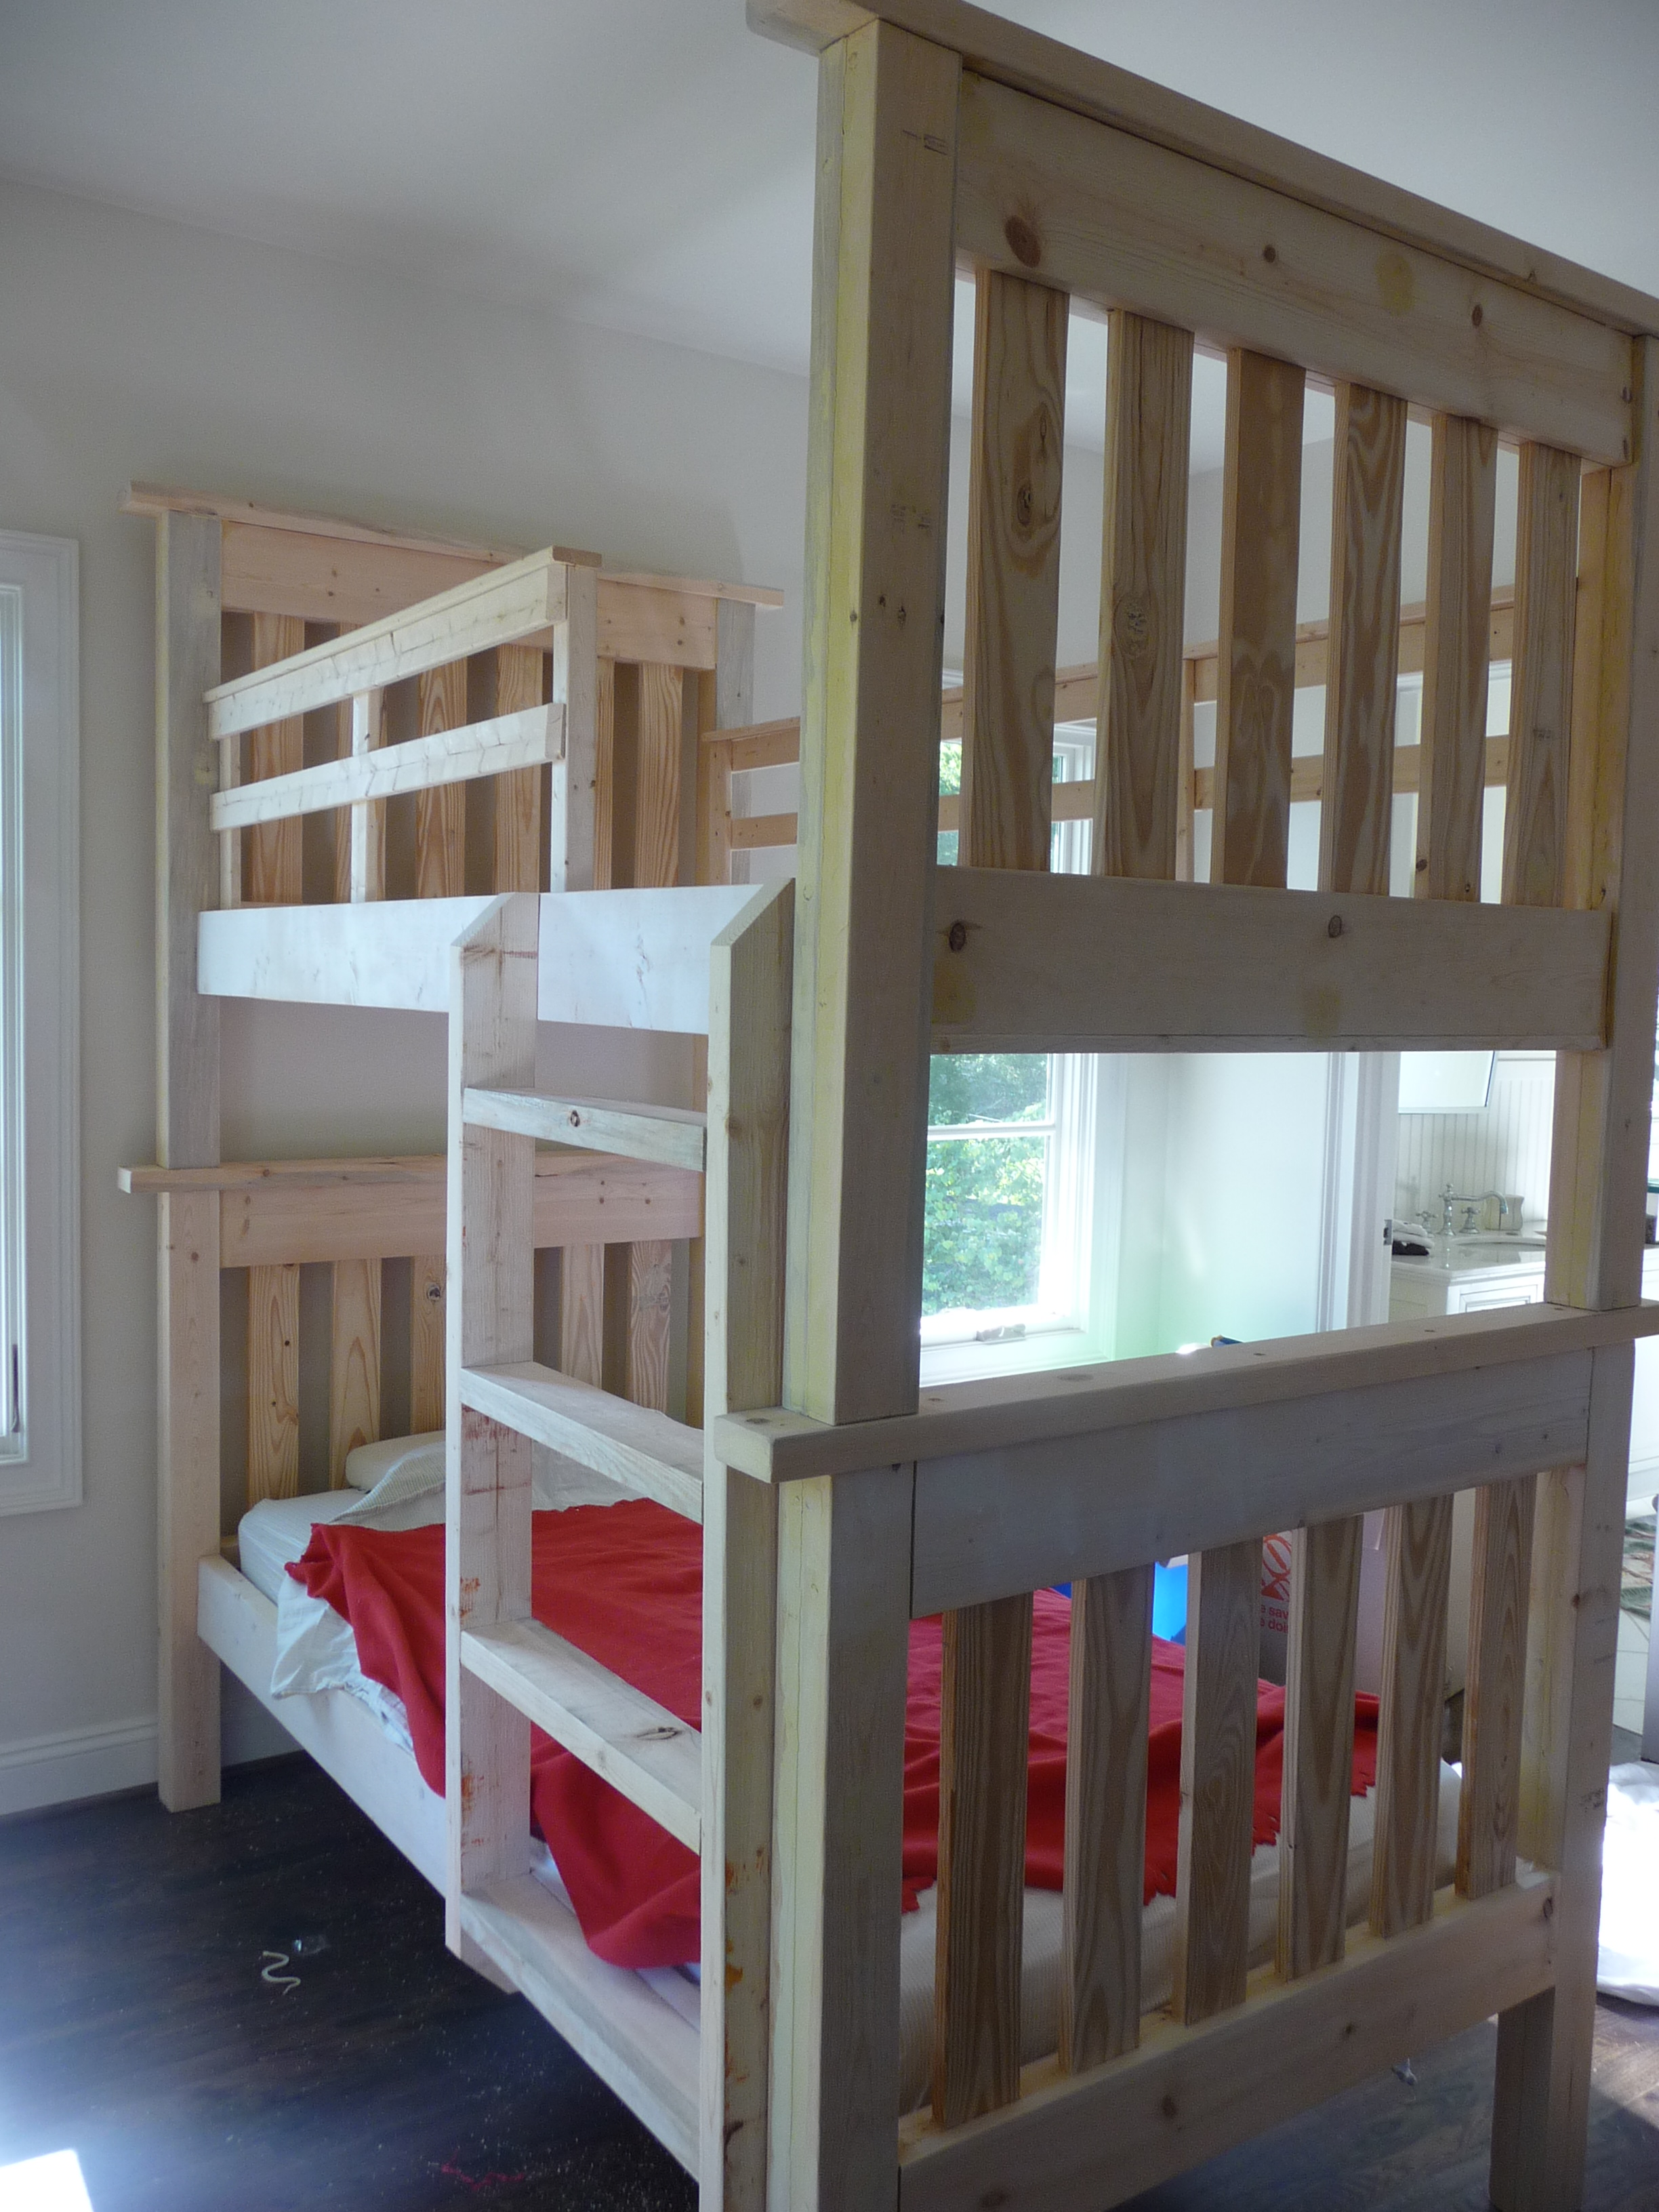
I made the bunk beds from the simple bed plan, following tips from others who turned them into bunks. Instead of headboards on bottom and footboards on top, I used all headboards to add height, and made the posts a little longer so that an adult can sit up on the bottom bunk to read during bedtime. (the room has 9' ceilings) I used 2x4s glued and screwed together, as I could not find 4x4 non-pt posts. I made the ladder out of scrap 2x4s and the railings from scrap 1x3s. I did as suggested and attached the bottom header to the bottom of the top bed, which made it easy to attach. This bed is super sturdy! It will be painted one of these days!!

Estimated Cost
$200
Estimated Time Investment
Weekend Project (10-20 Hours)
Finish Used
None yet - will be painted!
Recommended Skill Level
Intermediate

8 foot long shelf with a little twist

Submitted by Daniel_ram on Mon, 01/03/2022 - 17:25

I just made this shelf using 2x4s 8 ft long wood. It is very strong and looks great. My garage size required the shelf to be max 16 in deep, so I used a 1 plywood sheet divided by 3 equal parts for the upper 3 shelfs. Since I made a 4th shelf, I used 3 1x2s for the 4th bottom shelf instead of a new plywood sheet and avoided having extra 2/3 of the sheet around and also saved like 30$ since the 2x1s were only 2$ea. That touch makes it look a bit stylish too so a win win. If you do that, here's a tip: use the outer 2x4s as rails - make sure that the cleats on the lower shelf are placed a bit lower ~ 1in. In such way, you can place the three 1x2 rails at the same level as the outer 2x4s and this you end up having 5 rails total in the shelf. Do use the wooden screws with star head if you can, they were muuuuuch easier to use compared with the regular ones. Note, this shelf is very strong, probably too strong for my needs. For a 8ft long, and my storage needs (camping, Christmas stuff, other lighter things), I'd probably use 2x2s instead of 2x4s. That would save costs, specially since wood isn't cheap these days( I spent ~$150 in materials Jan 2022).

Comments

A-Frame Chicken Tractor

Submitted by Tonya P on Tue, 07/09/2013 - 19:46

New to raising chickens, but eager to jump right in to it.
We bought a pre-made coop for the main home for our new chicks and it's very nice, not something I could do myself since I'm not yet at that level, but I saw this chicken tractor and thought it would come in handy for what I have in mind so I made up my mind to build it.
The lumber, chicken wire, staples, and wheels are all store bought new and came to about $75. The materials we had on hand were the screws, hinges, plastic coated metal shelving (used in the nesting area, I thought that would make it easy to clean), paint, and the corner piece of vinyl siding for the roof cap (hubby's brilliant idea, and I painted it green with spray paint for vinyl).
I did not try to build it quickly, I don't really know how much time it took me, but if I had to guess I'd guess total time would amount to about 3 afternoons, by myself.
I wanted to leave the top on the one side open with the option to slap on the other boards if/when the need arises. I have the other t1-11 panels that can sit right in those areas because I stapled the chicken wire in a way that would allow it.
I also added a flip up panel as seen in the pictures for access. I didn't want a small door that I would have a hard time getting to things in there. I'm so glad I added this feature, it sure gives plenty of room for me to maintain the food and water dispensers as well as get in there and catch the little chickies :)
I wanted it green to blend into the wooded background in our backyard. I didn't want to take any beauty away from the cedar greenhouse and fencing we added last year, and this tractor would be moved from time to time and I felt this green that we had on hand was perfect to help it blend in rather than stand out.
This thing is heavy! I have a hard time moving it around and usually need my husband to move it so I won't hurt myself. I am considering some options... I don't like the rope I have on it to pull it, any suggestions would be appreciated.
As with the other items I've made with Ana's plans, this was fun and pretty easy to make. I love this site! Soon I will take on my next project, I've bought and gathered the materials, I'm anxious to get started :)
Thank you for looking :)

Built from Plan(s)
Estimated Cost
$75 - $85 for the new materials listed
Estimated Time Investment
Weekend Project (10-20 Hours)
Finish Used
Green exterior paint we had on hand.
Recommended Skill Level
Intermediate

Sturdy Workbench Modified

Submitted by Seth on Sat, 07/13/2013 - 21:55

This is a modified version of the sturdy workbench. I made it six feet long, about three feet wide (I can't remember exactly), and 36'' high. Since I'm 6'2'', I needed a bench that didn't keep me constantly bending over.

I used Douglas Fir framing lumber and 3/4'' plywood for the surface. The plywood was a cheap replaceable option since hardwood is extremely expensive in my area. The wood warped a bit after I built it, so its clearly not perfect. But who cares, its a workbench after all...

I used left over paint / stain I had laying around in the garage. The gray is a custom mix interior paint, and the stain is Minwax Golden Oak. I used 1 coat of stain, and three coats of Poly.

Built from Plan(s)
Estimated Cost
$100
Estimated Time Investment
Afternoon Project (3-6 Hours)
Finish Used
Minwax golden oak 1x, conditioner 1x, and poly 3x.
Recommended Skill Level
Starter Project

Comments

Simple Bookshelf

Submitted by binah06 on Thu, 05/26/2011 - 18:47

Came together pretty easily. Took about half a day.

Built from Plan(s)
Estimated Cost
$20 for wood, $20 for screws, nails, sandpaper and stain
Estimated Time Investment
Afternoon Project (3-6 Hours)
Finish Used
Minwax stain in Provincial. Tung oil as a finish. Might put a better finish on later.
Recommended Skill Level
Starter Project

Play fort and Swing Set

Submitted by gsnpbc on Fri, 03/16/2018 - 20:33

I wanted to build a structure for the kids to play in and on. I used the playhouse deck design and made it 8 feet by 8 feet. The "roof" is removable to provide shade when it's sunny. It's just 2x2 and a tarp - pretty simple, but it does the job. I used treated posts, dog eared fence boards andlots of screws. I stained and built the walls in my garage before assembling it. Once all of the wood at been stained, it came together pretty quickly with the grandkids help...Lol


Estimated Cost
$350
Estimated Time Investment
Weekend Project (10-20 Hours)
Recommended Skill Level
Intermediate

Comments

Twin over Full with Trundle, storage stairs

This project took a week to build.  Working during my boys' nap time and late nights, I was able to complete everything in about 7 days.  I used cedar, and sealed with Cabots Bleaching Oil.  The cost of wood for the beds and stairs and drawers came to about $700.  The extra cost came from the additional side rails on the top bunk and the stairs and drawers.  Still comes in about $500 less than if bought commercially.  The famiy loves the bed and as my kids are 2 and 3, I expect to get many years out of the bunk bed.  Side note:  I had to add quite a few brackets and angle joists to secure and minimize wobble due to the additional weight of the top bunk.  (2 2x4s from the 4x4 to the side of the cleat and side rail of the bottom bunk, on the back side only, made a world of difference)

Estimated Cost
$700
Estimated Time Investment
Week Long Project (20 Hours or More)
Finish Used
Cabots Bleaching Oil
Recommended Skill Level
Intermediate

Comments

Ms.Bungalungalow

Mon, 12/11/2017 - 14:28

Hey there, I absolutely love your bed. The $700 scares me a little but i will not be using cedar. I will be doing everything else just like you. Thanks for sharing.


Octagon Picnic Table

Submitted by Anonymous (not verified) on Thu, 05/26/2022 - 18:07

Just completed the Octagon picnic table. I added a couple of features to mine, namely a center hole for an umbrella and support blocks around the center point under the table to lock in the umbrella post on the lower base. Finished it in time to have lunch AND dinner on it today. This took from Monday through Thursday morning for me, but some of that time was me waiting for supplies along the way. In reality, I think this can be built in one day, with paint/stain curing overnight and final set up on the morning of day two.

Comments

Bathroom Storage Cabinet

I built this cabinet to store magazines and diapers (towels when the time comes) in the small 1/2 bath.

The top was made with left over oak pieces from when I ripped out the carpet and 2x12 stairs and replaced with oak treads.

Estimated Cost
$20 (already had the treads)
Estimated Time Investment
An Hour or Two (0-2 Hours)
Finish Used
jacobean stain on top, pale sandy beige paint with jacobean stain used as glaze on body.
Recommended Skill Level
Beginner

Comments

Debi G

Wed, 07/27/2011 - 11:15

I just created something similar. The way the top and body coordinate, and how the top cubbies are sized make this a stand-out.
Something similar would work for my classroom, too.

Folding (or not) Plant Stand

Submitted by Beth H on Sat, 08/31/2013 - 14:28

This was the most complicated project I've built yet, and of course I had a few problems. First, I drilled some holes in the wrong places, and things didn't line up. So i drilled them again. Then I had trouble with holding everything level without a helper. When it came time for the plant stand to stand ip, it wouldn't.

No worries. I screwed a couple of short boards underneath the top rack and made it a Stationary Plant Stand!

The thing is really cute and everyone asks me where I got it. I tell them I made it myself from Ana White plans. They never notice the extra holes in the legs or wonder why I can't fold it up and store it!

Built from Plan(s)
Estimated Time Investment
Day Project (6-9 Hours)
Finish Used
Spray paint with primer
Recommended Skill Level
Beginner

Mailbox Base

Submitted by TxDork76 on Wed, 11/14/2018 - 20:27

my mailbox was hit by a vehicle so I decided I wanted to do something creative/different but also didn't want to spend much money as it may just get taken out again in the future :)

this is a good project to get kids to help you with

instead of cutting into the concrete easement, I installed 2 post bases & locked them with sleeve anchors.  They're sturdy enough but will give if hit again.  drilling the holes for the sleeve anchors was the hardest part of the project.

I used a left over 4x4x8 for the posts, scrap 1x4s, 1x2s up the sides (1/2" gap between boards), and a 2x4 scrap to attach the mailbox.  I eyeballed the width between posts using the mailbox itself. I left over stain from another project (almost bought a quart of oops paint at HD)

I figure the total cost would have been about $100

It's a super easy project that took about 4hrs. I've already had a couple of neighbors come by to take measurements to try something similar.

FYI: USPS guildlines for installing a curbside mailbox: https://www.usps.com/manage/mailboxes.htm

Estimated Cost
$75-$100 depending on materials/tools on hand.
Estimated Time Investment
Afternoon Project (3-6 Hours)
Finish Used
valspar semi-transparent stain & sealer in "Pinebark"
Recommended Skill Level
Beginner

2x4 Modern Adirondack Chairs

Submitted by Anonymous (not verified) on Fri, 08/12/2022 - 09:48

These chairs were a perfect addition to the front porch and so comfy!

Comments

Barnwood frame as a vanity mirror

Submitted by Lady Goats on Thu, 08/11/2011 - 10:59

I was watching the DIY network while my neighbor was over one day, and got a hair up my butt to take the builder grade mirror down from my hall bath. I had just gotten a $50 Lowe's gift card for my birthday, so I decided to do a mini bathroom makeover. I had NO plans and no clue what I wanted in there, but the mirror was down so I needed to get GOIN!

I saw the plan for the Barnwood Frame and altered it to use 1x3s as well as 1x2s, and (obviously) made it bigger. I also built a medicine cabinet from 1x6s.

The biggest issue with this whole thing was cutting the mirror to size. I had never done anything like this, so my medicine cabinet mirror is about 1/8" too small for the frame (hid that by using DUCT TAPE on the inside!).

I still plan on building a vanity and changing out the sink in there, but that has to wait until I have the motivation to redo the floors!

Yeah, me and motivation aren't very close...

Estimated Time Investment
An Hour or Two (0-2 Hours)
Finish Used
I DON'T REMEMBER! But this paint color is so sexy, I DEFINITELY have to find it!
Recommended Skill Level
Beginner

Triple Bunk Bed

I took the “classic bunk bed” plans and changed them to accommodate my 3 girls. I have 9 ft ceilings so I just stretched the traditional plans out to allow the 3rd bunk to be added. It turned out nice and my girls enjoy it. I also built a matching toy box that is visible in one of the pictures. Please excuse my messy shop. I built this with my 40 year old shopsmith and a kreg jig. Thank you for the plan.

Built from Plan(s)
Estimated Cost
$300 +-
Estimated Time Investment
Weekend Project (10-20 Hours)
Finish Used
Golden oak stain and lots of poly.
Recommended Skill Level
Beginner

Style Wood Slat Closet System with Galvanized Pipes

Submitted by Anonymous (not verified) on Fri, 01/04/2019 - 06:28

Our 19 year old daughter moved back in with us and we had to put her in our den. This room doesn't have a door or closet. The closet system was priority one. She has a ton of clothes. We followed your plans to the letter, but didn't add the shelving in the middle. She wanted a space to put her dirty clothes basket. This was the perfect solution and super inexpensive and easy to make. 

Built from Plan(s)
Estimated Cost
$100
Estimated Time Investment
Weekend Project (10-20 Hours)
Finish Used
Minwax ebony stain. We just put it on and immediately wiped it off. We wanted it dark but not super black.
Recommended Skill Level
Beginner

Comments

Adirondack Chair

Submitted by Anonymous (not verified) on Sun, 10/02/2022 - 20:11

Had so much fun with my first woodworking project and obsessed with the grey/black stain!

Comments

4x4 Truss Beam Table and Bench

Submitted by Anonymous (not verified) on Fri, 10/21/2022 - 10:43

I built the 4x4 Truss Beam table and bench and followed Ana White's instructions along with Shanty2Chic.

Instructions and design were easy to follow and was a lot of fun to create.

Comments

Reading Nook turned Tent!

I made this for my boy who's turning four tomorrow! (Sep 1st) He loves building forts and I don't mind rearranging the furniture, but set up and clean up is so time consuming, we'd both rather spend more time playing. This is an indoor tent, but I took it outside for pictures. Aside from the obvious difference of adding doors and a back, the changes I made from the original plans are: using an 8 foot 1x3 so the tent is 4 feet deep instead of 3. Instead of stapling the fabric on the 1x3s at the bottom, I wrapped the fabric around and used velcro so I could remove it for washing. I sewed a tube of fabric and attached it at the top to make removal easier. Time Investment is so long because of the sewing involved for the tent. If you have an Ikea near you, they've got this stuff called glaze paint (more of a stain, I think) in all different colors - it doesn't need a top coat (unless you want it shiny), it's solvent free and, are you ready? $6 for 12.something ounces, MORE than enough for this project. To make it even easier if you're using fabric instead of curtains like me and you've got the room, cut a 8ft 1x3 in half so you've got two 4ft pieces. Most quilting cotton at fabric stores is 44-45 inches wide selvedge to selvedge (the ends that don't fray) and if you follow the plan according to where to drill for the top bolt, you'll need 4-4.25 yards of fabric, depending on whether you are going to use velcro or staple. I would use 4.25 if using velcro, the fabric can go right over the top bar and over the other side if you don't want to sew a tube like I did. If you don't want to sew at all, use iron-on hem tape on the cut edges and iron on velcro. Make sure of placement of the velcro before ironing on. More pictures on my blog =)

Built from Plan(s)
Estimated Cost
$50 - wood, bolts, stain, material for tent (everything)
Estimated Time Investment
Weekend Project (10-20 Hours)
Finish Used
Green Ikea glaze paint
Recommended Skill Level
Intermediate

Comments

Modified farmhouse bed - my first time building anything ever!

Submitted by brittanie on Wed, 09/07/2011 - 13:06

Got a new (and larger, King sized) mattress this summer, and wanted to have a real bed/headboard for the 1st time ever instead of just using one of those metal frames. Looked online for awhile, and somehow stumbled on this site - and so so glad I did, it saved me tons of $$! I really liked the farmhouse beds from PB, so decided to modify the plans from here to look more like that one - with a solid headboard and footboard (I used plywood for it).

It took me a long time to finish because I did all the sanding by hand, and used a hand saw to make cuts that I didn't get done when I bought the wood (the only power tool I own is a drill - and prior to this I'd only ever used it for drilling to hang shelves on the wall).

I've definitely got the building bug now, and have so many ideas for other projects I want to tackle. Thank you so much for this site and all the inspiration! Even though its not absolutely perfect, I absolutely love my new bed!

Estimated Cost
600-700
Estimated Time Investment
Week Long Project (20 Hours or More)
Finish Used
I used 1 coat of General Finishes water based stain in Rosewood, and then 4 coats of their water based poly, sanding in between each with 320 grit.
Recommended Skill Level
Beginner

Comments

stcarroll

Thu, 09/08/2011 - 07:03

You should be very proud of this piece, it looks wonderful! Very nice work with the hand saw and sanding, you worked hard and it shows!

Lora (not verified)

Thu, 09/08/2011 - 11:46

I have been thinking about this project for some time. You should be proud this is a great bed.

Kitchen Cabinet

Submitted by rjustice21 on Thu, 09/26/2013 - 09:18

My wife and I needed space in our kitchen to store various items. This cabinet works perfectly for that purpose.

Built from Plan(s)
Estimated Cost
$100
Estimated Time Investment
Weekend Project (10-20 Hours)
Finish Used
Dark Red paint. I am not sure of the name.
Recommended Skill Level
Beginner

Comments

mybartmart

Fri, 09/27/2013 - 21:17

That paint colour is beautiful. As is the pantry, very well done. I wish you could find out the name and brand of the colour. It is stunning.

mybartmart

Fri, 09/27/2013 - 21:17

That paint colour is beautiful. As is the pantry, very well done. I wish you could find out the name and brand of the colour. It is stunning.