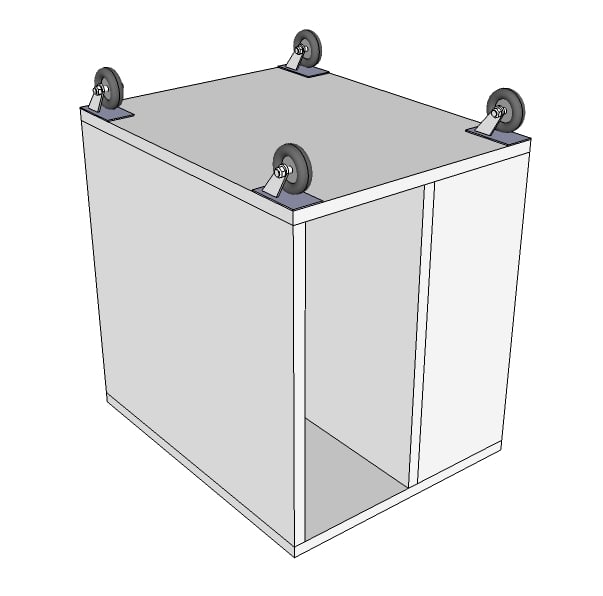
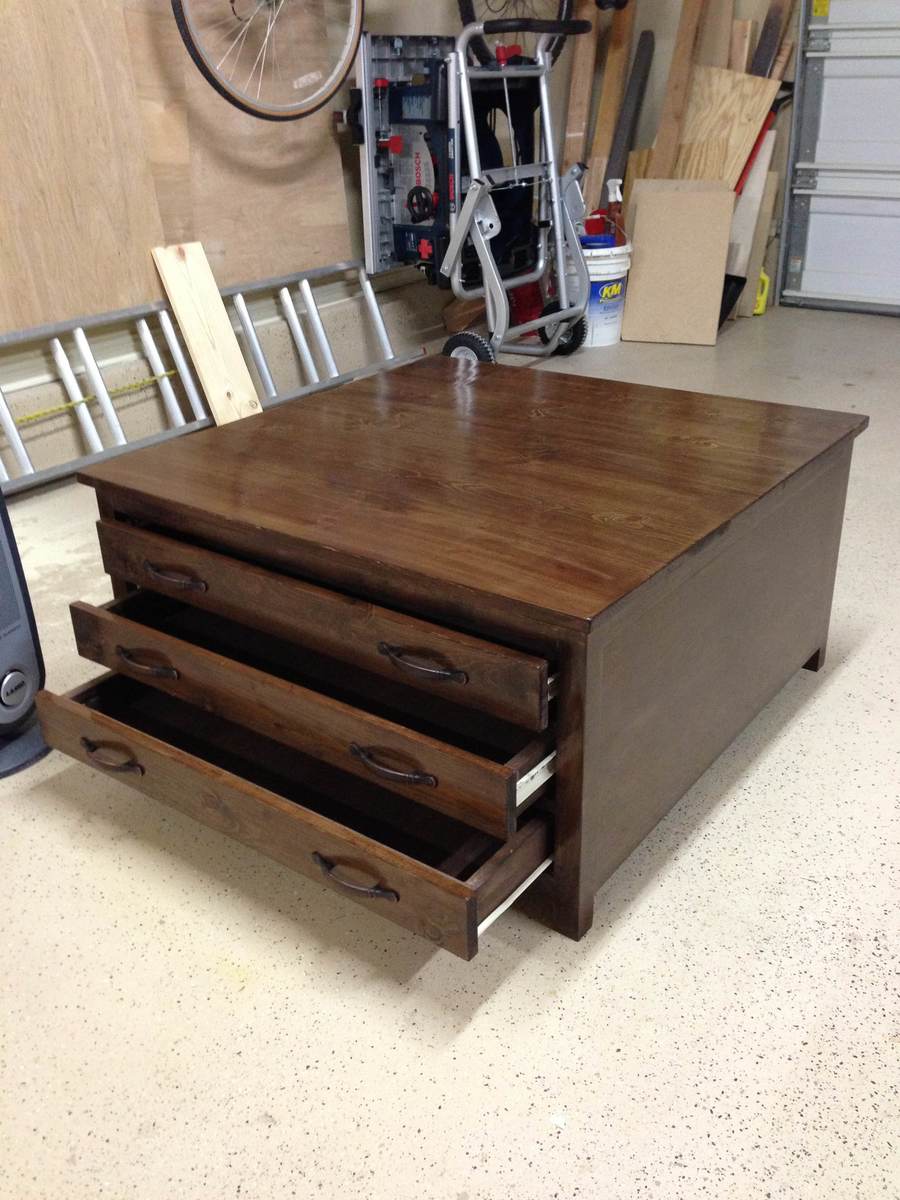
Community Brag Posts

Rollaway Workbench

Submitted by Indiri on Sat, 10/17/2020 - 18:26

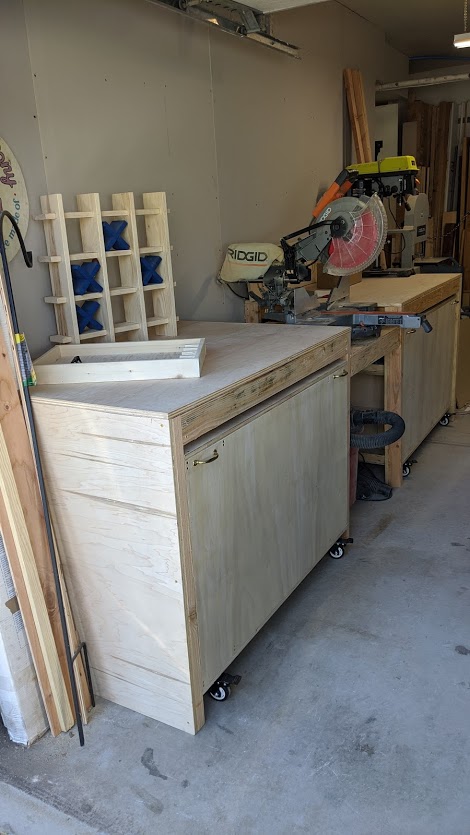
I have a one car garage for my "shop" which means I can be really short on space. This build is perfect for saving space!

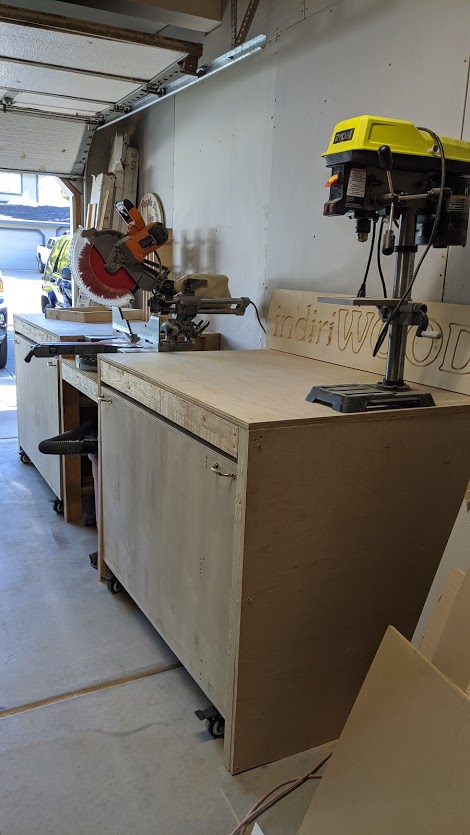
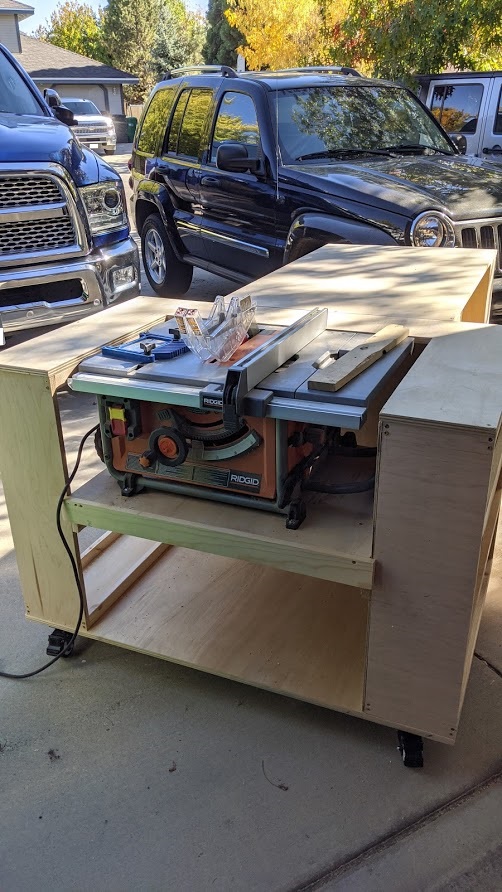
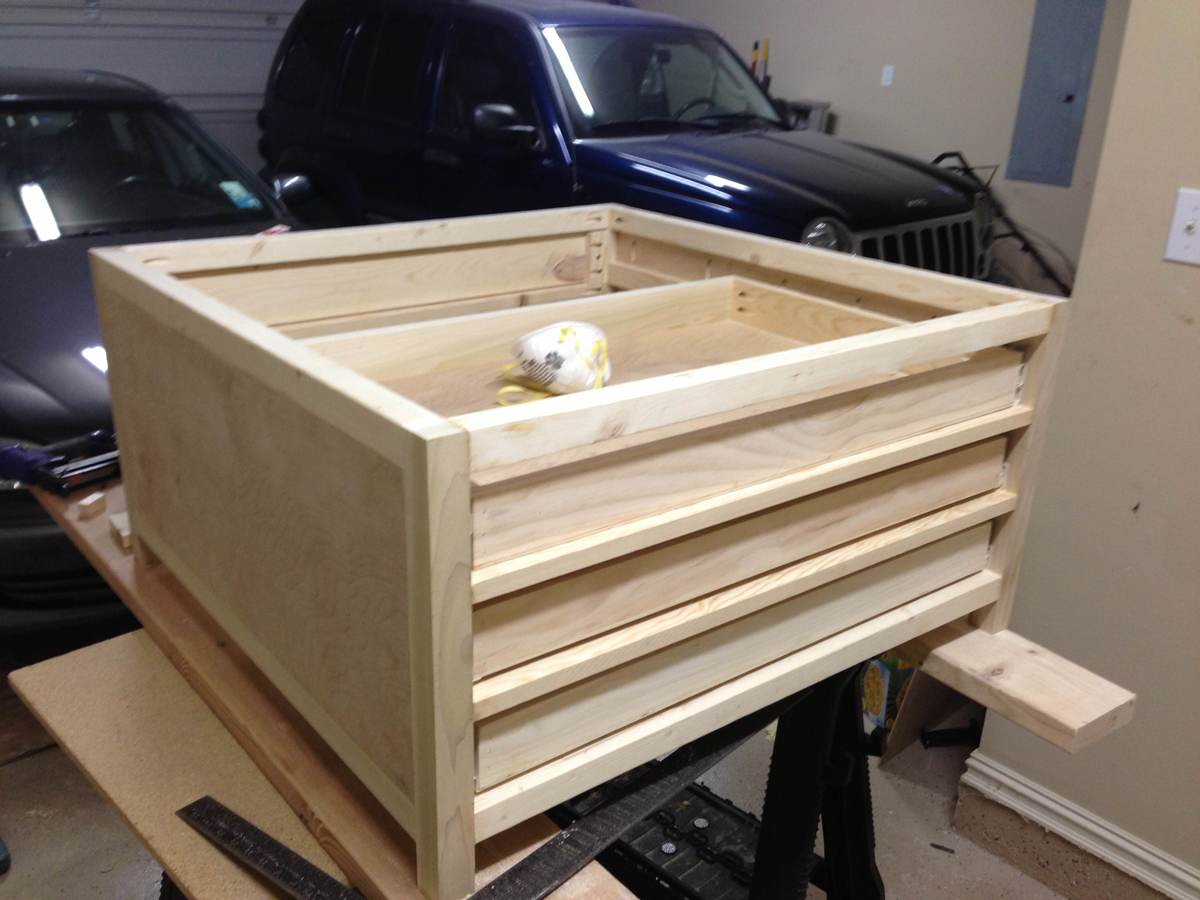
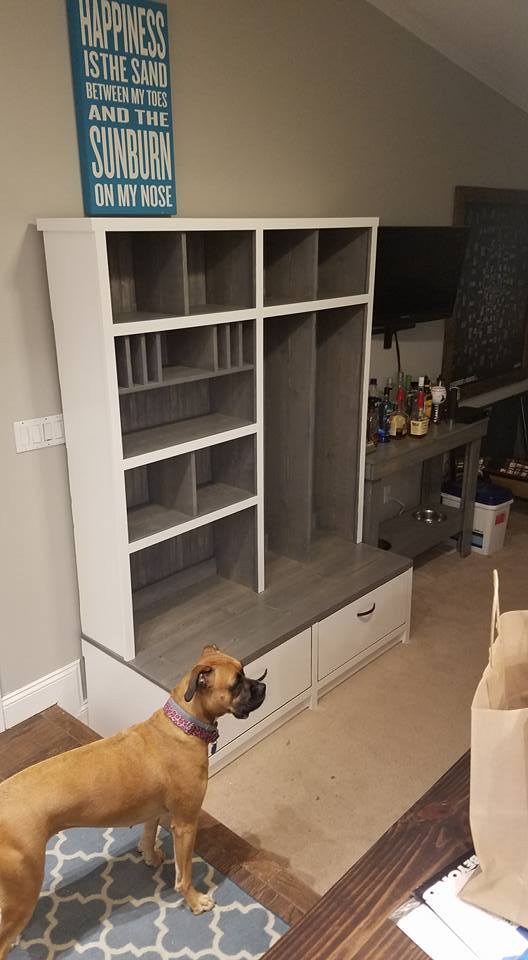
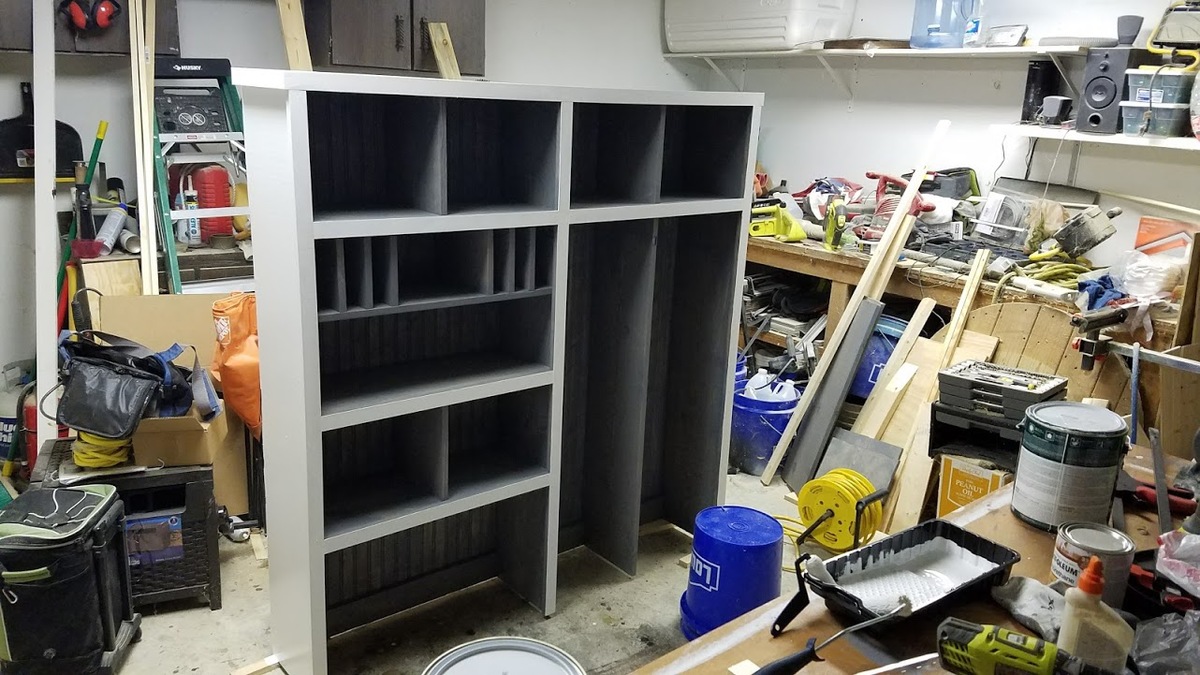
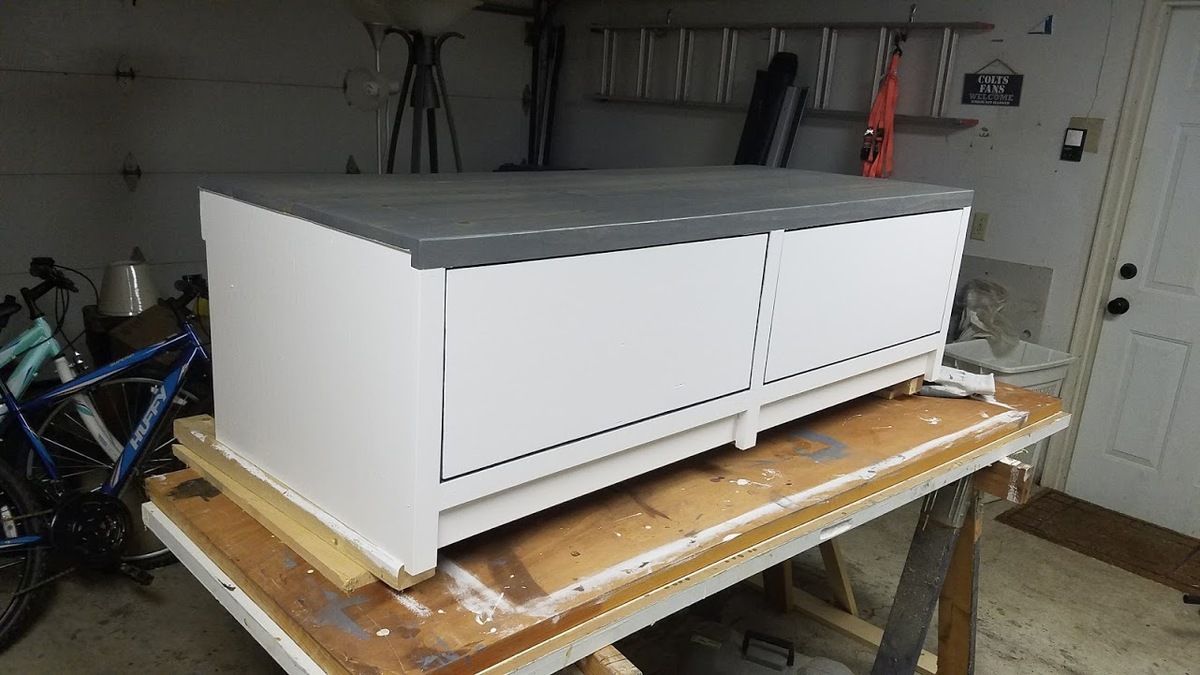
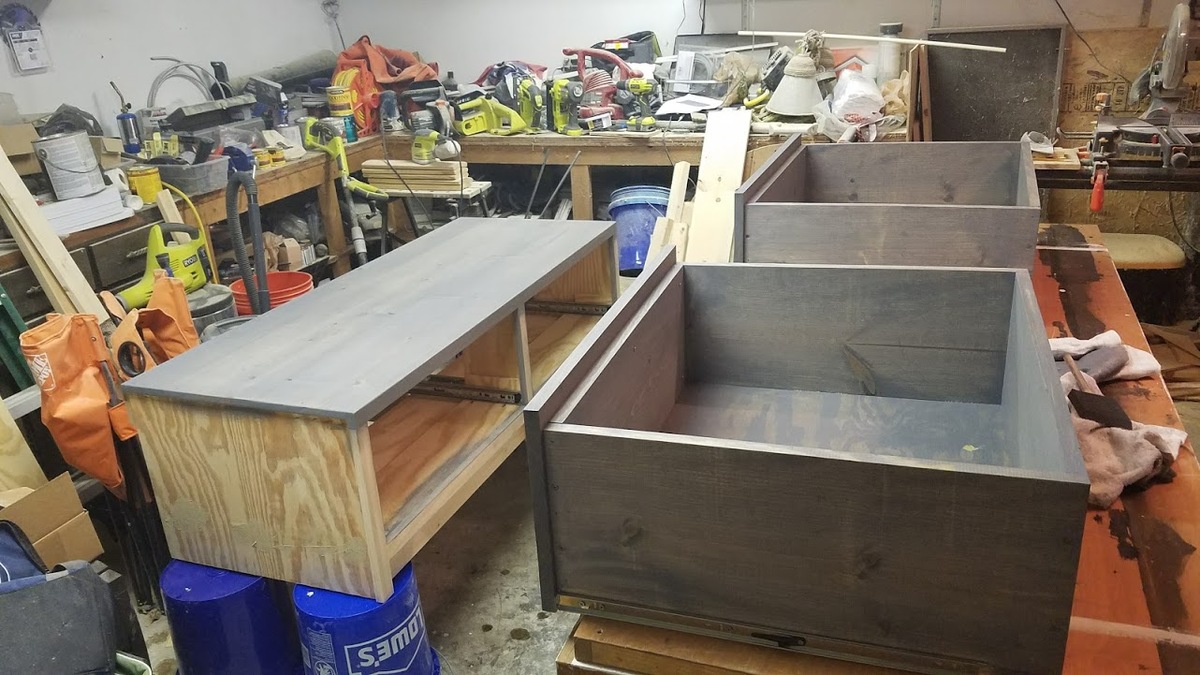
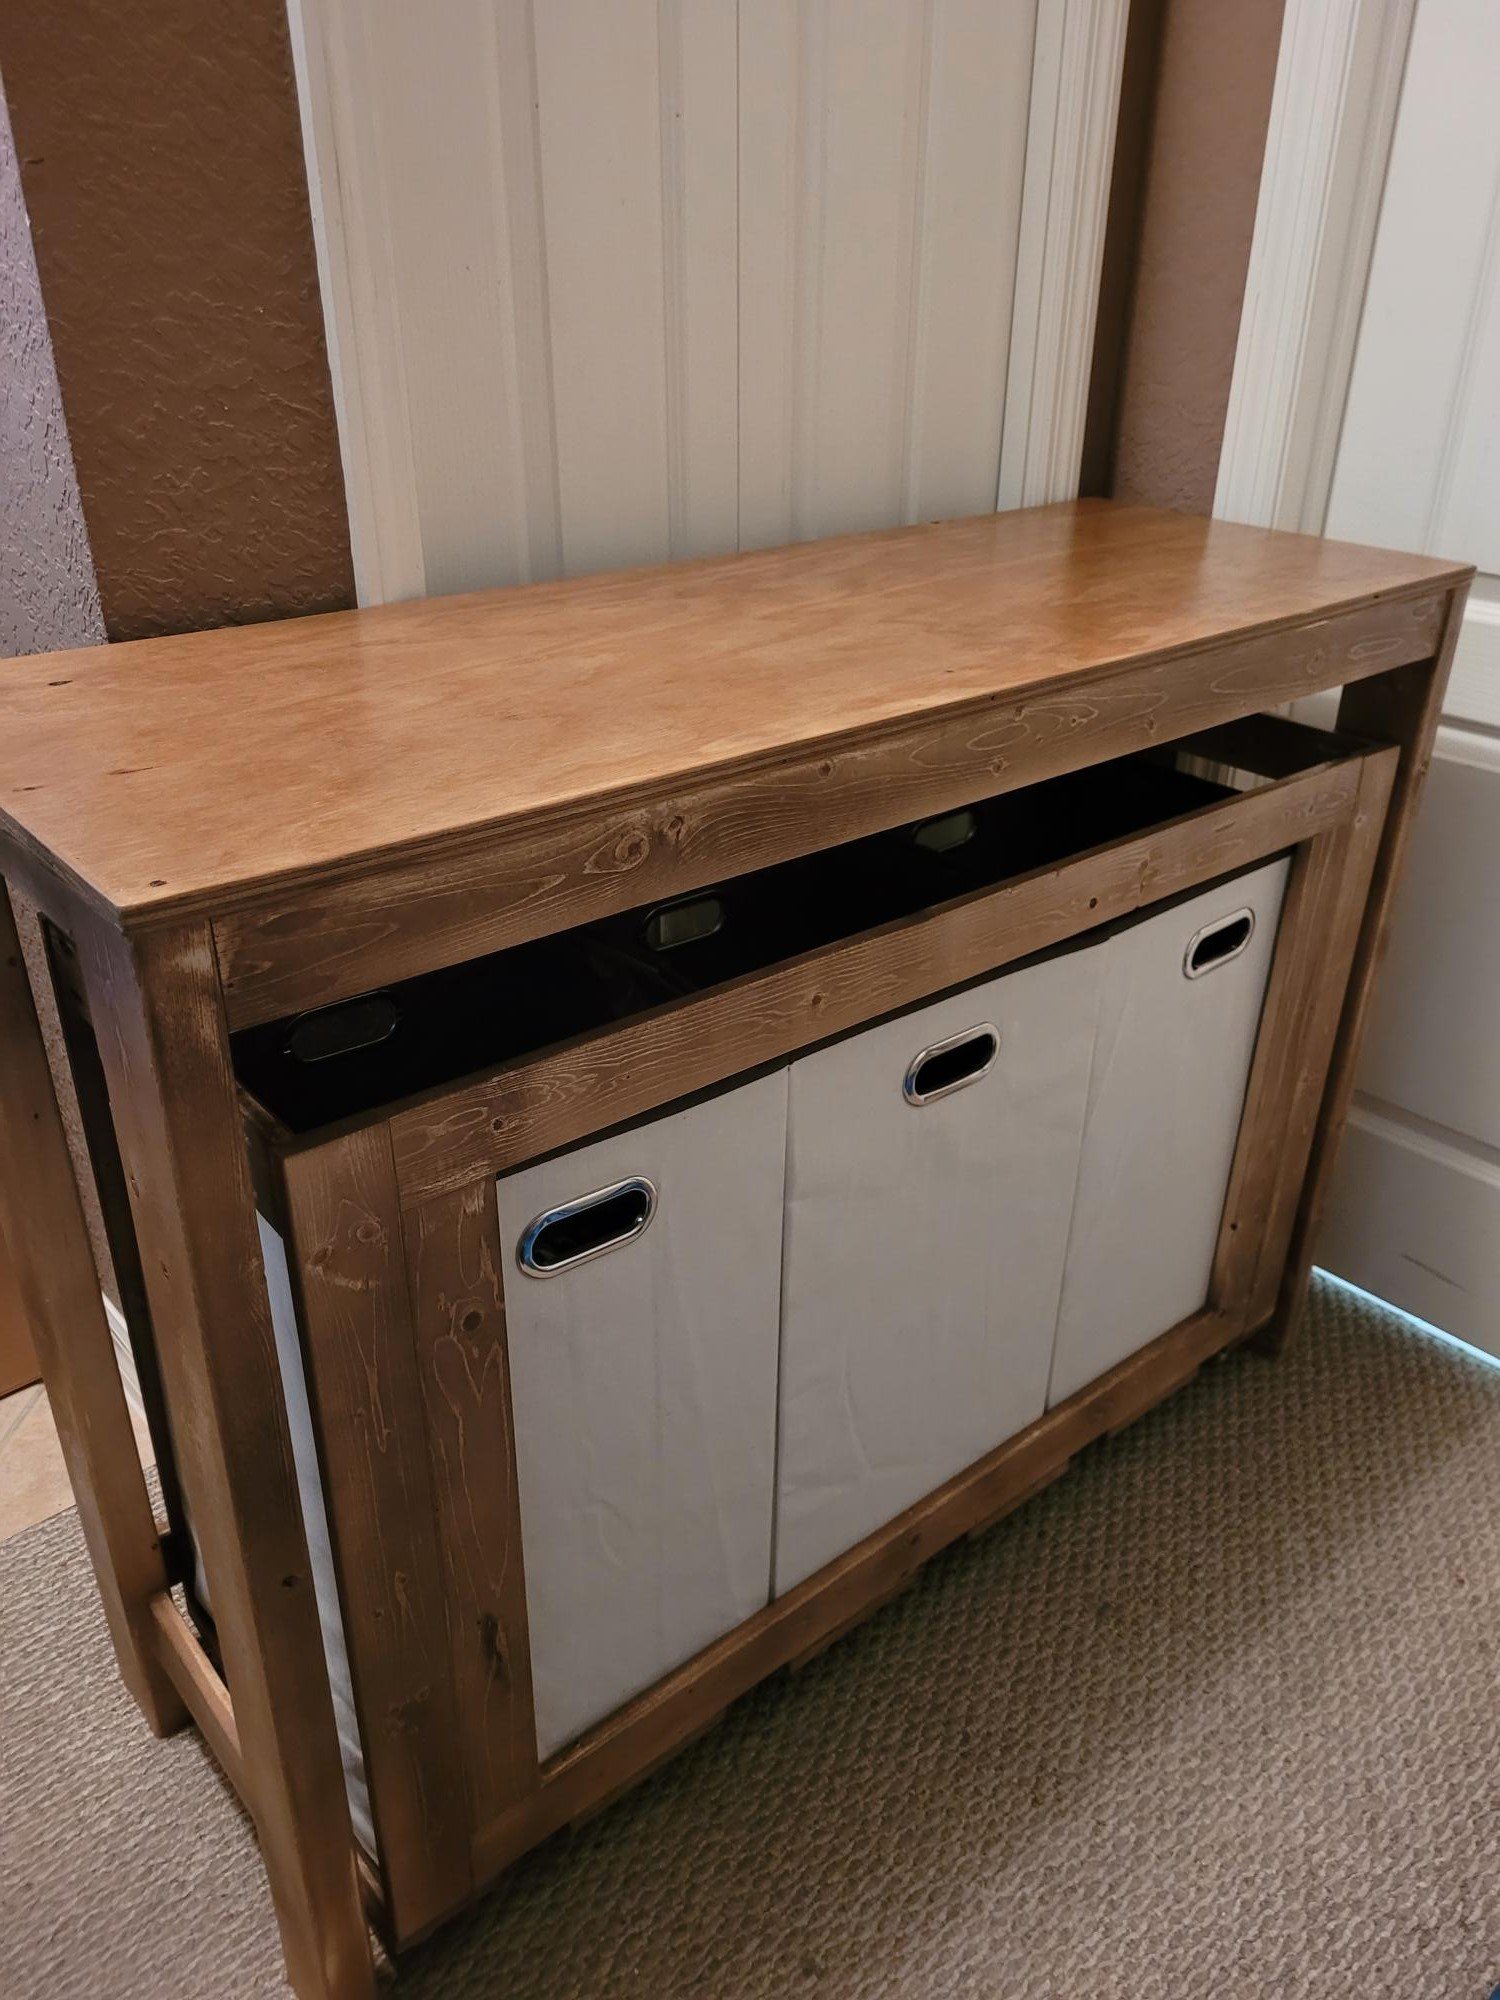
I made a few adjustments for the bigger saws (it's deeper and the center part is wider). I also used screws more in places that it called for nails but I wanted to be sure nothing would budge and also I didn't put the shelf backing on the one part where the table saw is in so I have better access to the saw while it's in place. I tried to use leftover wood I had in the garage wherever possible but I still had to buy 2 sheets of 3/4" and 1 sheet of 1/4".

Since I used more screws I may pretty up the front later with trim, I don't know. TBD

Estimated Cost
$150 because I used a lot of leftover wood
Estimated Time Investment
Weekend Project (10-20 Hours)
Finish Used
None
Recommended Skill Level
Beginner

Comments

Cabin Bunk for my 5yo son

Submitted by SDPerkins on Wed, 01/02/2013 - 12:27

My first Ana-White plan project. We are pleased with the plans and result. only made a few minor changes.

Estimated Cost
375
Estimated Time Investment
Week Long Project (20 Hours or More)
Finish Used
Kona stain/sealer
Recommended Skill Level
Intermediate

Comments

Labine37

Tue, 03/31/2015 - 09:01

I'm making the top bunk right now, I was wondering which plan you used for the ladder?

Thanks

My $55 Live Edge Desk

Submitted by jrbamberg on Tue, 10/21/2014 - 11:22

Built using the plan except for removing the back angle supports and creating a top that resembles a live edge look.  Most of the build is done with pocket hole screws, glue and nails. 

Built from Plan(s)
Estimated Cost
I had most of the wood except for the 1x12's which cost around $15. Screws and nails were all under $10. Took a long time to put together but most of that time was spent on the edging rather than the actual building. Sanding took a long time as well.
Estimated Time Investment
Week Long Project (20 Hours or More)
Finish Used
I used a quick dry (1 hr) oil stain and then a quick dry water-based poly.
Recommended Skill Level
Beginner

Comments

JoanneS

Tue, 10/21/2014 - 18:02

What a great build!  That live edge effect on your desktop is super cool!  (looks very real)  I'd love to know how you achieved that look, it's stunning!

jrbamberg

Wed, 10/22/2014 - 06:25

Joanne,

Thank you!  Grab a belt sander and go at it.  I tried using a grinder and that probably would work too, but mine doesn't work very well.  I also found that it burnt the wood.  Since the wood is soft, I used a belt sander to cut through the wood.  Dug in the edge of the sander to make deep gashes.  Its a lot of work but can be acheived with a great results.  Use a low number sandpaper to get rid most of the wood off (50 grit was good).  I practiced drawing out an idea on a spare block of wood off the same board and tried it out.  When the sample went well I got ready for the big board.  Once completed the initial slicing and dicing, I changed grit levels, 80, 120.  Lastly, with my orbital sander I used 120 again and then finished with 220 to get it all nice and smooth.  Hope that helps.  Then just stain and poly.  I hand sanded between layers of stain and poly with 220.  Lots of work sanding.  But it turned out smooth and flat. 

20 Second Tidy Up Table

Submitted by adamderkey on Mon, 01/30/2017 - 07:03

We needed a way to store our 6 month old's toys in our main living area. We were previously keeping them in a pack and play and that wasn't going to cut it. We decided this plan would do the trick. It works even better than we anticipated. Built exactly the same as the plans with the same finish as well.

Estimated Time Investment
Weekend Project (10-20 Hours)
Finish Used
Same finish that Ana used.
Recommended Skill Level
Beginner

Christmas Tree Shelf

Submitted by Anonymous (not verified) on Wed, 10/21/2020 - 08:50

This is my first time using some of the power tools that this required, however, it came out SO CUTE! I put one together and someone bought it raw. I put one together as the video showed, and then did one out of old fence pickets that were cleaned up and planed by a neighbor. They both came out beautiful. We used knobs that we had in the shop and offset them a little to be whimsical.
Vasiliki

Built from Plan(s)
Estimated Cost
$8-12
Estimated Time Investment
An Hour or Two (0-2 Hours)
Finish Used
Entry way to home, by the front door.
Recommended Skill Level
Intermediate

Comments

4-Foot Crown and Hooks Wall Shelf

The decorative 4-foot crown and hooks wall shelf makes a beautiful place to display photos and other decorations and also provides a practice application to hang backpacks, coats, hats and even Christmas stockings. It is fairly simply to build with basic tools such as a table saw and a miter saw.

The project costs about $57 to make with about half of the cost in the hooks. The overall dimensions of the project are 48 inches wide by 12 inches tall. It takes about 2-3 hours to build.

Download the plans at my woodworking blog at:
http://www.jrlwoodworking.com/

Estimated Cost
$57
Estimated Time Investment
Afternoon Project (3-6 Hours)
Finish Used
We painted the wall shelf with a high-quality Rust-Oleum 32 oz. Painter's Touch (two coats) and then mounted Everbilt Decorative Coat and Hat Hook from Home Depot. We chose a semi-gloss paint to give it some sheen. Depending on the color, we used the Everbilt Oil-Rubbed Bronze hooks for white shelves and the Everbilt Antique hooks for dark shelves.
Recommended Skill Level
Intermediate

Comments

kristenlotz

Fri, 01/04/2013 - 12:30

We actually have this shelf in a bright white color in our foyer to hang coats for visitors. We also put our Christmas stockings on it (one hook for each member of the family).

60 year old Barnwood Table

The wood came from a 60-70 year old barn that was torn down out on a friends property. The wood was fee and materials cost around $175. Took a couple weekends to build. 

Estimated Cost
$175
Estimated Time Investment
Weekend Project (10-20 Hours)
Finish Used
Polyurethane
Recommended Skill Level
Intermediate

Comments

Gmiller1966

Fri, 10/24/2014 - 19:56

My wife wanted a large table to entertain. She mostly wanted to be able to decorate the center and not have to move it during dinner. The table measures 10' x 4'8" and is 29" high.

My version of Crate and Barrel Atwood queen bed

Submitted by Chriss45 on Thu, 02/02/2017 - 00:51

My daughter loved Crate and Barrel Atwood bed so I built her this bed that is very similar. 

Estimated Cost
300 dollars
Estimated Time Investment
Weekend Project (10-20 Hours)
Finish Used
Walnut stain and watered down chalk paint
Recommended Skill Level
Intermediate

Comments

Corner Cupboard Hutch

Submitted by necdice on Tue, 10/27/2020 - 08:53

Thanks to Ana for the custom corner cupboard hutch plans! This project turned out great using Red Oak boards and an ebony stain. My customer loved it!!

Built from Plan(s)
Estimated Cost
100
Estimated Time Investment
Weekend Project (10-20 Hours)
Finish Used
Minwax Ebony with a couple coats of poly
Recommended Skill Level
Intermediate

Comments

Thankful FAUX the Fireplace!!

This Christmas I was determined to have a fireplace for the stockings to hang from! I played with the design a little to add depth and height.... and tiled a little.

Loved the results for only my second project from here!! Not perfect, but mine!lol Thanks for sharing Ana!!

~Dina

Estimated Cost
140
Estimated Time Investment
Weekend Project (10-20 Hours)
Finish Used
American walnut stain
Recommended Skill Level
Beginner

Comments

Farmhouse table tweaked

Submitted by Ddandrick on Sun, 10/26/2014 - 19:08

This was built using Ana's plans plus an inspiration photo my daughter took at an antique store in Chicago.  Notice the lower shelf stabilizing the bottom of the table. It also had to break down into sections to be moved three hours north to her apartment in Chicago.  Used lots of glue, and my trusty Kreg jig.  In the background is a tufted ottoman I also built at the same time.


Estimated Cost
$300
Estimated Time Investment
Week Long Project (20 Hours or More)
Finish Used
Poly stain
Recommended Skill Level
Intermediate

Fancy + Mimi's Hall Trees

Submitted by Anonymous (not verified) on Sun, 02/05/2017 - 13:28

Took the fancy hall tree bottom and added Mimi's hutch to the top. Added a little bead board to the bench and top edges to cover up the plywood, and voila! My wife's Christmas gift. 

Estimated Cost
$250-300
Estimated Time Investment
Week Long Project (20 Hours or More)
Finish Used
White paint and polyurethane
Recommended Skill Level
Intermediate

6 DRAWER COFFEE TABLE

Submitted by Nathan1342 on Mon, 01/07/2013 - 10:22

This was a fun little project. Followed the plans roughly. I made a few changes in the fact that I only added 3 drawers instead of six and instead of using the casters I made legs. When using cheap pine from lowes its rather difficult to get a frame that is completely square. This makes it quite the hassle to get the drawers to fit properly. If I had to do it over again I would use better wood and be very careful that the frame is 100% square. But overall a nice project.

Estimated Cost
300
Estimated Time Investment
Weekend Project (10-20 Hours)
Finish Used
Rustoleum Dark Walnut
Recommended Skill Level
Intermediate

Comments

R.H. Stype Testle Dining Table

Submitted by Rich2727 on Fri, 10/31/2014 - 09:30

Was inspired to build this table after a visit to R.H. with my wife and realized a table this size and style would cost us about $3000.

So I decided to build myselft.  With a little help from Ana's plans and my own modifications, I think I got pretty close to the Restoration Hardware Trestle Table.

I bought the pedestals at Osbornewood.com and asked them not to drill the leg holes and ordered it in pine.  That was the most expensive part of the table, about $380 a piece.  The rest of it is Douglas Fir.

I created a template and shaped the feet myself out of 4X8 beams.  I was able to use my jig saw and a Bosch 10" blade.  I made the rough cut with it and then sanded the rest of the shape using my belt sander.

The pedestals have a hollow center and were too tall so I cut them down and created plugs and glued them into the pedestal.  The bottom plug has a large threaded rod and is glued and bolted to the feet, and the top plug was used to create the horizontal supports for the table top.  I too created a template for this and used a jigsaw to cut the shape.

I then used Minwax American English, then weathered oak, (Like in one of Ana's stain posts).  I then wanted to give it that weathered/reclaimed wood look so I add a fair amount of the White Pickling stain.  I wanted a little less of the red tones and more brown...I may sand and refinish it someday, but it is in the house for now and can't wait for our first dinner party.

Built from Plan(s)
Estimated Cost
$1000
Estimated Time Investment
Week Long Project (20 Hours or More)
Finish Used
American English, Weathered Oak, White Pickling
Recommended Skill Level
Advanced

Comments

Braden Entryway Collection

Submitted by Anonymous (not verified) on Wed, 02/08/2017 - 07:02

Absolutely loved this build!  And it has become so handy to have for all the storage it provides.


I adjusted the original plans.  

  • Combined the hutch and mail sorter into one unit.
  • Stretched it 1 foot taller, spaced that out between several shelves.
  • Combined 2 drawer units into one.
Estimated Cost
?? not sure $800 maybe?
Estimated Time Investment
Week Long Project (20 Hours or More)
Finish Used
Rustoleum Vintage gray stain
Bright white paint
Recommended Skill Level
Intermediate

Modern TV console table

Submitted by Anzura on Mon, 11/02/2020 - 16:58

This console table was a pretty easy build and looks great. We had the lumber store rip the boards to the size we needed. We used solid maple boards instead of plywood. We mitered the corners to avoid seeing end grain. Followed the plans pretty close. Used 6" hairpin legs from Amazon painted antique bronze to match handles. Very pleased!

Estimated Cost
$300
Estimated Time Investment
Weekend Project (10-20 Hours)
Finish Used
Behr water based early American
Lots of prestain conditioner
Wax top coat
Recommended Skill Level
Intermediate

Comments

Entryway shelf & bench

Submitted by lswenson on Tue, 01/08/2013 - 19:08

It was so much fun building this bench & shelf for my entry. I now have a terrific place to stash things and hang my coat and purse! I am planning to make boxes to fit some of the spaces in the bench.

Estimated Time Investment
Weekend Project (10-20 Hours)
Finish Used
Valspar "Spanish Tile" gloss paint from Lowe's
Recommended Skill Level
Beginner

Great Weekend Project!

Submitted by basehordad on Mon, 11/03/2014 - 08:56

I used 1x6’s as opposed to 2x6’s for the base as well as the 19” pieces thus I cut the length of the legs to 27 3/8 the difference of 1 ½ inch from the plan.  In addition, the plans did not specify as to the placement of the legs on to the 19” pieces and thus I attached the 17 ½ bottom shelf braces and then attached the legs to the top.  I finished the project with MinWax Classic Gray stain which gave it an antique finish followed by a finishing wax.

Built from Plan(s)
Estimated Time Investment
Afternoon Project (3-6 Hours)
Recommended Skill Level
Beginner

Treehouse bed with slide

Submitted by ritchsam on Fri, 02/10/2017 - 19:56

I built this for my daughter Keila.  She loves it and her friends do too!  Took me one day.  I painted the entire bed in deck paint.  It completely eliminated all
Splinters!!! I added the slide, a USB plug, cup holder, and fan.  

Built from Plan(s)
Estimated Cost
350.00
Estimated Time Investment
Weekend Project (10-20 Hours)
Finish Used
Deck paint to cover all splinters. Slide was 75.00 extra found at a discount overstock supply house. I had to cut off two feet for it to fit in a 11x11 room
Recommended Skill Level
Intermediate

Laundry Station

Submitted by Anonymous (not verified) on Sat, 11/07/2020 - 10:17

My first project, something I took on with my kids. Lots of fun, errors, and lessons learned. Used an hvlp for stain and poly, so much faster and easier than brush or rag staining.

Thanks for the inspiration and instructions.

Built from Plan(s)
Estimated Time Investment
Weekend Project (10-20 Hours)
Finish Used
Minwax Special Walnut
Recommended Skill Level
Beginner

Comments