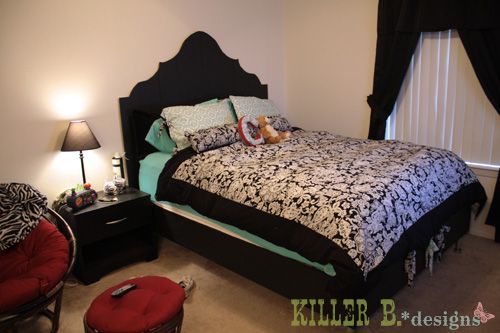
Community Brag Posts

1st time project!

Submitted by The_big_al on Wed, 06/24/2015 - 19:10

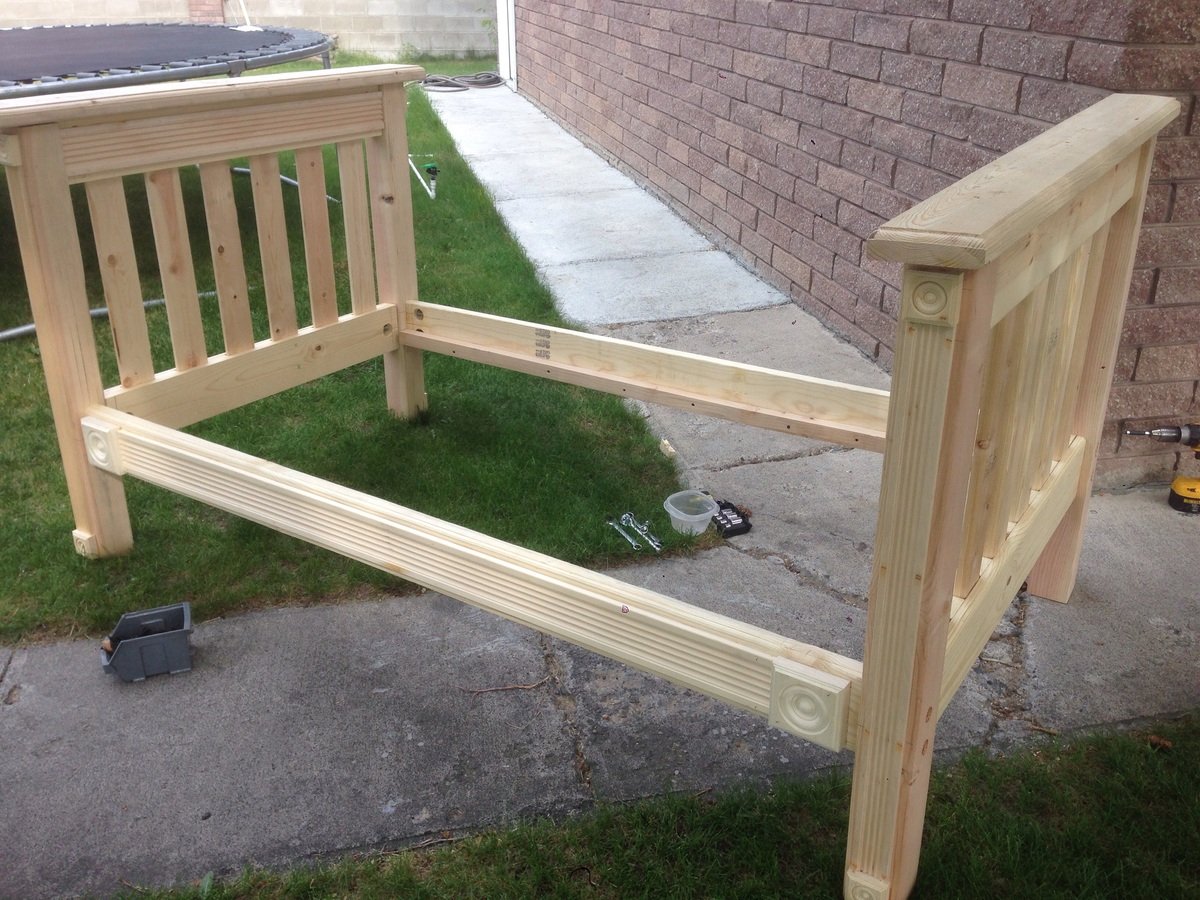
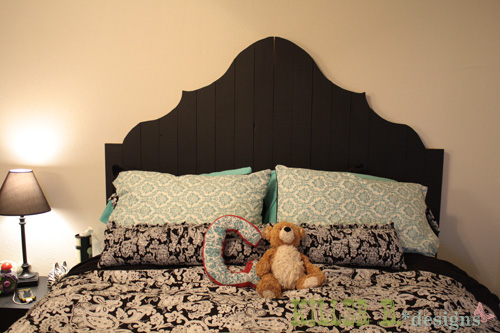
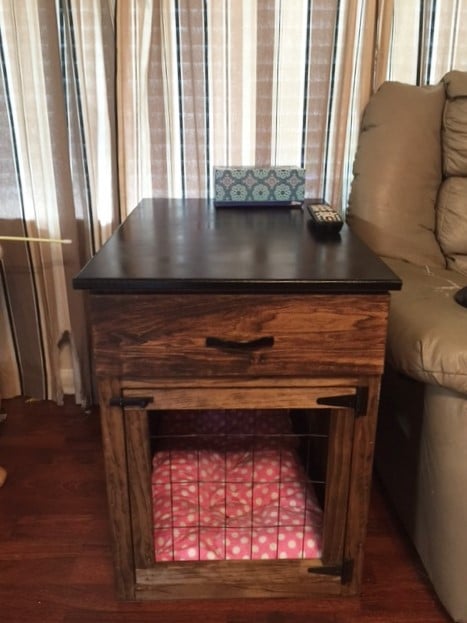
This was a pretty easy build. This was my first project and this looked like a pretty straightforward plan. I read over it several times before deciding what to do. I didn't like that it was held together using only screws. I anticipated that these beds will be moved several times over their lifetime and I did want to hassle with the screws stripping out the wood. Instead I used a 3/8 bolt and washer/nut set up so I could take the bed apart without worrying about stripping out the wood with screws. This necessitated drilling several large unsightly holes at the connection points. To help disguise this I trimmed it out using door casing and finished it out by staining the whole bed. The result was a classic look that will last my daughter's lifetime.

I will note that I changed a few parameters. I routed and the edges including the slats with a rounded corner edge. I used a 2x6 for the top cap of the head/footboards. With the addition of the trim work and bolt hardware, this did change the overall cost of the project. Total cost was probably close to $200. Had I stuck strictly to the plans I would have been closer to $100.

Built from Plan(s)
Estimated Cost
Because I changed a few parameters total cost was a bit higher. I think it was about $200 including hardware and stain.
Estimated Time Investment
Weekend Project (10-20 Hours)
Finish Used
The Simple Bed plans work great. They were easy to follow. They were also simple enough I could make modifications without too much issue.

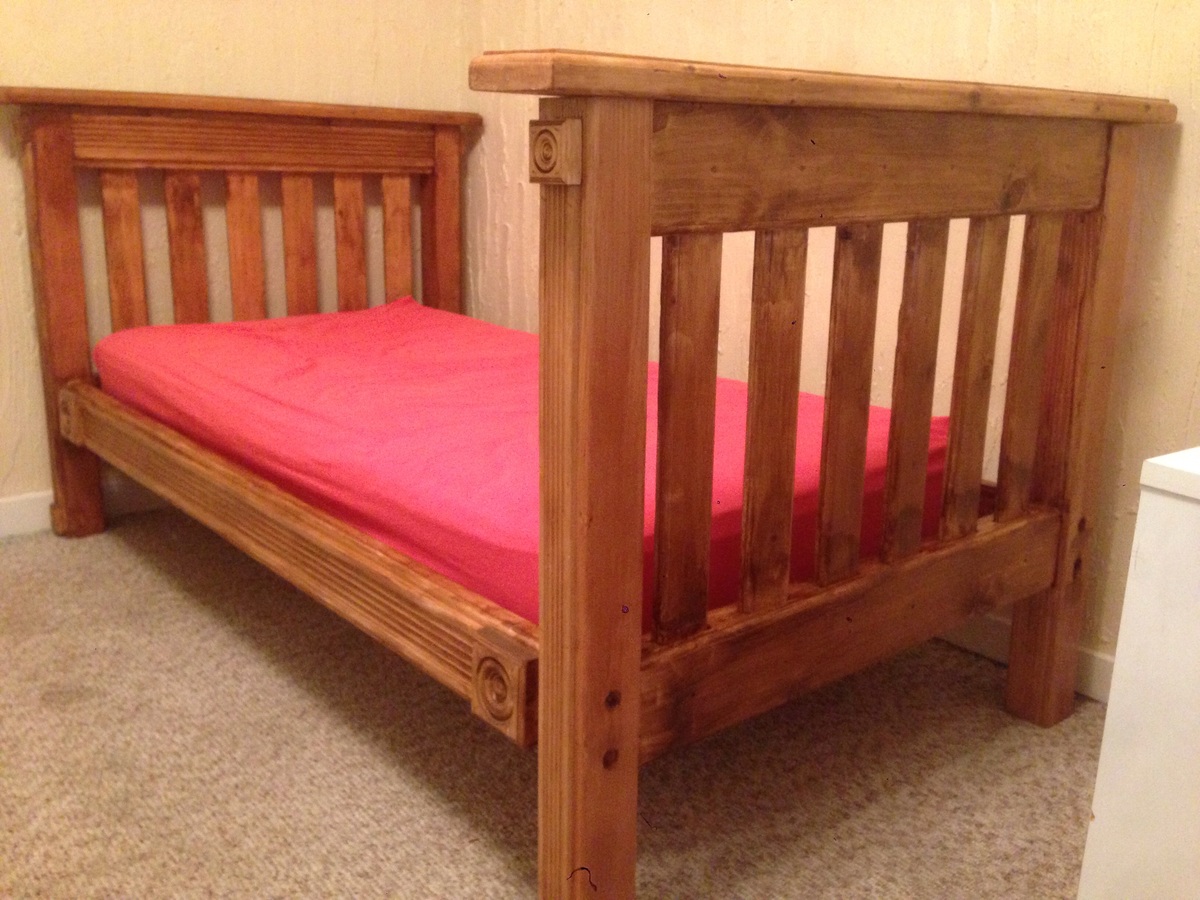
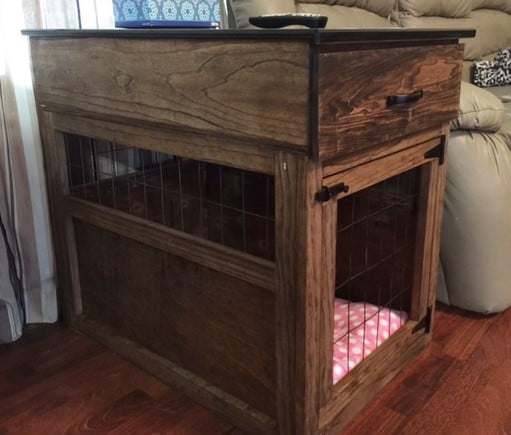
To make the bed I made, I made two headboards (in anticipation of making a bunk bed). Instead of using screws to hold the bed together I used a 3/8 4" bolt and nut combo. 4 bolts to hold the 4x4 posts to the head/footboard and 8 (2 on each end) to hold the side rails. I countersunk the bolts into the posts to hide the bolt head. I drilled 1 1/2 inch holes on the inside of the side rails and headboards to access the bolts and attache a washer and nut. Once tightened,the bolts holding the posts to the headboard will never have to come apart. Only the bolts for the rails have to be left accessible to take the bed apart for moving. However I was then left with huge unsightly holes in the outsides of the side rails and the insides of the head/footboards. I was going to leave it thinking it wouldn't look that bad but after assembling the bed I realized how unfinished it would look. That is when I decided to add the trim work which not only really made the bed look finished it hid all holes I had to drill. I did leave the holes in the backs of the posts uncovered since access to them is needed for assembly and dis-assembly.

Dimensions for the holes were calculated based on using the 1x6's in the headboard and the 2x6's in the side rails. If you want exact dimensions I can give you those. Just email me, however it was simple enough to figure out where to place them. The trickiest part is getting the holes drilled in the posts to line up with the headboards and rails.
Recommended Skill Level
Intermediate

Modified Version - Wall Built-In

Submitted by ColleenM on Tue, 05/10/2011 - 10:50

I used a combined/modified version of the Logan and Kristen's modified version as well. The opening in the middle houses the mirror currently, but was designed to fit a 27" flat panel tv when Ceira is older (maybe, LOL). I used regular pine to build it. I built it in two pieces (top and bottom). I couldn't put a back on it, as the heater (baseboard) is there, as well as outlets, and I didn't want to have to move either one. I adjusted the top portion to be slightly wider to cover the distance between the wall and the base bookshelves. This actually worked out well, as when we do eventually install a tv, we will be able to install and hide the wiring easily, and without having to add/move electrical outlets. I made sure to attach the shelves to the studs behind the wall as I am convinced some child, at some point will attempt to climb them. :)
Things I learned from this project - paint BEFORE assembling. This was a huge pain to get inside all of the upper shelves after it was already installed. Also - I hadn't had the carpeting installed at the time I built the shelves (it came about 2 weeks later). Make sure you either do your flooring first, or keep enough scrap flooring to cover the space behind the bottom shelves and under the radiator. Fortunately, I had enough (this time).

Estimated Cost
$80
Estimated Time Investment
Day Project (6-9 Hours)
Finish Used
I used leftover primer, and the same paint that I used for the moldings & trim (leftover) - Valspar semigloss in a shade of cream. Against the pale lavender walls looks very classic and girly.
Recommended Skill Level
Beginner

Farmhouse Style Bar Table - San Diego

My husband modified these plans by making it a 42" tall bar high table. He built it and I stained it with Dark Walnut Danish oil and it came out better than we imagined. Thank you for these awesomely cool DIY plans.

Estimated Time Investment
Weekend Project (10-20 Hours)
Recommended Skill Level
Beginner

Comments

Corn hole

Another great tutorial and project done. Thanks Ana

Comments

Glider

Submitted by Seansg5 on Sun, 08/09/2015 - 20:24

The bench was easy to build with great instructions. I had Home Depot make my cuts for this first project and then I went and bought a miter saw and other power tools for future ones. So much fun. 

Built from Plan(s)
Estimated Cost
$100
Estimated Time Investment
Afternoon Project (3-6 Hours)
Recommended Skill Level
Beginner

Comments

Cross35

Mon, 03/14/2016 - 08:35

Great work.  DId you do anything different to the swing itself?  How did you build the frame.  I'm looking to do this exact thing for my patio.  I don't have anywhere to hang the swing.


Thanks for sharing any info.

mbarland

Sat, 06/13/2020 - 16:54

Made the chair and then built the glider frame for it just eyeballing the picture. I can't figure out how to upload a photo of my design, but can try to describe it.

I made mine with a 4x4 on the base of each leg, but a 2x4 would work as well, it was just what I had on hand. The base board on each leg I made 48". From there I put two 48" vertical boards. The vertical boards were centered and from the front edge of the first board to the back edge of the second board. Two 16" boards were then used at the top and bottom of the vertical boards to hold them in place. Cap it off with a 30" board on top of the verticals. This is where you'll attach your eye bolts. I put both eye bolts 3 1/2" back from the front (a scrap of 2x4 works well as a guide). To join the two legs, I used two 52" boards on top of the base 4X4 of the verticals (one in front of the legs and one behind).

4x4 Truss Beam Table Black

I had trouble with the angled cuts not fitting perfectly. I have a circular saw, not a table saw or miter saw, so I had to measure with a protractor and mark, then try to follow my lines exactly. Tedious, but I like the table. It is mad heavy though!

Built from Plan(s)
Estimated Cost
$30 for stain. I had all the rest of the reclaimed wood. Otherwise, $150.
Estimated Time Investment
Weekend Project (10-20 Hours)
Finish Used
Minwax "ebony"
Recommended Skill Level
Intermediate

Comments

Bathroom Sign

Submitted by jsle_bel on Wed, 06/29/2011 - 19:49

I've been wanting to create some bathroom decor....here it is!

Recommended Skill Level
Starter Project

Comments

Cottage Bunk Bed

Submitted by kottmer on Tue, 06/12/2018 - 09:58

I used the surf bed plan and put a plywood face on the front and added the roofline, windows and flower boxes. The steps double as a bookshelf. 

Built from Plan(s)
Estimated Cost
$400
Estimated Time Investment
Week Long Project (20 Hours or More)
Finish Used
Semi-gloss paint
Recommended Skill Level
Intermediate

Comments

Ana White

Thu, 06/14/2018 - 11:32

This is adorable!  Glad you used the surf bus plans - those plans are so easy - smart to just add your own front too it!  Very much appreciate you sharing a photo.  Great job!

Memorial flag case

Submitted by TMW on Wed, 10/07/2015 - 13:11

I built this case for my Grandma when my Grampa died. I wanted to be able to display the shells as well. The design is a combination of a few I saw and like different aspects of.

Estimated Cost
$30
Estimated Time Investment
Afternoon Project (3-6 Hours)
Finish Used
shellac
Recommended Skill Level
Beginner

Comments

Dress-up Storage finally!

Submitted by tannisg on Wed, 08/03/2011 - 17:10

I made this for my girls' huge collection of dress-up clothes. I had to modify the plans a little to fit more costumes, and also to try to fit the longer length. I was hoping the longer dresses would hang without filling the bottom quite so much, but to make it tall enough for that the little one wouldn't have been able to reach the hanger bar.

I ended up with 4 foot boards all around - 6 pieces of 1x12 cut to 4 feet long, including the shelf at the top.

The eight year old cut the letters out of scrapbook paper and we glued them on with elmers glue then varnished over it.

All in all it looks great and holds 4 big plastic totes worth of dress-up (11 Halloweens/4 little girls/5 flower girl dresses and miscellaneous other outfits).

Now I'm just hoping they'll learn to use hangers and it will stay neat and tidy!

Construction was very easy and went well - took us longer to shop than it did to build!

Painting on the other hand took a long time, mostly just to wait between coats. I used spray paint and some polyurethane to gloss it up.

Estimated Cost
$50
Finish Used
spray paint, polyurethane
Recommended Skill Level
Beginner

Farmhouse Table

Submitted by Anonymous (not verified) on Fri, 01/04/2019 - 22:25

Love this table!

Recommended Skill Level
Beginner

Comments

Deck furniture

Submitted by Anonymous (not verified) on Fri, 10/21/2022 - 10:59

We used pine for the chairs and table and stained with Cabots black exterior deck stain and sealed with polyacrylic.

Comments

Swedish Bed with Metal Legs

My best friend (and upstairs apartment neighbor) was looking for a "grown up" bed for her apartment. When she saw the Swedish Bed, she fell in love. We built the frame out of 1×10′s and the “guts” were reclaimed wood from my Dad’s barn (to cut down on costs). She painted it a flat black using mistint paint pints from McCoy’s that were $1 each. The pipe legs were from Lowe’s in the plumbing section, and they’re threaded for easy installation. You just thread them into a little square base that you can screw straight into the wood, and pop on a threaded endcap so it doesn't scratch your floor or rip your carpet. Her first choice of 10" proved to be much too tall after she plopped on her enormously tall pillow-top mattress. So we exchanged them for the 6" version for a much more balanced look. She loves it!

Built from Plan(s)
Estimated Cost
$175
Estimated Time Investment
Day Project (6-9 Hours)
Finish Used
Flat black latex Oops paint
Recommended Skill Level
Intermediate

Table and chairs for my grand daughter

Submitted by Dan Craw on Thu, 12/10/2015 - 18:19

This was a fun project to build! The plans were very easy to follow and the table and chairs turned out just like they were supposed to. I ended up buying a Kreg jig to put the furniture together. The jig cost $40.00 at Home Depot and it was well worth it because I'll be able to use it on other projects. The plans showed the furniture being prepped and painted but my daughter wanted the pieces to look close to their dining room table so I took the time to stain and varnish them. I built the table and chairs out of pine and I used average dimensional lumber so the whole project only cost around $35.00. If you're looking for good children's furniture these would be good to build.

Estimated Cost
$35.00
Estimated Time Investment
Weekend Project (10-20 Hours)
Finish Used
Minwax Cherry #235 Stain - 3 coats

Minwax Helmsman spar urethane Clear Semi Gloss - 2 coats
Recommended Skill Level
Beginner

Adirondack chairs with funny back legs

Submitted by Anonymous (not verified) on Wed, 02/06/2019 - 07:45

The project was easy and fun. The plans are perfect, provided you follow instructions. I assembled the back legs backwards and that complicated the instalation of the back rest. I liked the result in the end.

Estimated Cost
~ $100 for the pair.
Estimated Time Investment
Weekend Project (10-20 Hours)
Finish Used
Exterior Behr Marquee Matte
Recommended Skill Level
Starter Project

Child size table and chairs

Submitted by kbates05 on Sat, 10/15/2011 - 16:55

Table was a little tricky for me and the wood kept splitting and the legs didn't seem very sturdy. The wood I have isn't the straightest so that gave me some trouble. Changed the dimensions of the table to 24" x 36" and used a lodge pole pine board so the top is a solid piece instead of the 1x8's keep the junk from collecting between the slats. The chair was pretty easy to build and my kids just love it. Thinking I will paint the table and chairs a high gloss white so it is scrub able and look good in our house.

Built from Plan(s)
Estimated Cost
$50
Estimated Time Investment
Afternoon Project (3-6 Hours)
Finish Used
None yet. Thinking high gloss bright white.
Recommended Skill Level
Beginner

Comments

Smaller Dog Crate with a drawer!

Submitted by Anonymous (not verified) on Wed, 01/06/2016 - 12:28

You may remember my green stratton day beds that I built a long time ago- finally I have another project to post- I am soo happy I found Ana White's website. We just got back from a 2.5 week vacation in Israel and my dogs were staying with my sister. She told me they had been sleeping in the same kennel together instead of separately. Their kennels are too small so I decided to build them one using wood I already had. But since they are small dogs, I decided to size it down- but I wanted it end table height- so I built a smaller kennel- 20"H x 19"W x 28"D. but... I added a drawer to the top to bring it to the right height. You can read all about it on my blog- link below.

Built from Plan(s)
Estimated Time Investment
Weekend Project (10-20 Hours)
Finish Used
provincial wood stain.
Recommended Skill Level
Intermediate

Comments

Super Storage TV Wall

Submitted by jgettings on Sat, 10/26/2013 - 14:10

This took me about a year to complete, start to finish, but there was a lot of downtime. I started by running the wires through the wall and taking the opportunity to add a ground to the outlet on this wall.

The bottom cabinets are from Ana's kitchen cabinet base plans, but they are a little shorter, shallower and do not have a toekick cut out. My hope is that this will serve as good practice to do an entire kitchen!! I built these based on my modified plans, pulled back the carpet (there is hardwood under them that I intend to expose at some point), popped off the baseboard, and installed these as if they were kitchen cabinets. The top is 6 pieces of whitewood 1x12's "Kregged" together - I wish I had used plywood but an entire piece would still not be long enough, so that was awkward either way. There is a simple piece of molding under the edge of the "countertop". At that point, not much got done all summer and we just had base cabinets with no uppers and no doors.

More recently, I finally got more time to work on this and created the upper shelves. I just kinda winged these. A whole bunch of 1x12's, I cut 4 the height of what I needed (about 5', from the countertop to the ceiling) and I made a bunch of shelves cut to size. I wound up making more shelves than we needed, but I put shelf pin holes in the vertical pieces so all of the upper shelves are adjustable! I used a kreg shelf pin jig and it worked great. The middle shelf above the TV was cut and added after everything else since I knew it would've been more difficult to calculate the length than to just measure after everything was in. I added some molding to cover up some things that didn't quite line up perfectly and to beef up the vertical pieces (1x2's make 'em look a little wider and cover the edges of the shelves). We finally have storage for all of the cd's and dvd's!!

I was a little nervous to do the doors, but the post for how to do doors came out at a perfect time. Turns out the hardware I bought way at the beginning was pretty cool and let you adjust up/down, distance from the cabinet, and left/right a few mm each way just by turning a screw. I'm glad I went with the fancy self-close-soft-close ones! I'm also in love with the handles I found.

I had some issues with the drawers and they don't slide perfectly, I think it's mostly a squareness issue. I'm planning on getting the kreg drawer jigs before I do the kitchen. I got the fancy soft close ones to see how they'd work to see if I want to use them in the kitchen, if I can't do a better job then I might opt for the cheaper ones!

I have intentions of adding crown molding to this room and that will go across the front of this when I do. I added a 1x4 across the top that can act as a base when we finally get around to that.

Estimated Cost
800
Estimated Time Investment
Week Long Project (20 Hours or More)
Finish Used
Lots and lots of white paint. I wound up using a spray enamel for the upper shelves in attempt to make them less sticky after finding out that latex paint doesn't really work well for shelves. I've also learned that the paint with the primer in it is my new favorite type of paint.
Recommended Skill Level
Advanced

Comments