Community Brag Posts

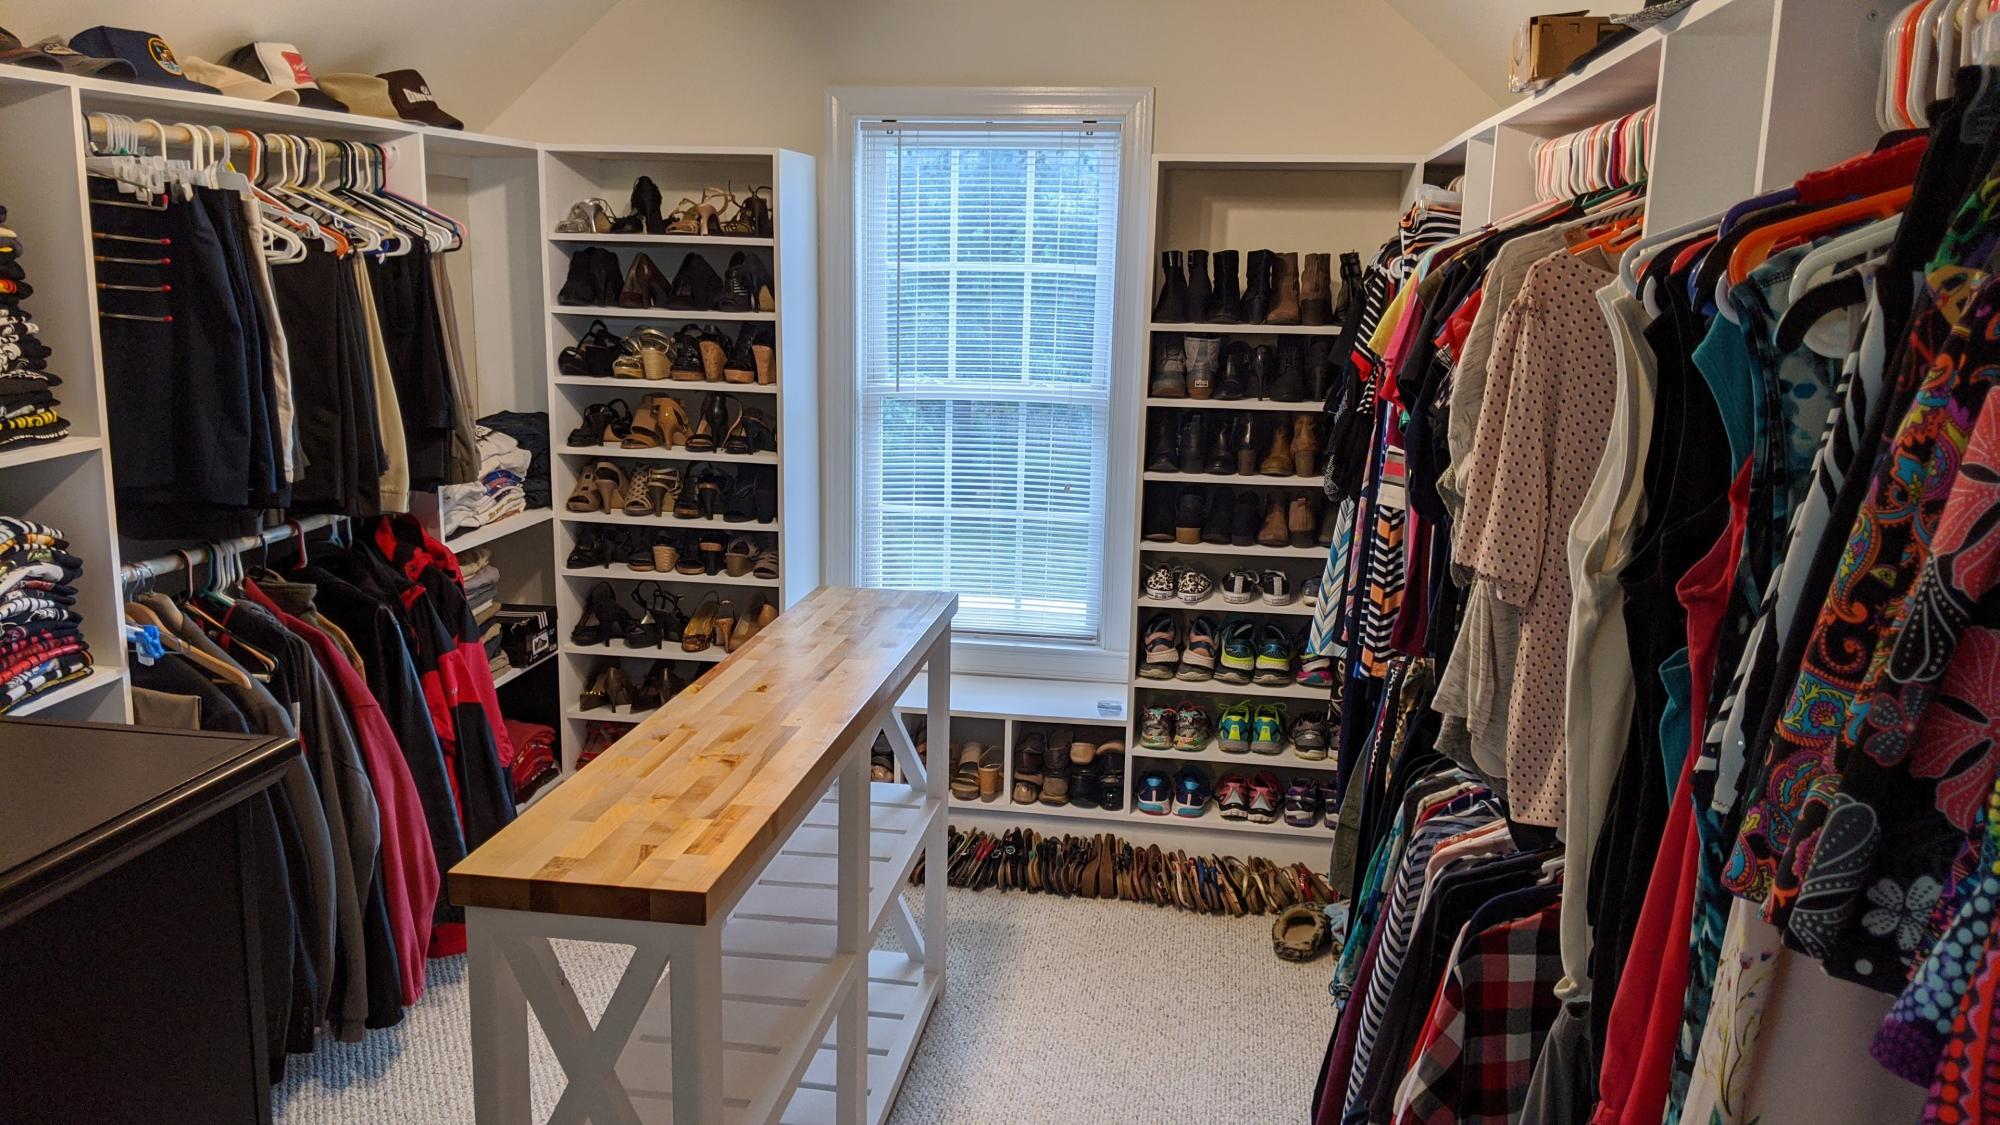
Our New Custom Closet and Table

Submitted by Anonymous (not verified) on Fri, 04/22/2022 - 08:30

Our cheap wire rack in the closet pulled out from the wall...twice. With input from the wife, I took inspiration from the various tower style closet designs and built this epic masterpiece. I still go in and marvel at what I did...two years later. We doubled up the hanging space, provided shelves and cubbies for all the shoes! And even built the table out of scraps from the project (a neighbor gave us the tabletop material as scrap from a project they finished). I had some stain left over from yet another project that was accidentally tainted, but turned out as a great color on the table. Thanks Ana for all the inspiring work!

Comments

Ana White Admin

Fri, 04/22/2022 - 11:36

This is amazing, great vision and execution, thank you so much for sharing! Just shared on our Facebook page:)

Farmhouse Table : Restoration Hardware Replica

Submitted by tsibiga on Mon, 06/20/2011 - 09:43

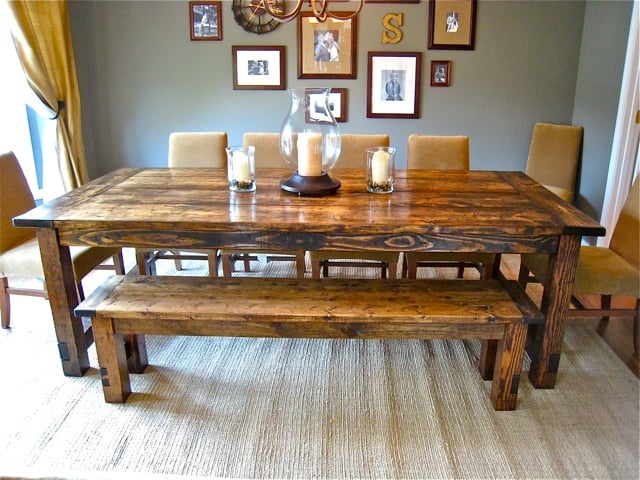
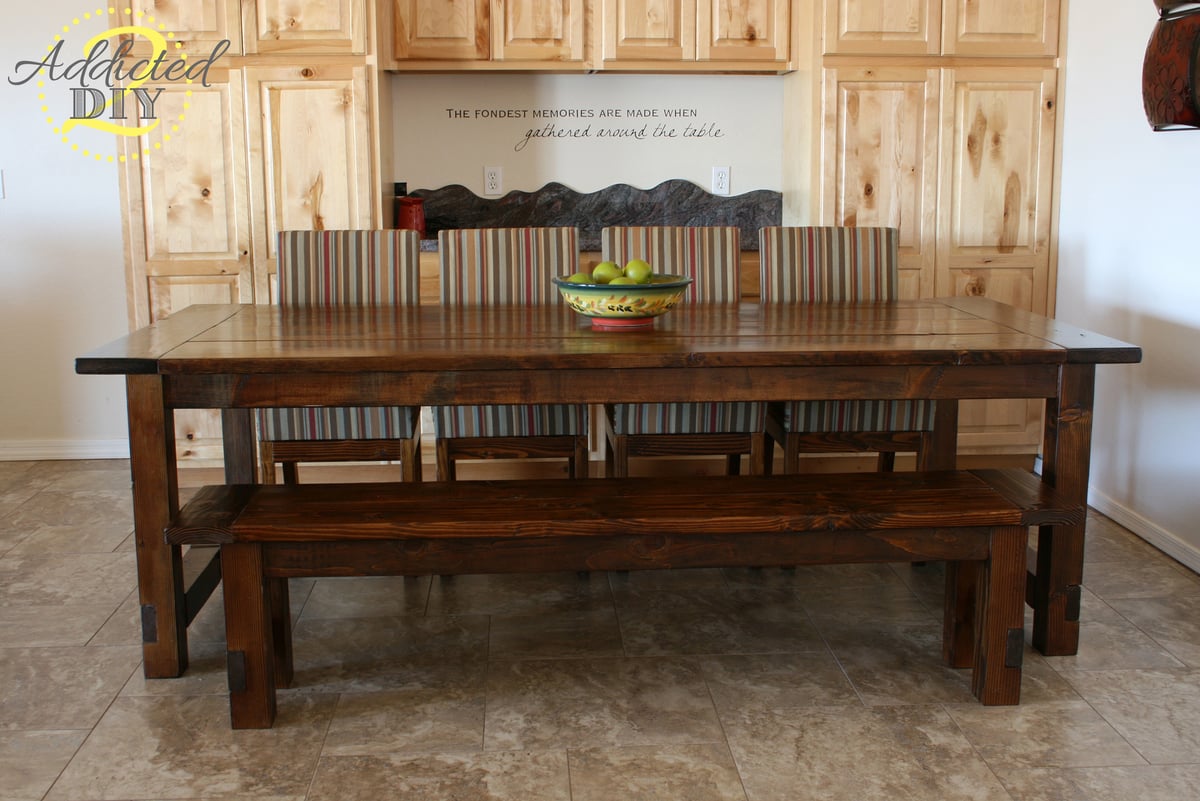
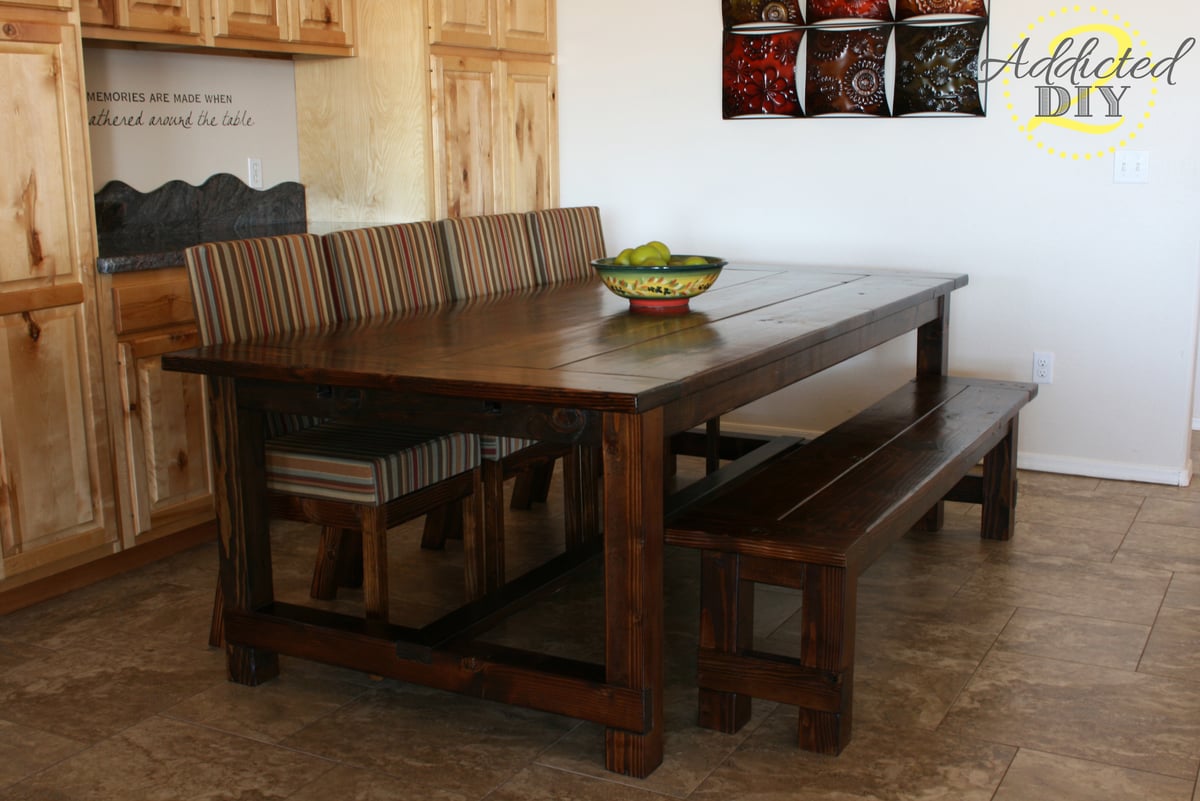
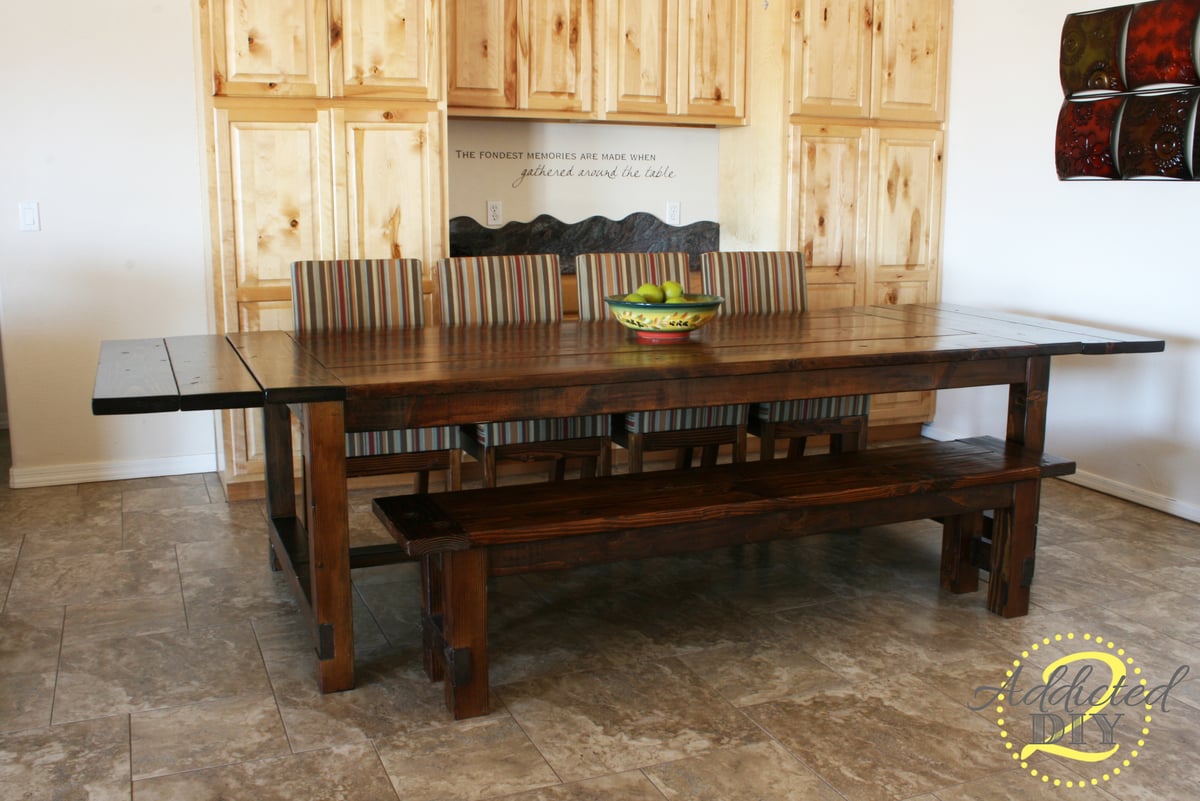
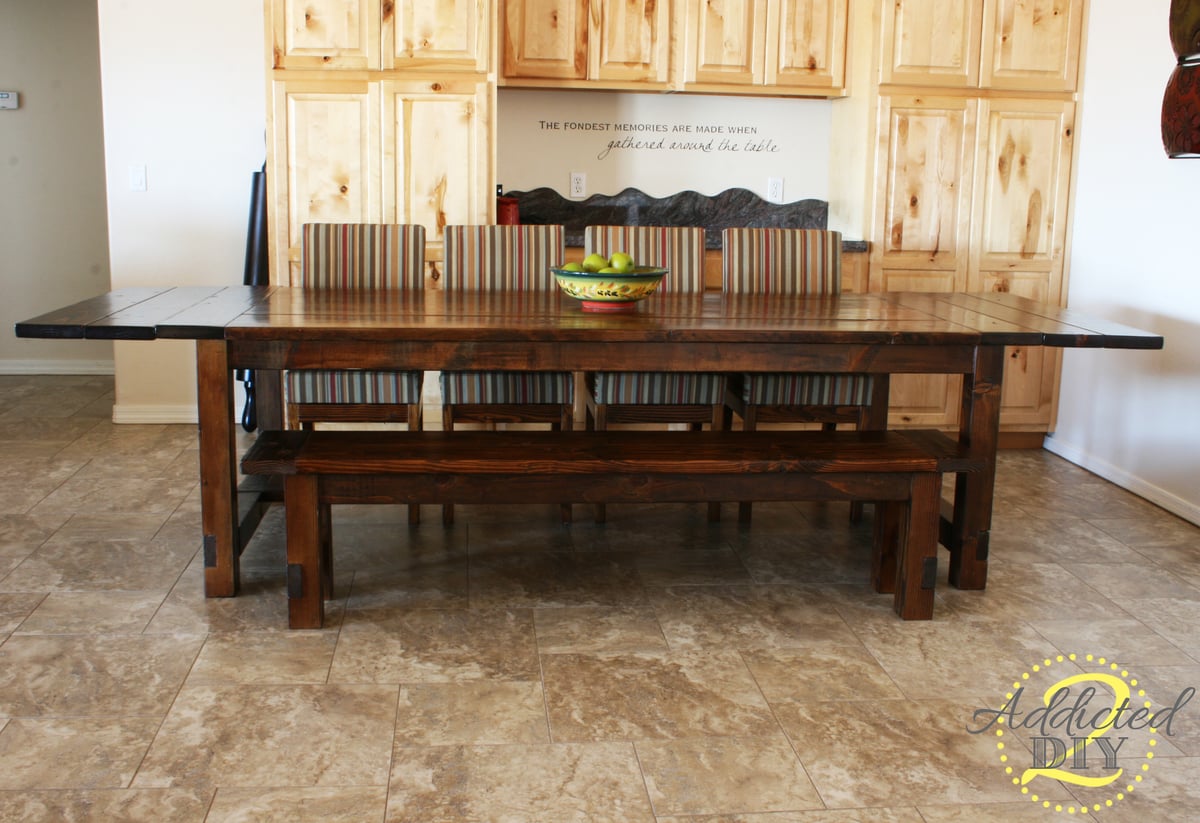
This is the first building project that I've tackled and it's all thanks to Ana-White. I did lots of things different than the building plan but it was definitely my inspiration and extremely useful. I loved the Restoration Hardware table and so I went to the local store to put my eyes on it for myself. Some of the things that I noticed, liked, and included in my design are; I used 4-2x12"s for the tabletop, I used 2x8"s as the breadboards, I used 4x4"s for the legs as well as the side stretcher, I used 2x4"s as the undertable supports, I built two 15" extensions using 2x8"s and 2x2"s, and I attempted to distress the wood yet stain it to match our dining room as best as I could.

www.tommyandellie.com

I've documented the build and you can check it out yourself at: http://tommyandellie.com/?p=14

I've revised the plans with even more details here; http://tommyandellie.com/index.php/2012/01/13/new-and-improved-farmhous…

Hope it helps.

Estimated Cost
$300
Estimated Time Investment
Week Long Project (20 Hours or More)
Finish Used
I banged up the wood using random things around the garage and then used a Dark Walnut Stain. Additionally, on the tabletop I did two coats of Briwax (light Brown) for a nice, shiny, and smooth eating surface.
Recommended Skill Level
Intermediate

Comments

niecey

Mon, 06/20/2011 - 15:06

This is stunning! I'm working on this table right now, but it's no where near as good as yours. I'm jealous. I love your extensions. I'd love to see a tutorial on adding extensions..

ispeakwhale

Tue, 06/21/2011 - 05:16

It looks beautiful. Did you attatch the 2x2 to the underside of the extensions and then notch out a place on the support for them to slide into? Can you please take a photo of the underside with the extensions on?

Tommy (not verified)

Tue, 06/21/2011 - 14:42

That's exactly right. Here's a link to the picture you asked for; http://www.tommyandellie.com/Site/Home/Entries/2011/6/10_Farmhouse_Tabl…

There's some more details and info specifically about the extensions on my blog at; http://www.tommyandellie.com/Site/Home/Entries/2011/6/10_Farmhouse_Tabl…

It's a super simple addition to the design and can take my table from 96" to 126"!!! Or take it from a 8-10 seat table to potentially 16 seats available for those Big thanksgiving meals.

Guest1 (not verified)

Wed, 06/29/2011 - 15:41

Hello,

I was just wondering that since your table is a bit wider than Ana's table, did you make the support for the stretcher wider? As in, did you increase the length at all (in addition to making it stick out a bit at the ends? If so, what did you extend it to? Thanks and gorgeous job!

tsibiga

Wed, 06/29/2011 - 18:49

Hello,

I followed Ana's example and allowed for a 1" overhang on both sides. So the tabletop is actually 44" wide and the stretchers are approximately 42". The long 2x4" stretcher is approximately 88".

Hope that helps. Thanks for the positive comments.

Guest (not verified)

Wed, 06/29/2011 - 20:28

I cant believe how good that looks. Great job! Out of curiosity, how did you make the notches (dados) for the 4x4 legs where they meet the table top? Really impressive table!

tsibiga

Thu, 06/30/2011 - 04:43

For the table legs, I set my table saw blade to a height of approximately 1.5". I then made a first cut at 3.5" from the bottom, then made a cut at 7", and then made several subsequent cuts in between those two cuts. After it was all slivered, I used a hammer to knock it all out, and then swirled the opening all around on the table saw (blade still at 1.5" tall) to smooth out all the cuts. I used the same technique for the stretcher as well.

Guest (not verified)

Sat, 08/06/2011 - 21:36

Hi Tommy, I tried clicking on your site and was told the site could not be found. Last week, I saw it fine and showed my hubby our next project, but now it's gone. Help!

Keri Beth (not verified)

Thu, 03/01/2012 - 07:17

What inspiring pictures! Apparently everyone agrees, because I just "pinned" one of these pictures to Pinterest and it was immediately repinned 27 times and counting. So nice work! I hope to make mine this weekend.

DES.II (not verified)

Sun, 04/29/2012 - 06:29

She and her boyfriend would like to build it using lumber i cut from my mill. They are thinking walnut, hickory or maybe ash but im not sure how that will work out with being distressed. And your extentions, do you have a 2x4 or two that slides out from under the table to help support them on each end ? Are there pics of the under side of the table as well? This is a great table and i think they will have fun as a family assemblimng and finishing it.
Thank you. DesII

Marci (not verified)

Thu, 10/11/2012 - 12:12

Where can I find the bench instructions??

James Groover

Tue, 04/14/2015 - 13:31

Hey Tommy, I saw the Farmhouse table design with extensions, I don't have Excel to open the cut list and need the buy list and cut list to complete the project, I am really short on time and need to start this project tomorrow. Please if you can, do you have a word document or a PDF that shows the page for those?

Mini farmhouse bedside tables

Submitted by AmberT on Thu, 03/22/2018 - 09:54

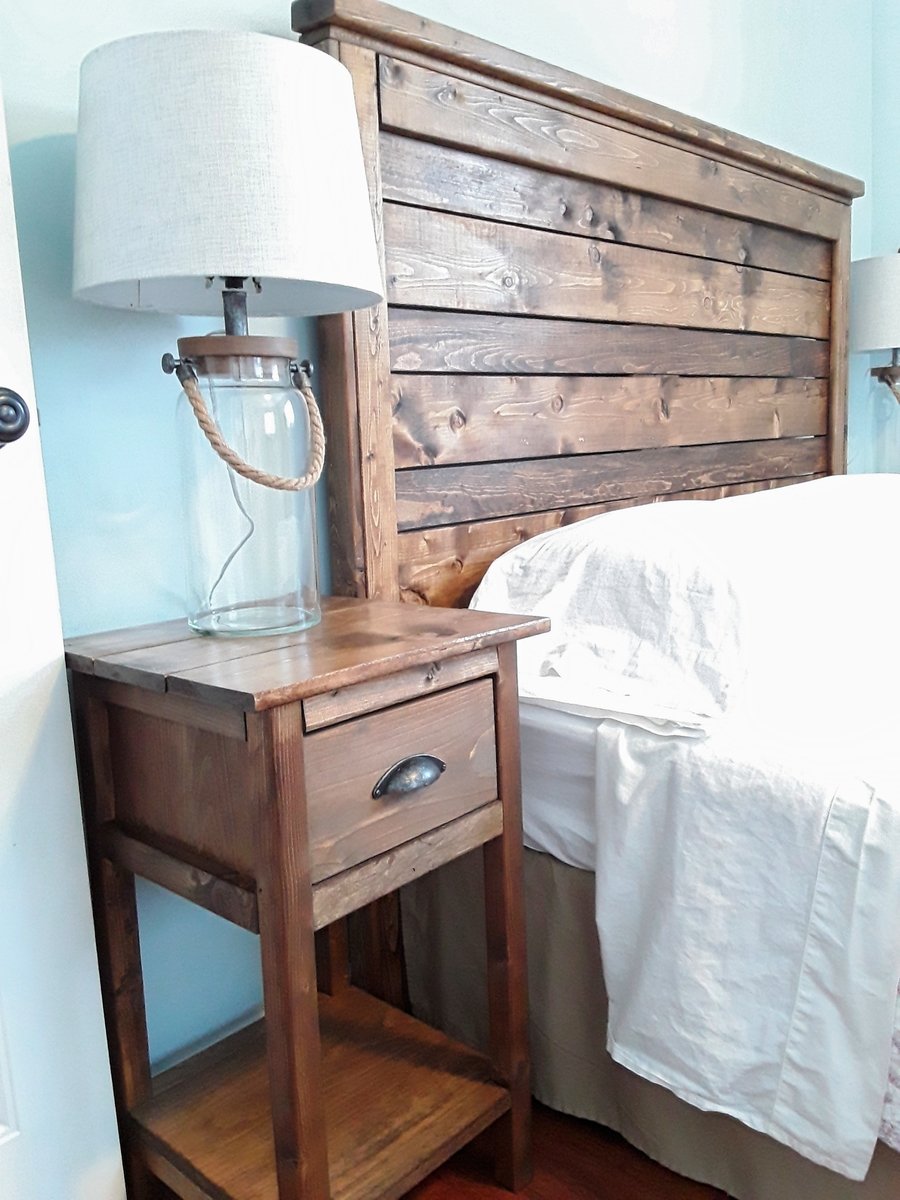
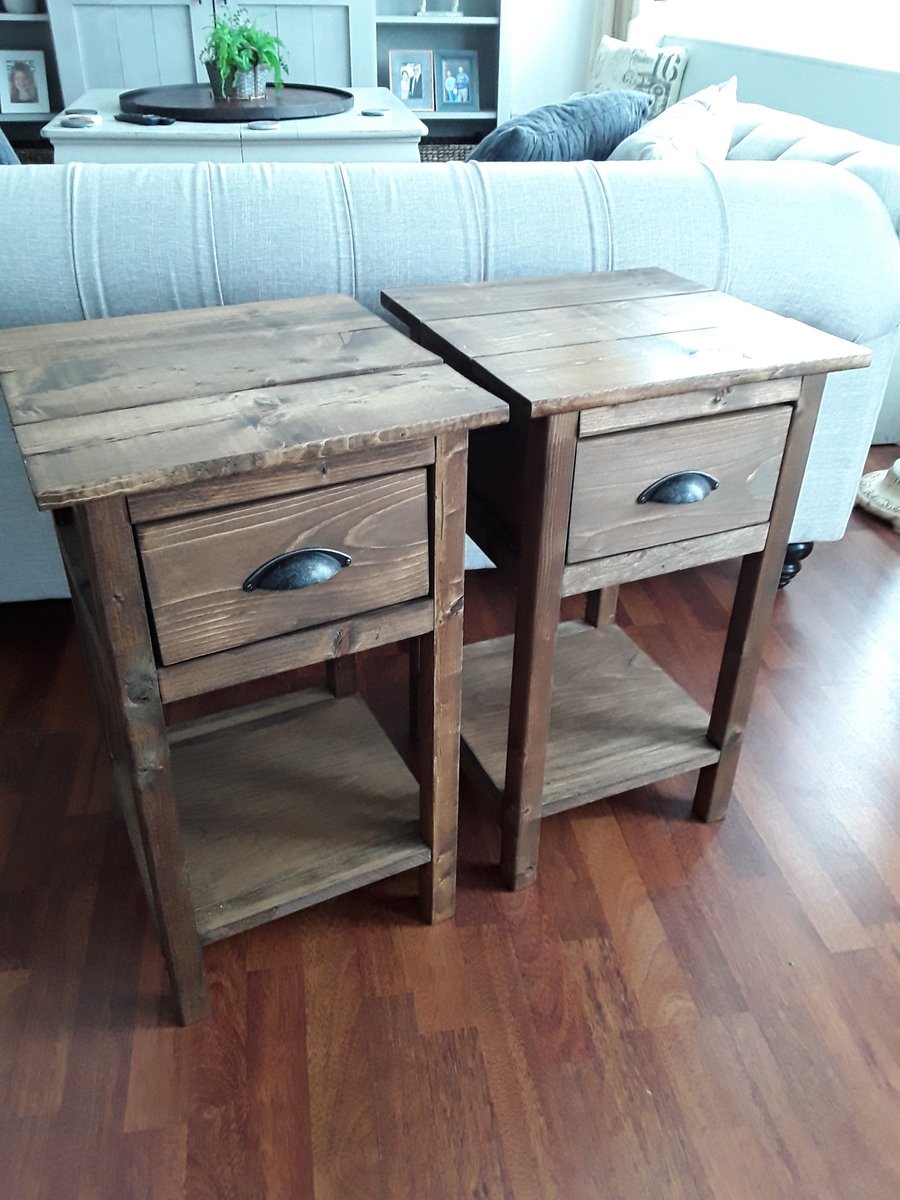
Side tables made from leftover pine and spruce, using Ana White's Mini farmhouse bedside table plans to match the headboard. Took about a day to do two.

Built from Plan(s)
Estimated Time Investment
Day Project (6-9 Hours)
Finish Used
Minwax Provincial Stain
Recommended Skill Level
Beginner

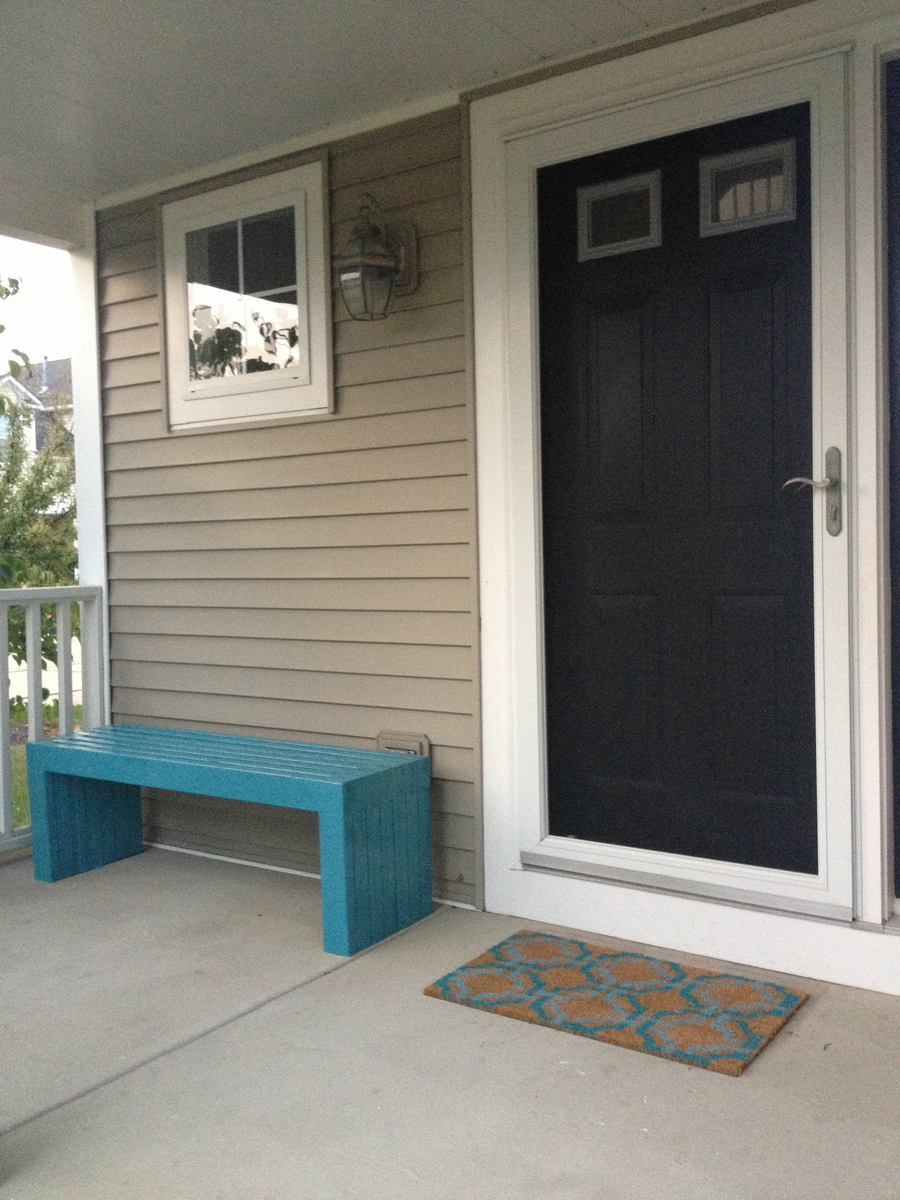
MODERN SLAT TOP OUTDOOR WOOD BENCH

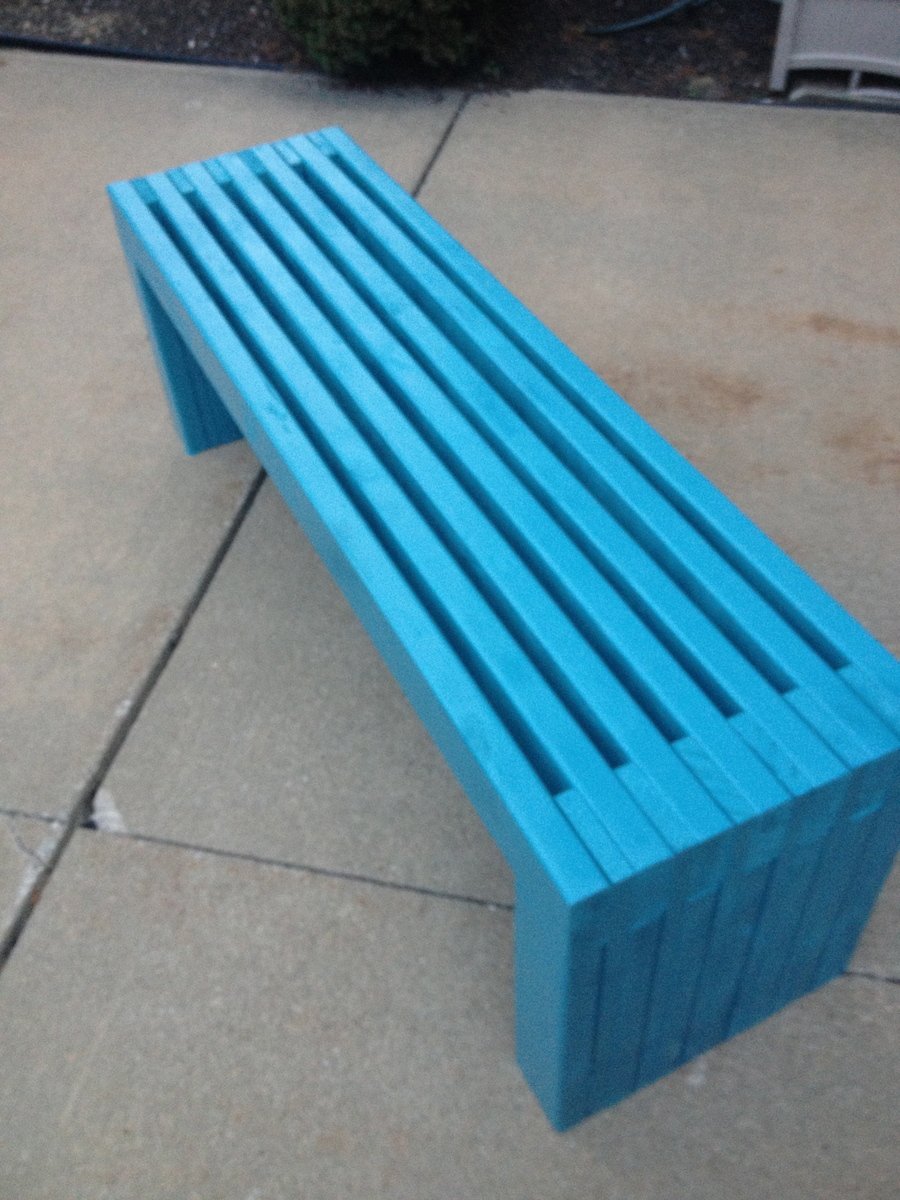
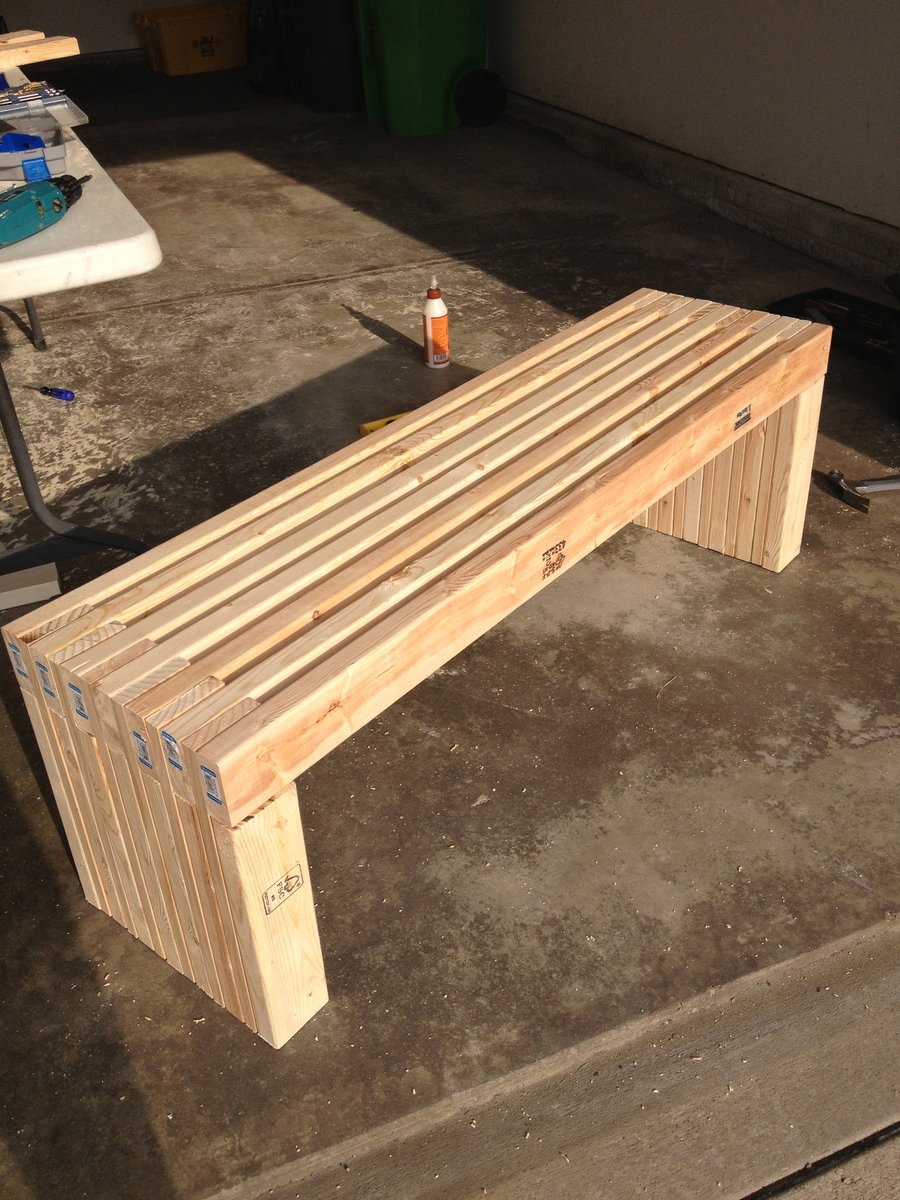
This was my first project. I am pretty excited how it turned out. If I did it again, I would recommend sanding and painting prior to building.

Estimated Cost
$60
Estimated Time Investment
Afternoon Project (3-6 Hours)
Finish Used
Valspar Spray Paint - Oasis
Recommended Skill Level
Beginner

Comments

The perfect sewing table!

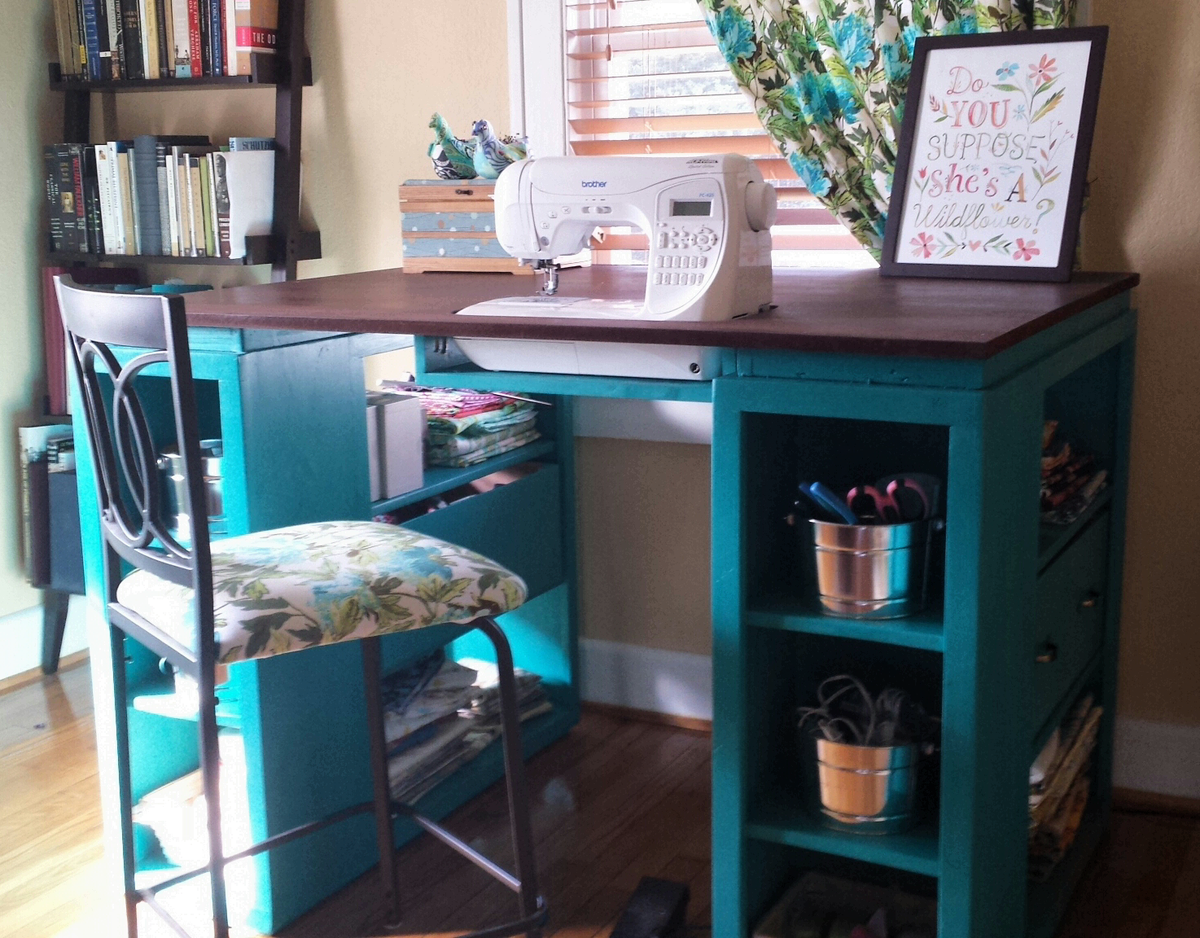
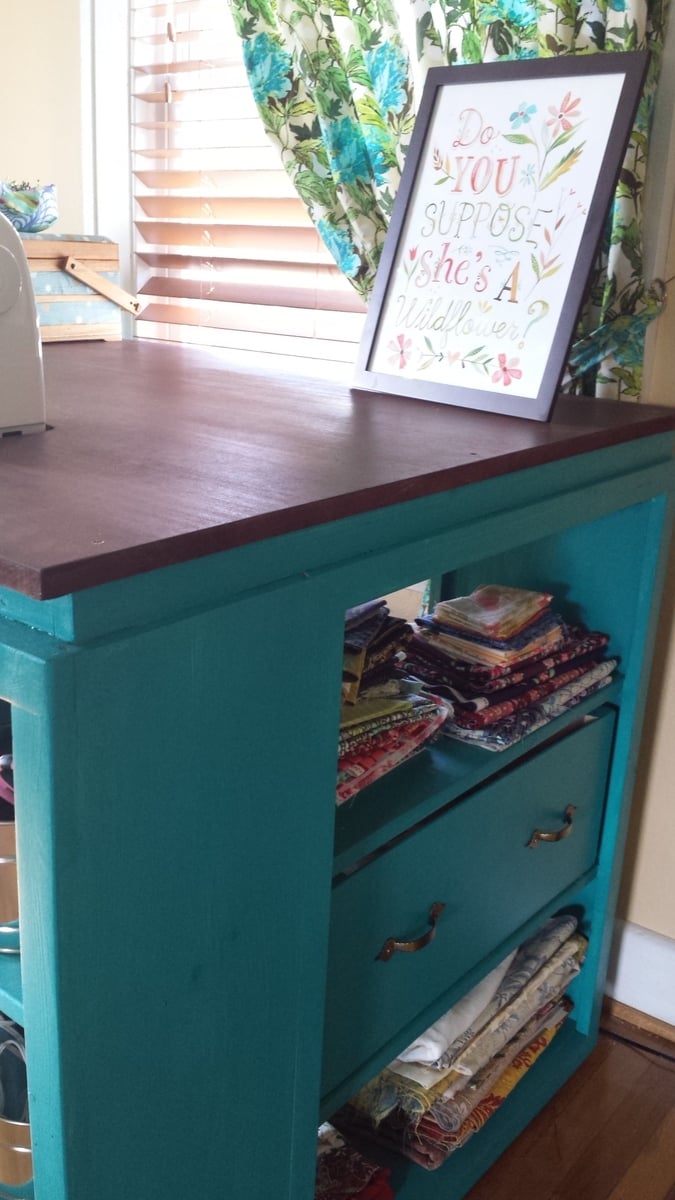
I have been looking at sewing furniture for years, but the prices always made my jaw drop. I have a small craft room, so I needed a table that could also triple as a cutting table and fabric storage. Thank you so much to Ana White for this plan! I built exactly to the plan in The Handbuilt Home, and it's the PERFECT size.

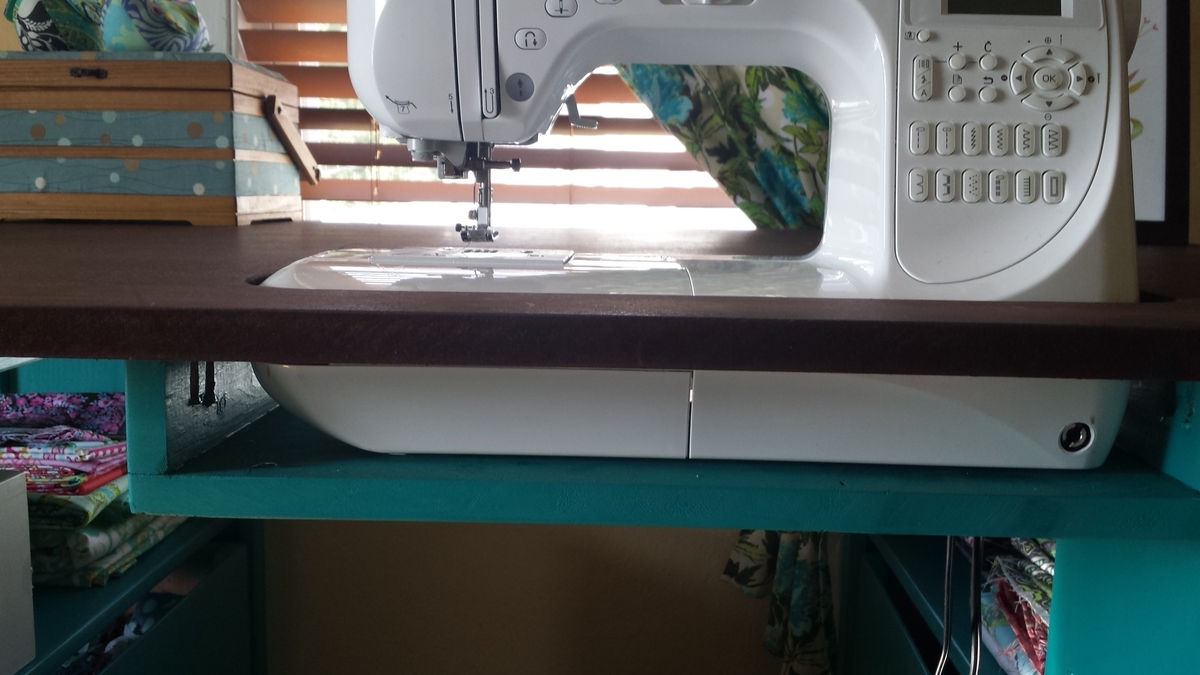
So the sewing machine can sit flush with the top, making working on big sewing projects way easier, I traced the outline of my machine on the MDF and cut it out with a jig saw. Then I built a small shelf using a 1x12 scrap and 2 1x3 scraps. Putting the 1x3s on top of the 1x12 made the shelf 3.75 inches deep, which is exactly the depth I needed. I attached it to the underside of the tabetop using a pockethole jig and screws.

I built 2 boxes using 1/4 inch plywood, and installed drawer pulls on them, giving the illusion that the table has 2 drawers built in. This is where I keep my ugly stuff--interfacing and fabric scraps.

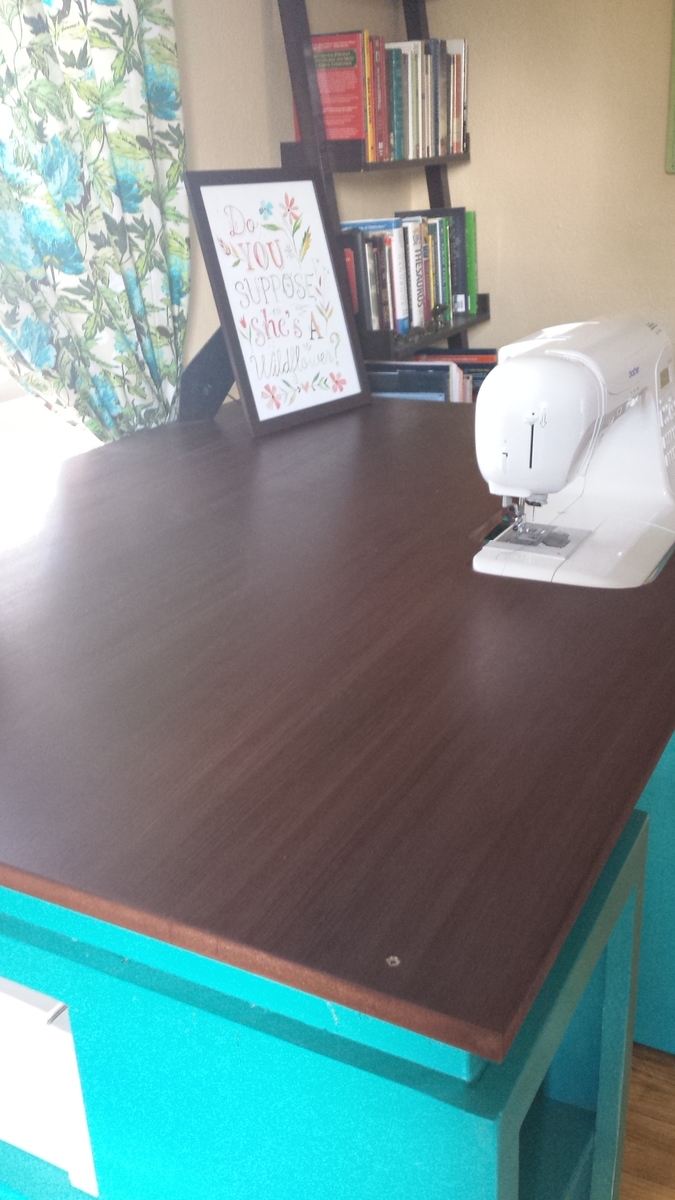
I got the color scheme for the table from the entryway console plan in The Handbuilt Home. In order to make the MDF top look like it had a wood grain, I applied mahogany gel stain with an old washcloth in very thick strokes that spanned the length of the tabletop. It soaked in and lost the "grain" look in some places, but the majority still looks like wood. I did have to apply several coats of polyurathane over the stain; the MDF has a prickly texture that grabs fabric and makes it hard to feed through the sewing machine.

My only complaint is that I didn't quite think through the fact that seating is bar height and I'm 5'7". It's a little difficult to reach my sewing machine pedal. I may build a small stool for the pedal to sit on so I don't have to half sit/stand to sew.

This is the first woodworking project I've done alone from start to finish: from going to Lowe's and picking out the wood, to cutting the wood with a circular saw, assembly, and finishing. (My fiance did carry it up the stairs for me. :) )

I'm so in love with this table! And now to finish the quilt I started 6 months ago....
Built from Plan(s)
Estimated Time Investment
Week Long Project (20 Hours or More)
Finish Used
I used 2 coats of Valspar Signature paint in Laguna Beach, and Minwax mahogany gel stain on the MDF tabletop.
Recommended Skill Level
Intermediate

Comments

MissMehndi

Mon, 09/23/2013 - 15:22

I love this idea!! I too have wanted a sewing table for a long time but the prices of them take my breath away. I may have to make myself one! Thanks for the inspiration!!

Sofa Console Table Bar Height for Dining

Submitted by ezematis1 on Mon, 01/23/2023 - 06:55

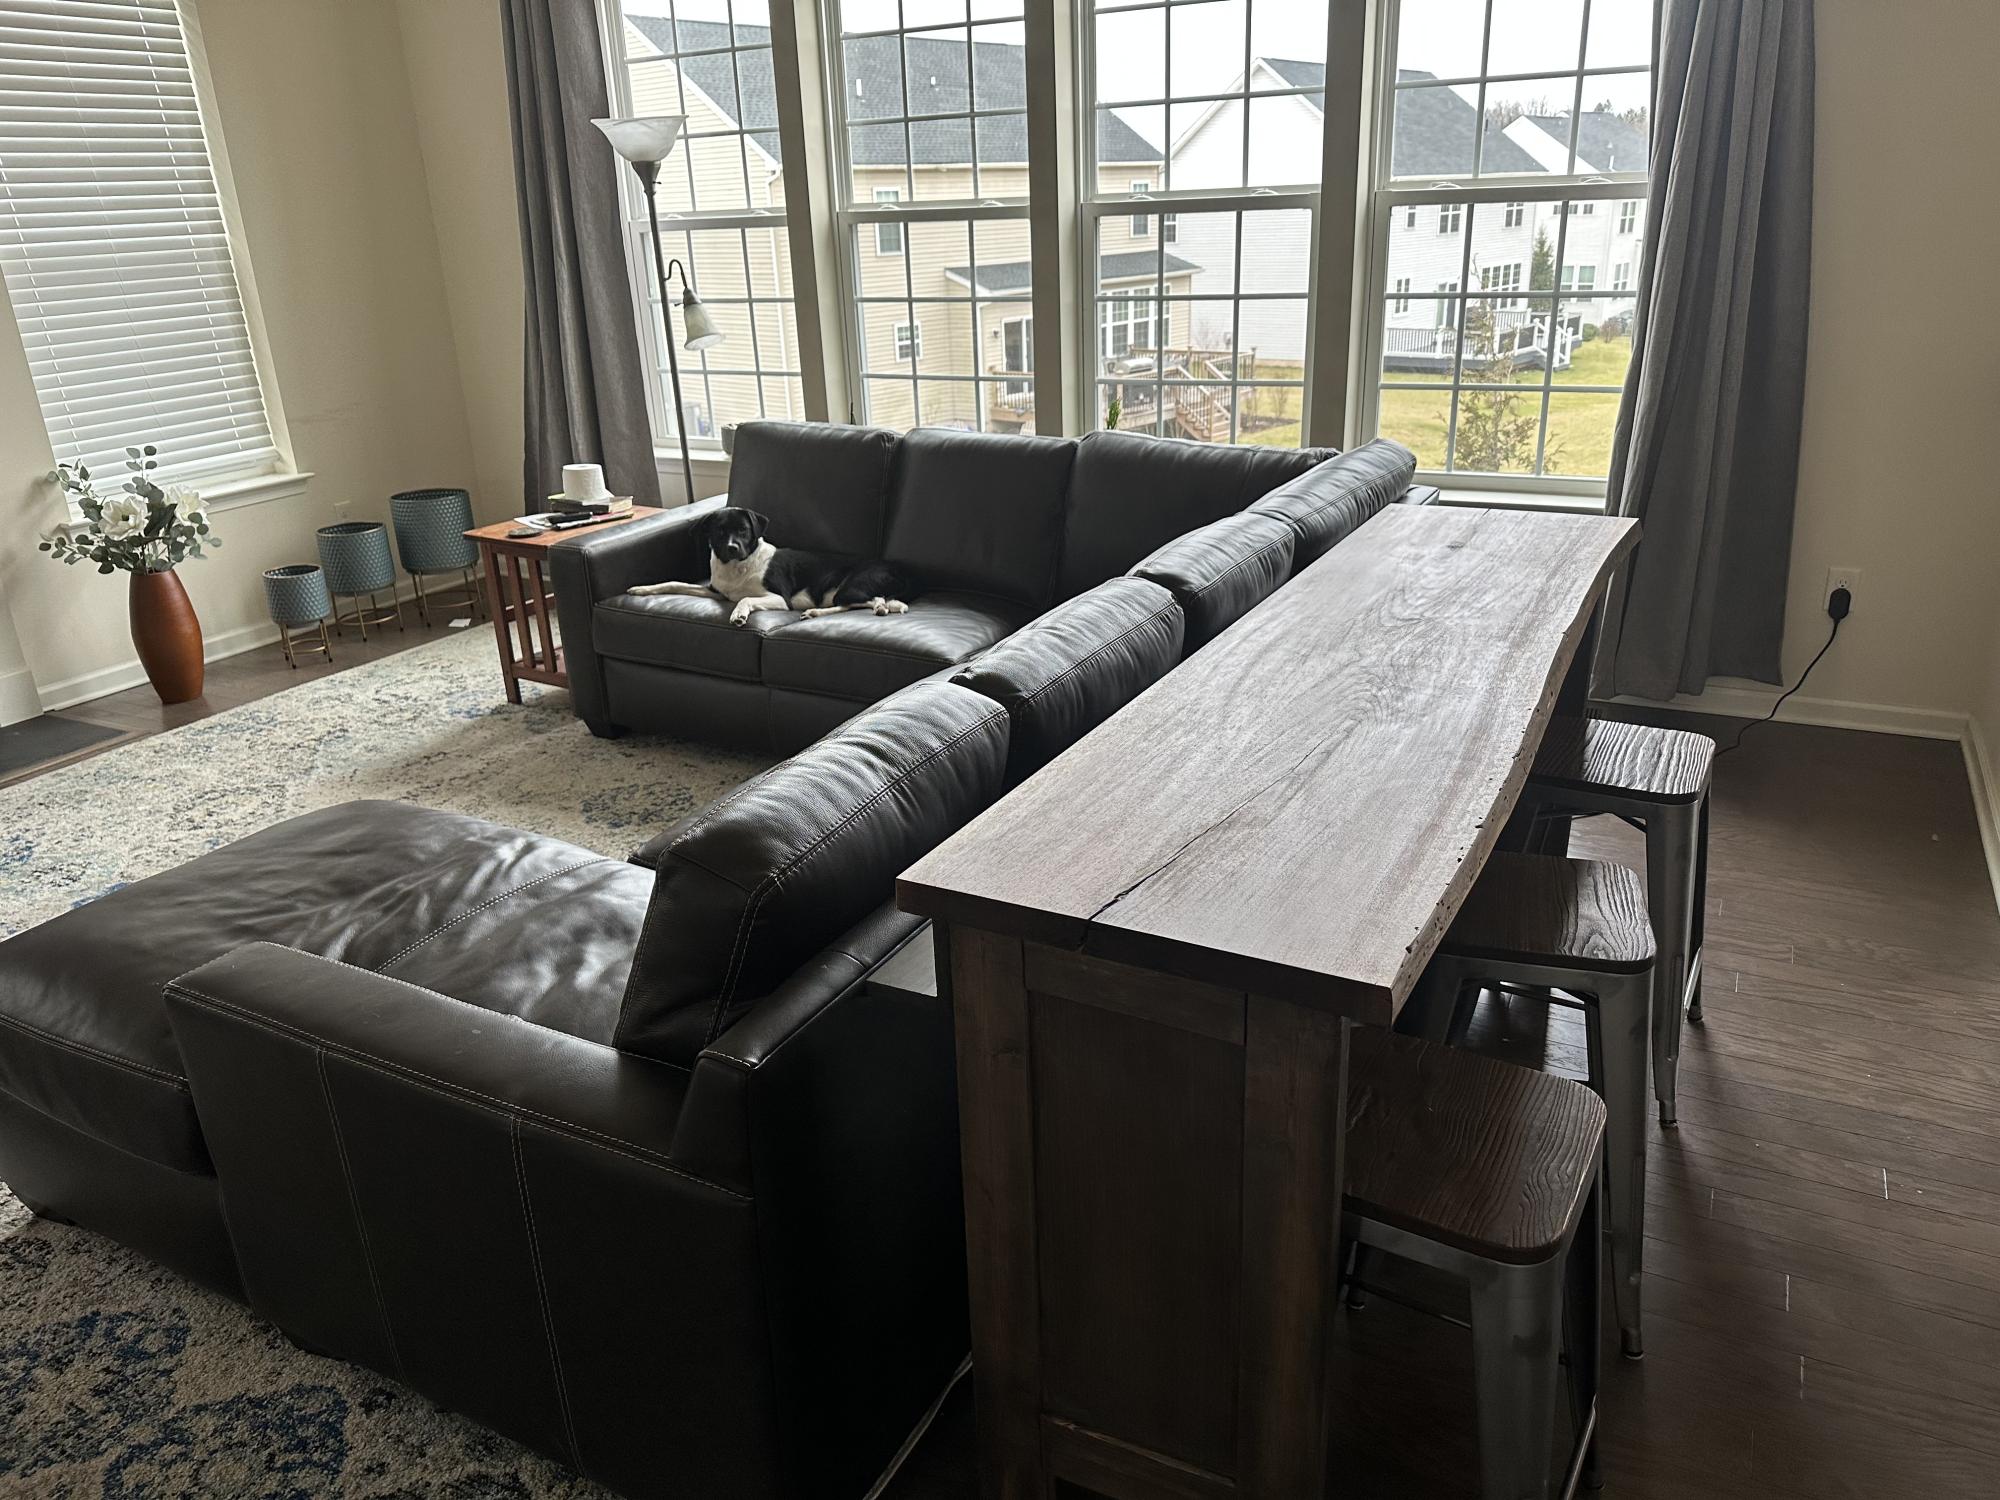
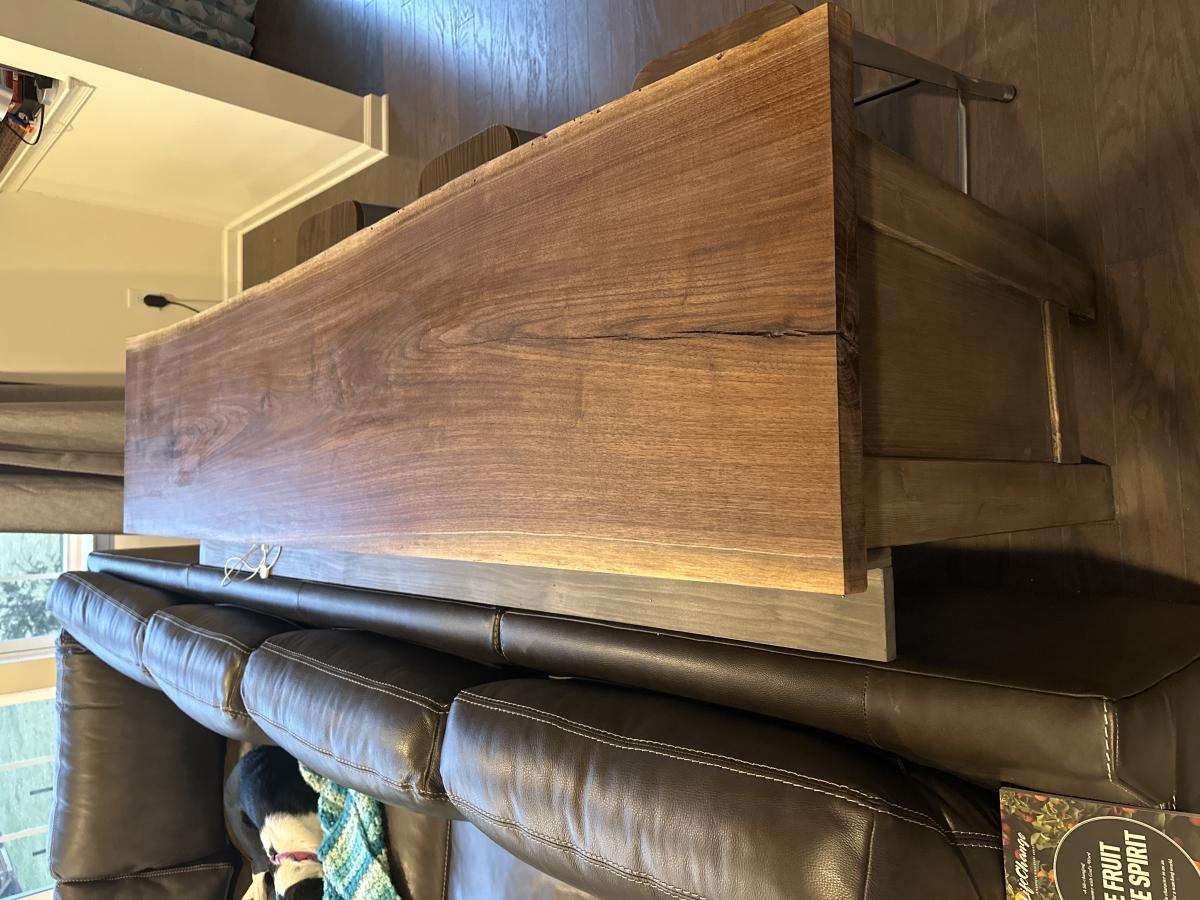
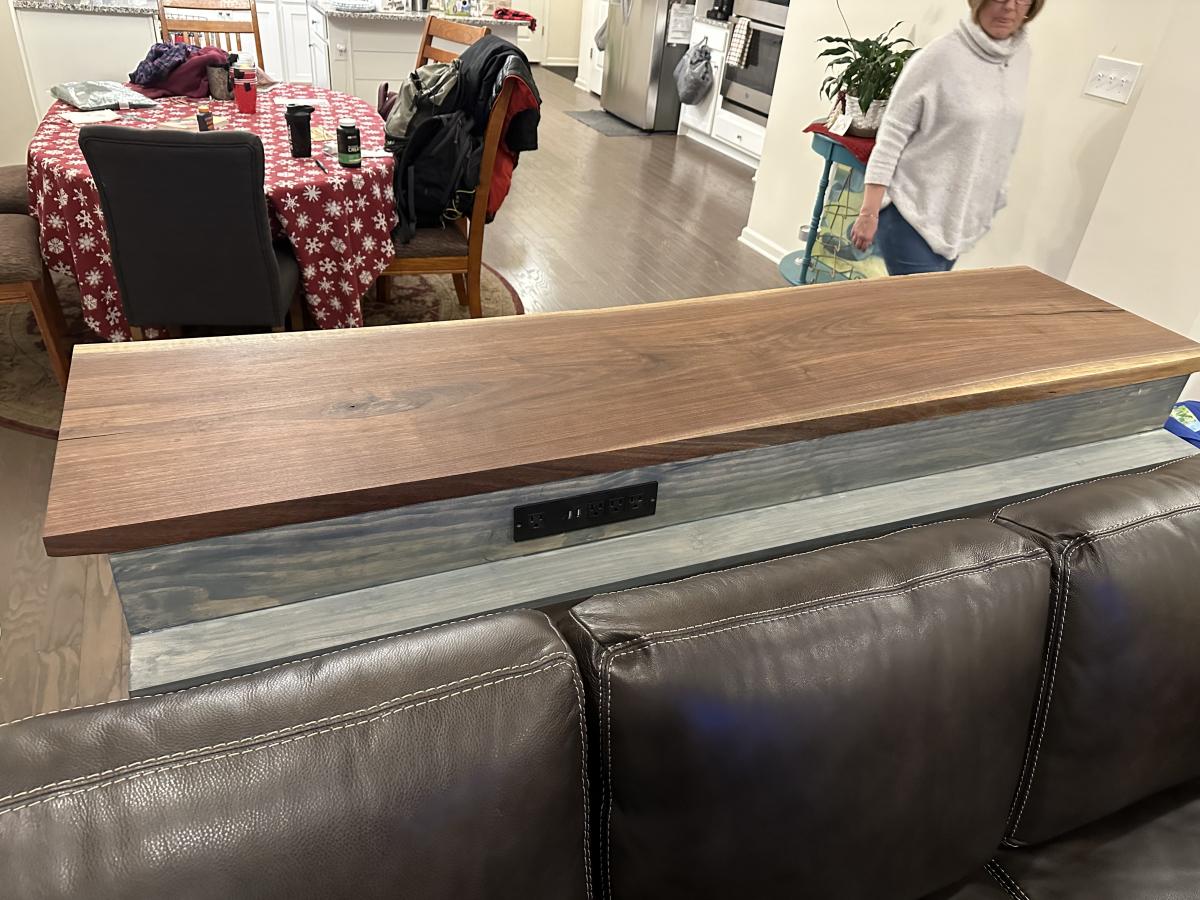
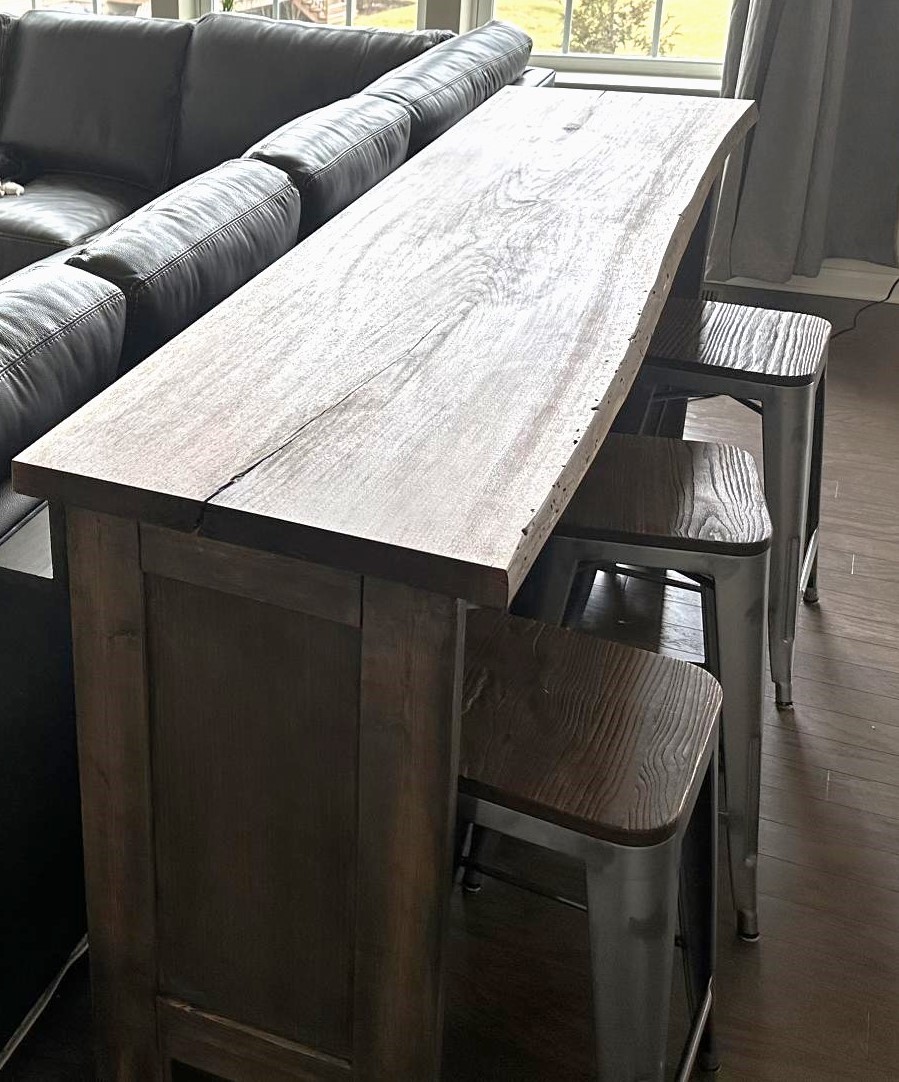
I took the basic idea of the Rustic X Console. Raised it to countertop height so I could use it for three stools. I also added a shelf so people sitting on the sectional could put drinks right behind them. Added a charging station to that shelf as well. Topped it with a live edge black walnut slab. Finally, I didn't use the X because the table was too high and the base was too narrow to make the X work. I used a tablesaw to cut a grove in the legs and then put a 1/4 plywood panel.

Built from Plan(s)

Comments

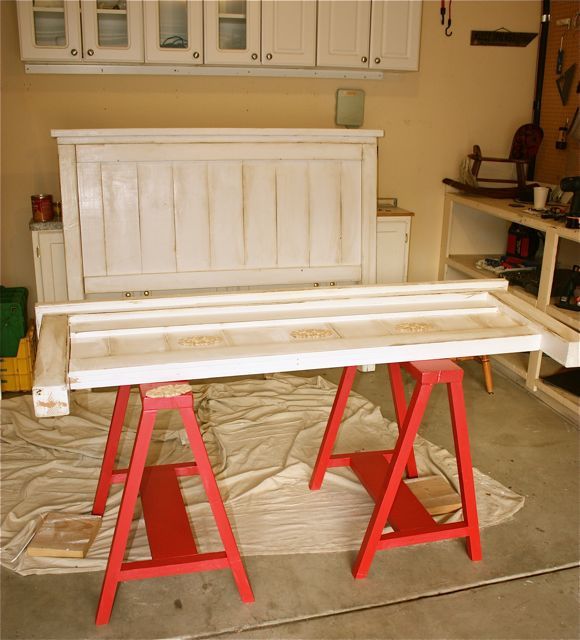
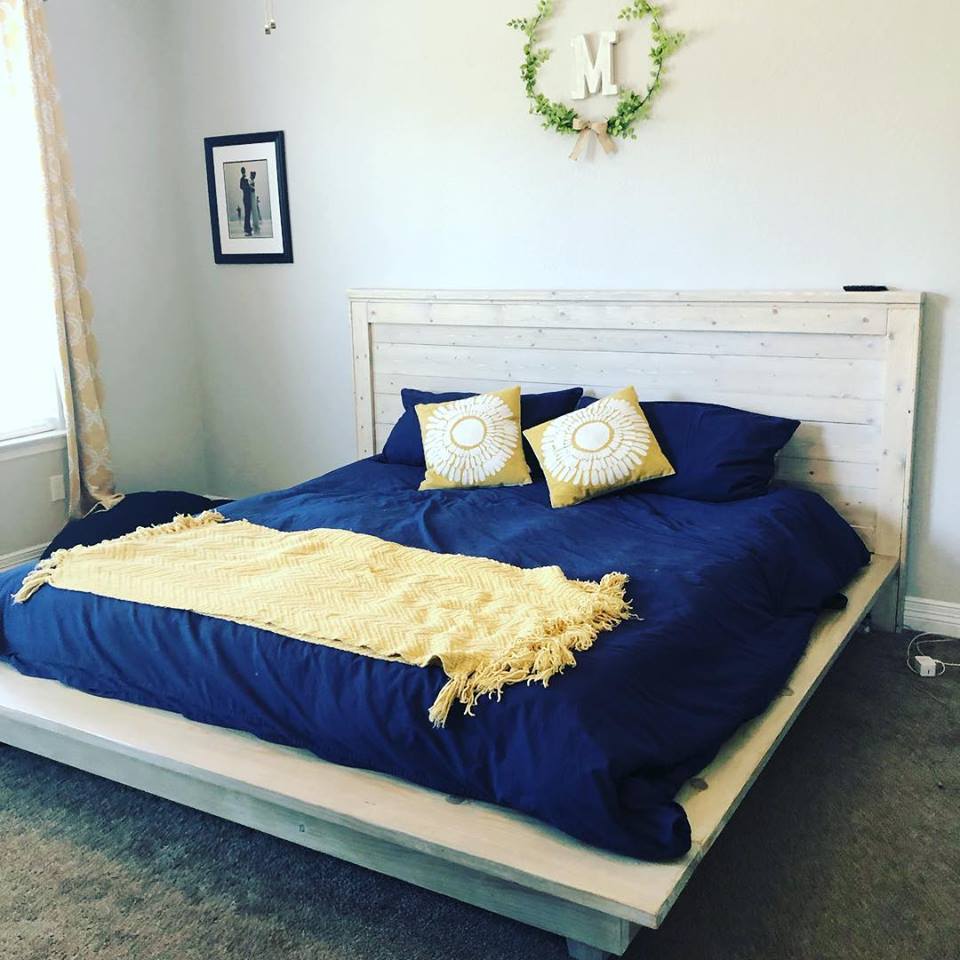
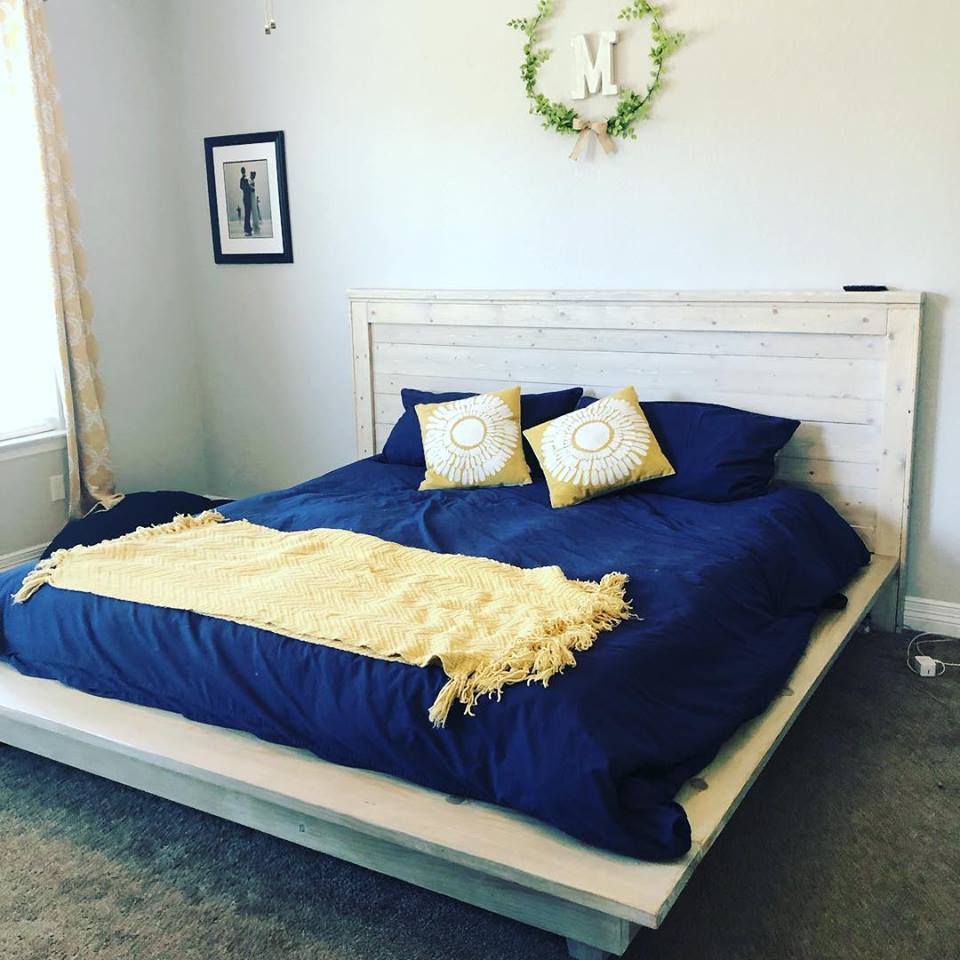
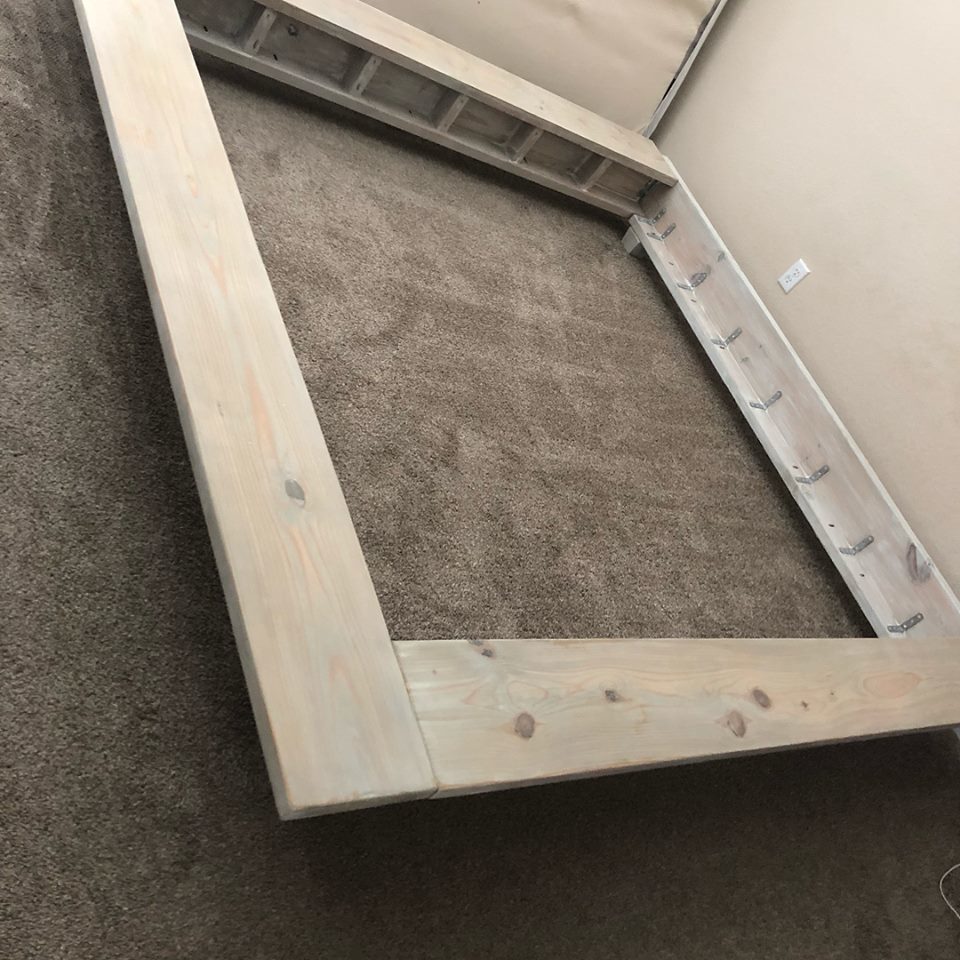
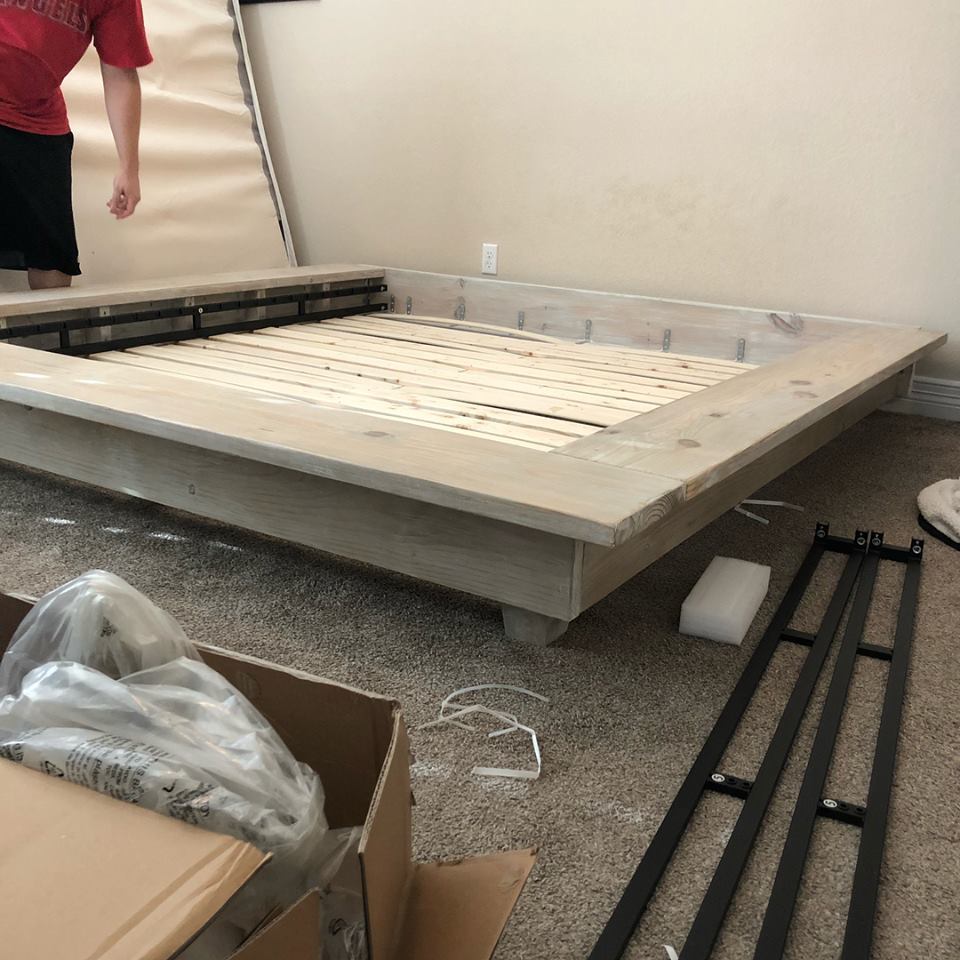
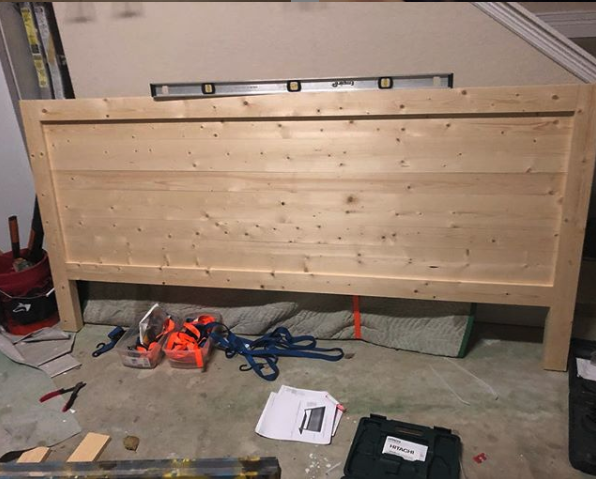
Reclaimed wood - look Headboard and . modified platform bed.

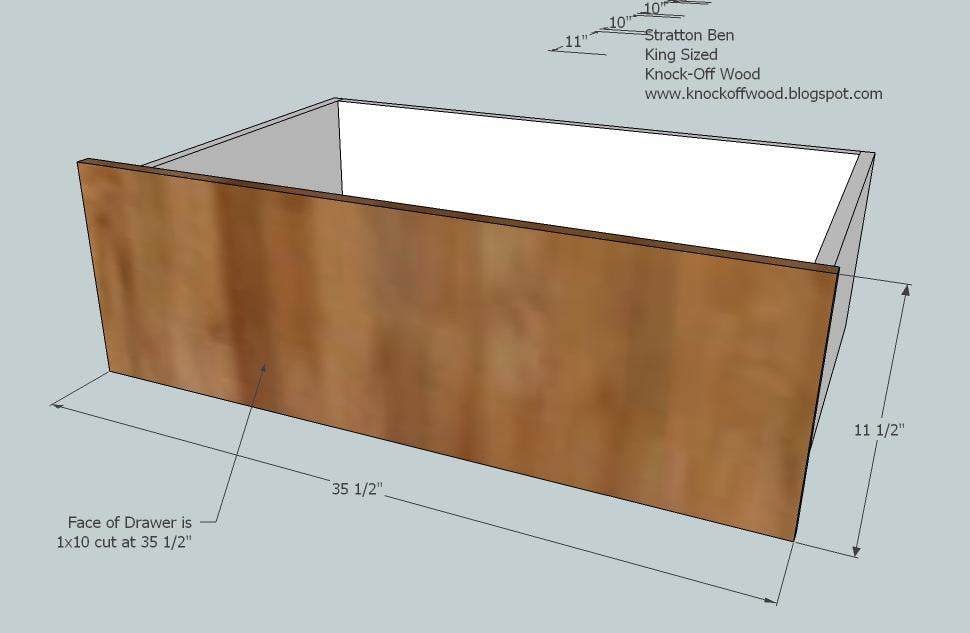
Made wider for a king and modified platform bed. Used a weathered oak stain followed by a 50/50 whitewash.

Estimated Cost
$300 ish
Estimated Time Investment
Week Long Project (20 Hours or More)
Finish Used
Used a weathered oak stain followed by a 50/50 whitewash. Varythaned.
Recommended Skill Level
Intermediate

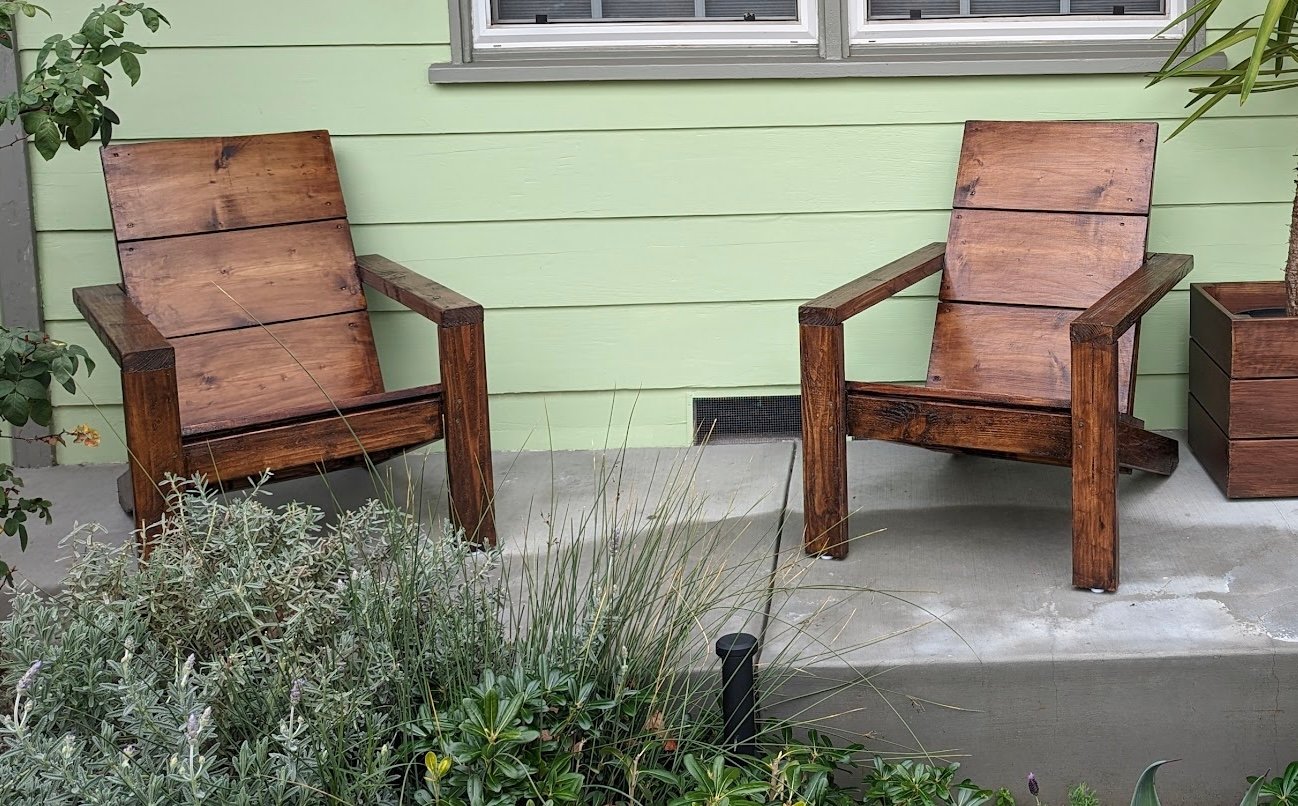
Adirondack chairs

Submitted by Anonymous (not verified) on Fri, 03/17/2023 - 23:53

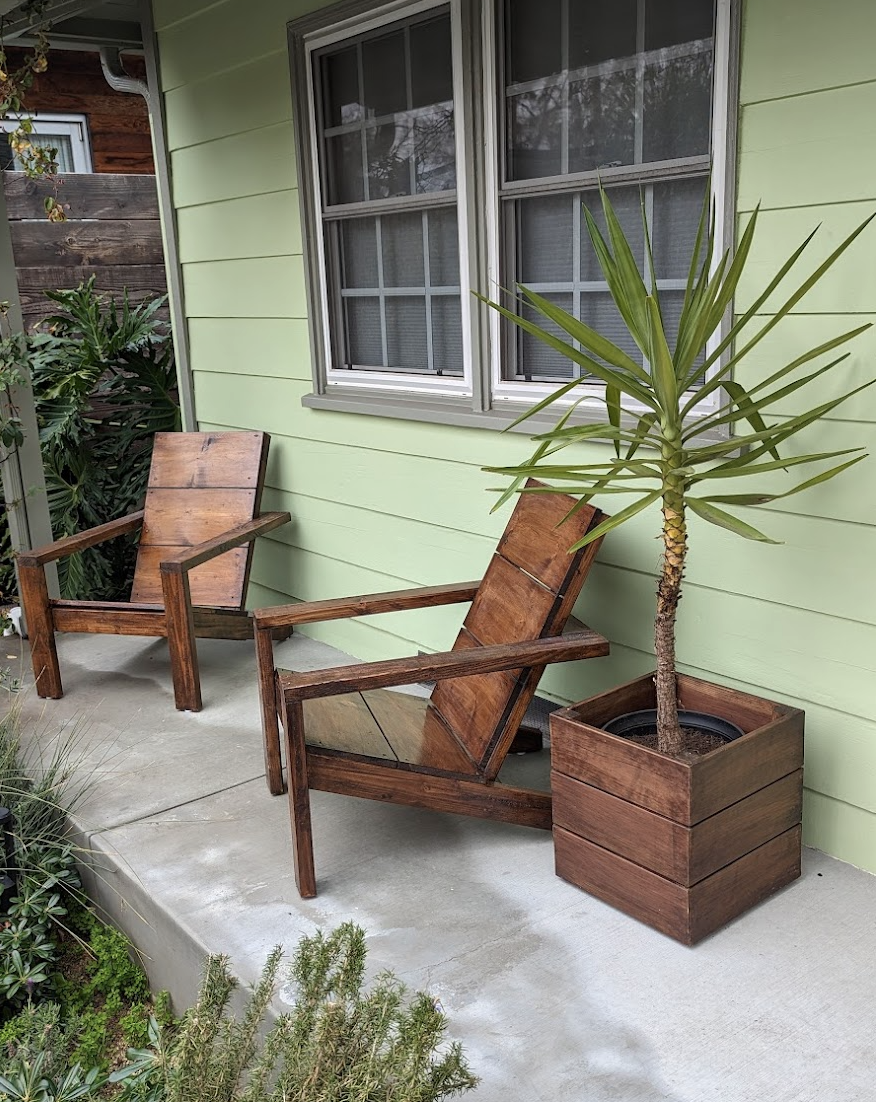
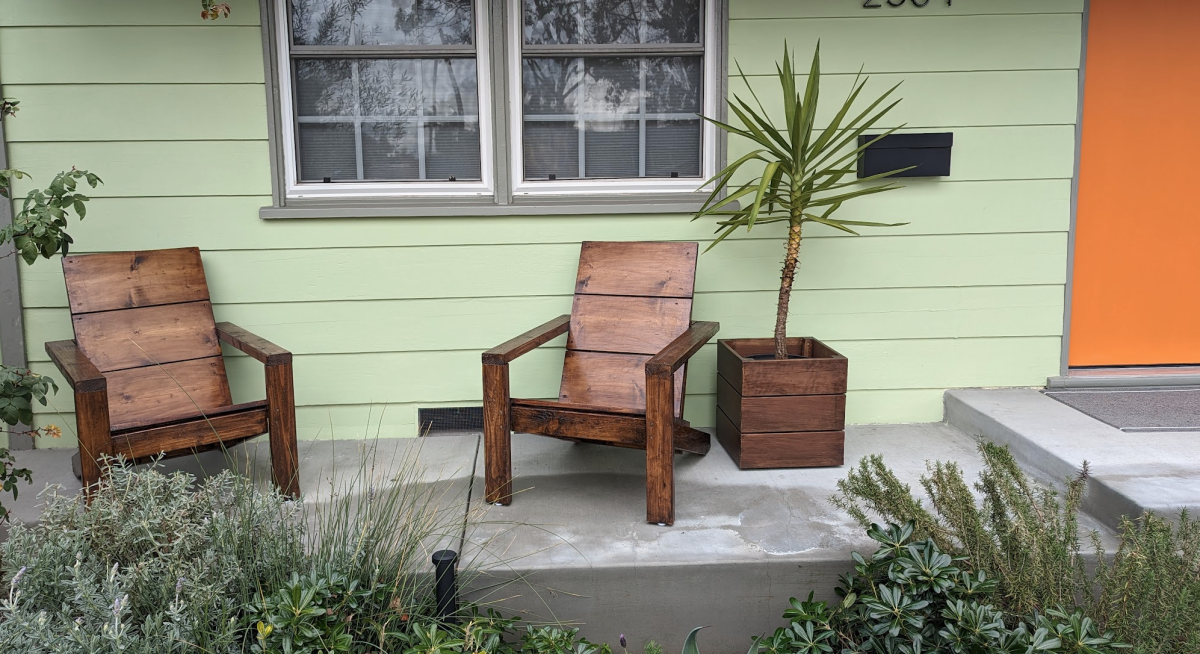
This was such a fun project. Your plans were spot-on and easy to follow. I am not a total beginner woodworker but not experienced either and I am so proud that I created these beauties with your help. They are adding so much to our curb appeal. I learned a lot and I got an education on pocket screws and the Kreg jig; I ended up buying the 520PRO. I am so grateful!! Thank you so much!

Comments

DIY Farmhouse Table with Extensions

Submitted by katie0910 on Tue, 11/05/2013 - 06:03

We built this farmhouse table a few months ago and absolutely love it. We modified the plans a bit based on another brag post and went with a replica of the Restoration Hardware table. I also built the chairs for the table based on the Parsons chair plans

Estimated Cost
$300+
Estimated Time Investment
Week Long Project (20 Hours or More)
Finish Used
Minwax Provincial
Minwax Polycrylic in Satin
Recommended Skill Level
Intermediate

Comments

Joni

Tue, 11/05/2013 - 17:59

Really nice job! This was quite an accomplishment, especially given that you guys did additional chairs (that look fantastic). Also, great job documenting on your blog.

Sonny's Play Mud Kitchen

Darling Mud Kitchen by Sarah Jean Gammon

"I had this idea of making Sonny a mud-kitchen, a kids play kitchen for the yard. I mentioned it to Brent and he laughed saying he had enough projects on his list. This was not something he was going to build. Sooo I built this all by my self...or as Sonny would say, “me do this my own self”. It cost ~30 bucks in lumber and a trip to the thrift store for some second hand pots and pans. 3 hours later, a little paint, a little stain and voila... Sonny Side Up Mud Kitchen! Thanks for the plans Ana."
Built from Plan(s)

First Project

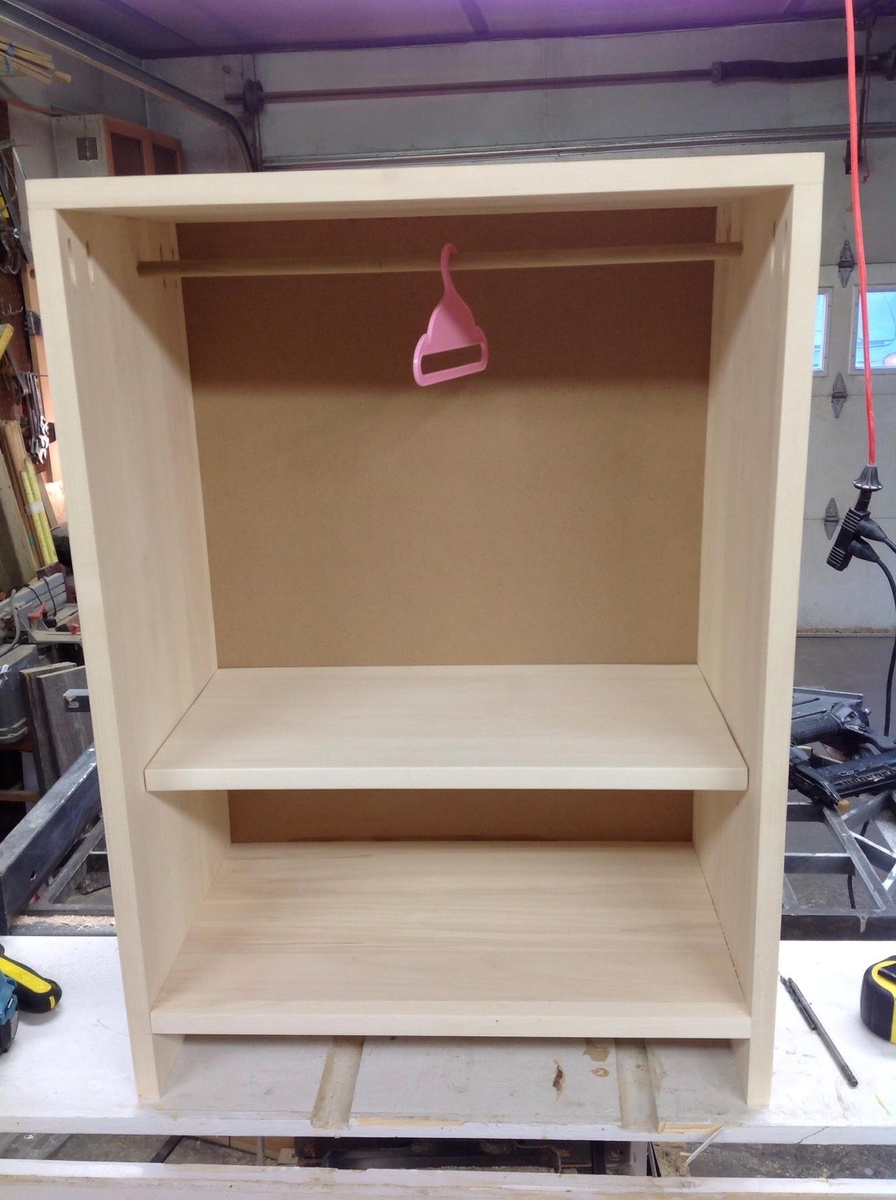
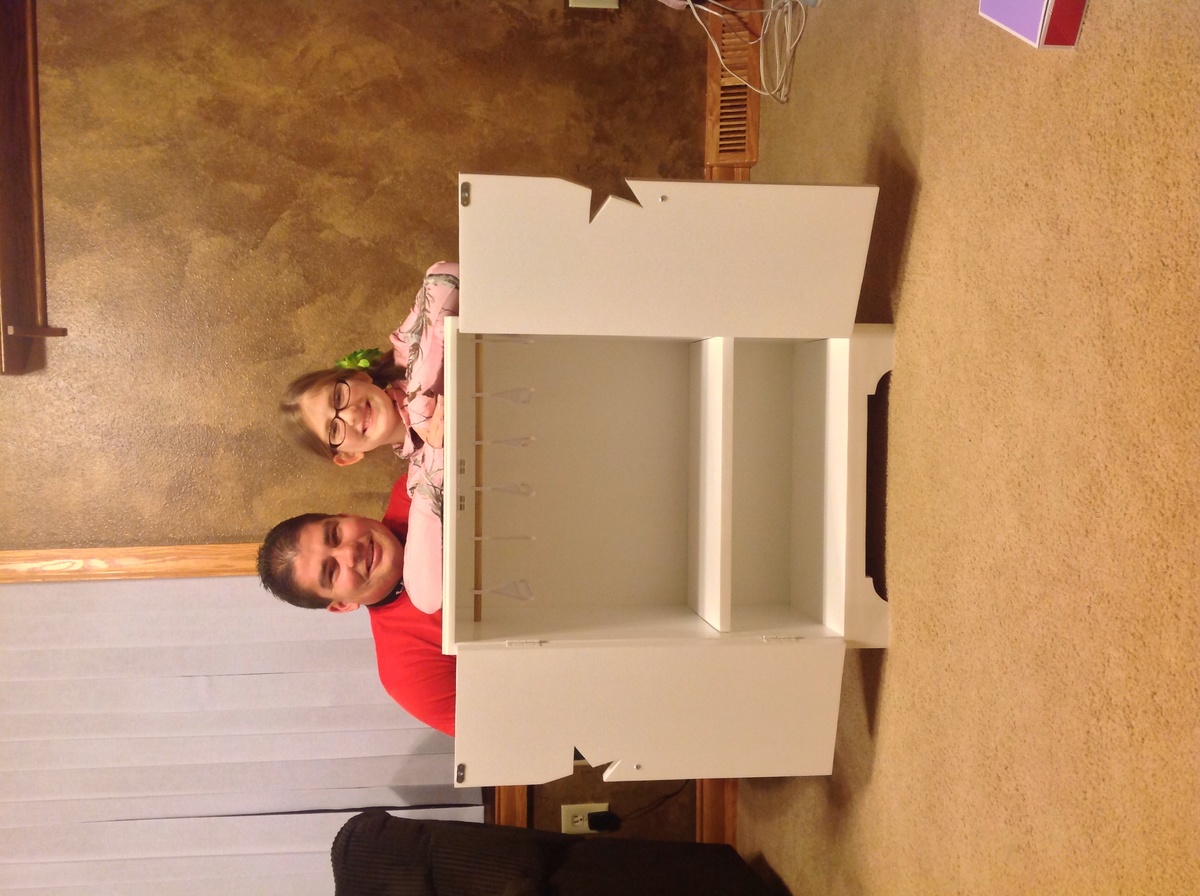
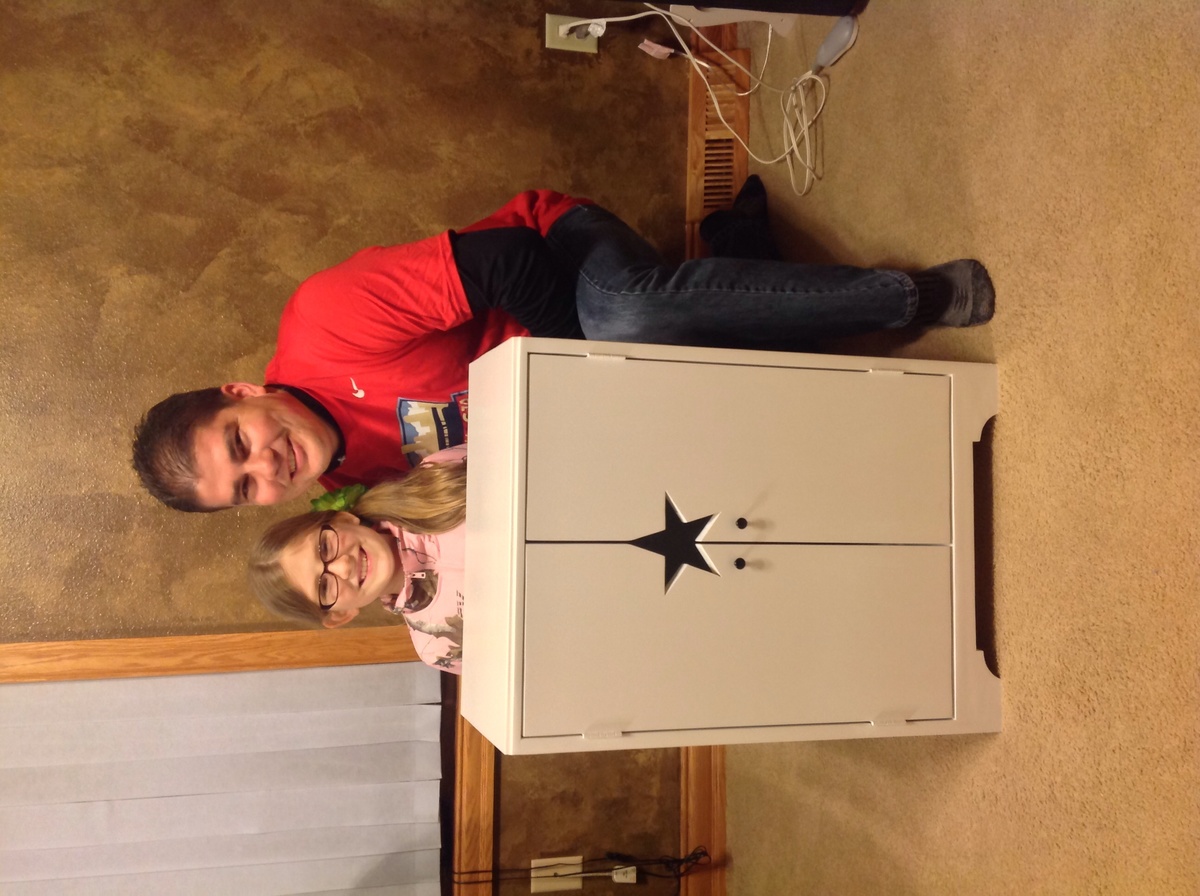
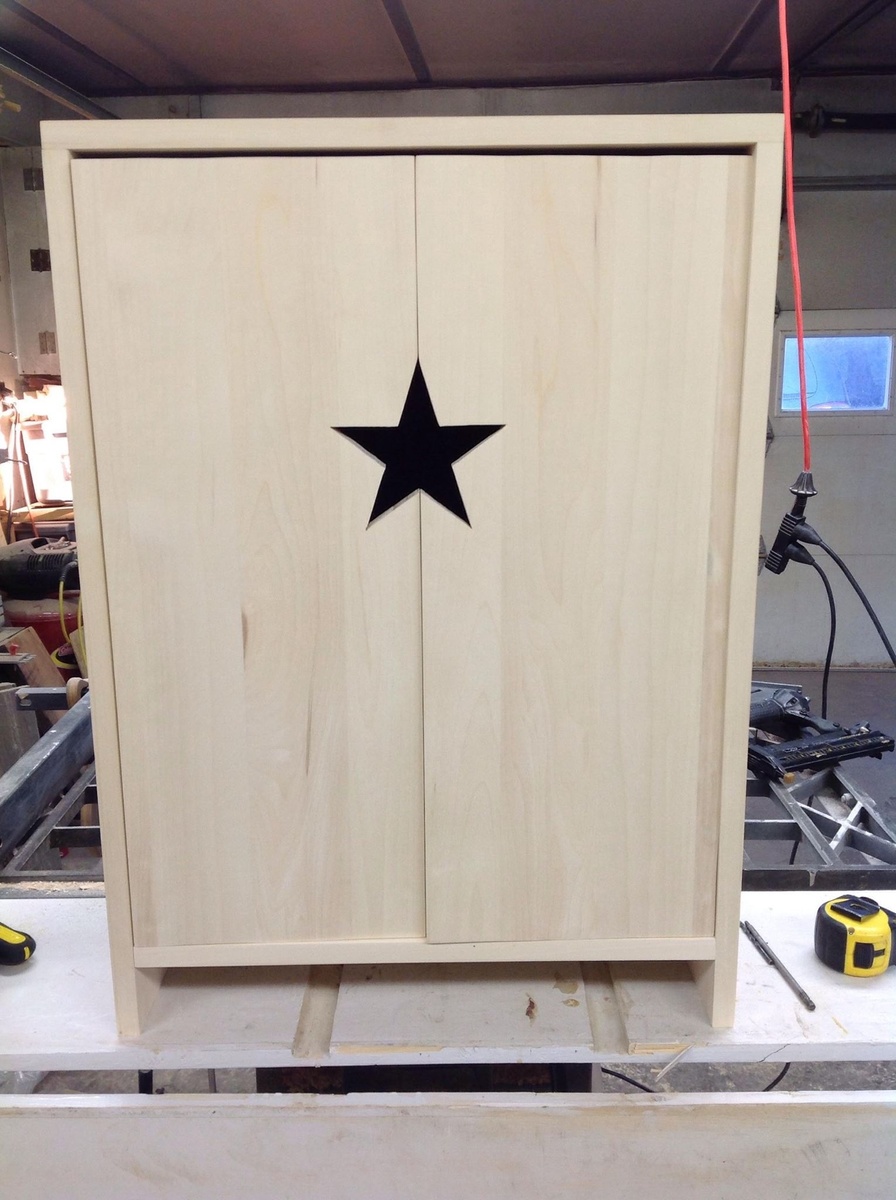
My 11 year old is a girlie girl and has been asking my wife and I for the American Girl Star Armoire cabinet for 2 years. I found a similar plan here on Ana-White's Plan page. I decide to use a little nice quality wood (Aspen) instead of just a clear pine wood. It turned out nicer than even I could have expected.
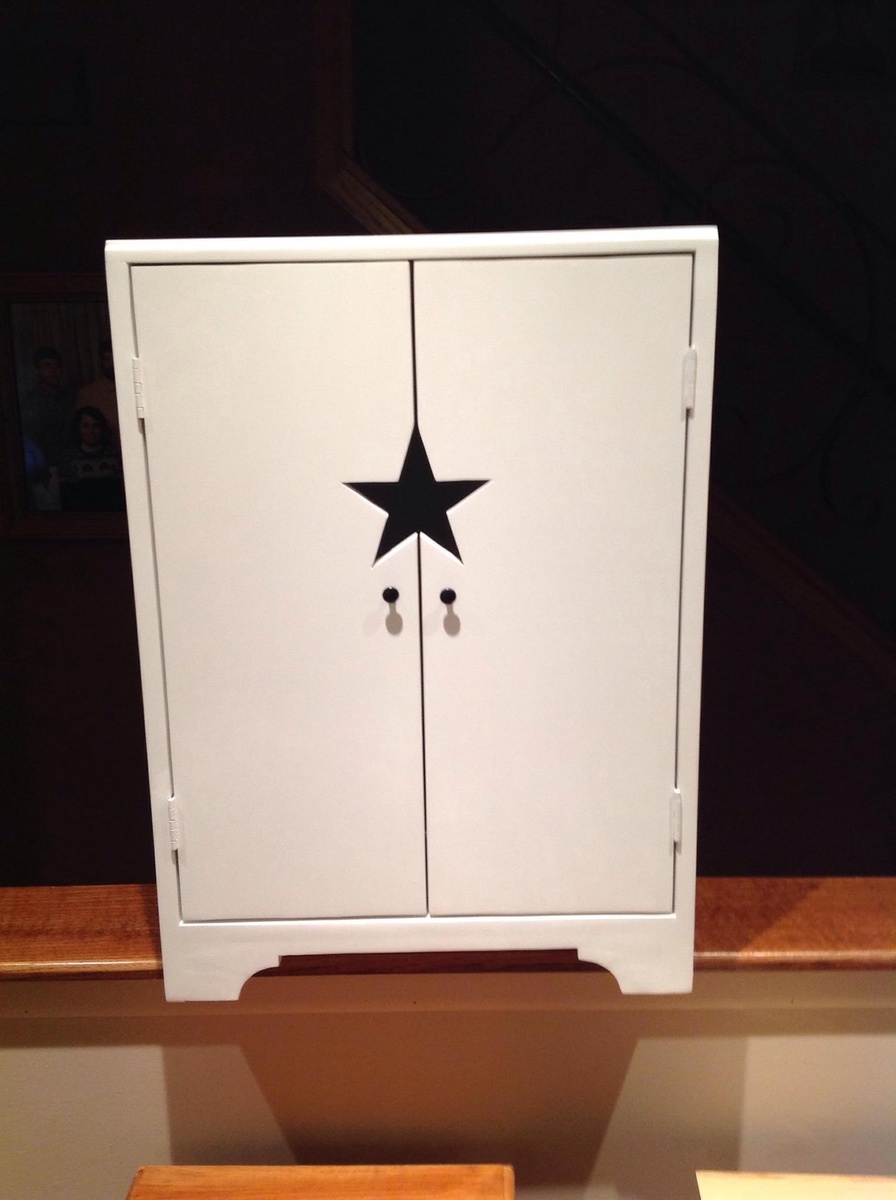
My daughter got this for her 11 Bday this past Sunday and has already filled the cabinet with all her special AG Dresses. I added my own twist by putting a 1/4" Chalkboard back on it so she can use it to play school with her AG Dolls.

I have a couple people interested in making one for them for Christmas. :)

My next project will be one of the bunk-beds featured on Ana's website.

Estimated Cost
$72.00 (Material & Hardware ONLY)
Estimated Time Investment
Afternoon Project (3-6 Hours)
Finish Used
My friend has a "cup gun" sprayer and the cabinet has 3 coats of white paint.
Recommended Skill Level
Beginner

Comments

bhammond

Fri, 11/15/2013 - 17:19

Beautiful cabinet, and what a treasure for your daughter! How did you make the star so flawlessly?

Nice work!

Redwood Farmhouse Table and Bench

Submitted by nkukona on Mon, 07/22/2019 - 05:35

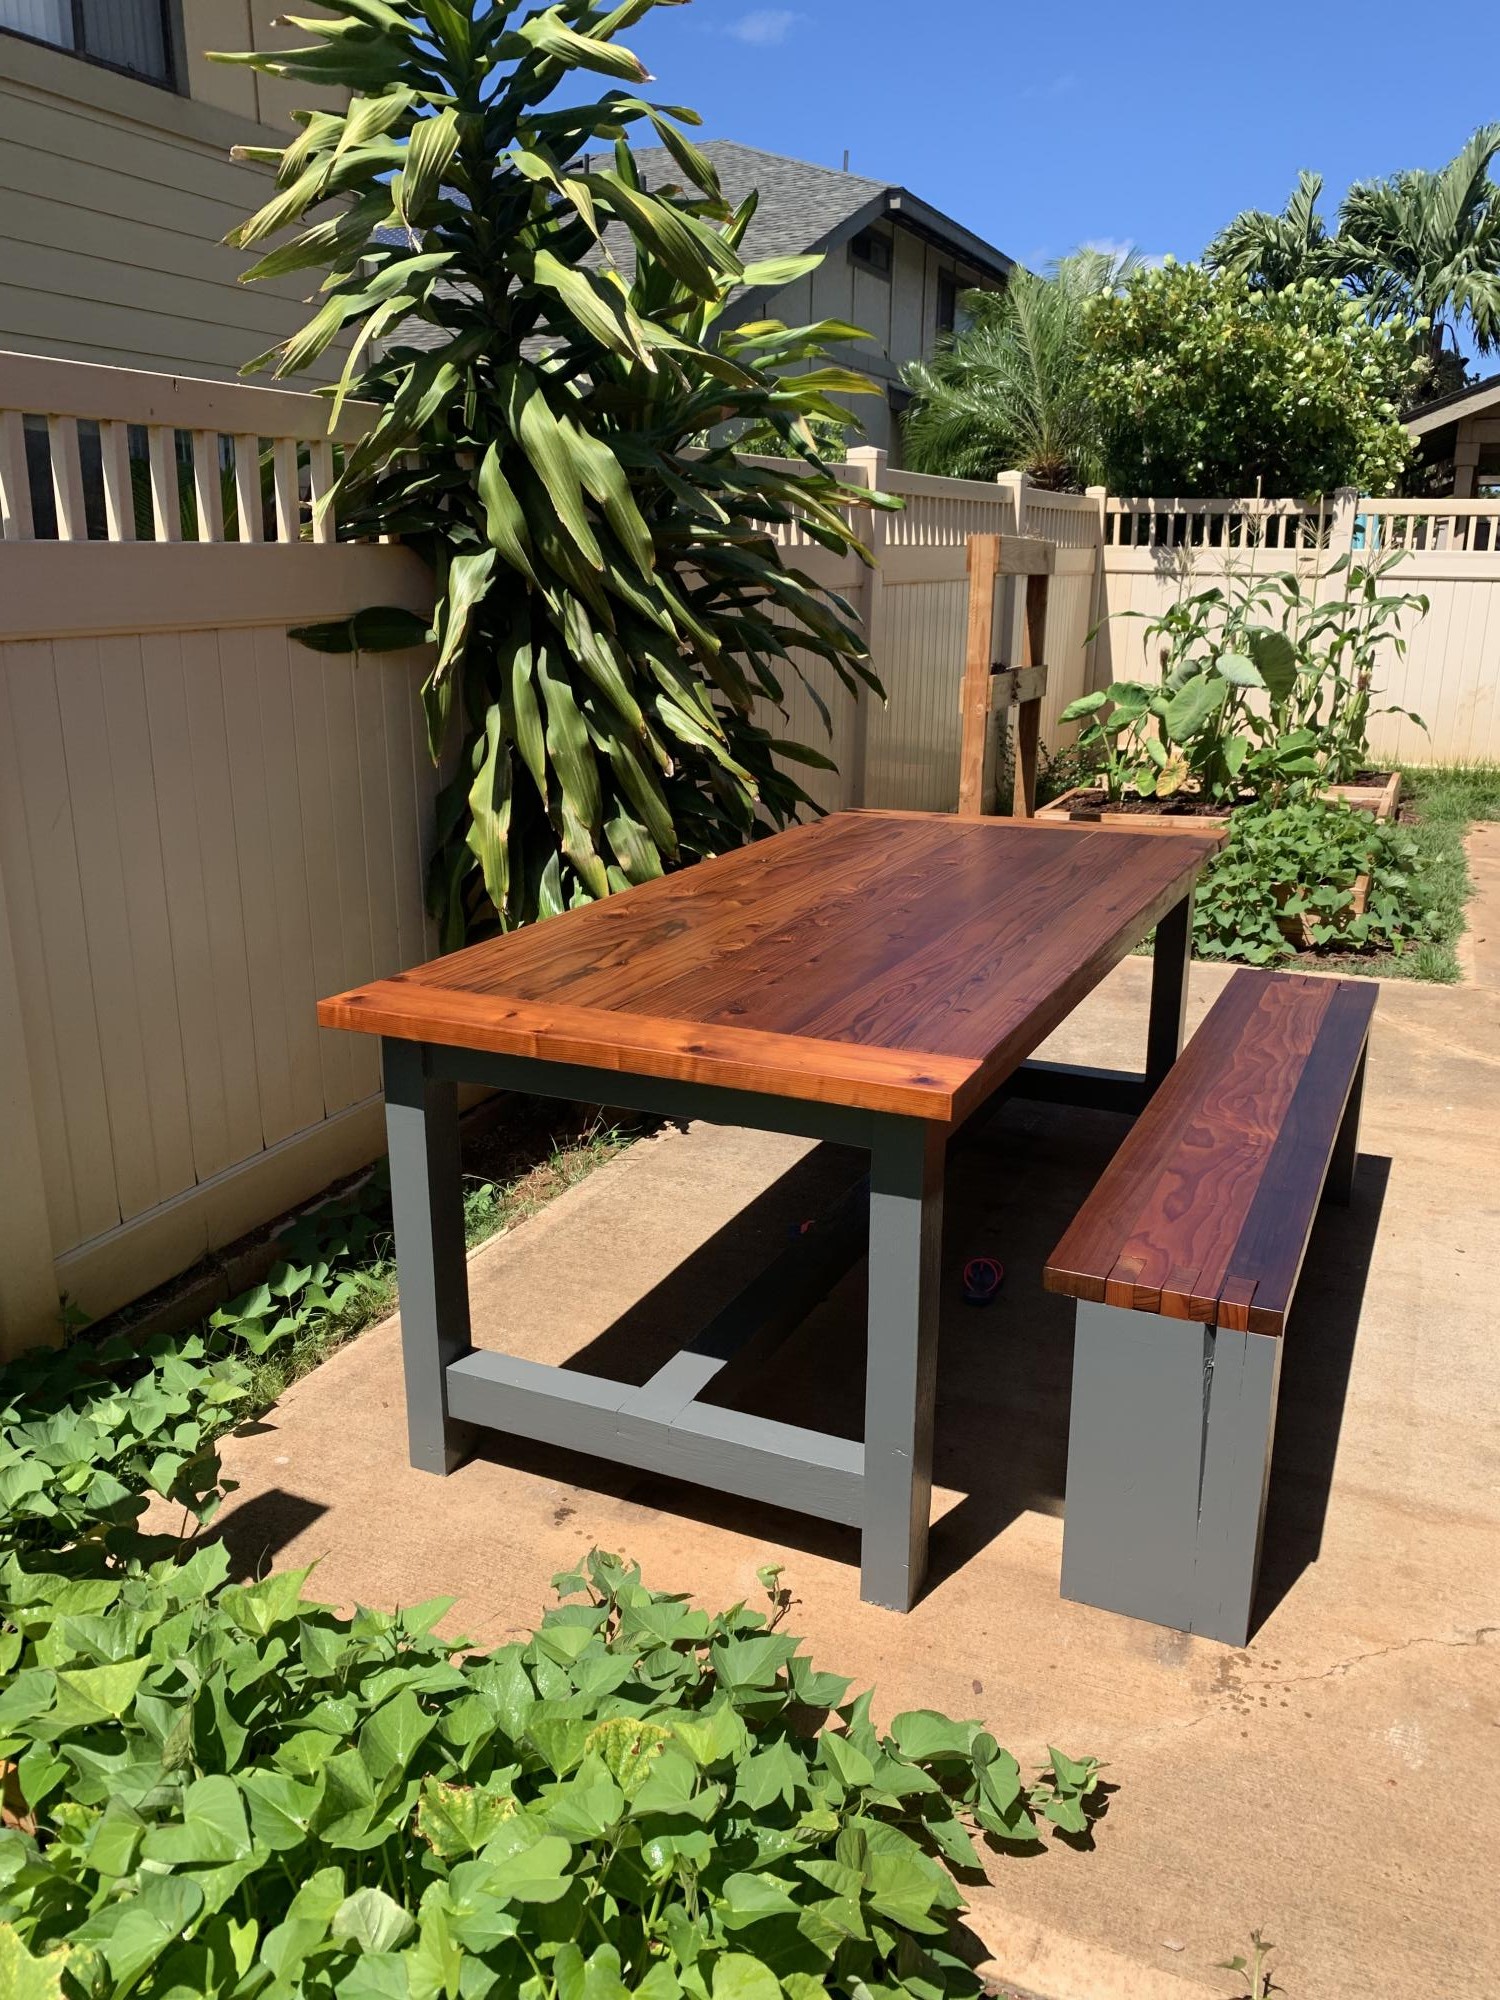
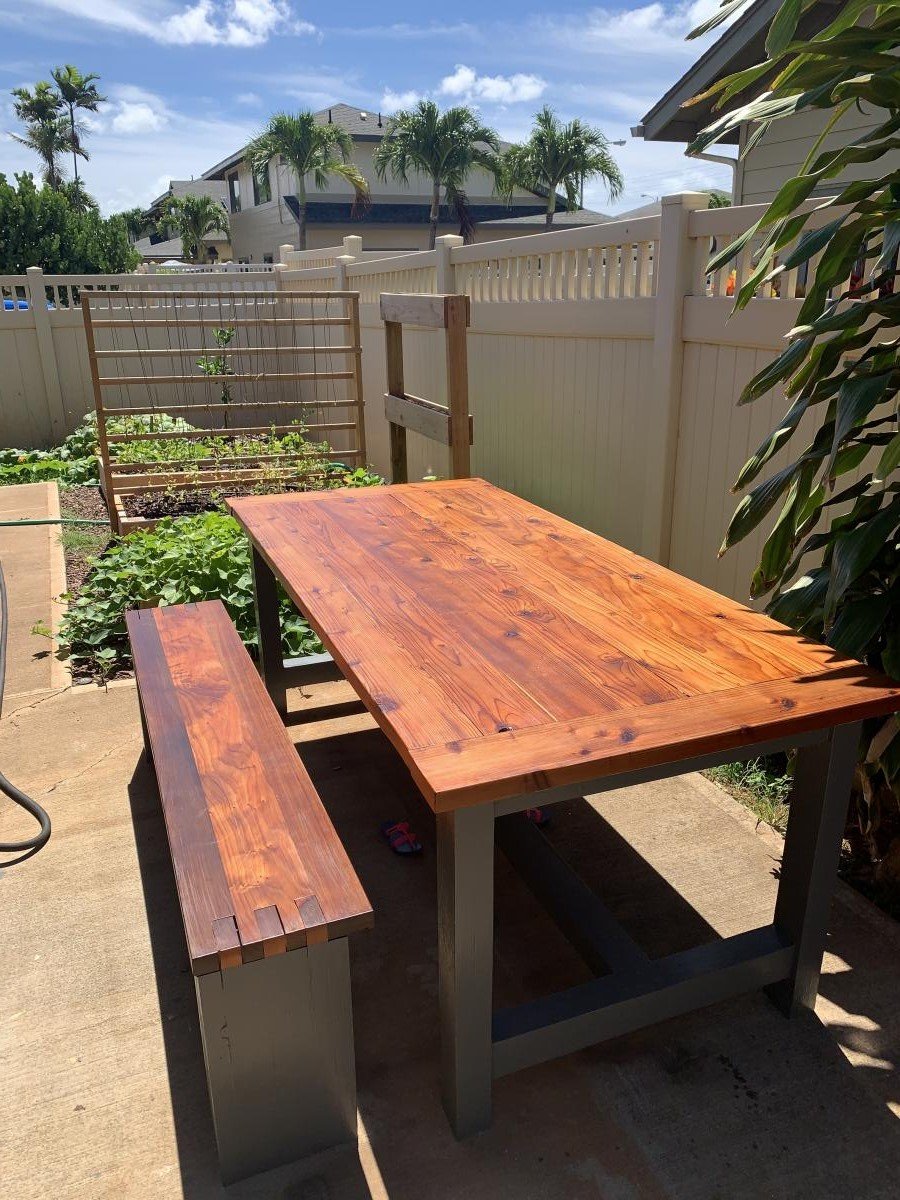
Farmhouse Table and Bench. Made from all redwood. Table is all new wood, and half the bench was from reclaimed redwood. Used Danish Oil and Spar Urethane to finish the tops, and paint to finish the legs.   

Estimated Cost
Not sure, but redwood cost a lot more than pine. Maybe $400 or so.
Estimated Time Investment
Week Long Project (20 Hours or More)
Recommended Skill Level
Beginner

Comments

Storage Shed

Submitted by Anonymous (not verified) on Fri, 02/05/2016 - 10:53

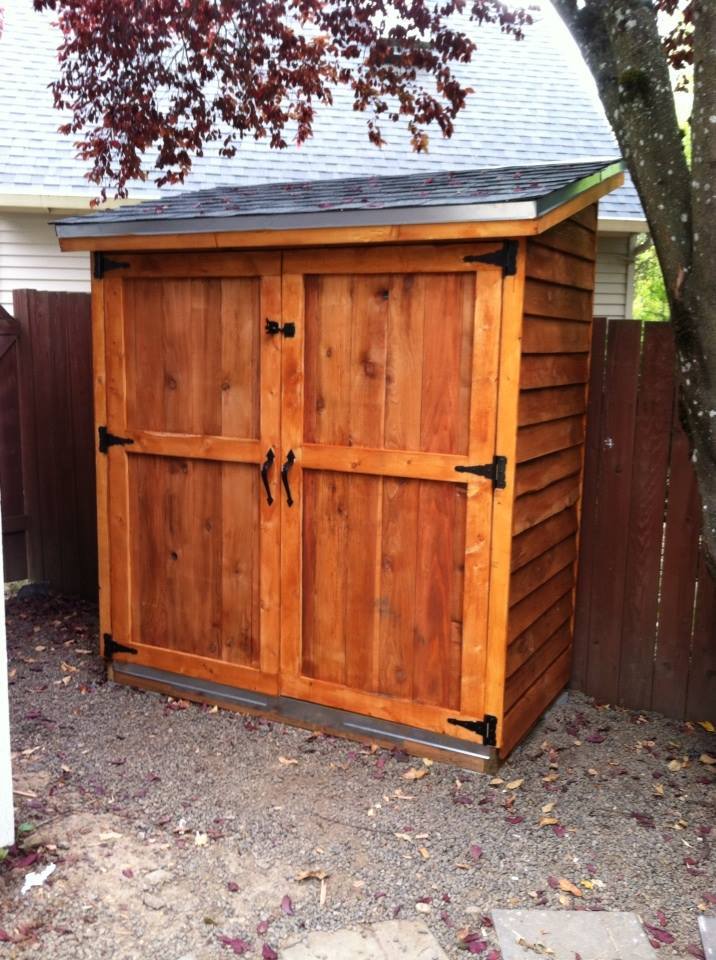
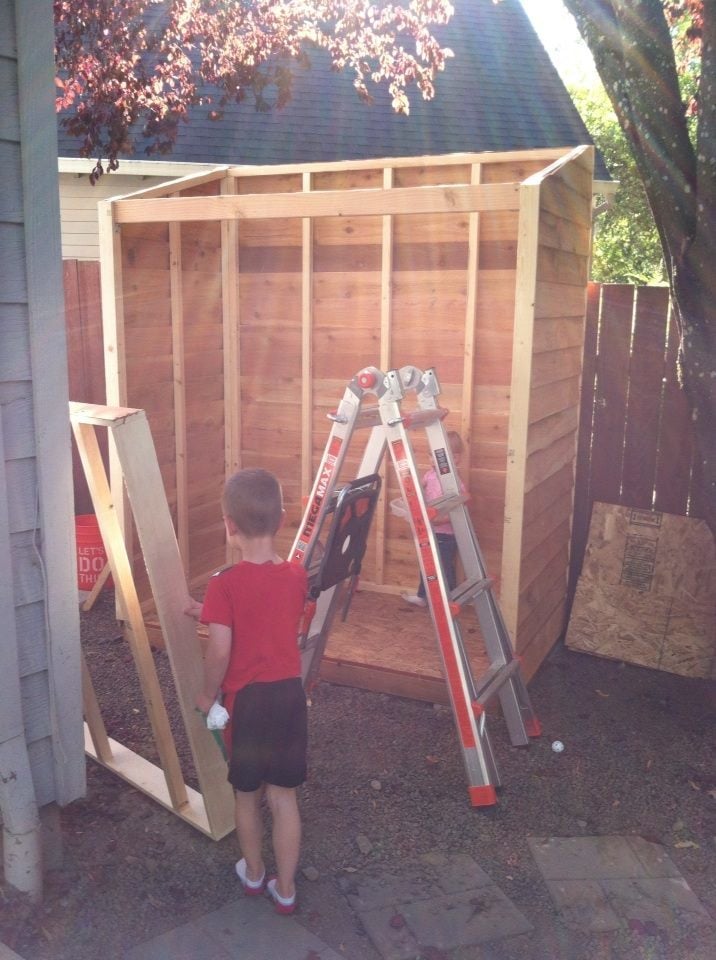
The plans were great! I hadn't built anything this big before but just followed the instructions step by step. I did also built a base to put it on (pavers on sand then pressure treated 2x6 frame). It took quite a while but that's just mostly because I had "helpers" and had to work on it when I had a spare minute. I was pleasantly surprised by how much we were able to pack in there. We added electricity and made a few other modifications to a larger shed we had so my husband could use that as an office. I built this to store all the tools, yard equipment, etc that we moved out of there.

Built from Plan(s)
Estimated Cost
$400-$500 (I added a base and added flashing and roofing paper to the roof)
Estimated Time Investment
Week Long Project (20 Hours or More)
Recommended Skill Level
Beginner

storage chest

Submitted by Anonymous (not verified) on Sun, 02/07/2016 - 17:13

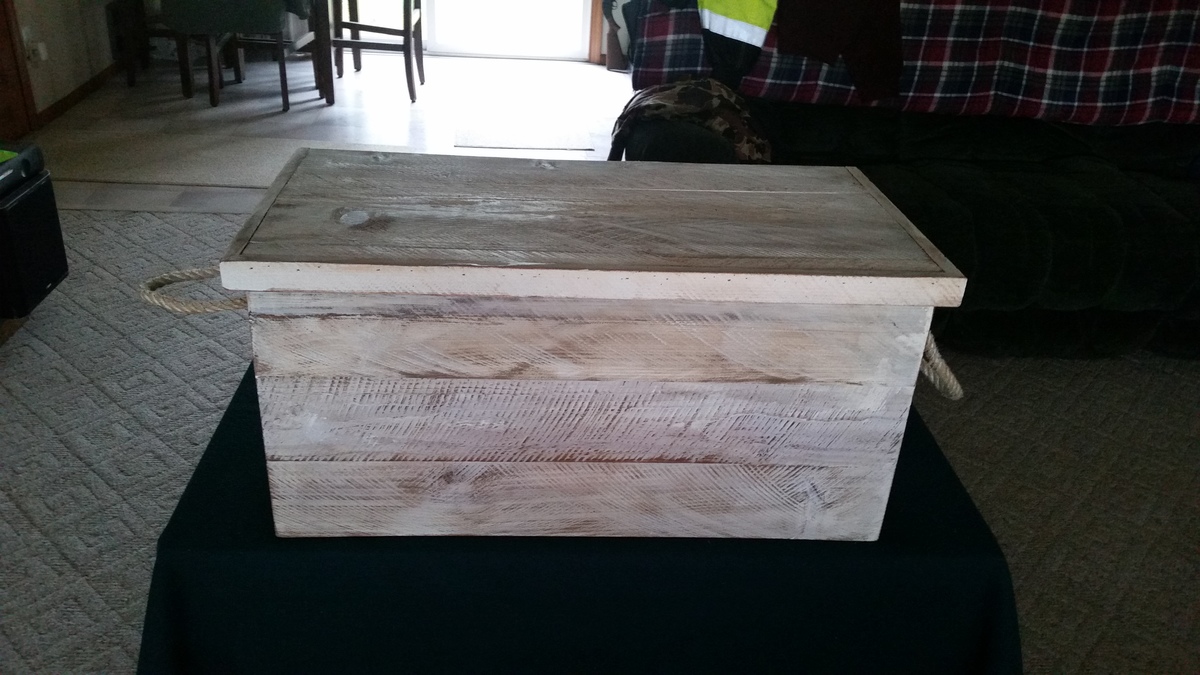
 Started as a tool chest for garage and after reading a article on ana white about finishings thought I would give it a tfy

Built from Plan(s)
Estimated Cost
about $15.00
Estimated Time Investment
Afternoon Project (3-6 Hours)
Finish Used
white wash then aged with vinegar and steel wool. Sealed with poly
Recommended Skill Level
Beginner

Playhouse with Steps and Slides

Submitted by Hafidz on Fri, 01/06/2012 - 14:06

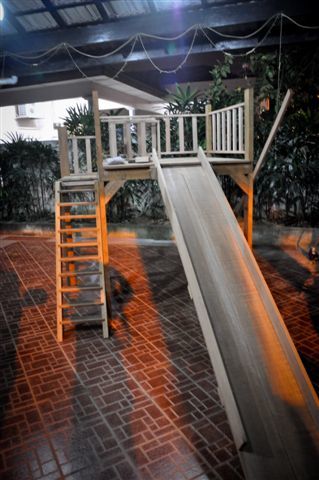
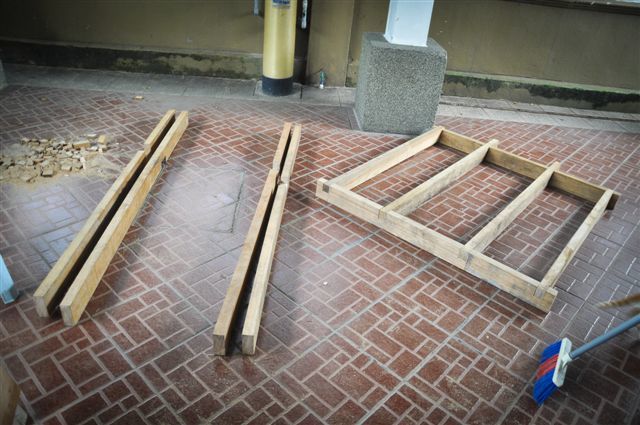
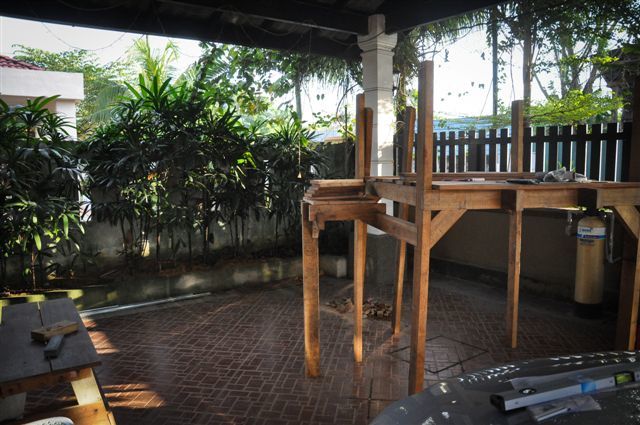
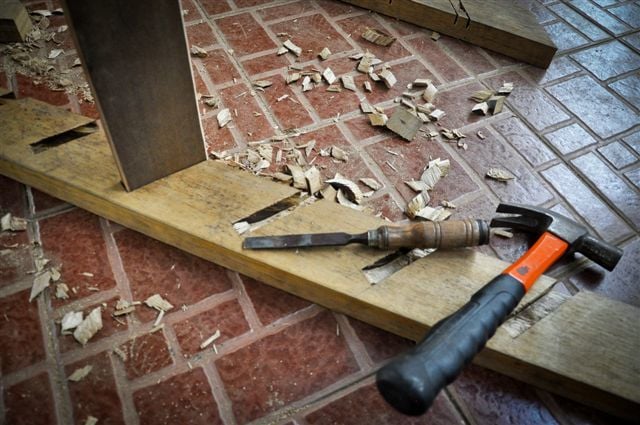
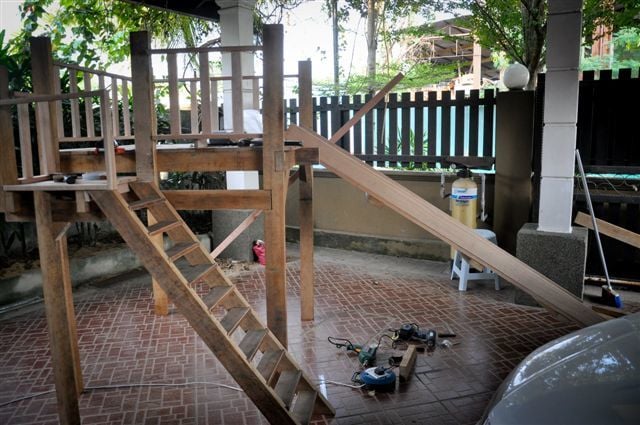
It's my first woodwork project and I went ahead on building a slide with a playhouse underneath. Took some of the ideas from Ana's playhouse deck plan. It took me awhile to figure out how to build the slides and steps though. The project is intended to cater for my 1 year old daughter. As you can see, the playhouse is not "there" yet as there's no wall surrounding the structure beneath the slides (there will be some soon enough). As this playhouse will someday be put under direct sunlight and heavy rain, choice of wood takes into account the tropical weather that we have here in Malaysia (I might have to put some heavy coating on that Meranti though).

Dimension wise it's a 4'X4'X4' structure with 1.5' steps attached at the side. The railing are about 1.5' high.

Built from Plan(s)
Estimated Cost
MYR 700
Estimated Time Investment
Week Long Project (20 Hours or More)
Finish Used
No finish applied yet.
Recommended Skill Level
Starter Project

Comments

I Built an Outdoor Sofa Set!

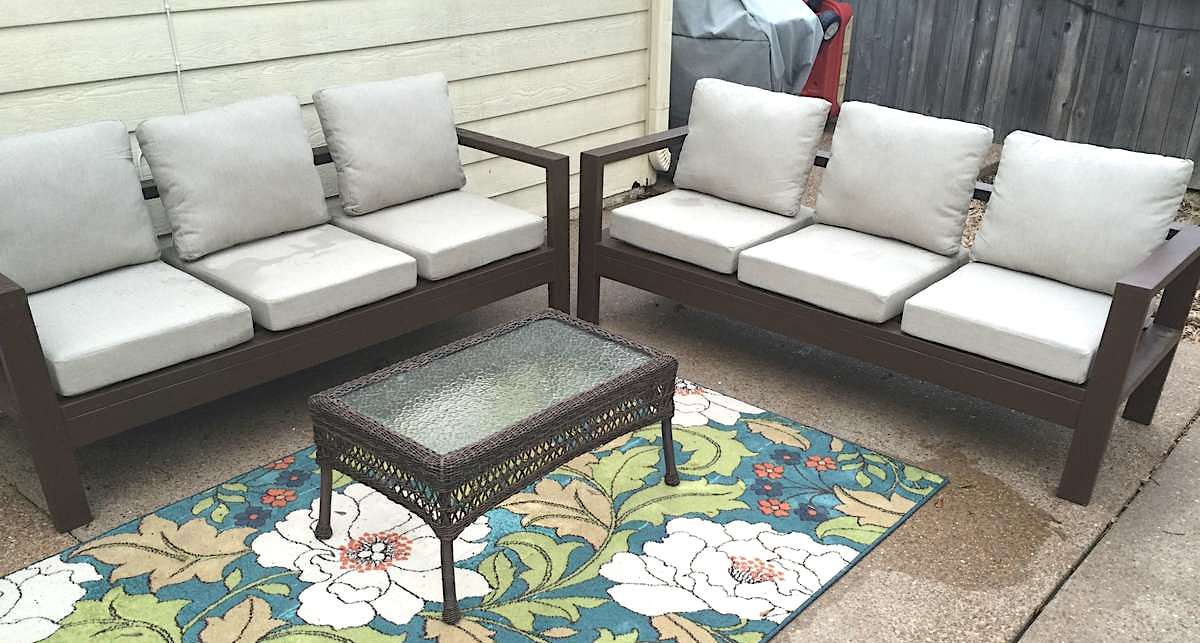
I have been wanting outdoor seating by my pool forever but couldn't afford anything I liked. When I came across Ana White's plans for the outdoor sectional I knew I had to build two. They are just what I was wanting and cost under $200. It took my brother & I one afternoon to buy the supplies and put it all together. Since this furniture is outdoors 24/7, I had to caulk the seams & paint the whole thing. That process took two days. The biggest expense was of course the cushions from Home Depot that Ana White recommends for this sectional. I have to admit, they are well worth every penny. They look amazing! Can't wait to spruce them up with some throw pillows.

Built from Plan(s)

Mario Castle Bunk

Submitted by jlholmes80 on Wed, 01/01/2014 - 00:30

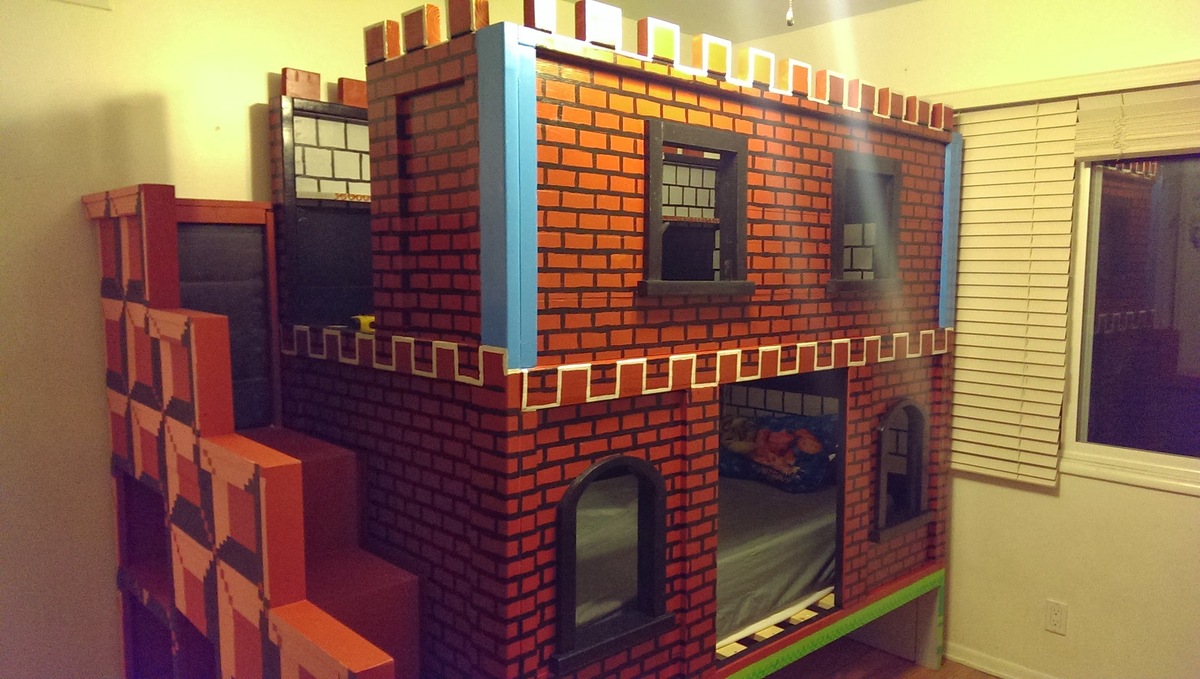
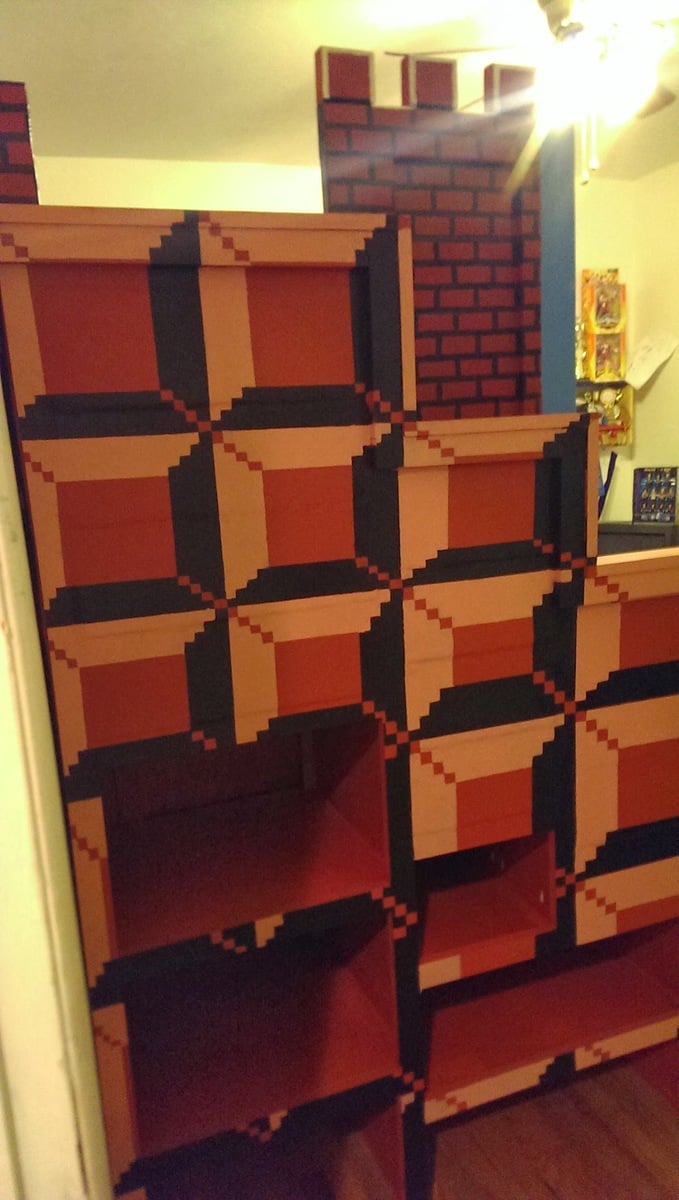
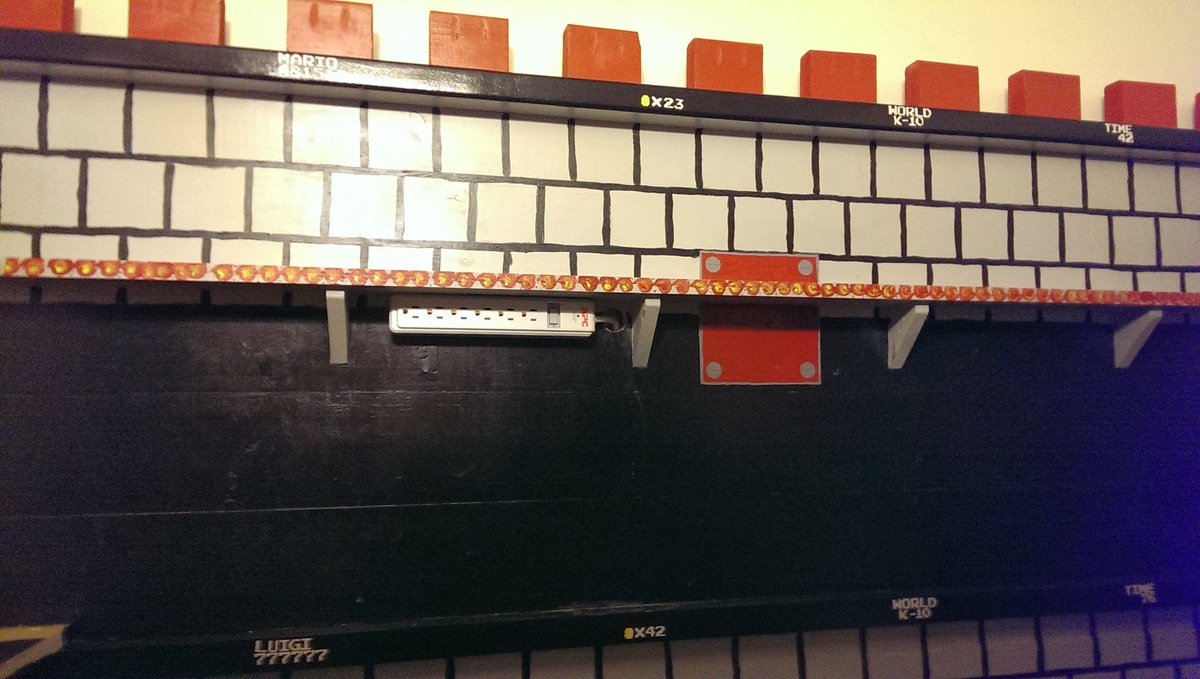
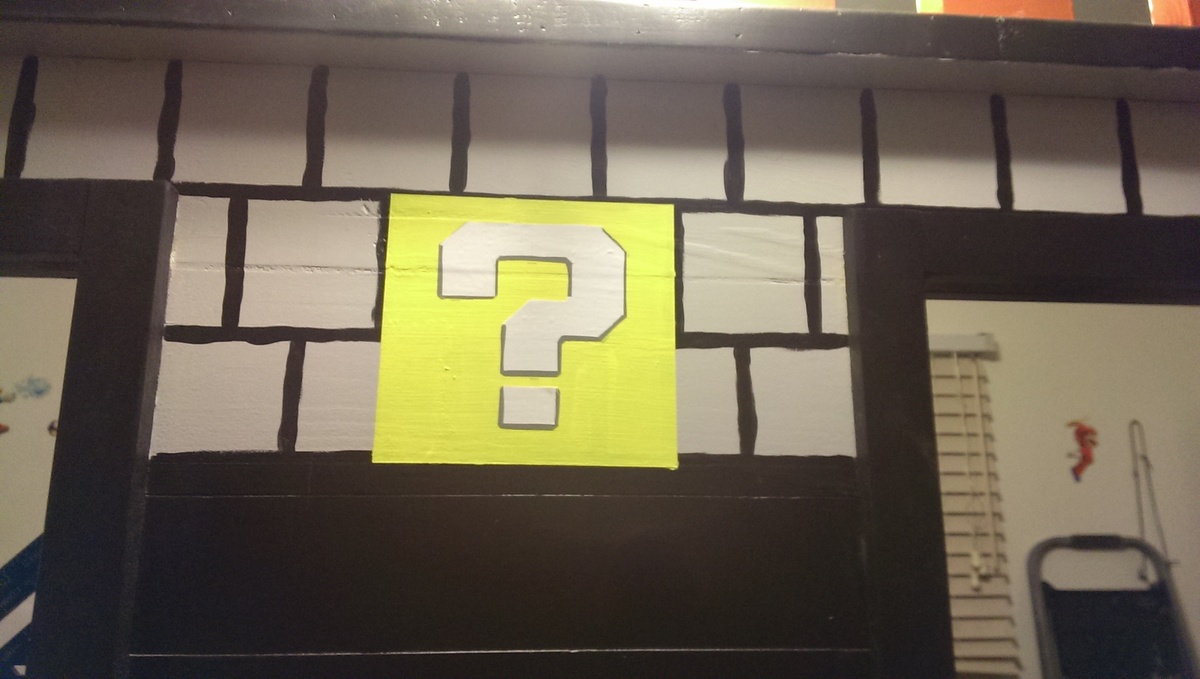
So my son needed a bunk bed and we came upon the sweet pea bed. It was too girly for him so we decided to go with a theme that would be timeless, something he wouldn't mind having when he is 18 (or older, he is 10 now). What is better than Mario! (We are a house full of gamers, my 17 year old is super jealous of this bed lol). The build was fairly easy and the plans were straight forward enough, the time consuming part was the painting (without all the painting we could have probably build this in a long weekend). We changed a few things, like not arching the top windows, adding the 4 inch 2x4 squares to the top to give the castle look and stairs are made to look like stairs from the side so we stepped out the banister instead of angling it.

Estimated Cost
500
Estimated Time Investment
Week Long Project (20 Hours or More)
Finish Used
Paint colors were all Behr paint+ primer (mostly eggshell or flat):
New Brick, Black, Polar Bear White, Green Crush, Green Acres, Lemon Zest, Windjammer, and French Silver. Some of the colors (like pinkish tone on the stairs) we created on our own mixing the New Brick and the Polar Bear.

Polyurethane. I mixed regular oil based polyurethane (gloss) with mineral spirits (50/50) and wiped it on. It was remarkably simple and gave it a nice seal/finish. Last coat I used Satin Polyurethane because I didn't want the gloss finish. I opted not to sand between coats because this is a kids bed and I wasn't looking for that "perfect" finish, just wanted some added protection.
Recommended Skill Level
Intermediate

Comments

Mrswhetstone1

Wed, 01/01/2014 - 06:11

This is the coolest bed I have ever seen! I wish I could make this for my youngest. I could probably build it, but I 'm pretty sure it would go downhill when I started painting it. You did an amazing job and your son is a very lucky boy!

jlholmes80

Wed, 01/01/2014 - 16:10

You can totally do it! I am a horrible painter (I'm too impatient) and you can't tell with this because of how forgiving the design ends up being. There is so much going on it's hard to pinpoint the mistakes. :)

jlholmes80

Wed, 01/01/2014 - 16:07

Thanks so much! This was the first thing we ever built (although my husband did a lot of building stuff in his youth we have never done anything together and I was a total beginner) so we are very happy with it. :D I appreciate all the kind words.

amercpina

Fri, 05/03/2019 - 22:00

We are super excited to build this for our 9 year old son. To make this a Full size bed am I correct in thinking that I only need to alter the side panels by adding 15inches? I am paranoid about building it and the mattress not fitting. Thanks so much!

Toddler Canopy Bed

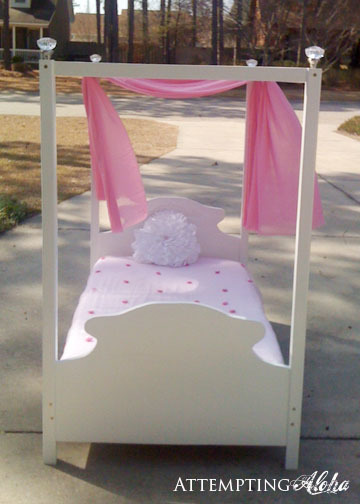
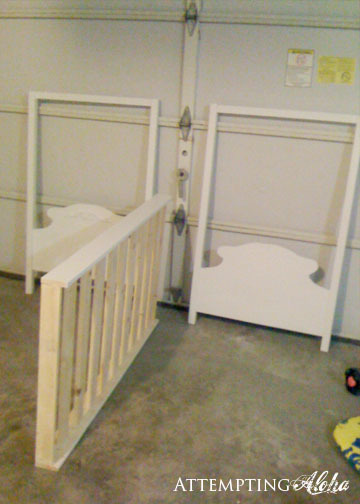
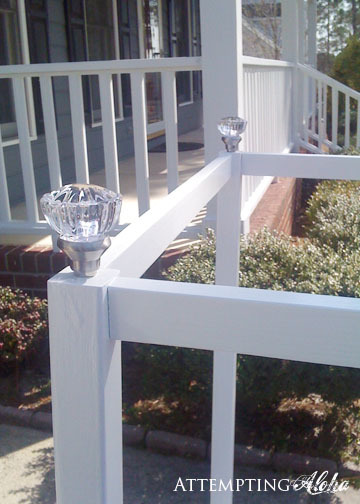
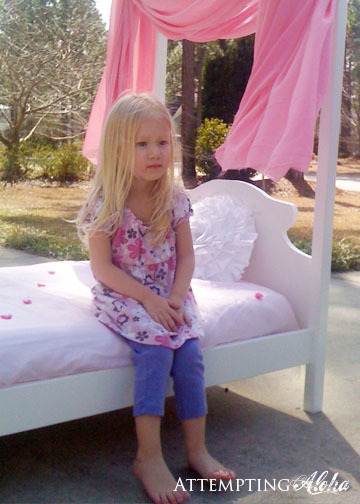
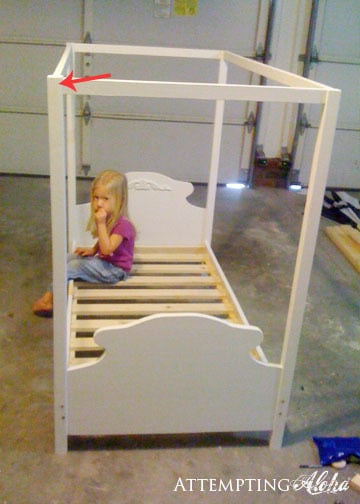
I designed and built this canopy bed without knowing Ana had already done a toddler canopy bed! Talk about reinventing the wheel. I should have known she already had plans up. ;)

Full plans are on my site, but I thought I'd add this as a brag post instead of a project plan since Ana's plans are already here. They're different, but the end result is very similar!

Built from Plan(s)
Estimated Cost
$20-50 depending on paint and finish supplies on hand
Estimated Time Investment
Afternoon Project (3-6 Hours)
Finish Used
Zinsser water-based primer, semi-gloss latex paint, and polycrilic topcoat.
Recommended Skill Level
Beginner

Doll Stroller

Submitted by DIYMomof4 on Fri, 11/15/2019 - 06:50

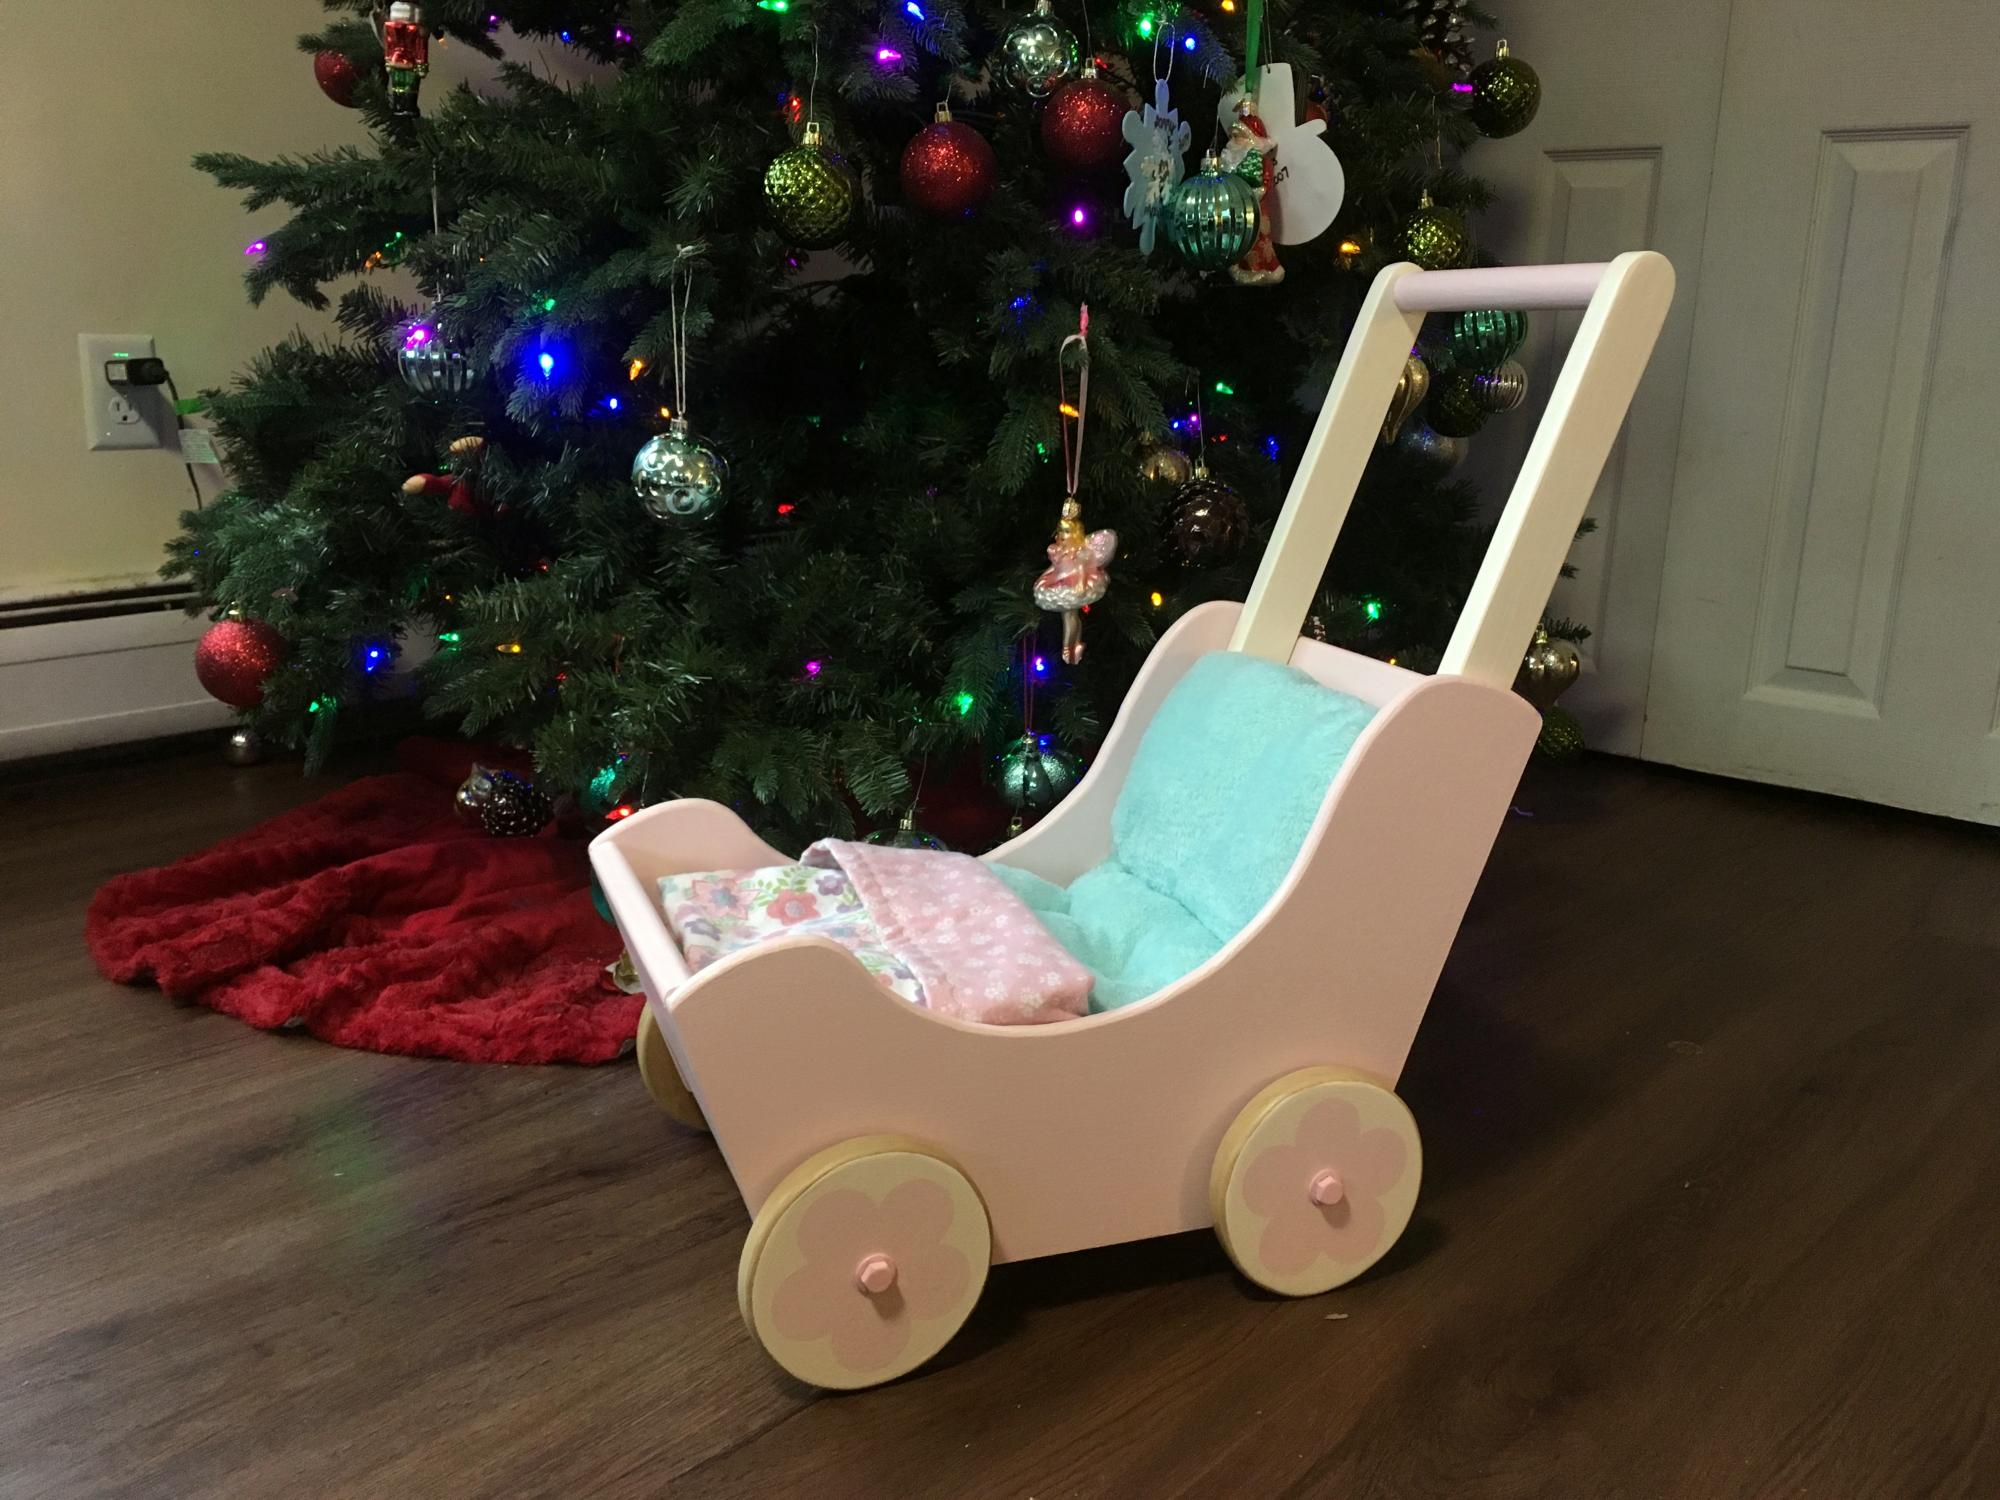
I made this stroller to donate to a charity fundraiser.  I'm very pleased with how it turned out!  I routered the edges with a small round over bit, which I think makes it a bit safer for little ones.  I attached the 1x2's of the handle 3" above the stroller bottom, which gives it a height similar to other doll strollers.  I also decide to change the way the wheels were attached.  In the picture, the wheels are attached as the plan shows.  I decided I would use (2) 3/8" metal rods as axles, washers for spacers, and an axle cap on each end.   This works really well, and the axle caps look nicer than the painted bolts.  Unfortunately, I donated the stroller without taking updated pictures!   

Built from Plan(s)
Estimated Time Investment
Weekend Project (10-20 Hours)
Finish Used
Behr Ultra Ceylon Cream and Radient Rose
Valspar satin polyurethane - on the wheel backs and edges
Recommended Skill Level
Intermediate
Seasonal And Holiday

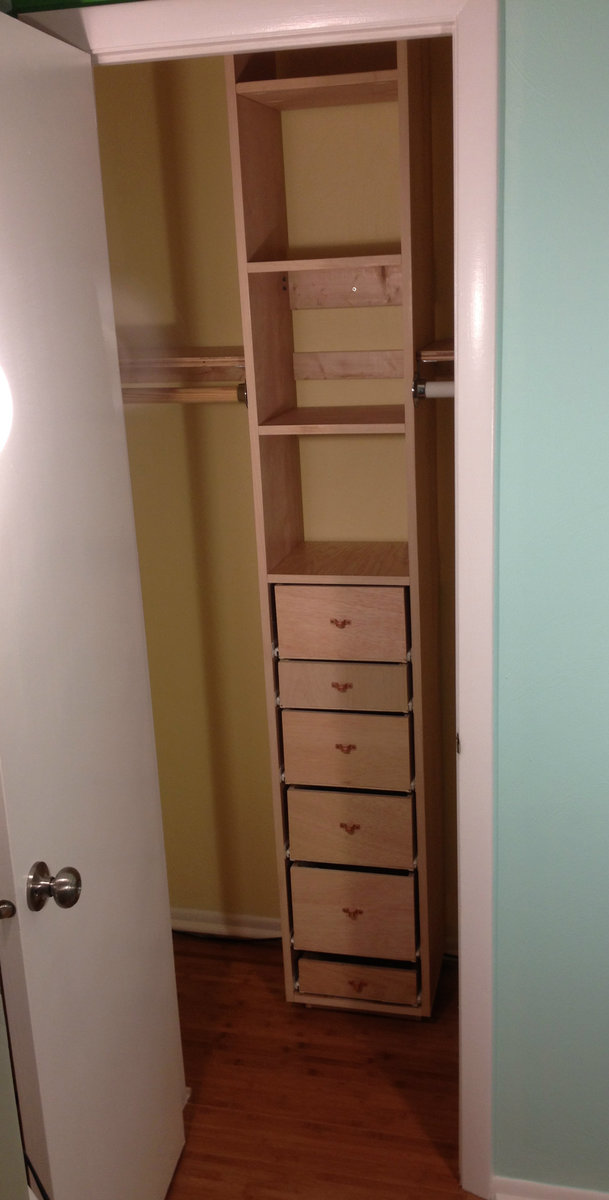
Closet tower from scraps!

Submitted by arkep on Tue, 01/07/2014 - 17:41

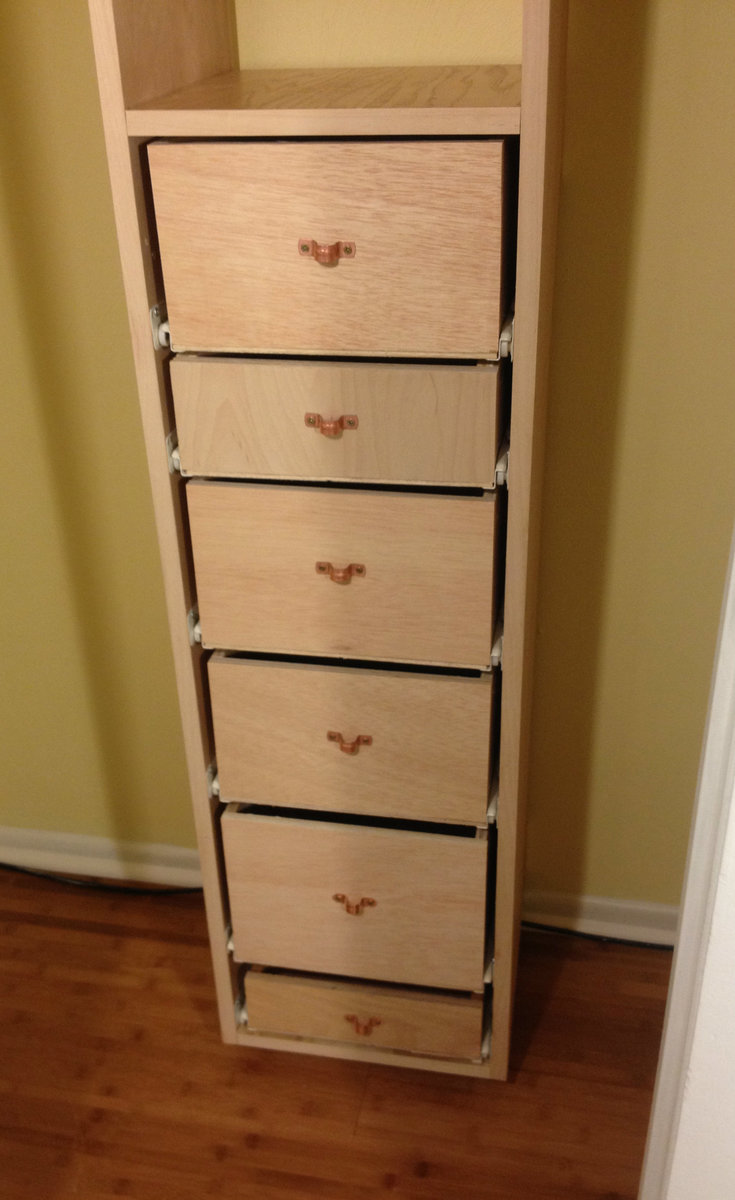
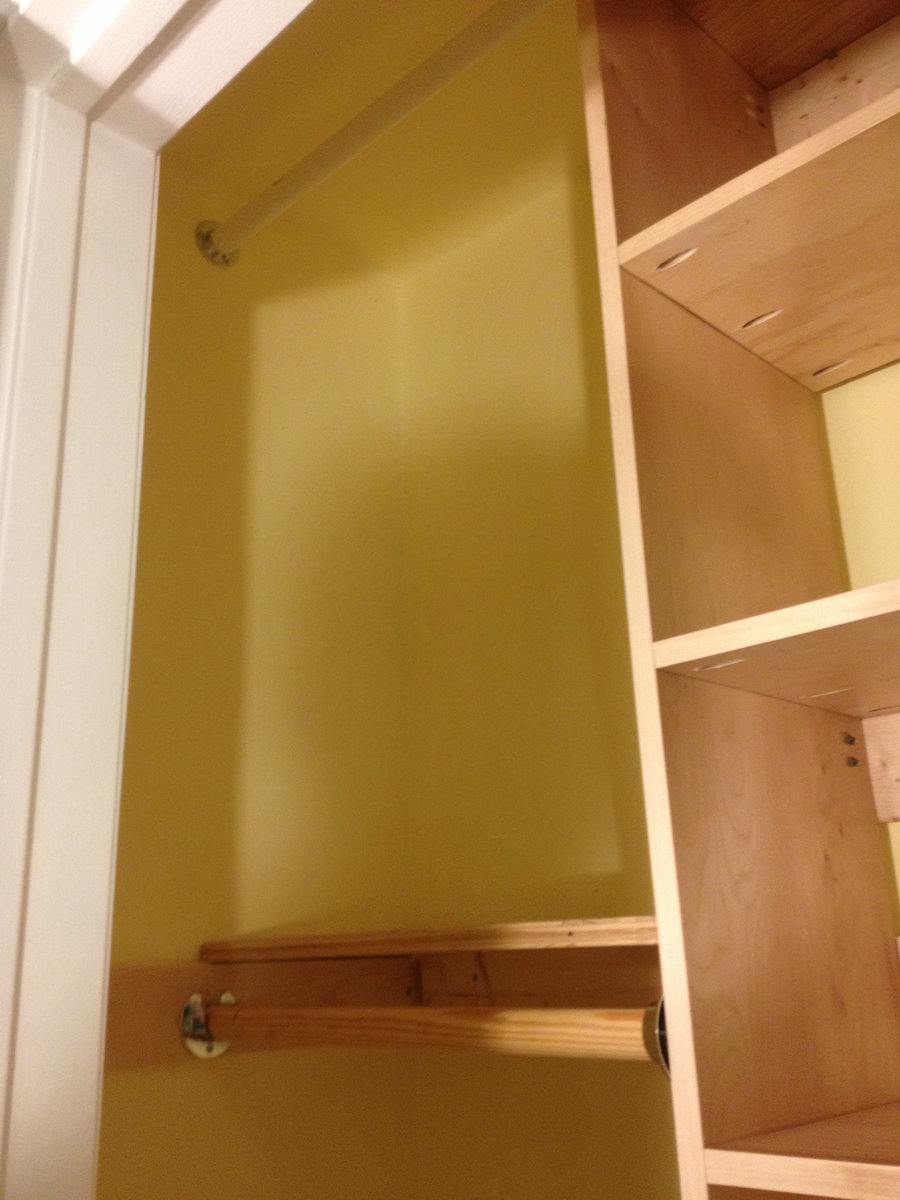
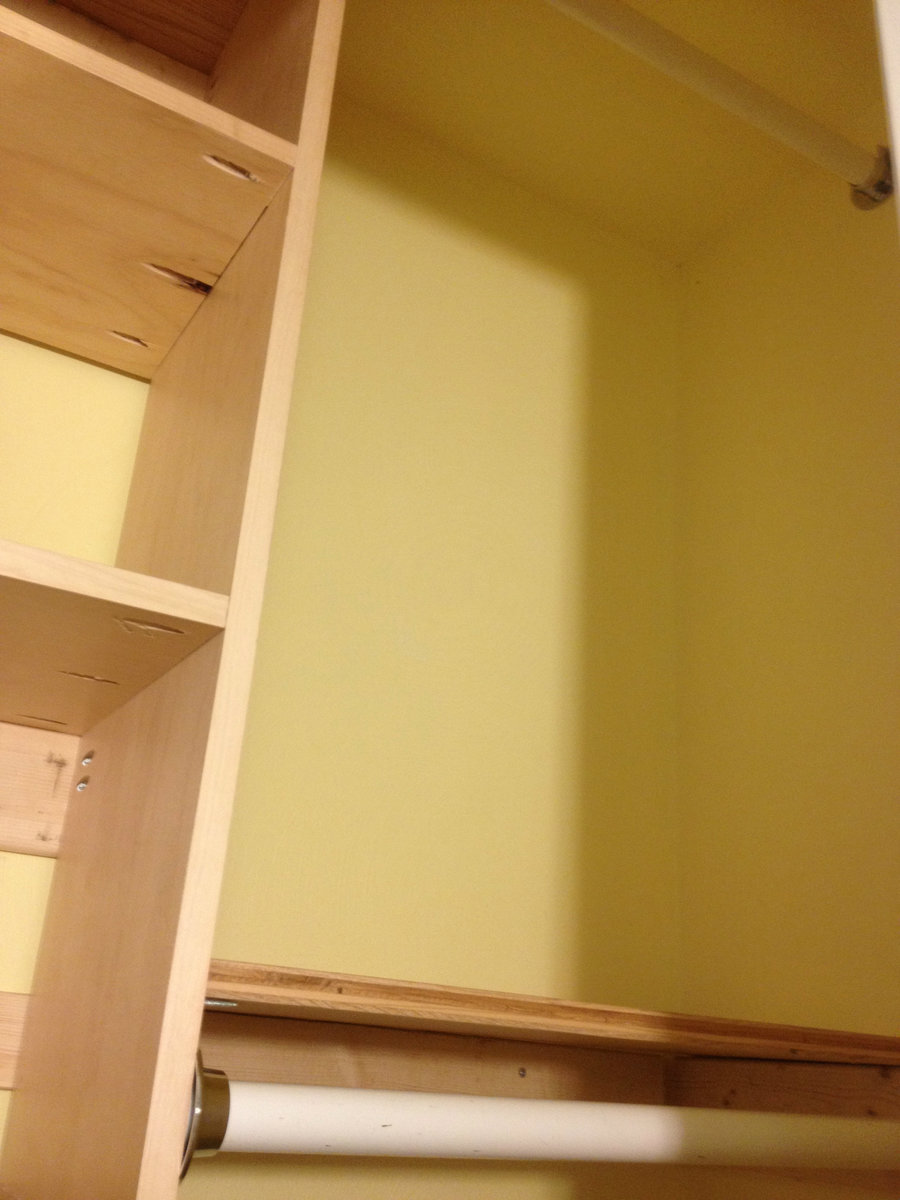
I needed some organization in my small closet, which originally only had one rod and one shelf. This is what resulted, and I made it from scraps from other projects, which is why the closet rods are mismatched...they'll be covered up with clothes hangers soon anyway. I had to buy the drawer slides and one more set of closet rod holders. I had some copper pipe straps and decided to use them as pulls on the drawers. I plan to make some crates out of cedar fence pickets to fit the shelves.

I just got the Kreg Micro Jig and used it on the drawers, which were made out of 1/2" plywood. I prefer to make drawers by using the table saw to create overlap rabbets and then use the nail gun to put them together, but it was 15 degrees outside today so I opted for the micro drill. It went pretty well...definitely caused less splitting in the 1/2" plywood than the regular kreg jig.

Estimated Cost
$40...I already had the plywood and closet rods
Estimated Time Investment
Weekend Project (10-20 Hours)
Finish Used
Polycrylic in Satin finish
Recommended Skill Level
Intermediate

Comments

lizdischert

Fri, 08/22/2014 - 21:34

I just wanted to give you props on your organizer! It's so cool! I love the drawers and are those casters on the bottom? I looked at yours before I did mine and your comments helped!Thanks for posting this!

JoanneS

Wed, 08/27/2014 - 16:43

I love projects made from scraps - yours is awesome! You did a great job on all those drawers, and the idea to use the copper pipe straps as drawer pulls is so creative!