Farmhouse kitchen island
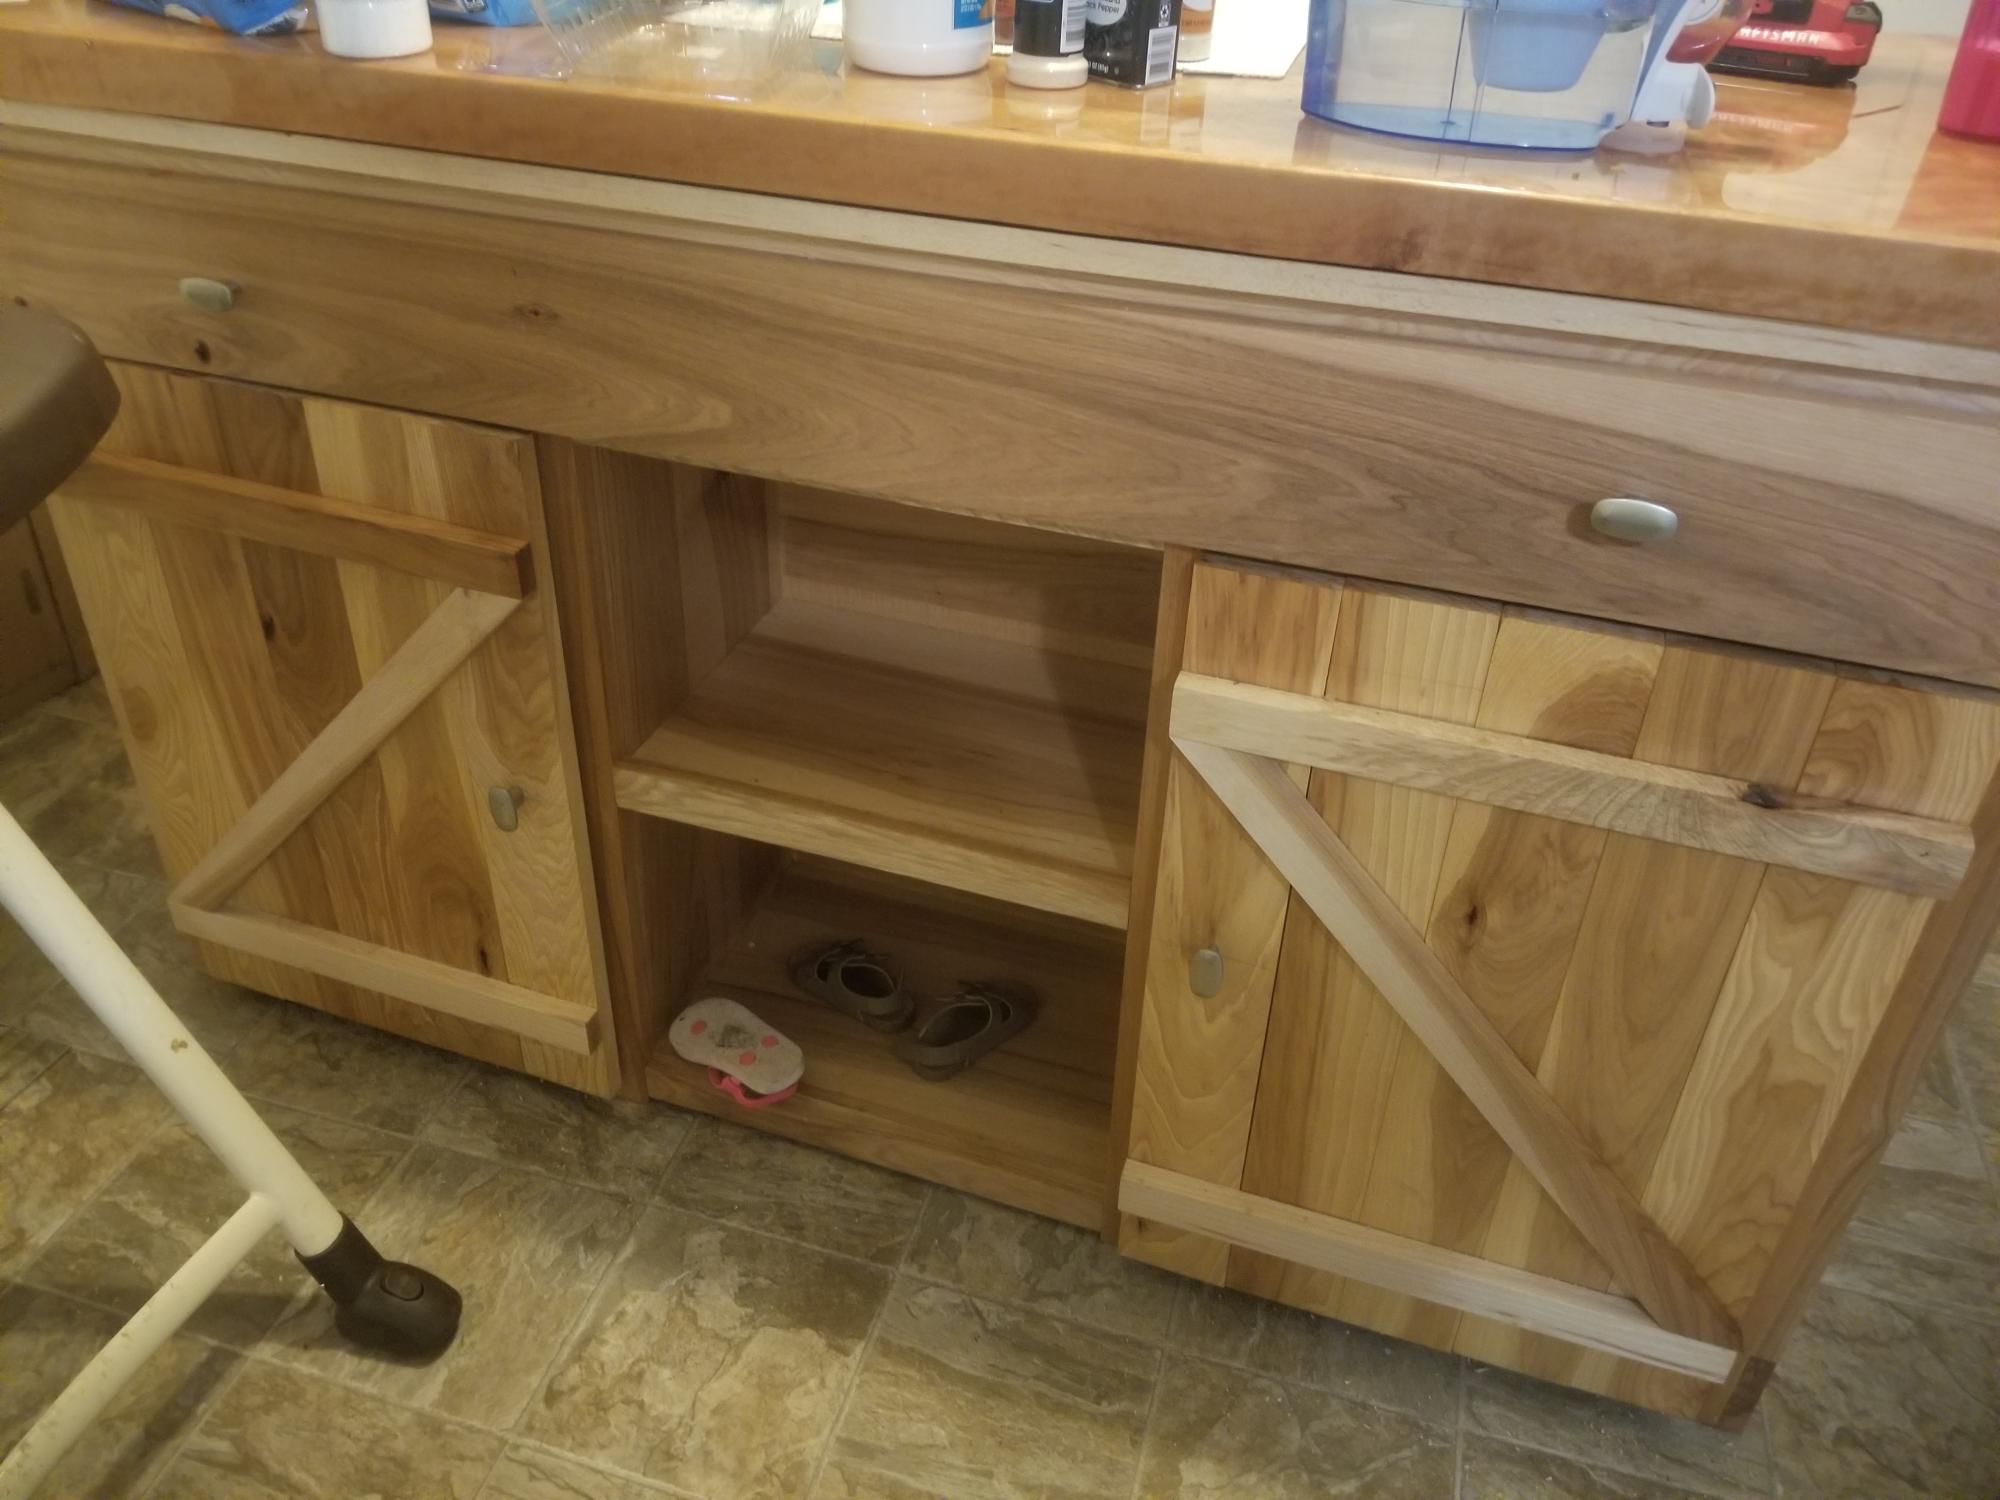
I found plans on here for a farmhouse kitchen island. I built it for my wife. She loves it.
Built from Plan(s)
I found plans on here for a farmhouse kitchen island. I built it for my wife. She loves it.

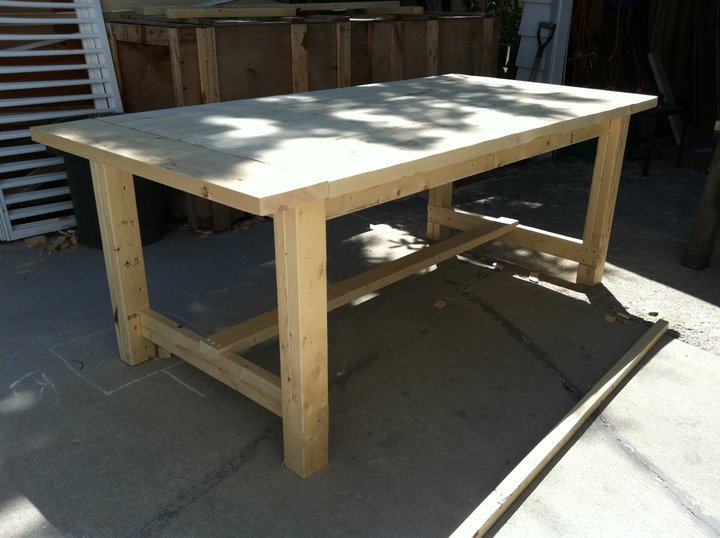
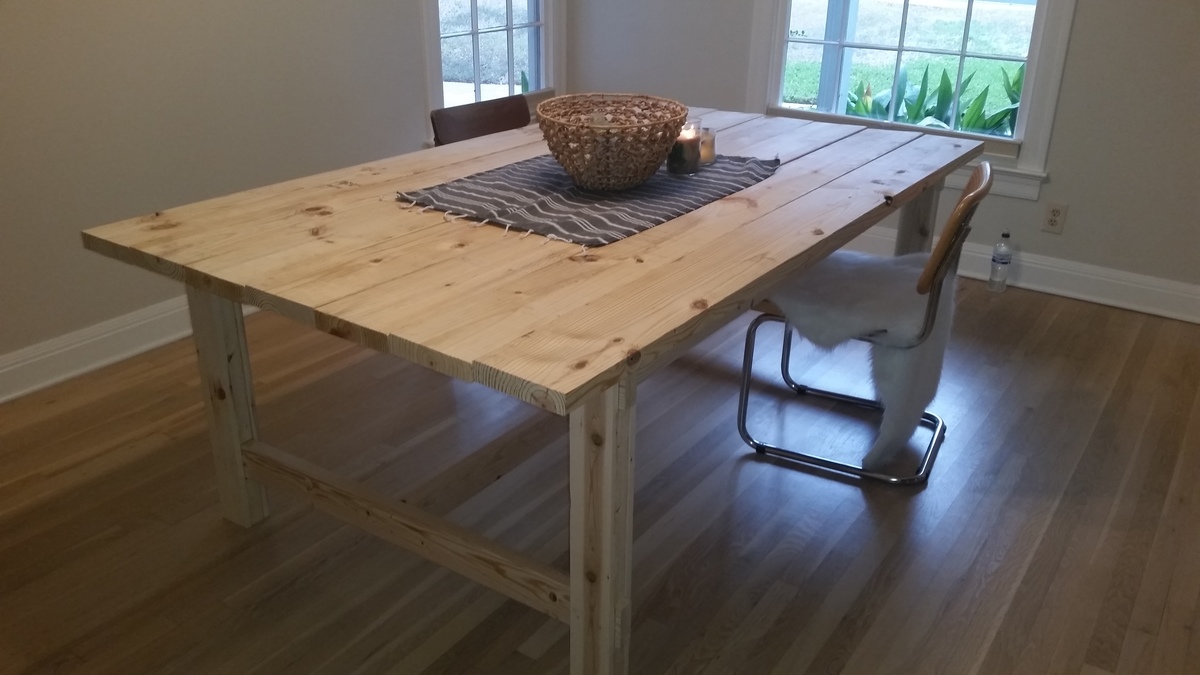
I asked my husband to build me Ana White's farmhouse table a few months ago...but he never found the time. Finally I announced I was doing it myself, expecting to get halfway through and then need my husband to finish it. I found out later he expected the same thing.
We were both surprised that I did manage to finish it myself, in about a week from the first trip to the store until it was finished and waiting to set before it came in the house.
I found notching the boards to be difficult at first, but my second try went great and everything fit as it was supposed to. We love our new table, and using the tools made me feel so empowered. I think I've found a new hobby!

I exactly used Ana's project but I decided to paint light grey and I used for cushions denim jeans. It is really resistent and cool. grazie Ana

Fri, 08/30/2013 - 09:23
Your sofa looks super! Love the gray color. What a cool idea to use denim jeans for your cushions!

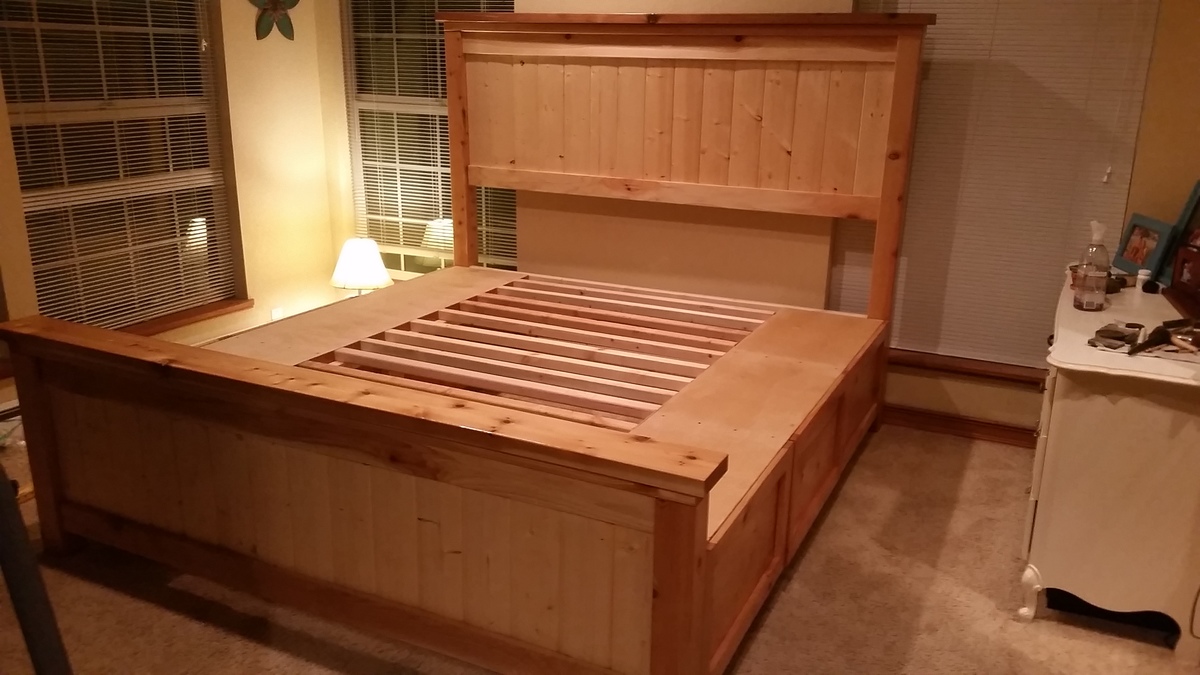
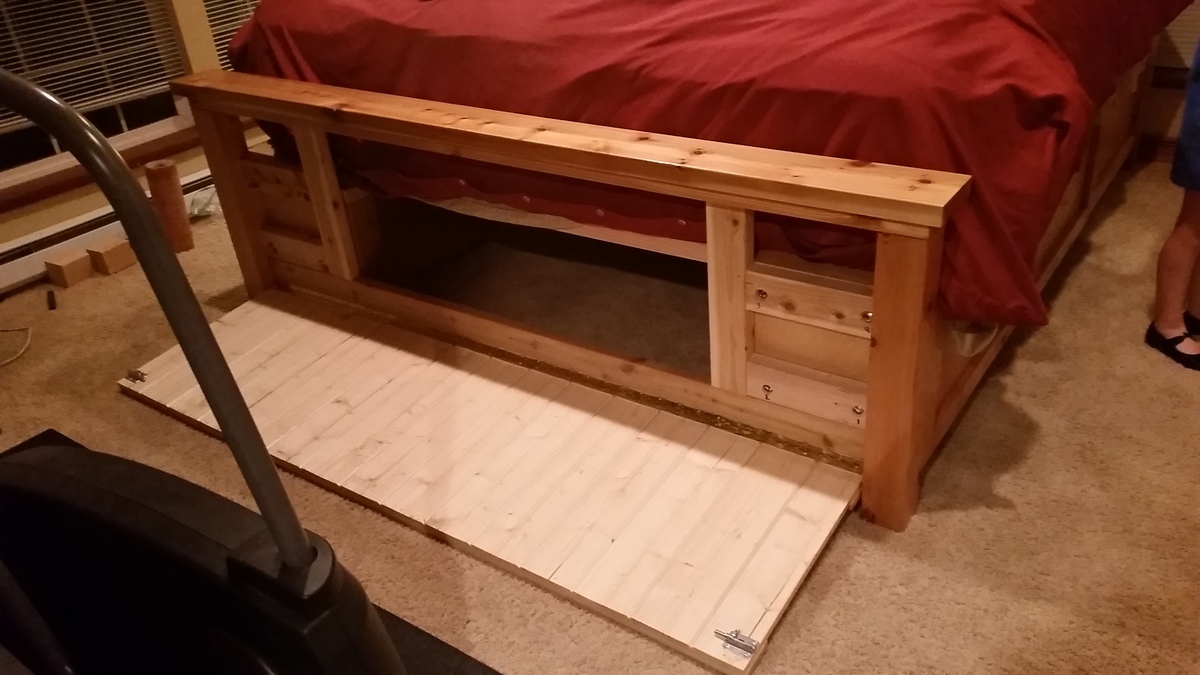
This was my first project using your plans. I changed the plans to make the bed King Size. I also hinged the footboard to allow storage in the middle of the bed. I am planning a drawer in the middle as well buy haven't installed that yet.
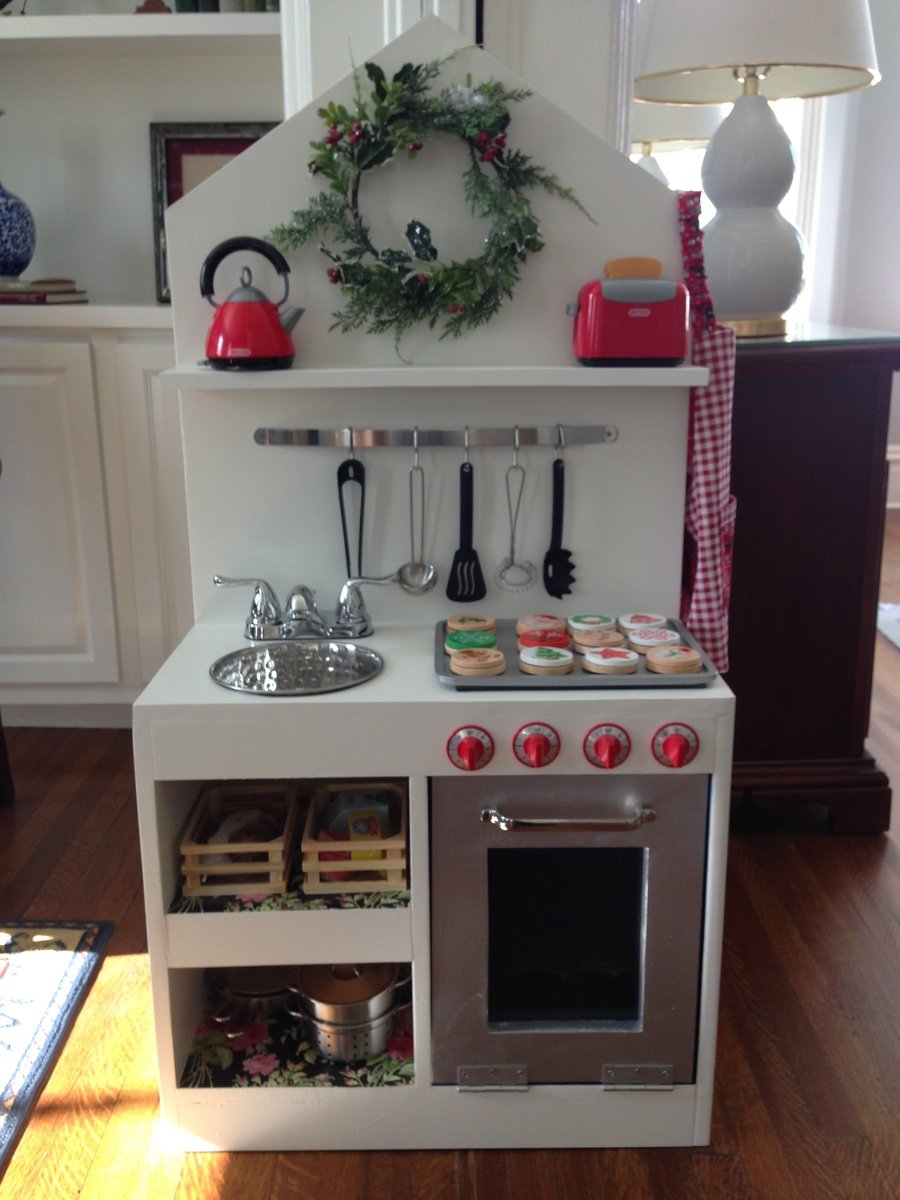
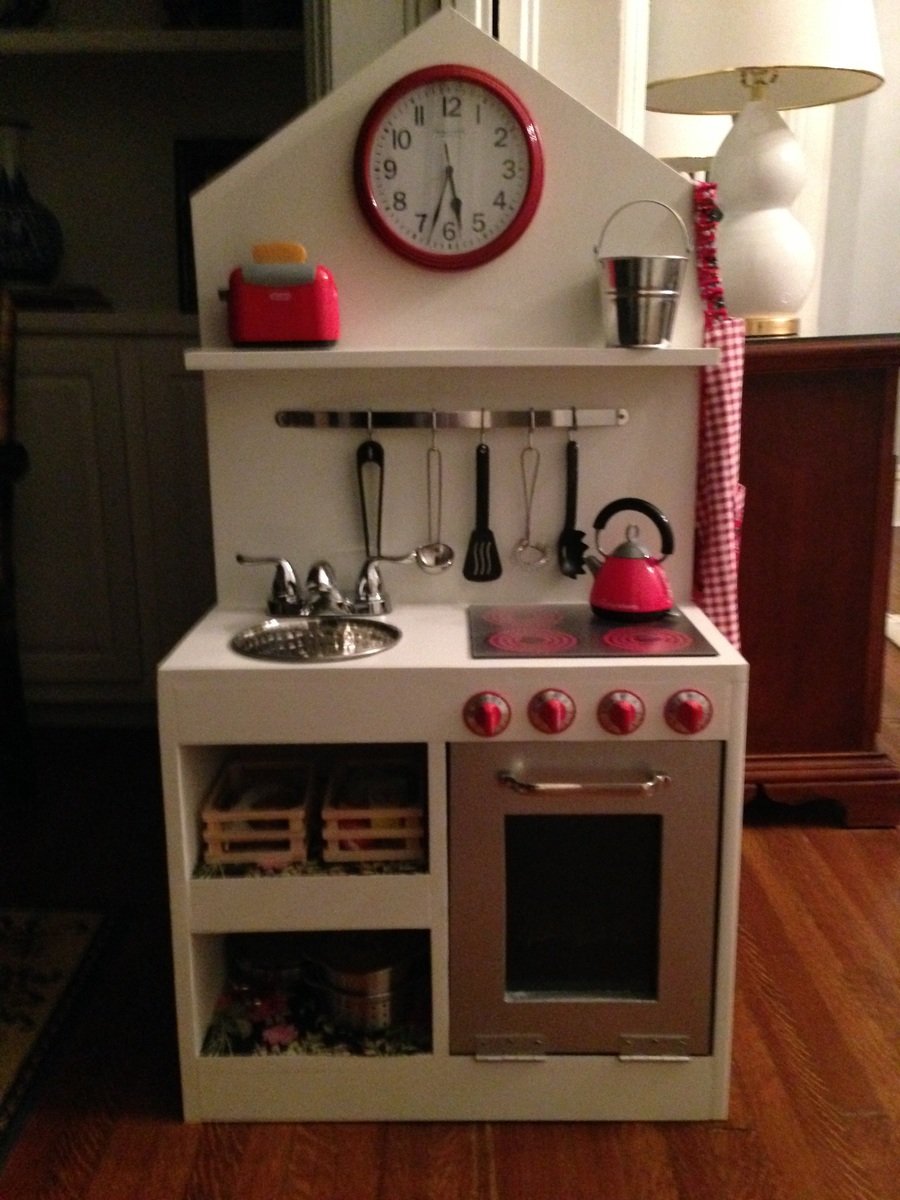
This was a fun build. I used a dog food bowl from Walmart for the sink, the oven handle is a Restoration Hardware pull from Habitat Restore, stove knobs (spray painted red) and faucet are from Home Depot (I couldn't find either at Habitat, but it's worth trying). The utensil bar is from Amazon. I cut out an oven window and glued a small sheet of plexiglass acrylic from HD to the door. I put a stick-on, battery operated light inside the oven that turns on and off by pushing it. I wanted the oven to open like a real oven, but I should have saved myself the trouble and just put the hinges on the side. The door bangs to the floor unless you can figure out how to install slide hinges to prevent it. (I couldn't make it work, but I'm sure more experienced DIYers would have no trouble.) I printed out the stovetop coils free from "printablecuttablecreatables.com" and glued them on a thin sheet of black foam.
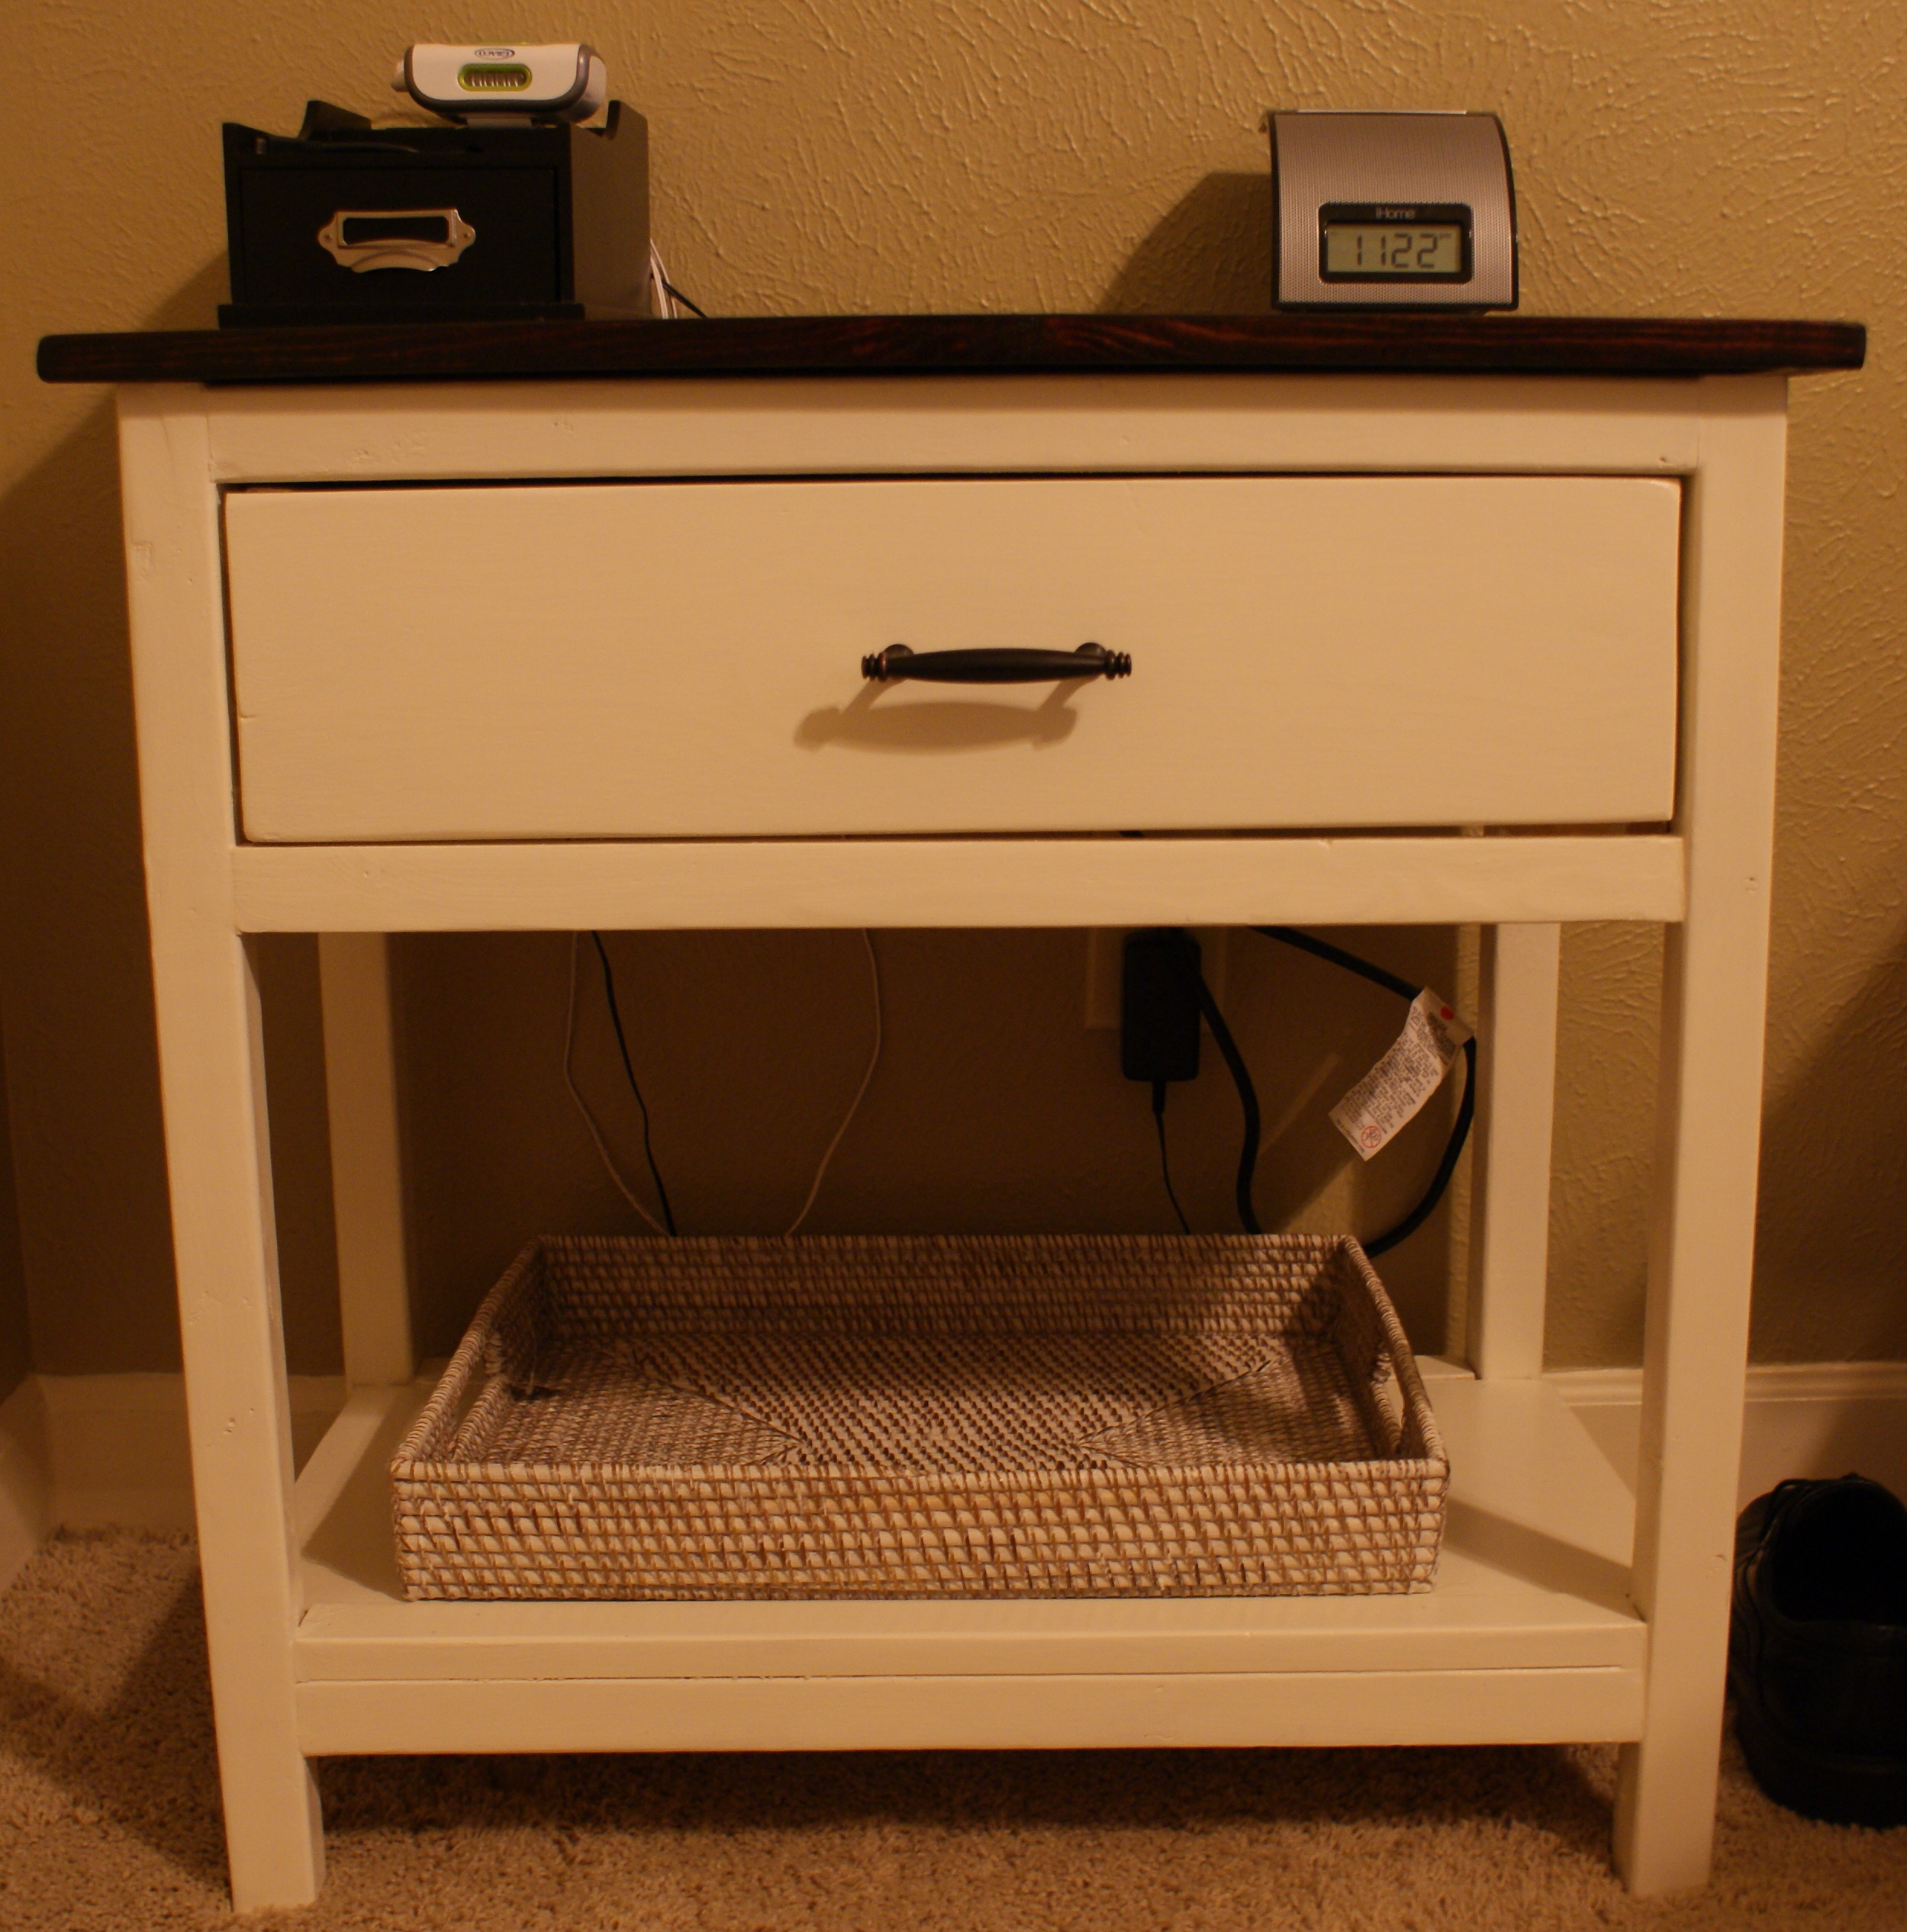
My husband and I decided to tackle the farmhouse bedside table as our first project. It was a test to see if we could build together without fighting and bickering. We succeeded! It is a little "rustic" but we are pretty proud of our first build. It was definitely a learning experience. The top is a little uneven due to one of the boards having a slight bend to it. I also should have put epoxy on the knots of the pine before painting it. We are going to make one more to match for the other side of the bed. Thanks for the plans Ana!
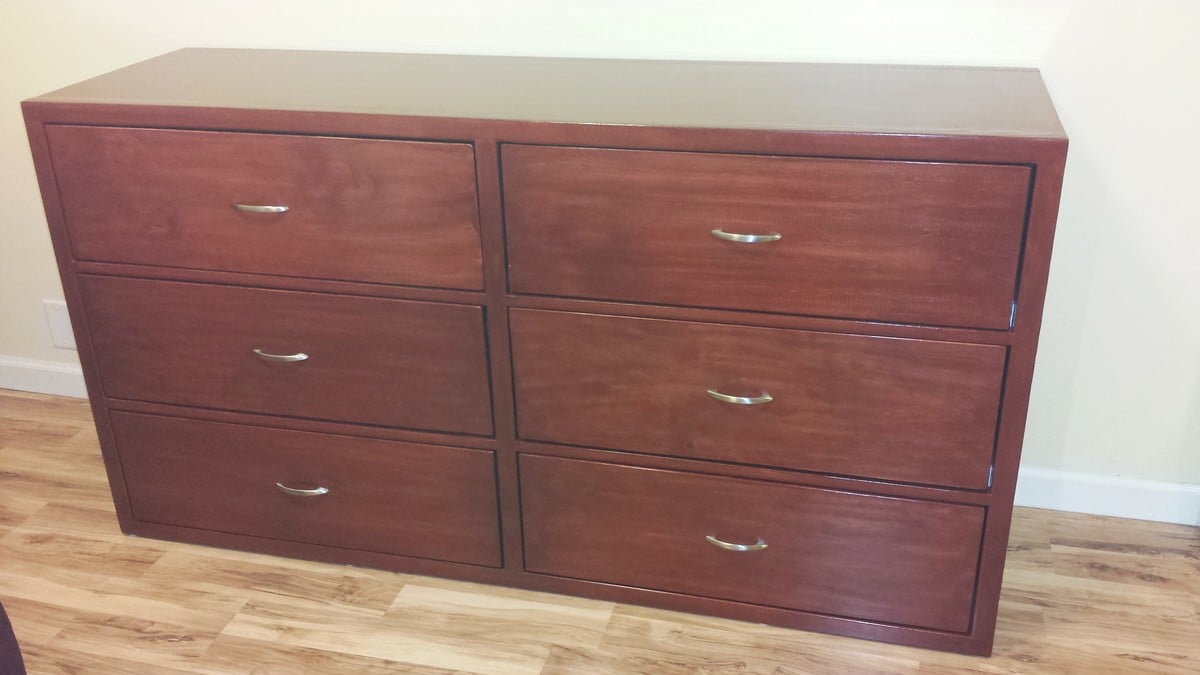
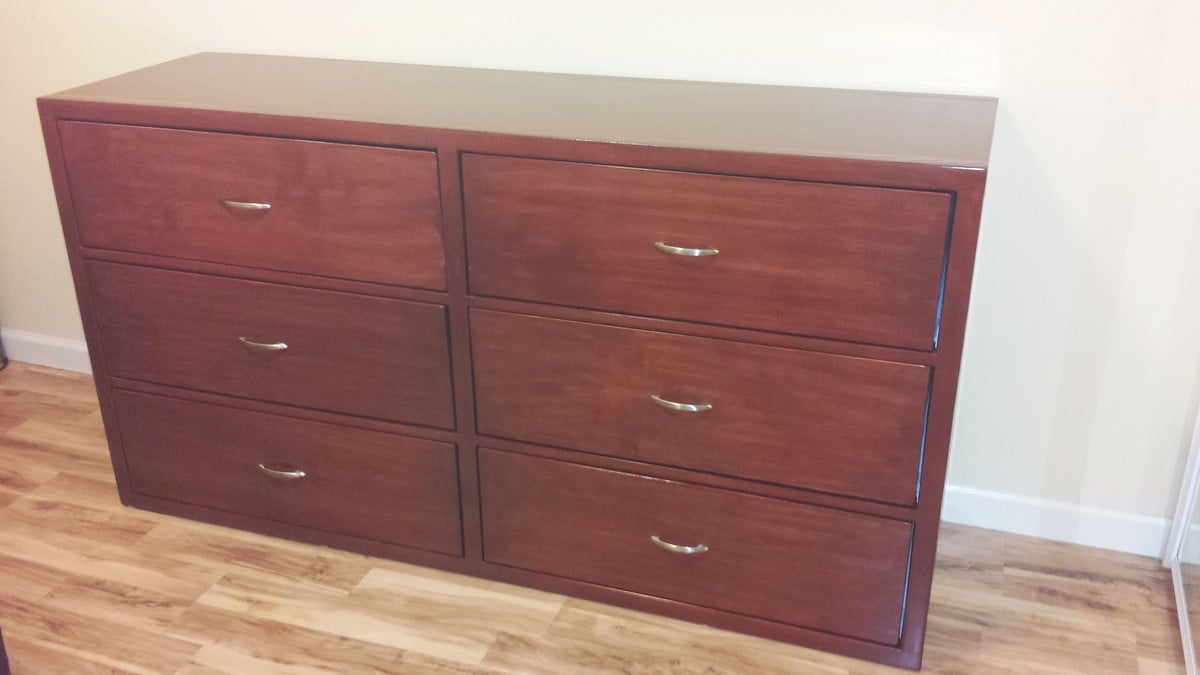
First big project, big for me anyway. Dresser came out better than I had imagined. I followed the plan exactly step by step except for the wheels part. Thank you Ana for the plans.
My daughter in law and I built this table, together in Austin, during my visit there! We had such an awesome time, together. This was made from Ana's book, A Handmade Home.
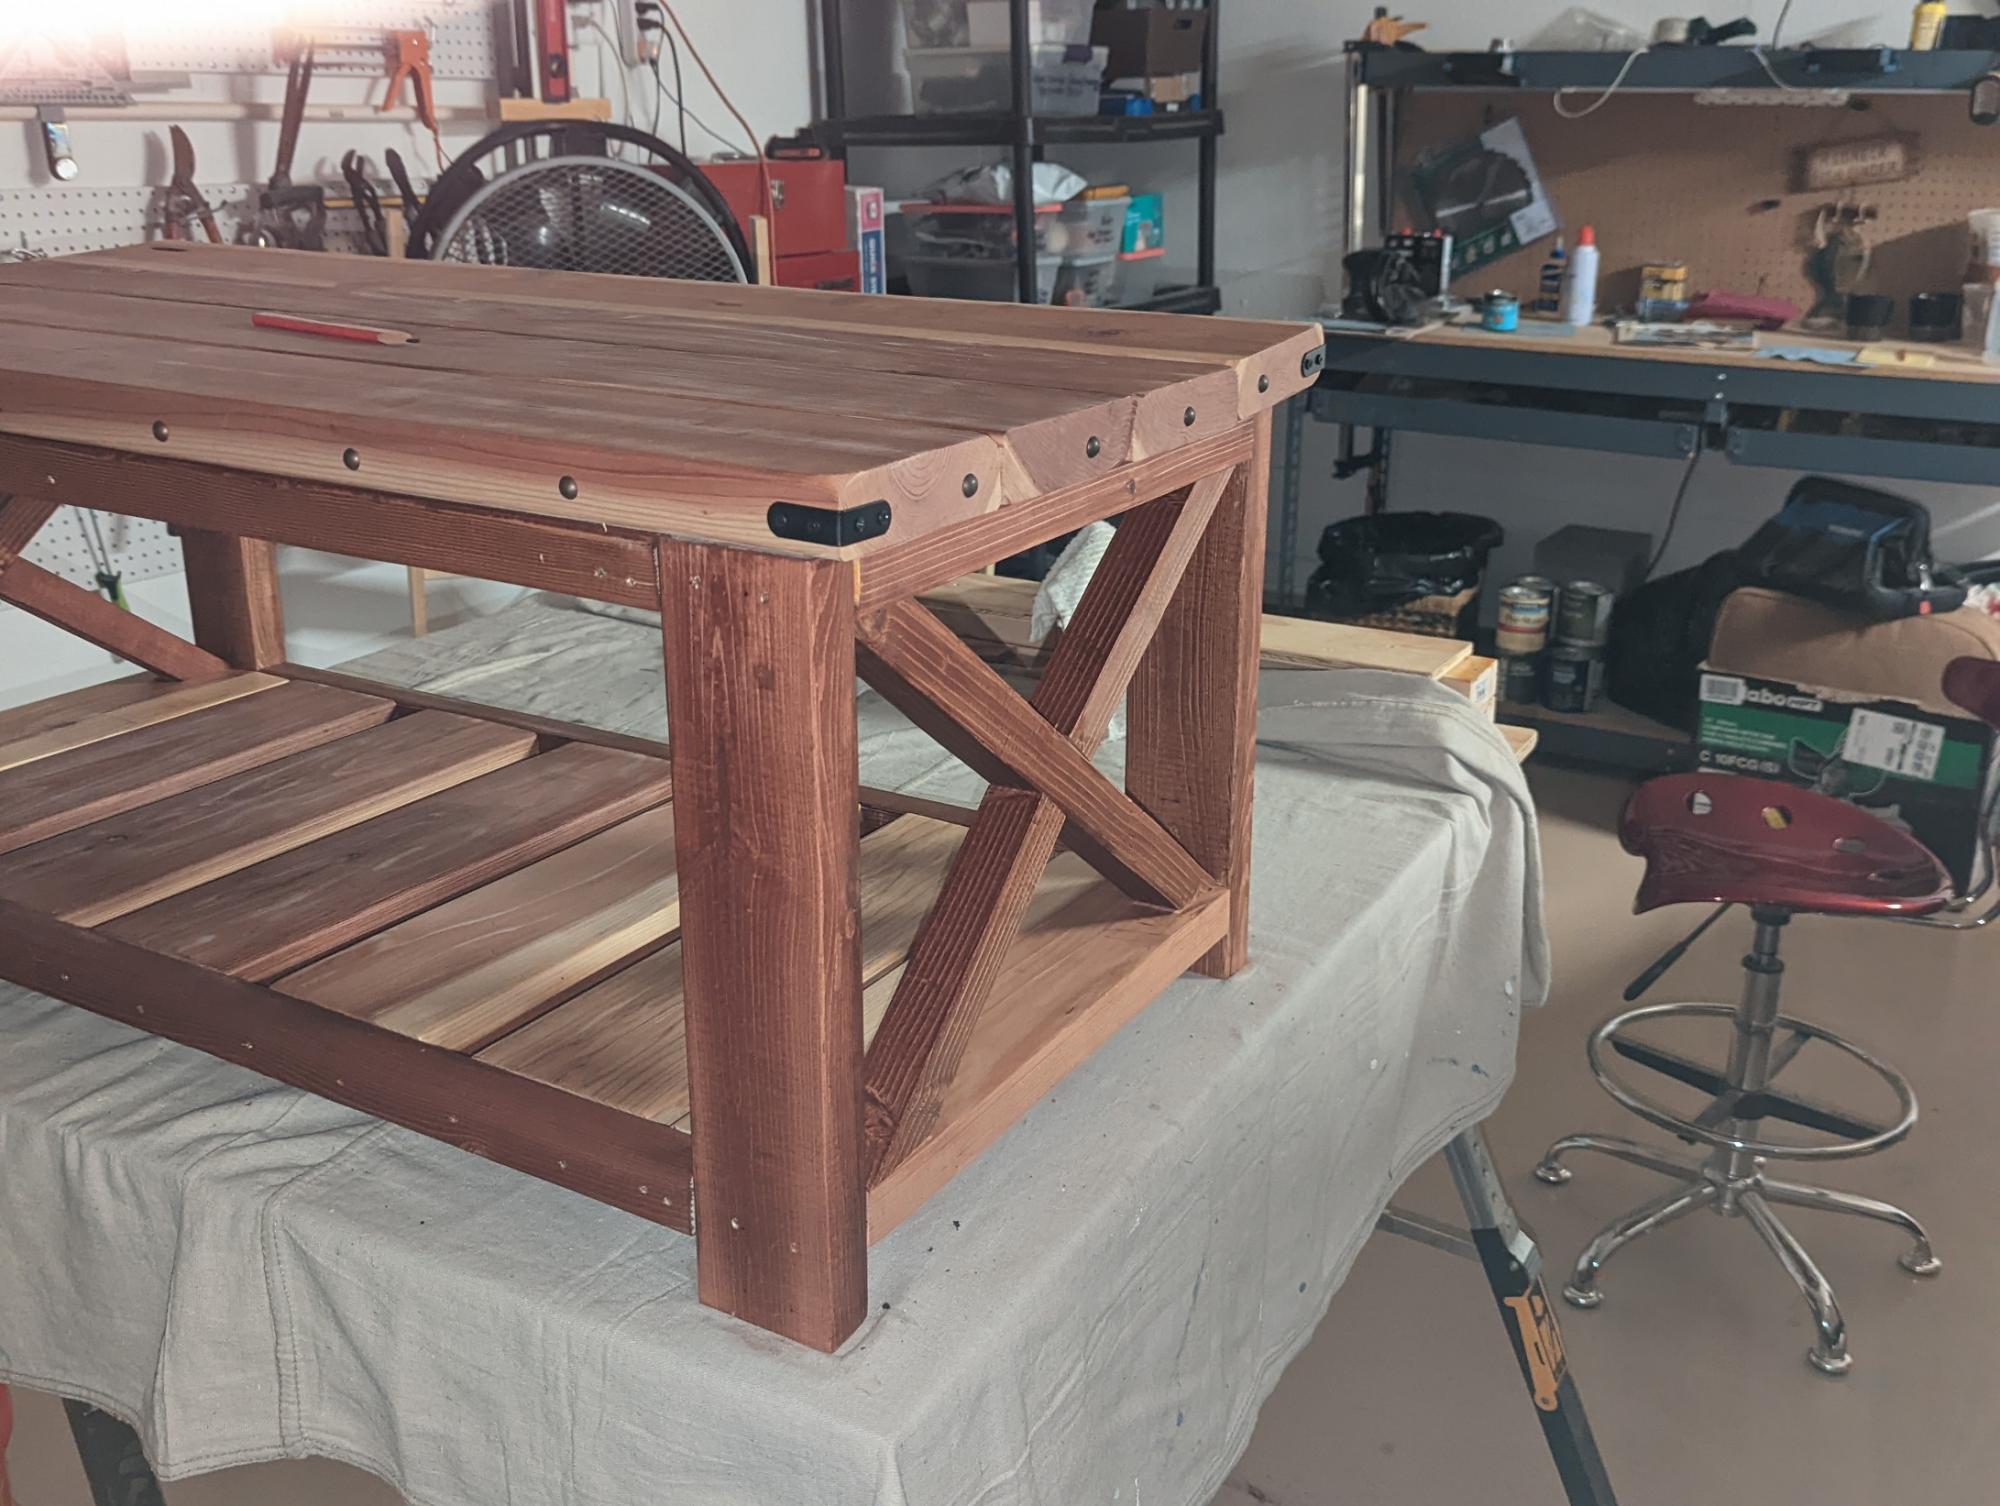
I really had a lot of fun with this project Ana, so thank you for both the plans and that YouTube tutorial. Built almost exactly like your plans, with the exception of those nail heads I added around the perimeter. Decided to use redwood for the 2x6's, and that seemed to add more wood beauty, but I also ended up with one board that was slightly bent. I fixed that with some wood filler. Finished with clear shellac.

Tue, 08/16/2022 - 11:01
Love all the extra details and gorgeous wood, looks fantastic!
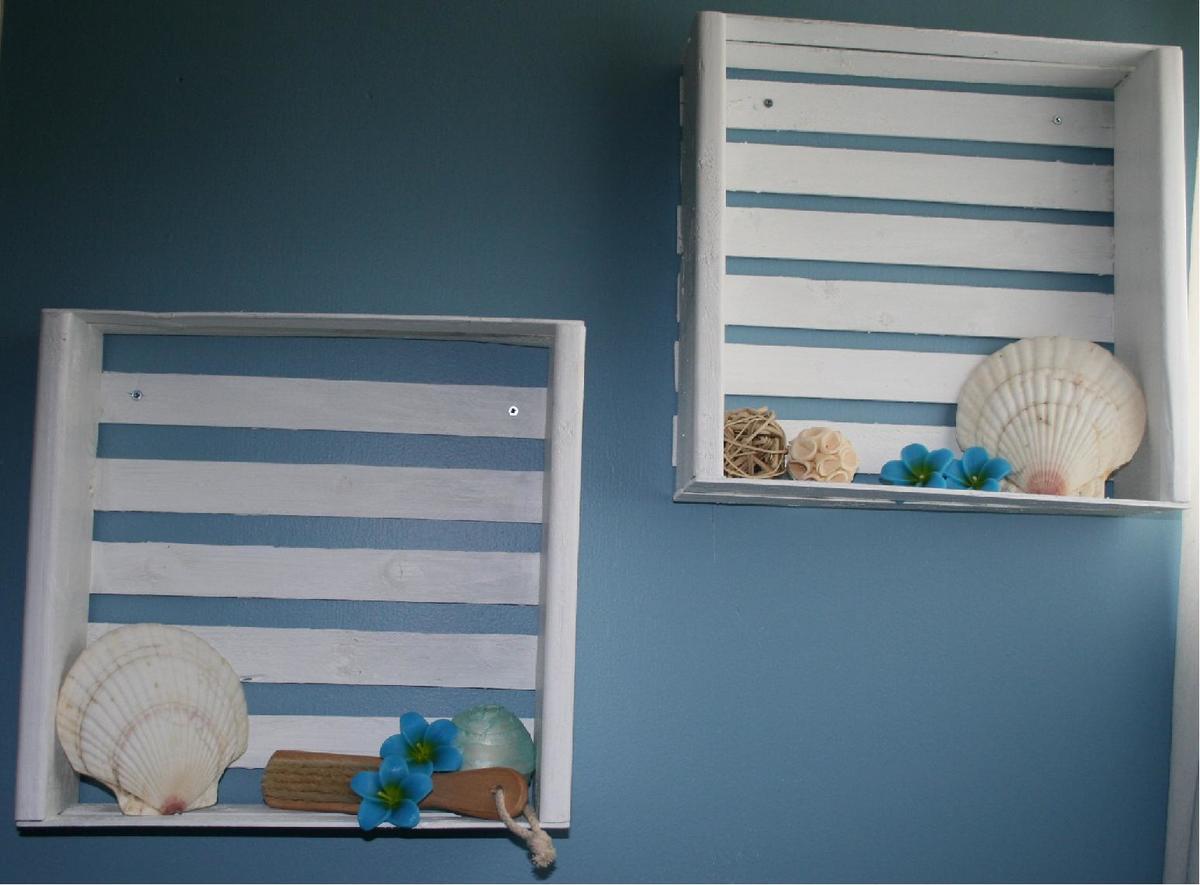
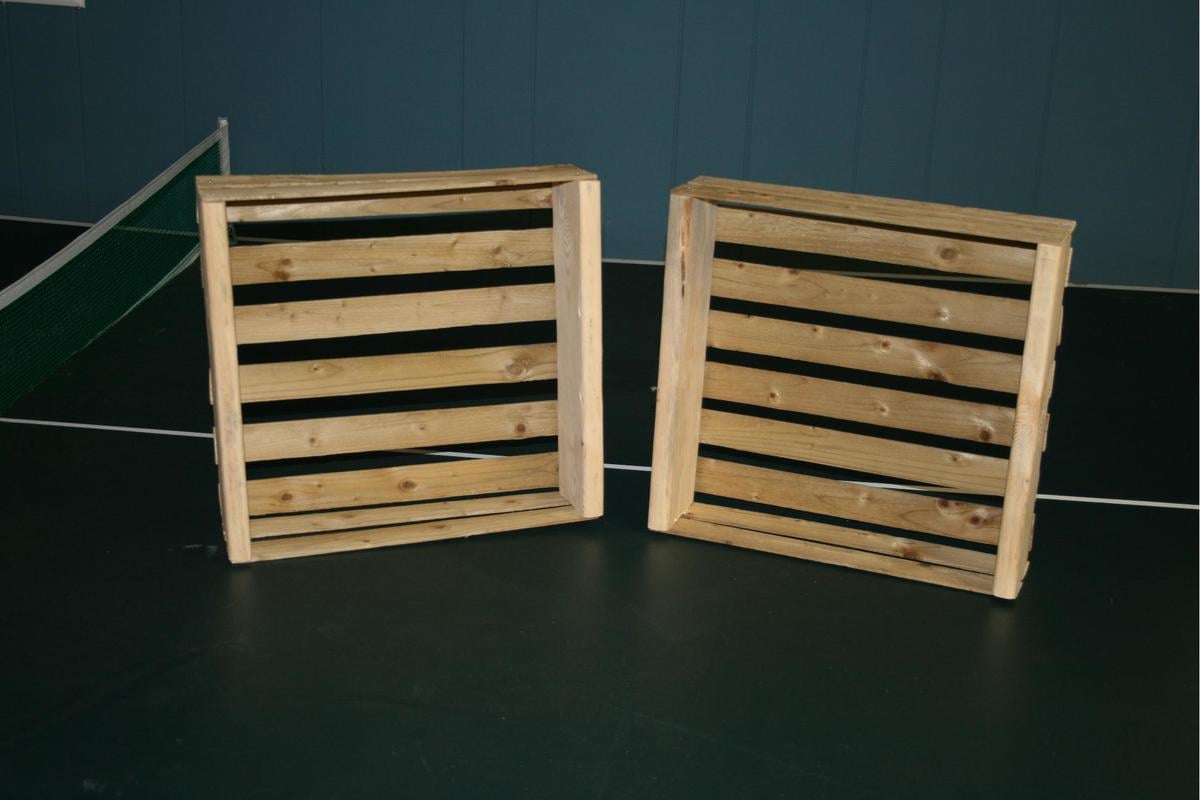
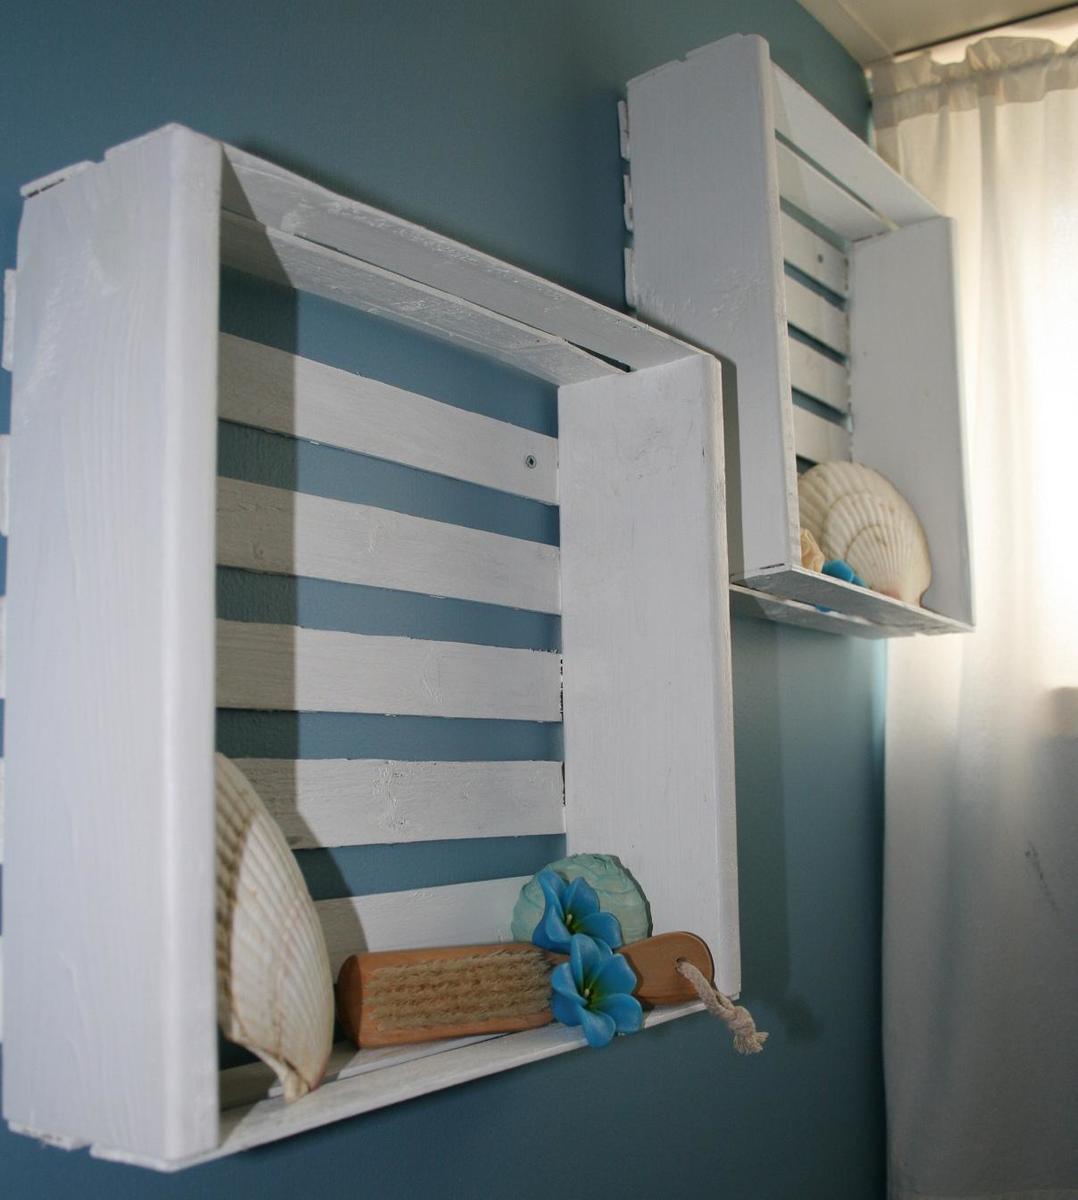
My first project where I made the whole thing by myself! My friend and I each loved this idea and so together we each made our own version! It was just what I needed for some bathroom beautifying in a small space!!

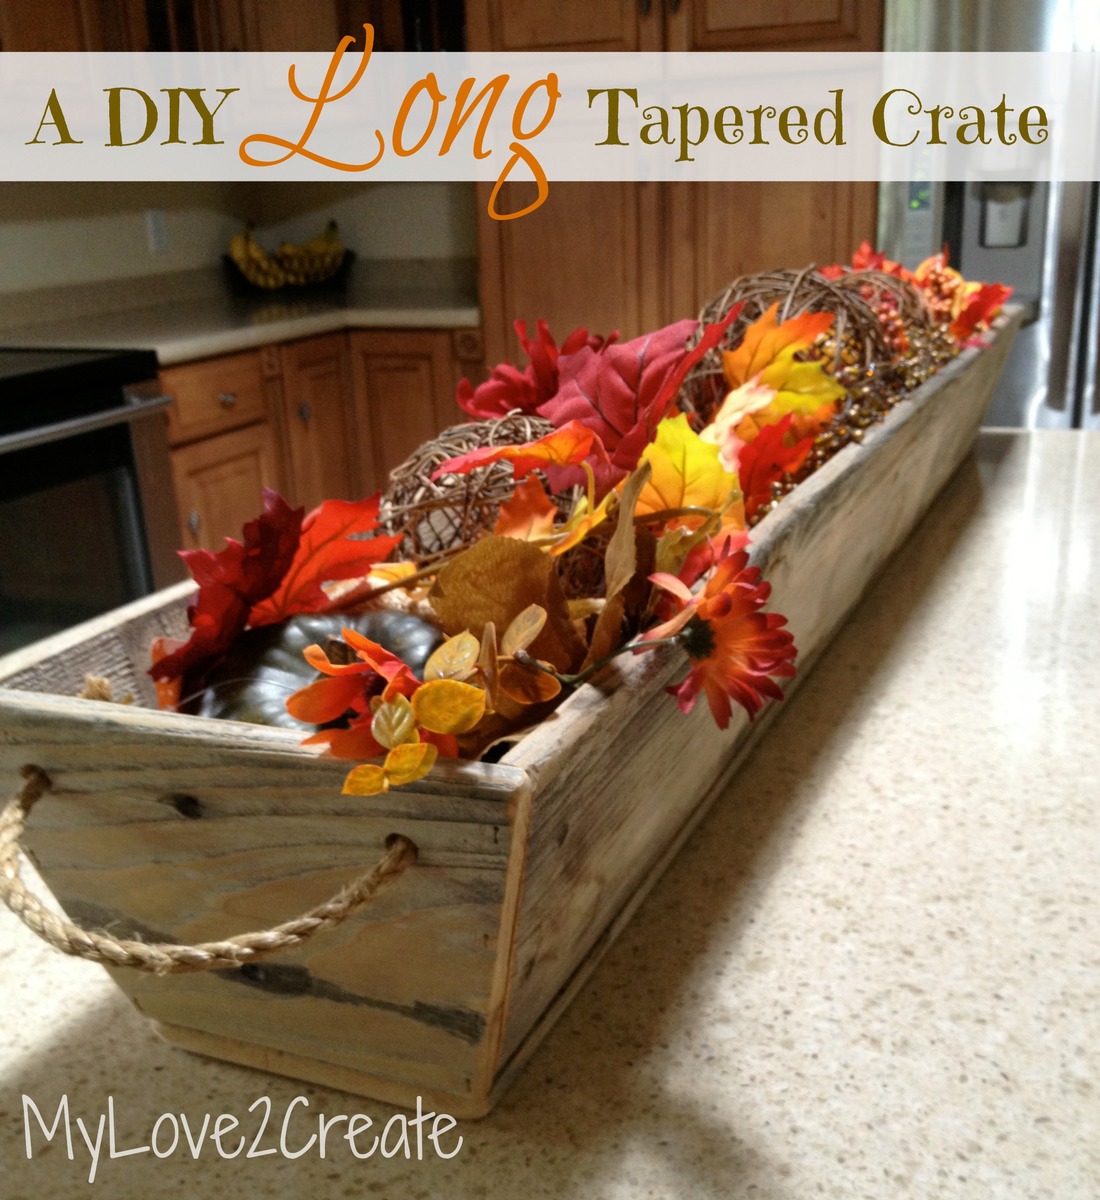
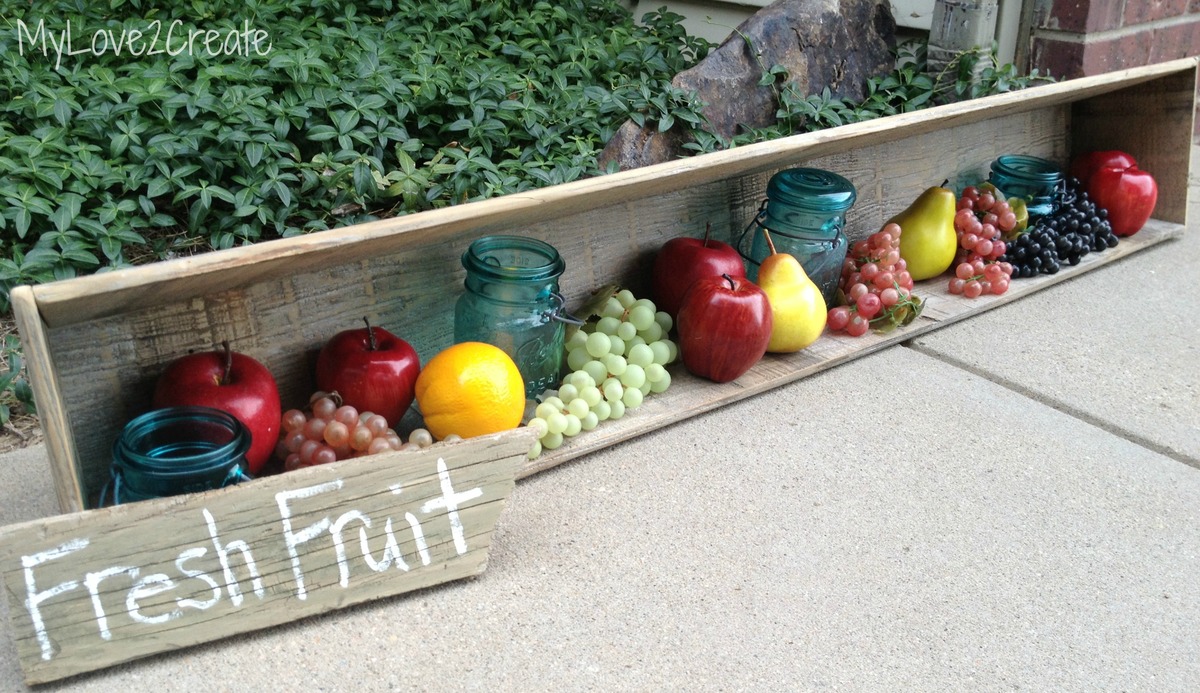
I love Ana's tapered crate! I decided to add some length to the sides and make it really long! It is super cute and makes a big statement, for only a small amount of work! Sa-weet!


Tue, 09/03/2013 - 14:47
Perfect for a Christmas display!
I better get busy and build one!
Val
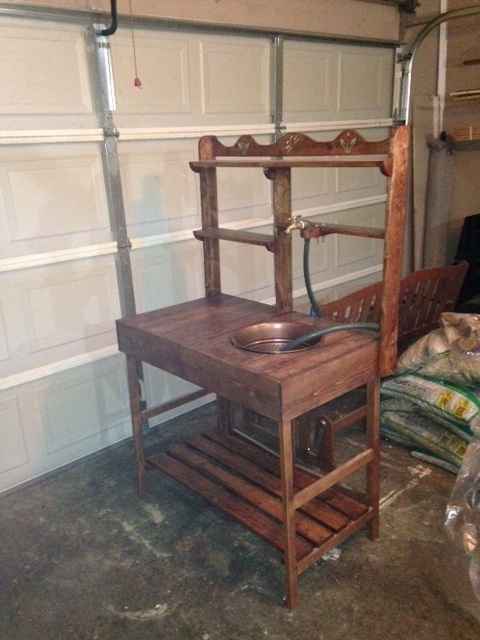
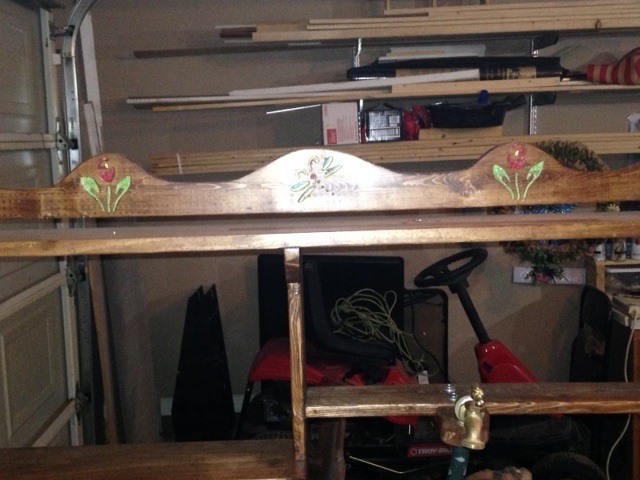
I modified the collapsibile planting table by Lady Goats. My wife asked for it to have a removable shelf to keep with the take down Idea and also to come up with a way to have a spicket added. this was a really fun project to make, I even added carvings and painted to allow it to stand out and to give it some color.
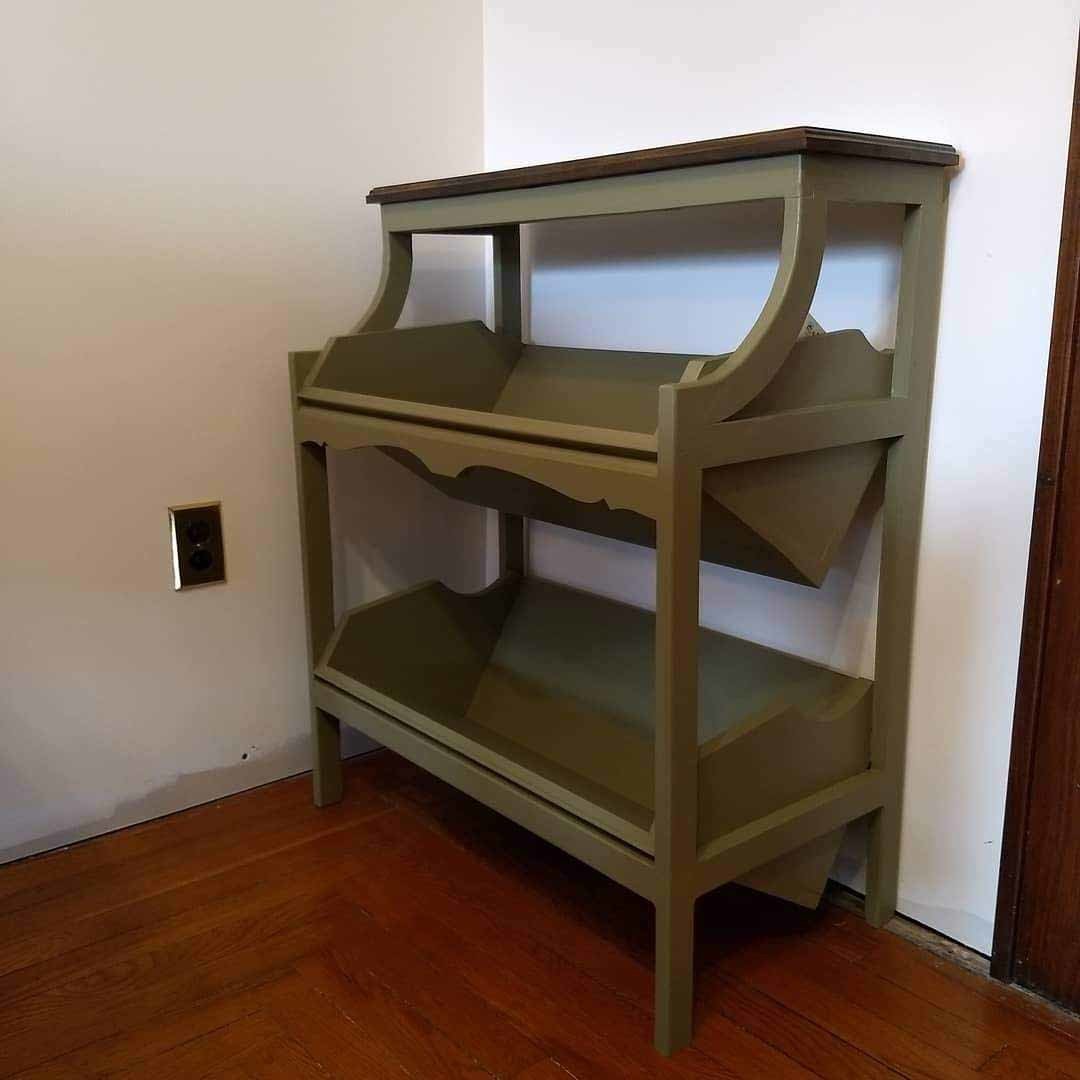
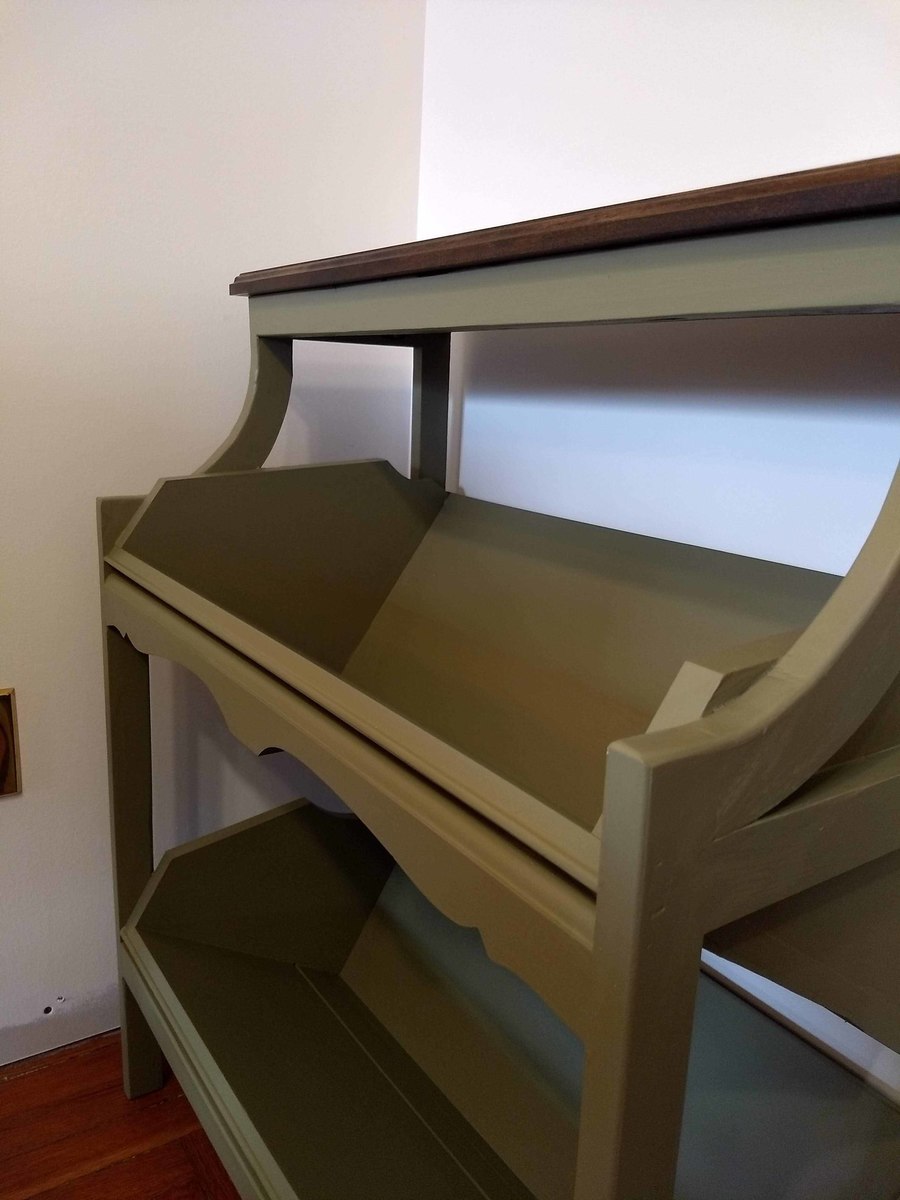
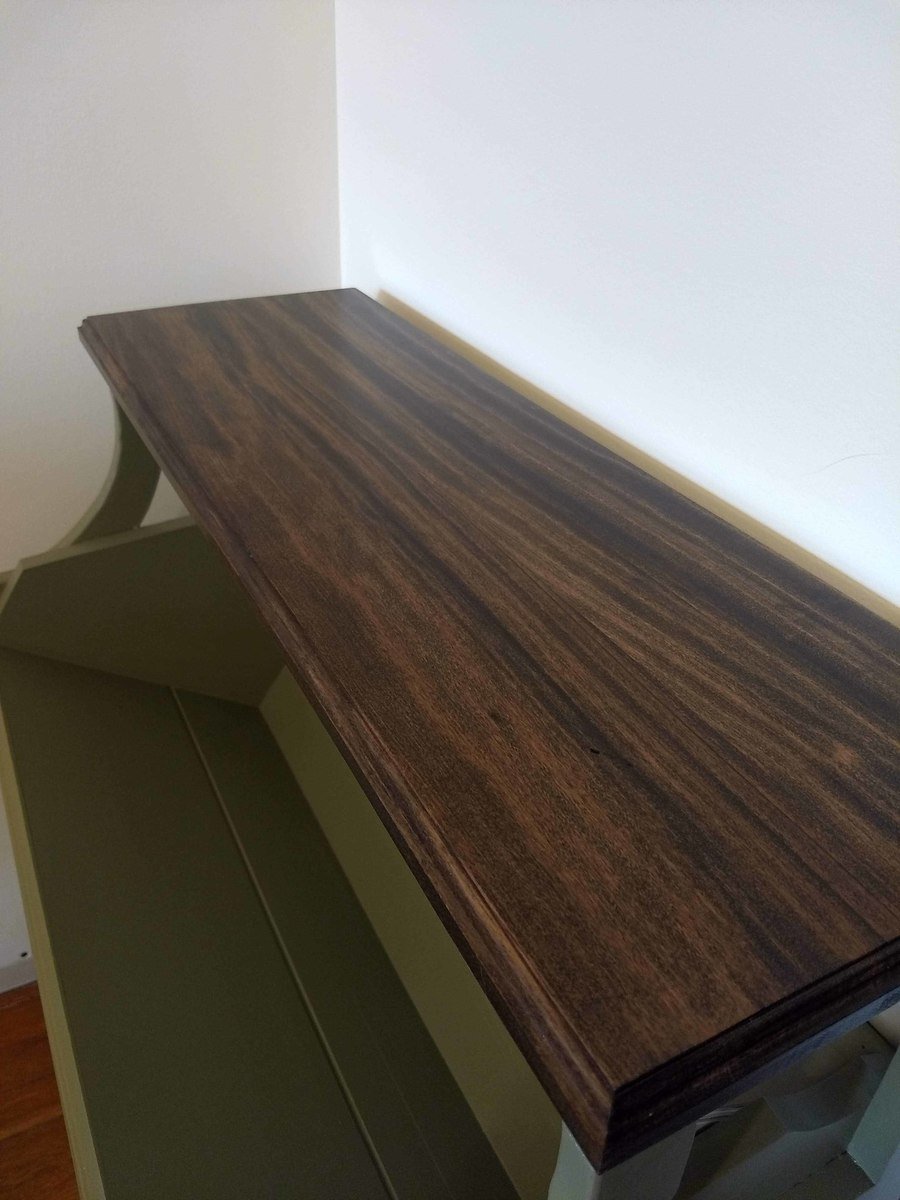
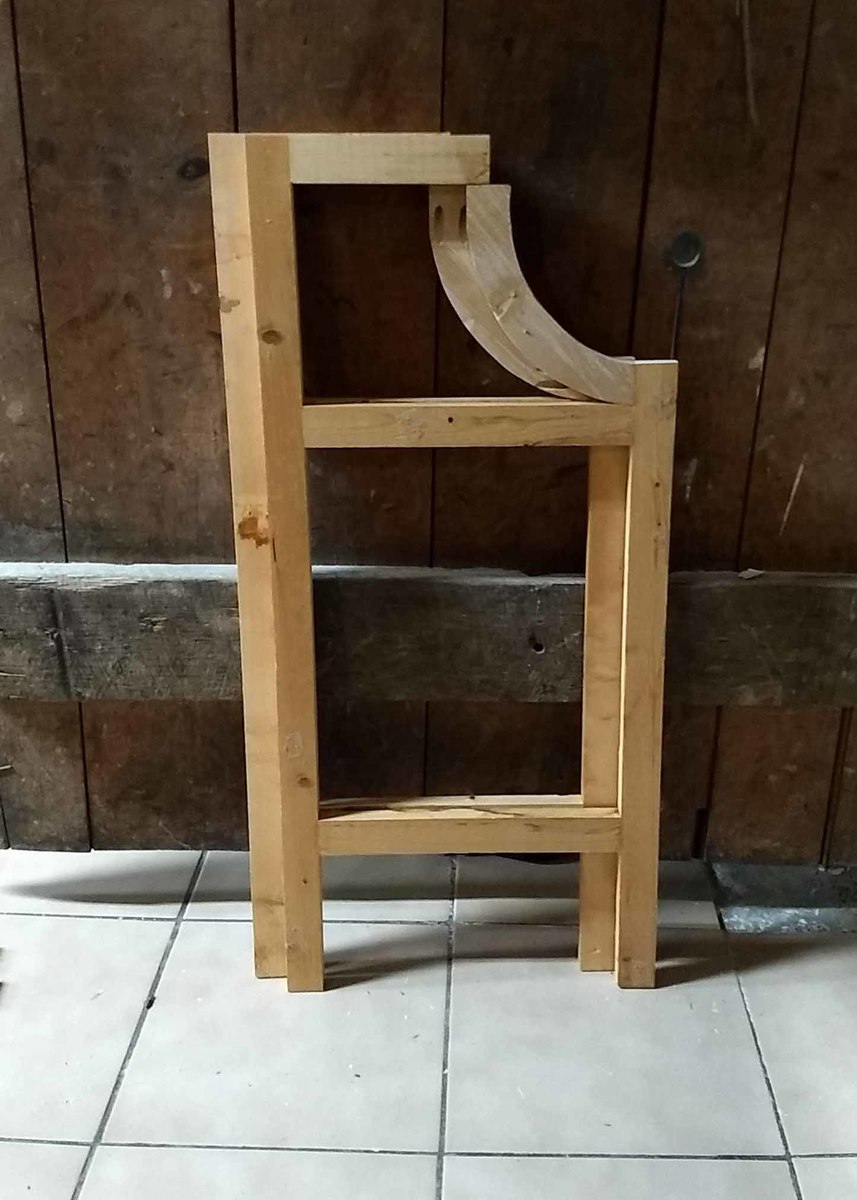
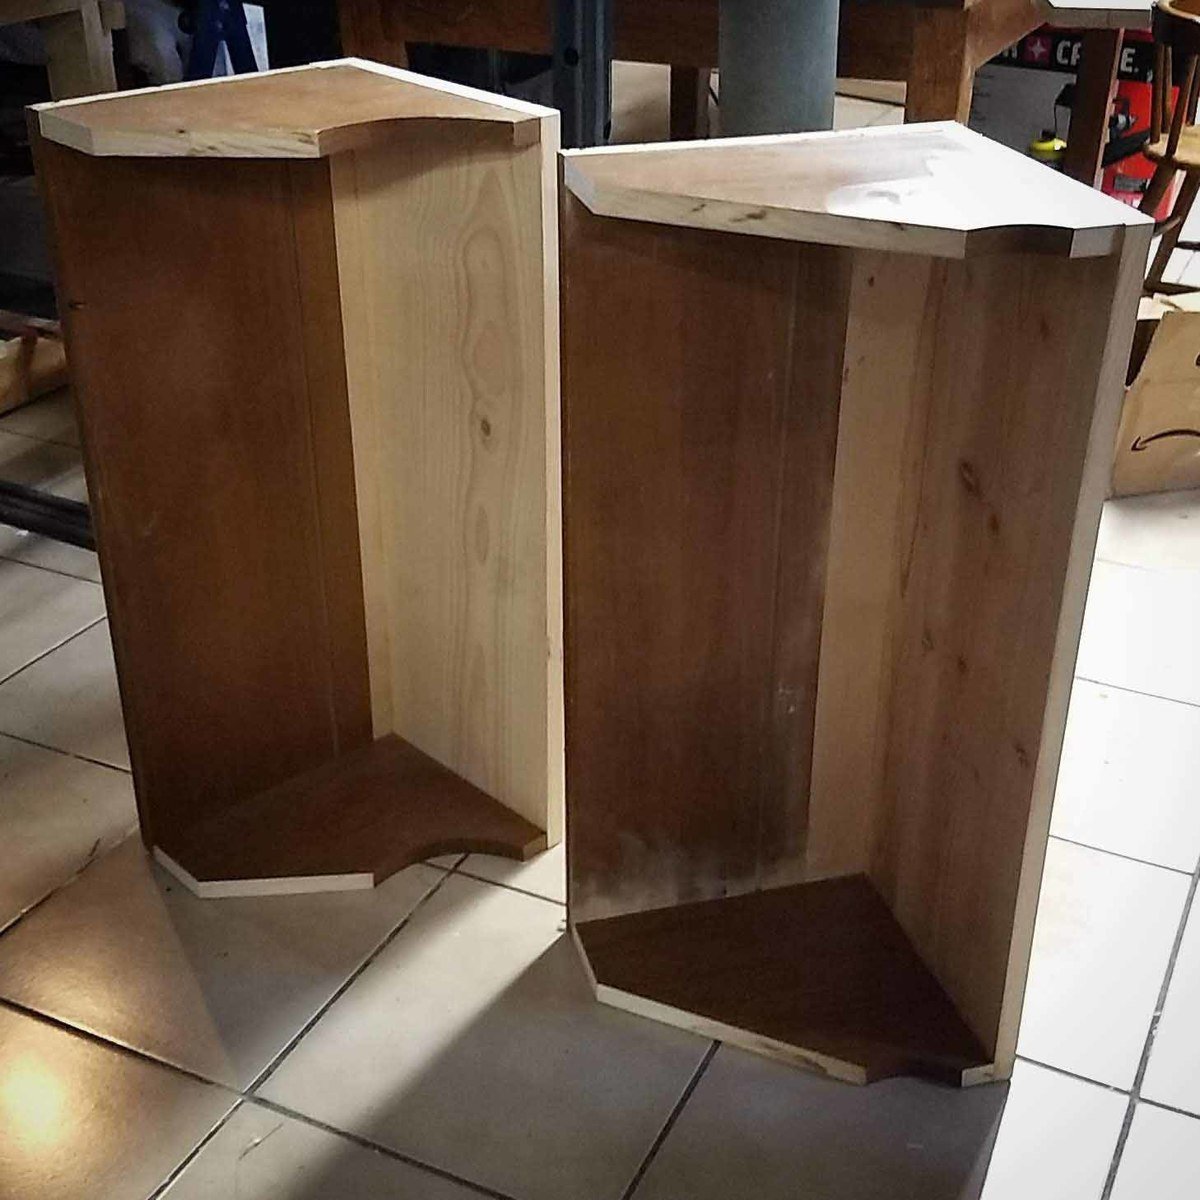
I did very little modification to the original plan on this one besides reducing the overall length to 28". I had an old plate/cup display hutch that wasn't very practical or pretty, so I took it apart and used the pieces to make the shelves (and the curvy bit under the first shelf). <!--break-->They weren't quite the right size, so I added other wood scraps (including a bit of plywood) to get the dimensions needed. The 1x2s are crappy used furring strips I ripped out of the attic when we redid the roof, so they were all water stained and covered in nail holes. The top was a vintage table leaf I acquired at some point and appears to be 3" pieces of poplar glued together (it took the stain beautifully). Oh! I did do one other thing that wasn't in the plans...I connected the shelves to the base using 5/8" dowels through the horizontal pieces on the sides. It took a little extra time, but I do feel more secure with the weight of the books+shelves (+possibly a climbing child) resting on those dowels instead of just screws.
The main thing is that this case holds my toddler's whole library. She can even put the books away by herself without them falling off when she doesn't place them just right. I love that it looks like it belongs in a grown-up's living room, but it's 100% classy kid-friendly furniture design!

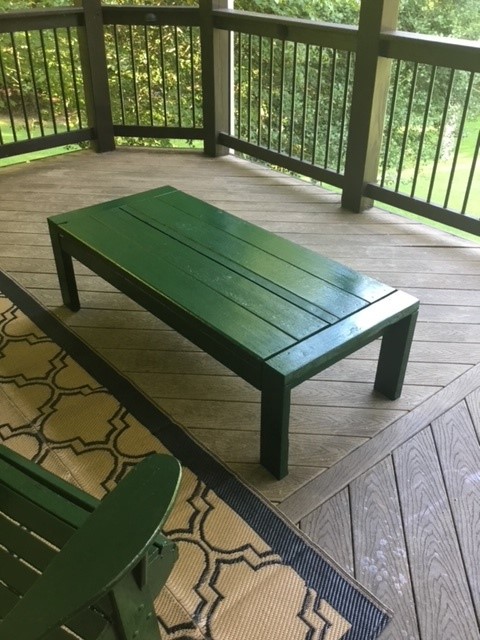
Here is a coffee table I built using the plans from Ana and wood from an old picnic table. The plans were perfect and the coffee table turned out well. I used the 2X4 coffee table plans - http://www.ana-white.com/woodworking-projects/2x4-outdoor-coffee-table - I had to make a few cutting adjustments in order to only use the reclaimed wood from the picnic table but it still turned out great.
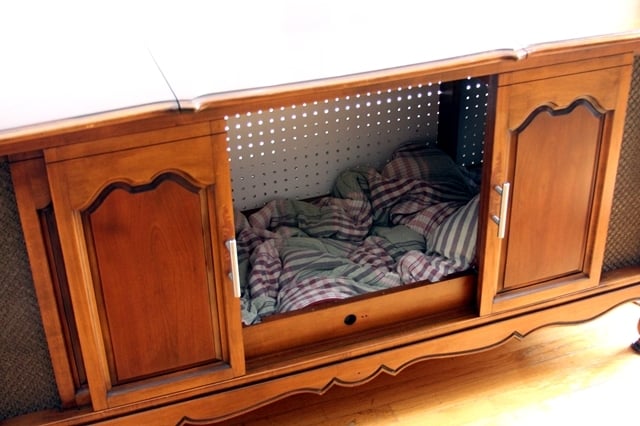
I love my dogs, but their wire kennels were an eyesore. Removing them completely was not an option, but I was tired of looking at them. I went back to my first-ever rehab project, and took it one step further to create a one-of-a-kind castle for my pups.
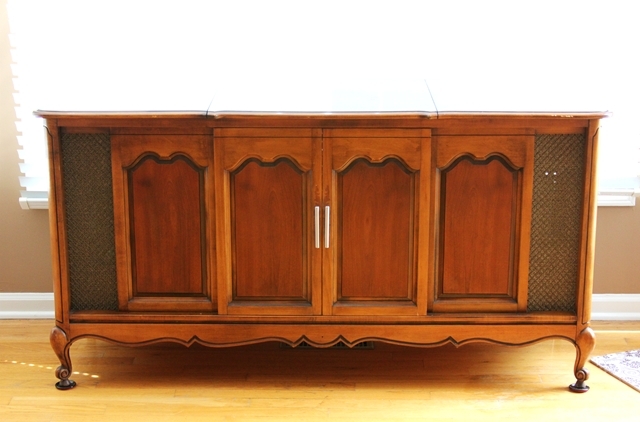
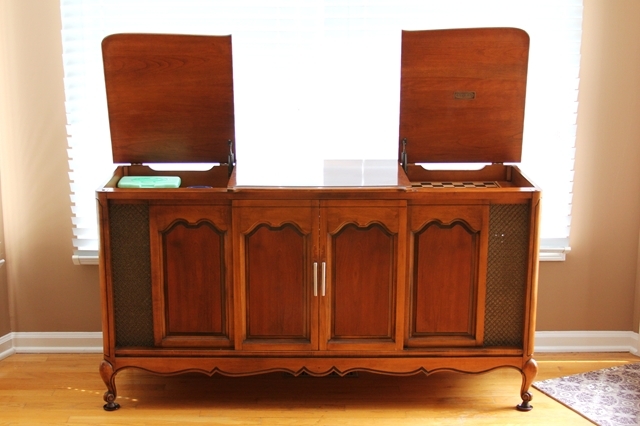
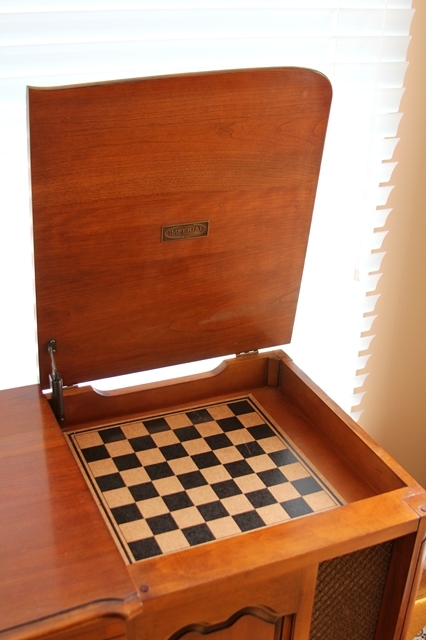
The original piece of furniture was an old console-style TV cabinet. Sliding doors on the front revealed the TV, and two lids on top contained the tuner and a turn-table.
Armed with screwdrivers, hammers and a dremmel, all components were removed form the cabinet, leaving just the shell. (PLEASE be sure you remove all sharp, potentially dangerous, screws, staples and what-not’s from the inside of the cabinets, to avoid injuring your pet! The dremmel allowed me to cut off and grind down stubborn screws.)
To cover the holes in the top cabinets, I used old checker boards. The cubbies are now a great place to store dog treats and leashes.
OPTIONAL: The back panel of the cabinet I used had holes from the TV components. I elected to replace the back board with a new sheet of peg board. (The peg board allows for much-needed ventilation.) In order to get the size perfect, I traced the old back onto the new and marked the original screw holes.
I vacuumed the inside to remove all construction debris and polished the exterior with Pledge. Then, I inserted an old comforter into the kennel, and stood back as my two pups launched themselves into their new abode.
The doors can stay open during the day for them to enter at their own will, and close for bedtime. And my eyes no longer hurt.
Thu, 08/11/2011 - 18:41
This was such a great idea. I love the old console. I love to build but I love it so much more when I can use old wood or repurpose parts of old furniture and industrial pieces. I feel creative. The checker boards are great. Do you have a blog?
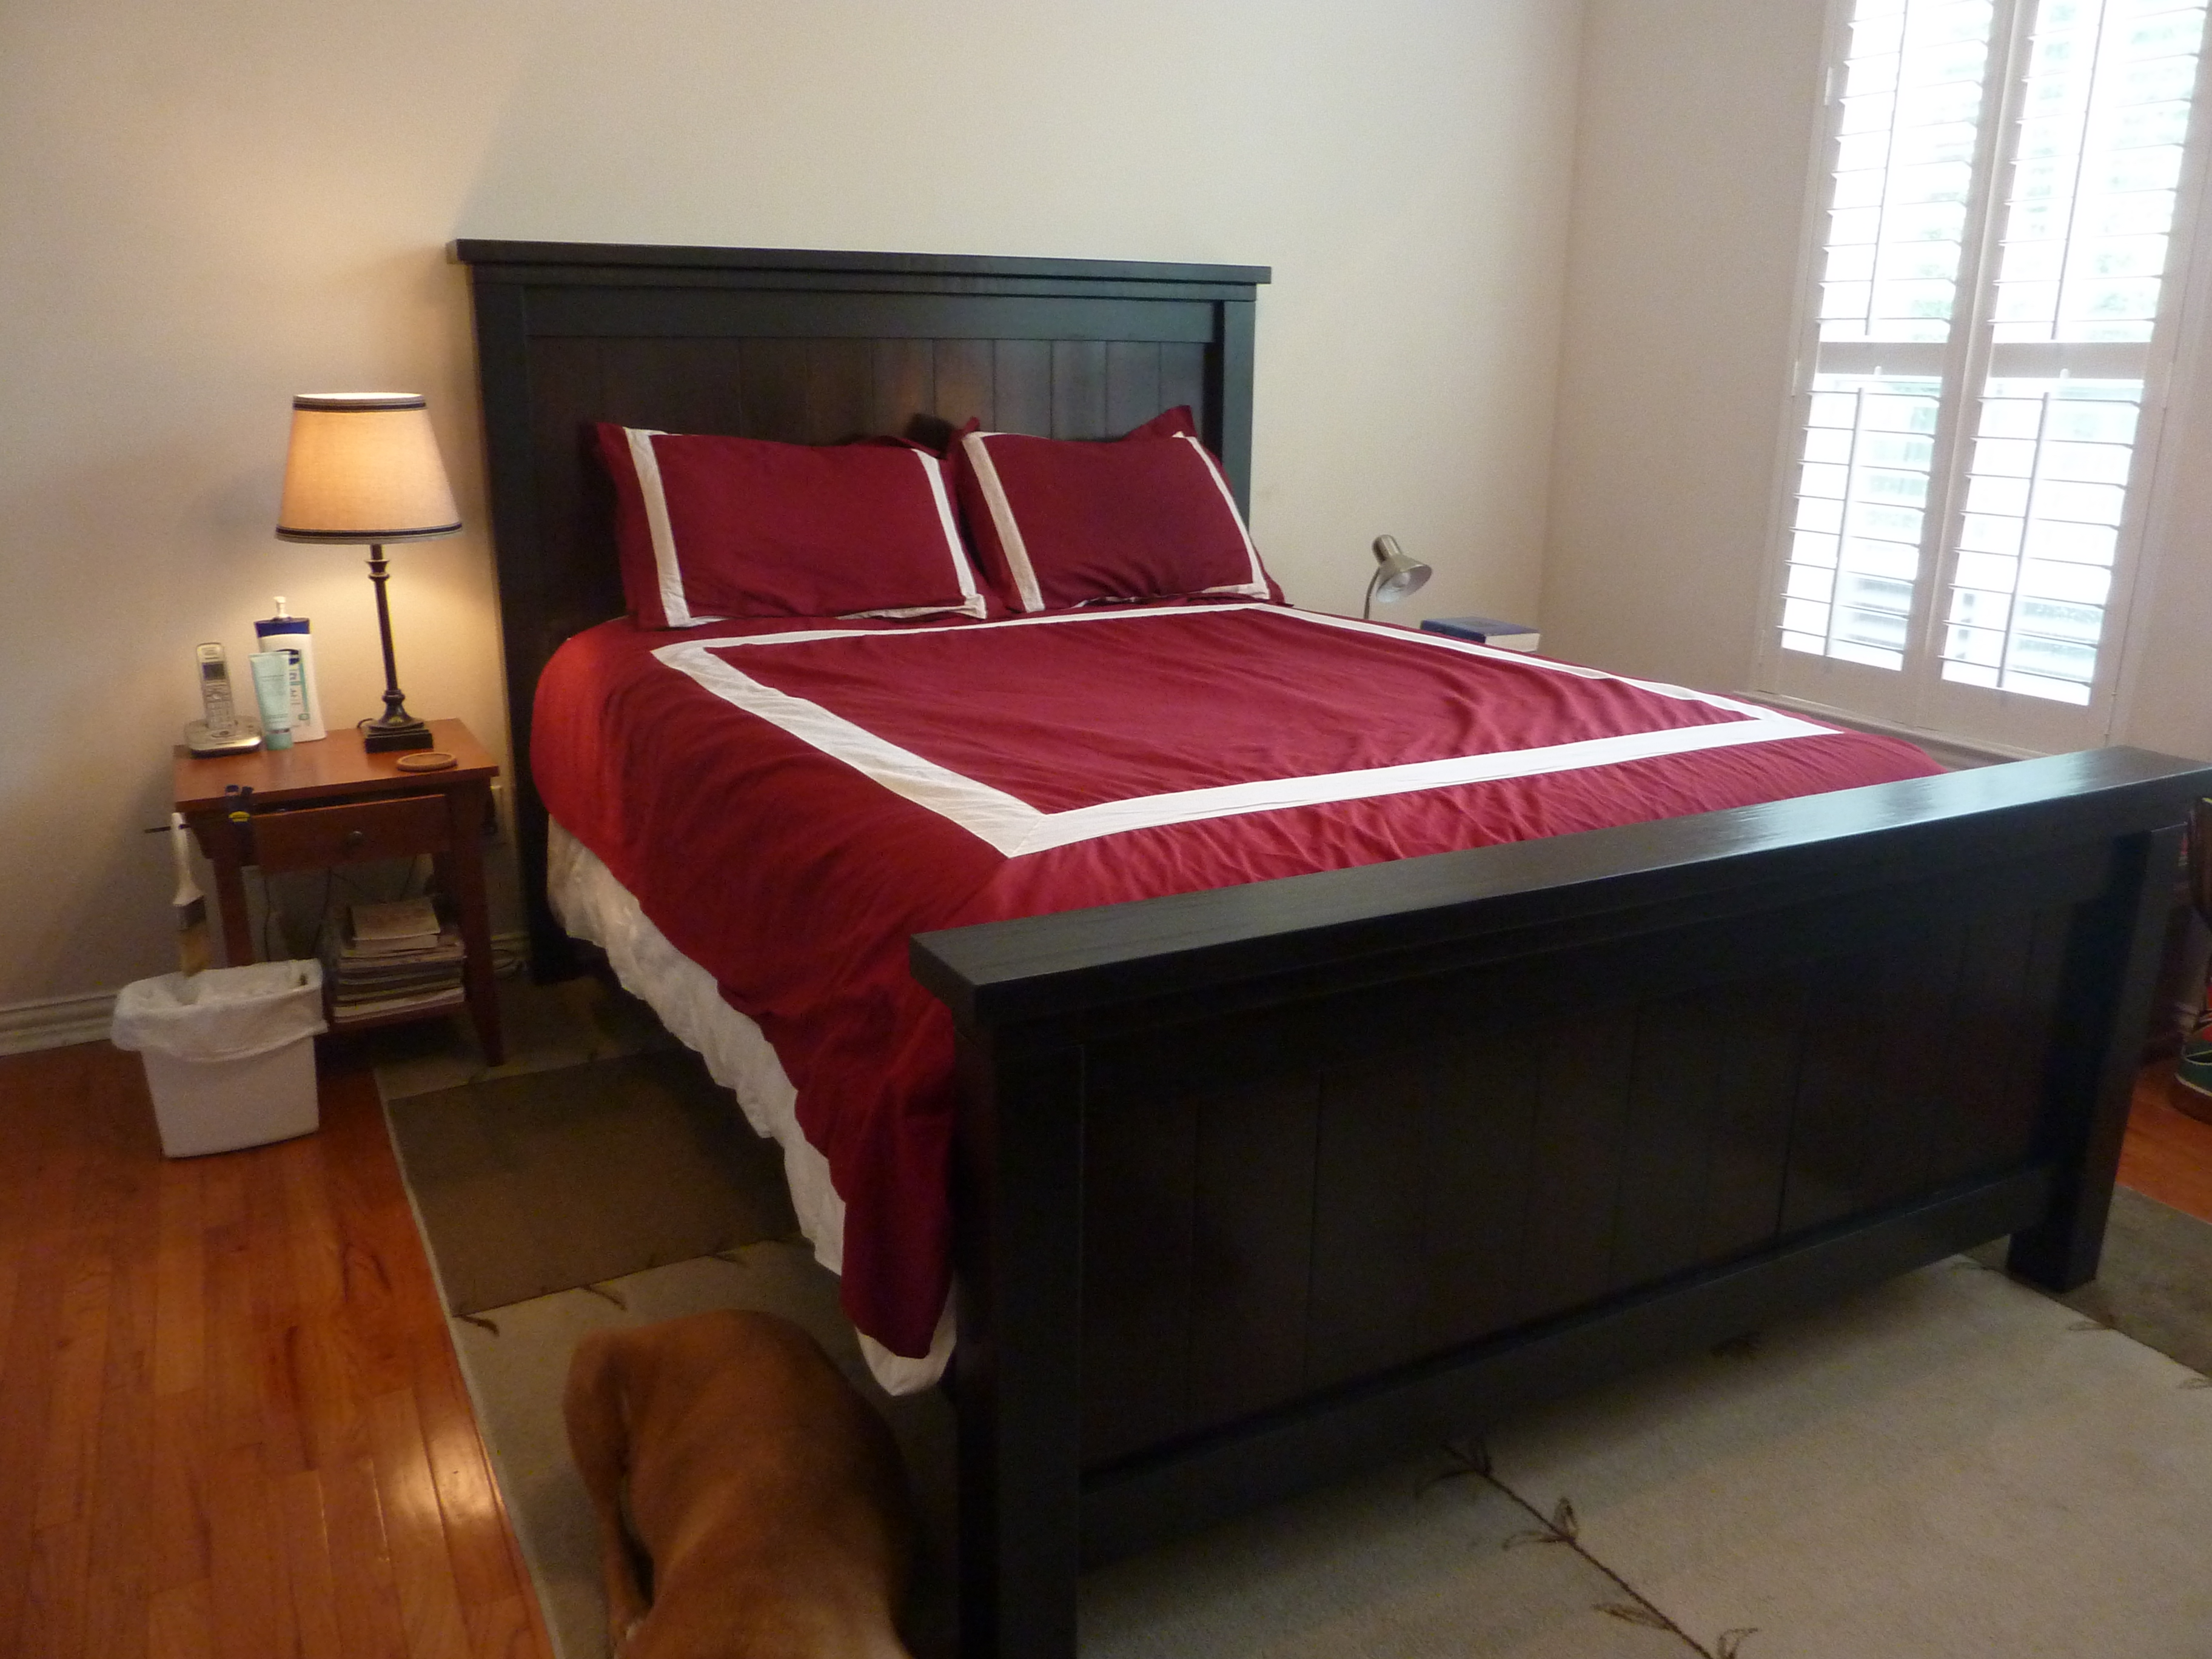
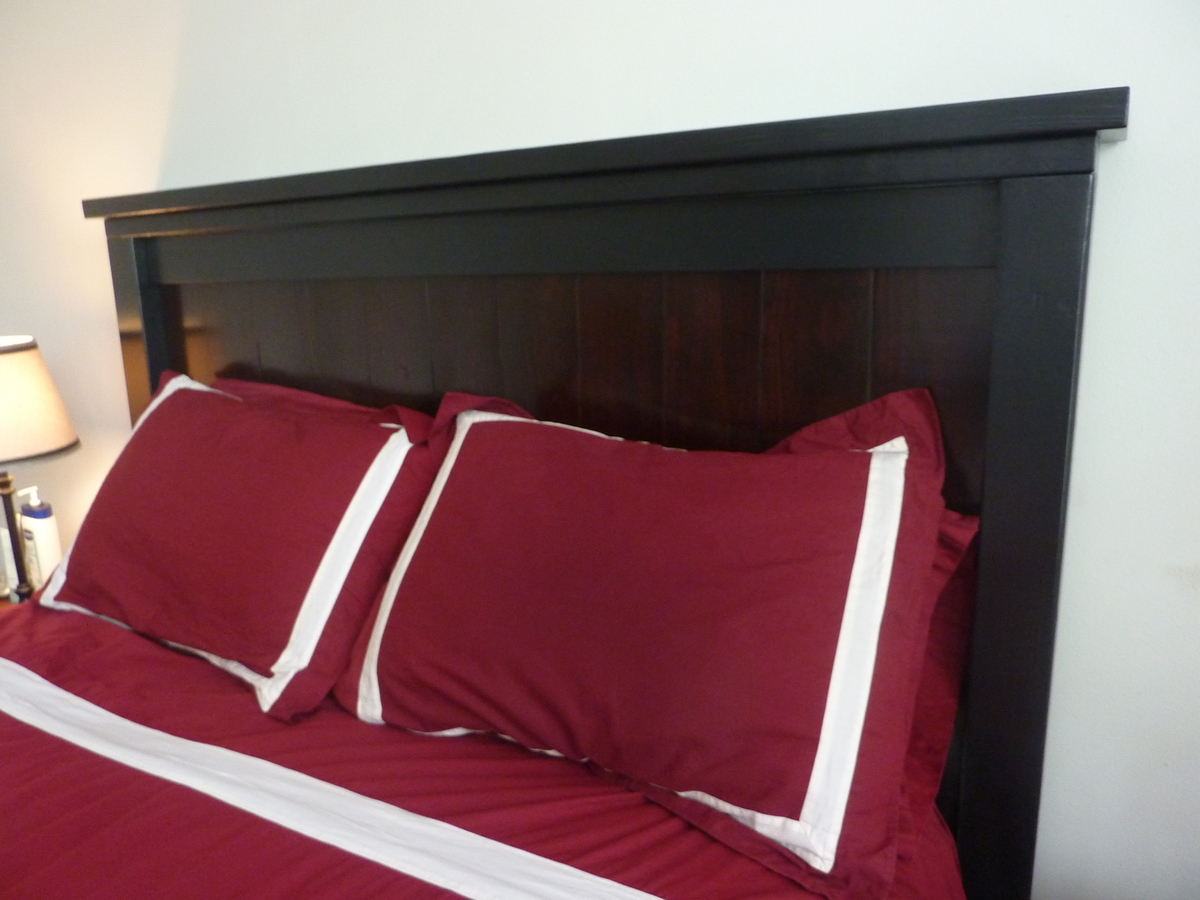
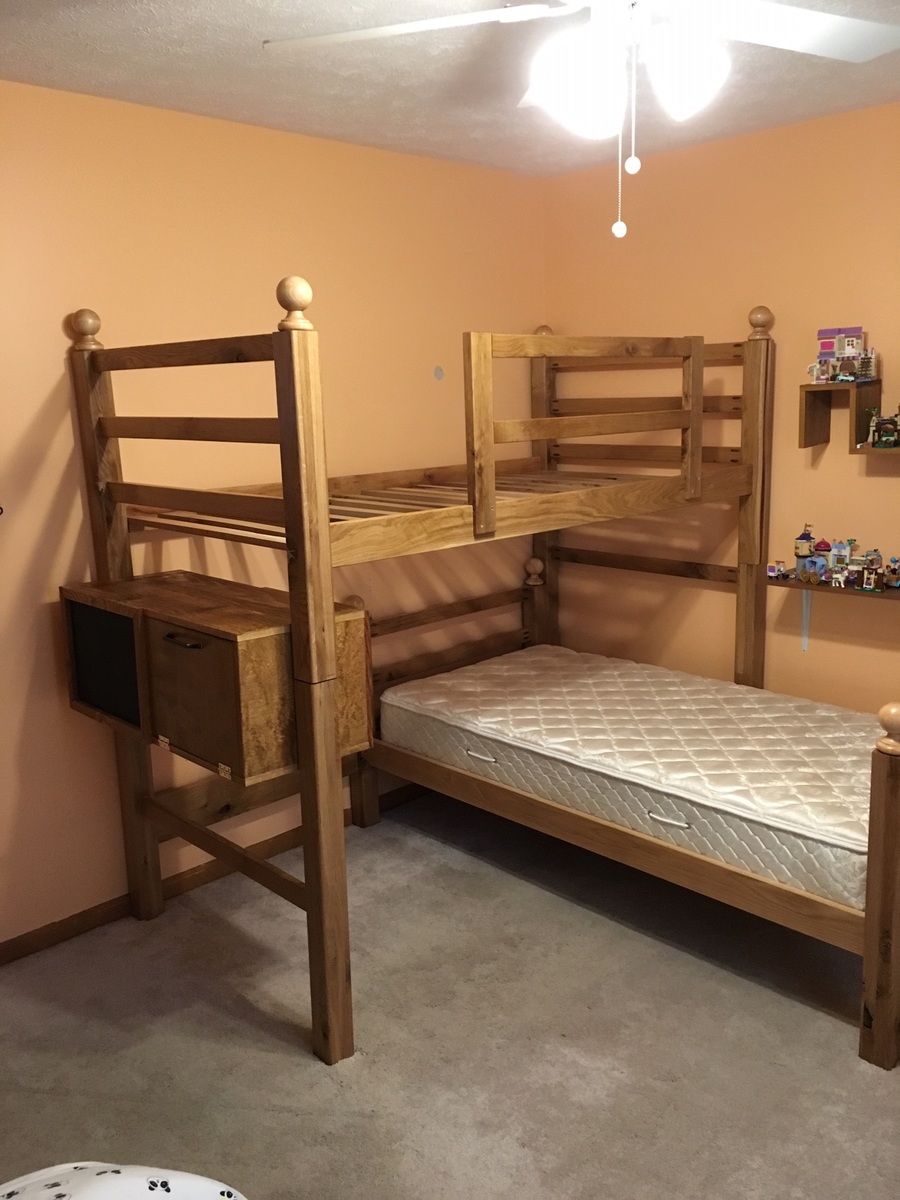
He likes natural wood, I like painted furniture. Solution: two-toned bed! Vertical slats are stained in Minwax Red Oak (took 3 times to get that dark color!), surround is painted black. I thought we'd never find a workable compromise!
I changed up the dimensions a bit to fit my preferences:
1. I like a taller headboard and footboard (dog can't rub against the end of the bed anymore - wahoo!).
2. Also wanted the bed to be just a bit higher above the ground so I wouldn't have to buy new under-bed storage boxes.
3. Used 1x6s instead of 1x8s for the vertical slats because they fit the width just perfectly - no trimming needed.
4. Added about 2" to the length so I'd have plenty of room for tucking the duvet at the end of the bed. I hate when the covers get stuck and I can't pull them up easily!
5. I routed out a groove in the posts to slide the side rails in because it seemed more secure than screws alone. Could've done it without, though.
6. We used dowels and wood glue on the 2x6 tops of the headboard and footboard pieces. I think it made a big difference in the overall appearance. We don't have a doweler, but the hubby made a guide with a spare 2x4 to keep our dowels lined up correctly. It worked pretty well.
Next time I would use pocket screws. I've acquired a jig since this piece was completed. It would definitely have saved me some time in the finishing process.
I really wish I could have talked the hubby into letting me distress the finish just a bit. The thing is, it's inevitable around here (my kids are like crazy apes sometimes!). So I really wanted it to at least look intentional. Oh well, I guess we'll get there soon enough even without it!
Thu, 09/05/2013 - 09:07
I like the foot board height. I noticed it in the Arched Headboard version of the Farmhouse bed a while back but could not find dimensions. I also like the idea of having more space under the sides to fit my storage bins. Could you tell me what the cut length was for the 2x6s on the foot board? I like the finish too! Bed looks great.
Thu, 09/05/2013 - 10:27
GScott -
Thanks!
I changed several things on the footboard, as follows:
Slats = 22"
Post = 26.5"
Total height of footboard = 29.5"
I made the slats on the headboard a bit longer too, but didn't change the actual height of the headboard. I just wanted the wood to extend down behind my mattress a bit so I wouldn't have a little corner of wall showing behind it.
As for more space under the sides - I just screwed the siderails in just a bit higher than the plan called for.
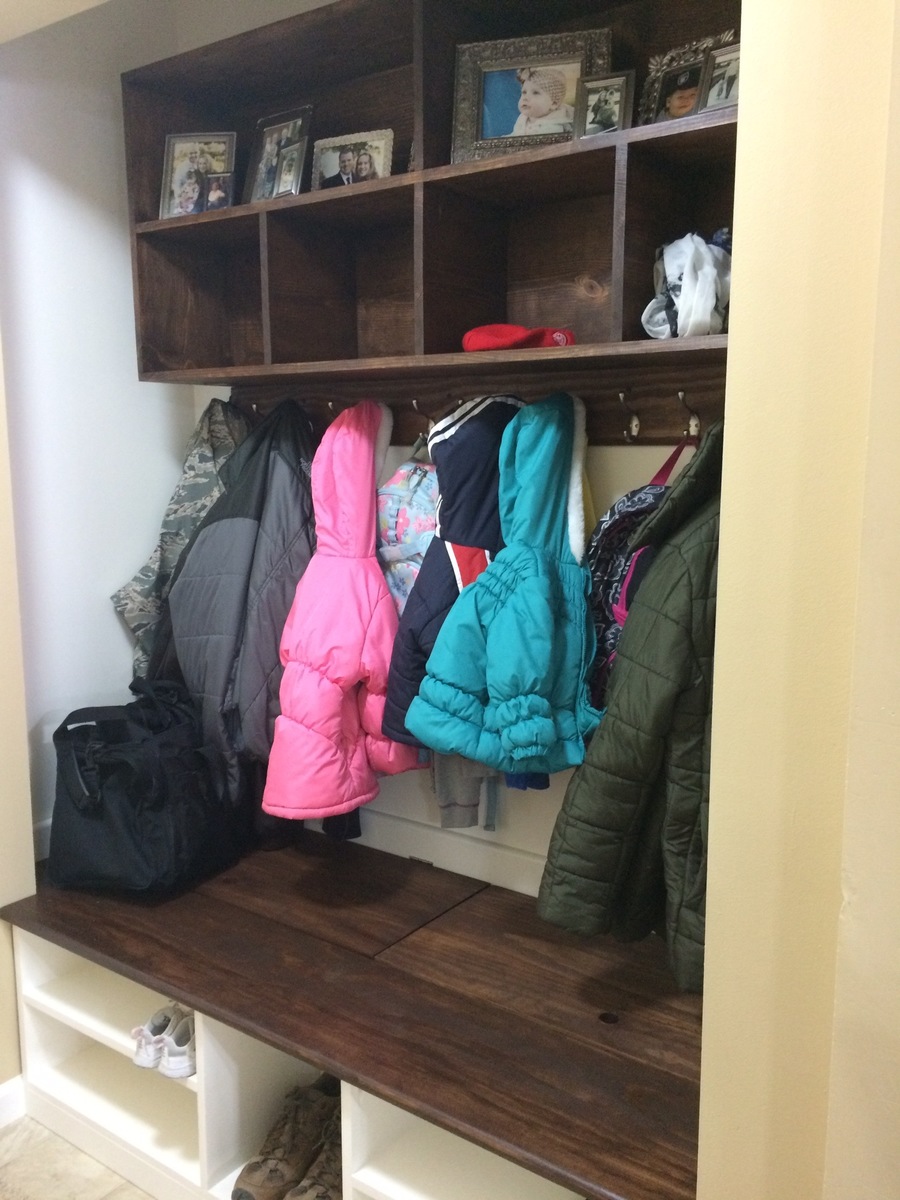
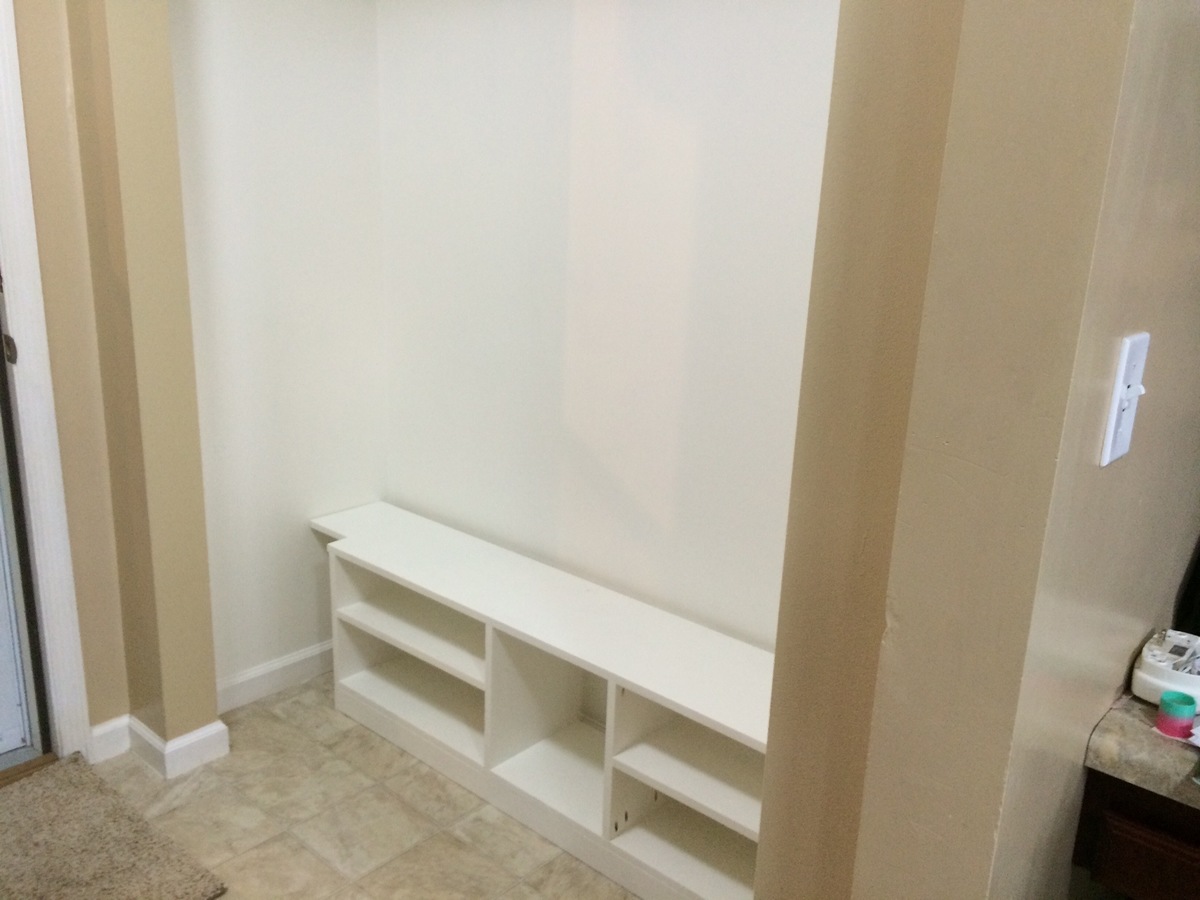
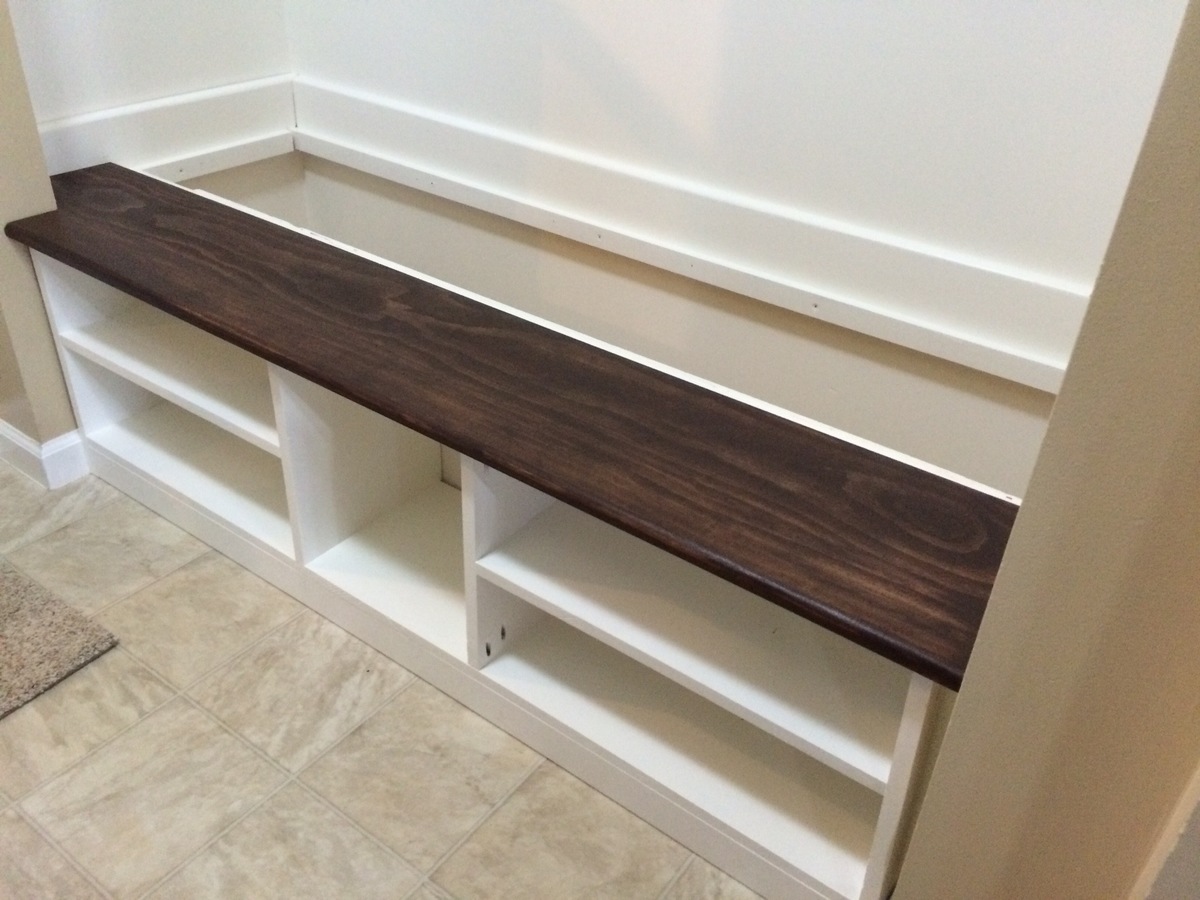
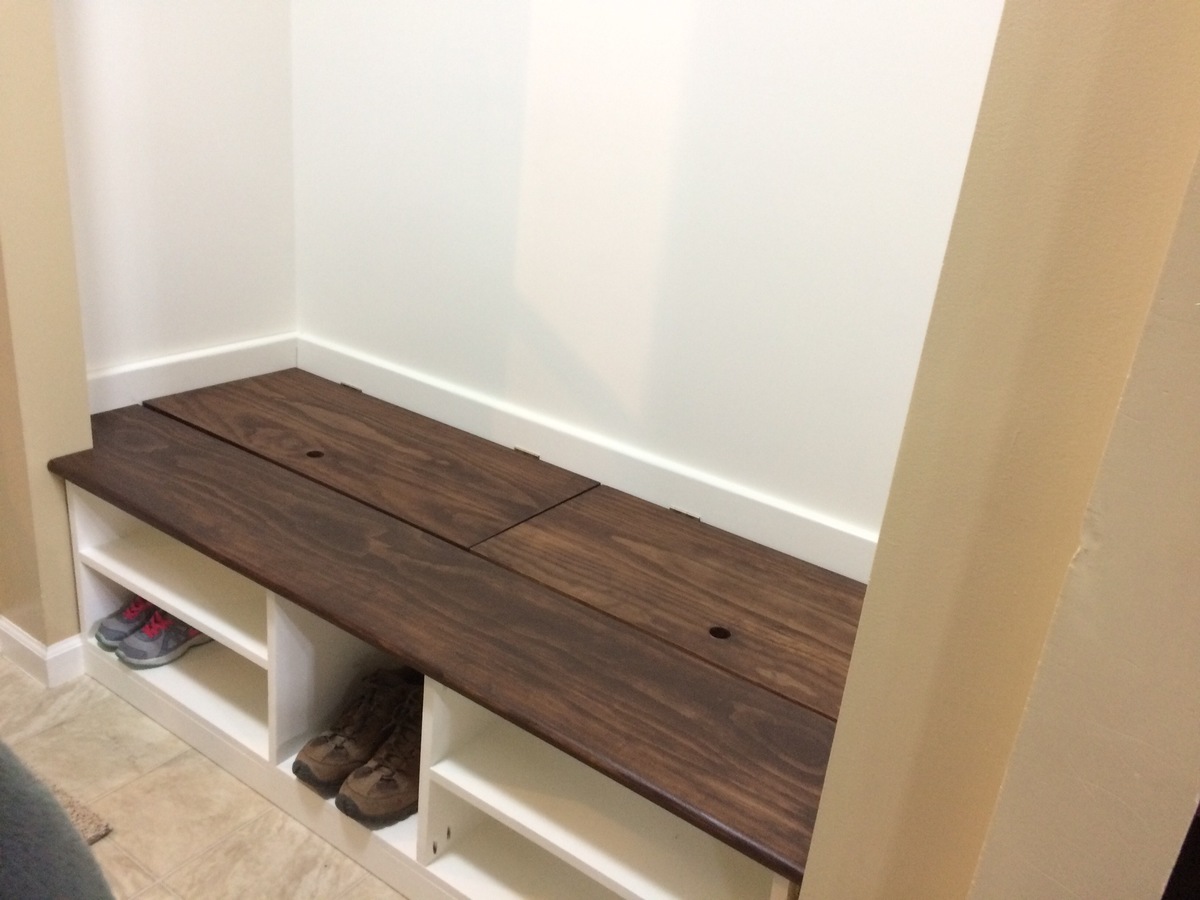
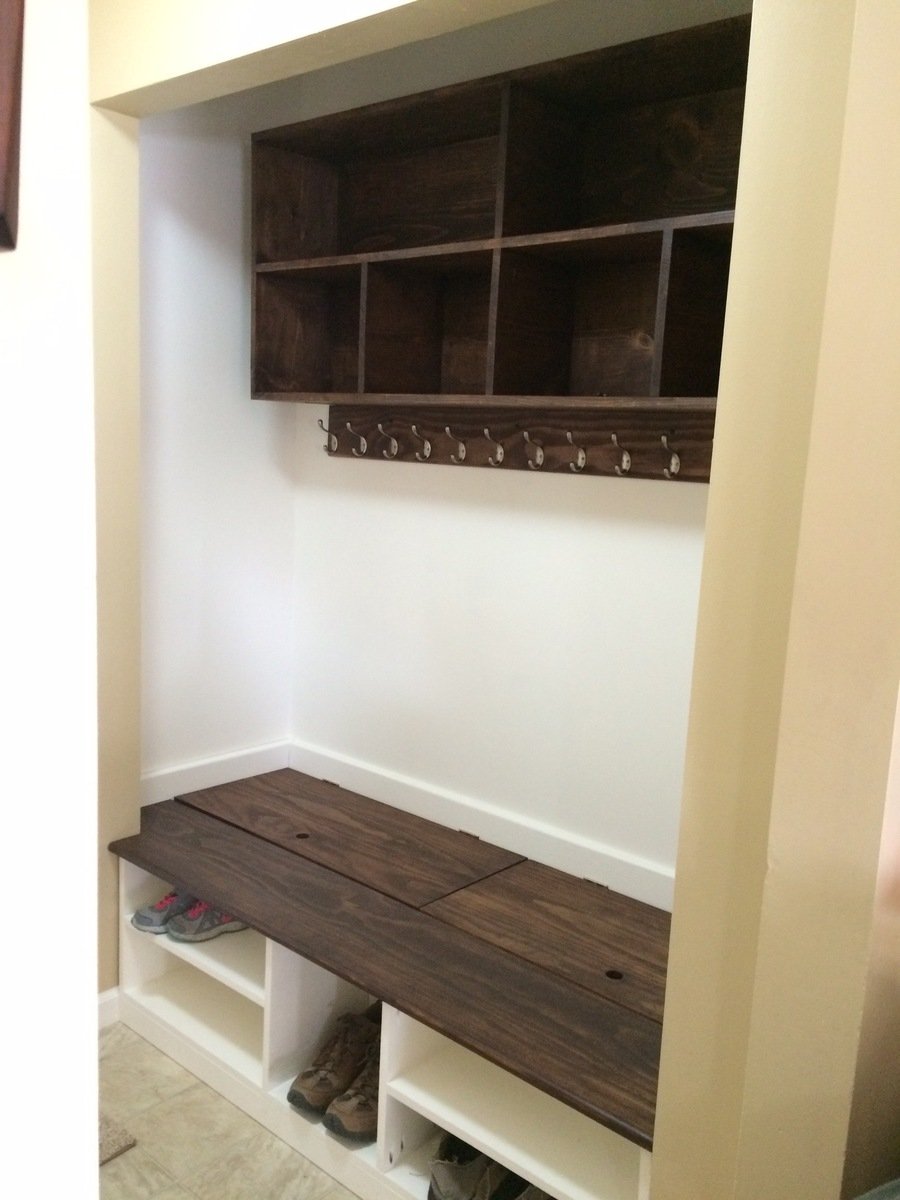
This was made from the Extra Wide Shoe Bench plans. Thank you Ana White my wife is so happy with this area in our house.
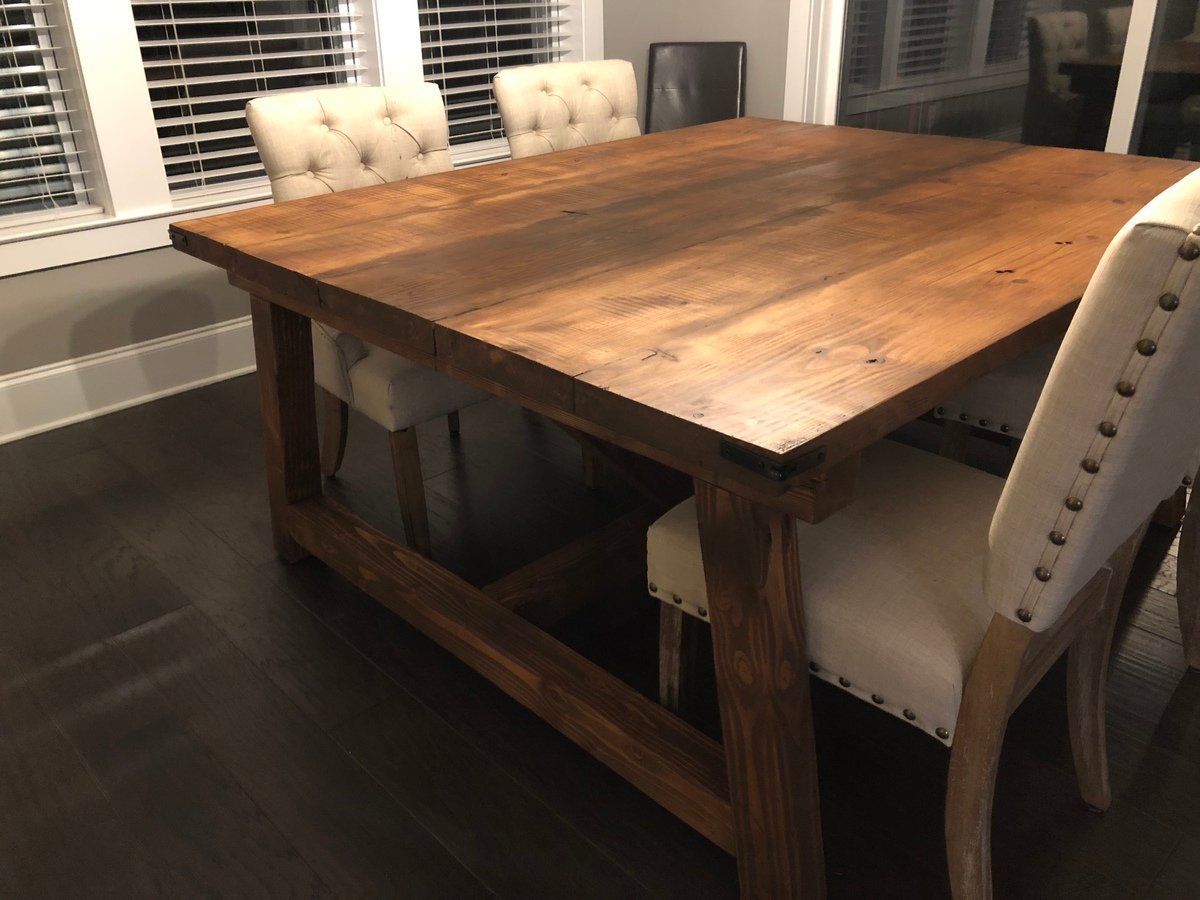
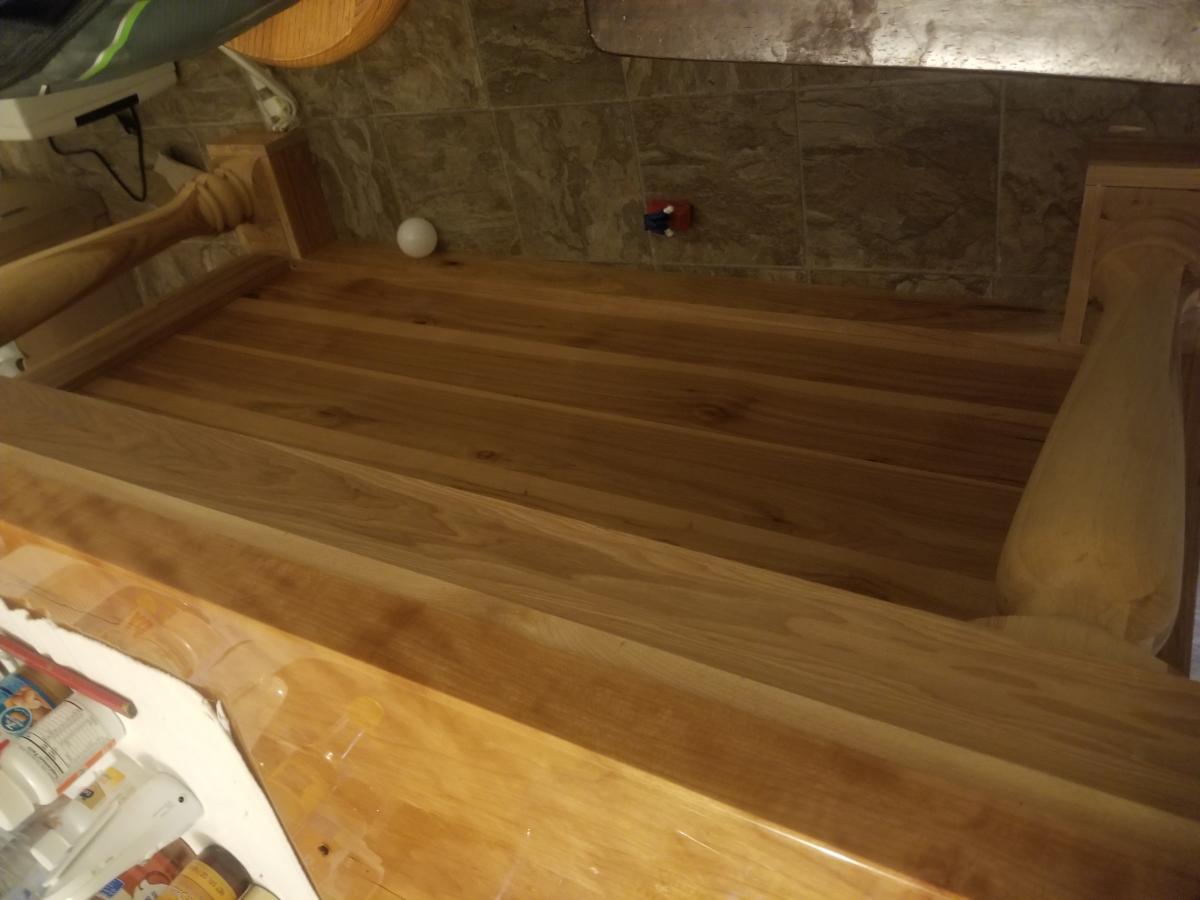
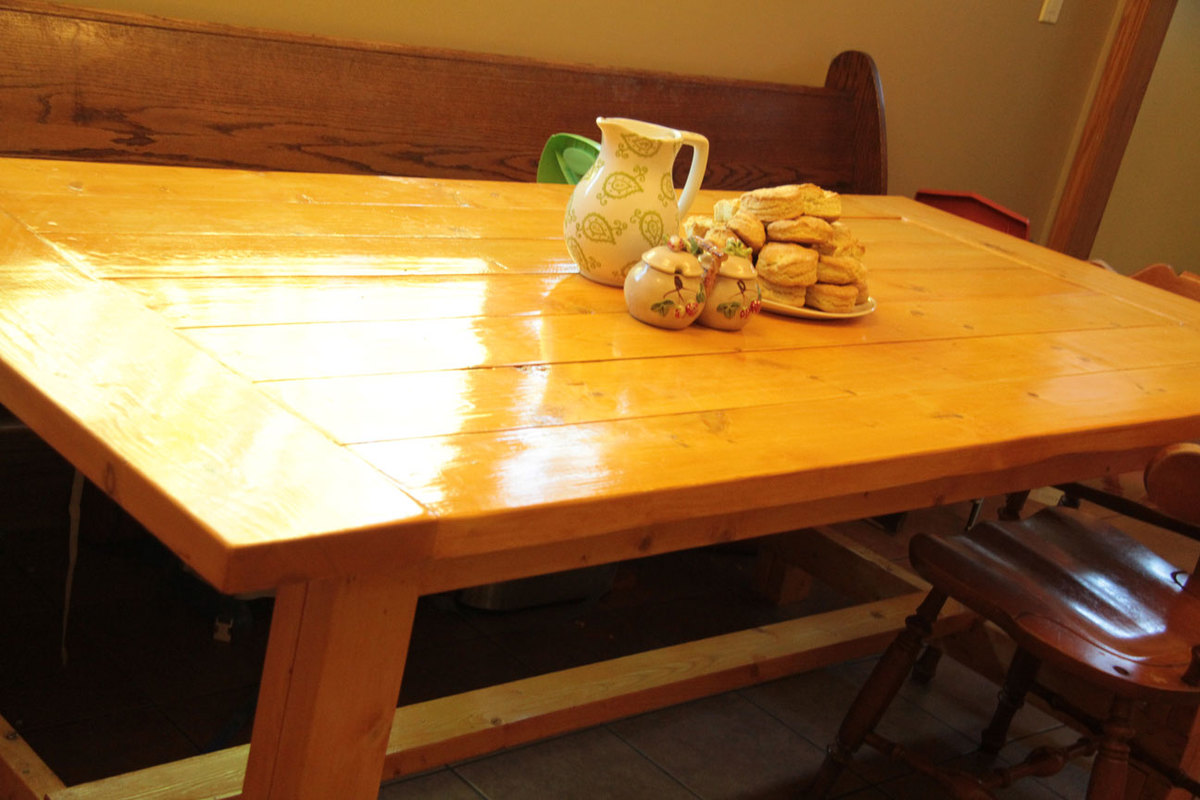
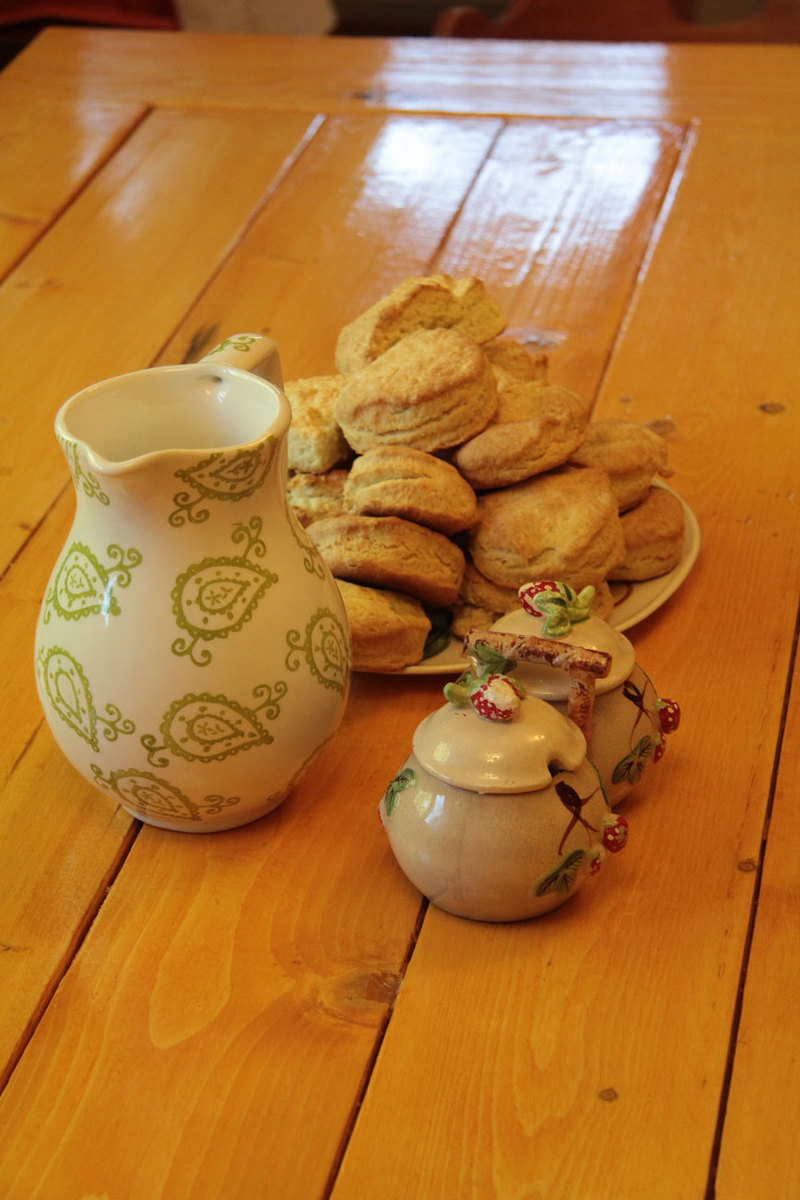
Found five 2x12 heart pine planks and used this base as the template. Table is about 18" wider than the plans. It turned out great!


Thu, 12/27/2018 - 10:05
That tabletop is gorgeous! Thanks so much for bragging, much appreciated! Ana
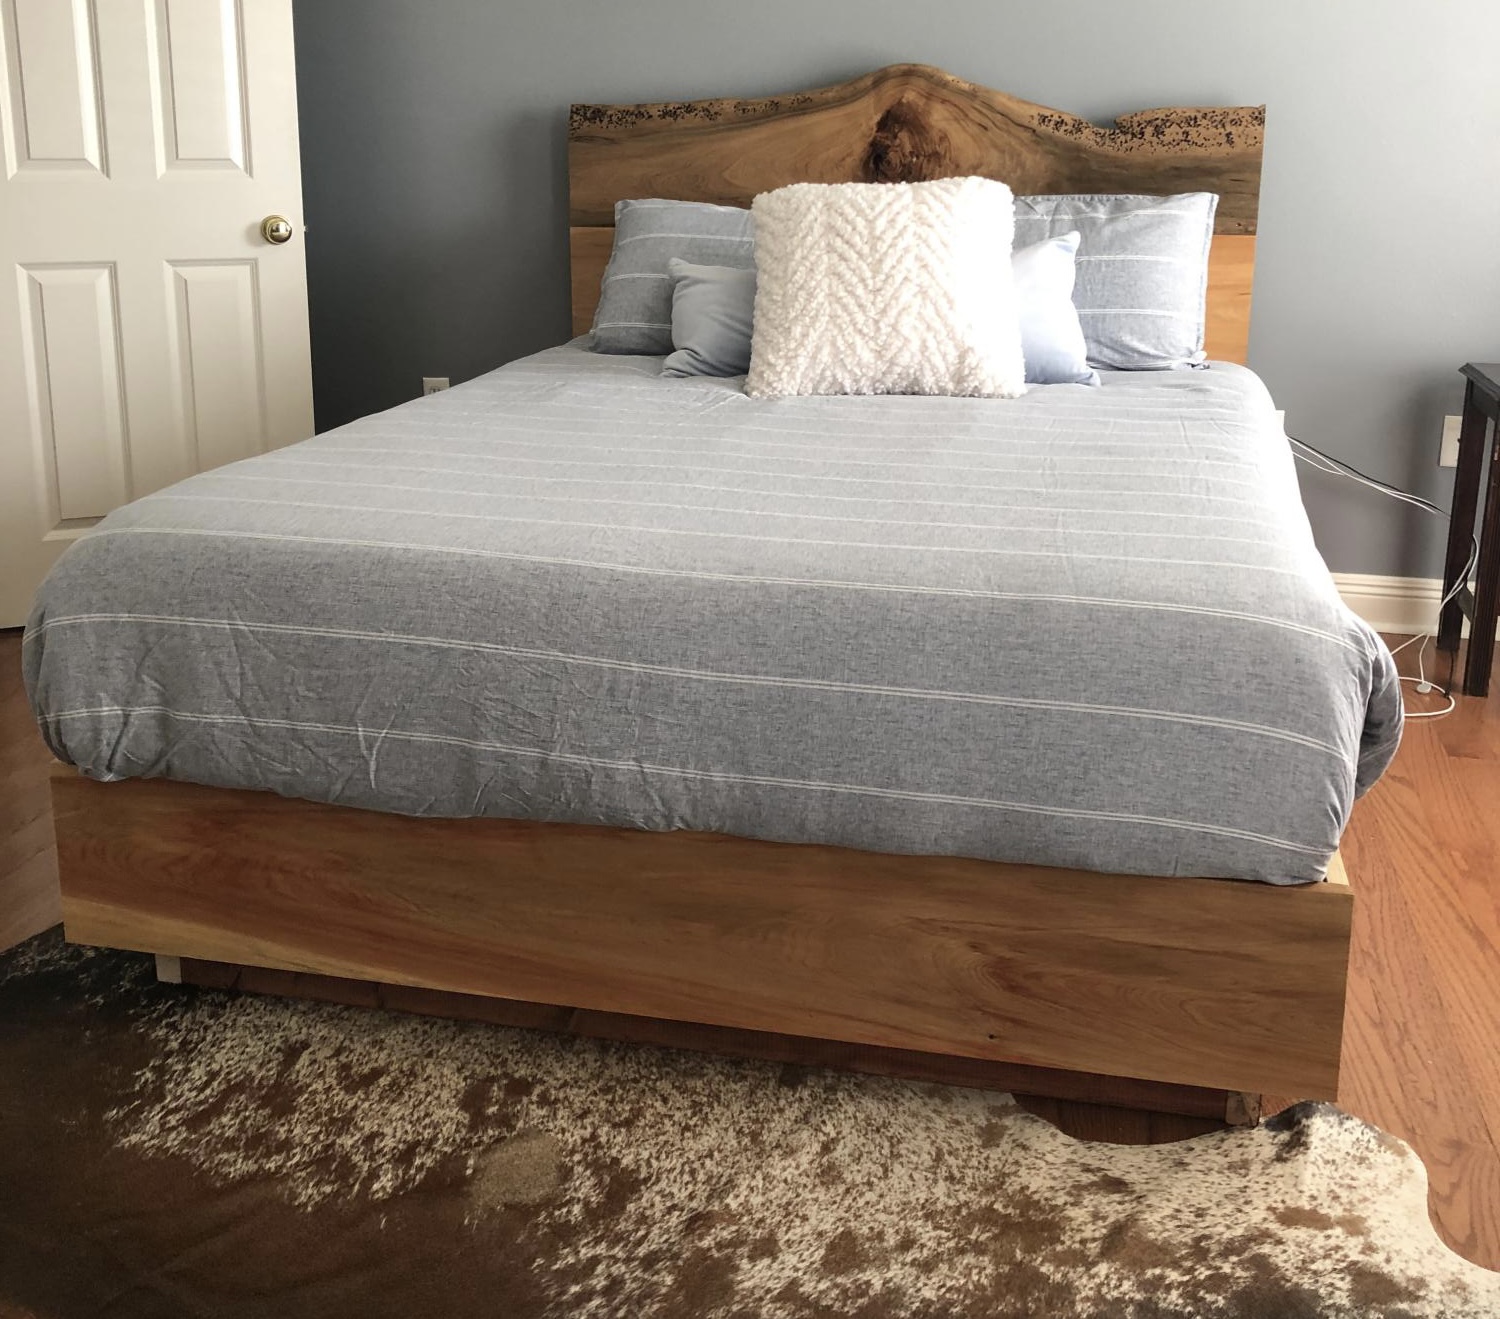
My son needed a new bed and he was interested in a live edge Cypress headboard. We were able to make this one!

Comments
Ana White Admin
Tue, 07/26/2022 - 09:20
Gorgeous island!
Beautiful build, thank you for sharing!