Community Brag Posts

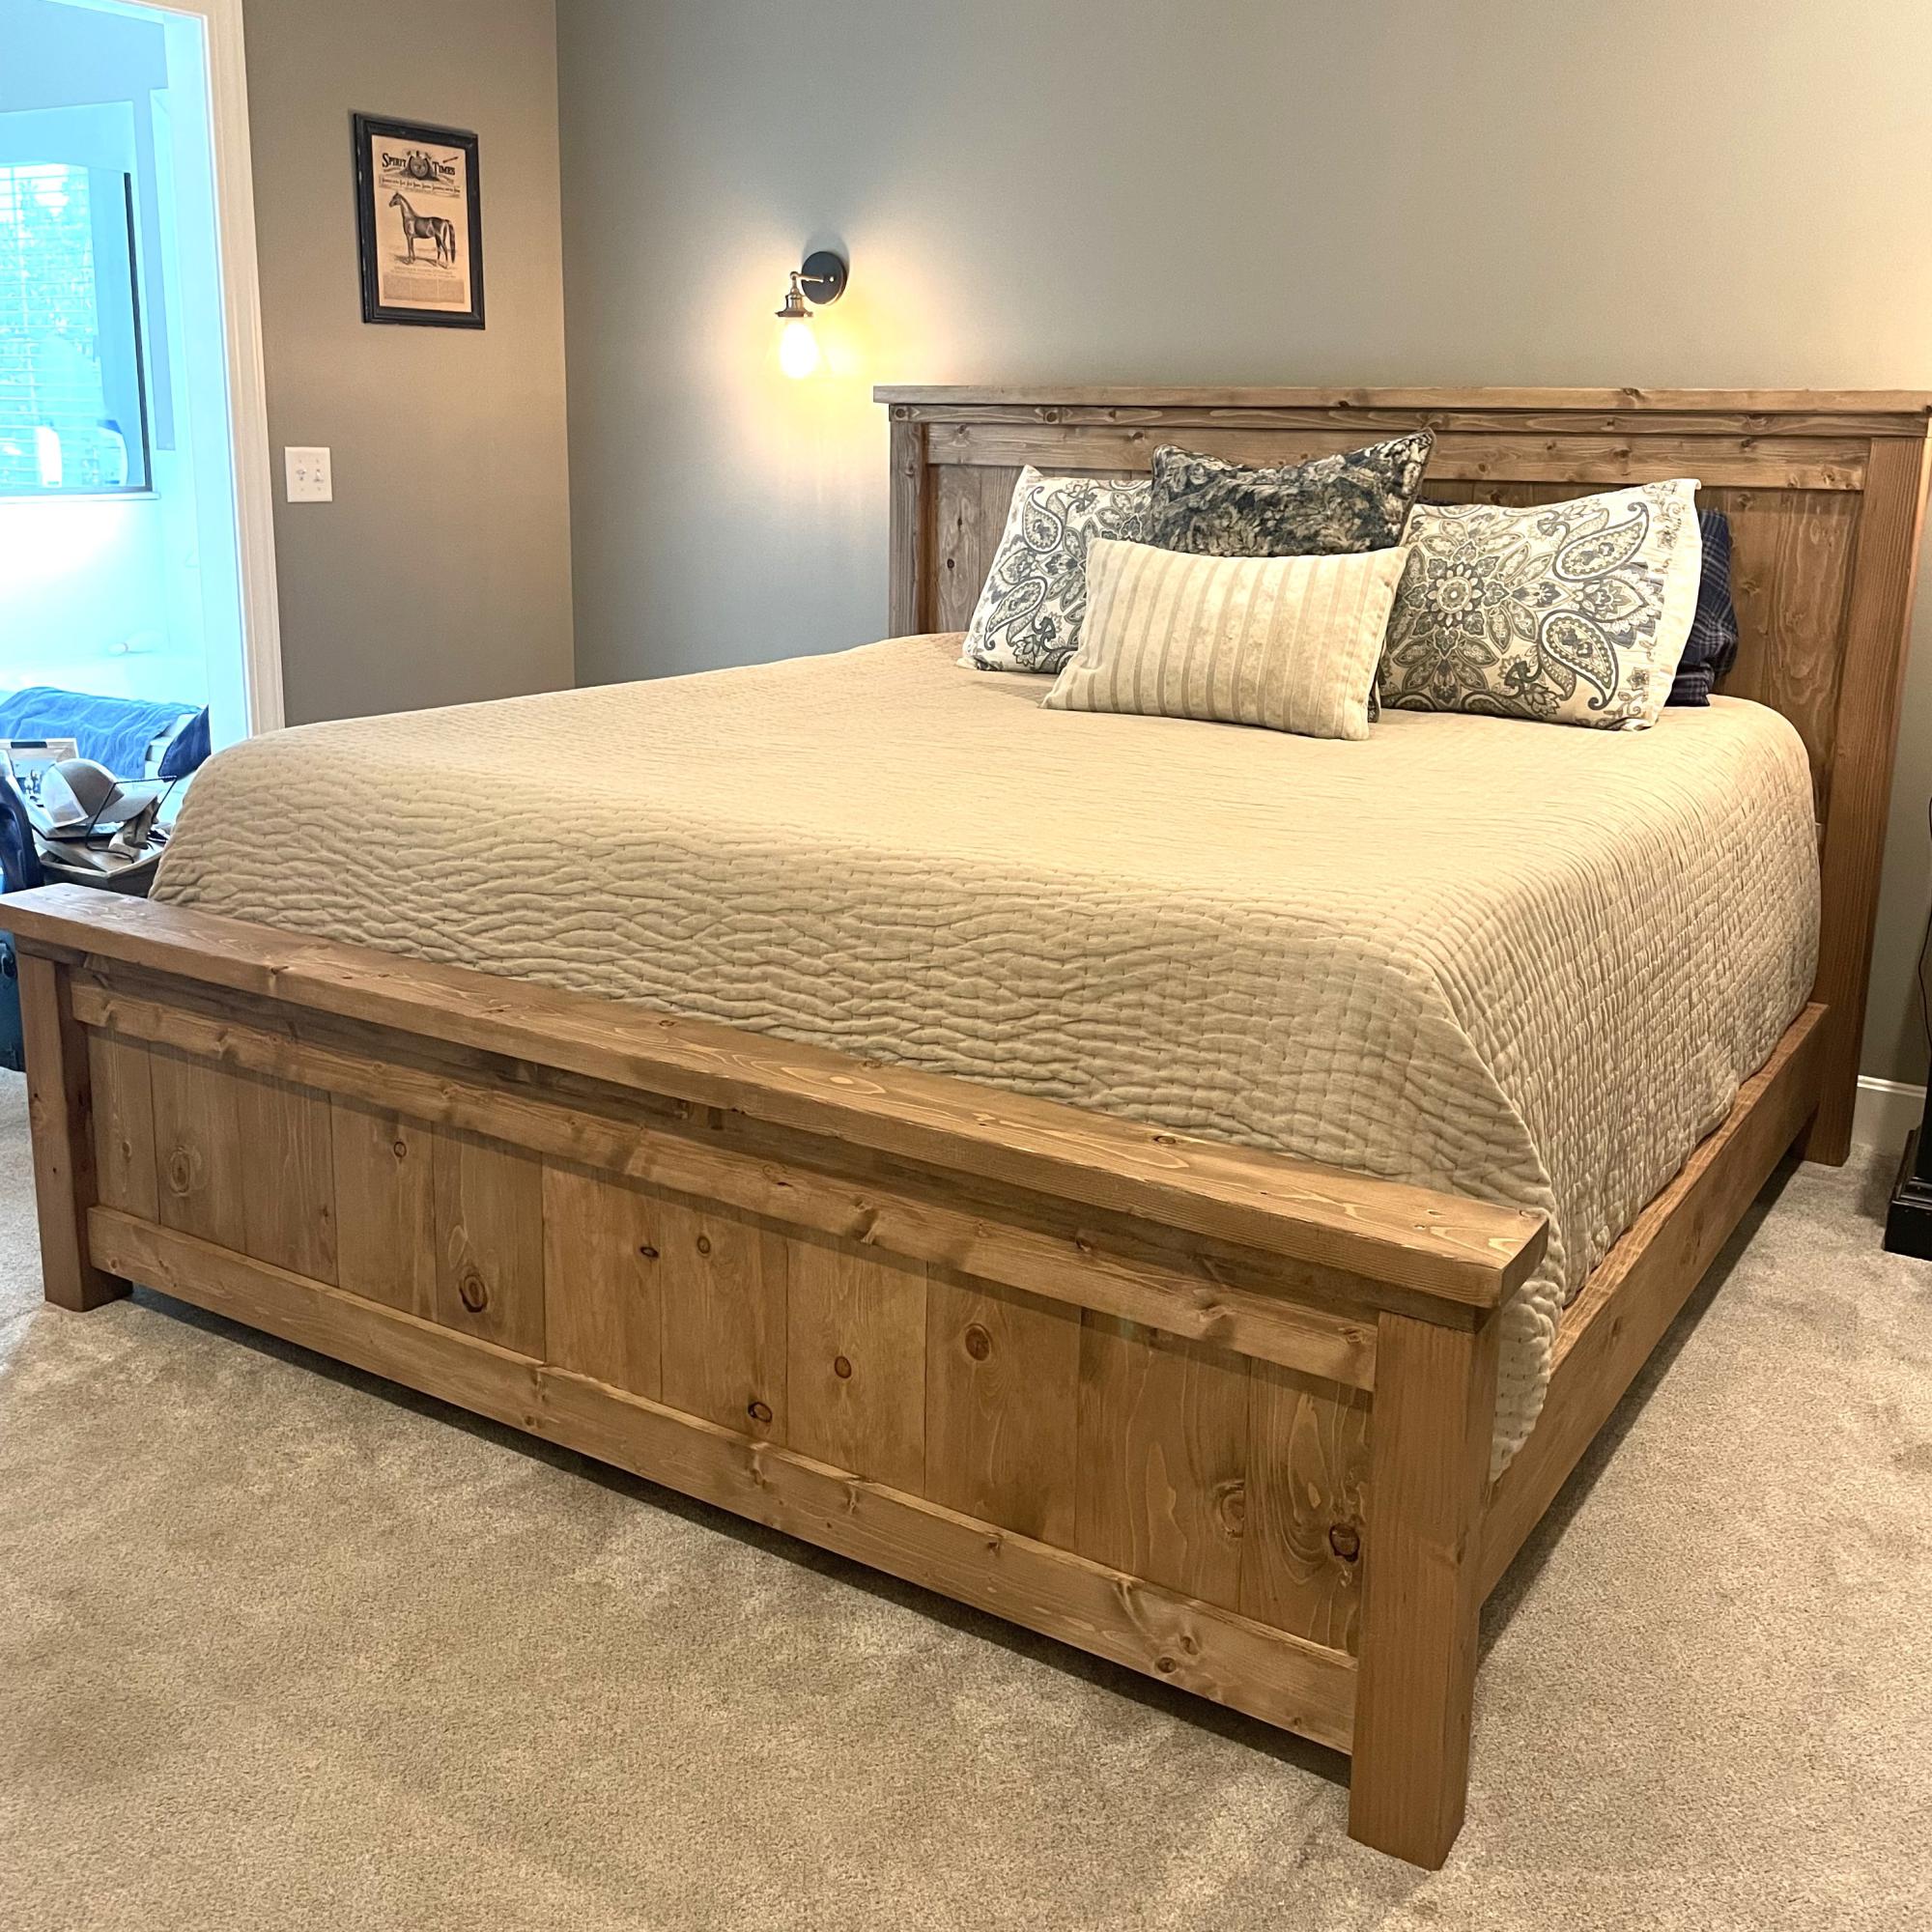
Farmhouse King Headboard/Barn Door

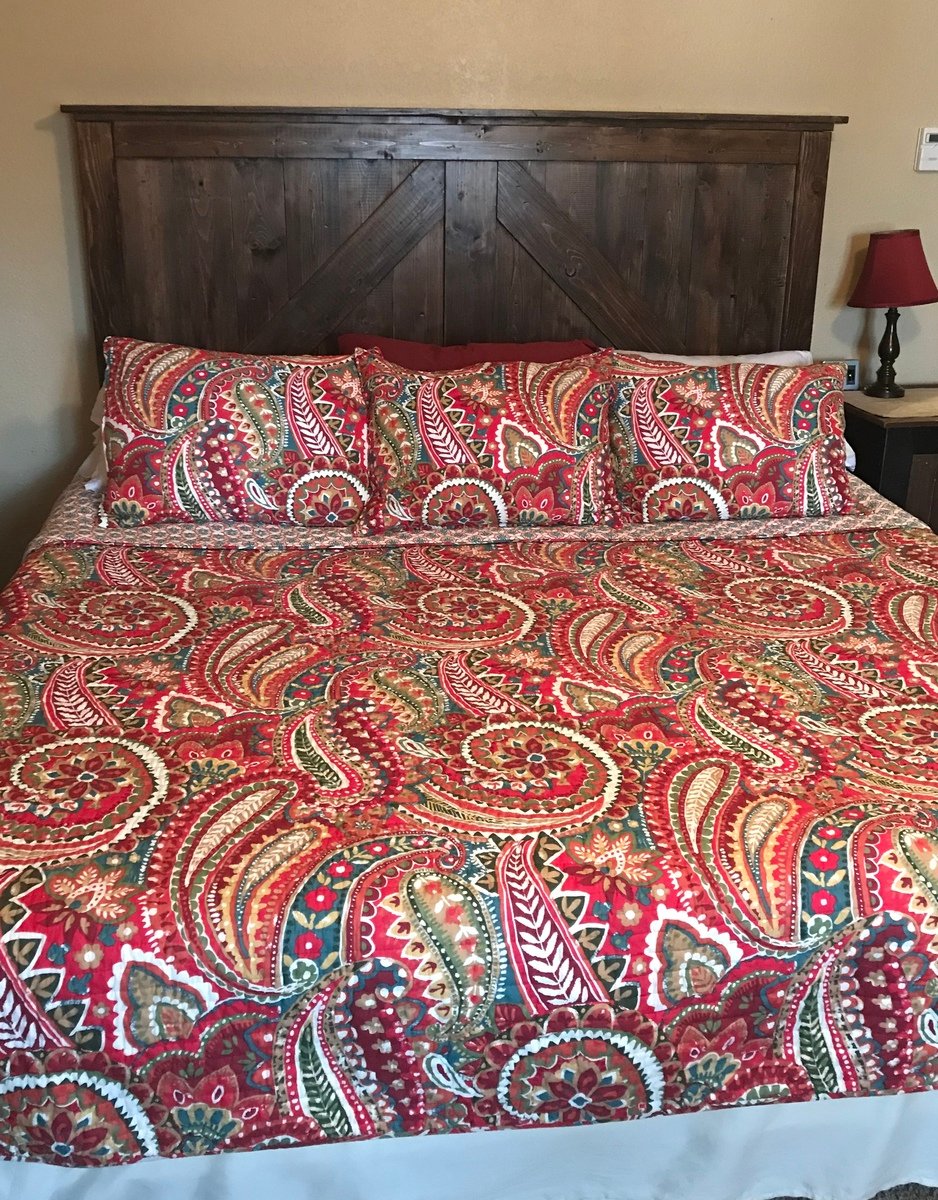
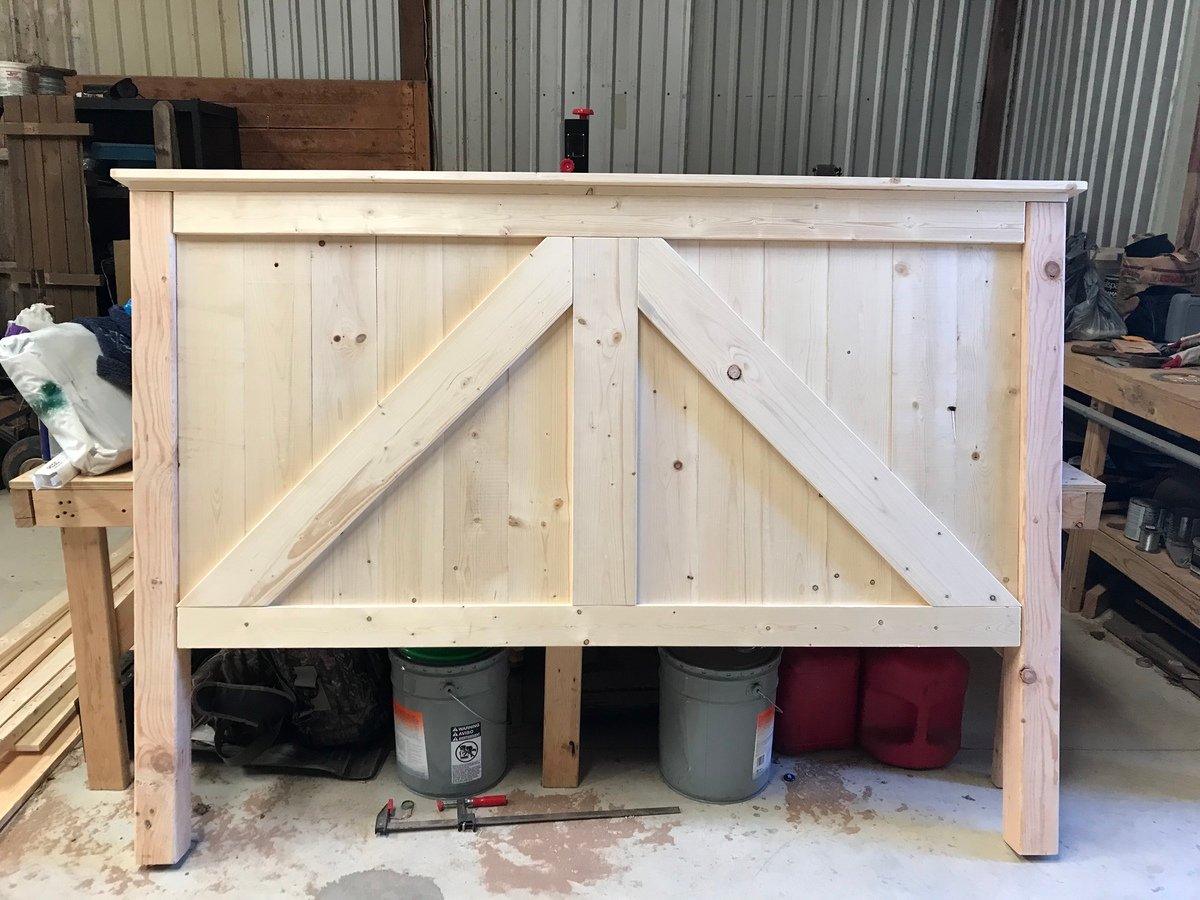
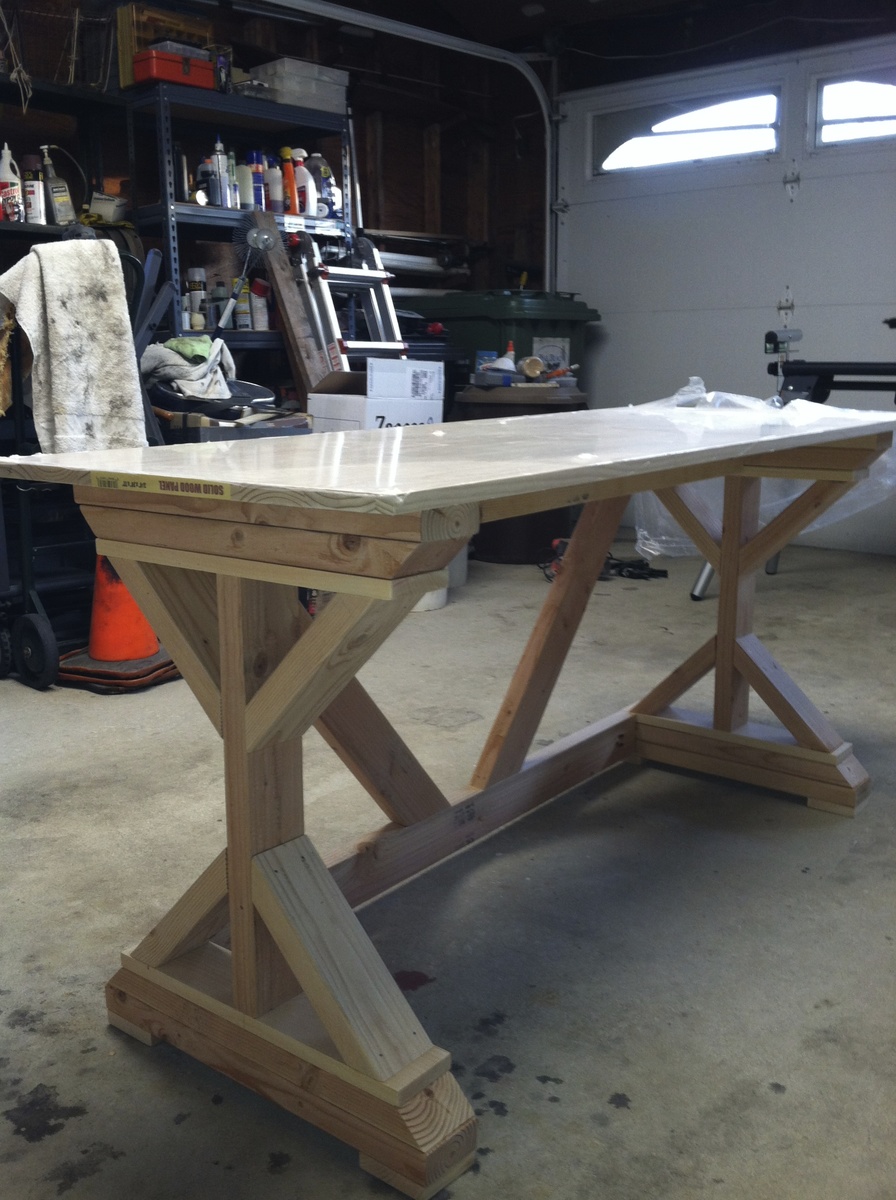
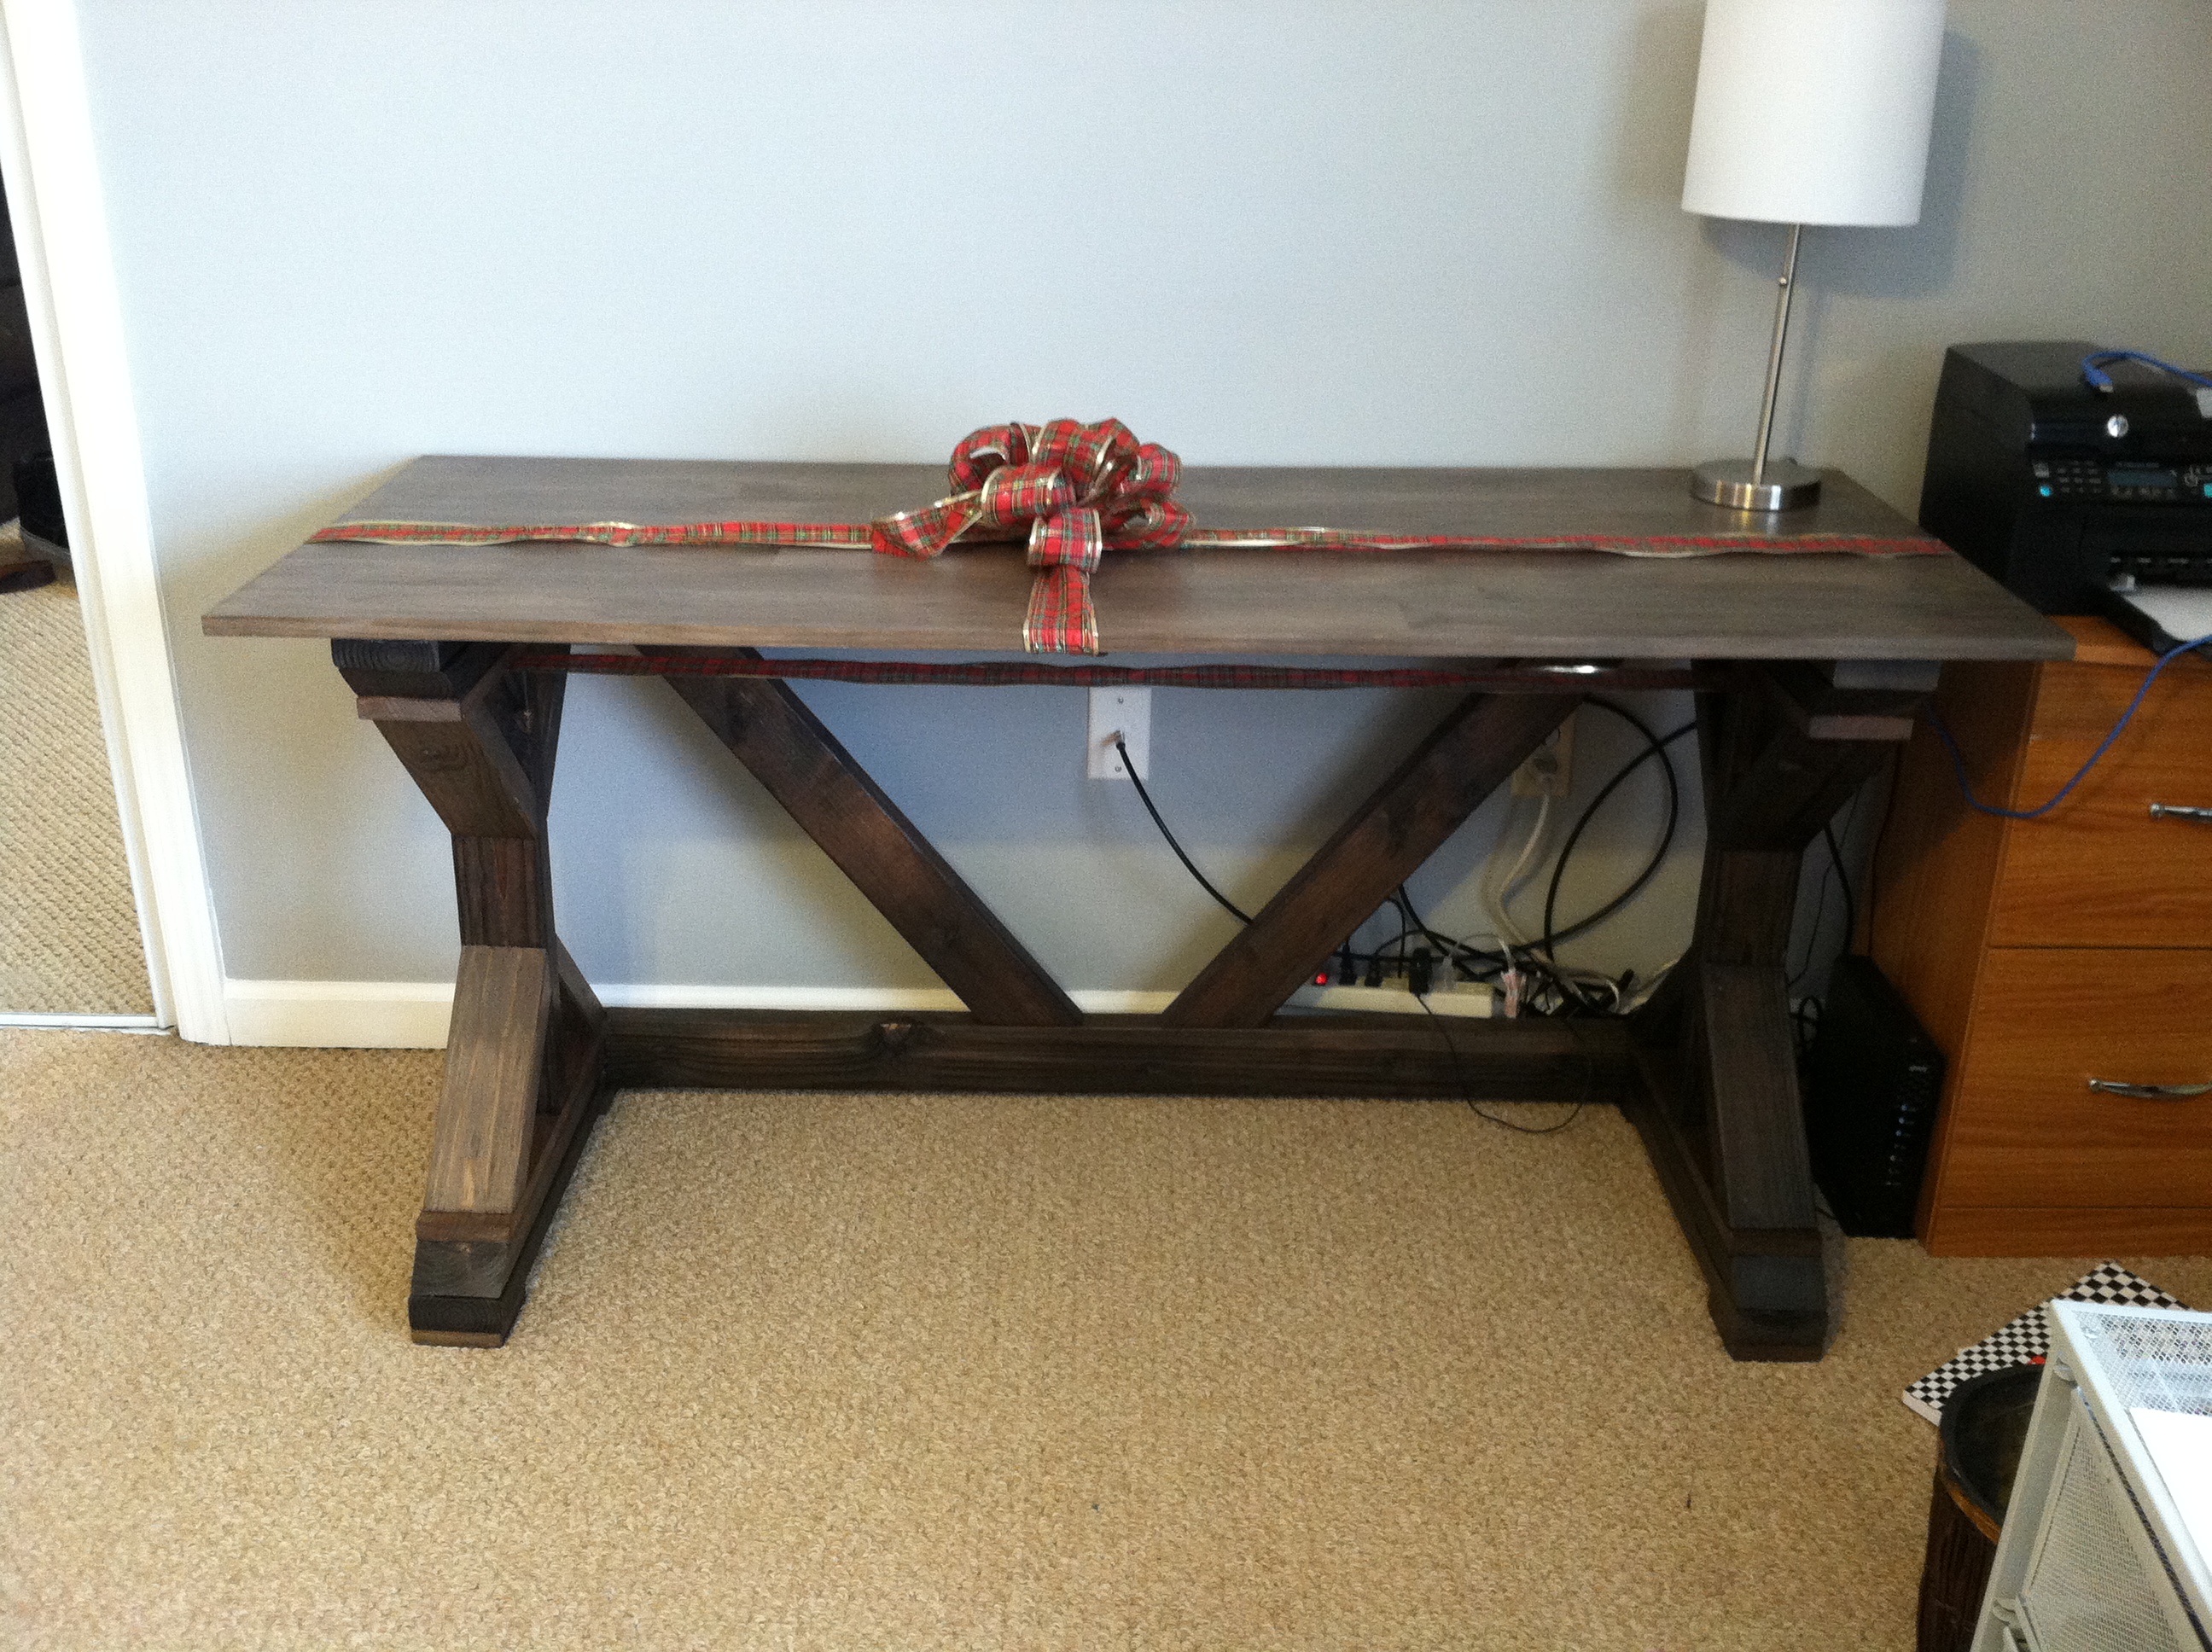
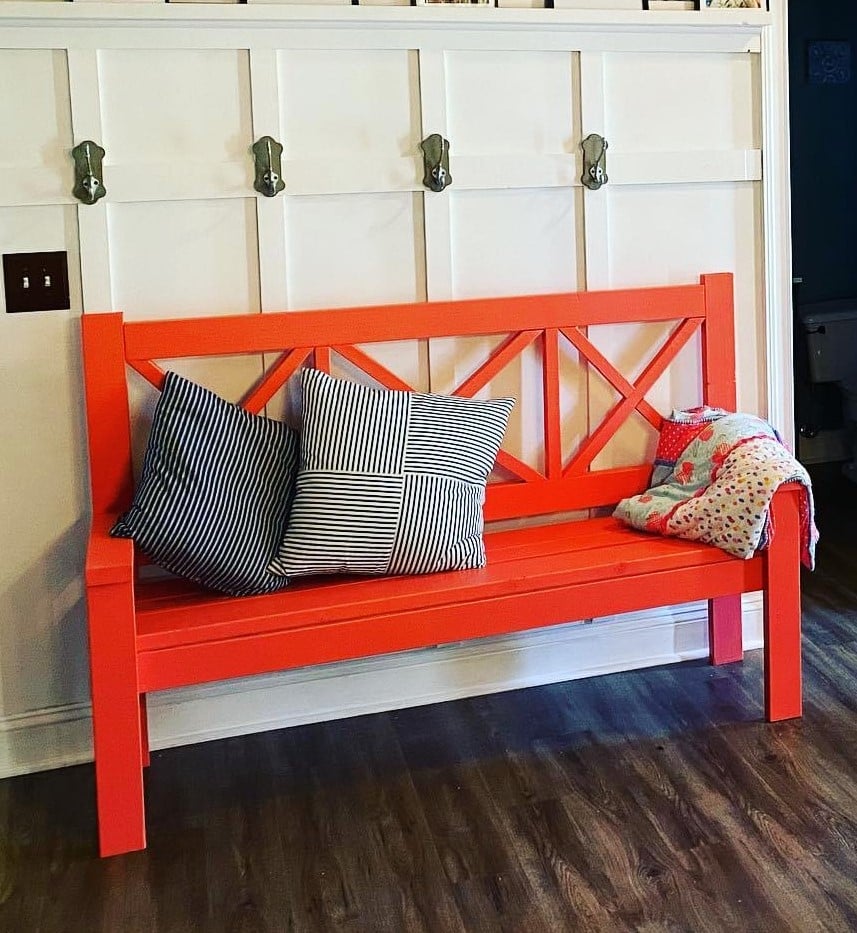
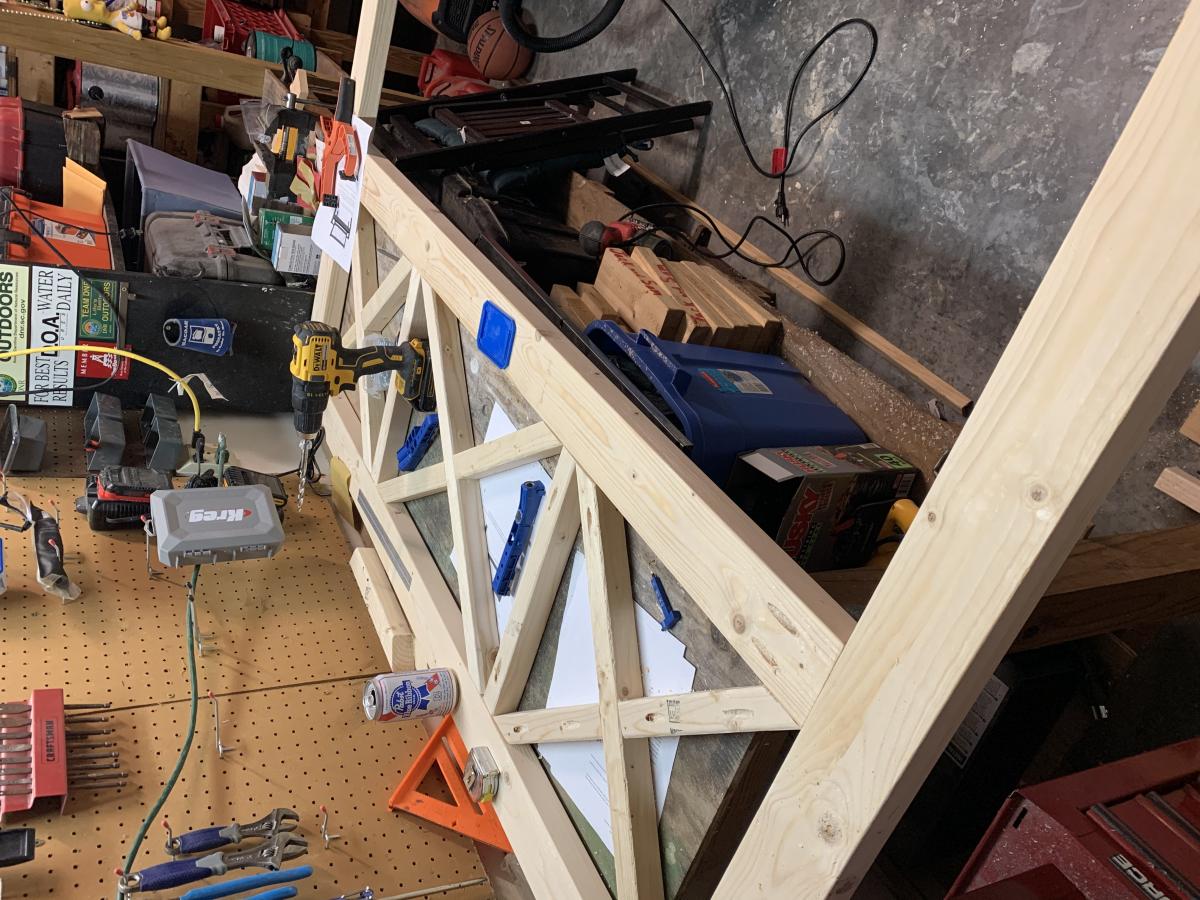
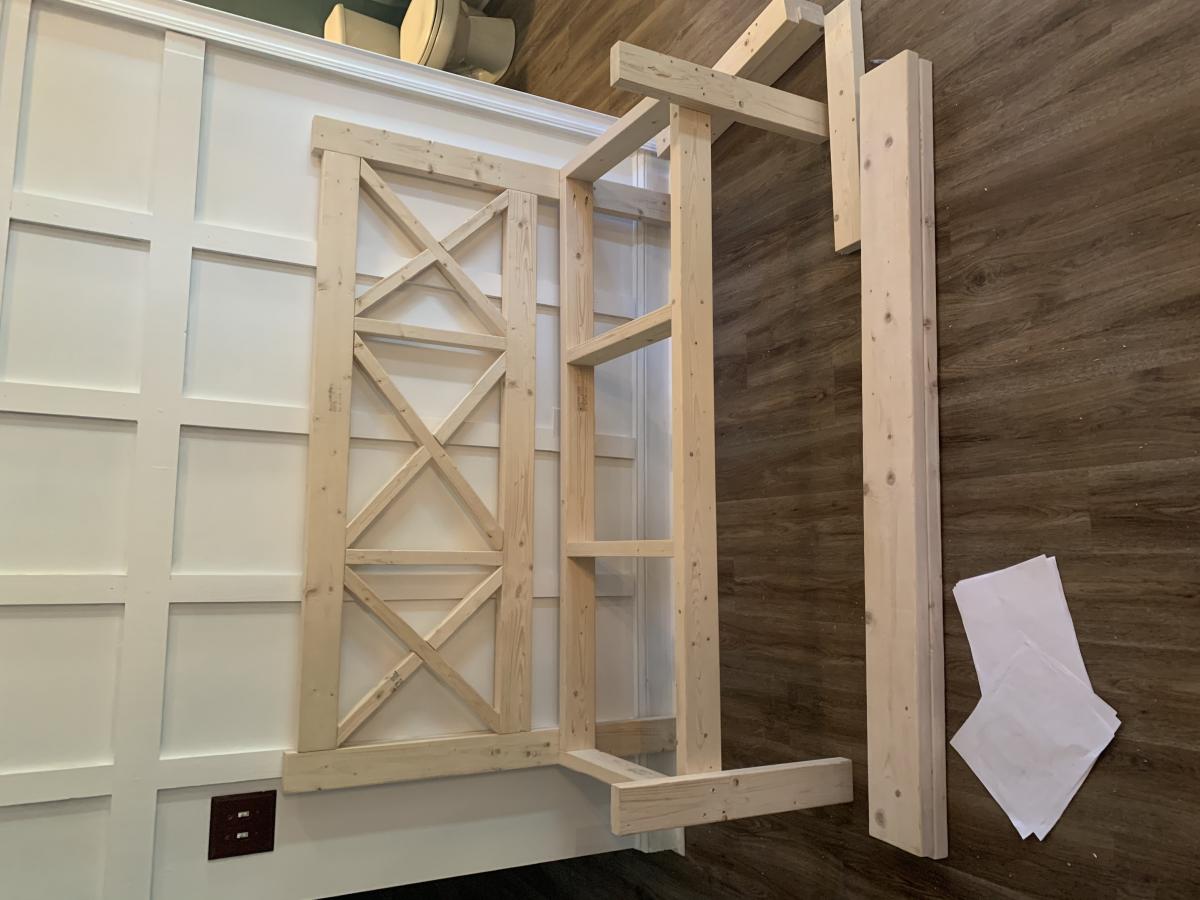
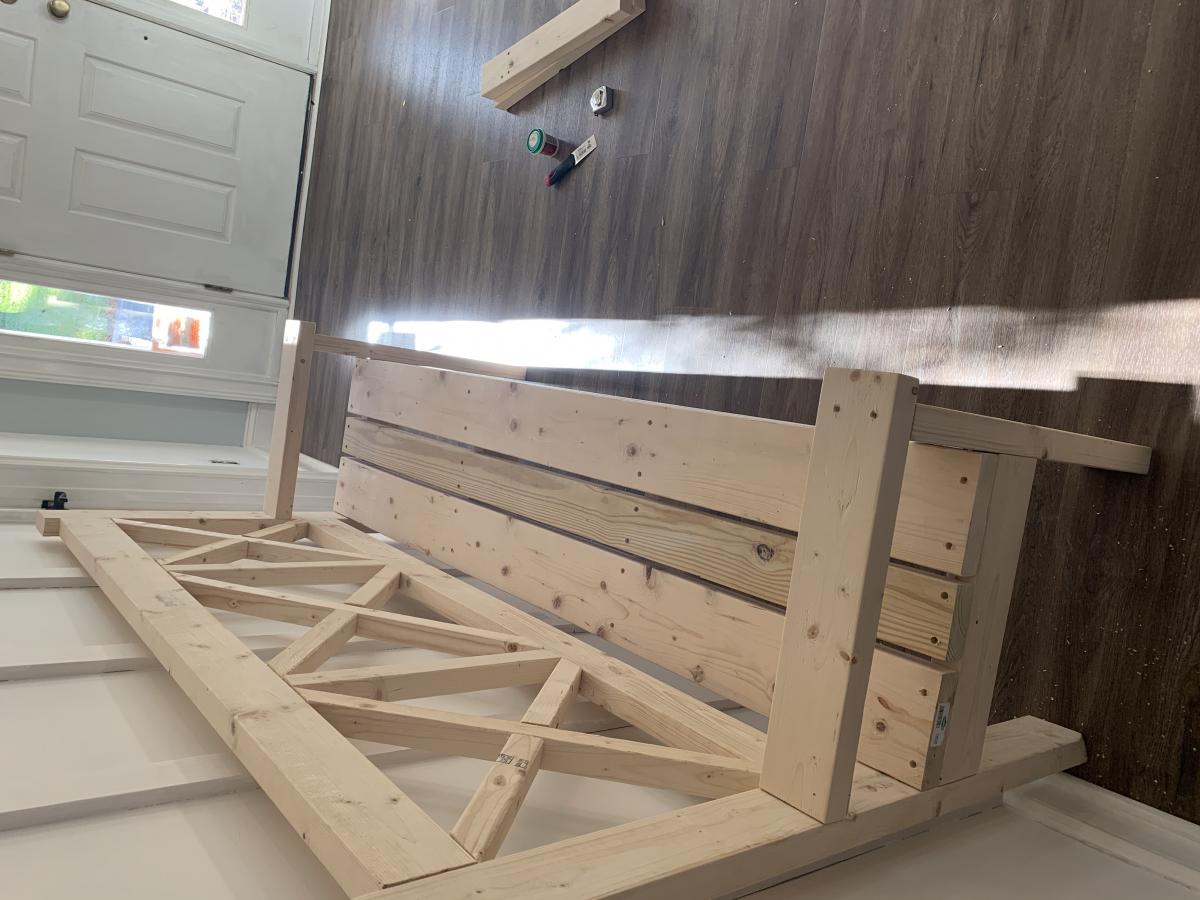
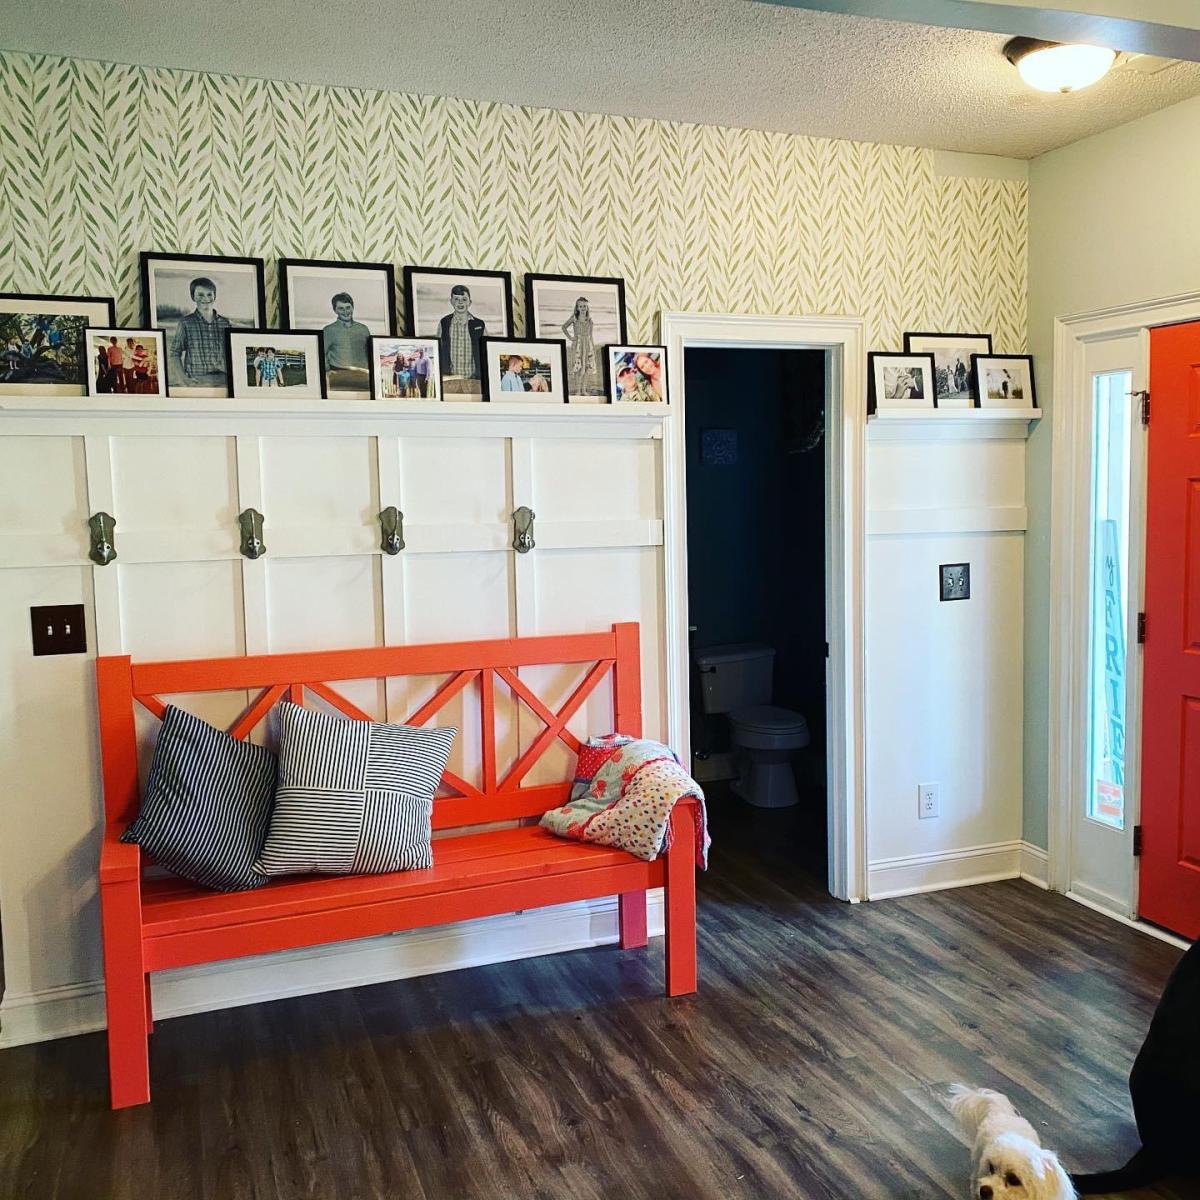
I found a barn door headboard in a rustic furniture store years ago. They wanted $2700 for a Queen size....no thank you! I followed the plans for the Farmhouse King Bed and added cross pieces for barn door look using instructions from the Brookstone Headboard. I cut the legs at 56” to add some height and I set the bottom of the back panel at 18” above the floor to make sure no gap is seen with our thinner, memory foam mattress. I couldn’t be happier with our headboard and the total cost, including screws & stain, was about $150! Boom! Thank you Ana White for sharing plans! I’m working on the Mini Farmhouse Bedside Table now & feel like I can build anything! I would highly recommend Power Pro Premium Interior screws (no splitting or stripped heads, no pre-drilling & they counter-sink great in soft wood). For the 4x4 posts I used GRK UberGrade R4 multi-purpose 4” screws, which had the same quality, all from Lowe’s.

Estimated Cost
$150
Estimated Time Investment
Weekend Project (10-20 Hours)
Finish Used
I used wood conditioner, as recommended. Then 2 coats of Minwax Special Walnut with light sanding in between. I chose 2 coats of clear satin polyurethane, lightly sanding in between for a great rustic finish that’s not too glossy. I did beat up the wood and sanded off all square edges prior to applying any finish.
Recommended Skill Level
Beginner

Phenomenal Family Room Built-Ins

Submitted by Anonymous (not verified) on Tue, 04/05/2022 - 22:55

We had an awkward family room with a second front door which rendered the layout less functional than it could have been. My sister mused, "I wonder what would happen if you took out the second entry and added built ins?," and this project was born. With a 4 year old and a 2 year old and limited tools and workshop space, we were excited to find ShelfHelp, which allowed us to create custom built ins at a fraction of the cost and time they otherwise would have required (utilizing the "Frameless Built-Ins, All in One Method" plan) . Including the custom soapstone top that we had made from a local shop that was advertising remnants, the project came in under $1000, and we were thrilled with the results. SO MUCH TOY STORAGE, an unobtrusive TV, and a much more functional layout. Thank you, Ana White!

Comments

Fancy X Farm Table and Benches

Submitted by Newfey on Wed, 08/07/2013 - 14:05

I made this table and benches for my daughter

Estimated Cost
$100.00
Estimated Time Investment
Weekend Project (10-20 Hours)
Finish Used
I finished the table and benches with a solution of extra fine Steel wool disolved in Apple Cider Vinegar and dark brown RIT Liquid Dye. Then gave it a number of coats of Polyurethane.
Recommended Skill Level
Intermediate

Modern Slat Bench- red and brown

Submitted by Anonymous (not verified) on Sat, 01/02/2016 - 09:30

I followed Ana's instructions  except for my bench was 56" in length and stained the top red bottom brown. 

Estimated Cost
50
Estimated Time Investment
Day Project (6-9 Hours)
Finish Used
Express brown
Red stain
Recommended Skill Level
Starter Project

Photo Gallery Made Easy!

Submitted by mdean on Mon, 10/21/2013 - 12:50

I love my new photo ledges. I had a huge space on my wall and these ledges are perfect. The ledges were so easy to make. I got a kreg jig for my birthday (I never thought I would ask for a tool for a birthday present) and I have gotten so much use out of it. I saw similar ledges at pottery barn for 10 times the cost of this DIY project. I saved so much with these ledges. The kreg jig has already paid for itself. The ledges make it super easy to switch out photos and I love being able to display so many fun photos. Everyone who sees these ledges loves them!! This was my first project. Thanks Ana for the great plans!

Estimated Cost
$50
Estimated Time Investment
Afternoon Project (3-6 Hours)
Finish Used
White gloss spray praint
Recommended Skill Level
Starter Project

Comments

mdean

Mon, 10/21/2013 - 12:51

I might spray paint all the picture frames white or an oil rubbed bronze in the future...I'm not sure yet. Opinions?

JoanneS

Mon, 10/21/2013 - 18:27

Your gallery looks beautiful! Great job on your first project, congratulations!

(ps- I think the oil rubbed bronze would look super on the picture frames.)

DIY Farmhouse Bed wth Boxspring

Submitted by Anonymous (not verified) on Sun, 07/16/2023 - 10:49

Wood = Pine
Finish = Minwax Special Walnut (after Pre-Stain)

This was a pretty straight forward build, but nice to have an extra set of hands. On the top board of the head/footboard, a countersink bit was used to recess the screw heads (otherwise, all fasteners in the plan are concealed). Then a mixture of glue/sawdust was used to smooth over the countersink hole. The whole project was sanded starting with 60 working up to 220.

We followed the plan, and in the photo this is the height of the bed with box springs and mattress. The bed feels sturdy and comfortable. It was a fun project and my first shot at interior furniture.


Grill Table with Marble Top

Submitted by Anonymous (not verified) on Mon, 08/14/2023 - 12:07

I used some leftover marble from having our countertops replaced and modified the plans to fit the marble. Love my new grill table!

Shawna

Built from Plan(s)

VegTrug

Submitted by carongirls on Sat, 02/22/2014 - 18:52

A friend needed a raised garden bed for her husband who is in a wheel chair. I searched and found the VegTrug's. It took a lot of trial and error. I based it off Williams Sonoma's pictures. I wouldn't of attempted this with out a plan if it weren't for Ana's website.

Recommended Skill Level
Intermediate

Comments

steve badham

Wed, 09/09/2015 - 02:56

We have just set up a "Men'sShed" in our little village here in the UK, and think that these would make a great first project for novice handymen. Are there any plans available to help us?

Steve

Trickman2

Wed, 05/18/2016 - 21:45

Not sure what the story is here,  Maybe she got in trouble for saying Vegtrug?  I would like plans for a DIY Raised planter bed like the above. 

Back To School Podium

I recently landed my first teaching position, and unfortunately my predecessor left quite a blank canvas for my classroom. I will be teaching math and definitely needed a lectern to hold my book as reference for examples during instructional time. However, I was completely unable to fork over $200 for a lectern...so of course I turned to Ana White! I saw the Podium Plan that another had submitted, and used it as a guide with some changes:

1) My dimensions are 15" wide by 21" long by 43" tall (I'm shorter than your average bear).

2) Used the table saw set at 45 degrees to create mitered joint edges with my plywood

3) Inset the shelves into the frame for added stability using a router.

4) Added casters to the base for maneuverability

5) Added an easily-removable laptop shelf for the side for easy hook-up to the Promethean Board in the classroom.

6) Decoupaging my name to the front for some visual interest...(and of course to claim ownership...:) )

My room is painted yellow, and all of my accessories are teal, lime green, and brown. This is gonna look GREAT in there, and best of all, it's attractive AND functional!

Built from Plan(s)
Estimated Cost
$40.00
Estimated Time Investment
Afternoon Project (3-6 Hours)
Finish Used
Paint and Spray-On Poly
Recommended Skill Level
Beginner

Comments

birdsandsoap

Sat, 07/28/2012 - 22:23

I don't remember having ANY teachers with anything this cool and personal in their classroom (except maybe woodshop, har-de-har-har). All the other teachers will be jealous!

Laundry Pedestal

Submitted by Kamoanui on Tue, 06/30/2020 - 09:42

This was quick build. First time for us using trim, so we wasted a few feet getting the angles right. We attached the legs directly to the frame, and did not use the metal brackets. We also did not build the floor frame. We measured how high/wide the laundry baskets ($3/piece at Target!) were, and made it to fit them. We added a piece of rubber mat to the top (bought at Lowe's). A few weeks later we helped our daughter and son in law build one for their new house!

Estimated Cost
$40
Estimated Time Investment
Afternoon Project (3-6 Hours)
Finish Used
White satin paint
Recommended Skill Level
Beginner

Farmhouse Console Table

Submitted by katprausa on Sat, 07/25/2020 - 12:55

Pretty impressed with our first project! Thanks for the excellent plans!! I can't wait to start on the matching side table and coffee table!!

Toy Storage for my Little Man

I am so excited about this project! I re-did my entire little man's room. It included a ton of Ana's projects! The closet, $10 ledges, step stool and the toy storage. This was quite the venture for me, I have done a lot of plans from Ana, but this one was a lot - a lot of painting. And hanging the doors, was a challenge :) I couldn't be more happy. My little man didn't want to leave his room he was so excited!

Estimated Cost
$220
Estimated Time Investment
Weekend Project (10-20 Hours)
Finish Used
Primed, sanded, painted with White Semi-gloss for two coats, sanding between each.
Recommended Skill Level
Intermediate

Comments

Patio Furniture

Submitted by Anonymous (not verified) on Wed, 09/09/2020 - 07:18

With a mix of the 2 attached plans, I found the perfect design! Plus, I was able to build them both, including the table, out of the scrap from the deck I built!! Thank you so much!!!

Comments

Fancy X Desk

Submitted by KSmith123 on Thu, 10/09/2014 - 13:59

This was my first build.  After searching high and low for a desk for my husband for Christmas, I decided to build him one......2 weeks before Christmas.  With some help from my father, we somehow pulled it off! (without killing each other) I followed the plans exactly, except for one thing.  I used a pine panel for the top so my hubby would have a flat writing surface.  I purchased a 6ft panel (i think) and cut it down to 5ft.  When he went away on a business trip, I transported it from my parents house (where the build was taking place) and assembled it.  Then I put a big red bow on it and surprised him!  Don't know how I'm going to top that gift!  

Built from Plan(s)
Estimated Time Investment
Weekend Project (10-20 Hours)
Finish Used
Steel wool and vinegar for the whole thing finished with a poly topcoat.
Recommended Skill Level
Beginner

Large Porch Bench with X Backs to highlight feature wall

Submitted by Anonymous (not verified) on Mon, 11/09/2020 - 16:29

Using the Ana White plans of Large porch Bench with X backs I was able to create this amazing area in the entrance way of our home. The bench was part of a larger project where I added the modeling and shelves to the wall. The plans were great, I just made the bench a bit smaller, as the original size was a bit overwhelming inside the home.

Estimated Time Investment
Weekend Project (10-20 Hours)
Recommended Skill Level
Intermediate

Comments

RH Inspired Shanty Sideboard & Hutch

Submitted by jhavinga on Wed, 12/31/2014 - 14:34

Have been wanting to build this for 6 months now and just havnt had the time. Finally completed it!
I made some small changes to the design, different trim layouts, different dimensions, and went with a plank look for the back of the hutch instead of a solid peice of 1/4" plywood.

Built from Plan(s)
Estimated Cost
$500.00. This price includes wood, stain, and hardware.
Estimated Time Investment
Weekend Project (10-20 Hours)
Finish Used
1 coat of Minwax Weathered Oak, then 1 coat of Minwax Special Walnut.
Recommended Skill Level
Beginner

Comments

In reply to by ehays216

jhavinga

Thu, 01/01/2015 - 22:48

Thank you ehays216! Ive looked at your Farmhouse Storage Bed a few times.. Have always wanted to try the Steel wool/Vinegar trick.

Cheers,
Justin

timberandsoul

Sat, 01/03/2015 - 07:40

Great job! The love how the color turned out. May I ask where you purchased your backdrop from? And what size it is?

Thanks!

In reply to by timberandsoul

jhavinga

Sun, 01/04/2015 - 16:09

Thanks a lot timberandsoul!
Photo was taken on an empty wall in my living room, Which is currently a light gray wall. thought it looked boring so I did a quick switch of backdrops in PS. I just typed in brick wall in google.

Cheers,
Justin

Singhs

Sun, 01/04/2015 - 16:27

What type of wood did you use, home depot/lowes regular pine or some specialty wood ?

jhavinga

Sat, 01/24/2015 - 13:08

Sure! the plans call for 2 solid sheets of 1/4 plywood for the backing.. I simply just ran the plywood through a table saw at 5.5" wide and brad nailed it the back. =)
The stain is weathered oak and let sit for 15min. Then right away special walnut and let sit for 15 min.
repeat until desired colour. let me know if you have any more questions!

Cheers,
Justin

Sschoono

Sun, 01/08/2017 - 07:33

How many coats did you have to do to achieve this look?  The weathered oak looks so light...and gray.


Thanks!

Painterlyrhett

Sun, 05/17/2015 - 19:40

What was your strategy on attaching the sideboard to the Hutch. I haven't seen where there is any instructions or conversation around this. What and how did you accomplish this and/or is there anywhere to go that discussed this that helped you.

Thanks,

Outdoor 2x4 Sofas

Submitted by Anonymous (not verified) on Mon, 04/24/2017 - 07:11

Super simple build! Thanks for the plans!

Built from Plan(s)
Estimated Cost
$120 for wood (per sofa), $12 for screws, $25 for water seal, $150 for cushions (per sofa)
Estimated Time Investment
Day Project (6-9 Hours)
Finish Used
Sanded with 120-grit sandpaper, two coats of Thompson's Water Seal (transparent).
Recommended Skill Level
Beginner

Comments

Modern Adirondack Chairs & Outdoor Side Table

Submitted by j_bowman on Sun, 04/11/2021 - 11:35

These modern Adirondack chairs were my first wood working project ever and they turned out awesome! I wanted to build a small table to complete the set and Ana’s new side table plans were exactly what I was looking for. I am truly amazed at how easy these projects were to make and how great they look on our front patio. Ana’s step-by-step plans make it so simple. My wife and I can’t wait to build some more of these projects for our backyard lanai and pool area.

Finish Used
General Finishes Red Mahogany stain
Spar Urethane

Comments

Seasonal And Holiday

Modified Adirondack Chairs and Coffee Table

Submitted by carvern on Mon, 10/04/2021 - 14:16

I had some Kebony deck boards left over from another project and thought they would work well. I think they did! Kebony is pine that is soaked in an alcohol and then heated up. It has a 30 year warranty and requires no care. I used a Penofin oil on the 2x4s and Cutek oil on the Kebony

Comments

Ana White Admin

Tue, 10/05/2021 - 09:53

Kebony sounds like a great material for outdoor builds, very pretty too! Well done, thank you for sharing!