Community Brag Posts

Fancy X Farmhouse Table and Bench

Built this table and bench for my wife. She wanted to host Thanksgiving dinner and needed a bigger table. I used the 96” plan, building the bench first and the table second. 3 coats of Danish oil dark walnut, and 2 coats of poly. I get a lot of compliments about this table. The bench is remarkably comfortable and sturdy. And yes, my wife was very pleased, plus I finished on time for dinner.

Comments

BearWoodworks

Mon, 01/17/2022 - 13:49

Thank you. The set up gratitude goes to my wife. She inspires me to complete these builds. And thank you to Ana White for these awesome build plans. I’m running out of house for all the builds so far.

Rustic Bathroom Vanity

Submitted by khoran66 on Tue, 04/05/2022 - 13:18

This was a great first project for my husband and I. First time doing drawers but was amazed how easy it rally was.

Comments

Fancy Hall Tree

Love this site!  I've made the Facny X Farm Table, and now this piece.  I changed the back to ship lap.  Also cut out the baseboard so it sits up against the drywall then coped the baseboard around the base to look built in.  Thanks!!!

Edit - sorry for the pics being sideways, they're not like that on my phone or computer :(

Built from Plan(s)
Estimated Cost
$50
Estimated Time Investment
Weekend Project (10-20 Hours)
Recommended Skill Level
Beginner

Rustic Modern TV Console

Just finished up this unique TV console.  Built from reclaimed pallet wood. 

Estimated Cost
$150.00
Estimated Time Investment
Weekend Project (10-20 Hours)
Finish Used
Clear coat of wax
Recommended Skill Level
Advanced

Comments

Templar

Mon, 12/02/2019 - 22:10

Hi there Im new to site and also have the issue of not seeing the plans for this Rustic Modern TV Console. Are they available and Im doing something wrong or??

A Home for Some Orchids

I built this with some scrap mdf, and 1x3's. I offset the shelves, and voila! A modern shelf to go with our eclectic, yet very modern decor. It also gives me a nice display for some of my orchids. I love this shelf!

Built from Plan(s)
Estimated Time Investment
Afternoon Project (3-6 Hours)
Finish Used
Kona Brown
Recommended Skill Level
Starter Project

daybed converted to fit ikea kura bunk bed

Submitted by Anonymous (not verified) on Sat, 12/26/2015 - 12:29

We wanted to add some storage to our Ikea Kura bunk bed. We needed to adjust the size of the day bed by a couple of inches but worked awesome. Looks like one finished bunk bed.

Estimated Time Investment
Weekend Project (10-20 Hours)
Recommended Skill Level
Intermediate

Comments

Trakrys1011

Wed, 02/03/2016 - 12:43

Hi i just purchased the lumber to make this following the plan from thw original day bed. Would you happen to still have the changes that you made to put it under the ikea kura bunkbed?

Extra wide shoe bench and cubby area

Submitted by Anonymous (not verified) on Wed, 12/30/2015 - 03:17

Modified the cubby plans to just be 5 cubby's wide. My wife wanted white so I dressed it up a bit with the bead board, trim and crown moulding.

Estimated Time Investment
Week Long Project (20 Hours or More)
Finish Used
Early American Stain/Lacquer/ Sherman Williams Extra White
Recommended Skill Level
Intermediate

Comments

Queen Size Day Bed

Submitted by Anonymous (not verified) on Fri, 03/15/2019 - 05:45

This is such an easy plan to make. It was my first time making ANYTHING but I was motivated by saving money. The original bed like this from a store was 1700 dollars. I did make a few beginner mistakes but figured it out.  I changed some of the measurments to fit my queen size mattress and of course its for my actual bedroom and not patio... I get so many compliments!! Hope you like it.

Estimated Cost
400.00 it was only so expensive because I had to by all the tools... worth every penny
Estimated Time Investment
Weekend Project (10-20 Hours)
Finish Used
Mahogany stain with a satin finish

Recommended Skill Level
Beginner

Chartreuse Moving Double Pull Out Trash Can

Submitted by pjfessier on Thu, 05/02/2019 - 17:25

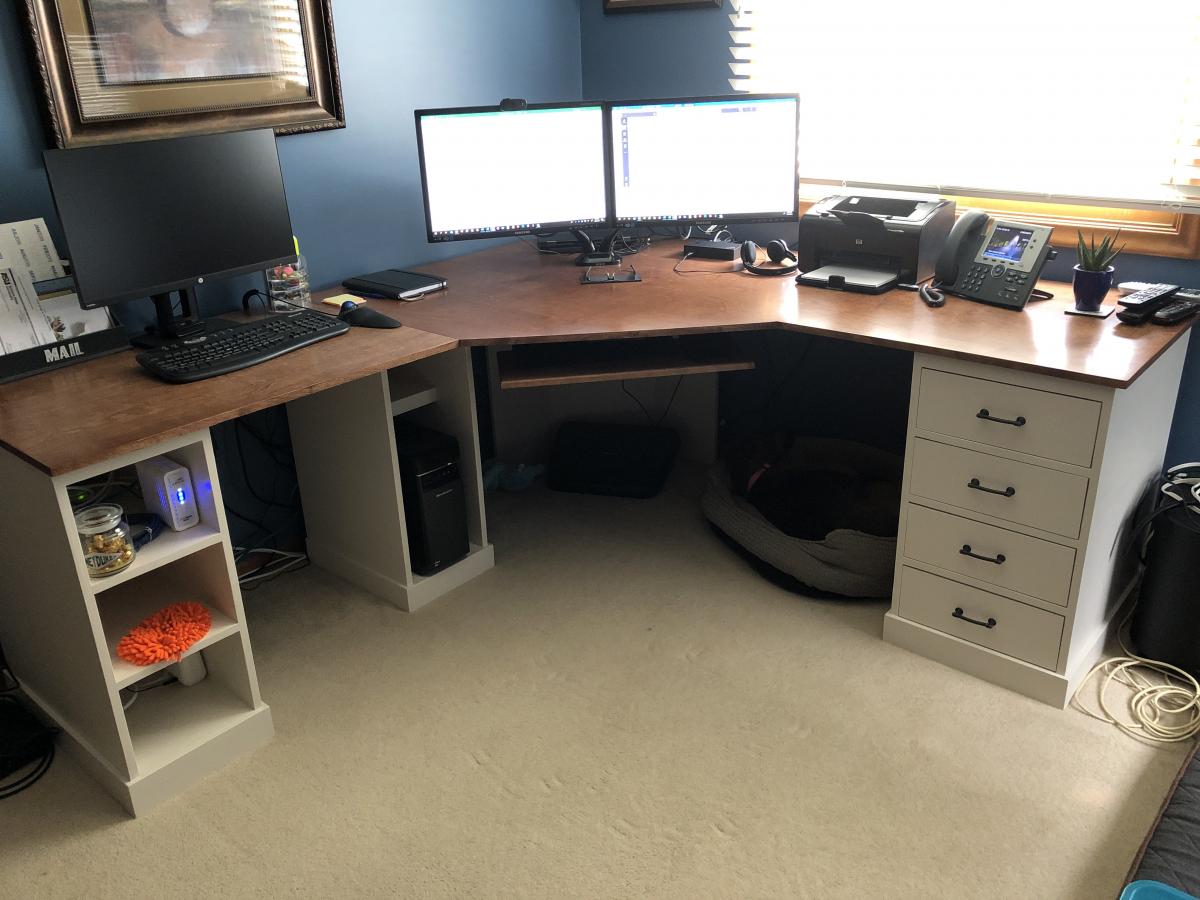
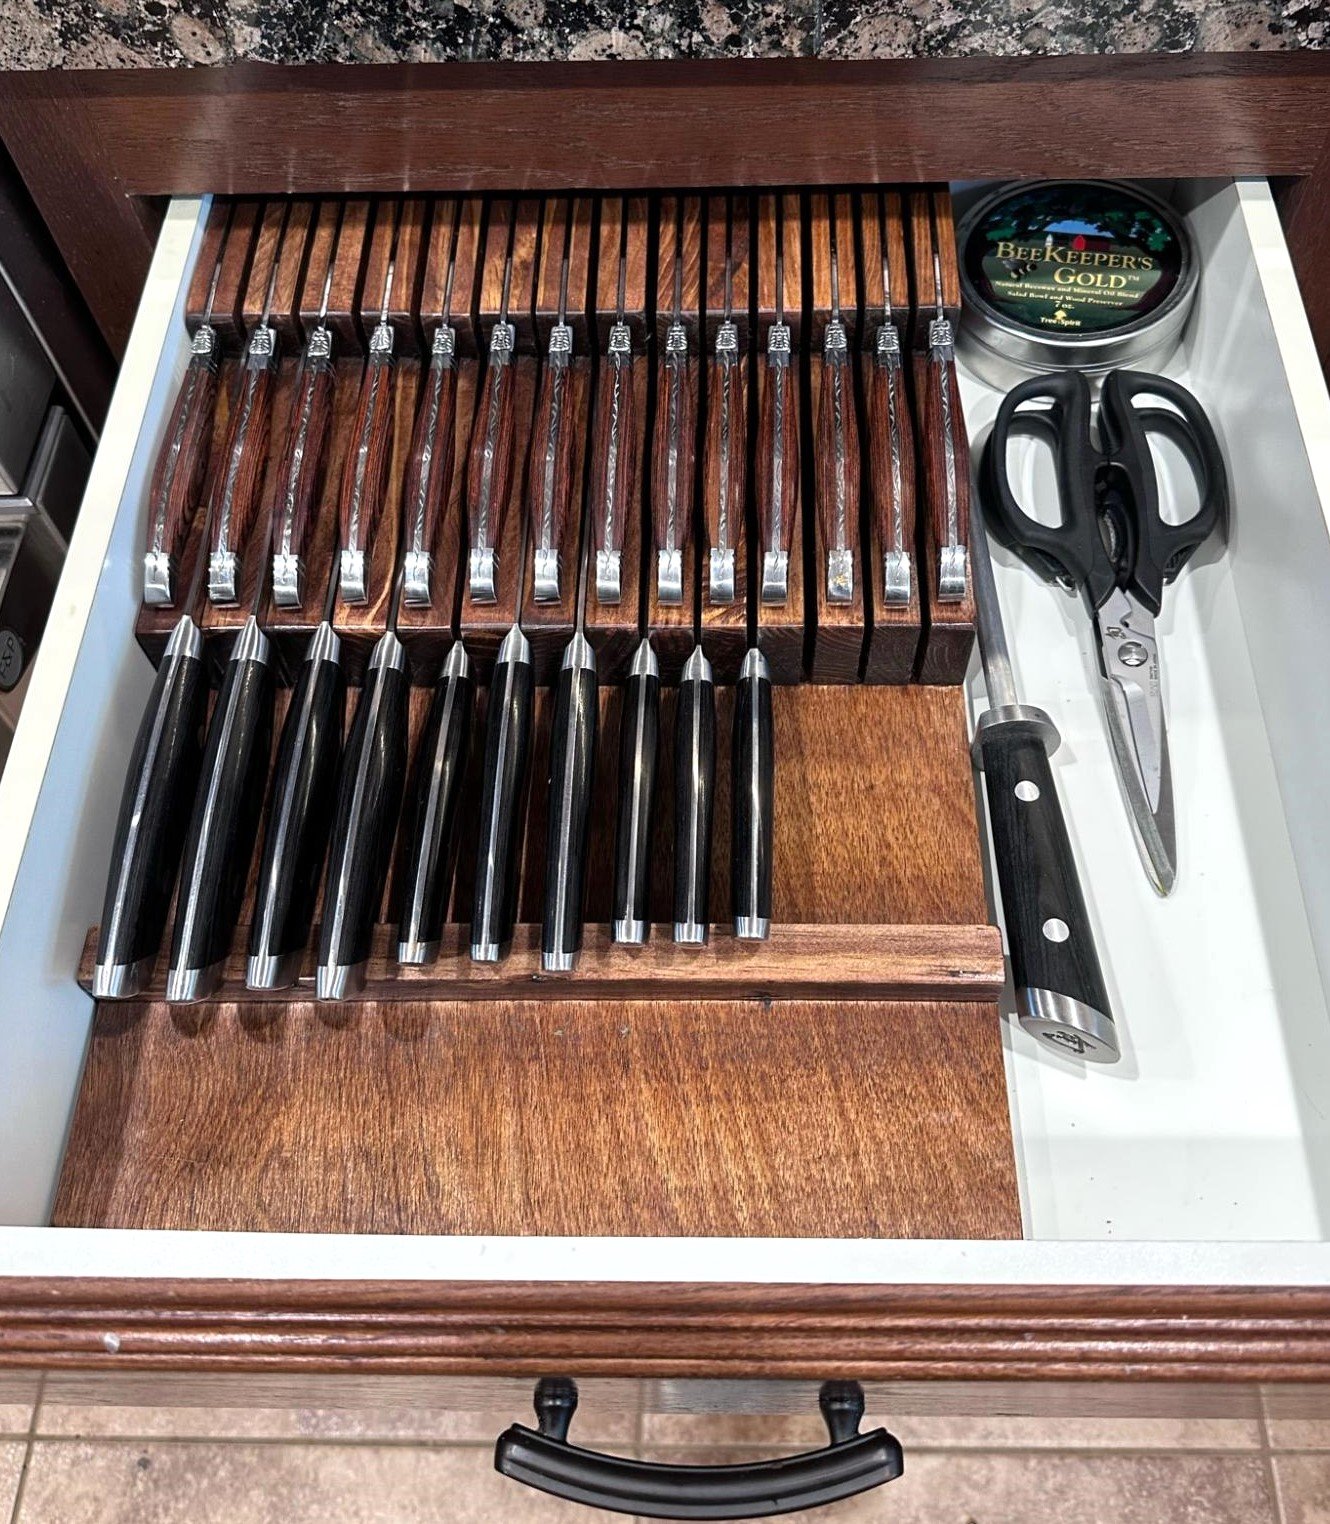
I replaced all of the drawers in our 1960's kitchen with custom built new drawers that have full extension slides.  I can't afford a complete remodel, but the new drawers allow the kitchen to function much better. The old drawers had wood slides that would allow you to pull them out about 2/3 of the way. Any more than that and the whole drawer would slide out and go crashing to the floor. 

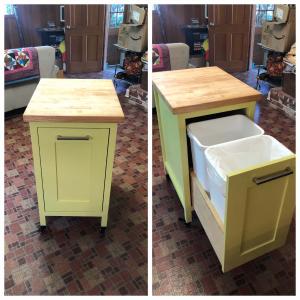
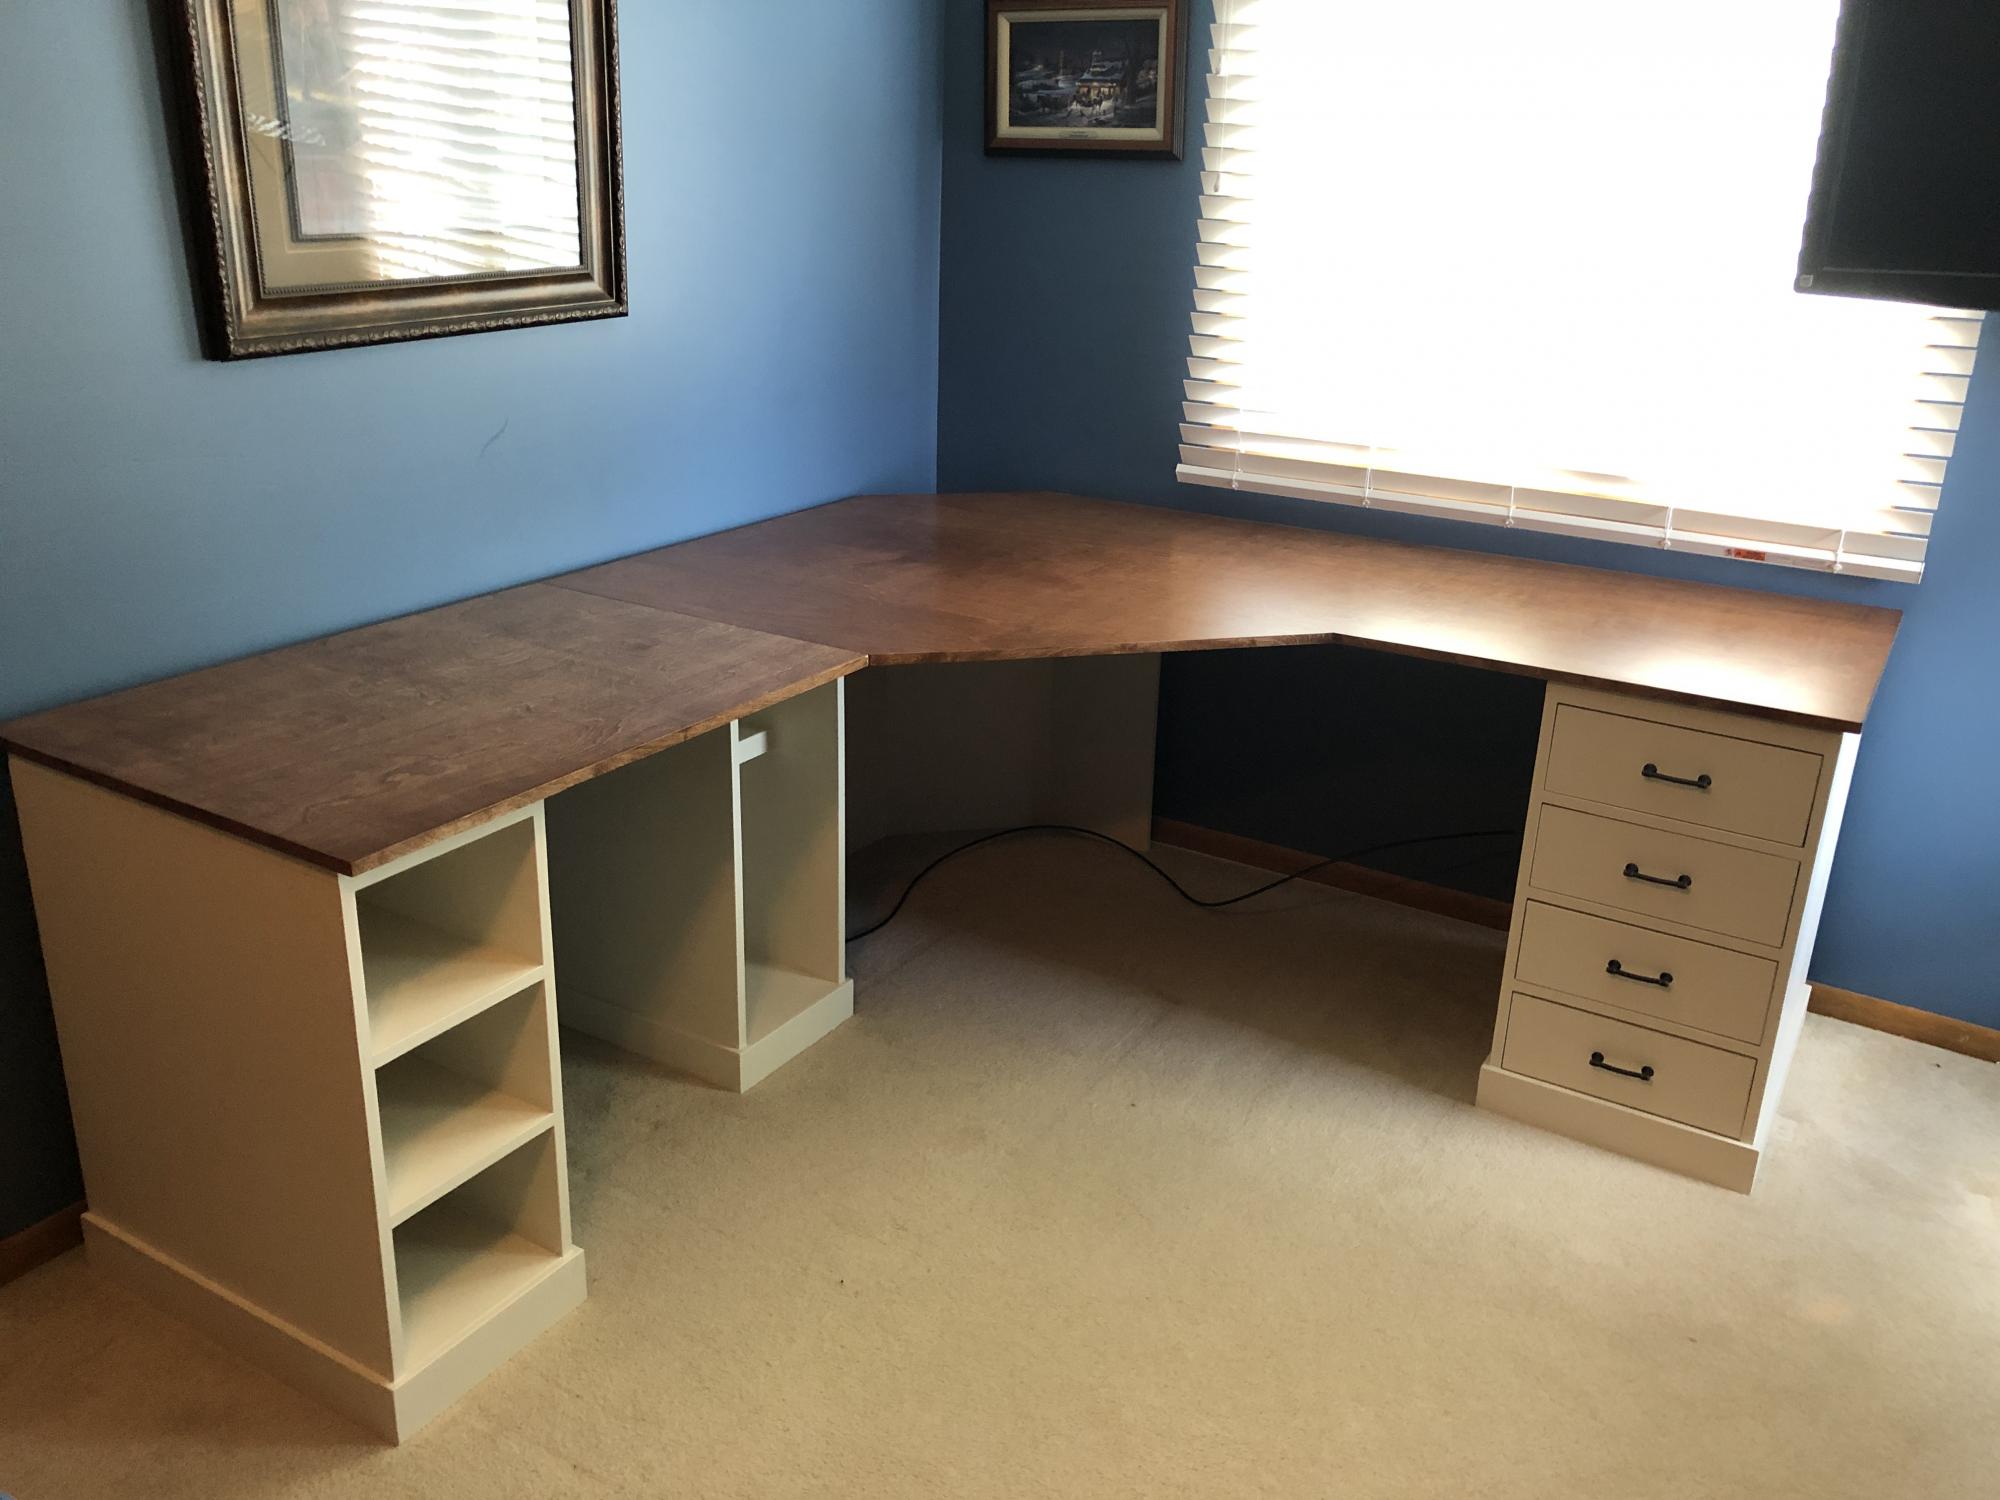
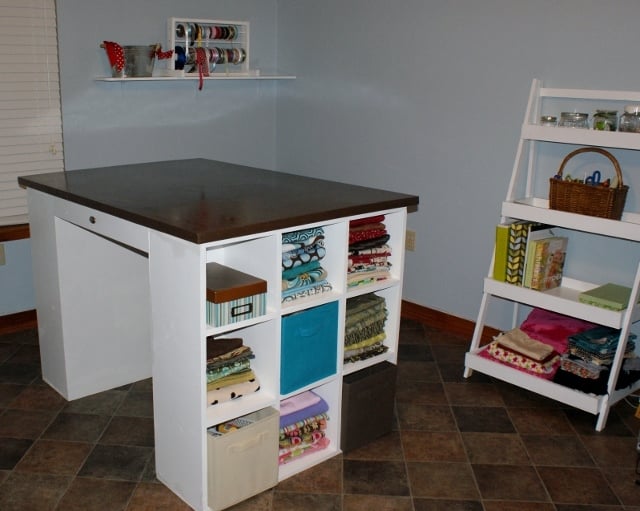
I had wanted to build a cabinet like this, but I couldn't figure out how to pull it off. I'm an amateur with basic tools working out of my garage. I found Ana's plan and combined it with my experience making drawers to make this cabinet. I use Blum soft close slides and the cabinet is working great so far. 

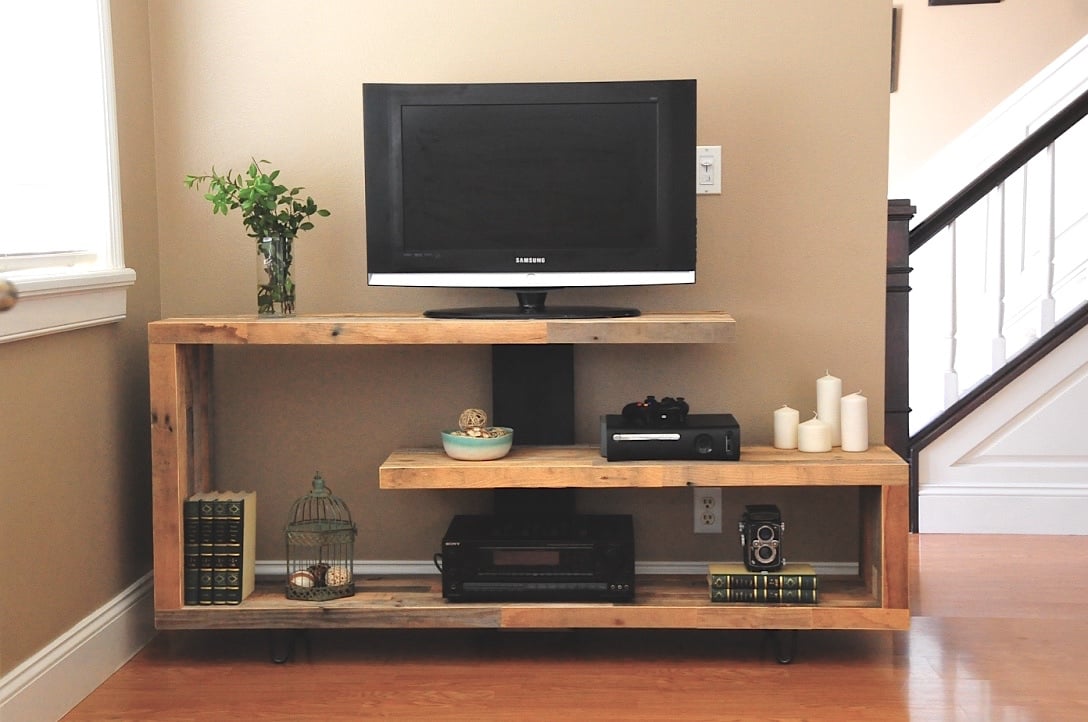
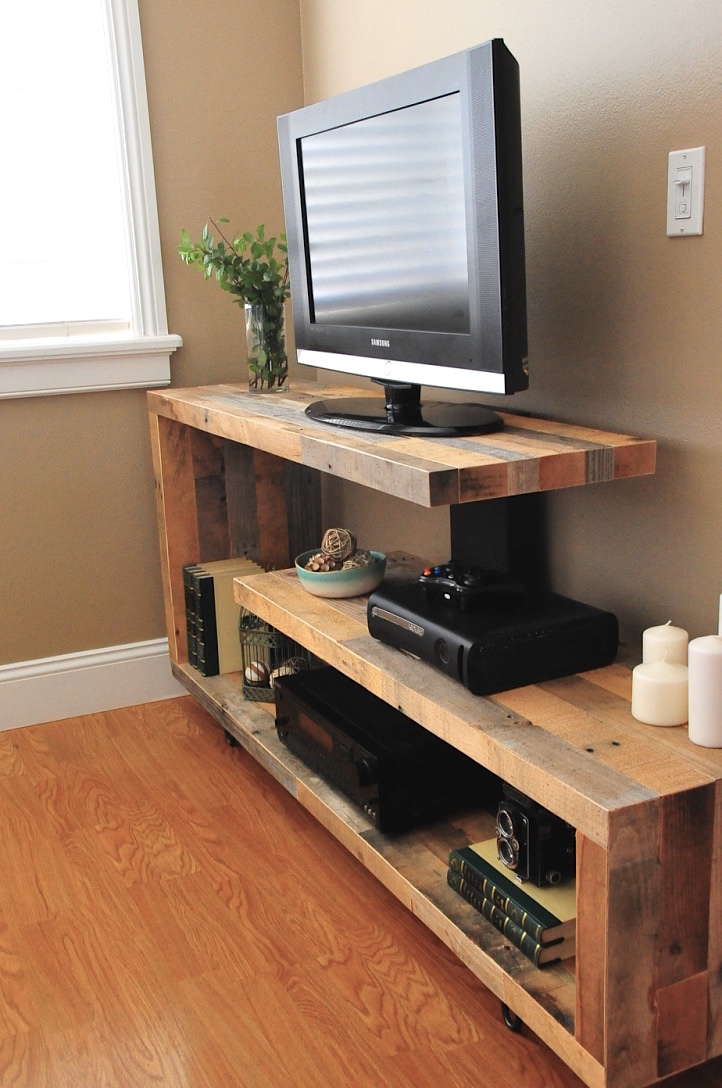
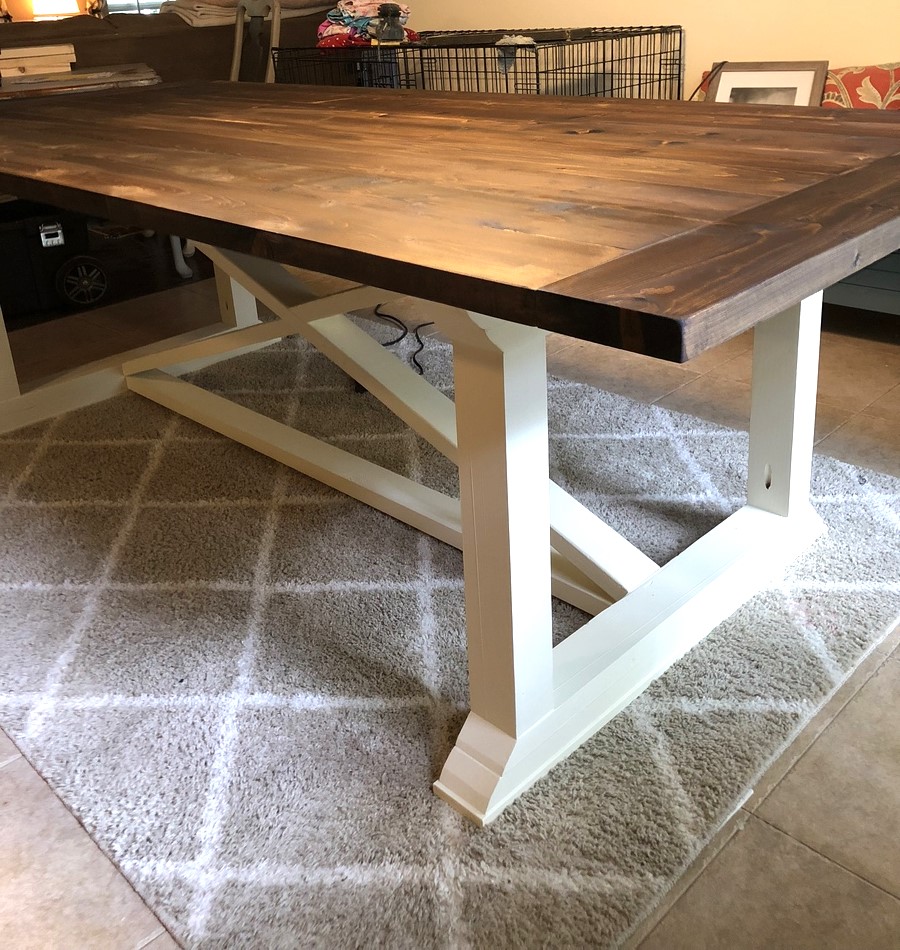
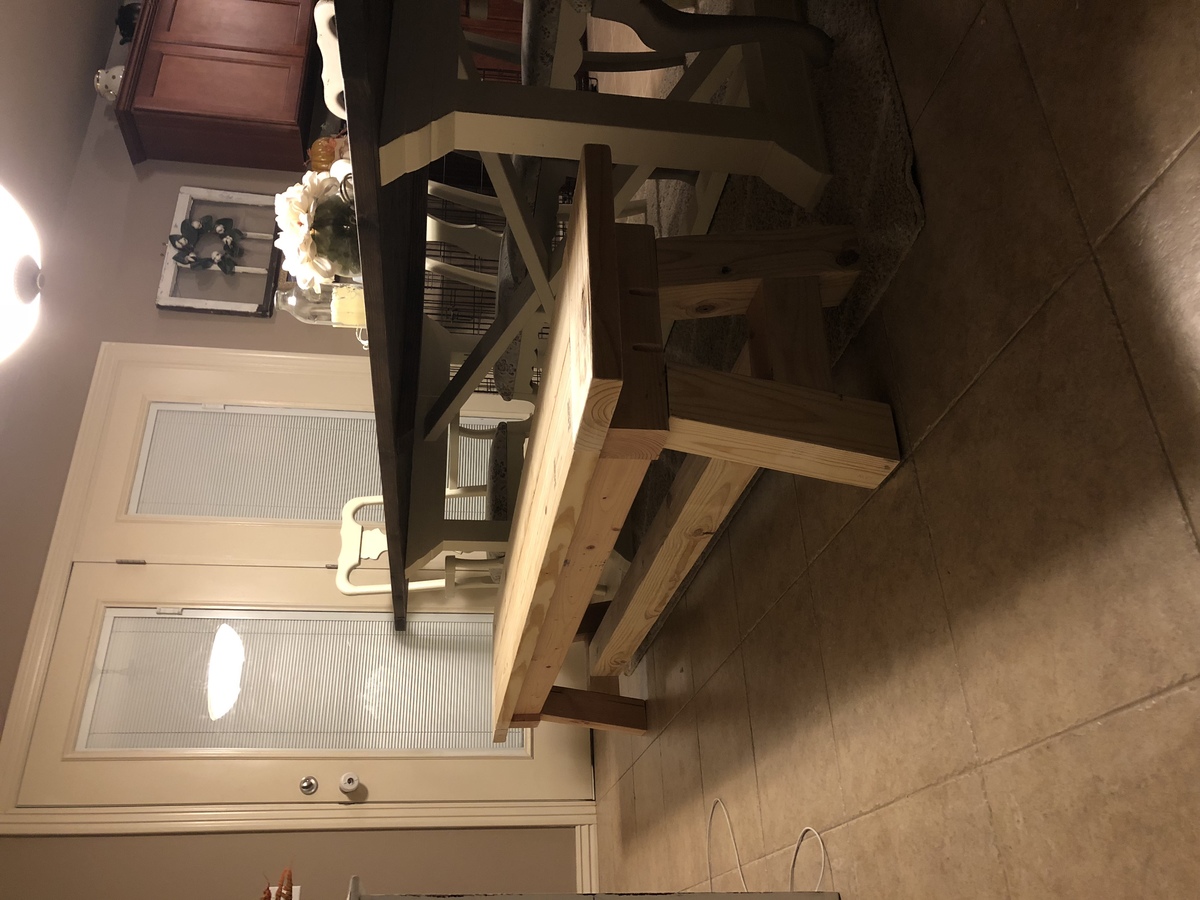
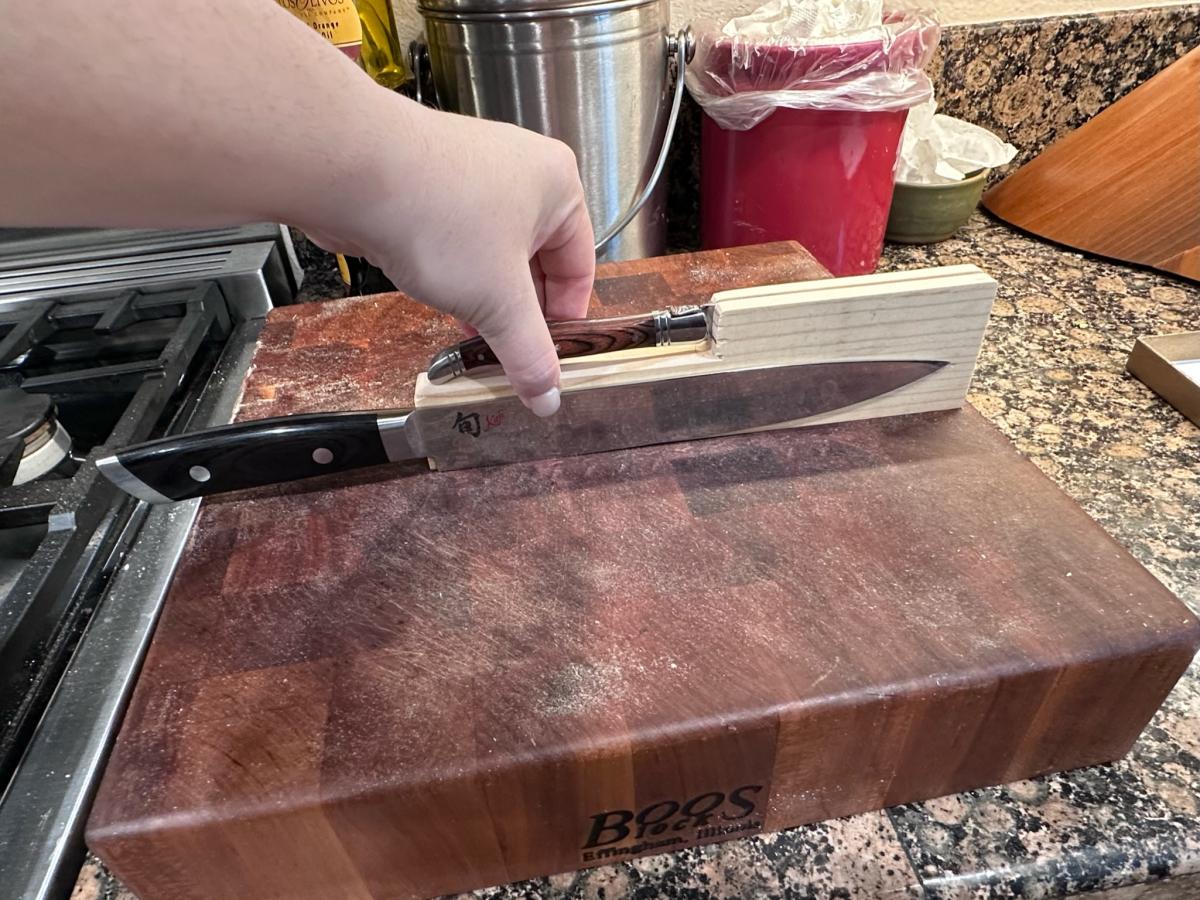
The butcher block top is left over from countertops I put in the kitchen. The project basically started with me wanting to put that last bit to good use. It's 1 1/2 in thick acacia. I wish I'd have gone for maple but the acacia is okay. 

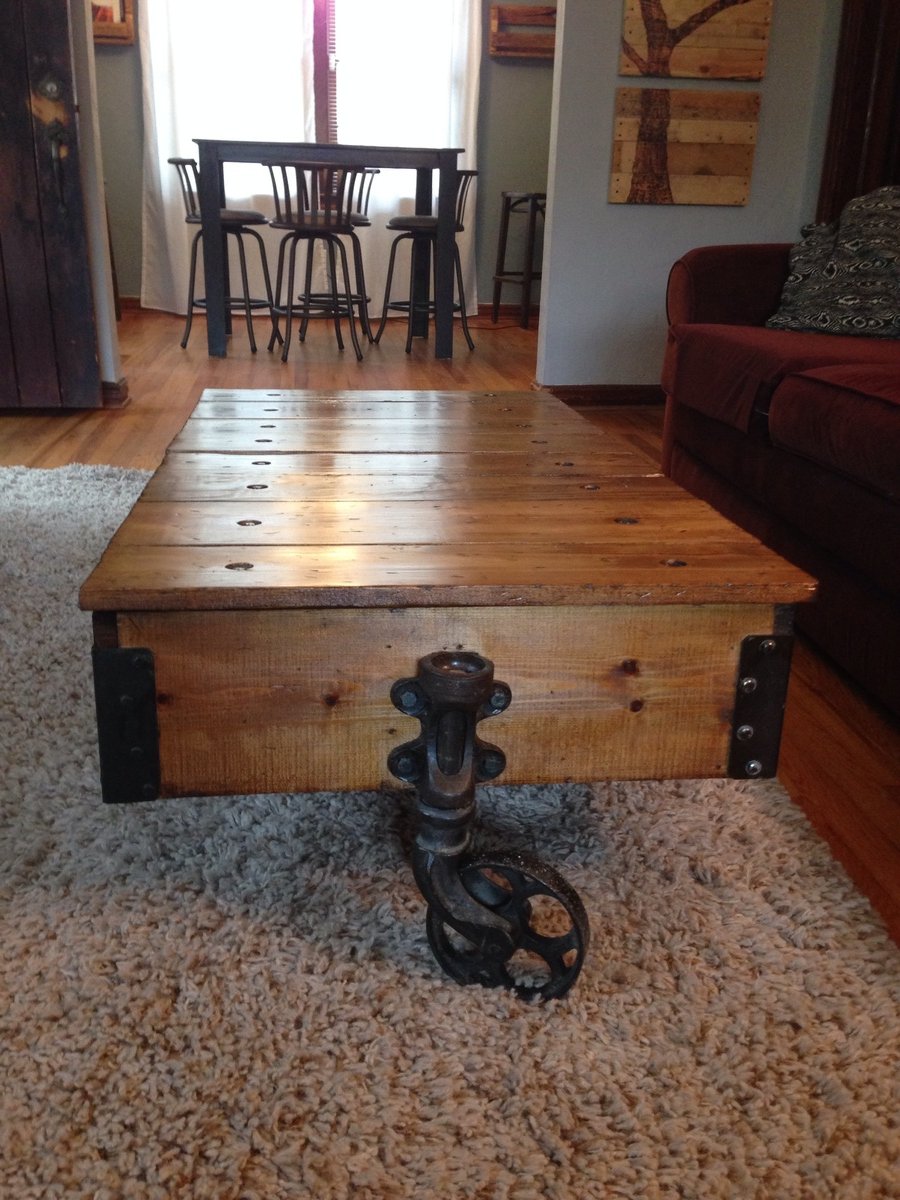
I don't know if you can see it in the photo, but it has locking casters on the feet so that we can move it around when we need to clean the kitchen floor, but it doesn't move when you pull on the drawer. I guess it can also double as a little island when we have dinner parties. 

Estimated Cost
$100.00 I'm really not sure. The slides and paint were pretty expensive. Of course I didn't use all the paint so if something else needs to be chartreuse I have more. The wood was poplar and some high quality plywood. It's 3/4 ply on the slides but only 1/4 on the back. The drawer is made with left over baltic birch 1/2 in ply that I had left over from my other drawer projects. I guess you could consider the varnish and nail free too as I already had those. Building the drawer is really a whole separate project that takes as long as the cabinet. And the Shaker door is also its own little project.
Estimated Time Investment
Week Long Project (20 Hours or More)
Recommended Skill Level
Beginner

Comments

Factory Cart Coffee Table with Storage

I have been longing to make a factory cart coffee table for years after seeing one in a local antique store in Jacksonville Florida. I started by following the dimensions from Ana Whites table and then decided to make the table top with the ability to open up into storage. I followed the plans and updated with hardware that I (painstakingly) pieced together from various sites online. I love the industrial feel the cast iron hardware brings to this adaptation and cannot wait to start building matching end tables. Thank you Ana for the inspiration!

Built from Plan(s)
Estimated Cost
$200
Estimated Time Investment
Week Long Project (20 Hours or More)
Finish Used
Minwax provincial stain for the primary and minwax espresso to detail the distressing and edges. Finished with 4 coats of minwax water based polyurethane
Recommended Skill Level
Intermediate

Comments

jahnkekong

Wed, 11/06/2013 - 17:11

Could you share any details about how you finished the wheels? I have a cart I am trying to refinish but stalling out on the cast iron parts. I really don't want to paint them, and I don't want them to rust.

Just noticed the Kupo Nut reference! I love it!

In reply to by jahnkekong

TongueAndTeak

Wed, 11/06/2013 - 19:16

Thank you so much for catching the Kupo nut reference! Haha I only felt it was fitting to add a little nerd flair :) rust oleum has a hammered black paint that also doubles as a rust inhibitor so it worked perfectly to touch up the cast iron parts and keep that rustic feel to the hardware. I finished with a clear top coat as I'm sure that I will end up constantly kicking the wheels by accident haha.

Cyber Sapp

Wed, 12/04/2013 - 18:45

I know you mentioned it was painstaking to find all of hardware, but can you share where you found the front casters? Also how did you put your stamp on it? I'm knew to woodworking so please excuse my ignorance.

In reply to by Cyber Sapp

TongueAndTeak

Wed, 12/04/2013 - 19:18

Hi cyber sapp! I was able to piece them together from eBay and etsy items. I searched for key words: "antique cast iron caster" or "factory/industrial cart wheel" and you should be able to find ones that work. I held out for the best deals I could. Be prepared to search quite a lot if you want to find the best deal.
As far as the decal is concerned, I created the template on illustrator and used it as a template to paint the decal on. I checked online and saw a few examples of transferring images on to wood that will probably be easier than hand painting. Hope this helps!!

Cyber Sapp

Wed, 12/04/2013 - 22:25

Thanks for the update. I made one similar to your modifications. I'm using storage too, I will share once I get the soft close installed. I'm looking for something that want slam fingers when it is closed. I also used Walnut to build it. It is solid like a tank with the hardwood, but came out pretty good. I made a few minor mistakes and now want to make one closer to yours.

Mandymoochops

Mon, 12/16/2013 - 23:30

What an amazing job you did, I'm still holding out for my end wheels too and you are so right about search search search. It doesn't help being in Canada with shipping costing so much for these too.

Love love love, well done

TongueAndTeak

Tue, 12/17/2013 - 21:23

Thank you very much!! I do not envy you right now as the search took me forever to find the right wheel that matched one I already had. I have had good luck in the past asking eBay sellers about changing to flat rate shipping options. Not sure if they have that option for shipping internationally but it never hurts to try! Keep up the good fight as the wheels REALLY pay off in the end.

Outdoor escape

Submitted by Bread0186 on Tue, 04/18/2023 - 11:39

First build ever. Took about 2 days and the most expensive part was the cushions, but Lowe's had a good deal. I did not sanding, painting, or staining. I'm sure I'll do that eventually, or make another sectional later, but I'm in North Texas and loving this set right now.

Comments

Desk with drawers and open cabinets

Submitted by kwall5 on Thu, 07/25/2019 - 20:10

I used a modified version of the narrow drawer unit as the foundation for this desk build. I decided to make wooden drawer guides rather than using manufacturer metal guides. I liked the idea of it having a more traditional wood-on-wood feel and saving a few dollars. I love the simplicity of the base cabinet design and the contrast between the painted base and stained top. Thanks yo all who shared their projects for the inspiration!

Estimated Cost
About $250
Estimated Time Investment
Week Long Project (20 Hours or More)
Finish Used
Paint, stain, and polycrylic
Recommended Skill Level
Intermediate

Camp Loft Bed Modified & Modern Kids Bookcase

This build was super fun and easy.  I modified it slightly with a bottom bunk and outdoor grade slide for my two grandsons.  The room is only 10x10 so it pretty much takes up all the space, but I left a good amount of space under the bed (11”) for storage or for the dog to hide.

I attached hinges to the stairs for easy access to underneath, maybe for a hidden fort or more storage.  To gain extra support for the beds, I added angle irons to the top bunk legs and 11" 2x4s to the bottom bunks legs for the cross bars to sit on.  Both my husband and I tested, and they're not going anywhere, pretty solid.

Thanks Ana & Jared for sharing your talents with the rest of us!!  I wish I had room in my home to make every single one of your projects!

🥰,

Alexis 


Estimated Cost
$260 (w/slide)
Estimated Time Investment
Weekend Project (10-20 Hours)
Finish Used
Varathane Provencial
Behr Marquee in “Inked”
Recommended Skill Level
Beginner

Toddler Bunk Bed

This project cost around $75 dollars for all the materials and paint. It took about 10 hours to complete. It is costructed of pine 2x4 with the exception of the slats which are 1x3.

Built from Plan(s)
Estimated Time Investment
Weekend Project (10-20 Hours)
Finish Used
Latex Semi-gloss Interior/Exterior Paint
Recommended Skill Level
Intermediate

Comments

chalip2

Wed, 06/22/2016 - 18:45

Love the bunk bed, its looks perfect for my needs.

Is there anyway you can send me the plans for this?

Upholstered daybed

Submitted by Anonymous (not verified) on Sat, 02/20/2016 - 11:41

Fun day project. Had toddler mattresses left over after my boys moved to big boy beds. Used the mattress and upholstered it to look similar to a couch. Now it lives in their playroom complete with throw pillows from target. I built some of this with scrap wood on hand to save cost. All in all, a very fun project!

Built from Plan(s)
Estimated Time Investment
Day Project (6-9 Hours)
Recommended Skill Level
Beginner

In Drawer Knife Block Includes Steak Knife Storage

I watched your video and modified mine to take up less space by using 1 x material instead of 2X material, and I cut a notch in the top to allow steak knives to store on top.  Once a cut a notch, then I used my table saw to create the space where the steak knife blades fit. 


From there, lots of sanding and gluing. I made the plywood base about 1/4” shorter than the depth of my drawer so it could be easily placed inside my drawers that don’t fully extend out. 


I finished it with pre-stain conditioner, stain, and then an oil/beeswax blend (used for cuttting boards) applied with 0000 steel wool for a super smooth, satiny finish. 

Angie 

Built from Plan(s)

Modern King Farmhouse Bed with Canopy

Although I have experience building projects and using tools, this was my first Ana White project. I am a huge fan! I wanted a little bit more modern take on the Farmhouse bed with canopy, so I attached the headboards and foot boards directly to the 88" tall 4 x 4 posts. This was done instead of creating the king farmhouse bed first and adding the canopy on top of it like the plans show. I used solid 3/4" birch plywood instead of the planks for the headboard/footboard for a more streamlined look. I also used 1 x 4's around the entire perimiter of the headboard/foot board instead of just the top and bottom. I am thrilled with how it turned out, it looks exactly the way I wanted it to! Step-by-step information on how I built the bed are on my blog at decorsanity.com. Thank you Ana, you rock!!

Estimated Cost
$350
Estimated Time Investment
Week Long Project (20 Hours or More)
Finish Used
1 sprayed coat primer, 1 sprayed coat Behr flat paint in Polar Bear White, 1 coat sprayed Minwax Polycrylic
Recommended Skill Level
Intermediate

Comments

BeaxBuilt

Fri, 01/24/2014 - 23:28

It looks very sturdy. I like your idea of the 1x4 around the entire perimeters and making the canopy the actual bed frame. Thats what I would have done too. I am always trying to think of ways to use 2 x's or 4 x's instead of 1 x's I like the chunkier look. Great job

My new sewing table!!

Submitted by sattaway on Sun, 02/19/2012 - 20:46

I consider this my first build...notice the ribbon rack and painter's ladder shelf also in the photo. Those were just confidence boosters to help me tackle the craft table I've been asking my hubby to build me for years. I just got tired of waiting, and decided to give it a try. With a 2 and 6 year old in the house, this took me a few weeks to complete...building during nap time and forgoing sleep on some evenings just to get it done. :) The drawers were by far the trickiest part of the whole thing. My first attempt was with 16" euro side mount slides, and I couldn't get the drawers in because they are inset under the tabletop. I ended up going with just a regular side mount drawer slide ($4.30 per drawer). The bookcases and the drawers are just your standard white cabinet paint, but the tabletop is finished in Martha Stewart's Potter's Clay textured paint (Hacienda) with a top coat of polyurethane. I also made the table top twice as thick by gluing 2 pieces of plywood together and screwing them together through the bottom piece. The height of the table is perfect for cutting fabric...no more backaches from bending over a table to cut fabric. I can't wait to move on to my next project! :)

Estimated Cost
$150
Estimated Time Investment
Weekend Project (10-20 Hours)
Recommended Skill Level
Beginner

Comments

Sandie

Mon, 02/20/2012 - 14:28

Great job! I love it when women finally figure out that they CAN build! Everything looks great!!!!