Community Brag Posts

coffee table

Submitted by alice on Wed, 03/10/2021 - 03:31

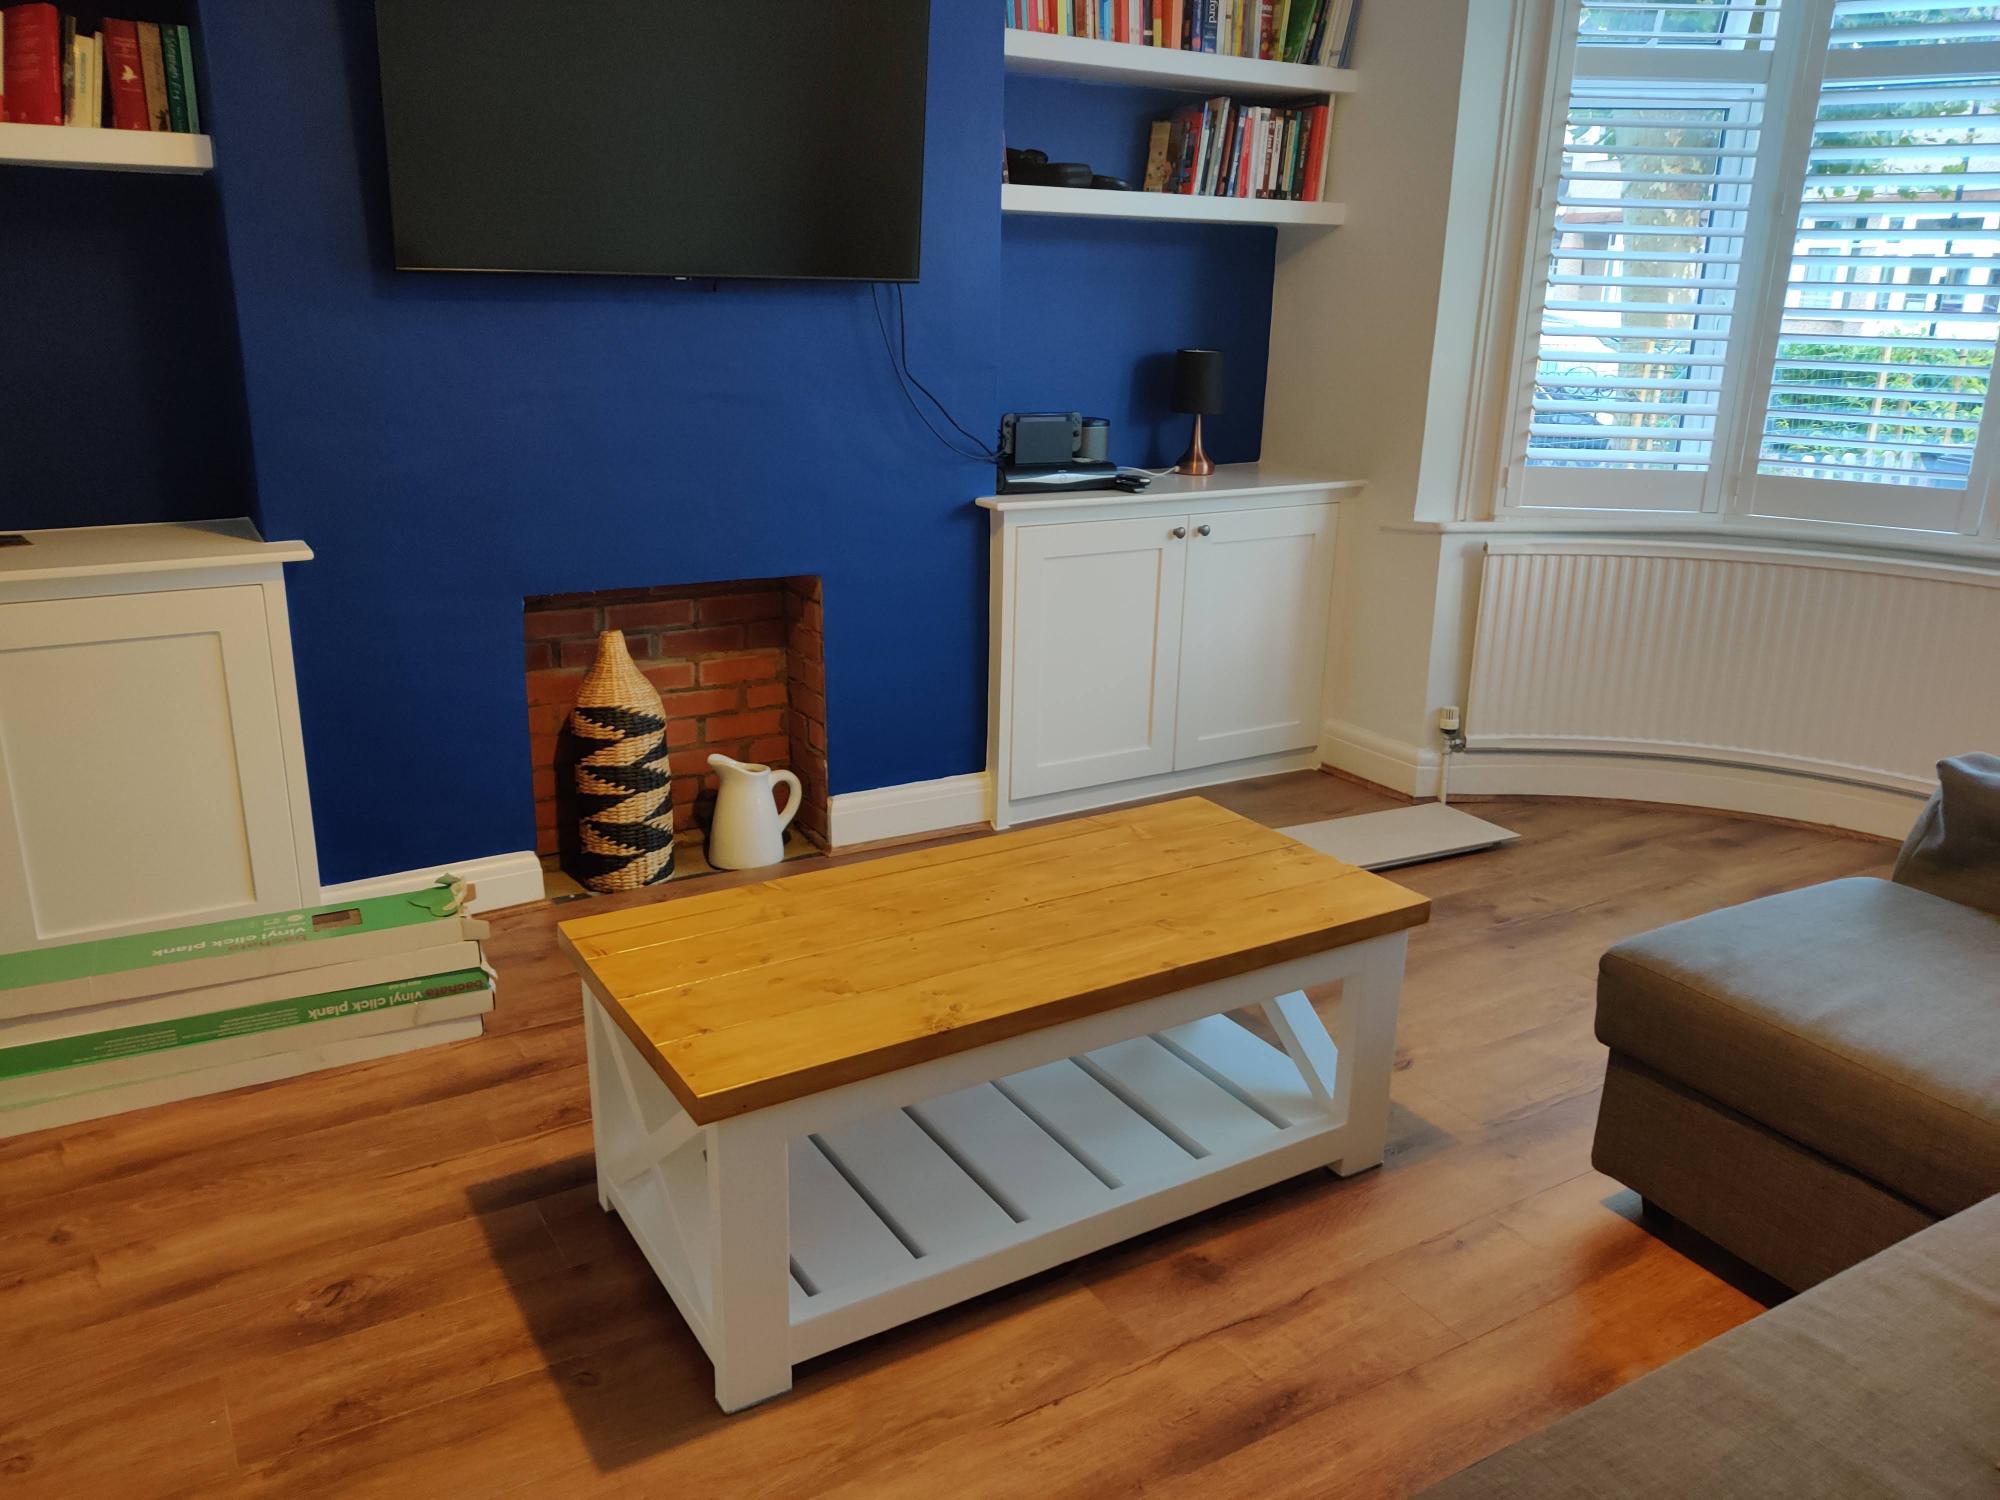
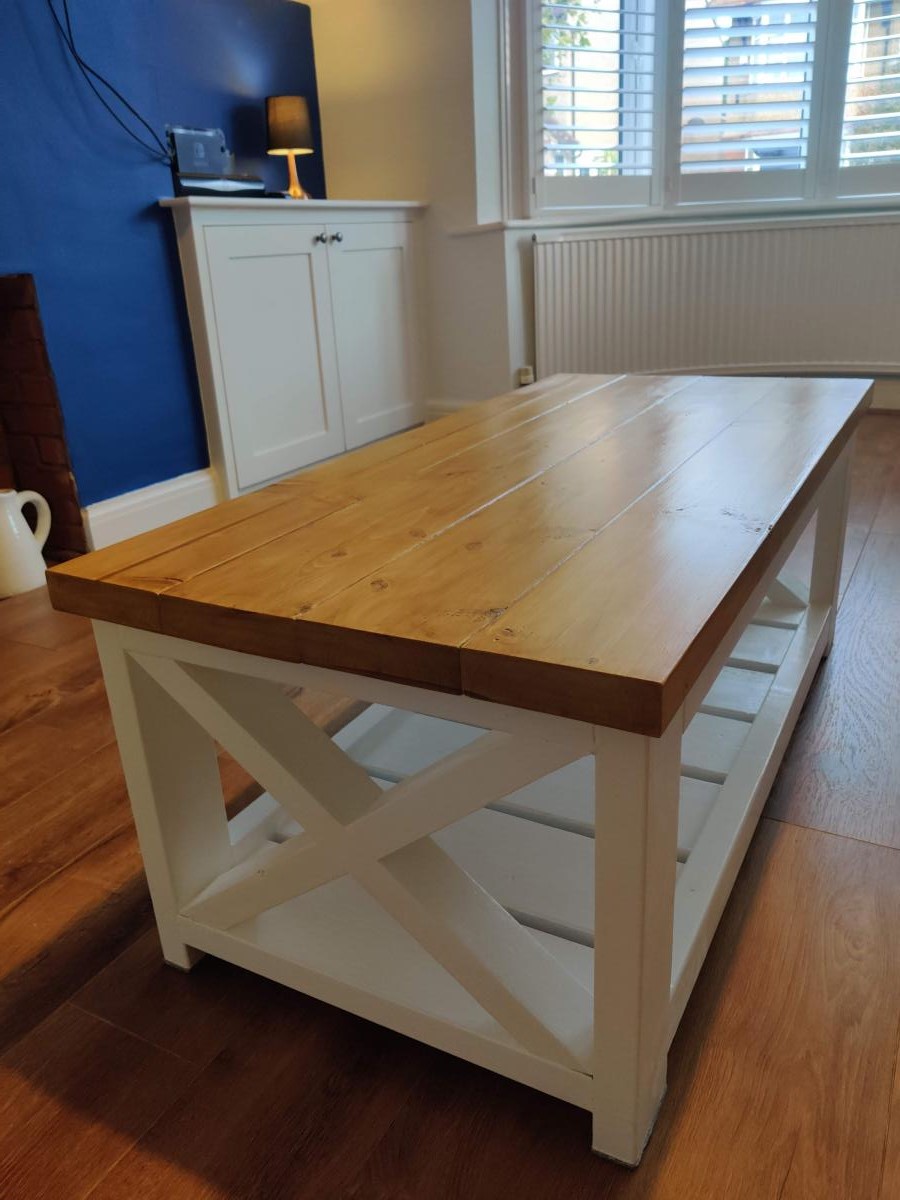
This is my first ever woodworking project and I'm really pleased with how it looks! Thank you for the plans, they were really clear and the video was the perfect guide for someone like me who had never done this before. Assembly took a couple of weekends I think. I had to predrill holes and I found the cuts for the x a bit difficult to do so had to try a couple of times. But definitely doable and very satisfying to have built something!

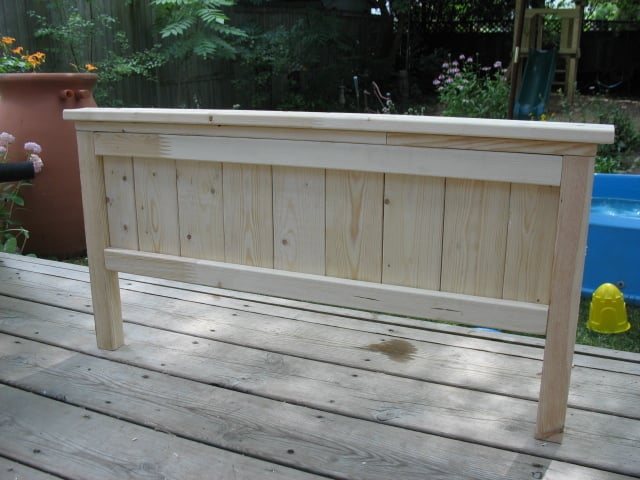
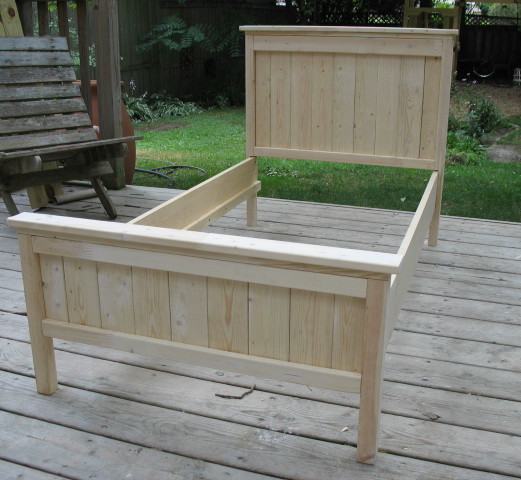
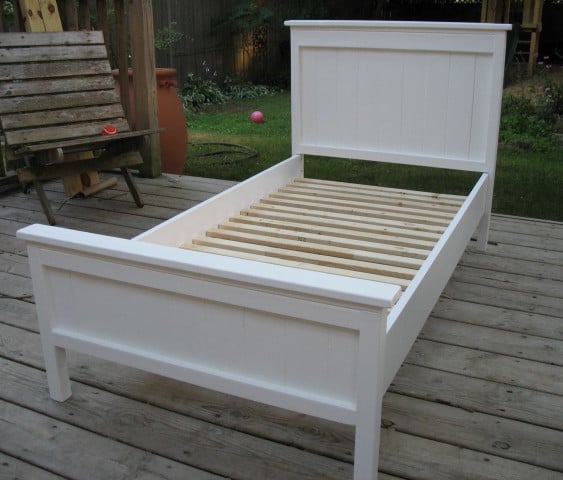
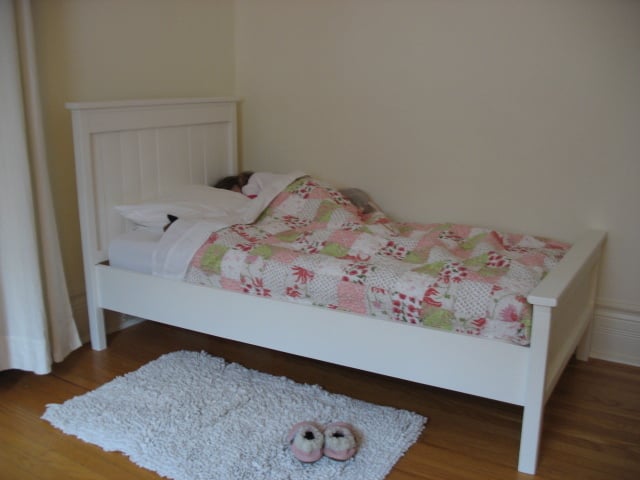
Little Big-Girl Farmhouse Bed

Submitted by Tea Granny on Tue, 03/12/2013 - 11:49

This bed was my 3rd project from Ana white. I'm just getting around to posting it now....

The headboard and footboard were made 2 inches wider than the original plans to account for my wider crib mattress. For my mattress width (28"), I required an extra 1x4 for the headboard and footboard center panels (7 instead of 6), along with 2 1x3s. This meant that I needed to add one extra 1x4 to my shopping list. I only required one 1x6, at a 10 foot length (since I didn't make the arch on the headboard).

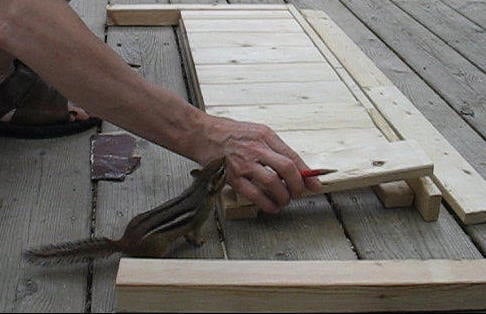
Most of the work was done on our backyard deck, my outdoor workshop. I usually enjoyed the company of a little chipmunk as my "helper". He became very tame over the summer, allowing me to pick him up and pet him. At times, he would sit on my lap or ontop of my shoulder while I was working on a project. He was always with me, just hangin' out. I'm not really sure how long this project took, as I was usually distracted by his company!

I really enjoyed making this project! Our daughter was SO excited to sleep in her new big-girl bed!

Thanks Ana for the great plans!

Built from Plan(s)
Estimated Cost
Wood, $28.45. Paint, $36.97 per gallon (I already had the paint from another project)
Estimated Time Investment
Weekend Project (10-20 Hours)
Finish Used
Behr Premium Plus Self Priming Paint - I had 2 separate gallons of this in different colours and finishes. One was semi-gloss white (I found this to be too shiny, and the shade too cool). The other gallon was a flat finish, in a Farrow and Ball colour "Pointing".
Since the walls of the room are already in the "Pointing" colour, I wanted to keep the bed whiter than the walls, just slightly off white. I ended up mixing some of both gallons together. The result? - a lovely eggshell finish in a warm white colour. Perfect.
Recommended Skill Level
Beginner
Comments

dmcarwin

Wed, 03/13/2013 - 08:01

You did a great job! I love you "little helper" in the first picture!

In reply to by dmcarwin

Tea Granny

Wed, 03/13/2013 - 13:40

Hi dmcarwin - Thanks so much for your comment!

I love my little helper as well. You, however, must be a VERY busy lady! With 6 little helpers??? How do you ever find the time for all your fabulous projects? You truly amaze me!

In reply to by Tea Granny

dmcarwin

Wed, 03/13/2013 - 15:35

You are so sweet, I don't do projects in a normal time frame, they are more like, cut the wood one day, sand the next, build another, etc....It is rare I do a build all at once, for obvious reasons! But I truly love it and so I make the time for it when I can! I just checked out the rest of your projects they are fabulous!

Tea Granny

Wed, 03/13/2013 - 18:07

Oh, yes. I certainly know about the non-normal time frames. My projects are done during nap-time or in the middle of the night. I finished a play kitchen at 4am on Christmas Day! Cutting it close - after numerous 4am nights, a couple all-nighters ...and about 40 hours later. I definitely was an elf in the workshop.

The play kitchen is pictured in the background of my second photo for my Toddler Chalkboard project. I used Ana's plans and another plan as my inspiration, heavily modified the measurements. I have not had time to post it yet, but soon....

Okay, so I've just checked out your blog! Wonderful.

LindseyMagno

Sun, 08/09/2015 - 06:51

This is gorgeous!!!!! My daughter will be two in two weeks, and while I'm not quite ready for a big girl bed, and we don't need her crib for another baby yet, I'm so excited to finally find the perfect plans when I am ready. You did a GREAT job, it's just beautiful. When I compare this to the $400 plus beds in stores I just shake my head and say THANK YOU ANA for giving us great alternative options. Thank you for the inspiration!!

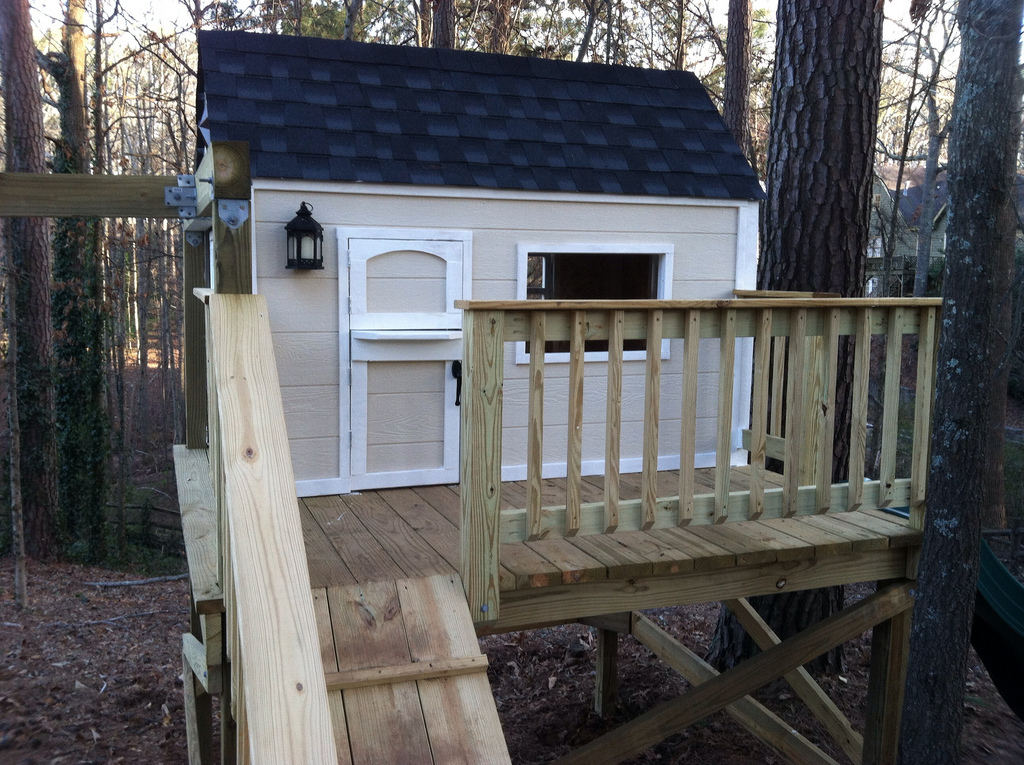
Our Daughter's Playhouse

Submitted by jhedlund on Fri, 03/22/2013 - 06:17

We built this in early 2013. We ended up turning the house 90 degrees on the deck, because the slide worked best off the backside of the deck due to the various heights around the deck. The sloped back yard caused some challenges, but in the end it's a very sturdy deck with the cross beams attached. Thanks for posting these plans online for us, our 3 daughters are loving the playhouse and swingset! Here are some more pics of the project: http://www.flickr.com/photos/11031534@N00/sets/72157633009259873/

Estimated Time Investment
Week Long Project (20 Hours or More)
Recommended Skill Level
Intermediate

Comments

sgilly

Fri, 03/22/2013 - 15:07

Of course your girls love it - it's fantastic! Great job.

Robinwood

Fri, 03/22/2013 - 16:39

Love this - my grandson's back yard is too small to build something like this; which is why we had to settle for his loft bed airport/clubhouse.

slug

Thu, 06/27/2013 - 05:24

I'm planning on building two A-Frames and no playhouse, so my questions are focused there.

Did you do any modifications to swing portion of the plans?
Is it sturdy enough for an adult to swing on as well?
It looks like you put the posts in the ground, did you cement them in too?
How high off the ground is the bottom of the support beam for the swing?
Is there any issue side-to-side swaying?

Seasonal And Holiday

Modern Adirondack Chairs

Submitted by frmoody on Mon, 05/03/2021 - 17:35

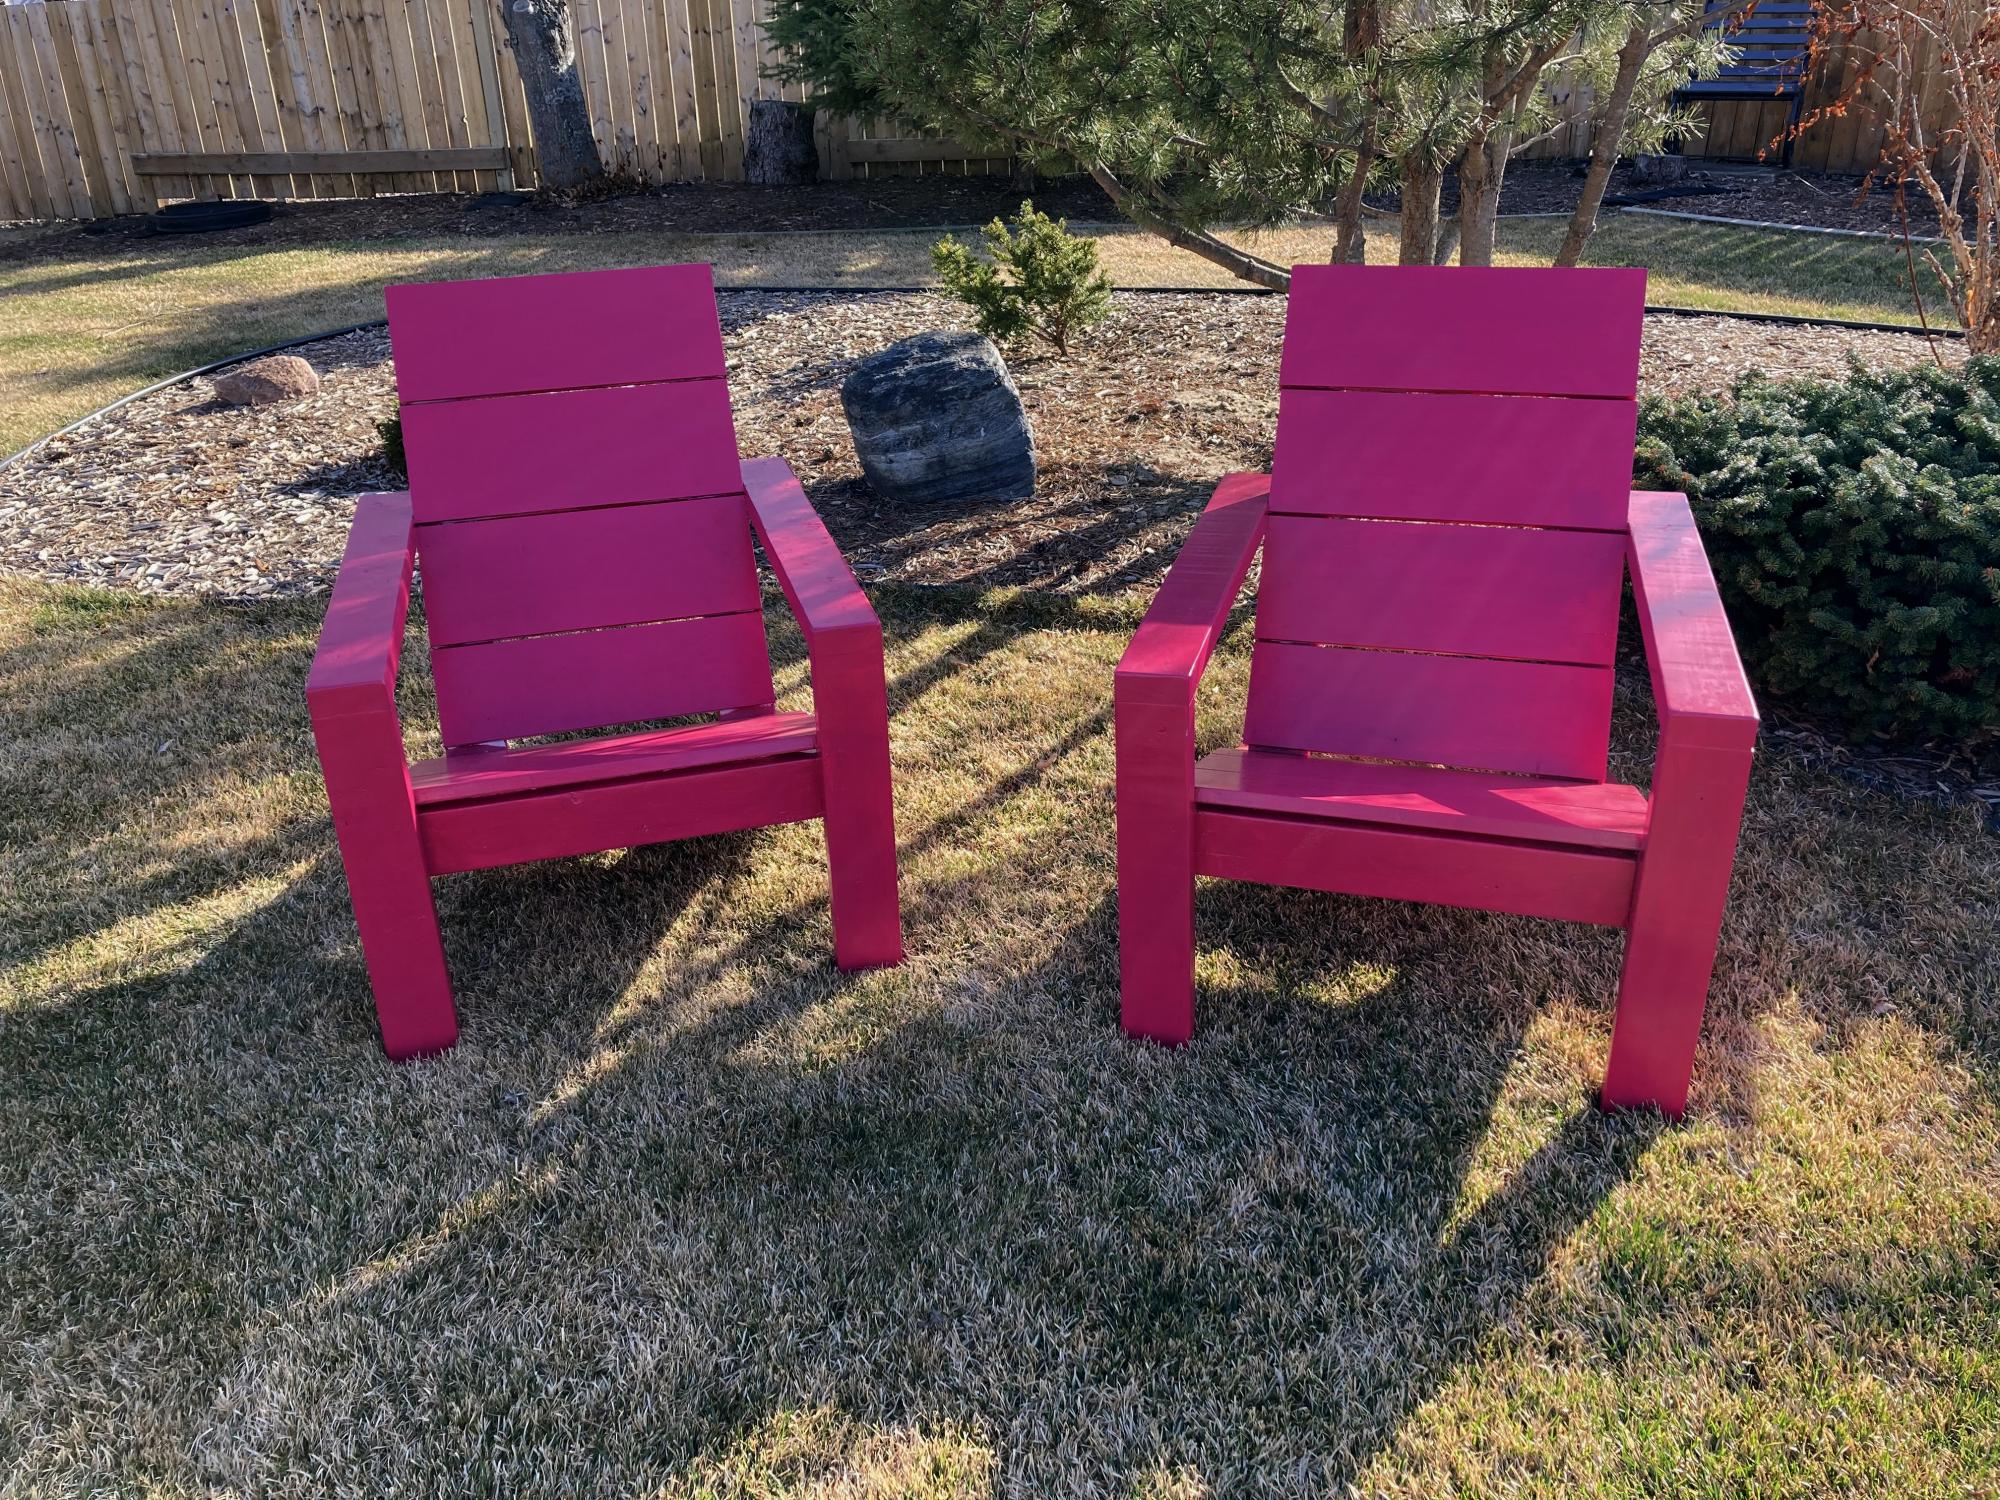
This was a nice simple build. The only problem where I live (near Edmonton, Alberta) is that the price of lumber has gone crazy. I think it is the same everywhere. 2 x 4's are running about $8.50 (CAD) each. I can see myself building a few more of these as the neighbours like them. Chose to go with a funky magenta colour to add some colour to the backyard. Very comfortable to sit in but I think I will add some cushions. I should have taken Ana's advice and painted the boards (especially back and seat) first. Once assembled I had to go in with a small brush to get the sides.

Estimated Cost
$40 each
Estimated Time Investment
Day Project (6-9 Hours)
Finish Used
Exterior semi gloss paint.
Recommended Skill Level
Beginner
Comments

Simple 2x4 Potting Bench - Modified

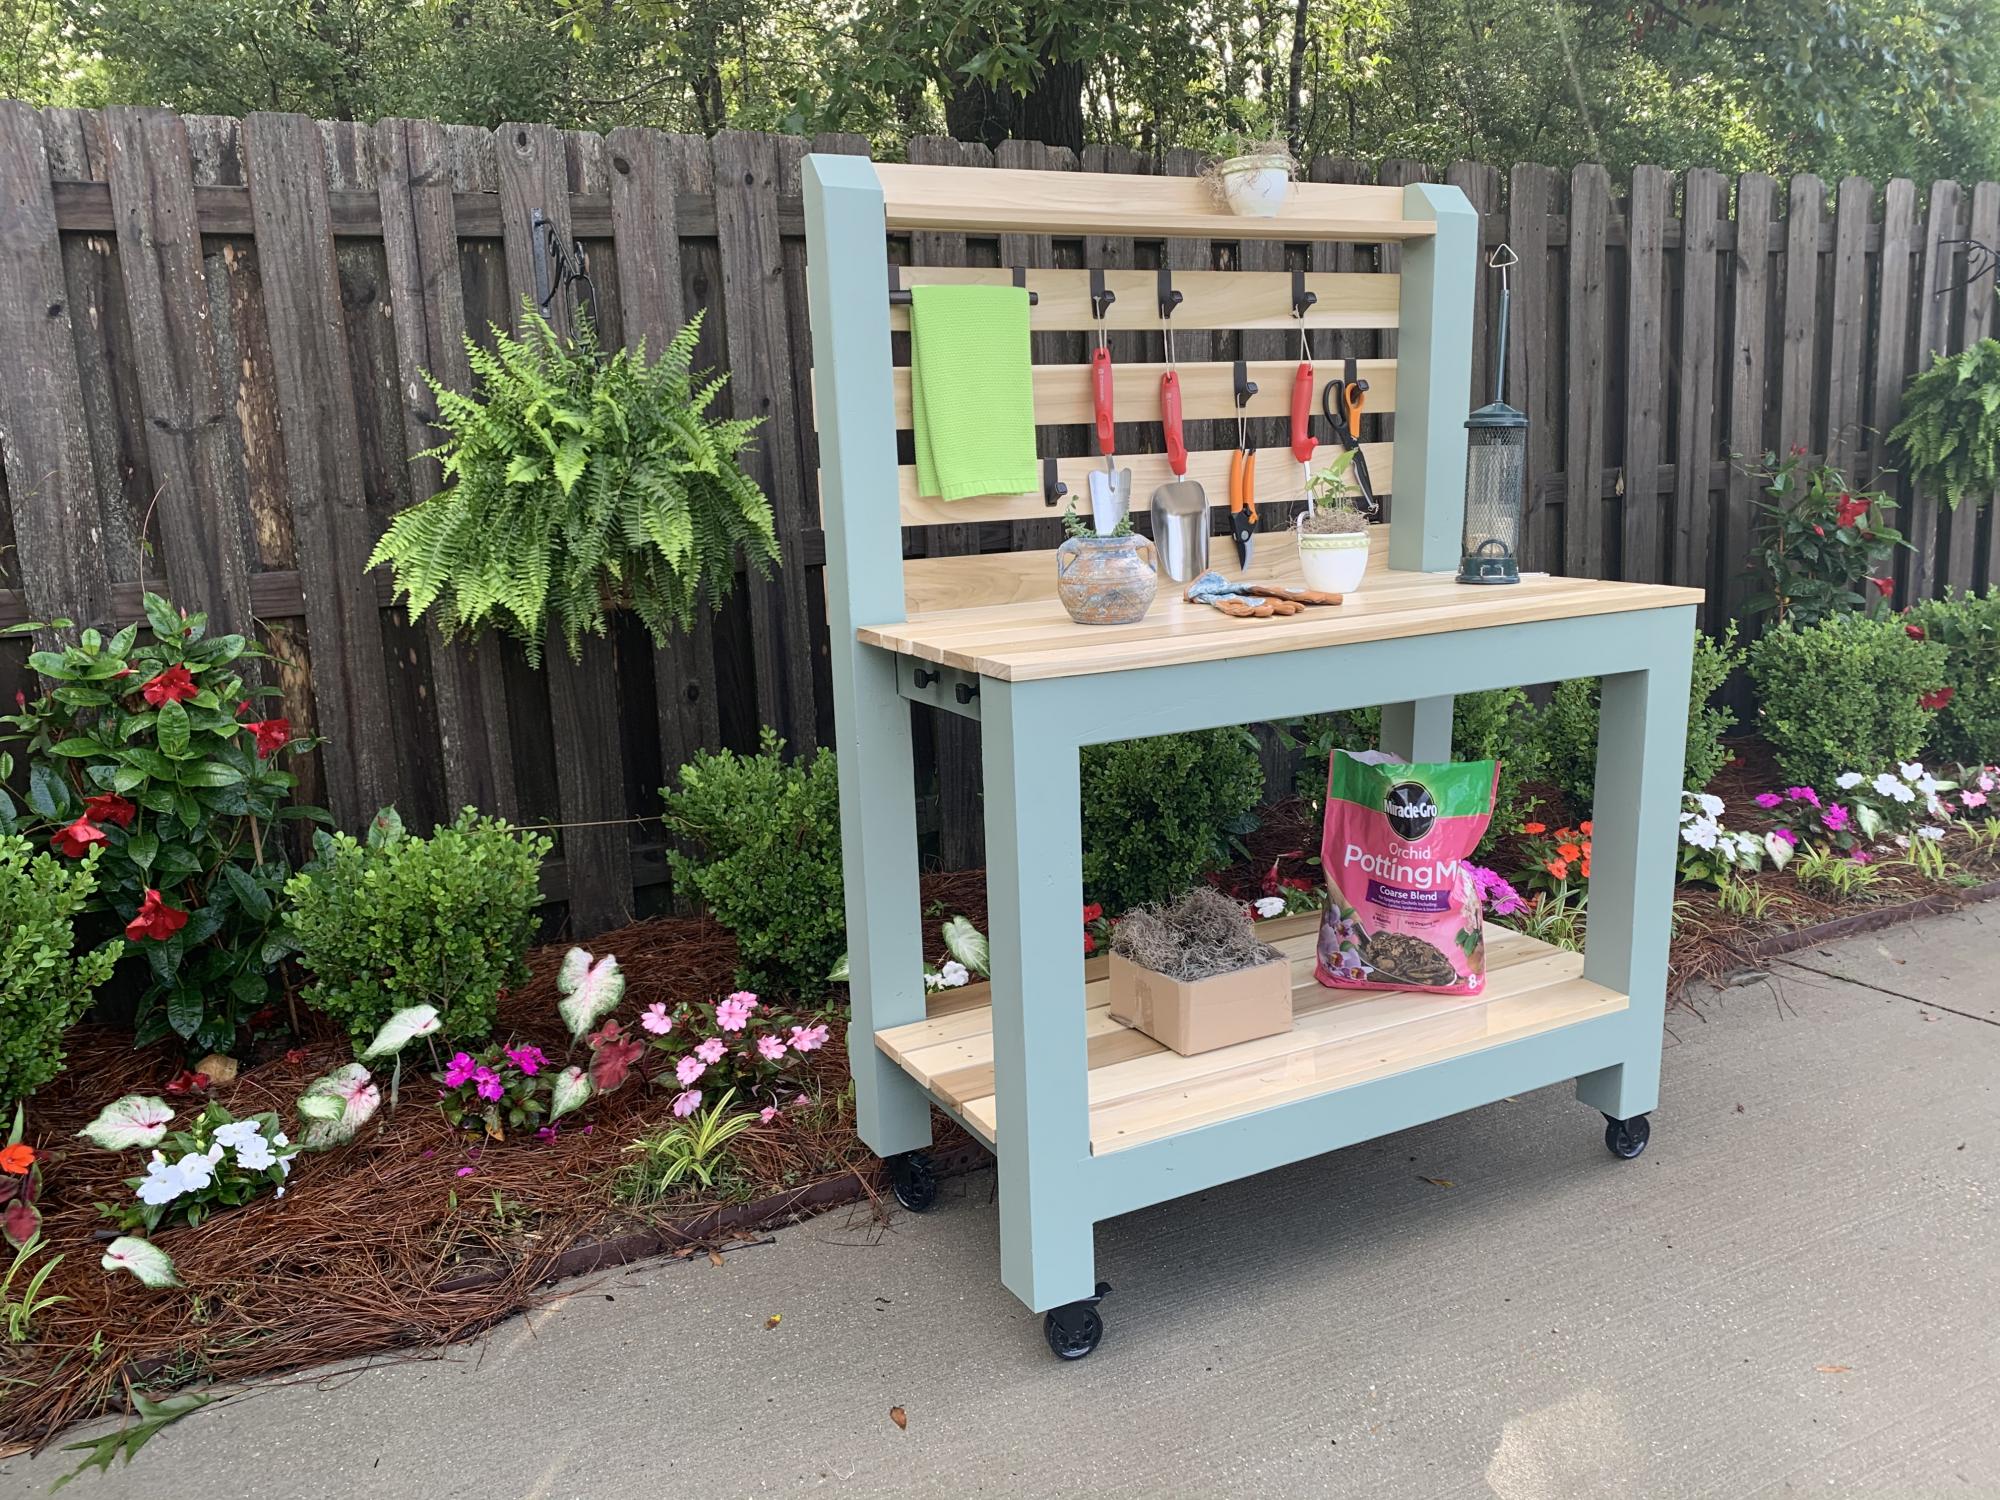
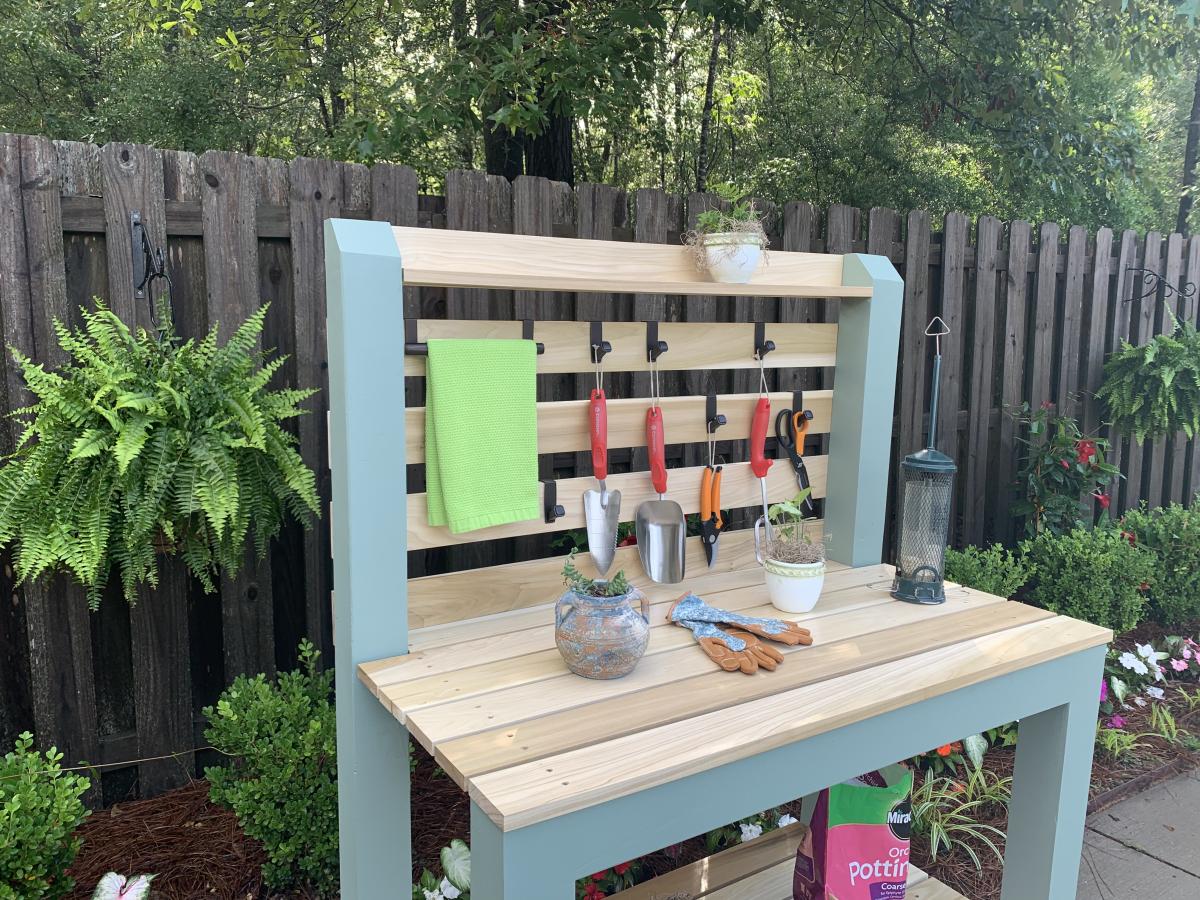
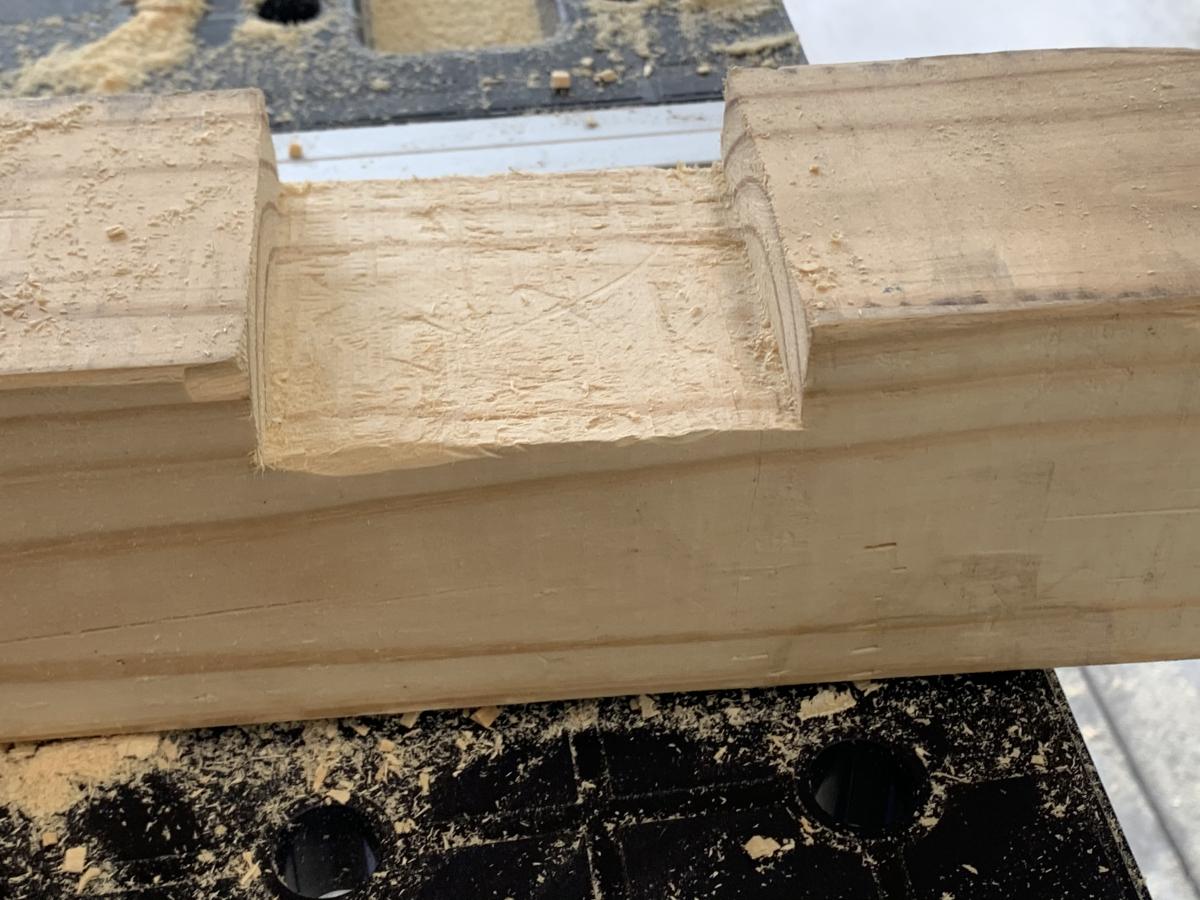
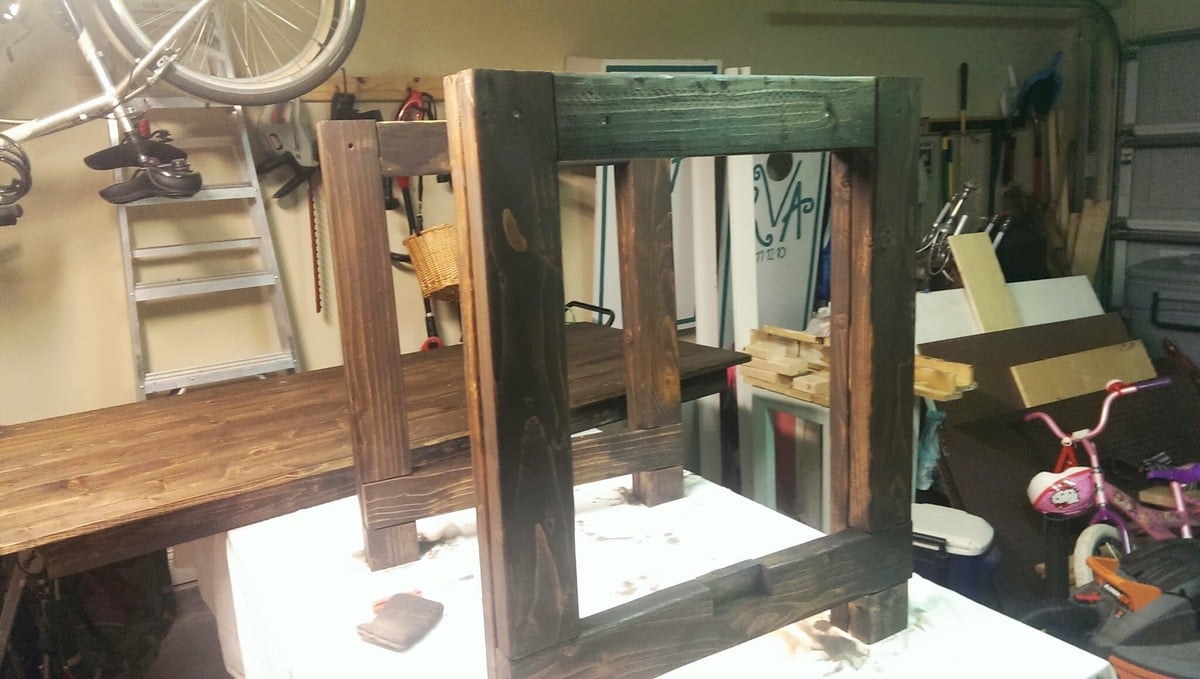
I was intrigued by Ana’s Simple 2x4 Potting Bench. The project seemed simple enough and it would be used as a means to clean up clutter in the garage. My main focus was to make it semi-portable and weather resistant. Instead of using 2x4’s for the corner posts, I used 4x4’s to accommodate casters. I also shorted the length of the posts by 4 inches to compensate for the height of the casters. To provide extra rigidity I did a dado for the 2x4’s that connect the front and rear legs. In retrospect, I wish that I did not dado the legs because it made it more difficult to attach some of the shelf planks. I painted the frame green and left the shelves and backboards clear for beautiful contrast. My wife is ecstatic with the result.

Estimated Time Investment
Weekend Project (10-20 Hours)
Finish Used
Benjamin Moore Environ Green paint for the frame and Minwax Polycrylic for the poplar shelves and backboards.
Recommended Skill Level
Intermediate

Comments

Seasonal And Holiday

Entertainment Center for 60" Flat Screen LED TV

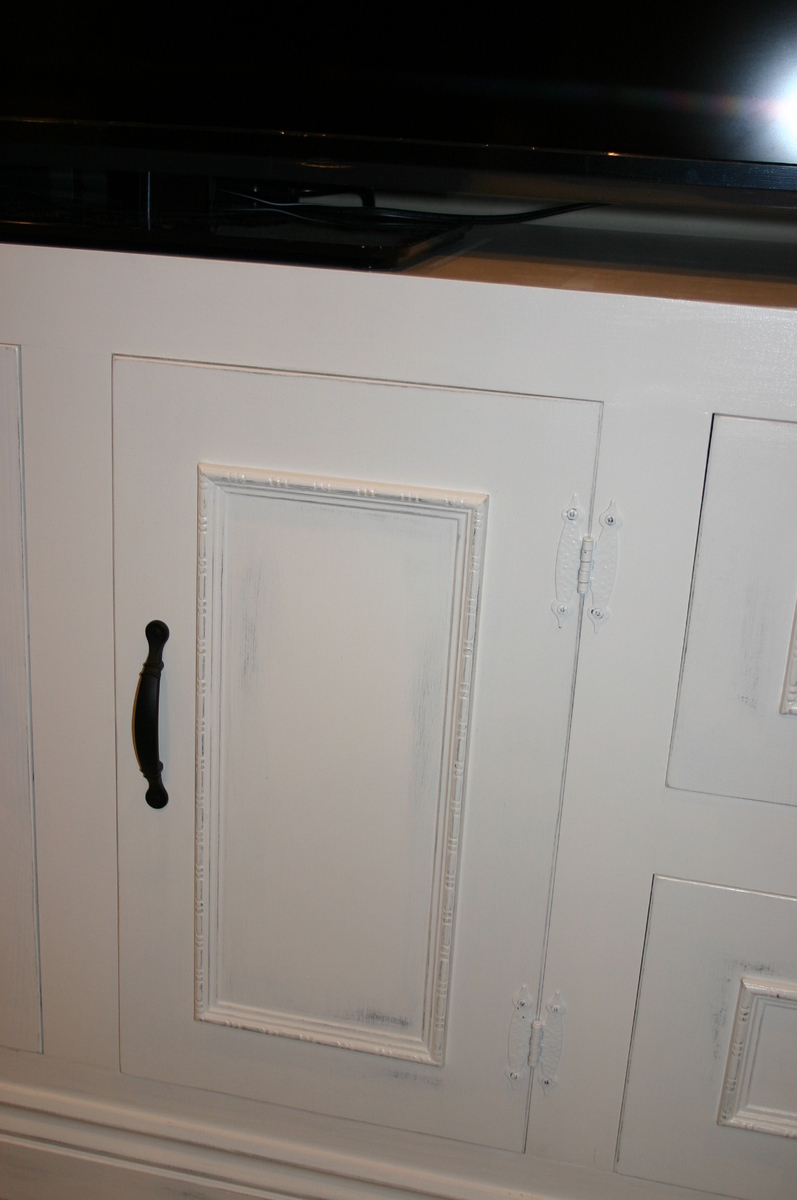
I used the plans from JRLwoodworking and the pictures from AZCA33 and combined them to create an entertainment center to hold my new 60" flat screen tv. I priced new entertainment centers at furniture stores for a nice entertainment center to hold a large tv and the price was around $2000. I looked around online and found a couple of websites of handmade entertainment centers and decided to give it a try. I had never made anything remotely his large or detailed, but with the plans and some patience, I was able to bring this thing to life. I couldn't have done it without the help of this website or jrlwoodworking. I am very proud of this piece of furniture and plan to cherish it for a long time....

Estimated Time Investment
Week Long Project (20 Hours or More)
Finish Used
Black latex paint (satin), white latex paint (satin), and Polyacrylic (satin)

We painted the bare wood with the white latex paint first. After a couple of coats, my wife used the black paint on the areas that she planned to look distressed. We painted over the black with the white until fully covered. She sanded the white until the black came through like she wanted and then we coated the entire thing with a polyacrylic coat.
Recommended Skill Level
Intermediate

Comments

NimbleShopper

Mon, 04/22/2013 - 13:51

Wait a moment, that is a super WOW!

Really nice work. The piece is worthy of a magazine cover. Very well done.

kristenlotz

Sat, 06/01/2013 - 19:21

Hi RAZORBACKFAN, I am so excited to see this build from our plans at jrlwoodworking.com! This is absolutely beautiful. It looks like a very difficult project, but with the step by step instructions and going through it a few times, it really can be done by a handy do-it-yourselfer. I hope you enjoy yours as much as we enjoy ours. The best part of it is telling everyone you built it. Nobody would believe it unless we had the pictures to prove it.

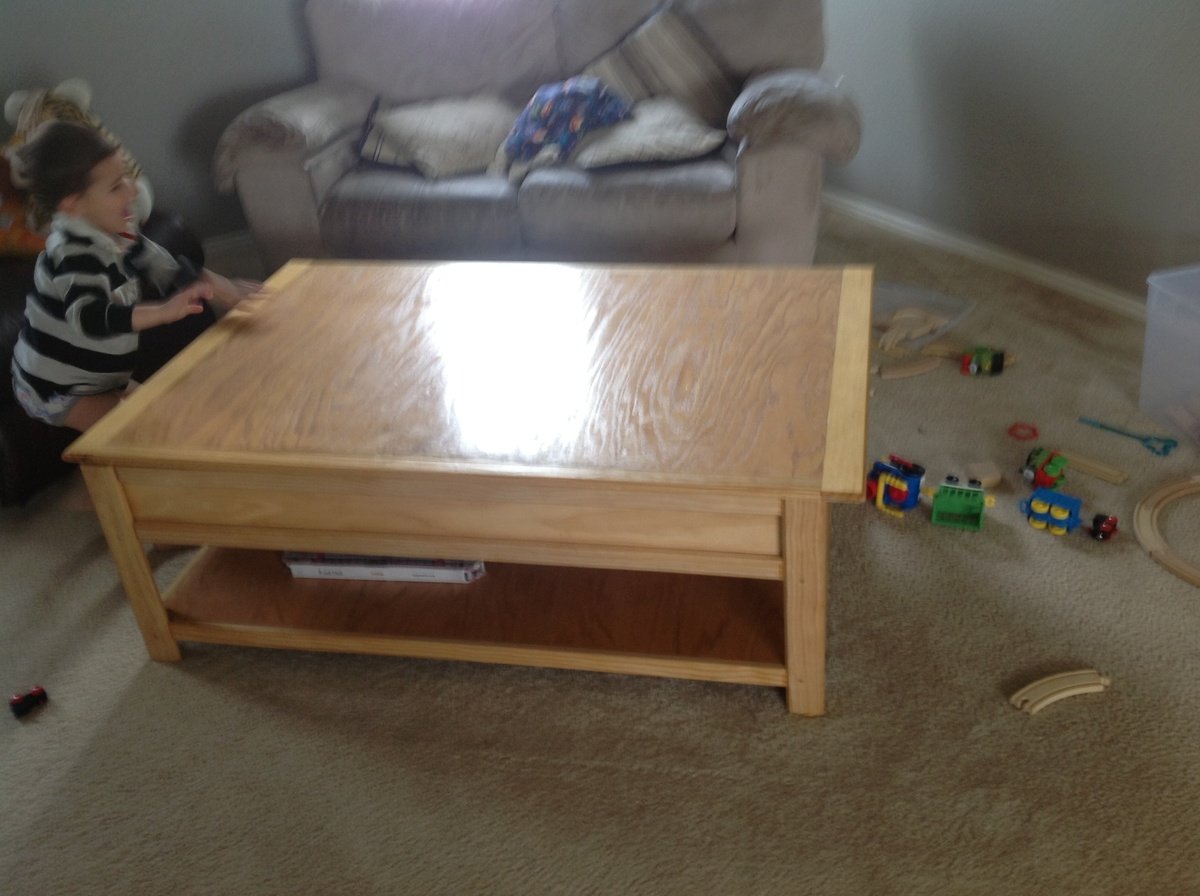
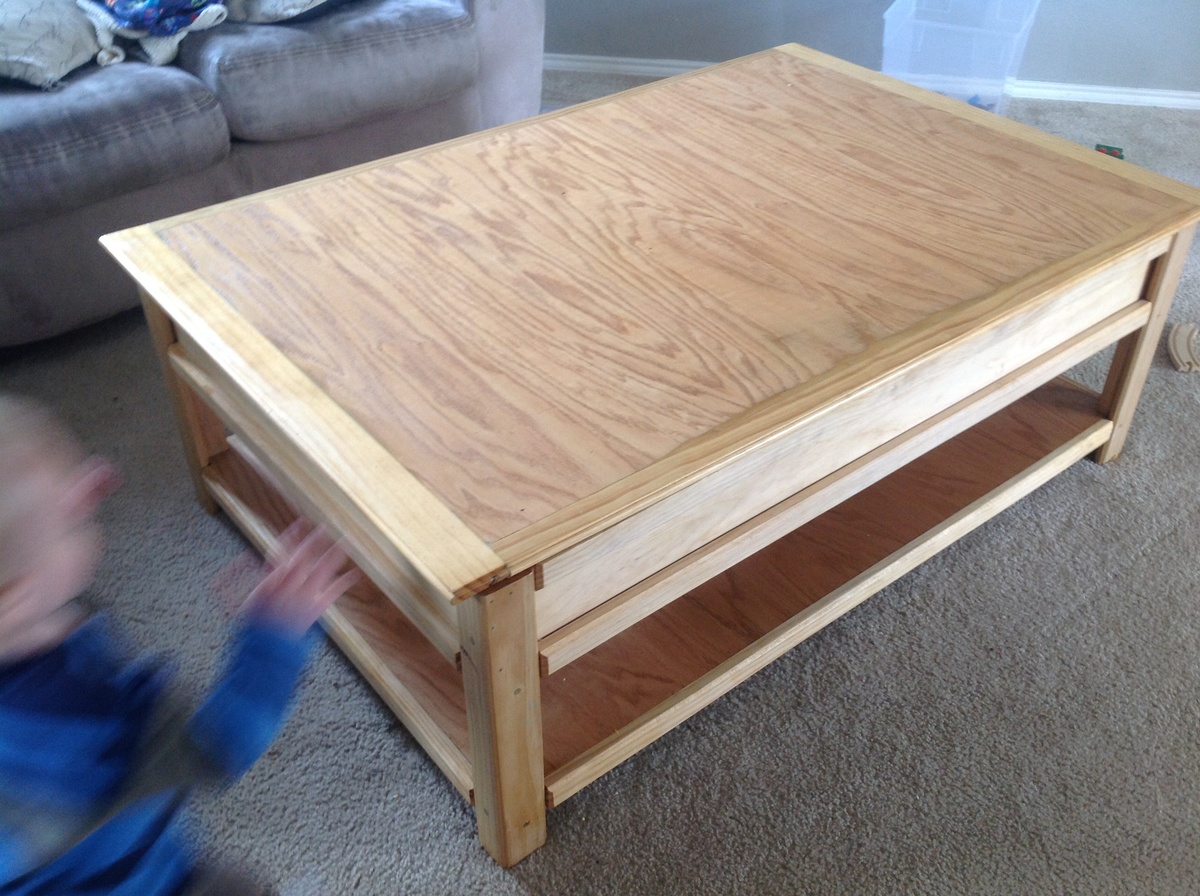
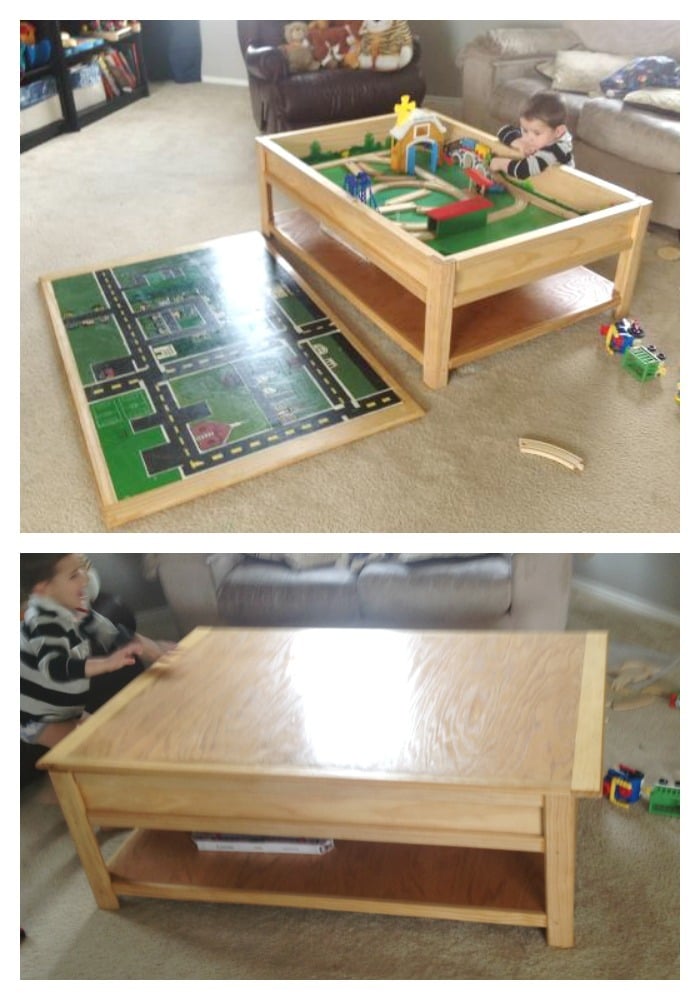
Train & car table

Submitted by Jrich on Thu, 04/25/2013 - 12:58

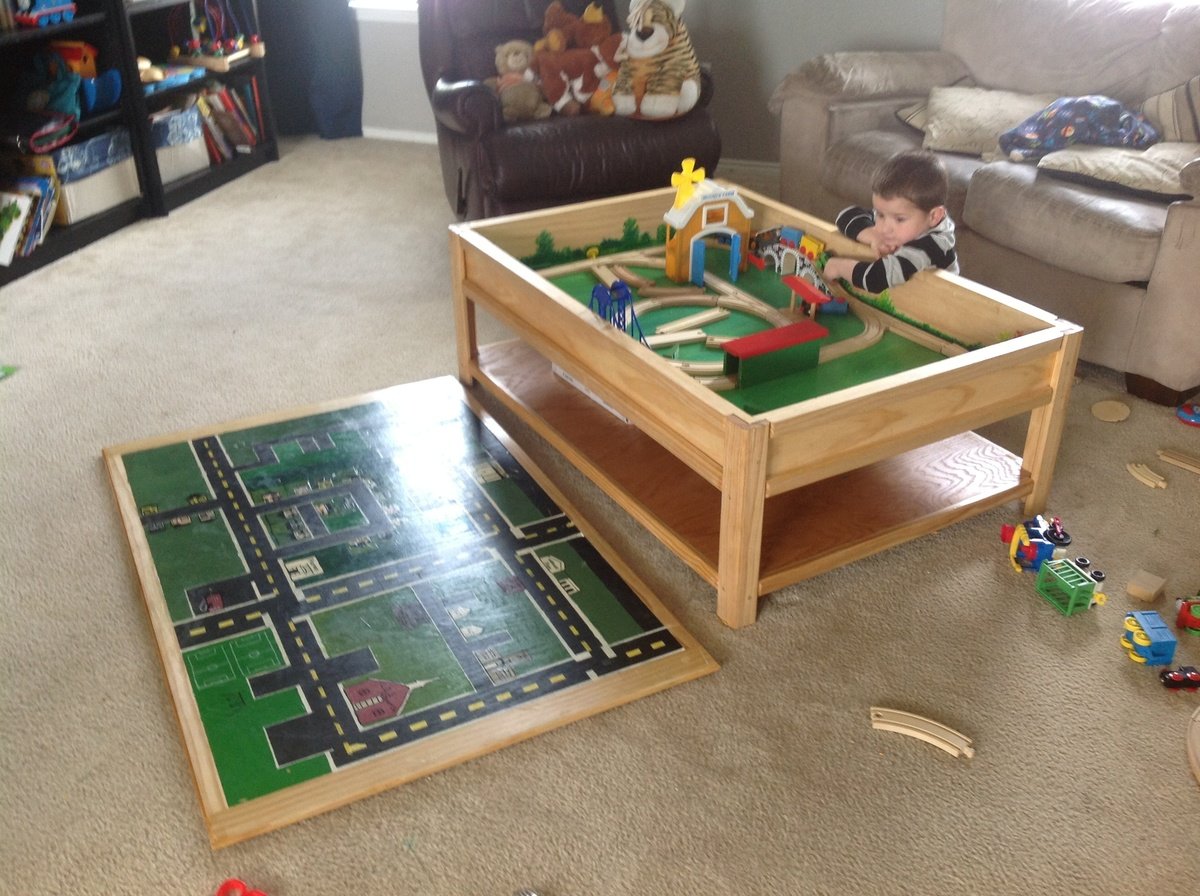
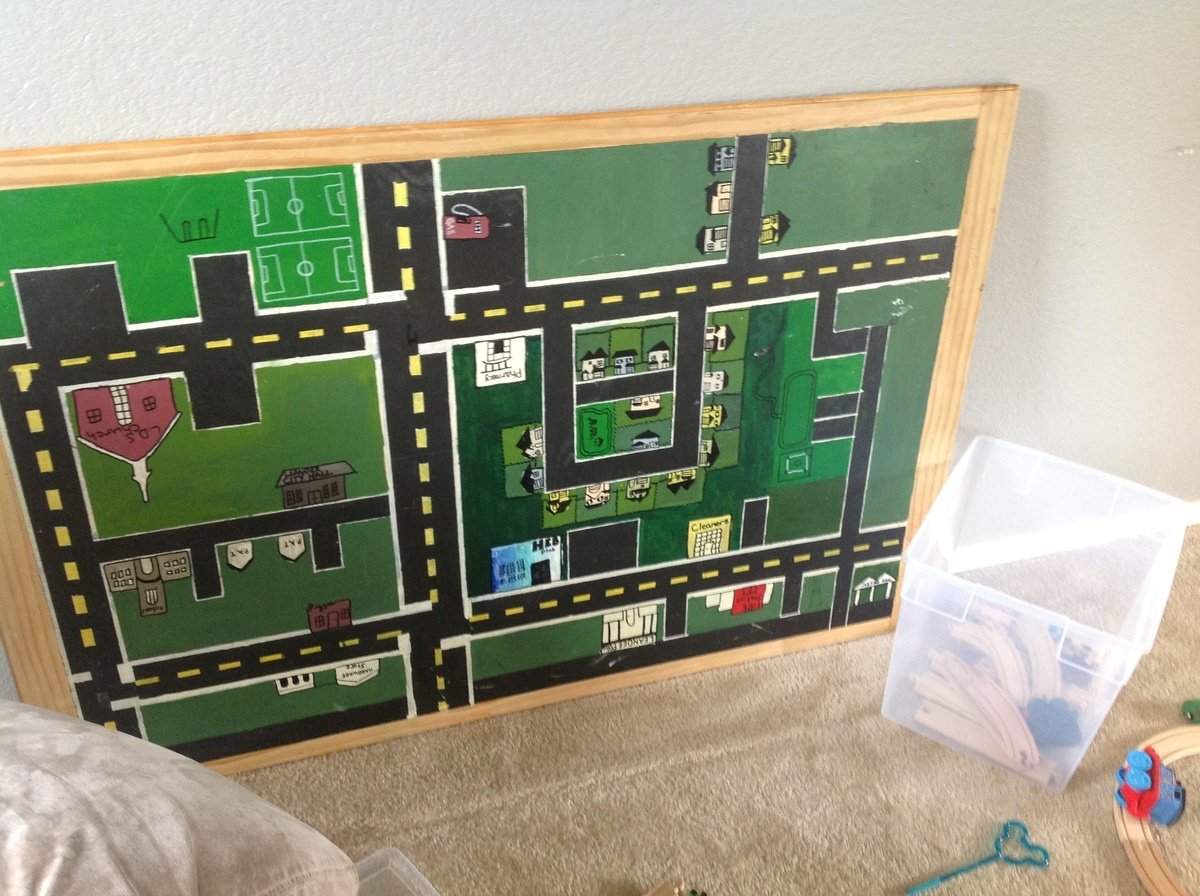
We customized the train table a bit and laminated the top into one solid piece so that we could paint a car map of our neighborhood on the underside. It's heavy! But with two boys in the house it's never really on anyways! :)

Built from Plan(s)
Estimated Time Investment
Week Long Project (20 Hours or More)
Finish Used
Tung oil
Recommended Skill Level
Beginner

Comments

mswendsen

Thu, 03/06/2014 - 22:26

I was wondering how you made it possible to lift and what the process was to do the map? I am wanting to do something like this for hot wheels for our friends son so he has something to play with when they come over.
Thank you

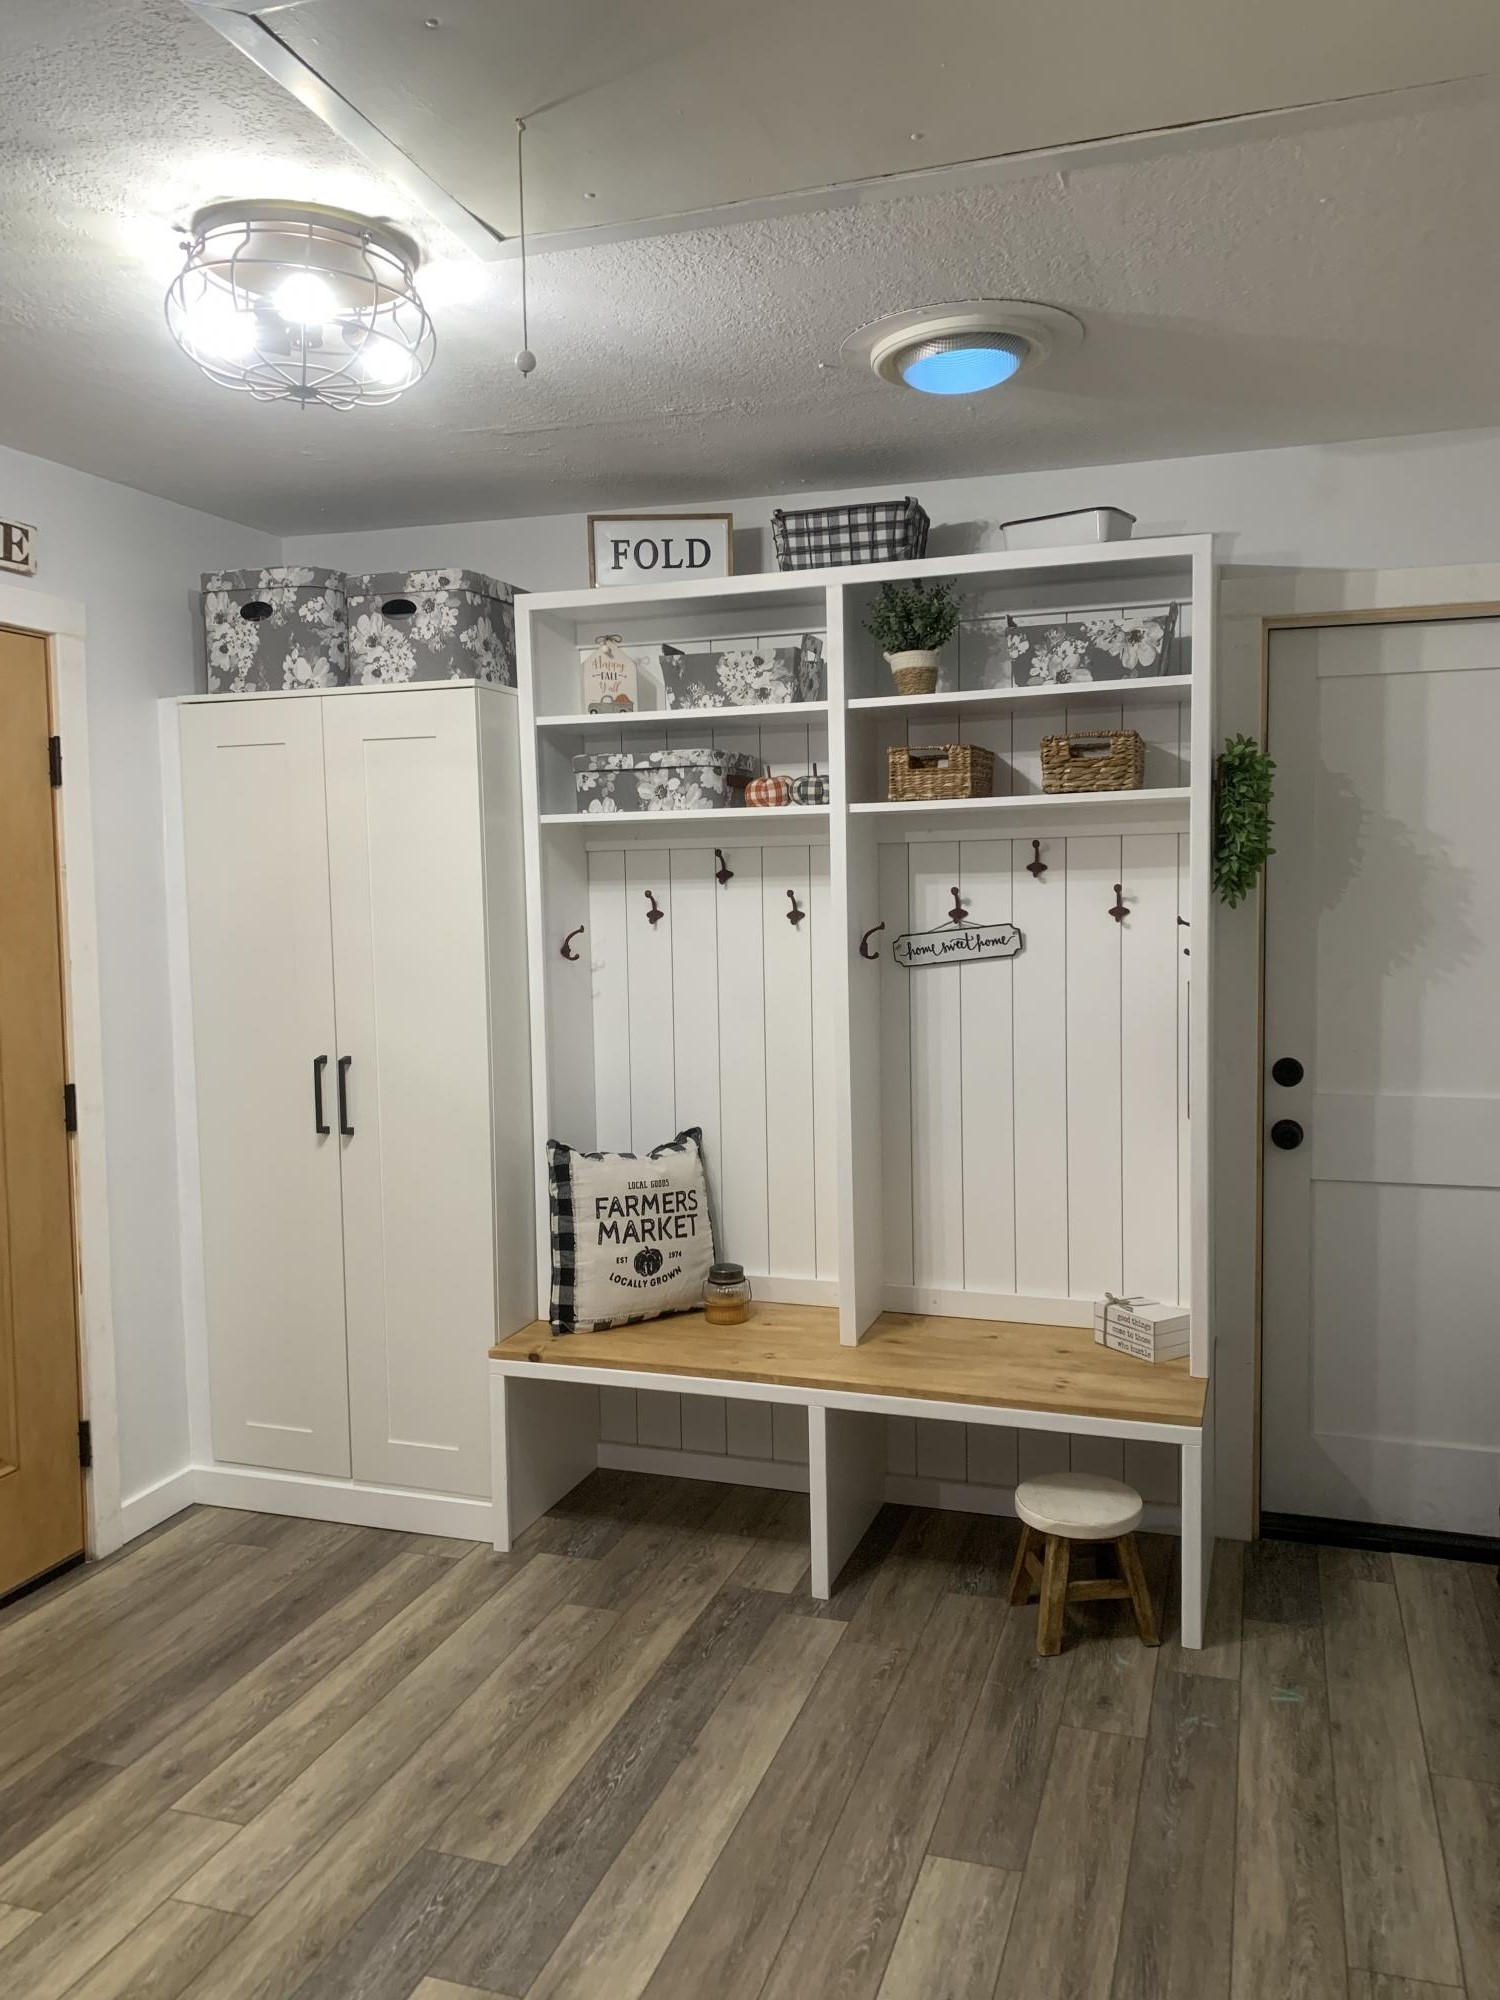
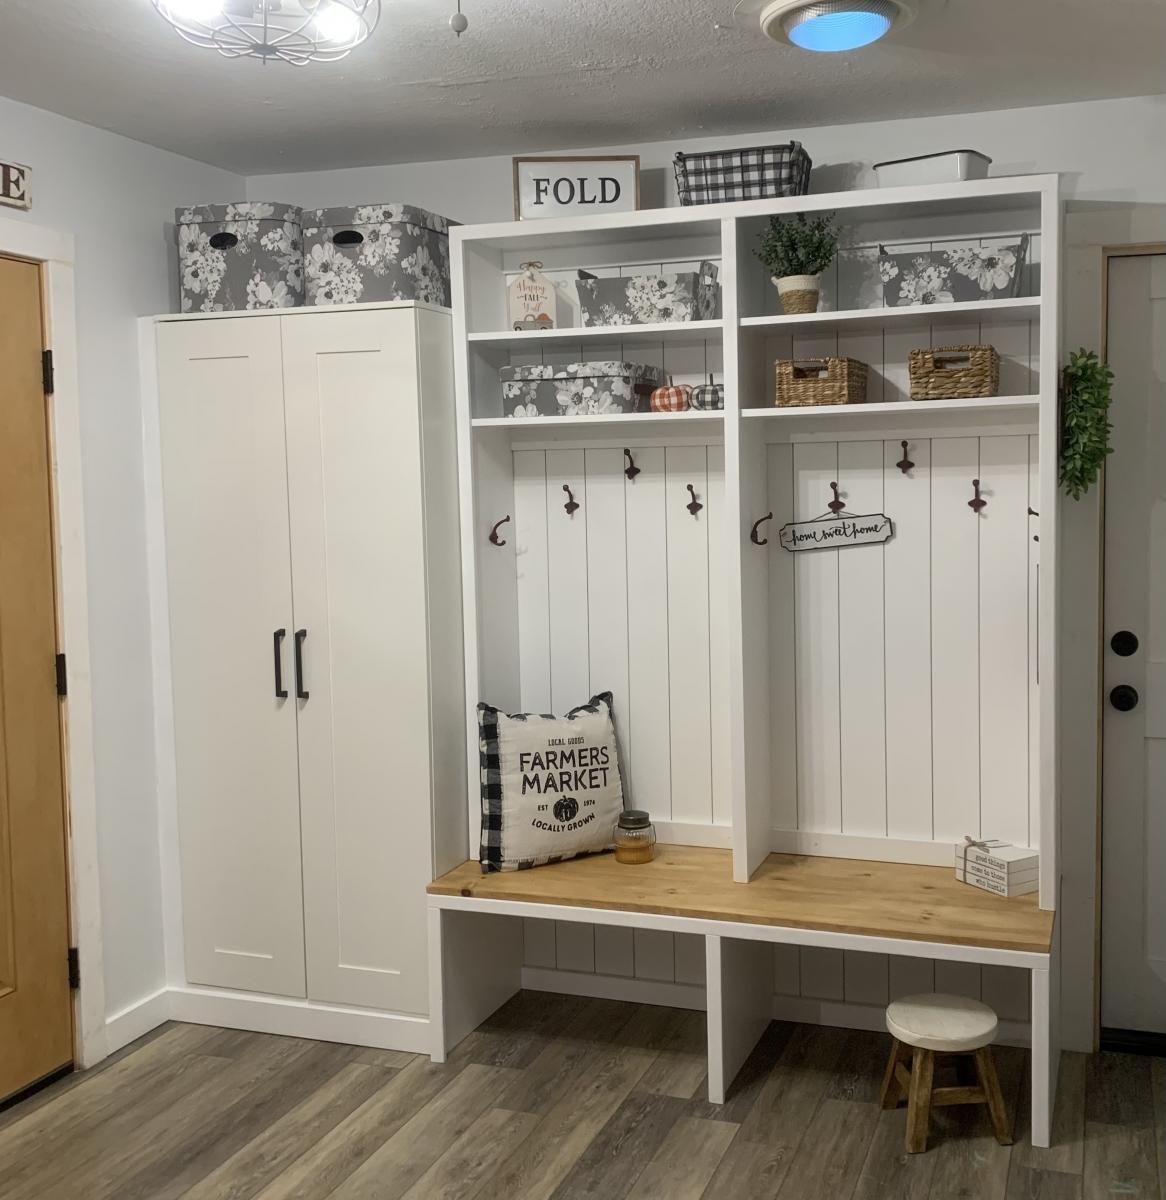
Mudroom Bench with Hutch

Submitted by calliher on Sun, 09/12/2021 - 18:45

This is my laundry room and it is about 12x10. It looked so bare with only the washer and dryer. So I thought making this a mudroom also. I live in the mountains and have snow 3 to 4 months a year. This will be perfect. I purchased an IKEA cabinet built it in and added the Ana White plans with two bays.

Comments

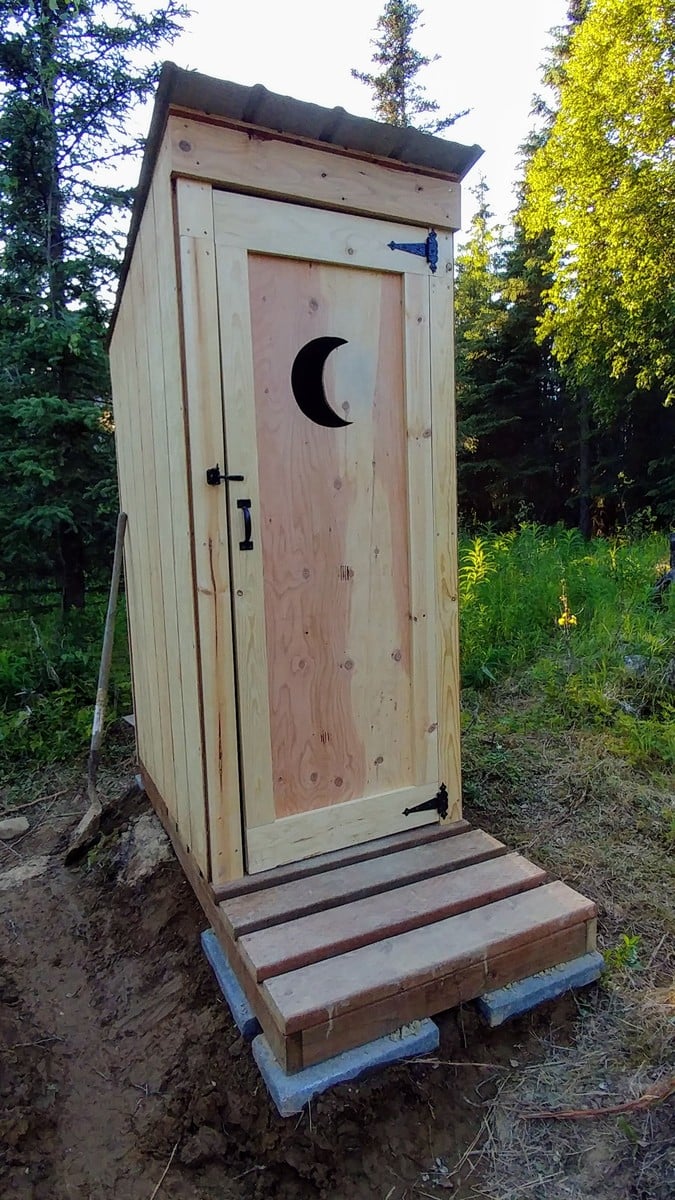
Simple Outhouse

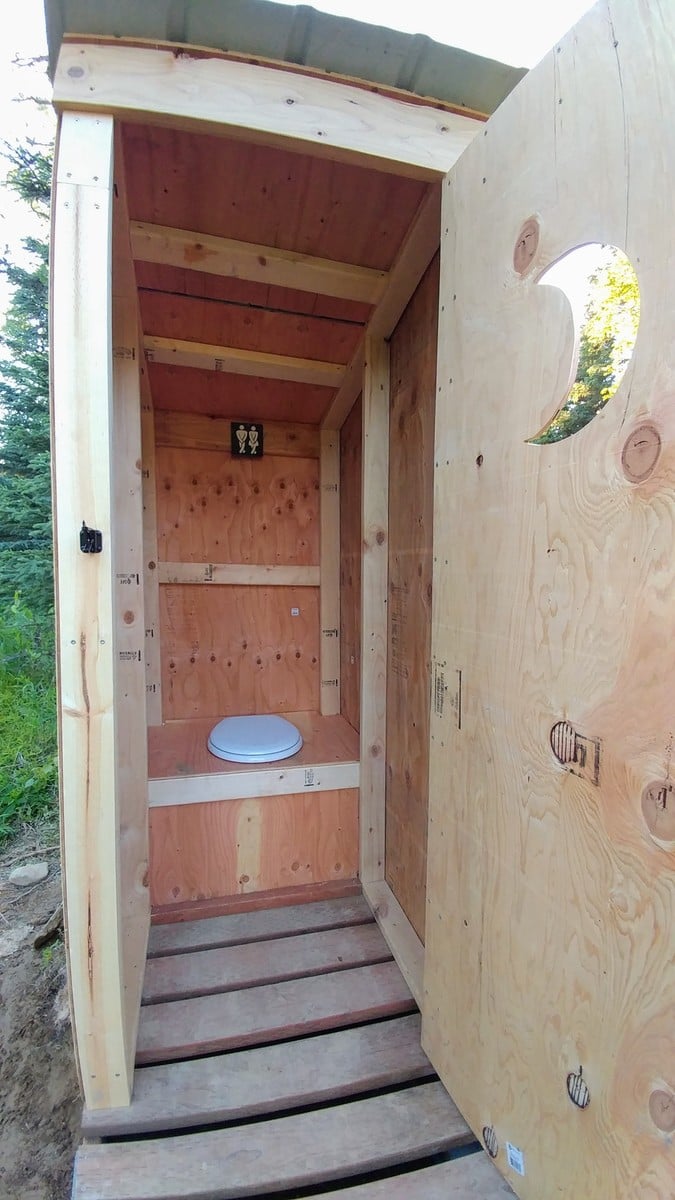
I built this outhouse to go with a dry cabin I'm working on, and also as an emergency backup for my house. I used treated lumber on the base/deck and splurged on T-111 for the siding. I wanted to use greenhouse polycarbonate for the roof, but found a piece of metal roofing in my shed that was exactly the right size so I used that instead. I thought about doing a fancy cutout on the door but ended up going with a half moon because it was easy. I'm thinking about cutting out stars of different sizes all over the rest of the door to let in more light. I'll trim and stain it next summer.

Built from Plan(s)
Estimated Cost
$450 - I used T-111 which is $40/sheet here in Alaska. I also used treated lumber where recommended and stainless steel screws.
Estimated Time Investment
Weekend Project (10-20 Hours)
Recommended Skill Level
Beginner

Comments

CH

Mon, 01/13/2020 - 15:25

WHAT HAPPENS TO THE 'STUFF' THAT YOU DEPOSIT IN THE TOILET?  I DIDN'T READ ANYTHING ABOUT DIGGING A PIT/TREATMENTS, ETC.  PLEASE LET ME KNOW.  THANK YOU!  CH.

Wood Toy Box

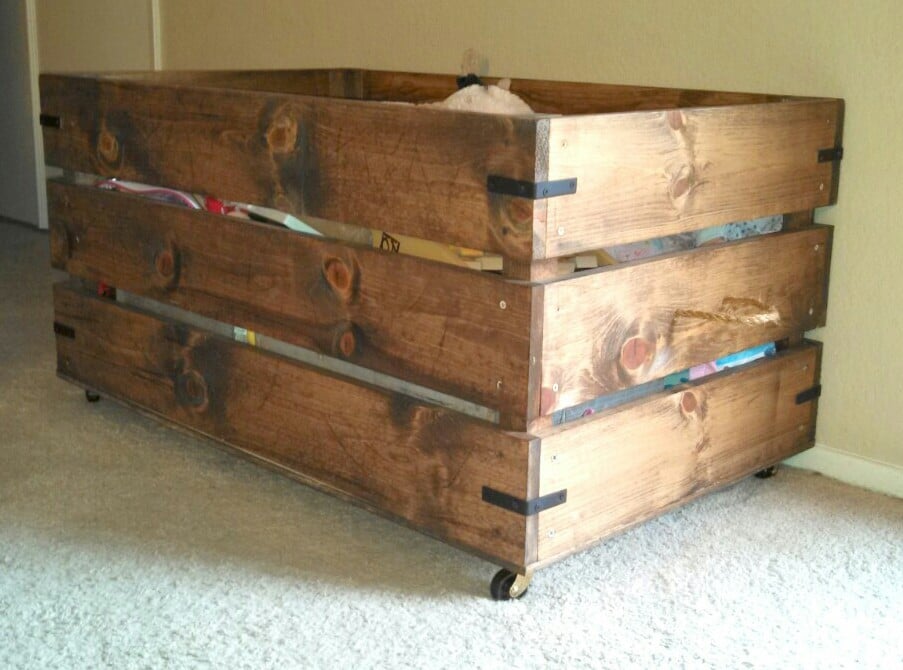
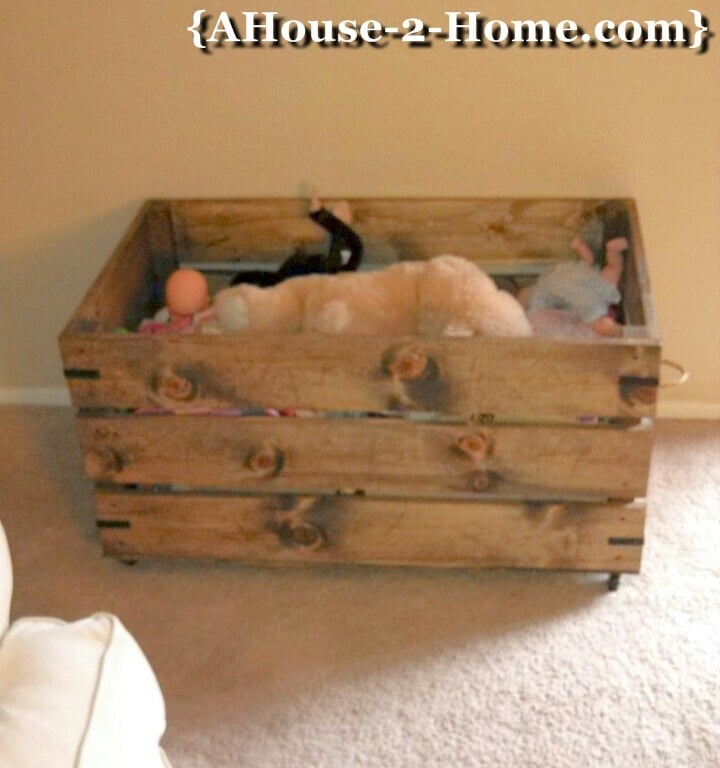
This is a great beginners project. I wanted something that would match my living room and still be functional for my daughter to get her toys out . We have a full tutorial at our blog.... www.Ahouse-2-Home.com Also , if you have any questions please feel free to leave us a comment! Thanks!

Built from Plan(s)
Estimated Time Investment
An Hour or Two (0-2 Hours)
Finish Used
Chestnut stain
Recommended Skill Level
Beginner

Comments

ImTheNana

Sun, 01/25/2015 - 07:15

Is there another source for the plans? The linked site is down.

Front Porch Bench

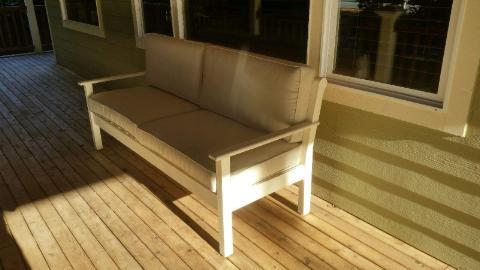
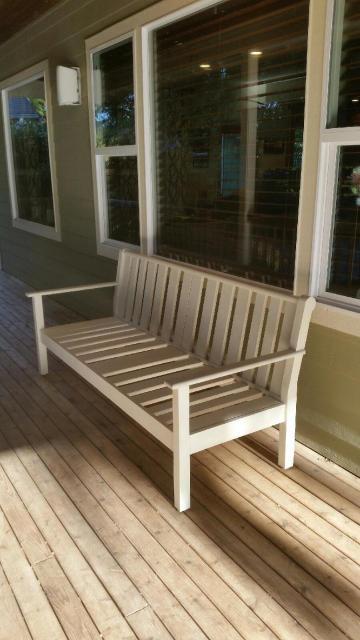
Submitted by Smokeydog on Wed, 05/06/2015 - 19:33

I made this porch bench for my daughter-in-law 's birthday. She purchased bench cushions from Pottery Barn and asked if I would build the corresponding bench. Using the dimensions of the cushions and examining online photos I was able to build the framework and tried my best to duplicate the
Chatham series bench. Not quite ready to tackle the curved bench rest and arms but after watching YouTube on how to make curved woodworking items I might just take a shot at it next time.

She really loves the bench and I am pleased with how it turned out.

Estimated Cost
$275.00
Estimated Time Investment
Weekend Project (10-20 Hours)
Finish Used
Rustoleum Spray Paint
Recommended Skill Level
Intermediate

Comments

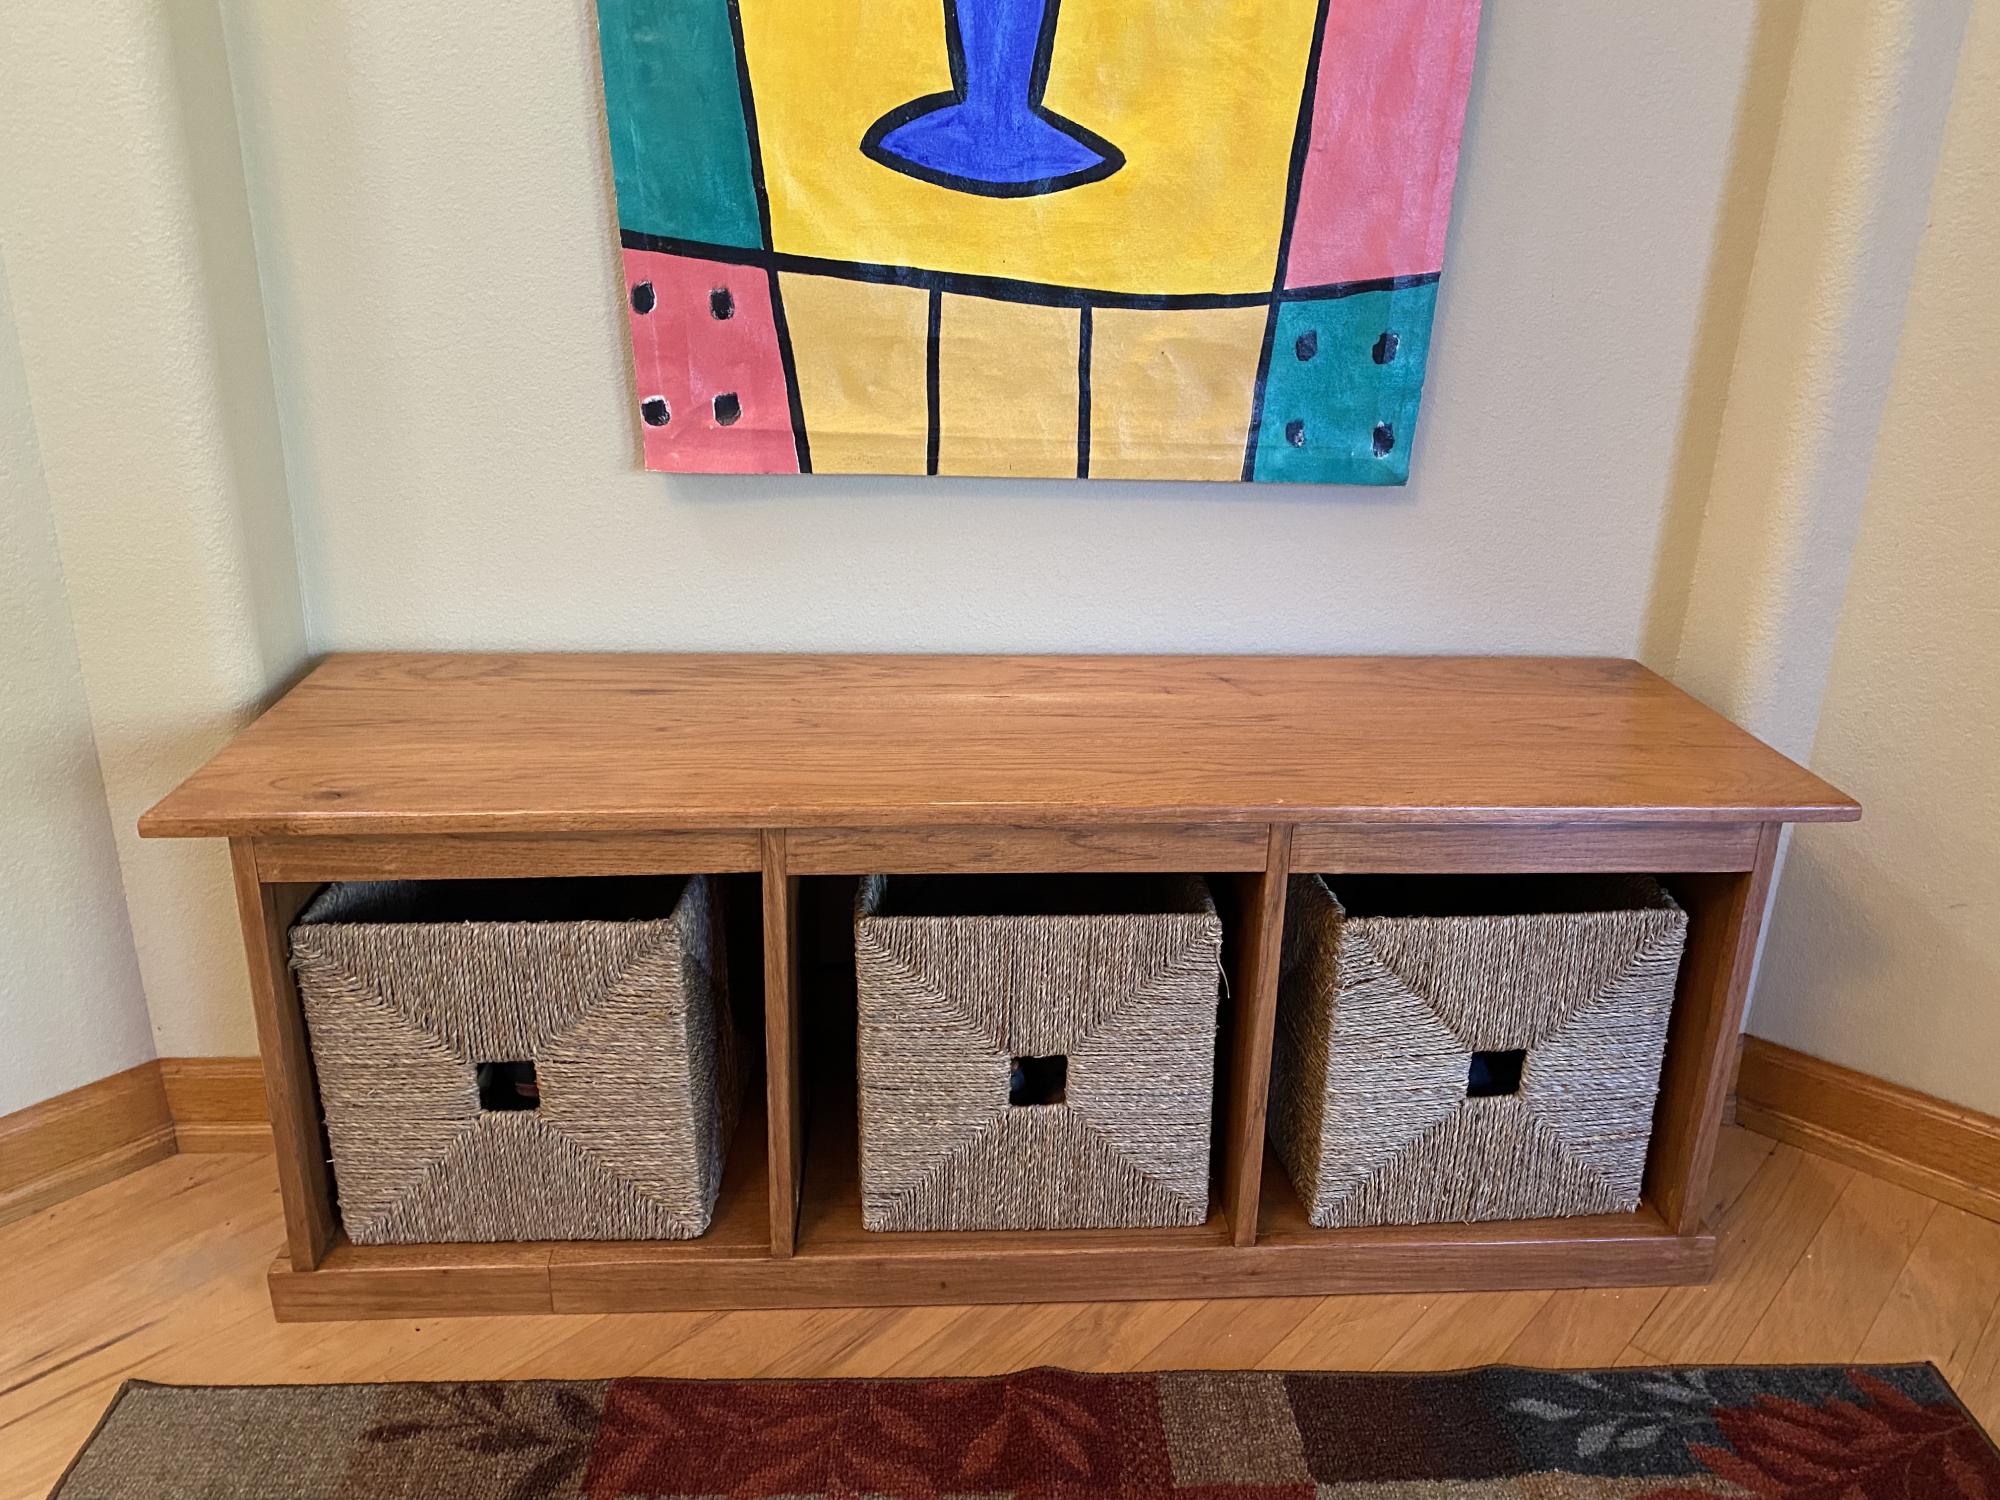
My entry way bench in Hickory

Submitted by Anonymous (not verified) on Sat, 10/23/2021 - 15:07

The Shelf Help app helped me customize this to my space, the plans were excellent. Thank you!

Built from Plan(s)

Comments

Foldable Farmhouse Table 2

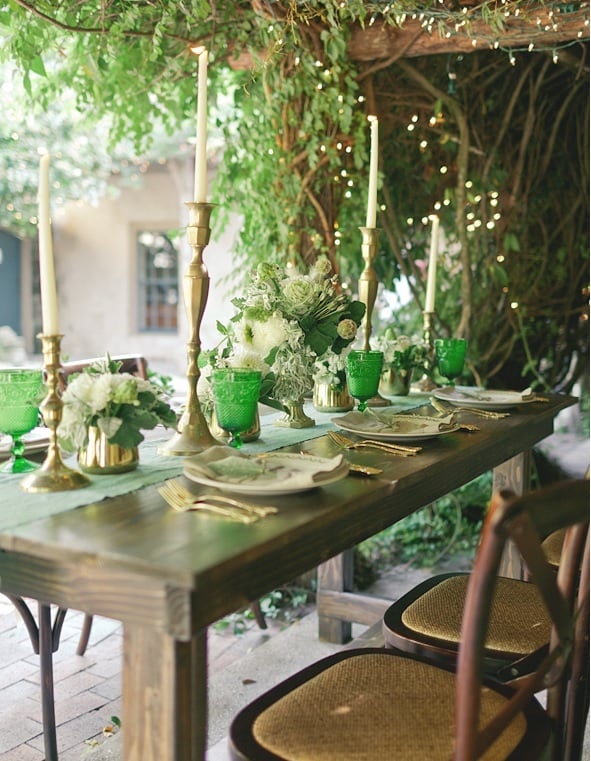
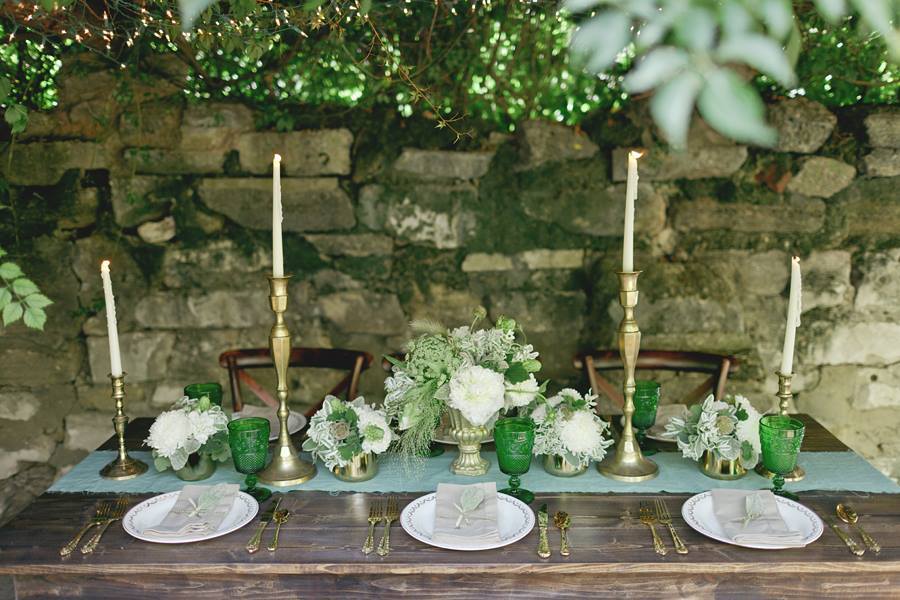
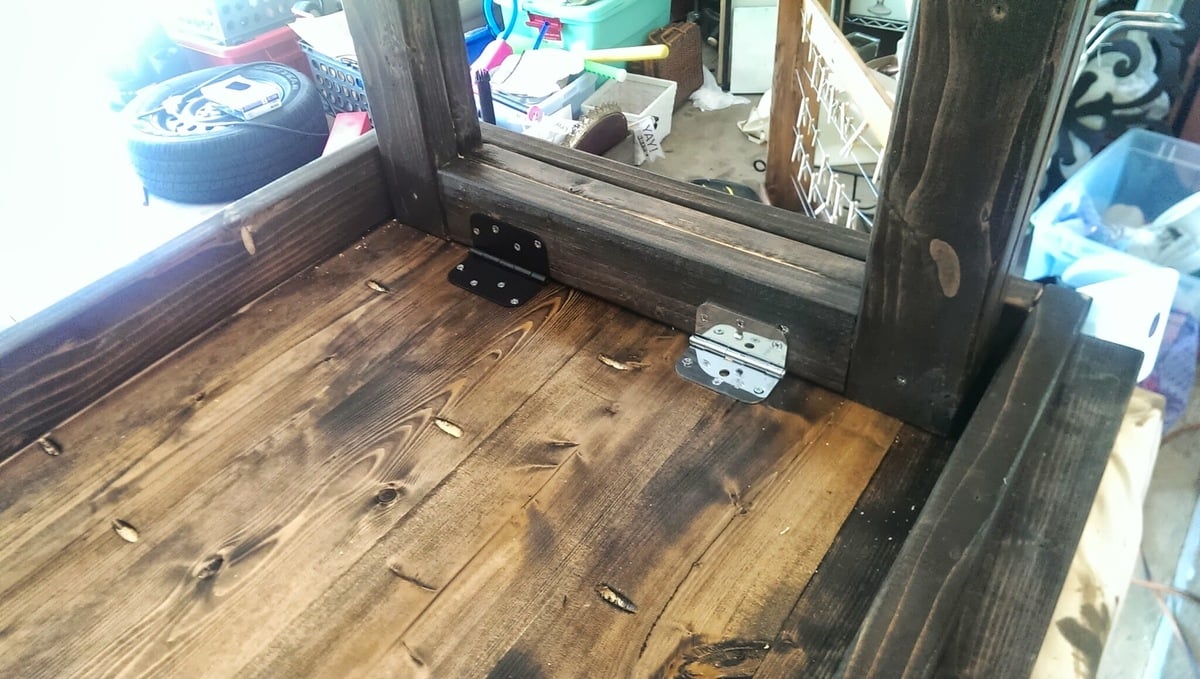
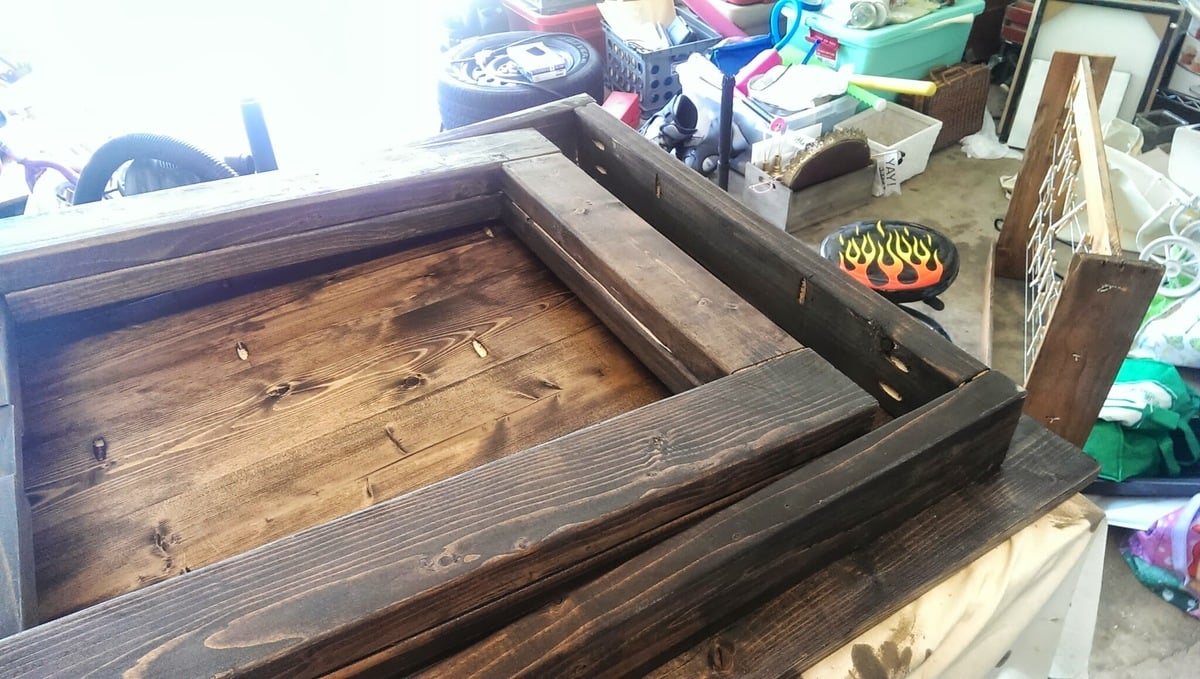
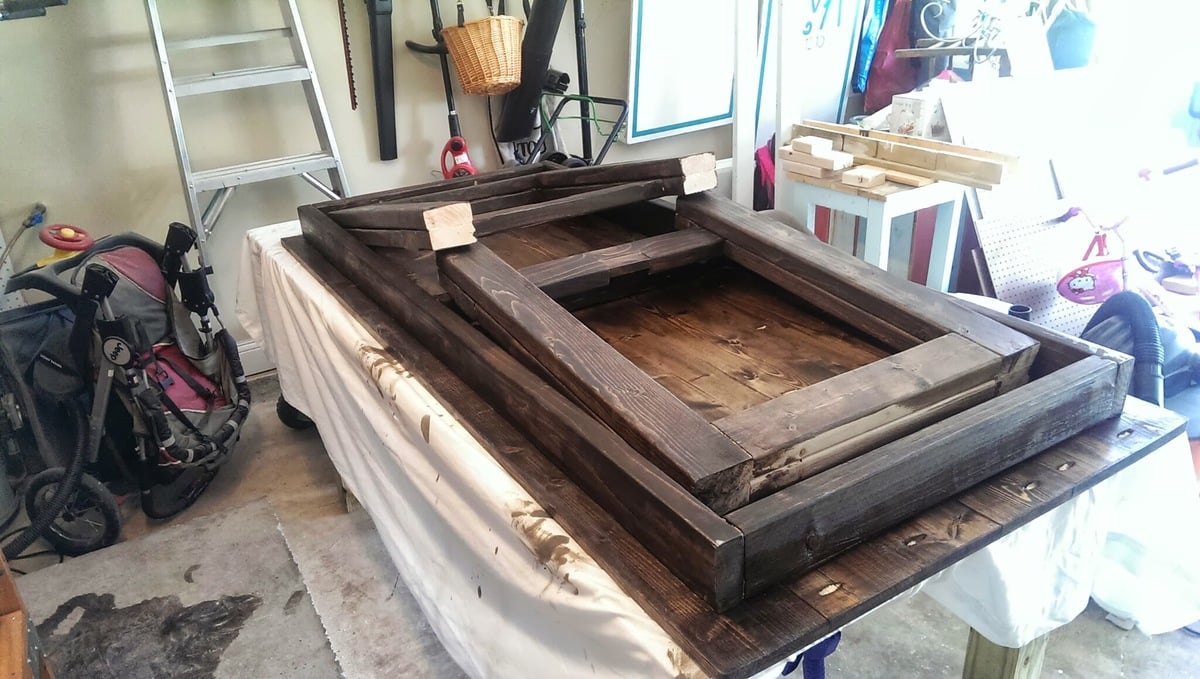
I recently published my first foldable farmhouse table last week here: http://ana-white.com/2013/06/foldable-farmhouse-table The first one I made was very heavy because I used 2x6 tops and 4x4 legs. I decided to make another one that would be lighter and easier to transport. The plans are basically the same just instead I used 1x6 for the top and put 2x4s together for the legs. I also shorted the length by about a foot. The only issue with making the table shorter length is that the legs don't fold completely flush. You could easily make the legs short enough to fold flush, but then the table was a little too short from the ground up for us. The same as before I simply used kreg joints to join the top boards together. I then made a 2x4 frame and attached it to the bottom. I made each of the legs separately by joining 2x4s together and sanding everything down. Everything was stained before putting the legs on using Miniwax Dark walnut stain. I used 2 coats of Miniwax water based clear coat to seal it. A notch was cut out on each of the bottom 2x4 supports on the legs and I glued in a small piece of wood cut to size. These are so I can put in a 2x4 support board under the table so that the legs do not fold in on themselves when it is standing up. The legs are just attached using door hinges you can buy in packs in the hardware section. Be careful when screwing into the 1x6 top not to use too long of screws or else you will over screw and have them come through into your table top. Table design was by Amber Veatch Designs and photographed by Andi Mans Photography

Estimated Cost
120.00
Estimated Time Investment
Day Project (6-9 Hours)
Finish Used
Sand to finish and then used Miniax dark walnut stain followed by Miniwax water based clear coat.
Recommended Skill Level
Beginner
Comments

Freddyflis

Tue, 07/07/2015 - 06:41

We have built something very similar and we have a good bit of wobble at the top, even though the stretcher down the center of the table is holding solid in there and secred with clasps. Were thinking of some sort of sliding pin into the top of the leg to the apron. Anyone run into this before?

Seasonal And Holiday

Faux Fireplace with Hearth

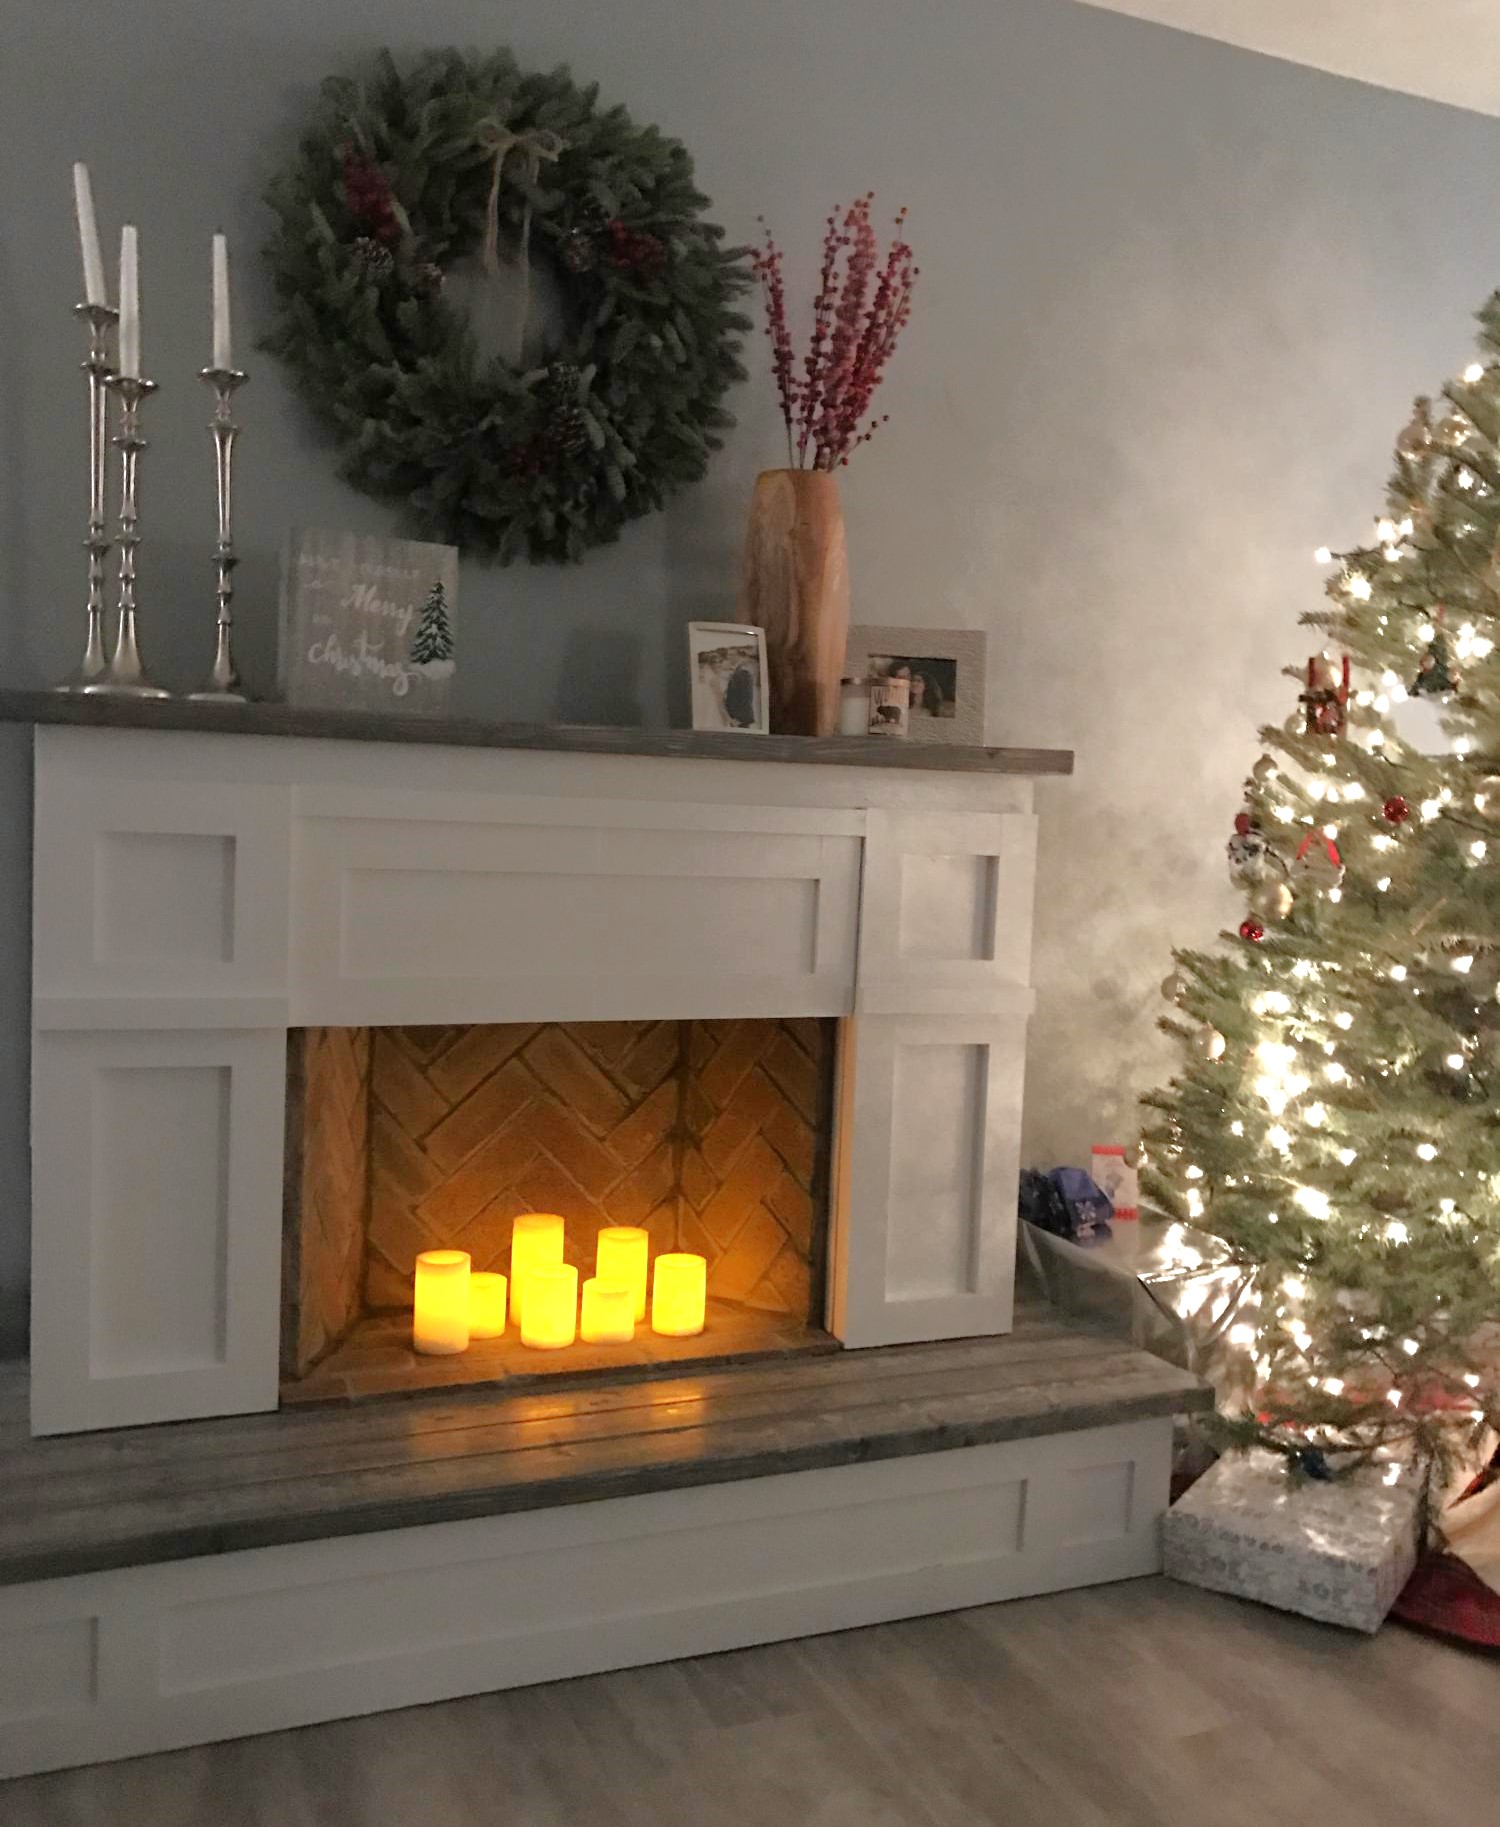
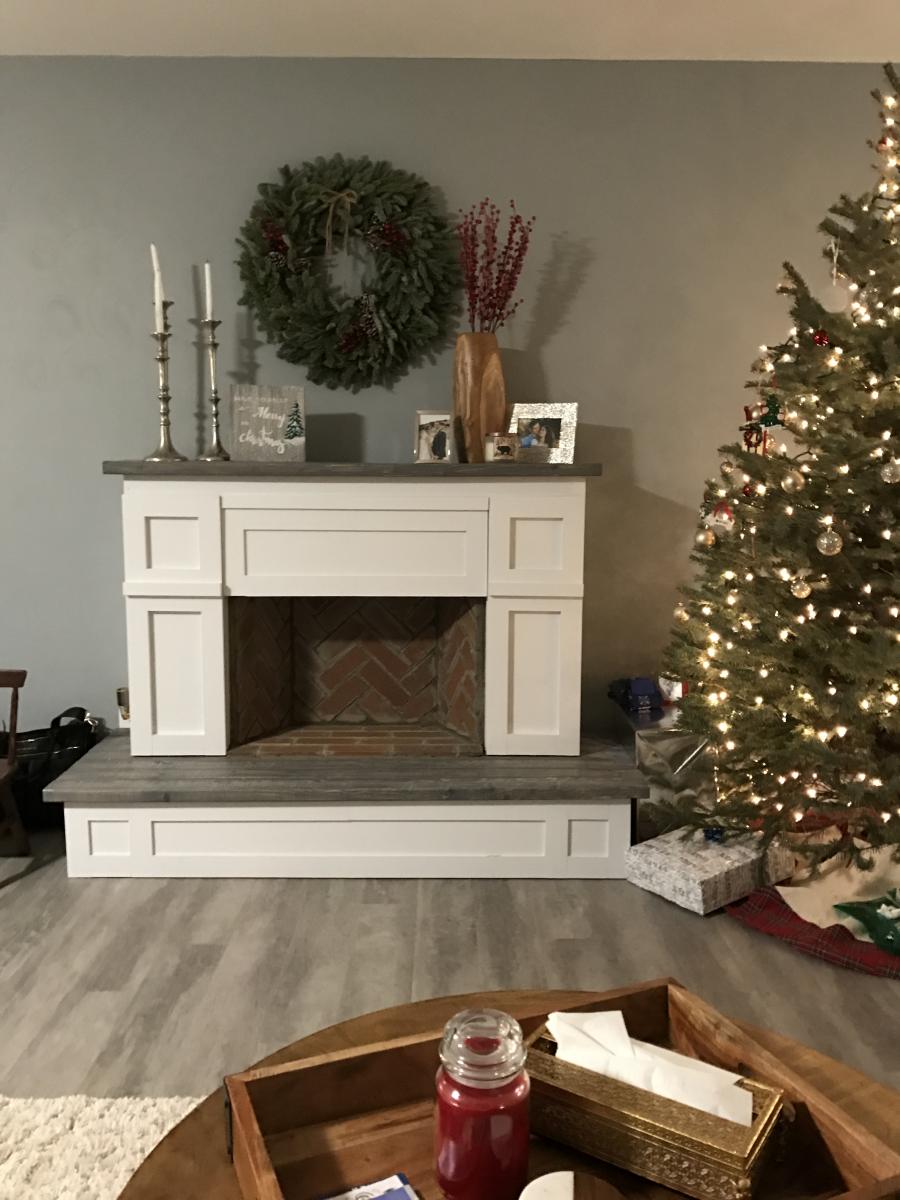
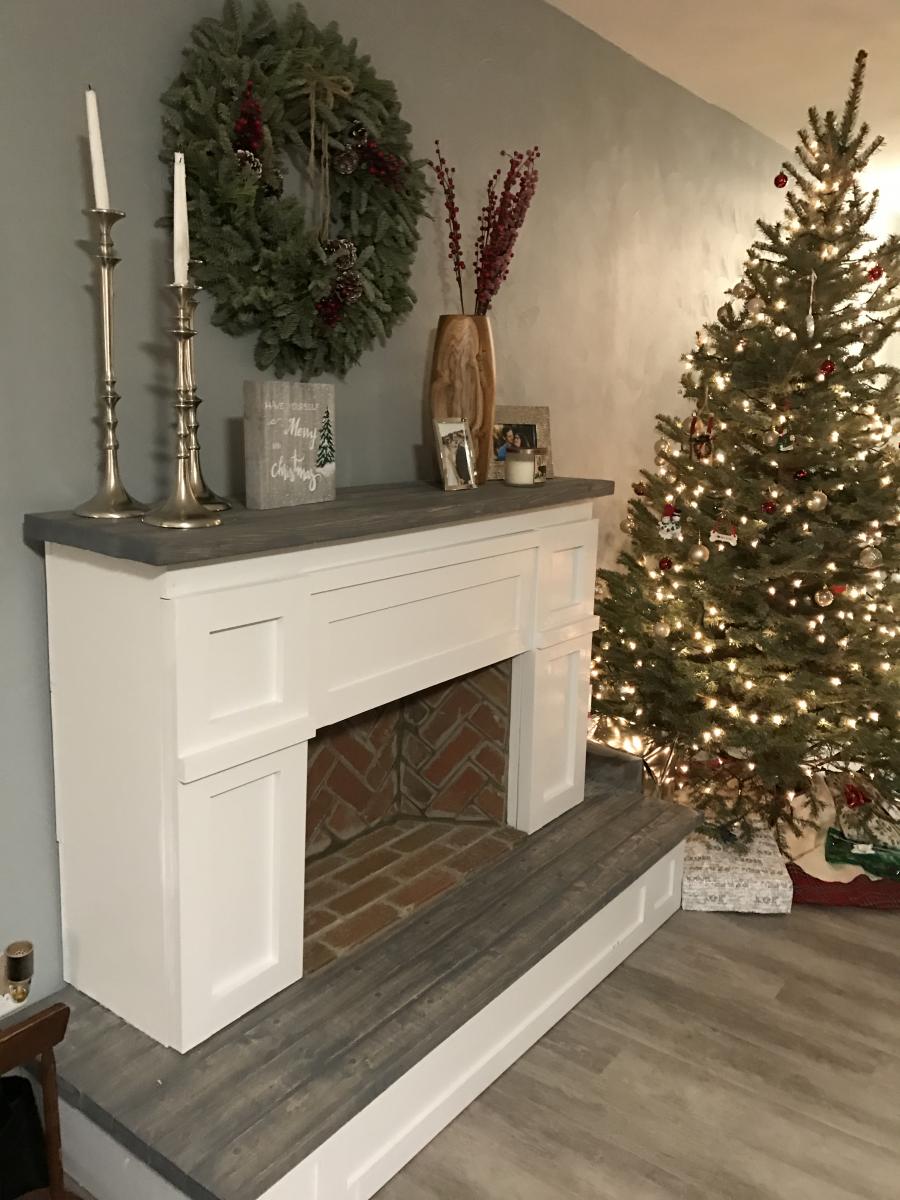
We made some modifications by adding a hearth for additional height (the room we have it in is very large and open) and joining 2x4s for the mantel and base which I stained grey for contrast. We decided to use thin brick for in the "firebox" to make it look more realistic. We also have a newborn and spent over two months putting it together a little at a time in our free moments so I'm not sure how long it would actually take to do at once, but cutting and putting up the brick was very time consuming. 

Estimated Cost
$250
Estimated Time Investment
Week Long Project (20 Hours or More)
Finish Used
White paint, Minwax "Classic Grey" stain
Recommended Skill Level
Beginner
Comments

westmoundstar

Thu, 08/27/2020 - 11:16

This looks great! I'm actually in the middle of this build with the hearth as well. Couple questions....
How did you connect the two pieces? Also, did you connect to the wall? I'm assuming you didn't leave the 5 1/2 inch gap on the bottom of the fireplace and connected direct to the hearth. Let me know, thanks!

Seasonal And Holiday

Farmhouse Table

Submitted by Becbud on Thu, 05/05/2011 - 11:47

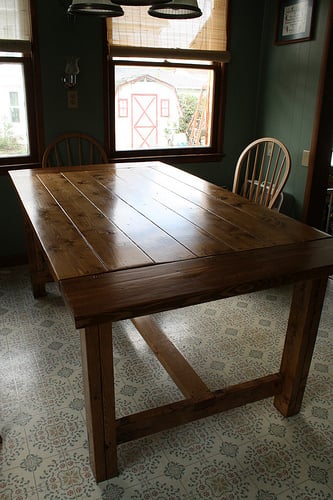
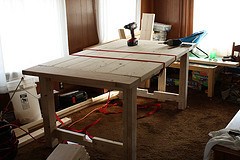
We shortened the length of the table to 5 1/2 feet. Took me bits and pieces of 3 weeks to build working around rain days and napping children.
Around $80 in materials, not counting the new orbital sander (which I wanted for a while).
Looking forward to building 2 benches next month. A sturdy table for my family of 7. (Including 3 boys!!!)
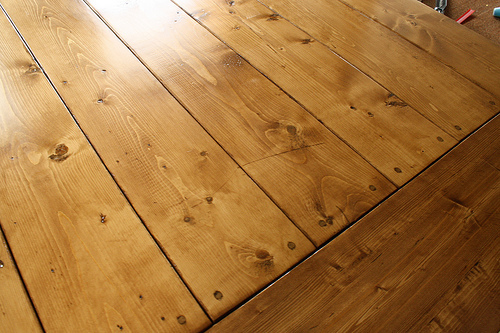
This was my first project. I see the flaws, but overall, I'm very happy. I built mostly myself, but hubby had to help with the hauling indoors/outdoors, kids held wood while I used the saw, stood on boards while I attached. It was fun for all of us and we are thrilled with the results. Even the scratch in the tabletop photo below was done by my 2 yr old and I call that his little touch!

Estimated Cost
$80
Estimated Time Investment
Week Long Project (20 Hours or More)
Finish Used
Formby's light walnut stain (found in my basement)
applied, wait 5 min, and wiped off
Minwax Fast Drying Polyurethane in semi-gloss
(2 coats on base, 4 on table top)
Recommended Skill Level
Beginner

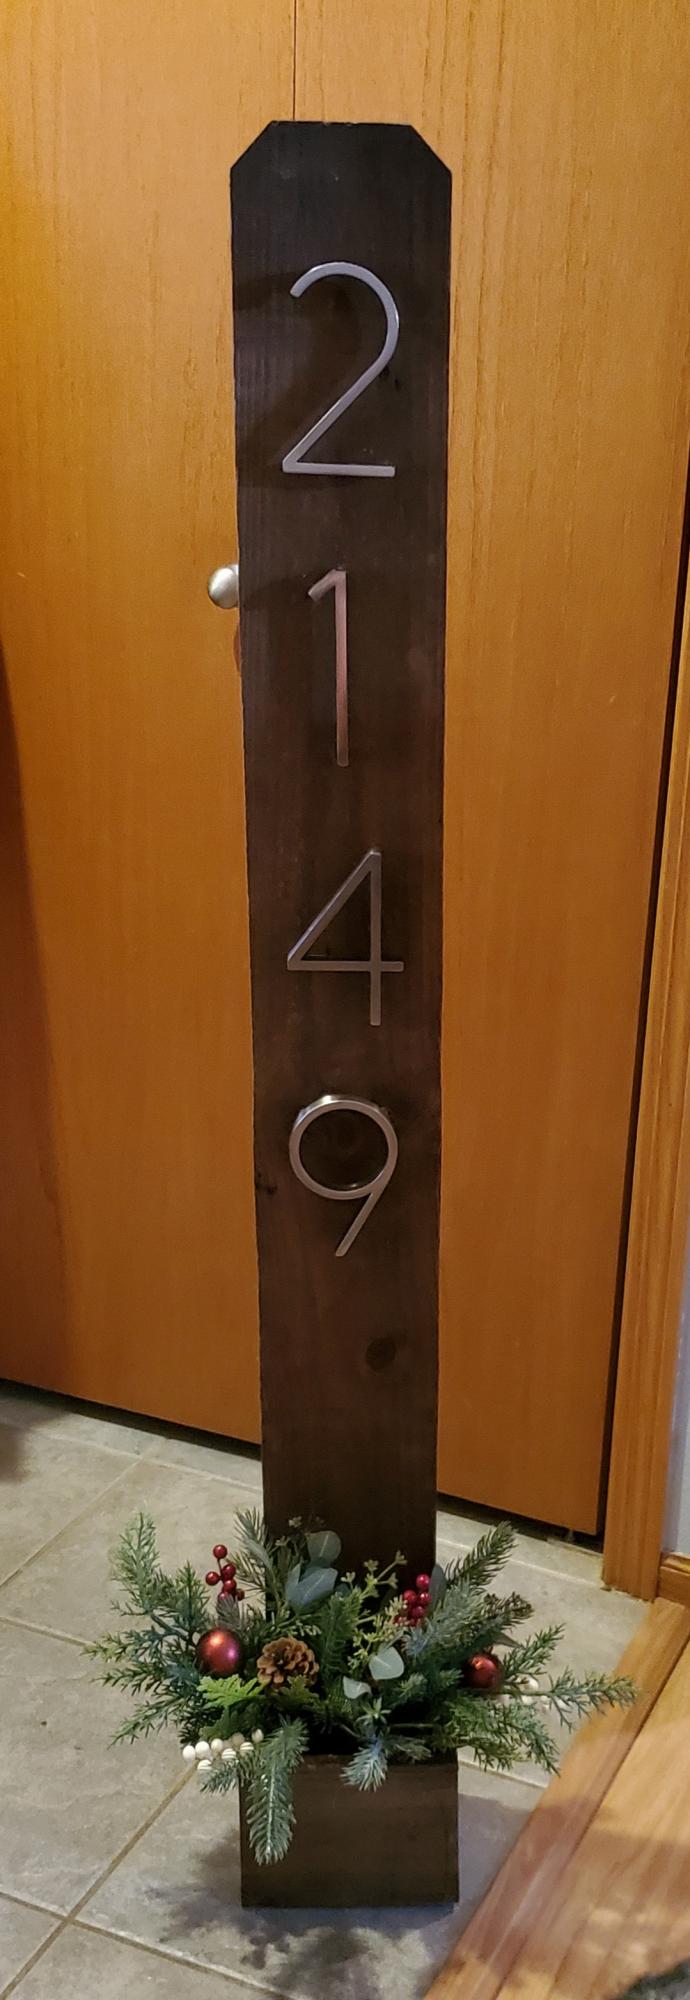
Address marker/planter

Submitted by Anonymous (not verified) on Mon, 12/27/2021 - 13:03

I made this simple but elegant projects for a last minute Christmas gift.

Comments

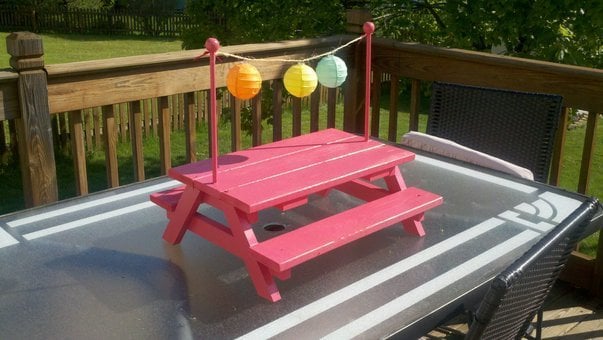
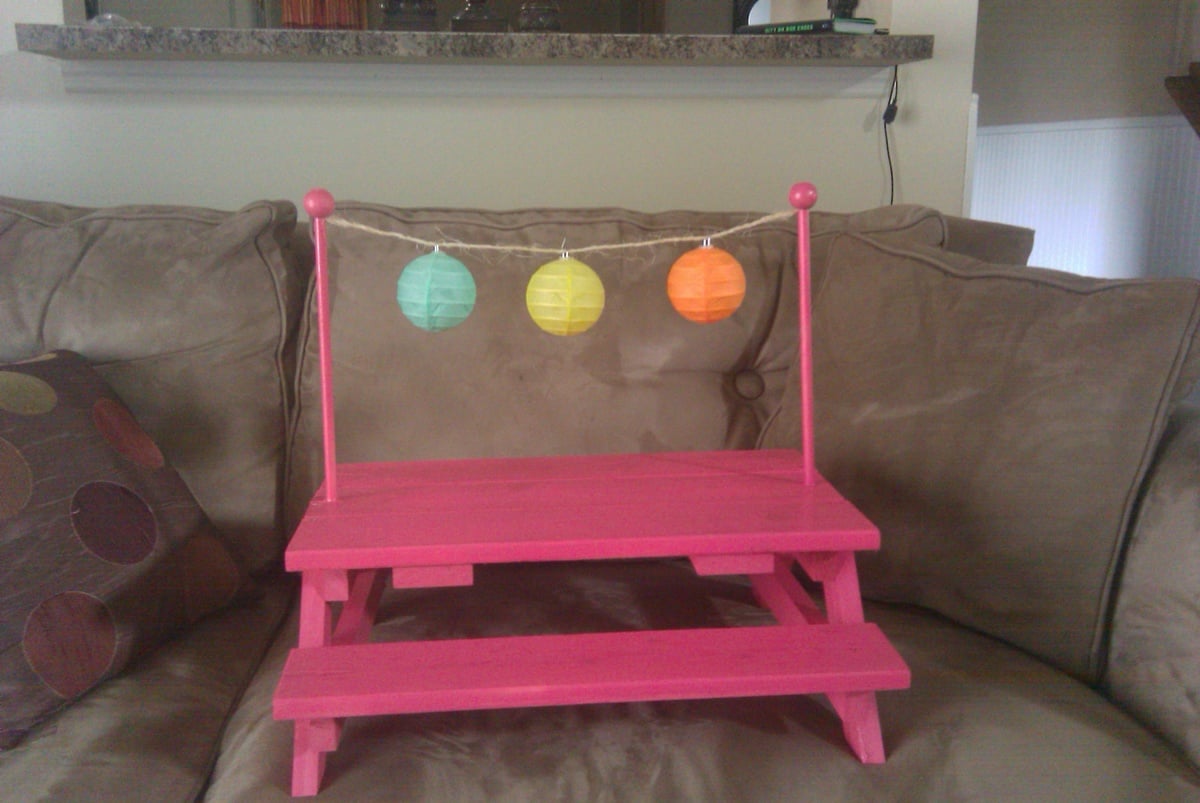
Doll Picnic Table

Submitted by dhrider33 on Sun, 05/22/2011 - 18:09

My 10 yr old son and 8 year old daughter really loved helping make this for their cousin. They've never been so excited to give a gift!

Built from Plan(s)
Estimated Cost
~ $15 ... although I had various scrap wood laying around from other projects
Estimated Time Investment
Afternoon Project (3-6 Hours)
Finish Used
Sanded / Primed / Painted
Recommended Skill Level
Beginner

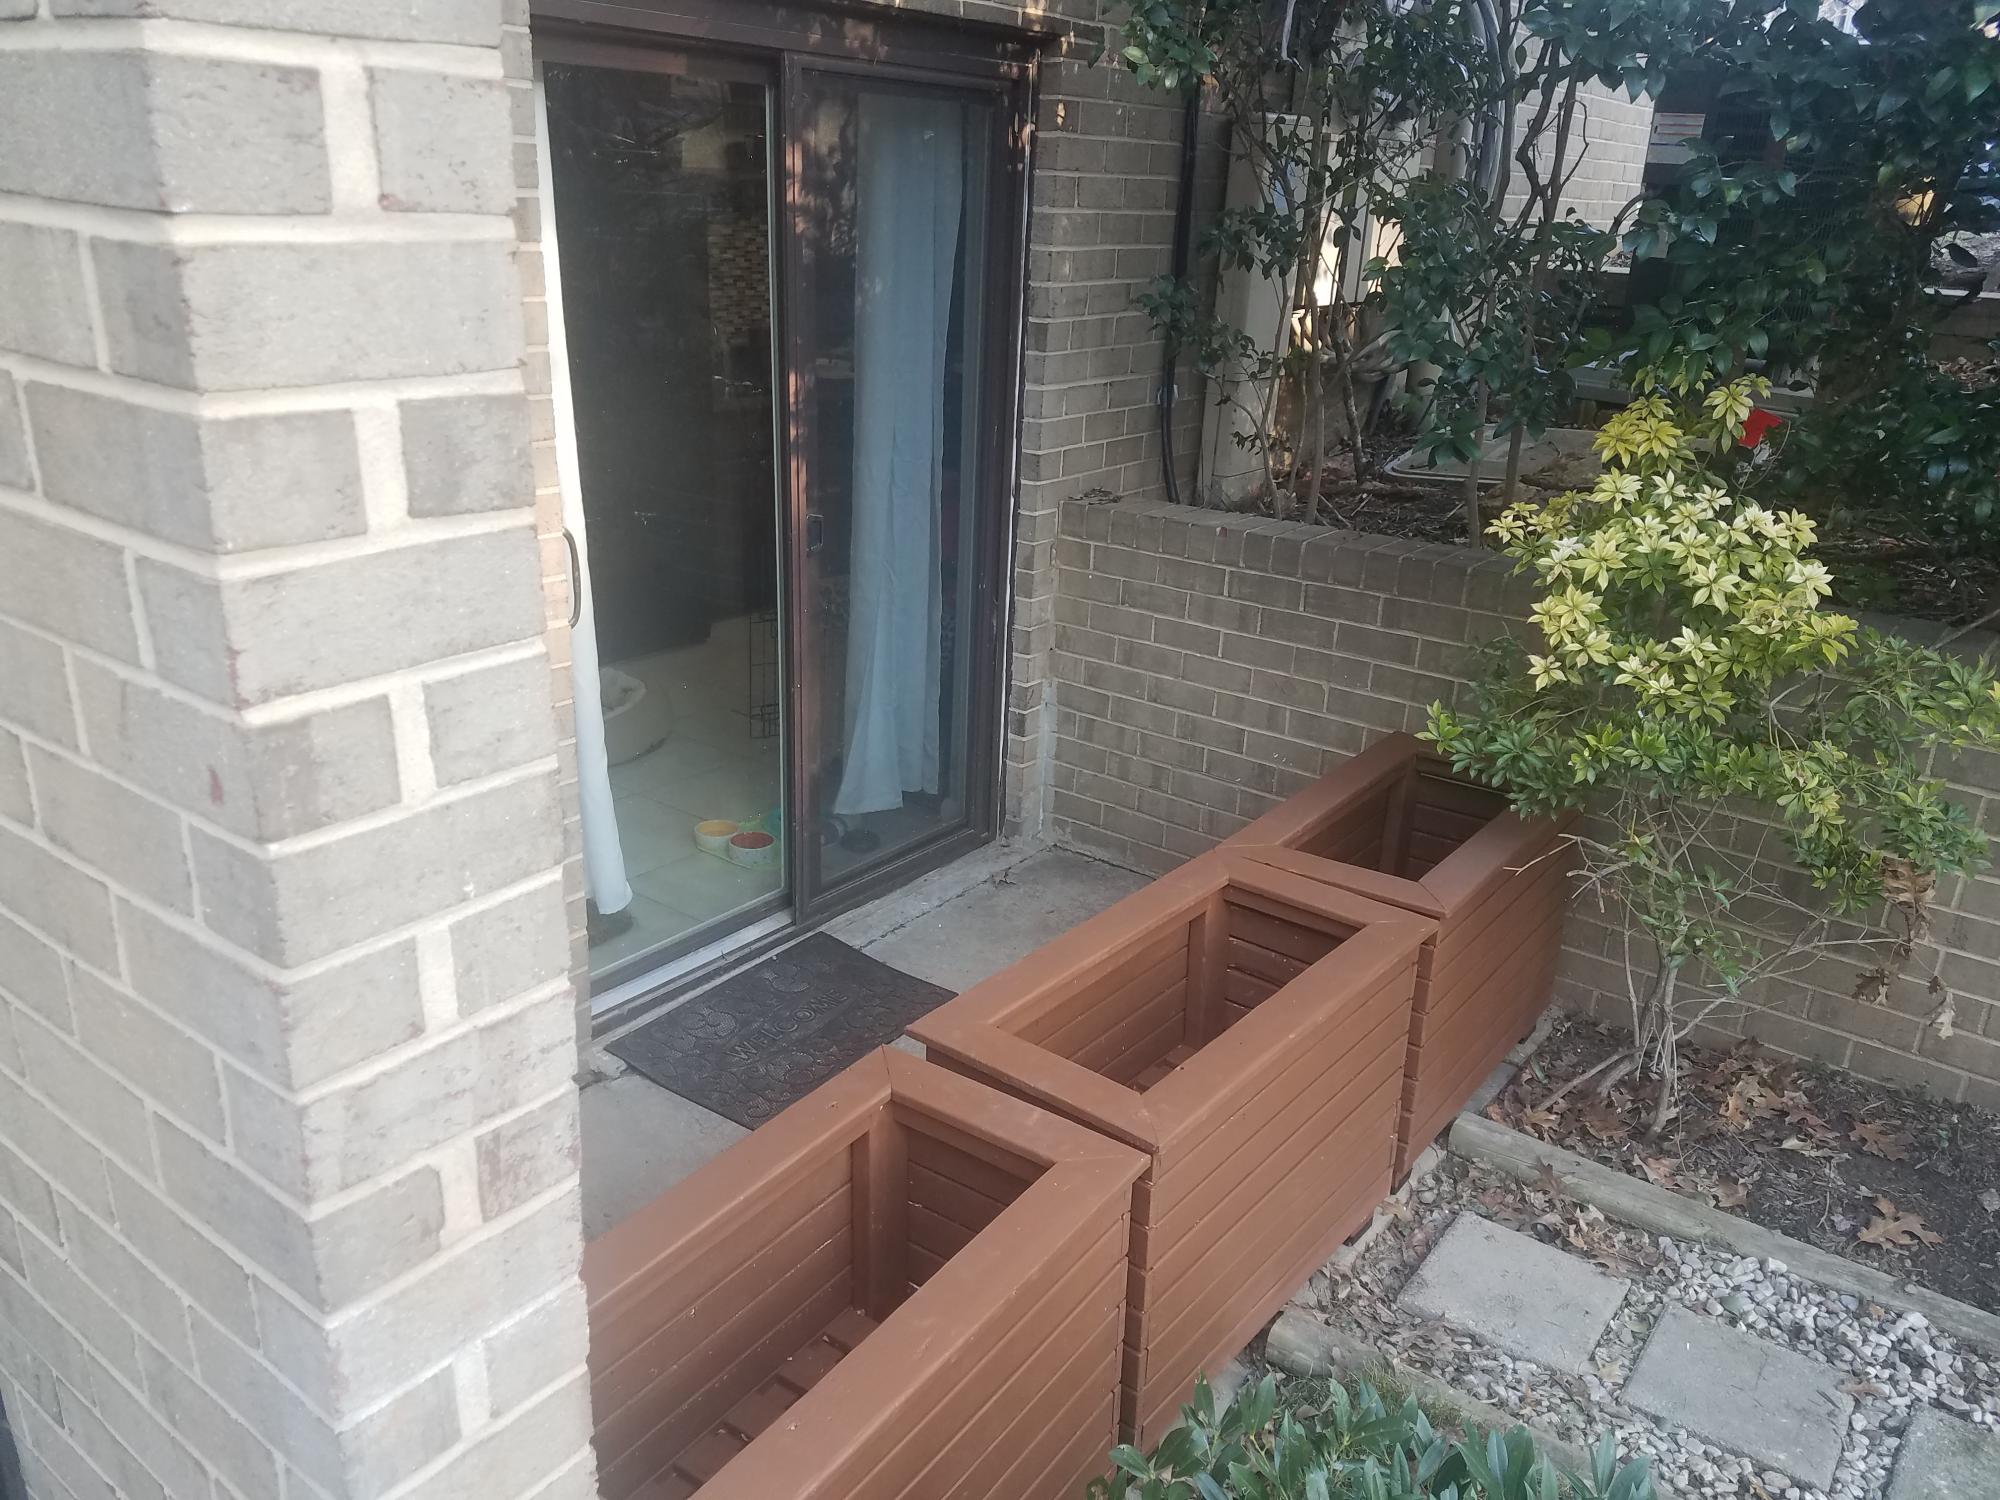
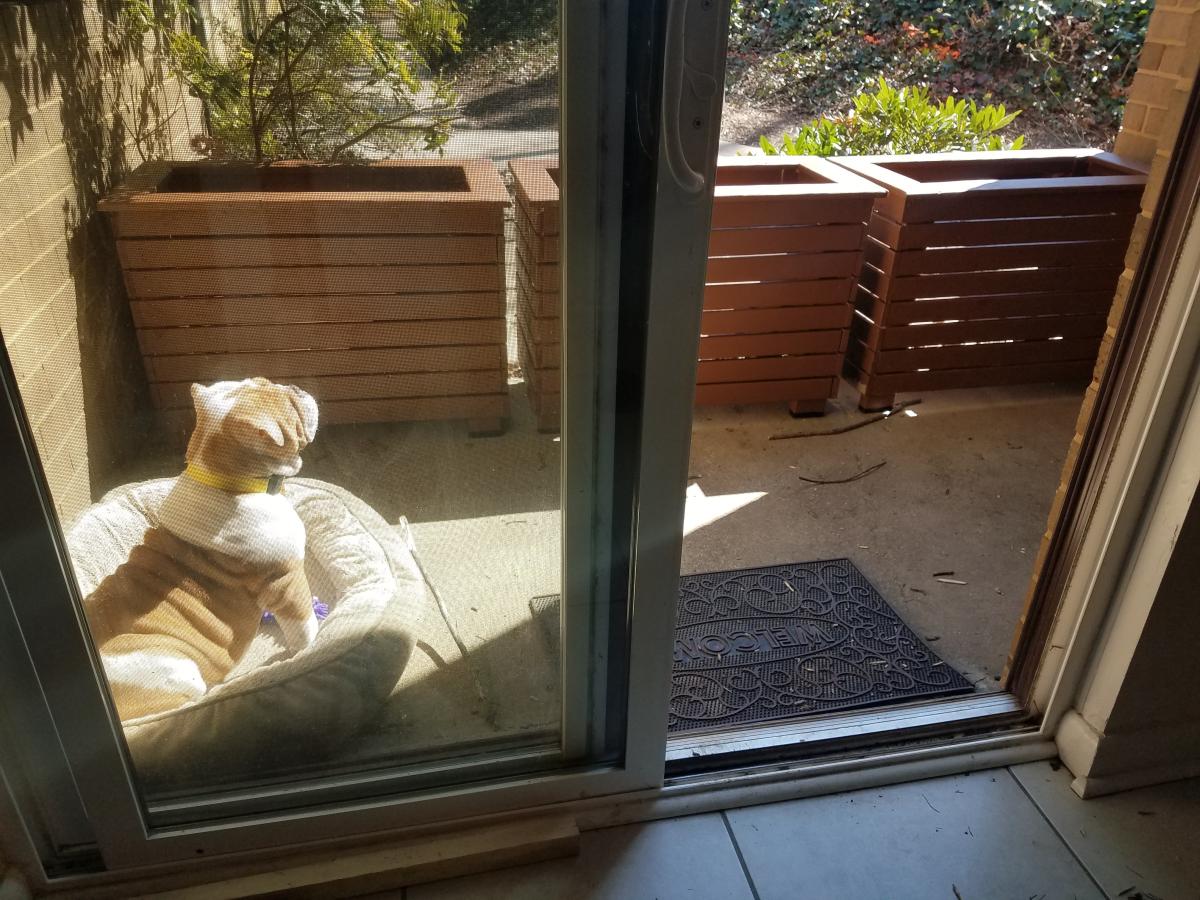
Planters- modified

Submitted by Anonymous (not verified) on Mon, 03/07/2022 - 06:14

Used your youtube instructions for the square planters and revised them to create these! Thank you so much for your video it helped me so much. I was trying to make a small backyard for my dog at my condo without breaking any rules not to have a fence. Gary loves it!

Comments

A $15 One-Day Pirate Table

Submitted by Joanna A on Fri, 06/10/2011 - 20:57

This was my second wood project. I loved working on it. The measurements and instructions were great. It is definitely for toddlers which works well for us. I used stain we had from/for other projects. Thanks.

Built from Plan(s)
Estimated Cost
App. $15
Estimated Time Investment
Afternoon Project (3-6 Hours)
Finish Used
Stain
Recommended Skill Level
Beginner
Comments

Marisol

Sat, 06/11/2011 - 13:32

I have been eyeing this for a while...but I ended up doing the preschool bench. SO CUTE!!!!

Joanna A

Sun, 06/12/2011 - 10:40

Marisol, I was choosing between the two as well... but since I have boys the choice was a bit easier :-)

ndanner
Sat, 06/14/2014 - 12:12

Are the seats and table top supposed to be 1x2 instead of 1x3? I am confused bc the sides would be too short.