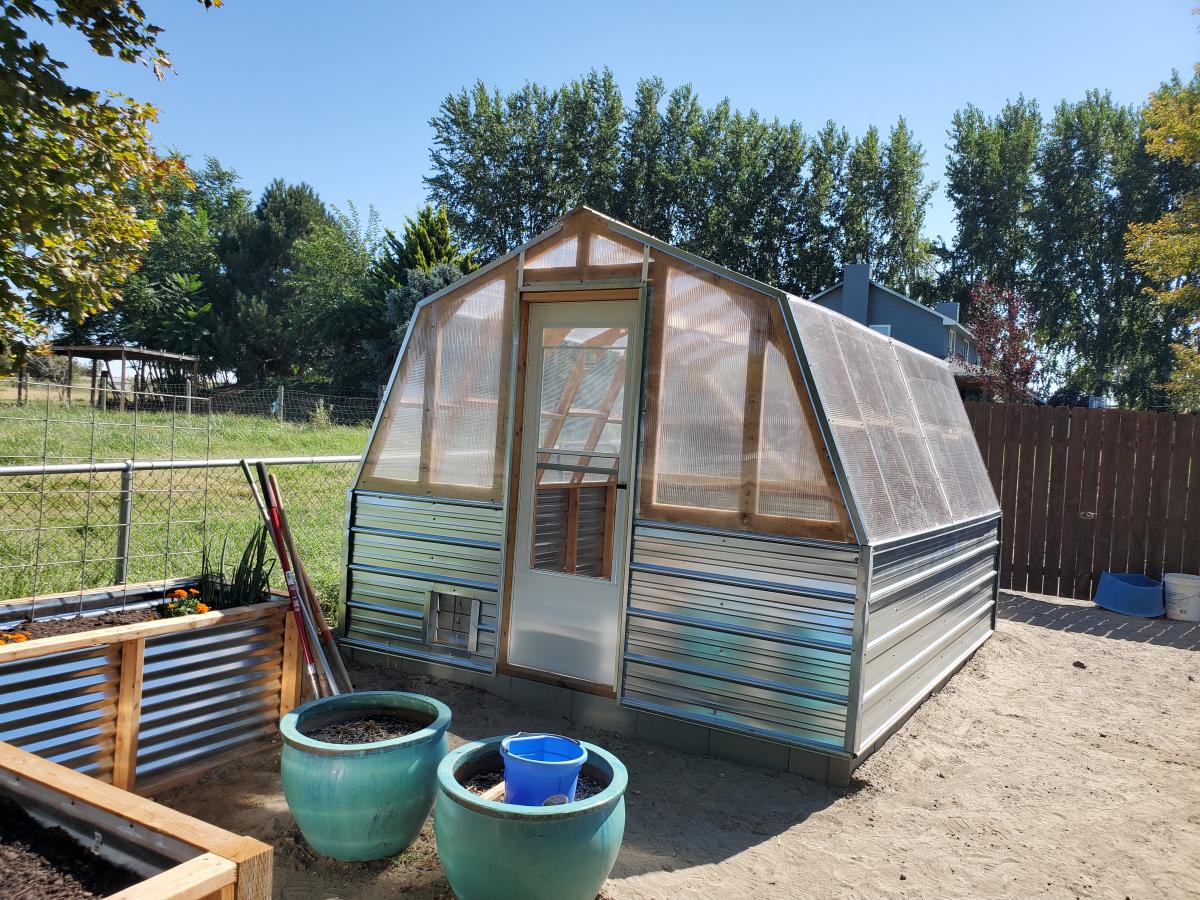
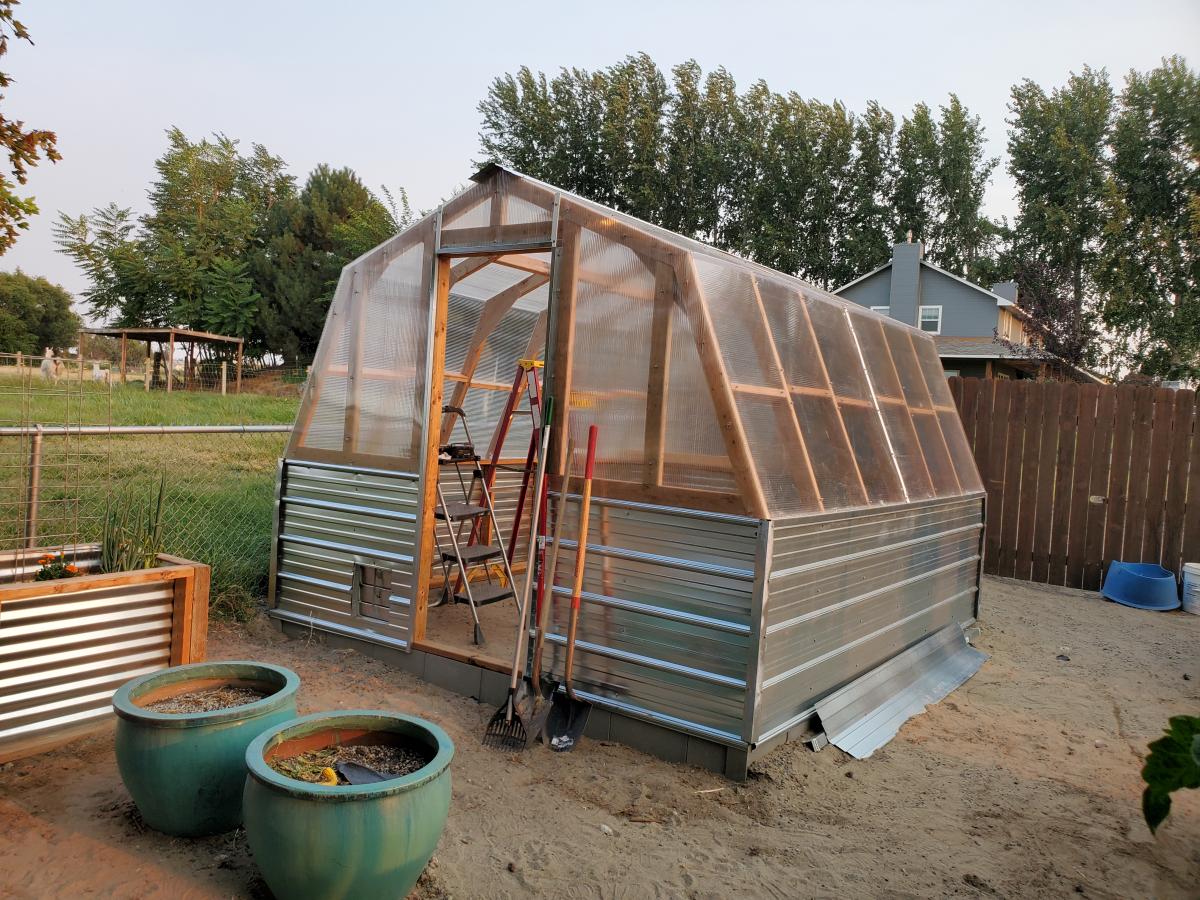
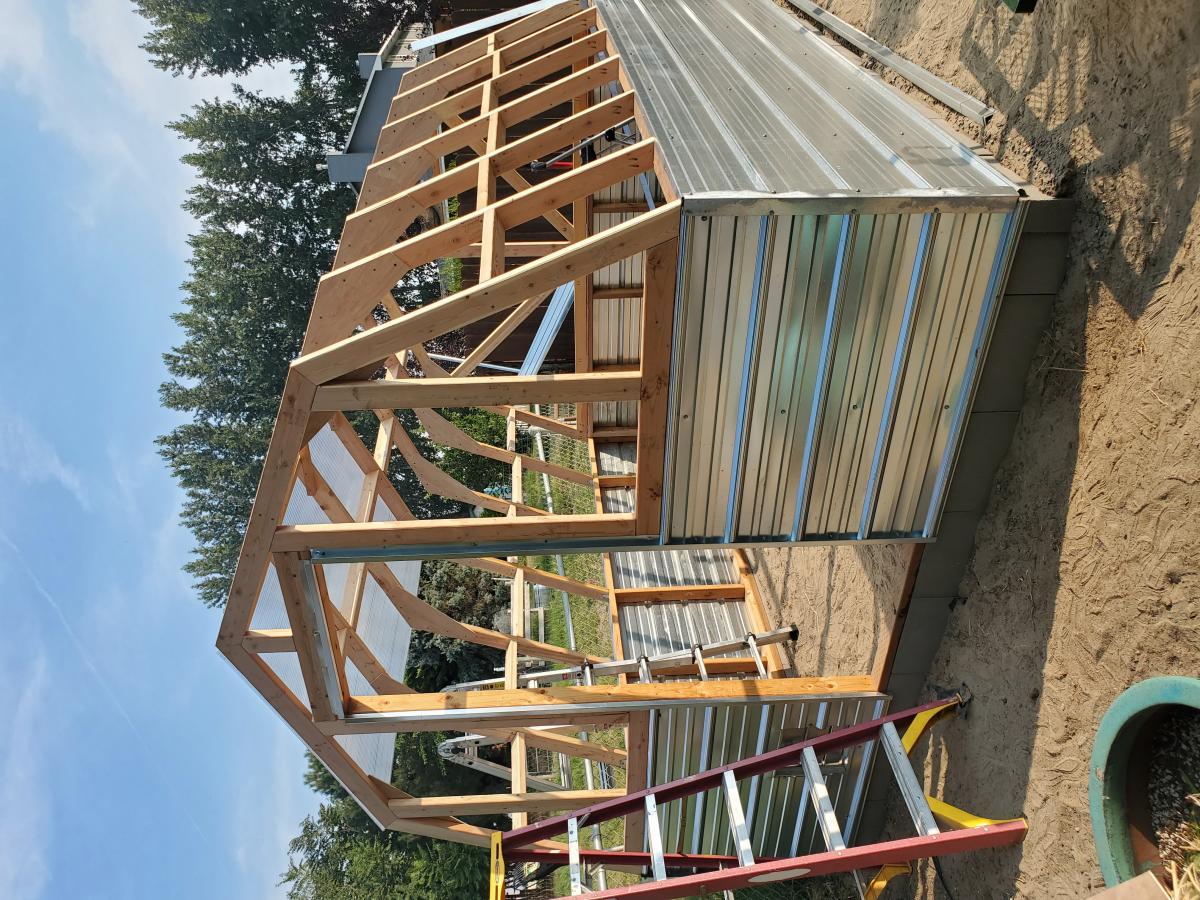
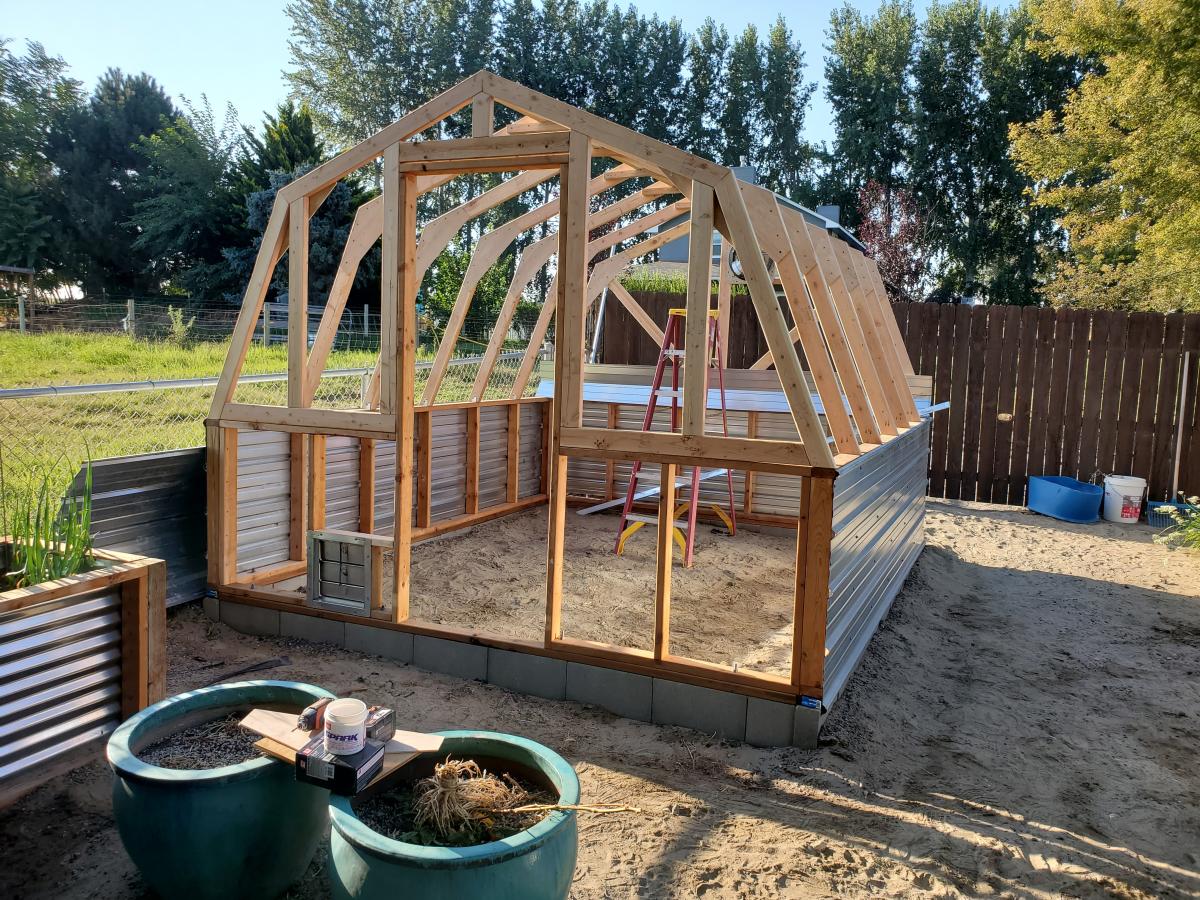
New Green House
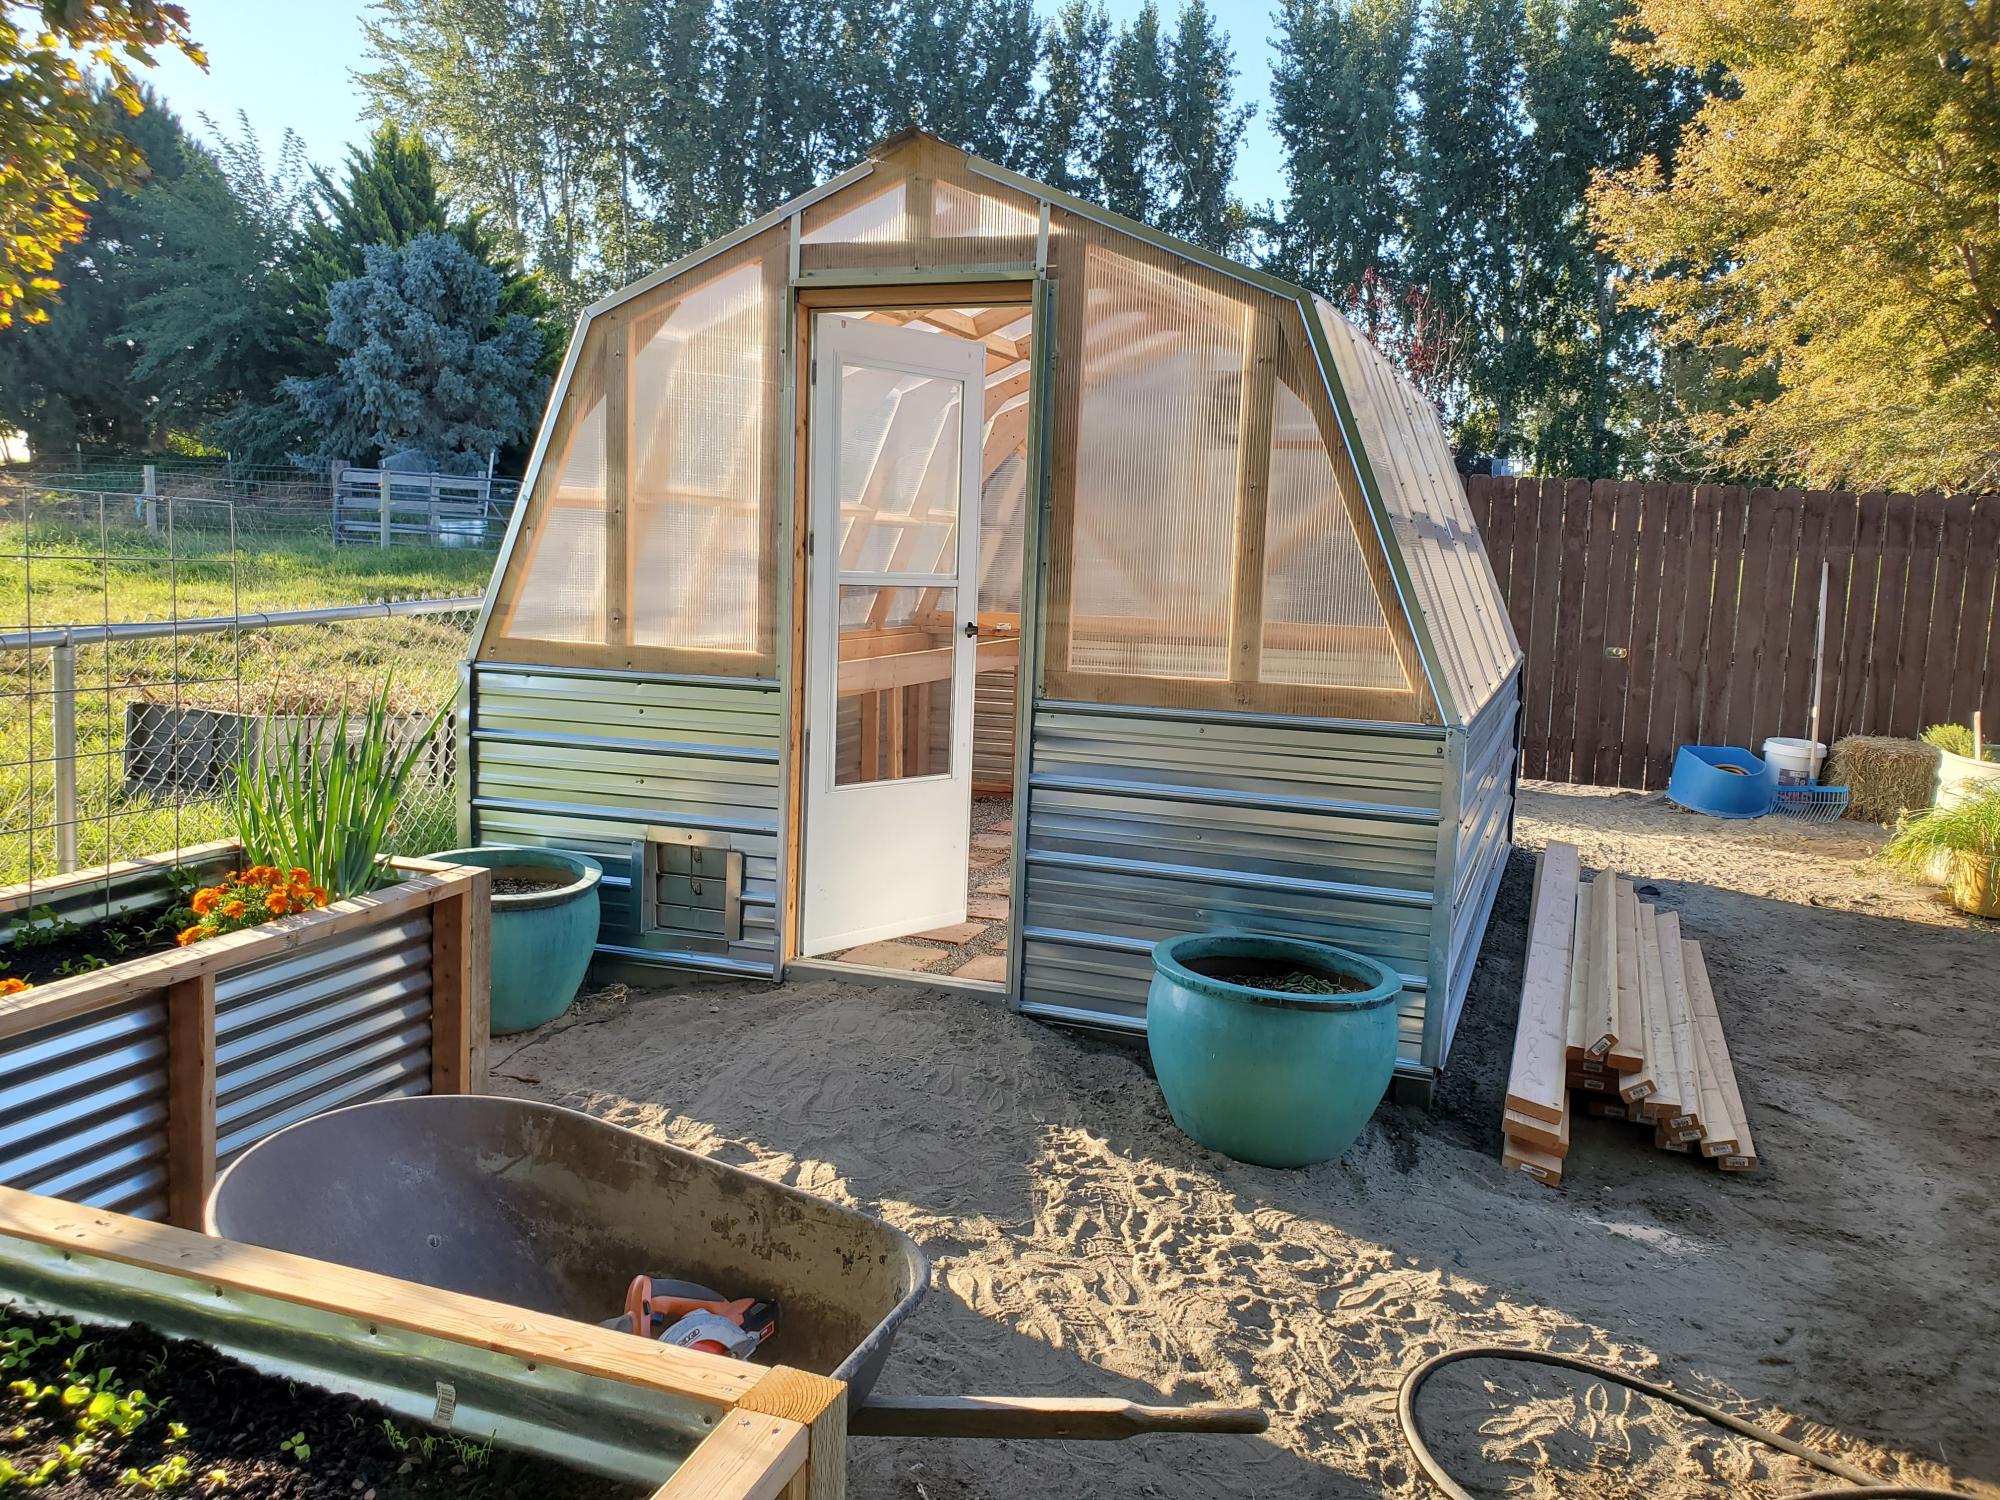
My wife and I built your green house! It is turning out awesome! I just want to take the time to say thank you for the plans. You are a great designer and generous with your sharing.
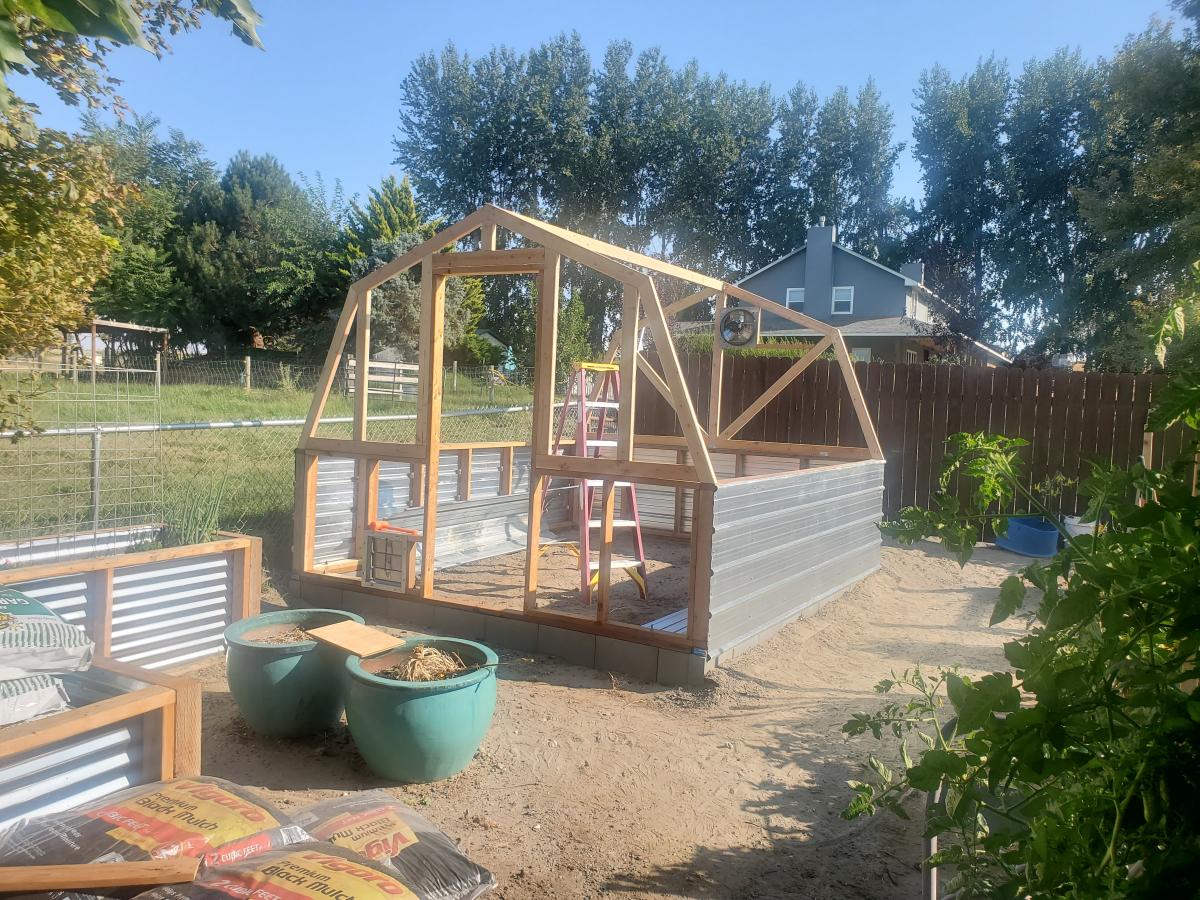
Built from Plan(s)
My wife and I built your green house! It is turning out awesome! I just want to take the time to say thank you for the plans. You are a great designer and generous with your sharing.

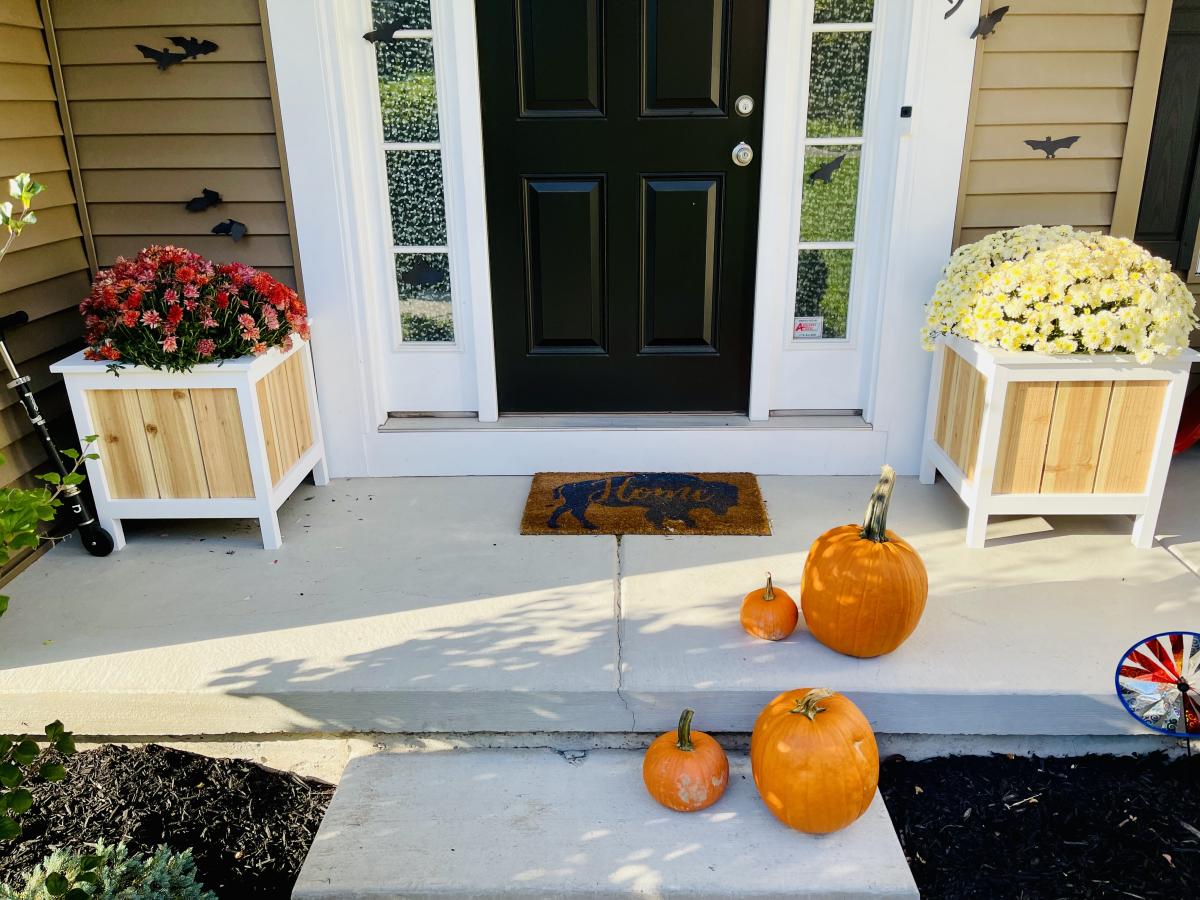
These were exactly what we were looking for to dress up the front of our house. They are a great size and went together pretty easily. Getting the angle cuts right took a few tries, but once you get past that it's all pretty simple! Also these are very forgiving for small errors and they look fantastic! We made three for across the front of our house and painted them to match our front door. For more details on our planters, please follow the link to our blog!
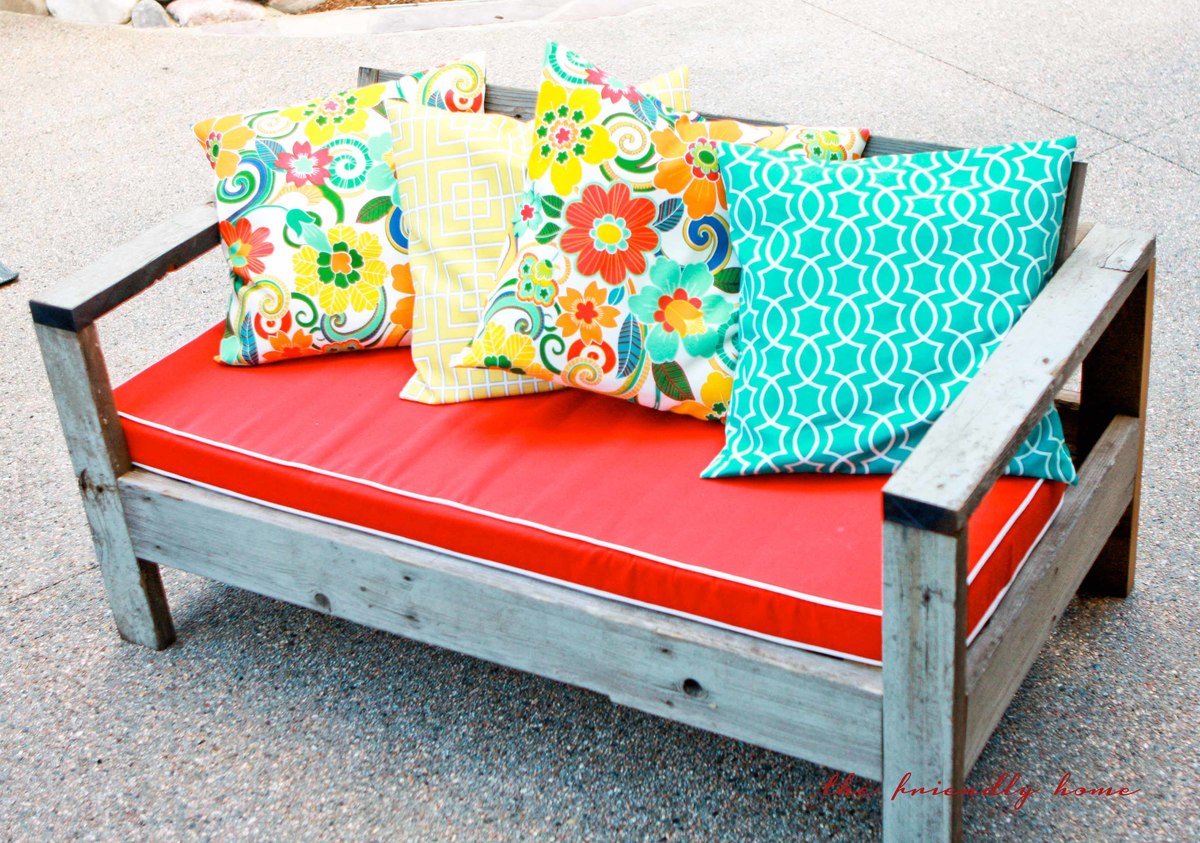
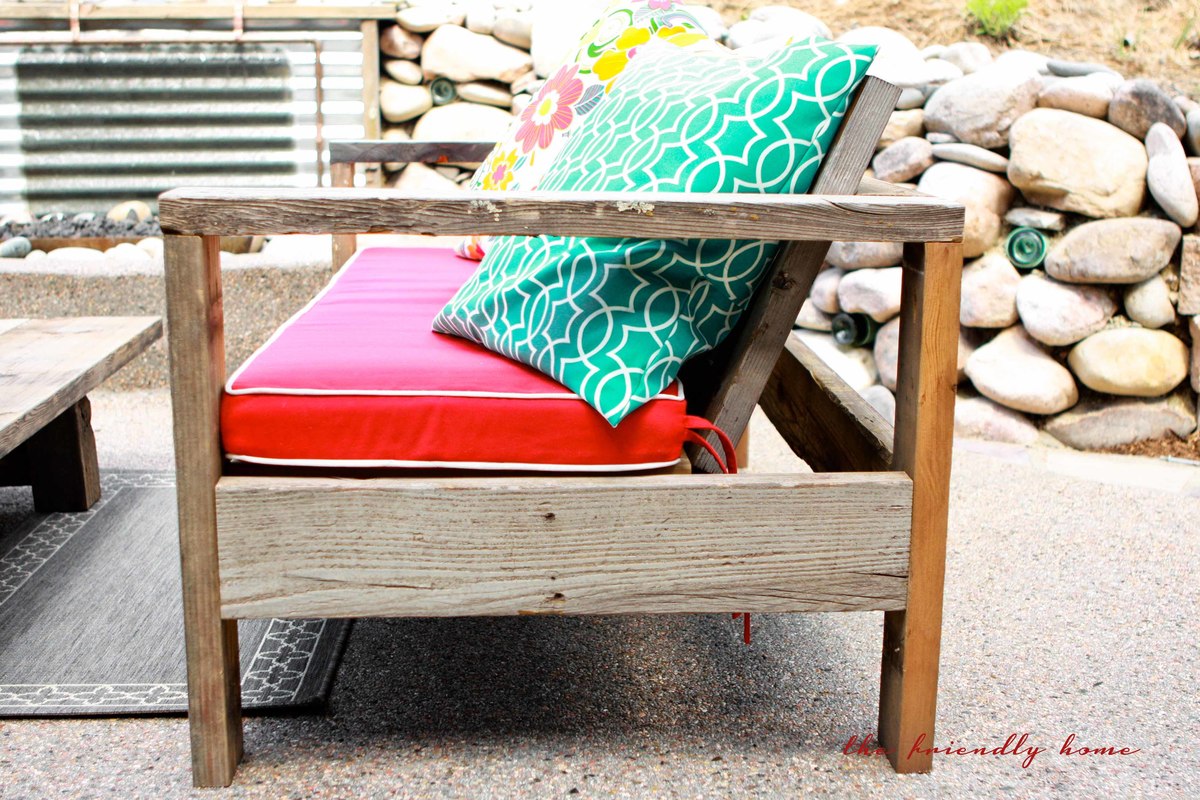
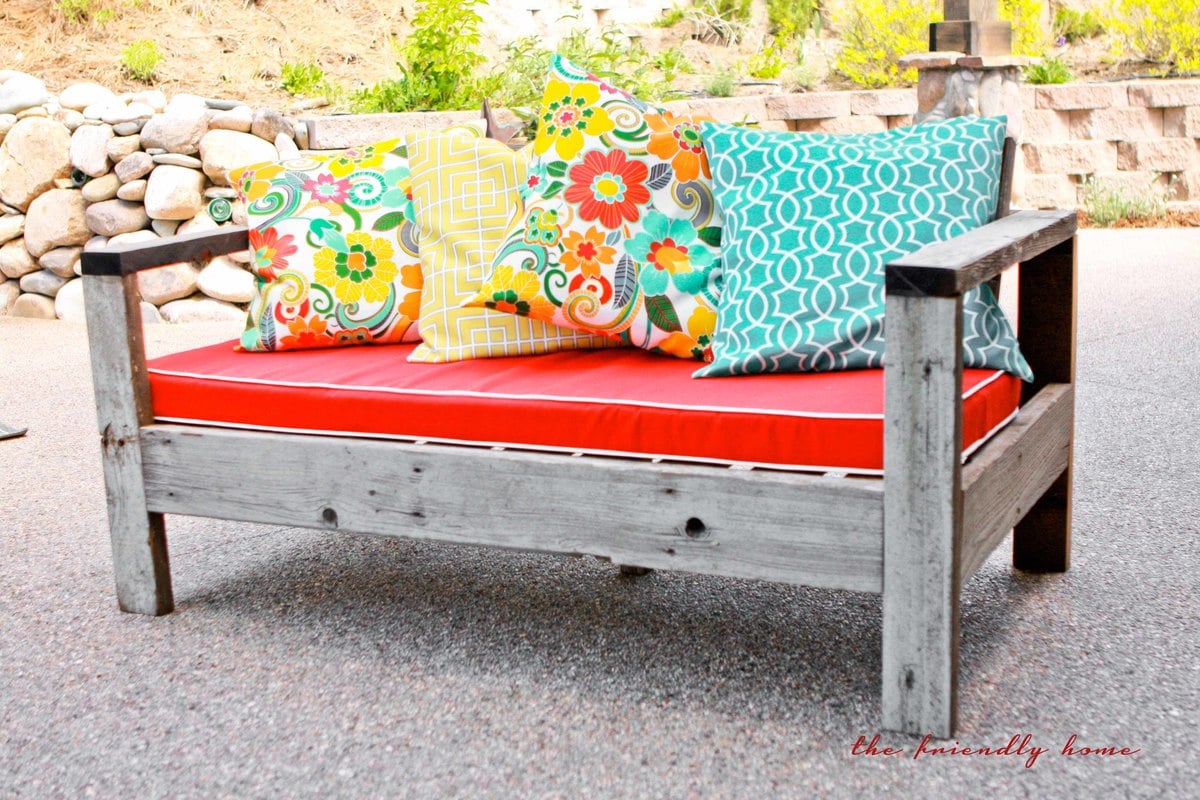
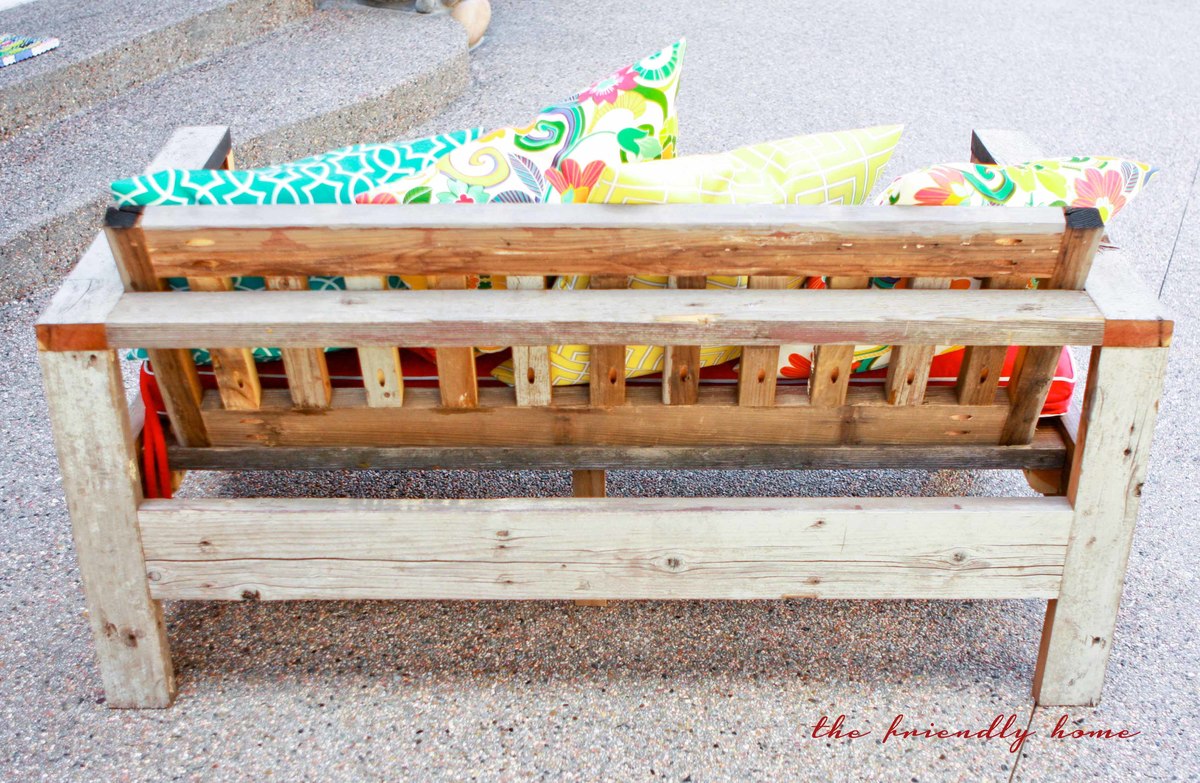
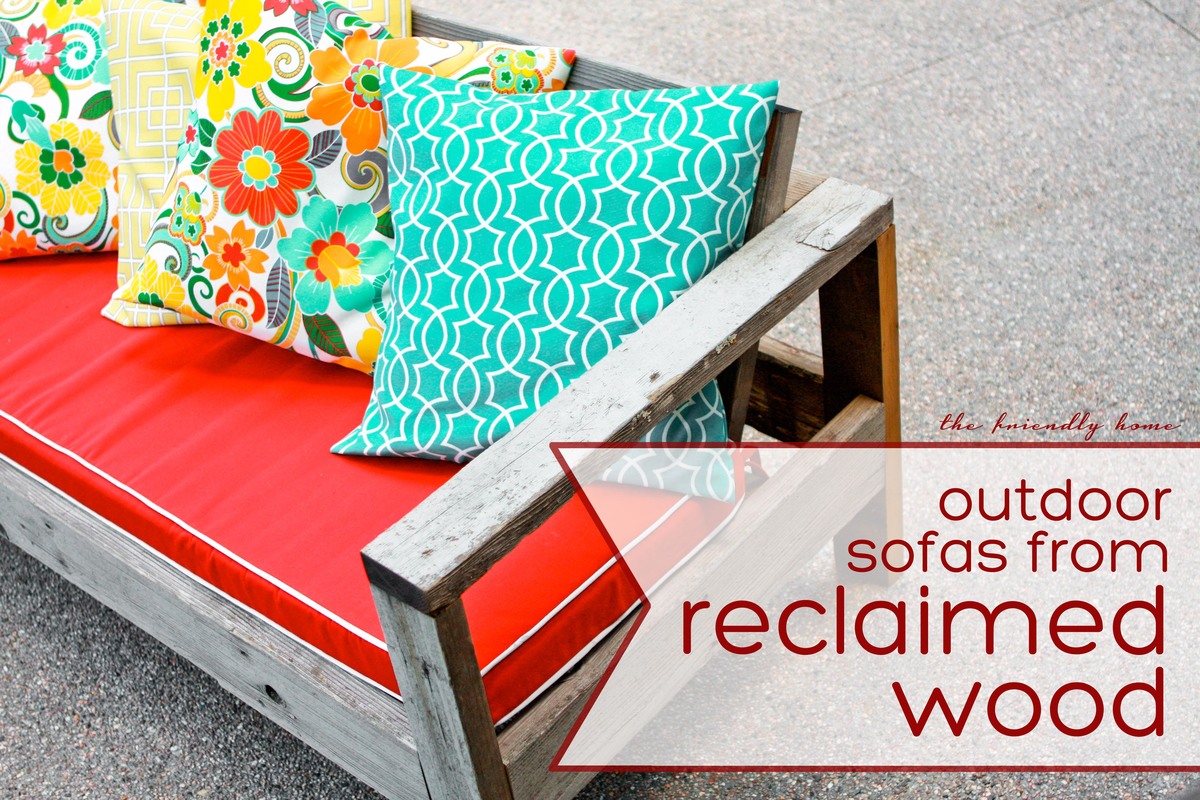
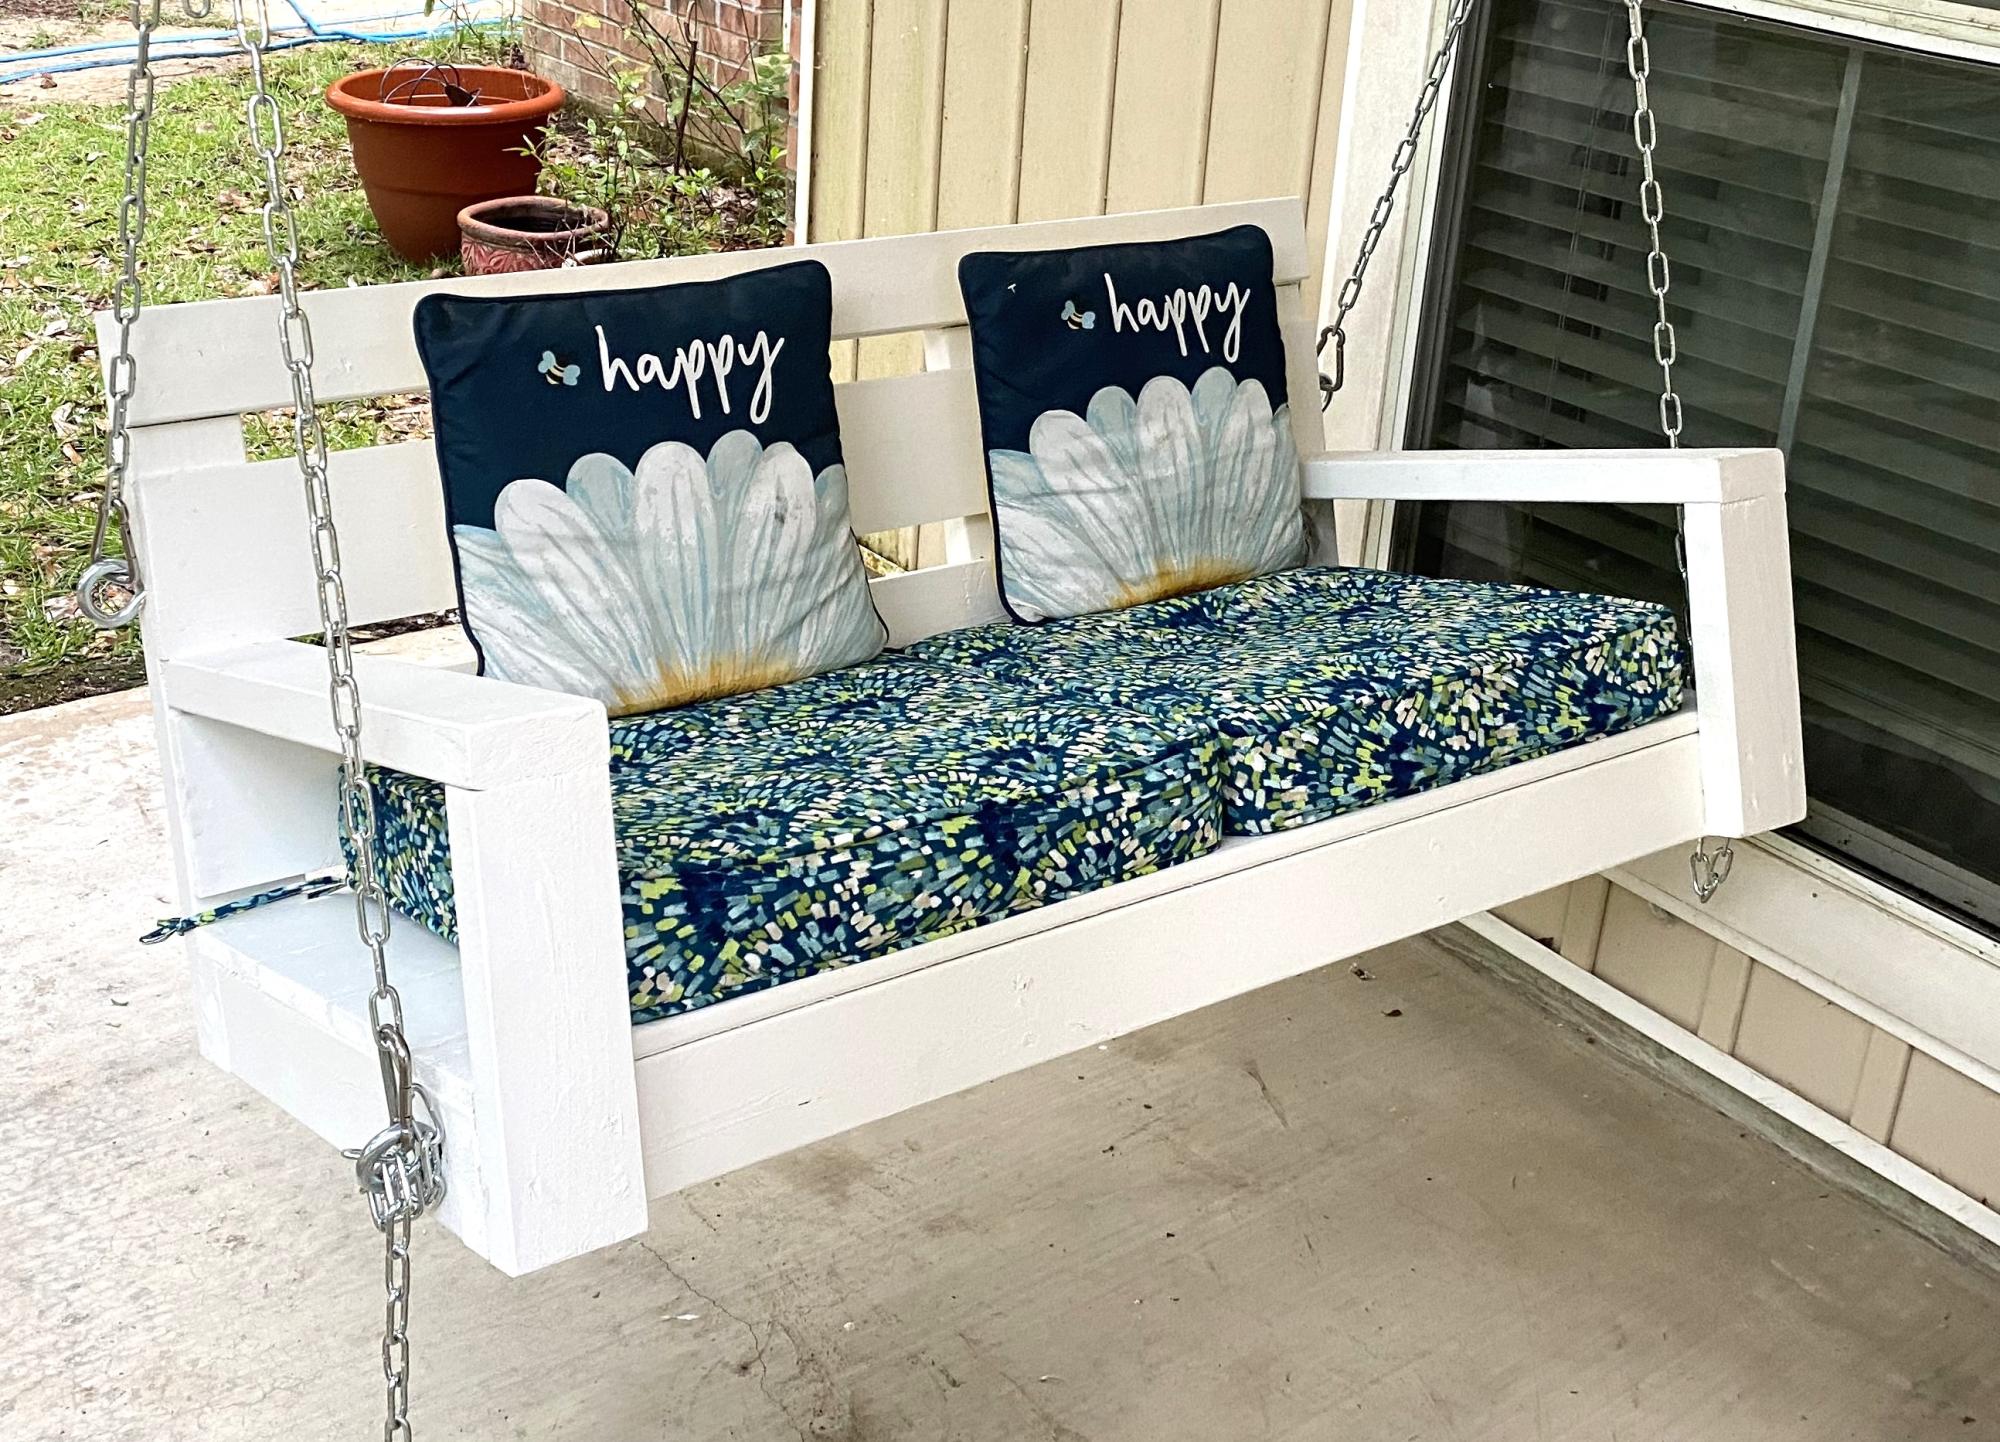
Using Ana's plan as a guide, I built two of these sofas to fit an outdoor cushion I already had. I used wood from our old deck -- a great way to re-use and save money, too!
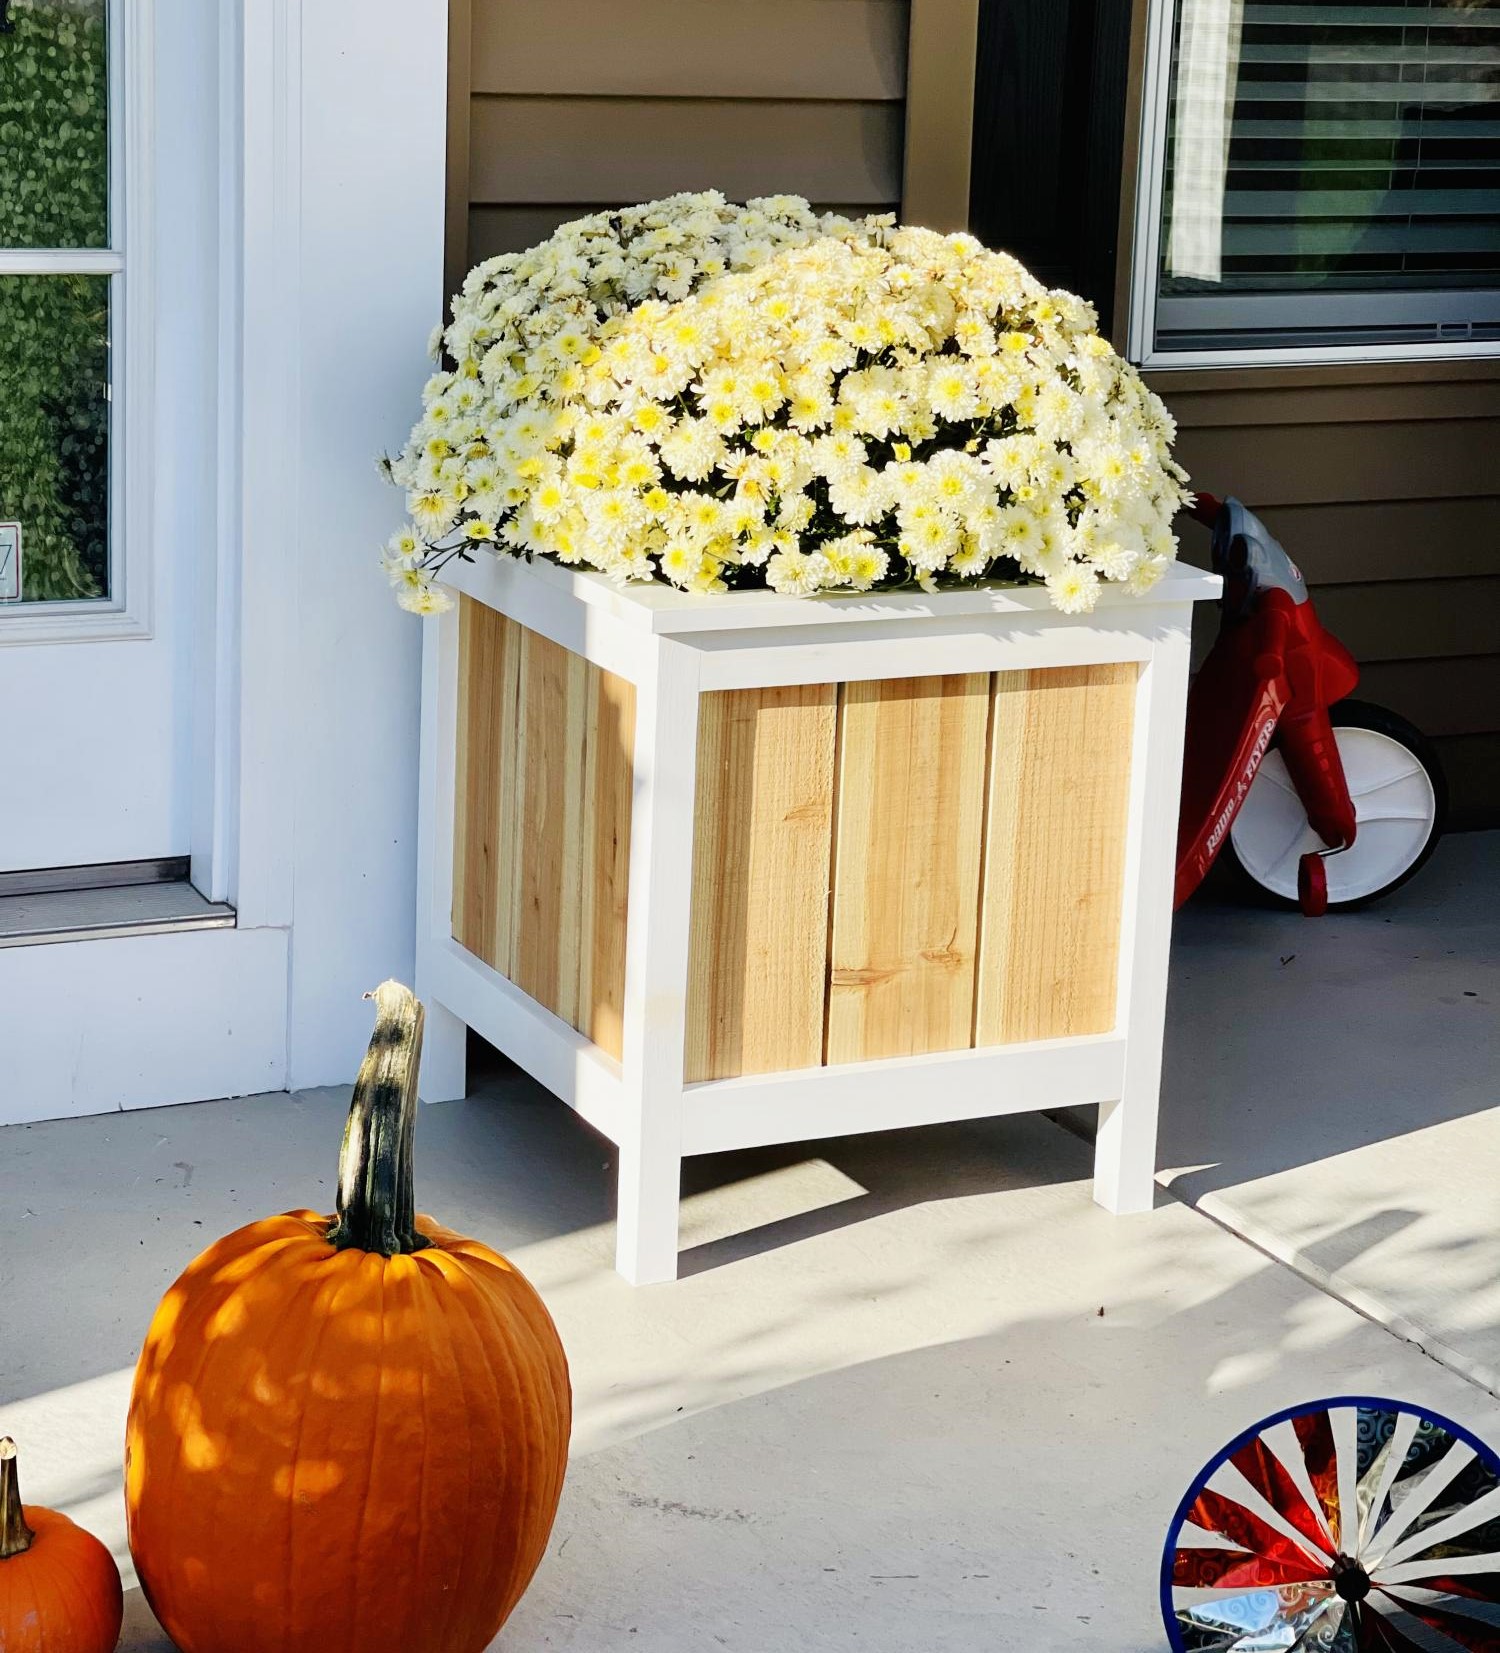
My wife wanted some planters for the front porch. Thanks to Ana whites page for these plans. Also loved the top modification that I think is a must.
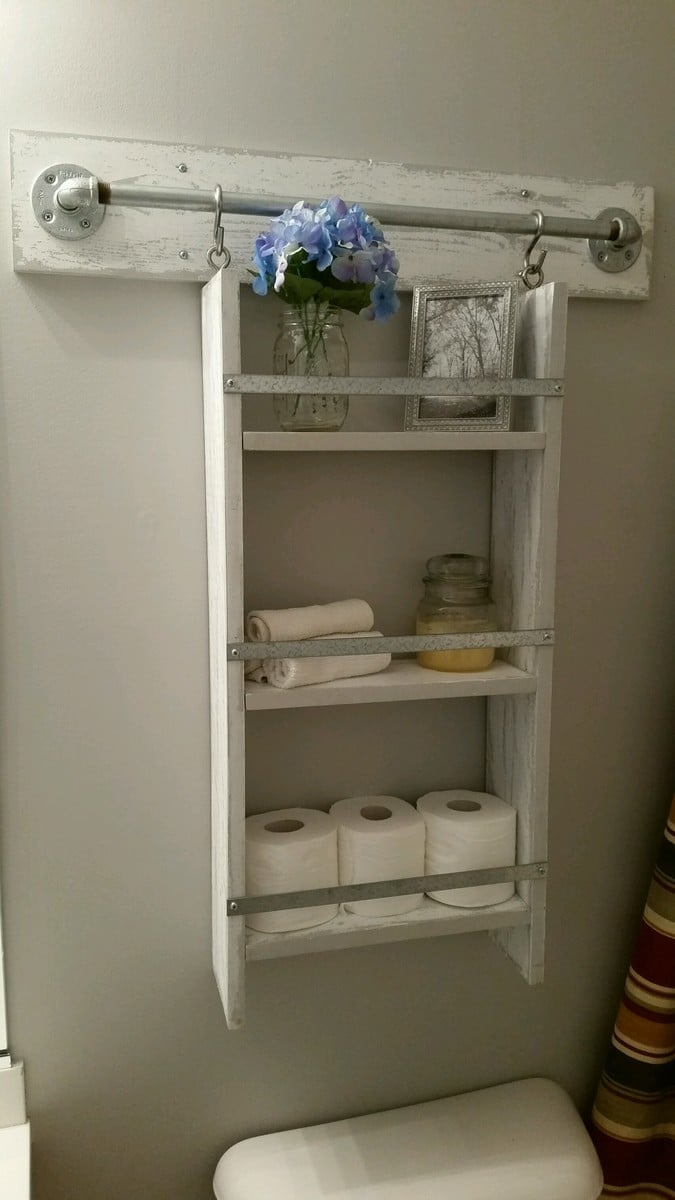
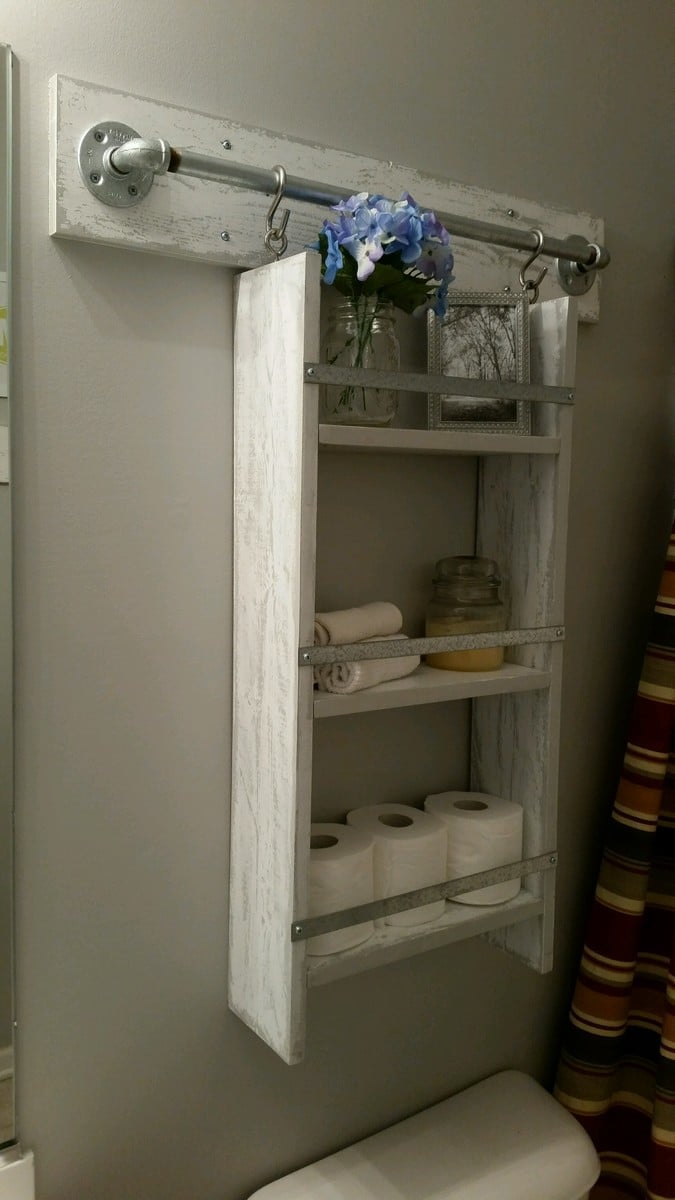
This was a very fun project to build. I pretty much followed the directions that were posted, but I used 1x6's instead of 1x4's because I wanted more storage space on the shelves. I also used 1/2" iron piping instead of 3/4" and am happy with how it turned out. Since the guest bathroom is gray, we didn't want to stain the wood and chose to do an easy to do "weathered" (directions below) look. Now all we need to do is replace the ugly shower curtain!
Wed, 03/30/2016 - 06:41
Love the weathered/distressed look you did. Can you share your technique for the paint job?
Sun, 10/30/2016 - 19:55
Love this! What is the length of the iron pipe and also the board that's mounted to the wall? Do you remember what color gray you used?
Tue, 02/07/2017 - 21:31
What is the measurements for the metal pipe and also the board itsbibe.
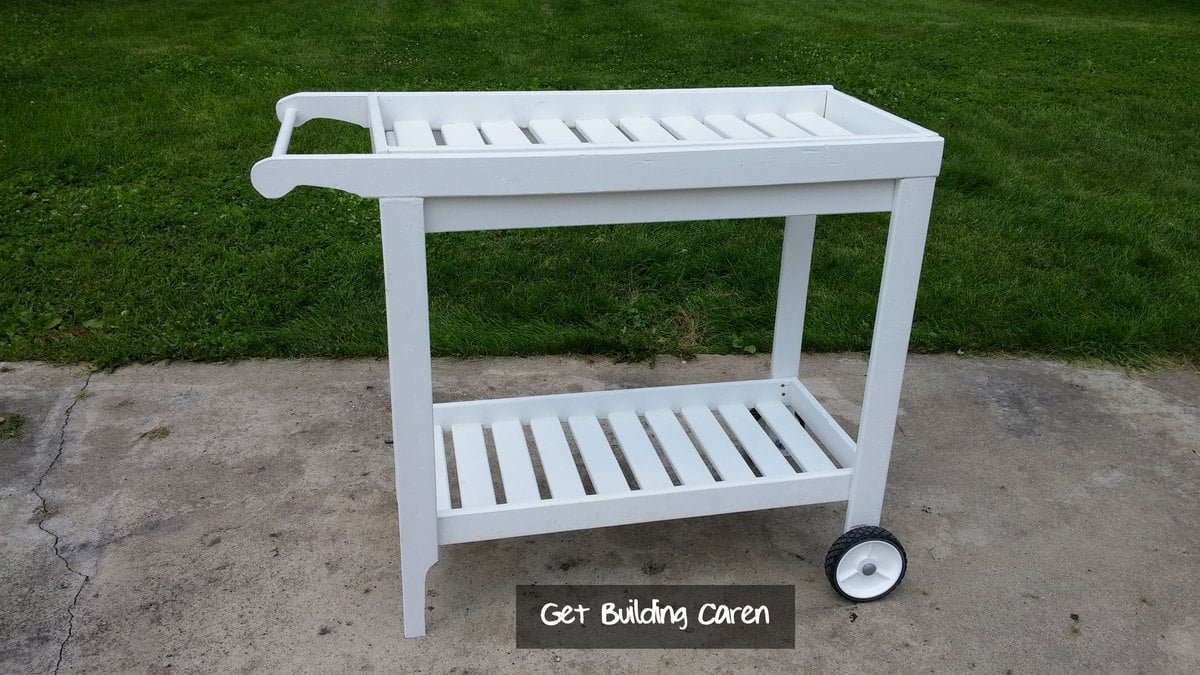
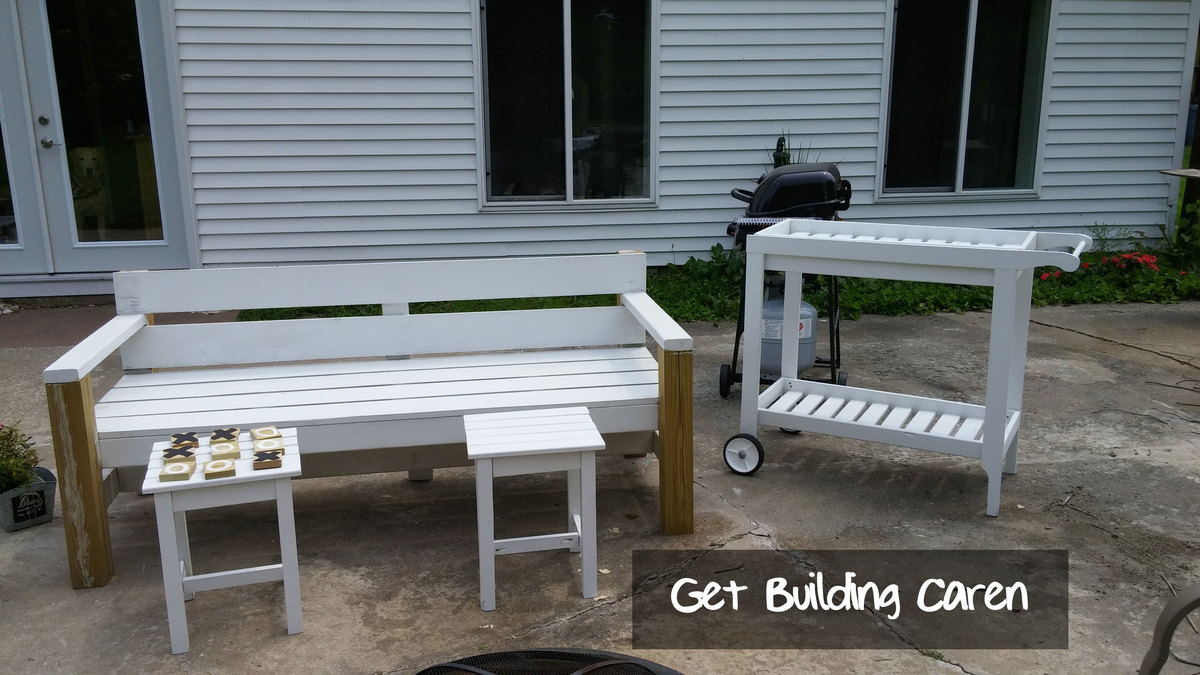
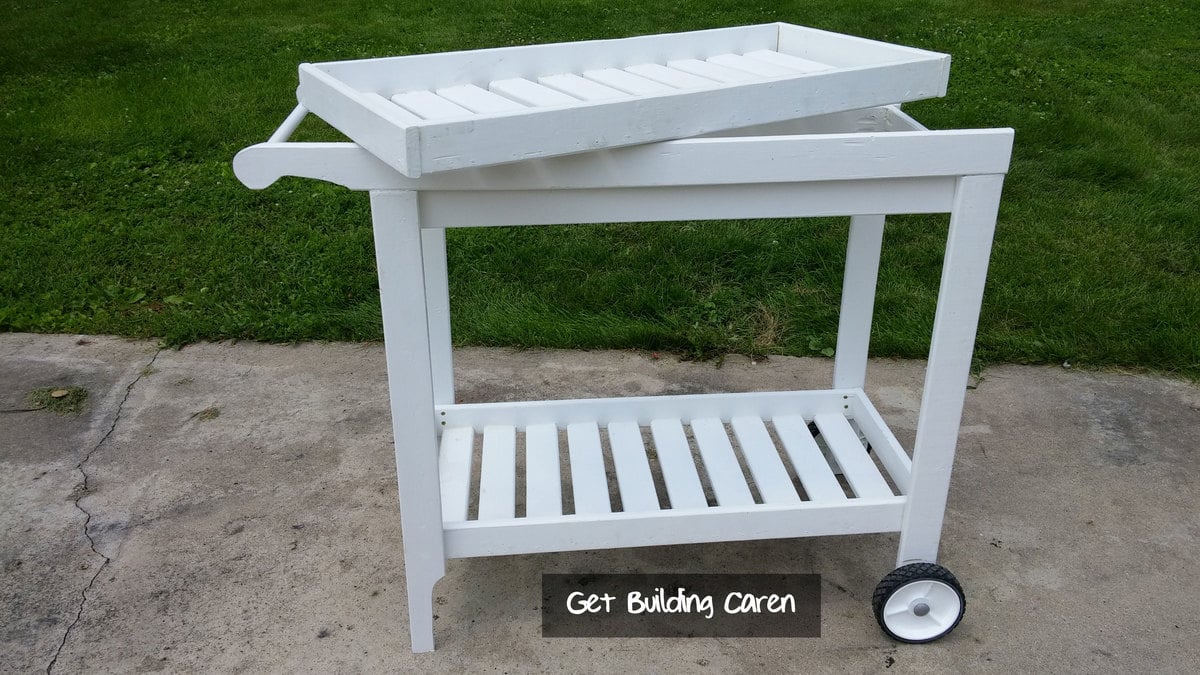
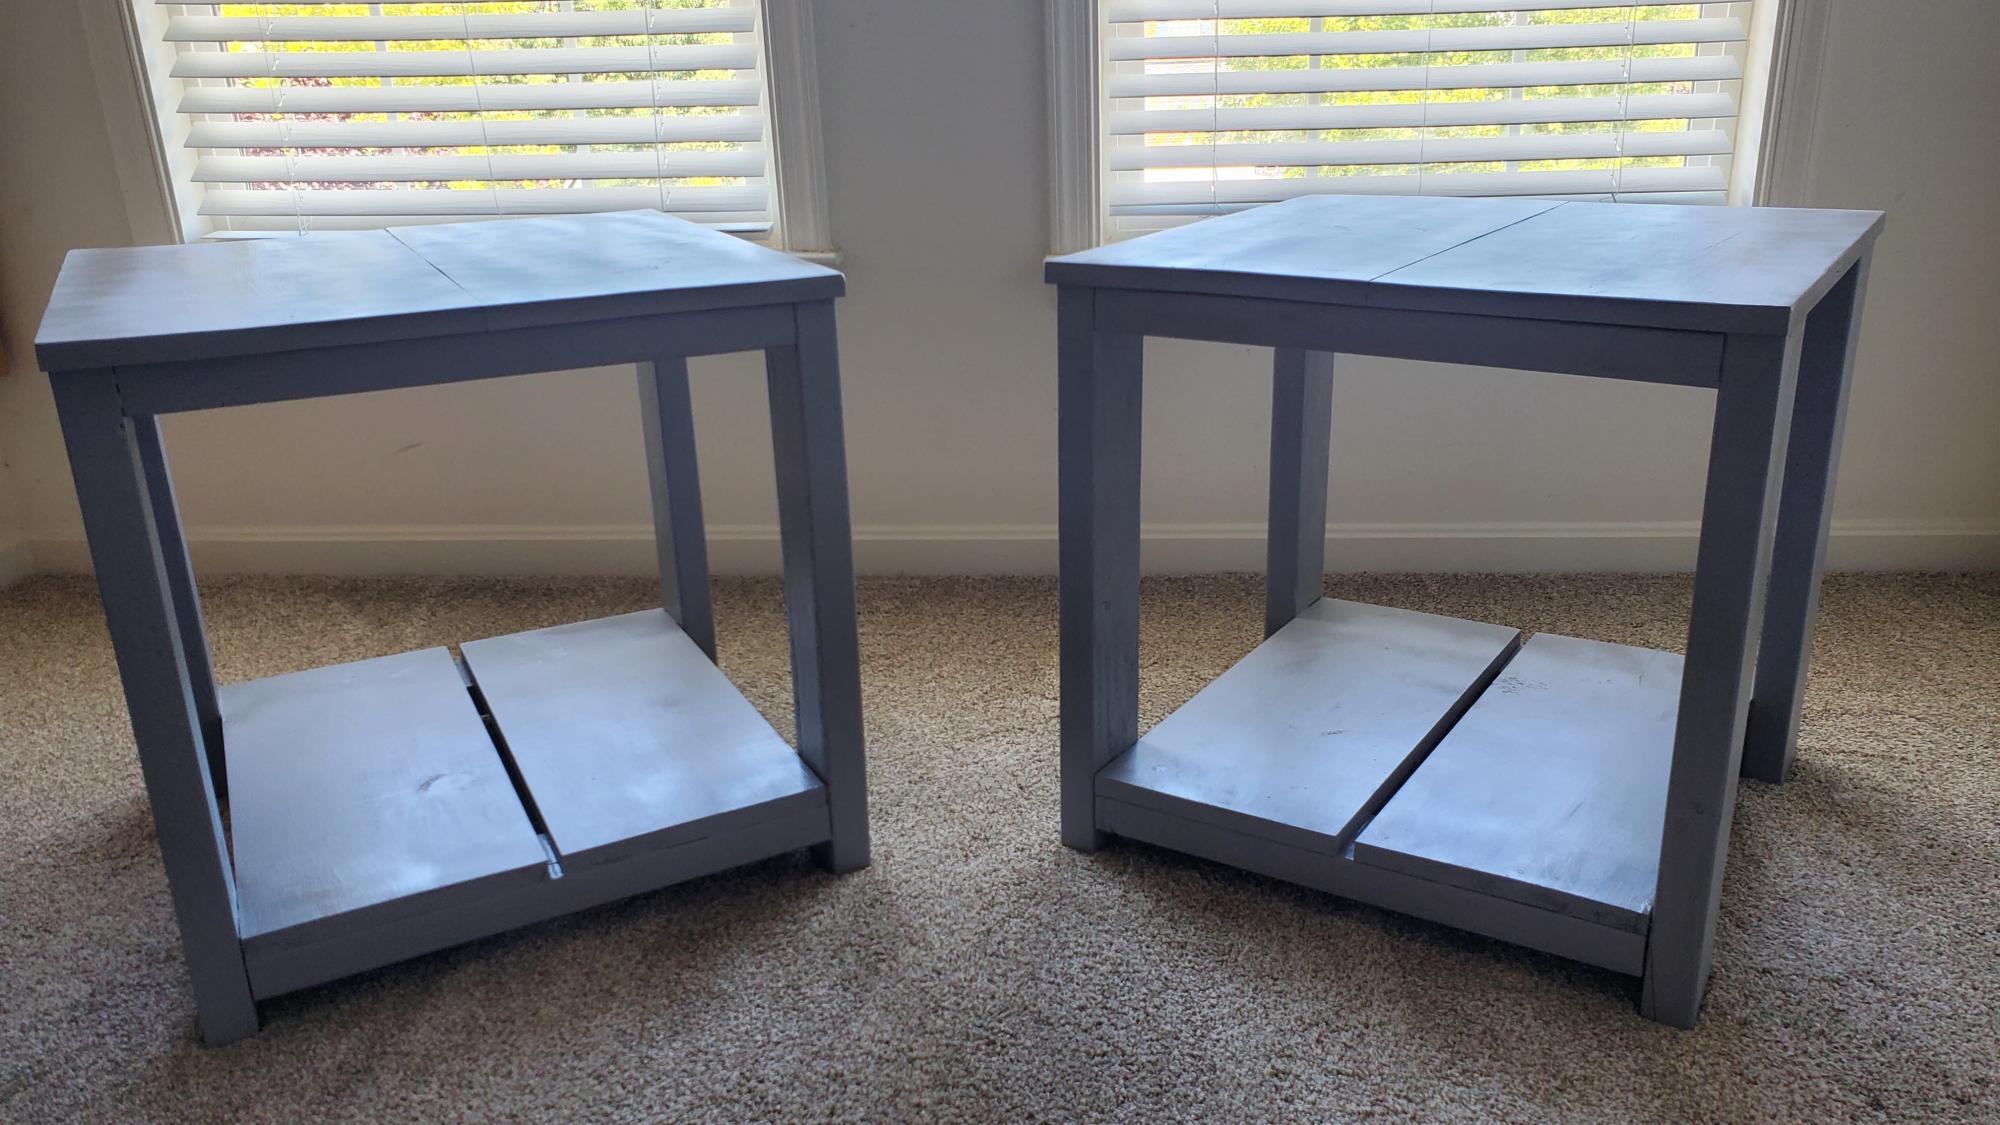
The rolling bar cart (or BBQ cart) with removable tray is the latest addition to my suite of DIY patio furniture. This site has become a bit of a building obsession with me. Even with the detailed instructions, I still found ways to make this project my own: I added a 3/4" dowel and plastic wheels, instead of wood rounds. I painted all the pieces with primer and exterior paint before assembling it, because it's hard to get paint between the slats, unless you have a spray painter. The white slat design of the bar cart, park bench and matching side tables goes with the white siding of the house for my own patio picnic.
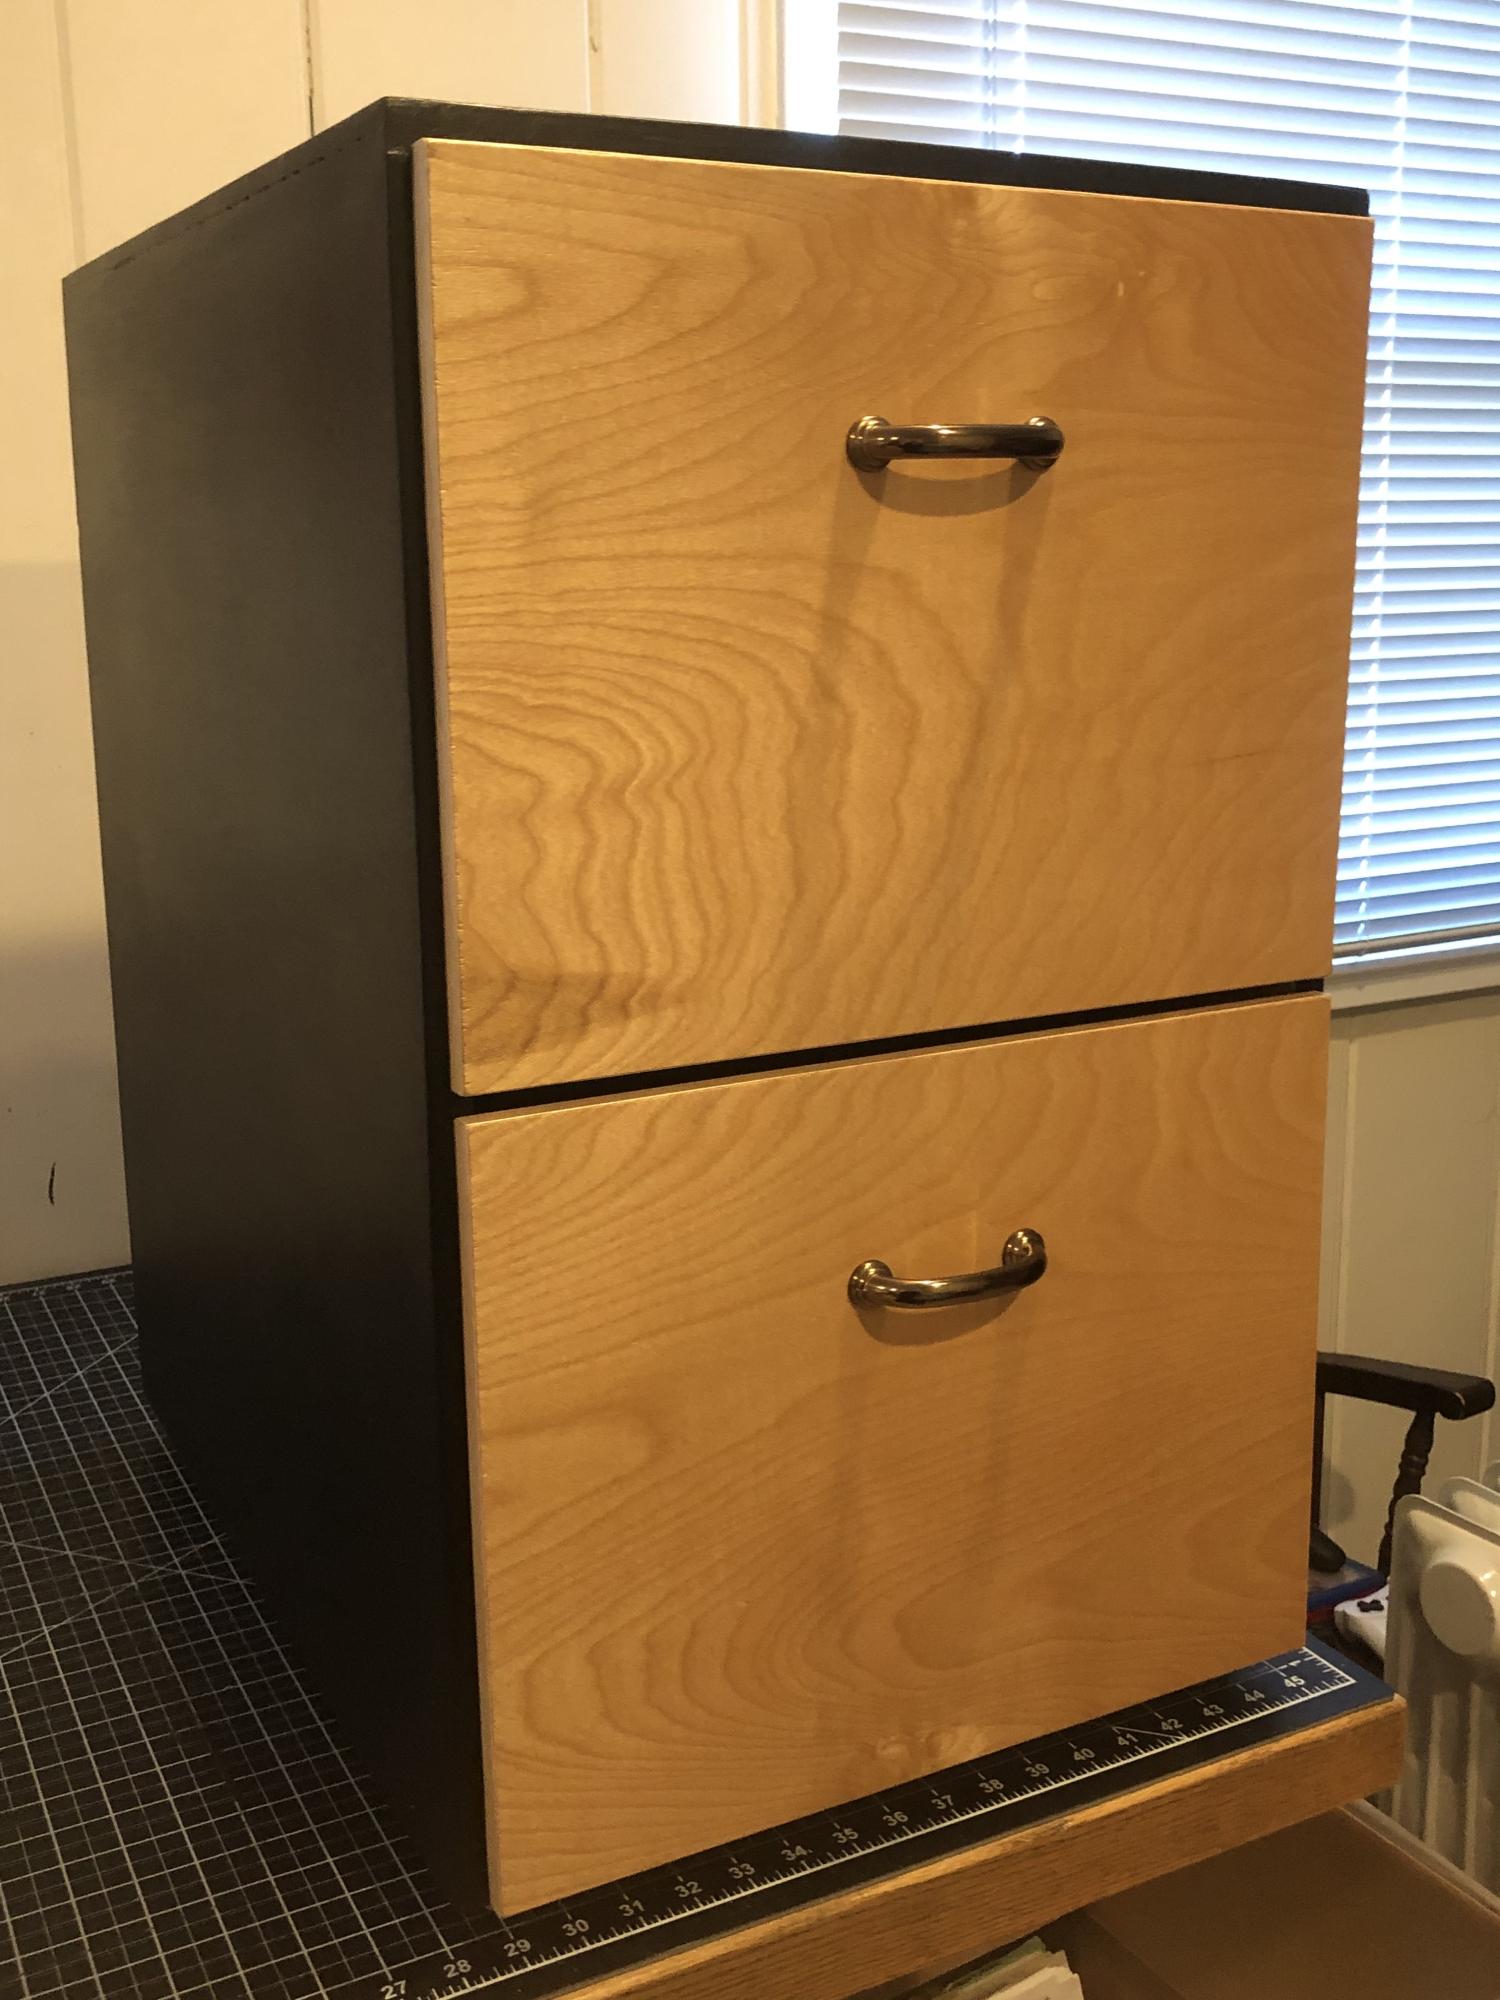
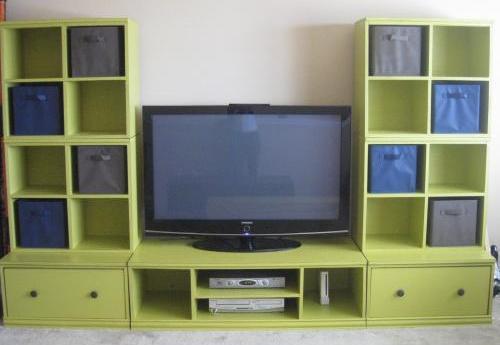
I got tired of wrestling with my old filing cabinet and decided to build one that would stand up to regular use. Based on the AW plan noted, I build this out of 3/4" plywood. The drawer faces are 1/2" birch plywood and the hardware is salvaged from old kitchen cabinets. Overall dimensions are slightly modified to fit my space. Painted the cabinet box flat black and because the birch faces have such an interesting swirl, I used clear poly for the drawers. Fun project that works well and looks great.
Thu, 04/21/2022 - 14:48
Thank you for sharing, that looks so much better than the alternative file cabinets, well done!

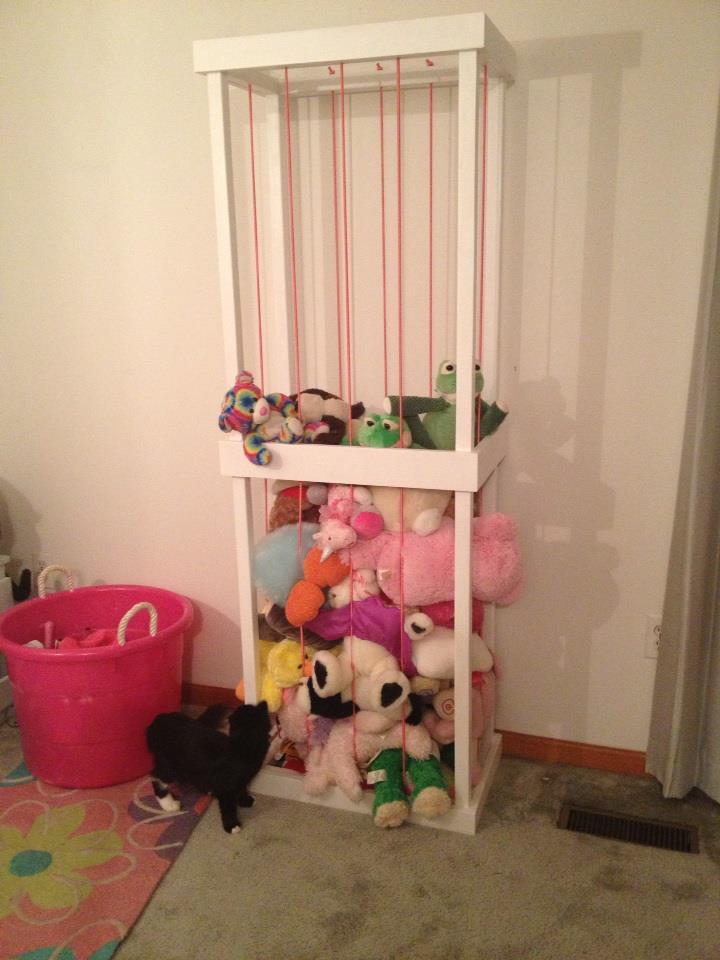
There were a few of these floating around pinterest so I just looked at a few pictures and kinda winged it. It is made almost just like Jamie’s except I used additional 2x2’s as you can see in the pics… I needed something to thread the bungee cords through. I tied them off on the top and bottom. I ordered a roll of pink bungee cord off of amazon. This is actually two years old as you can see from how much it has filled up. I also went back and added additional rows of bungee cord between all the others as stuffed animals were falling out. Again, I winged it. Having plans will make this build much easier!!


Wed, 10/02/2019 - 06:37
Sorry its so late... I just saw your comment. the 2x2's were furring strips that were untreated. I used dimensional lumber for the 1x3's

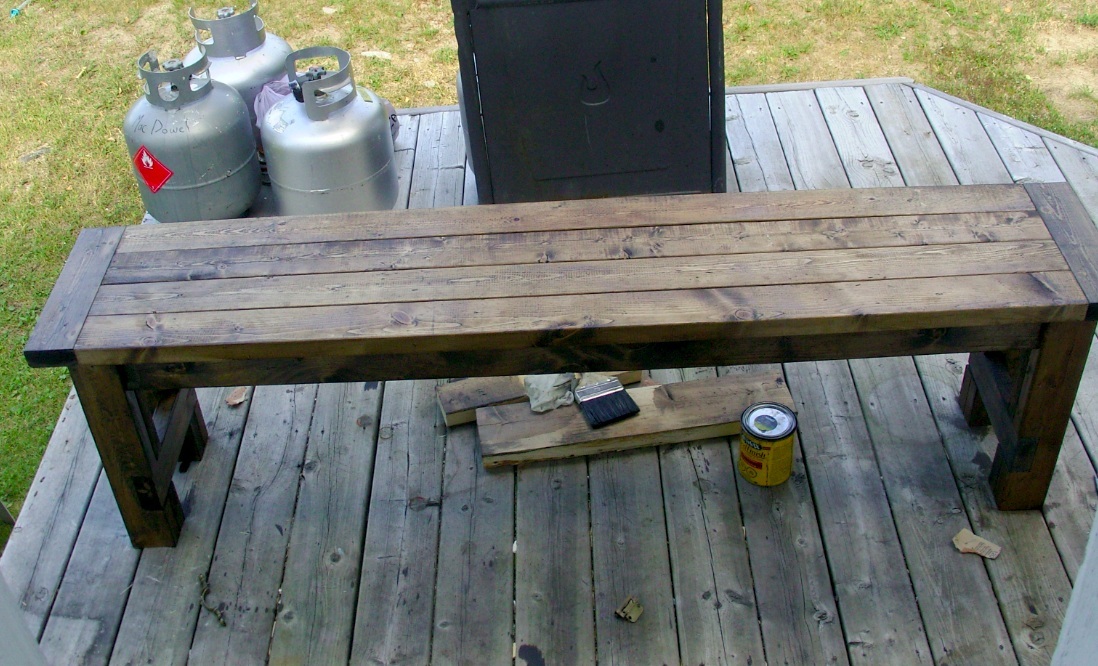
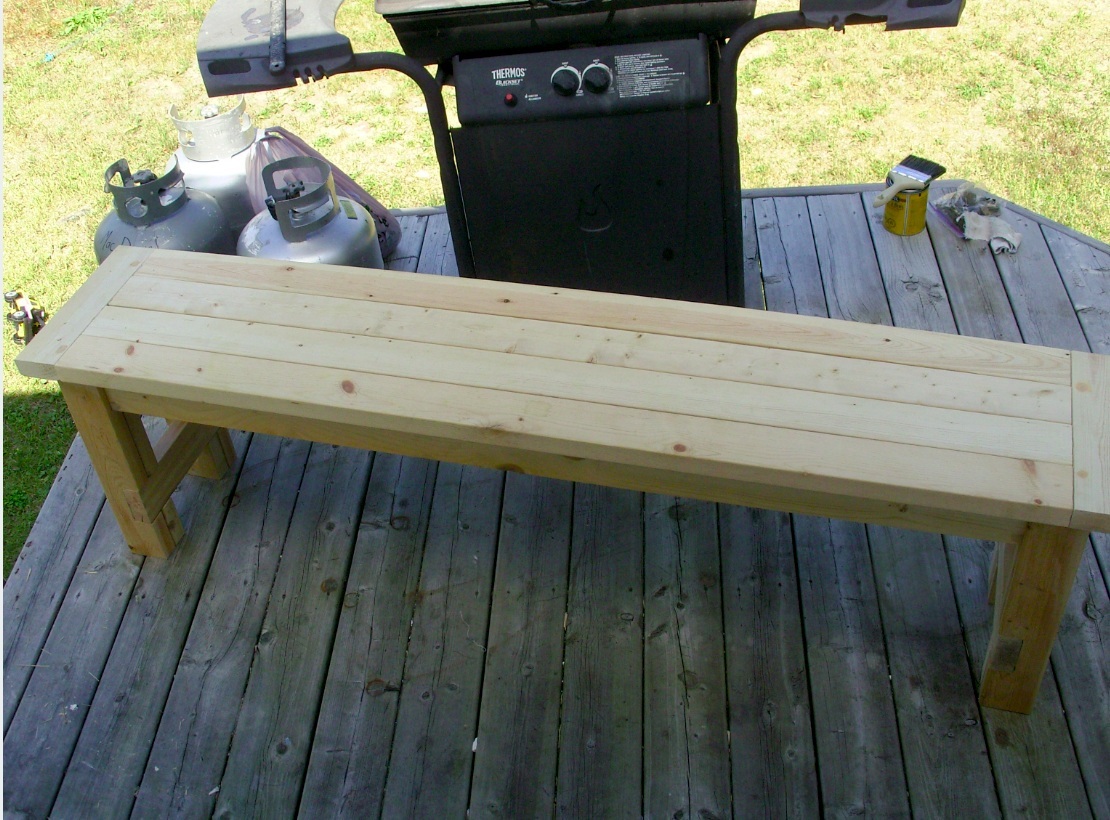
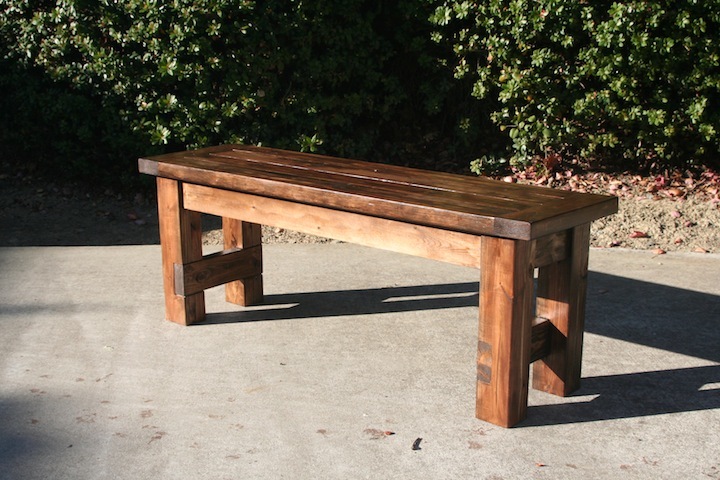
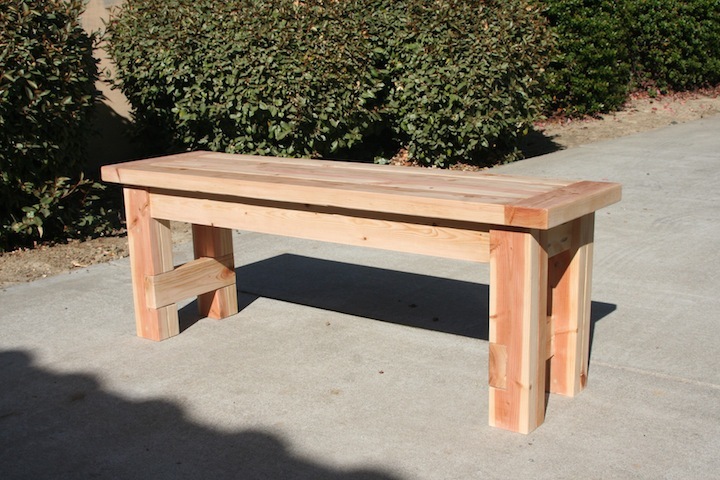
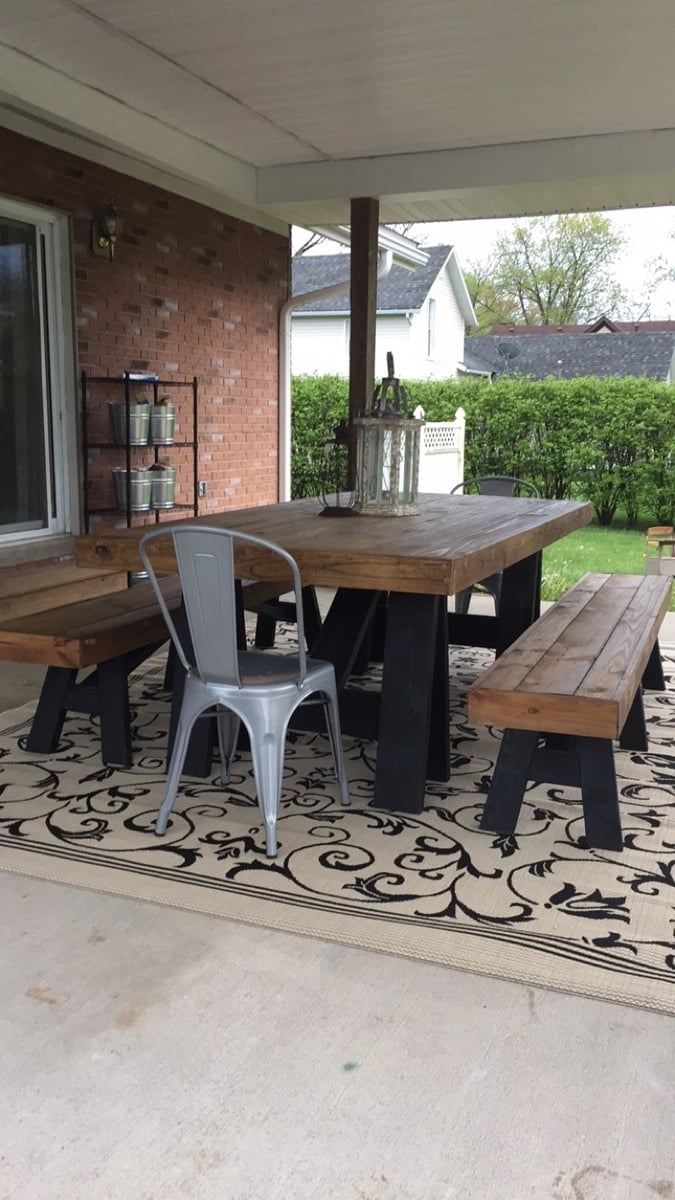
After building a custom sized farmhouse table by combining and tweaking the two plans here, we knew we wanted another piece of dining furniture as substantial as the table and in the same style. The farmhouse bench was the logical choice!
After calculating our desired height and length (our table is taller, but not a long as Ana's) we jumped right into building. Other than waiting for the glue to set and the stain to dry the building itself took less than two hours.
Before we stained the table we distressed the wood by tossing a bag of screws, nails & miscellaneous cabinet hardware against the bench top, followed by random scatterings of hammer blows and a few fuax-nail punch holes to make it seem more time-worn and aged (we used the same process on our table before finishing it). The key was to not go over-board and keep it random to make it seem as if the marks had been acquired over many years.
We love how both pieces turned out, from the cost to the look to the peace of mind knowing that it won't break our hearts to see the furniture get a little scratched or banged here & there as well as the substance given by having a solid wood dining set. This is one bench that won't flip over willy nilly. :)
Wed, 05/02/2012 - 15:39
Beautiful!
I am debating on using spruce or pine. how was your exeprience with spruce? did it split any?
In reply to Beautiful! I am debating on by Mar_co (not verified)
Thu, 05/03/2012 - 05:54
We haven't had any issues with the spruce splitting thus far, but we did pre-drill every screw and nail used as well as check the wood piece by piece at the lumber yard to look for deviances, warping, cracks and excessive knots (rule of thumb: the more knots in the wood, the more likely it will crack or split over time).
Another thing we do to condition the wood (even though it has been stained and poly'd) is to give it a good buff with [wood] oil every 6months or so; we're under the impression that this helps maintain the natural humidity of the wood.
Pine would likely have a better longevity and would probably be less apt to dry as quickly as spruce, but it depends on your price points too.
The greatest thing about the design of this bench is that any board can be replaced at any time (with a little elbow grease), including the legs--though the benchtop itself gets the most abuse. We're not gentle with our bench and so far the only 'damage' is a small chip on one corner from tools being dropped on it.
Hope that helps, happy building!
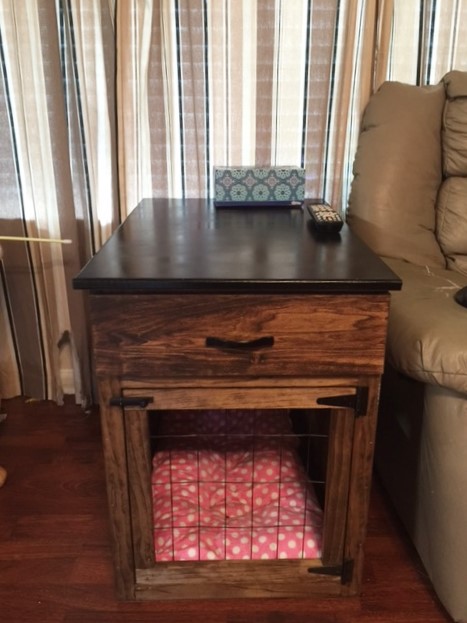
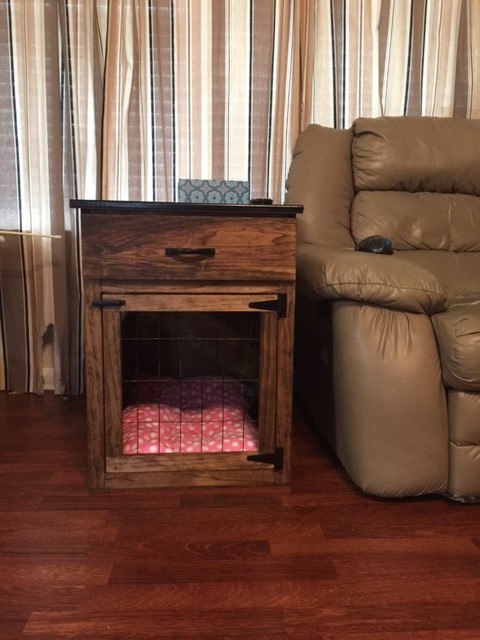
You may remember my green stratton day beds that I built a long time ago- finally I have another project to post- I am soo happy I found Ana White's website. We just got back from a 2.5 week vacation in Israel and my dogs were staying with my sister. She told me they had been sleeping in the same kennel together instead of separately. Their kennels are too small so I decided to build them one using wood I already had. But since they are small dogs, I decided to size it down- but I wanted it end table height- so I built a smaller kennel- 20"H x 19"W x 28"D. but... I added a drawer to the top to bring it to the right height. You can read all about it on my blog- link below.
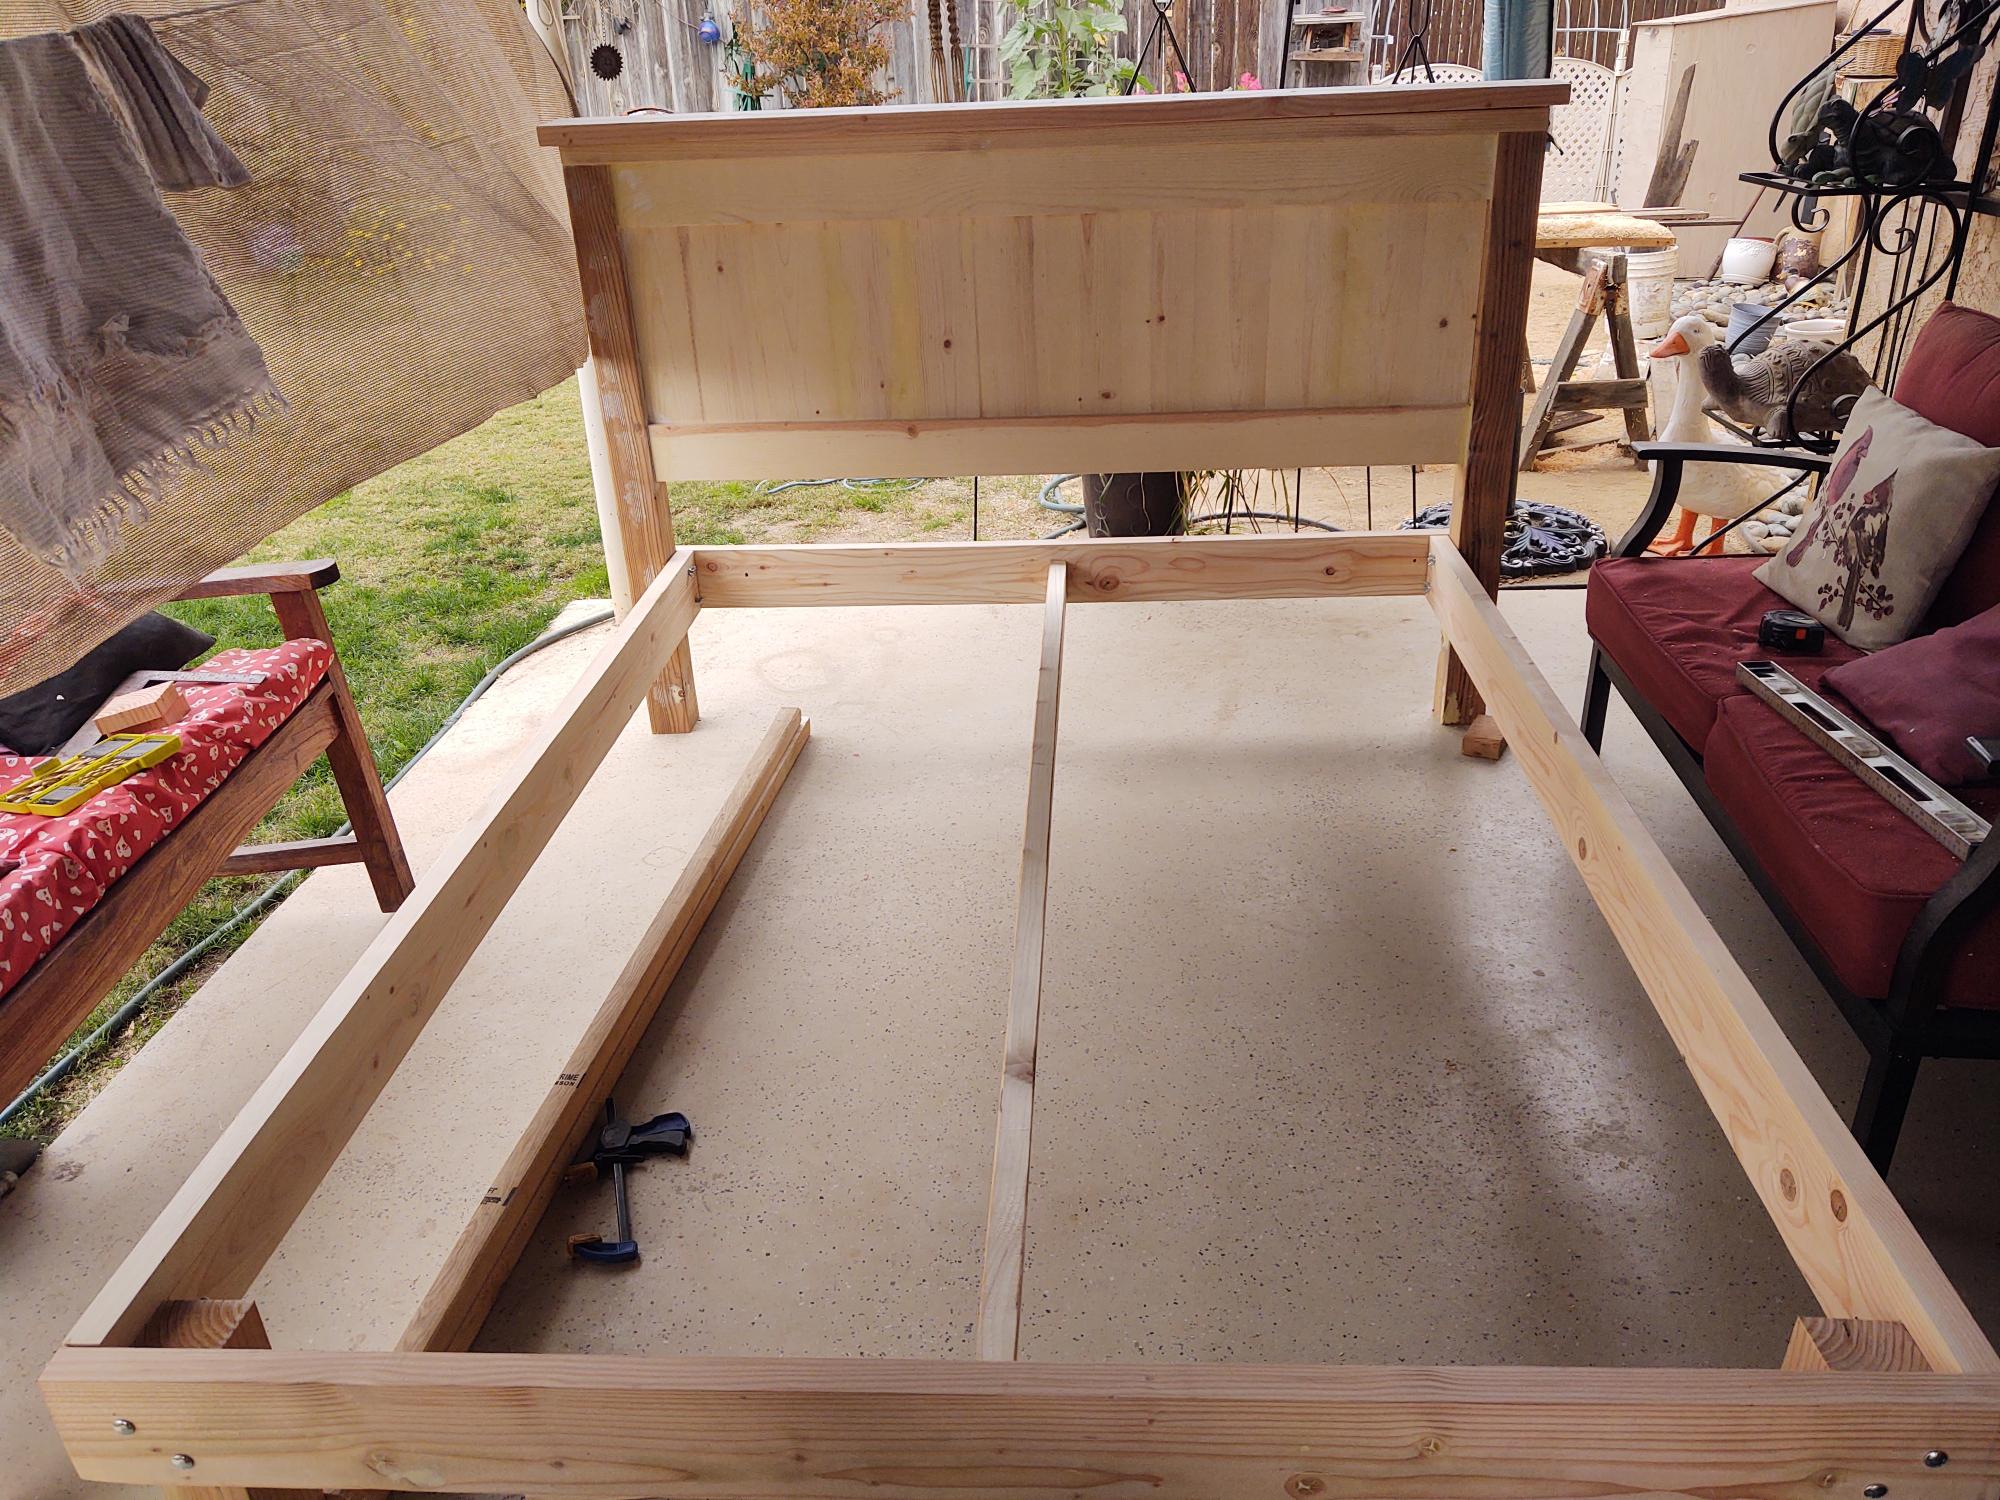
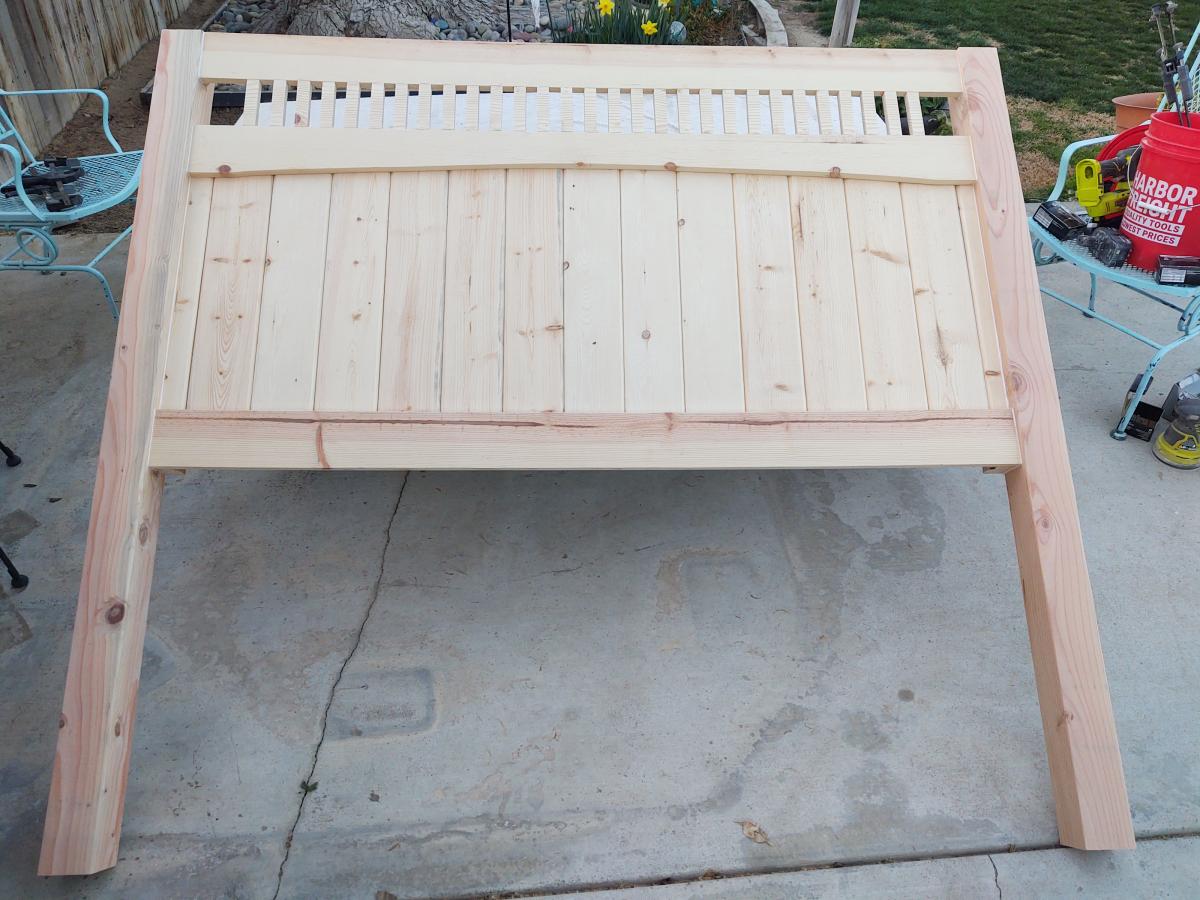
I followed your basic farmhouse bed plans and modified them. I have made three headboards now. Each time someone sees them, they want me to build one for them!

First time building furniture. This turned out much better than I thought. After this I probably could've build the farmhouse table myself instead of paying way too much for my wood dining table. Only if I have found Ana's site sooner. :)
Having a Kreg jig also made the whole process much easier.

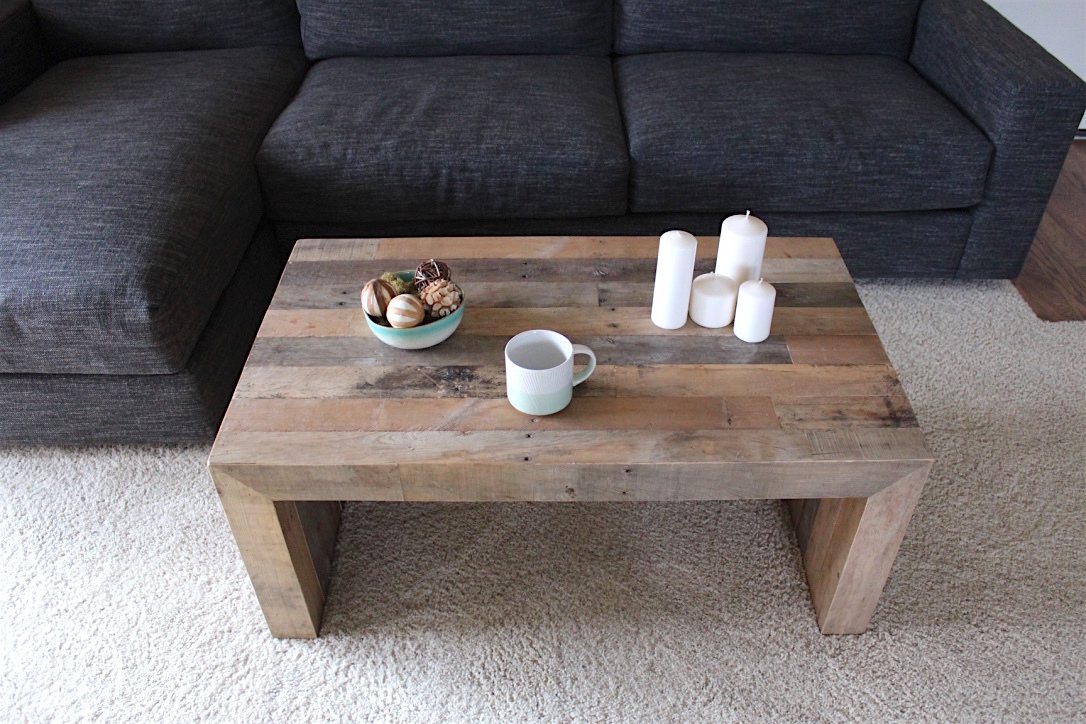
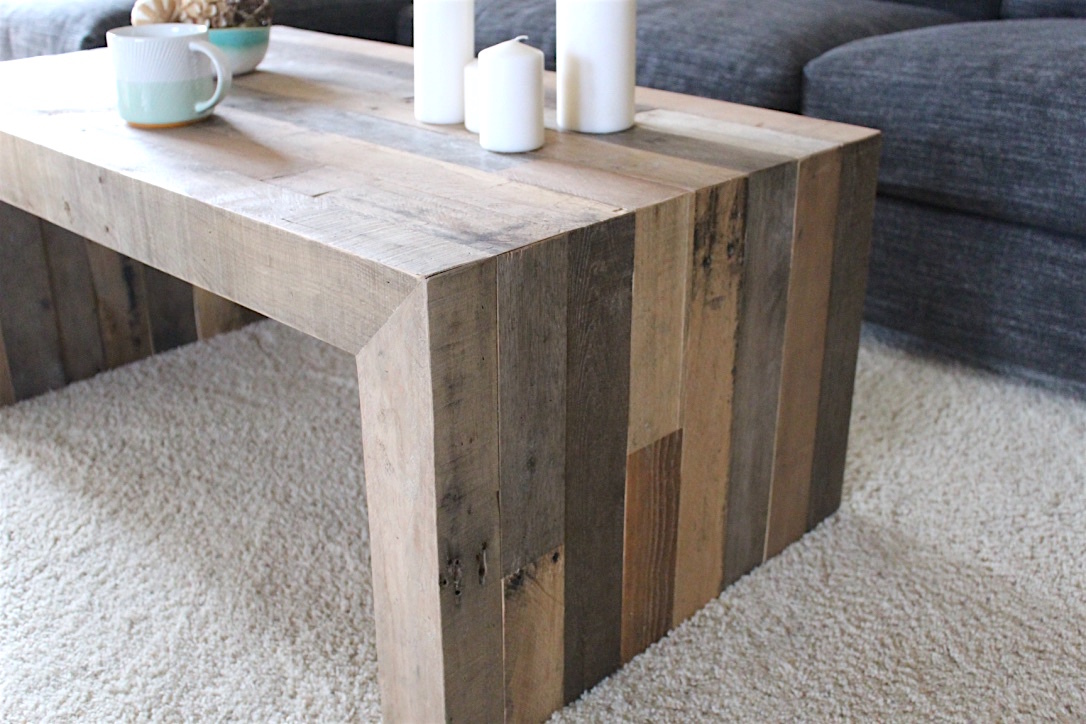
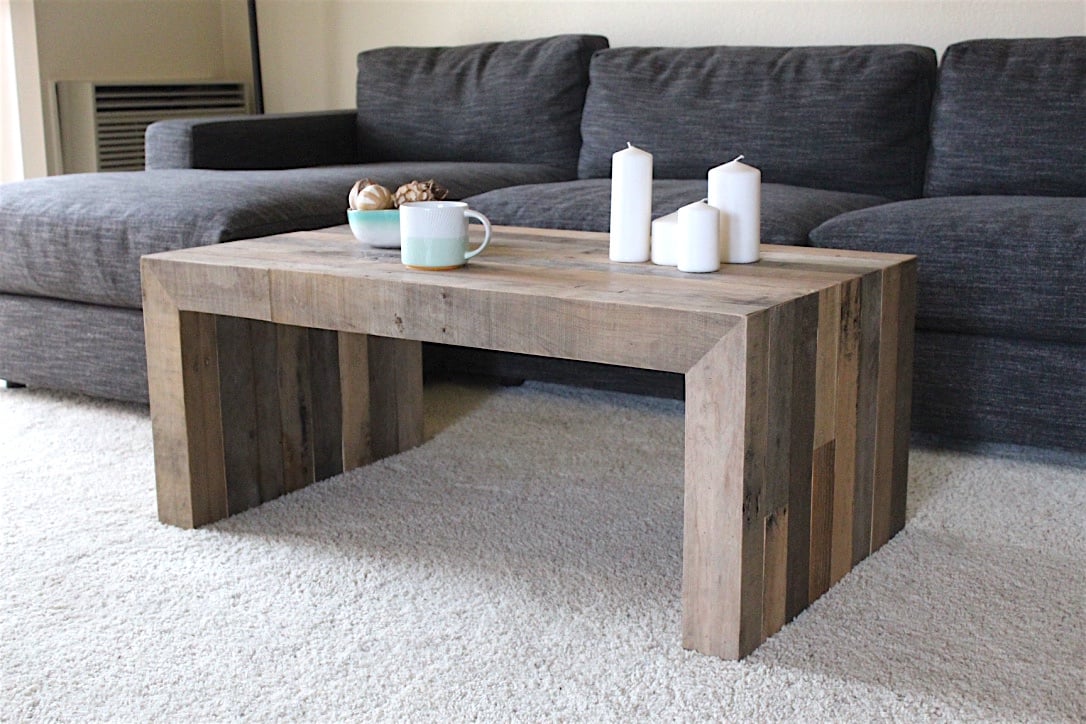
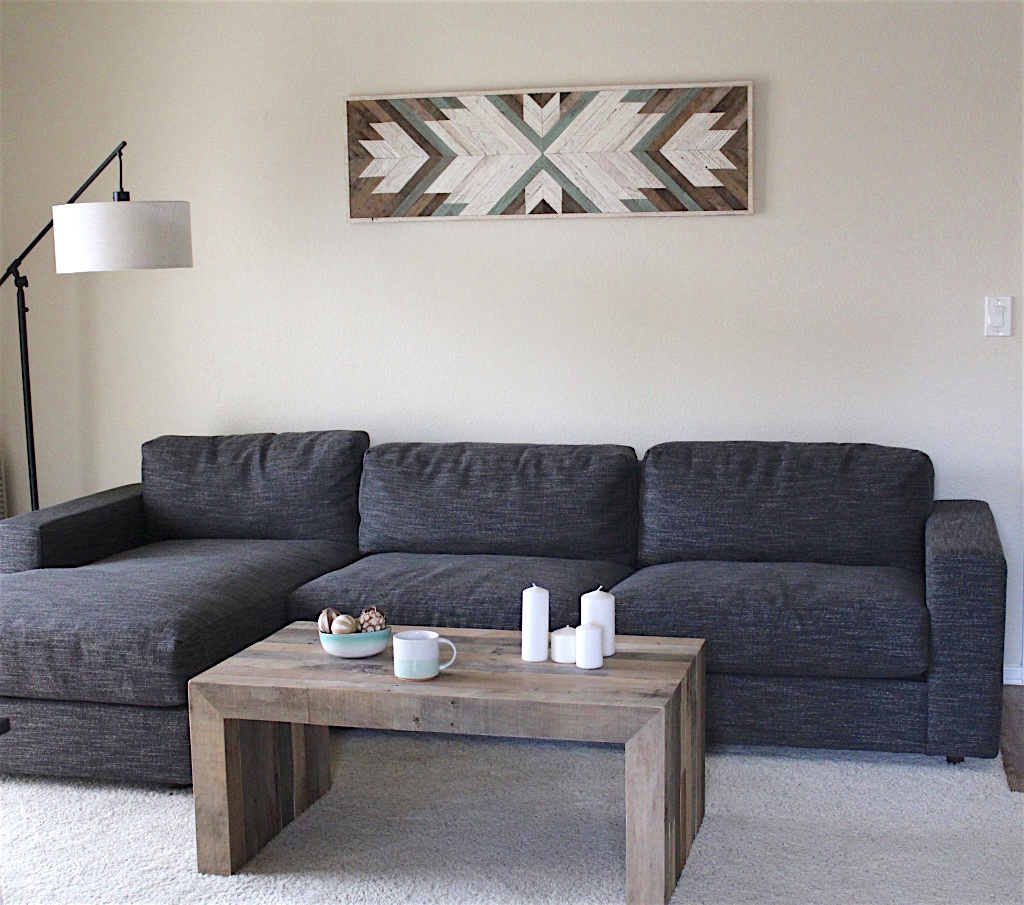
I built this coffee table from reclaimed pallet. The design is based off of the West Elm Emmerson line.
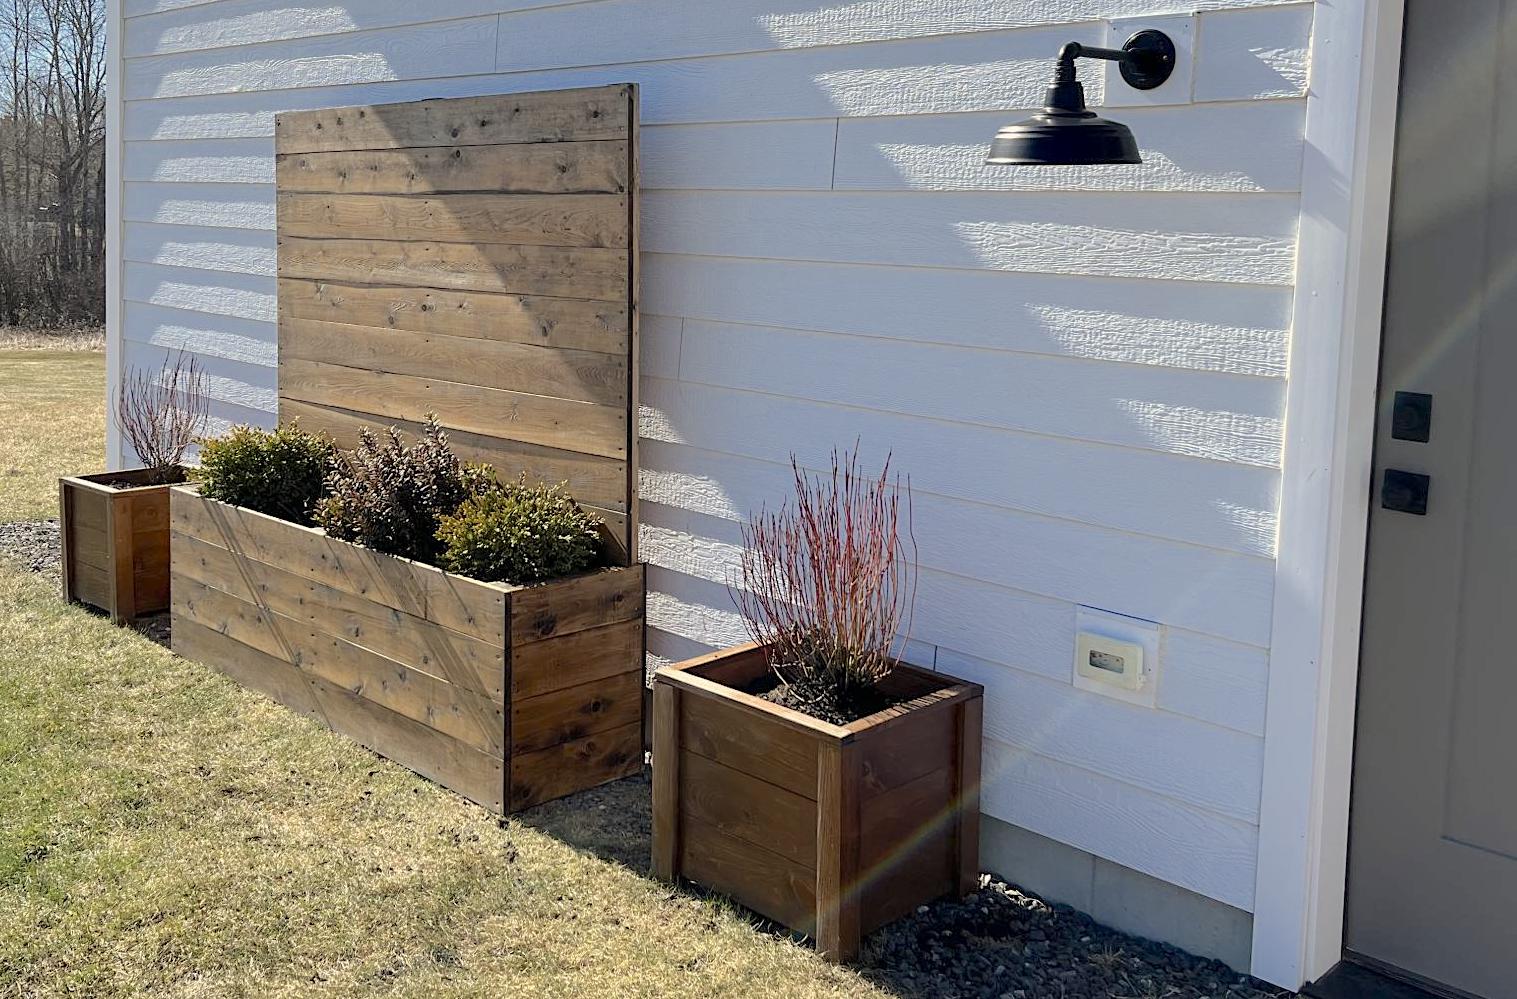
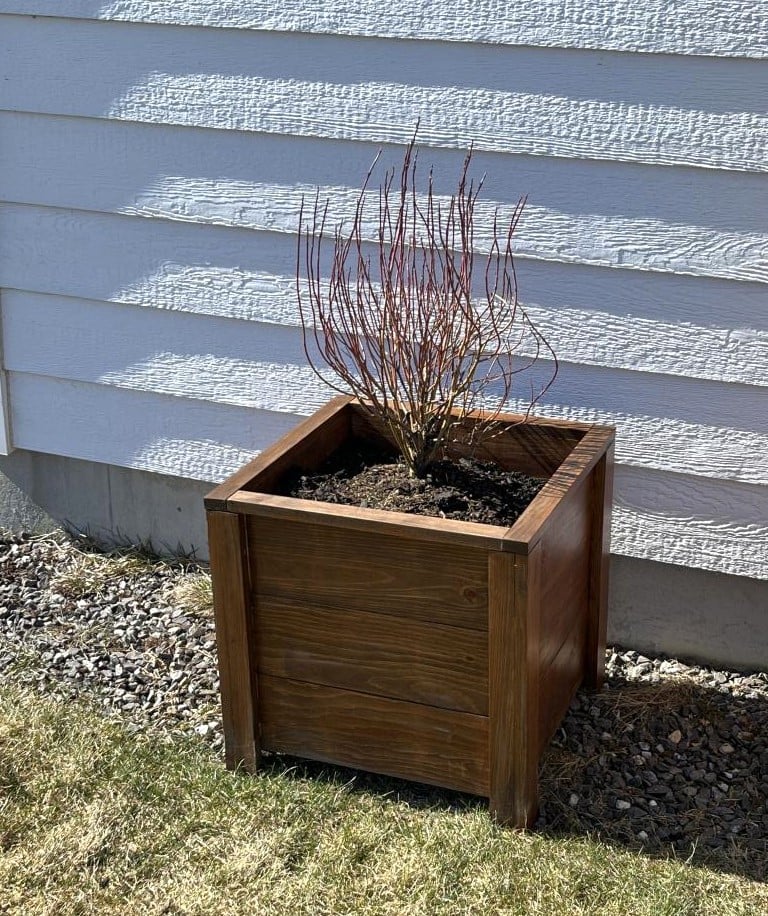
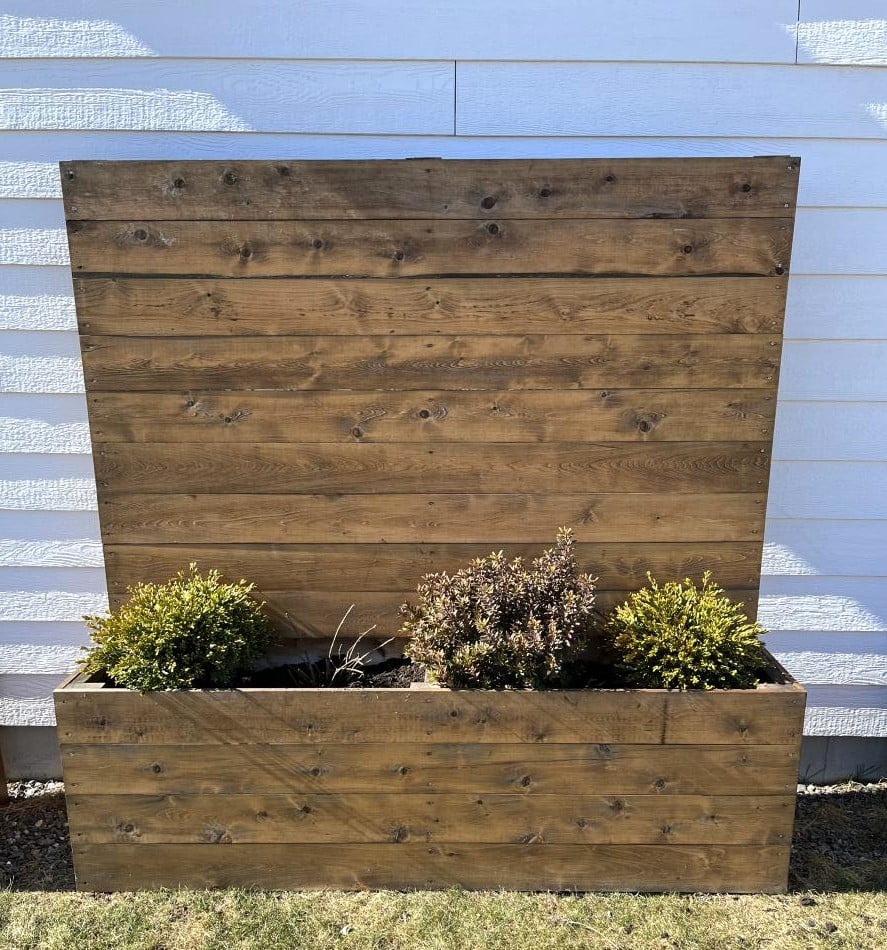
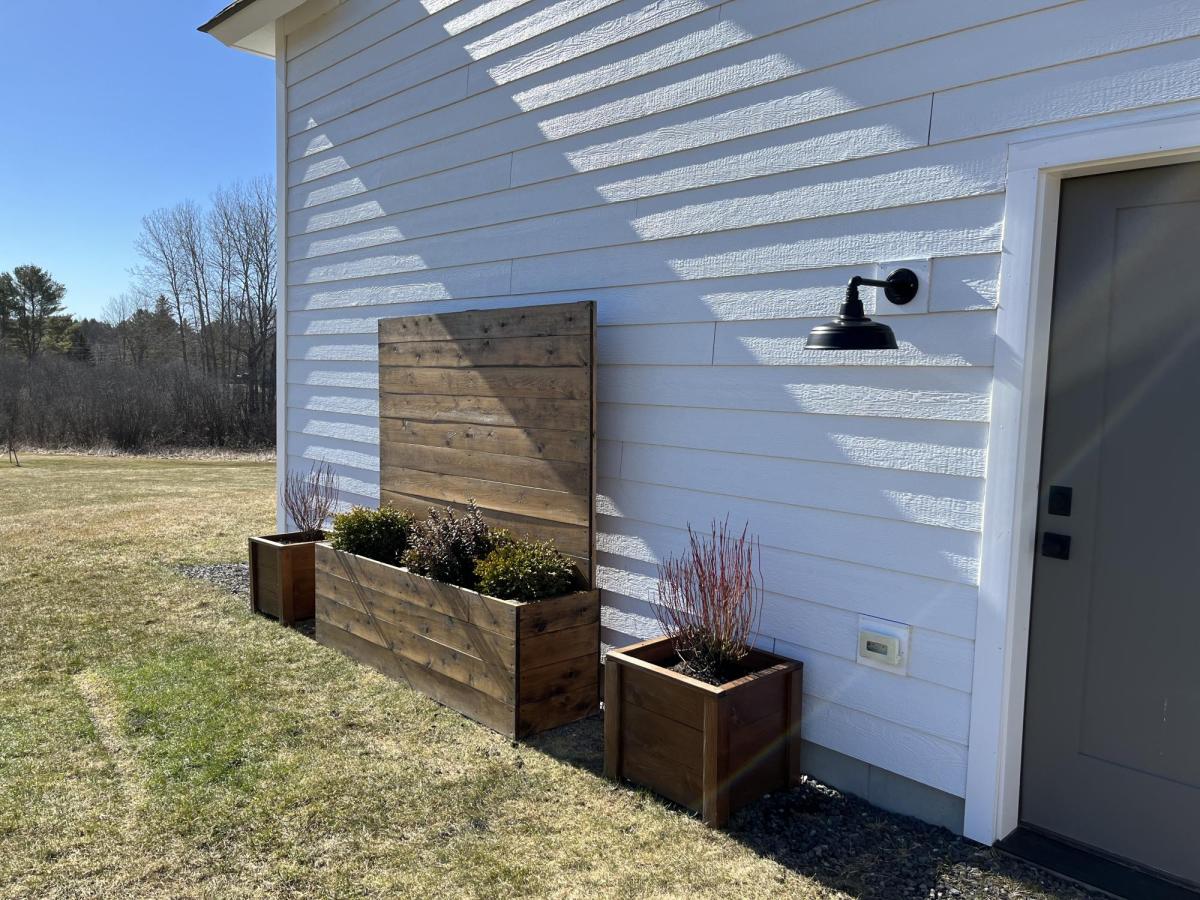
These planters are exactly what we needed to warm up this blank siding! The smaller planters are made from pine, the larger from cedar.

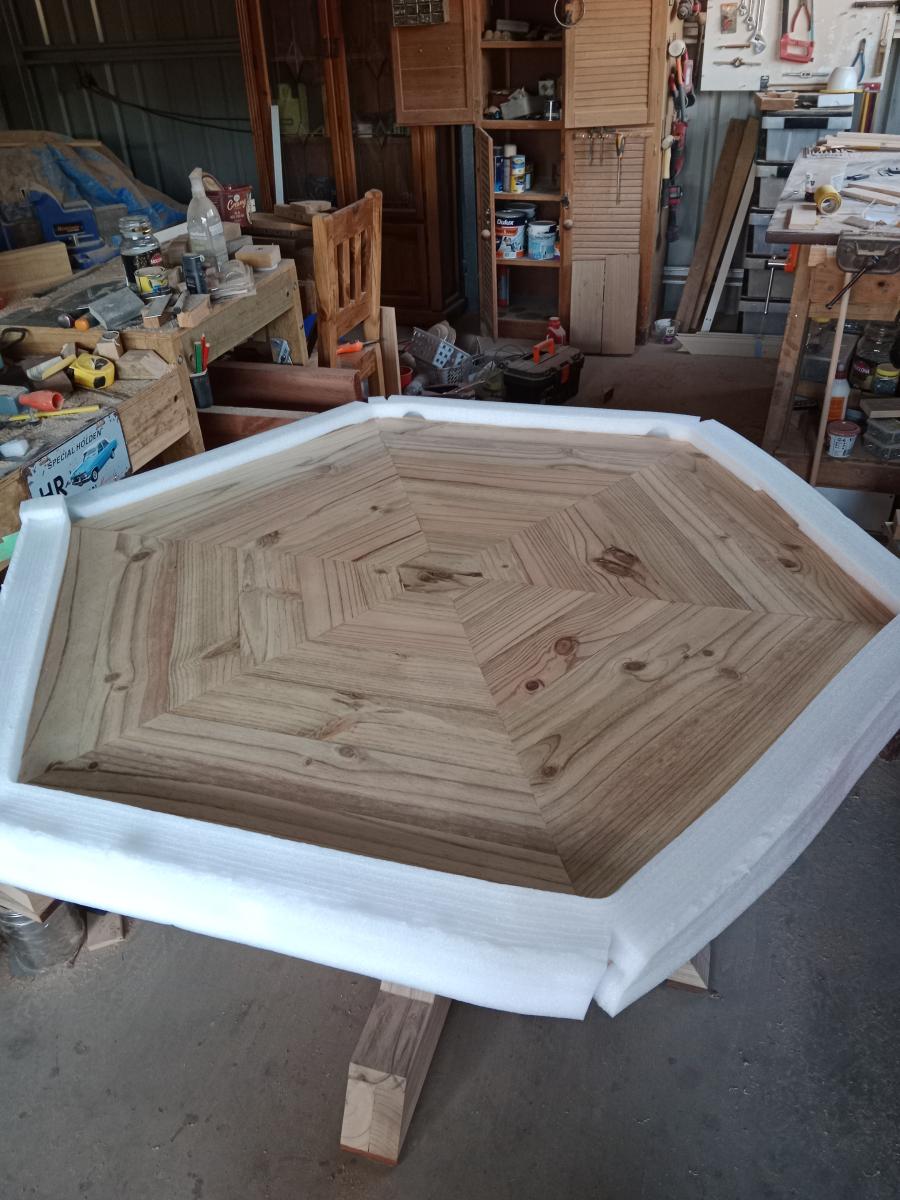
After completing all the pieces for myself based on 4x4 pedestal dining table with planked wood top, I thought I would build a table for my daughter.
The pedestal base is the same as the plan.
Now all i have to do is get it transported 400km down the road
The table was made from 200mm x 50mm pine sleepers
The top was finished with 2 coats of British paints 1 coat finish
Tue, 05/30/2023 - 12:52
Wow, this is gorgeous, thank you so much for sharing! Your daughter will be thrilled.:)
I am slowly adding things to dress up the outside of my home. This was a fun project to do, many thanks for the plans!
Renae G
Plans are 2x4 Nightstand https://youtu.be/gLYuisY7i-M and color is from DIY Nightstand https://youtu.be/FR8x_PFPGXM
I loved the simplicity and my wife loved the color.
Thank you
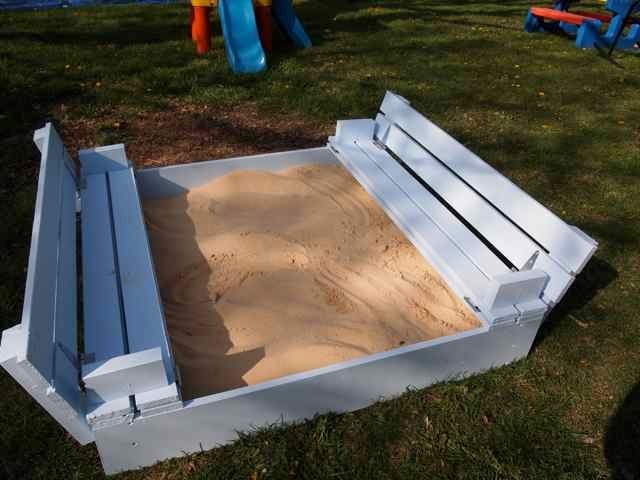
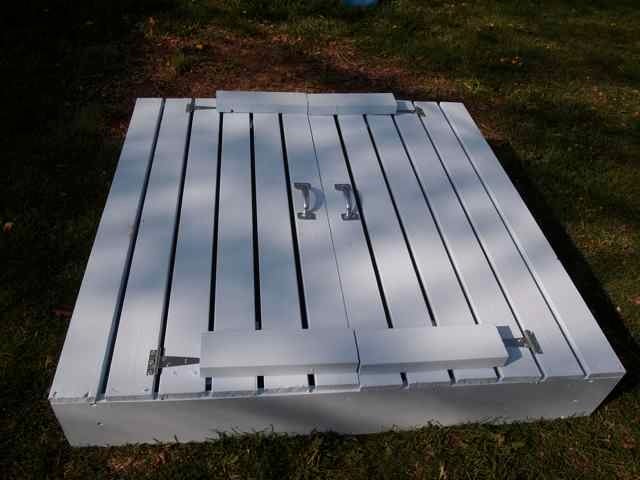
I knew I needed a sandbox for my toddler, and saw the original on pinterest. I was so happy when I came here looking for designs and saw that someone had created a plan for this. I think I'm more excited about it than my little guy is.
The plan was easy to follow, and it went together quickly. Thank you very much for these plans


Tue, 04/10/2012 - 10:45
Your son is adorable, and I totally "get it" when you say that you're more excited than he is! haha. Great job!
Wed, 04/11/2012 - 19:43
Great sandbox, it looks awesome! Your son is going to have so much fun in it this summer.
Tue, 10/16/2012 - 19:32
You rock Ana! Your plans are some of the best quick builds with lots of features. I built this sand box in two hours and my son is having the best time. This is a Texas winter replacement for the beach and the backyard pool.
Mon, 05/23/2016 - 19:44
So I just started making this box and it's truly an awesome design but I couldn't get 1x8 lumber instead I got 2x8... For the box base, will this make an difference in the mechanics of the seat and back opening..and the overall size of the box is 1.5" longer at 49" instead of the 47" the plans detail.. I was hoping that it won't but I think it might interfere with the 2x4 support the seat back..
I right in the middle of this project so I need to get on with it as it's nice tomorrow..
THANK YOU
ED
I challenged my husband who is new to any woodworking project to make me this table! That he did!!


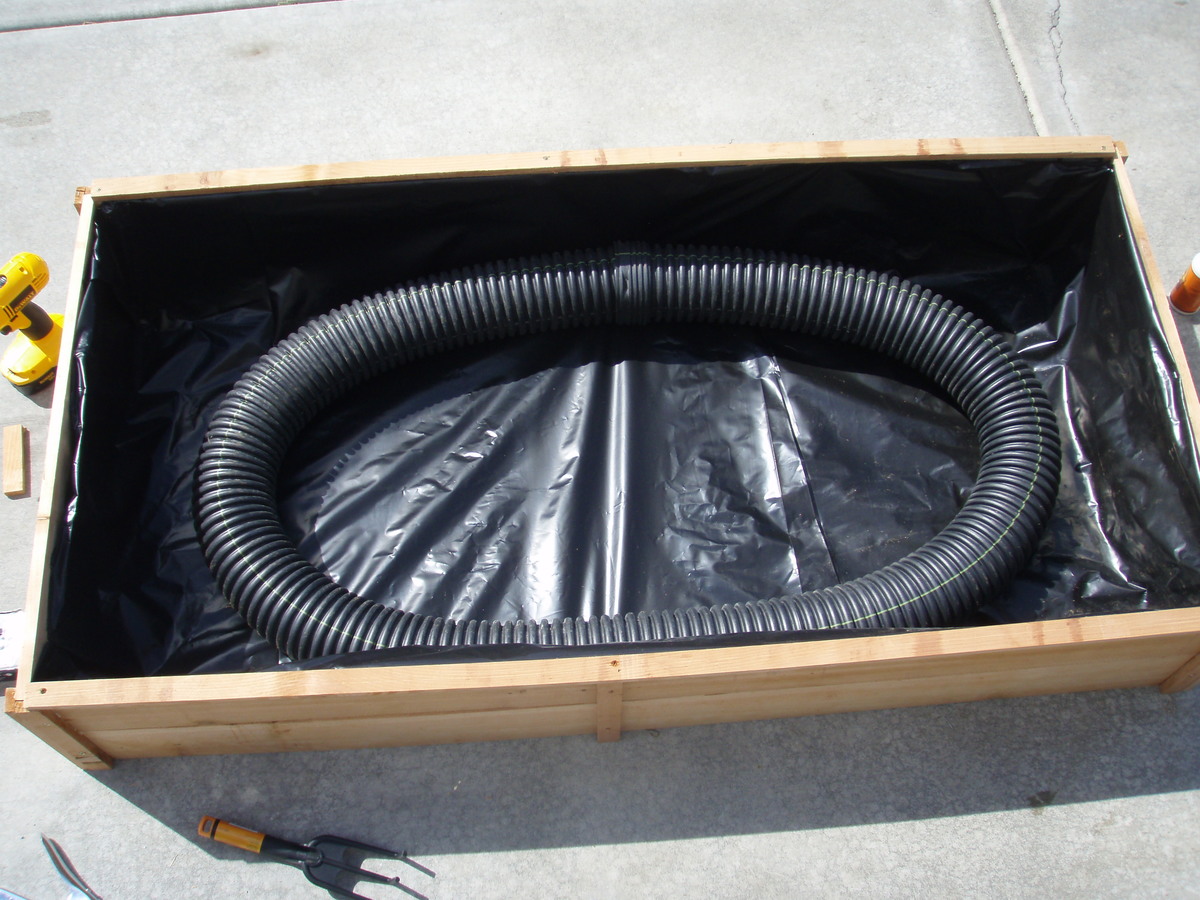
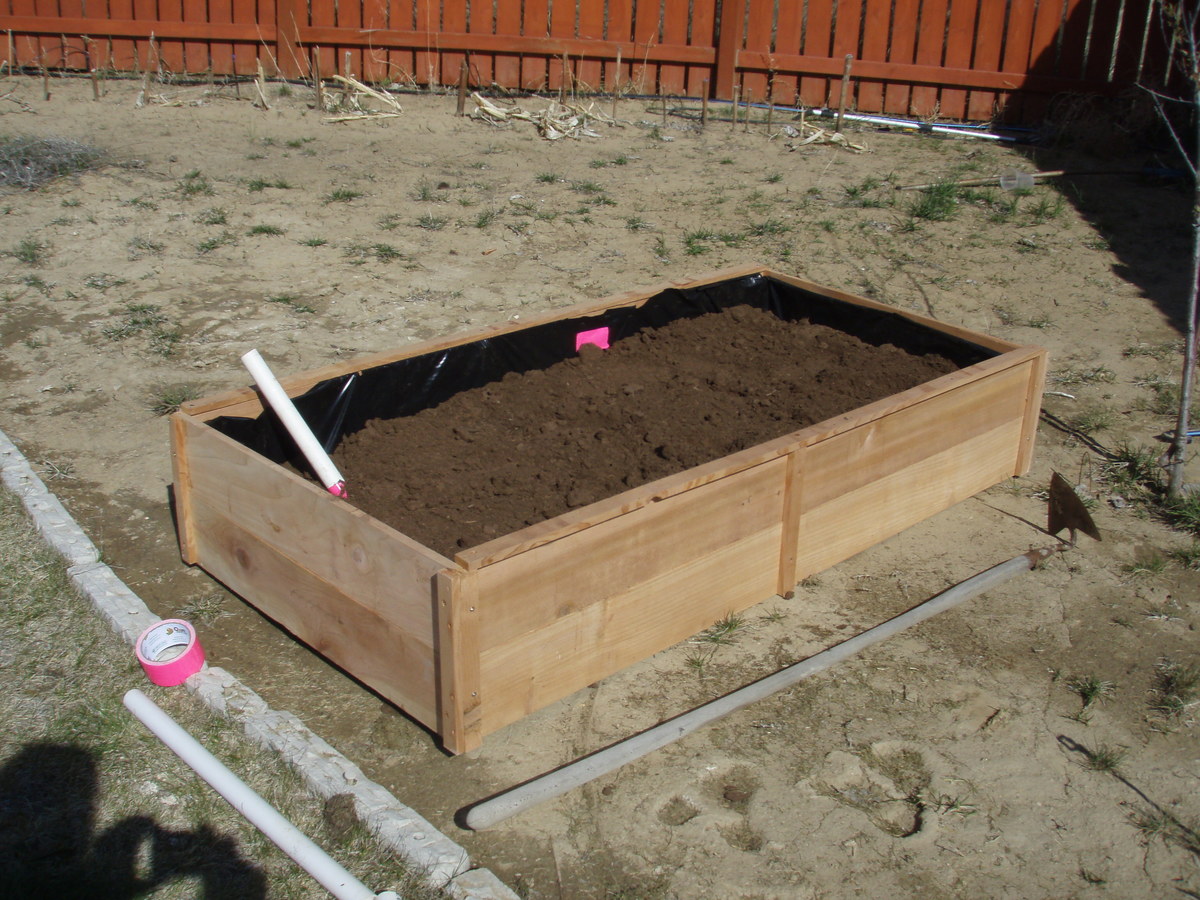
I read about a SIP, or self watering planter in Family Handy Man April 2012. There planse we expensive and compicated. These were easy and fun to make. I like the I dea of using 50% to 90% less water, and only watering once a week.
I added a post down the middle to help with bowing.
I found 5 foot cedar fence posts for $1.28 at orange. Including glue and screws $10. I have the palsit lininn, the withe piping on hand. HTe drain pipe was $6. for a total of $16.
Orange had a 2 x 2 plastic Self watering planter $30, big savings
I say starter only if you are not ripping, but using 1 x2 's
Wed, 09/05/2012 - 21:12
I am not sure, a roll my dad had laying around. Most research suggests pond liner.
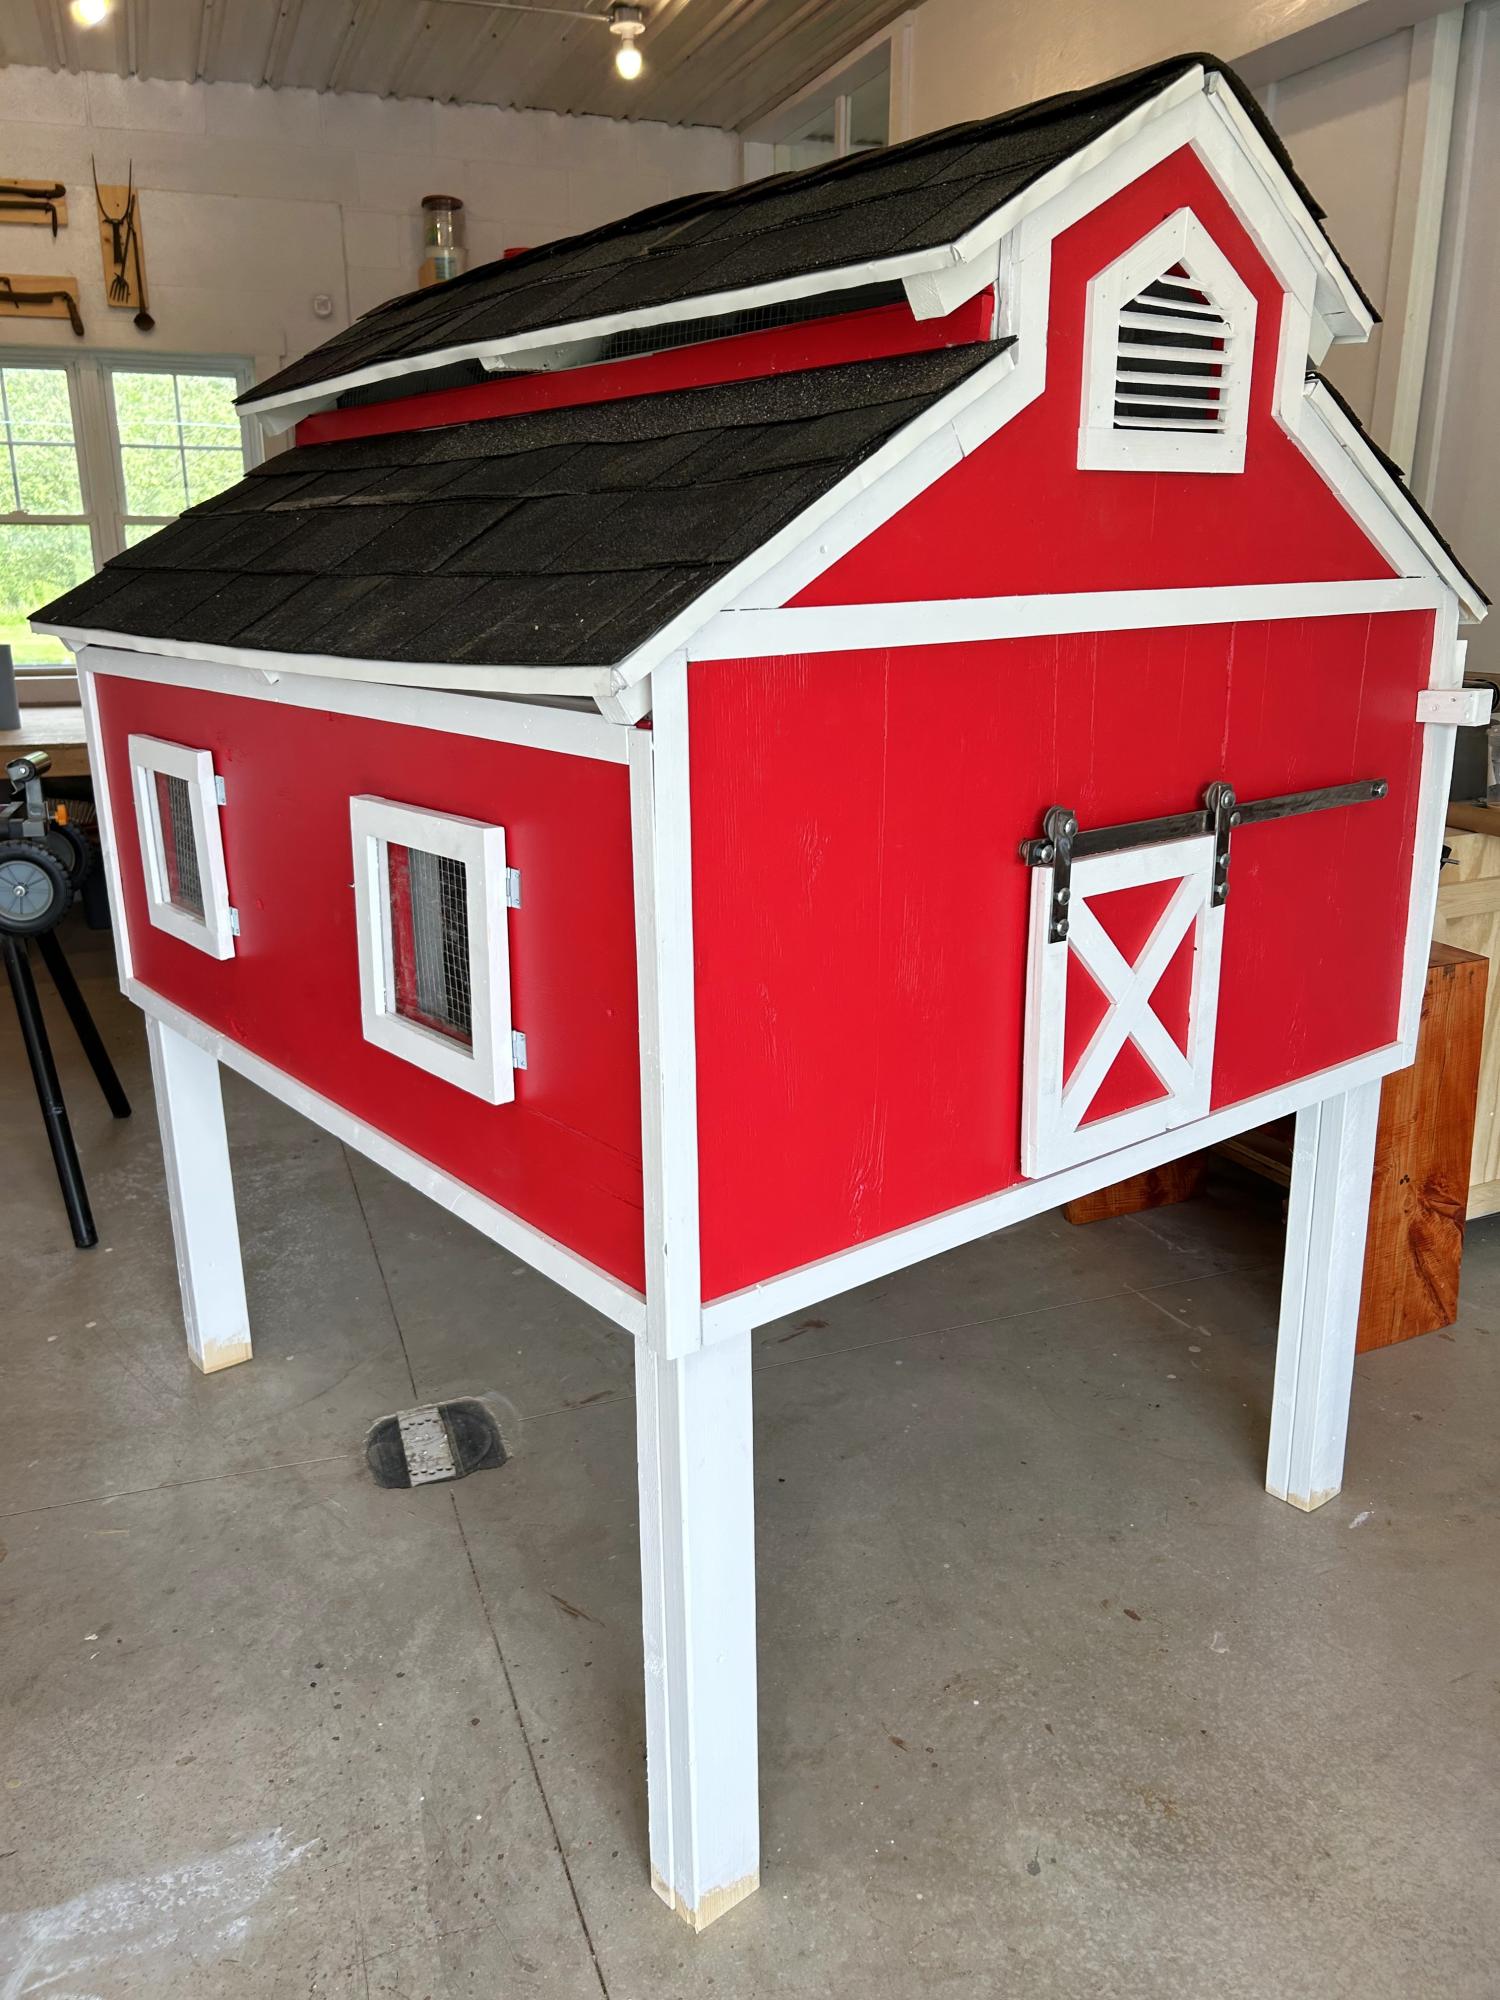
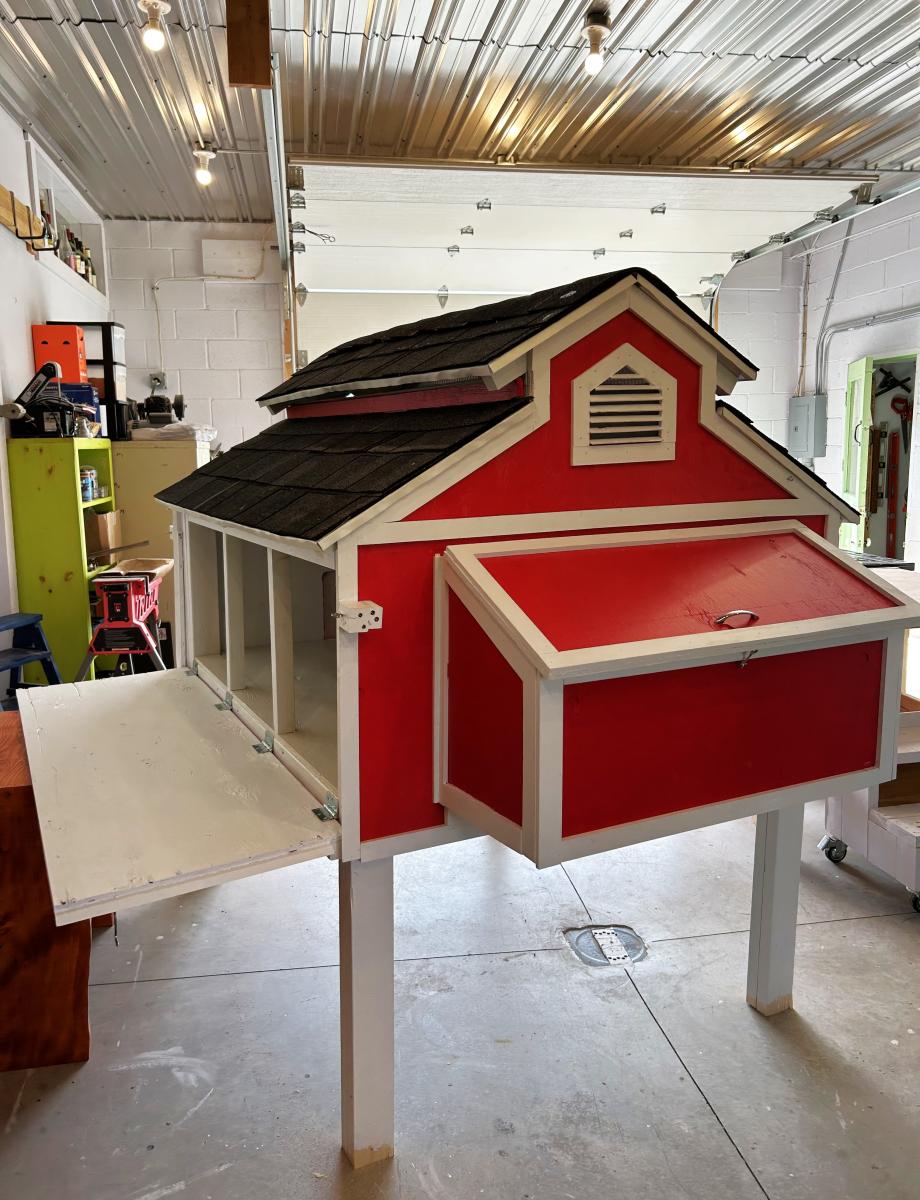
Chicken coop I made to look like a little red barn complete with a working barn door. We have seven girls and they love their lovely barn home.
Sue Laidacker


Comments
Ana White Admin
Sat, 10/02/2021 - 07:19
Love it!
Thank you for sharing, it looks amazing!