Entryway bench
Used plans for Alexia bench.
I used leftover 4 x 4 pine we had for the legs. I bought some paneling and moulding to dress it up.
I also used leftover flooring for the drawer faces.
Used plans for Alexia bench.
I used leftover 4 x 4 pine we had for the legs. I bought some paneling and moulding to dress it up.
I also used leftover flooring for the drawer faces.
From the rustic X end table plan, I made mine slightly taller and a little more narrow to fit my space. Also decided to do a chevron top
Let me start by saying all of the credit for building this beauty goes to my husbands super talented 90 year grandfather!! I found your plans a few years ago & instantly fell in love but sadly did not have the skills or confidence at the time to tackle such a project. Luckily “Pal” (aka hubby’s grandfather) so graciously jumped at the task & built this for my girls as their gift from “santa”! I recently gave the interior a complete DIY budget makeover & my girls are in love! With all of the wonderful memories they’ve created & will continue to partnered with the fact that I can eventually tell them their GREAT grandfather handmade this for them makes this that much more special! ❤️
Sat, 07/03/2021 - 09:35
Love the story behind the build, very special indeed!
This is my first project working with wood. My husband and friends are very amazed by what I built.
Just started woodworking. This is my first ever build. Surprised with how sturdy this bench is.
Built this for our son's nursery.
This little chair turned out really well. The only significant changes I made to the plans were to cut the back slats in an arch, round the corners on the arm pieces, and round-over all of the exposed edges.
I really enjoyed this project. I would suggest painting as much as possible before assembly. I used pocket screws to hide which are hidden on the back side and a nail gun to attach the front 1x2s. I made a total of 8 ledges.
One thing I did different from the project plan is that I connected the bottom board on top of the back board to give me a little more space on the bottom for layering my books.
I've built a lot of things...mainly corn hole boards for friends and family but this is my first furniture build. My wife's Valentine present! Now I'm thinking my new big screen tv sure could use a nice Apothecary media cabinet.
The main difference is my cart is the width of the shelves. My wife wanted something wider than a 2x12 so I combined (2) 2x8's with pocket hole screws. This is my first real build and I was surprised at how strong the shelves are with just pocket hole screws! I also made the cart counter height as she will be using it in the kitchen.
I used the plans from JRLwoodworking and the pictures from AZCA33 and combined them to create an entertainment center to hold my new 60" flat screen tv. I priced new entertainment centers at furniture stores for a nice entertainment center to hold a large tv and the price was around $2000. I looked around online and found a couple of websites of handmade entertainment centers and decided to give it a try. I had never made anything remotely his large or detailed, but with the plans and some patience, I was able to bring this thing to life. I couldn't have done it without the help of this website or jrlwoodworking. I am very proud of this piece of furniture and plan to cherish it for a long time....
Sat, 06/01/2013 - 19:21
Hi RAZORBACKFAN, I am so excited to see this build from our plans at jrlwoodworking.com! This is absolutely beautiful. It looks like a very difficult project, but with the step by step instructions and going through it a few times, it really can be done by a handy do-it-yourselfer. I hope you enjoy yours as much as we enjoy ours. The best part of it is telling everyone you built it. Nobody would believe it unless we had the pictures to prove it.
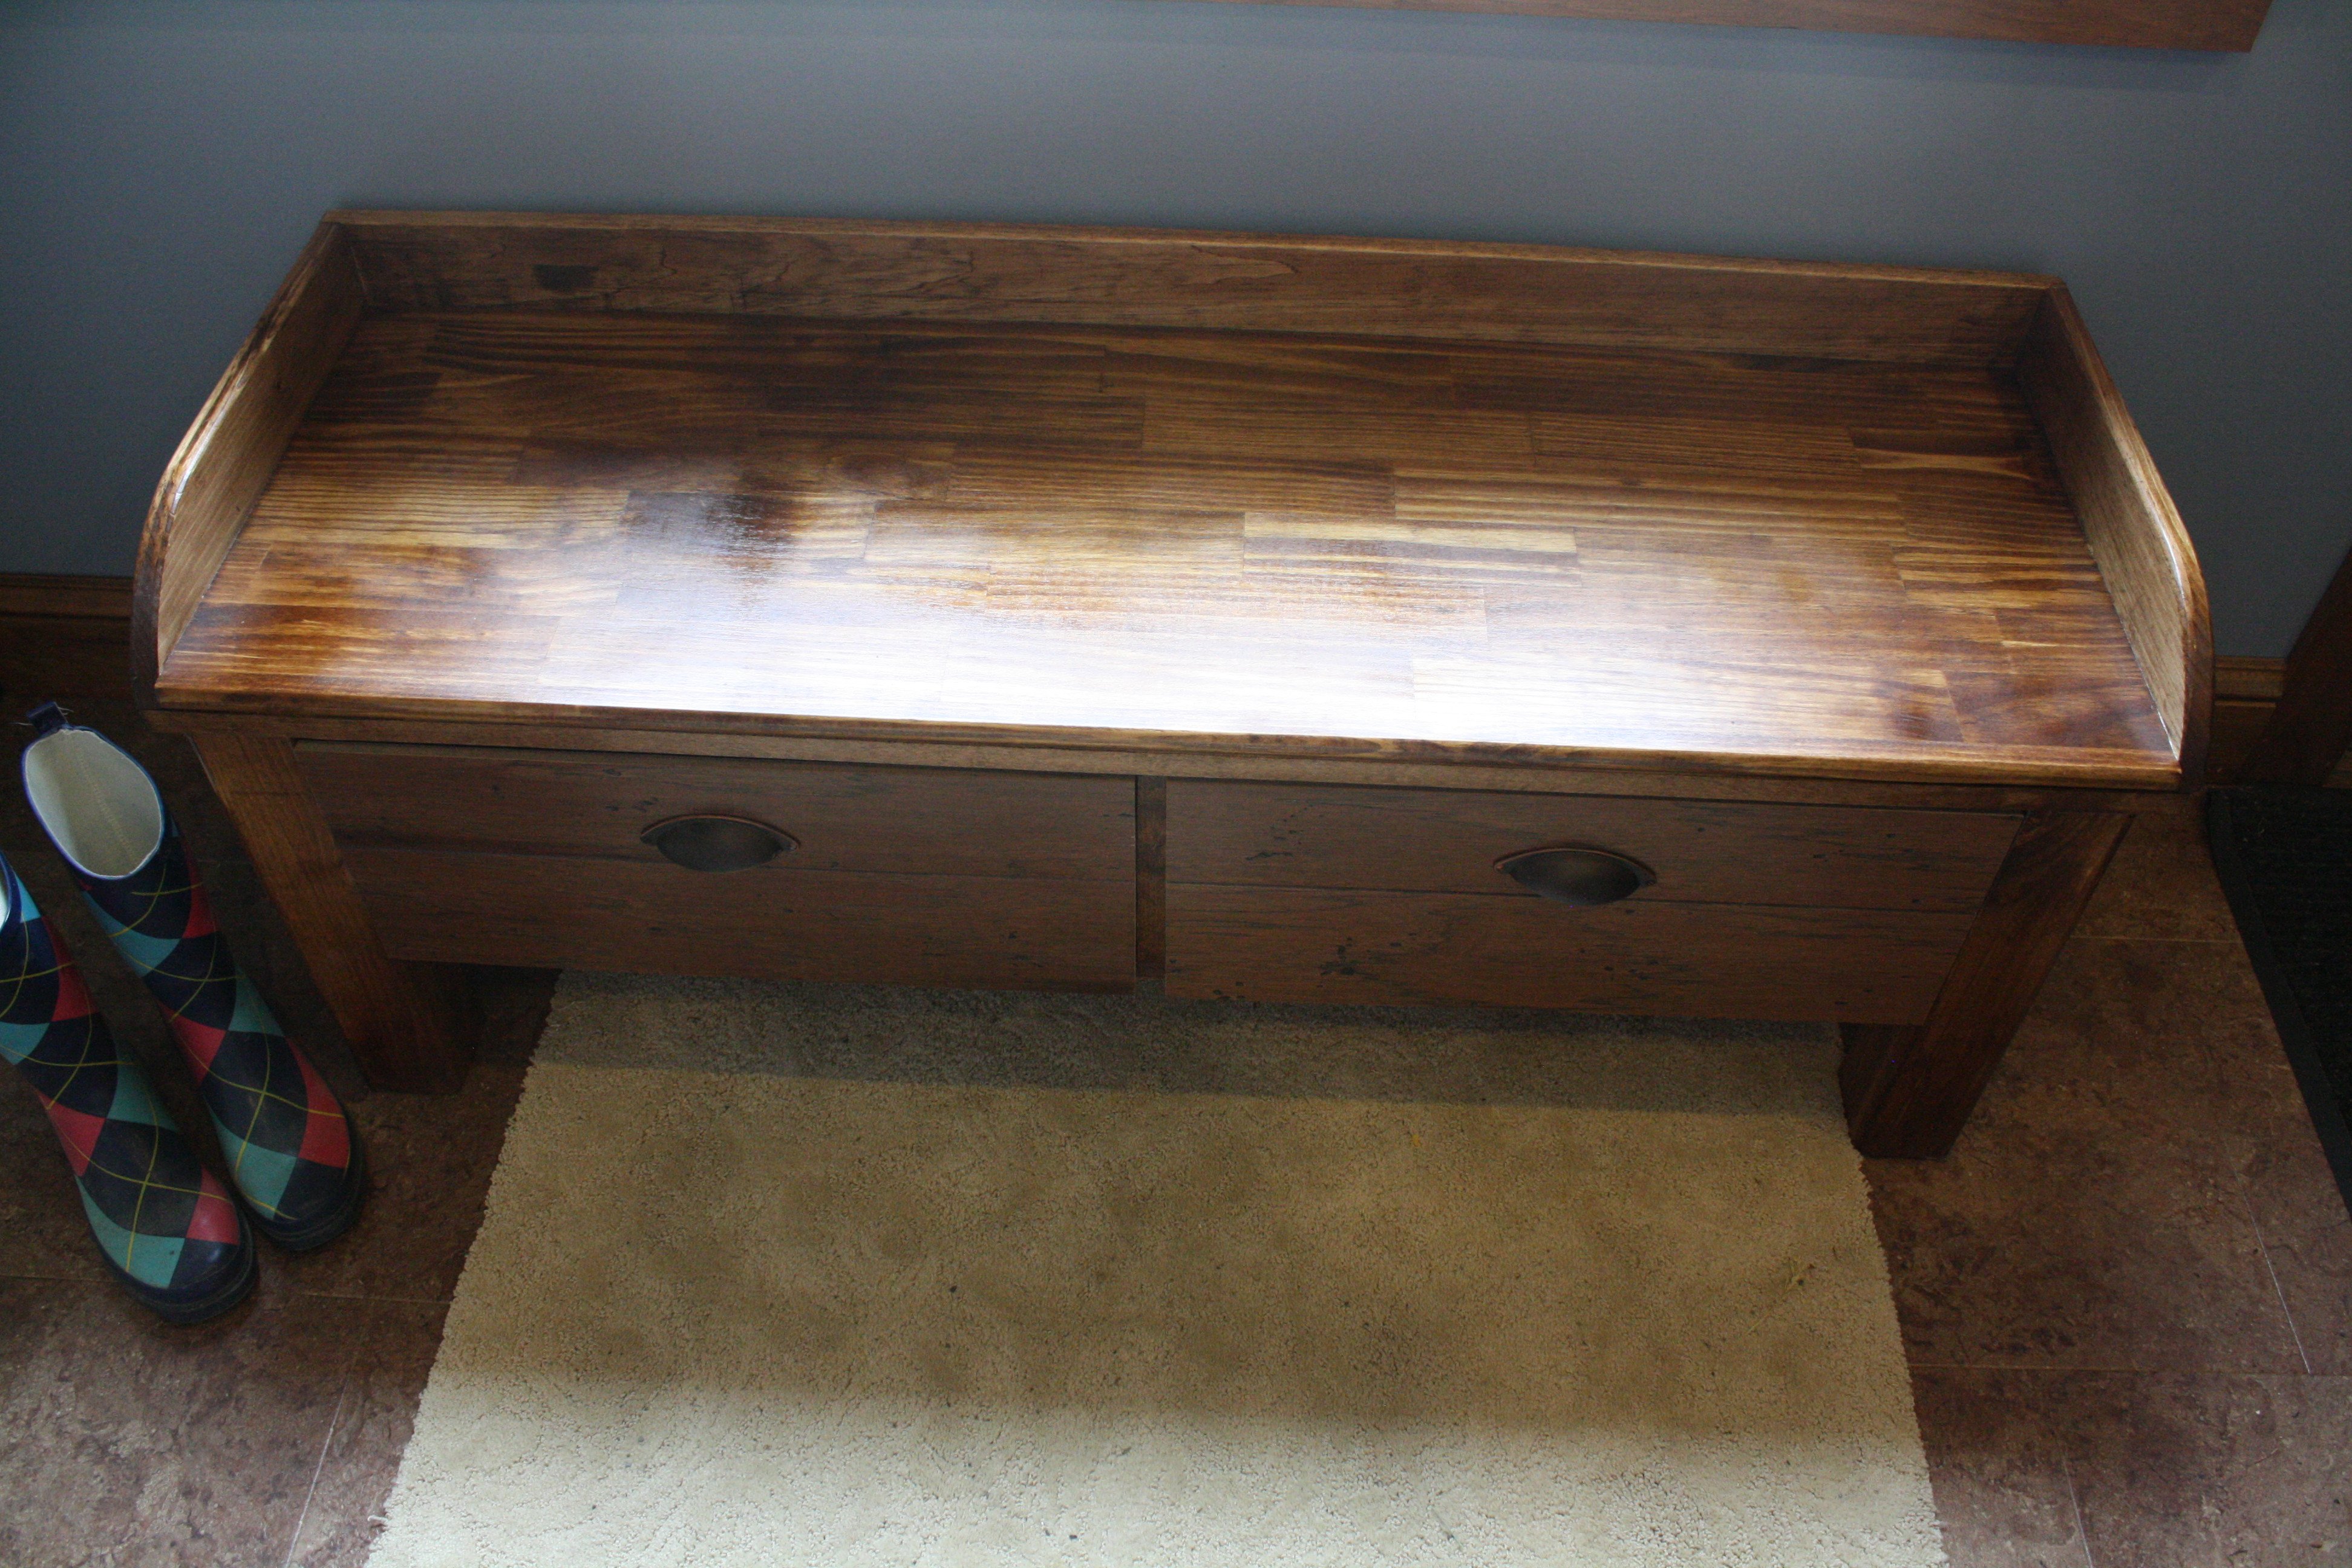
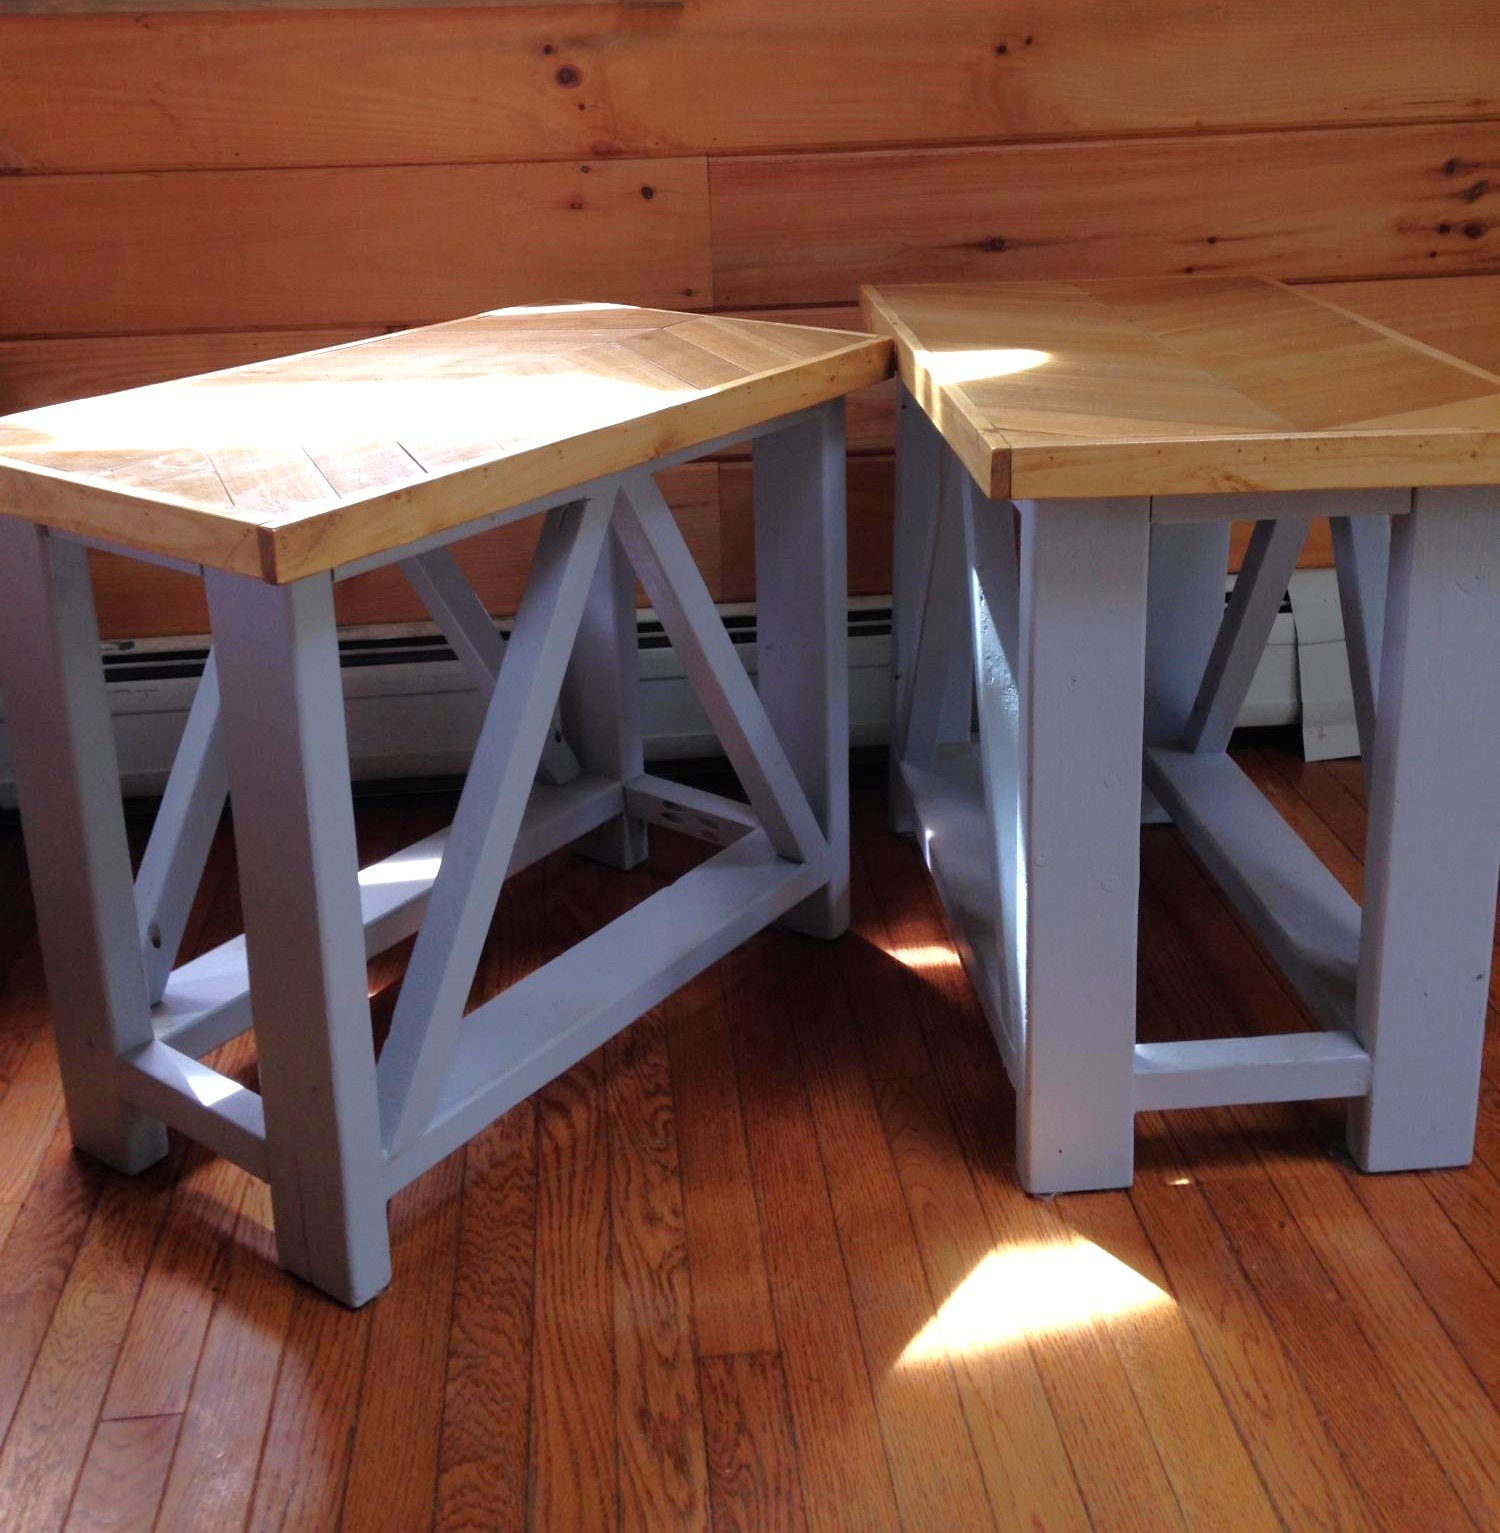
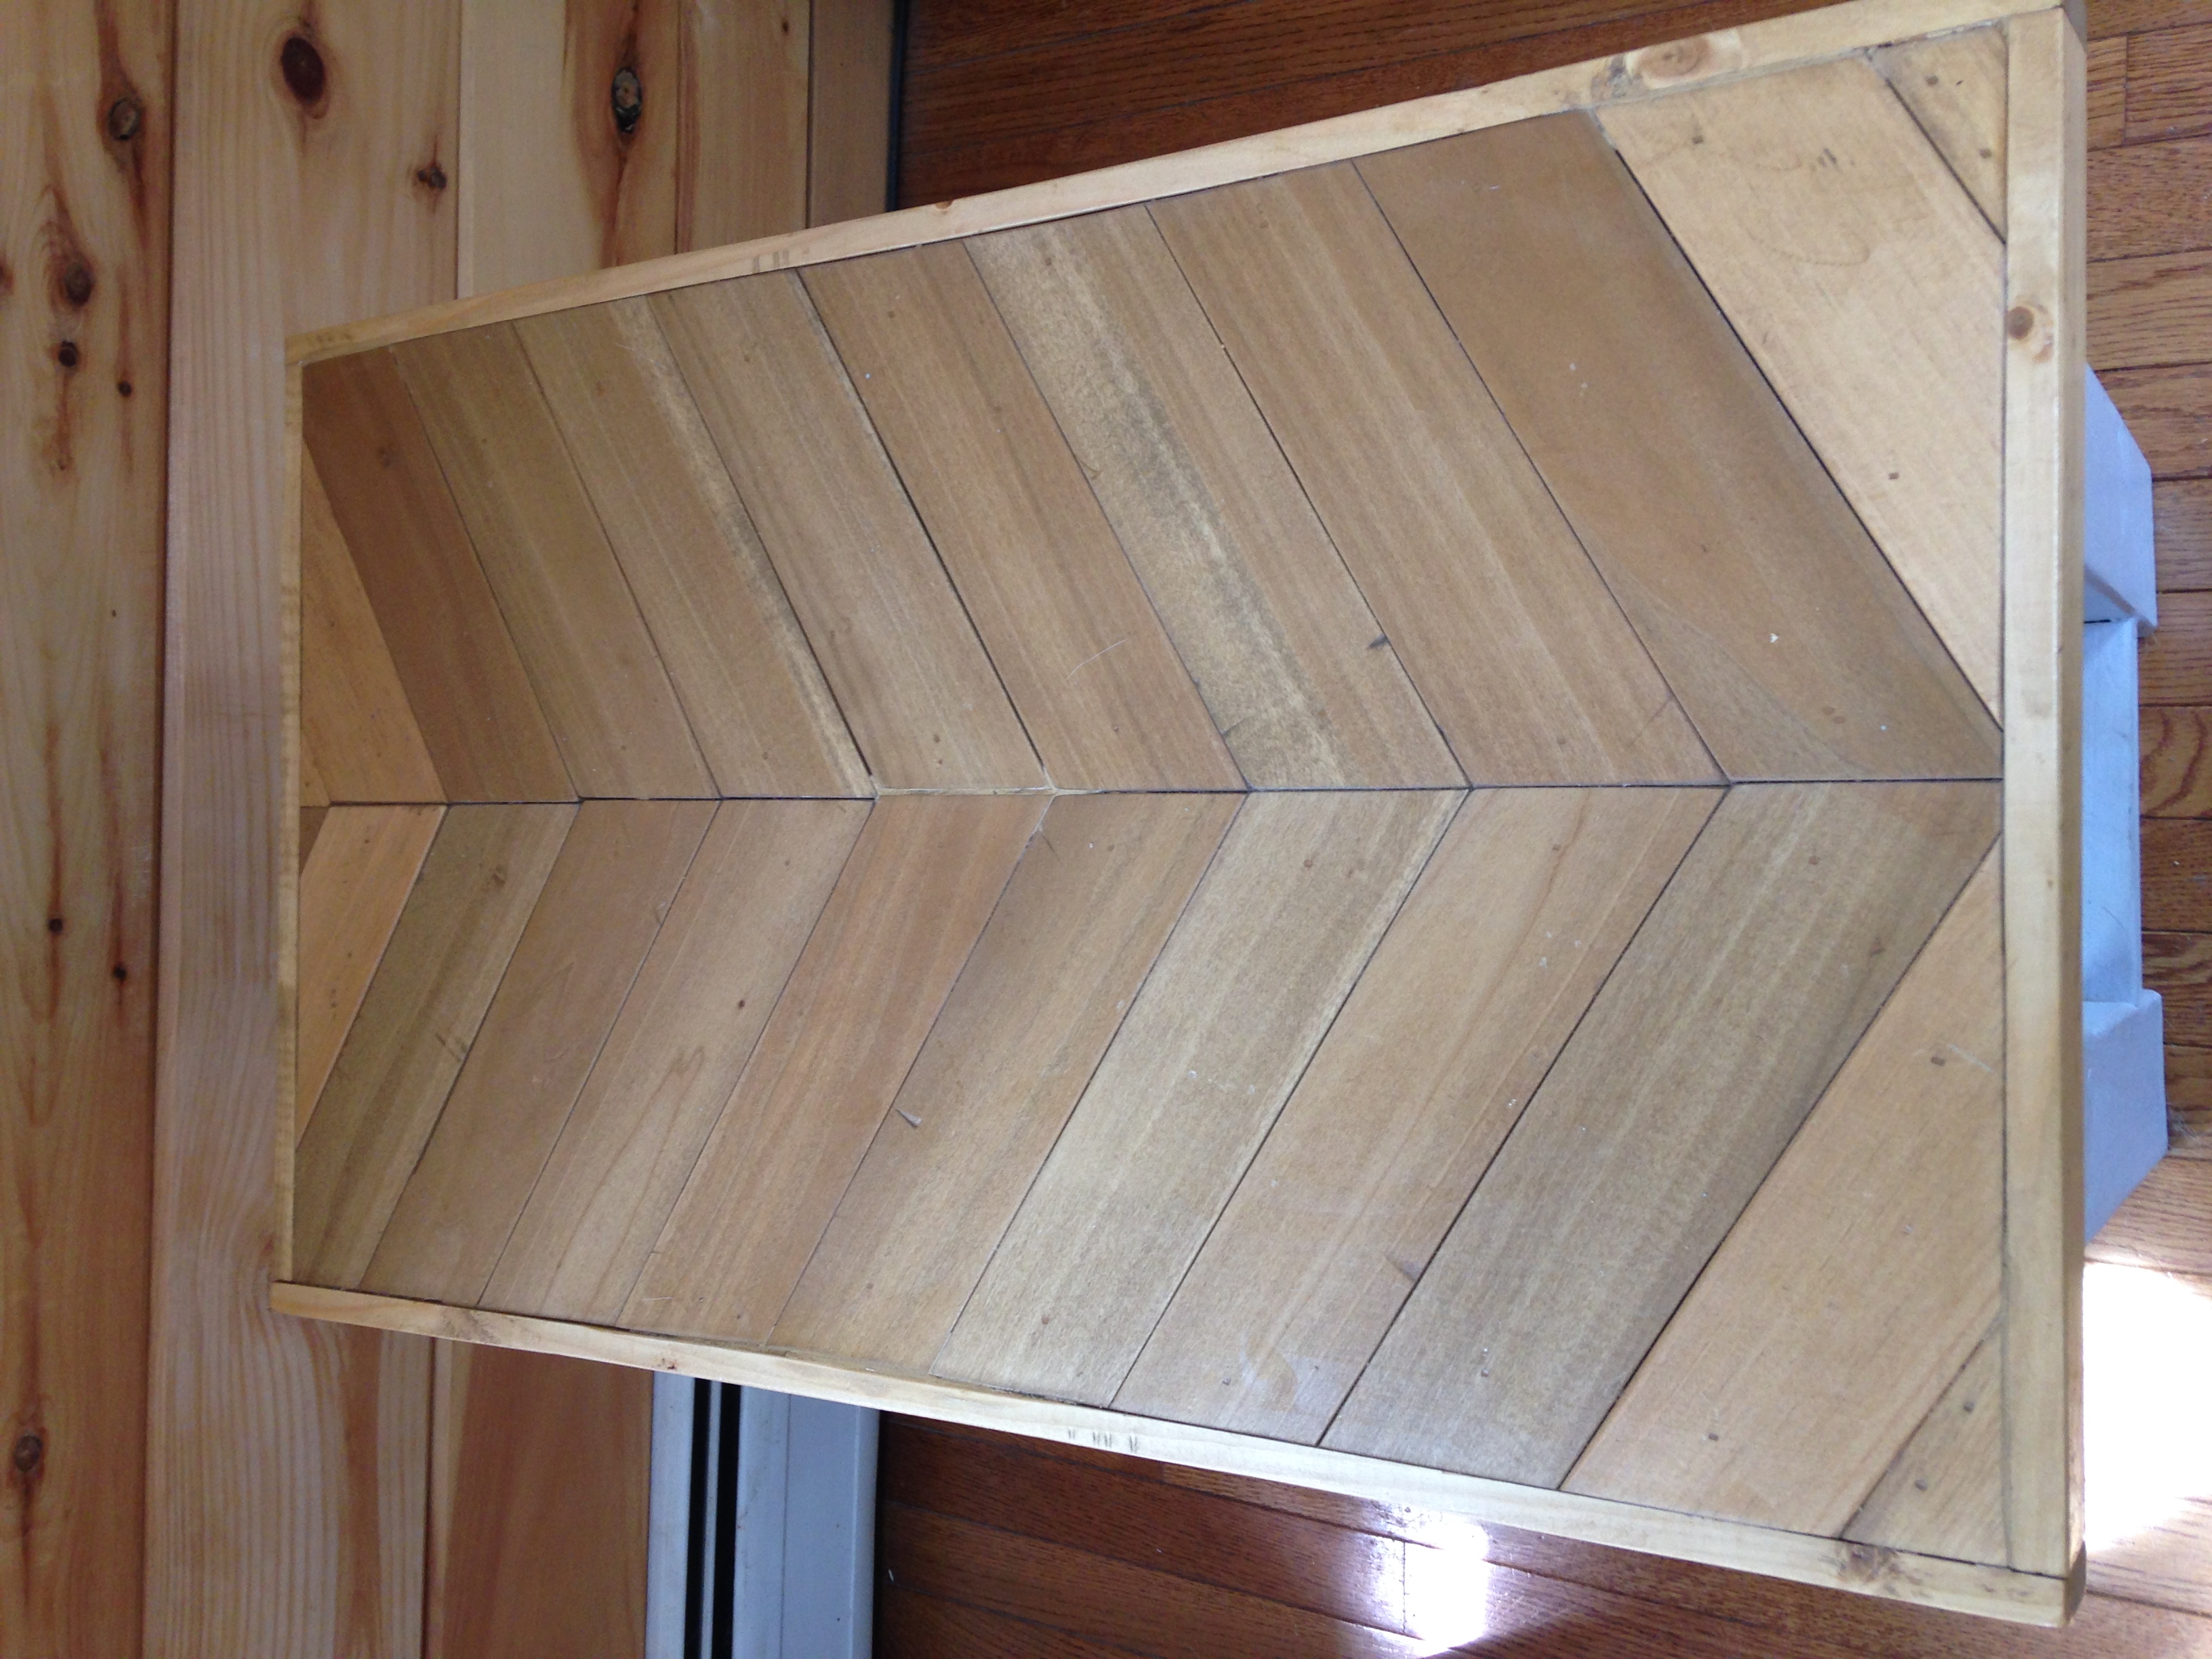
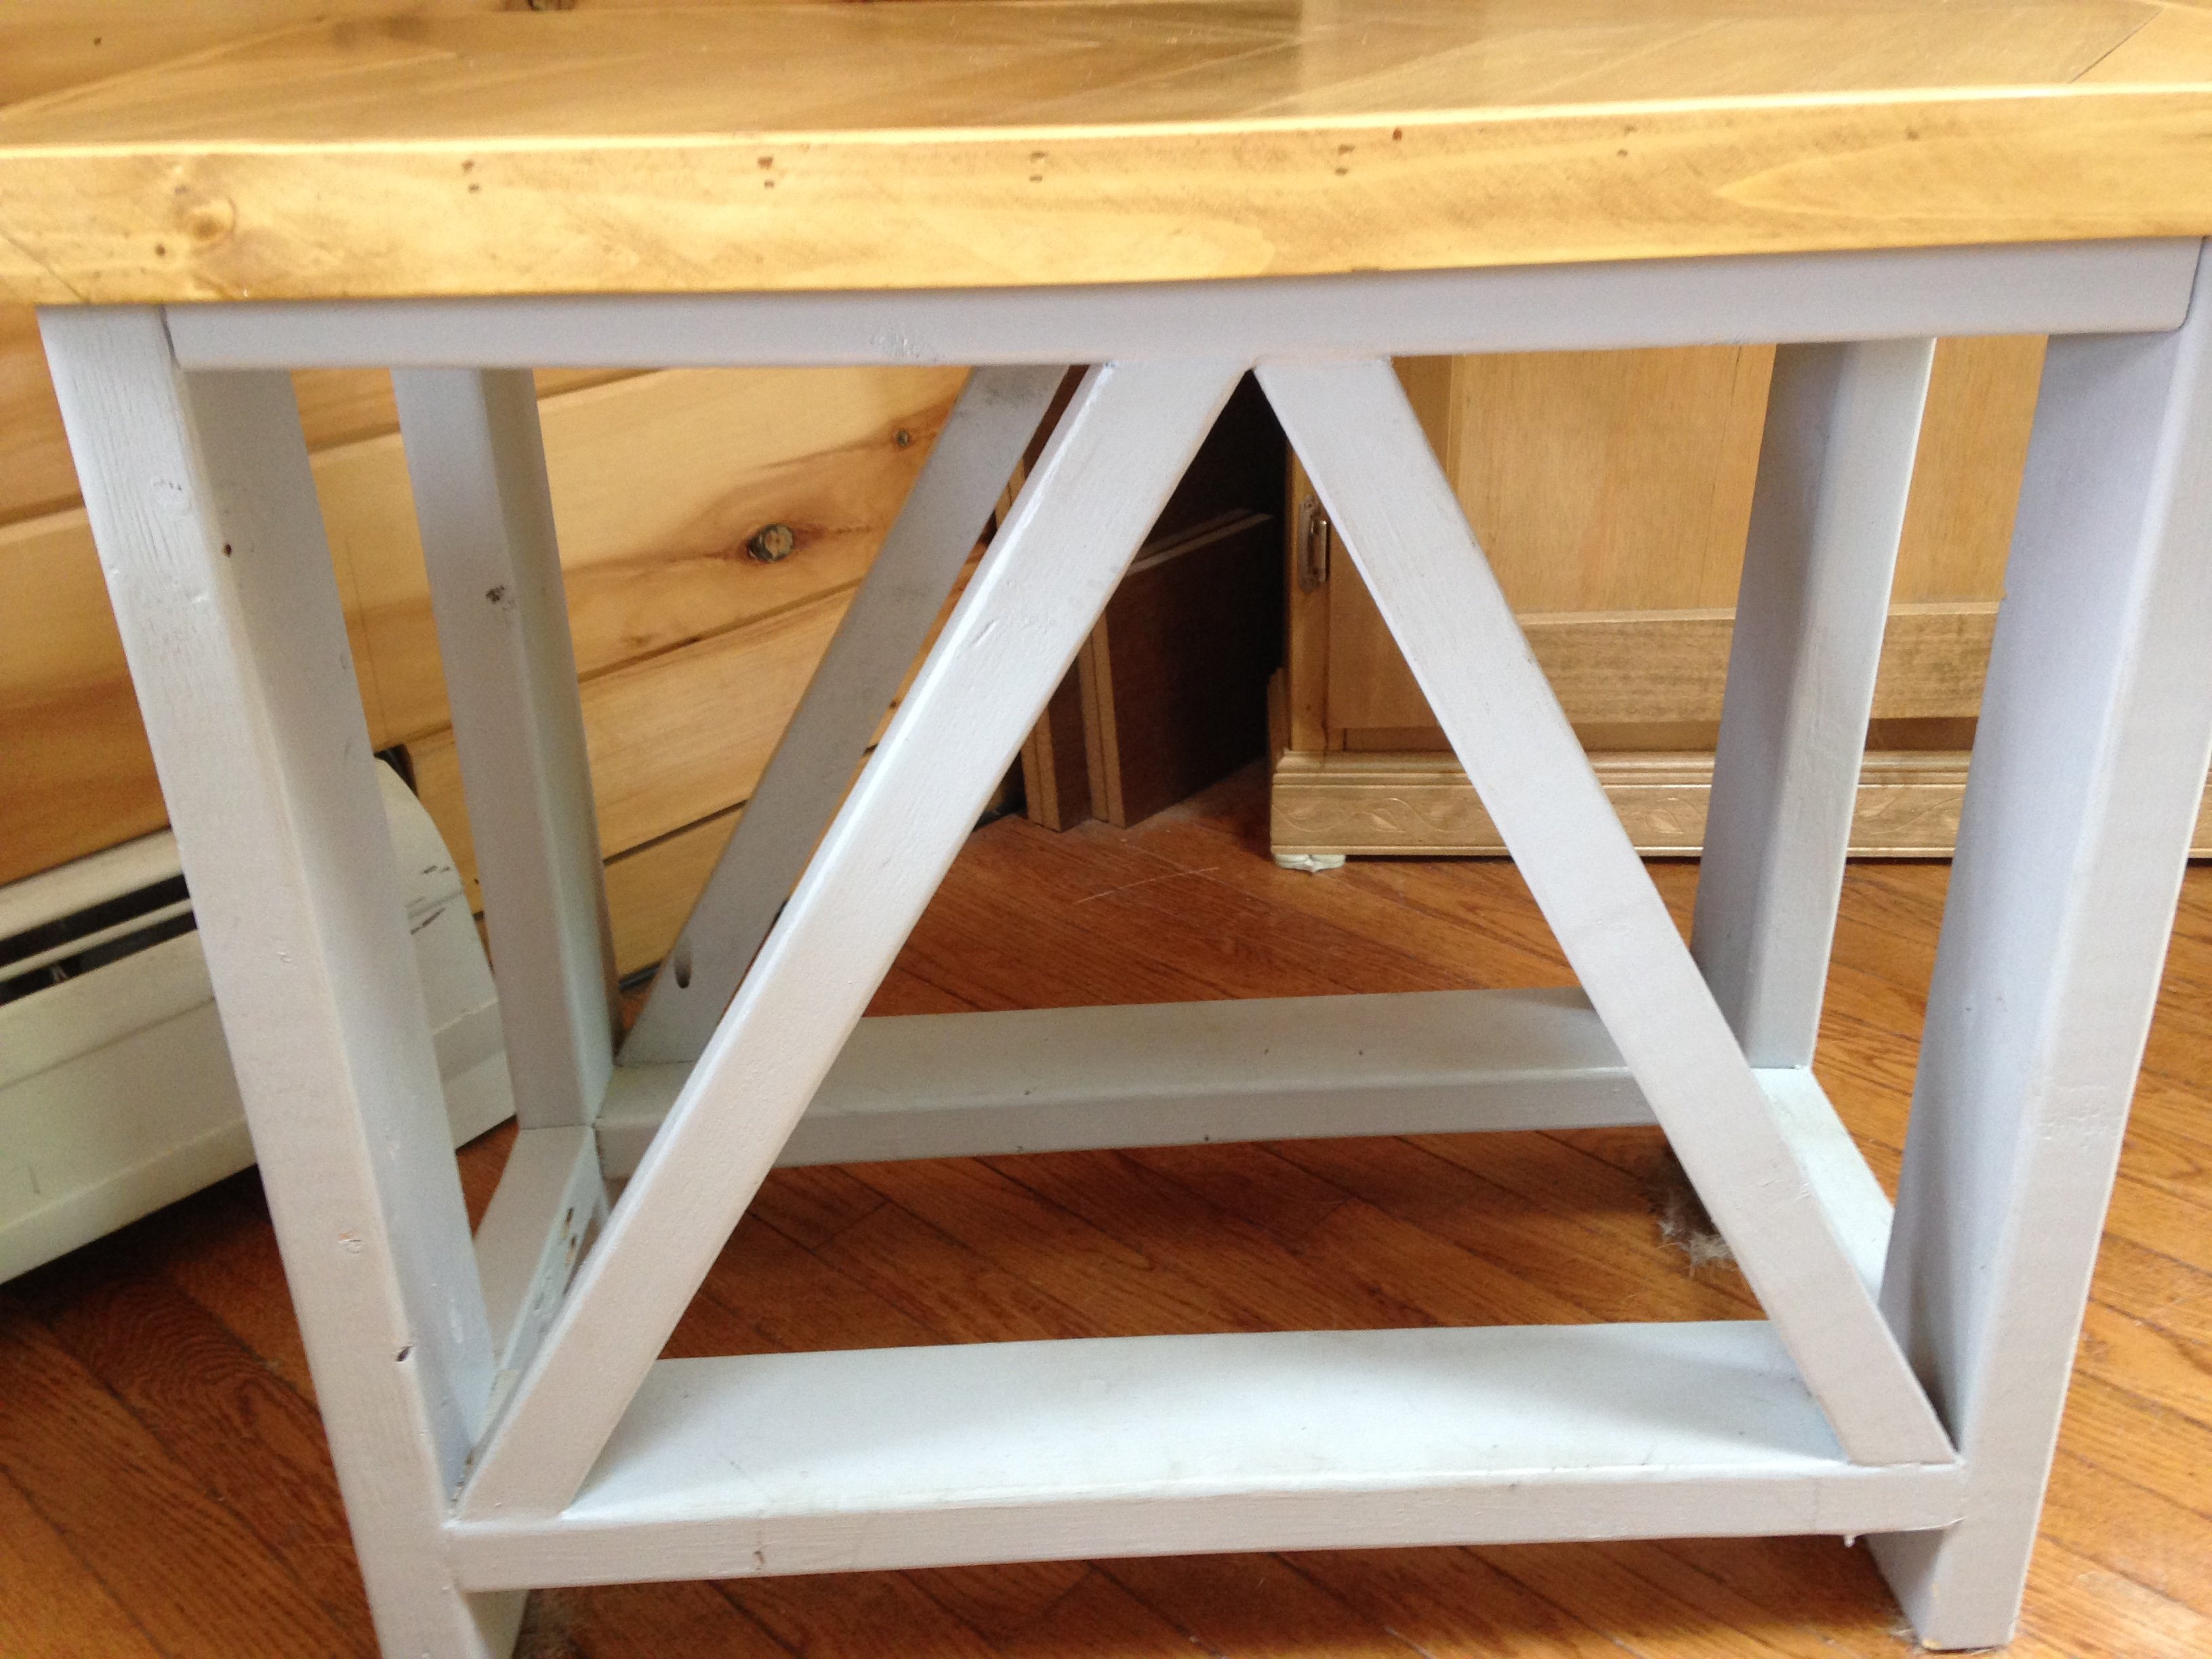
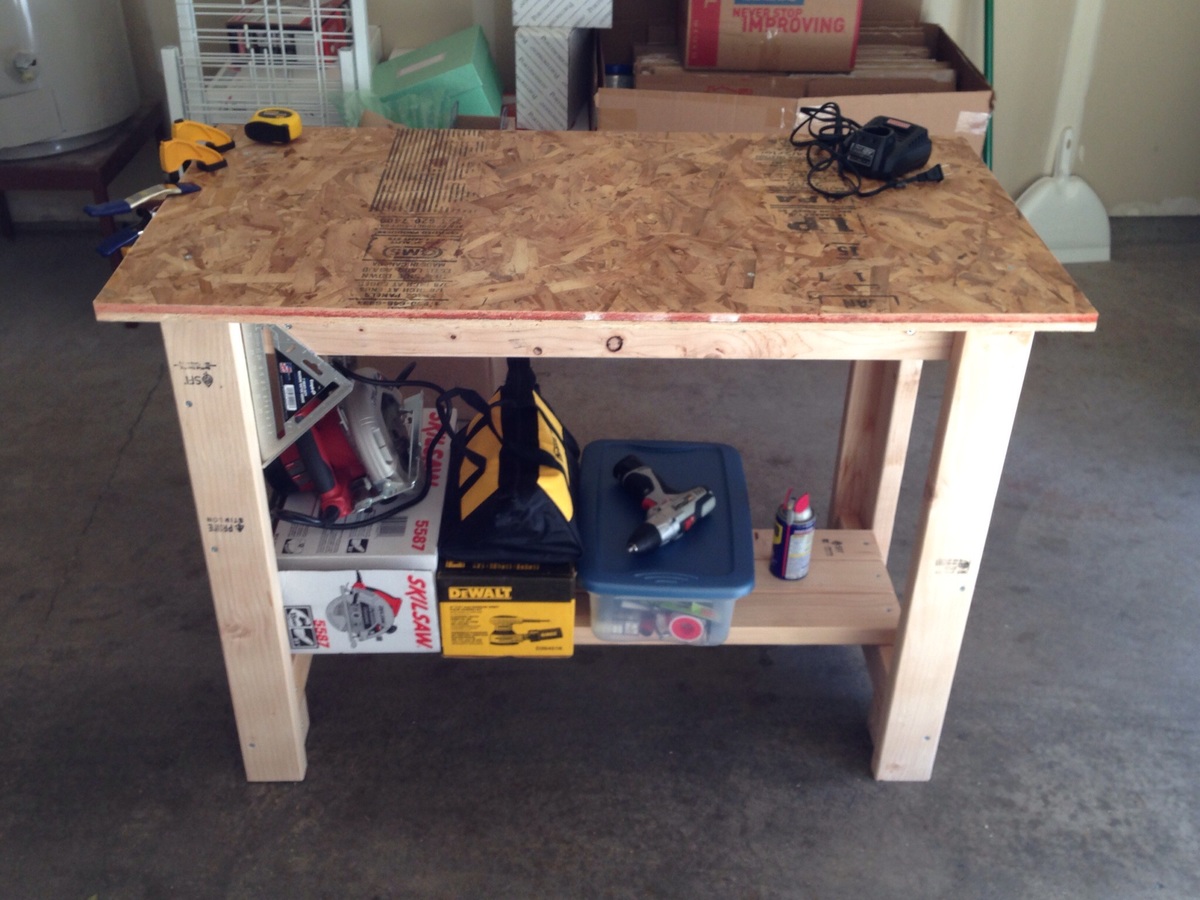
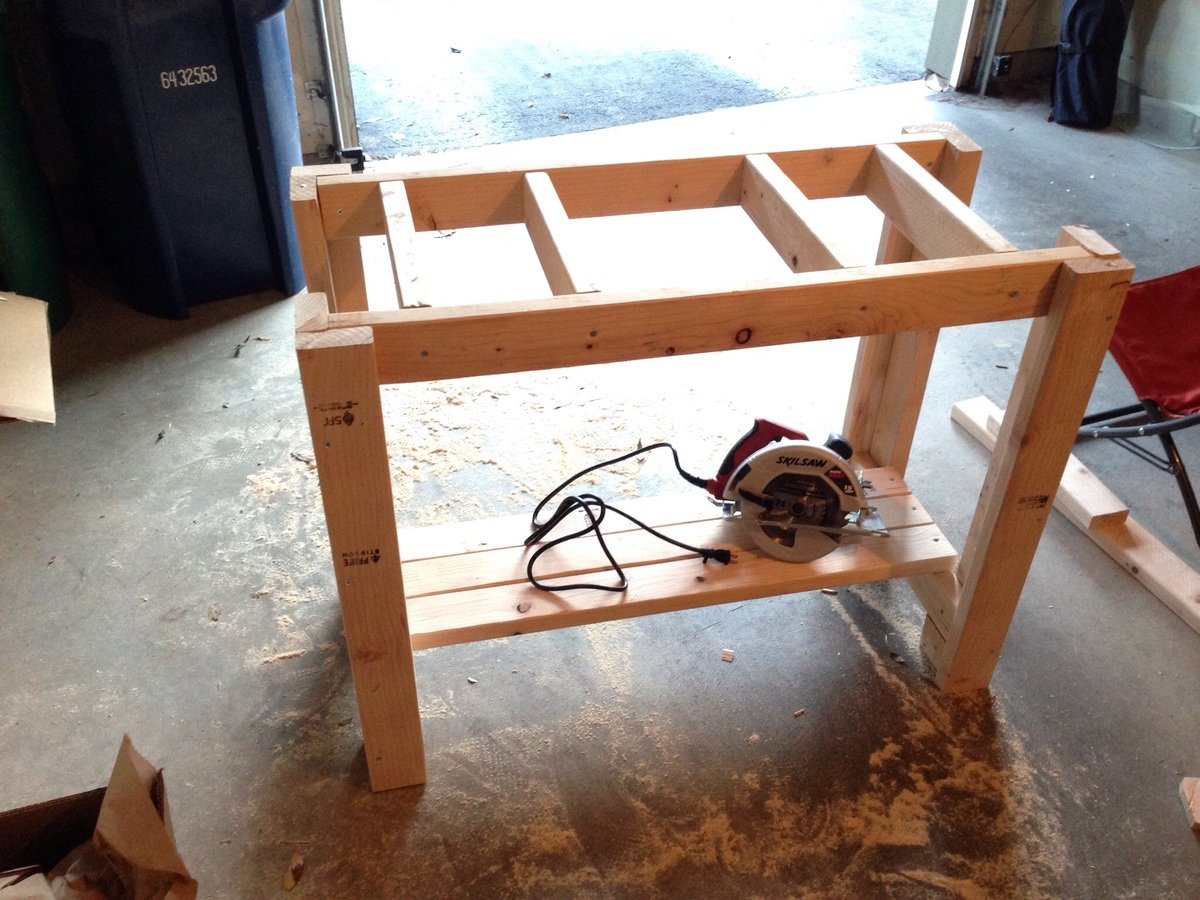
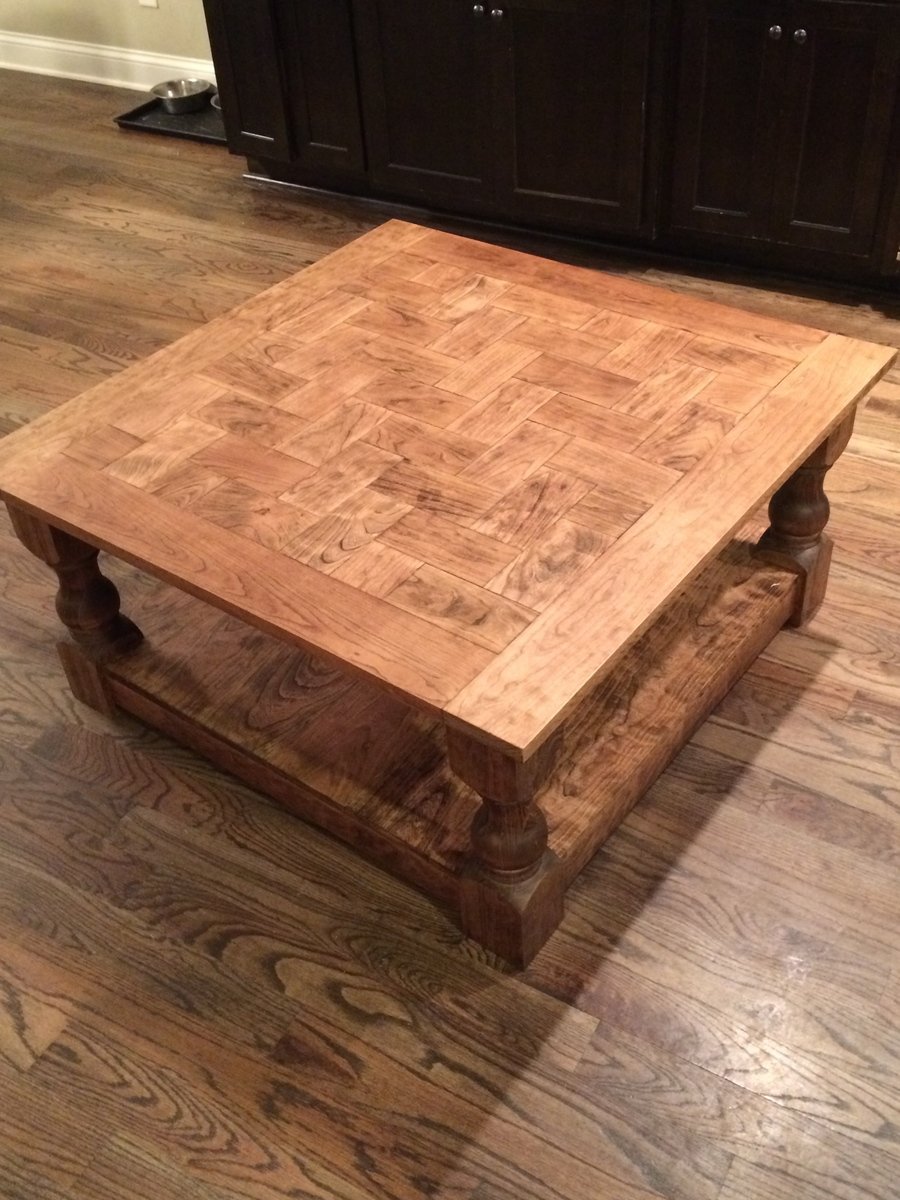
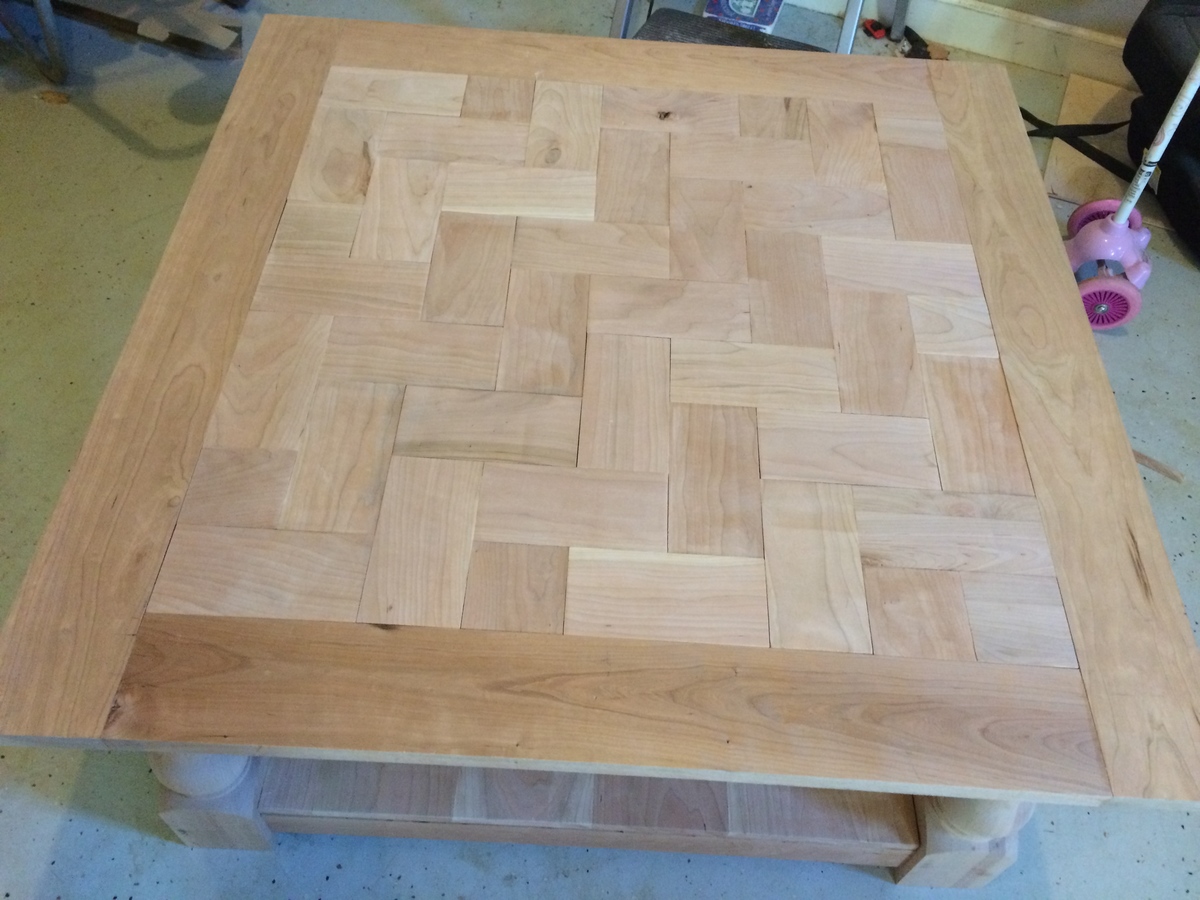
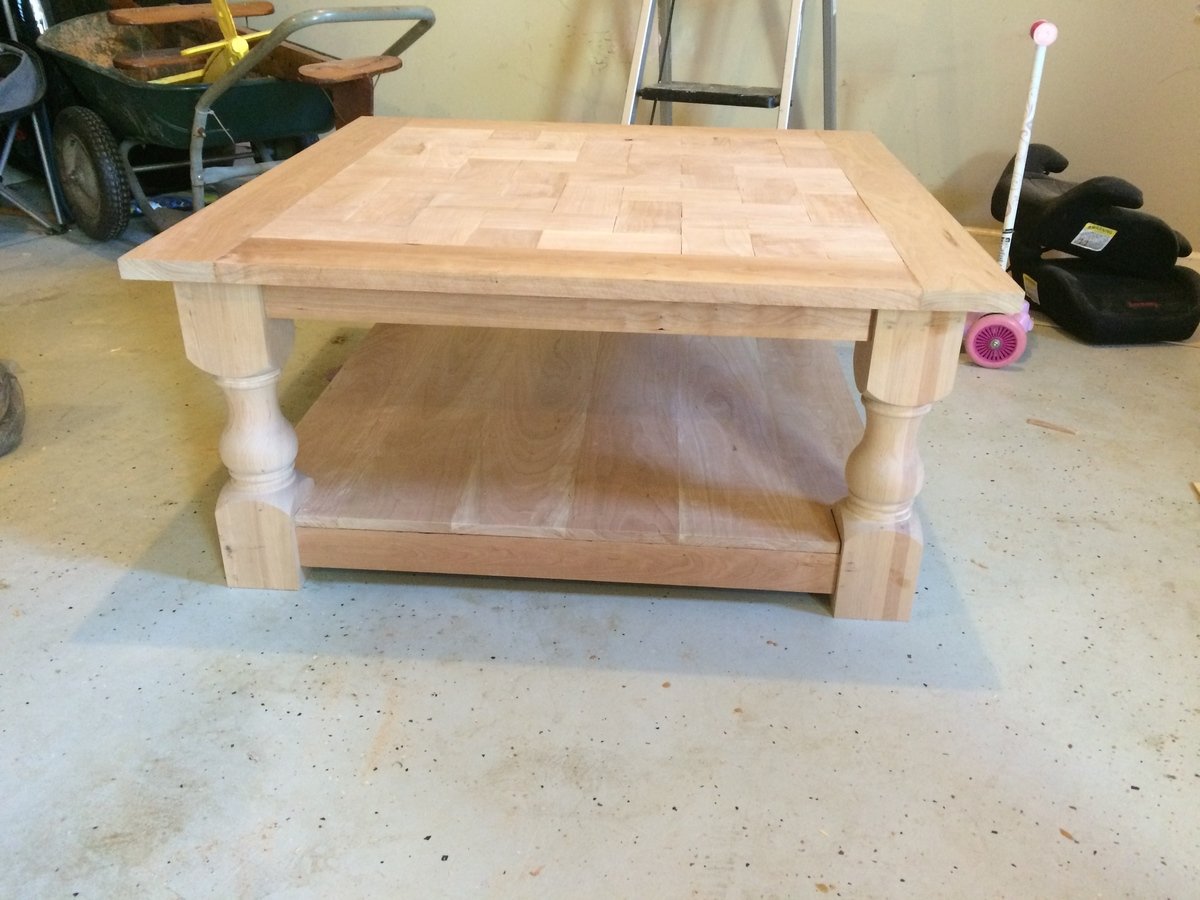
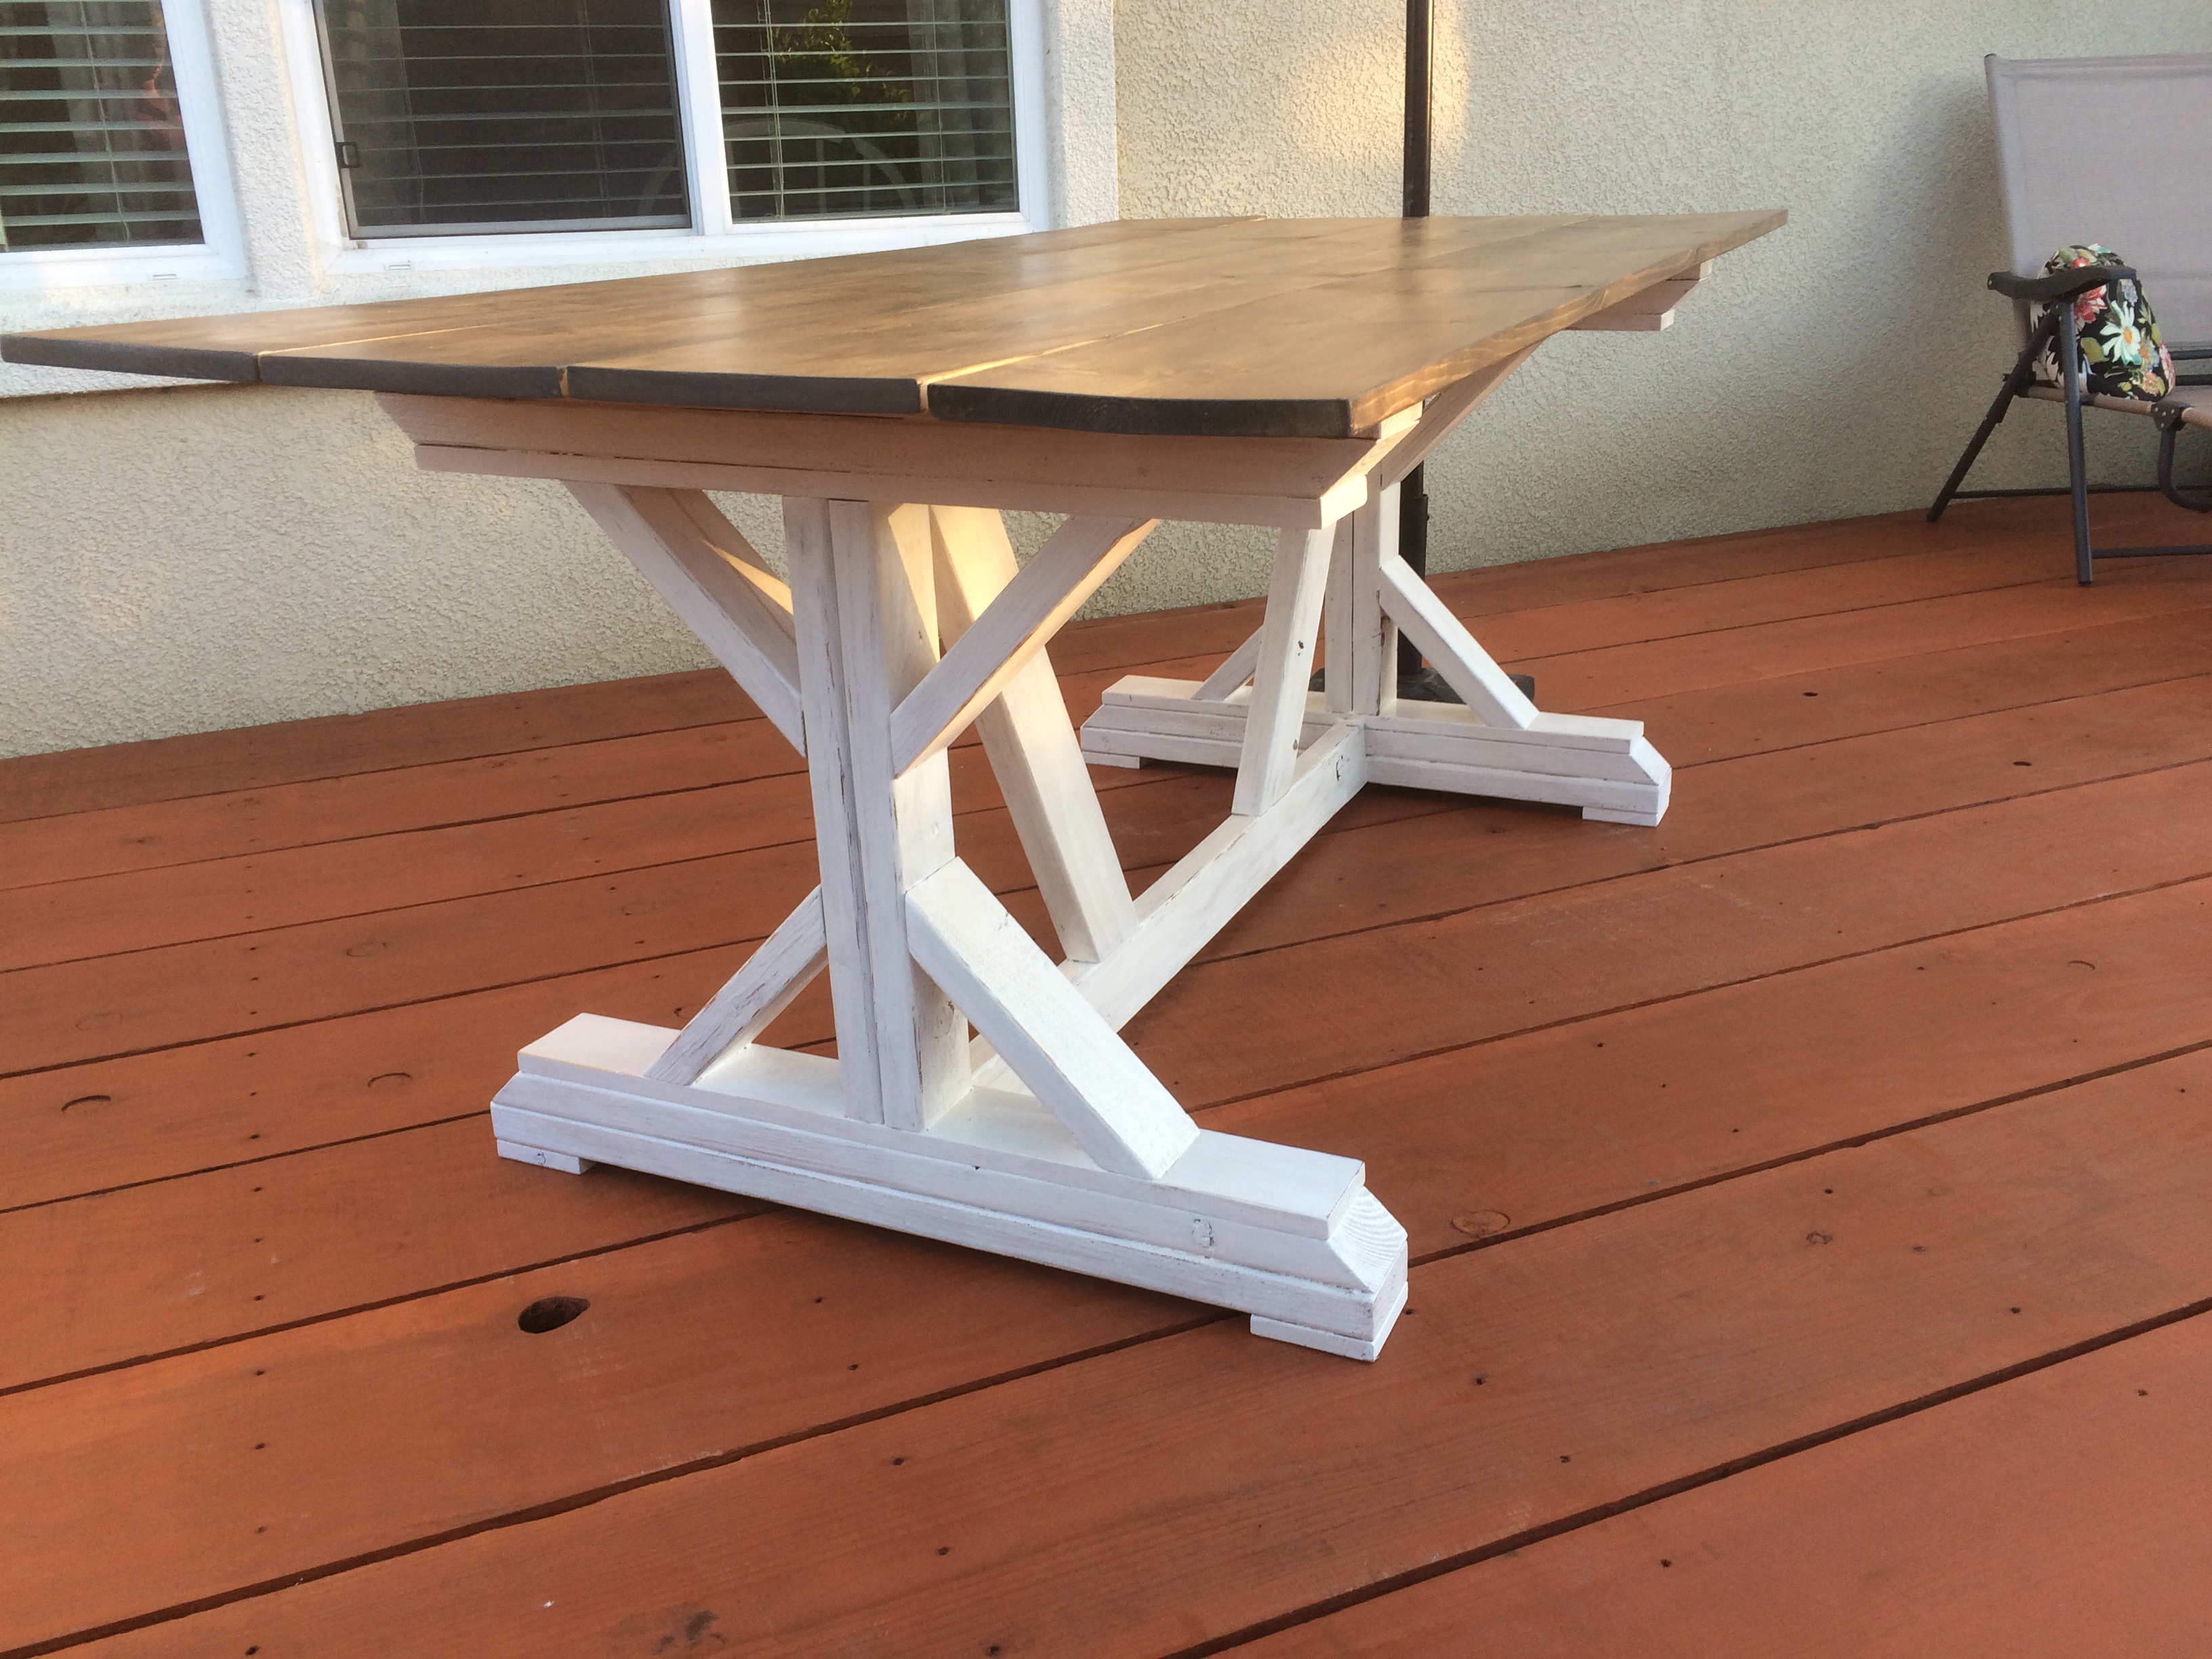
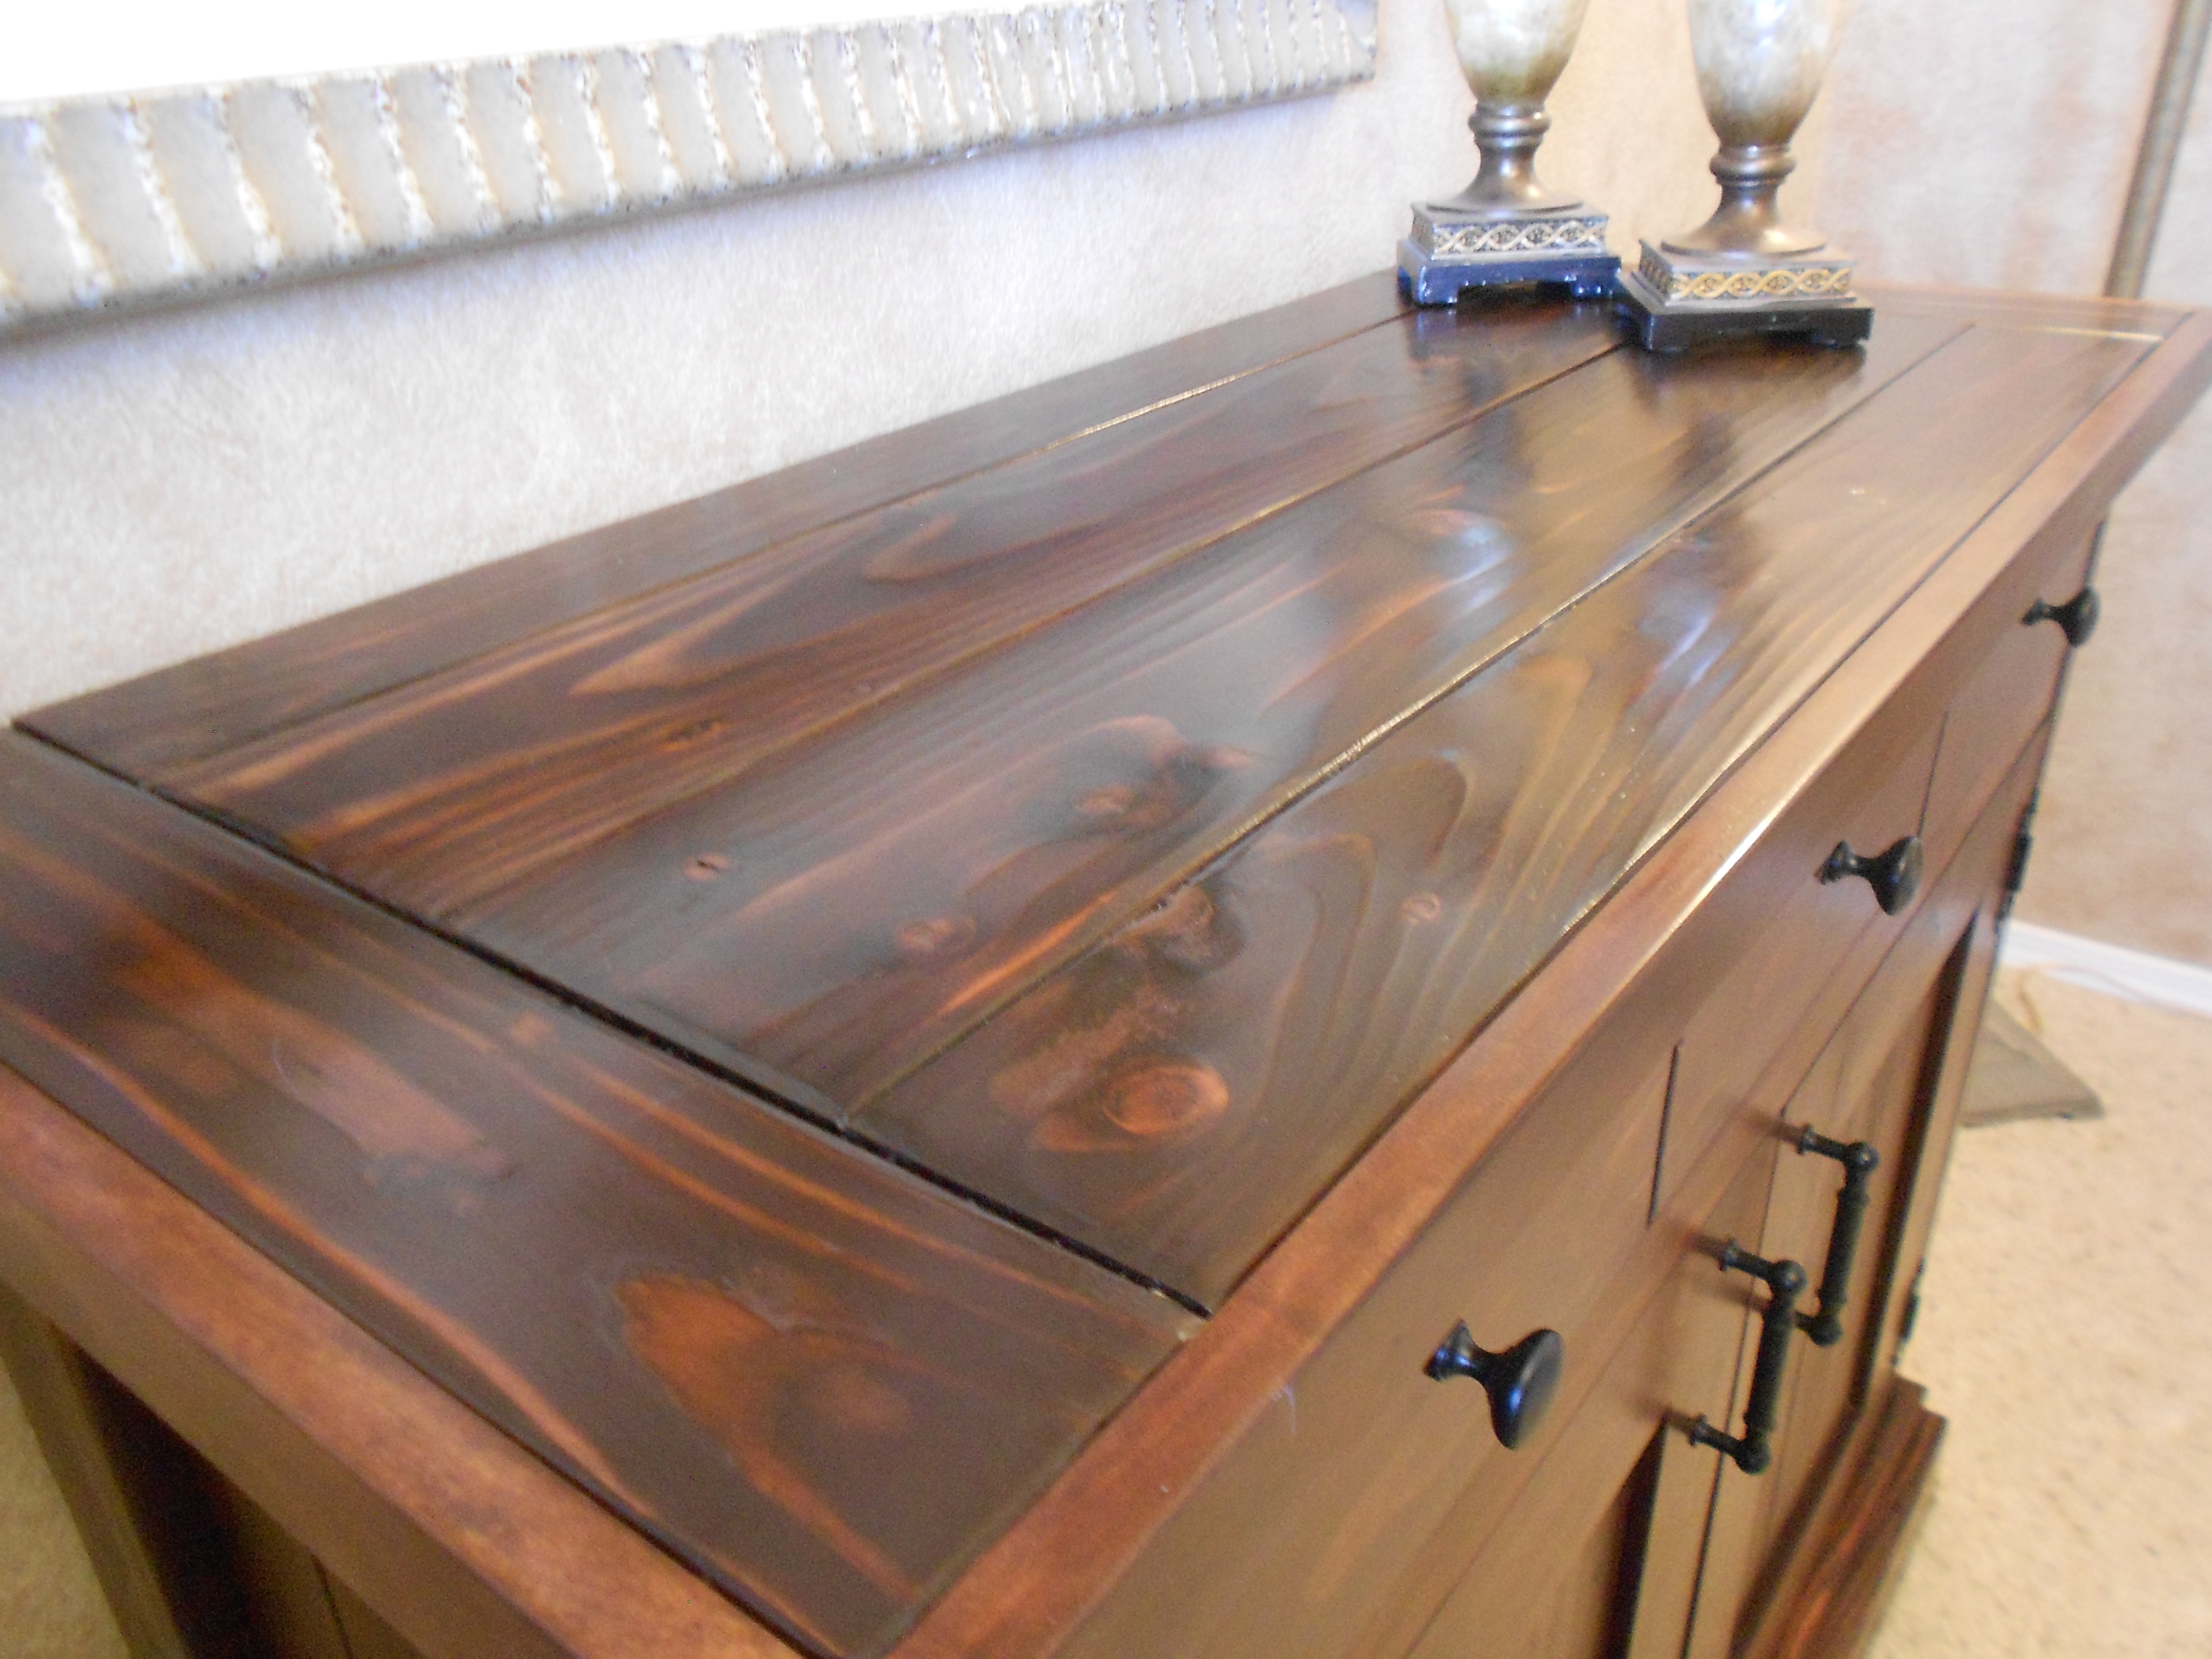
I altered the plan a little - this is 40" square. I edge-glued planks for the bottom level, so I had them sit on top of the aprons instead of inside them. Note: if you have top and bottom aprons attached to the legs before you put the bottom in (that will sit on top of the apron and not within), you can't get it on in one piece...oops. :) The most difficult part was the herringbone - figuring all the dimensions, cutting everything precisely, getting all pieces to fit, and finding a way to attach it to the framing boards and support in underneath. I love the table, but I'm very frustrated with the finish. It's so blotchy, and I tried to do everything correctly to prevent that (see info on the finish). With every project I learn a few things...
Sat, 03/14/2015 - 20:23
I LOOOVE the herringbone pattern! What a really neat idea.
We are a homeschooling family and desperately needed bookshelves. My husband made this entertainment system to reclaim space in style. It's gorgeous and functional! Thank you Ana for the plans!!
We customized the train table a bit and laminated the top into one solid piece so that we could paint a car map of our neighborhood on the underside. It's heavy! But with two boys in the house it's never really on anyways! :)
Sandbox with lid, painted first, then assembled. I had originally planned to alternate the colors on each board, but partially assembling it into the 5 large pieces and then painting made the process much more manageable.
Tue, 03/17/2015 - 18:37
This is super cute! I love the colors that you chose!
Second time building this table. Made it smaller, cutting support pieces to 45 rather than 60. Also tried 1X10 for the top.
Shortened the width for 22 inch wide cushions. Stained with golden oak minwax and finished with tung oil.
I loved the look of the planked wood sideboard but it was too big for my space. I was inspired by Knot Perfect’s smaller version. I really liked everything about how his looked, including the finish. My finish didn’t turn out quite as nice as his, but I am still very happy with it.
Tue, 11/26/2013 - 12:25
This looks AWESOME! It looks just like mine... glad I could inspire you :)
I made this dresser for a young lady who has never had any furniture unless it came from IKEA. Time to mix it up a little. She was very delighted. The bulk of the dresser is poplar plywood with decorative birch trim. I had trouble matching the paint color she wanted so I experimented by buying paint as close as I could find to the shade of grey she wanted and then mixed it with paint I had in the shop until I got the desired result. I'm no master at mixing paints. I simply got lucky. I traced out the decorative top using my wife's China serving platter and then routered the edge. Turned out OK and my wife was none the wiser.
Thu, 03/19/2015 - 14:04
Thank you for your nice comment. The drawer face and trim were painted separately. The drawers are flush with the frame but the trim is not. The trim is attached to the drawer face and protrudes out from the frame. I liked the shadow effect that this created. I also decided to put white quarter round on the base of the dresser. This additional trim really makes it pop! I'll update the photo when this is completed.
Thanks again!
Tablesaw, router, fliptop mitersaw, and dust collection workbench.
Sat, 08/01/2020 - 08:27
That's a nice build. I would love to know if you do have plans for this workbench?