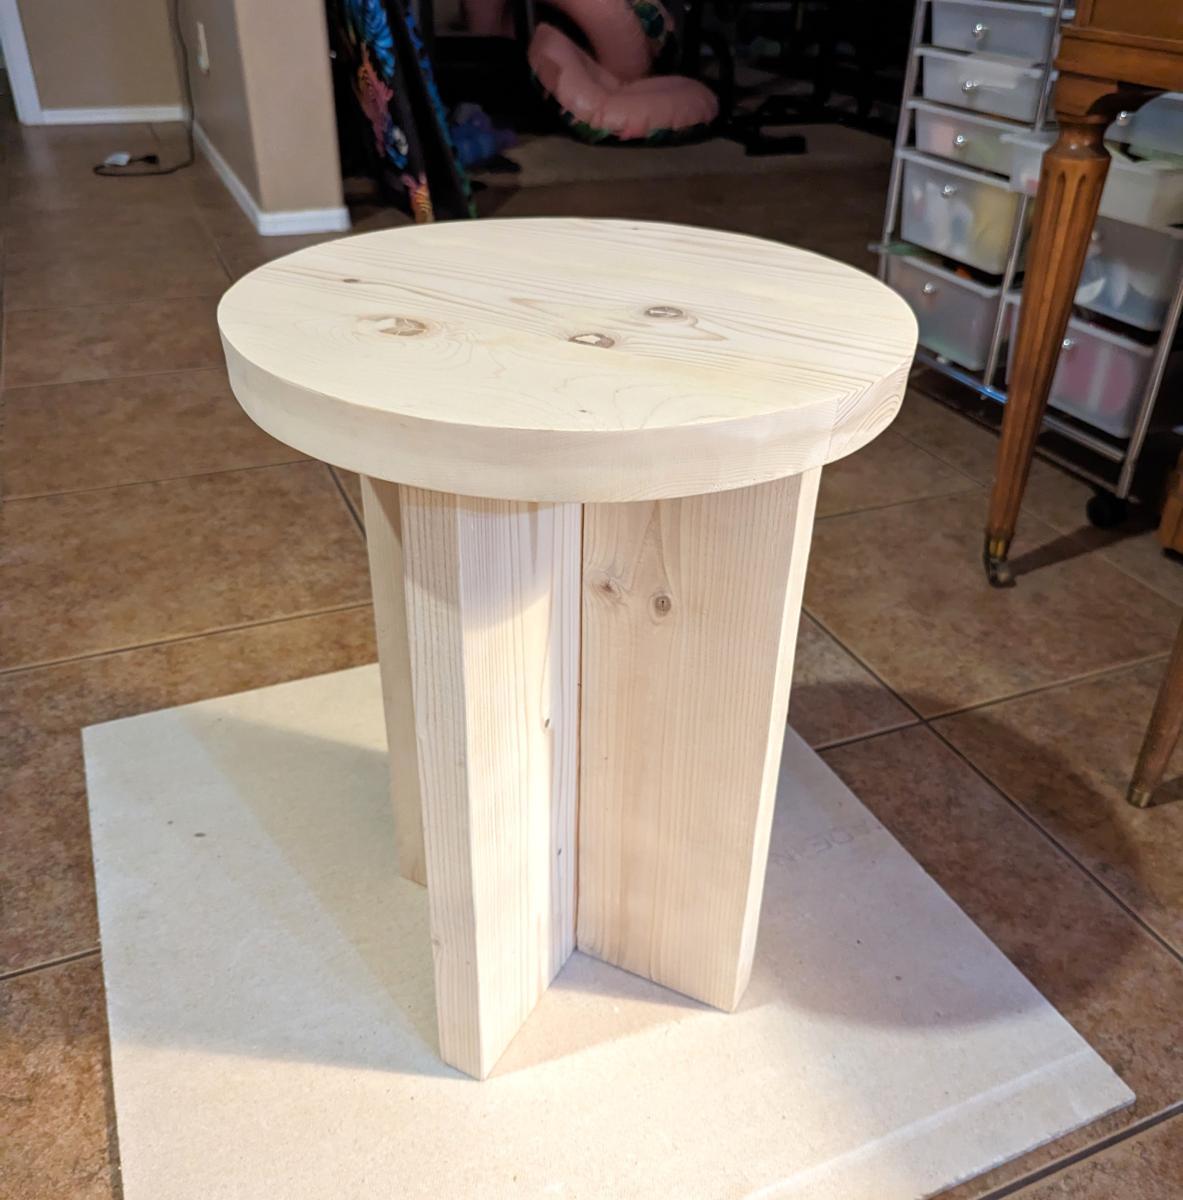
Mushroom Side Table
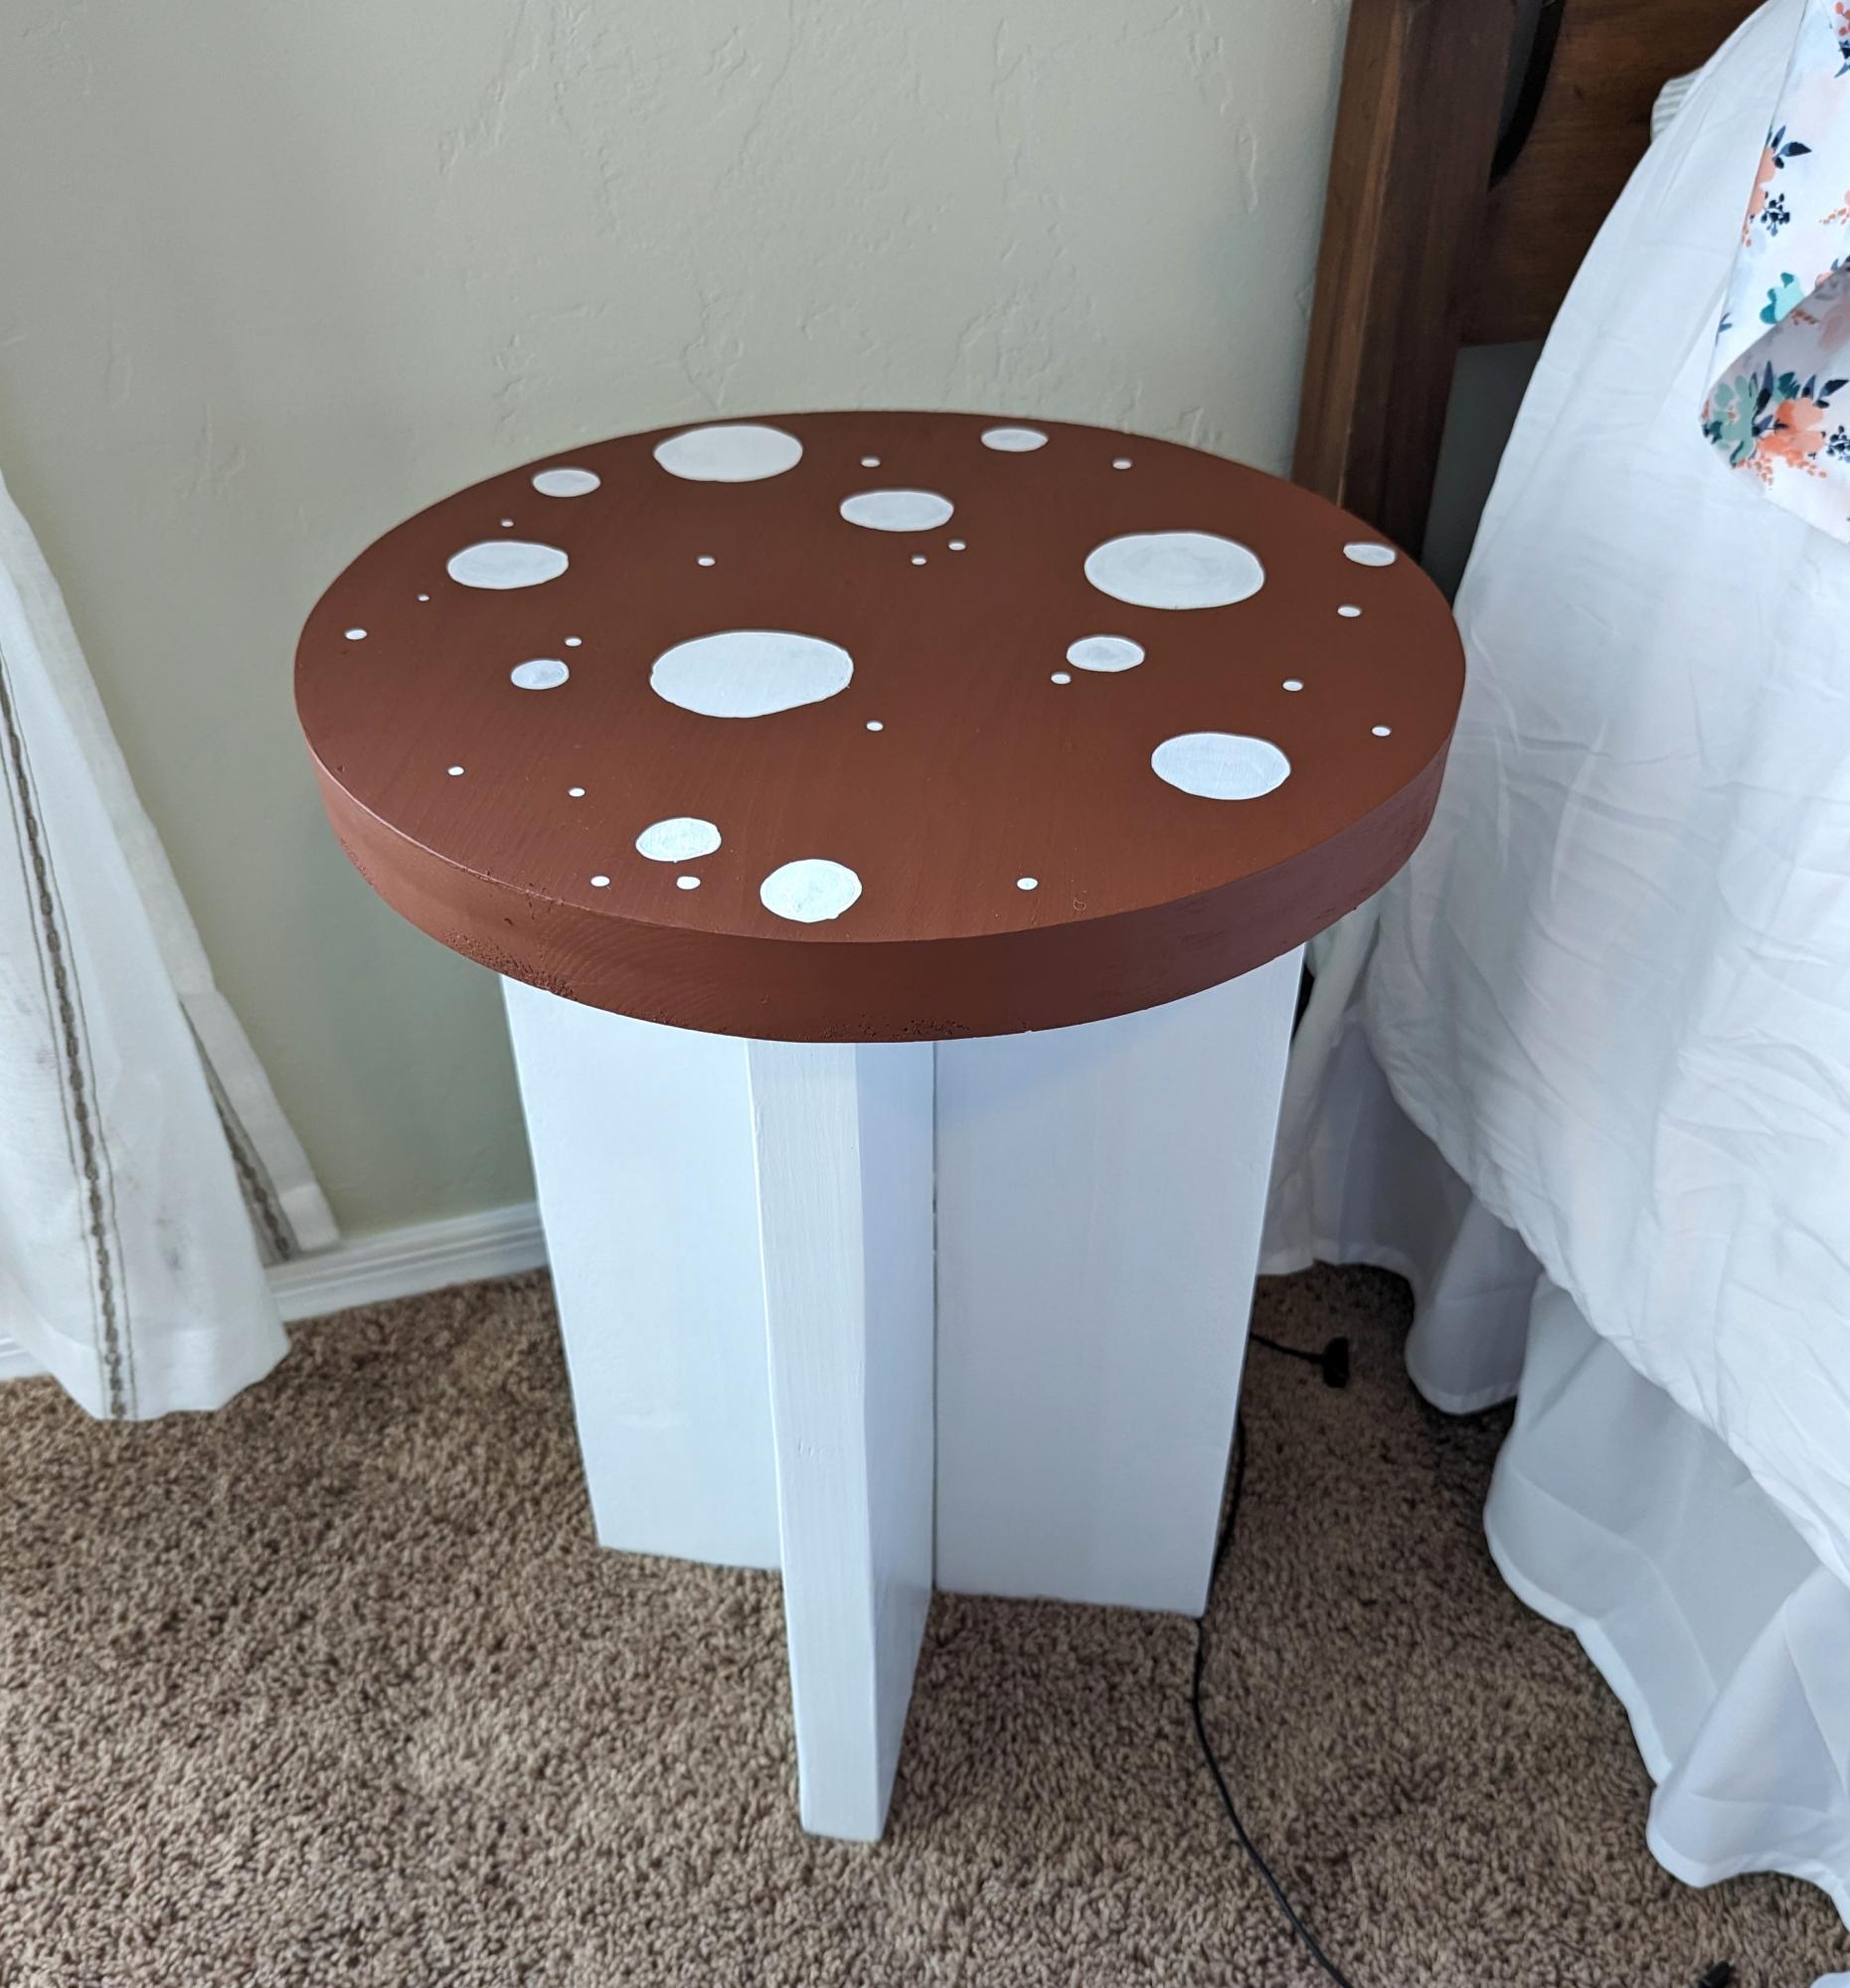
We made this for our daughter, and our other daughter wanted to paint it to look like a mushroom. We are very happy with how it turned out.
Built from Plan(s)
We made this for our daughter, and our other daughter wanted to paint it to look like a mushroom. We are very happy with how it turned out.
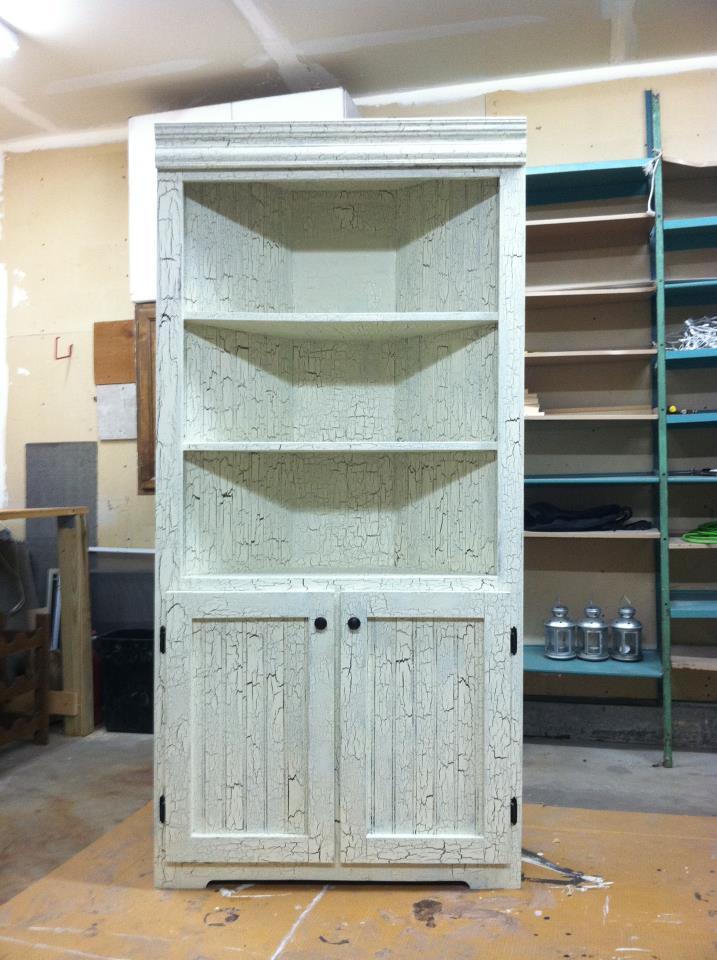
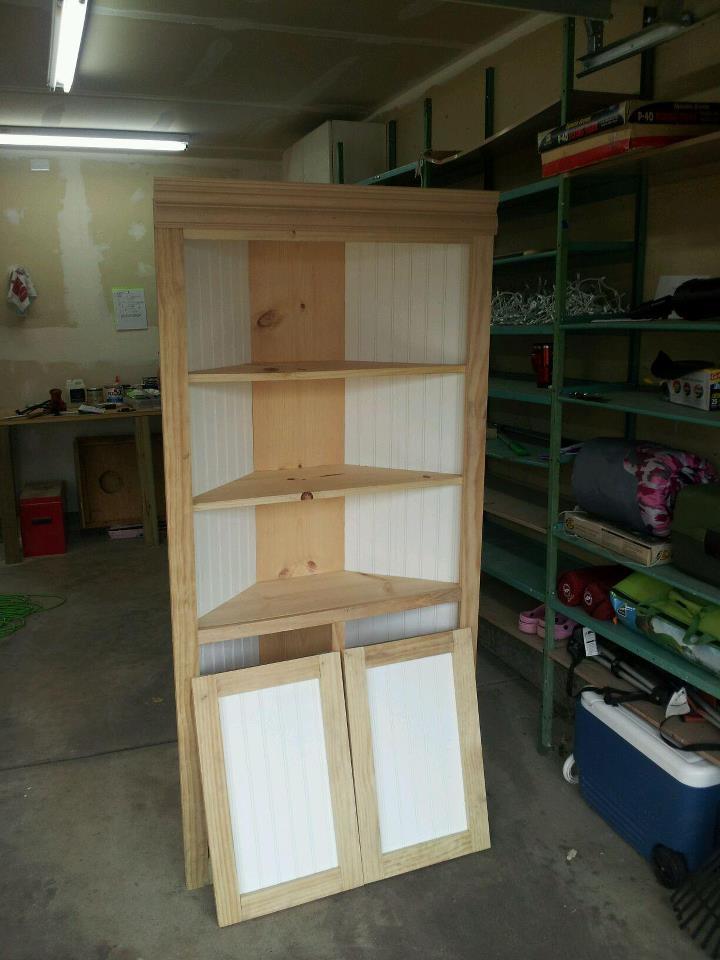
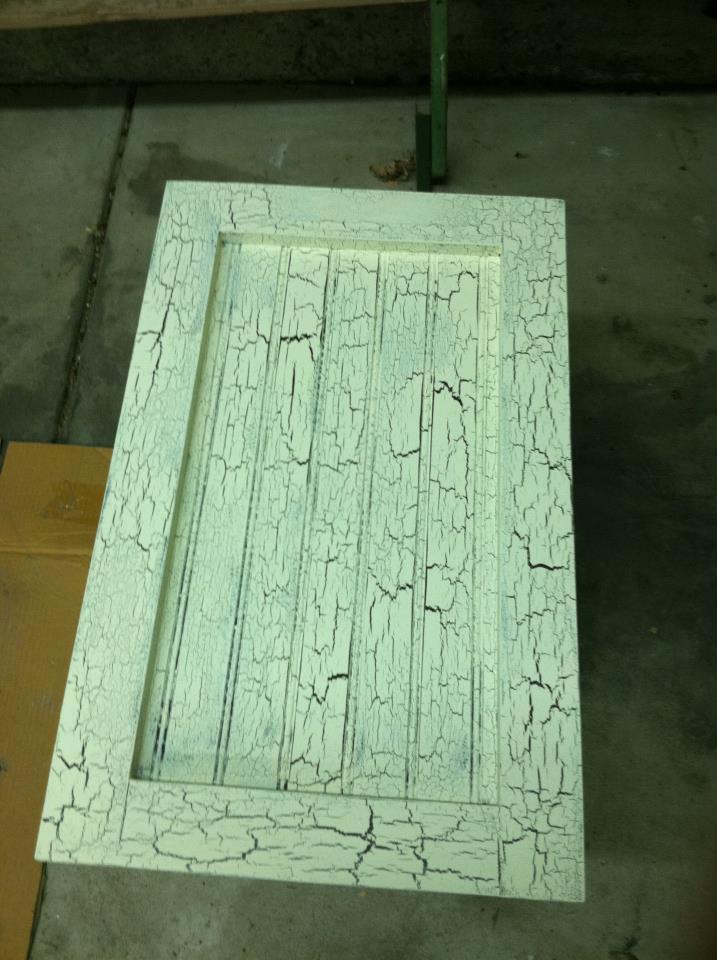
This was my first project. It took me a weekend to build and prime. Since I chose to use a crackle finish, waiting time between coats extended the total time to one full week. My husband and I were supposed to make this hutch together, but I became obsessed and did most of it alone! I adjusted the size a bit to make it larger, so I could fit big pieces on shelves and in cabinets. Thanks for the plan Ana!!

Fri, 04/13/2012 - 14:47
Wow, this is sooo beautiful! The finish is just awesome. My Hubby hates to paint, and he saw this multi-step finish and said you must have the patience of a saint! :) Congrats on such a stunning first project!
Mon, 10/01/2012 - 23:33
Very Nice! What did you do to make it "bigger"...did you make it deeper or wider? Just curious, because I would like to try and make a bigger version as well. Did you still cut the shelves on each side at a 45 degree angle? Thanks!
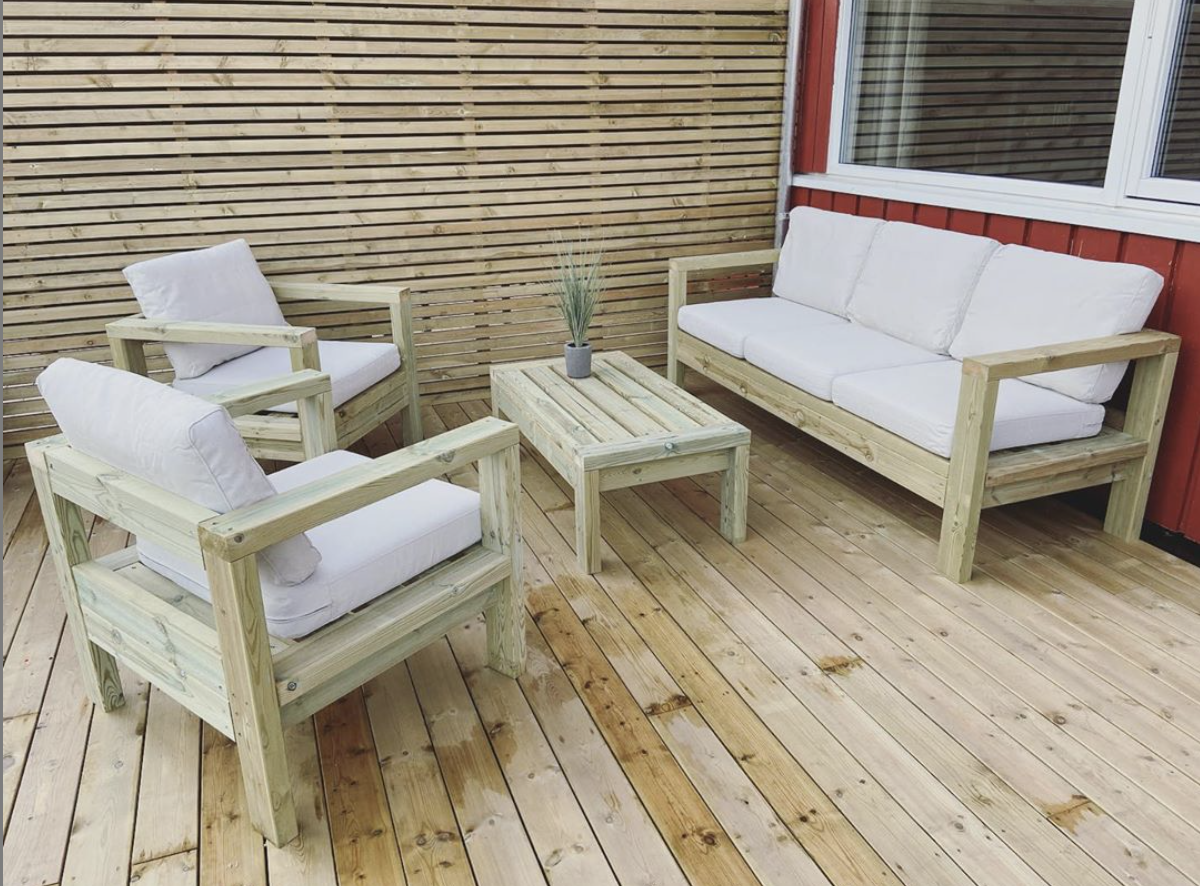
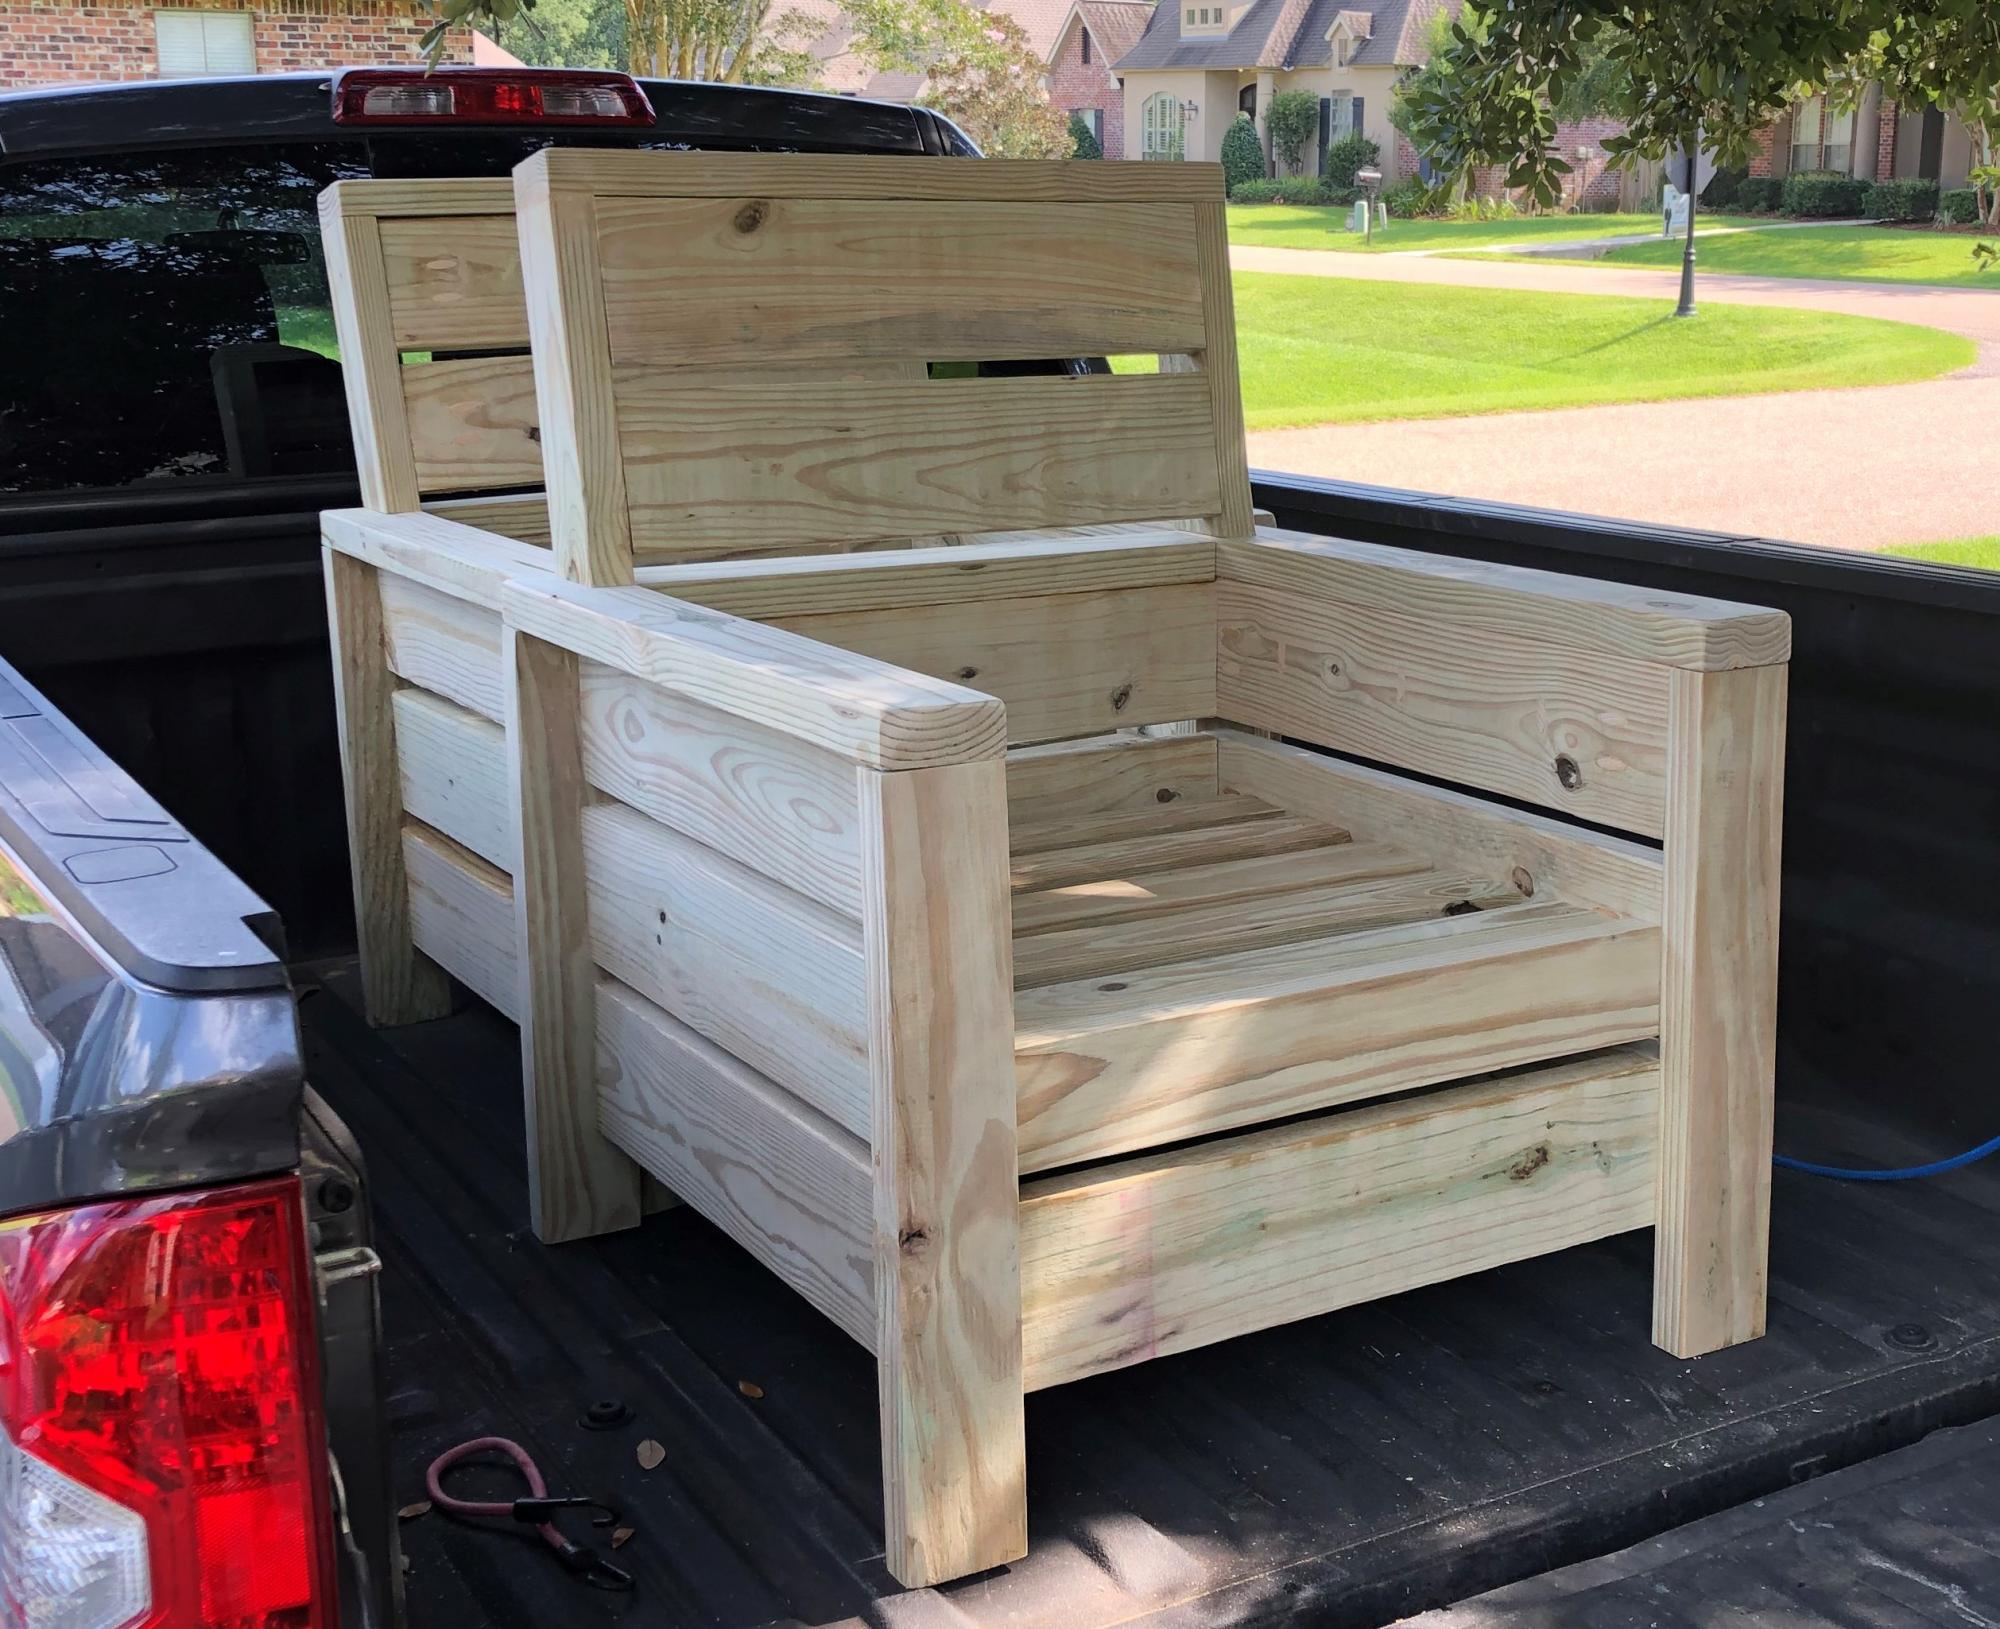
So, we decided after not finding any outdoor furniture, that why not make them! So this is the result, made a few changes to the size and measurements so the pillows from IKEA, would fit perfectly. Now we are waiting for them to be ready to oil/paint. We also made the chairs with the sofa plans, so happy we did that. Thank you so much for the plans! We are so happy! IKEA pillows name are: Sitting pillow - FRÖSÖN/DUVHOLMEN 62cm by 62 cm. Back pillows - FRÖSÖN/DUVHOLMEN 62cm by 44 cm.
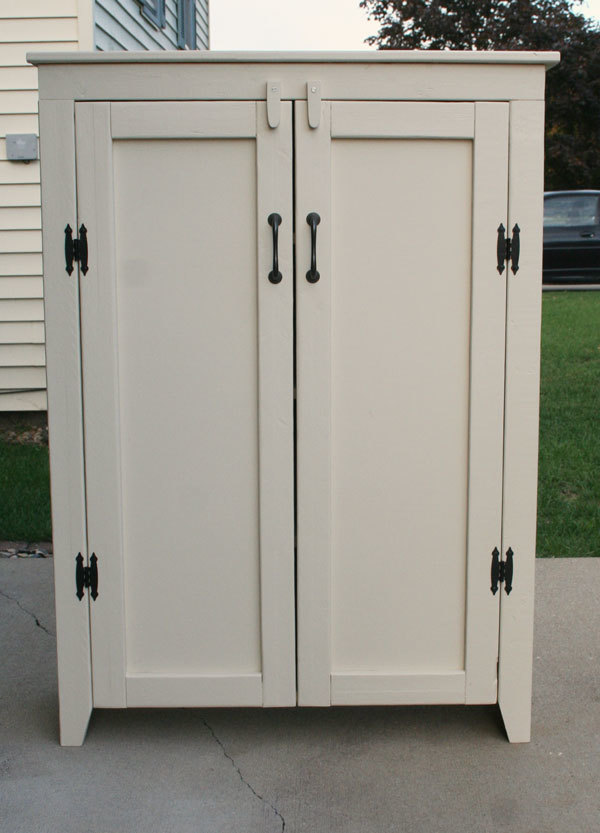
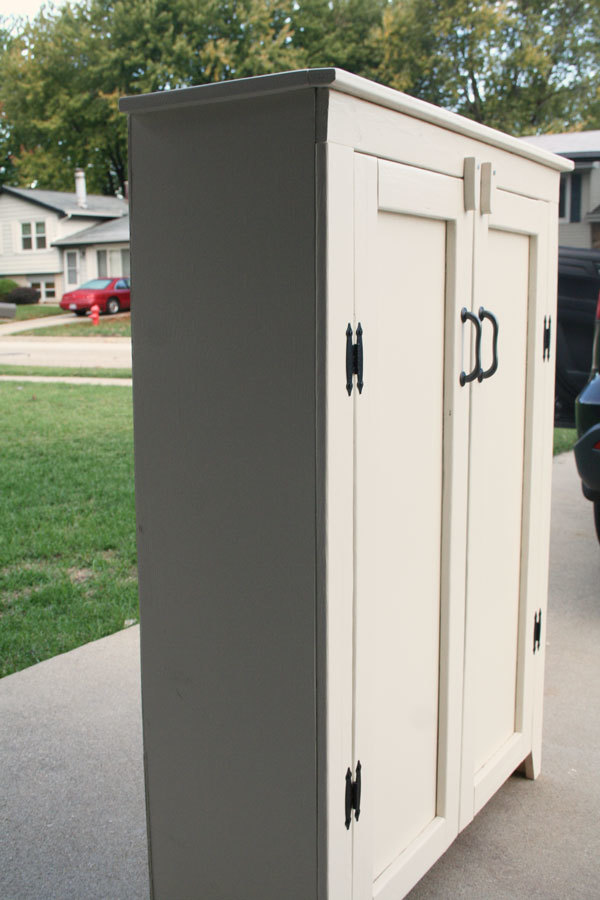
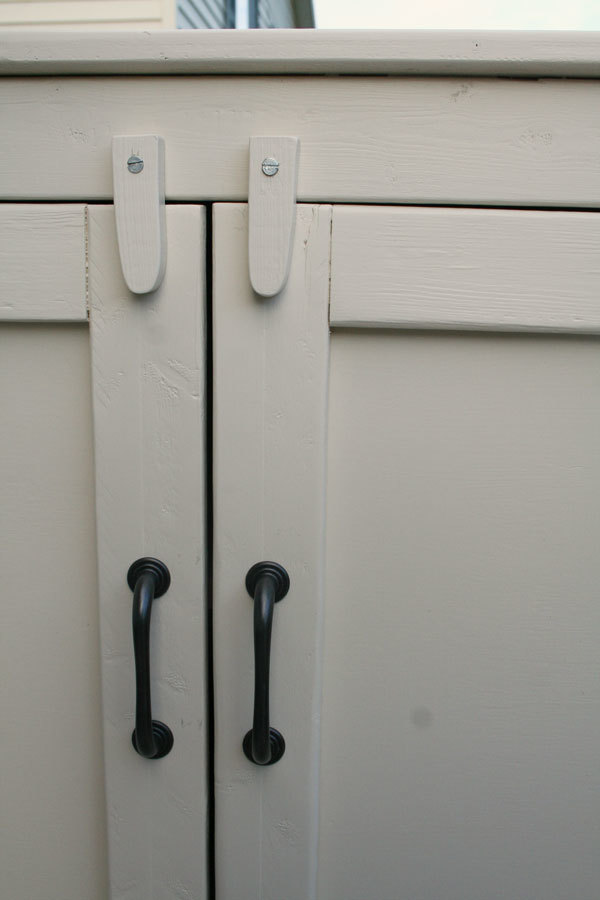
This project was built by my husband, for our daughter who needed some storage for her card-making and scrapbooking supplies. I had the easy part of doing the painting and purchasing the hardware. The hinges and handles are from Home Depot. It is a challenge to find good lumber at our big box stores. That was probably the most difficult part of the build...dealing with warped wood. This piece is suited for the primitive and rustic look so it didn't matter that the wood had some dings and splintering from the edges. Everything was sanded well and these marks just added to the character. He did encounter some problems with drilling the 1 and 1/4" kreg screws into the frame of the door. The wood wanted to split. Also, the plans called for magnetic closures but we could not determine how those would be installed as the shelves do not reach to the doors. So we cut some wooden swinging closures and attached them to the top of the cabinet. They seem to work well. One modification if he builds this again (and our other daughters are now putting in their orders!) would be to add a wooden support down the center front so that the doors would have something to close against. The way it is now, the doors could be pushed inward and put a lot of stress on the hinges. We were very pleased at how this project turned out! Thank you for the plans.

Tue, 10/09/2012 - 13:20
I like the way that came out and I agree its hard to get good wood at the big box stores it took me a while to go through the stacks they had there to find straight pieces. The other thing I had an issue with was the 1 1/4"
Kreg screws as well but if you dont over drive them it generally will not crack the wood. Just be gentle and if it still does turn the clutch down on the drill that will help as well.
Thu, 10/11/2012 - 18:11
Lawson4450,
Thank you for your comment, and for the advice on the Kreg screws!
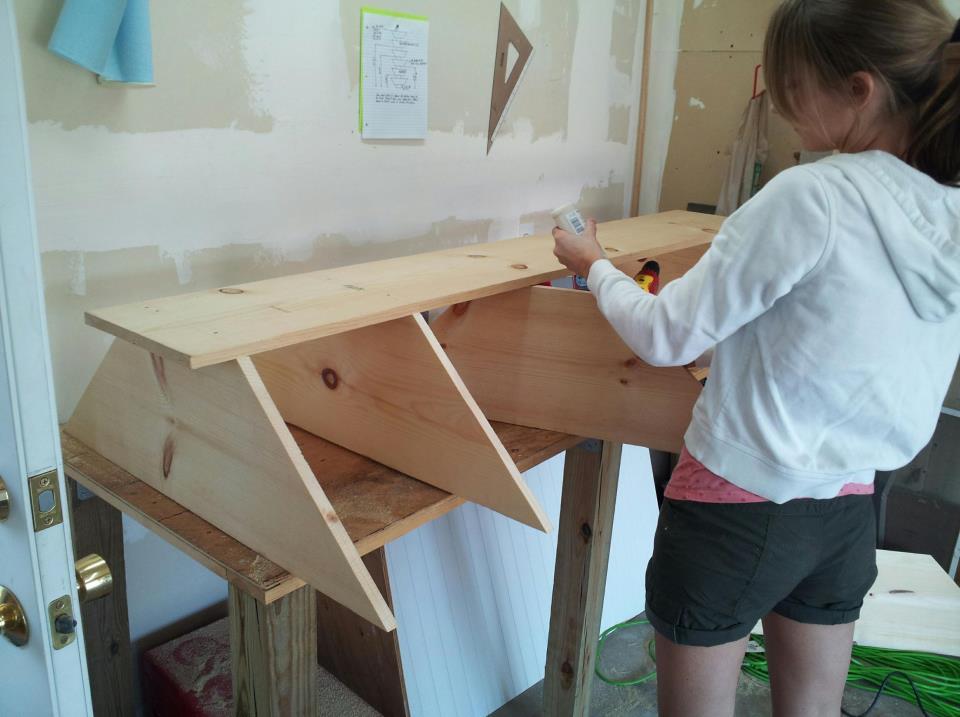
We are in the process of cleaning up our garage, so that future building projects are easier to do! One thing my husband also built was a small workbench, with a lower shelf to store the Kreg jig, screws, etc on. It comes in handy as we always know where to at least find the Kreg stuff! We should also keep some notes on the shelf, too, to refer to when the wood cracks, etc.
-Ann
Wed, 10/10/2012 - 10:37
You could solve the door not reaching the shelves problem by installing the magnetic closures on the underside of the top piece so it would also act as a stopper for the doors so they don't swing to the inside. I think that's what Ana meant in the plans. Kinda like this:
Thu, 10/11/2012 - 18:04
Aisha,
Thank you for the photo of the magnetic closure. That makes a lot of sense! We could still add those, and also leave the swinging locks in place, too.
-Ann
Sat, 10/13/2012 - 10:43
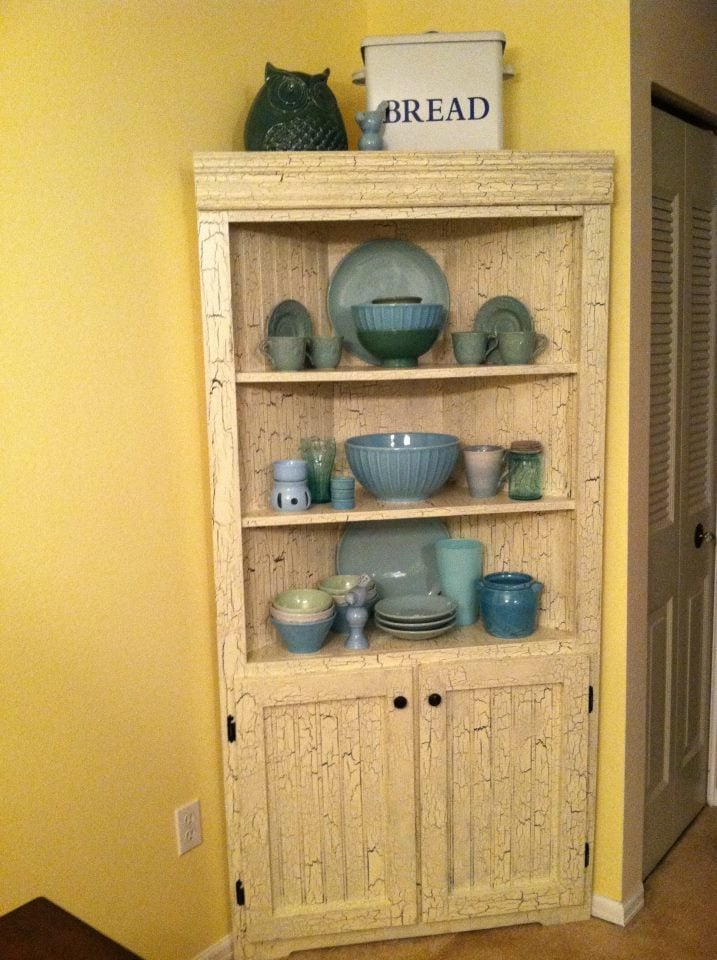
I am the lucky receiver of this jelly cabinet. It is exactly what I had in mind when I was on the hunt for one. I was so pleasantly surprised when my parents came to visit and showed me my early birthday present in their trunk! :)
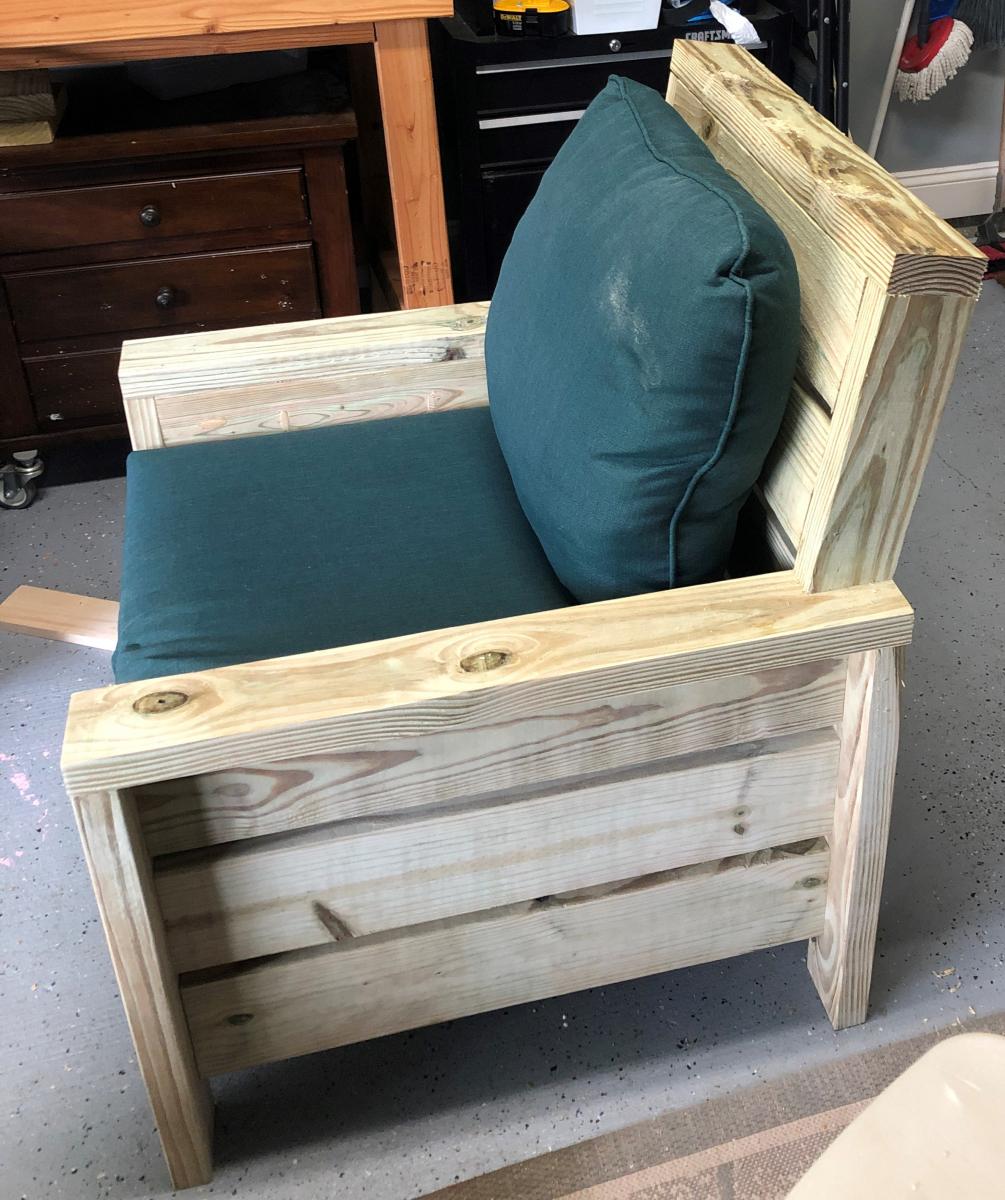
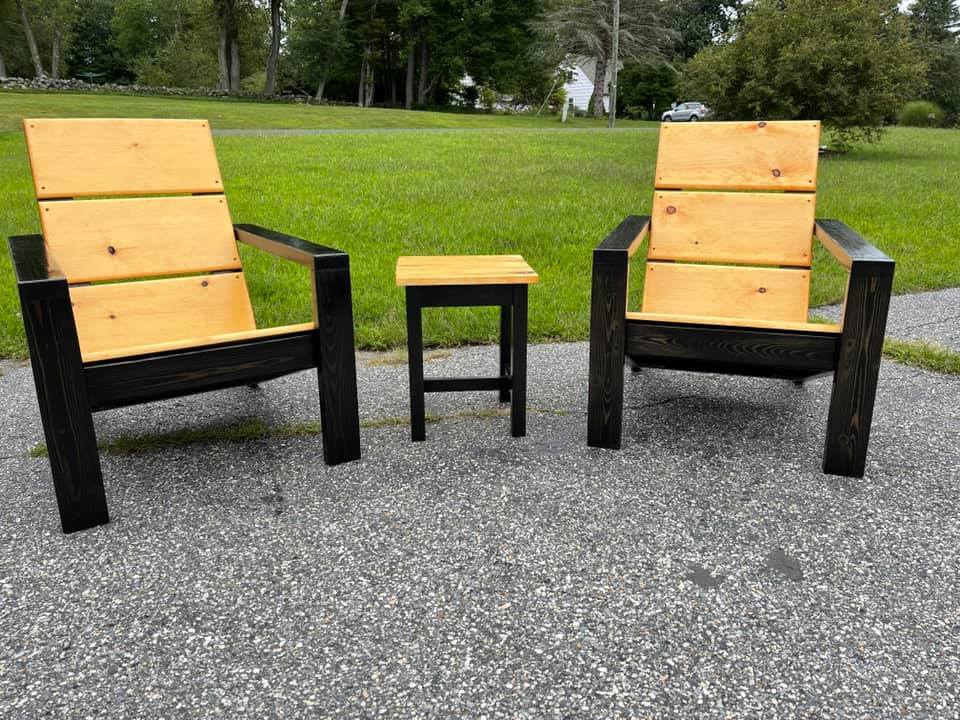
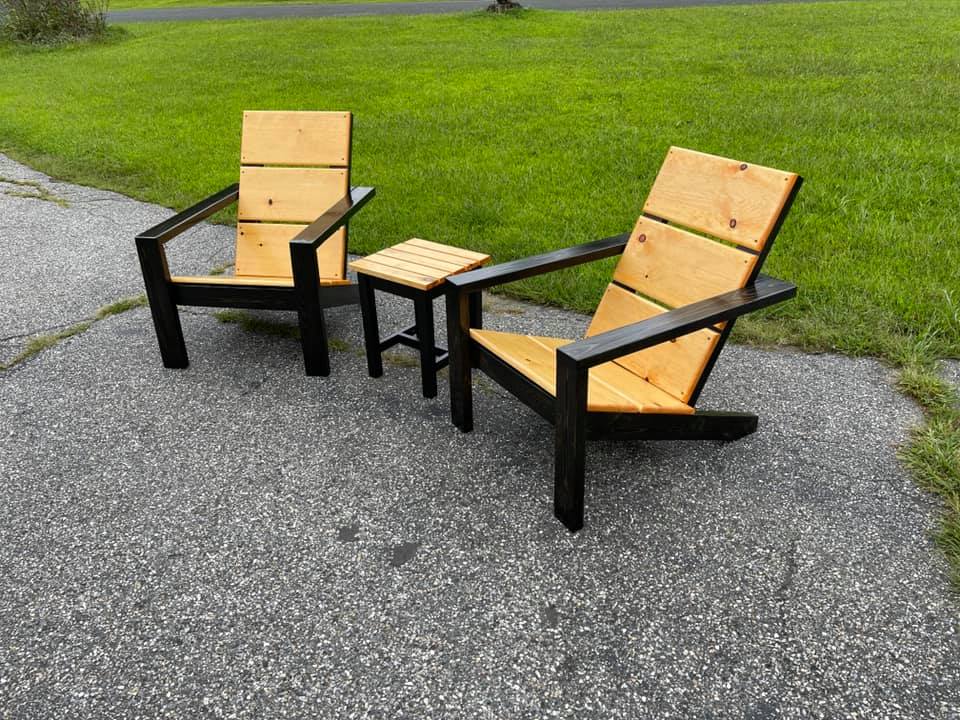
Per request of my wife, I opted to add a backrest to the chair. I feel as though my backrest design keeps with the style of the original build. I accomplished this by cutting the 2x4 vertical arms of the backrest at 13 inches with a 10 deg miter cut at the base. This allows you to keep with the 3/4" on the 2x6 backrest slats. I finished it off with a 2x4 top plate. I'd also note that I made slight modifications to the plans to accommodate 24" cushions.
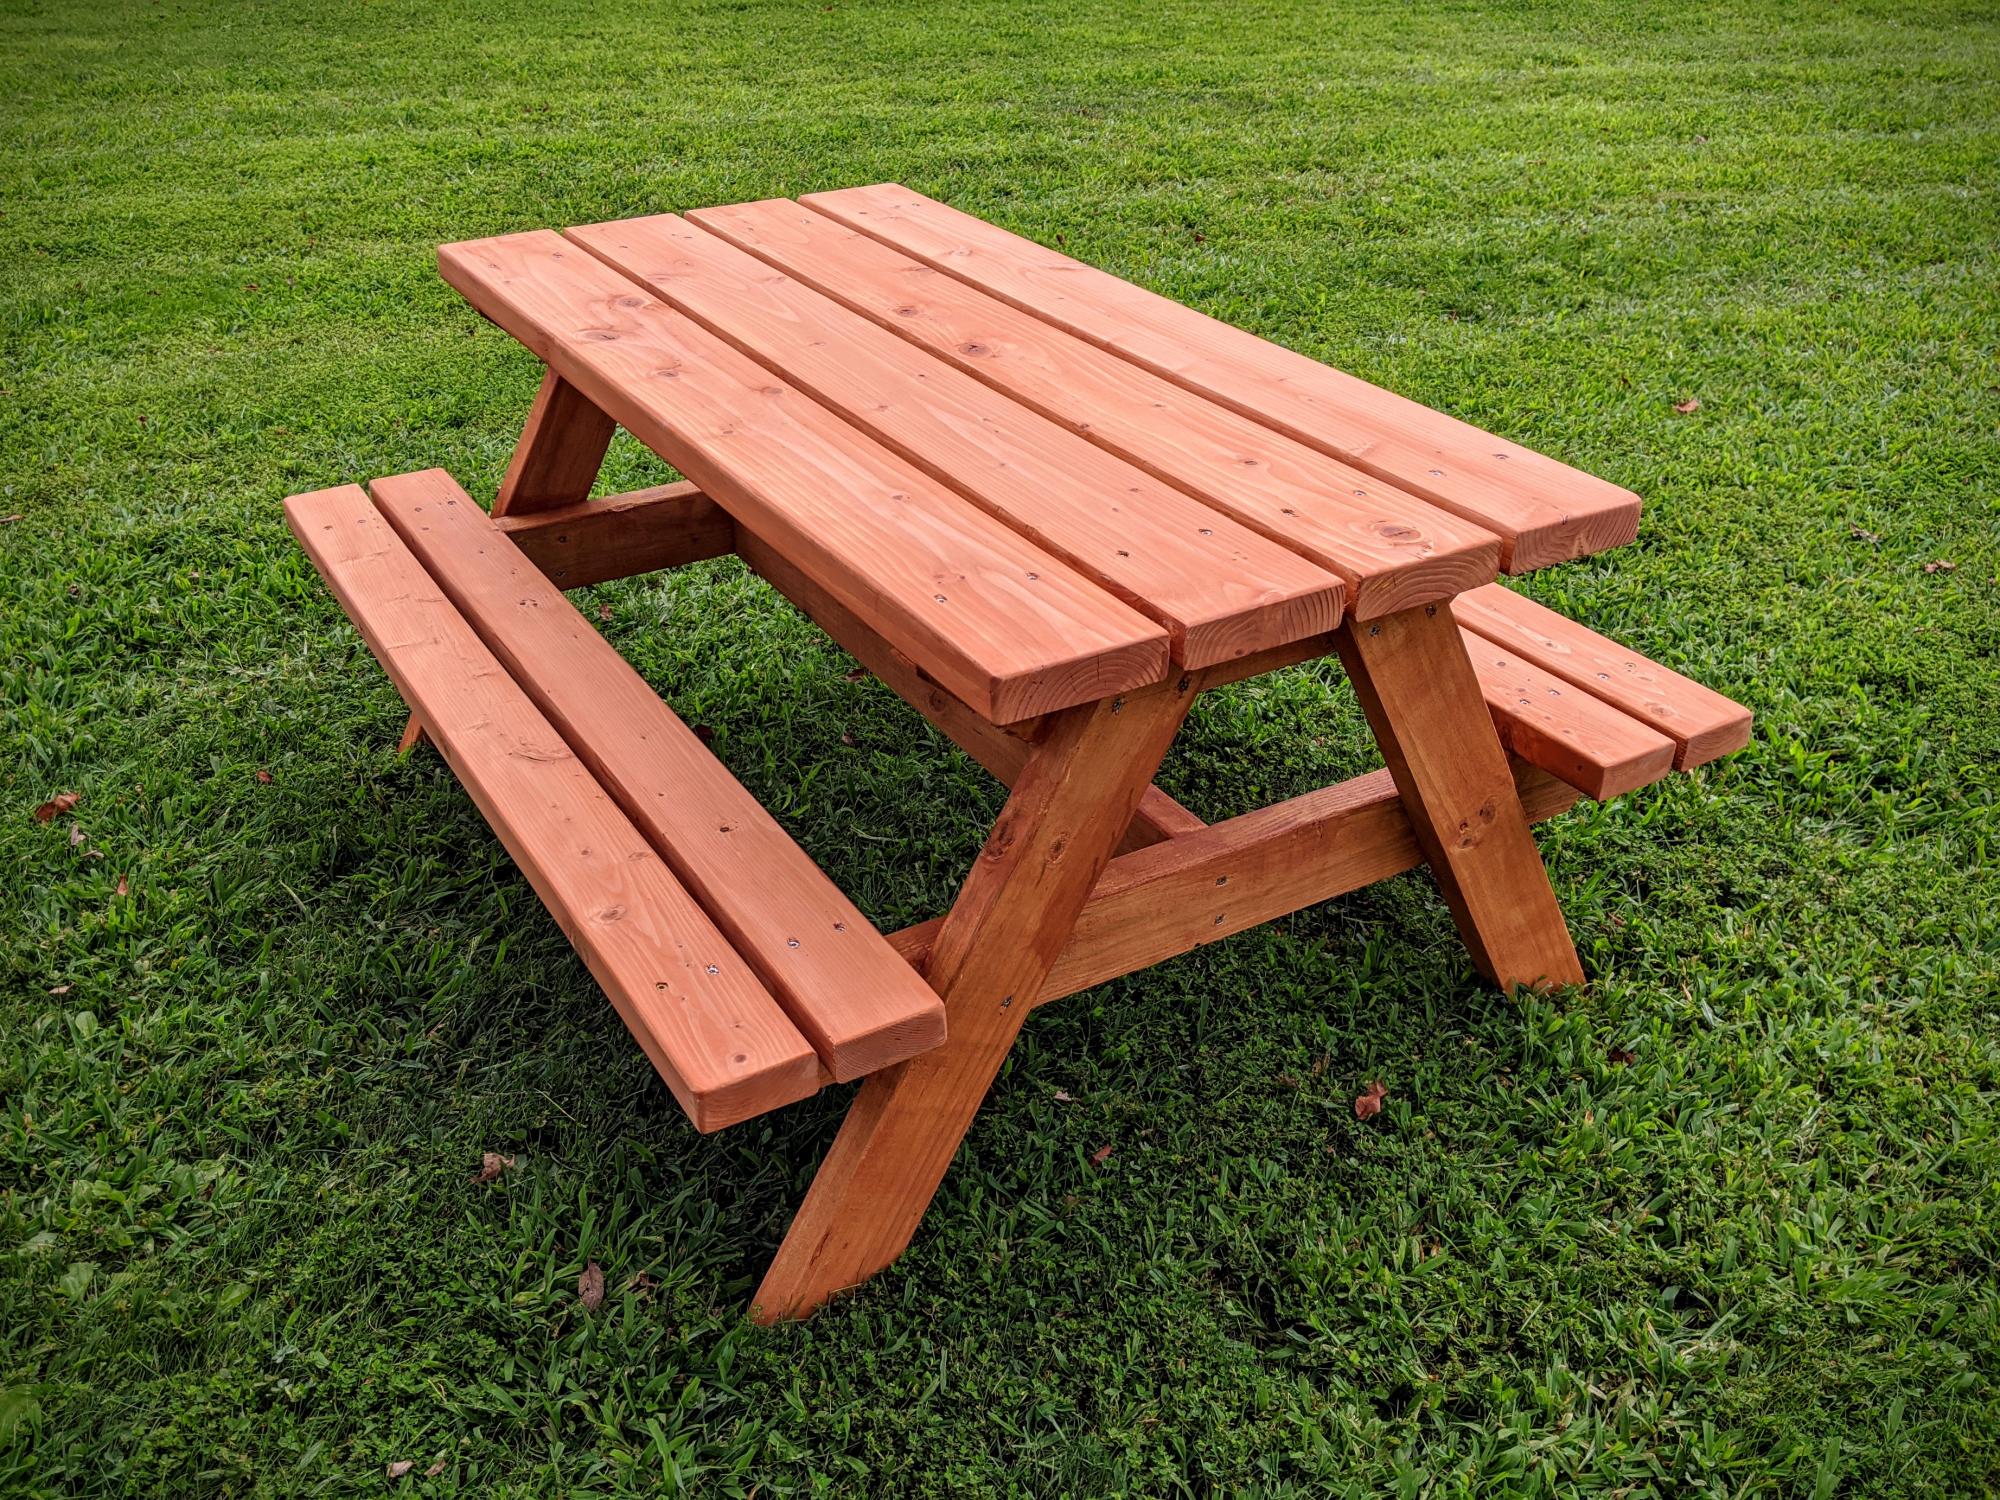
Built using Ana Whites plans for a Bigger Kids Picnic Table. Used pressure treated 2x4 for frame (legs and supports), 2x4 and 2x6 pine (fir) for table top and bench. Finished with Cabot's semi-transparent redwood stain and sealer.
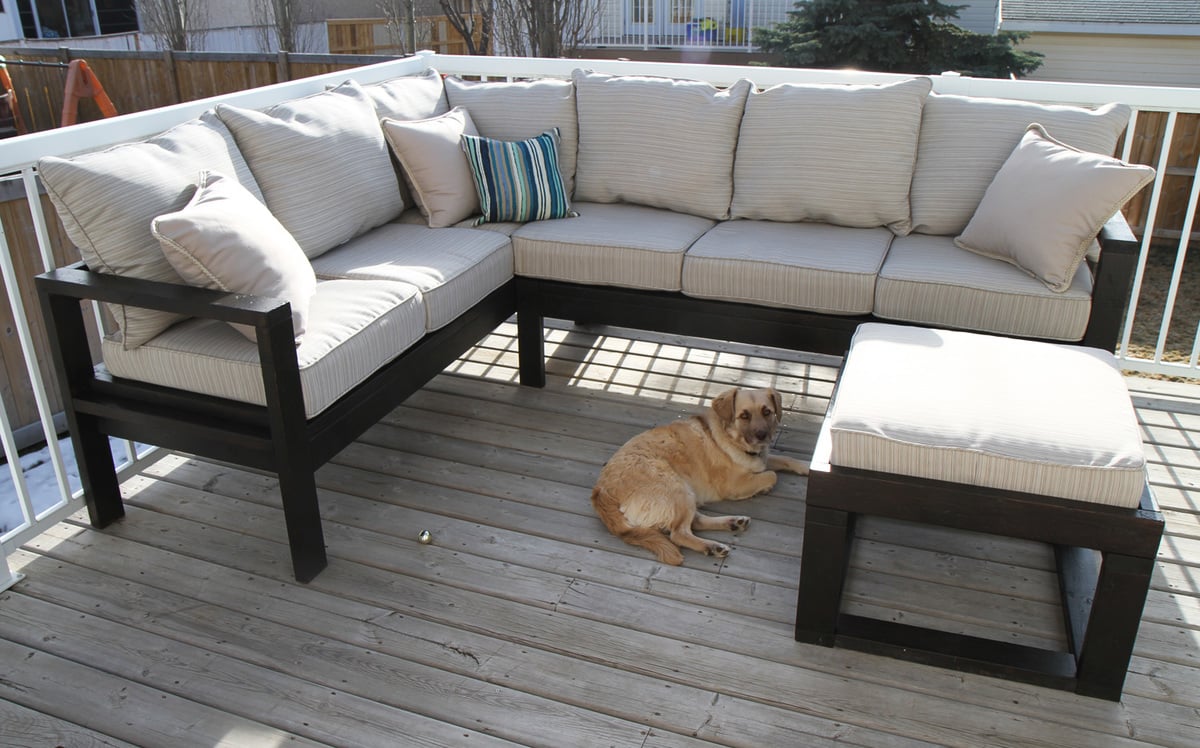
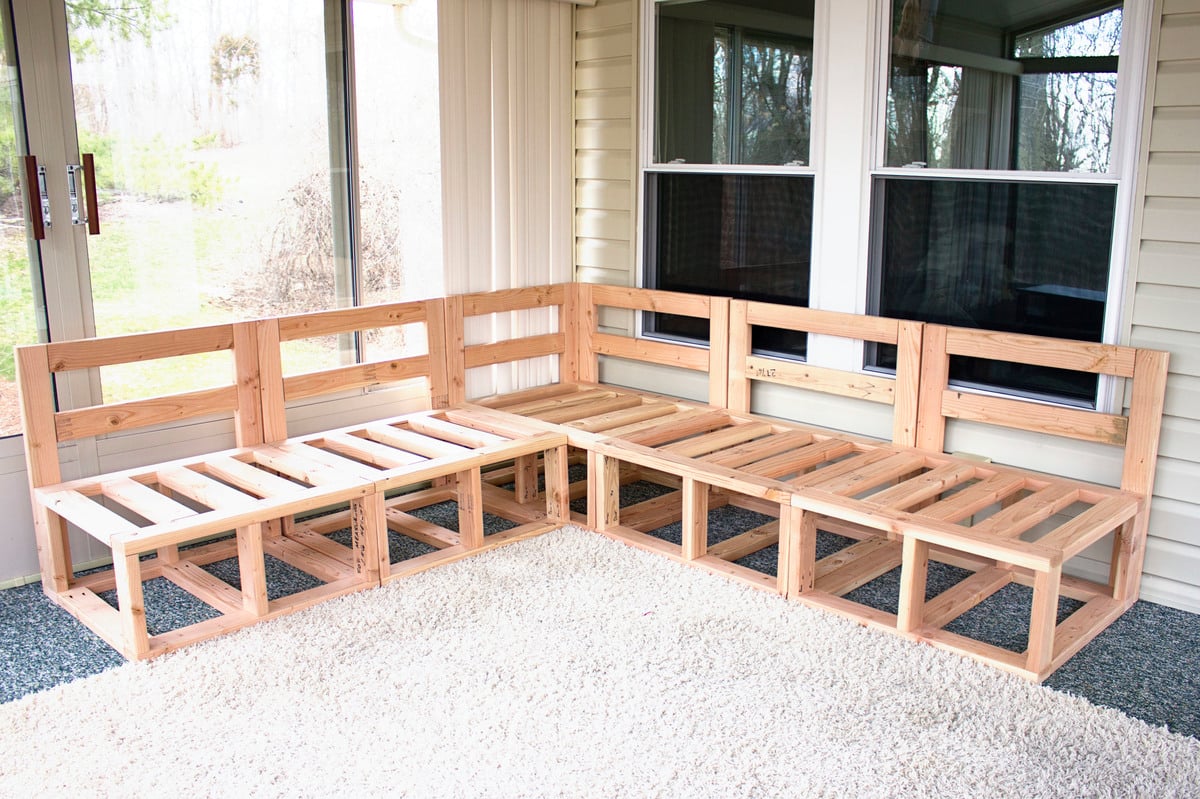
Modifed slightly to make a sectional. Used extra cushion for an Ottoman. Added an additional board behind/beside cushions to hold them firmly in place. (2x2)
Purchased 9' boards instead from our lumberyard. Cushions from Lowe's, throw pillows from WalMart/Canadian Tire.

We followed the outdoor sectional plan from Ana Whites blog to create this outdoor sectional. First we bought the cushions and custom built this sectional to fit the cushions. We used 2x4's and the kreg jig for pocket screws, then covered the base in beadboard and some pine trim, gave it a good sanding and a nice paint job.
Fri, 04/12/2013 - 05:46
Thanks! We built the frame according to Ana's design (customized dimensions for our cushions) and then covered the base in bead board and used pine trim around the edges. The cushions are from the Frontgate Outlet in Cincinnati.
Wed, 05/07/2014 - 15:34
Is there a link to the side/corner section of this so I do not have to guess. Thanks.
My dog loves to people watch all day while I'm at work and she needed a new bed so I took the plans for the lower platform and modified them so it would stand alone. Took the platform and put it on the bottom so that her bed would sit inside instead of on top where she could more easily fall off.
I tried building without PH screws at first and all I ended up with was a lot of cracked and wasted lumber. Got the PH jig and finished the whole build myself in 2 hours. Sanding, staining, and sealing tomorrow but I'm just so excited about it I had to post now!
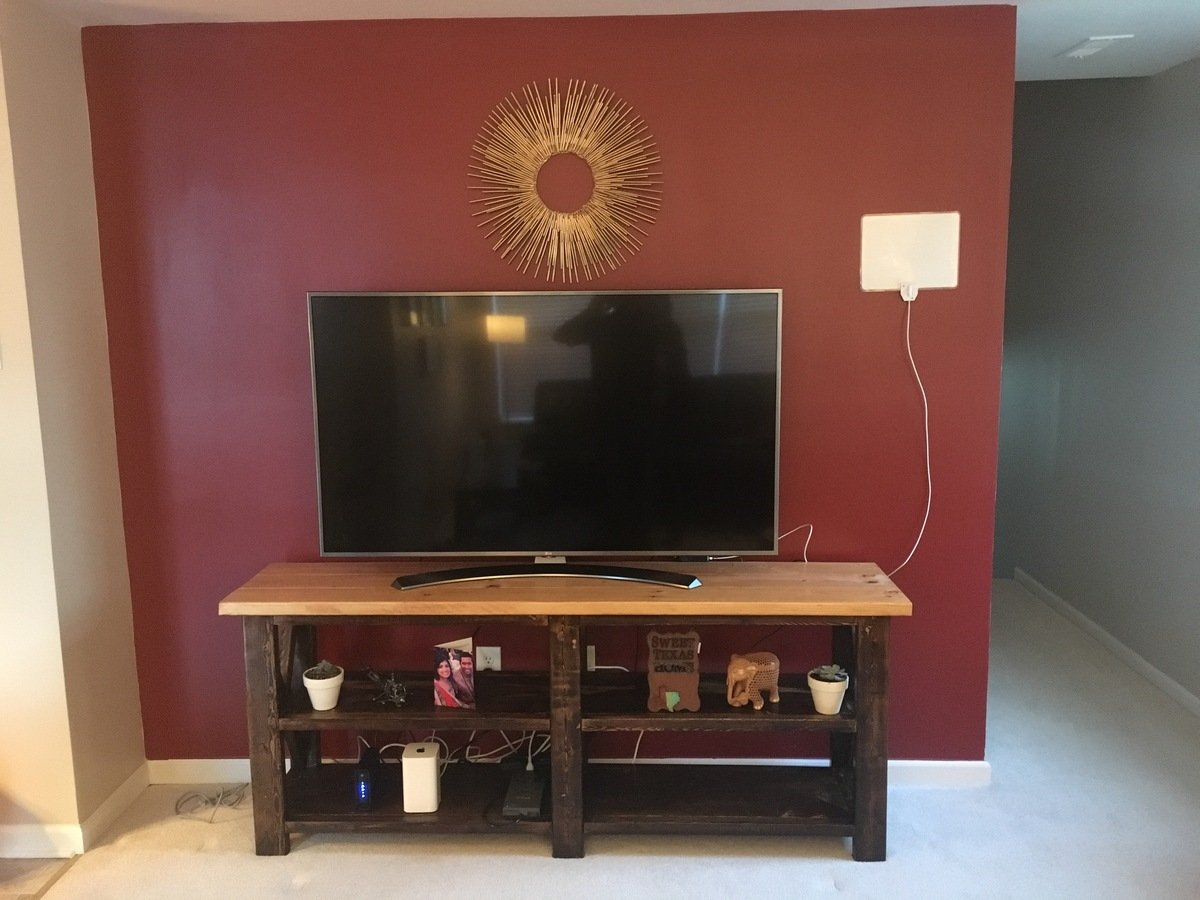
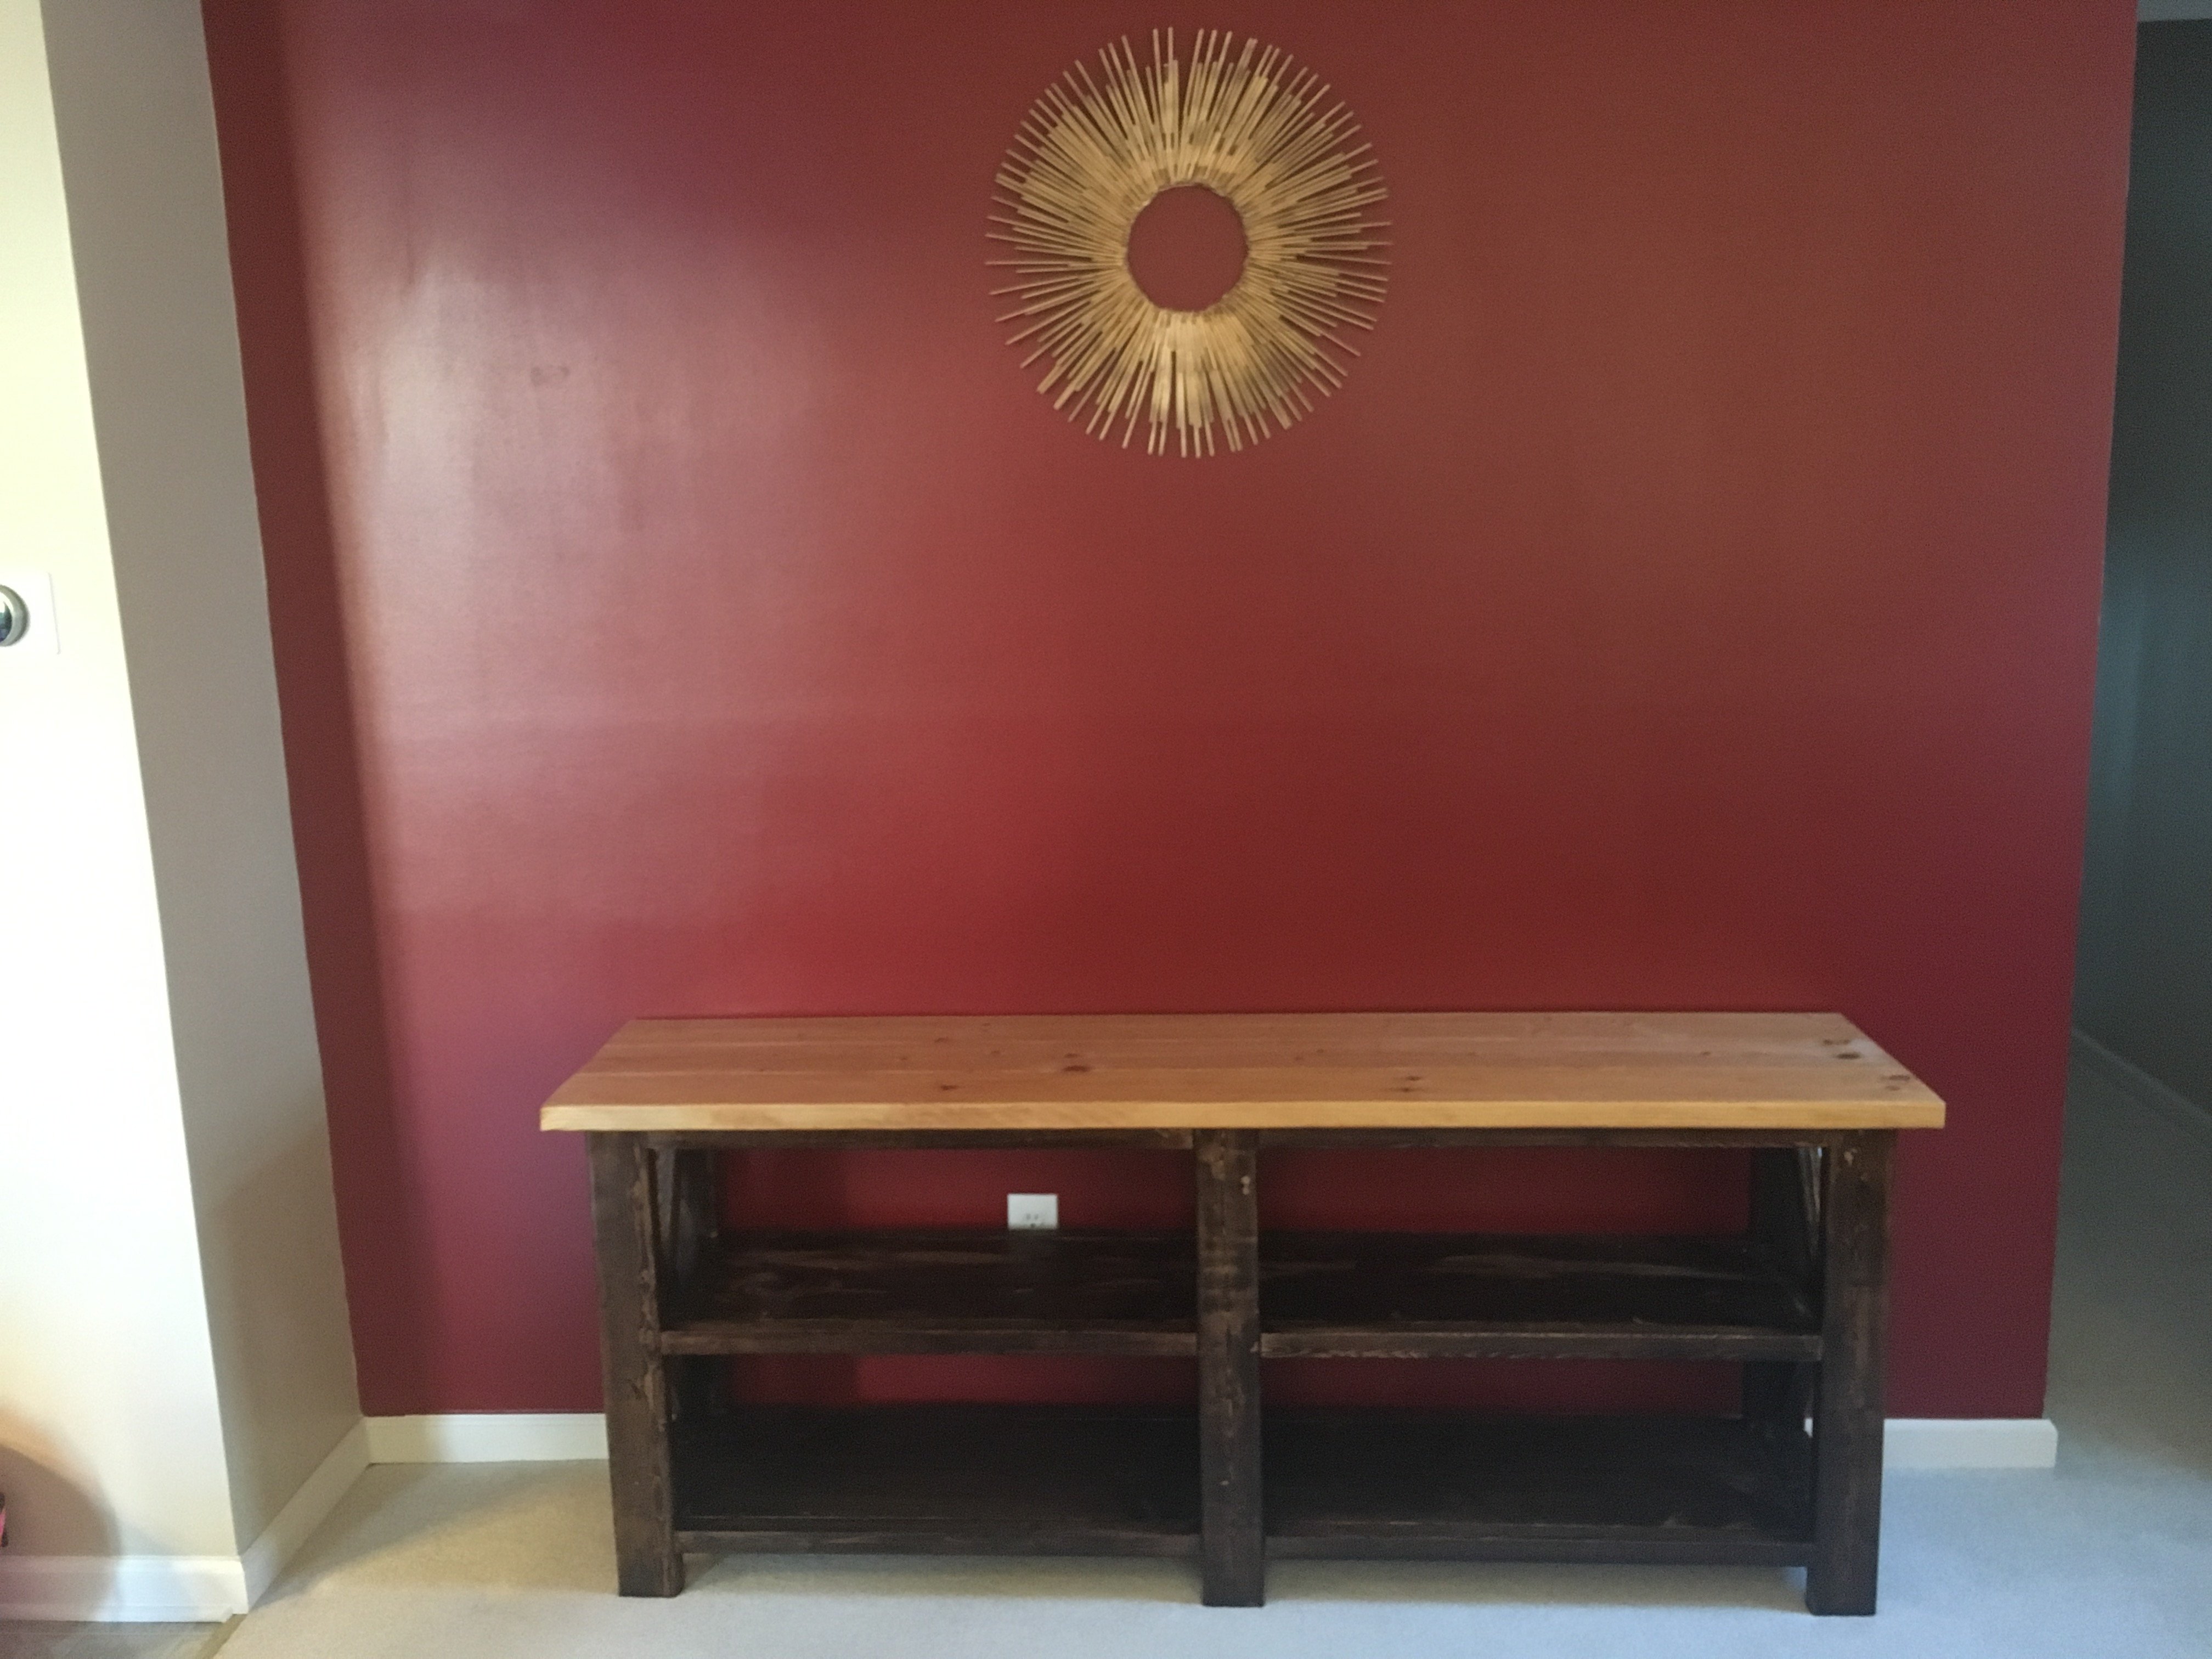
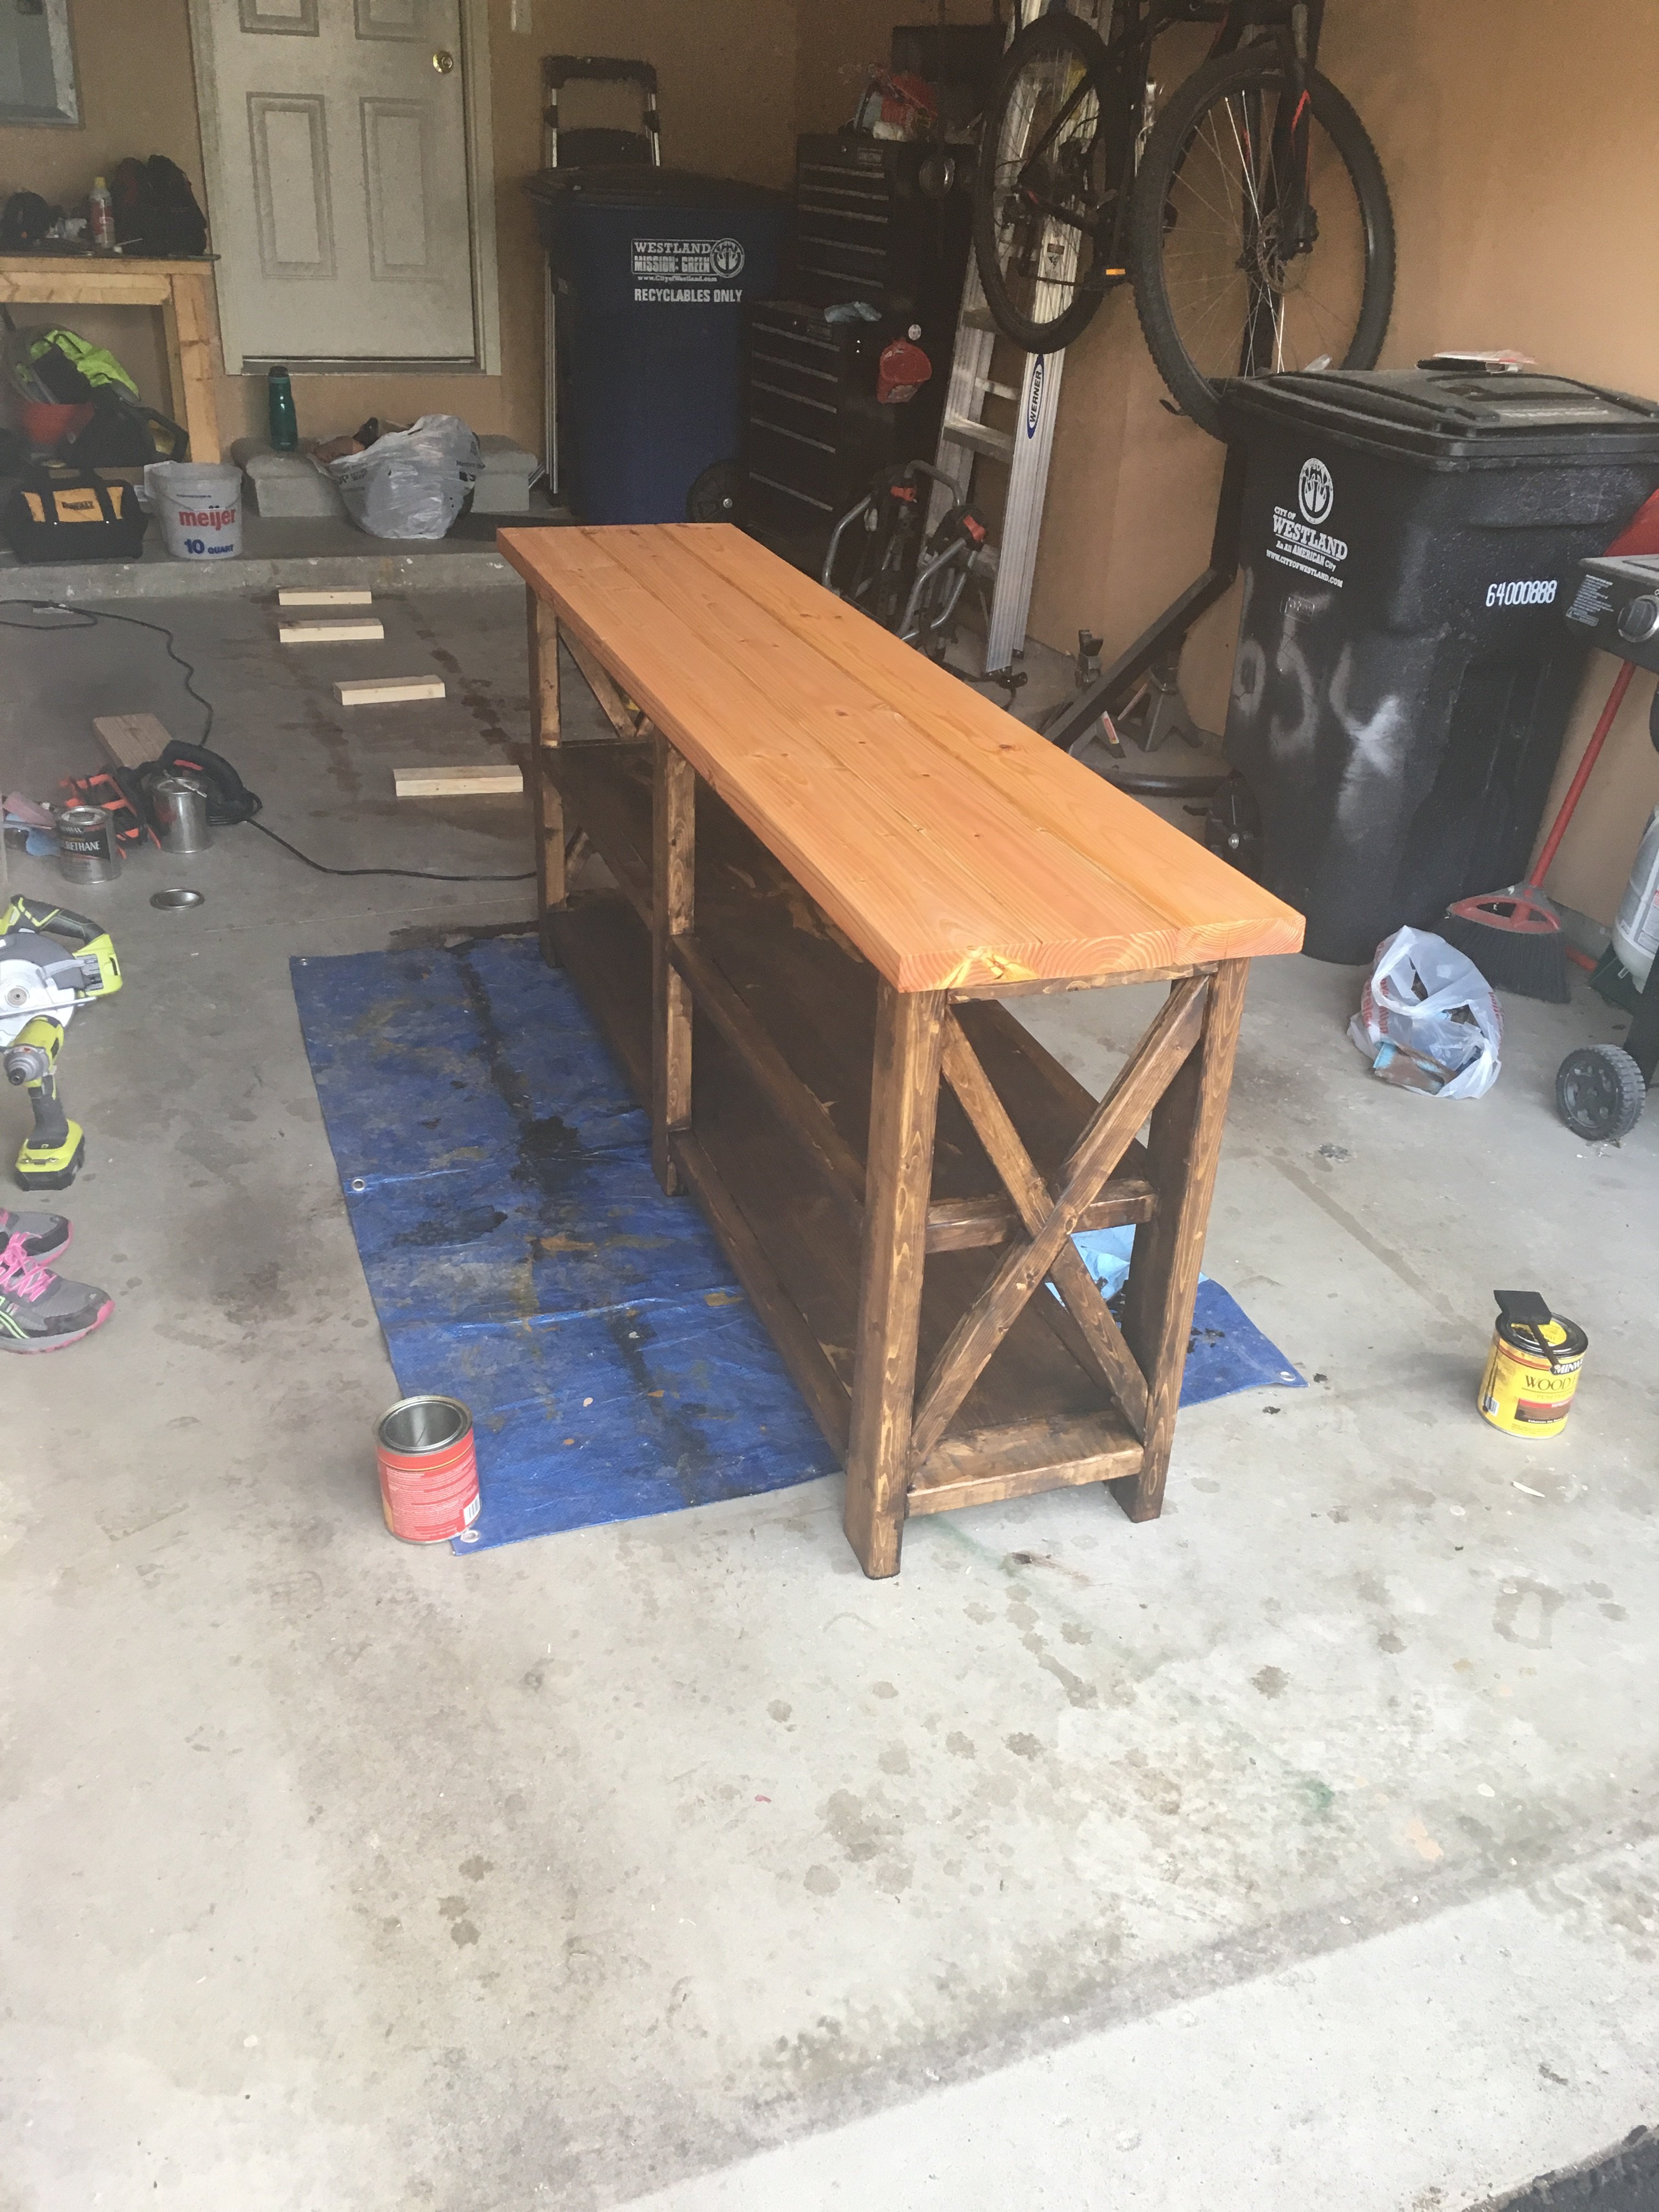
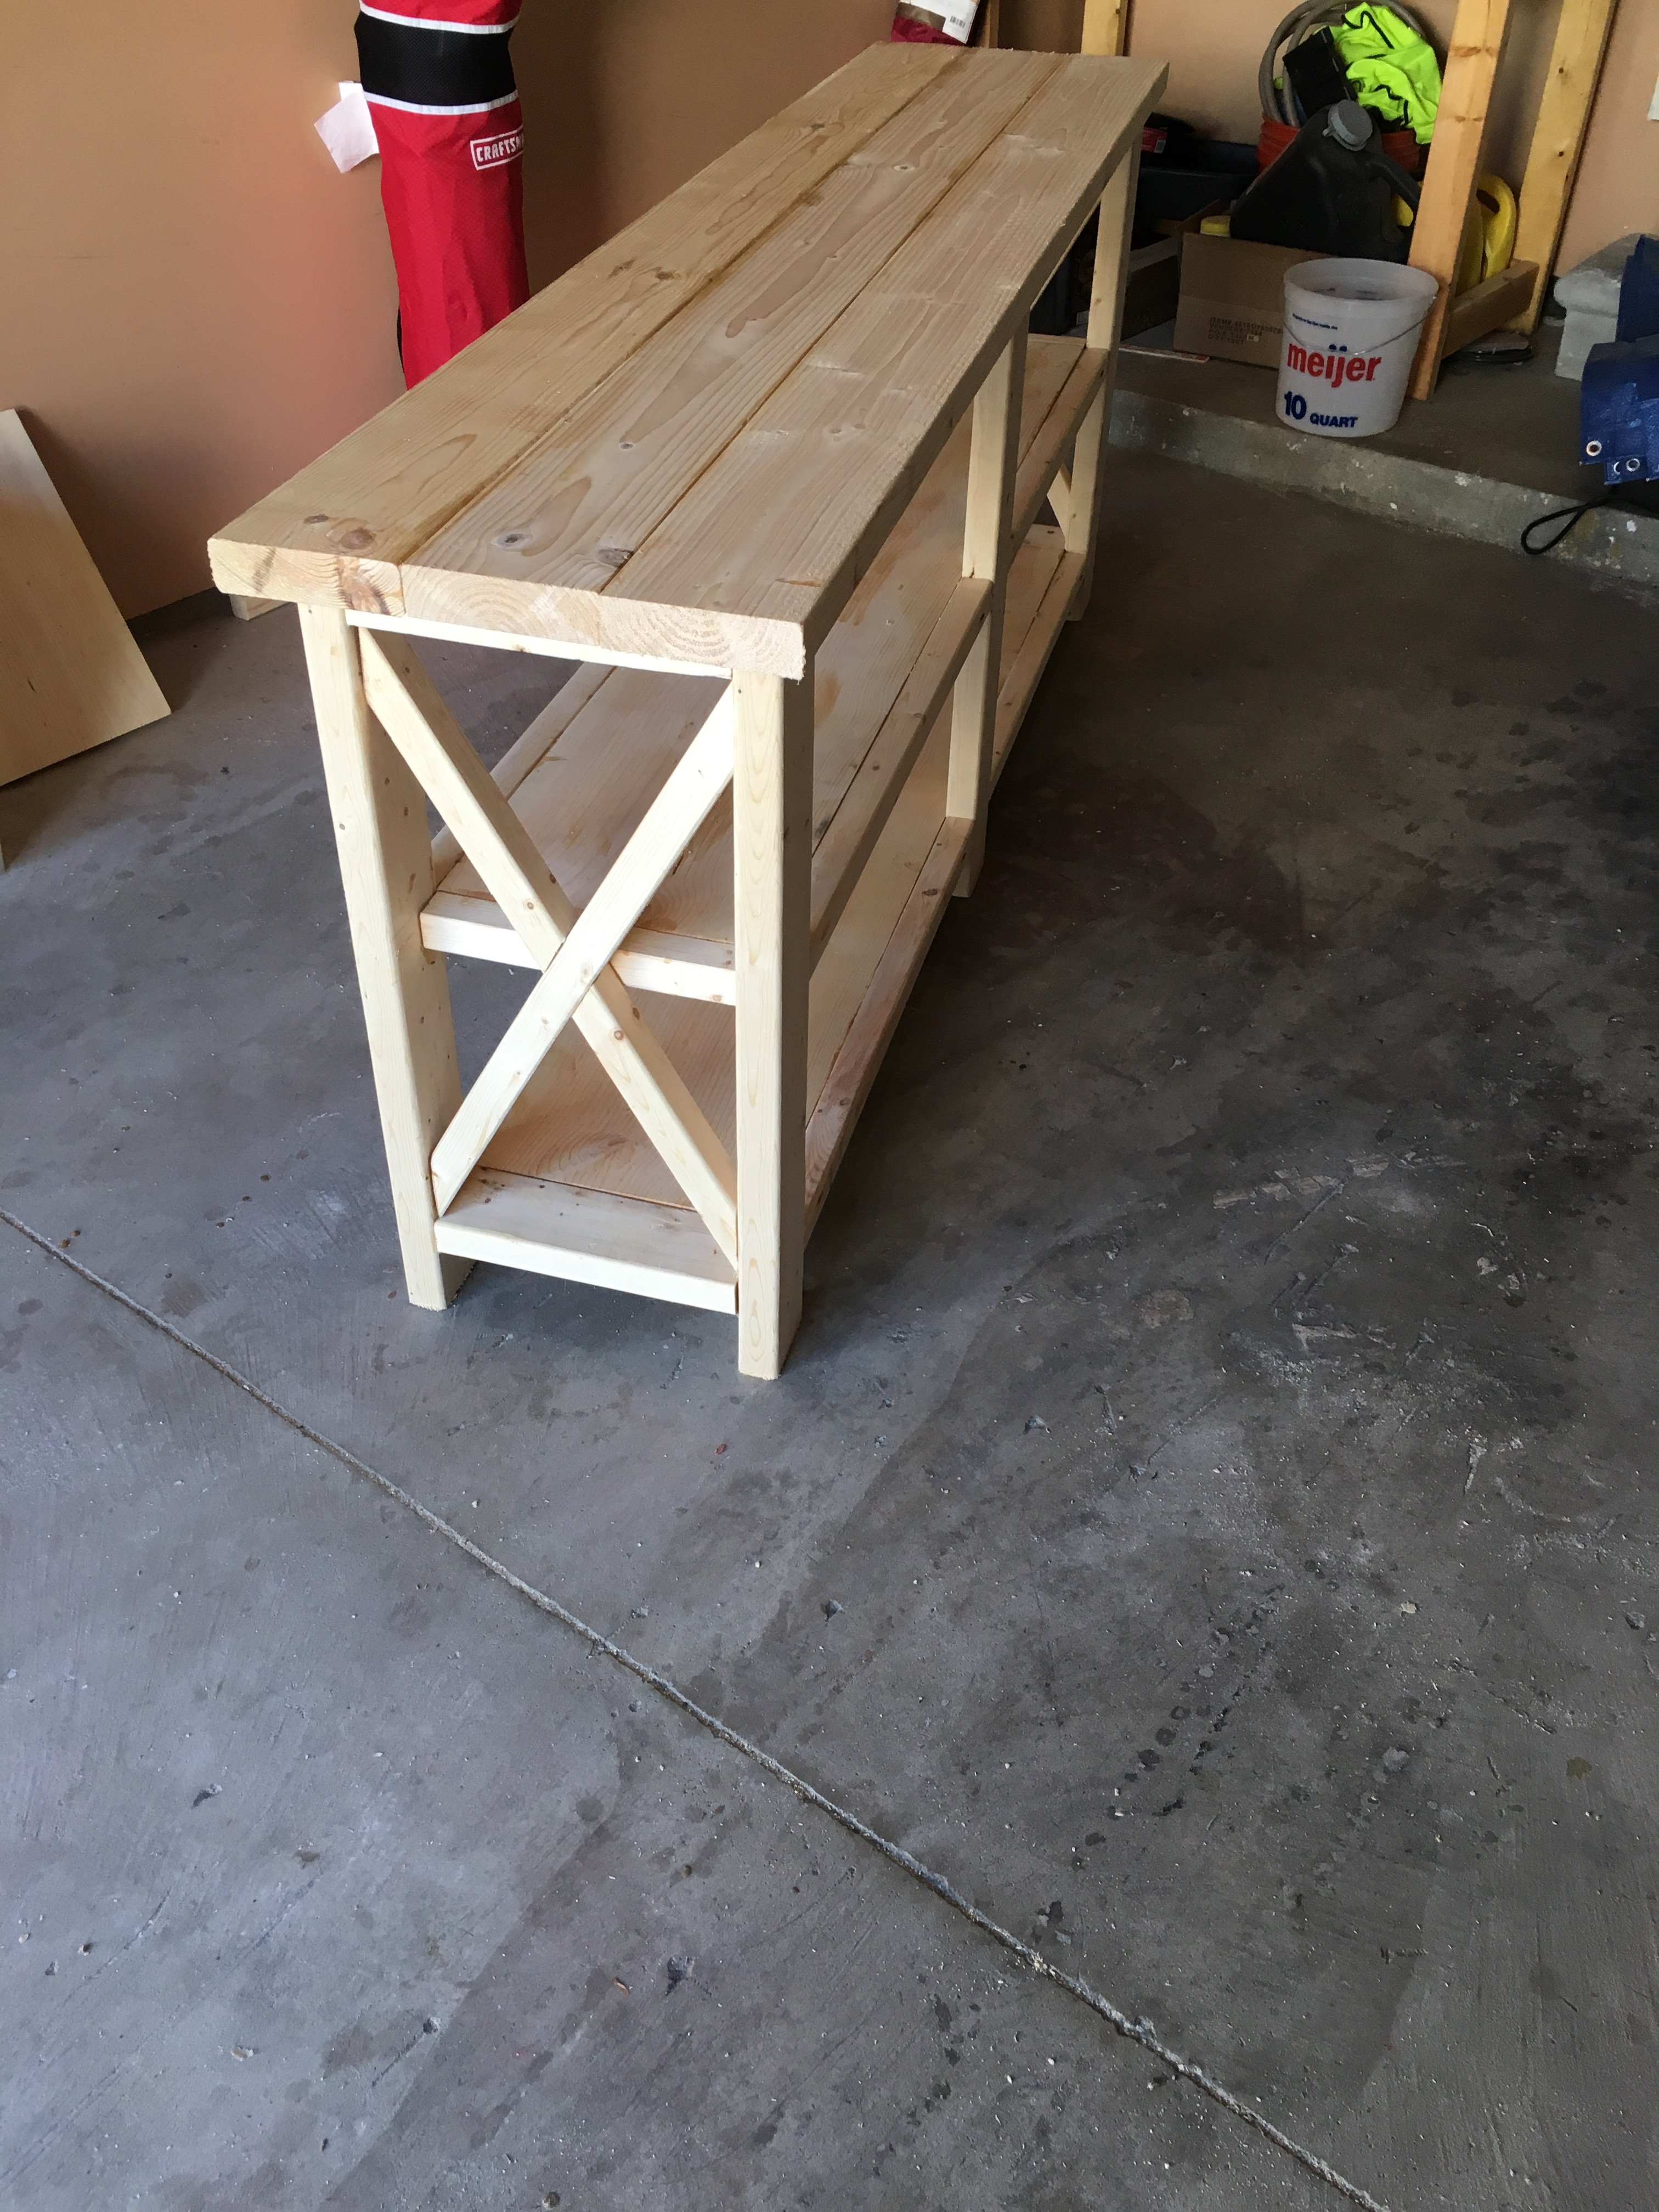
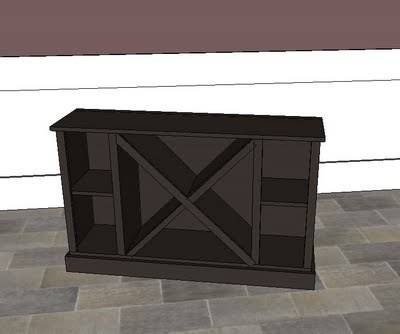
Wife picked this plan for our TV stand for our new TV. Took 2 weekends to make and total cost was ~ $100.
Followed the build instruction from this website except for the "X" on both sides. I do not own a miter saw to cut all the differrent angles. Hence I cut the 60 degree angles using circular saw and speed square and put the x togetter by creating dados 3/4" deep on the center of both the 2x2 member of the X using a router.
For stains, we used Minwas Expresso for the bottom and the top we used Golden Pecan. 2 coats of stain folloed by 2 coats of high gloss polyurethane.
This is one of my first wood working projects I have accomplished and these two plans were some that I really enjoyed making.
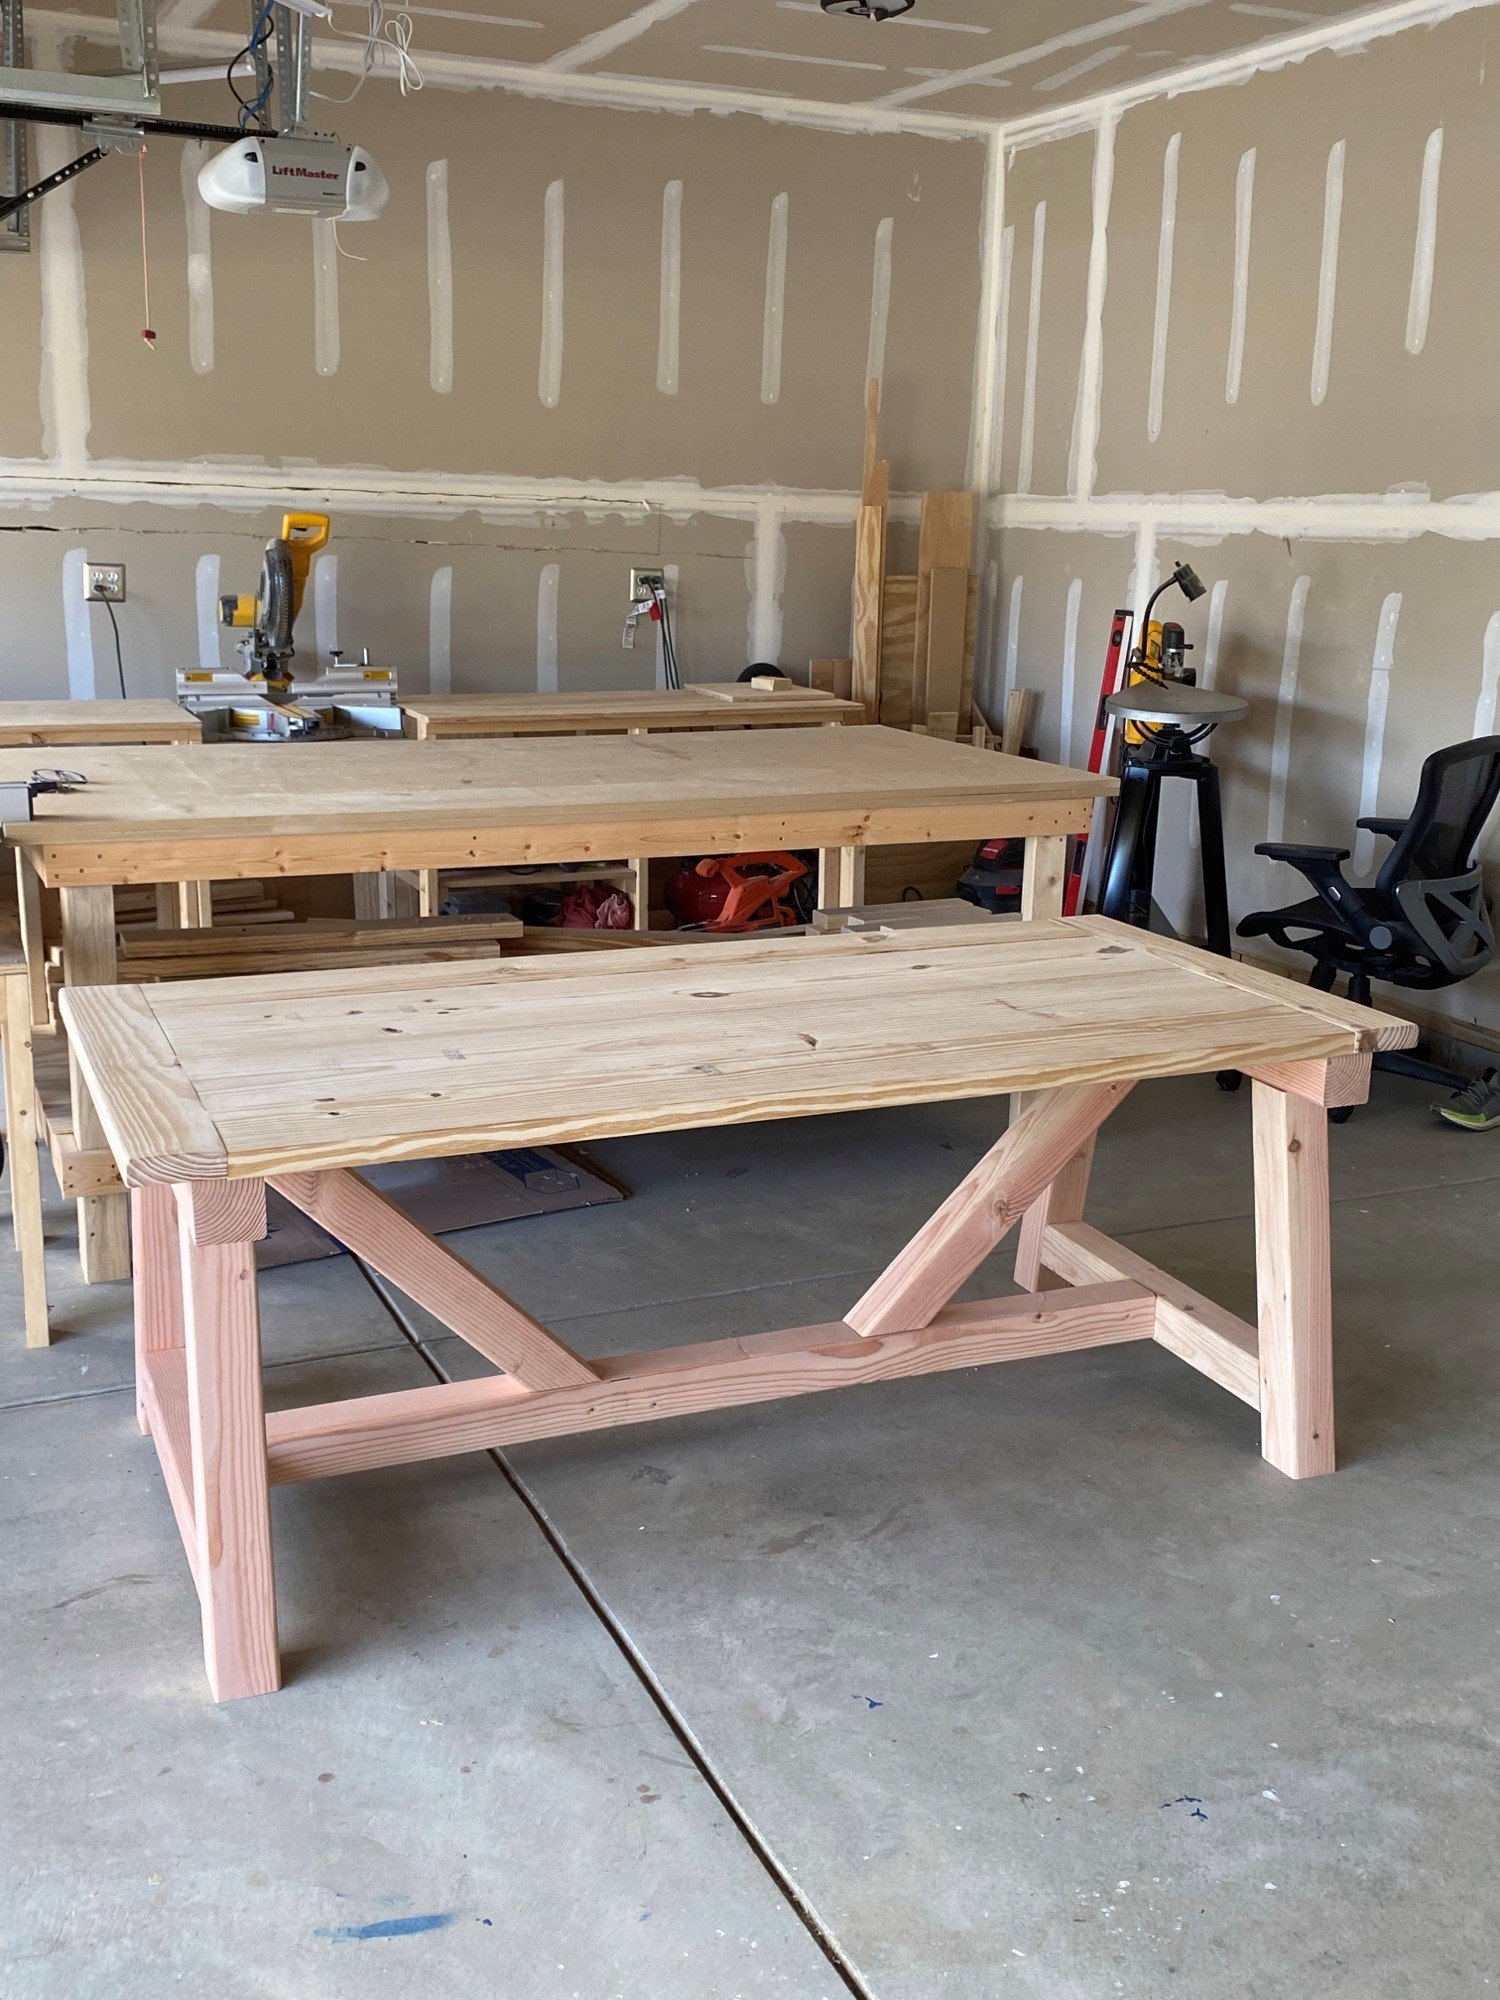
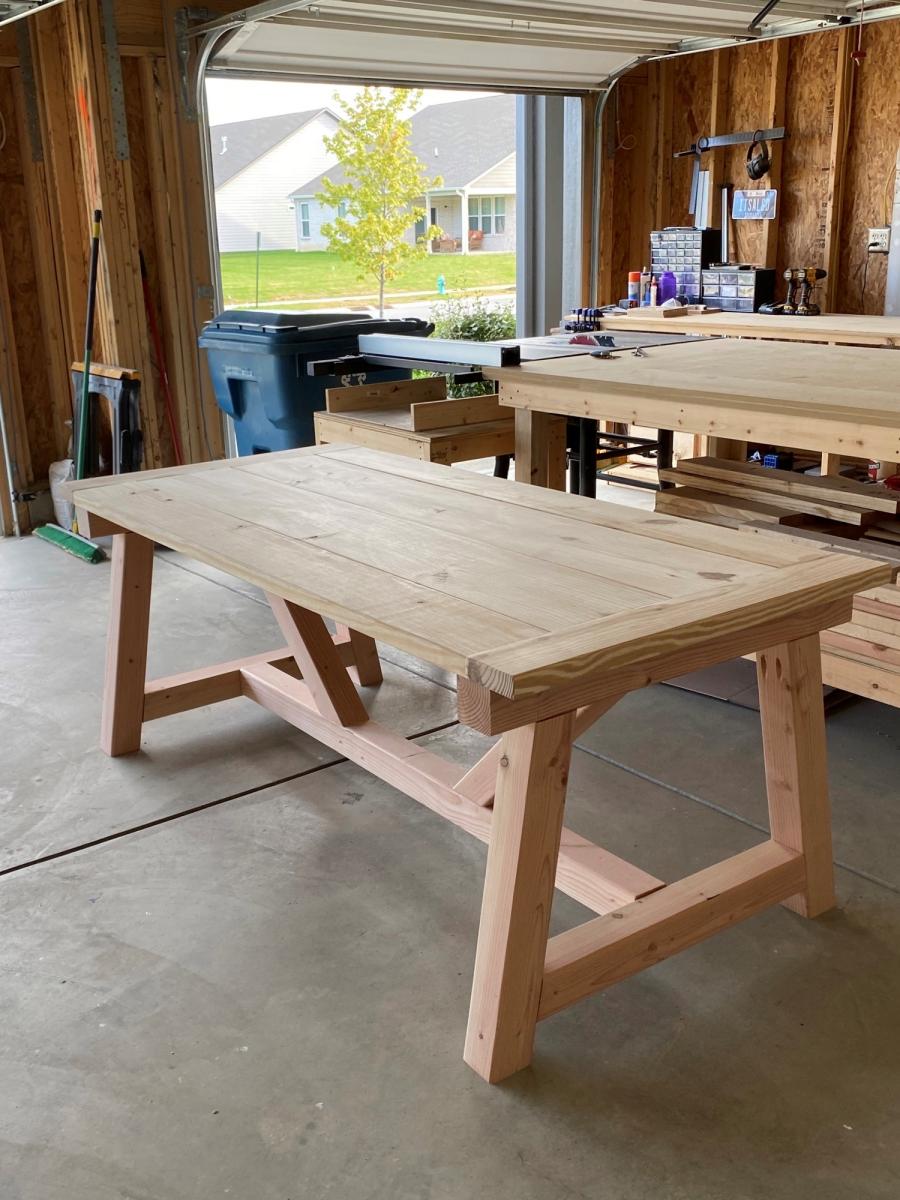
I followed the plans for the 4x4 Truss Beam Table and it turned it out great! I definitely recommend the Kreg Jig HD for the 4x4's. I used non HD Kreg screws for the table top.
It's much easier to build it upside down to ensure you get all your pocket holes underneath. Also, use duct tape to keep the 45 degree angle posts clamped as it's much easier when screwing together.
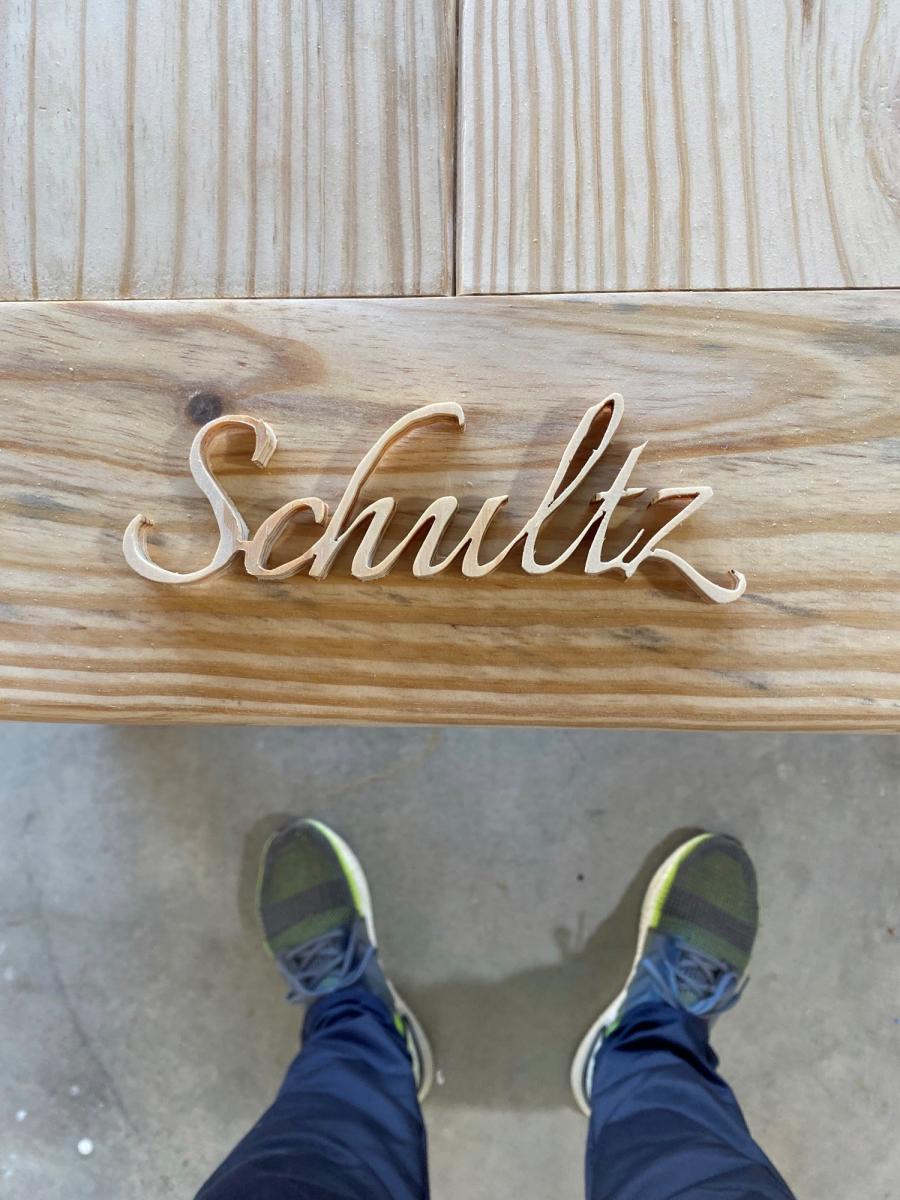
As a bonus for the family I built it for, I cut their name out with my scroll saw and added as a personal touch for the piece.
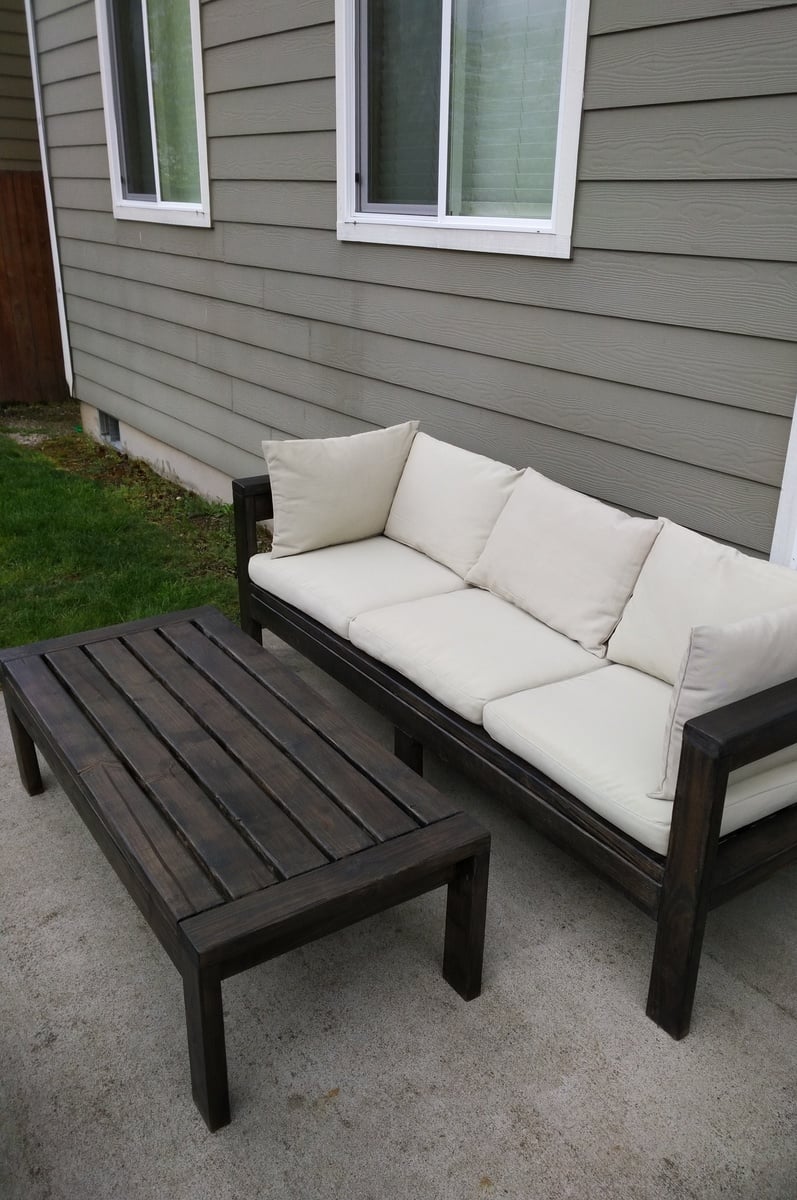
I enjoyed making this outdoor sofa and table combo from Ana's Ryobi series. An inexpensive and easy project that we just love! All construction grade 2x4.

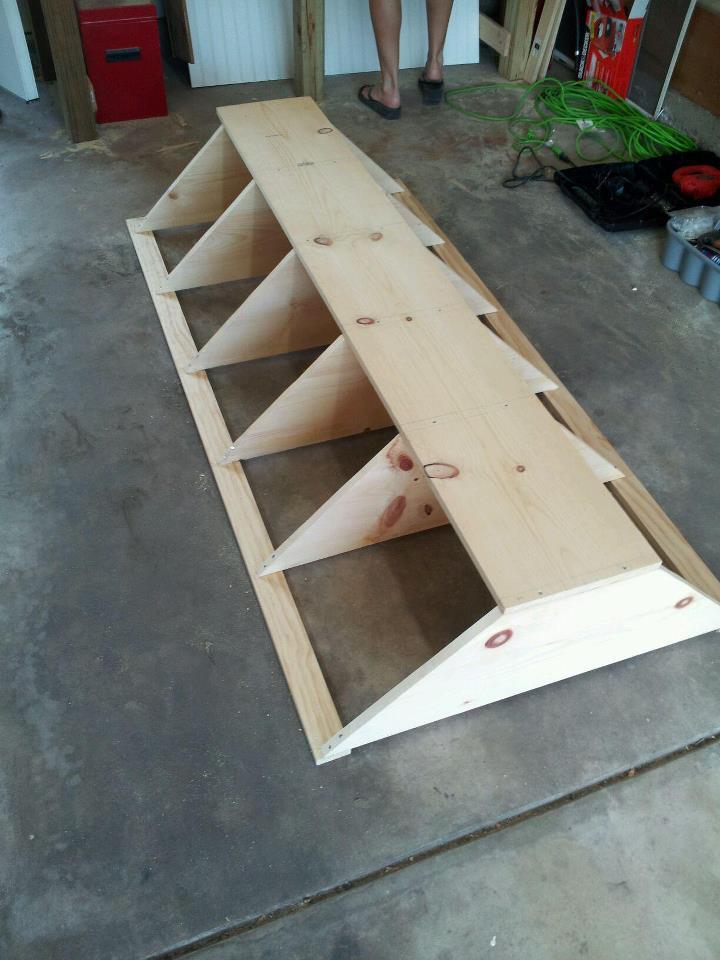
I built this to fit inside a closet that I have in my garage to store all my camping stuff. I built it 5 feet long so I only had to buy 2x4s that were 10 feet long. I also built the bottom shelf closer to the ground to allow just a little bit more space between the first and second shelf. All in all it was a very easy and fulfilling project. I was a little worried about how sturdy the shelves would be but they are very solid. Thanks Ana!
Sat, 05/23/2015 - 15:14
For some reason when I upload the photo it saves sideways....sorry
Wed, 08/12/2015 - 06:11
Your version is exactly what I'm planning on building. Nice to see it before I get started.
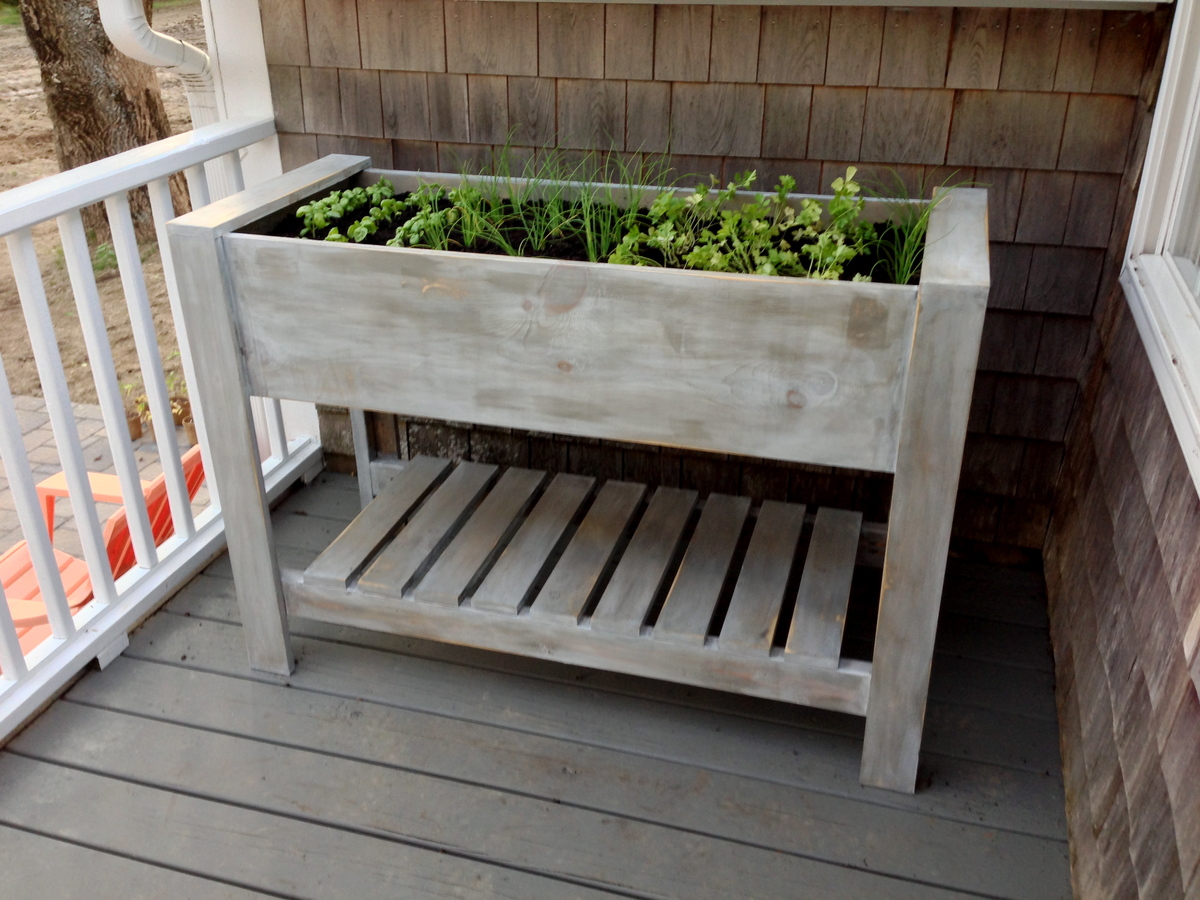
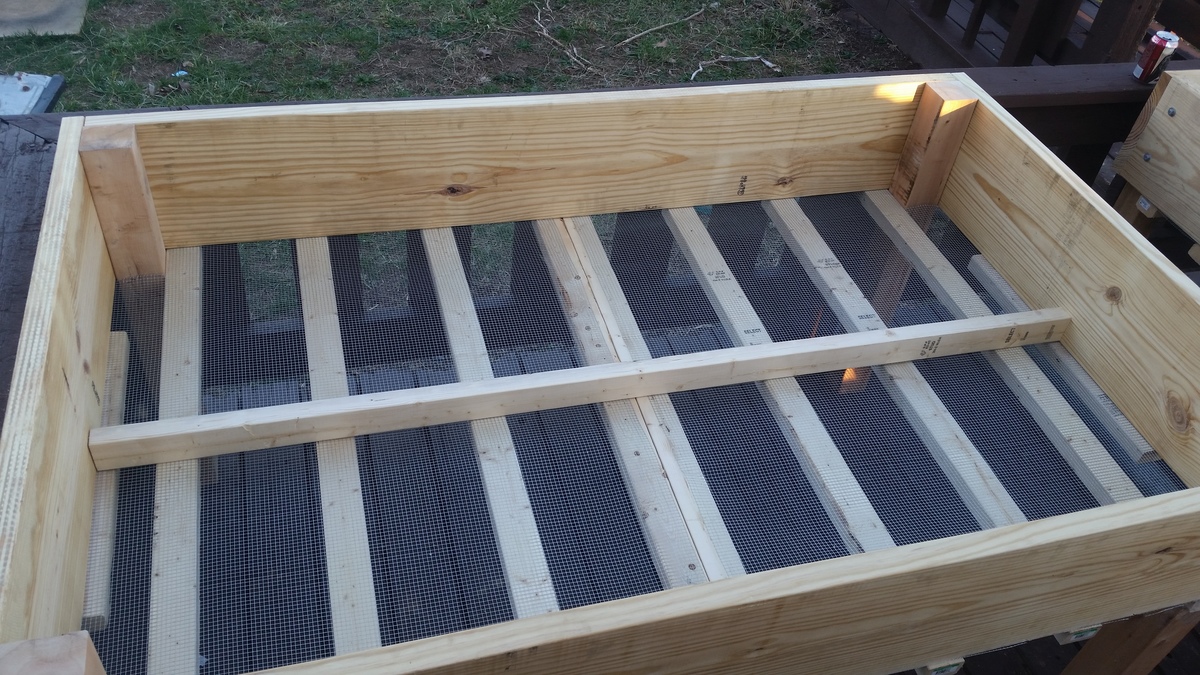
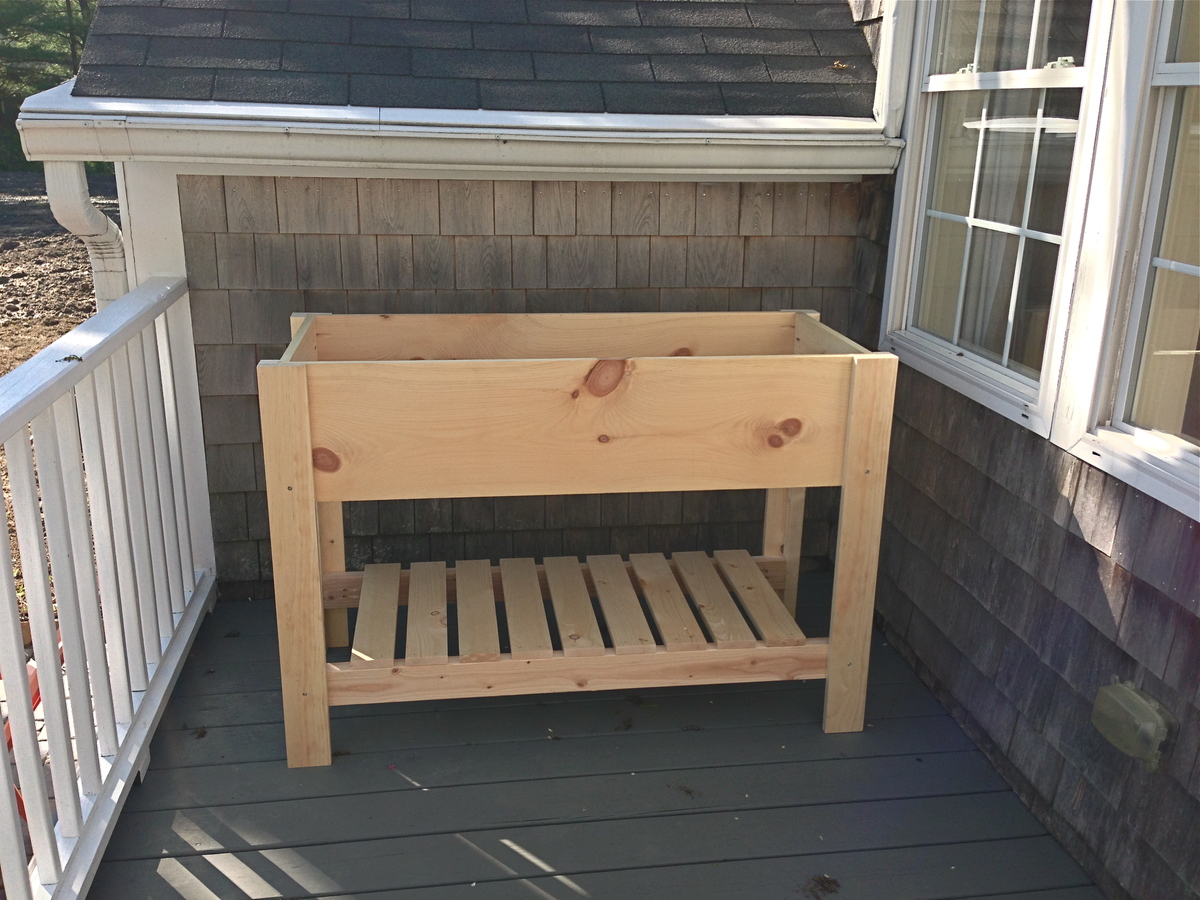
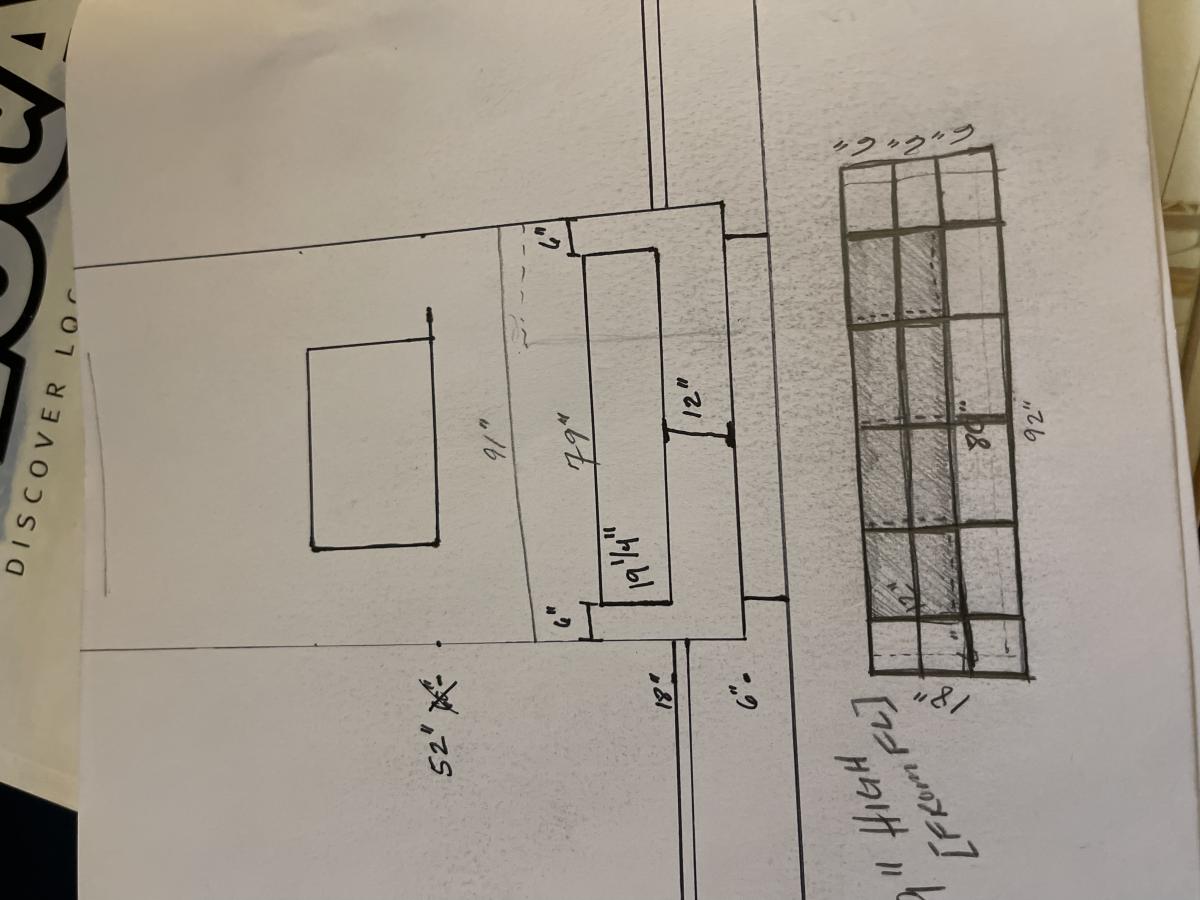
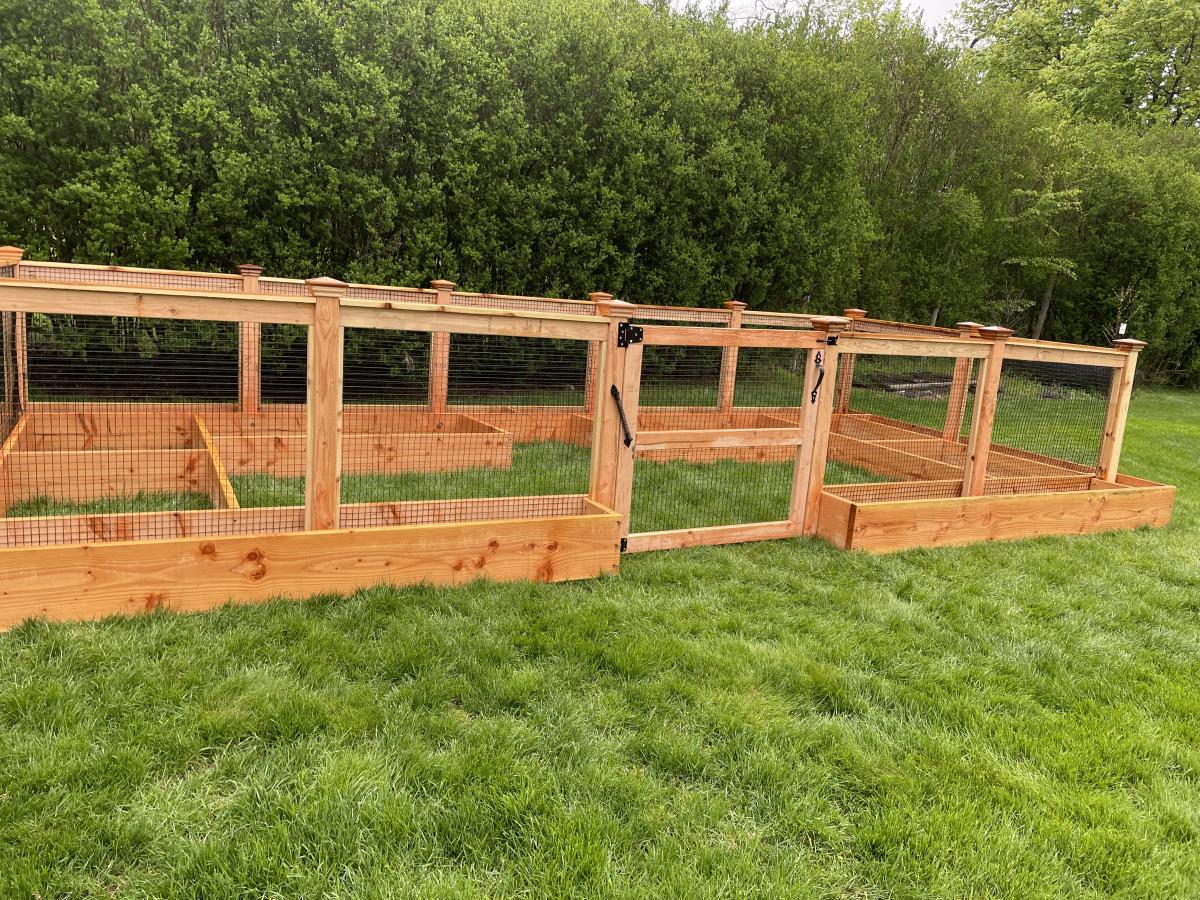
I followed Ana's Raised Planter Box plan exactly. We did purchase a Kreg Jig Jr. recently, which came in handy on this project for sure. It is a very sturdy piece and it only took a couple of hours to assemble.
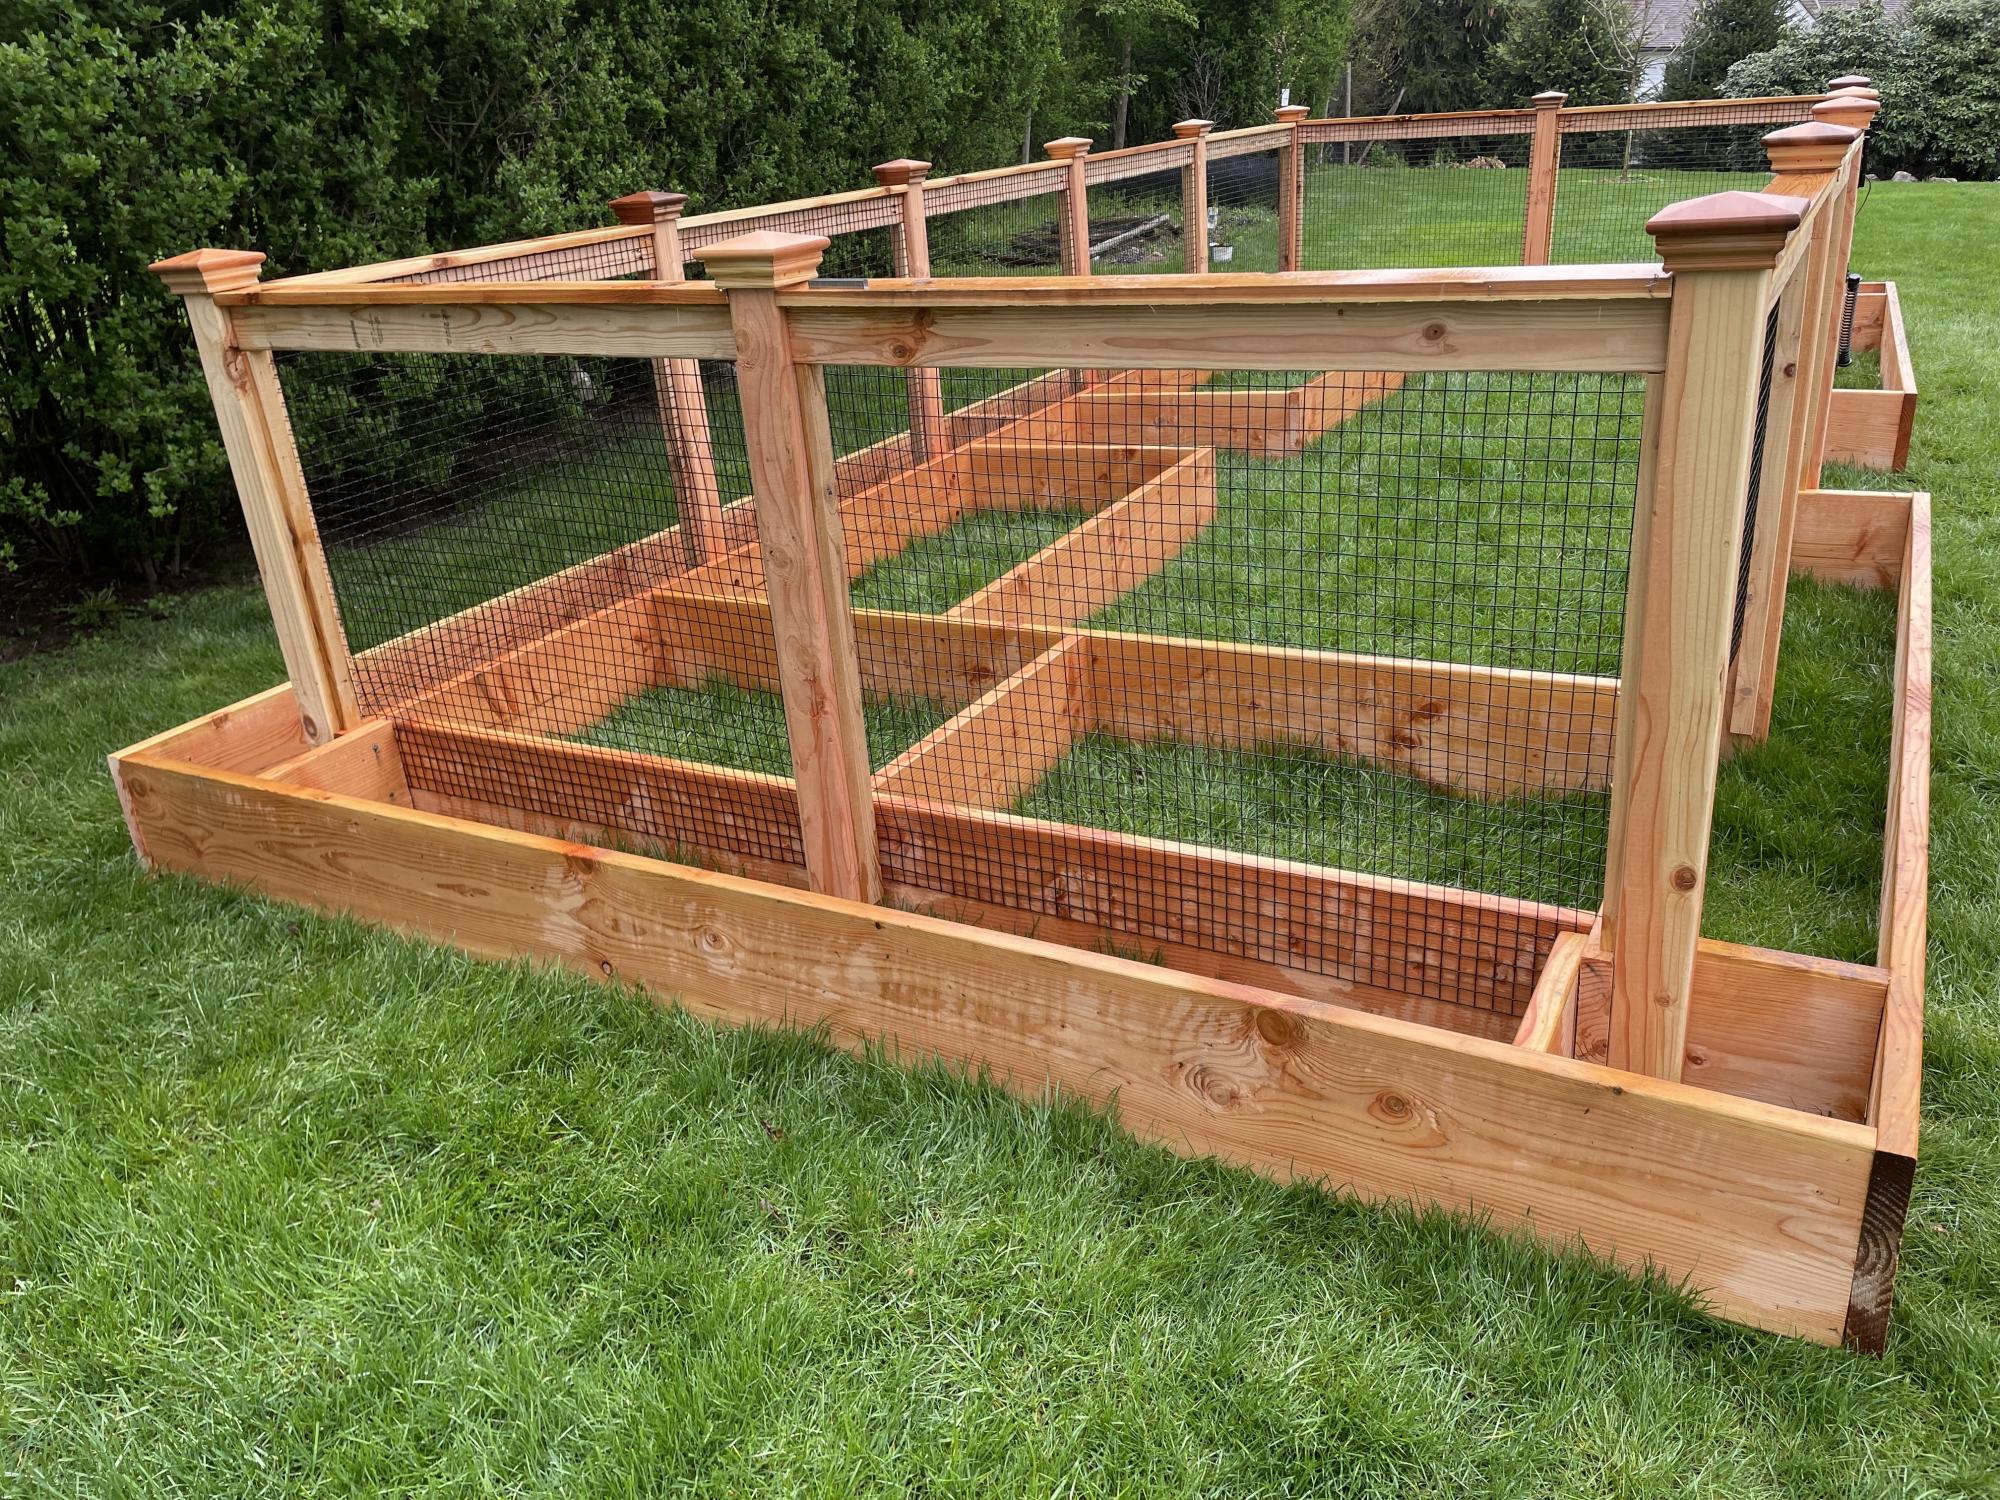
A vegetable garden with an outside ring to plant marigolds to keep deer away.

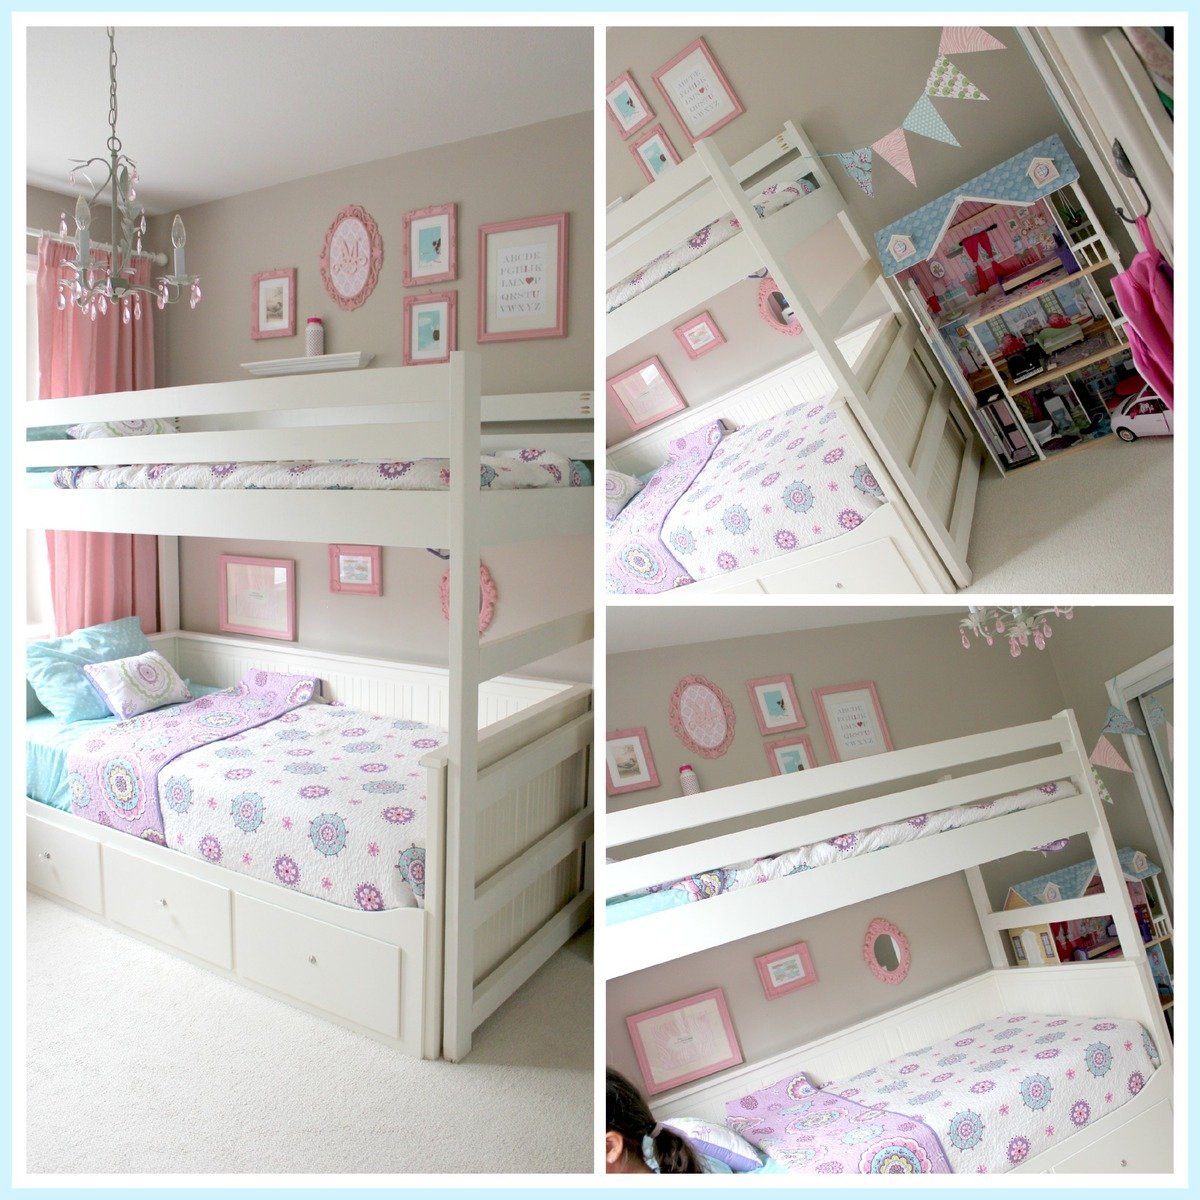
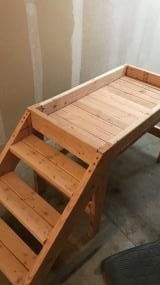
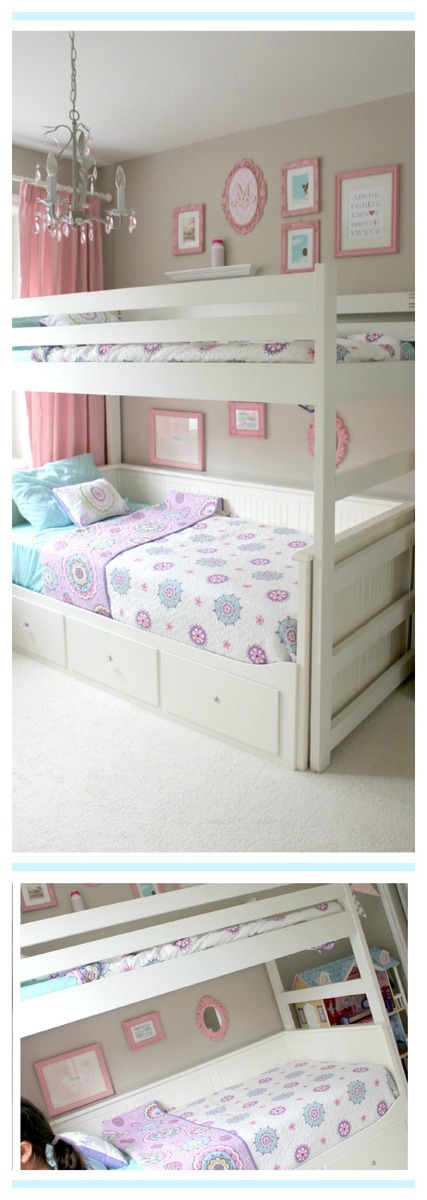
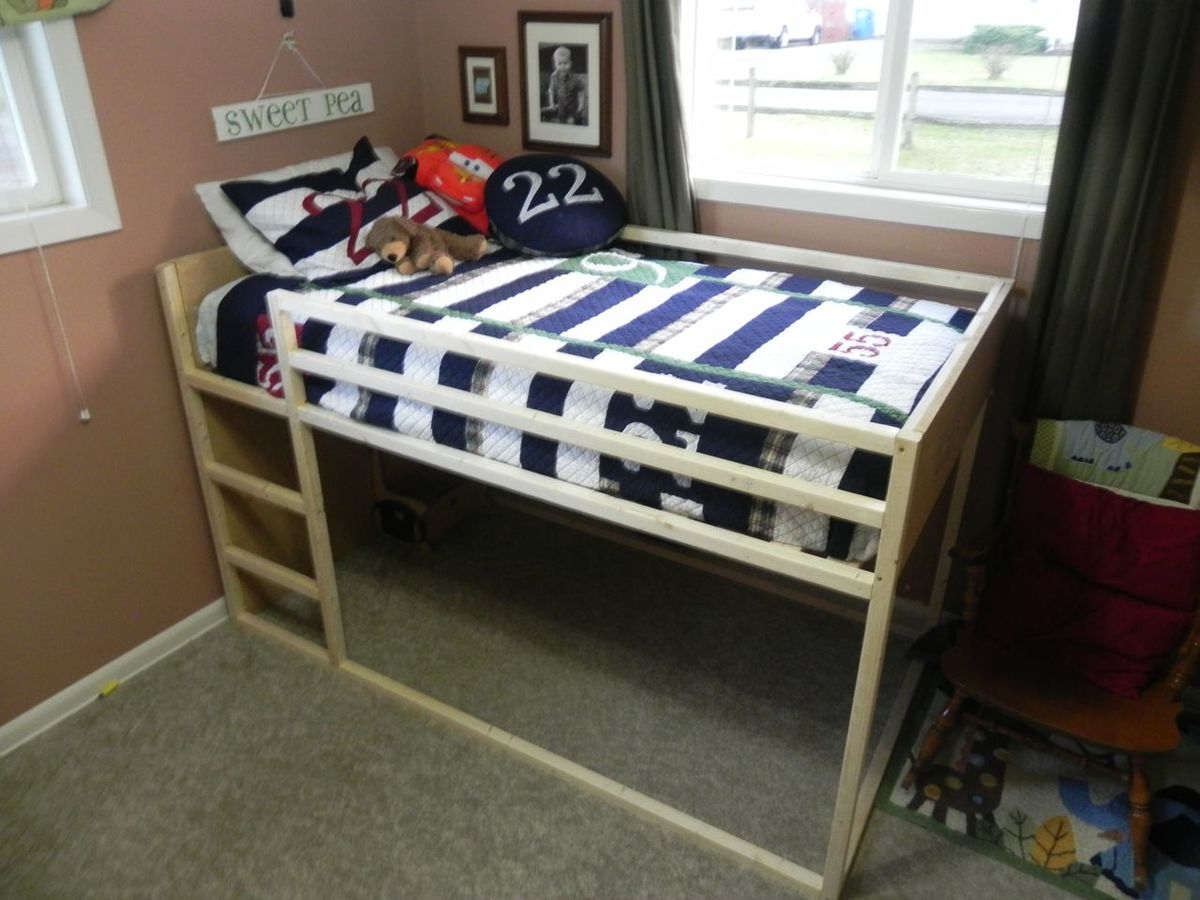
I liked the simple design of the camp loft bed, so I took the plan and modified it to fit over top of our existing Ikea daybed. I adjusted the width of the loft bed and made it a little taller, so that I could sit on the bottom bed and read to the kids with out hitting my head on the loft bed all the time.
I built the ladder into the side of the loft bed so that it wouldn't interfere with the drawers on the front of the daybed. This worked out well, as it also gives the girls more room to play!
This build is super easy, but I have to say that I don't like working with 2x4s. They are so rough....I spent a lot of time sanding and filling, and it's still not perfect. But I'm ok with it ;) I may add another cross support because it is a bit wobbly (probably b/c I made it taller).
The finish is a color matched 'All surface enamel' from Sherwin Williams.
Wed, 08/04/2021 - 06:38
Hello Millhouse. I love the loft bed you created. I have the exact hemnes daybed for my daughter and I beg to build the same loft bed. Do you have the exact modified plan you used with the measurements that fit the bottom bed? This would be super helpful!! Thanks in advance!
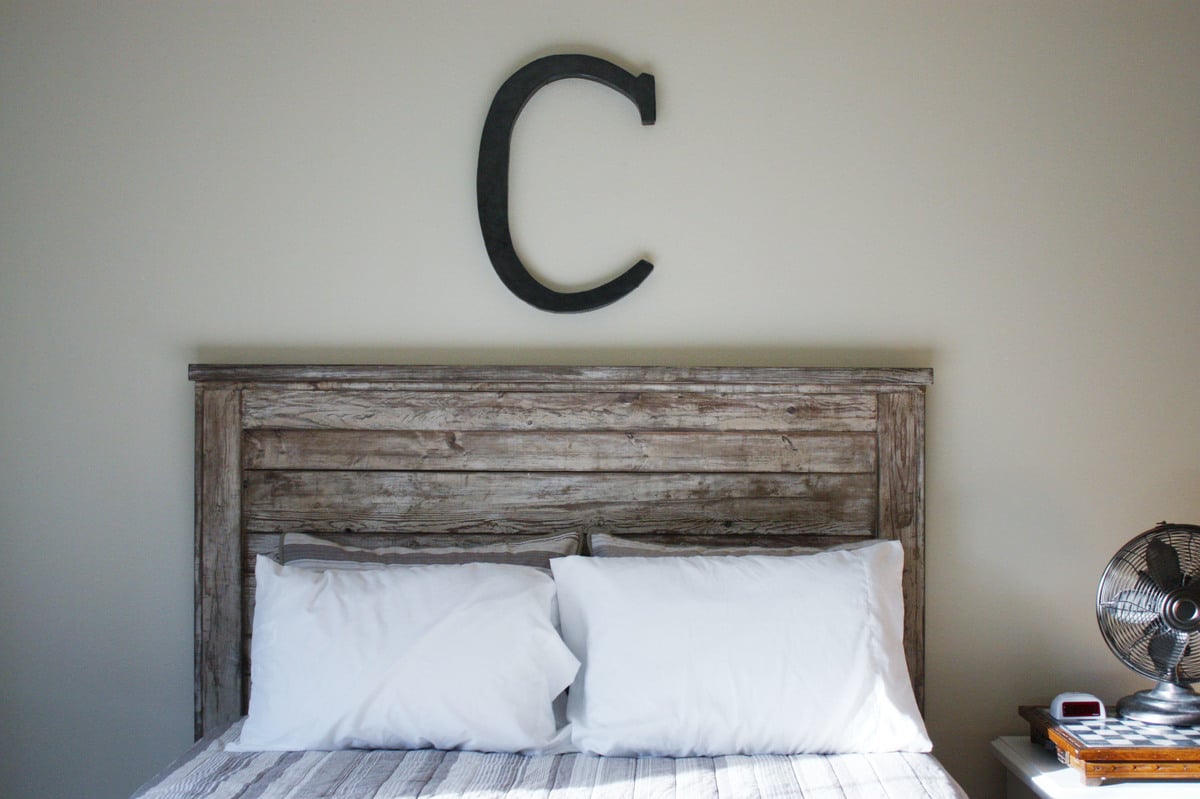
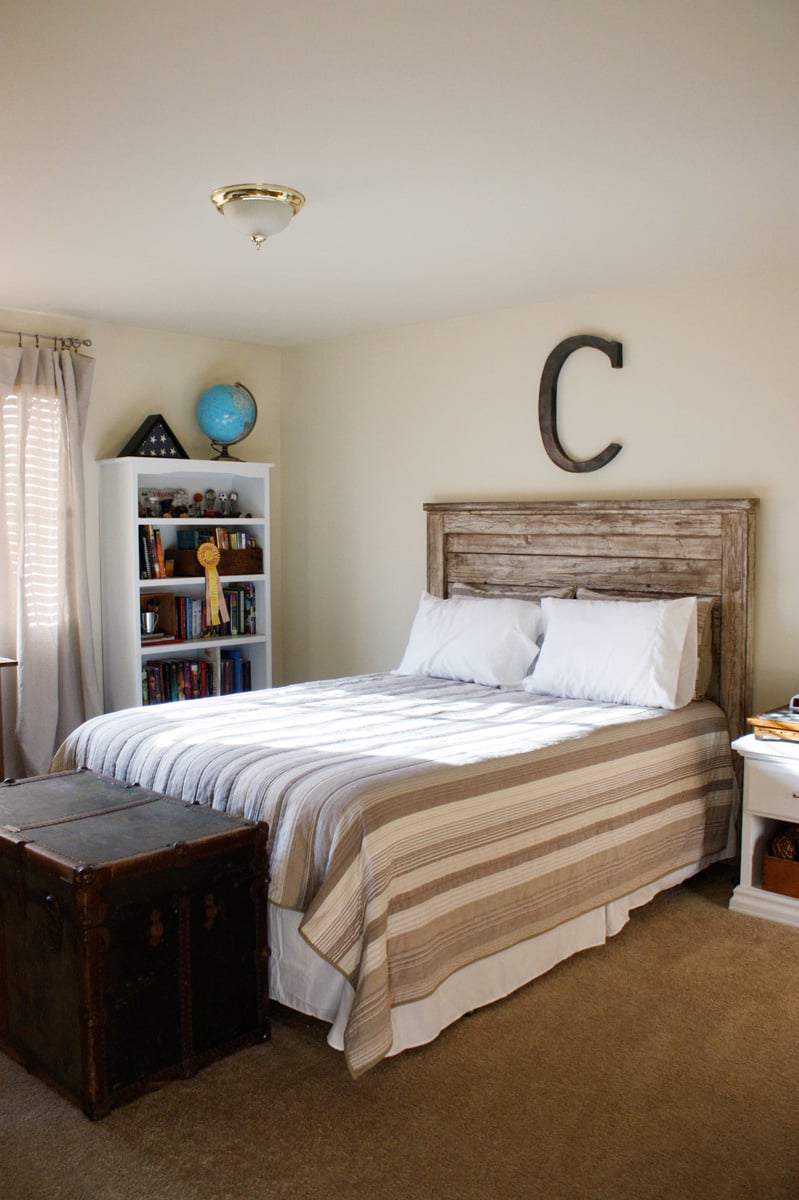
Rustic headboard built in an afternoon. Total cost was only $35!
Wed, 11/09/2011 - 12:46
I thought the 56 in headboard was a little excessive. So I cut it down a foot. If you decide to do this take 6 inches off the top and the bottom so it looks portionally correct. Another thing I did that was not mentioned in the what I have read so far was use kregs joints to connect the inner panel. If you build it from the back you will not see any joints except the top ones on the foot board. I patched them with that elmers patch stuff and are no longer visible. Minus all the sanding I built two beds in a half day.
Wed, 11/09/2011 - 15:52
I was thinking of doing this headboard for the farmhouse storage bed. Did you use 4x4s or build the legs the way they are in the plan? I have several 3x3s for legs that I was planing on using with the kreg. How easy was it to get the boards lined up with the kreg?
Wed, 11/09/2011 - 19:56
The legs are the same as the plan. I don't have a kreg jig so the bed is nailed and screwed together instead. Hope that helps! -Brook

Thu, 11/10/2011 - 06:48
Your finish is to die for. I could just look at it all day long. I'm weird like that. Fab job!
Tue, 11/15/2011 - 11:40
ok.thanks for your reply. But did you sand like 80-120-220 grit . thanks
Wed, 06/06/2012 - 12:37
Congratulations !!! and thanks for inspiring us by posting these photos of a terrific job!
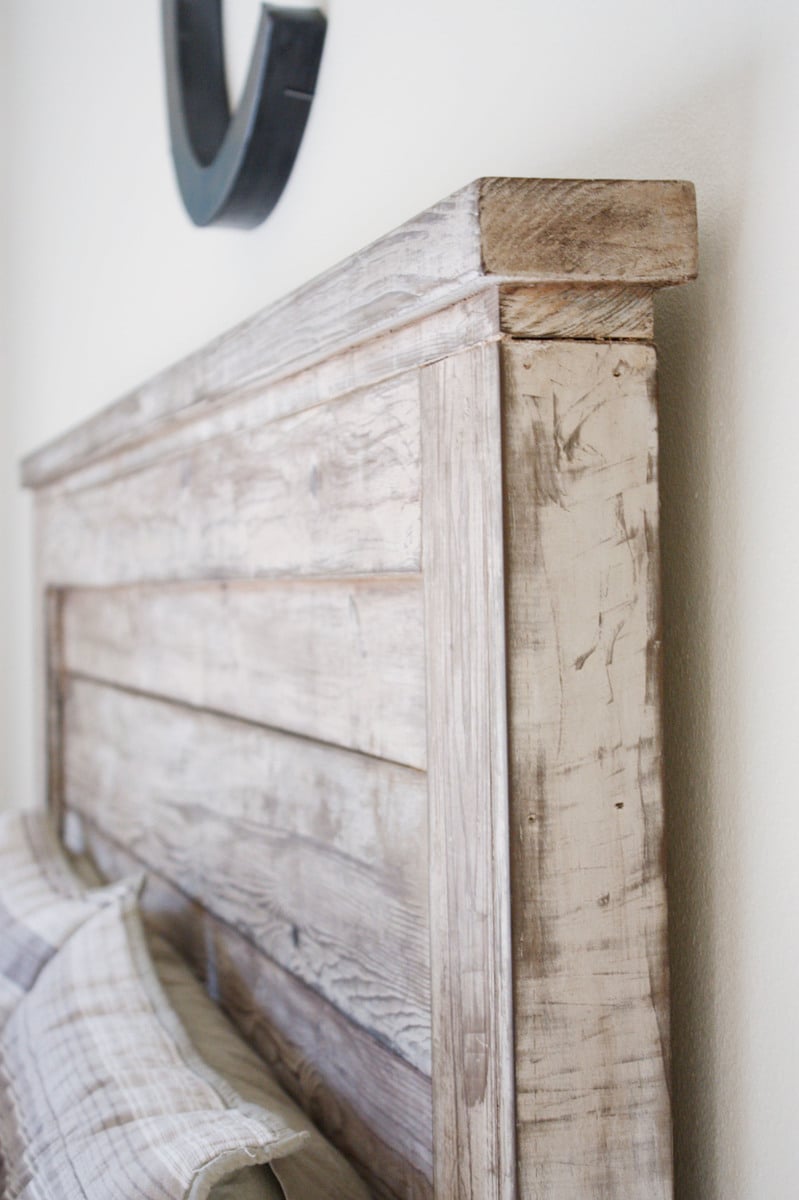
I was just wondering..how did you manage to get the perfect light brown - chocolate tint shown on these photos??
I've followed the process described (oxidized the wood using tea followed by steel wool/vinegar mix) to the point. However, the result is grey tinted. even tried applying the process to different types of wood and applying less mix..even sanding it after the project dried and applying the clear wax..Same GREY result..
Please help!!
Wed, 06/06/2012 - 13:26
Different woods will give a different finish. This project turned out a little browner than the other times I've used the tea/vinegar treatment. Probably because it was previously painted and then stripped. You can also buy dark wax that will help change the color. You might try finding a stain that is the color that you want and staining your project. Good luck!
Thu, 08/23/2012 - 06:39
I just made the rustic headboard with new pine boards. Can I get this look with the tea and vinegar? How was it done? Thanks.
Wed, 07/10/2013 - 12:53
where does the white come from in your wood. did you strip pre primed pine then tea and oxidation? thanks,ante
Thu, 03/01/2018 - 16:39
Wow, I love the finish you gave this piece! Absolutely beautiful! Well done.
Mon, 12/07/2020 - 10:14
Anyone have plans for the sides and footboard for a queen?? Please and thanks! :)
We are so thankful for the plan! This is our first building project (ever!) My son loves his new fort bed, and we feel so empowered to have done it ourselves!
Wed, 01/25/2012 - 19:47
I was looking for a cute, simple bed for our 9 year old son as he gets a room to himself for the first time in his life(we adopted him from Haiti 2 years ago, where he shared with 4-8 little boys and then he has shared with his little sister since they came to us). This is just what I was looking for and didn't know it-haha.
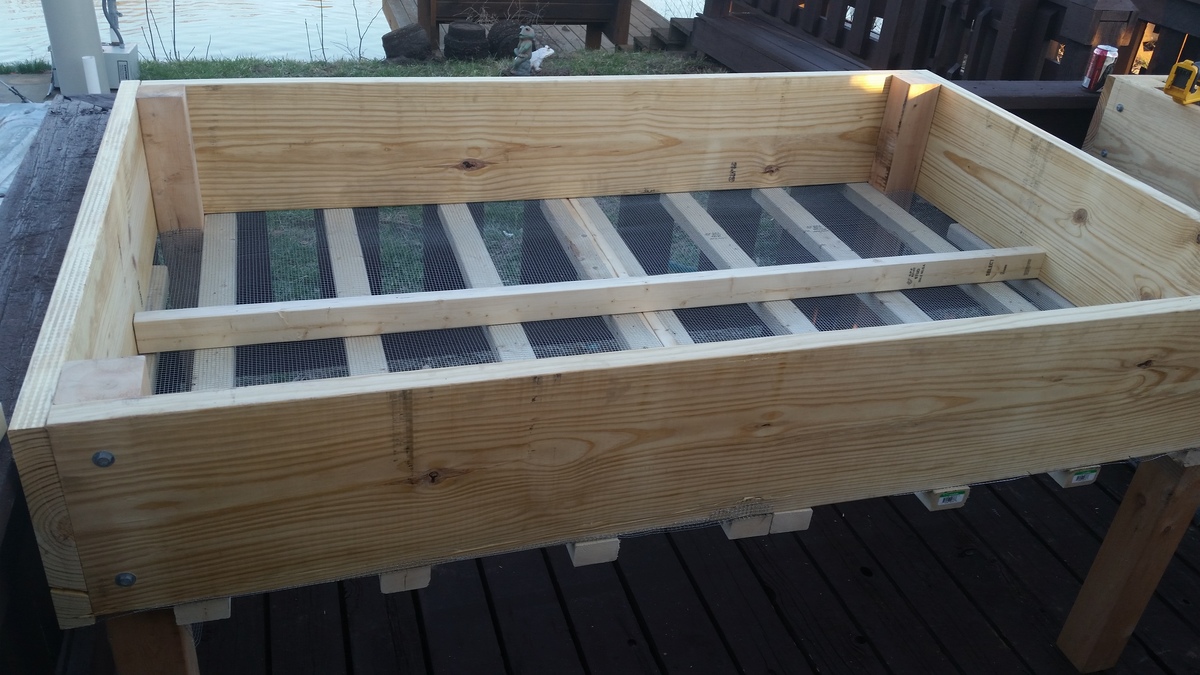
2 - 2x12x8
2 - 2x3x8
2 - 4x4x8 (cedar, fur is cheaper and will work fine also)
16 - 5/16x4 lag screws
16 - 5/16 washers
3x10 feet 1/4 hardware wire
20 - 3inch wood screws (outdoor rated, deck screws or the like)
you will have left overs if you buy extra lags you can make some other boxes depending on how high you want these, or set them on ground without legs. and use the wood screws