Community Brag Posts

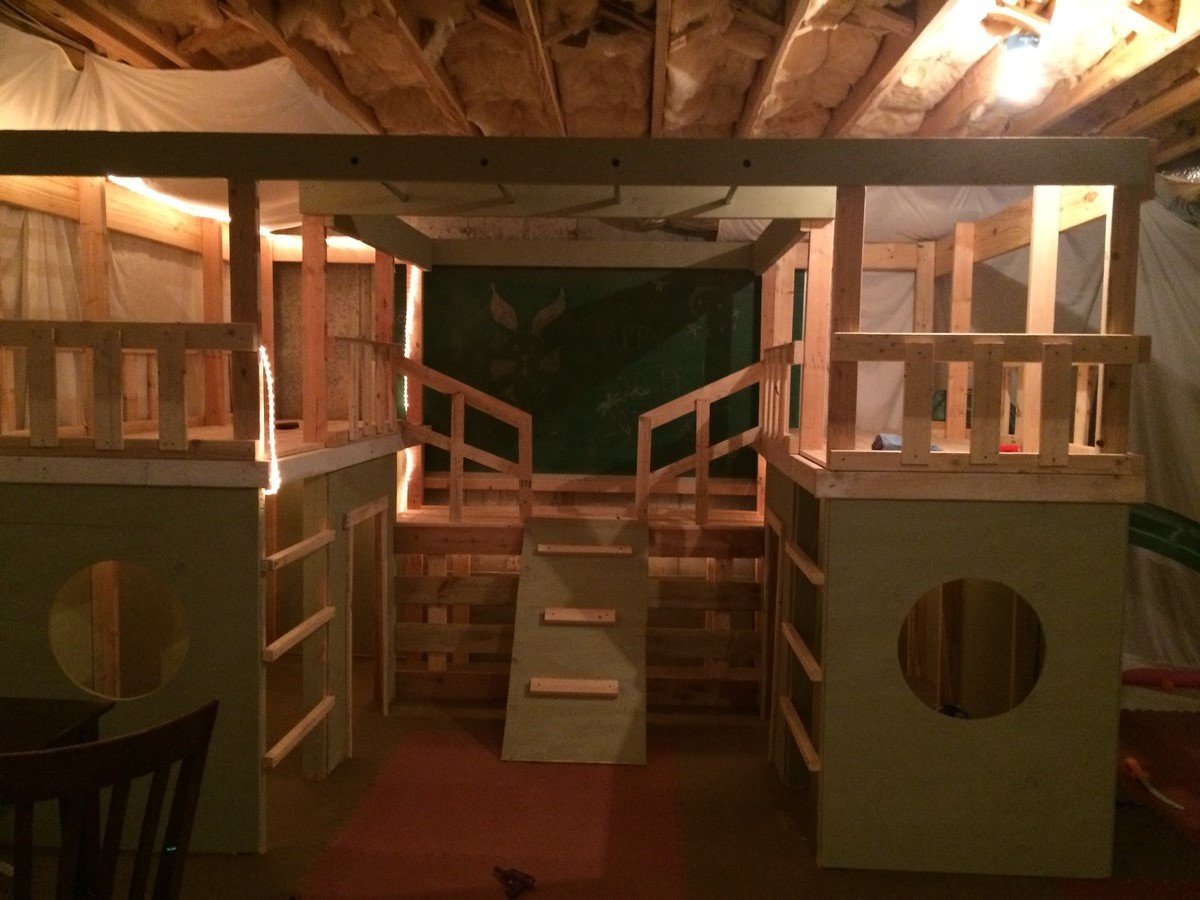
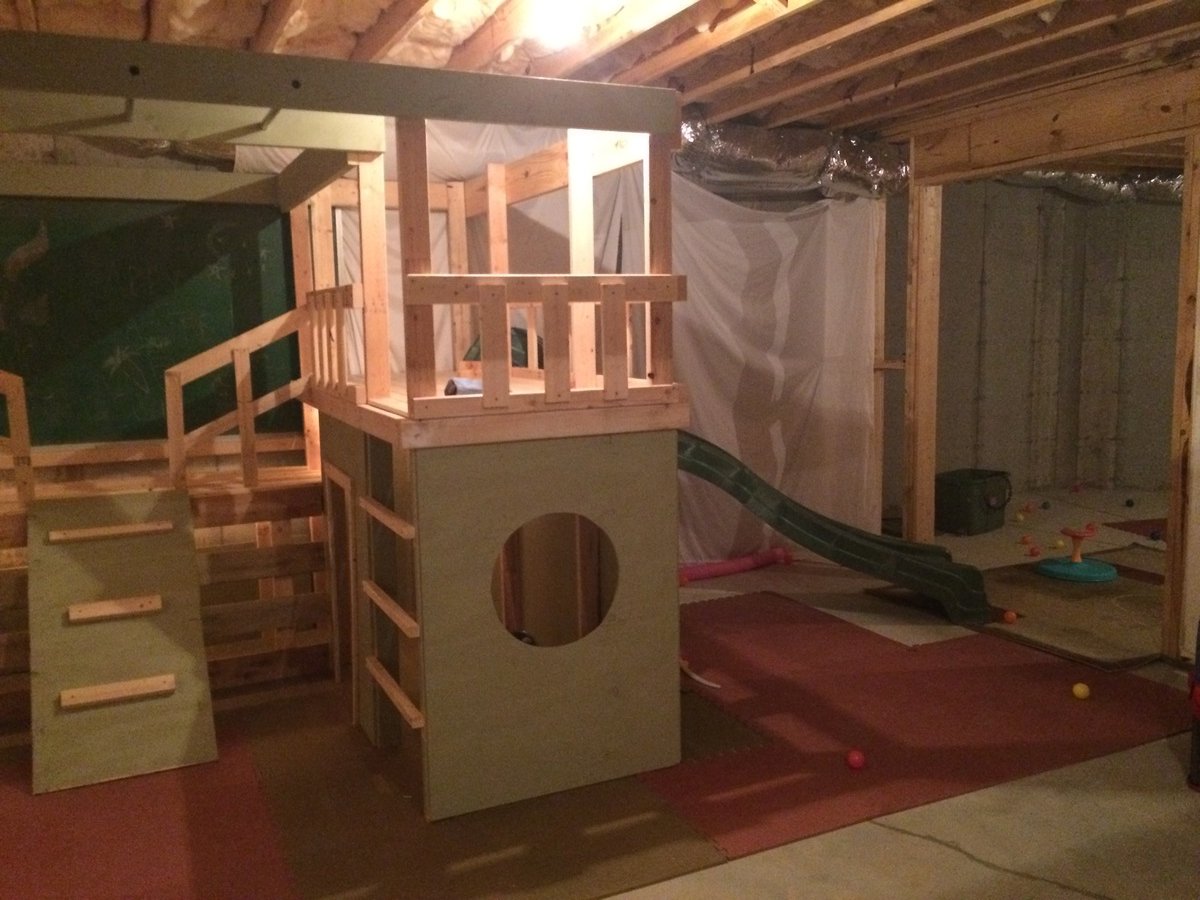
Indoor Playhouse Fun

Submitted by Anonymous (not verified) on Sat, 05/21/2016 - 18:21

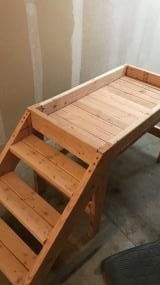
This project was a success!! I had a week of vacation that I dedicated to this great project! The directions were easy to follow...thank you Ana! 

I managed to get the slide from someone's outdoor play set that they were giving away :)  I secured it to the side of the upper level. It's been the kids favorite part! 

Estimated Time Investment
Week Long Project (20 Hours or More)
Recommended Skill Level
Intermediate

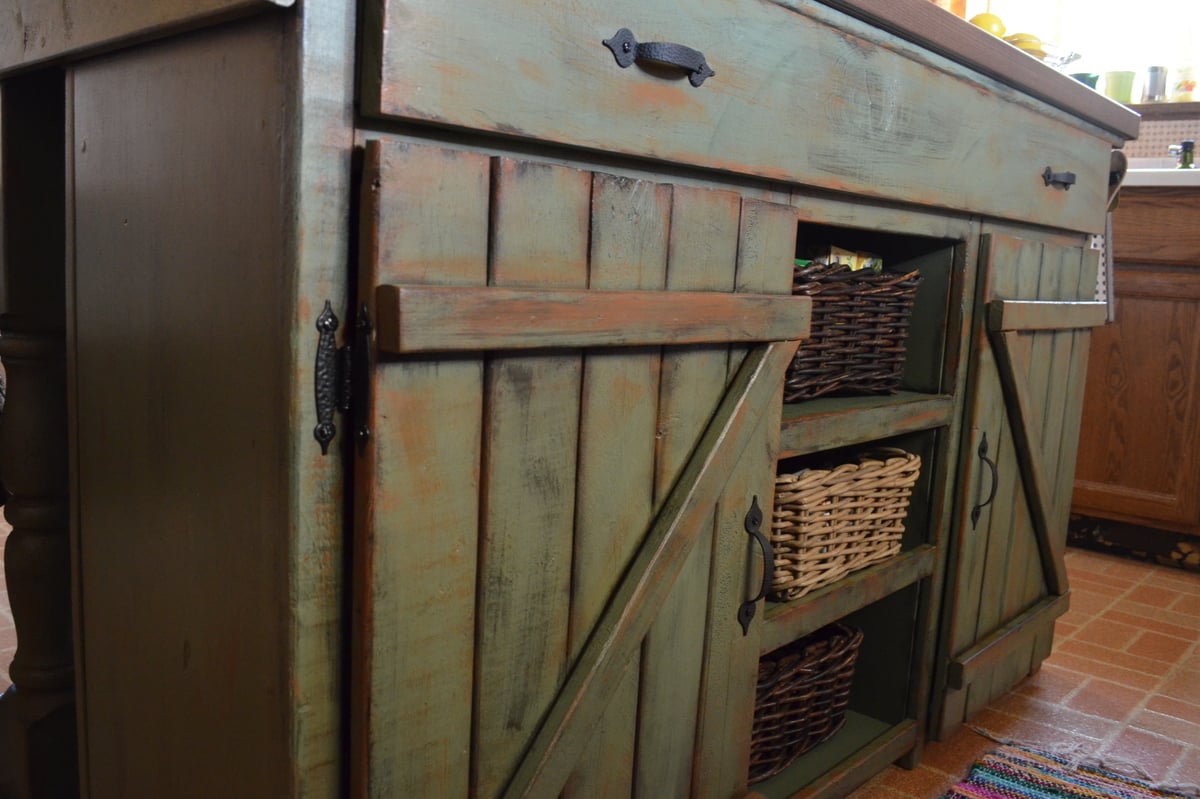
Farmhouse Kitchen Island

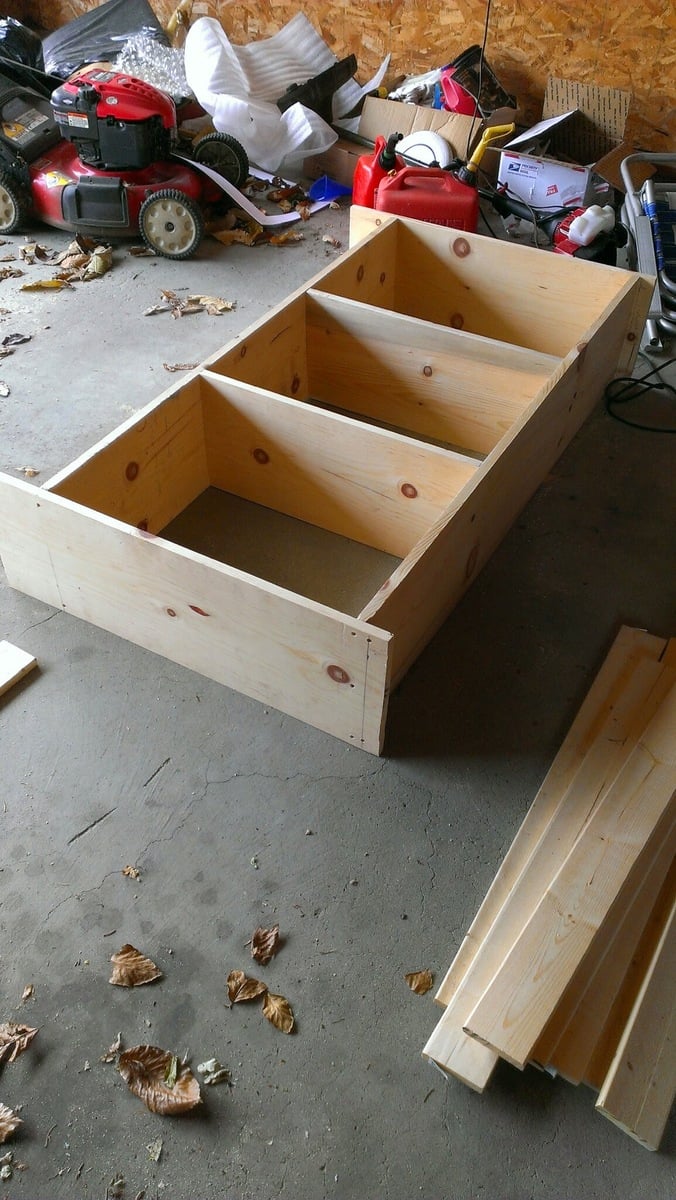
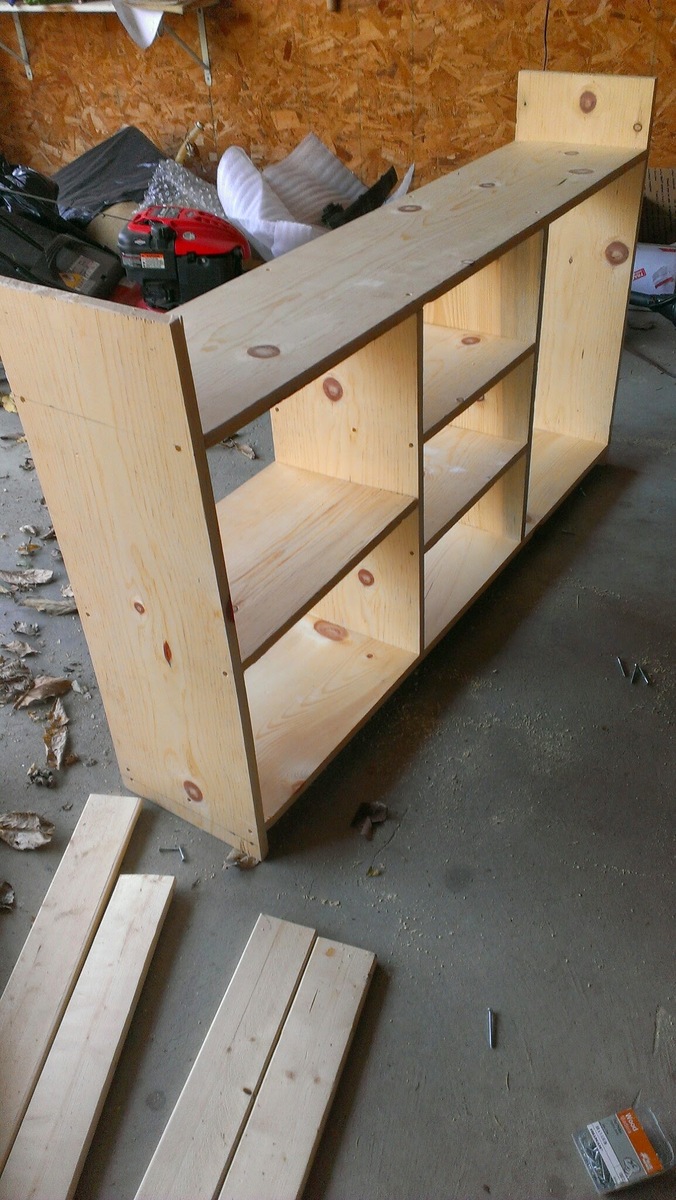
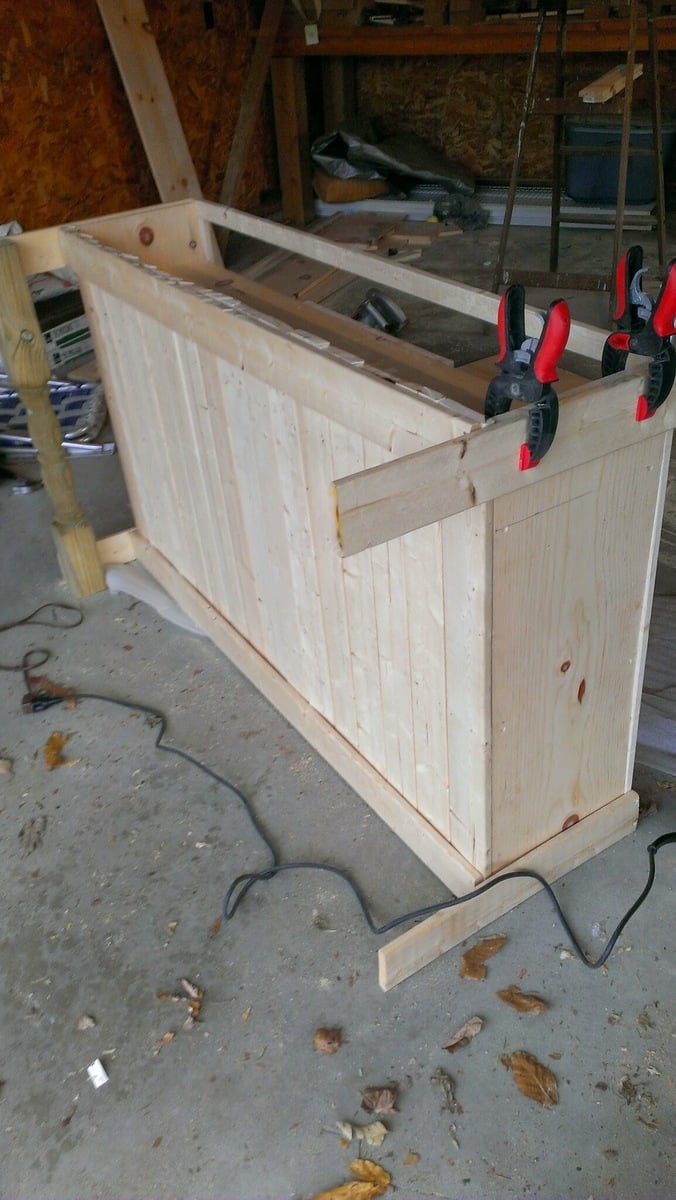
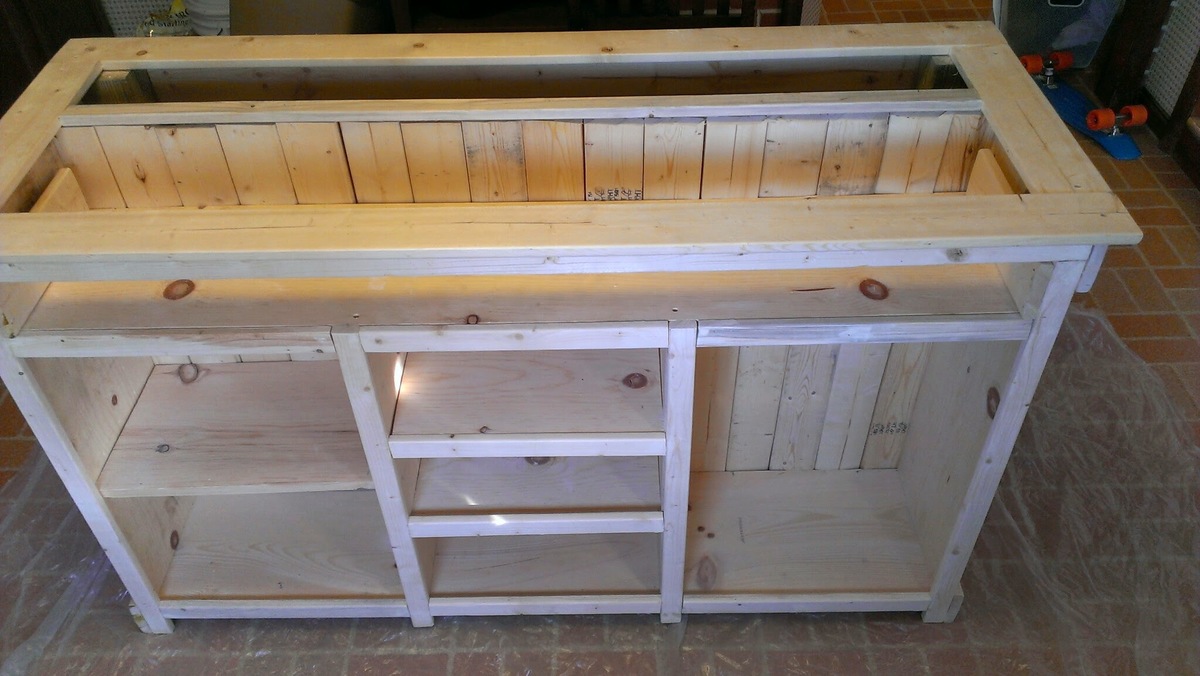
Grabbed some cheap whiteboard for my first project. My wife was looking at buying an island and I decided to surprise her by trying my hand at building one. Turned out to be an enjoyable new hobby that I hope to continue (plus, Laura now says I am her "favorite husband!").

Materials breakdown:
The lumber is white board from Lowe's for $115
The countertop is laminate Pragel from Ikea for $59 (cut to size)
Paint, polyurethane and drawer hinges were $50

I had another $75 in tools, glue, wood filler, nails, etc, because this was my first project.

Estimated Cost
$225
Estimated Time Investment
Weekend Project (10-20 Hours)
Finish Used
Green paint with black and chestnut dry-brushed distressing. Two coats of polyurethane.
Recommended Skill Level
Intermediate

Comments

Pastor Priestley

Wed, 04/02/2014 - 17:42

We just moved into an old house with a garage and the previous owners left a work table and an ancient Craftsman jig-saw, circular saw, and scroll saw (all from 1956). They were a bit sketch, but they got the job done!

gozinehtalaee

Tue, 11/15/2016 - 00:15

I love that. It have a nice design. ین درها دارای تکنولوژی مدرن و پیشرفته بوده و استفاده از آن سهل و آسان می باشد. وجود موتور توبولار و مرکز کنترل پیشرفته الکتروند فرانسه در آن باعث ایجاد امنیت، آرامش خیال و سهولت کارکرد آن بصورت دستی و اتوماتیک شده است. این مدل درب اتوماتیک به دلیل کم حجم بودن و جمع شدن در زیر سقف فروشگاه ها و یا مراکز تجاری و یا به صورت عمودی در سوله ها و کارخانه ها، هم باعث کارآیی بیشتر و هم دارای زیبایی مضاعف می باشد و کاربرد آن در مراکز تجاری، فروشگاه ها و صنعتی باعث ایجاد امنیت، راحتی و سهولت در استفاده از آن شده است .

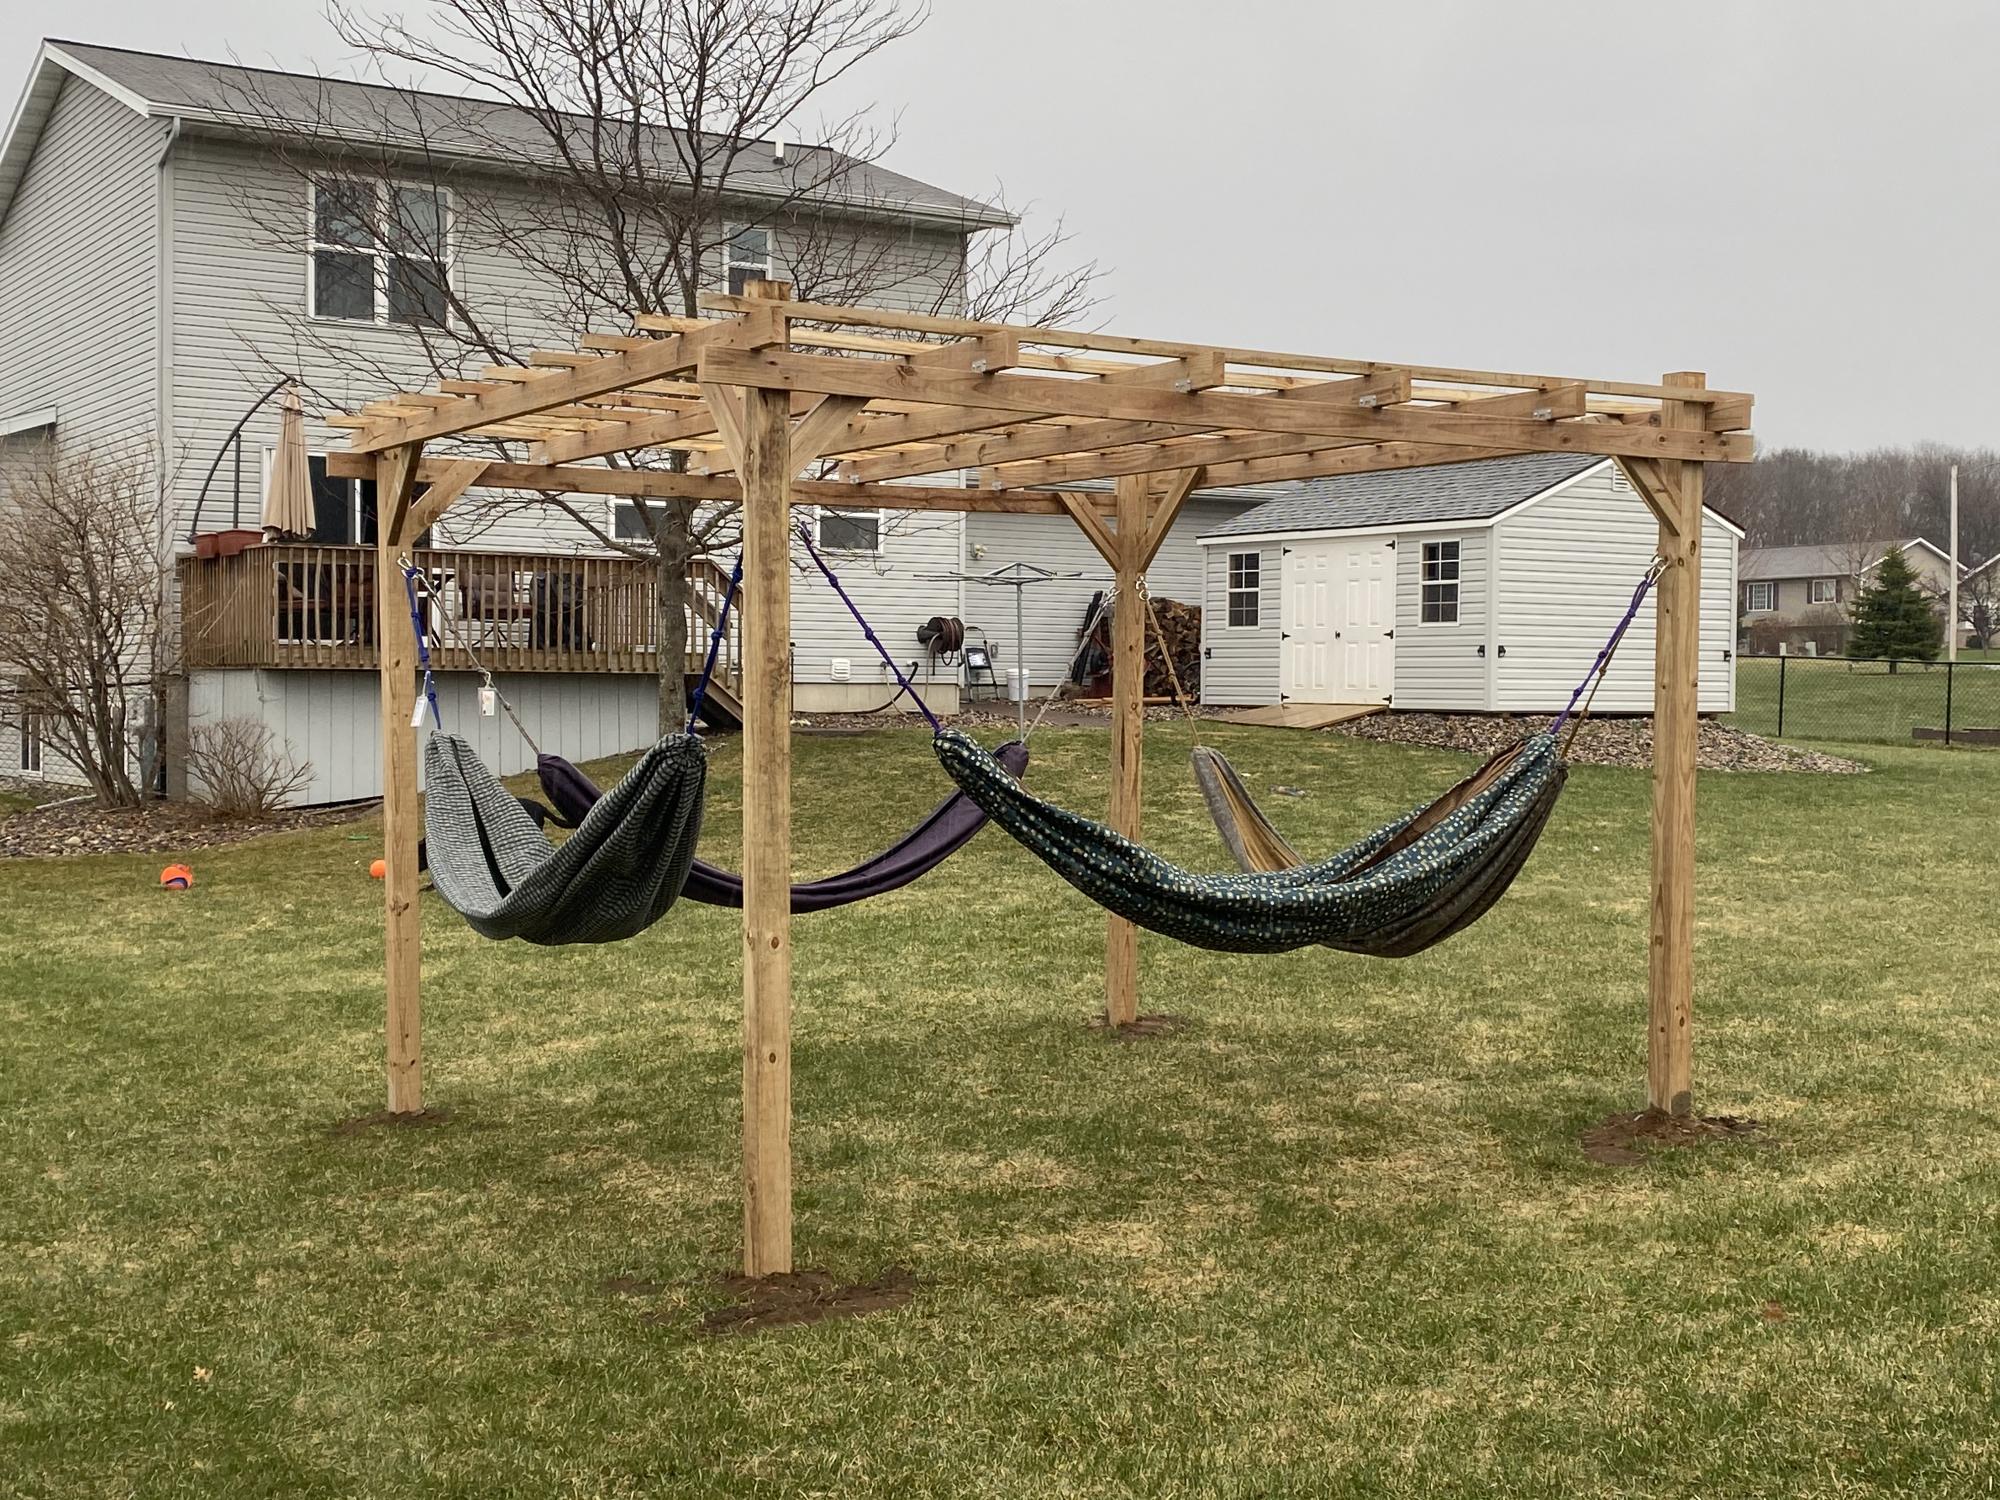
Weatherly Pergola with Hammocks

Submitted by jacquiejn on Mon, 04/27/2020 - 08:22

I've wanted a place to hang our hammocks for a few years now. We have some really nice hammocks from a local artisan. This past weekend, we built the framing with intentions of making it a pergola at a later time. With encouragement of my son & boyfriend, we decided to add the pergola on Sunday. I liked this plan because it wasn't as complicated or expensive as a lot of other plans out there that use 2x6s instead of 2x4s. Adding the angle brackets really solidified the whole structure. I'm so thrilled with this project! Unfortunately, today (Monday), it's raining, so I can't go hang out there.

Built from Plan(s)
Estimated Cost
300
Estimated Time Investment
Weekend Project (10-20 Hours)
Finish Used
We will allow the wood to dry most of the summer before finishing.
Recommended Skill Level
Intermediate

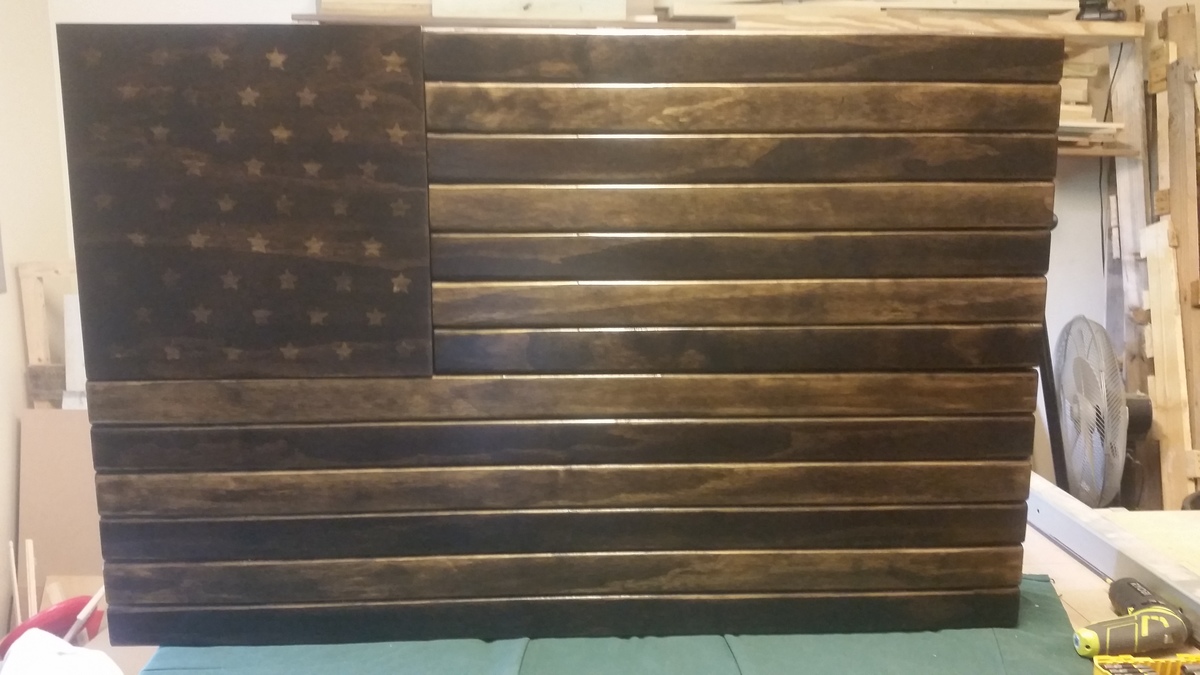
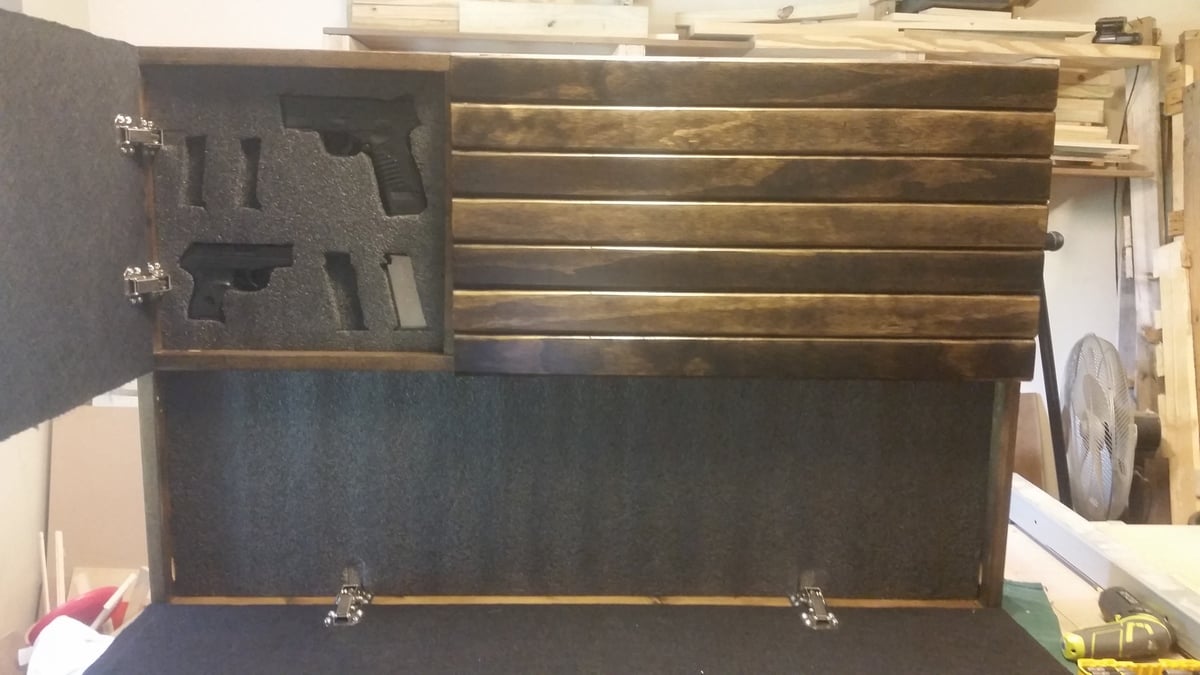
US Flag gun case

I threw some plans together for this.  Going to make another one and tweak it a little but overall I'm happy with the way it turned out. I used dark walnut stain and 4 coats of poly.

Estimated Cost
$150
Estimated Time Investment
Afternoon Project (3-6 Hours)
Finish Used
Dark walnut and polyurethane.
Recommended Skill Level
Intermediate

Comments

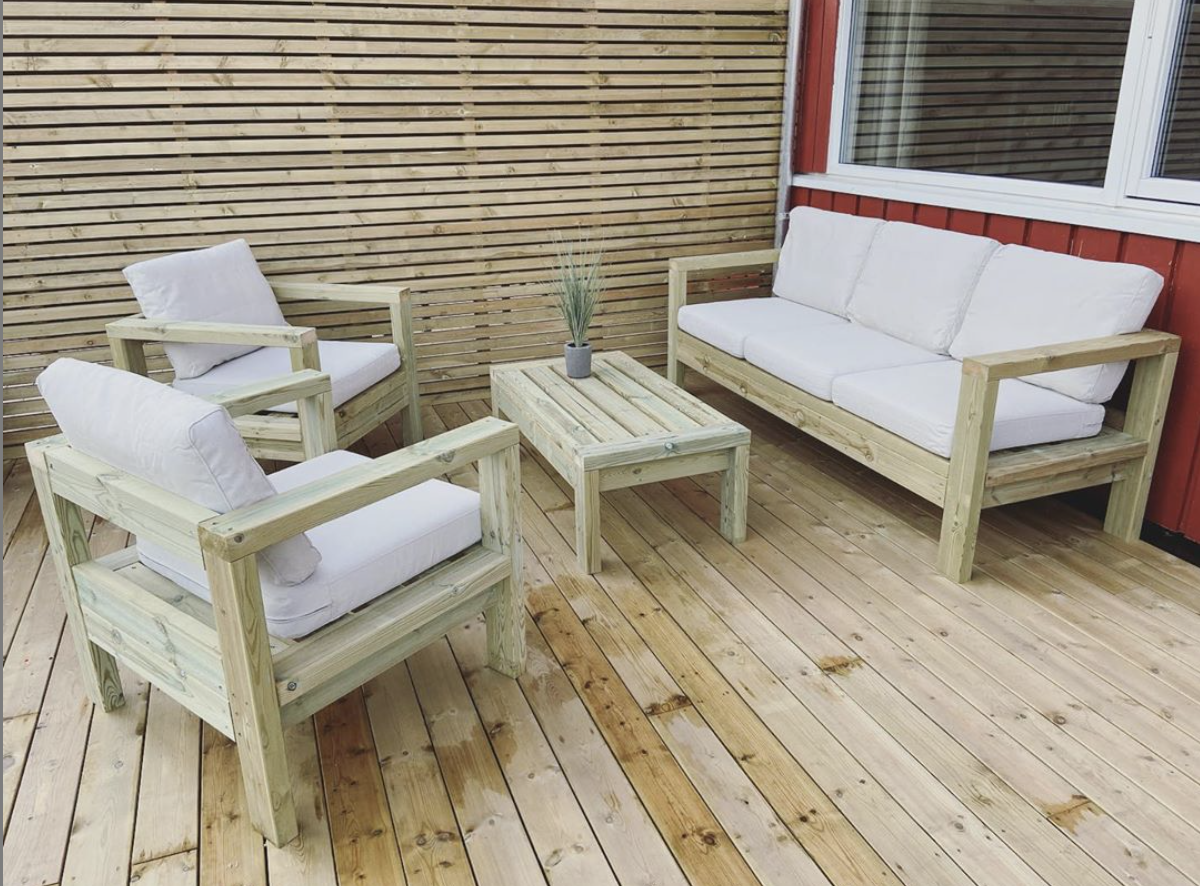
Outdoor sofa with table and matching chairs!

So, we decided after not finding any outdoor furniture, that why not make them! So this is the result, made a few changes to the size and measurements so the pillows from IKEA, would fit perfectly. Now we are waiting for them to be ready to oil/paint. We also made the chairs with the sofa plans, so happy we did that. Thank you so much for the plans! We are so happy! IKEA pillows name are: Sitting pillow - FRÖSÖN/DUVHOLMEN 62cm by 62 cm. Back pillows - FRÖSÖN/DUVHOLMEN 62cm by 44 cm.

Estimated Cost
$240
Estimated Time Investment
Day Project (6-9 Hours)
Recommended Skill Level
Starter Project
Seasonal And Holiday

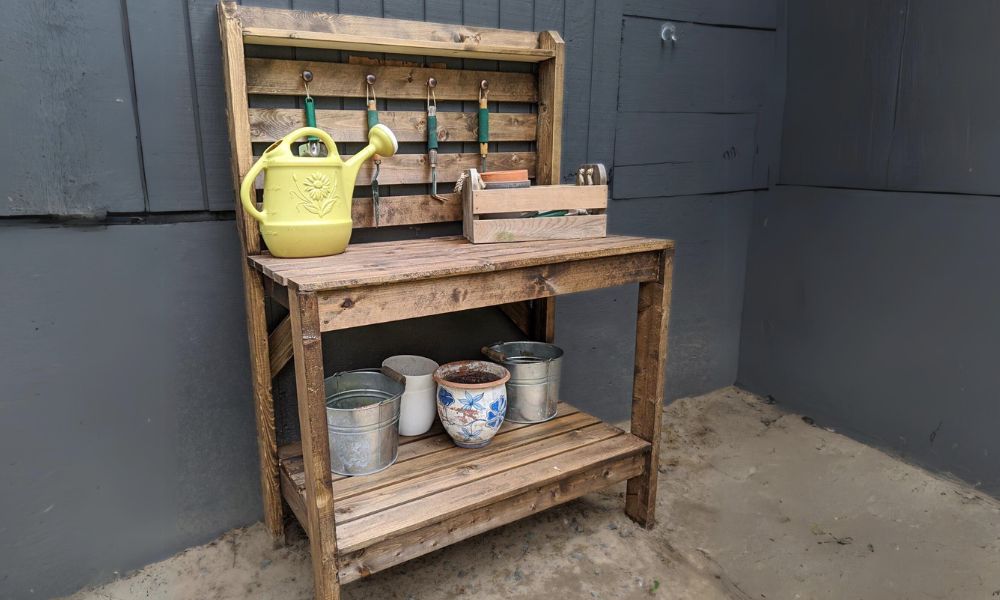
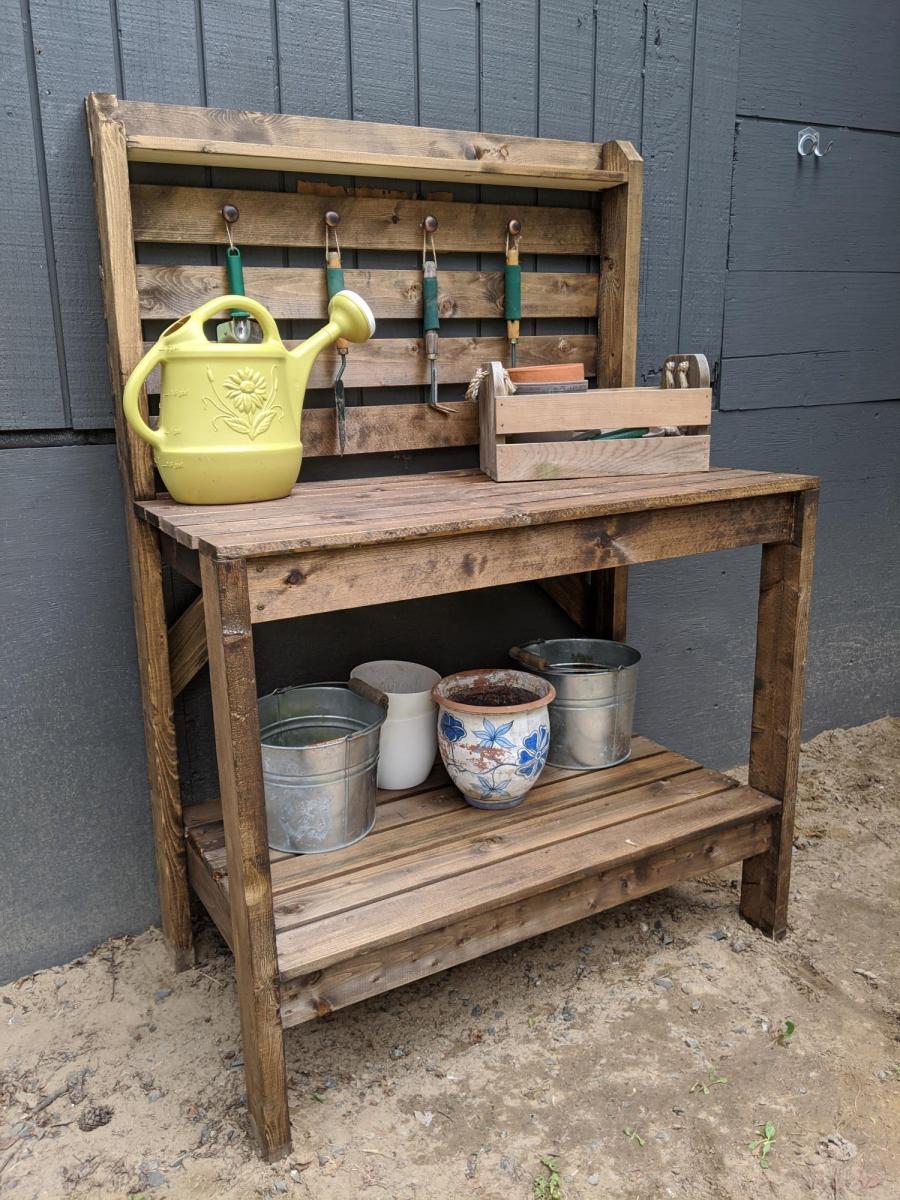
Simple 2x4 potting benxh

Submitted by Anonymous (not verified) on Sun, 05/24/2020 - 16:10

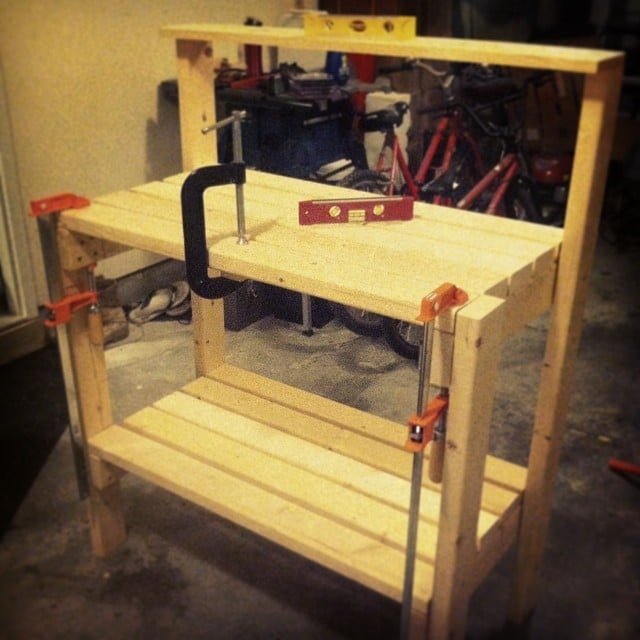
Loved this project! The plans were so easy to follow, even for a begginer. Thank you so much!

Estimated Cost
$55
Estimated Time Investment
An Hour or Two (0-2 Hours)
Finish Used
Walnut stain
Recommended Skill Level
Beginner
Seasonal And Holiday

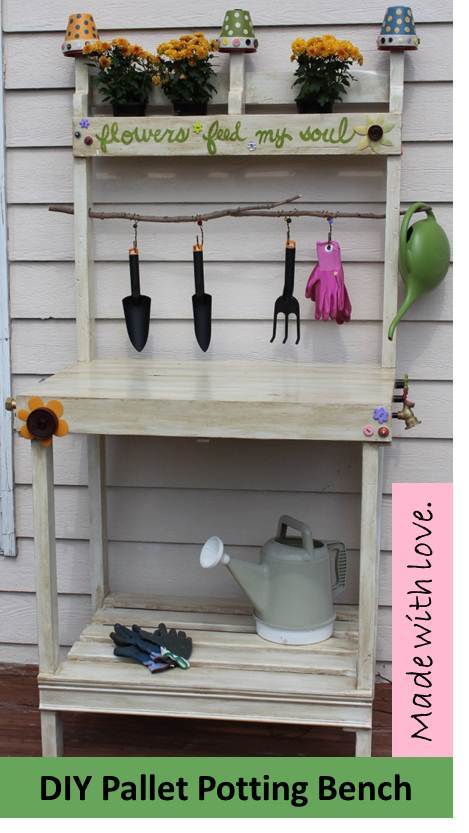
Cute DIY Pallet Potting Bench

Submitted by shampbel on Wed, 09/12/2012 - 20:33

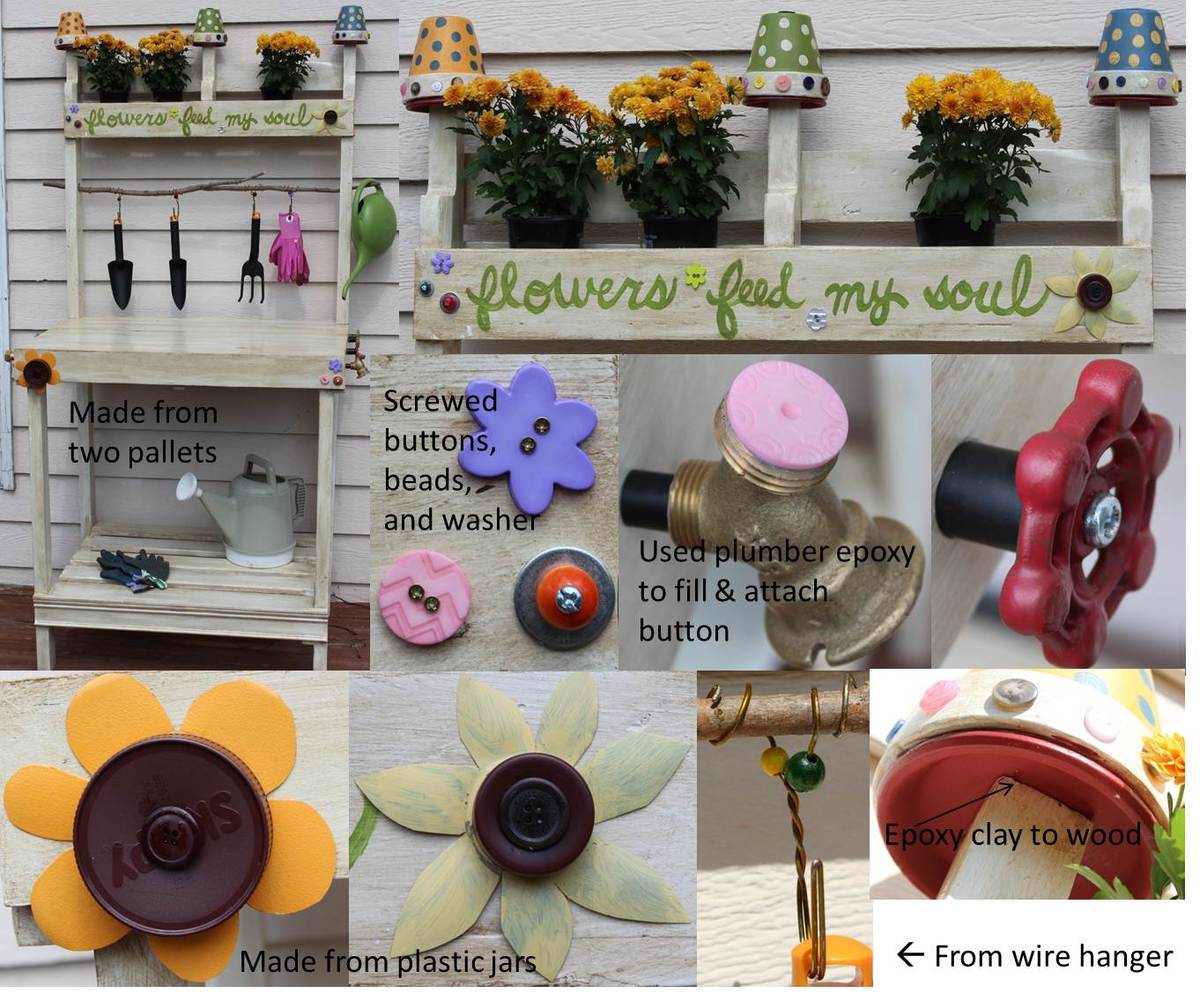
Made from 2 pallets, 2 x 6 x 8, leftover trim from my house, wood branch from my backyard. Attached shelf with pocket holes.

Accents:
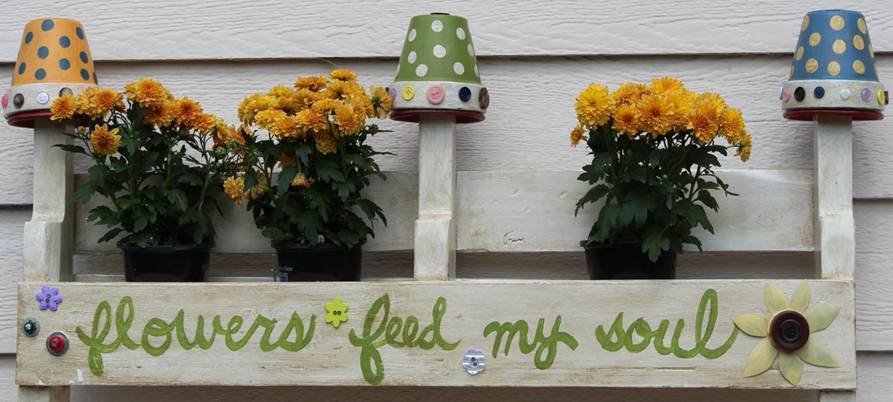
-Handpainted lettering; painted prior to glazing entire piece
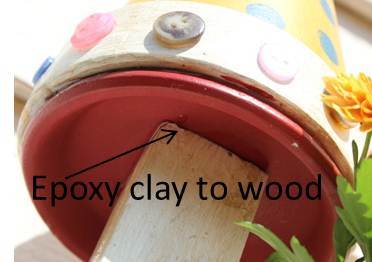
-Finials made from 4.25 inch spray painted and glazed clay pots and saucers coated with Valspar clear finish and attached together with epoxy; buttons attached to pots with E6000 adhesive
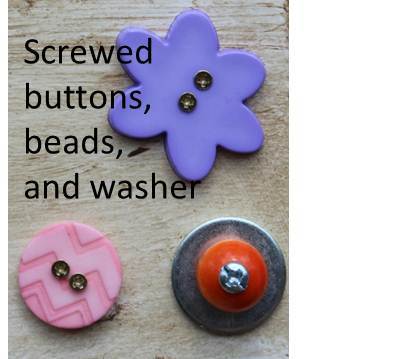
-Buttons attached mostly with small screws; a few with holes too small for screws were attached with epoxy
-Plastic flowers made from mayo and water bottles and lids; sanded, primed, spray painted, coated with Valspar clear coating; attached with screws
-Faucet knobs sanded, spray painted, glazed and attached with screws
-Plumbing pipe filled with plumber epoxy puttty; insert screw into putty before it hardened, then screwed into wood
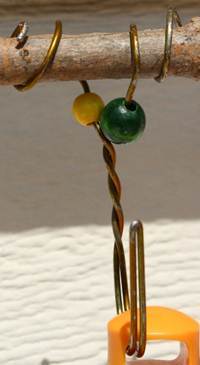
-Gardening tool hooks made from pant wire hangers with a few beads attached; wire simply wrapped around tree branch

Not sure that I will use pallet wood again since difficult to pull apart pallets, uneven and some split boards could not be used, and required tons of sanding for those boards that could be used. I think I paid more for orbital sanding pads than the cost of buying new wood. Will use pallet wood for other non-furniture projects not requiring a perfect finish.

Estimated Cost
$40.00
Estimated Time Investment
Week Long Project (20 Hours or More)
Finish Used
Kids distressed with hammers, sanded with 80 grit, Kilz Primer (1 coat), Sherwin Williams Exterior White Latex Paint (1 coat), Behr Glaze tinted with Brown Latex, Spar Urethane (3 coats)
Recommended Skill Level
Beginner

Beginner Farm House Table w/ pocket holes

Submitted by Anonymous (not verified) on Wed, 09/02/2020 - 19:28

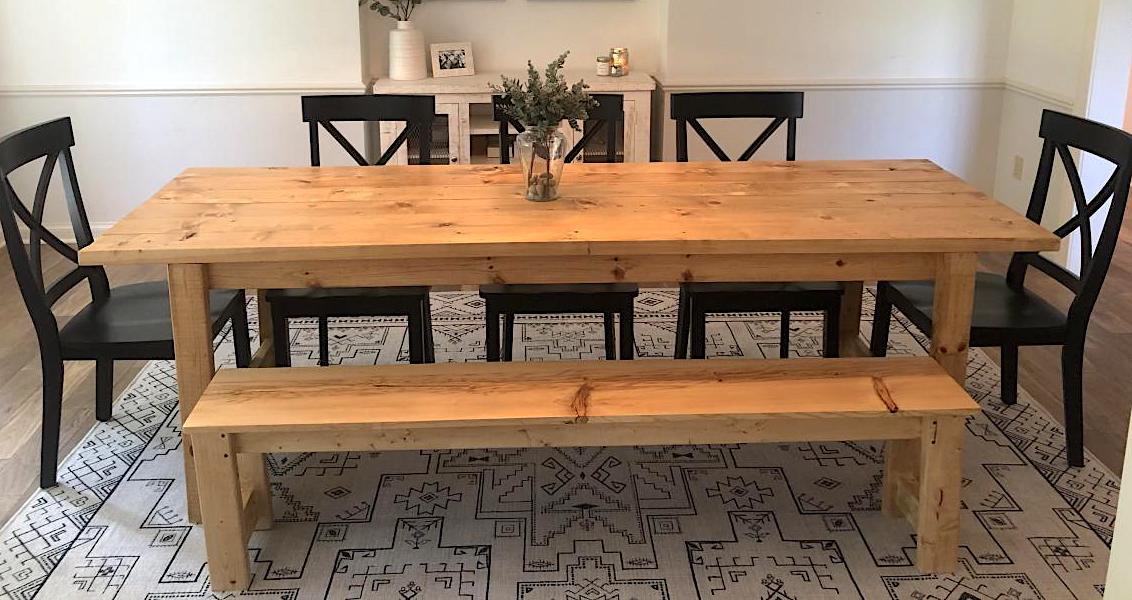
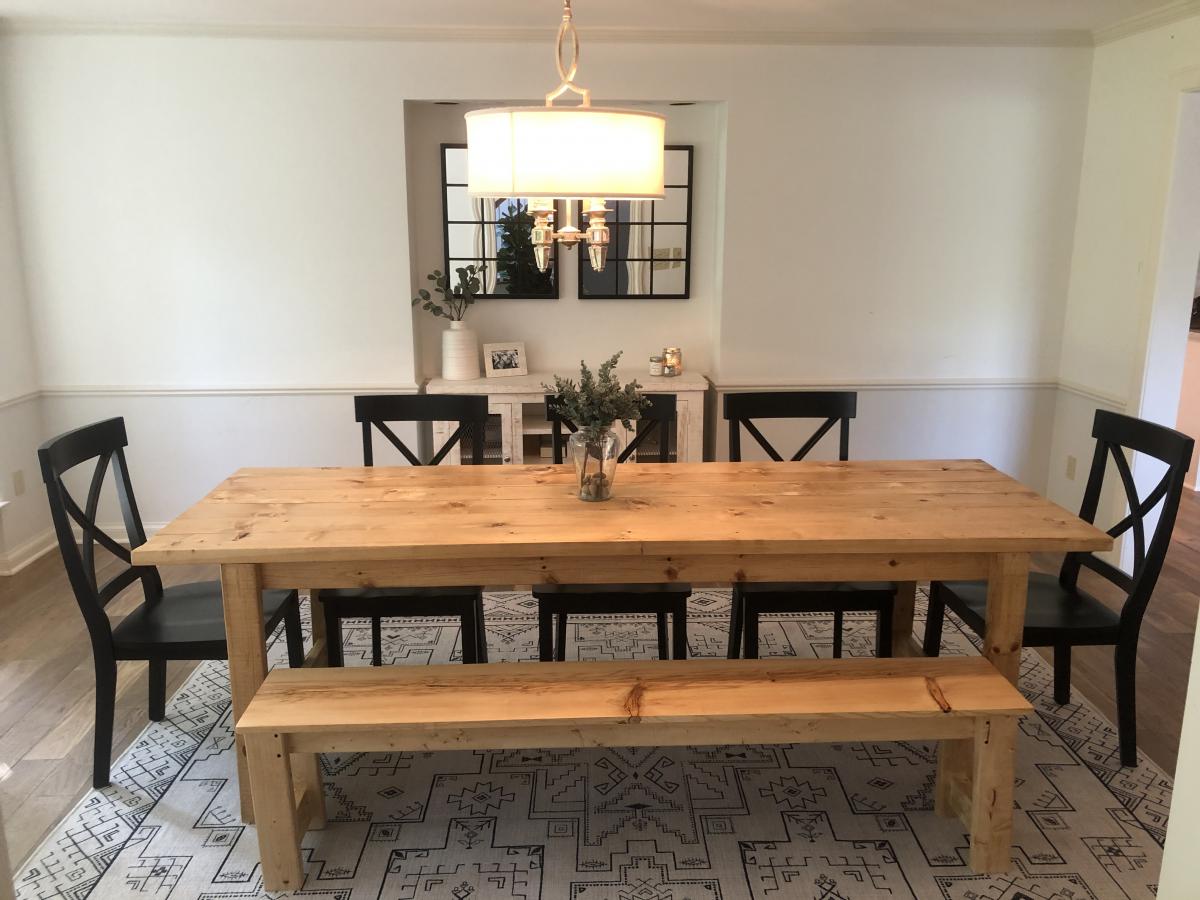
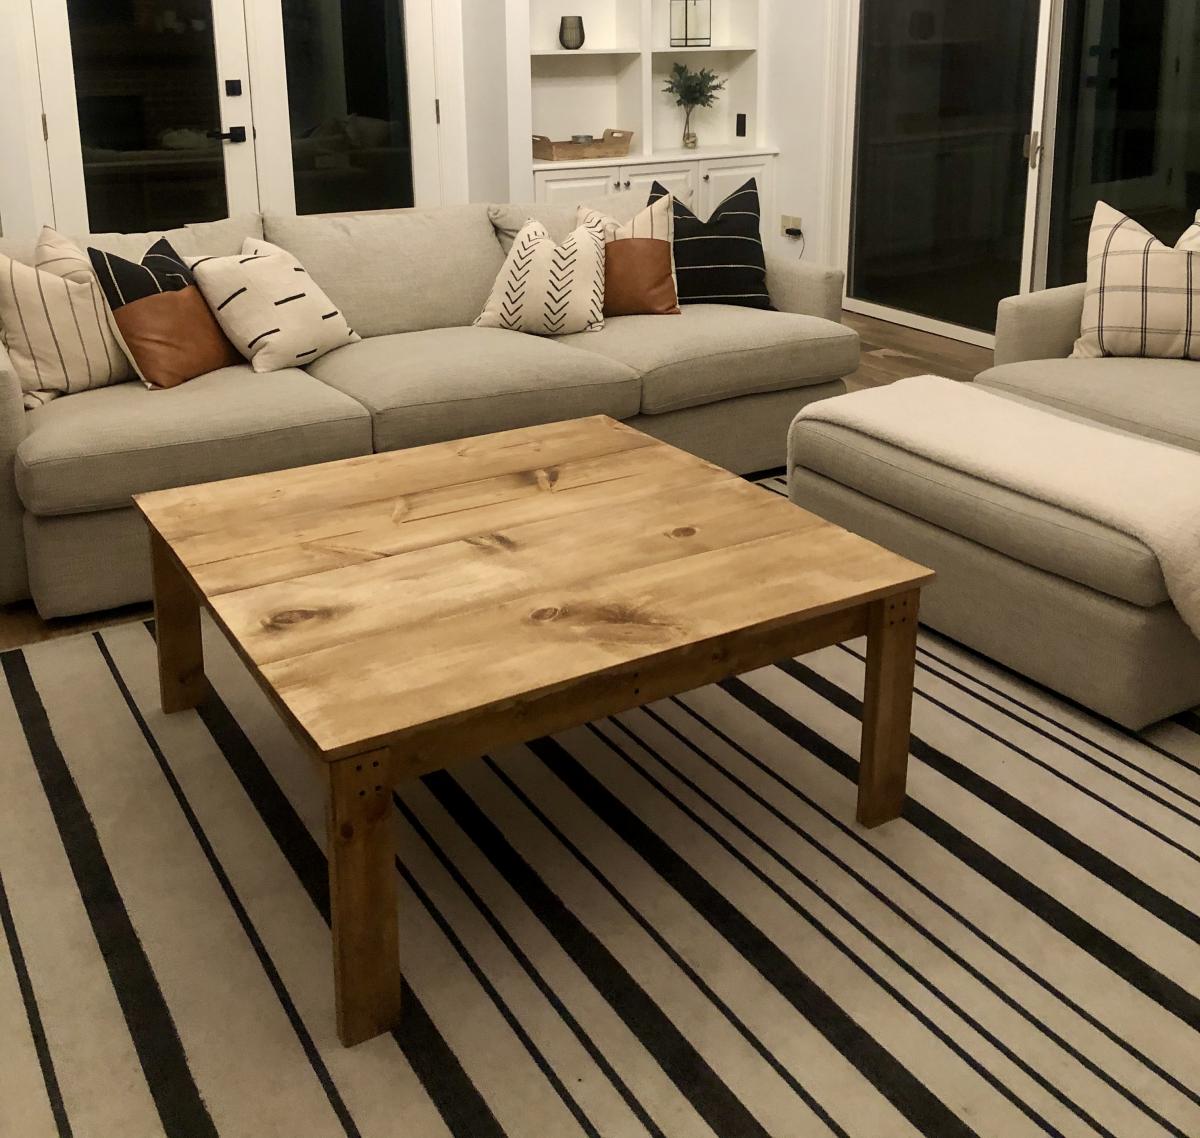
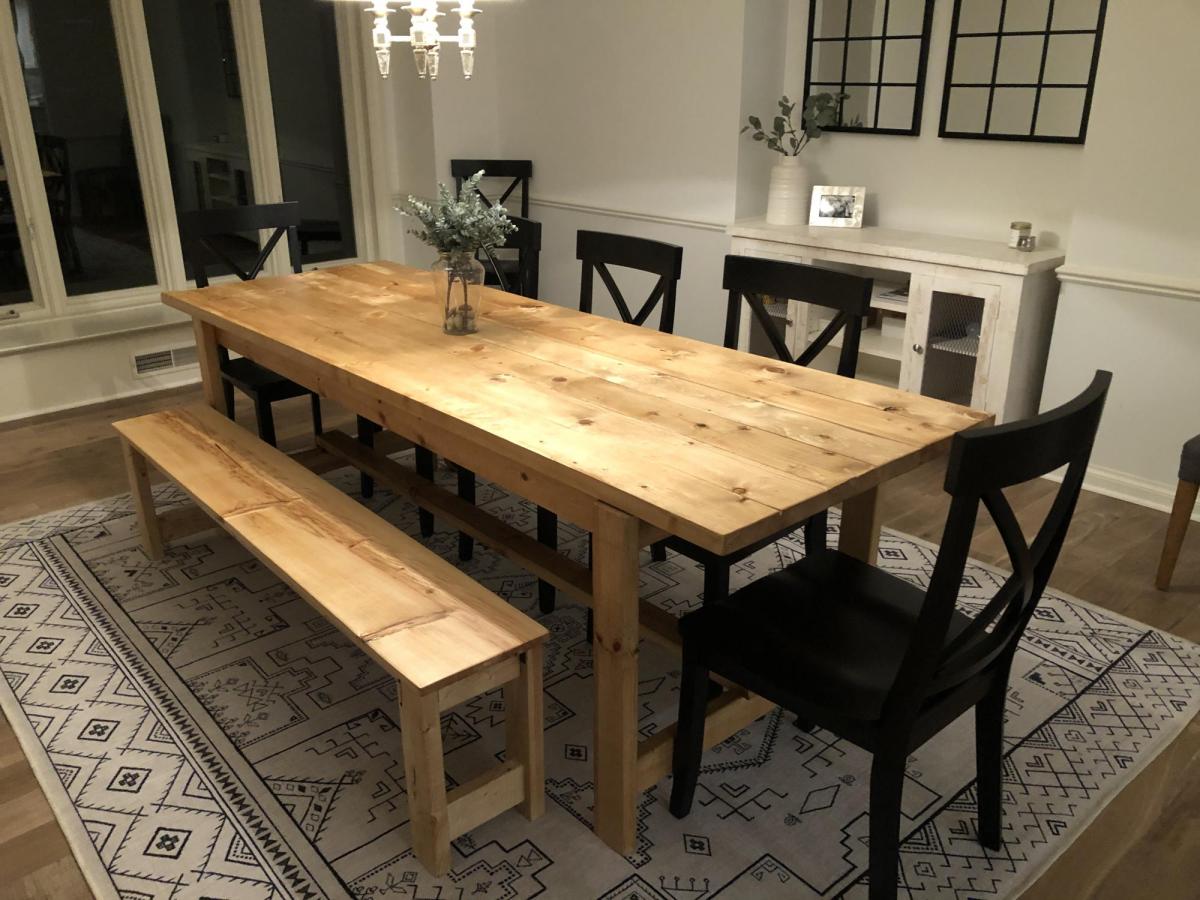
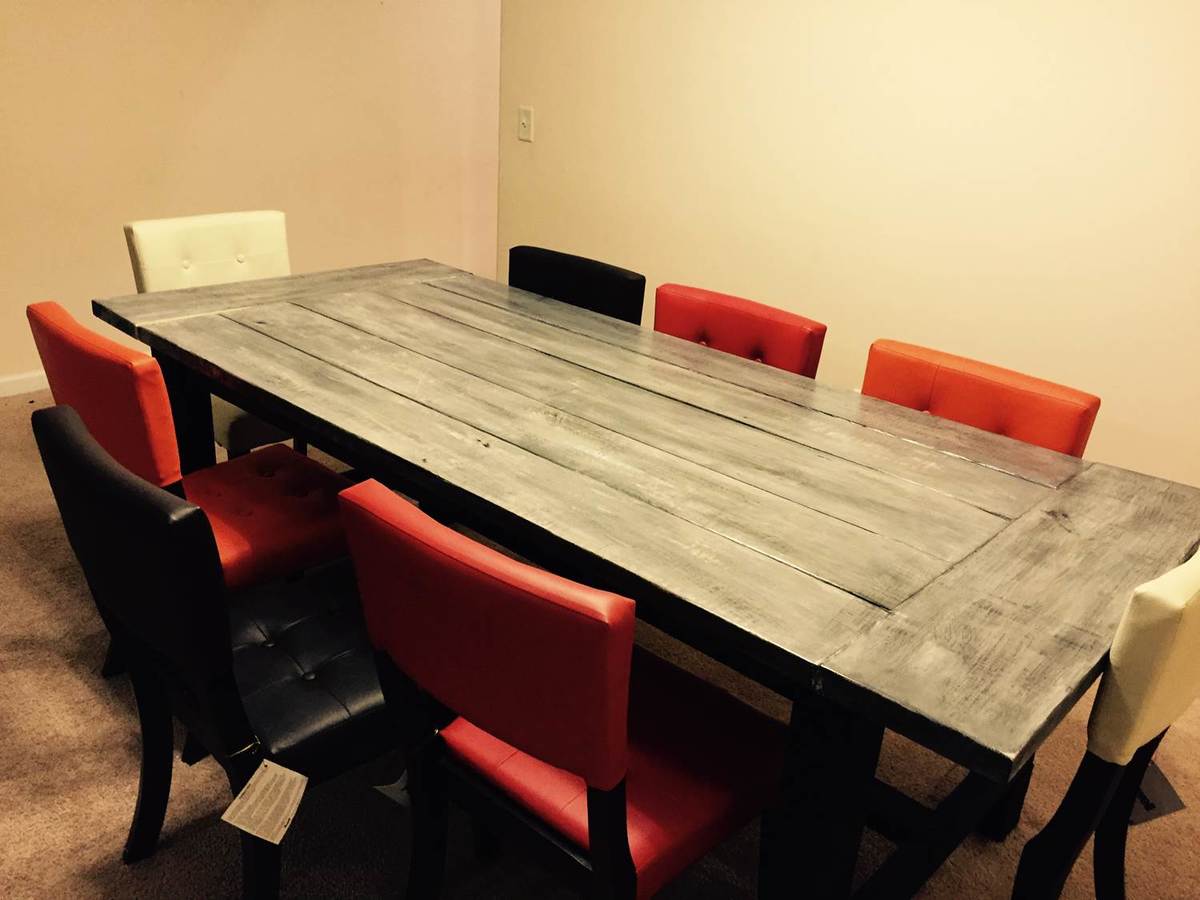
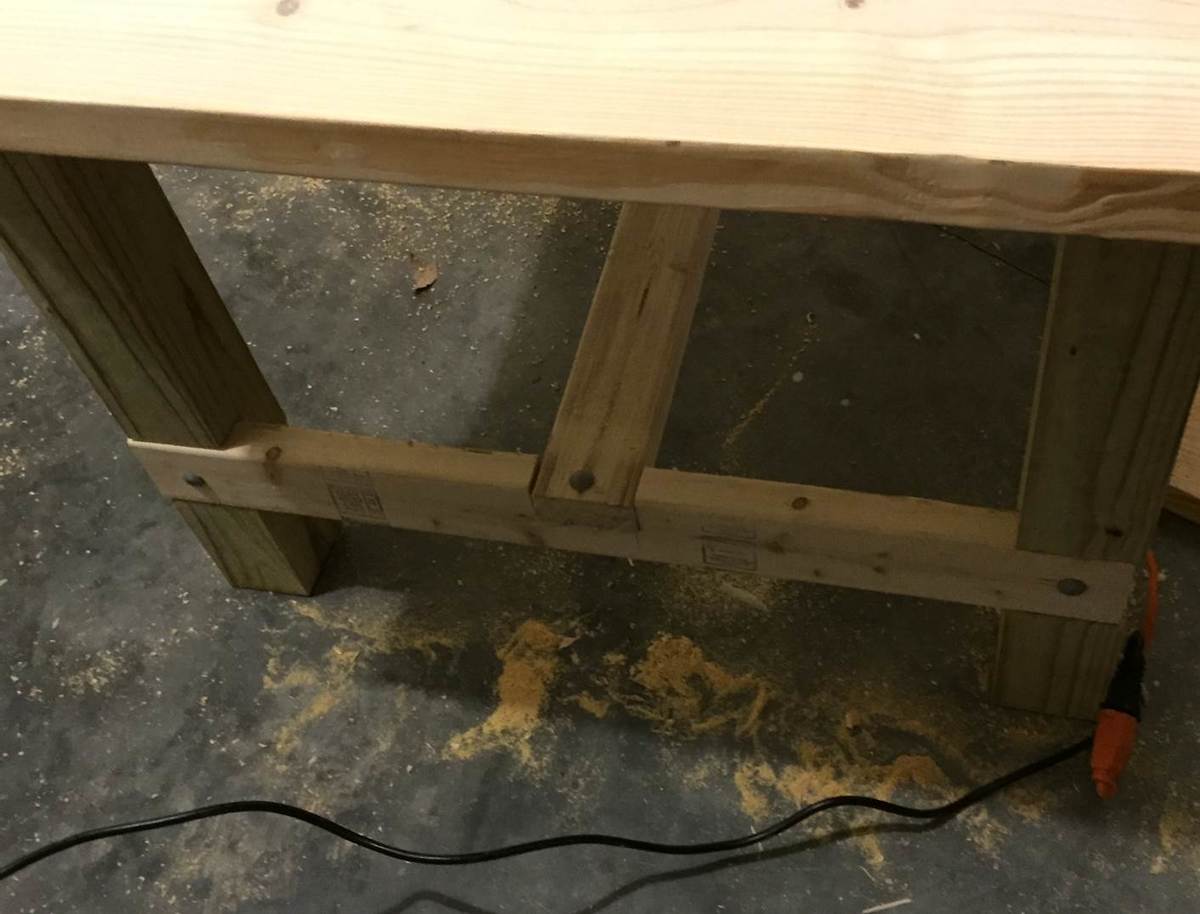
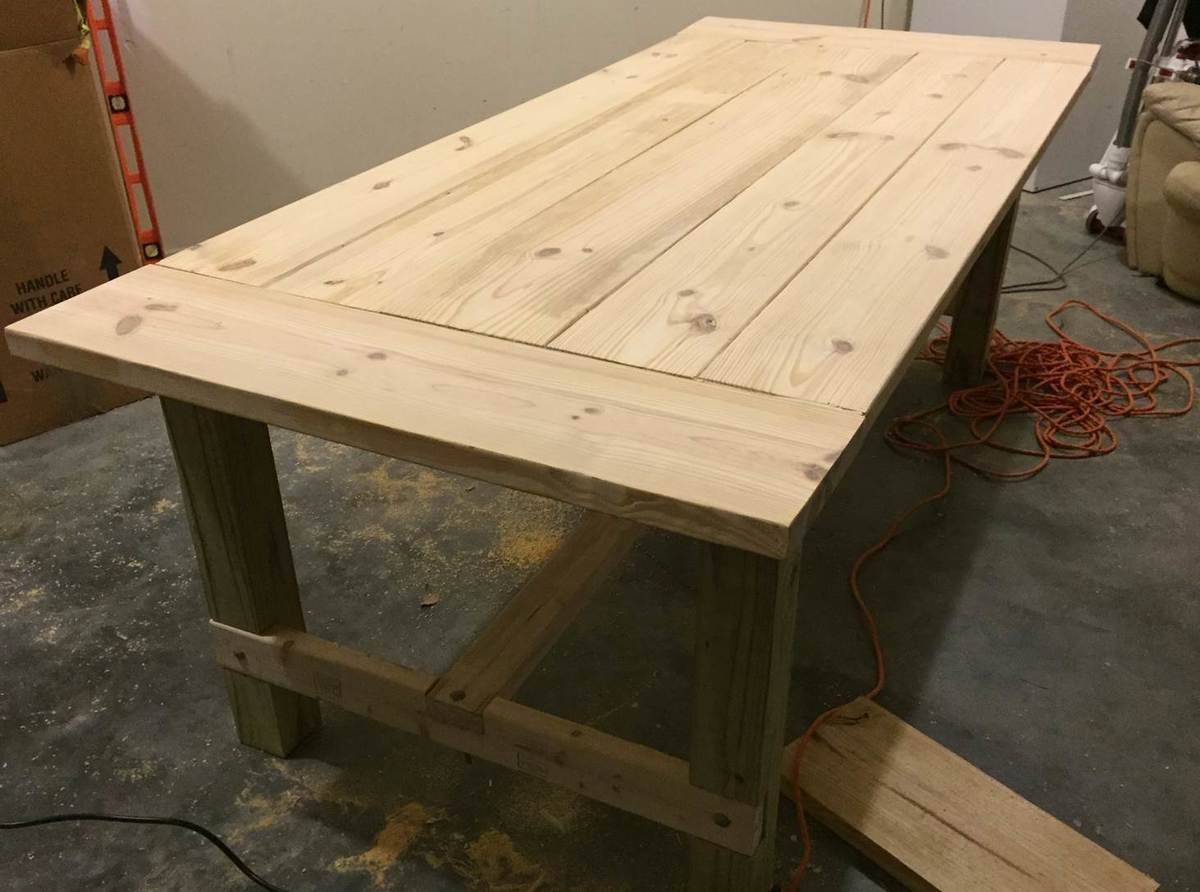
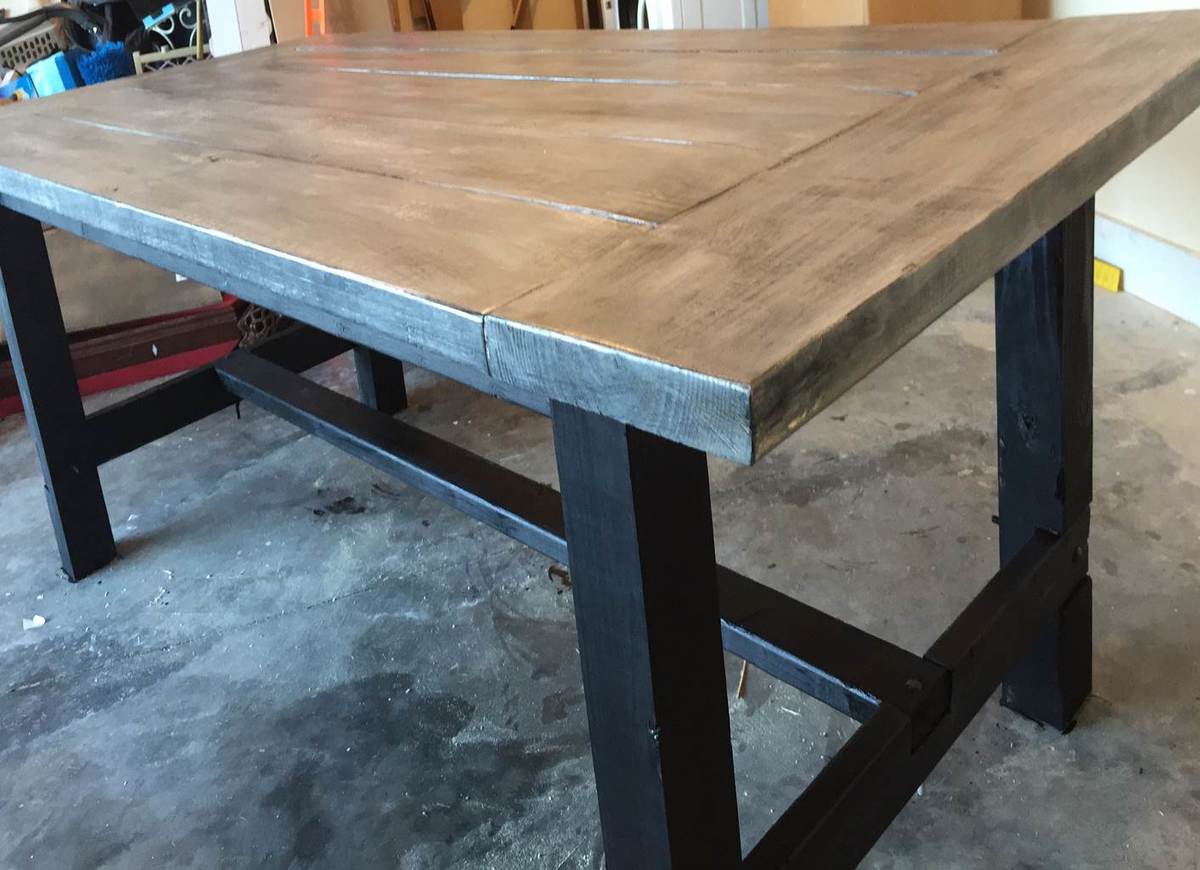
Love this! The farm house table and bench (1st photo) were my first 2 wood project ever. They came out great so I decided to make a coffee table using modified dimensions (2nd photo) and used poplar for the table top instead of pine. Poplar took to the stain I used really well. The farm table is Danish Oil, Light Walnut and the coffee table is in Danish Oil Dark walnut. I used wipe on Poly to finish both tables and I used matte black wood screws for an accent on the base of the coffee table. Everything else was assembled with a compact circular saw and pocket holes w/ a Kreg Jig. Thanks for the plans!

Estimated Cost
$200
Estimated Time Investment
Weekend Project (10-20 Hours)
Finish Used
-Danish Oil Light Walnut - 2 coats (dining table)
-Danish Oil Dark Walnut - 1 coat (coffee table)
-Wipe on Poly, Gloss - 2 coats (both)
-Sanded all wood w/ orbital sander prior to assembling (I find it easier to get all the splinters, scratches, and stamp marks out if I do it before assembling)
Recommended Skill Level
Beginner

Comments

Outdoor Deck Tables

Submitted by Scott-F on Sun, 10/11/2020 - 18:34

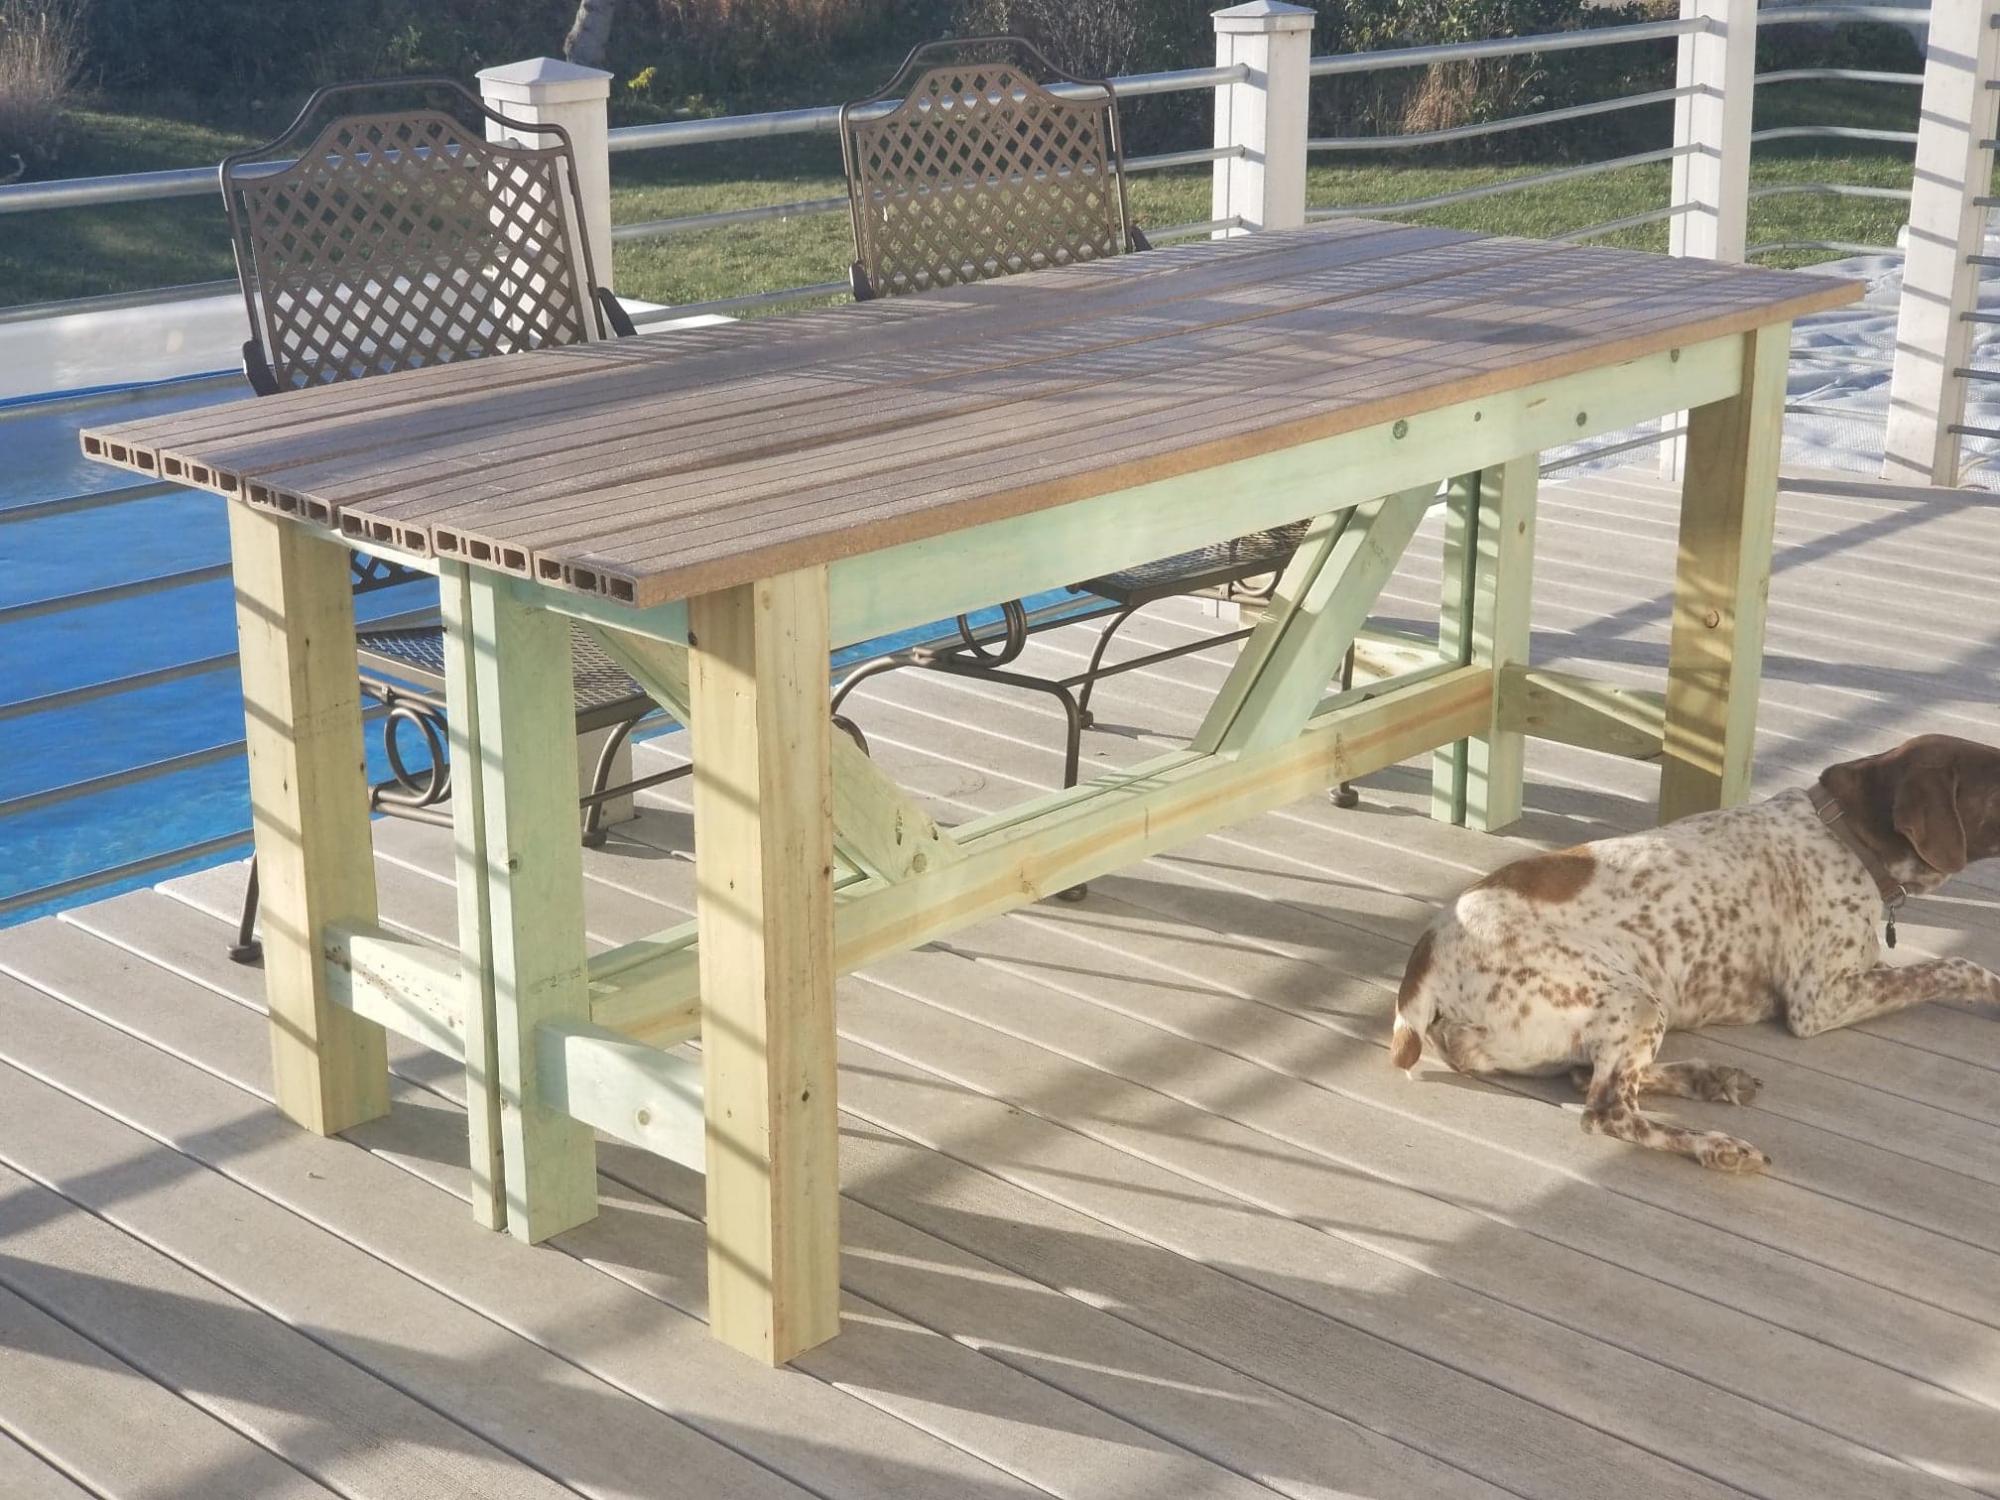
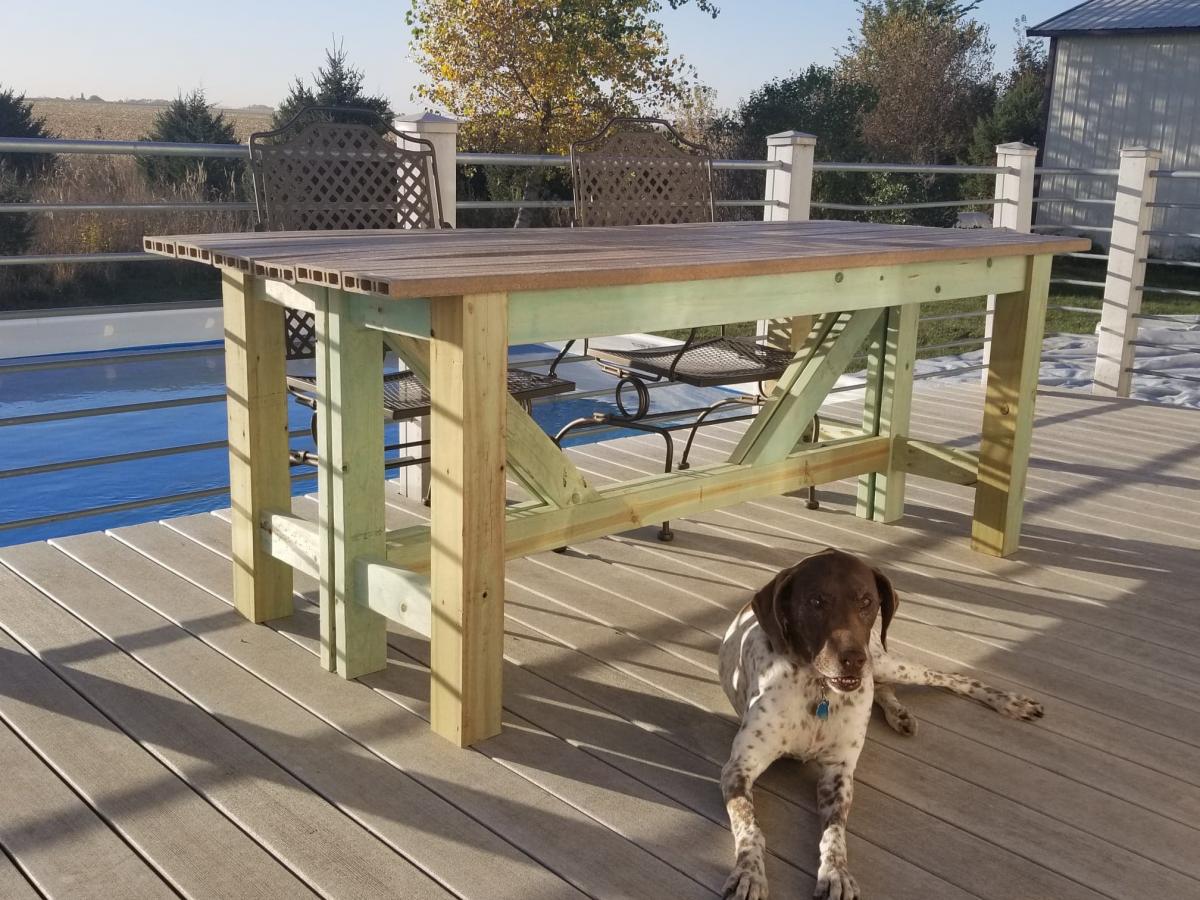
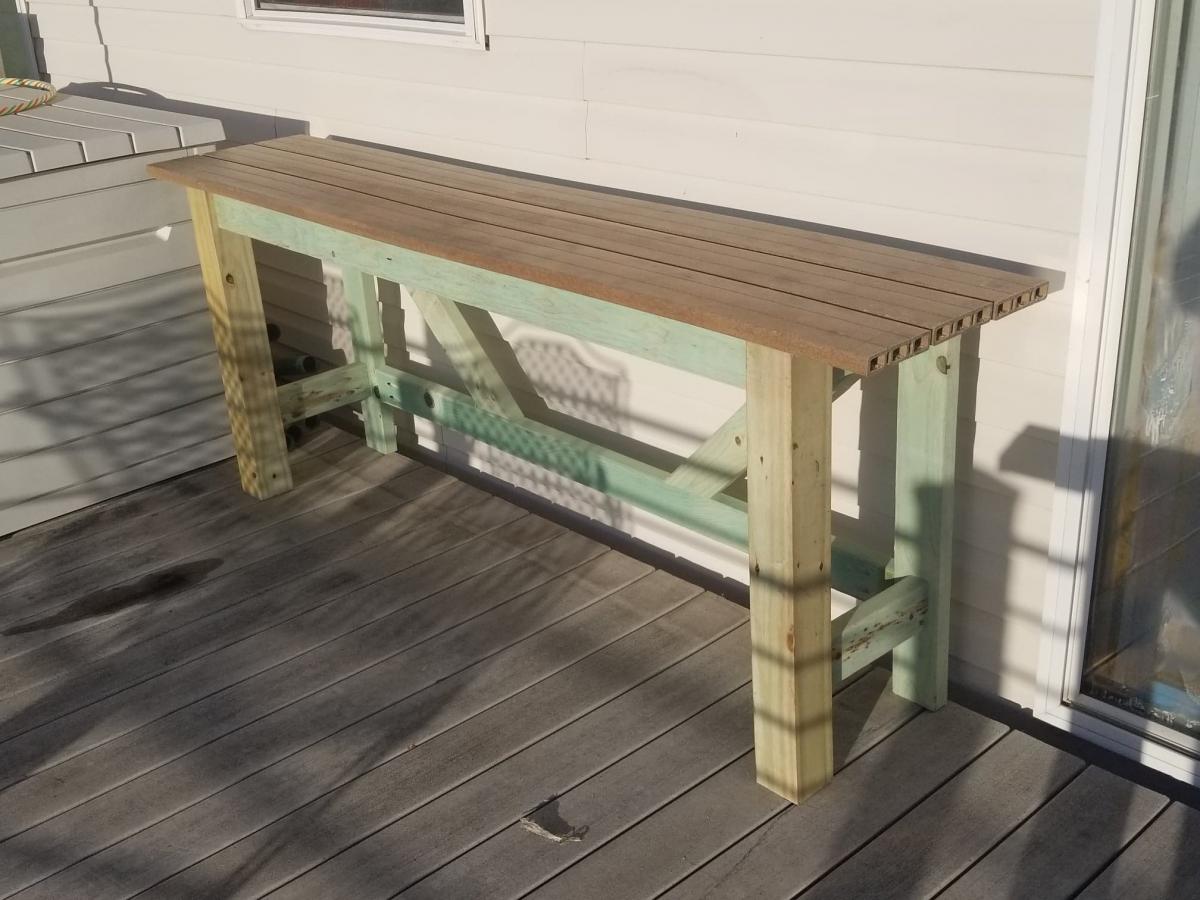
My wife and I were looking for a dining table for our deck. We looked at a few to purchase but could not decide. I wanted something that would not take up a lot of deck space. When the Facebook post for the "Outdoor Bar Table" came up, it inspired me to try to build a similar table. I already had purchased a Kreg HD pockethole jig for a project I never got to (At least yet), so I figured construction would be pretty simple.

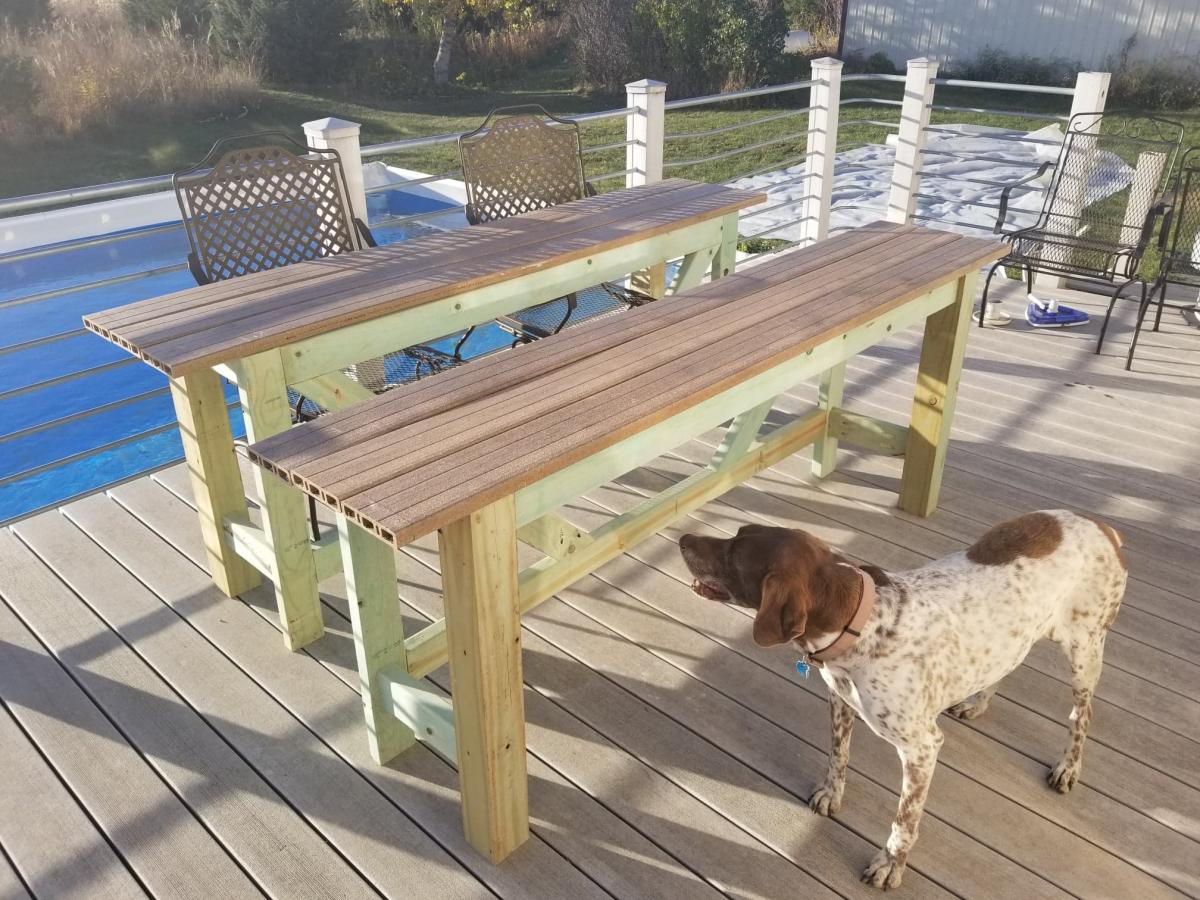
I should say my tables are loosely based off of Ana's plans, they served as a good reference. I lowered the table to 30" to match our existing deck chairs. I decided to actually build 2 half tables, so that when we were not using the table they could be set to the side of the deck. The back of each table is constructed with 2x4s so when the tables are put together it maintains the 4x4 look.

For the tabletop I had extra composite deck boards that I never used for the deck, so the depth of each half table was based on using 3 deck boards, with a 1/4" gap between each deck board. I used the same hidden fastener method I used on the original deck, so the deck boards are secured from under the table.

This being my first pocket hole project, there are a couple of small mistakes. 1) On the 45 degree trusses cut all 4 at the same time, then did the pocket holes. I missed the fact that I needed to drill 2 of the pocket holes on the opposite side. 2) I built the 2nd table back on top of the 1st table back so they matched. but I got mixed up when assembling the 2nd table so the pocket holes that should have been on the side facing the other table back, are facing the opposite side.

I did use Treated lumber for the table frame, and some of the pieces were still pretty wet, so we will wait until next year to paint the base.

We really like how they turned out, and that we still have almost all of our deck space when the tables are in the "Stored" locations.
Built from Plan(s)
Estimated Cost
$85
Estimated Time Investment
Afternoon Project (3-6 Hours)
Finish Used
None as of yet, Plan on painting after treated wood dries out
Recommended Skill Level
Starter Project

Comments

Outdoor Canopy Bed

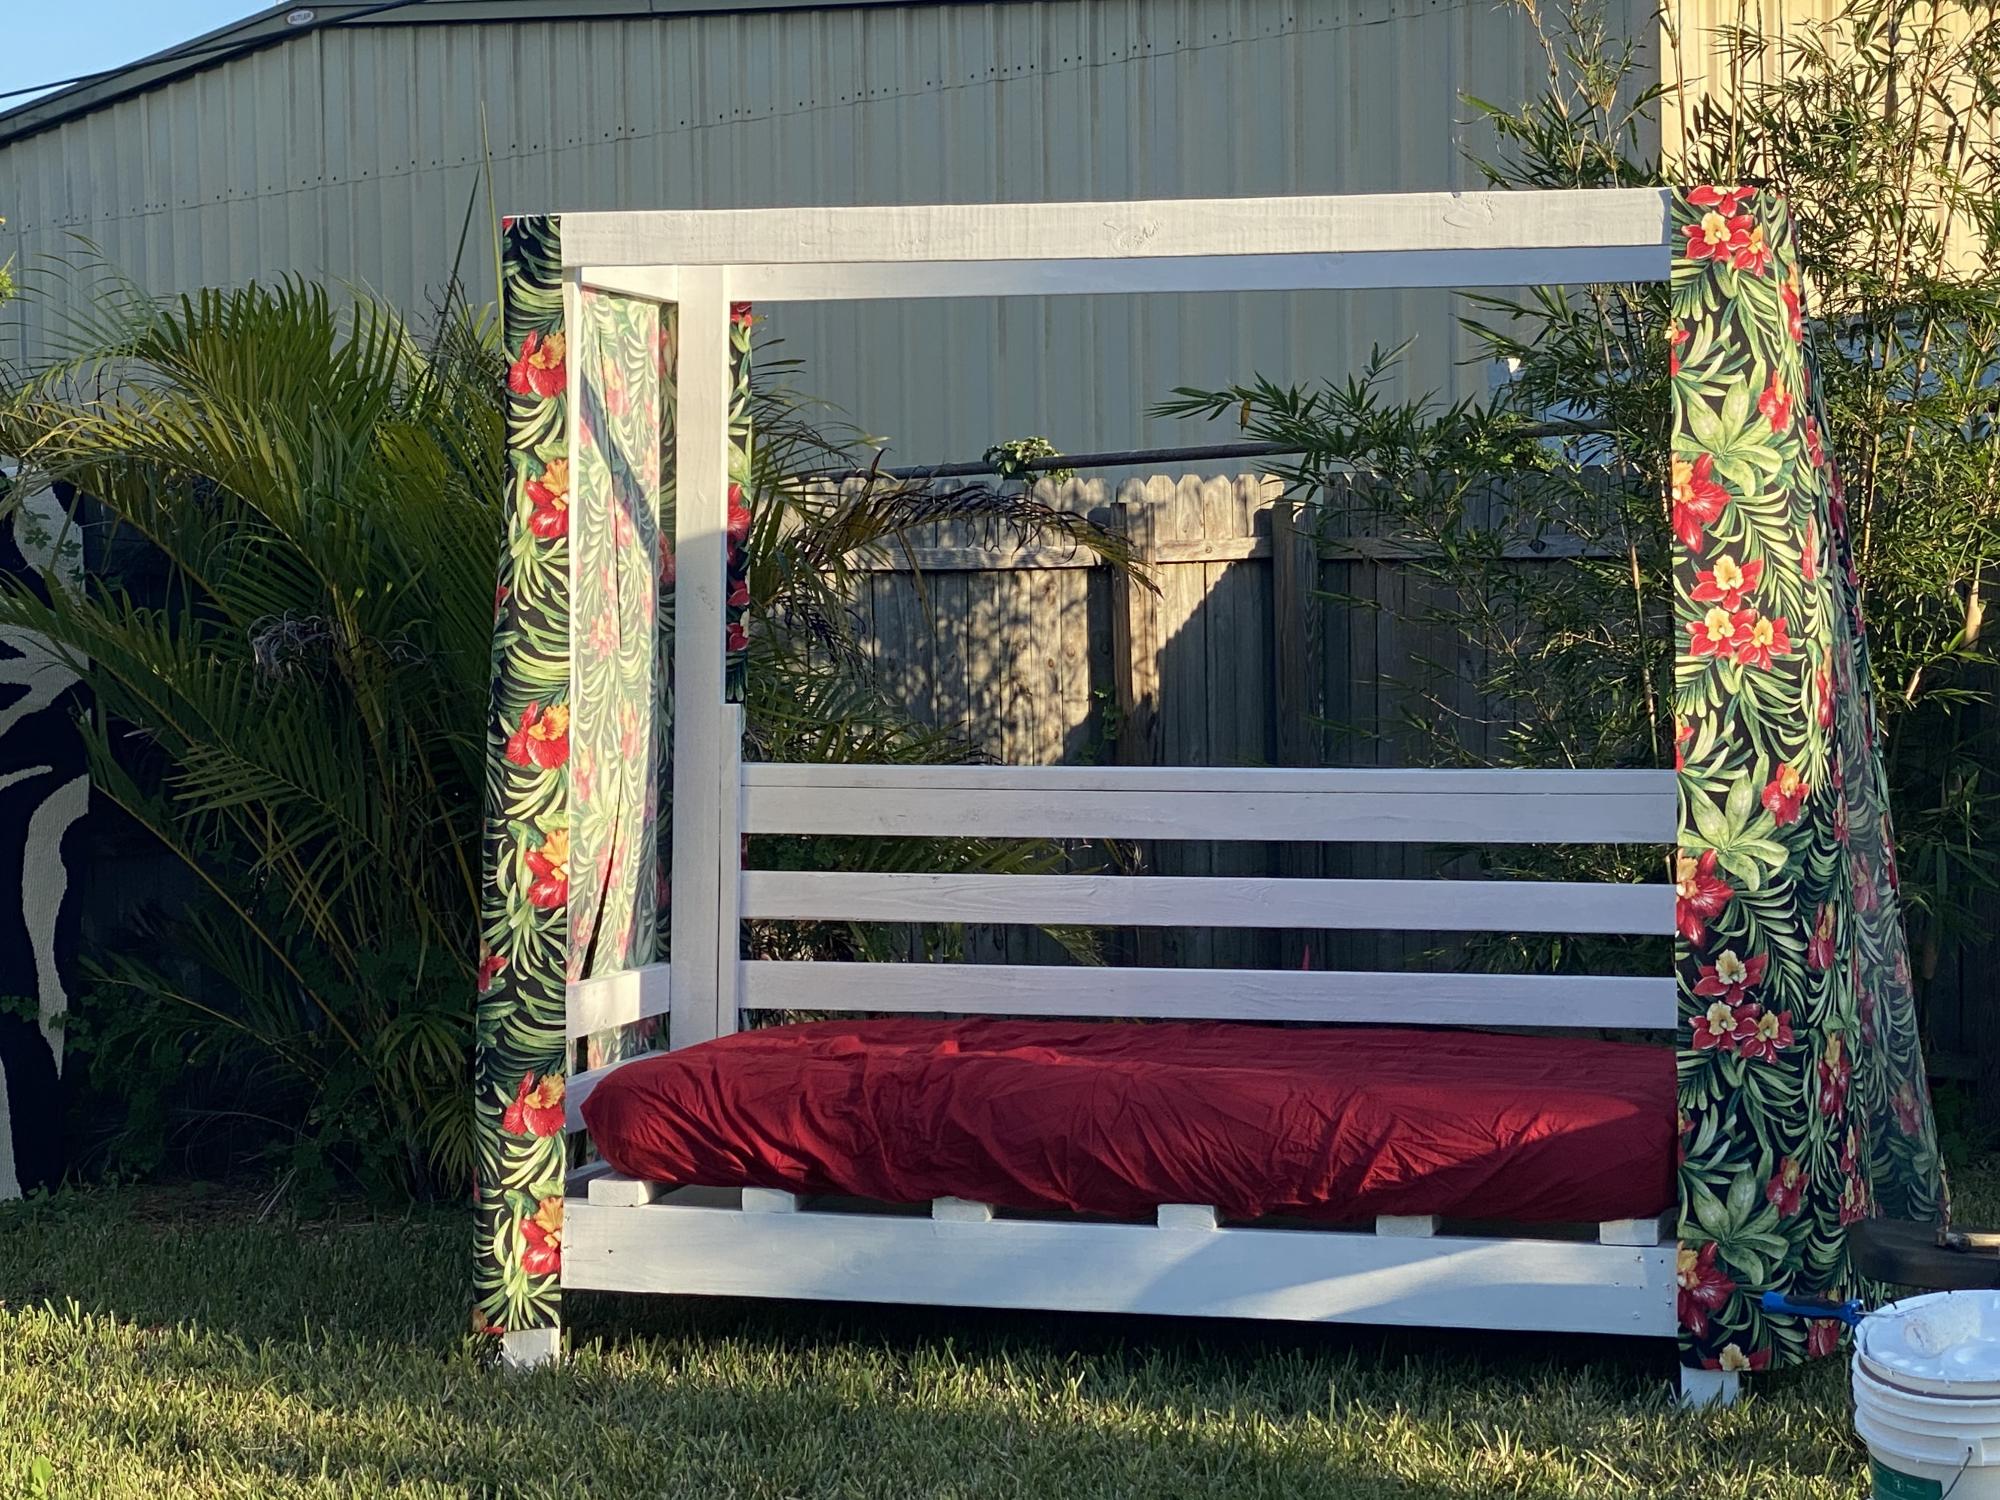
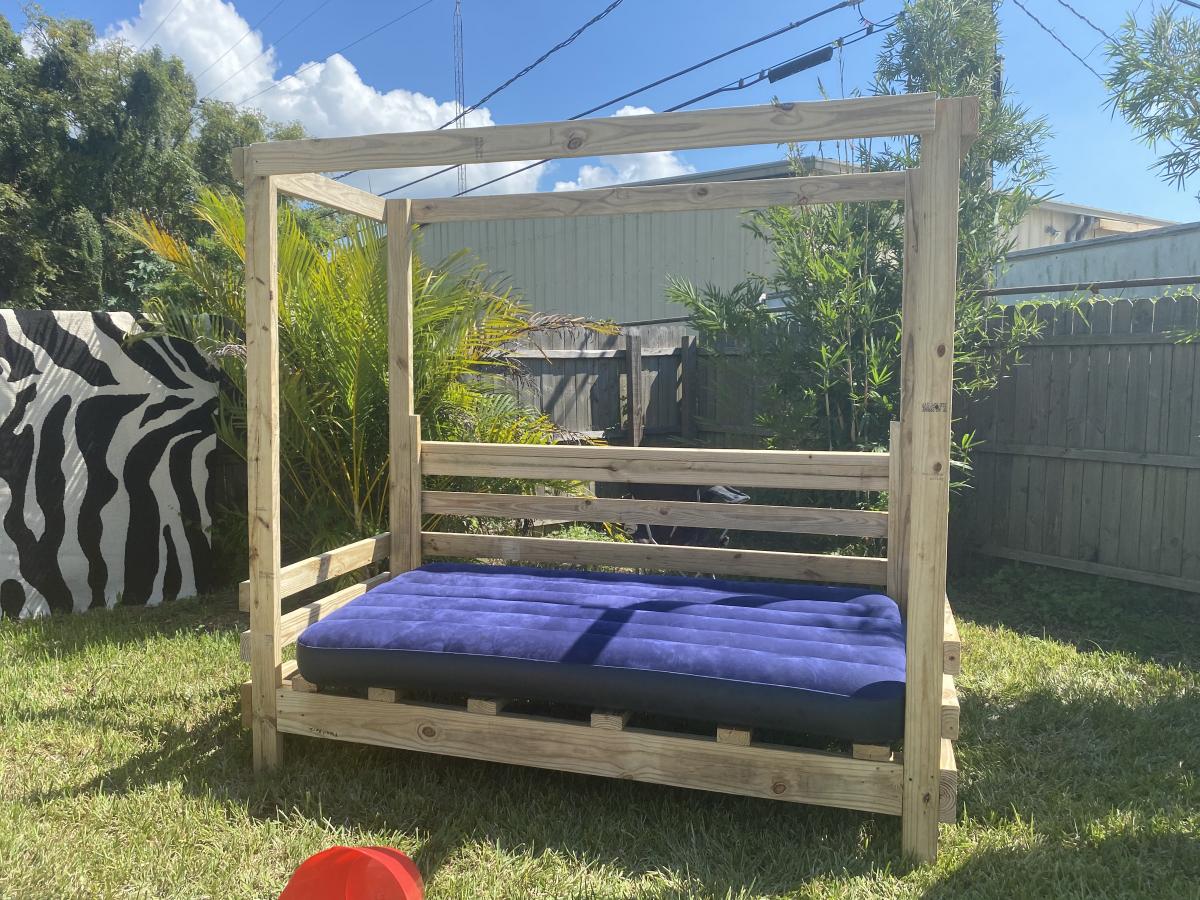
Completed this project last week off of the plans here under outdoor! I Love it and plans were soooo easy to follow!

Estimated Cost
150
Estimated Time Investment
An Hour or Two (0-2 Hours)
Finish Used
Painted white with exterior paint, outdoor fabric and twin size air mattress.

Comments

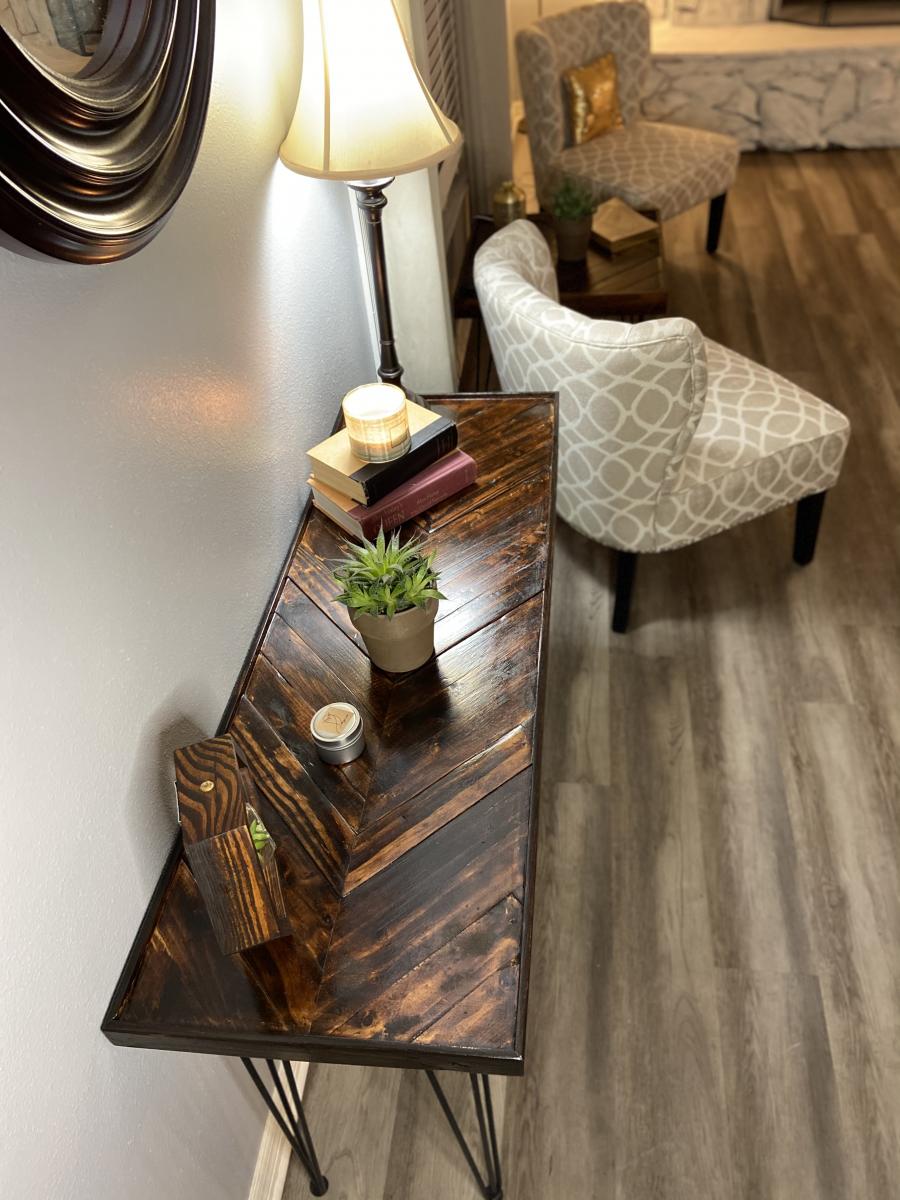
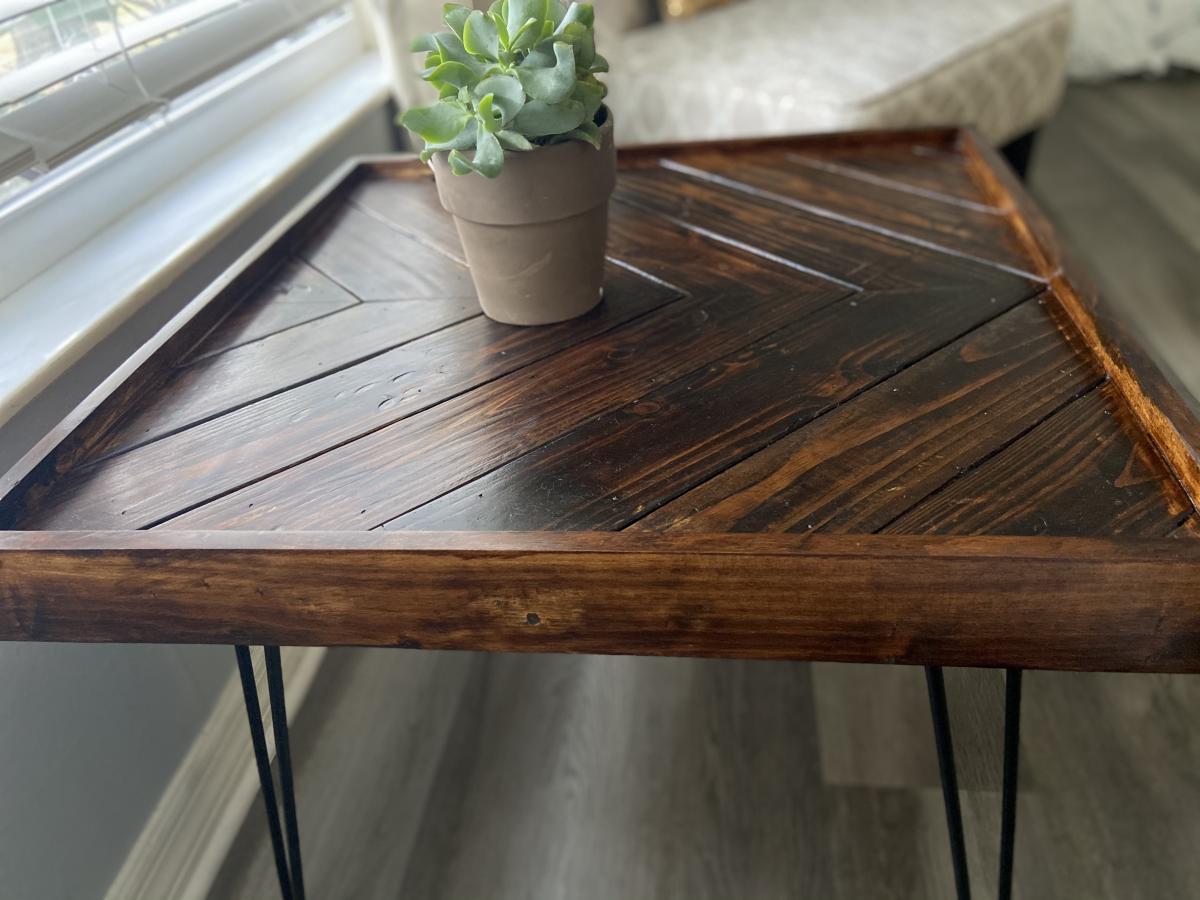
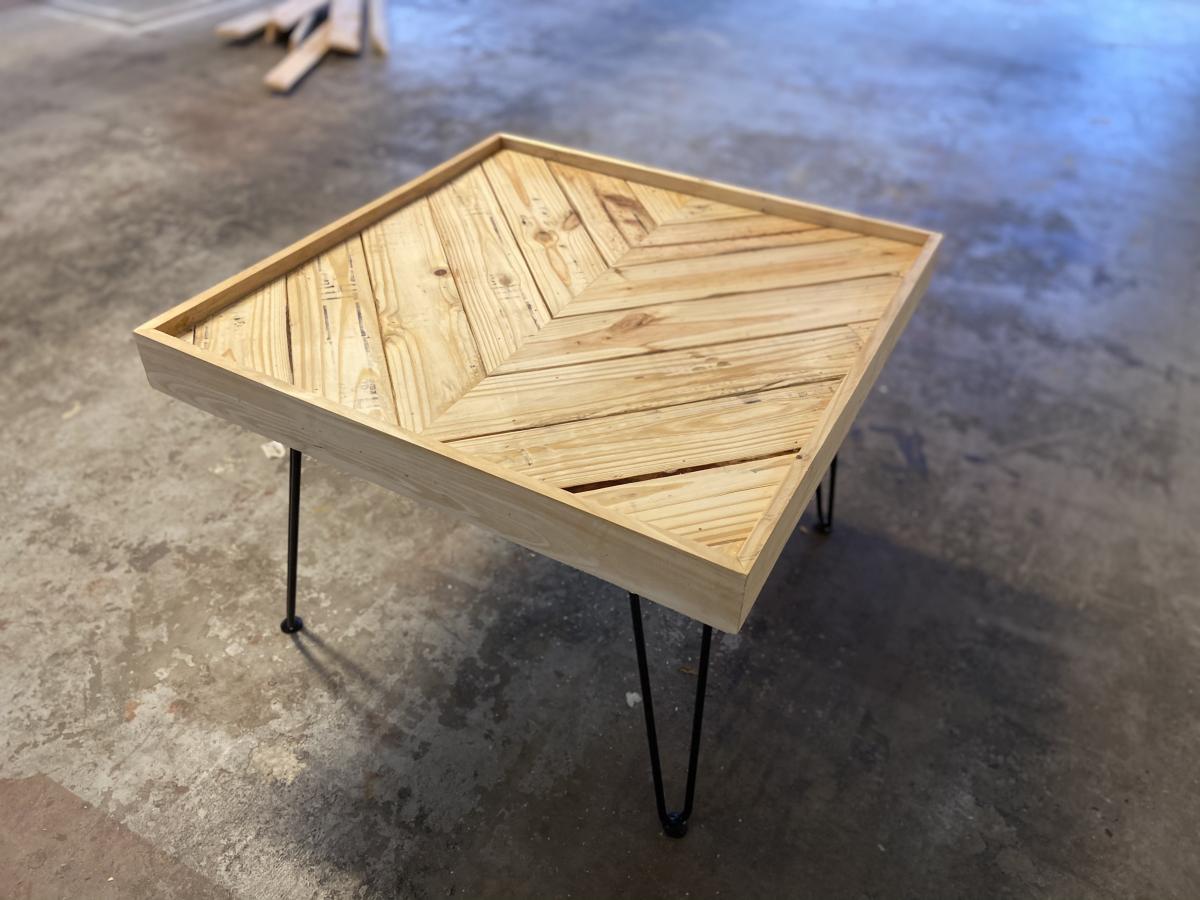
Pallet Wood Side and Console Table

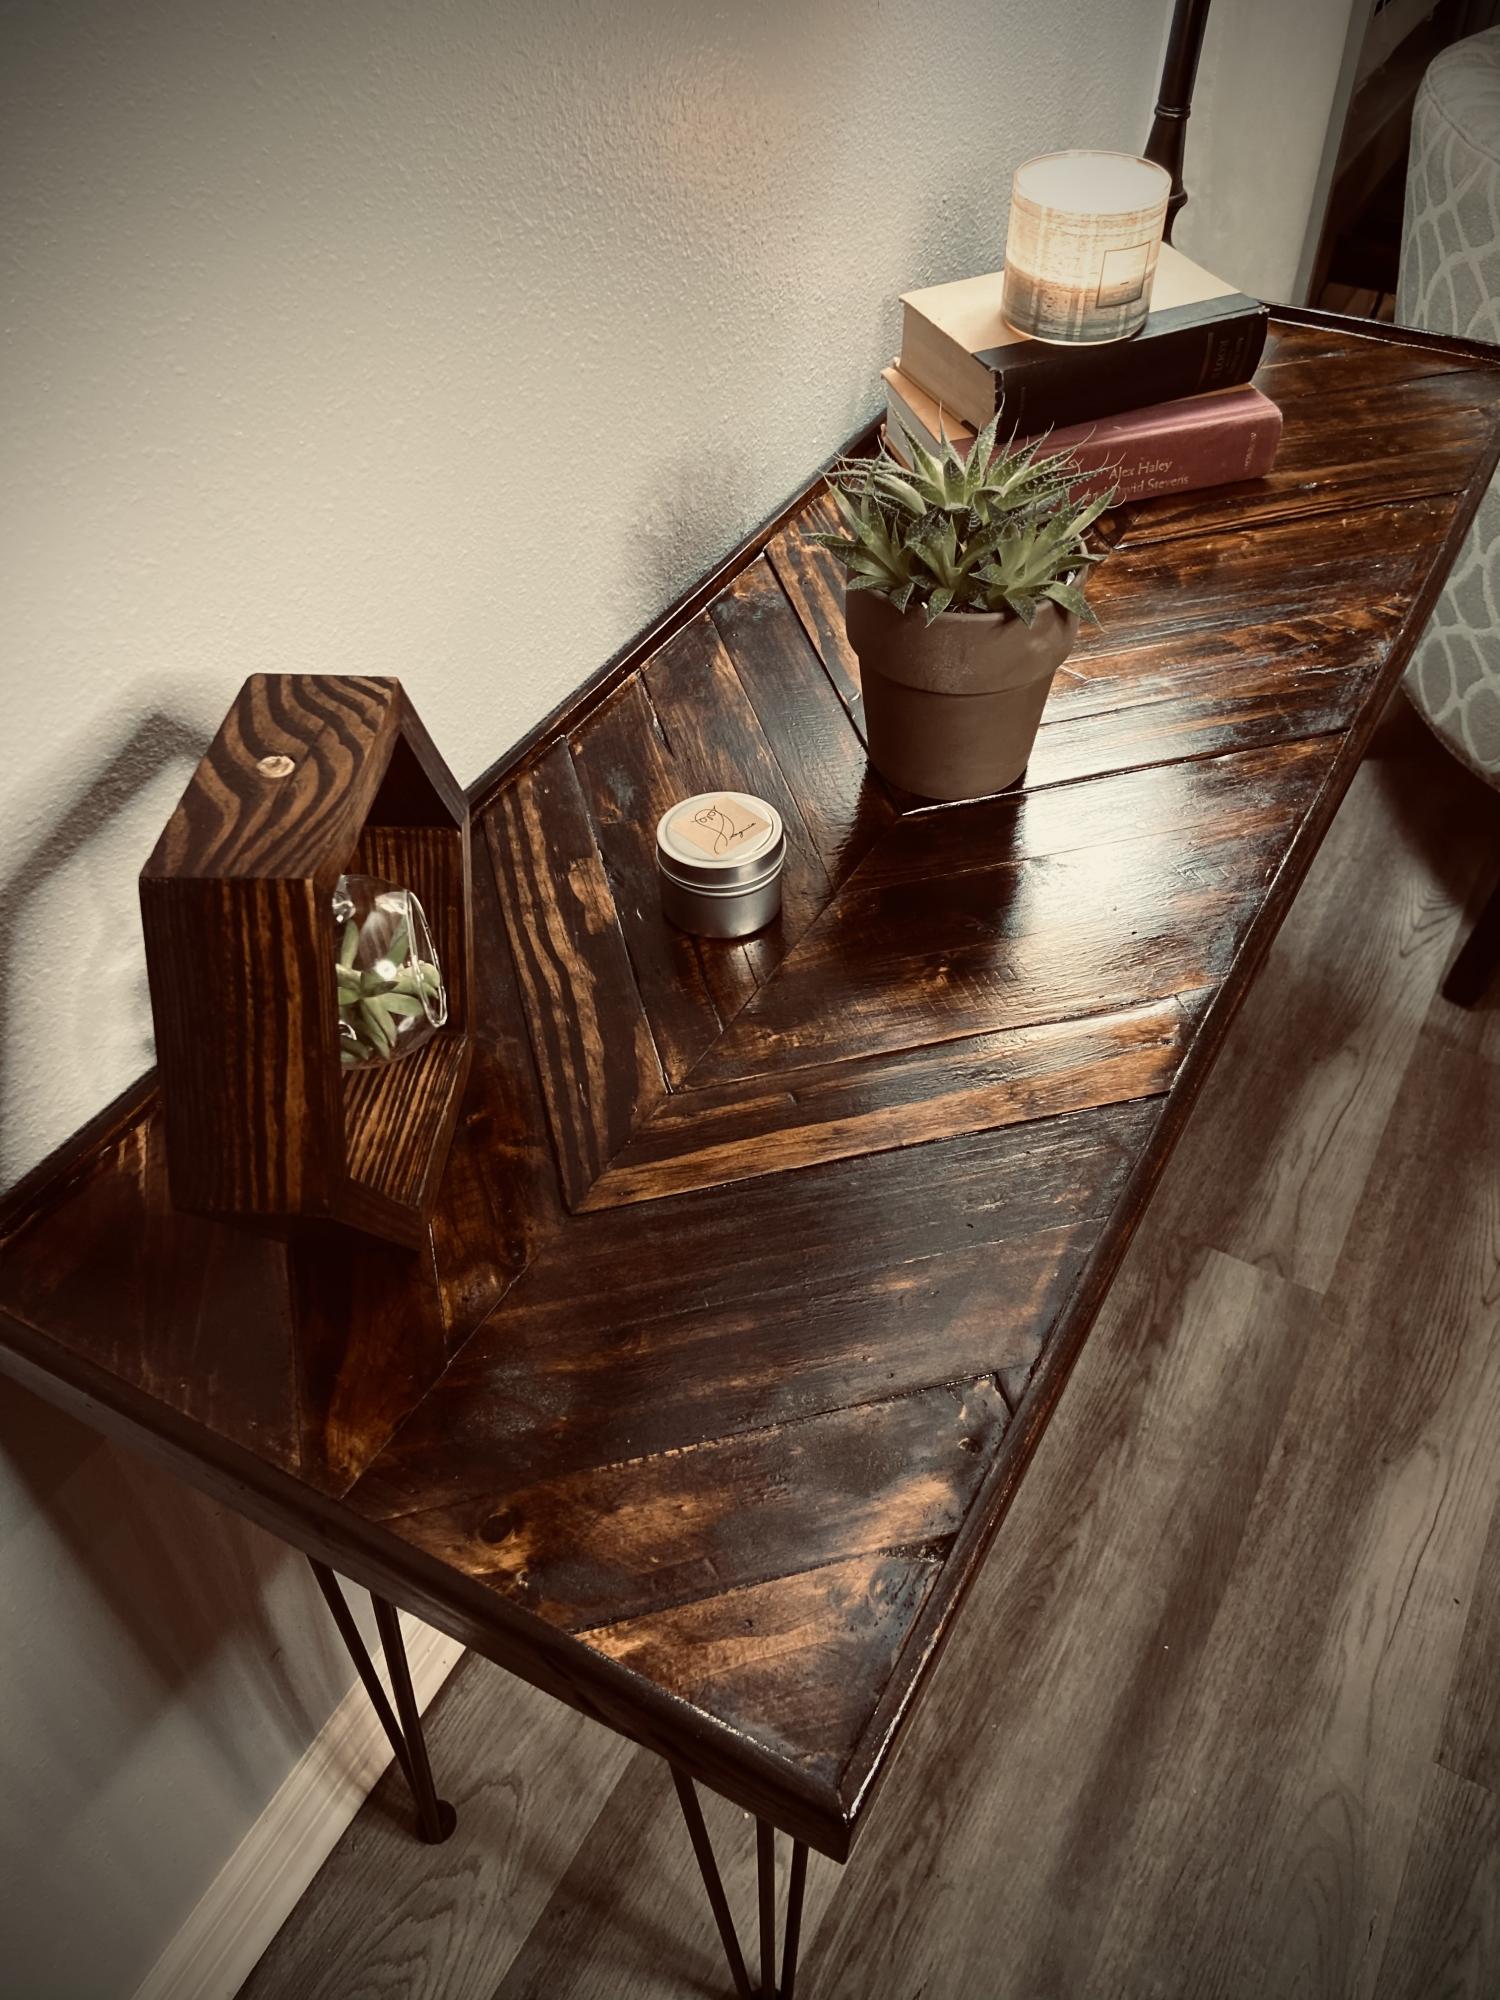
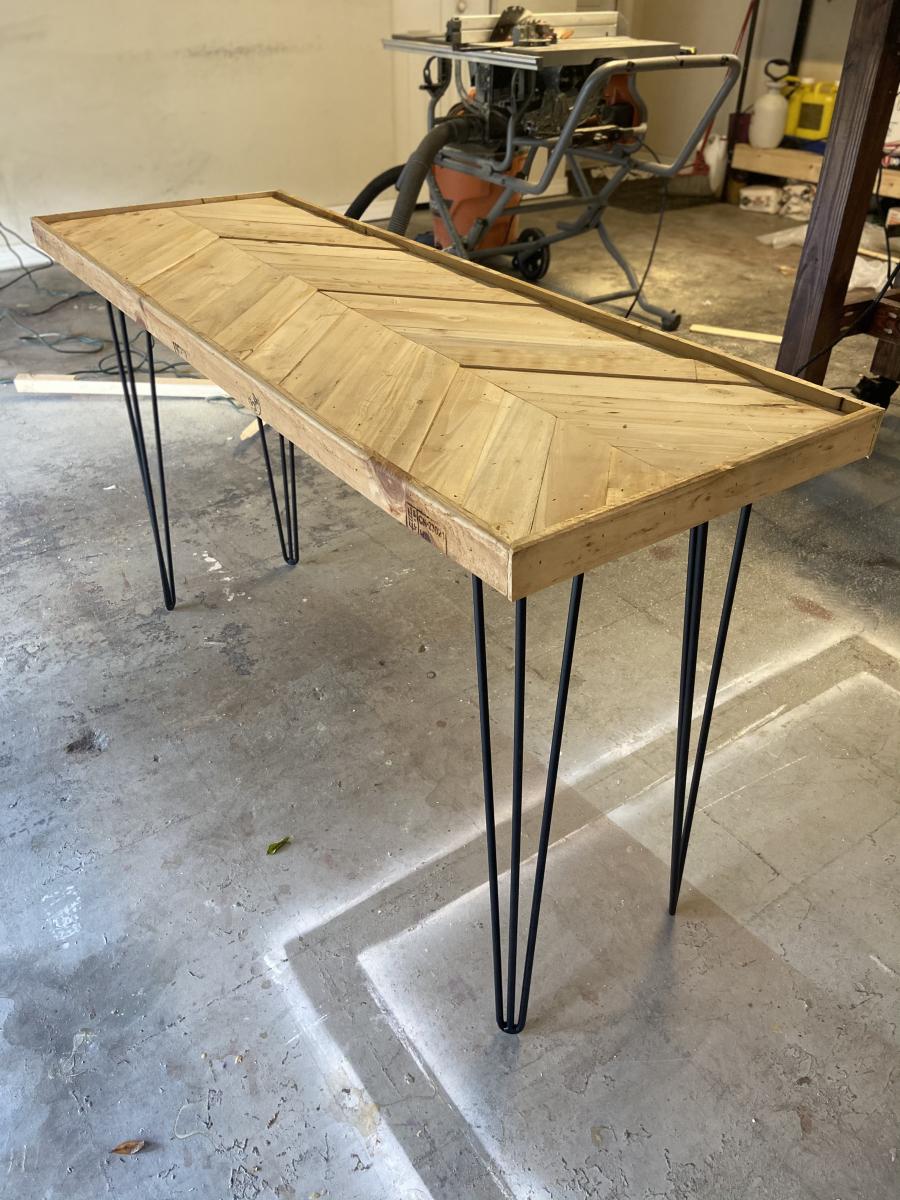
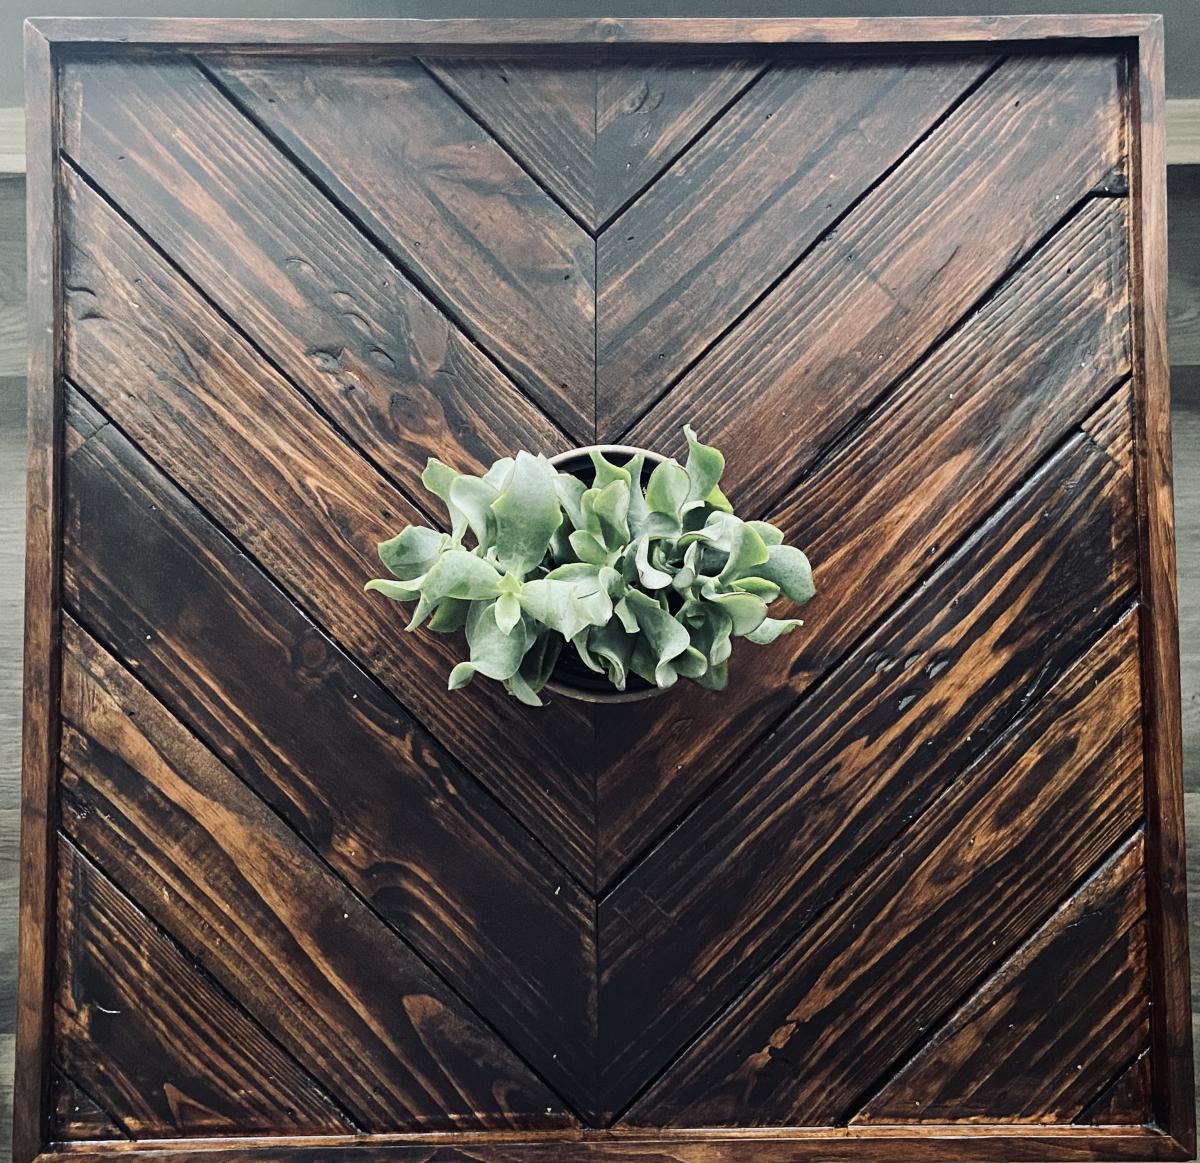
Amazon had an awesome sale on hairpin legs and I couldn’t pass them up. We had a few unused pallets, so I just created this beautiful table console and side table. Happy creating y’all!

Estimated Cost
67.00
Estimated Time Investment
Weekend Project (10-20 Hours)
Finish Used
Minwax Honey/ Satin Polyurethane
Recommended Skill Level
Intermediate

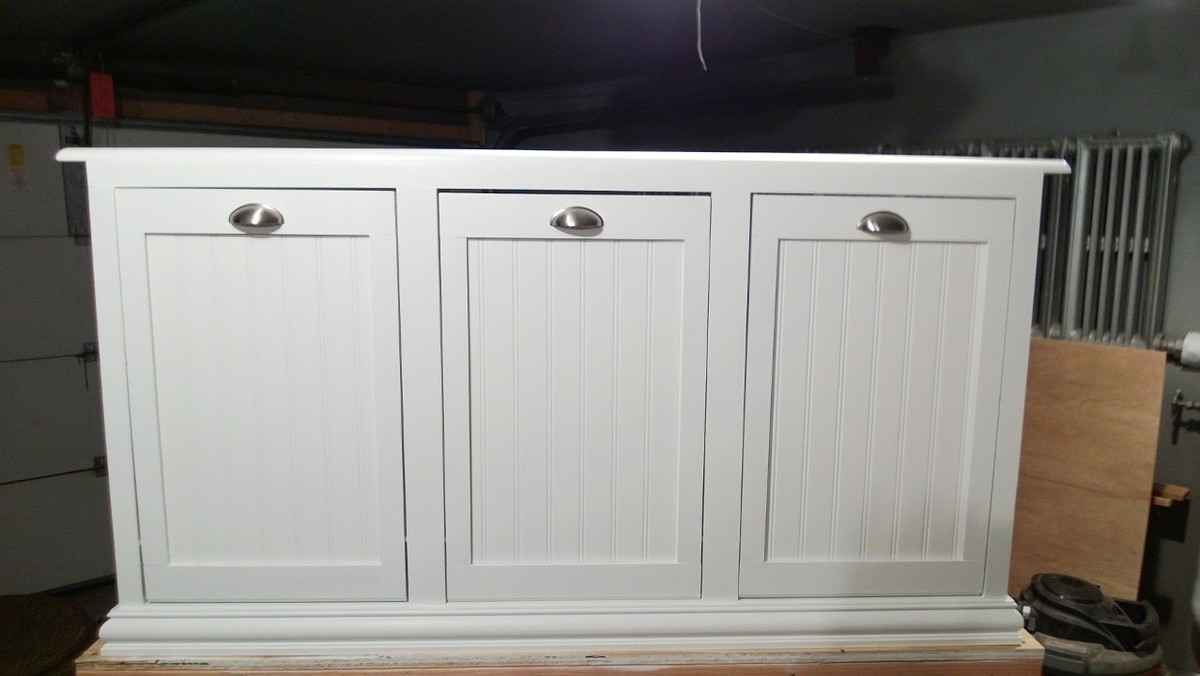
Three Bin Laundry Sorter

Submitted by Meyer1120 on Mon, 01/21/2013 - 21:10

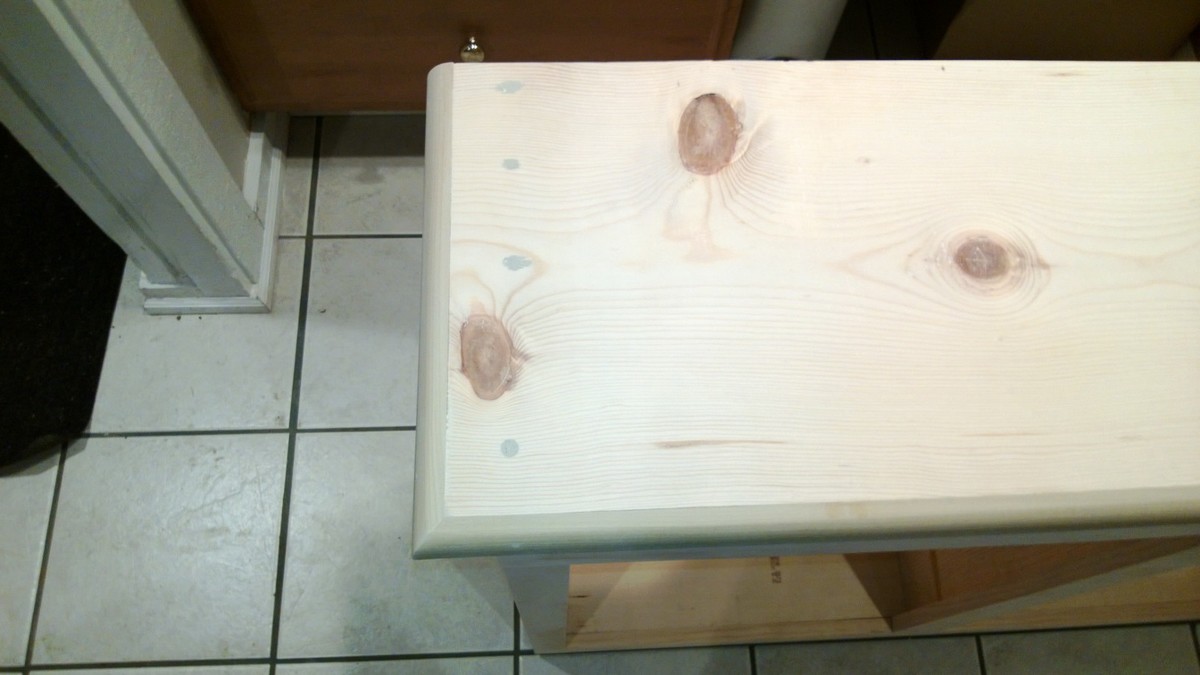
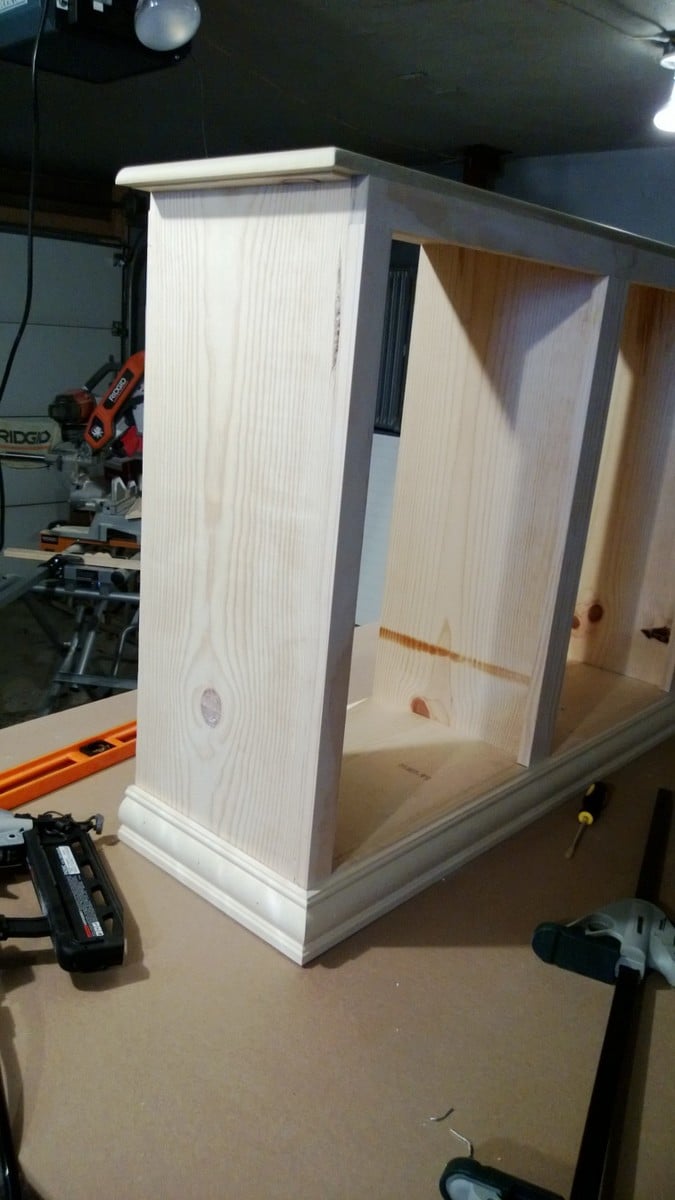
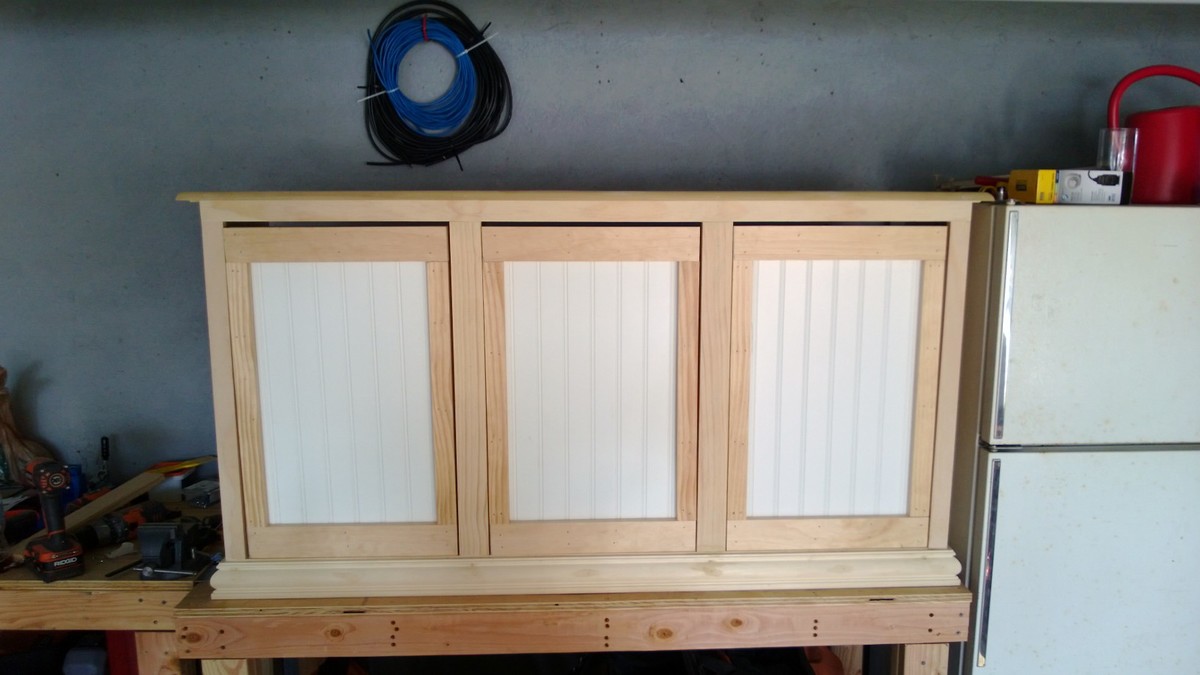
Modified the original plan to meet our needs of a laundry sorter. Had problems with the hinges so ditched them. I used dowels with a combination of a chamfer cut on the bottom of the door. Dado-ed the trim on the doors and slide the bead board panels in. The face frame is all held together with pocket hole screws, which I highly recommend because it eliminates nail holes and keeps the face frame square. This was my first wood working project, took me a little long to get it done. Thanks for looking.

Modified January 28

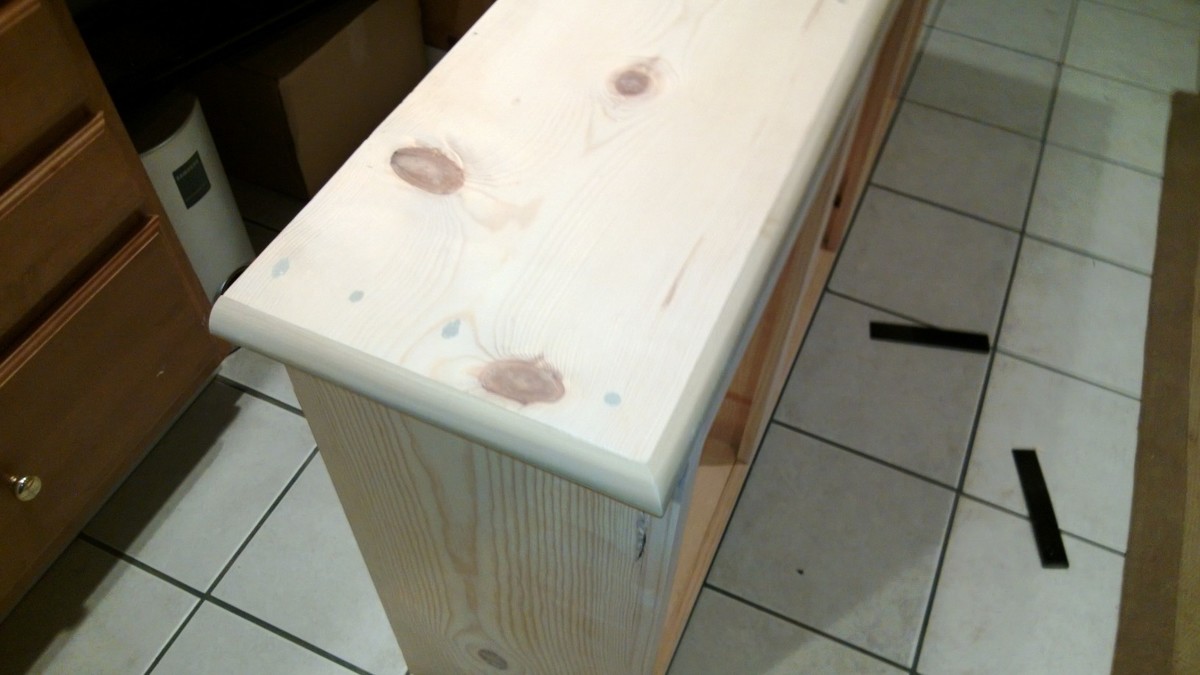
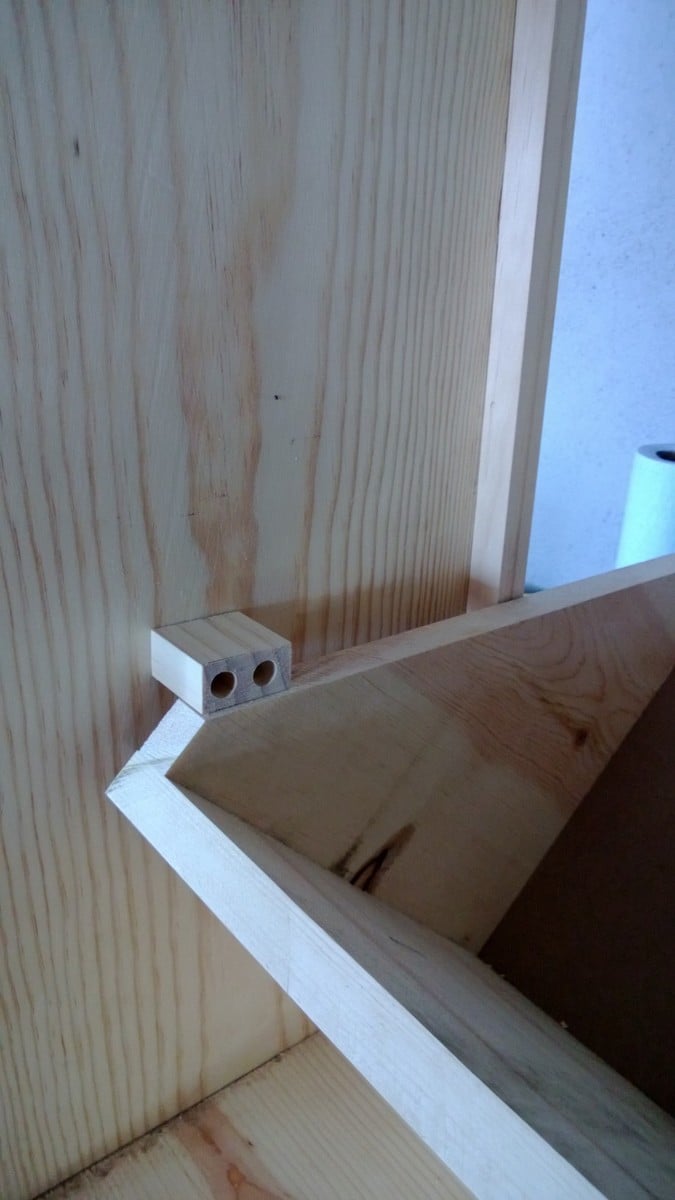
So here are some more pictures of my project. I don't really have any good pictures of the dowels. But what I can tell you is, I drilled holes through the sides of the face frame and the trim pieces and then measured where the holes would be in relation to the "drawer". I then drilled holes in the drawers at those measurements, I was careful to not go to deep. I think I went in half an inch. After that I started at one end and placed the dowels in, then put each drawer in. It wasn't easy but with a little patience it worked. The key is to wax the dowels so they will last longer as well. I also am including pictures of the top and bottom trim. On the top the original plans called for an overhang piece and I didn't like the way that looked. I ran the top board an inch long on each side and then wrapped it in quarter round trim. I did this because I plan on adding the Mimi Hutch Top. The bottom was built per the plan, but I ran into a problem with my bottom trim not being level and you could tell. So I raised the whole unit on 1 1/2 legs then placed it on a level surface and again wrapped it in a decorative trim. The key on both trims was a nice miter joint. Last picture I added was of my stoppers. I took scrap from the 1x2 trim and cut them to an inch and a half or two (can't really remember), then using the Kreg Jig drill bit drilled recessed holes. I then opened the doors until the side 45s were level then mounted the blocks on each side. I feel that it is better than a chain or string catch. Again thanks for looking and I hope I answered all of your questions.
Estimated Time Investment
Week Long Project (20 Hours or More)
Finish Used
Primmer and paint
Recommended Skill Level
Intermediate

Comments

moosmani

Tue, 01/22/2013 - 11:29

Dowels! What a great idea! Would you mind sharing how you did it? Could you possibly add some pictures showing the dowels? You did a great job. It looks beautiful.

mullid1

Thu, 01/24/2013 - 09:27

I love what you have made! Could you post pictures of the top and the bottom trim? I'm very impressed that this is your first project!

mullid1

Tue, 01/29/2013 - 09:12

Thank you for the photos and new instructions! You're awesome!!!

VLT

Fri, 03/15/2013 - 12:05

This is lovely; I like the trim job you did. Is there a way to post the plans so we can all get to them. I cannot believe this was your first project!

Liz82

Sat, 11/16/2013 - 18:23

I am a little confused. I love the three bin laundry sorter, but everyone is mentioning plans. I am not finding plans for it on the site. Also, what goes in to hold the clothes? There may be obvious answers, but I am not seeing them. I'd appreciate any help you could give.
towering inferno

Tue, 12/02/2014 - 02:58

I've been thinking of working up one very similar to this, also with 3 bins, but I didn't want to use chain either.  Those stoppers will be ideal - do you put them on both sides or is one enough?  Thanks for the share!

Karahd

Sat, 01/24/2015 - 11:29

Hi-

Im not sure if you still have the plans to this awesome project, but if you do, would you be able to share them with me? Ive been looking to make something like this forever, but just couldnt find any help!

thanks,
karah
[email protected]

petemoore

Mon, 02/08/2016 - 07:46

hi im the same as everyone can you send me the build plans with dimensions etc

many thanks

virginie D.

Wed, 03/02/2016 - 14:49

Hi

It's exactely what i need. so amazing. Someone can send me the plan please? I'm so newbie to do tat all by myself without plans. Thanks you.
virginie D.

Wed, 03/02/2016 - 14:49

Hi

It's exactely what i need. so amazing. Someone can send me the plan please? I'm so newbie to do tat all by myself without plans. Thanks you.

ajbreaux

Mon, 05/02/2016 - 14:22

My wife loves this . if its possible could i get the plans and hopefully have time to build it to give to her for mothers day ? thanks 

Kimhubbell

Fri, 12/02/2016 - 11:01

I would also love to have the plans for the 3 bin sorter. I am barely an intermediate so more specifics would be a huge help! Thanks to anyone who could help.

lworthy

Mon, 07/10/2017 - 04:19

 I absolutely LOVE your laundry sorter!!!! You did a fabulous job and the TRIM, WOW amazing!!!! I've searched Ana's website and cant find the plans' could you please email me the plans to [email protected].  I started building my own furinture back in October 2016 and the reward is amazing... Keep up the good work.

Happy Building,

Lisa

woodmama

Tue, 01/16/2018 - 22:18

I'm too new at woodworking to be able to tackle this right now, but would love to download the plans for future. My most successful project so far is a pretty standard bookshelf. I got a free plan, with lots of guidelines and explanations, at https://tinyurl.com/ydeup8lo -- it came with a 440 page guide, "The Art of Woodworking" that has tips and techniques, and am plowing through that right now.

momto3

Wed, 02/28/2018 - 12:53

This is amazing.  I am very new to woodworking.  Could you send me the plans please?  I would be most appreciatative 

Ljohns

Wed, 03/11/2020 - 23:27

I would love to have the plans for the three bin laundry sorter to build for my laundry room. Are the plans available? Awesome work!

Large Garden Bench with X back

Submitted by aem4v2000 on Mon, 04/05/2021 - 04:08

I love this bench. It is so solid. I have now built three of them for around our yard/porch. If you have the necessary tools and skills (intermediate level) you can build it in an afternoon. I built it in 4 hours with lots of breaks. My cost estimate includes paint and screws.

Estimated Cost
$145.00
Estimated Time Investment
Afternoon Project (3-6 Hours)
Finish Used
Valspar Satin Season Flex exterior paint and primer in Gravity
Recommended Skill Level
Intermediate

Comments

Farmhouse headboard

I built this headboard a while back but just never got around to posting it.  I distressed the wood, painted it mint green and applied a chocolate glaze. 


Estimated Cost
$100.00
Estimated Time Investment
Day Project (6-9 Hours)
Finish Used
Mint green and chocolate glaze
Recommended Skill Level
Starter Project

Comments

Twin Over Full Bunk Bed

Submitted by sapperstan on Mon, 04/01/2013 - 14:47

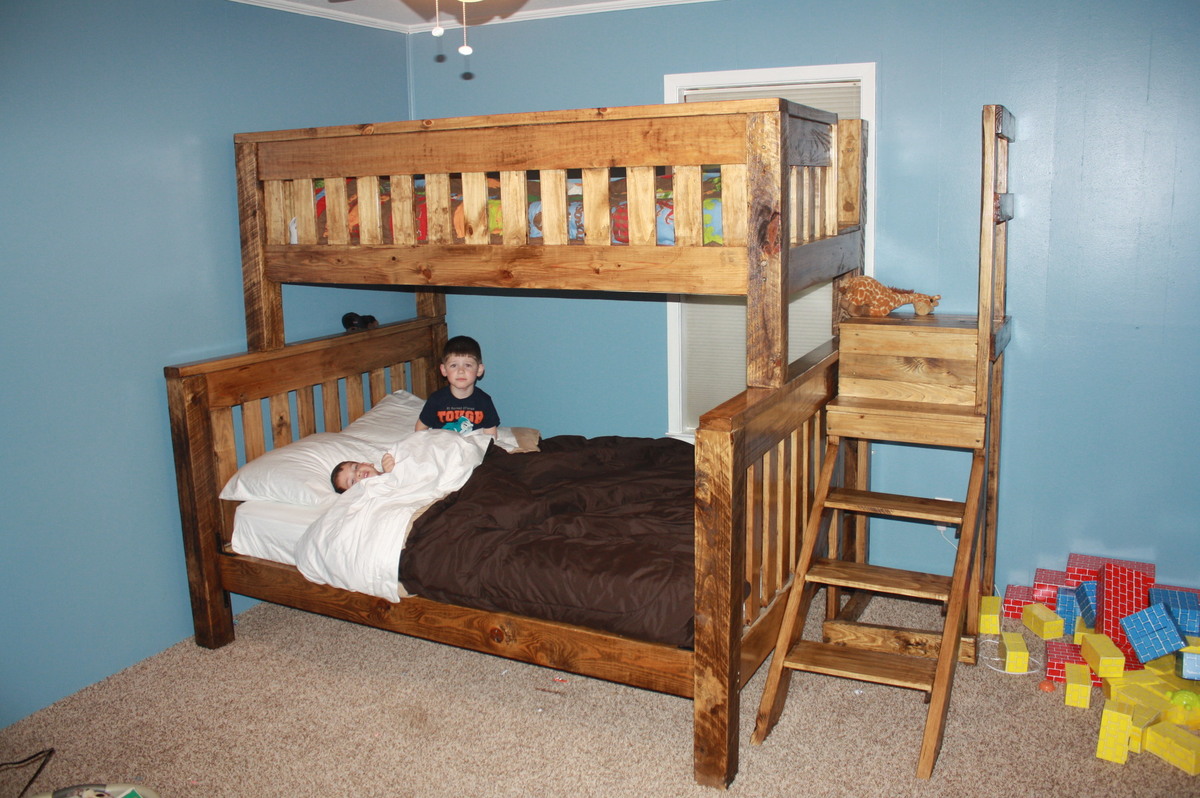
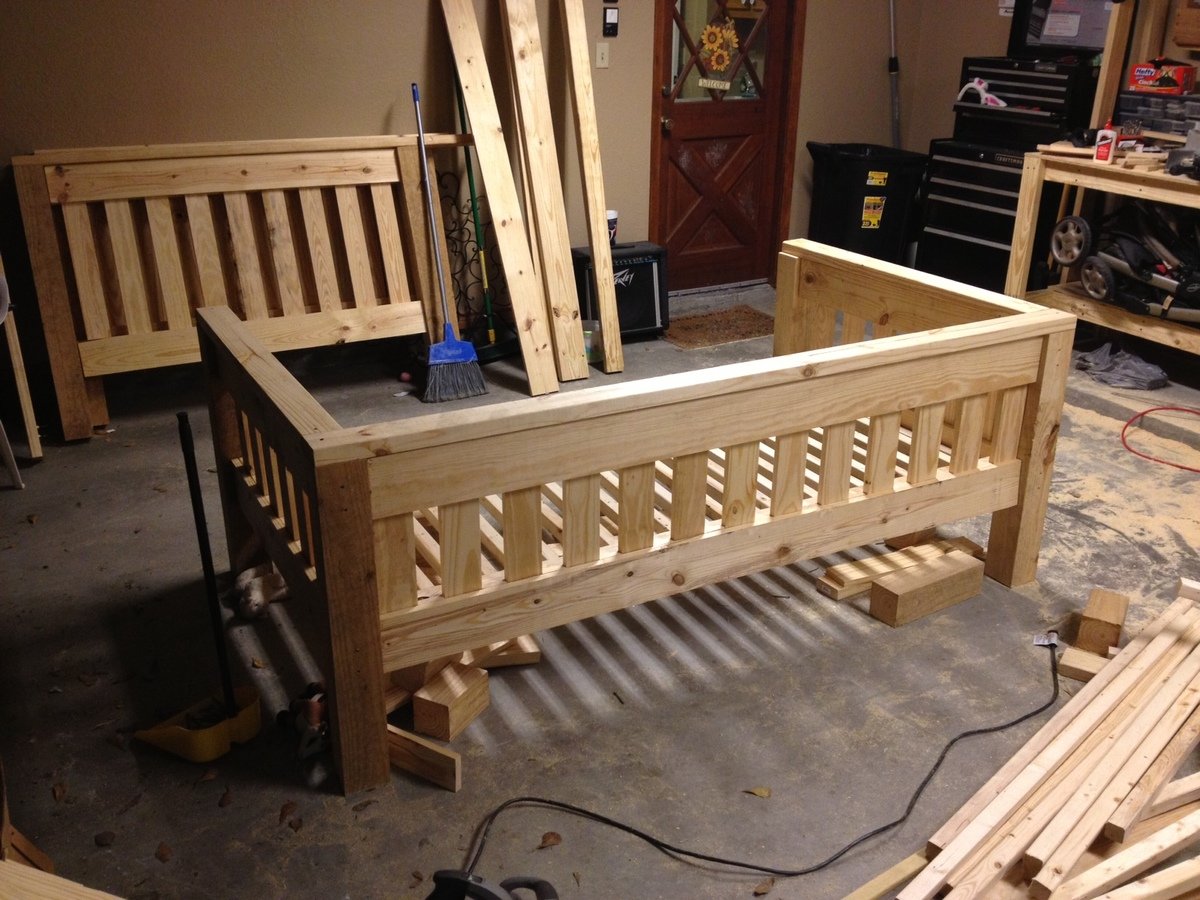
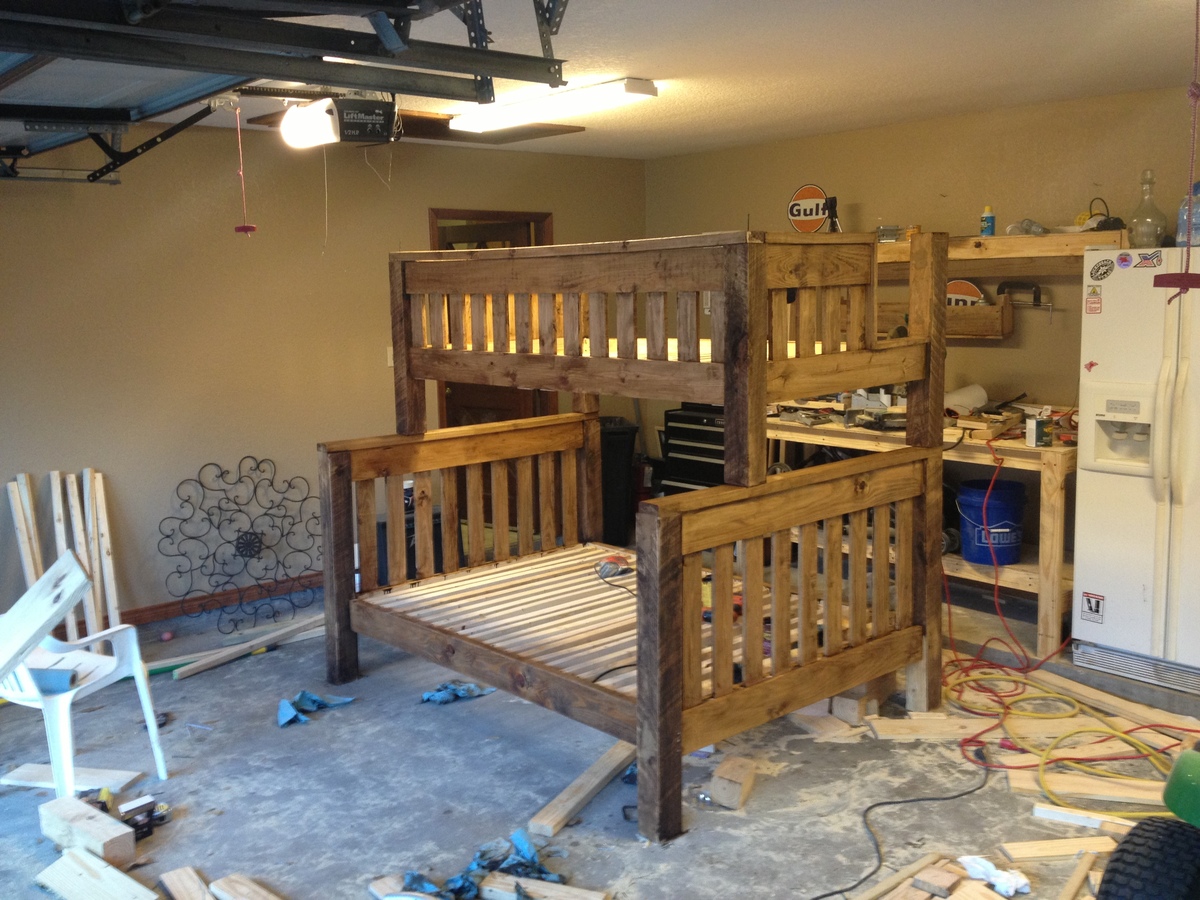
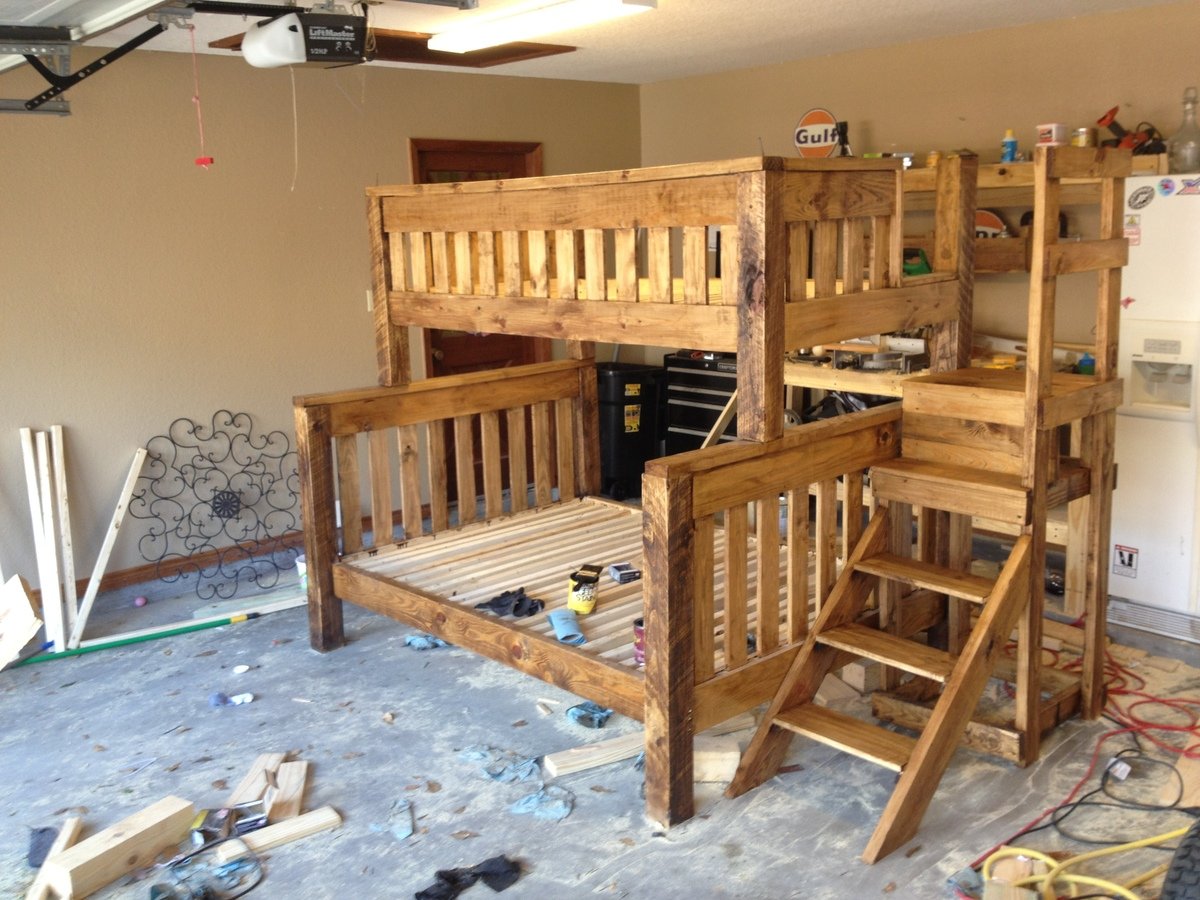
My 4 year old kept asking for a bunk bed, so my wife and I went to the furniture store and saw we would be paying close to $1000 for a junkie bunk bed. We told him it cost too much and left it at that. Then he started bringing us pennies, dimes and all the change he could find to pay for the bed. So I found this website and decided to attempt to build him one. I started building it after work on Monday, continued for a few hours every evening and finished Saturday morning. It turned out amazing, and both the boys love it. It is extremely sturdy, and will last beyond my lifetime. It's just a good quality design. Total Cost was about $300. Not bad for what we would have been paying for a lesser quality bed. Changes I made: I added the railing on the front of the upper bed to match the headboards and railing on the back side because my wife is a worrier. I also designed and built the stairway and bolted it to the lower bed. I am no professional carpenter, a novice at best. Most people with a little carpentry knowledge can build this. Thanks Ana, we all love it!

Estimated Time Investment
Weekend Project (10-20 Hours)
Finish Used
Sanded with 220 grit
Applied wood conditioner
Applied Minwax Aged Oak gel stain
Applied Polyeurathane for protection
Recommended Skill Level
Intermediate

Comments

spiceylg

Tue, 04/02/2013 - 05:17

Wow, you did a wonderful job! What a sweet story with your son bringing you any change he found. Adorable. I'm sure your sons are so proud of you and it means so much more than just store bought. In looking at that first smaller picture of just the top part, it looks like a view from the back side of a day bed. You can take apart the bunk beds when they get older and you have one full bed and one day bed. Awesome!

My First Project Farm House Table

Submitted by iceman0941 on Thu, 03/05/2015 - 10:22

Thanks Anna White for your plans and for your great website!

Estimated Time Investment
Weekend Project (10-20 Hours)
Recommended Skill Level
Beginner

Comments

Doggy loft bed!

Submitted by Anonymous (not verified) on Sat, 06/03/2017 - 17:31

My dog loves to people watch all day while I'm at work and she needed a new bed so I took the plans for the lower platform and modified them so it would stand alone. Took the platform and put it on the bottom so that her bed would sit inside instead of on top where she could more easily fall off.

I tried building without PH screws at first and all I ended up with was a lot of cracked and wasted lumber. Got the PH jig and finished the whole build myself in 2 hours. Sanding, staining, and sealing tomorrow but I'm just so excited about it I had to post now!

Estimated Cost
With the two sets of lumber, having to buy the jig, hardware, stain, and electric sander it cost me about $130
Estimated Time Investment
Afternoon Project (3-6 Hours)
Recommended Skill Level
Beginner

Comments

Simple Red Garden Bench

Submitted by EAnderson on Sun, 03/29/2015 - 19:20

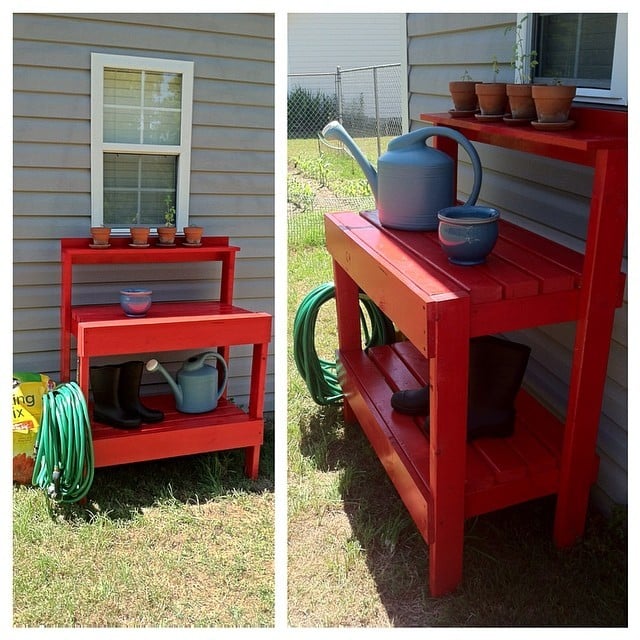
This was the first building project I completed by myself start to finish! I was able to use 2x4s we already had in the garage (sorry husband!) and some scrap wood for the few other pieces it required. The only thing I added to the plans was some trim for the front.

I built this last summer and since then the shelf on the very top has warped a bit. I would recommend adding extra support. It rains a lot here, and I think that contributed to it warping. Other than that, it has held up very well and the shelf can easily be fixed with some brackets.

Overall, this was a great first build for me! The plans were straightforward and easy to follow. And there's just nothing more rewarding than standing back at the end of a day of building and thinking, Hey I made that :)

Built from Plan(s)
Estimated Time Investment
Day Project (6-9 Hours)
Recommended Skill Level
Beginner

Comments

How to Build Simple Raised Garden Beds

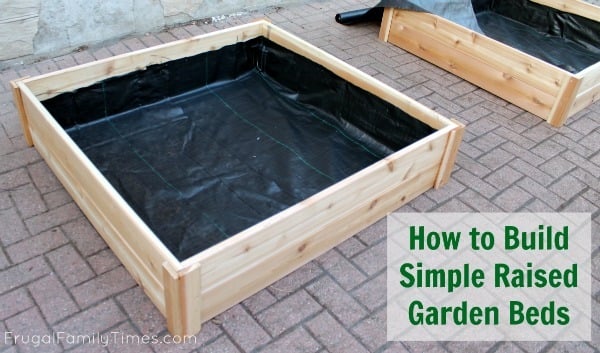
Starting with Ana's simple $10 raised garden plans, we built ours to be part of our experiment: Growing Vegetables in Our Driveway. Because our boxes are visible from the street, we made them a bit fancier and sturdier than we would have if they were hidden away in the backyard. An easy, afternoon project - with delicious results!

Estimated Time Investment
An Hour or Two (0-2 Hours)
Finish Used
none
Recommended Skill Level
Starter Project
Seasonal And Holiday