Community Brag Posts

Storage Captains Bed

Submitted by Anonymous (not verified) on Fri, 09/16/2022 - 05:03

So this was a really fun project from start to finish, I wanted a storage bed with a place for my son to showcase his Super Hero collection!

Estimated Cost
300
Estimated Time Investment
Week Long Project (20 Hours or More)
Finish Used
Paint
Recommended Skill Level
Intermediate

Comments

Julie's benchmark media console

Submitted by Timjuliek on Sun, 03/19/2017 - 16:42

My wife used the benchmark media console plans with her own idea for the doors

Built from Plan(s)
Estimated Cost
$200
Estimated Time Investment
Week Long Project (20 Hours or More)
Finish Used
Sherman Williams pro classic
Recommended Skill Level
Intermediate

Mudroom Closet Makeover

Submitted by Anonymous (not verified) on Thu, 01/21/2021 - 07:10

The concept of hidden boot storage at the back is genius!!! I knew as soon as I saw your plan that I needed that in this space! Thank you so much for what you do!

Finish Used
Bench seat was wood conditioner, minwax early American, minwax weathered oak. Then finished with shellac. The coat hooks are from Amazon. The ring pull is from Lee Valley.

Comments

Truss Beam Dining Table

Modified plan dimensions to accommodate 8' long by 4' wide top. Also, added 4" lag screws (just for appearance) to secure beams at base of the legs and center support

Built from Plan(s)
Estimated Cost
$550
Estimated Time Investment
Week Long Project (20 Hours or More)
Finish Used
Top:
Varathane Jacobean Stain + Poly
Polyurethane\Mineral Spirit 50/50 mix (see PMK Woodworking)

Base:
Varathane Antique White Stain + Poly
Recommended Skill Level
Intermediate

Comments

Entertainment center

Submitted by brittrad14 on Thu, 04/08/2021 - 06:08

1st project in the bag. I love how this turned out. Now to decide on the doors!

Built from Plan(s)
Estimated Cost
$350
Estimated Time Investment
Week Long Project (20 Hours or More)

Comments

Vintage Airport Loft Bed

Submitted by Robinwood on Tue, 03/19/2013 - 20:20

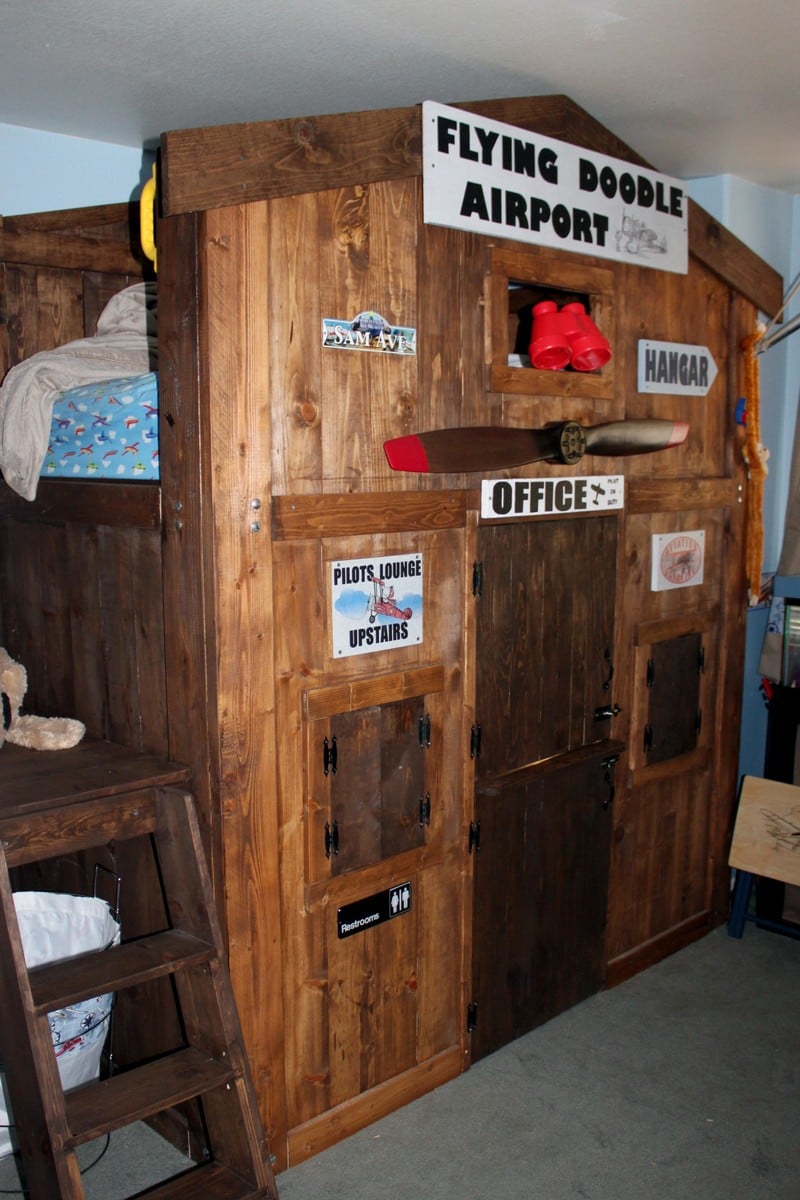
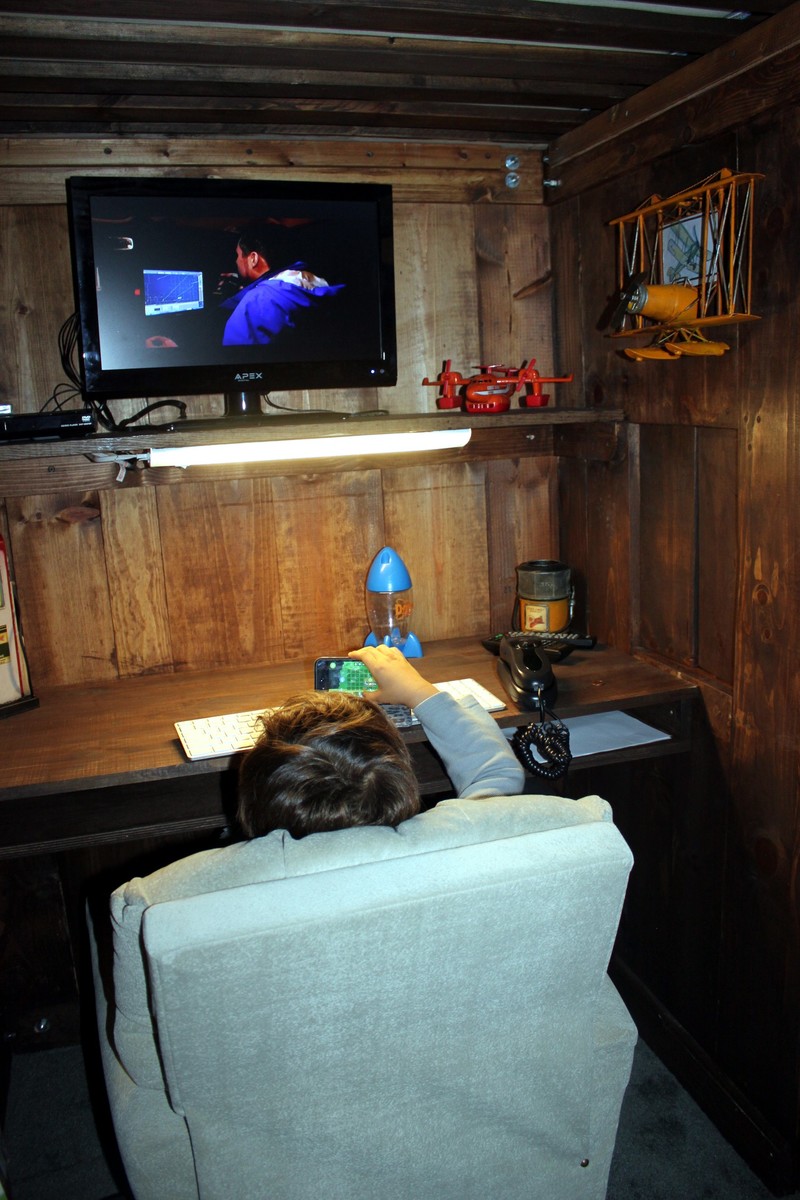
In my 70 years, this has to be the biggest project I've done. My grandson especially loves vintage airplanes; so I decided to make it look like a small vintage airport. I based this on the Clubhouse Bed, but for the steps at the end, I borrowed from the Camp Loft Bed - I added rails at the end because he felt a little uneasy when he tried the stairs. He wanted more of a clubhouse (he is special needs and likes the closed in feeling) and wanted doors and shutters so he could close everything.

Doodle is his nickname - hence "Flying Doodle Airport".

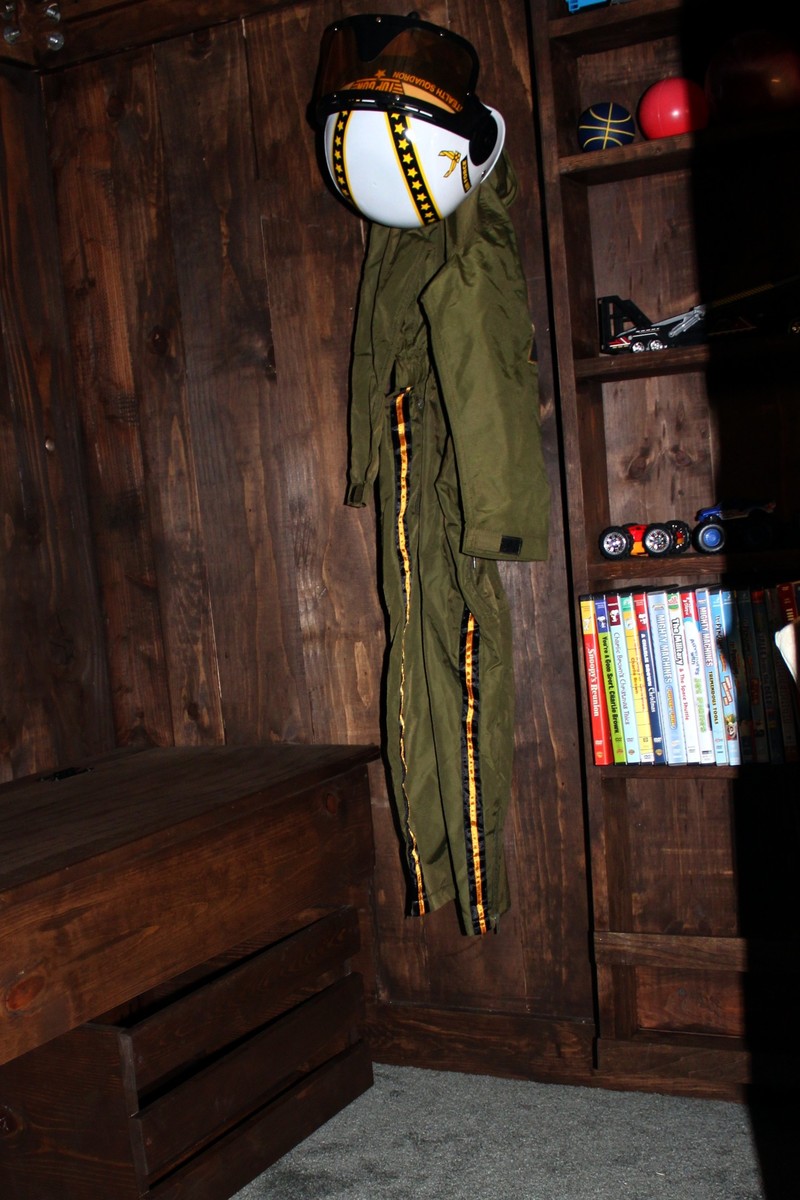
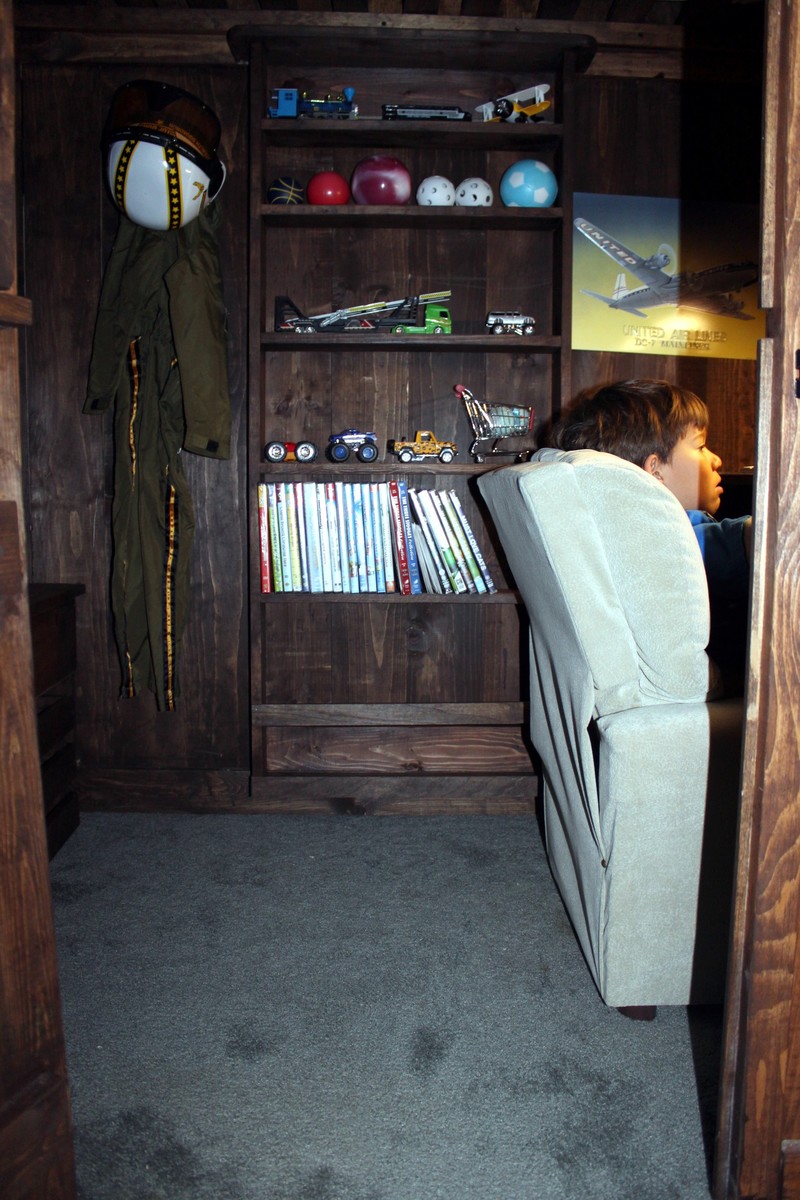
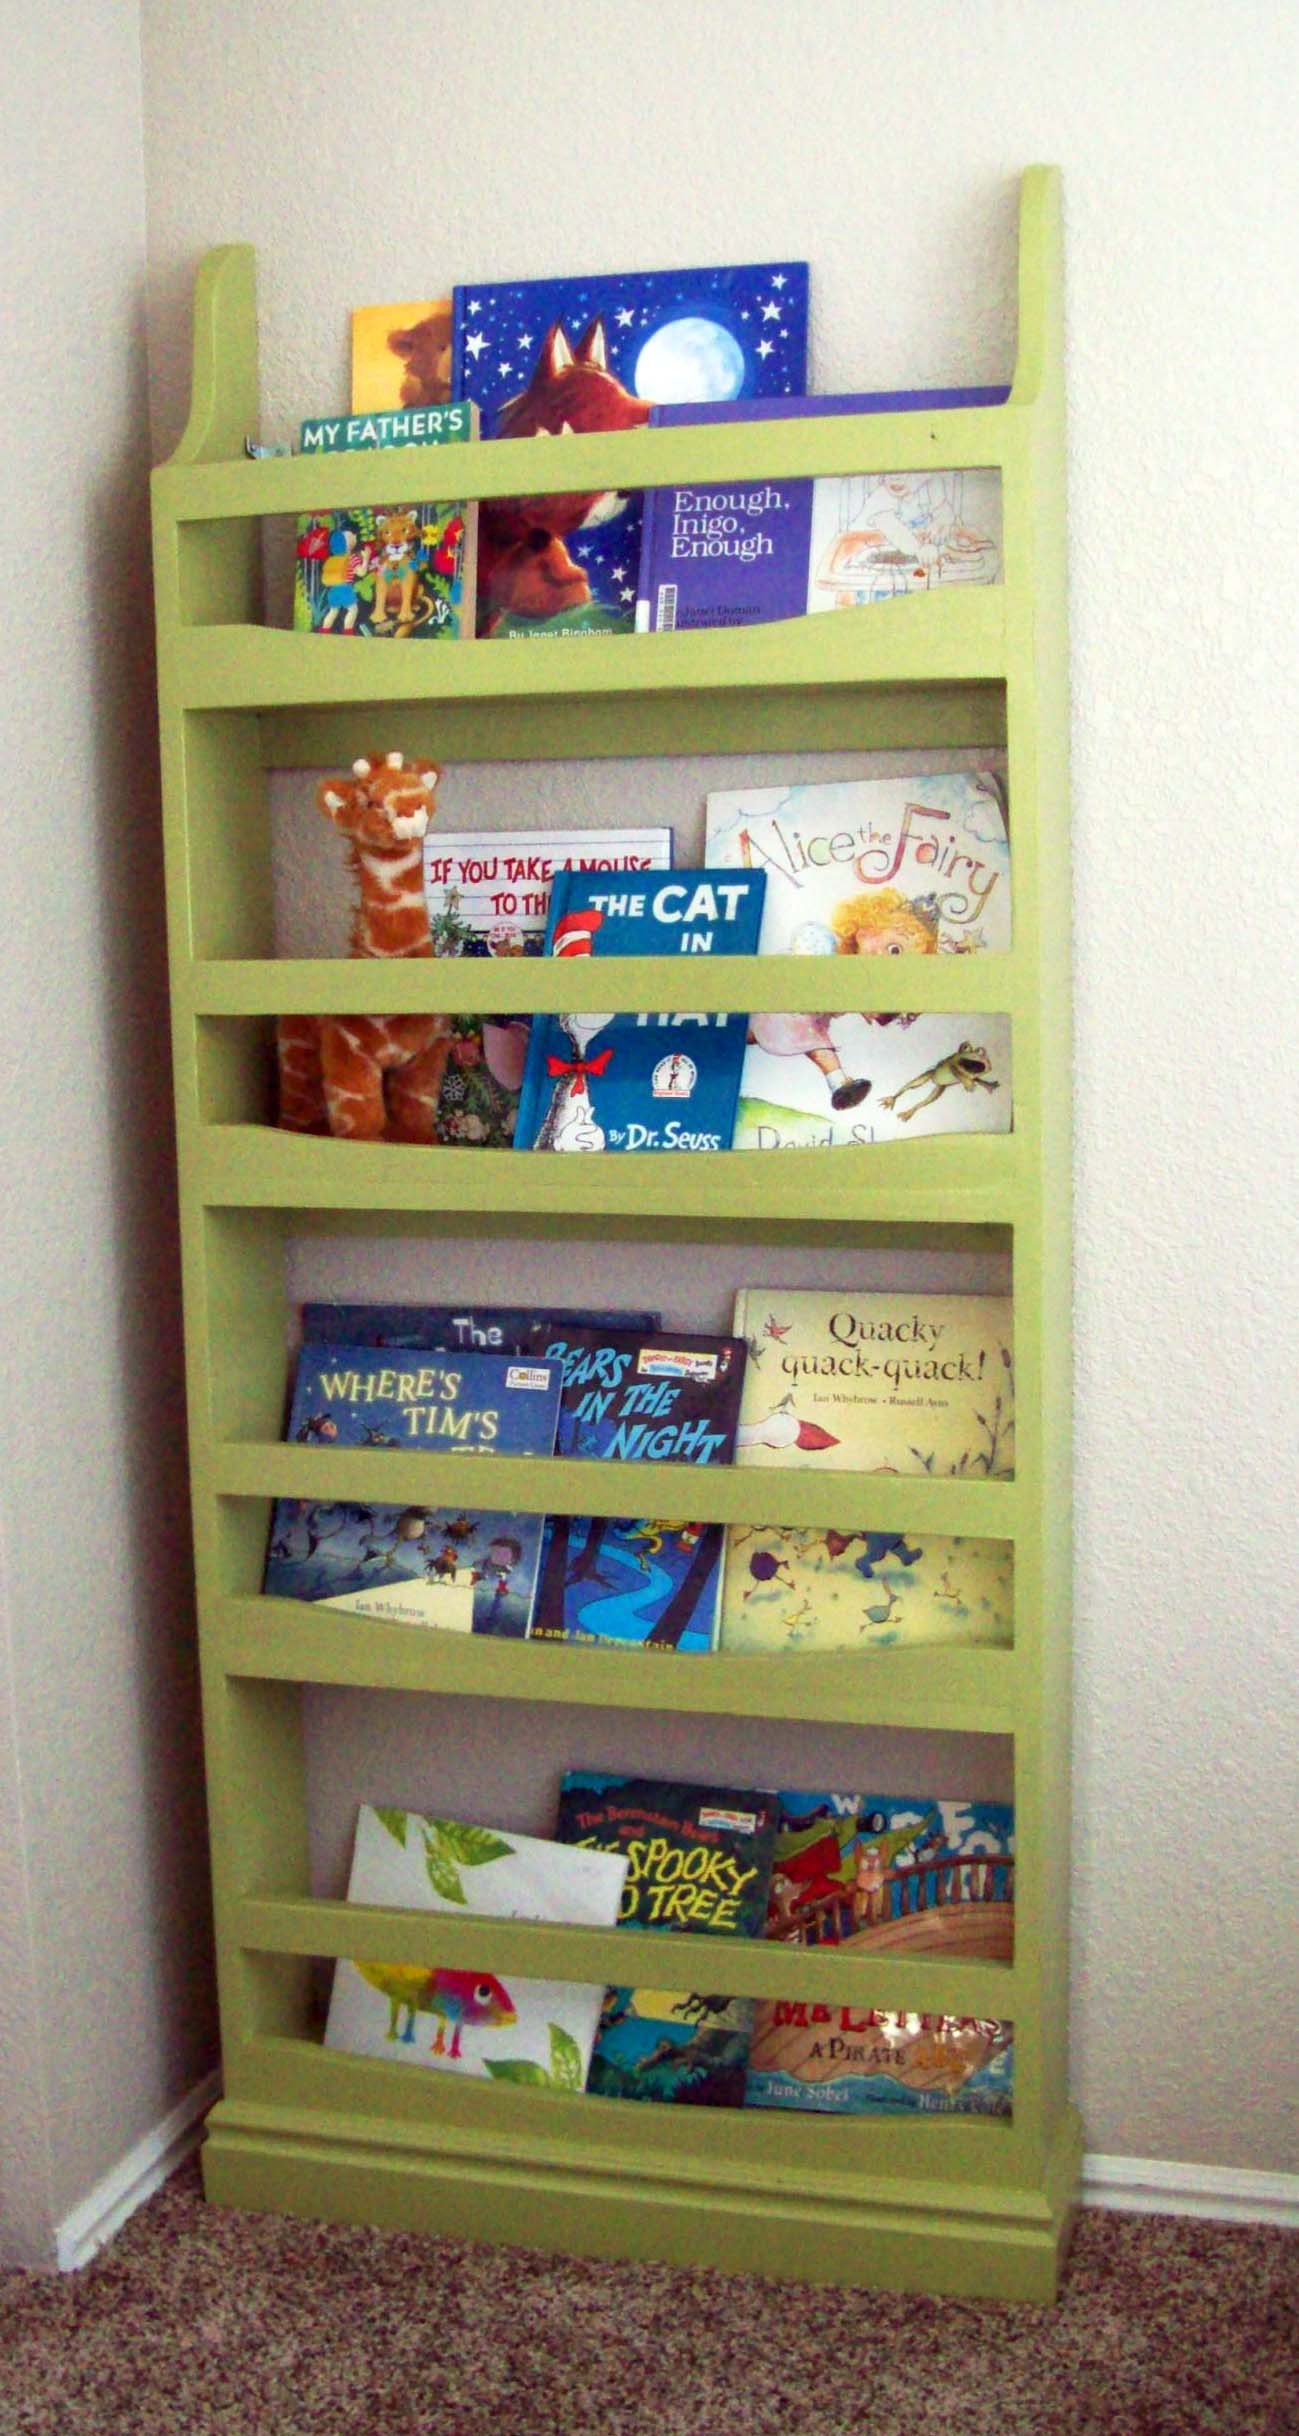
Inside is a lift up storage bench (with crate below for extra storage); a toy/book shelf unit; and his desk. He is currently using his lounge chair, but has already asked that I build him a real office chair - one that has wheels and turns around. I guess that's my next build.

This took about two weeks from start to finish.

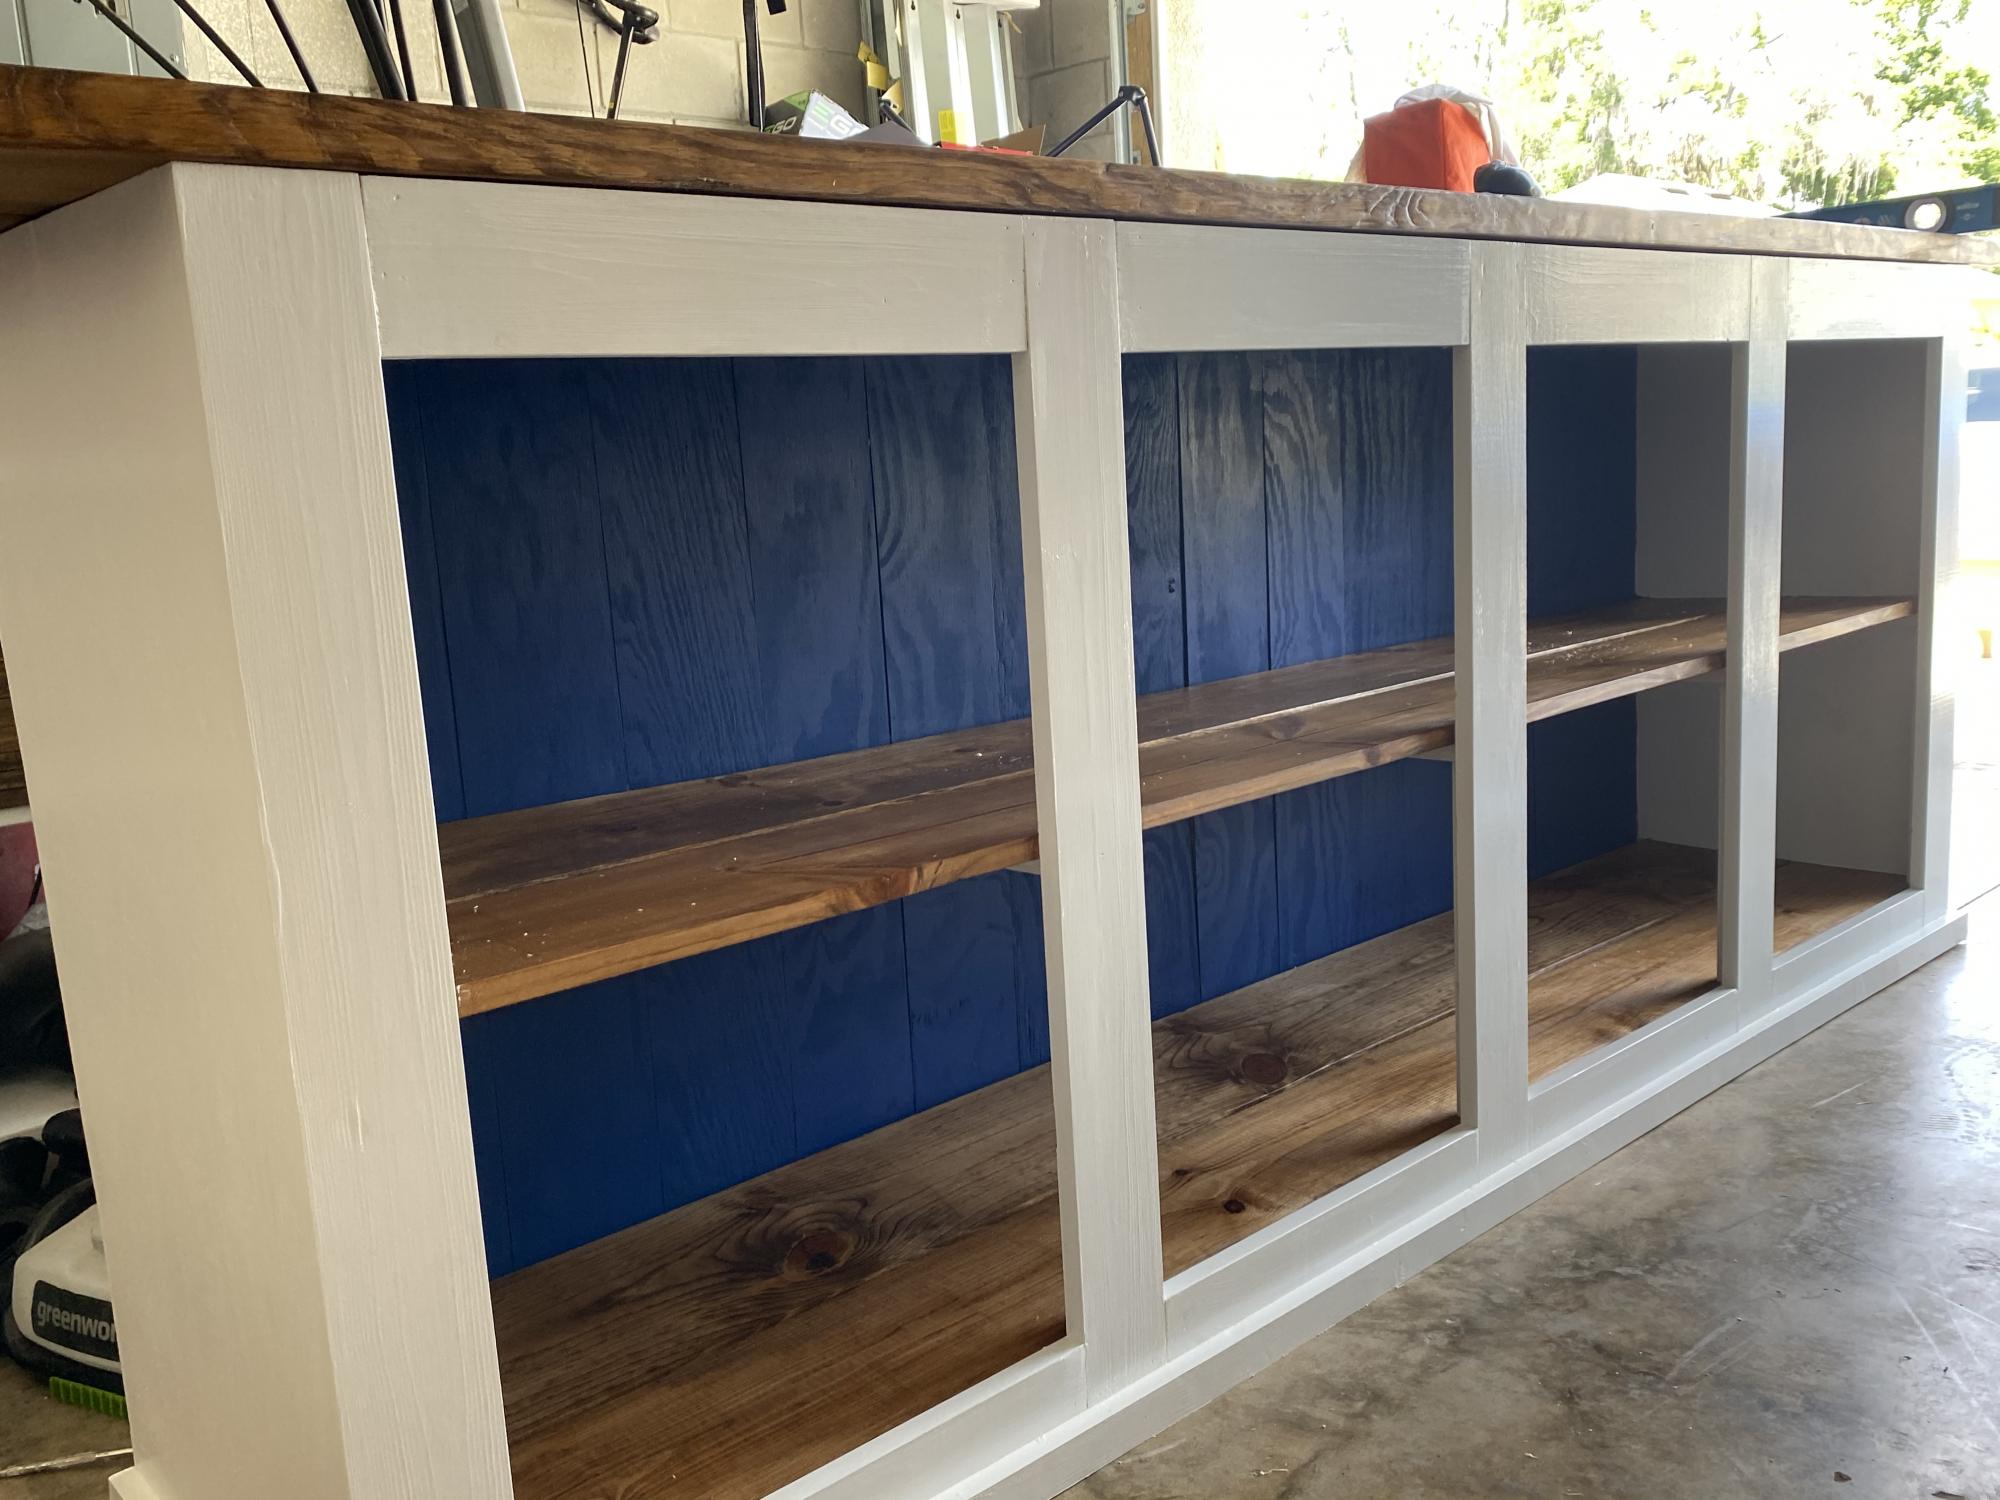
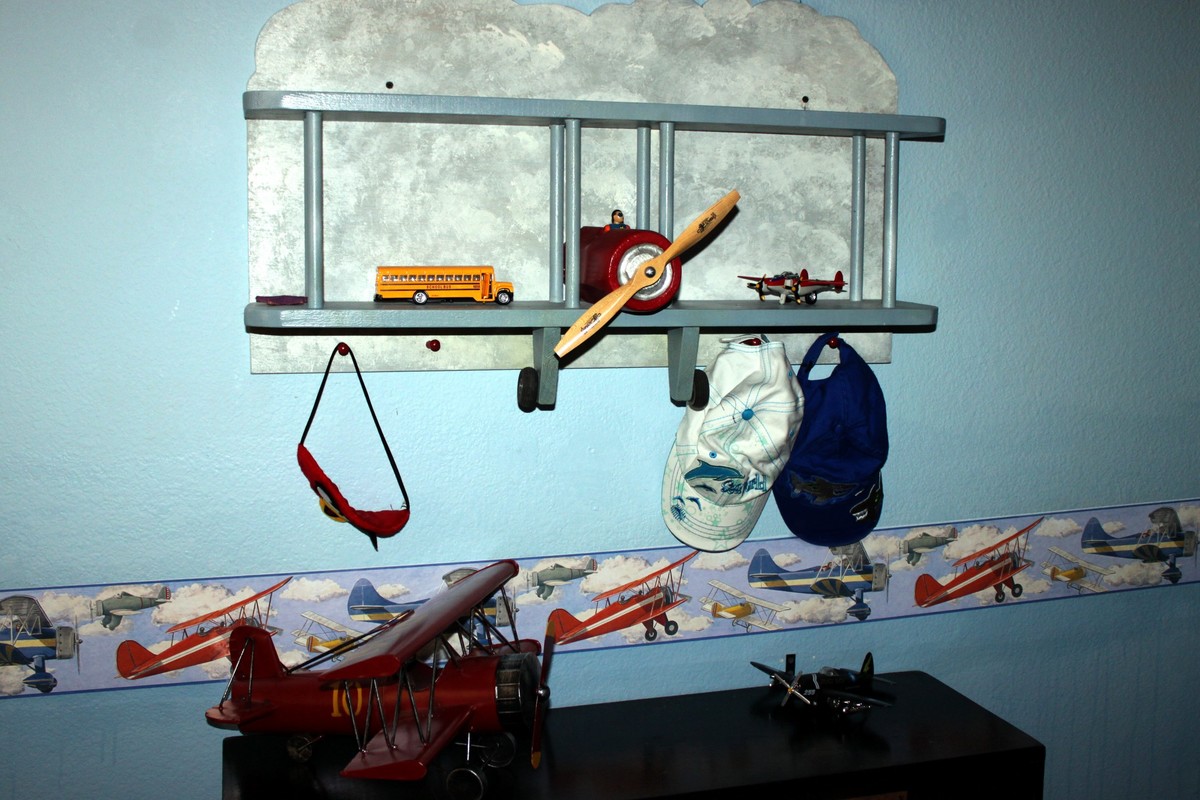
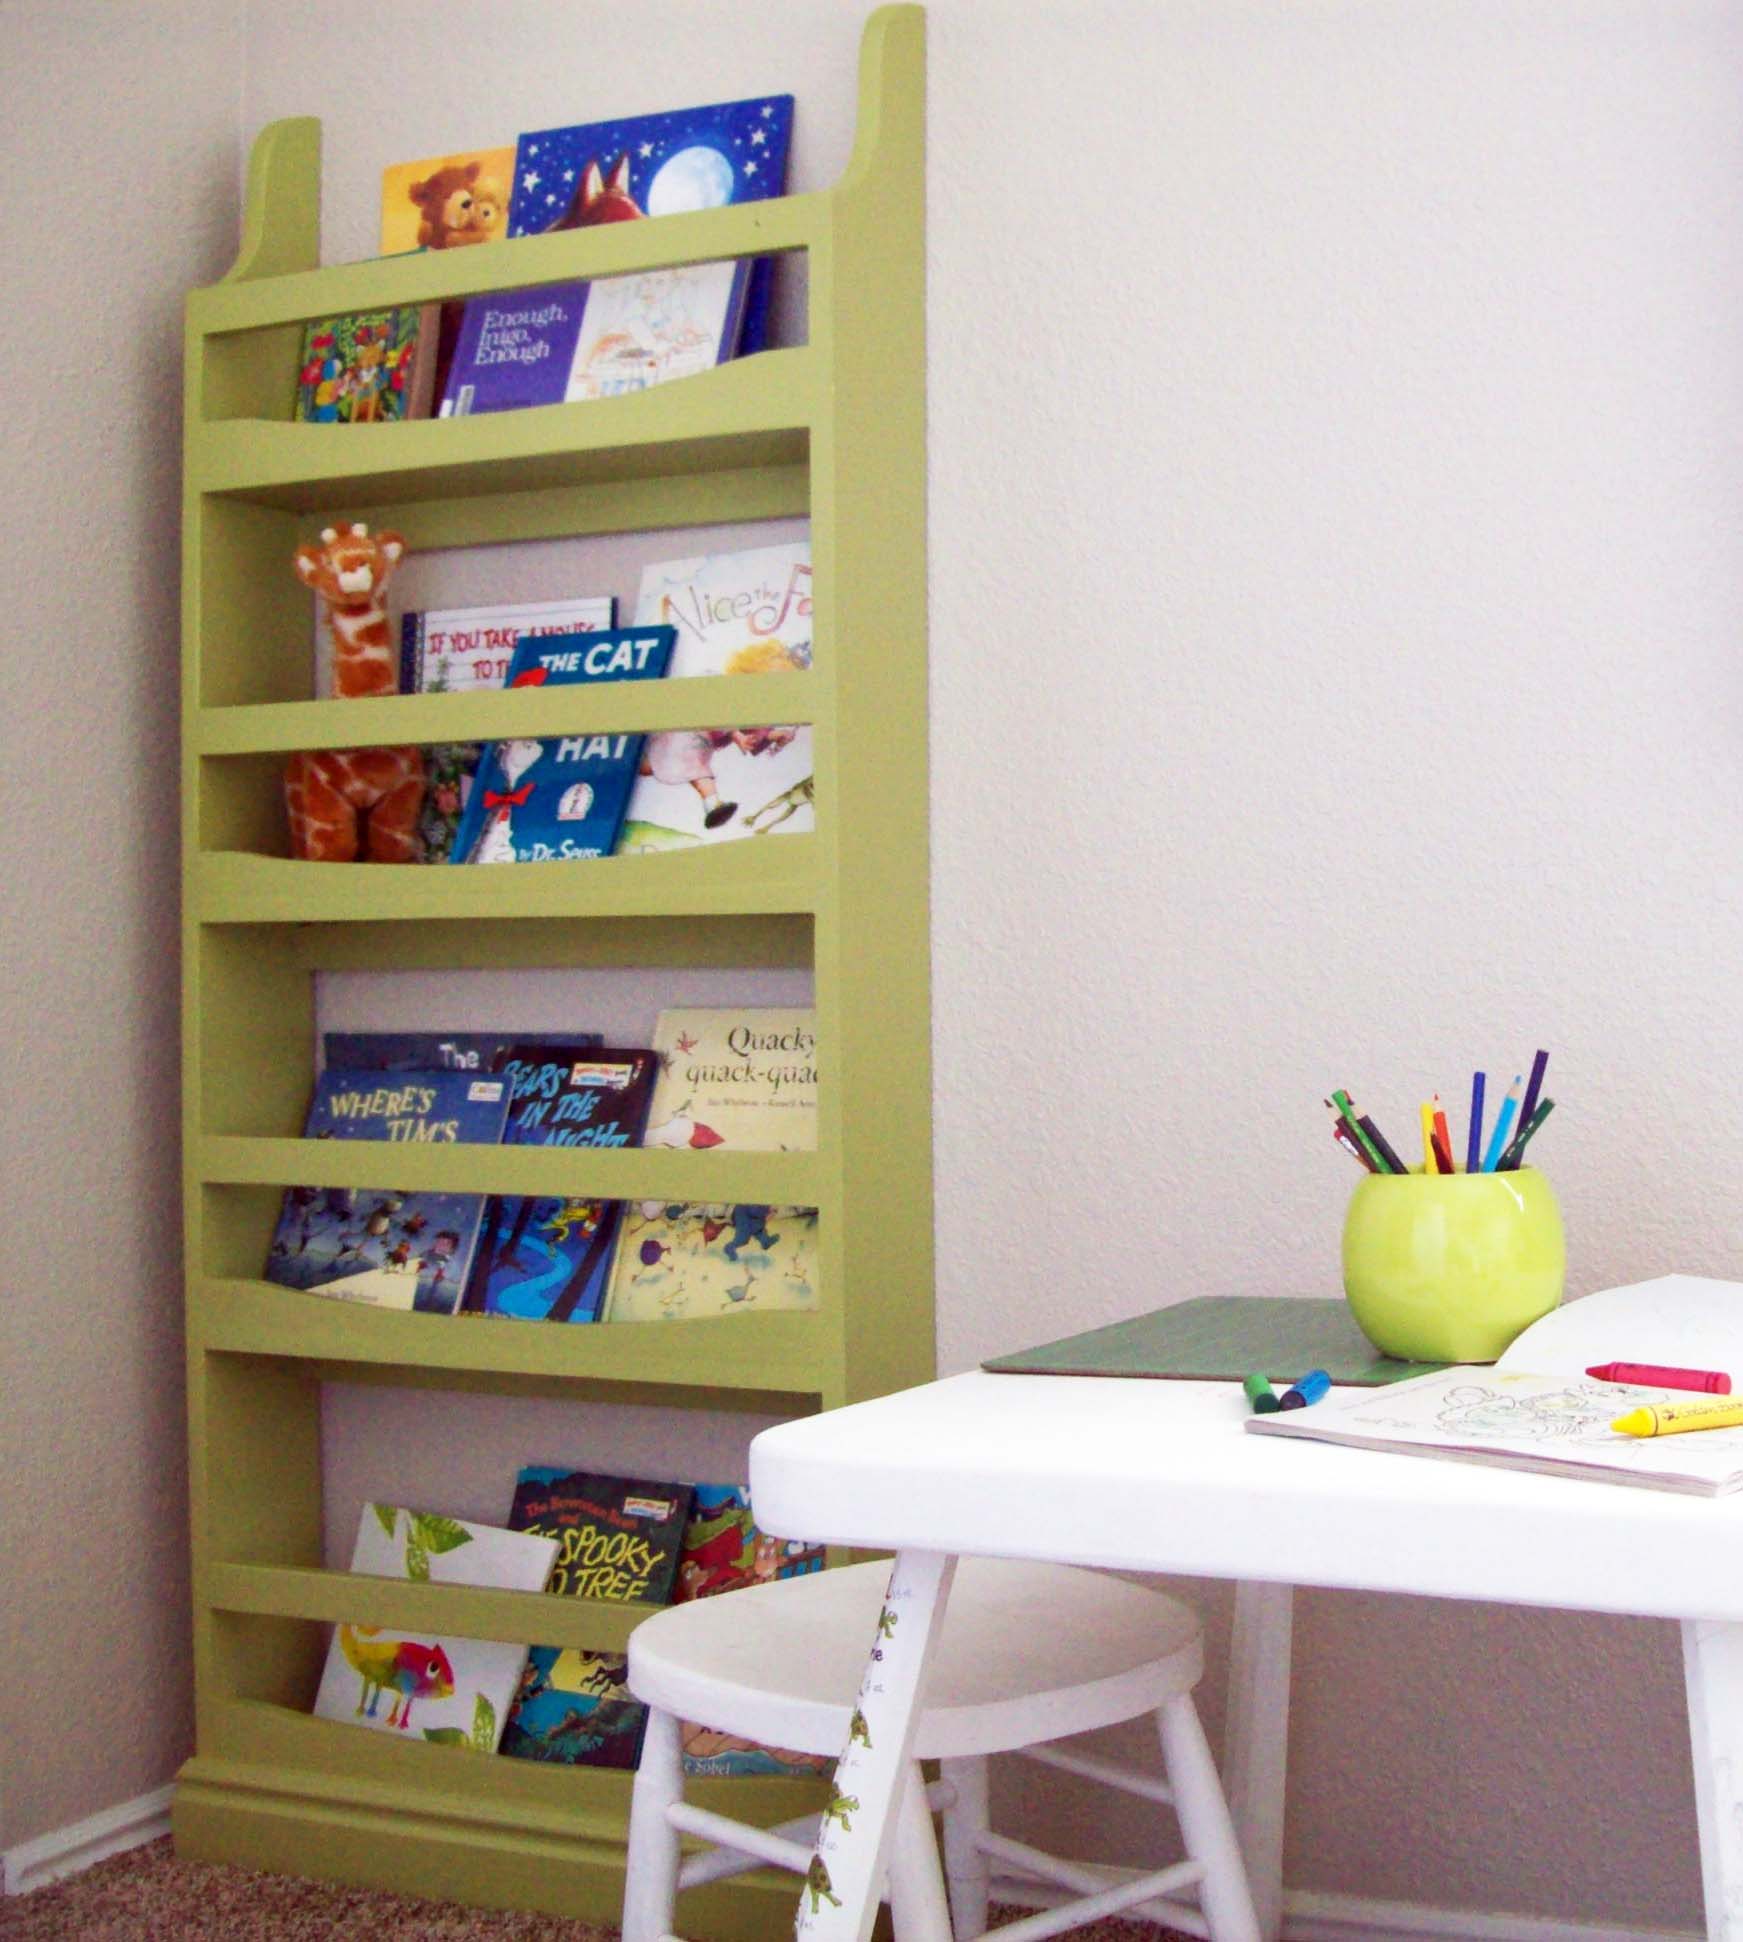
The last photo is of the Bi-plane shelf that I built last year and didn't get to put up until now. I was ill for the entire year and was finally able to start woodworking again this year - and I am so happy. A lot of plans have been posted and I'm anxious to play "catch-up".

Estimated Cost
$500.00
Estimated Time Investment
Week Long Project (20 Hours or More)
Recommended Skill Level
Intermediate

Comments

spiceylg

Wed, 03/20/2013 - 05:37

Wow, this is beautiful! You did a wonderful job. I love all of the details! I am also glad to hear that you are well again and able to do something you love. What a blessing!

bhoppy

Wed, 03/20/2013 - 08:13

That is one amazing bed!! I love all the little details you added! I'm sure your grandson loves it!!

porter46

Sun, 11/01/2015 - 12:47

This is beautiful! So much detail! I love this project!

Simple Chairs with some color

Submitted by Anonymous (not verified) on Tue, 04/13/2021 - 10:10

My son and I conquered this project over the winter. Cut all the pcs and the assembled 4 chairs for less than $150.

Built from Plan(s)

Comments

Living Room Wall Makeover

Submitted by djolly1231 on Sun, 05/30/2021 - 10:36

We have lived in our home for 2 yrs now and have been trying to figure out what we wanted to do with the plain boring wall with cords handing from out behind the tv due to no power outlet on that wall. We finally decided to do the whole wall in shiplap but the the cost of lumber going through the roof I went with 1/4 underlayment that I had ripped down to 6in strips at my local hardware store. I cut them down to size with my miter saw the painted them white before I attached them to the wall with 1 1/4 brad nails and used nickels for my space in between each row. The cabinets are 36 in tall. The carcass is made fro 3/4 in MDF and the face frames are made from 1x3 pine and attached with wood glue and brad nails. Cabinet doors are made from 1x4 pine for the frame and 1/4 underlayment for the center. I used my hand router to route out a 1/4 deep groove for the center to drop into the frame I used wood glue and brad nails to attach it to the frame and filled in any gaps with paintable caulk. They are attached to the studs in the wall with 3 in wood screws. The mantle is made from 1x6 pine boards and attached to a wall bracket made from 1x6 that are attached to the wall in each stud with 3 in wood screws. The mantle is attached with wood glue and 1 1/4 brad nails. The shelves were made out of 1/2 Poplar 4x8 plywood sheet ripped down to size. The wall brackets are made from 1x2 pine attached to studs with 3 in wood screws. And the shelves are attached with wood glue and 1 1/4 brad nails. I added 3 1x2 spacers to each shelf between the top and bottom board to prevent them from sagging before attaching the face of the shelves with wood glue and 1 1/4 in brad nails. This project took about a month to complete because I worked on it during free time. Also this was the first major build I have ever done so I was also learning along the way. Some parts were frustrating but most of it was fun and a great learning experience. Also this project evolved as I was building it. My wife loves the finished product. Now it’s time to find my next project.

Estimated Cost
500
Estimated Time Investment
Week Long Project (20 Hours or More)
Finish Used
Dark walnut stain. Valspar Ultra in eggshell and ultra white for the color of the cabinets , shiplap and crown
Recommended Skill Level
Intermediate

Comments

DIYGina

Tue, 12/05/2023 - 11:47

Surprisingly makes your living room appear so much larger compared to the before picture! Thank you for sharing your photos with us and congrats on a great result!

Rustic Display End Tables

Submitted by Anonymous (not verified) on Sun, 06/06/2021 - 18:09

These rustic display end tables were built using the “Rustic X End Table” plan, with an added twist! The fronts and two sides are all glass enclosed with barn wood backdrop and bottom.

Built from Plan(s)
Estimated Time Investment
Weekend Project (10-20 Hours)
Finish Used
Minwax Classic Gray with Polycrilic Clearcoat
Recommended Skill Level
Intermediate

Baby proof

Submitted by shoak on Thu, 02/26/2015 - 12:02

We just recently had our first child and decided we needed to protect our electronics a little better from the soon to be mobile baby. Turned out great! I highly recommend leaving the back off until the piece is completely stained or painted. It takes up less floor space and the tv is totally out of reach of little hands. We customized the shelf heights to fit the sound bar and computer perfectly. I was so excited when I stumbled across these plans looking for a new tv stand. Everything I found either wouldn't fit my computer     Or didn't have doors. Love it!

Built from Plan(s)
Estimated Cost
$200.00
Estimated Time Investment
Weekend Project (10-20 Hours)
Finish Used
Minwax stain with two coats of satin polyurethane
Recommended Skill Level
Intermediate

Comments

Doll crib

Submitted by DWolf on Sat, 04/13/2013 - 15:46

After building the playhouse loft bed recently, I whipped up the fancy doll crib for my daughter. My mother made a beautiful pillow and quilt to match the one of my daughter's bed.

Built from Plan(s)
Estimated Cost
$13
Estimated Time Investment
Afternoon Project (3-6 Hours)
Finish Used
White all purpose paint
The tiny rails are a bit tricky to paint. A paint sprayer would definitely help!
Recommended Skill Level
Beginner

Adirondack Chairs

Submitted by JoanneS on Thu, 04/25/2013 - 18:12

These sturdy chairs are a wonderful replacement for plastic deck chairs! They are nice and heavy, and won't blow over in a storm! This project is a mix of Ana's Adirondack Chairs and the Simple Outdoor Lounge Chair. I combined ideas from the two plans to use the extra lumber we had left over from an outside project from last year. Left-over lumber included some 2x4 for the bottom frames, some 5/4 decking board for the seat, back, and arms, and a few balusters at the back. Most of the lumber was left over, so I only had to spend $20 for 2 boxes of Kreg screws and 2 pc 5/4 x 8 decking board. Finished with some left over exterior latex semi gloss paint. This was a fun weekend project - built the chairs on one day, and finished the sanding and painting the next day. My next project is a little outdoor table to go with them, and I have a few scraps left over to use for that. These chairs have received lots of compliments, and we've given Ana's web site name to several admirers. Ana, thank you for your wonderful plans!

Estimated Cost
$20
Estimated Time Investment
Weekend Project (10-20 Hours)
Finish Used
Ace Royal exterior semi-gloss paint in navy blue (left over paint from about 5 years ago, was color-matched, so it doesn't have a name).
Recommended Skill Level
Beginner

Comments

mepaganjr

Sun, 09/28/2014 - 10:46

I don't see any plans for this chair.  Is it possible to get them?

JoanneS

Sun, 09/28/2014 - 18:15

Hi Mepaganjr,

I used the plan for the Simple Outdoor Lounge Chair

http://ana-white.com/2010/05/plans/simple-outdoor-lounge-chair

as my guide for the seat part, and the slant of the back,

and used Ana's Adirondack Chair

http://ana-white.com/2010/05/furniture-plans-adirondack-chair-ana.html

as the inspiration for the tall chair back and front legs.  I did several adjustments to fit the mixture of sizes of 2x and 5/4 scrap wood that I had available.   I traced a paint can lid to make the curve on the top of the chair backs.

A great plan that has a similar seat and legs is the Adult Adirondack Chair, which is in Ana's book, The Handbuilt Home, on page 174.  That's a great plan because it only uses six 1x4's an one 1x2.  If I hadn't been using up the mixed scrap lumber, I would have used the Adult Adirondack Chair plan.  

Happy building!  :)  Joanne

Sandbox w/ Built In Seats

Submitted by Anonymous (not verified) on Wed, 06/14/2017 - 07:30

I have built some other stuff before, but not with paint and sanding and such. It was definitely a great learning project. There are imperfections, but it's a toy, so kids will be having fun and that is all that matters.

Built from Plan(s)
Estimated Cost
$100... but, the paint will be used on other projects, and I paid for better boards for on top.
Estimated Time Investment
Weekend Project (10-20 Hours)
Recommended Skill Level
Beginner

Comments

Rustic Wine Rack

Submitted by tedgray86 on Wed, 03/18/2015 - 21:53

Ask for materials and how to

Estimated Time Investment
An Hour or Two (0-2 Hours)
Recommended Skill Level
Beginner

Chicken Tractor

Submitted by Cliffhorn on Thu, 05/02/2013 - 07:26

A friend of mine got two baby chicks and needed something for them to live in. She also wanted to be able to move it around the yard so they could have freah grass to be on. It uses 2x4s, 3/4 plywood, chicken wire, and plastic roofing. It was a fun build.

Estimated Time Investment
Day Project (6-9 Hours)
Recommended Skill Level
Starter Project

Comments

Outdoor Bench

This was my very first project I tackled from Ana's site. I wanted to see if I could do it, so started with something easy. I think it turned out great and looks great in our flower bed in front of our house.

Estimated Time Investment
Weekend Project (10-20 Hours)
Finish Used
I primed it, painted it red then sanded it down in spots and rubbed stain to give it aged look.
Recommended Skill Level
Starter Project

Mail Box

I used Ana's plan to make this mailbox for my daughter. I altered the plan a bit from the original. The hardest part was cutting the curve at the top sides, and putting on the door with a toddler helping! This piece is VERY LOVED by my daughter, and gets LOTS of play!

Estimated Cost
about $20 including lock and hinges (I used scrap wood pieces.)
Estimated Time Investment
Afternoon Project (3-6 Hours)
Finish Used
Paint, decoupage
Recommended Skill Level
Intermediate

Farm table

Submitted by Anonymous (not verified) on Mon, 10/11/2021 - 15:33

First attempt ever at building anything! Probably took me a lot longer than it should have, but I'm very proud of the result

Comments

Three 4'x8' Raised Cedar Beds for $45 total.

Submitted by amberhibbs on Fri, 04/01/2011 - 13:41

I finished these last weekend and finally took pictures.

I found 44 5' cedar pickets on craigslist for $30 and built these raised beds. I built them according to Ana's instructions except I made them bigger (4'x8'). Since my boards were 5' long I couldn't span the entire length and went with a brickwork style overlap so there wasn't one seam in the center or a weird off-center seam. And, of course, I blogged about it.

Estimated Cost
$15 per bed, $45 total
Estimated Time Investment
Weekend Project (10-20 Hours)
Finish Used
None.
Recommended Skill Level
Intermediate

Dream Bookshelves!

Submitted by Anonymous (not verified) on Sun, 12/26/2021 - 12:32

When supply issues made buying lumber for my dream shelves nonsensical, I turned to Ana's Shelfhelp and Voila!! I built the base on my own and added my own moulding, but without Ana's sites, I would not have made this dream come true. THANK YOU!

Comments