Community Brag Posts


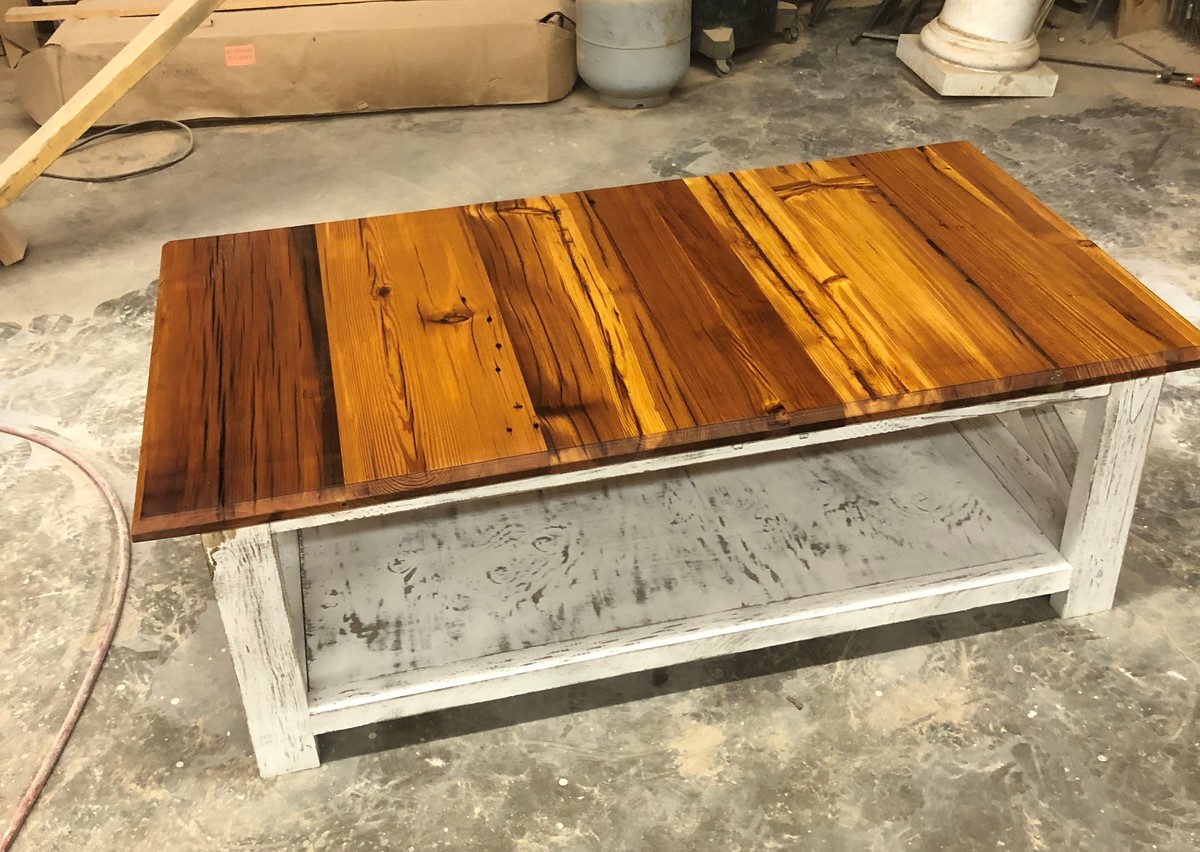
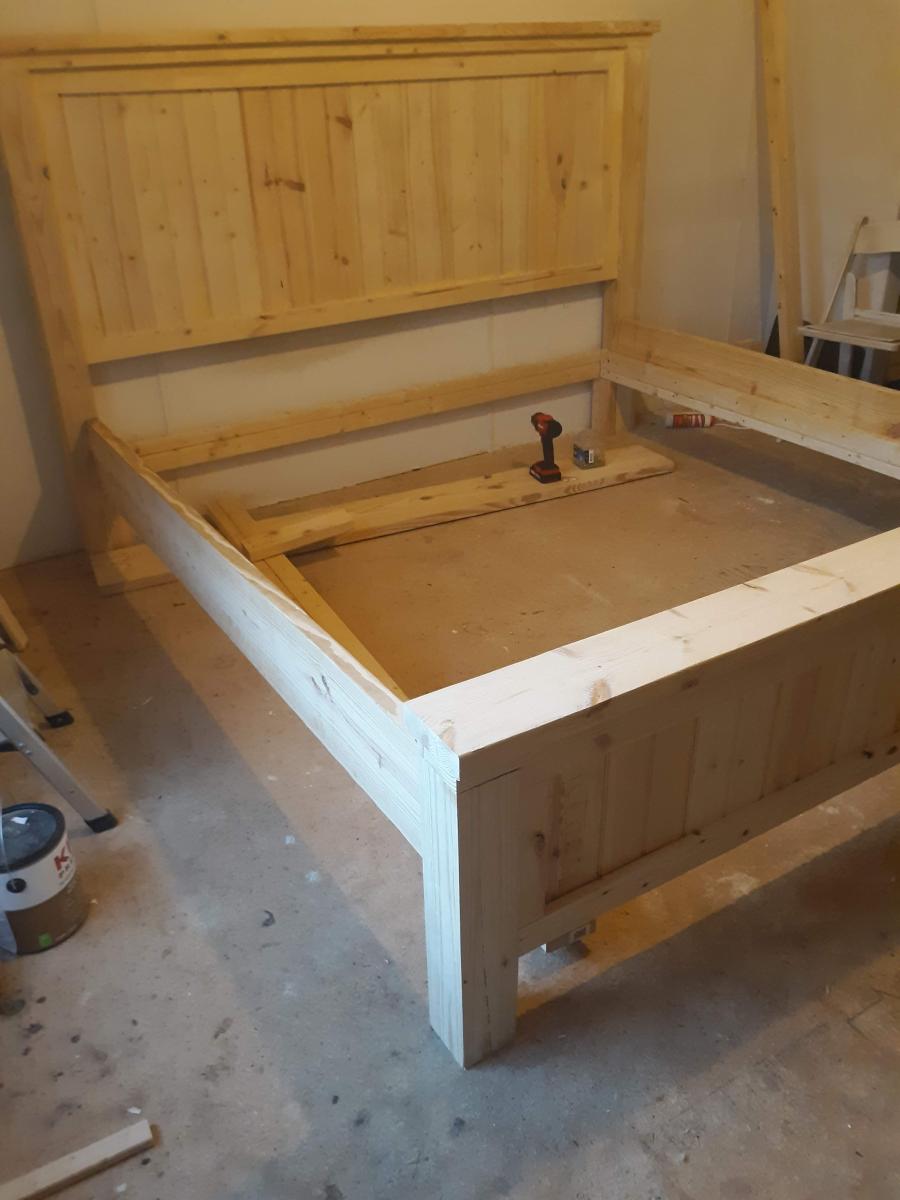
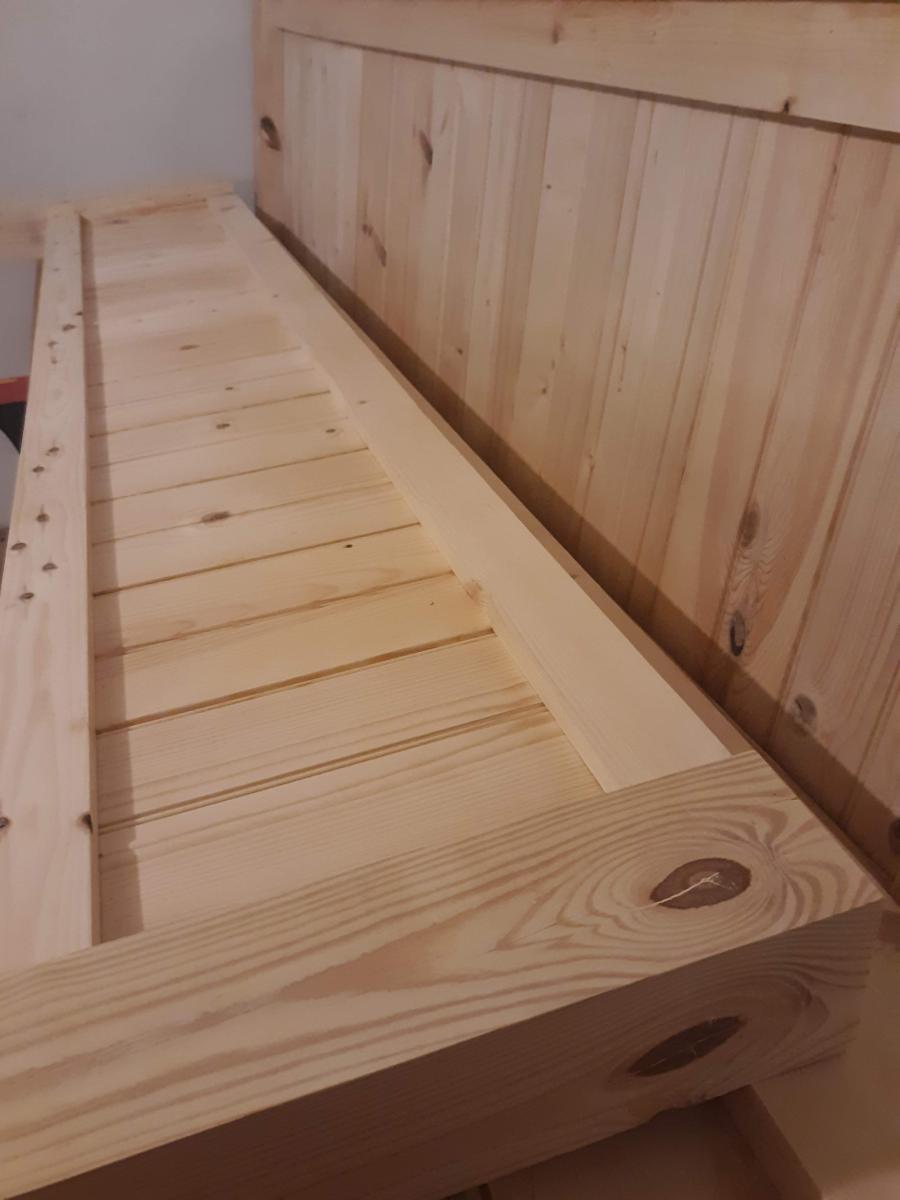
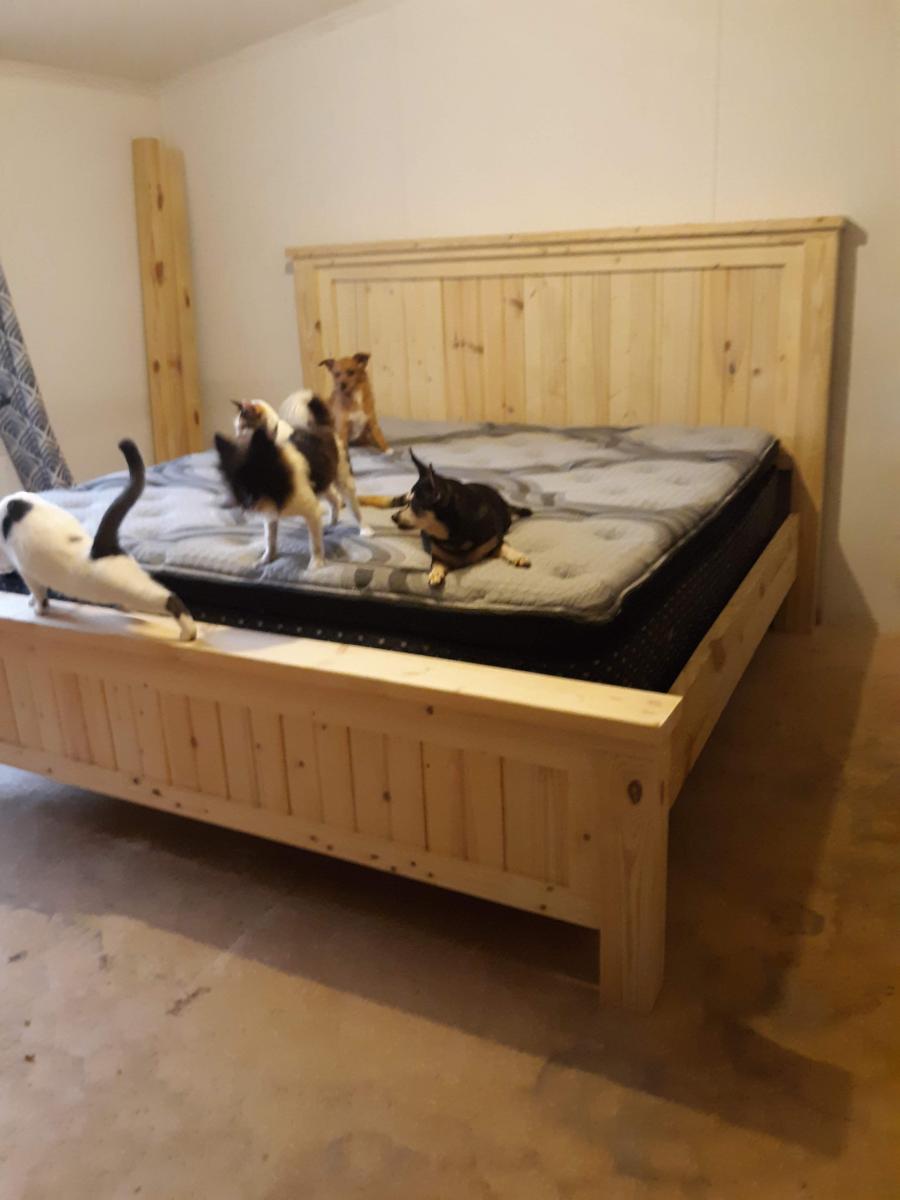
King farmhouse bed
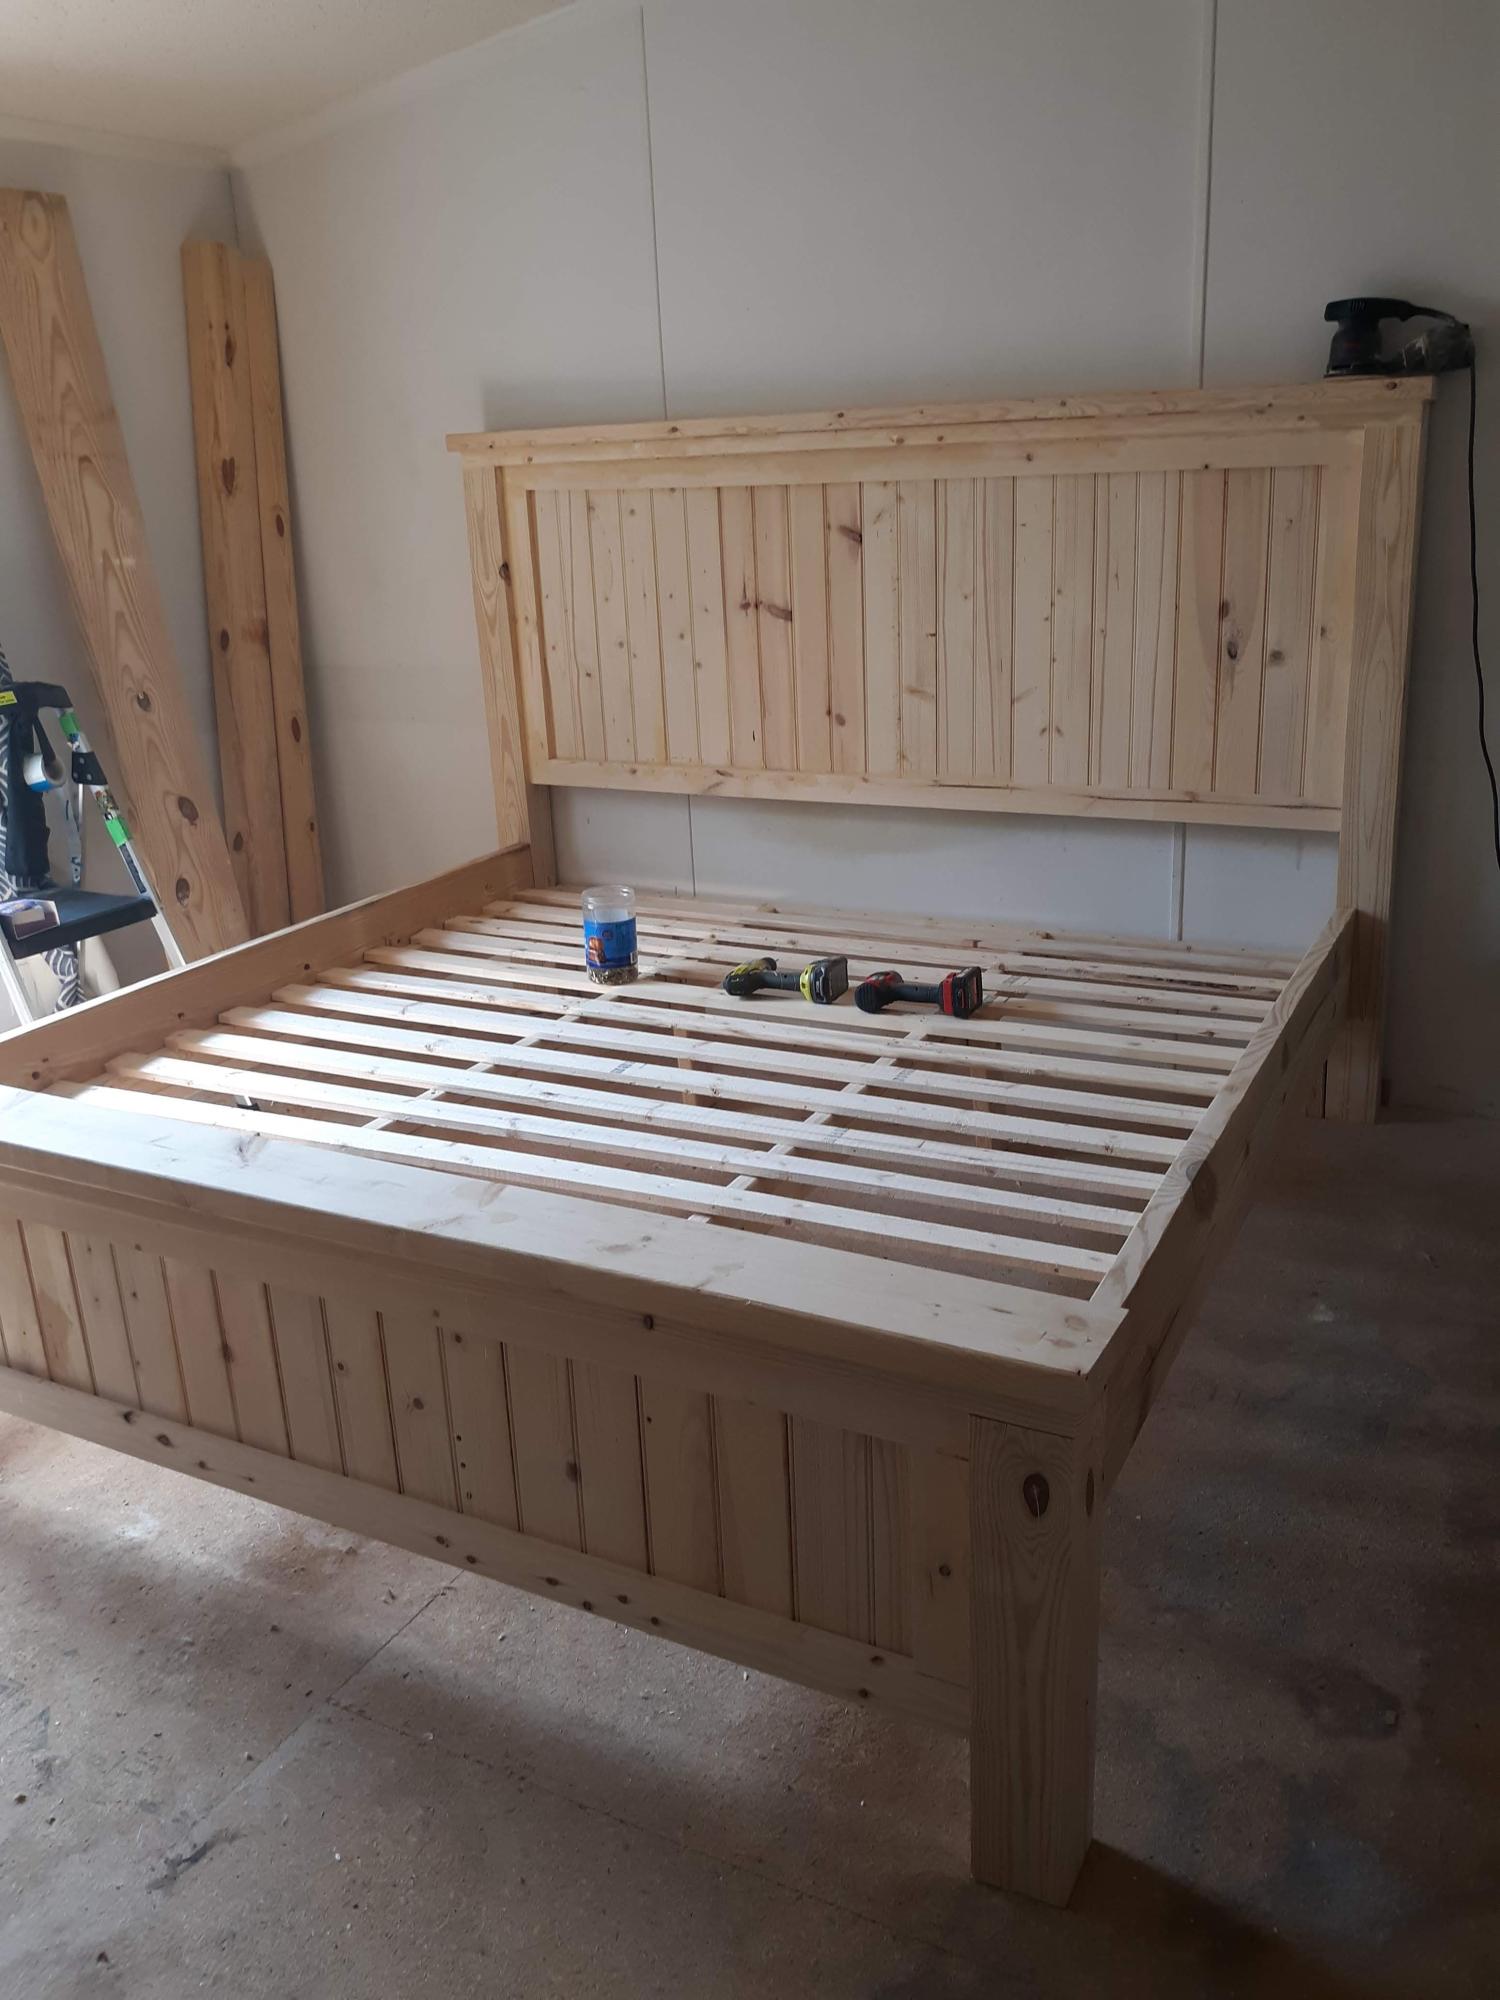
Always wanted to build my own bed frame and this was it. Let me start out by thanking Ana, for her great plans. I also wanted to say that even with lumber prices at high prices, does not mean quality lumber! The big box stuff took a lot of prep to become workable. I purchased the 4x4 posts from a local guy with a small saw mill. They were actual 4x4 inch, so some measurements needed to be adjusted.
Very satisfied with the outcome as visible by the inspectors in the last picture! Our plan is to finish it in a flat whitewash finish topped with a matte poly. This piece of furniture is stout and will last generations.

Built from Plan(s)
Comments
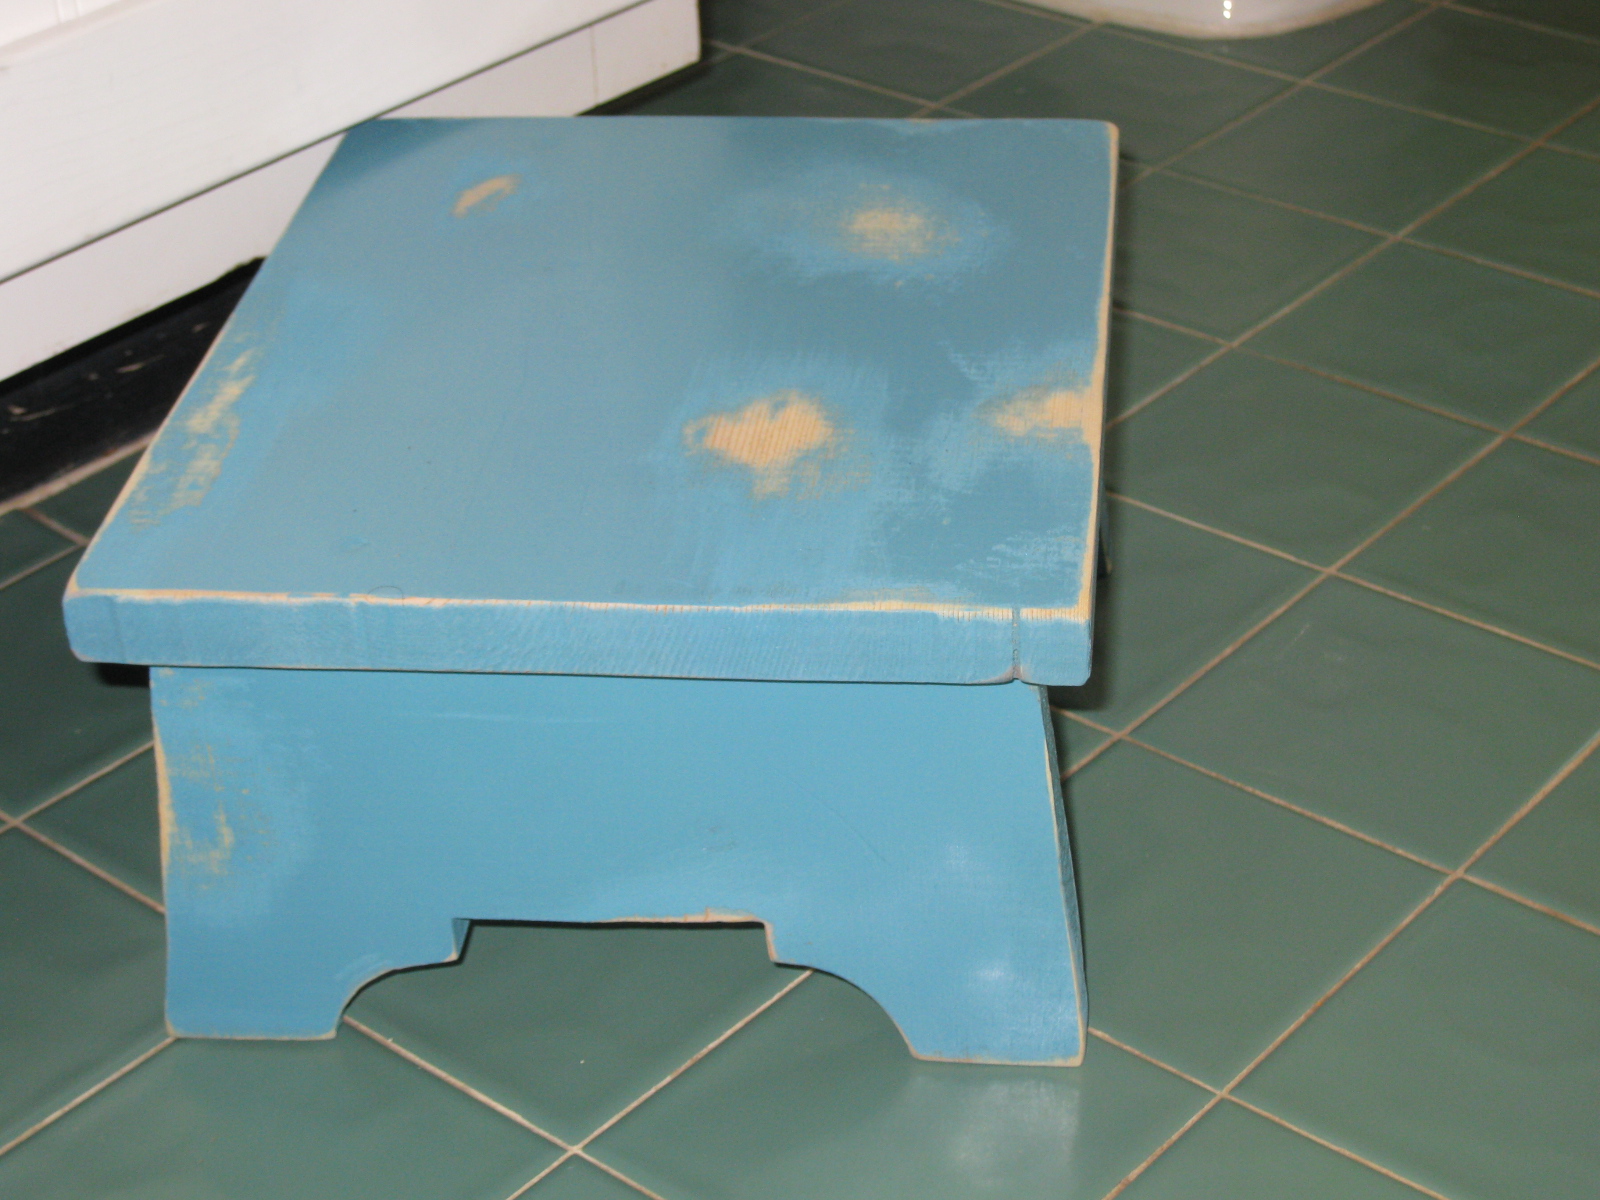
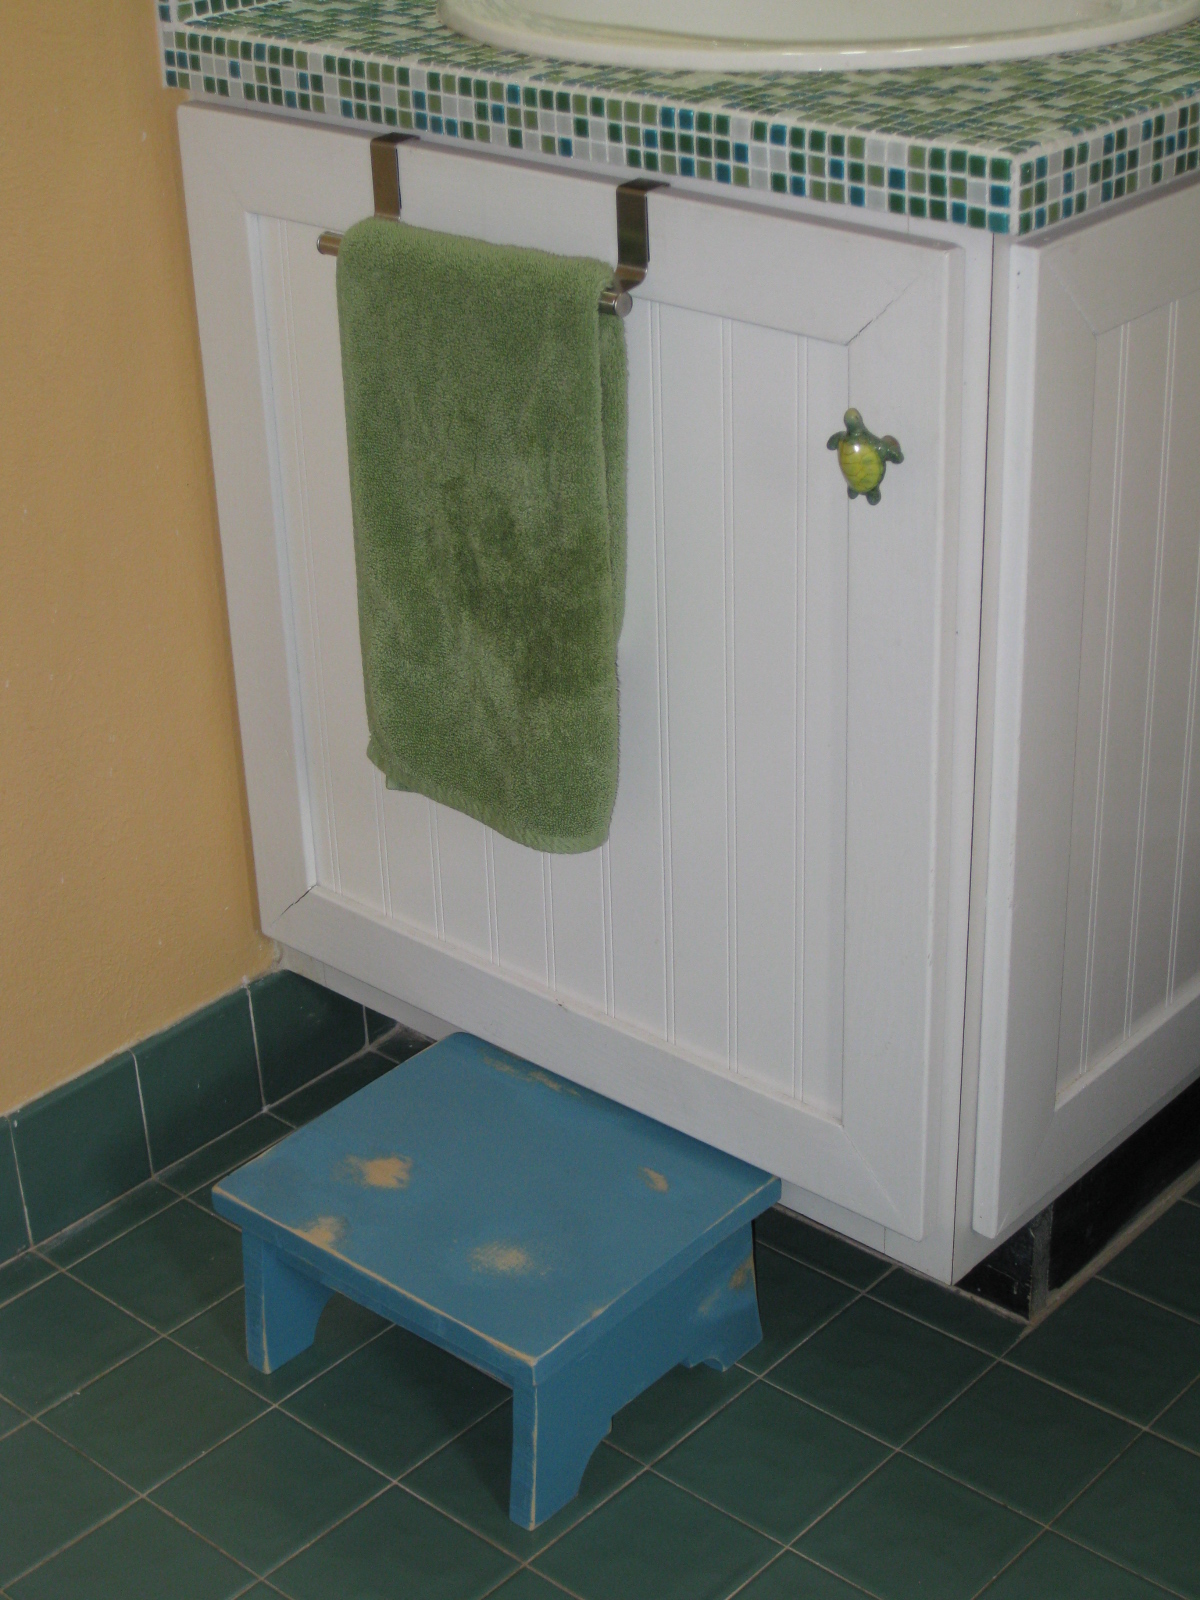
Single Step Stool
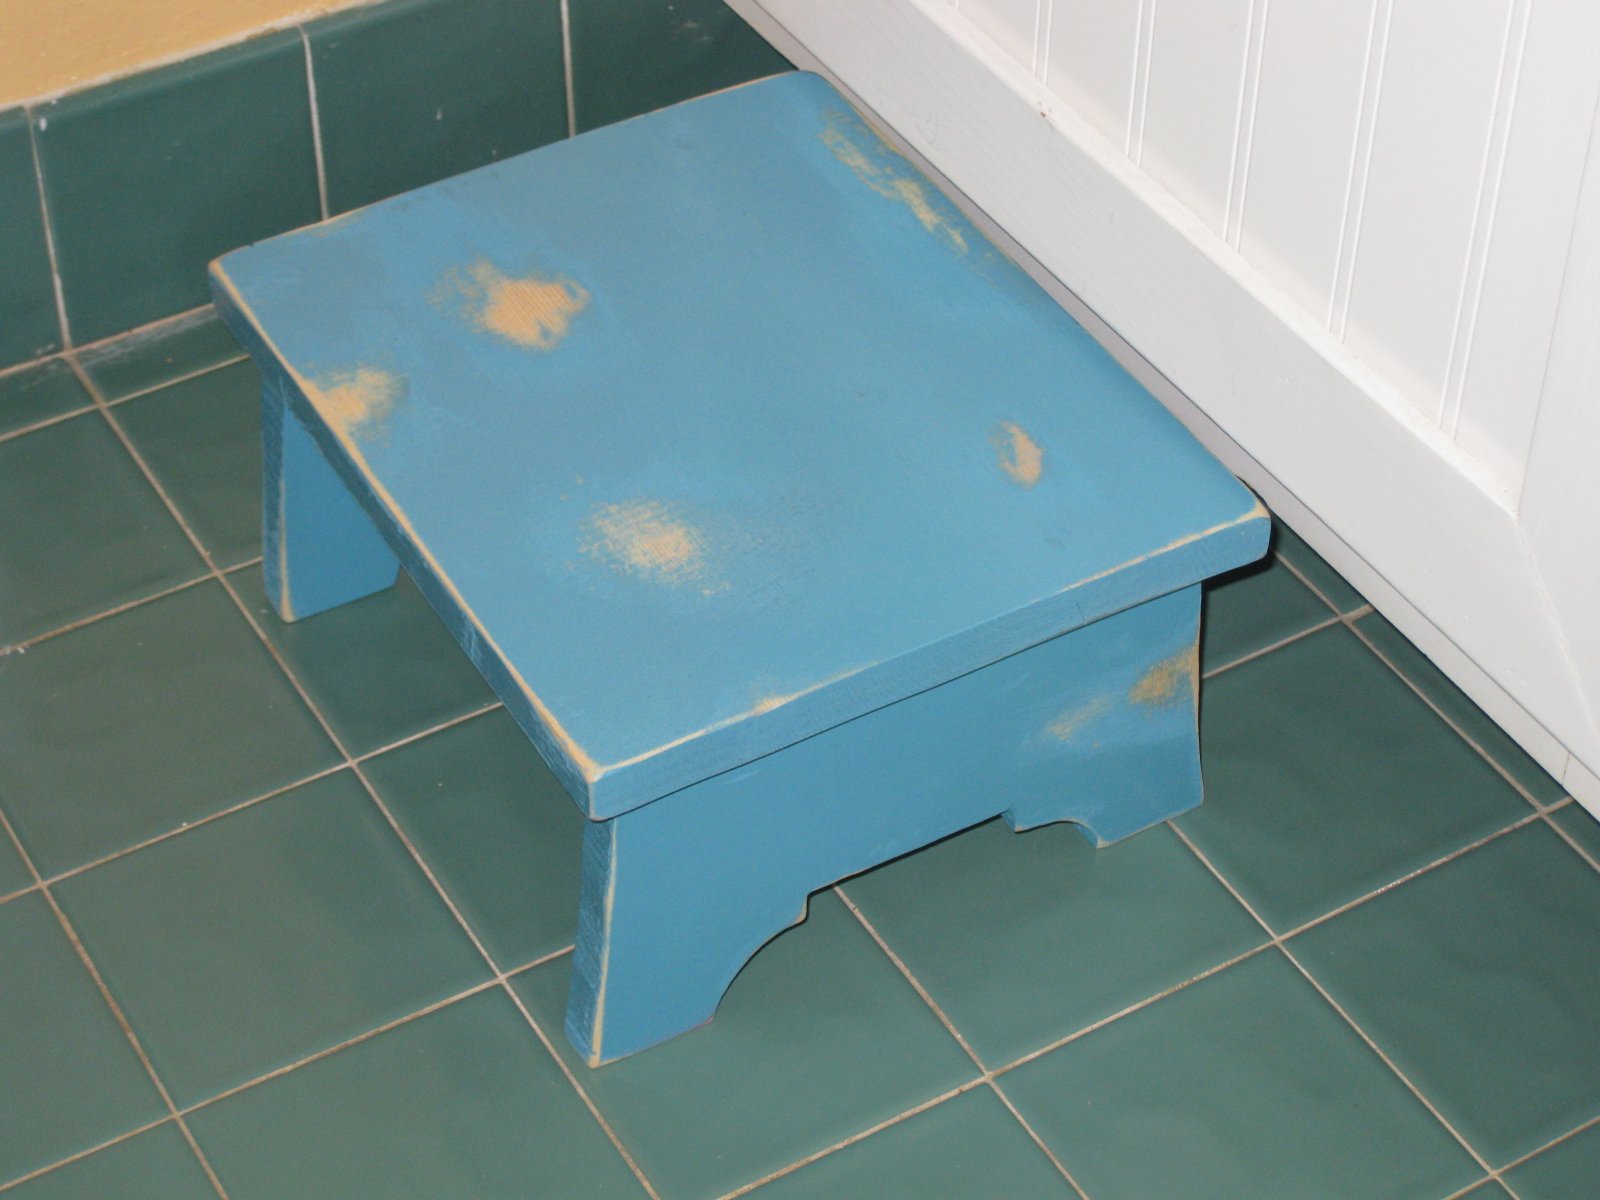
I really loved the inspiration Vintage Step Stool when I saw it but what I really needed was a single step step stool to place in front of the sink vanity in our downstairs bathroom. I have had a cheap plastic Sesame Street one there for the longest time but I hate it because it's so, well, baby-ish! Also, I wanted something that was only 5.5" high so that we could still open the vanity door without the step stool getting in the way and without having to move the step stool first. So, I printed out the plans for the Vintage Step Stool and I played around with it - I drew my version, then drew it again using MS Publisher and printed out a template for the sides. I used a 1 x 8 x 4 to cut the sides and top and a 1 x 2 x 4 to cut three supports. I also splurged and bought a pocket hold jig jr.!! I used a jigsaw to do ALL of my cutting. The completed size is about 9.5"d x 11"w x 5.5"h. This is the first thing that I have ever designed and built myself and I just have to say that I am sooooo proud of myself!! I can't wait to show my dad!

Estimated Cost
$20 (not incl cost of jig)
Estimated Time Investment
An Hour or Two (0-2 Hours)
Finish Used
I used spray paint
Recommended Skill Level
Starter Project
Comments

Tue, 06/07/2011 - 11:14
Perfect fit for your space
Perfect fit for your space and love the finish! Turned out so good! Love it!
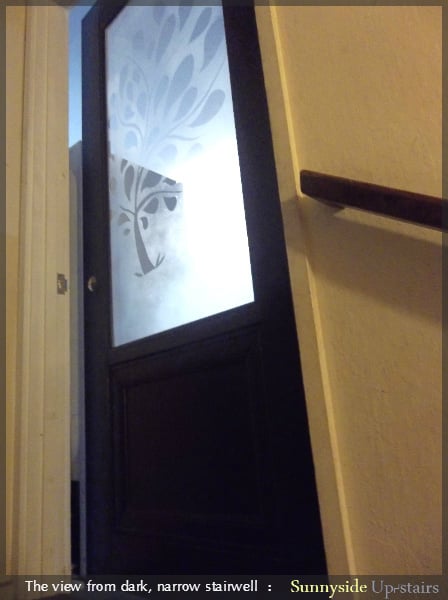
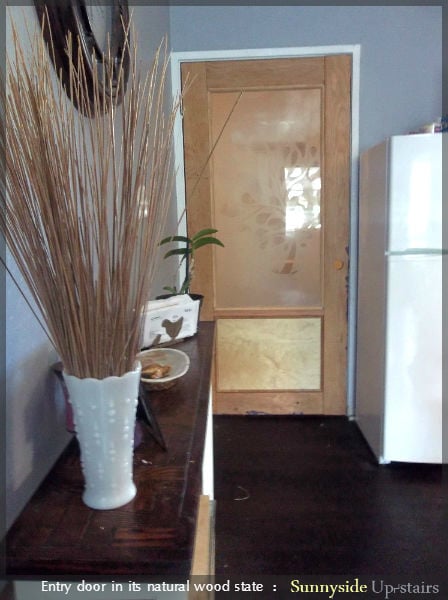
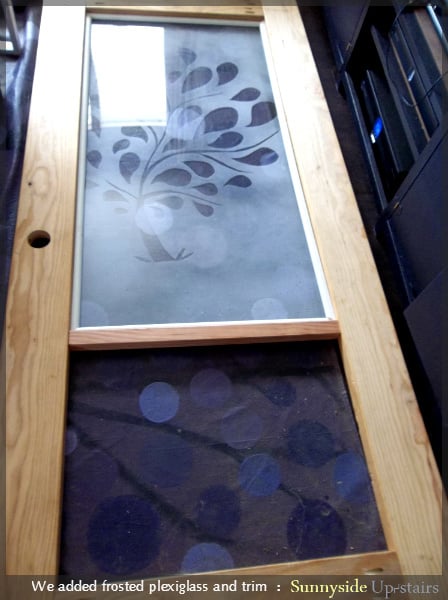
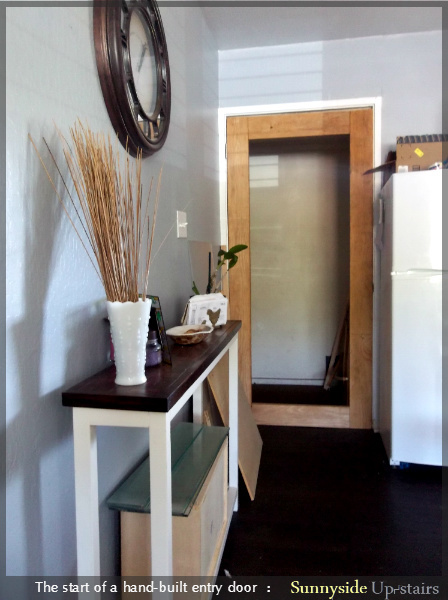
Frosted Plexiglass Entry Door

We gutted our above garage apartment a year ago and have been DIYing as much as is reasonable inside. We installed Allure Ultra vinyl flooring throughout, which is thicker than the old, chipping peel and stick vinyl there was previously. Instead of planing the previous termite eaten hollow-core door with heavy, less-than-secure glass jalousies, we decided to build our own entry door.
We were able to use orphaned 2x6s in my mom's garage and old trim we saved from gutting our apartment. The choices we made amounted to a total of about $150 for this door, including basic door hardware and $70 plexiglass. The hardest part was spraying the plexiglass, as I'm a rather unsuccessful spray painter.
We appreciate having our custom door, and we hope someone else in need of an entry door is inspired to save money and try one out too!

Estimated Cost
$150, based on our choices and what wood was already owned
Estimated Time Investment
Week Long Project (20 Hours or More)
Finish Used
Olympic semi-gloss latex paint in a deep purple shade.
Recommended Skill Level
Intermediate
Comments


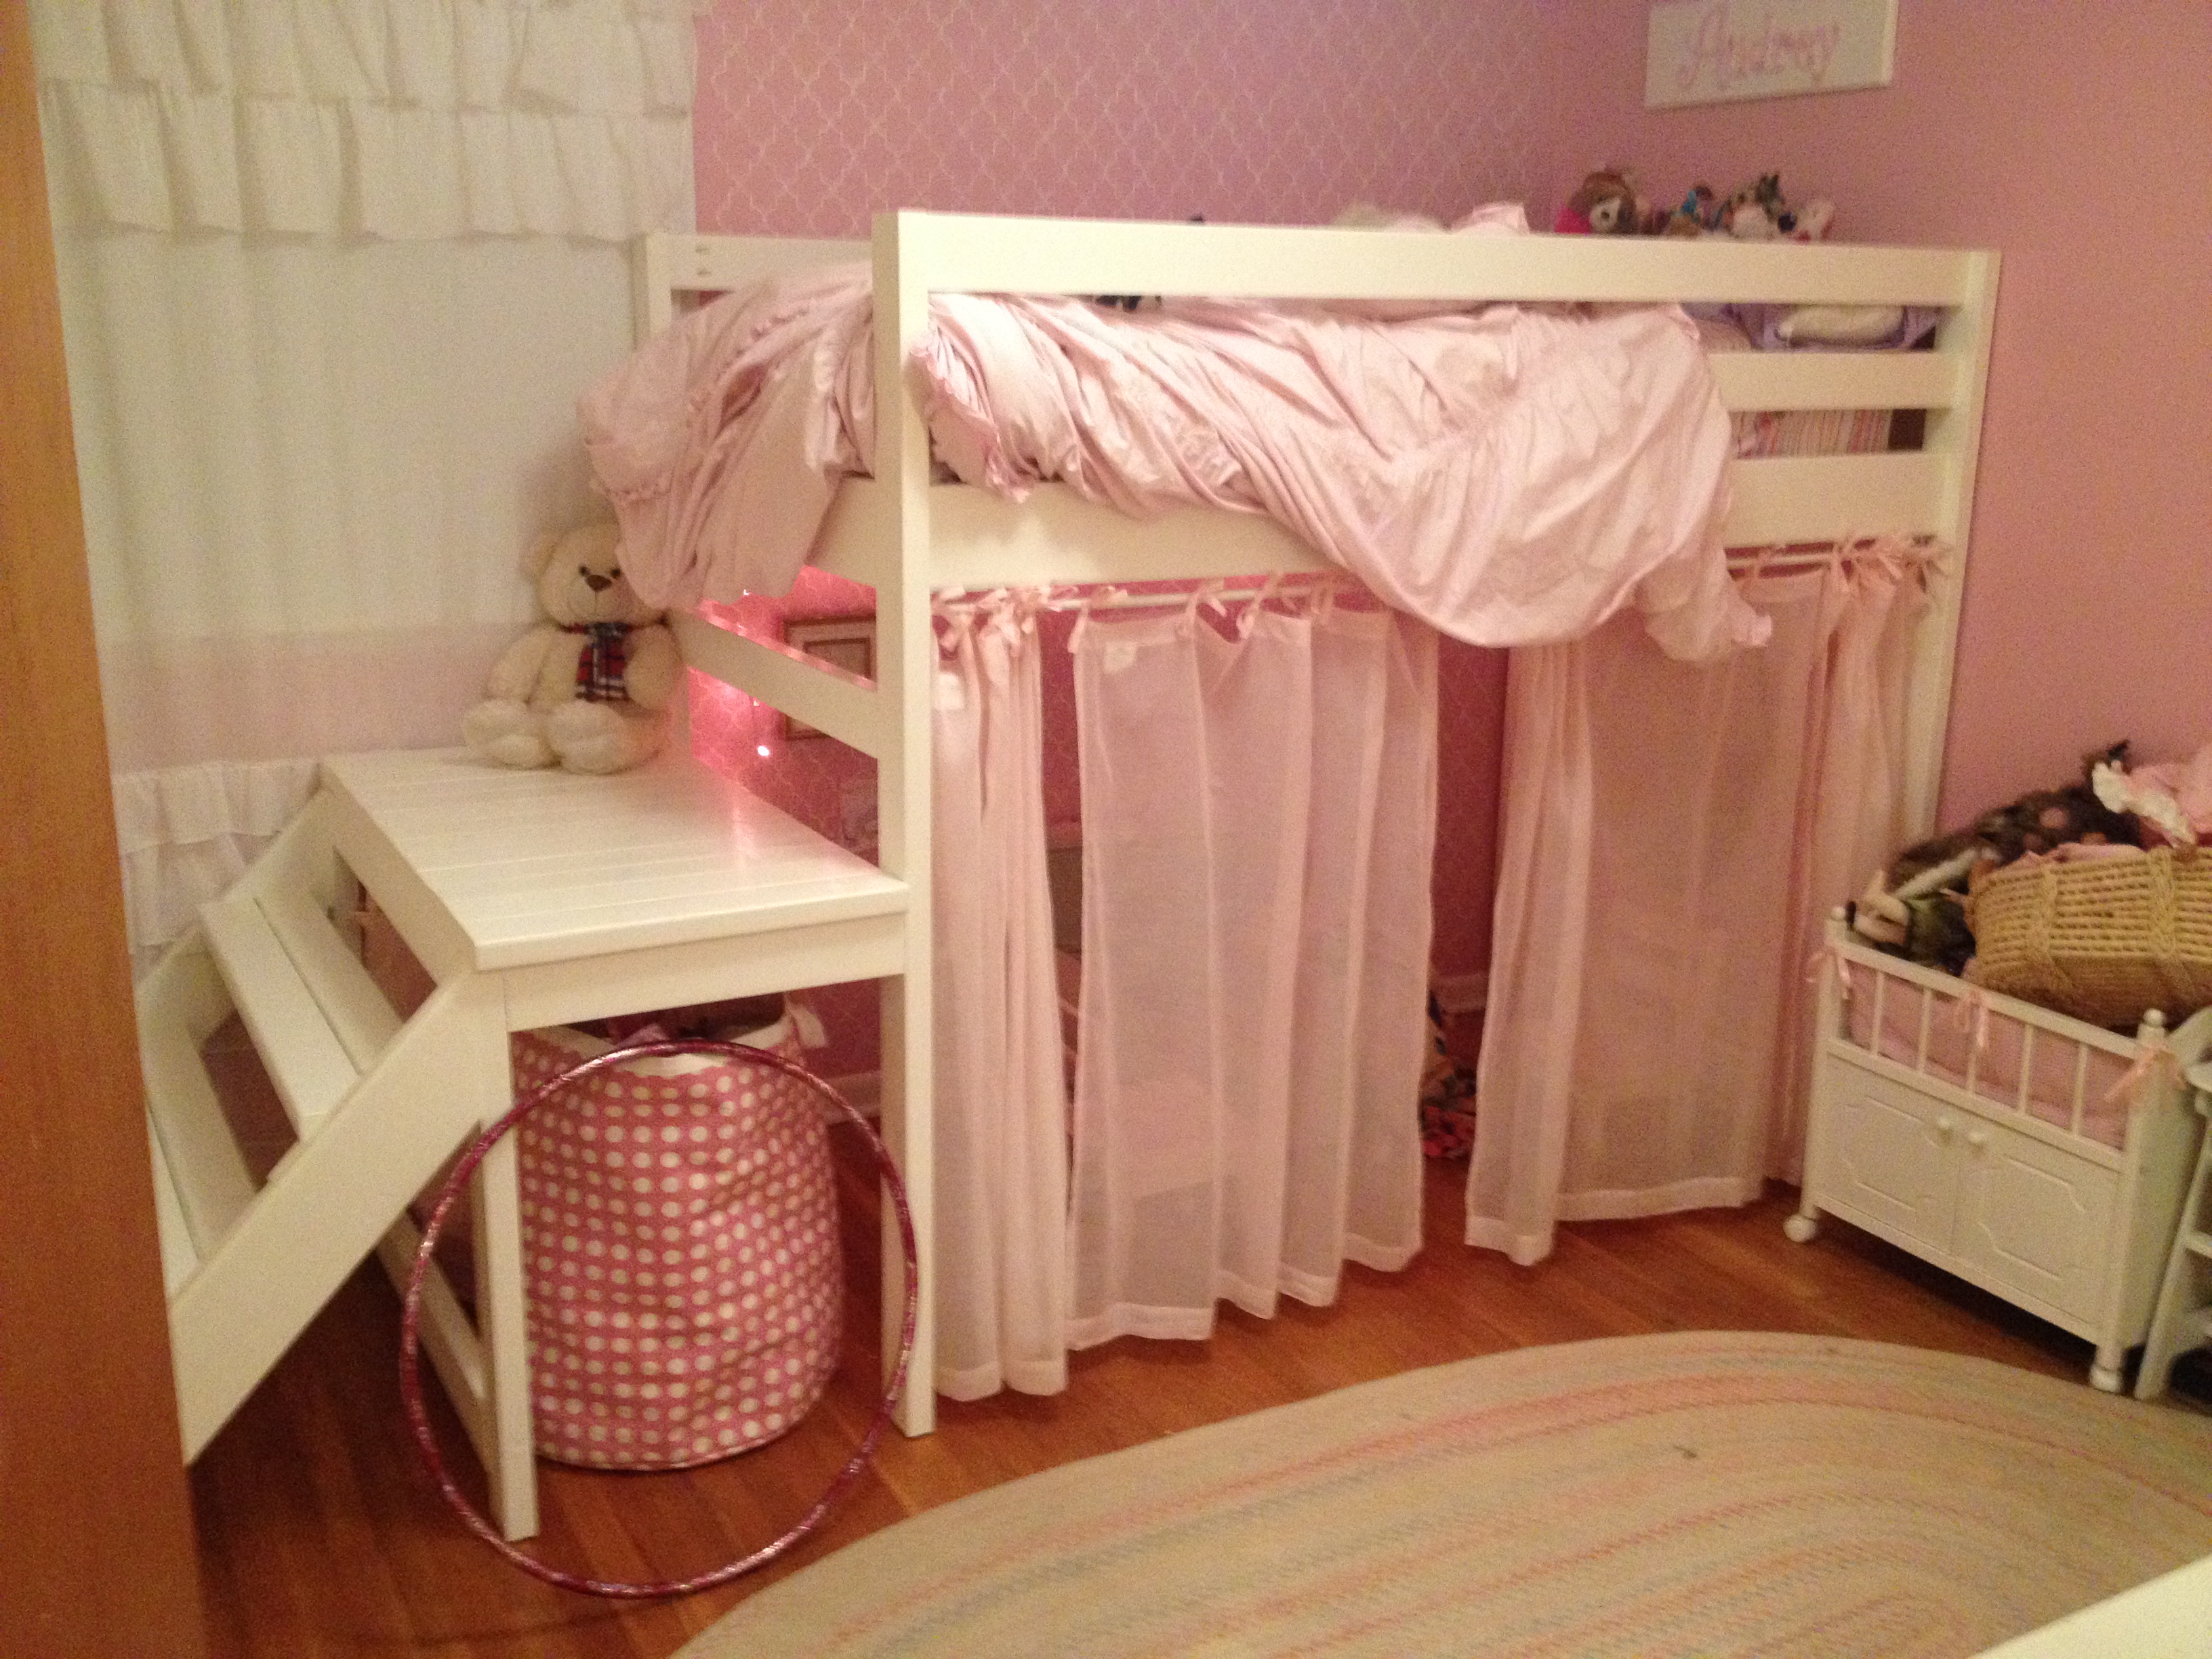
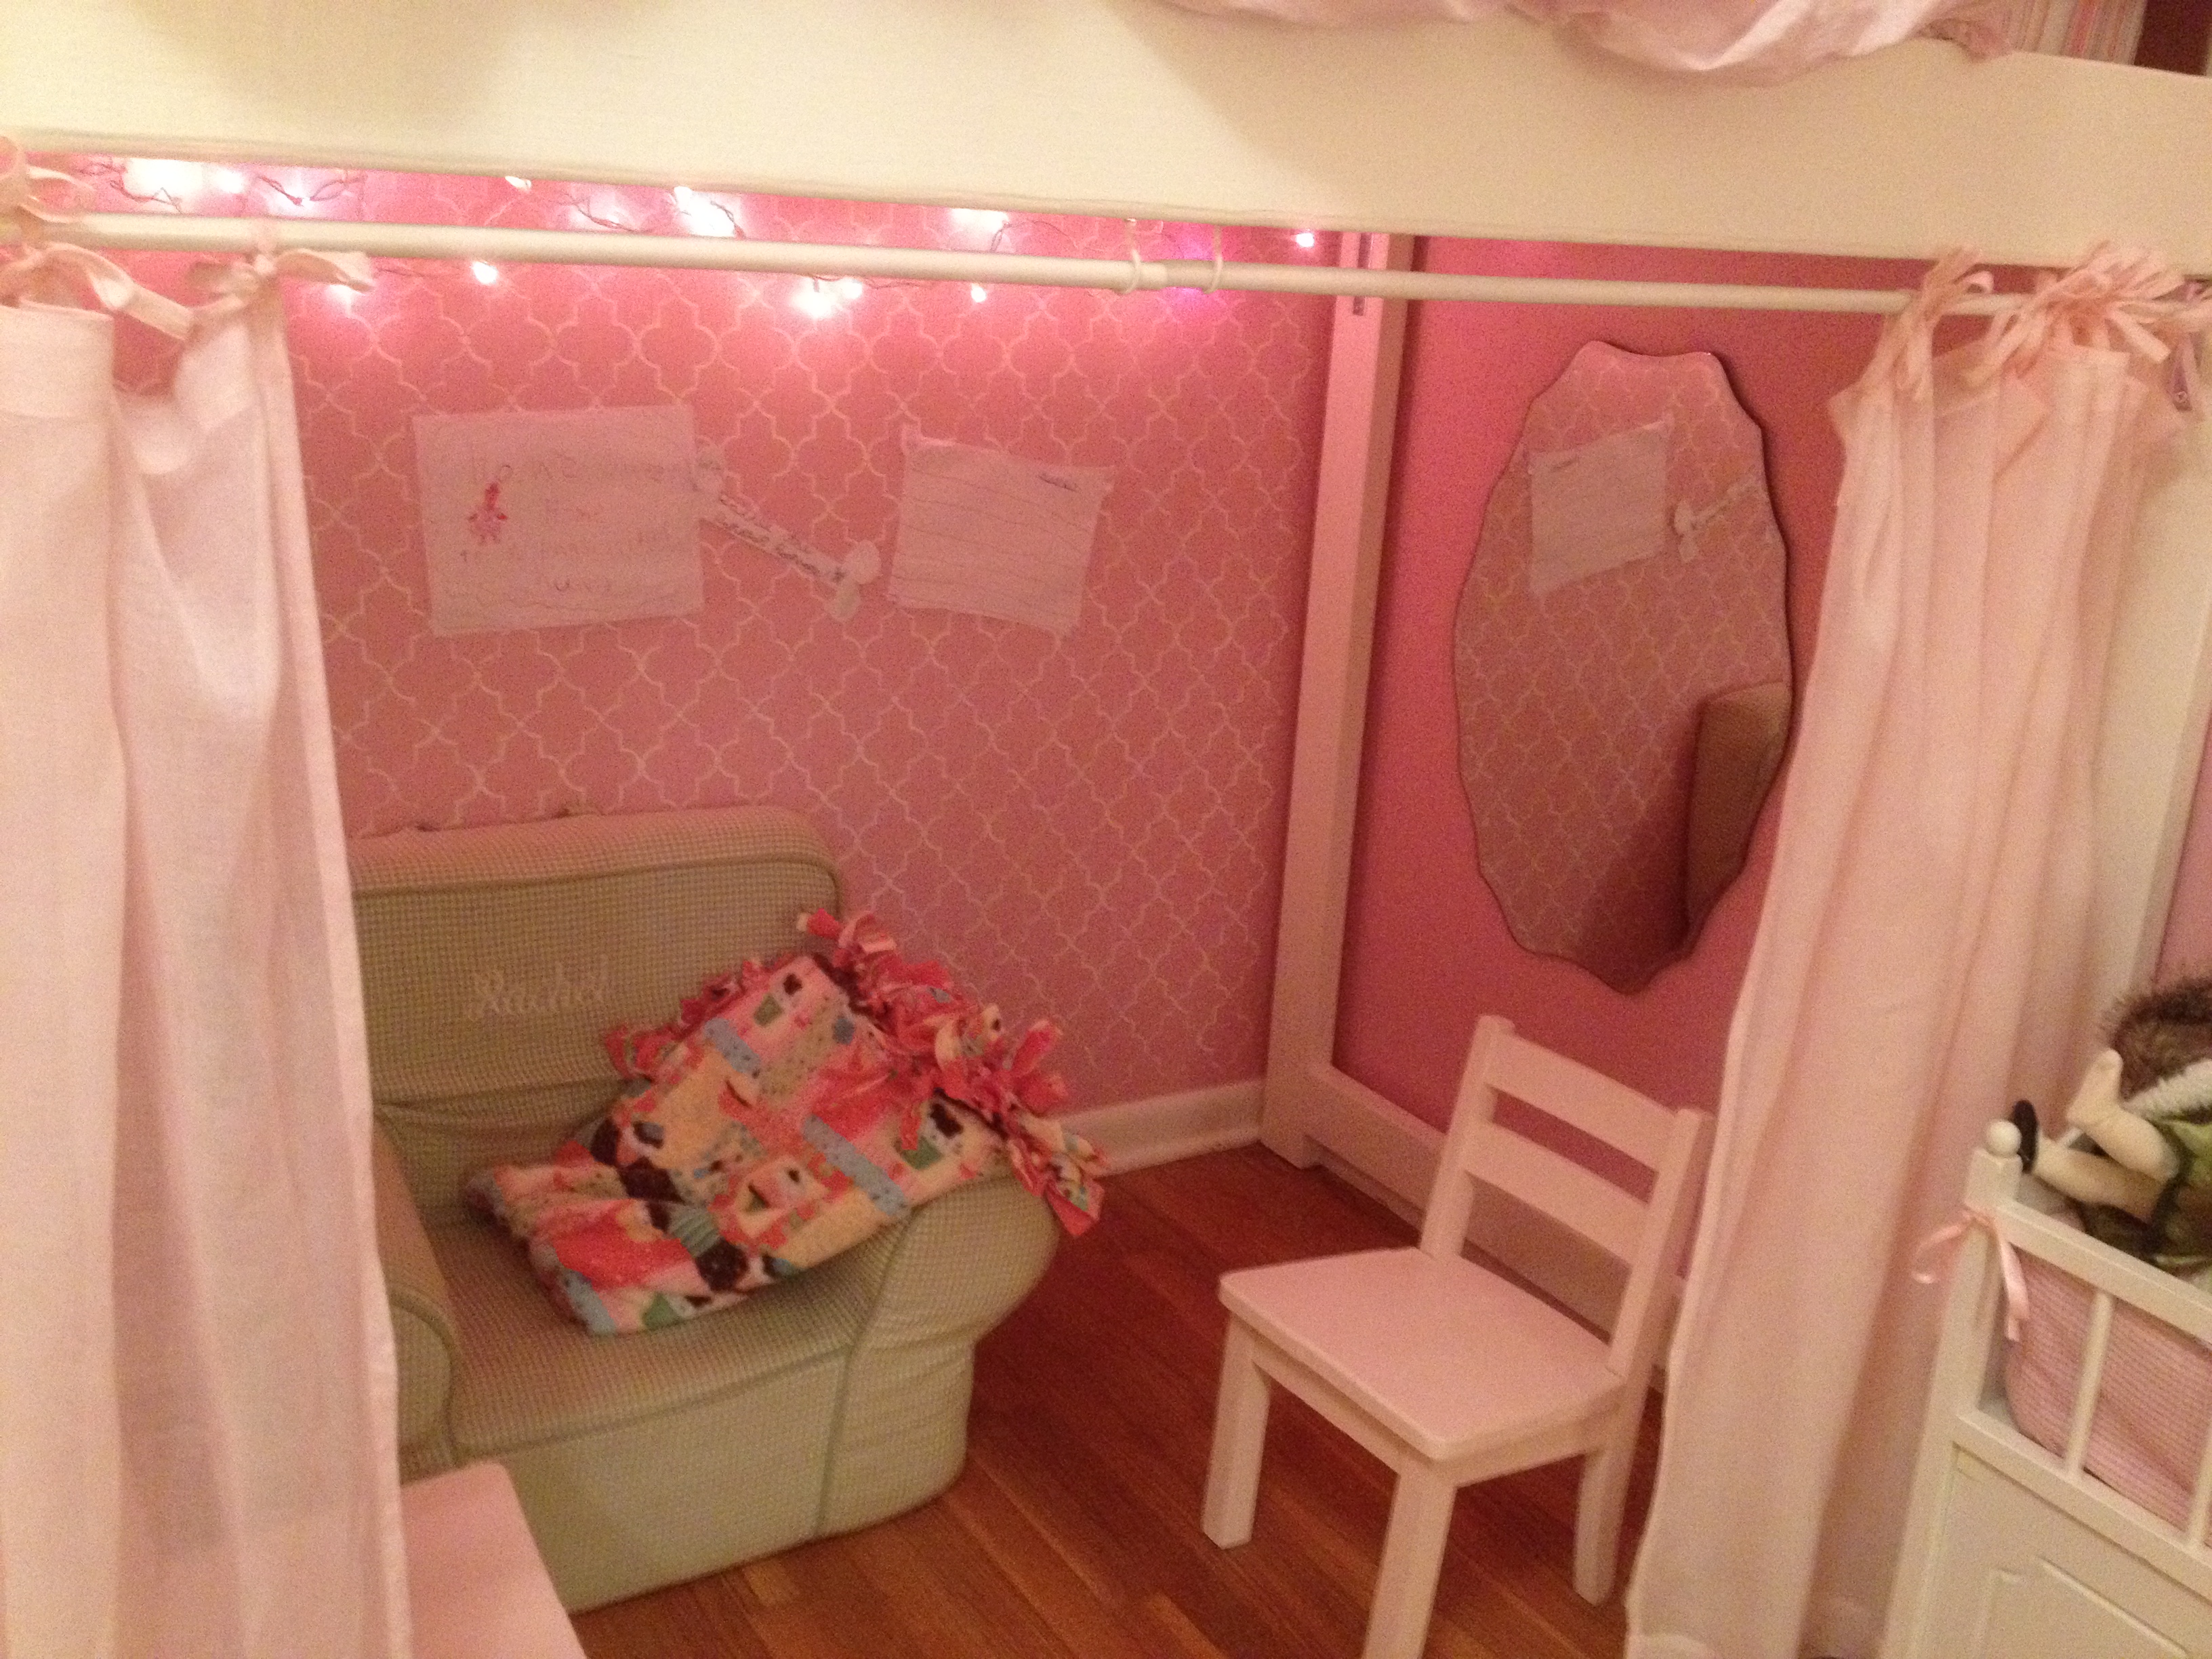
Little girls Jr. Loft Bed
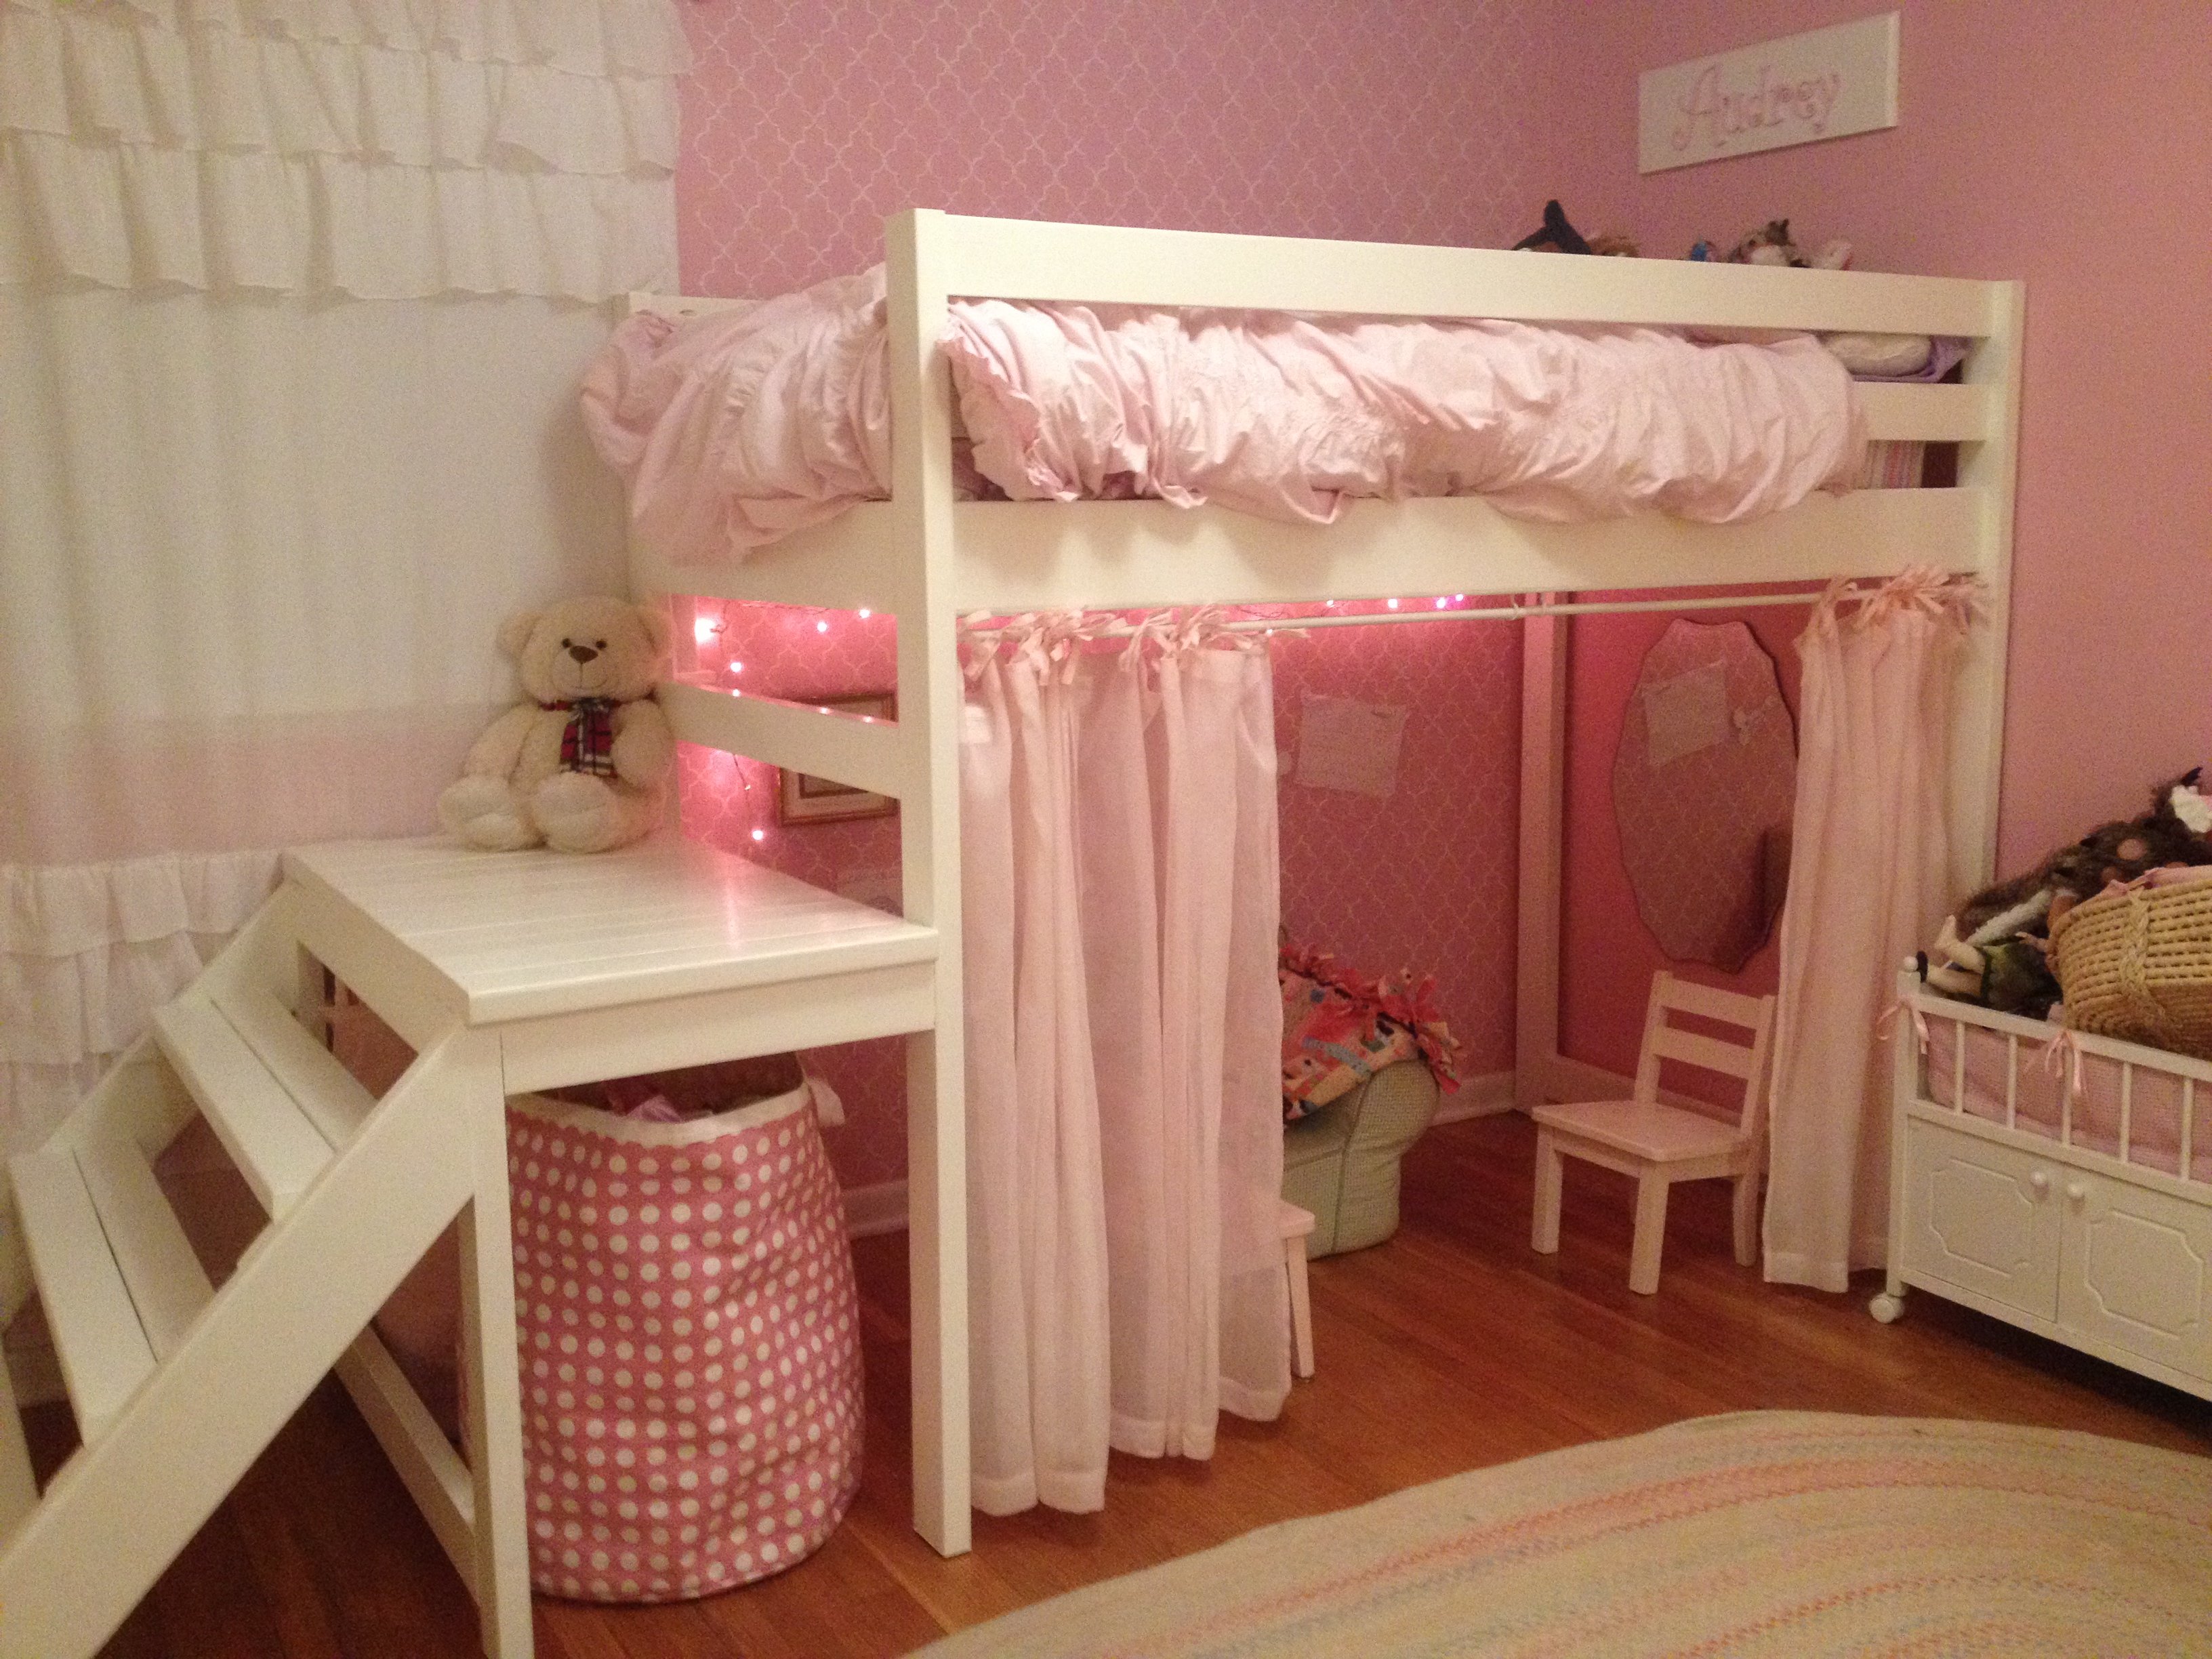
I built this for my little girl's room and she loves it! She loves the play area underneath especially. The build did not take that long, but the finishing (sanding and painting) took many hours. It is very sturdy. My girls sleep up there together all the time, and we have even had adults sleep up there. We didn't have a corner to put it in, so I built wider steps along the same wall as the bed.
Built from Plan(s)
Estimated Cost
$200
Estimated Time Investment
Week Long Project (20 Hours or More)
Finish Used
Antique white with a satin finish.
Recommended Skill Level
Beginner
Comments
Fri, 11/04/2016 - 00:39
Thank you! Sorry so late to
Thank you! Sorry so late to reply, I am just now seeing this. It is a twin mattress.
Wed, 09/16/2020 - 19:25
modifications help requested
I am interested in this design, but would like to have it with a full size mattress. How would I alter the plans? I would also like to have the stairs be storage drawers/stairs. Can you help me with this?
Thank you!
Lockers
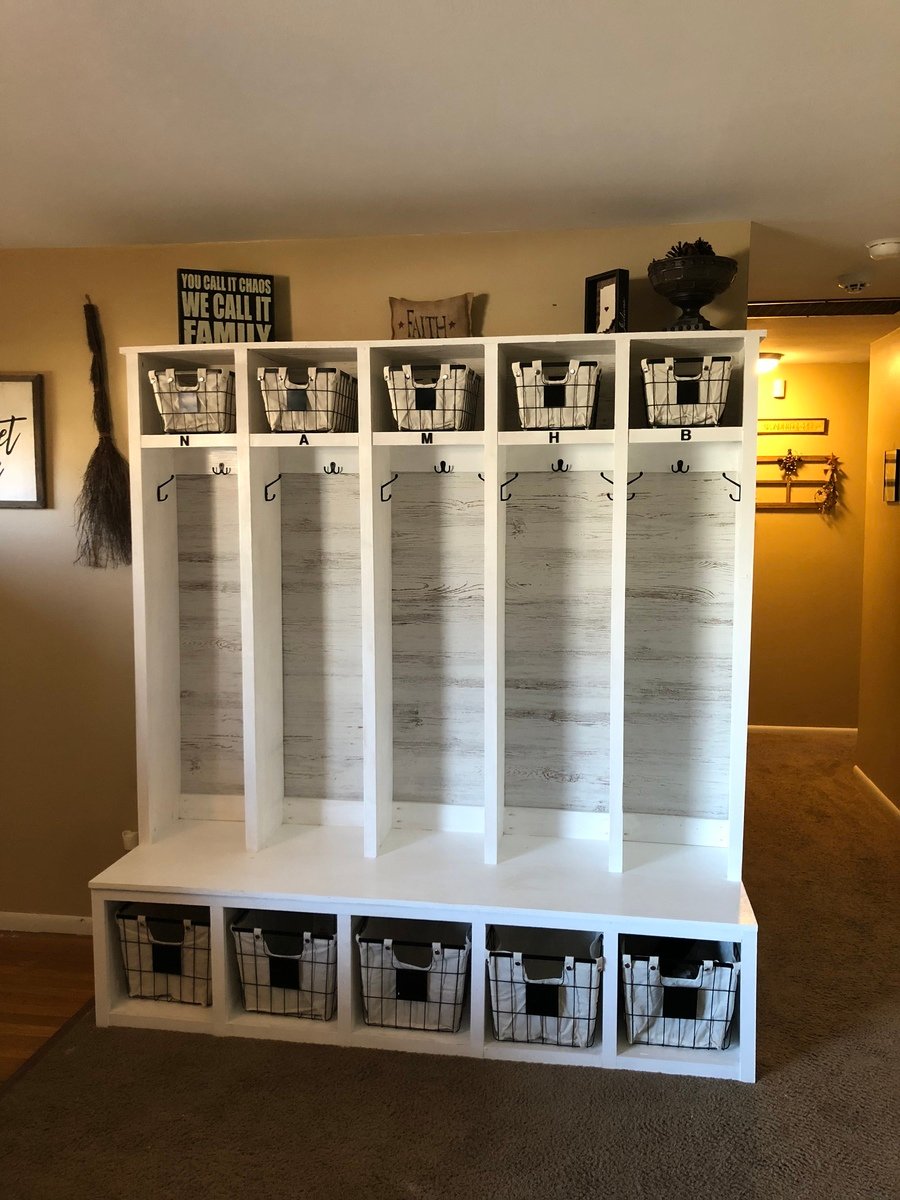
Lockers for the whole family
Built from Plan(s)
Estimated Cost
$250
Estimated Time Investment
Day Project (6-9 Hours)
Finish Used
Gloss paint
Recommended Skill Level
Intermediate
Comments
Mon, 01/25/2021 - 14:54
Wrong link
The plans linked is for a piece that is nothing like the picture here. I’ve noticed lately your website has incorrect links, the pdf print option doesn’t work, and the focus seems to be less on the plans and more about selling your pre-cut stuff. Very disappointing.
Ana white seesaw
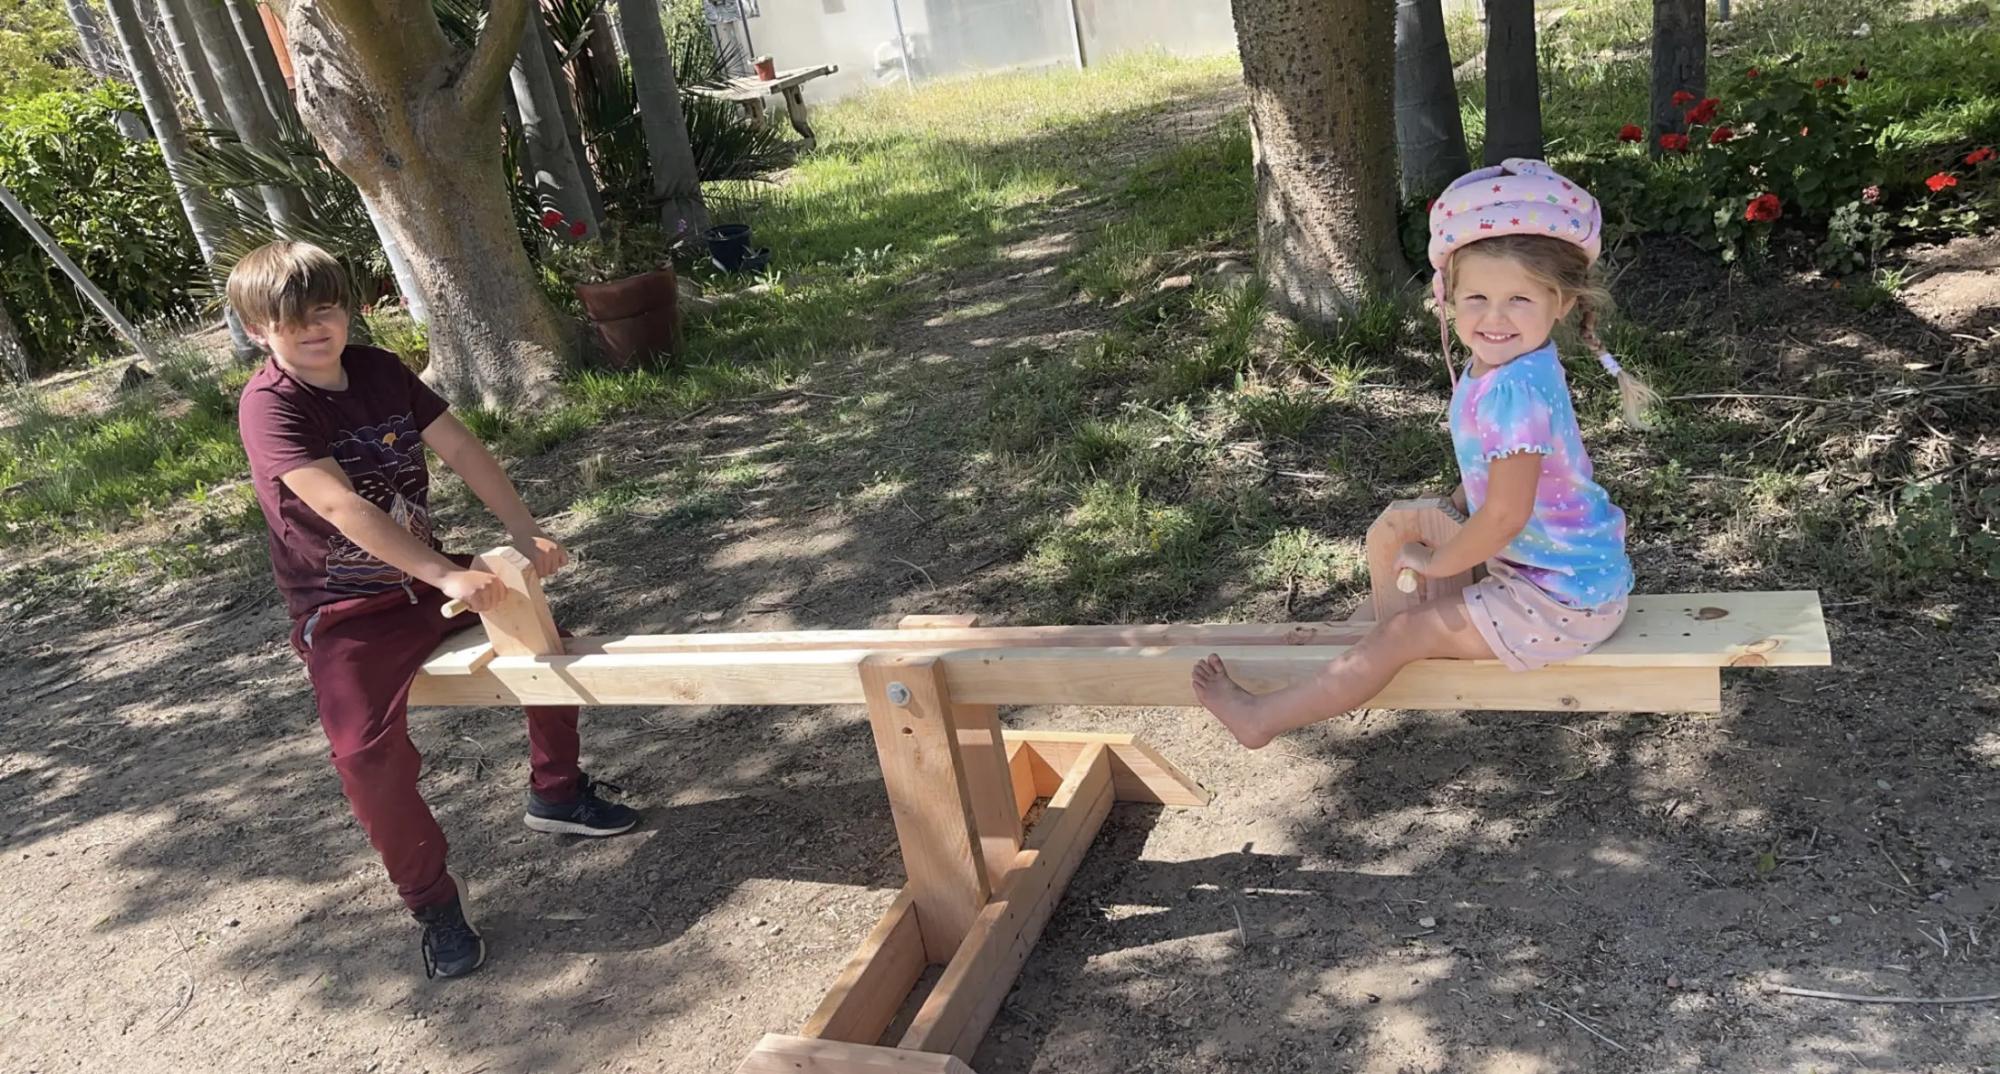
My 11 year old followed the plan and directions by you Ana!!!! We just helped him a little bit and we are so proud of the end project. The kids love it !!!!
Thank you Ana
Built from Plan(s)
Comments
Thu, 04/21/2022 - 15:11
Amazing work young man!
He has a bright future, and look at that smile, that just made my day! Thank you for sharing:)
Ten Dollar Ledges

After moving into my new house, I found this great blog and began dreaming of building furniture! I am finally trying it out. Since I didn't know the first thing about power tools and wood-working I wanted to start simple. I bought some 48" pieces of 1x4 and 1x2 in pine, spray painted some old frames and used some of my wedding pictures/momentos and voila...my first project was done! I will be making many more of these easy and pretty shelves! Now to find a wall to put them on.
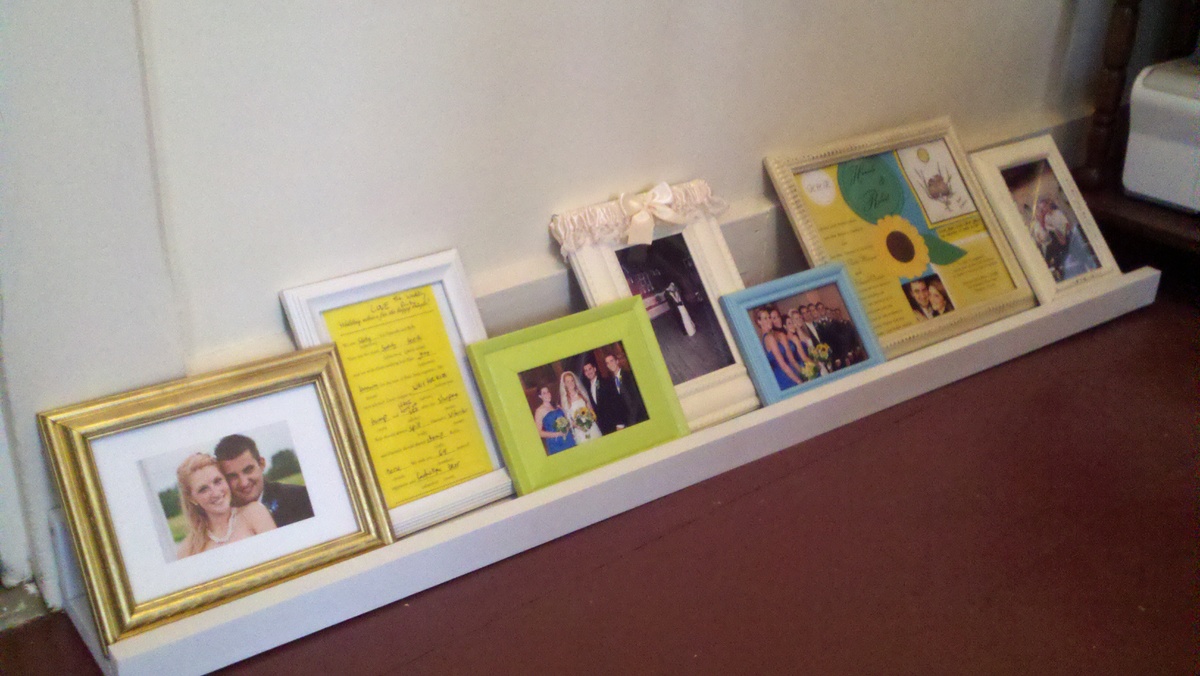
Built from Plan(s)
Estimated Cost
$5.00
Estimated Time Investment
An Hour or Two (0-2 Hours)
Finish Used
High Gloss White Paint
Recommended Skill Level
Starter Project
Dress up center

I followed the plans for the dress-up center. My daughter loves it and picked out the paint color and princess decals to decorate it.


Built from Plan(s)
Estimated Cost
$120, my husband bought the expensive wood
Estimated Time Investment
Day Project (6-9 Hours)
Finish Used
Behr Interior Paint & Primer, Satin finish, Pink Chintz
Recommended Skill Level
Beginner
My version of the Madison dresser
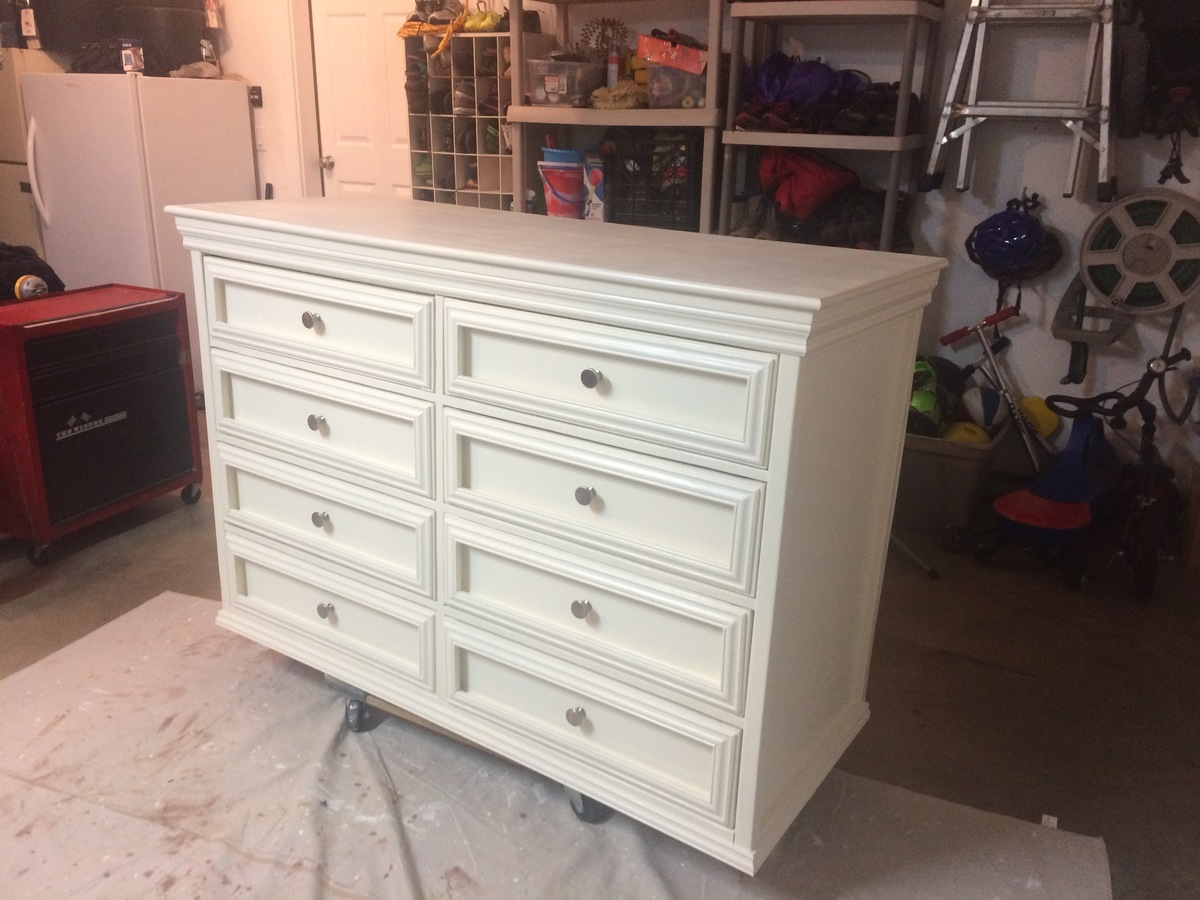
I made this dresser to replace two cheesy dressers my wife and I had when we first moved out on our own. The style was taken from the Madison dresser design. I added two more drawers as we were condensing two dressers to one and I wanted to ensure I was able to use it!!
Built from Plan(s)
Estimated Cost
150-200
Estimated Time Investment
Week Long Project (20 Hours or More)
Finish Used
Behr marque paint. Advertises one coat on any surface but I did two coats to sand down grain.
Recommended Skill Level
Intermediate
Comments
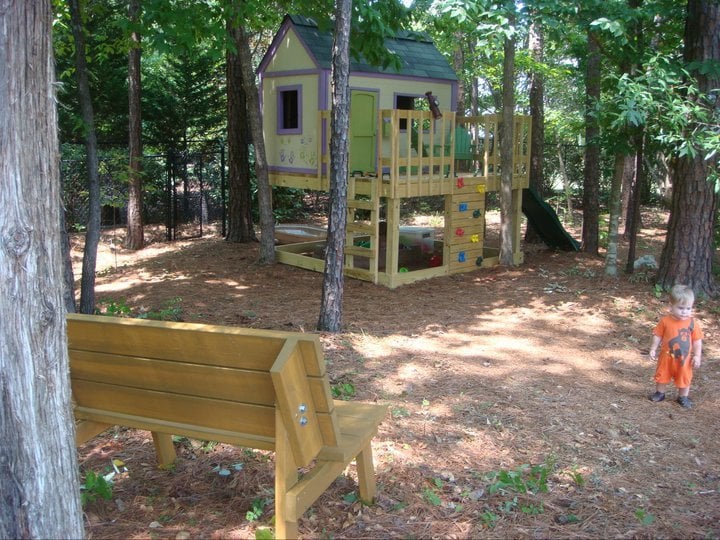
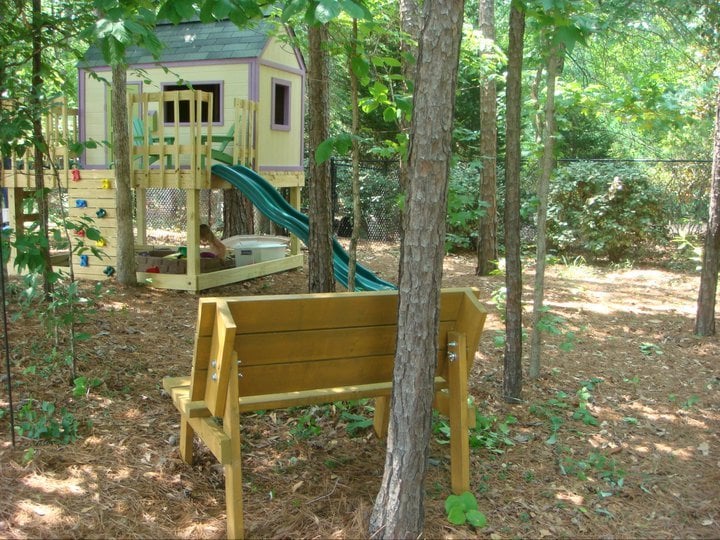
Tent fixed to wall
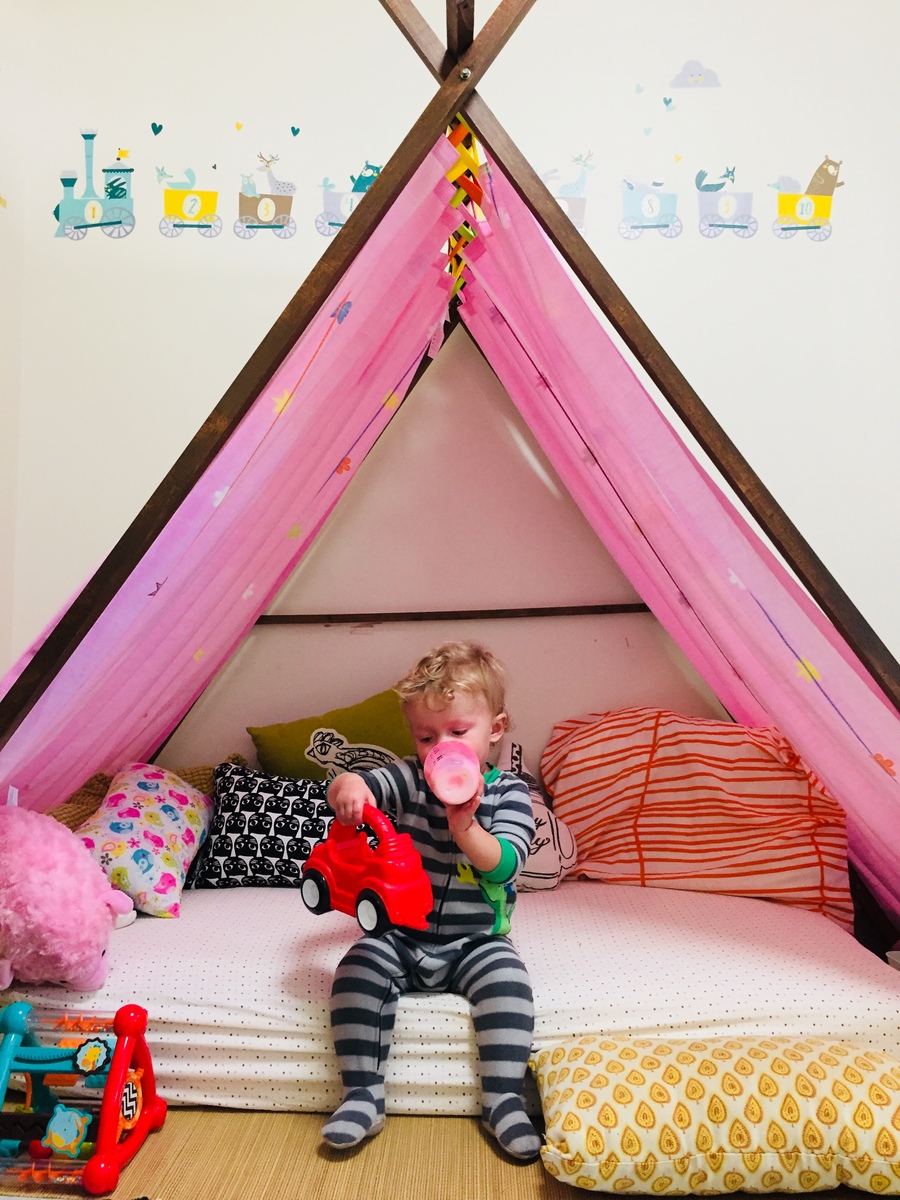
I wanted this to be more permanent and stable so I used two screws each in all the bottom attachments,added a brace in back and secured it to the wall. I used a square piece for the top rail and made the whole shebang equilateral so it’s little more squat and stable.
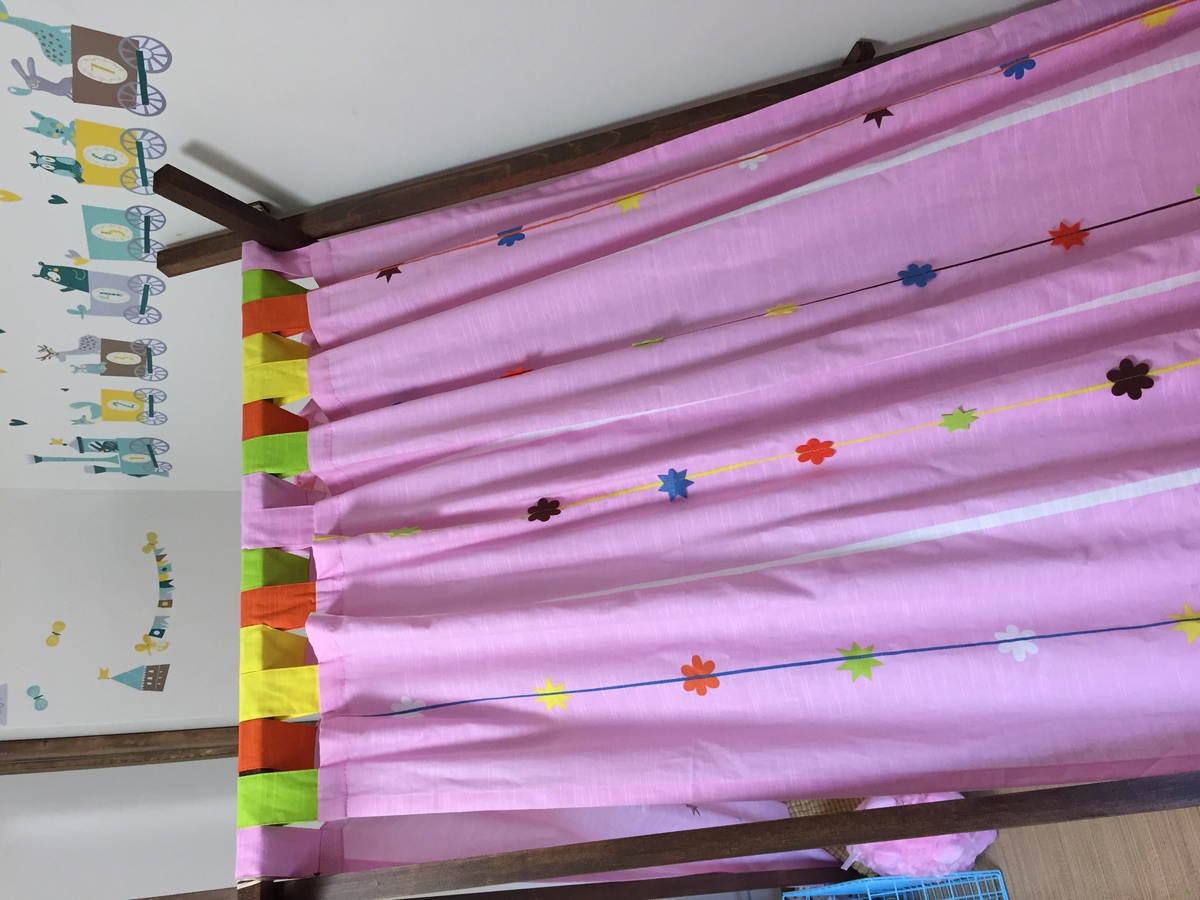
Built from Plan(s)
Estimated Cost
60
Estimated Time Investment
Afternoon Project (3-6 Hours)
Finish Used
Minwax Chestnut, wipe on.
Recommended Skill Level
Beginner
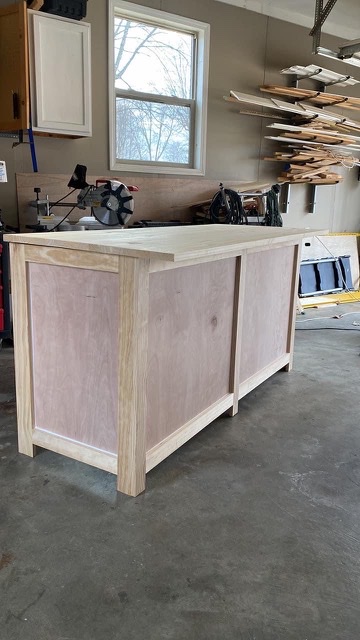
Bar cabinet
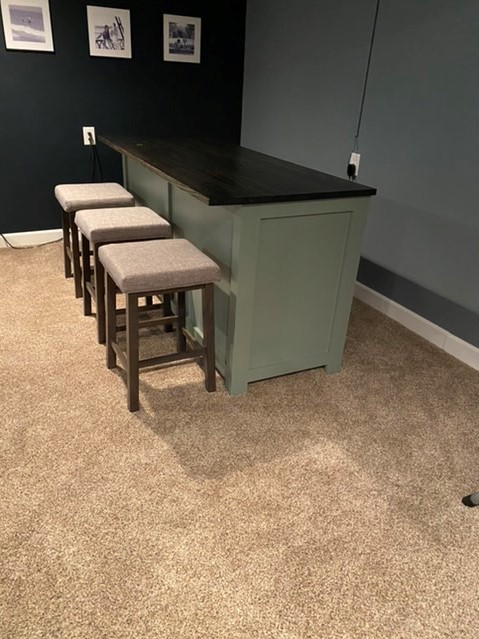
My wife wanted a eat at bar/cabinet for the basement family room. So after several design ideas this is what we come up with. It was a pretty simply build, built the frame using Kreg pocket holes to attach everything together. Love the Kreg pocket hole. Then cut the1/4” panels and attached them to the inside with brad nails. The top is a 1 x 24 glue board from Menards. Then some paint, stain and poly , attach the top and its ready to go. I used a water base poly for the top, it is great if you want to apply several layers quickly. Sand the poly after a couple layers with an 800 grit, then apply a couple more then repeat until you are happy with the finish.
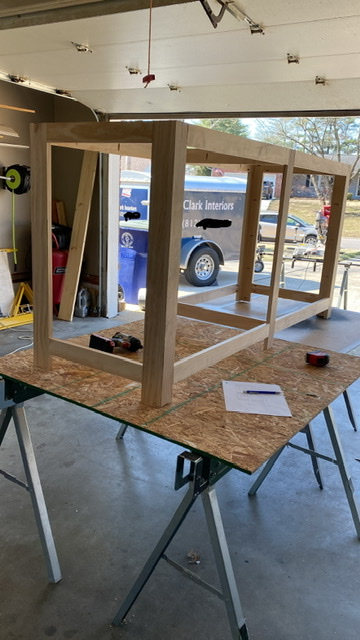


Comments
Easy Rustic Console Turned Shabby Chic Vanity

Why not build this tiny table? It will only set you back about $20! It takes about 10 minutes to build! And the plans are extremely flexible--not to mention forgiving!
But I knew that rustic was not the way to go for my new guest room. I needed something a little more feminine--french-inspired, EVEN! So I decided to stain it ebony and paint over in a satin white. The result was great!
Built from Plan(s)
Estimated Cost
$20
Estimated Time Investment
An Hour or Two (0-2 Hours)
Finish Used
Ebony stain, white satin paint
Recommended Skill Level
Starter Project
Salvaged Wood Planter

I built a planter box from salvaged wood all by myself in a morning. While the project was a little more involved than I had expected it really encouraged me to keep trying to build new things.
Built from Plan(s)
Estimated Cost
FREE
Estimated Time Investment
Afternoon Project (3-6 Hours)
Finish Used
Natural; unfinished
Recommended Skill Level
Beginner
Comments

Luxury Storage Cabinet Design

Best Storage Design For Your Home that keeps your books, clothes and anything in a appropriate way.
Storage Cabinets Design Ideas : http://www.spaceworks.com.au/melbourne/shelves-cabinets
Recommended Skill Level
Intermediate
Leaning Wall Shelf
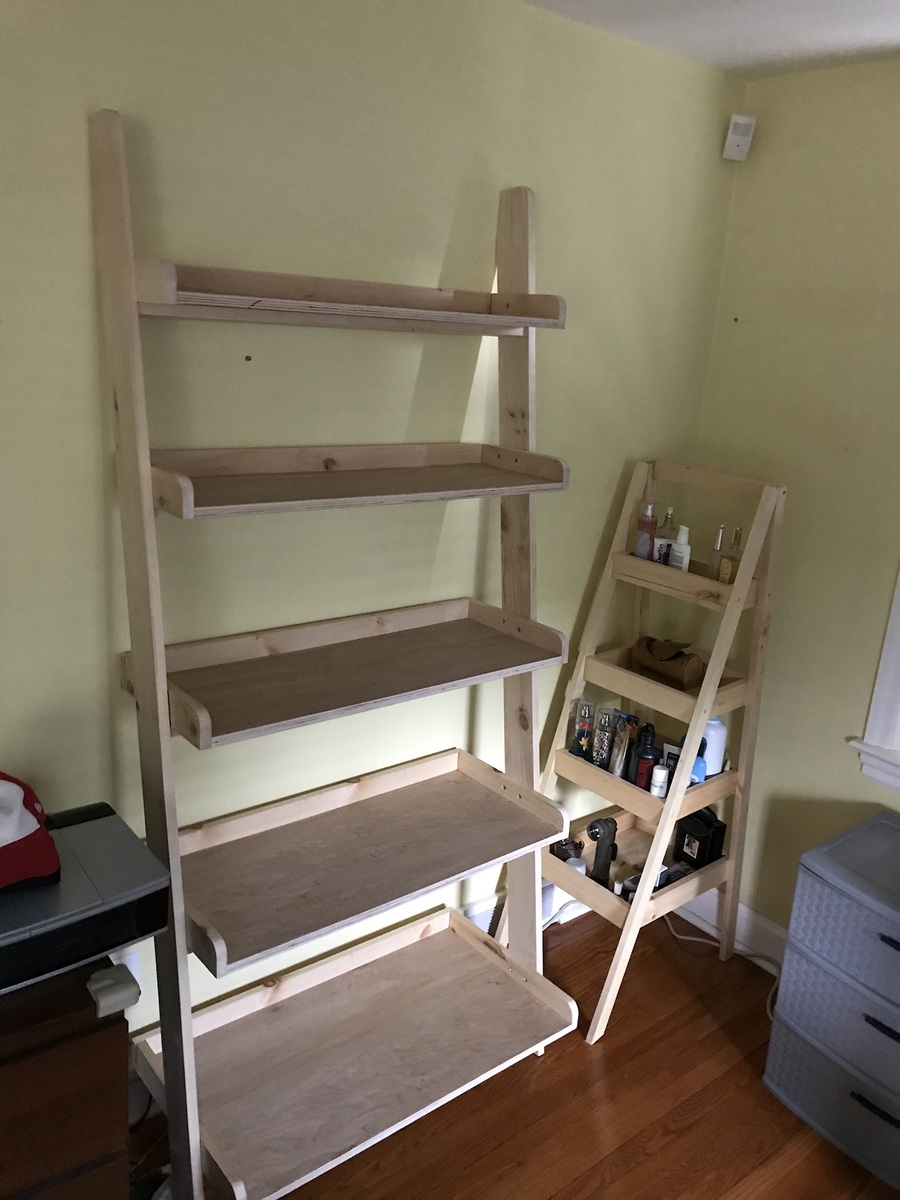
This is my version of the Leaning Wall Shelf by Anne White this project was fun. This shelf was to have a place to keep my Newborns son’s diapers wipes etc. I’m going to build another for my daughter in the near future. I learned a lot from this project, like how to find degrees with a framing square.
Estimated Time Investment
Day Project (6-9 Hours)
Finish Used
Varathane gloss
Recommended Skill Level
Intermediate
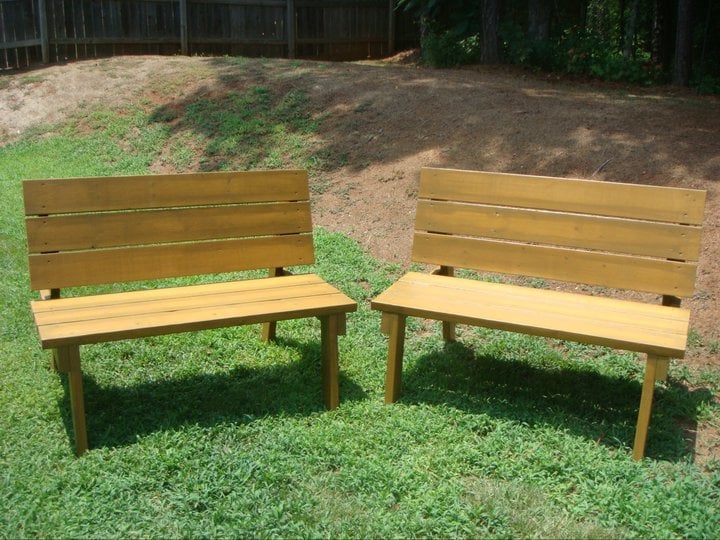
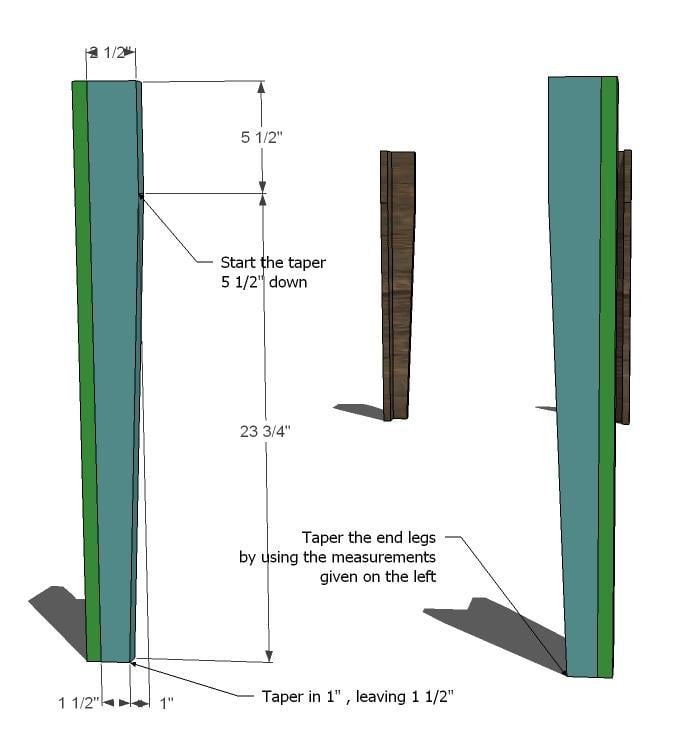
Farmhouse Bed, Console Table and Bench!
It’s been a couple years, but here a some projects that I made from your plans!
So much fun!
by Shawna

Built from Plan(s)
Convertable Picnic Table
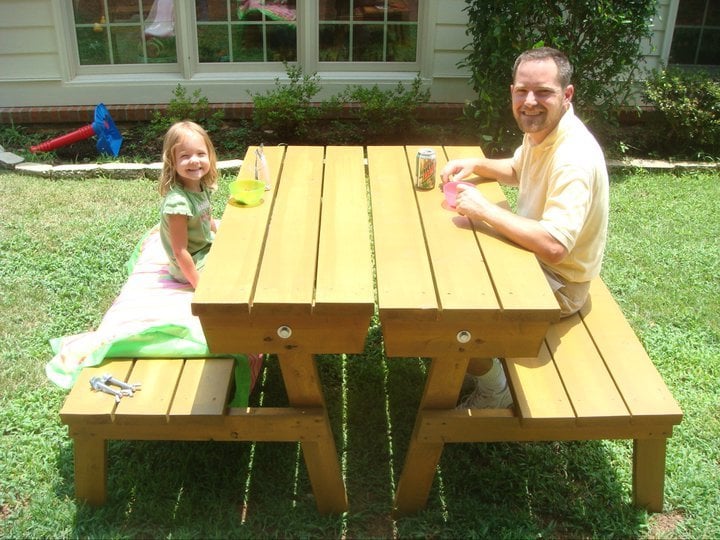
I love these benches/table. They were easy to make and are comfortable to sit in.

Built from Plan(s)
Estimated Cost
$60 for wood and hardware, $60 for stain and stain supplies
Estimated Time Investment
Day Project (6-9 Hours)
Finish Used
Stain
Recommended Skill Level
Beginner
Comments

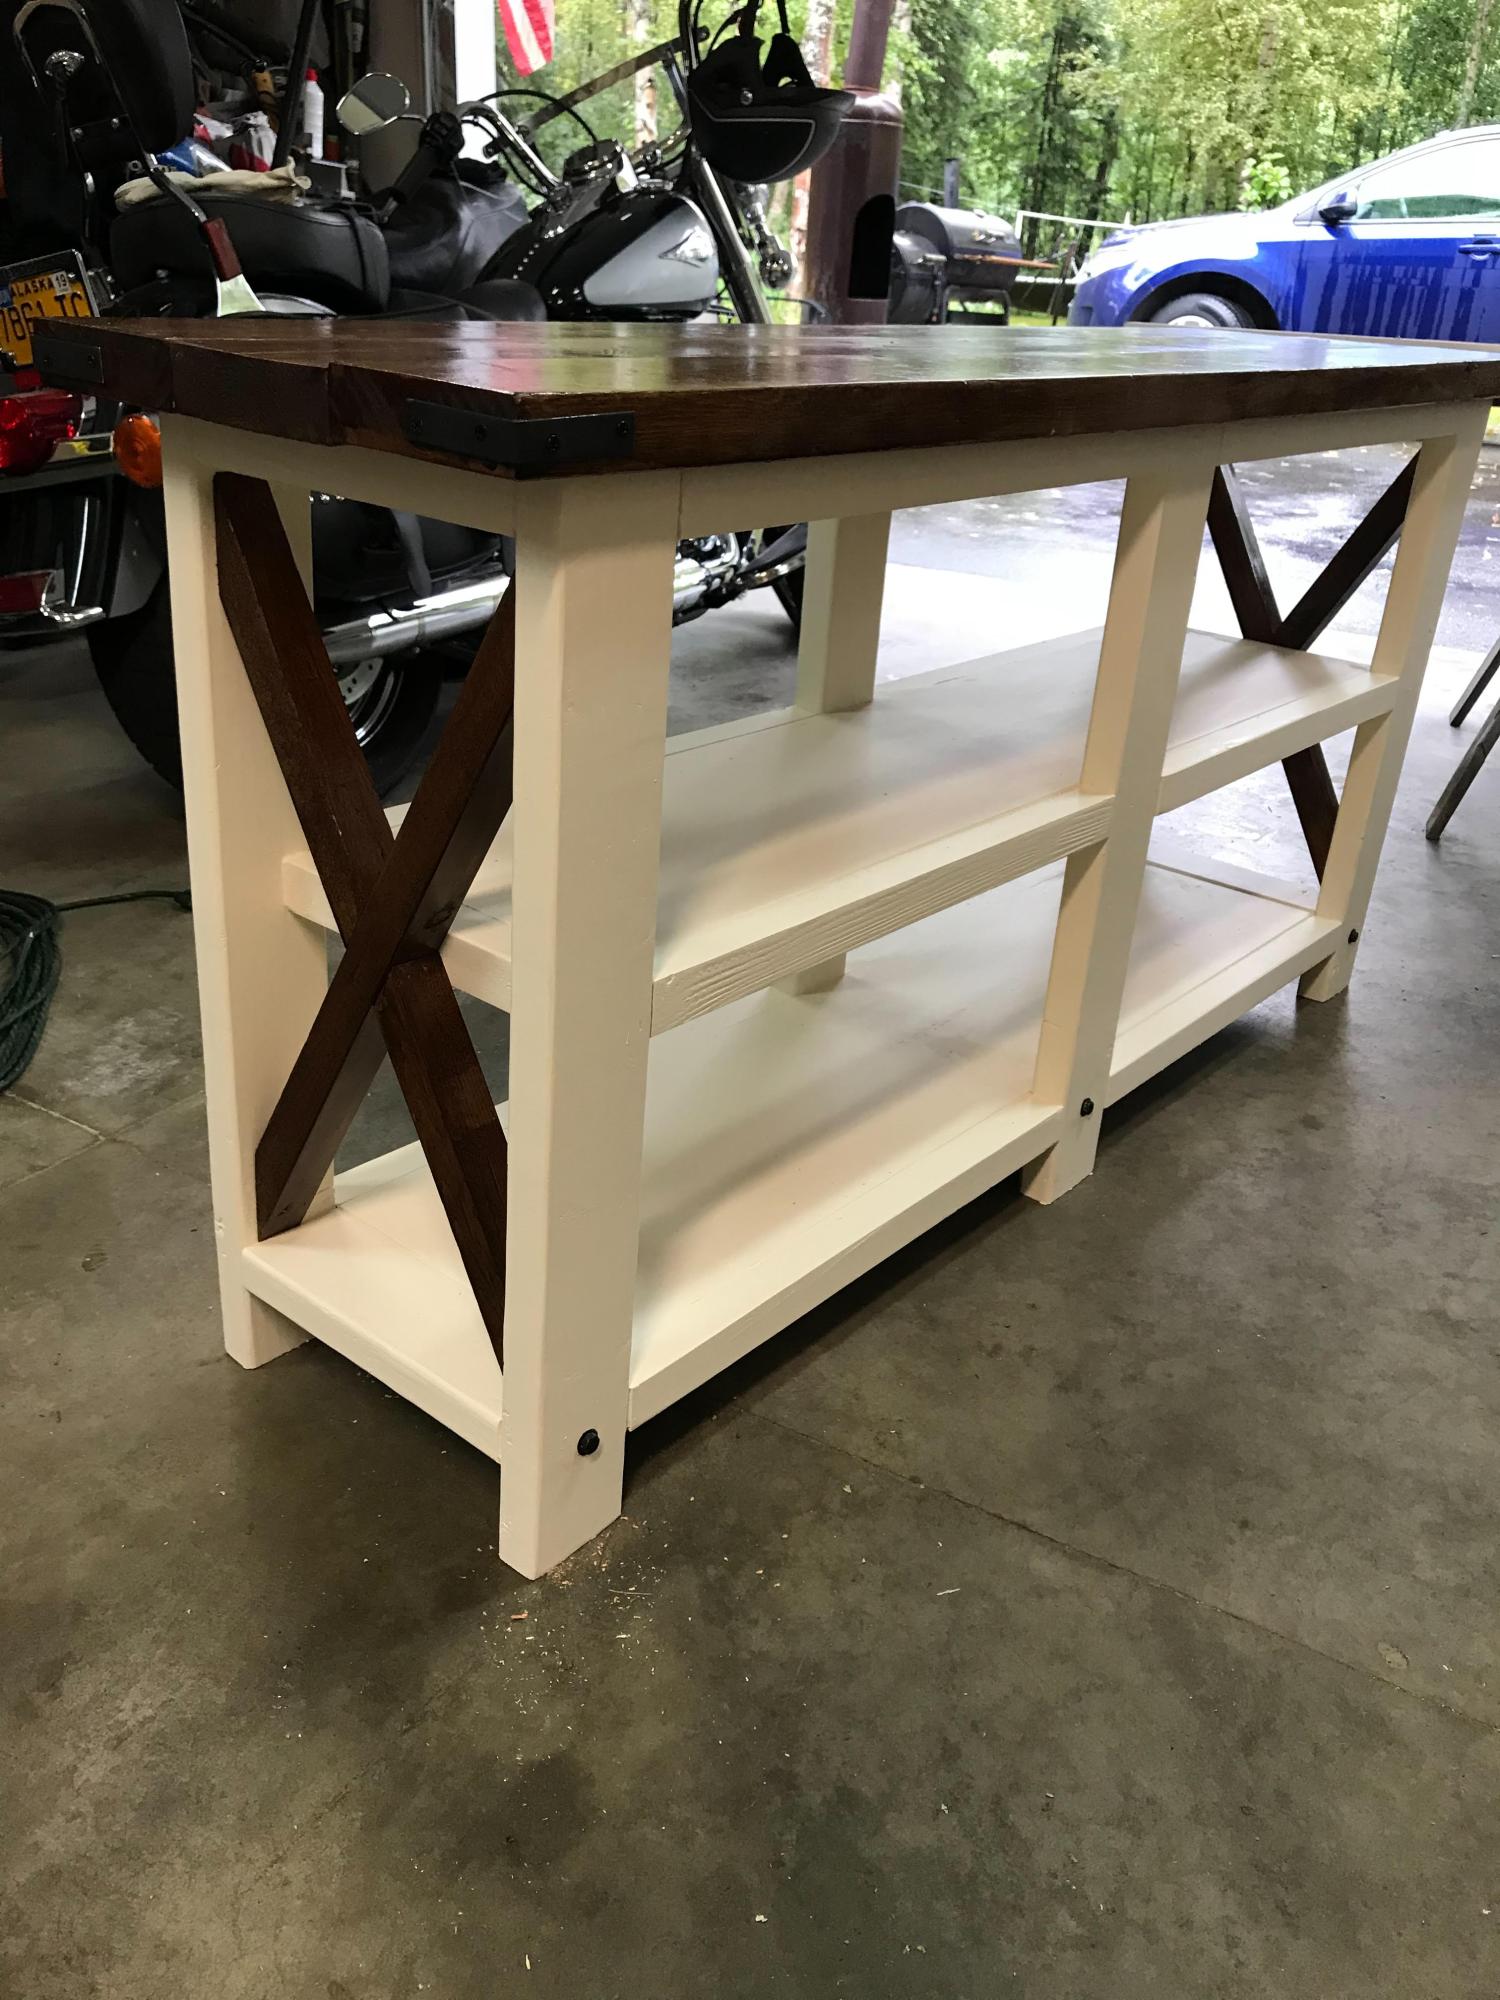
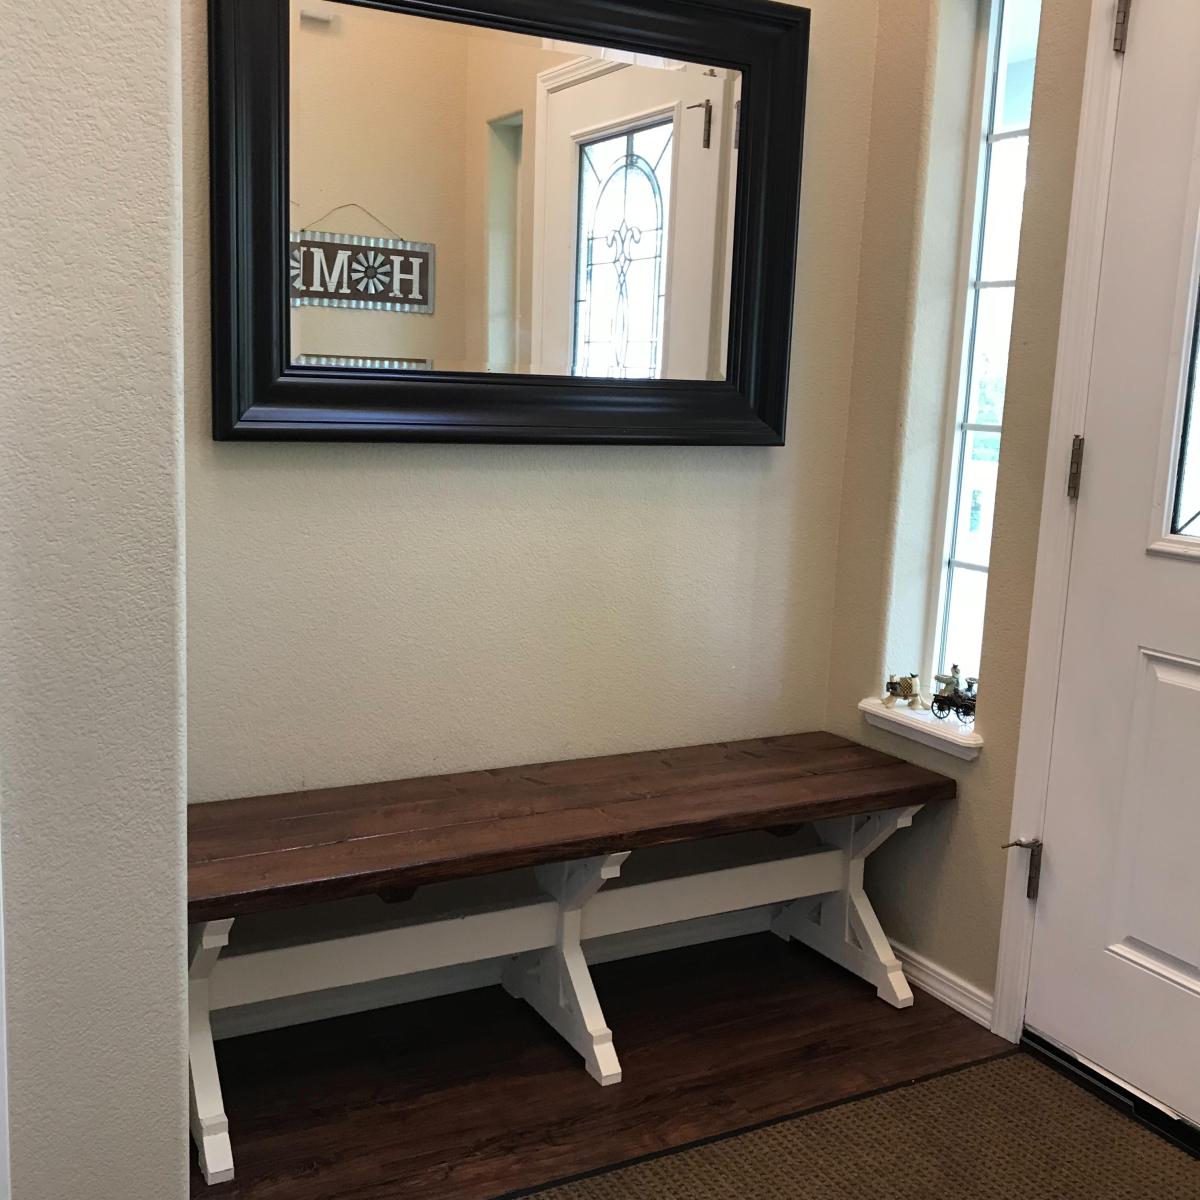
Rustic X Console

This project was for a wedding gift... My wife gave the young couuple some ideas to choose from and after seeing these plans on Ana White they loved it. Thank you Ana for the great plans!!!
Built from Plan(s)
Estimated Cost
$150
Estimated Time Investment
Day Project (6-9 Hours)
Finish Used
White Vinegar/Steel Wool Mix and a polyurethane to protect it.
Recommended Skill Level
Intermediate
Comments
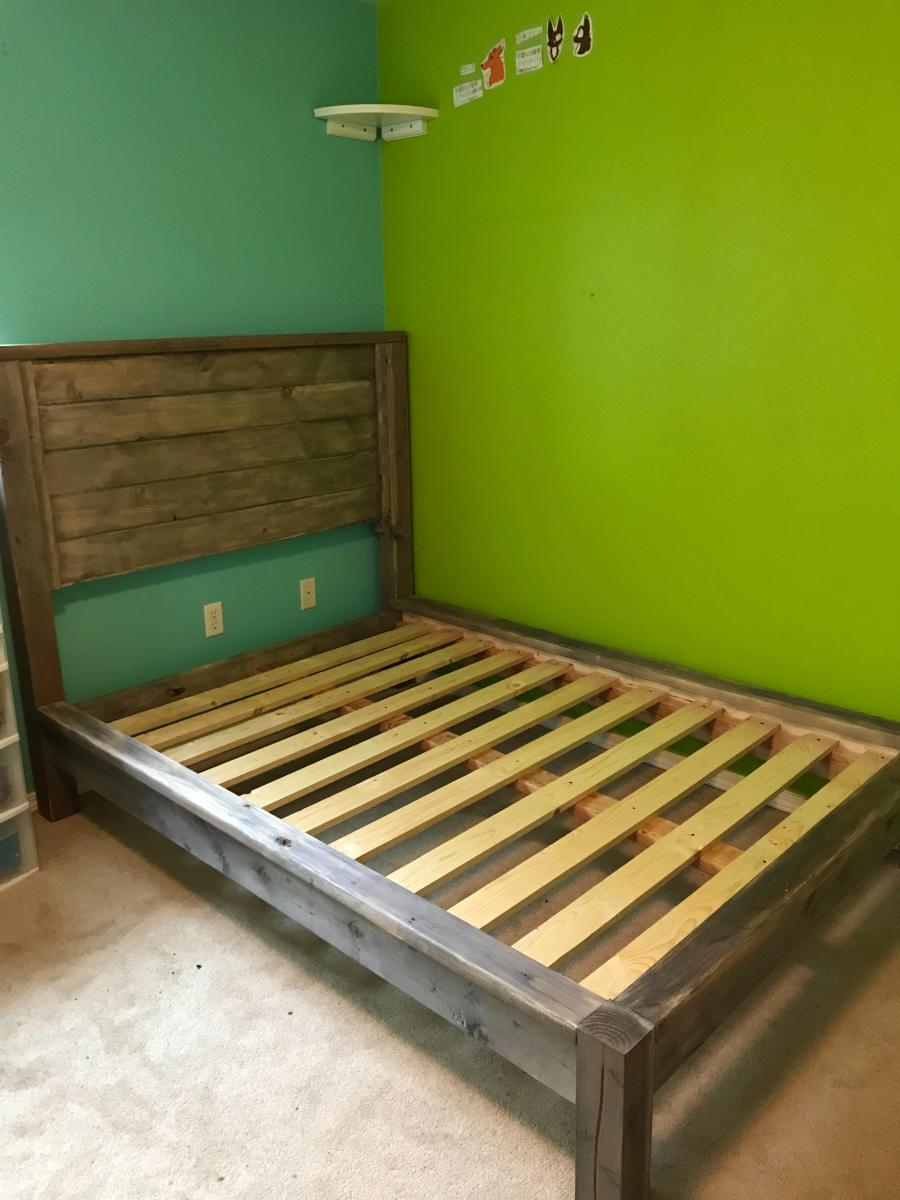
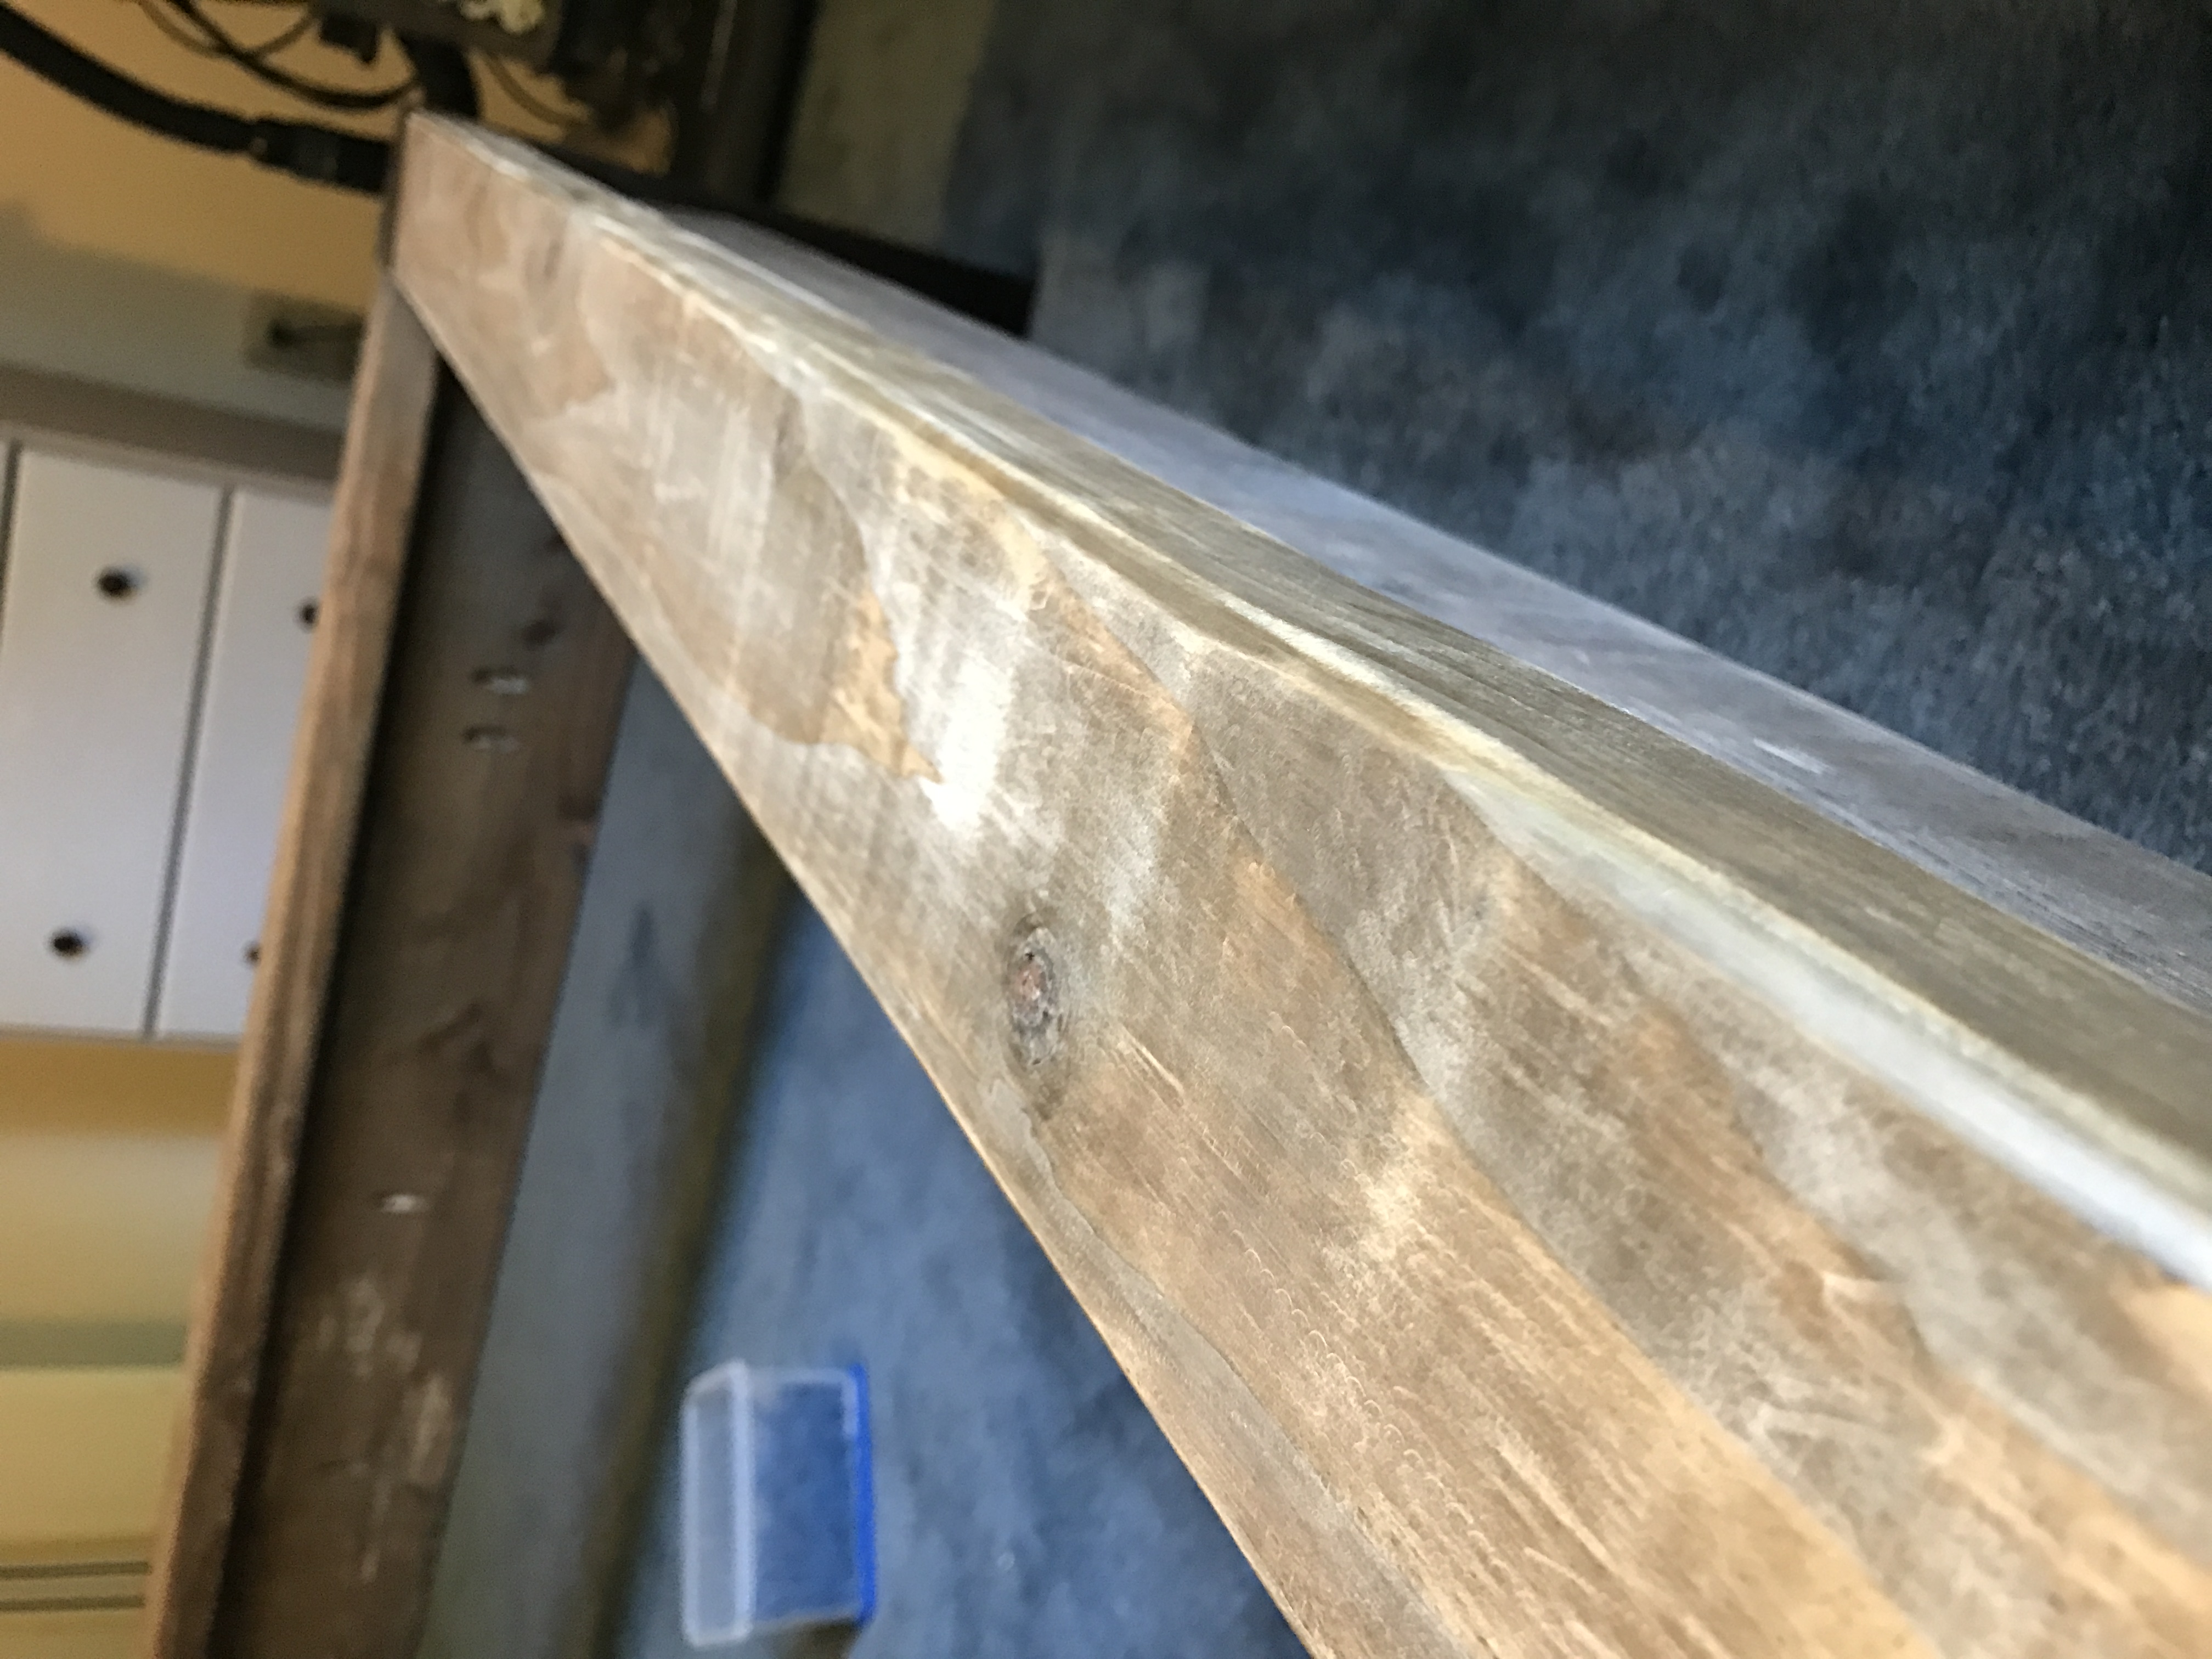
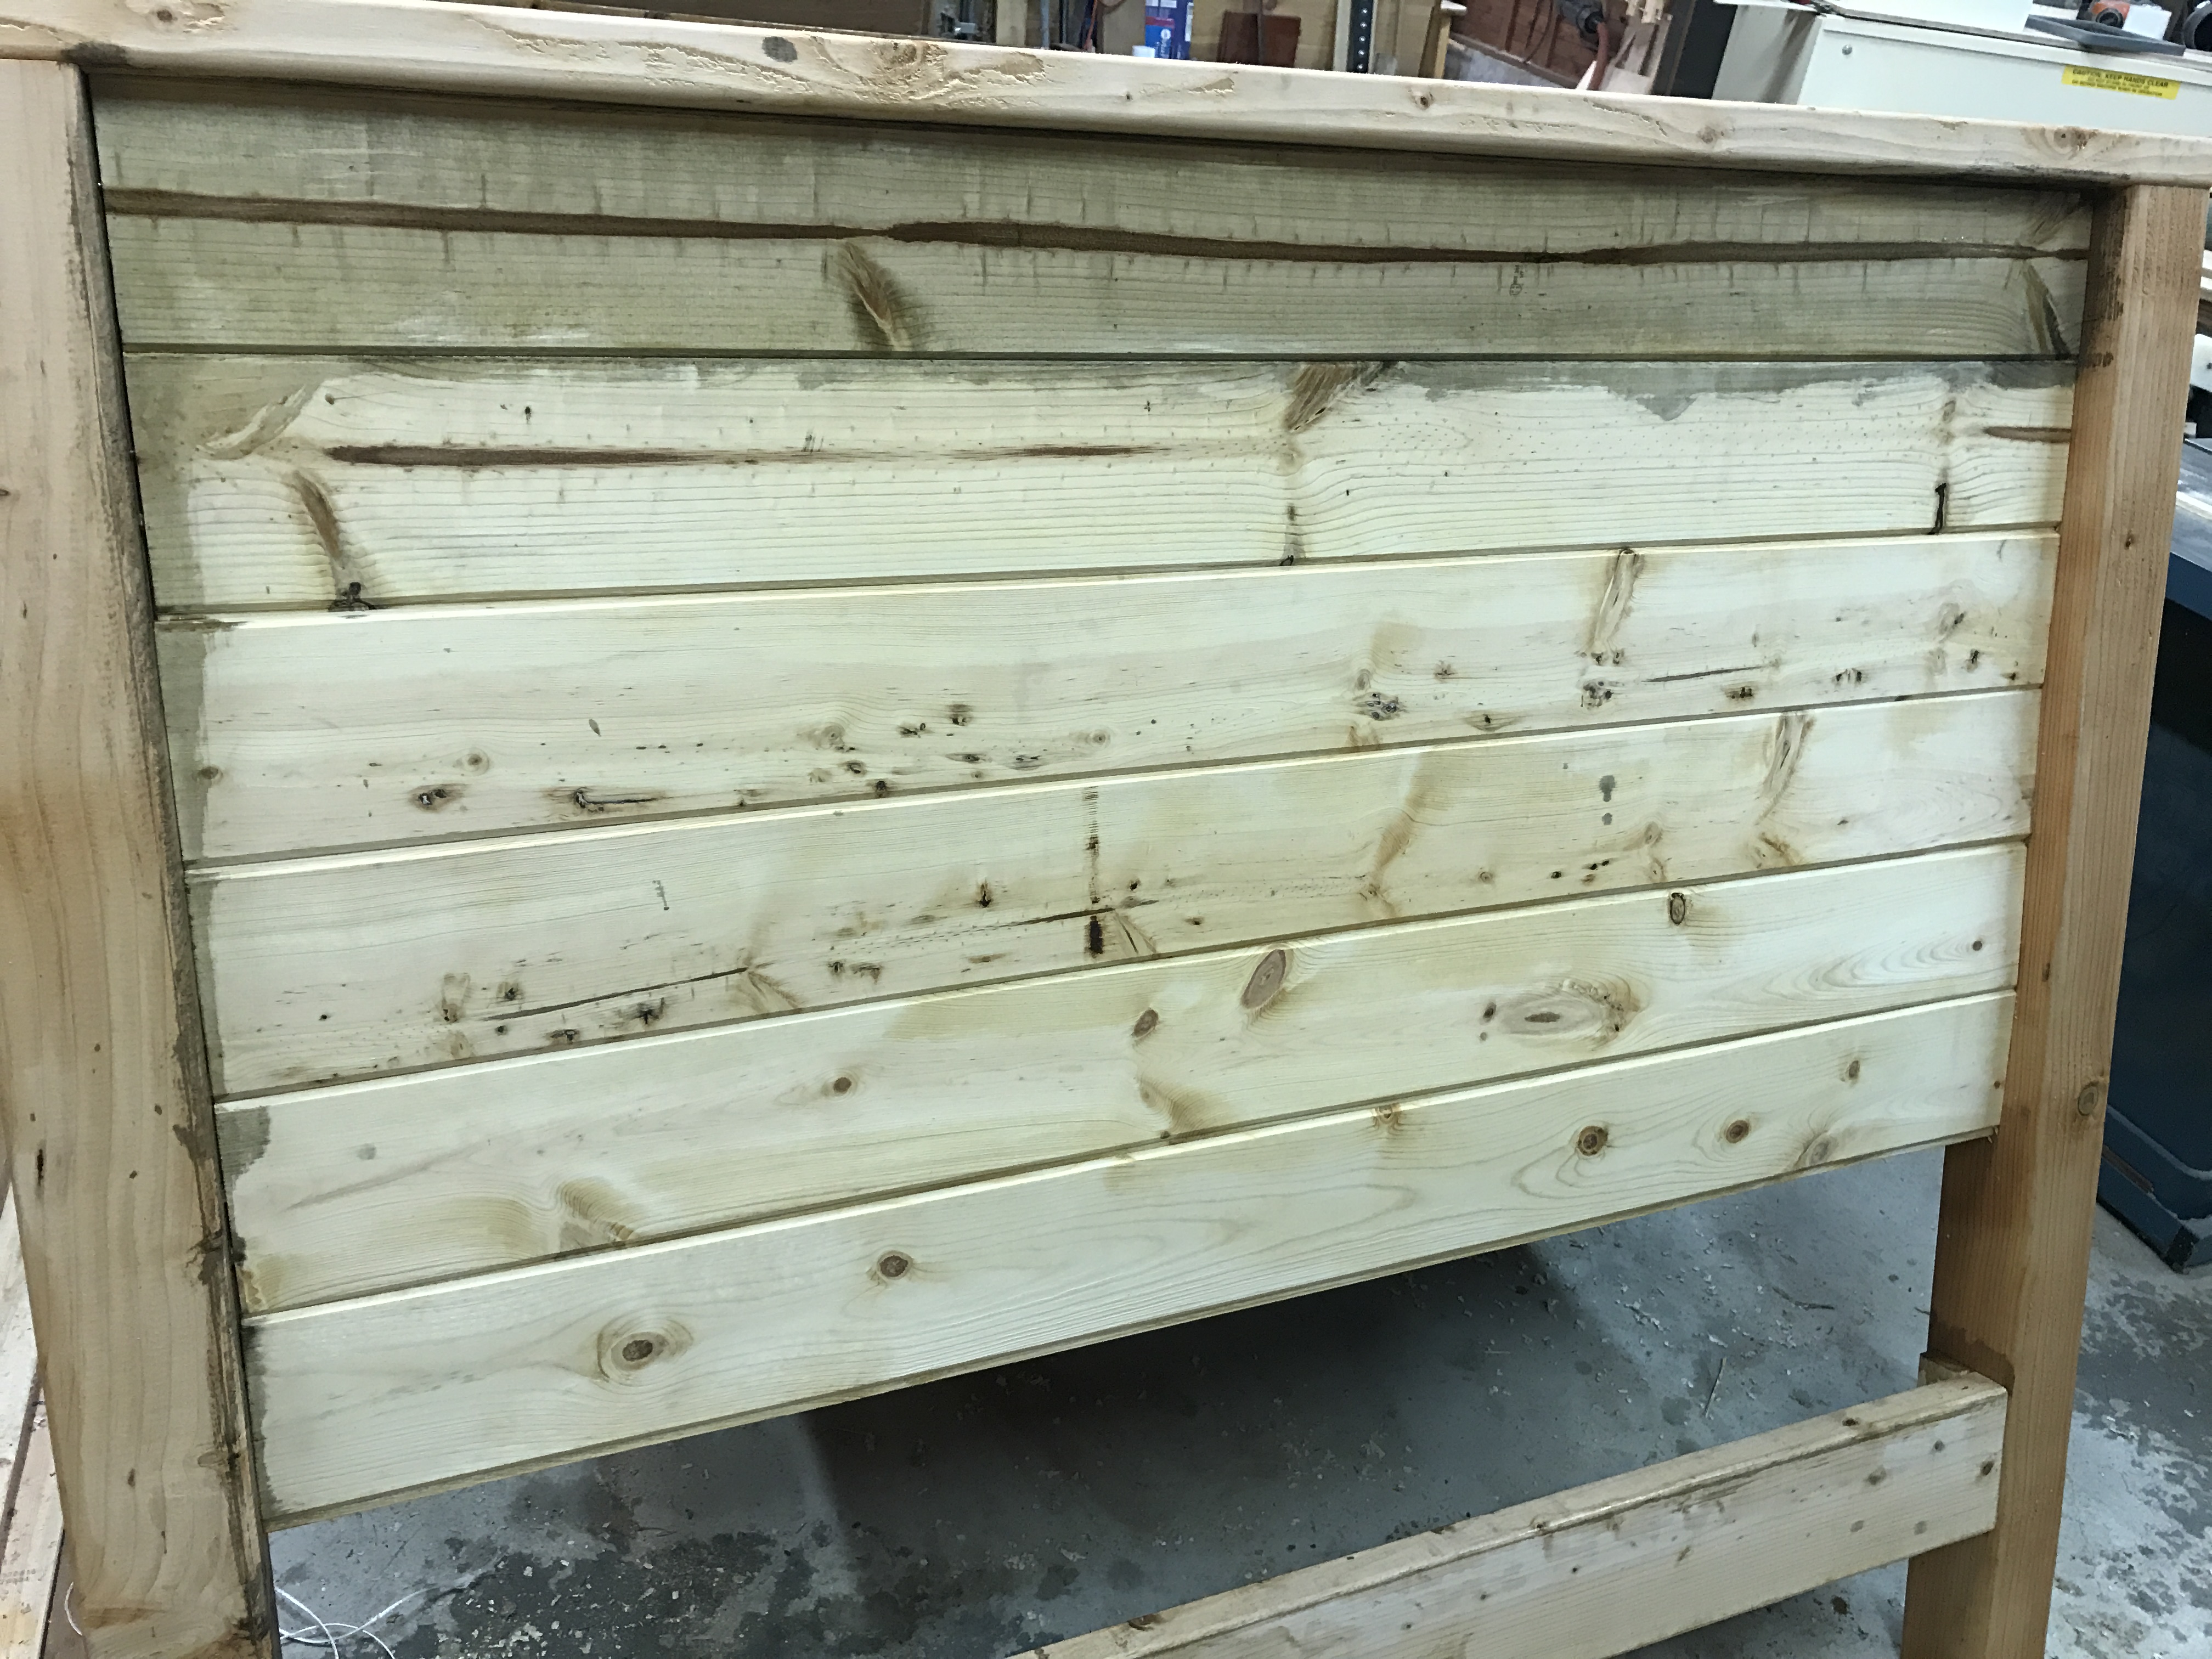
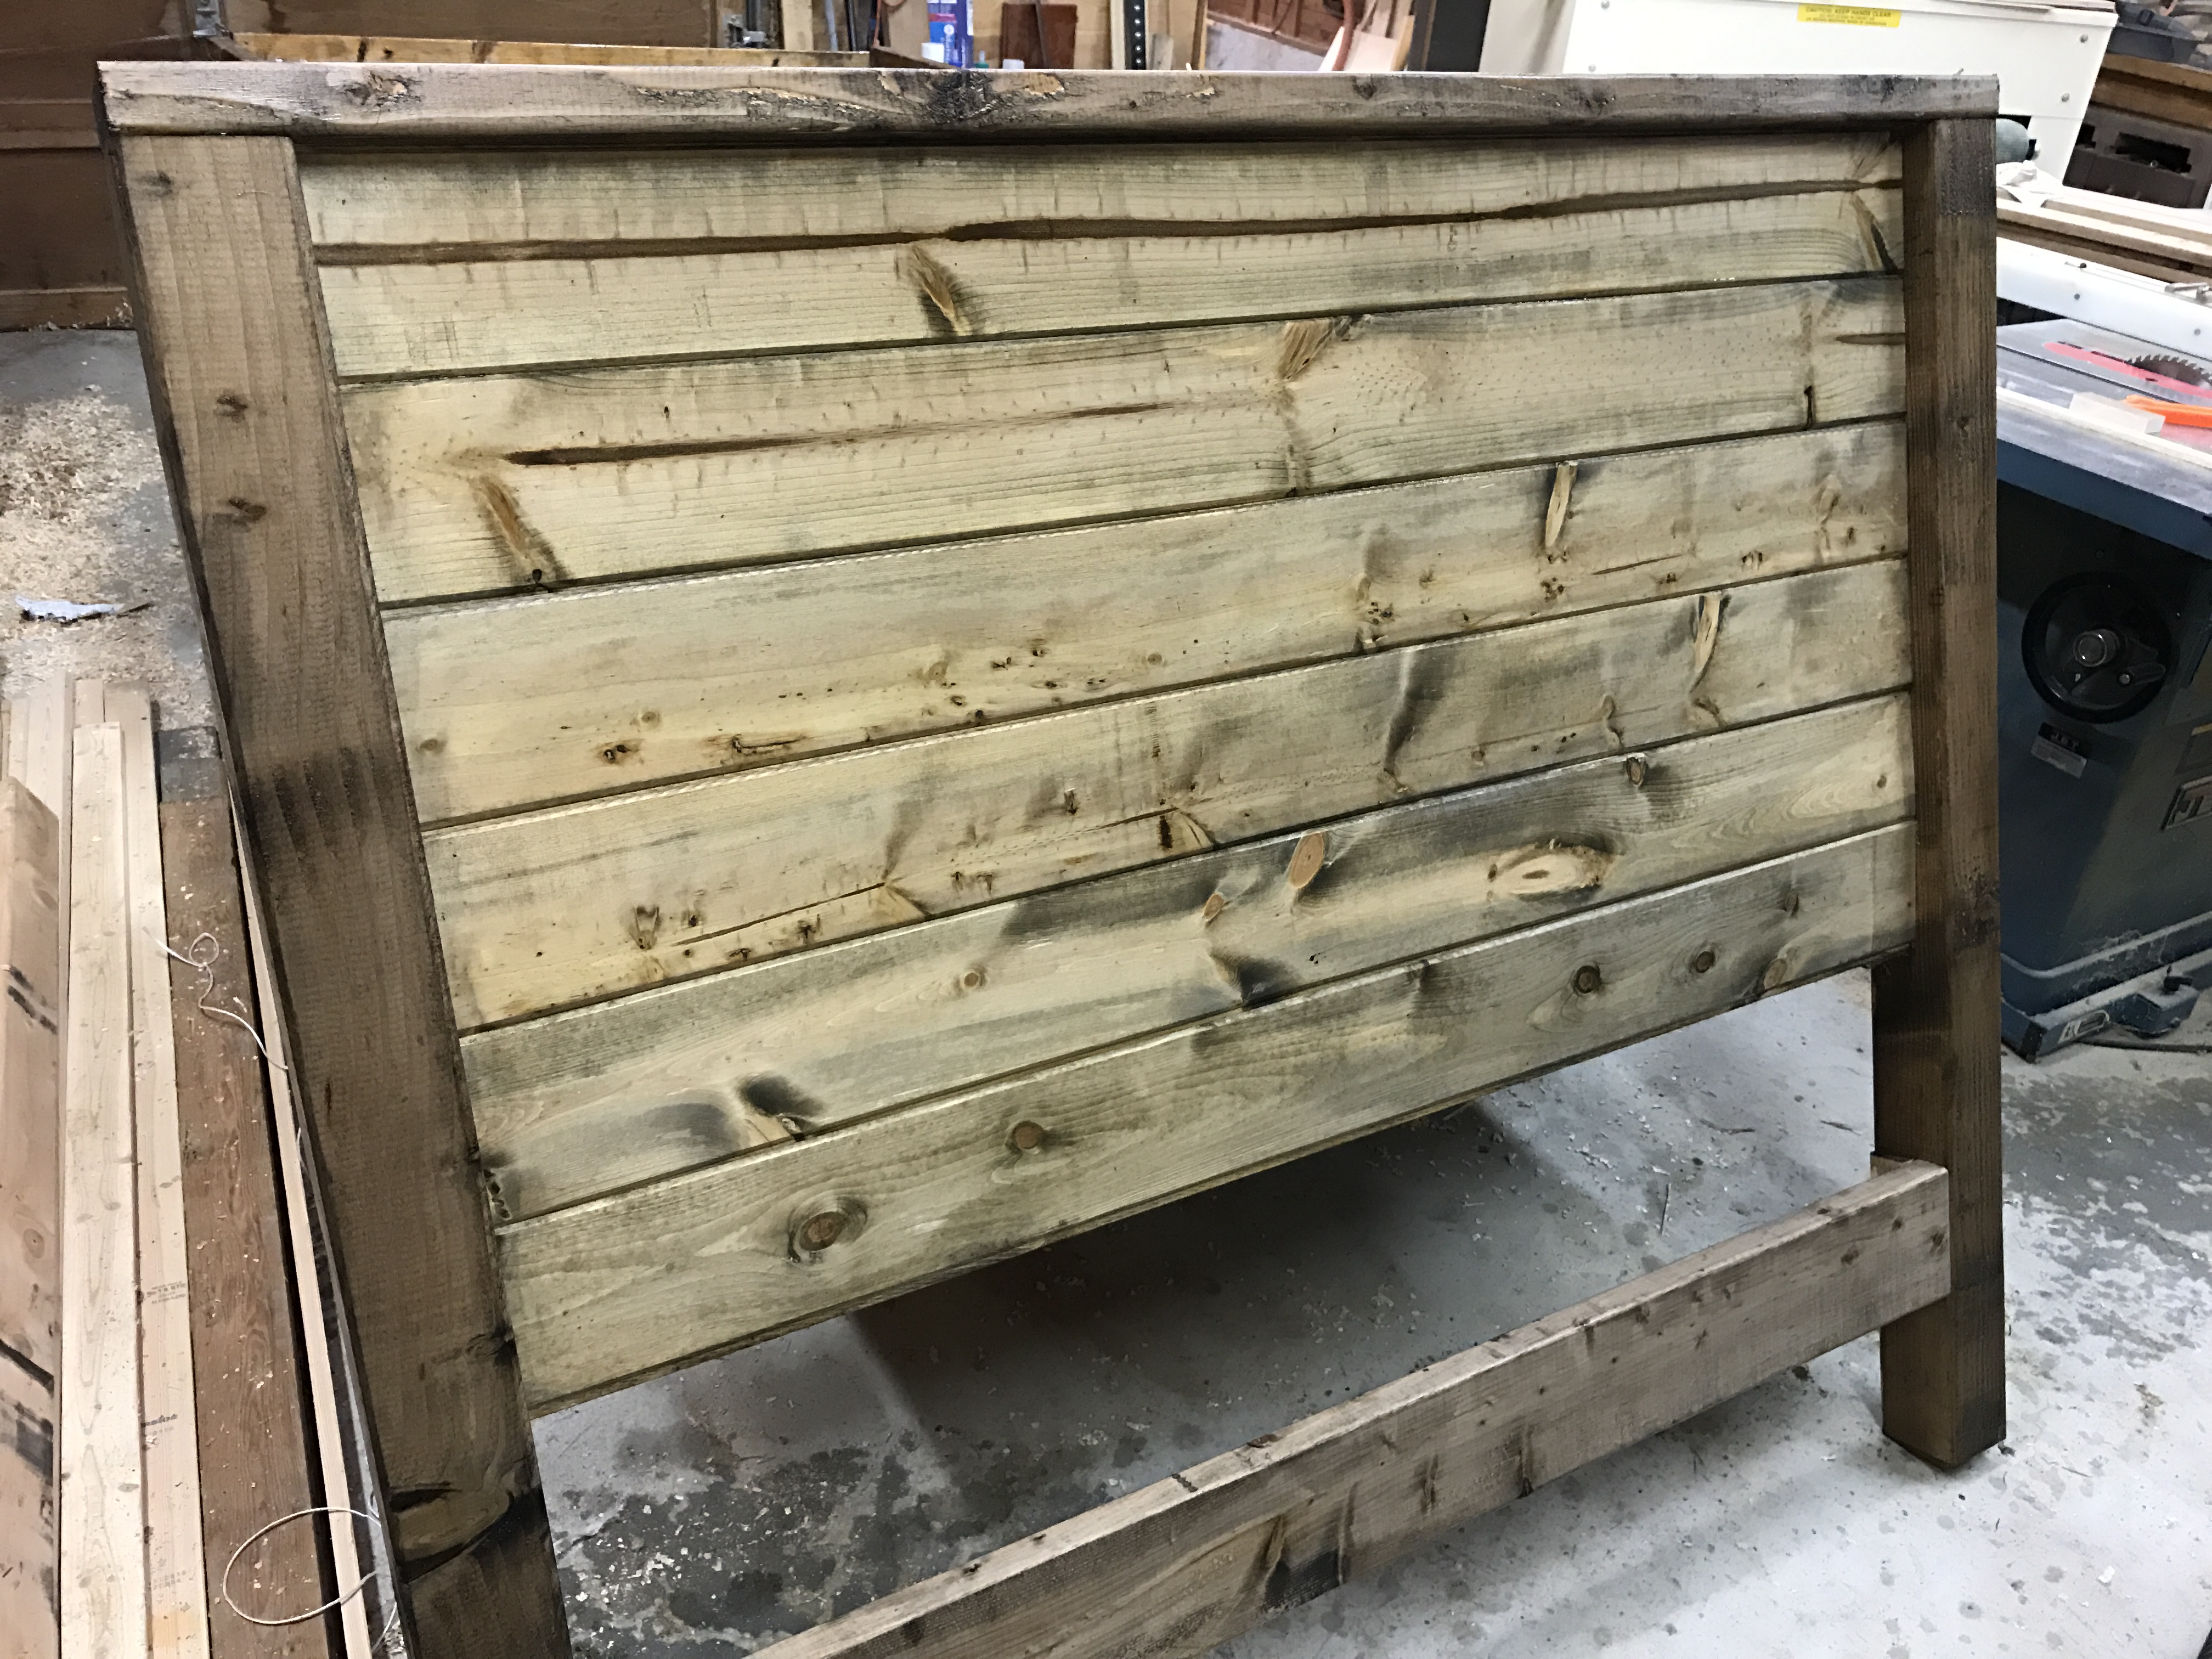
Modern Farmhouse Bed
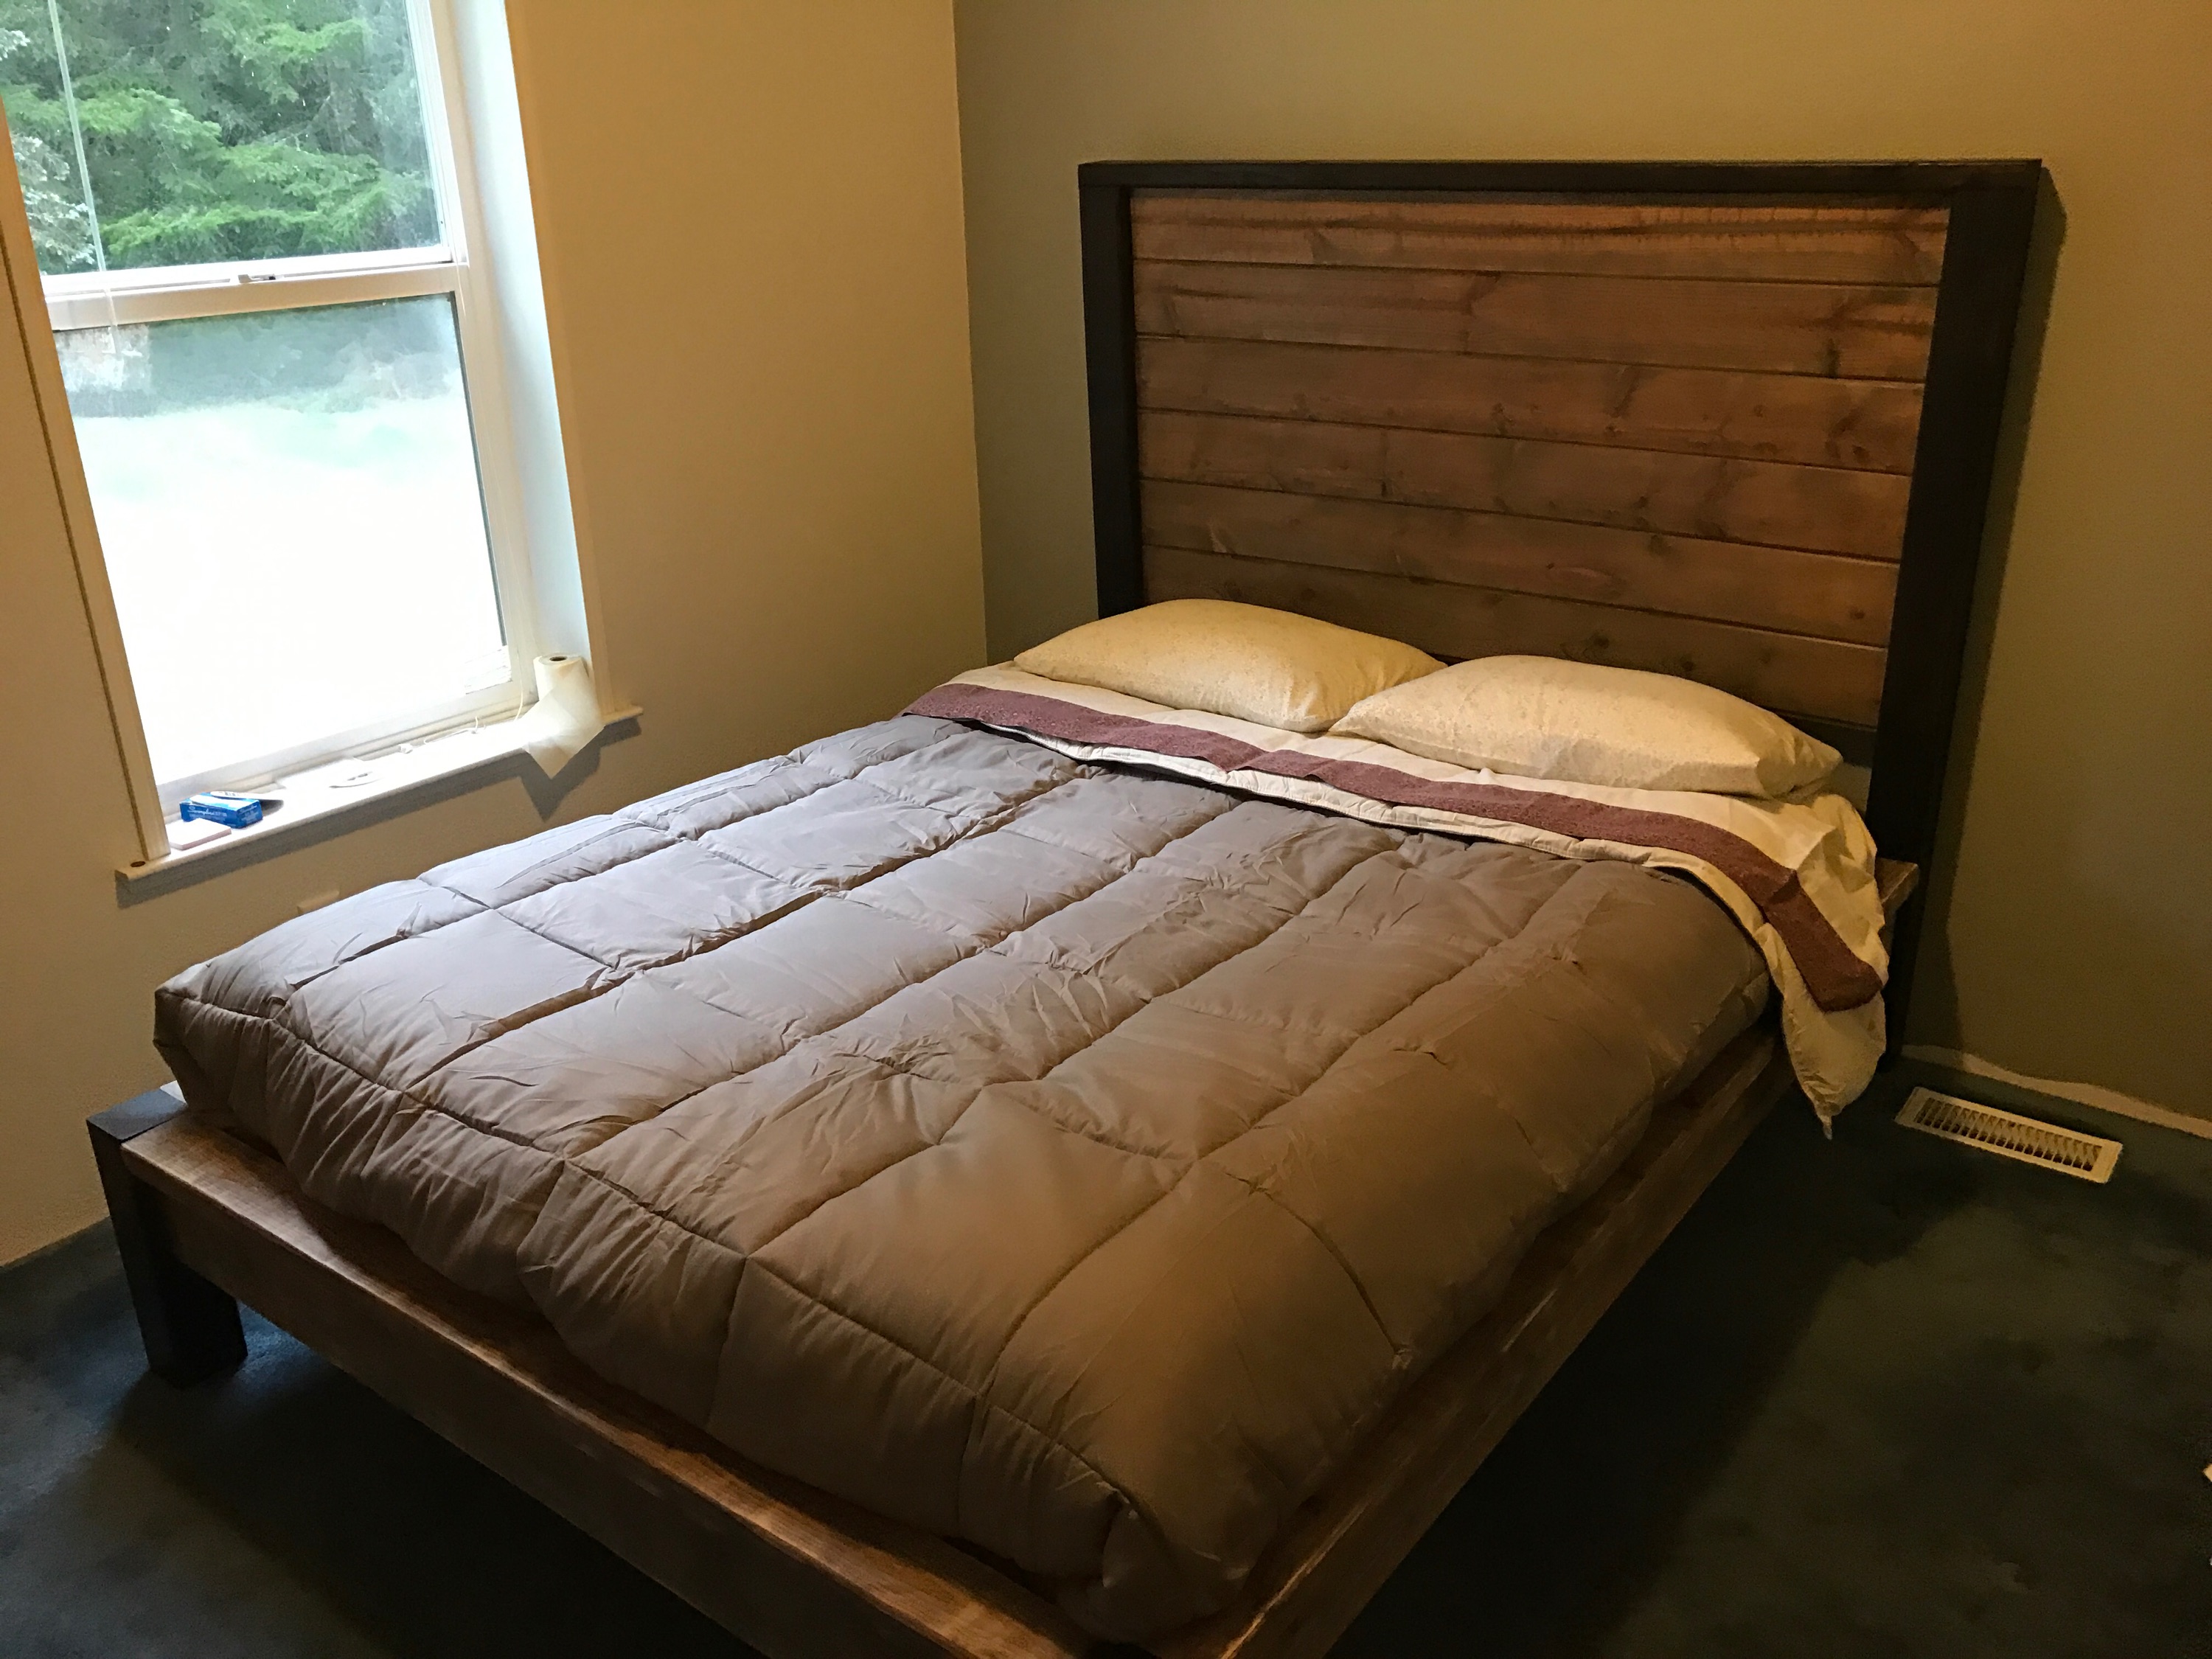
$200 build and approximately a weekend to complete with finishing the wood.
Added a tongue/groove plank (6x total)
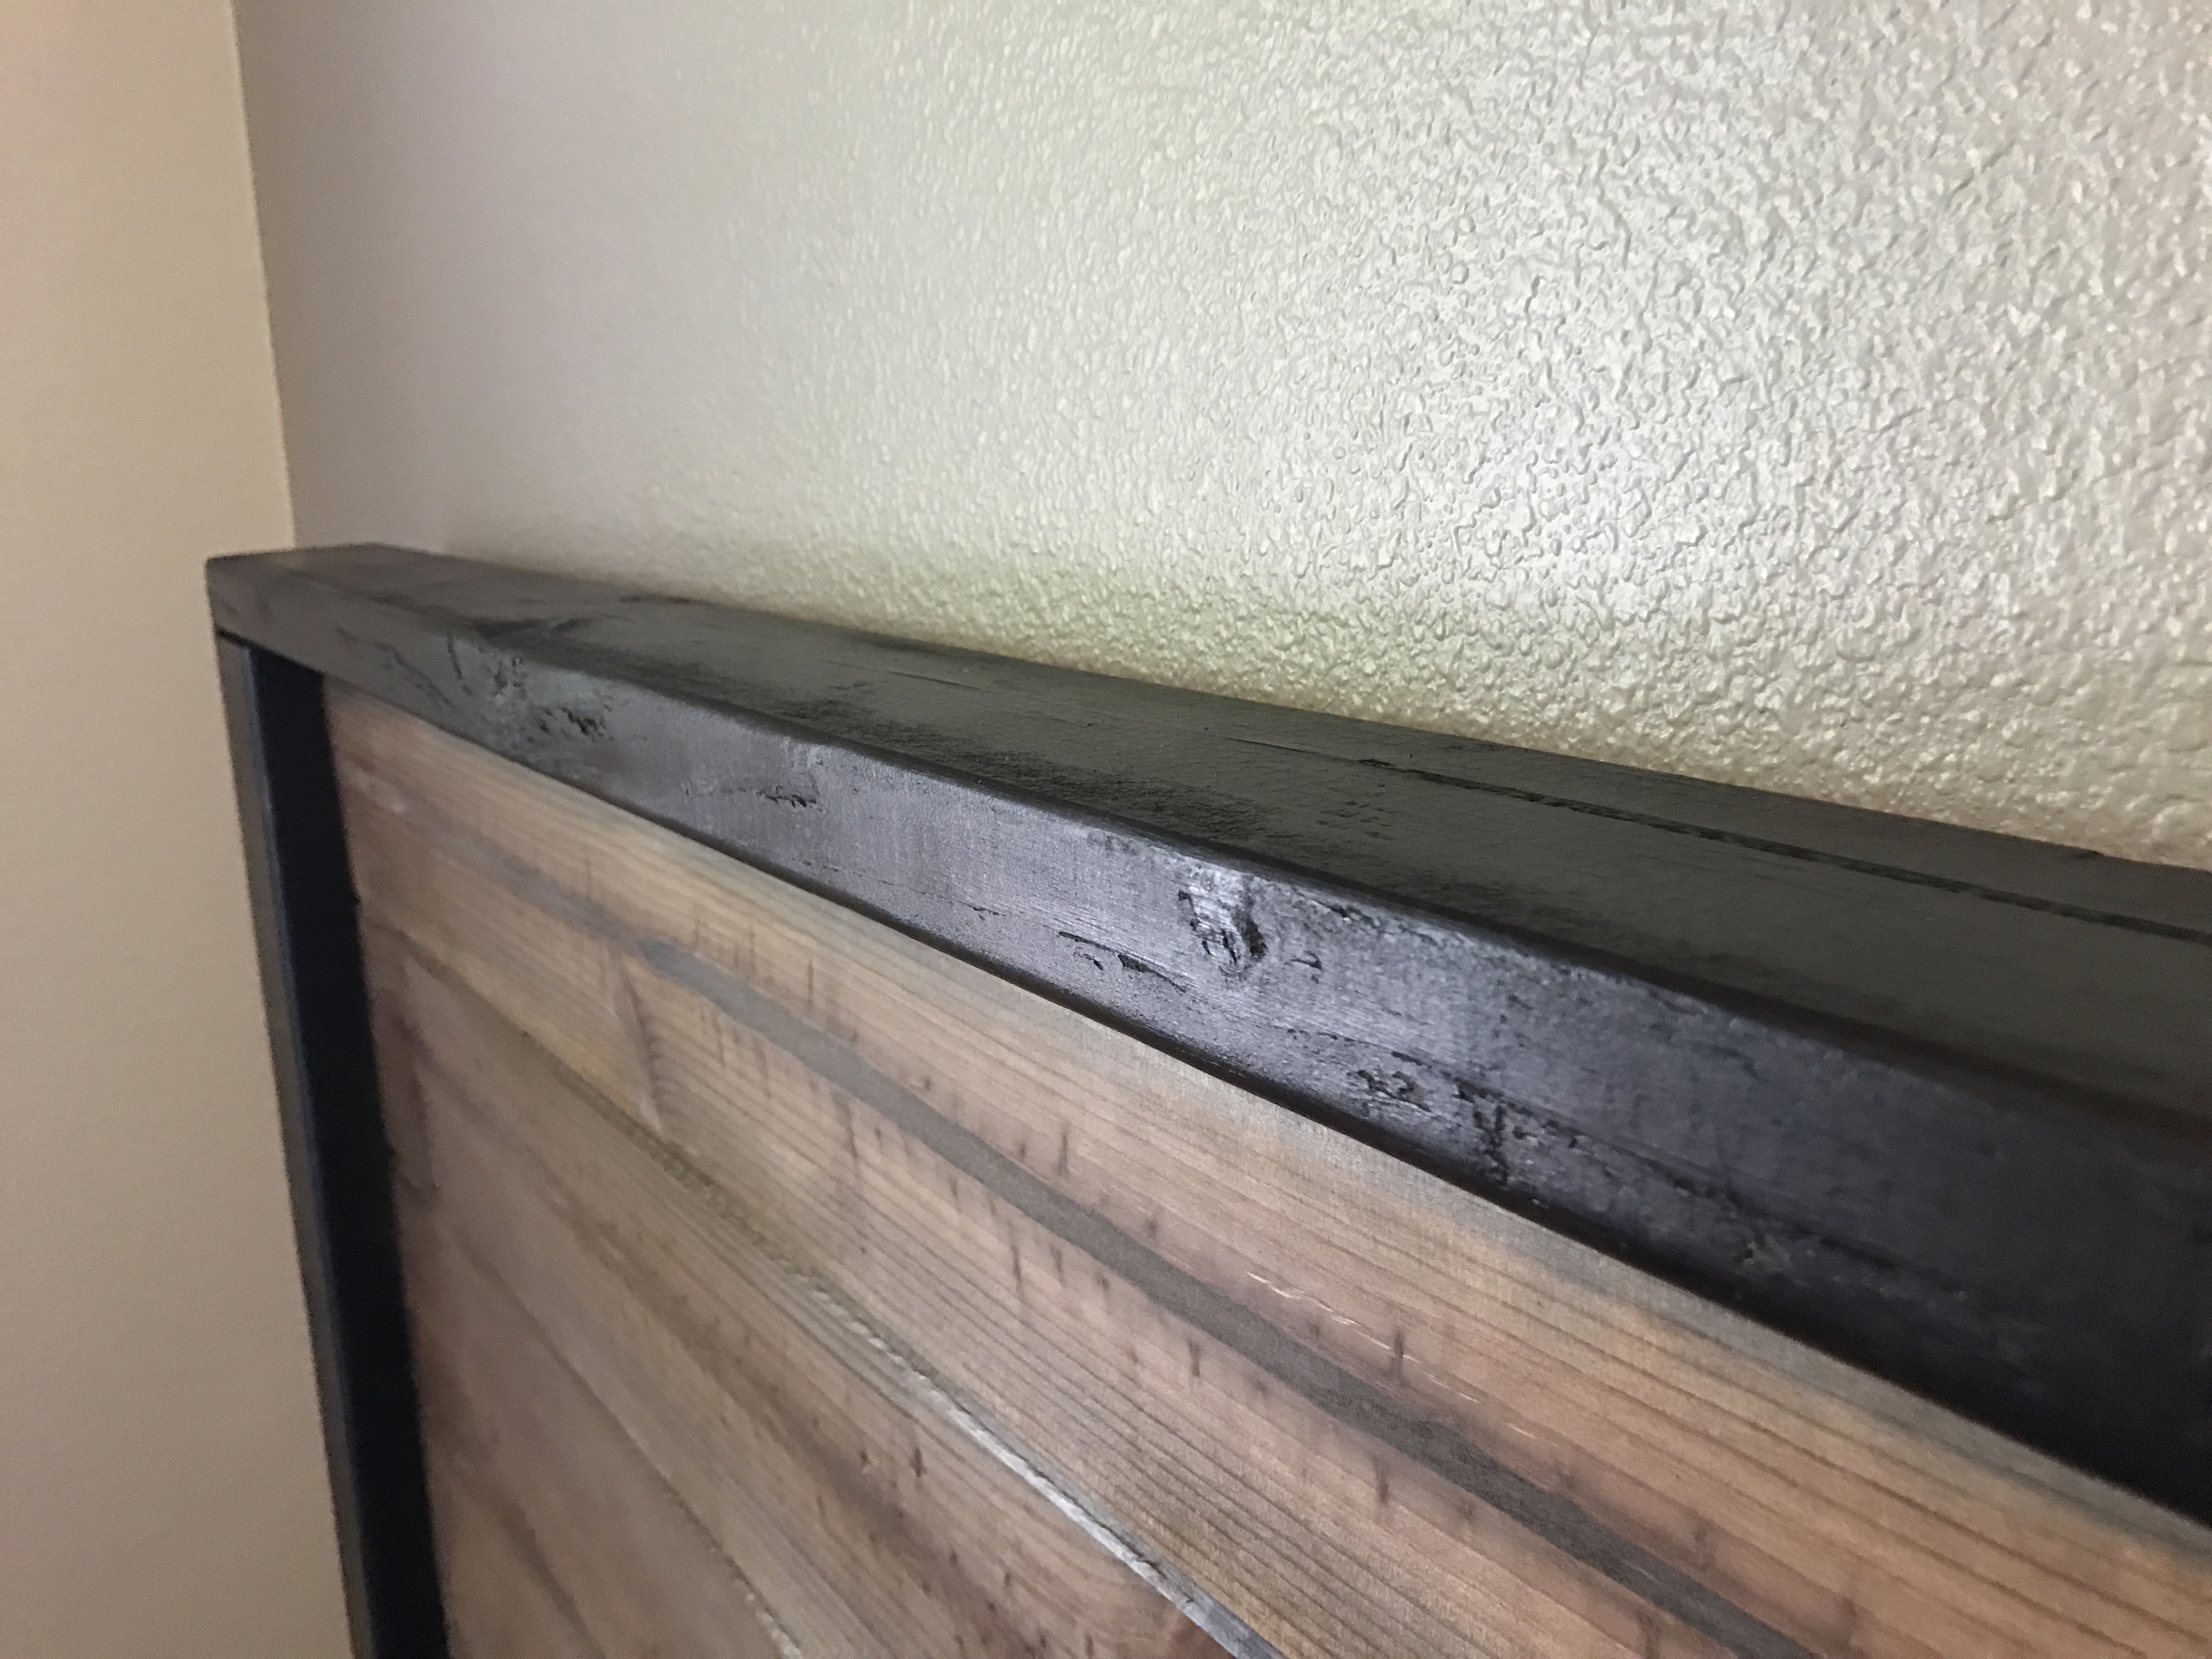
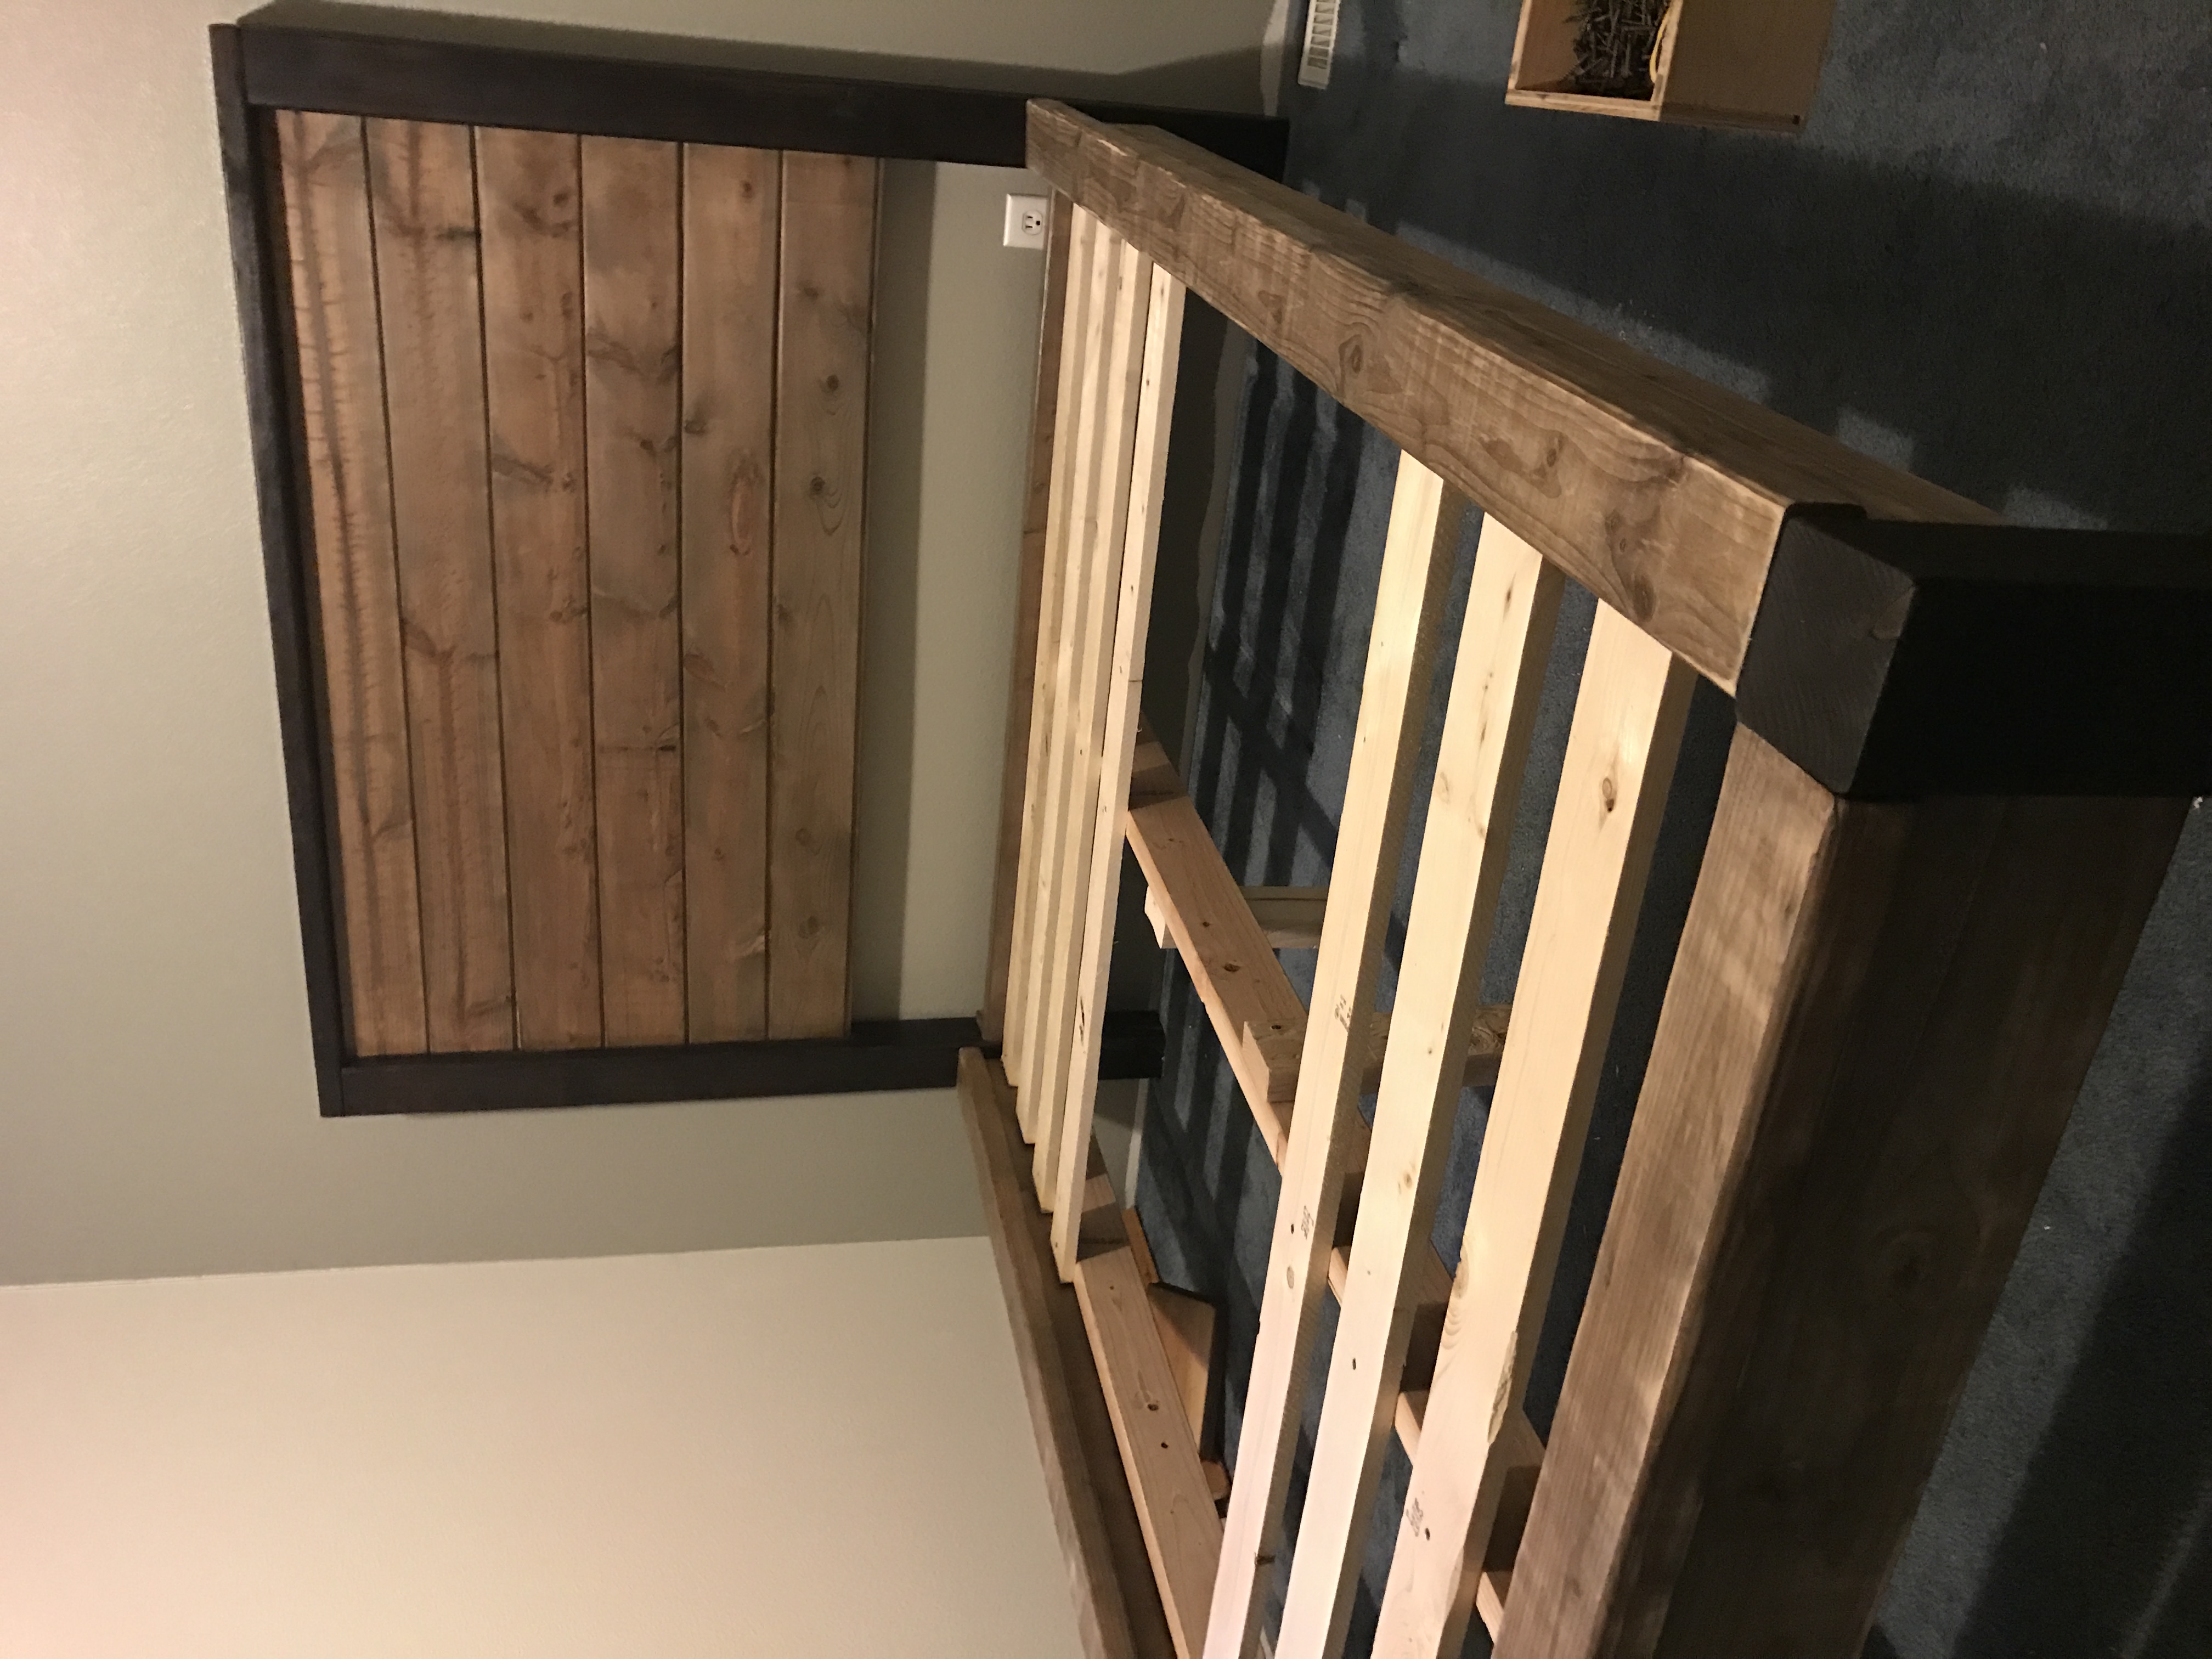
Built from Plan(s)
Estimated Cost
$200
Estimated Time Investment
Weekend Project (10-20 Hours)
Finish Used
Brewed tea and vinegar/steel wool stain. Finished with a clear wax on the rails and tongue/groove planks. Dark pieces were waxed using briwax.
Recommended Skill Level
Beginner