Community Brag Posts

My Farmhouse/homework table

Submitted by ajcajj on Fri, 08/05/2011 - 10:47

I saw the plans for the narrow farmhouse table and had.to.have.it! I showed my husband and he liked it but wanted turned legs. This was the compromise. I'm so happy with how it turned out!

Built from Plan(s)
Estimated Cost
$28.00
Finish Used
I used a minwax stain with poly on the top and white on the legs
Recommended Skill Level
Beginner

A Different Take on the Cedar Shed

Submitted by afbutters on Sun, 10/18/2015 - 12:26

Loosely based on the small cedar fence picket storage shed plan, this was my first attempt at making a storage unit with a roof. There was only one unplanned trip to the store (to replace two 2x4's that I cut to the wrong length). Pro tip: "measure twice, cut once" doesn't work if you measure the wrong length twice. Also almost lost two fingertips because I'm an idiot and forgot the most basic of safety rules for power tools, namely the "don't put your fingers near the blade of a circular saw when it's in use" rule. Very lucky to only come out of it with a good scare and some wounds that will heal without permanent damage. 

Built from Plan(s)
Estimated Cost
$500 (Canadian)
Estimated Time Investment
Weekend Project (10-20 Hours)
Recommended Skill Level
Beginner

Comments

Sideboard

Submitted by Anonymous (not verified) on Mon, 01/21/2019 - 23:48

Really enjoyed making this! Thank you for the plans Ana White! 

Built from Plan(s)
Estimated Cost
250.00
Estimated Time Investment
Weekend Project (10-20 Hours)
Finish Used
Rustoleum Chalked linen white with gloss finish.
Recommended Skill Level
Intermediate

Comments

Hidden slid top addition.

Submitted by Anonymous (not verified) on Sun, 01/27/2019 - 19:15

I wanted a add a safe spot to hide all my gaming controllers and remotes from my 1 1/2 yr old nephew. It was pretty simple and I got the idea from tactical designs. They make hidden storage! If you cant tell it is still dusty from sanding! Best wipe it off!

Estimated Cost
120
Estimated Time Investment
Week Long Project (20 Hours or More)
Finish Used
Ipswich pine with polyurethane top coat.
Recommended Skill Level
Beginner

Sofa Console Table Bar Height for Dining

Submitted by ezematis1 on Mon, 01/23/2023 - 06:55

I took the basic idea of the Rustic X Console. Raised it to countertop height so I could use it for three stools. I also added a shelf so people sitting on the sectional could put drinks right behind them. Added a charging station to that shelf as well. Topped it with a live edge black walnut slab. Finally, I didn't use the X because the table was too high and the base was too narrow to make the X work. I used a tablesaw to cut a grove in the legs and then put a 1/4 plywood panel.

Built from Plan(s)

Comments

ladder shelf build

Submitted by Anonymous (not verified) on Thu, 02/16/2023 - 09:02

Thanks for the plans had to go with something like this to avoid putting cabinets in and risk hitting a water line in the wall.

Comments

Reclaimed wood - look Headboard and . modified platform bed.

Made wider for a king and modified platform bed. Used a weathered oak stain followed by a 50/50 whitewash.

Estimated Cost
$300 ish
Estimated Time Investment
Week Long Project (20 Hours or More)
Finish Used
Used a weathered oak stain followed by a 50/50 whitewash. Varythaned.
Recommended Skill Level
Intermediate

A little take on Ana's sink

Submitted by Anonymous (not verified) on Sun, 02/19/2023 - 21:55

This was a build to convince my wife that I should do the cabinets in our new house...now I have to do them all. I should have just said, Sure, go to Ikea!"

Comments

Modern Craft Table *tweaked*

Completed Modern Craft Table! We tweaked the plans a bit because I was looking for a larger table top. The top now measures 48" x 76". We simply did this by adding an extra set of cubbies to the other side of the shelves. Absolutely LOVE how this turned out! All I need now is 4 counter height stools built and lots of shelves to complete my craft room! Will be sure to post those once they are completed!

Built from Plan(s)
Estimated Time Investment
Weekend Project (10-20 Hours)
Finish Used
Ultra White Latex Paint
Recommended Skill Level
Beginner

Comments

Ana White

Thu, 11/17/2011 - 01:10

Darn I was so excited to see you craft table! I apologize that your brag post did not show images. If you can send me images at knockoffwood(at)gmail.com I'd be happy to post. Thanks so much for submitting a brag post. Ana

Guest (not verified)

Sun, 03/04/2012 - 07:31

I LOVE LOVE LOVE your craft table. I want one! Looks like my husband wil have to get busy! Thanks for sharing!
Kristina
Houston, TX

Kimmy (not verified)

Tue, 03/20/2012 - 17:51

Is this the pic of the one you did ?? I am wanting a bigger table top too. I have waited years for just the right table and this is it.

Kimmy (not verified)

Tue, 03/20/2012 - 17:51

Is this the pic of the one you did ?? I am wanting a bigger table top too. I have waited years for just the right table and this is it.

Kimmy (not verified)

Tue, 03/20/2012 - 17:54

Is this the one you made ? I want a bigger table top as well. But I don't see the extra cubbies.

Kimmy (not verified)

Tue, 03/20/2012 - 17:54

Is this the one you made ? I want a bigger table top as well. But I don't see the extra cubbies.

naildoctors

Tue, 05/29/2012 - 00:05

This is great!! I am planning something similar, but what is your idea or the plan you used for the middle support to keep it from sagging over time? My idea is to run another cubby in the middle from side to side. What do you think?

Laura Mulholland (not verified)

Mon, 01/21/2013 - 09:54

I love the modern craft table, just what I have been looking for, do you share instructions, dimensions, etc.? thanks, Laura

HapETexanGal

Thu, 05/12/2016 - 15:14

I'm loving this and would love to have FIL build it for me but the plans look like its for the regular modern craft table but not the tweaked?  Also is there support for the middle?  Can you send me a link for the tweaked supply list please, can't seem to find it.  Love what you do!

Privacy wall

We needed some privacy from the neighbors and to hide their pool equipment and voilà!!! 4 2x4 for the frame 22 1x4 for the slats

Built from Plan(s)
Estimated Cost
$176
Estimated Time Investment
An Hour or Two (0-2 Hours)
Finish Used
None
Recommended Skill Level
Beginner

Comments

Modified washer/dryer pedestal

Submitted by KaraBoo on Wed, 02/03/2016 - 09:32

I loved the idea of building a washer and dryer pedestal for extra laundry basket storage underneath! Sashua's is beautiful so I took her idea and modified it a bit to work for me. My washer is very, very heavy and I was worried that if there was no support under the weight in the middle, it would start to bow and sag. The original plan also put the washer too high for me to have been able to use without a step stool. So in my modification I screwed cleats into the 2X4 frame of the laundry room wall, placed the 3/4" plywood on top of it and screwed it in. In the front, I used 4X4's as the two corner leg supports and then added two 1X6 supports in the front center, creating three laundry basket bays. I placed it directly onto the floor as opposed to building the bottom base. This saved me money since I was able to buy half the lumber and also allowed me to lower the height of the platform while leaving enough space for my baskets. The top of my platform is approximately 14 1/2" high, which is just low enough so that I can see into the soap filling compartment at the top of the washer. Being that I'm only 5'2" I would have needed to use a step stool to use my washer at the original 19 1/2" plan height. I framed the top edge of the platform with 2X2's, to ensure that my washer or dryer never walked off the edge. Finally, I added some trim along the front edge and around the legs and that's it!

Estimated Cost
$60
Estimated Time Investment
Afternoon Project (3-6 Hours)
Recommended Skill Level
Beginner

Comments

Codding58

Mon, 02/15/2016 - 12:25

I REALLY like this modified version, I think it looks GREAT!    when you say you screwed cleats to the back wall, are you talking a 2x4 across the back fastened to the studs, or what did you use?    I think my wife would love this version, and I may just have to get started on one myself.   yes

Storage Shed

Submitted by Anonymous (not verified) on Fri, 02/05/2016 - 10:53

The plans were great! I hadn't built anything this big before but just followed the instructions step by step. I did also built a base to put it on (pavers on sand then pressure treated 2x6 frame). It took quite a while but that's just mostly because I had "helpers" and had to work on it when I had a spare minute. I was pleasantly surprised by how much we were able to pack in there. We added electricity and made a few other modifications to a larger shed we had so my husband could use that as an office. I built this to store all the tools, yard equipment, etc that we moved out of there.

Built from Plan(s)
Estimated Cost
$400-$500 (I added a base and added flashing and roofing paper to the roof)
Estimated Time Investment
Week Long Project (20 Hours or More)
Recommended Skill Level
Beginner

My First Project

Submitted by Anonymous (not verified) on Wed, 05/24/2023 - 05:04

My very first woodworking project and could not have done it without you!!

Mistakes were made and lots was learned but pretty happy with how it turned out in the end.

Built from Plan(s)

Comments

Ten Dollar Ledges (which were free - sort of)

Submitted by lcf on Tue, 01/17/2012 - 22:18

Thanks for a great plan! I've been procrastinating in posting, since I have plans to start blogging and wanted to link. Unfortunately, my blog remains a pipe dream as I still can't come up with a name.

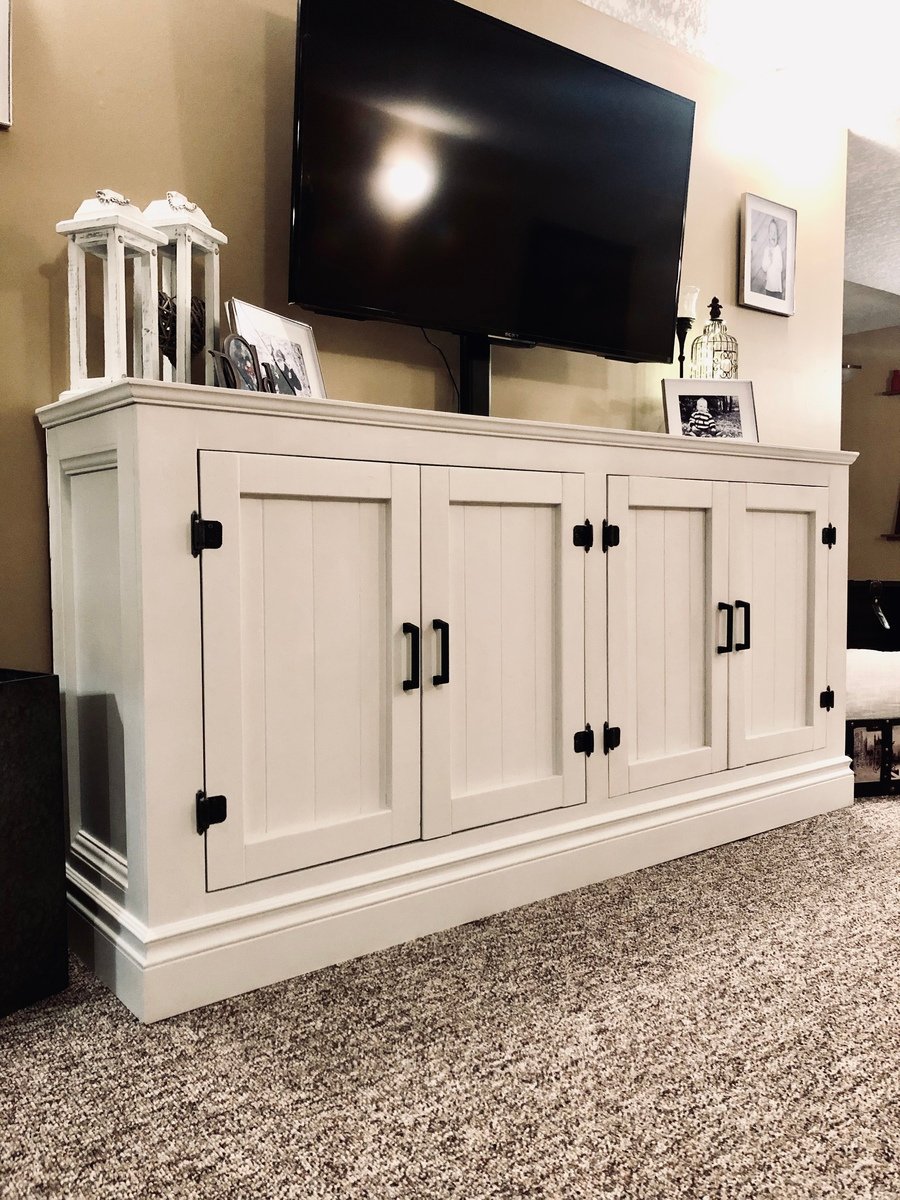
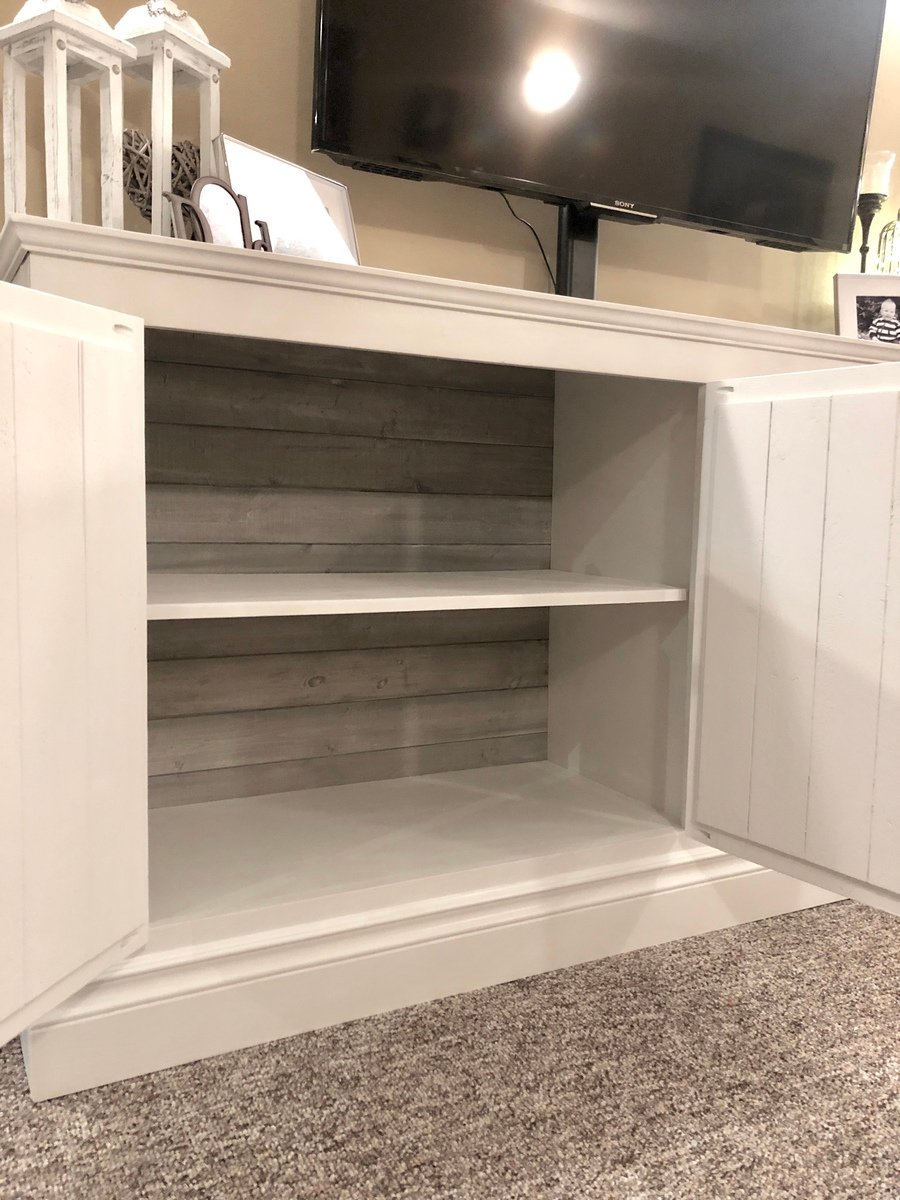
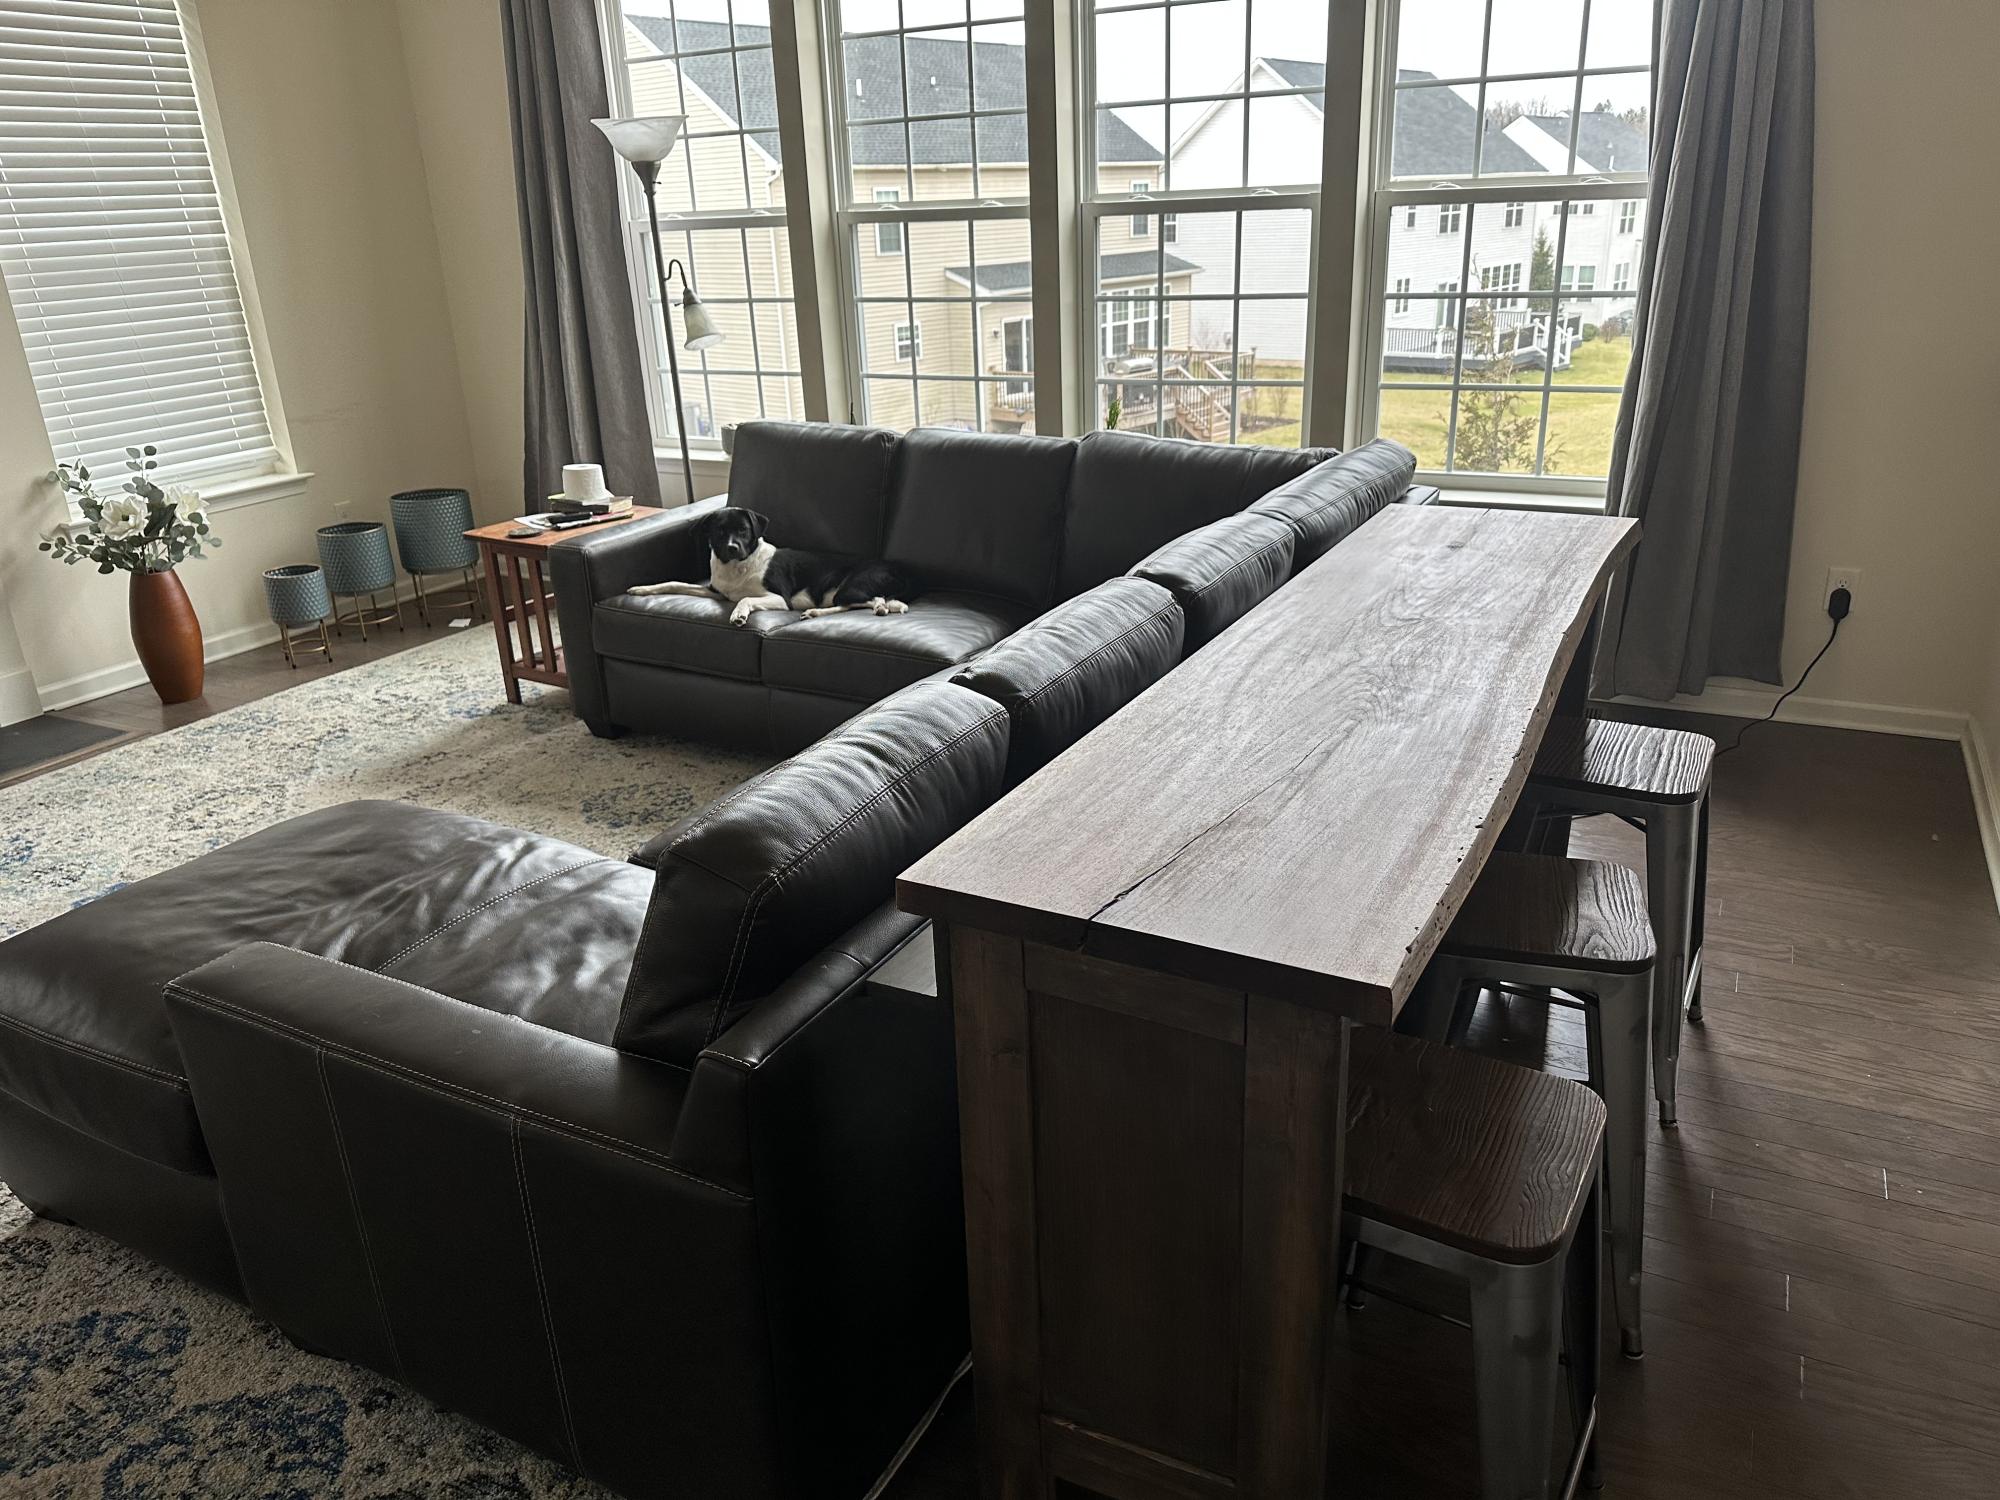
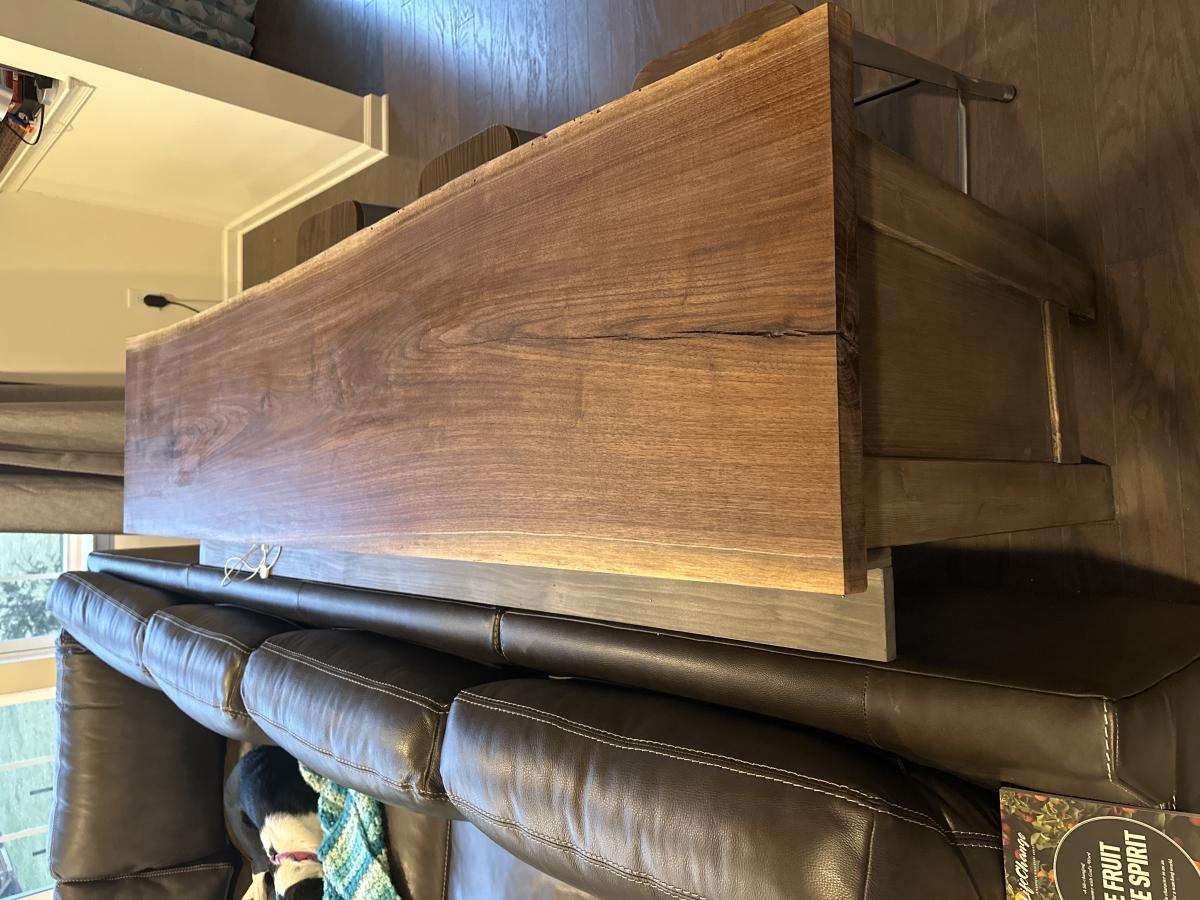
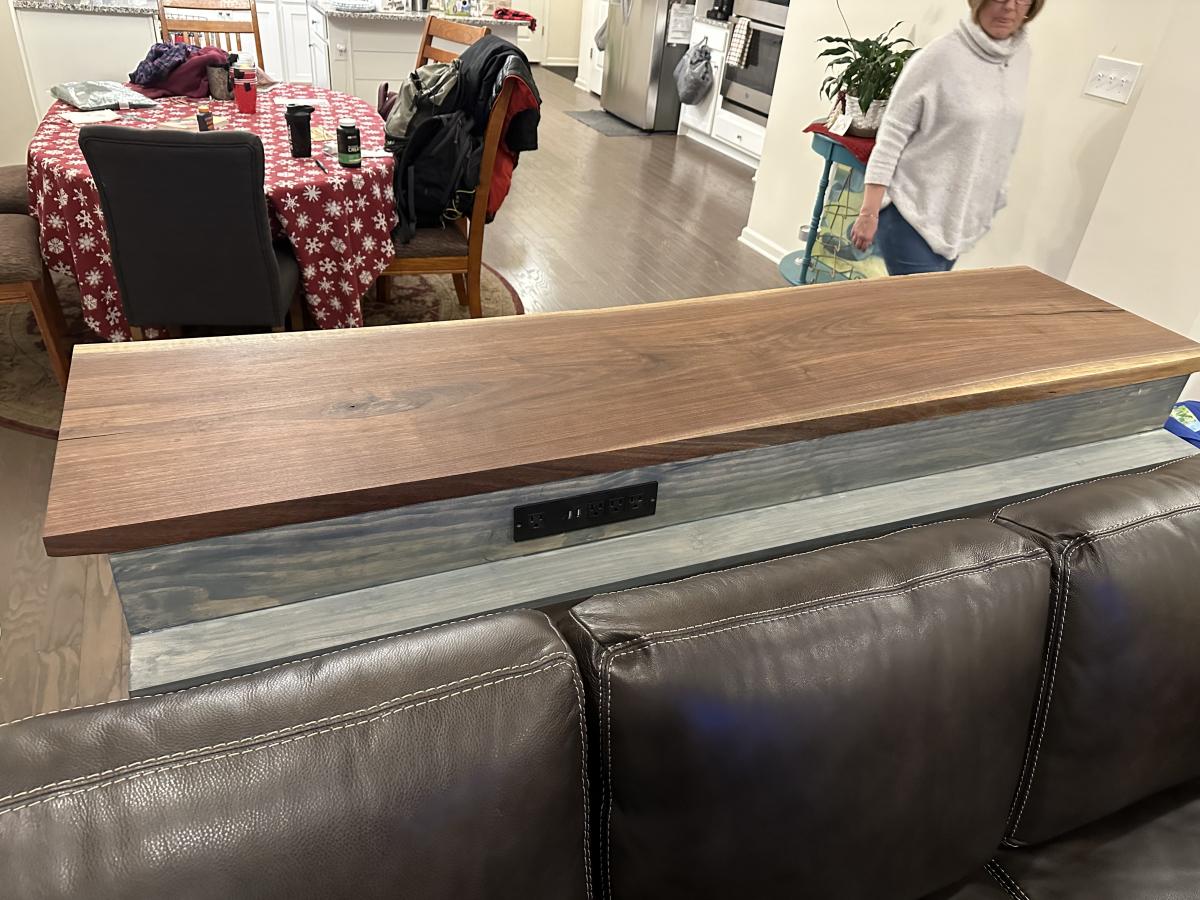
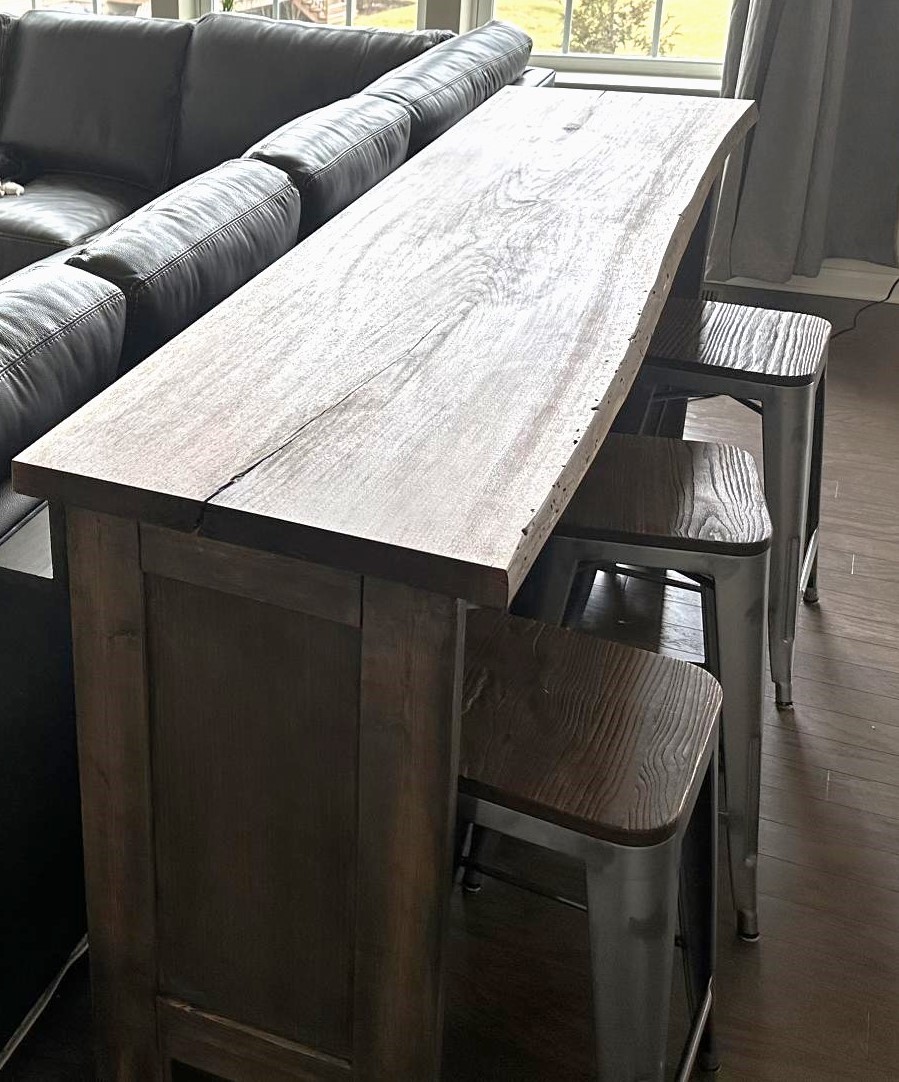
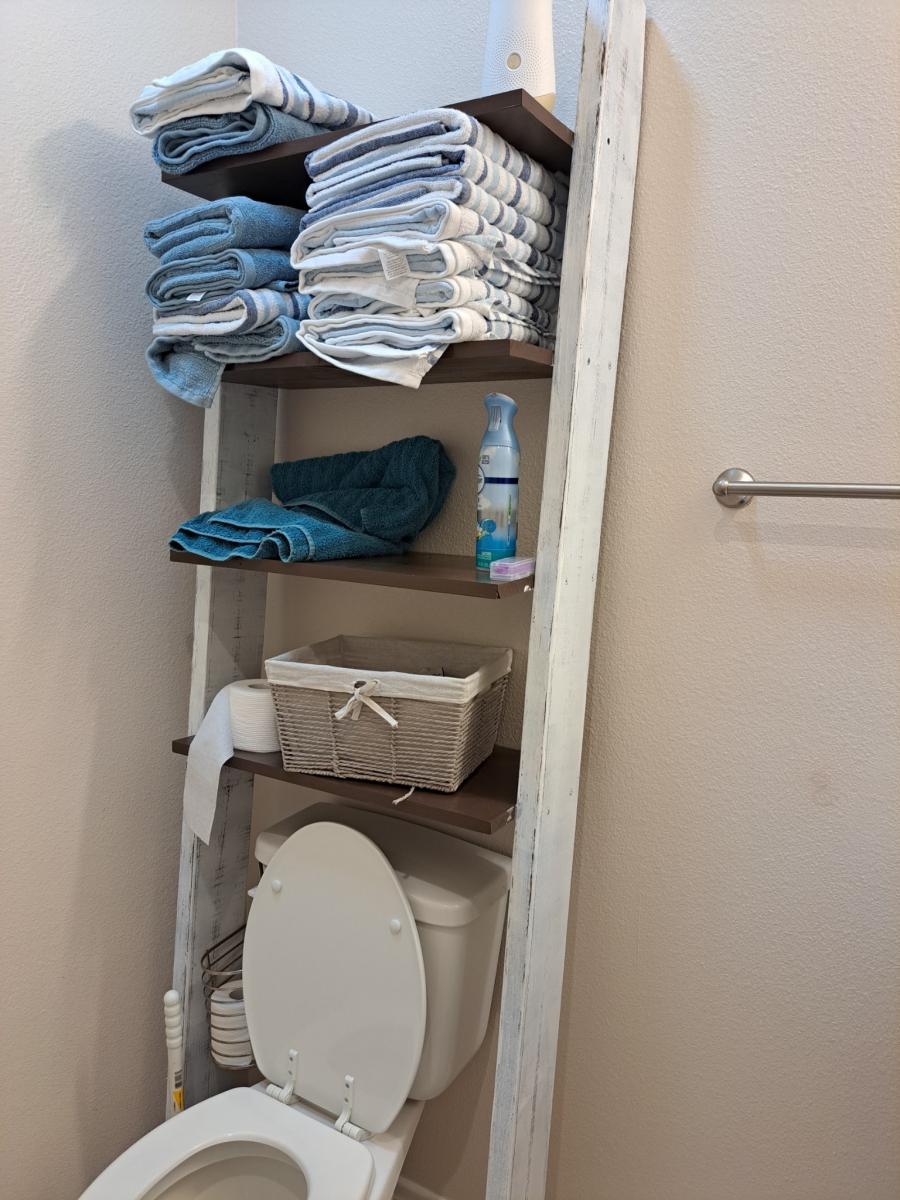
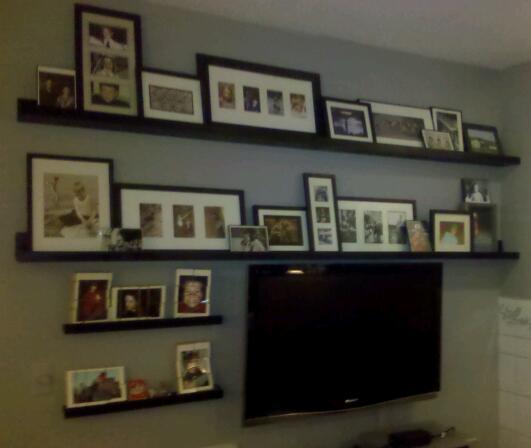
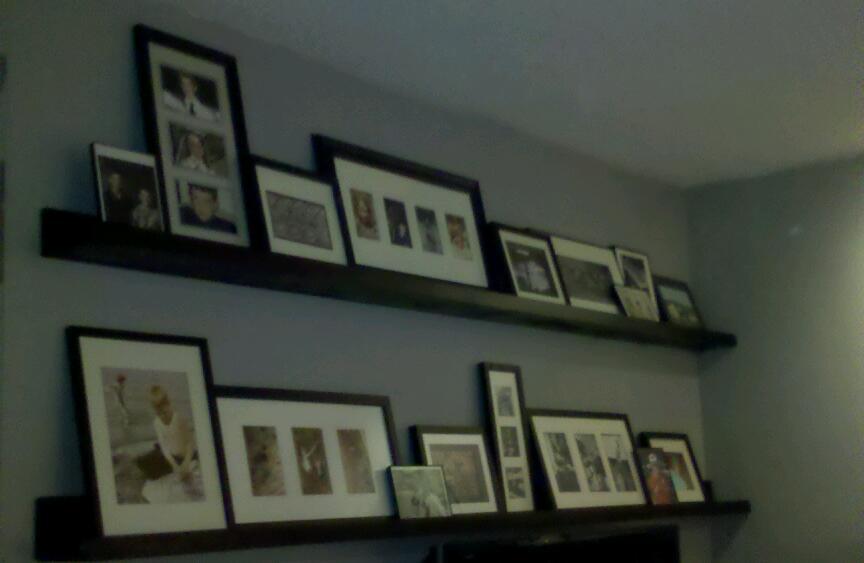
The two long ledges were the ones I made (smaller ones are ancient.) These have helped me a great deal in my efforts to pull together/put my own stamp on the most awkwardly laid out and chopped up house imaginable! The 'in your face effect' created by my piling nearly every photo I own on them should be temporary - wall space will open up as other rooms get done. I do think they soften up the gigantic television (Ok, stop laughing. It was worse before.).

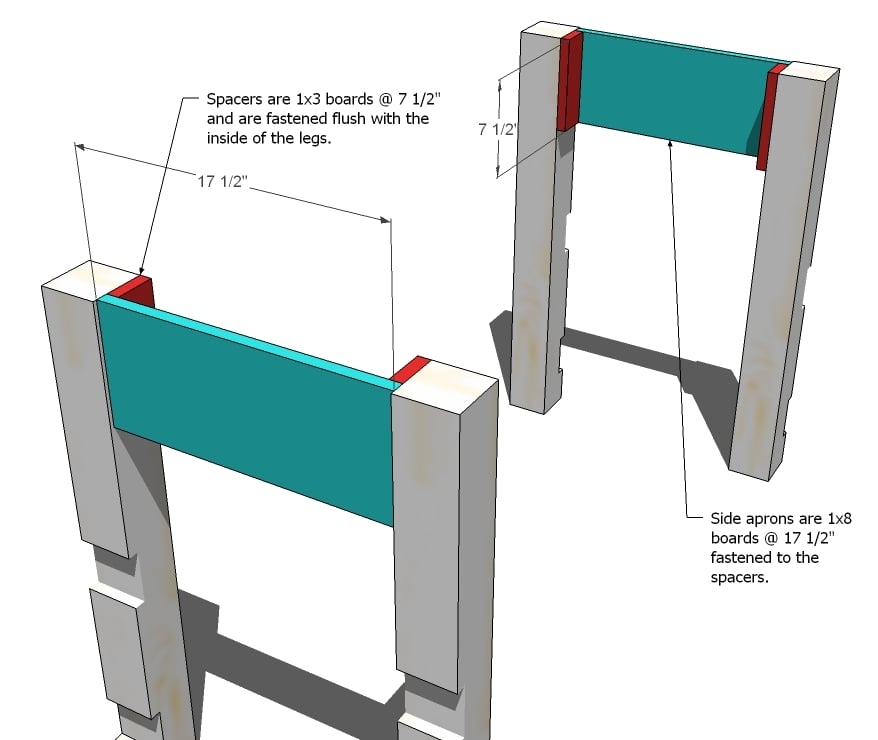
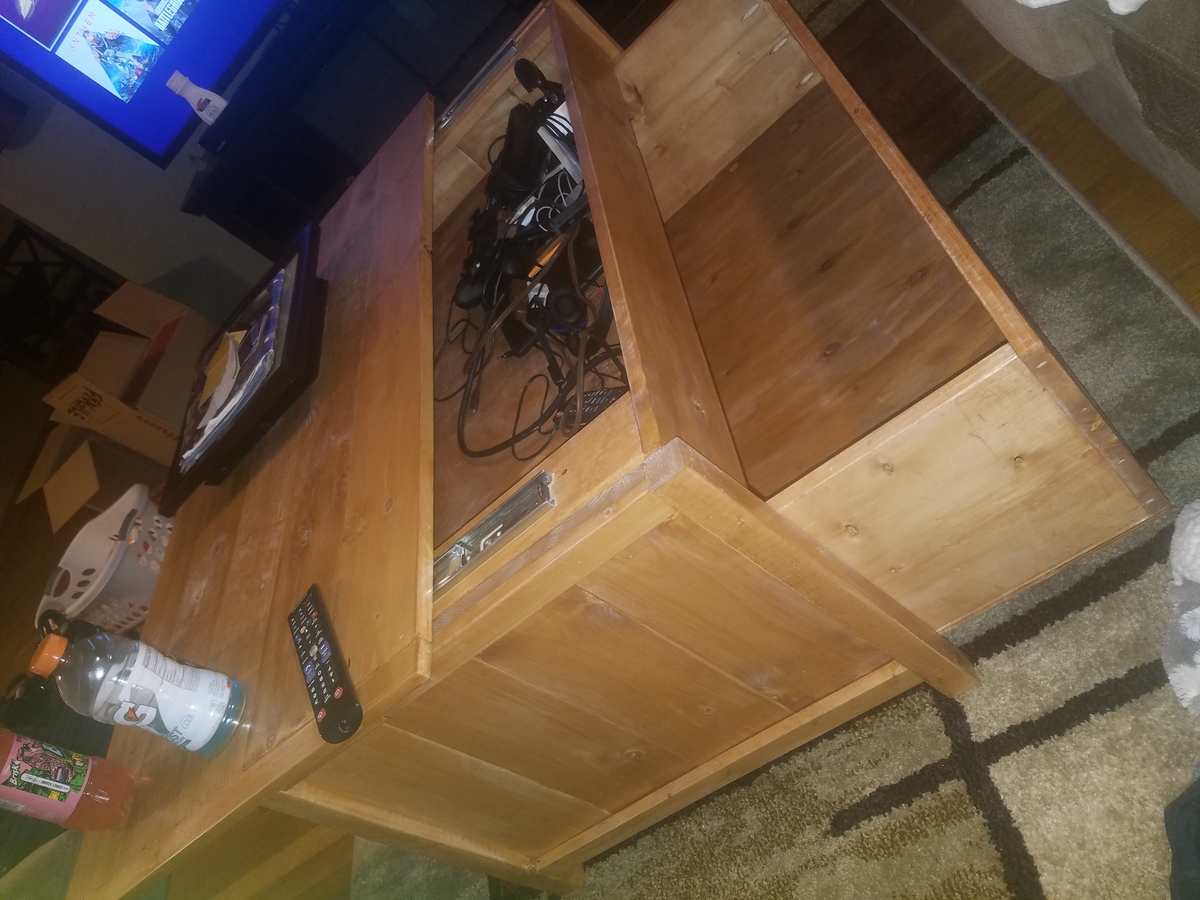
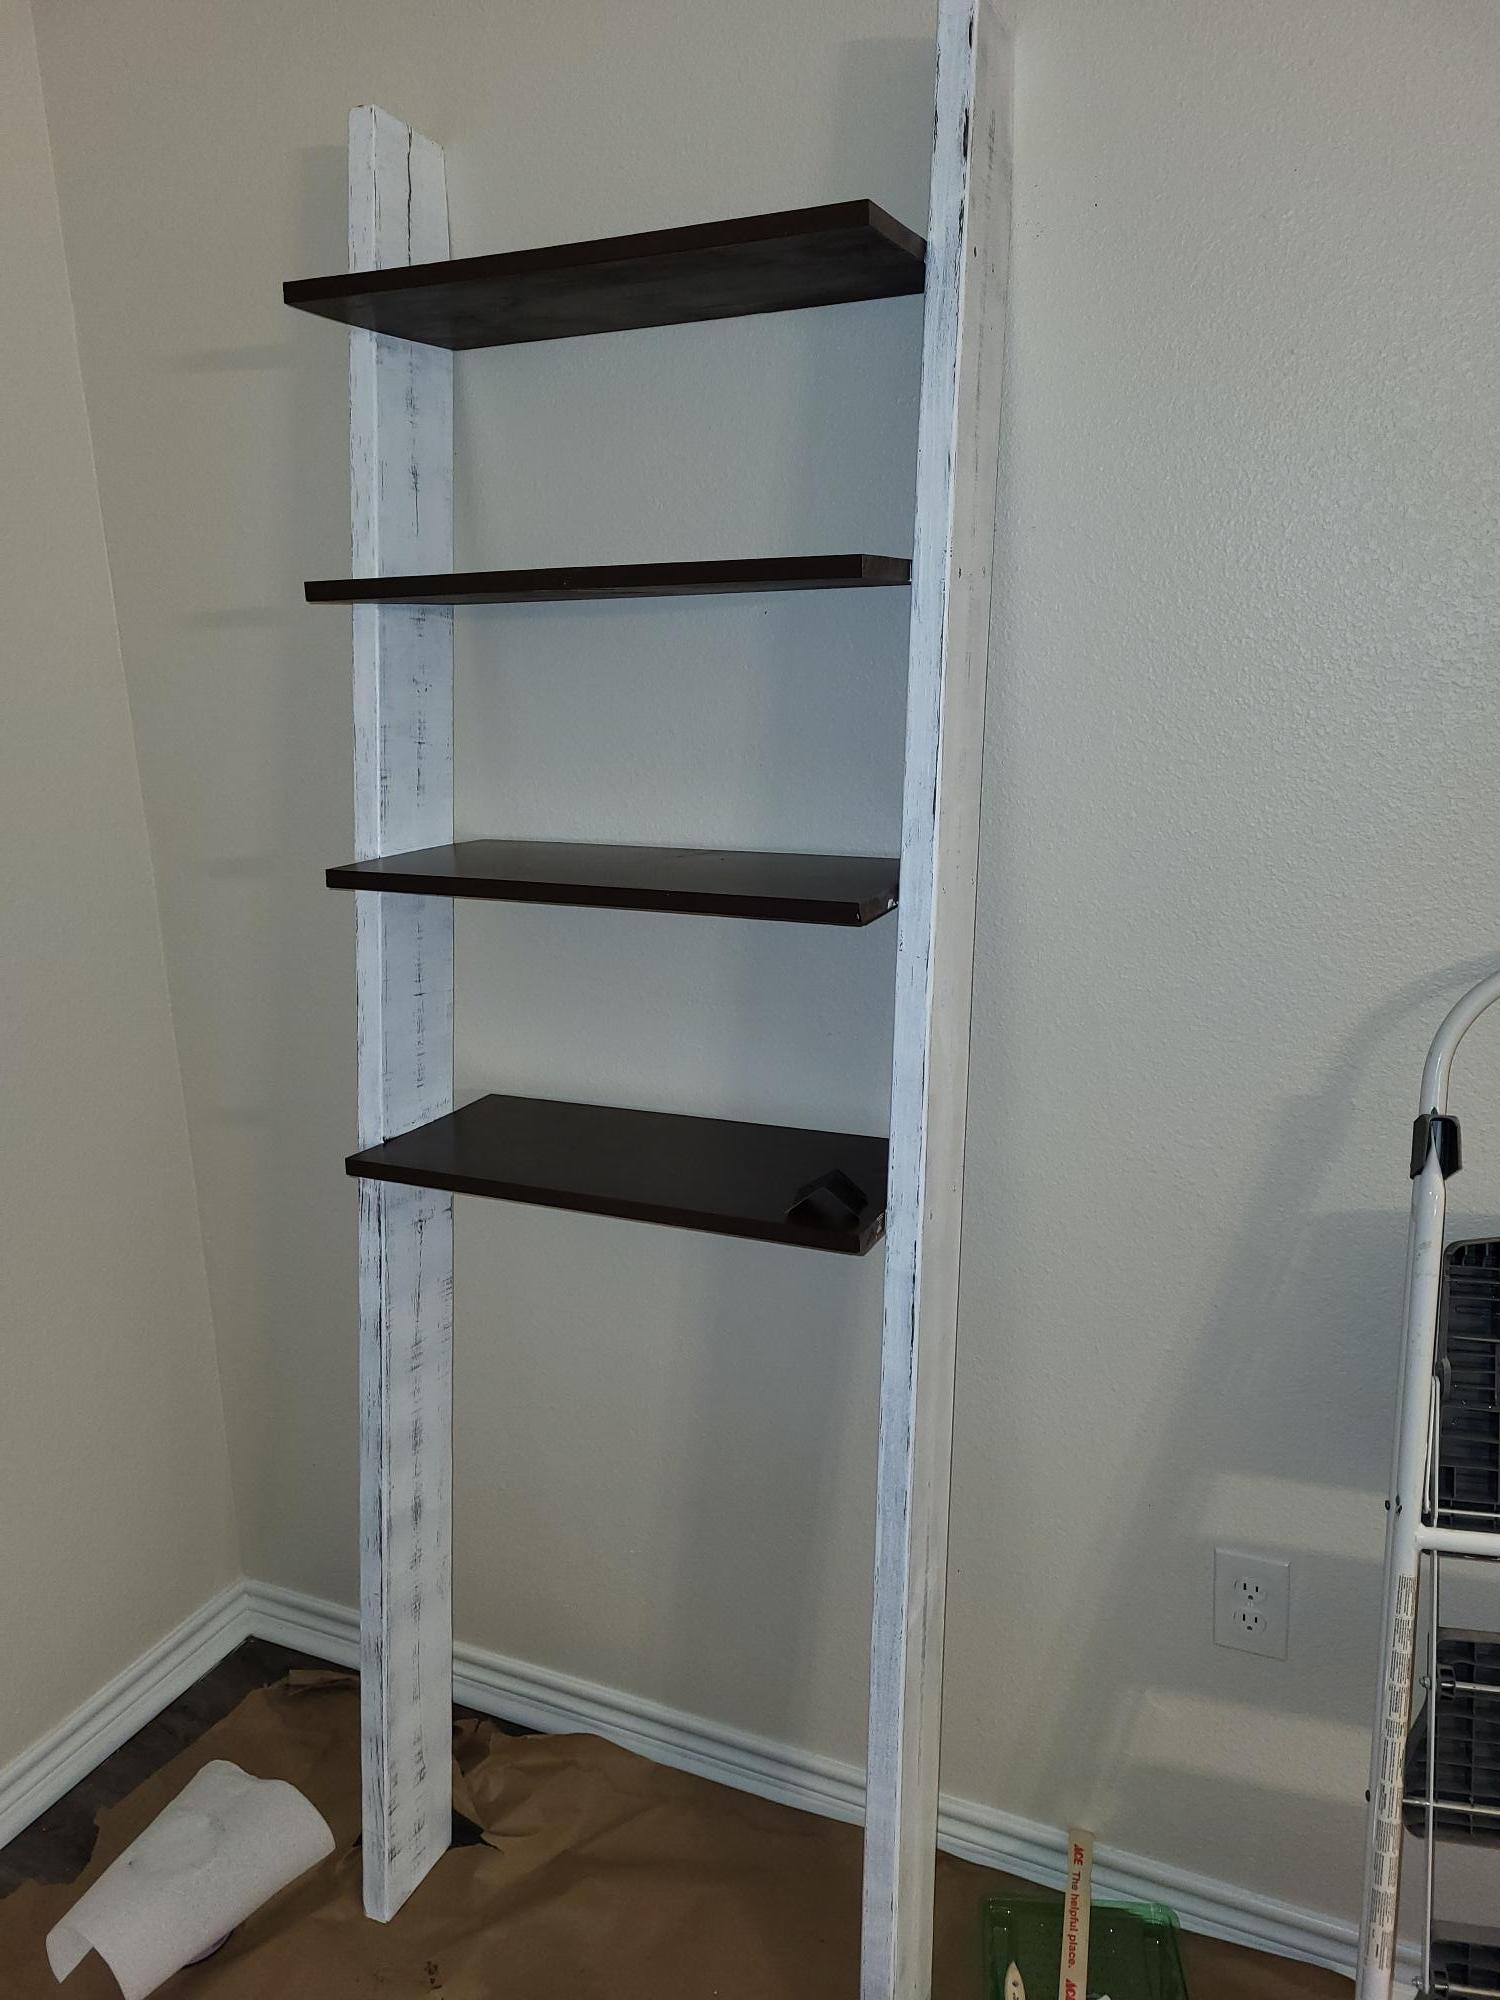
While the Ten Dollar Ledges were the inspiration for these, I didn't follow the instructions, since I have lots of leftover plywood and buying lumber when you live in the country and drive a VW Bug is not much fun. I'm very pleased with both the shelves and the garage space their creation opened up. There was a tradeoff, though, as it took me far longer than the hour or two each would have took had I used dimensional lumber. Four inch rip cuts are a pain! (especially since I was a bit too perfectionistic.) But I'm very happy with the results. Thanks again!

Built from Plan(s)
Estimated Cost
very little (always have screws on hand and used paint I had)
Estimated Time Investment
Weekend Project (10-20 Hours)
Finish Used
Black semigloss spray paint.
Recommended Skill Level
Beginner

Comments

patricia klein (not verified)

Sat, 01/21/2012 - 16:20

Hi - I am SO EXCITED - just made a $10 ledge! I have been wanting a photo/art ledge for a long time and actually purchased one from Pottery Barn which I returned. I hated the finish on it an found it very difficult to hang, not to mention that it was expensive! I had some idea how I might make one but wasn't sure, so went on line looking for instructions. So glad I found yours - it was really easy and looks great. The best part is that you can make it whatever size and finish that you want. Now i have to get busy making art to fill it! Thank you so much for your great ideas - i see quite alot of others on your site that I just might try.

Rustic X-Entryway Table

Submitted by LN2014 on Mon, 03/14/2016 - 21:29

Handmade rustic entryway table. Stained with Varathane Stain and made from 2x4s & 2x6s Canadian white pine

Estimated Cost
$25
Estimated Time Investment
Day Project (6-9 Hours)
Finish Used
Varathane Ash Stain.
Varathane Polyurethane Satin
Recommended Skill Level
Intermediate

Comments

paveltrudel

Mon, 04/11/2016 - 05:30

Hi,

I really love your entryway table. Do you have a plan that we can use with dimensions and cut list?

Thank you

Tkkl07

Mon, 07/11/2016 - 06:38

This table is beautiful!  Are there any plans?  The link doesn't show the plans or the cut list. Thanks! 

elaina_tanaka

Sat, 08/06/2016 - 19:56

This table is beautiful!  Would you be able to share the plans for this?  Thank you!


Brian Famous

Sat, 03/17/2018 - 19:38

I modified the design slightly, by adding feet and a 1x4 board accent (that makes it easier to build).  I'm assuming the overall height is 29.5" and the length is 48".   If you want these to be different, feel free to reach out to me and I can help you adjust. 

You can find the plans here: http://famousartisan.com/diy-x-base-sofa-table-plans-or-entry-table/

Brian Famous

Sat, 03/17/2018 - 19:39

I modified the design slightly, by adding feet and a 1x4 board accent (that makes it easier to build).  I'm assuming the overall height is 29.5" and the length is 48".   If you want these to be different, feel free to reach out to me and I can help you adjust. 

You can find the plans here: http://famousartisan.com/diy-x-base-sofa-table-plans-or-entry-table/

Changing Table/ Storage Shelf Combo

Submitted by westmjk on Sat, 03/03/2012 - 11:09

Combination of Entryway Bench and Storage Shelf with Hooks and simple changing table. I did make the table a little taller as my wife and i are pretty tall. I also had to add about an inch to the overall length of the table as well to fit the baskets. Mostly straight forward.

Estimated Cost
~$150
Estimated Time Investment
Weekend Project (10-20 Hours)
Finish Used
4 applications of Min-wax "Red Mahogany" stain, and 4 coats of satin polyurethane. Stain kind of hides the grain, but you do what your wife asks...
Recommended Skill Level
Intermediate

Comments

Mario Castle Bunk

Submitted by jlholmes80 on Wed, 01/01/2014 - 00:30

So my son needed a bunk bed and we came upon the sweet pea bed. It was too girly for him so we decided to go with a theme that would be timeless, something he wouldn't mind having when he is 18 (or older, he is 10 now). What is better than Mario! (We are a house full of gamers, my 17 year old is super jealous of this bed lol). The build was fairly easy and the plans were straight forward enough, the time consuming part was the painting (without all the painting we could have probably build this in a long weekend). We changed a few things, like not arching the top windows, adding the 4 inch 2x4 squares to the top to give the castle look and stairs are made to look like stairs from the side so we stepped out the banister instead of angling it.

Estimated Cost
500
Estimated Time Investment
Week Long Project (20 Hours or More)
Finish Used
Paint colors were all Behr paint+ primer (mostly eggshell or flat):
New Brick, Black, Polar Bear White, Green Crush, Green Acres, Lemon Zest, Windjammer, and French Silver. Some of the colors (like pinkish tone on the stairs) we created on our own mixing the New Brick and the Polar Bear.

Polyurethane. I mixed regular oil based polyurethane (gloss) with mineral spirits (50/50) and wiped it on. It was remarkably simple and gave it a nice seal/finish. Last coat I used Satin Polyurethane because I didn't want the gloss finish. I opted not to sand between coats because this is a kids bed and I wasn't looking for that "perfect" finish, just wanted some added protection.
Recommended Skill Level
Intermediate

Comments

Mrswhetstone1

Wed, 01/01/2014 - 06:11

This is the coolest bed I have ever seen! I wish I could make this for my youngest. I could probably build it, but I 'm pretty sure it would go downhill when I started painting it. You did an amazing job and your son is a very lucky boy!

jlholmes80

Wed, 01/01/2014 - 16:10

You can totally do it! I am a horrible painter (I'm too impatient) and you can't tell with this because of how forgiving the design ends up being. There is so much going on it's hard to pinpoint the mistakes. :)

jlholmes80

Wed, 01/01/2014 - 16:07

Thanks so much! This was the first thing we ever built (although my husband did a lot of building stuff in his youth we have never done anything together and I was a total beginner) so we are very happy with it. :D I appreciate all the kind words.

amercpina

Fri, 05/03/2019 - 22:00

We are super excited to build this for our 9 year old son. To make this a Full size bed am I correct in thinking that I only need to alter the side panels by adding 15inches? I am paranoid about building it and the mattress not fitting. Thanks so much!

Kids Wooden Play Grill

Submitted by Anonymous (not verified) on Sun, 11/03/2019 - 17:10

Built this toy grill for my nephews first birthday. Went together without many hiccups. I will say these plans seemed less detailed than other Ana White plans I have worked on...but for the better I guess, as it forced me to figure somethings out on my own. I opted to add the drawer behind the grill plate, like the blogger who also made this grill did. Kept the same color scheme as well. Pretty proud of how it turned out.

Built from Plan(s)
Estimated Cost
$40
Estimated Time Investment
Day Project (6-9 Hours)
Recommended Skill Level
Intermediate