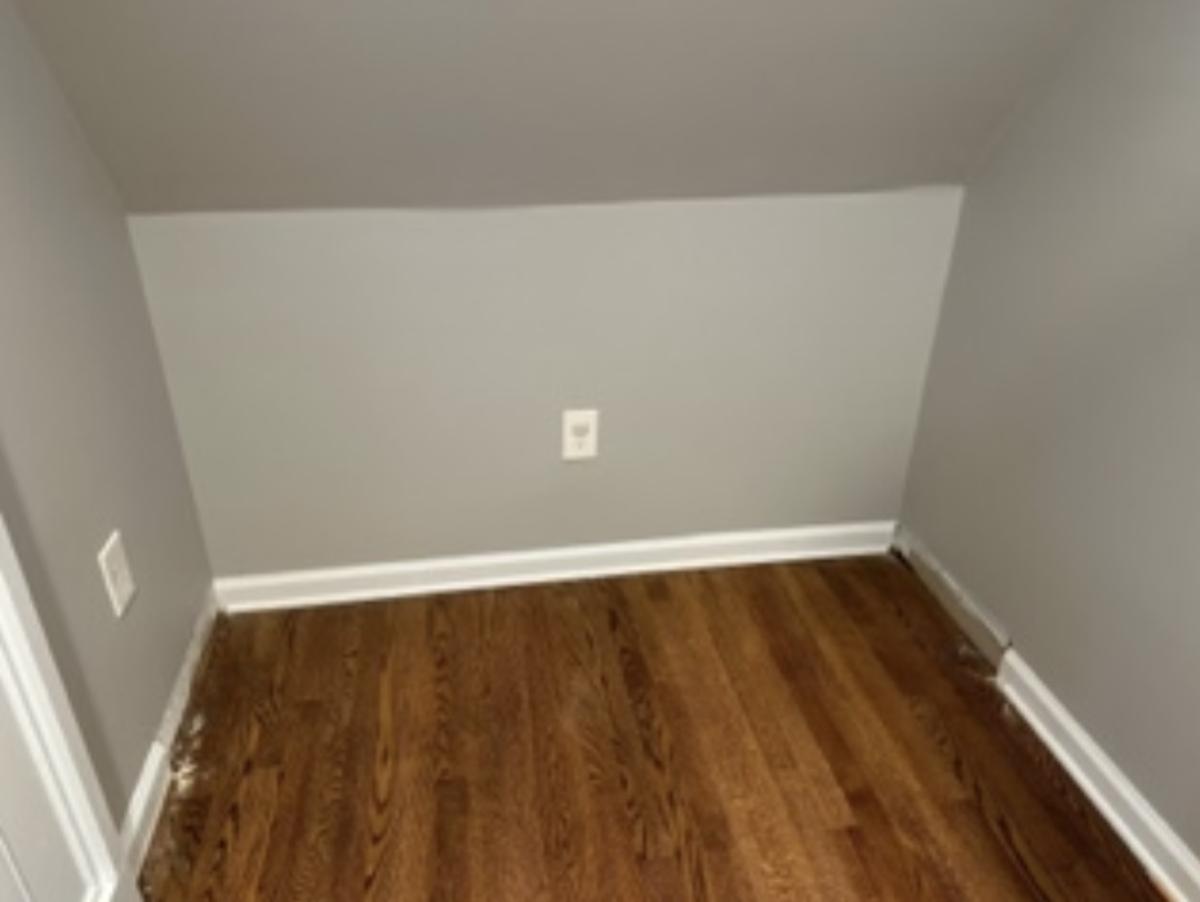
Home Gym Yoga Nook

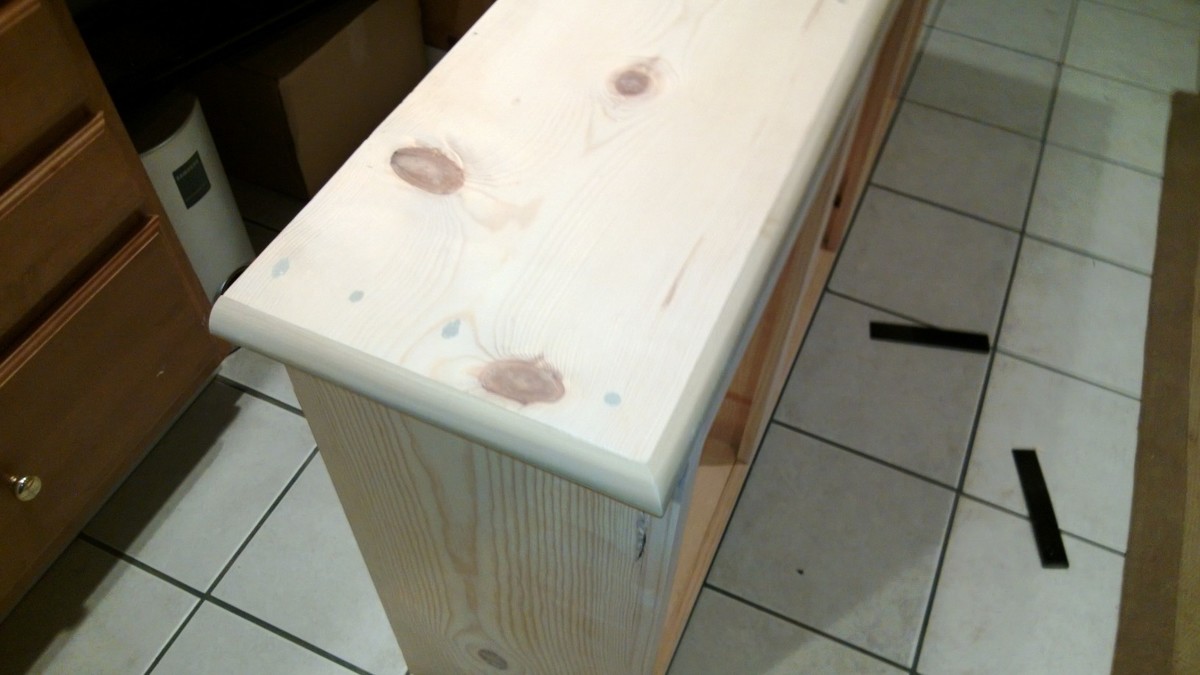
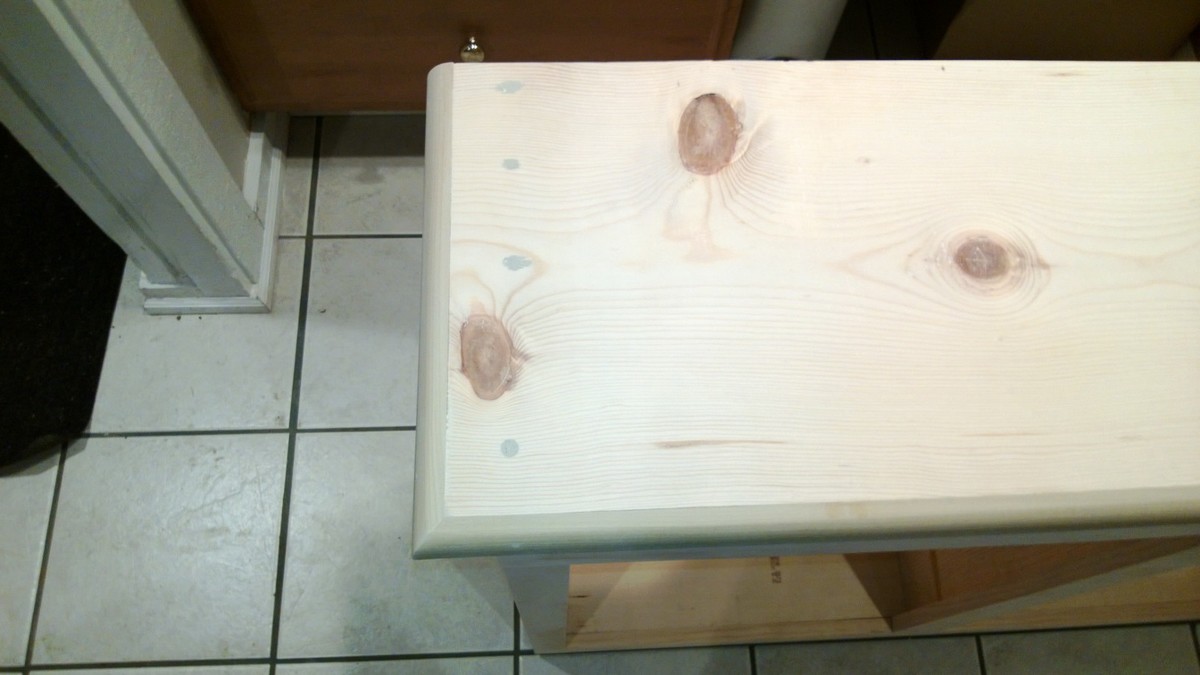
Exercise/Yoga nook. Built using the base plans from Ana's Shoe Bench Front with Hidden Storage and Easy to Build Floating Shelves.
Built from Plan(s)
Exercise/Yoga nook. Built using the base plans from Ana's Shoe Bench Front with Hidden Storage and Easy to Build Floating Shelves.
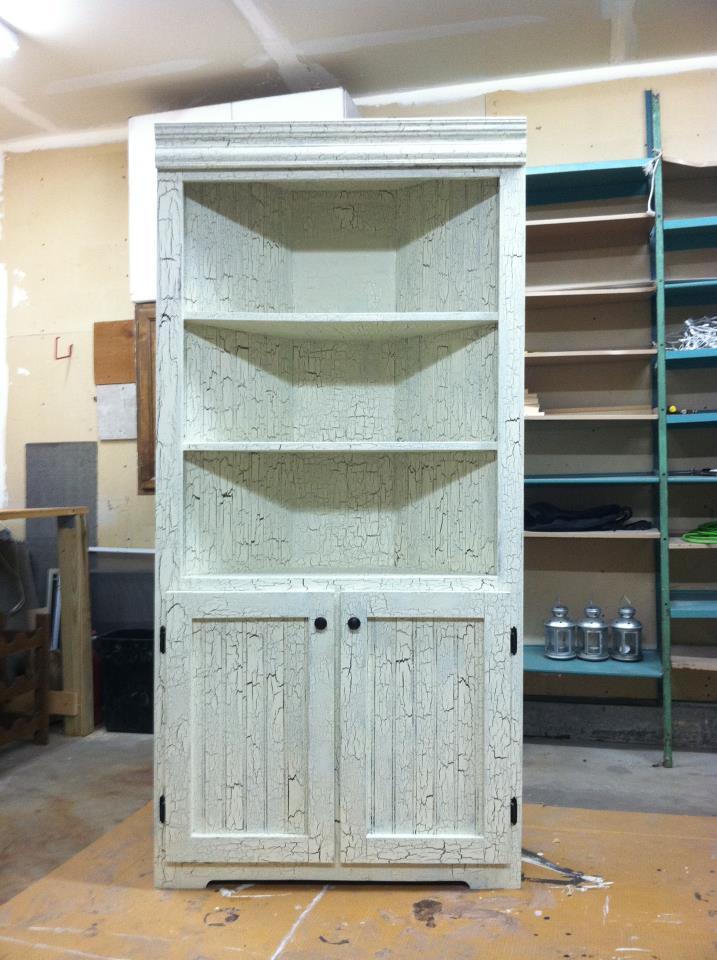
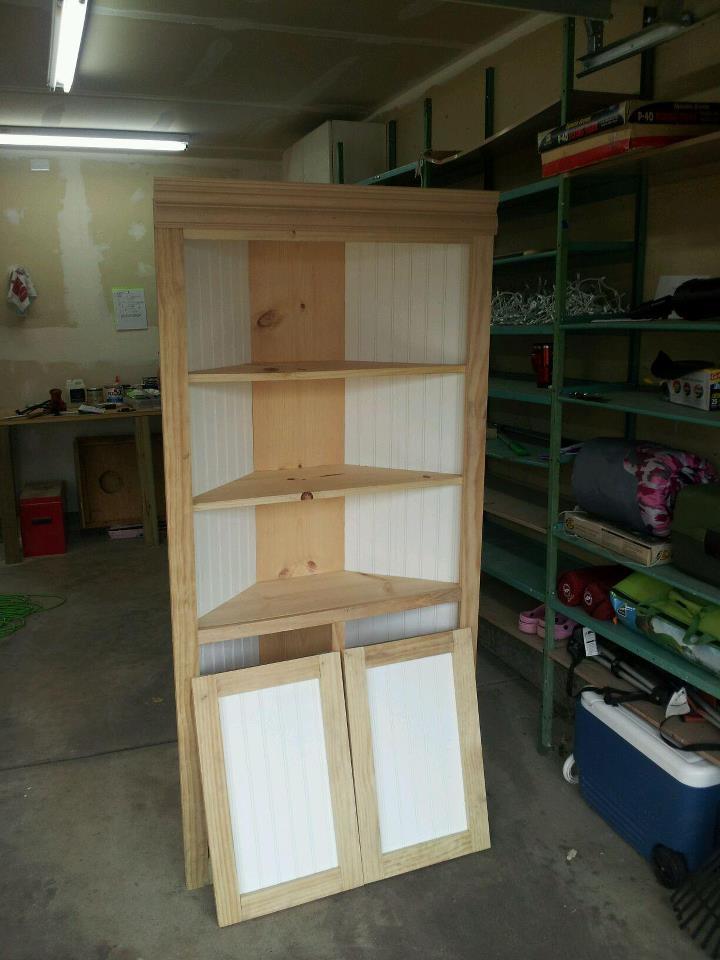
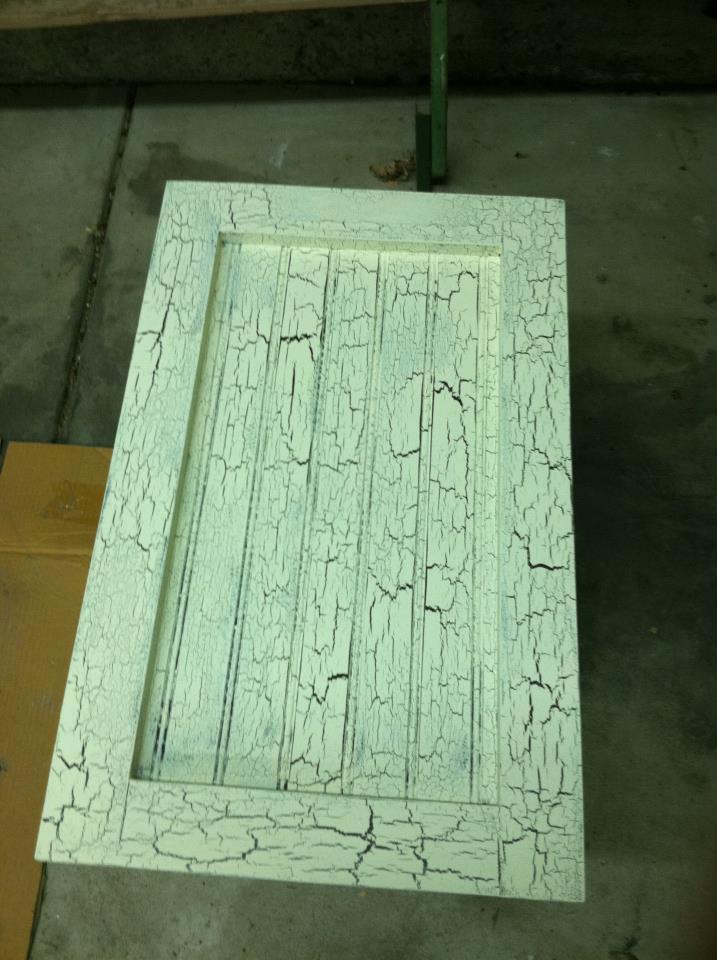
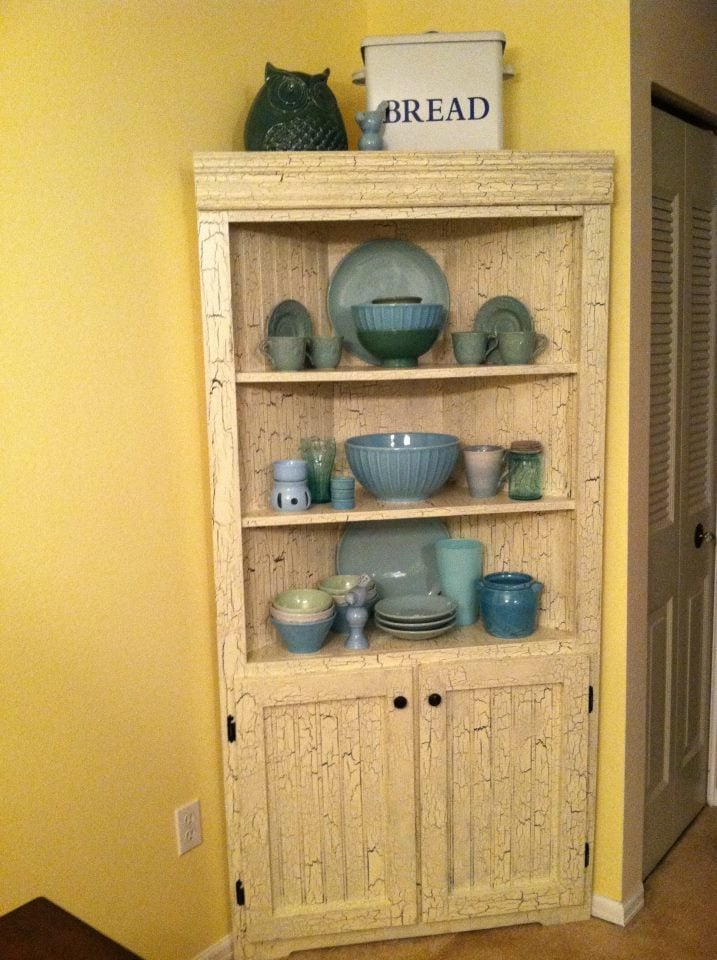
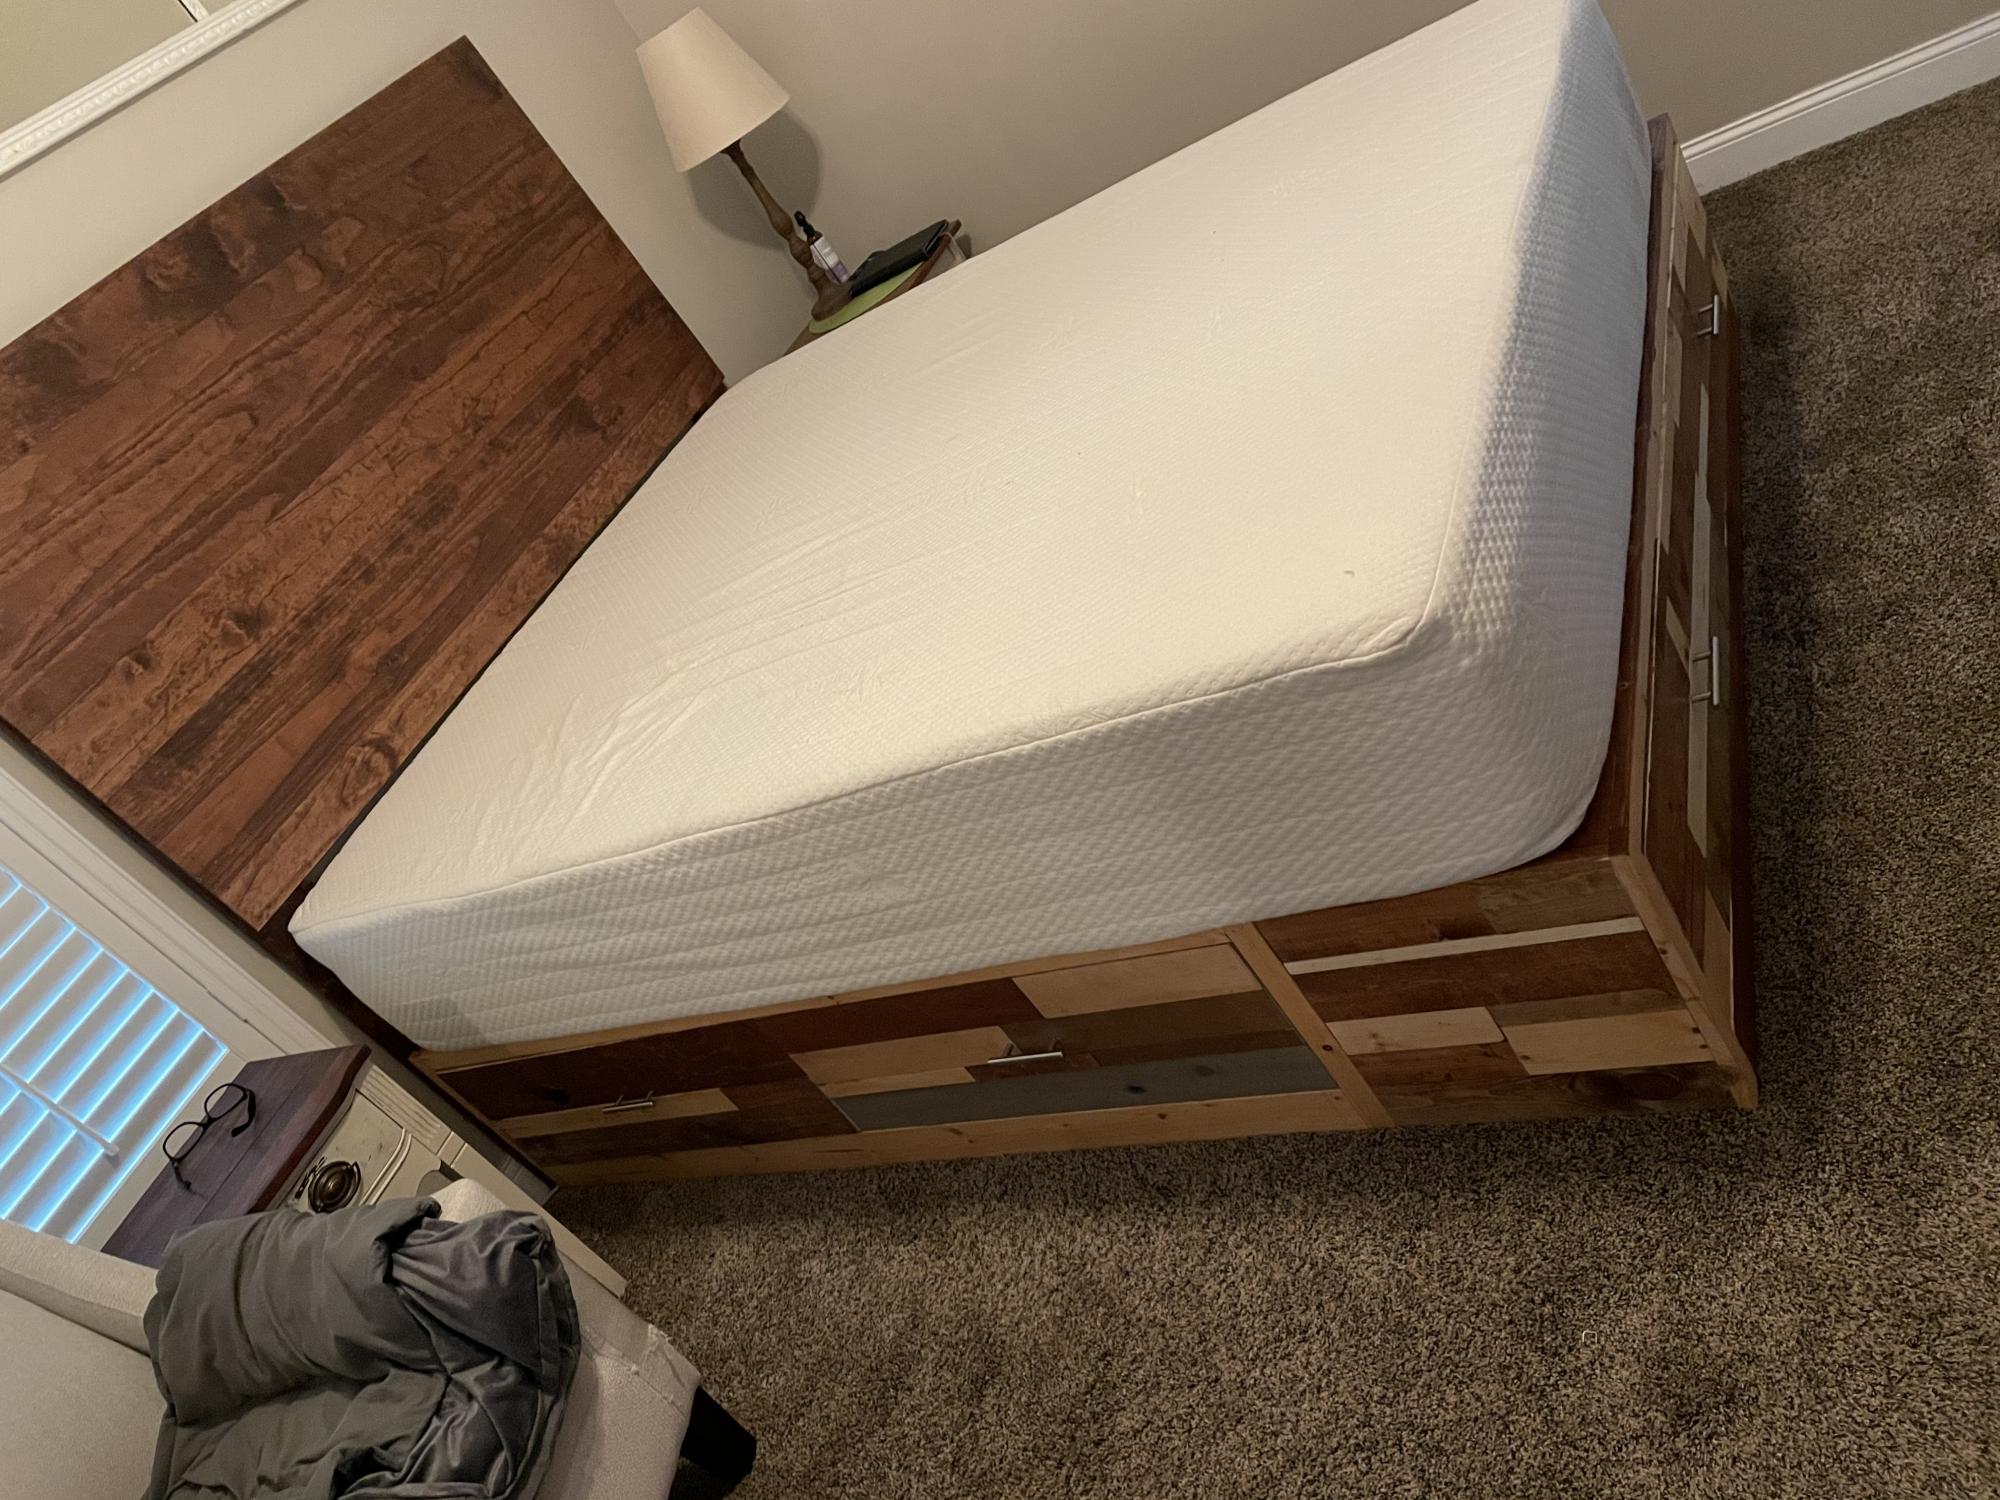
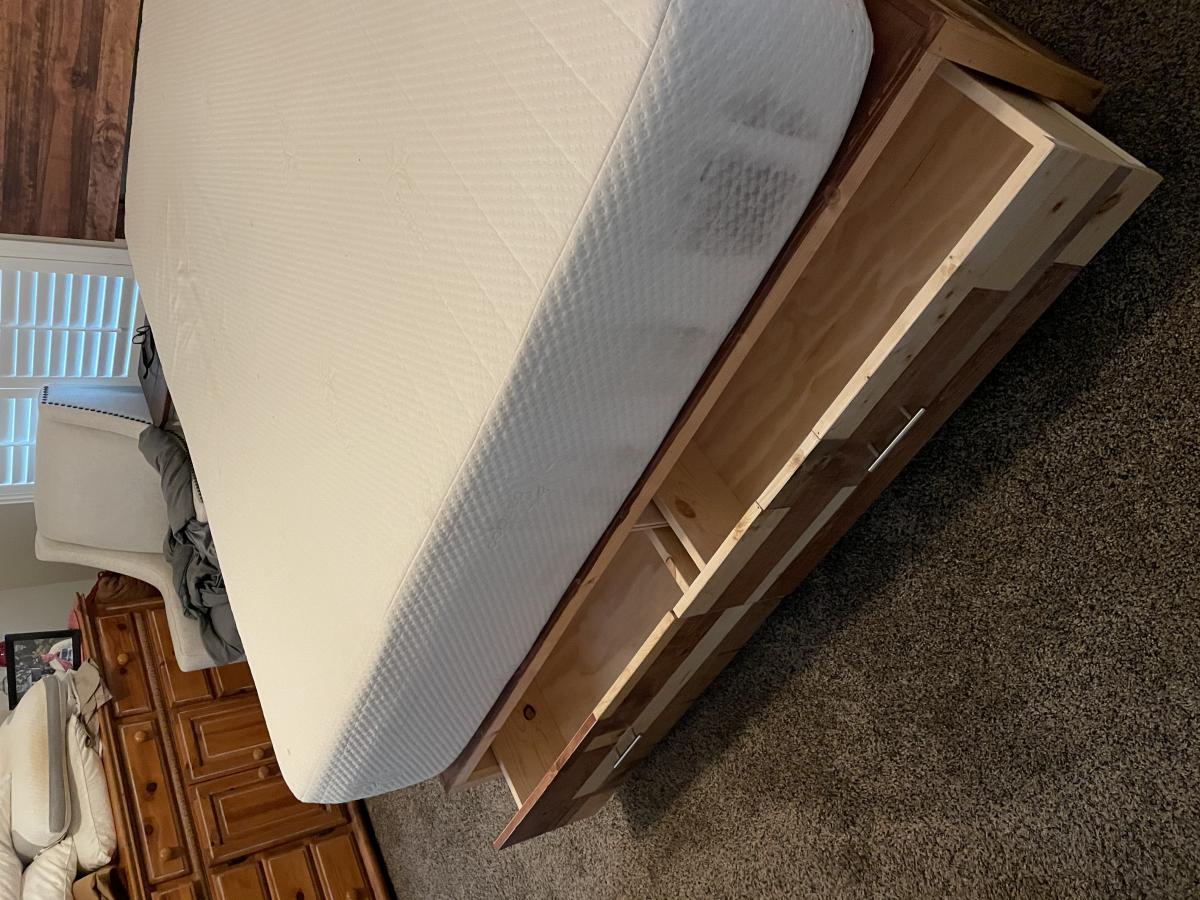
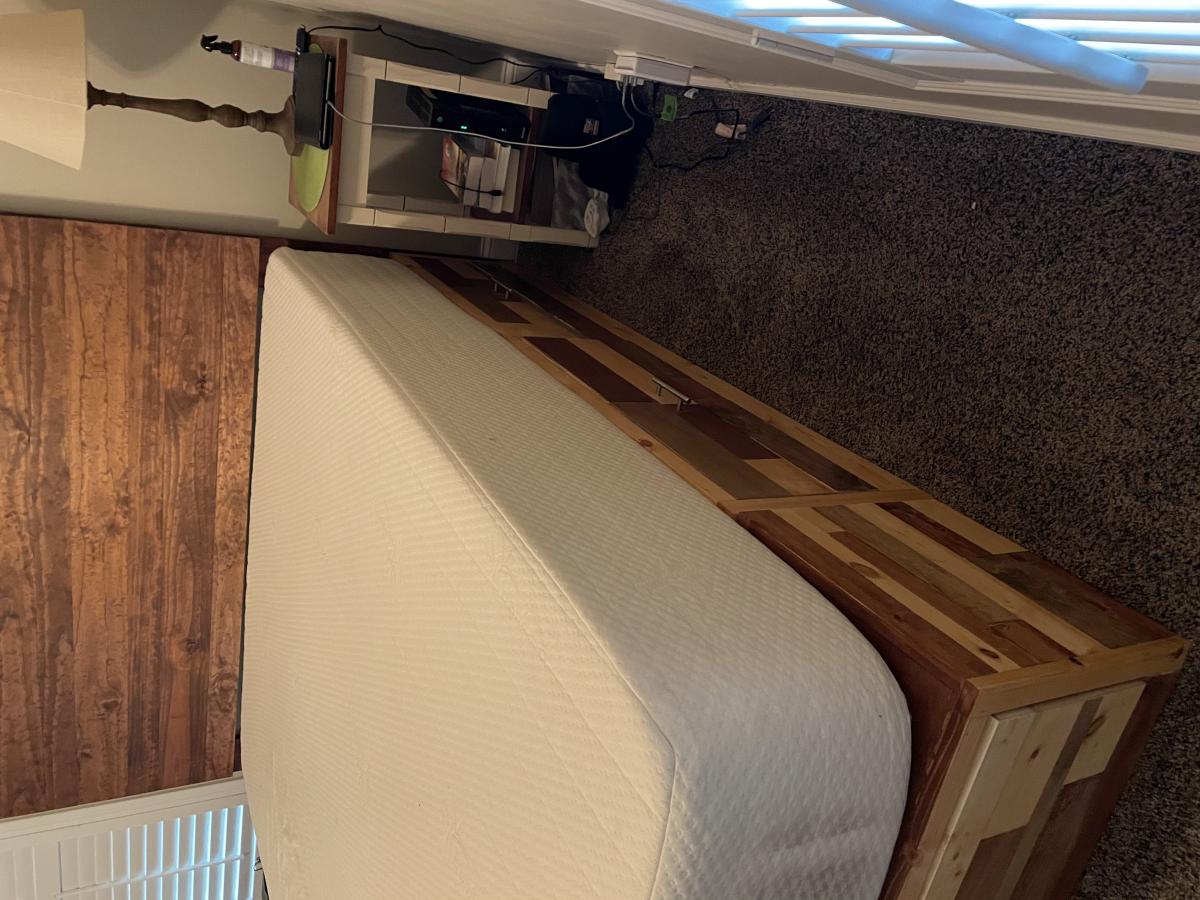
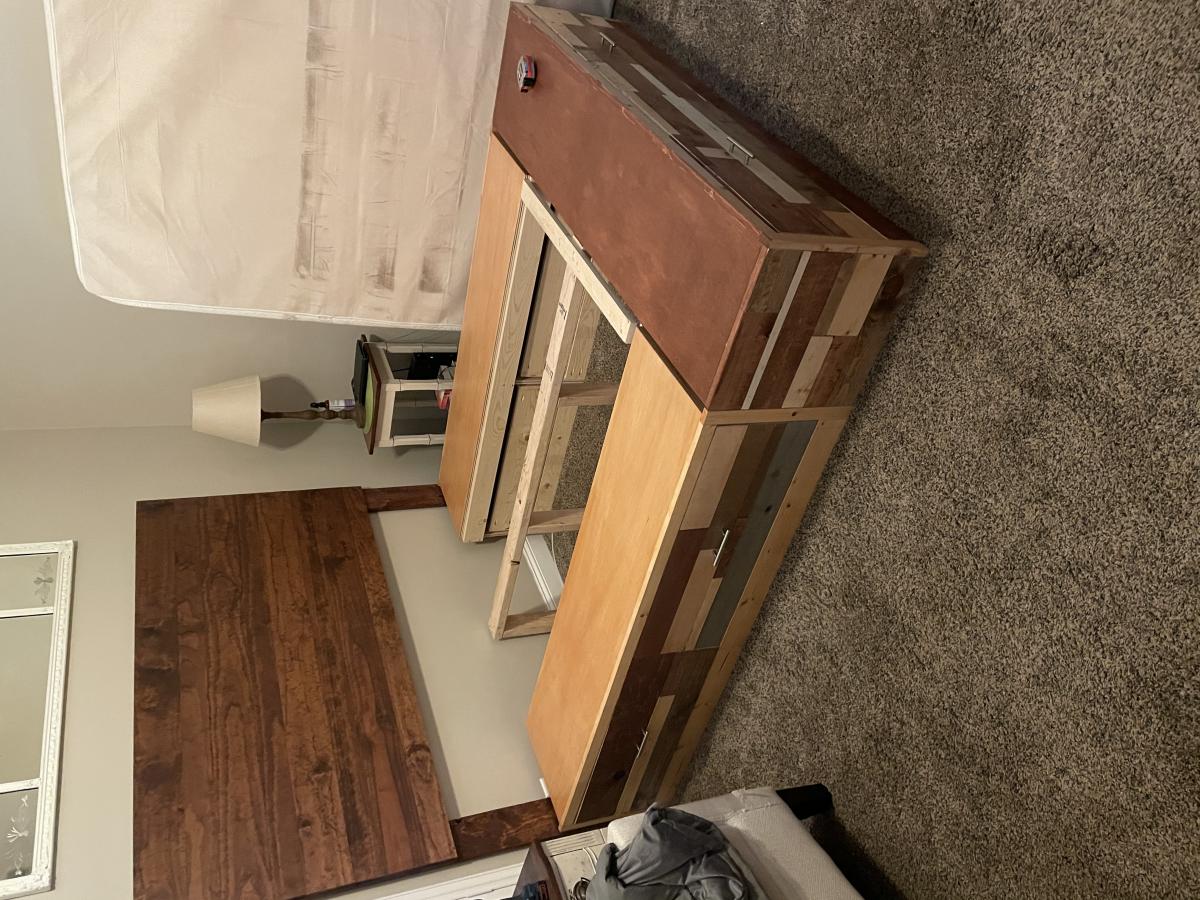
This was my first project. It took me a weekend to build and prime. Since I chose to use a crackle finish, waiting time between coats extended the total time to one full week. My husband and I were supposed to make this hutch together, but I became obsessed and did most of it alone! I adjusted the size a bit to make it larger, so I could fit big pieces on shelves and in cabinets. Thanks for the plan Ana!!

Fri, 04/13/2012 - 14:47
Wow, this is sooo beautiful! The finish is just awesome. My Hubby hates to paint, and he saw this multi-step finish and said you must have the patience of a saint! :) Congrats on such a stunning first project!
Mon, 10/01/2012 - 23:33
Very Nice! What did you do to make it "bigger"...did you make it deeper or wider? Just curious, because I would like to try and make a bigger version as well. Did you still cut the shelves on each side at a 45 degree angle? Thanks!
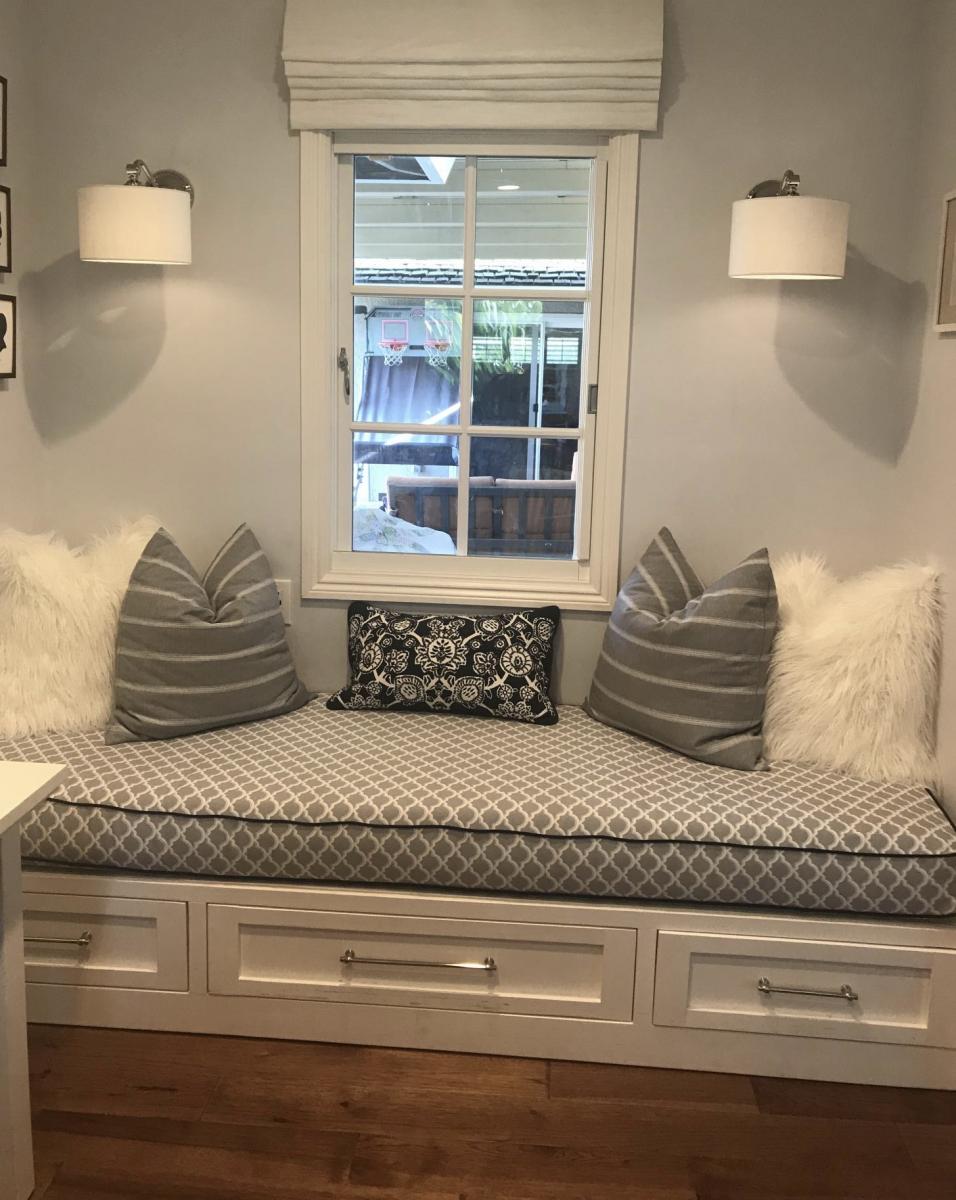
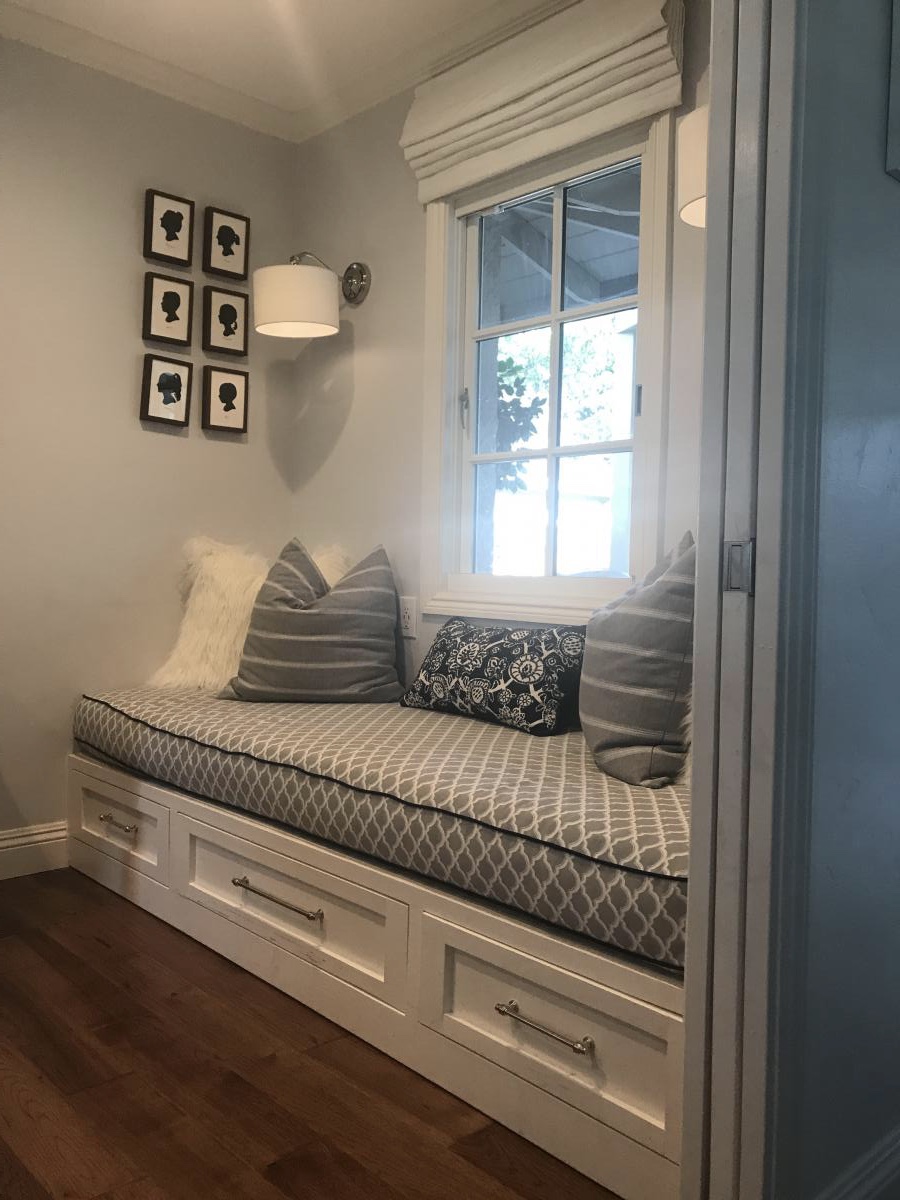
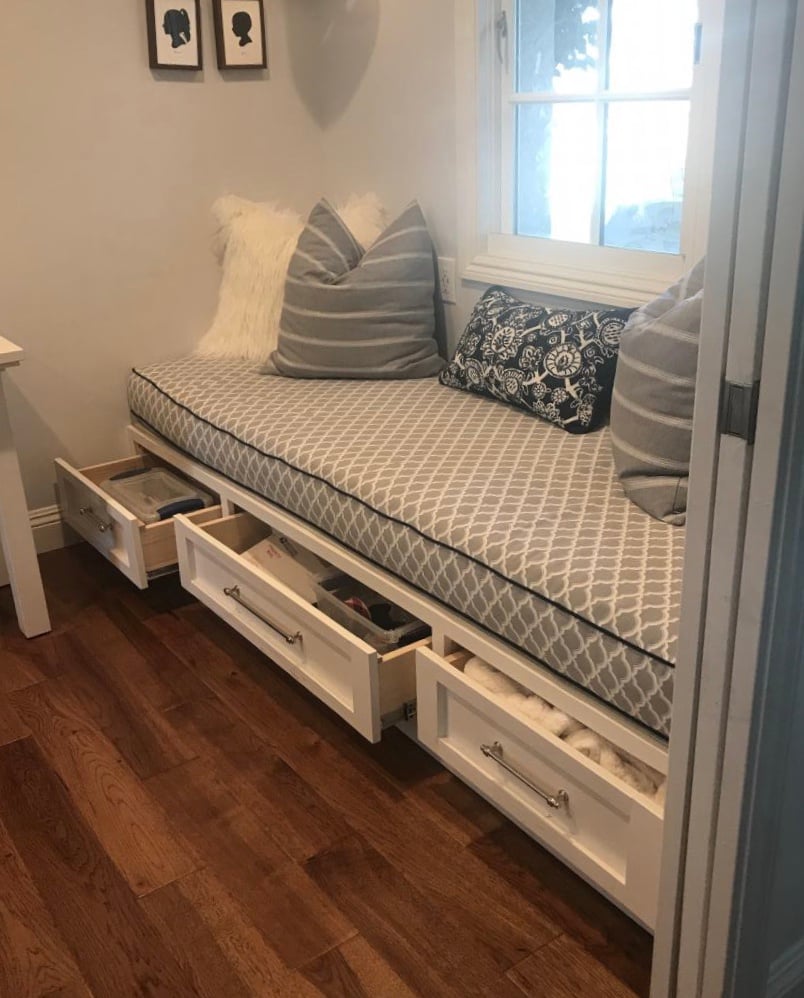
Ana White, you inspired me! My husband bought me a miter saw for Christmas but I was too afraid to use it for all of my woodworking dreams...and then I found your blog!
I am a mother of six young kids but I watched your videos over and over and I reworked your plans to fit our little build-out and voila! We are beyond thrilled with the results! We have a new bed for overnight guests and a great reading nook for 2-3 people at a time!
Thank you for empowering women in the BEST way. My husband was there to help me with the heavy lifting and to cheer me on when I needed it. But if I hadn’t found you, I’m not sure I would have tackled it in the first place. Thank you and God bless your family!!

Sat, 03/14/2020 - 14:11
We are building a bed for my son with drawers. Would you mind giving the dimensions of the drawers you mad? Thank you
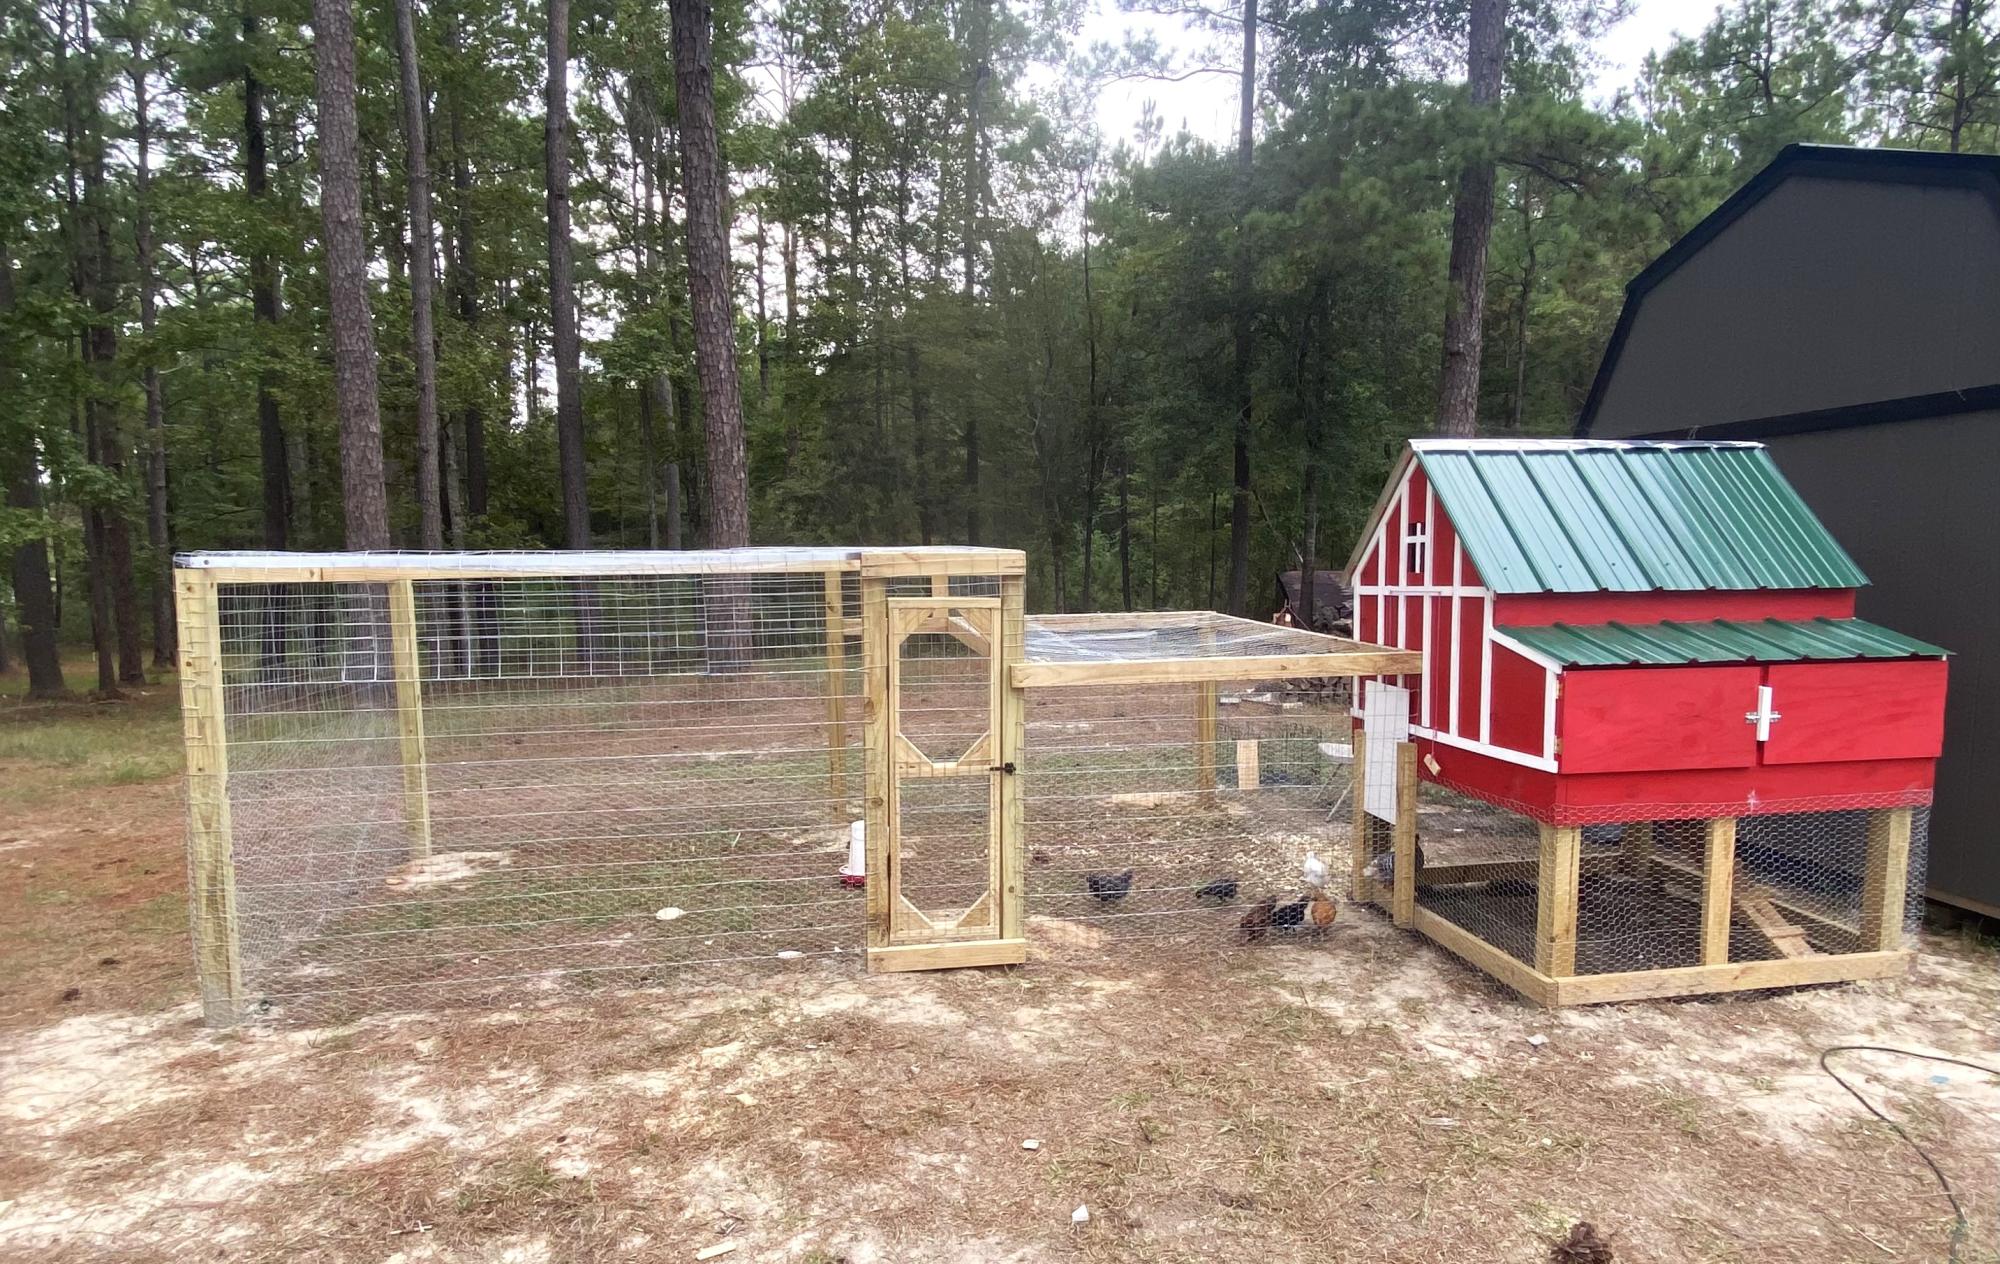
Small coop with run. Awesome plan.
Jinks hill farms
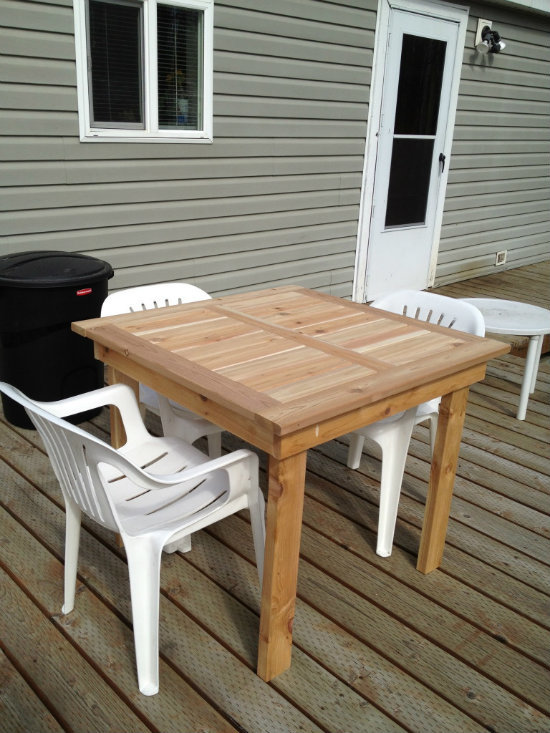
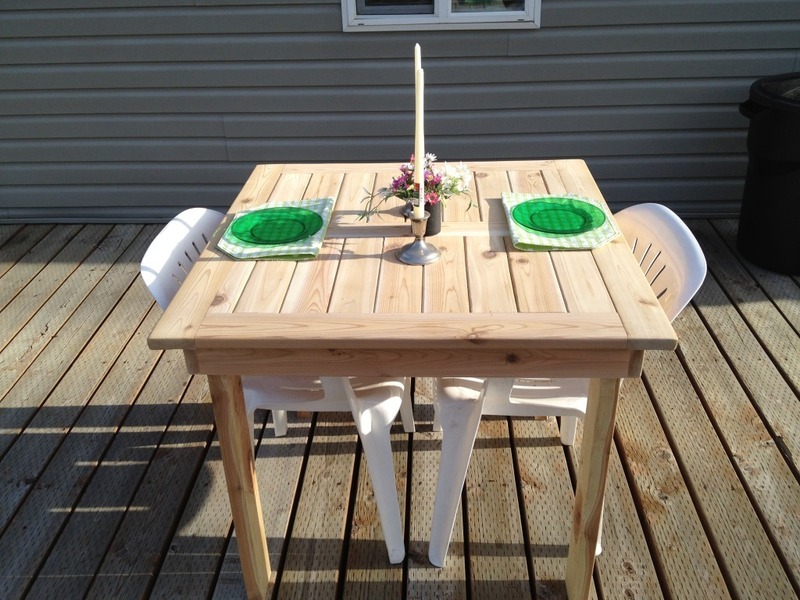
My wife has been wanting new patio furniture so here is my version of the simple outdoor table, I shortened it to fit our needs. Next is the chairs to match.
Sat, 06/16/2012 - 16:00
What are the dimensions? I am trying to build a similar table and am thinking 40" square.
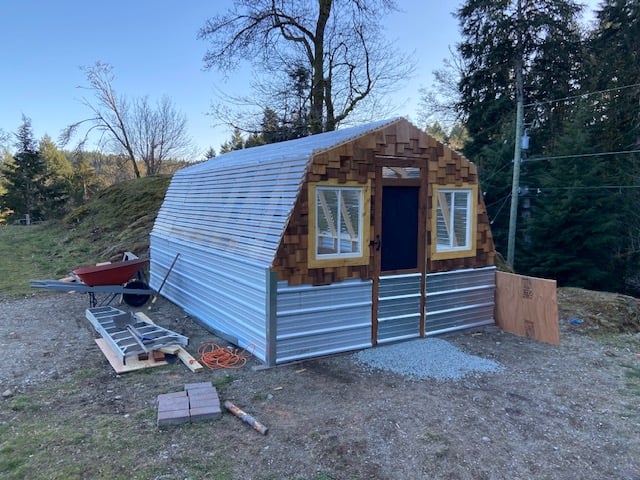
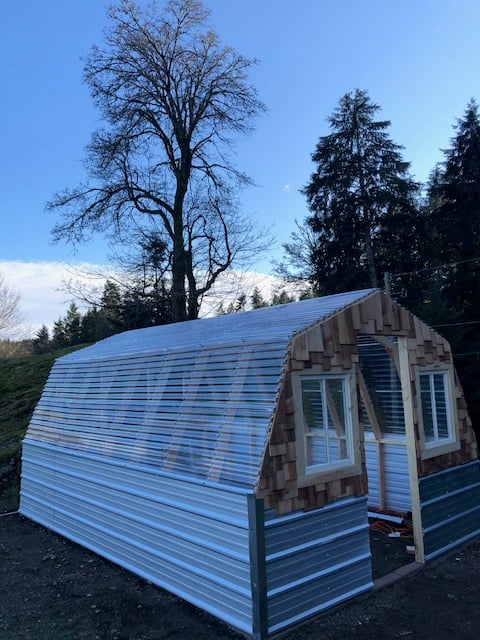
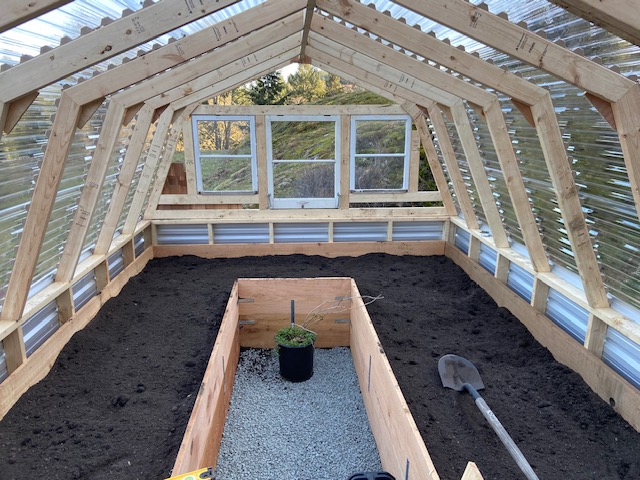
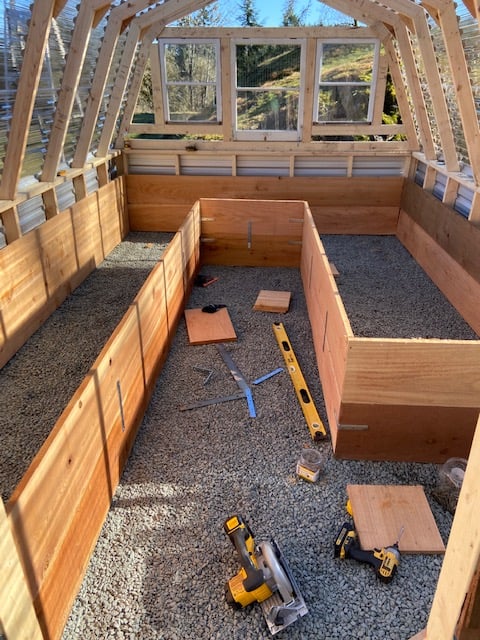
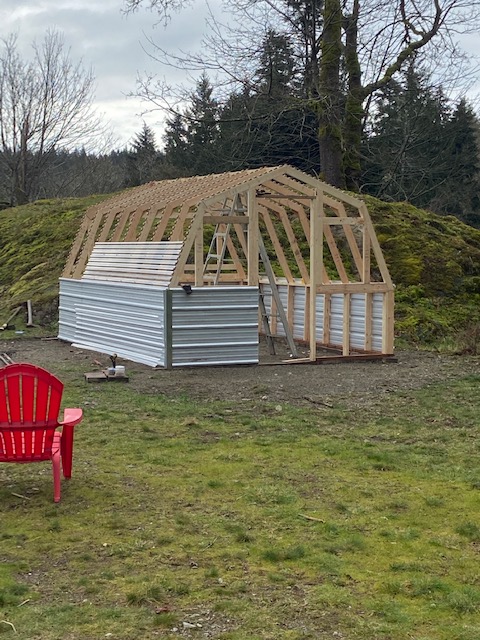
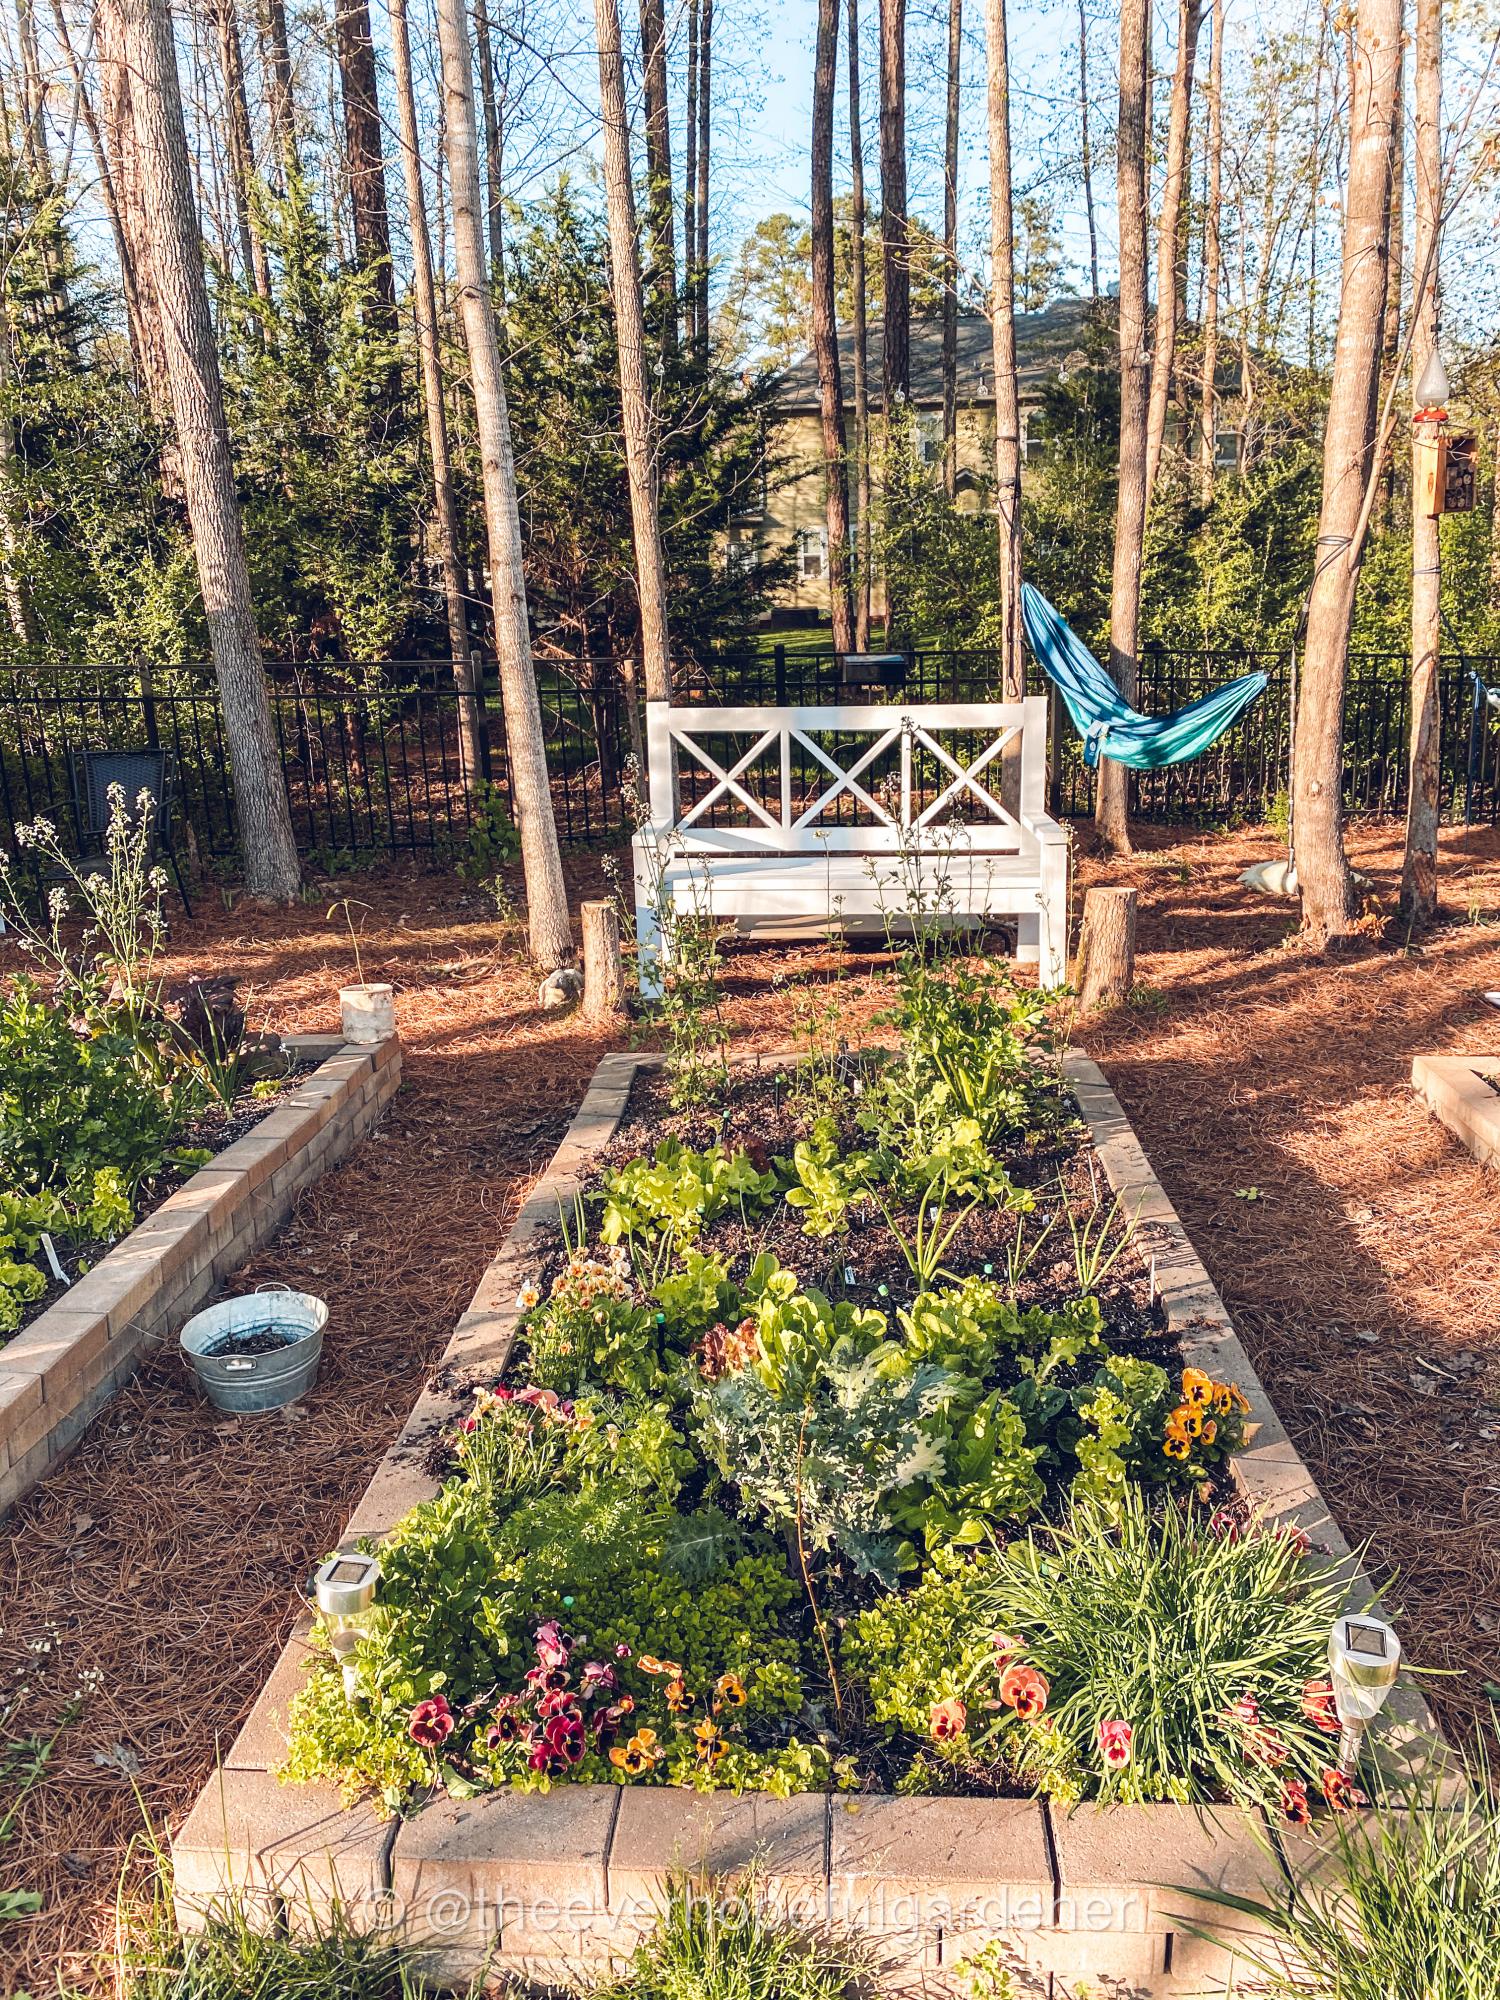
*NOT SURE MY PICTURES ARE UPSIDE DOWN??* This is the second time i've built this greenhouse. We recently moved to a bigger property so I built it 4ft longer at 16ft. I had some old windows to I modified the front and rear so I could incorporate them into the design. The cedar shake really adds to the appeal of the greenhouse as well. I still have to flash it off, but we are very happy with this greenhouse.
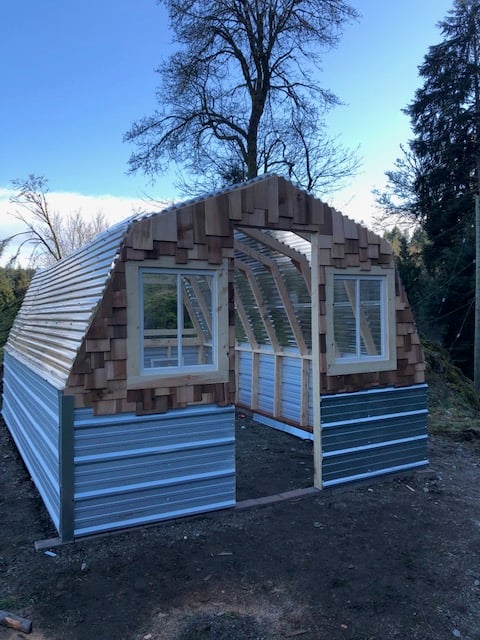

Wed, 03/25/2020 - 10:13
Got the photos straightened out, thank you for posting!
This is amazing, thank you so much for using our plans and sharing photos, it is much appreciated!
Tue, 05/05/2020 - 12:35
Great greenhouse, I'm just starting to build one the same. What height are your beds?
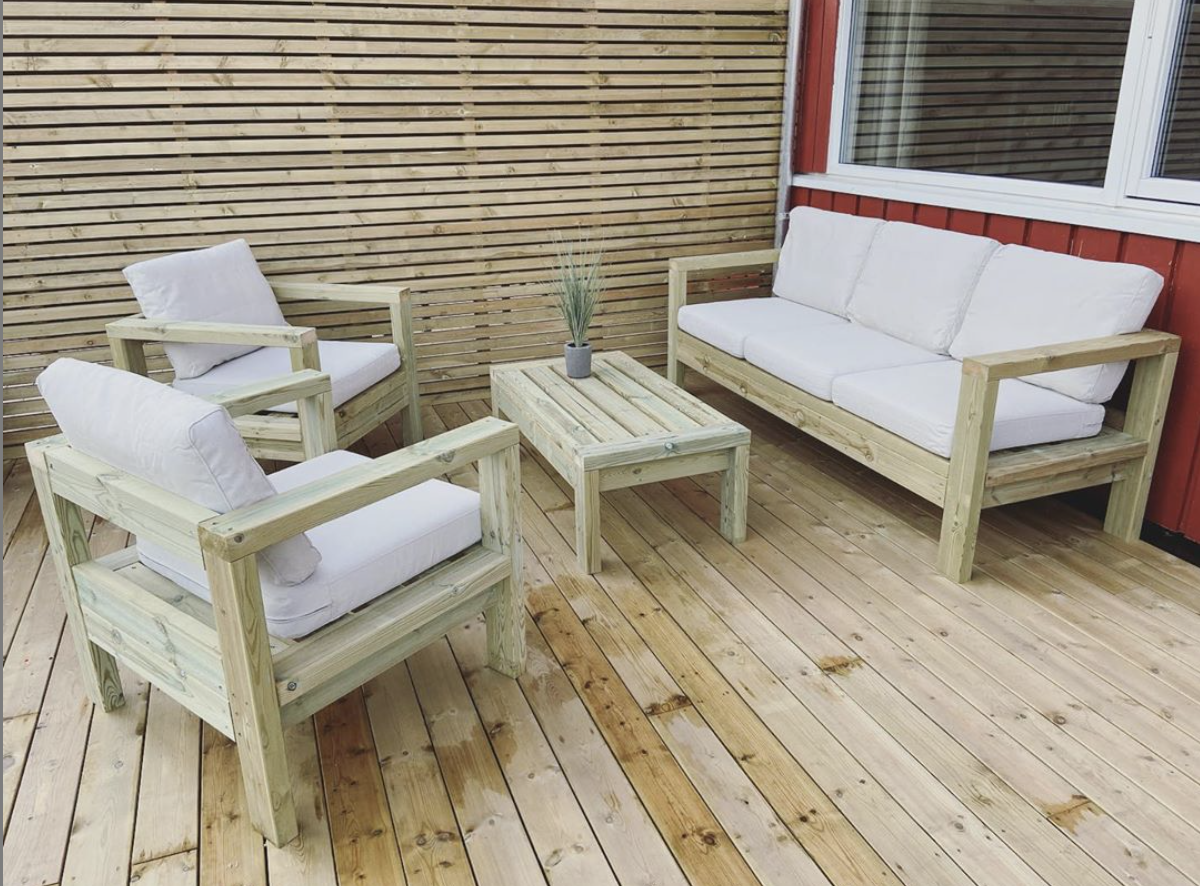
So, we decided after not finding any outdoor furniture, that why not make them! So this is the result, made a few changes to the size and measurements so the pillows from IKEA, would fit perfectly. Now we are waiting for them to be ready to oil/paint. We also made the chairs with the sofa plans, so happy we did that. Thank you so much for the plans! We are so happy! IKEA pillows name are: Sitting pillow - FRÖSÖN/DUVHOLMEN 62cm by 62 cm. Back pillows - FRÖSÖN/DUVHOLMEN 62cm by 44 cm.
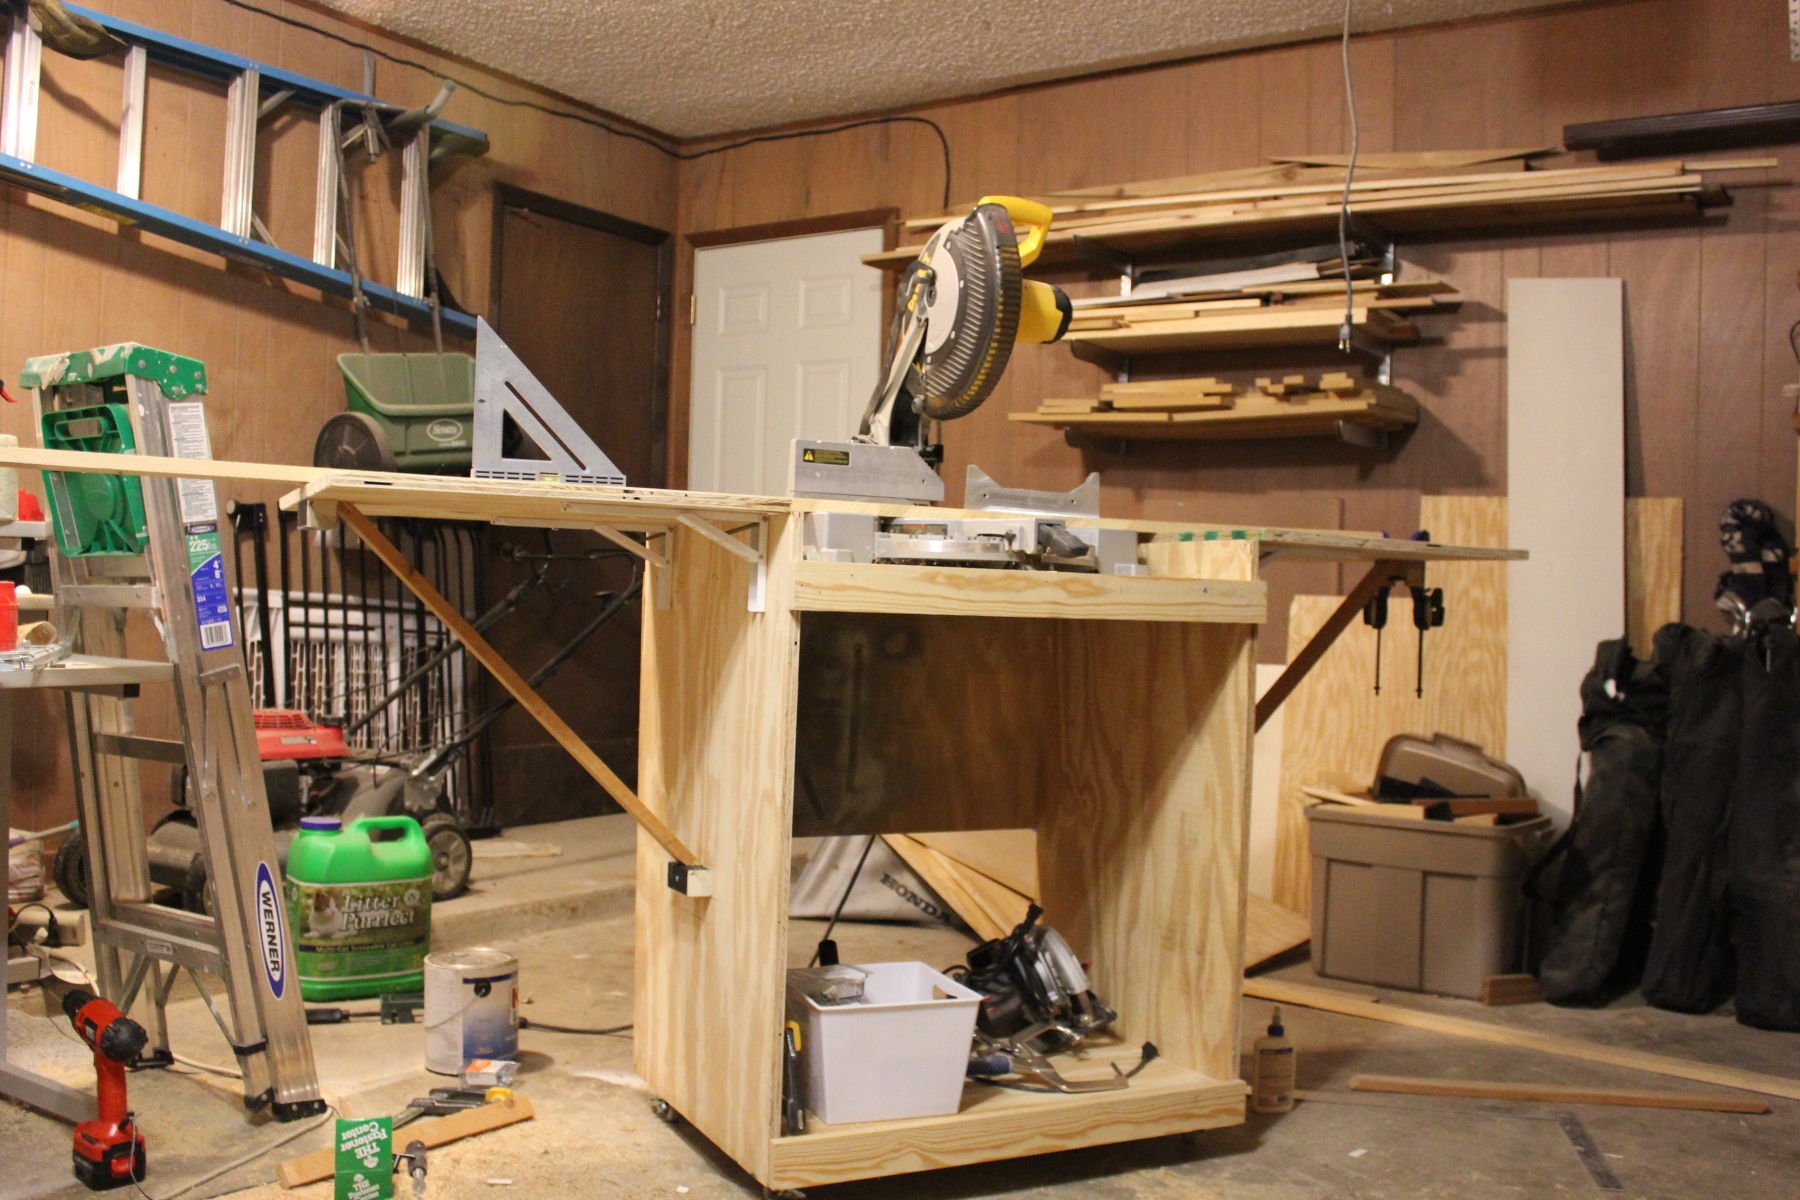
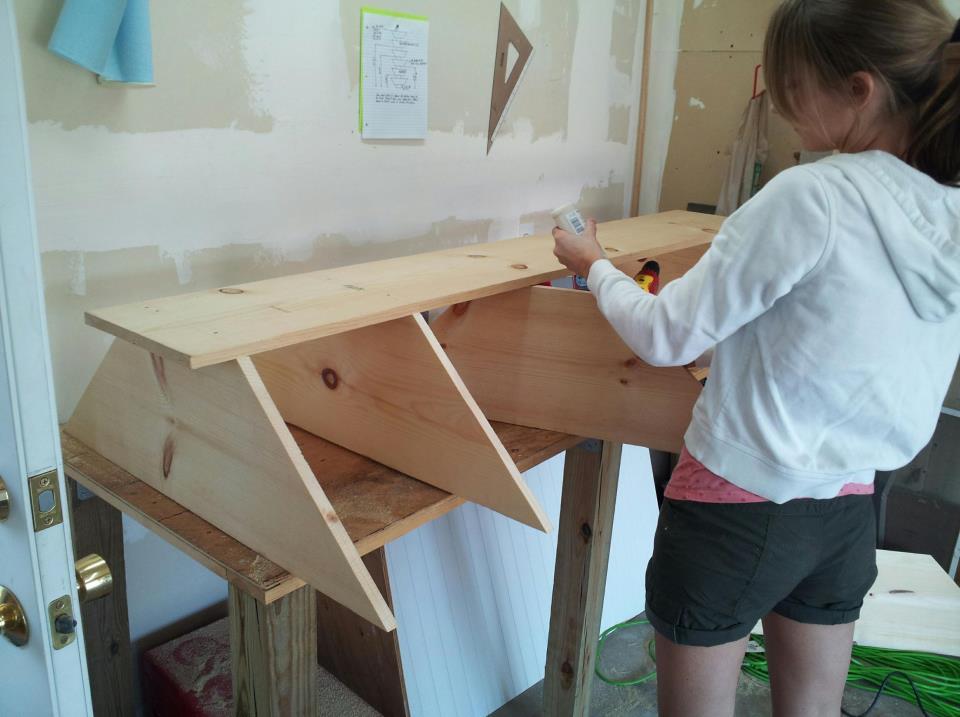
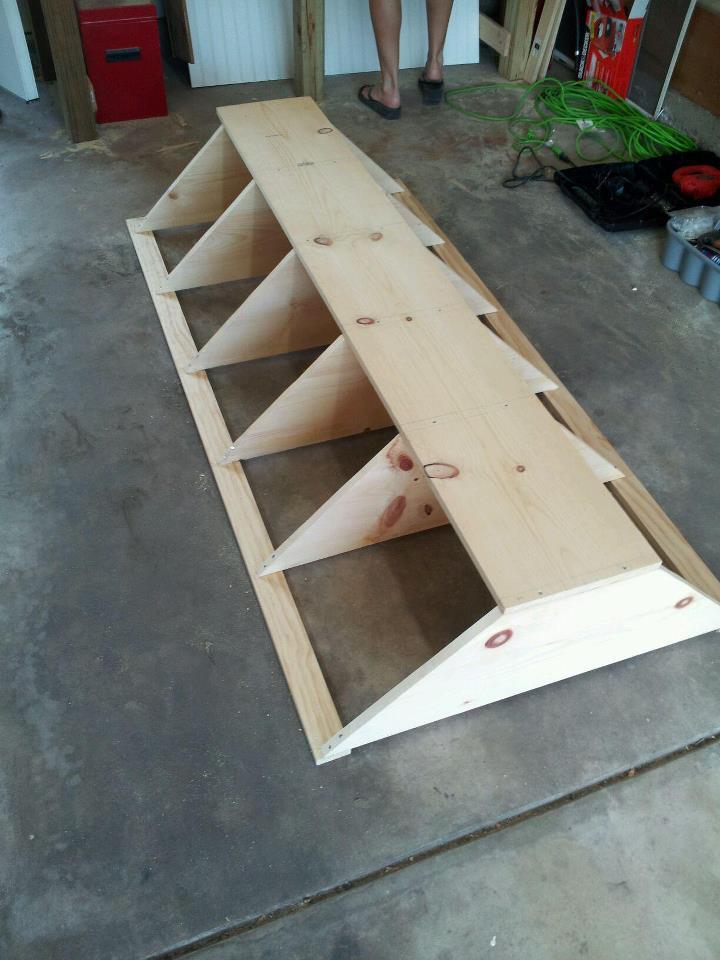
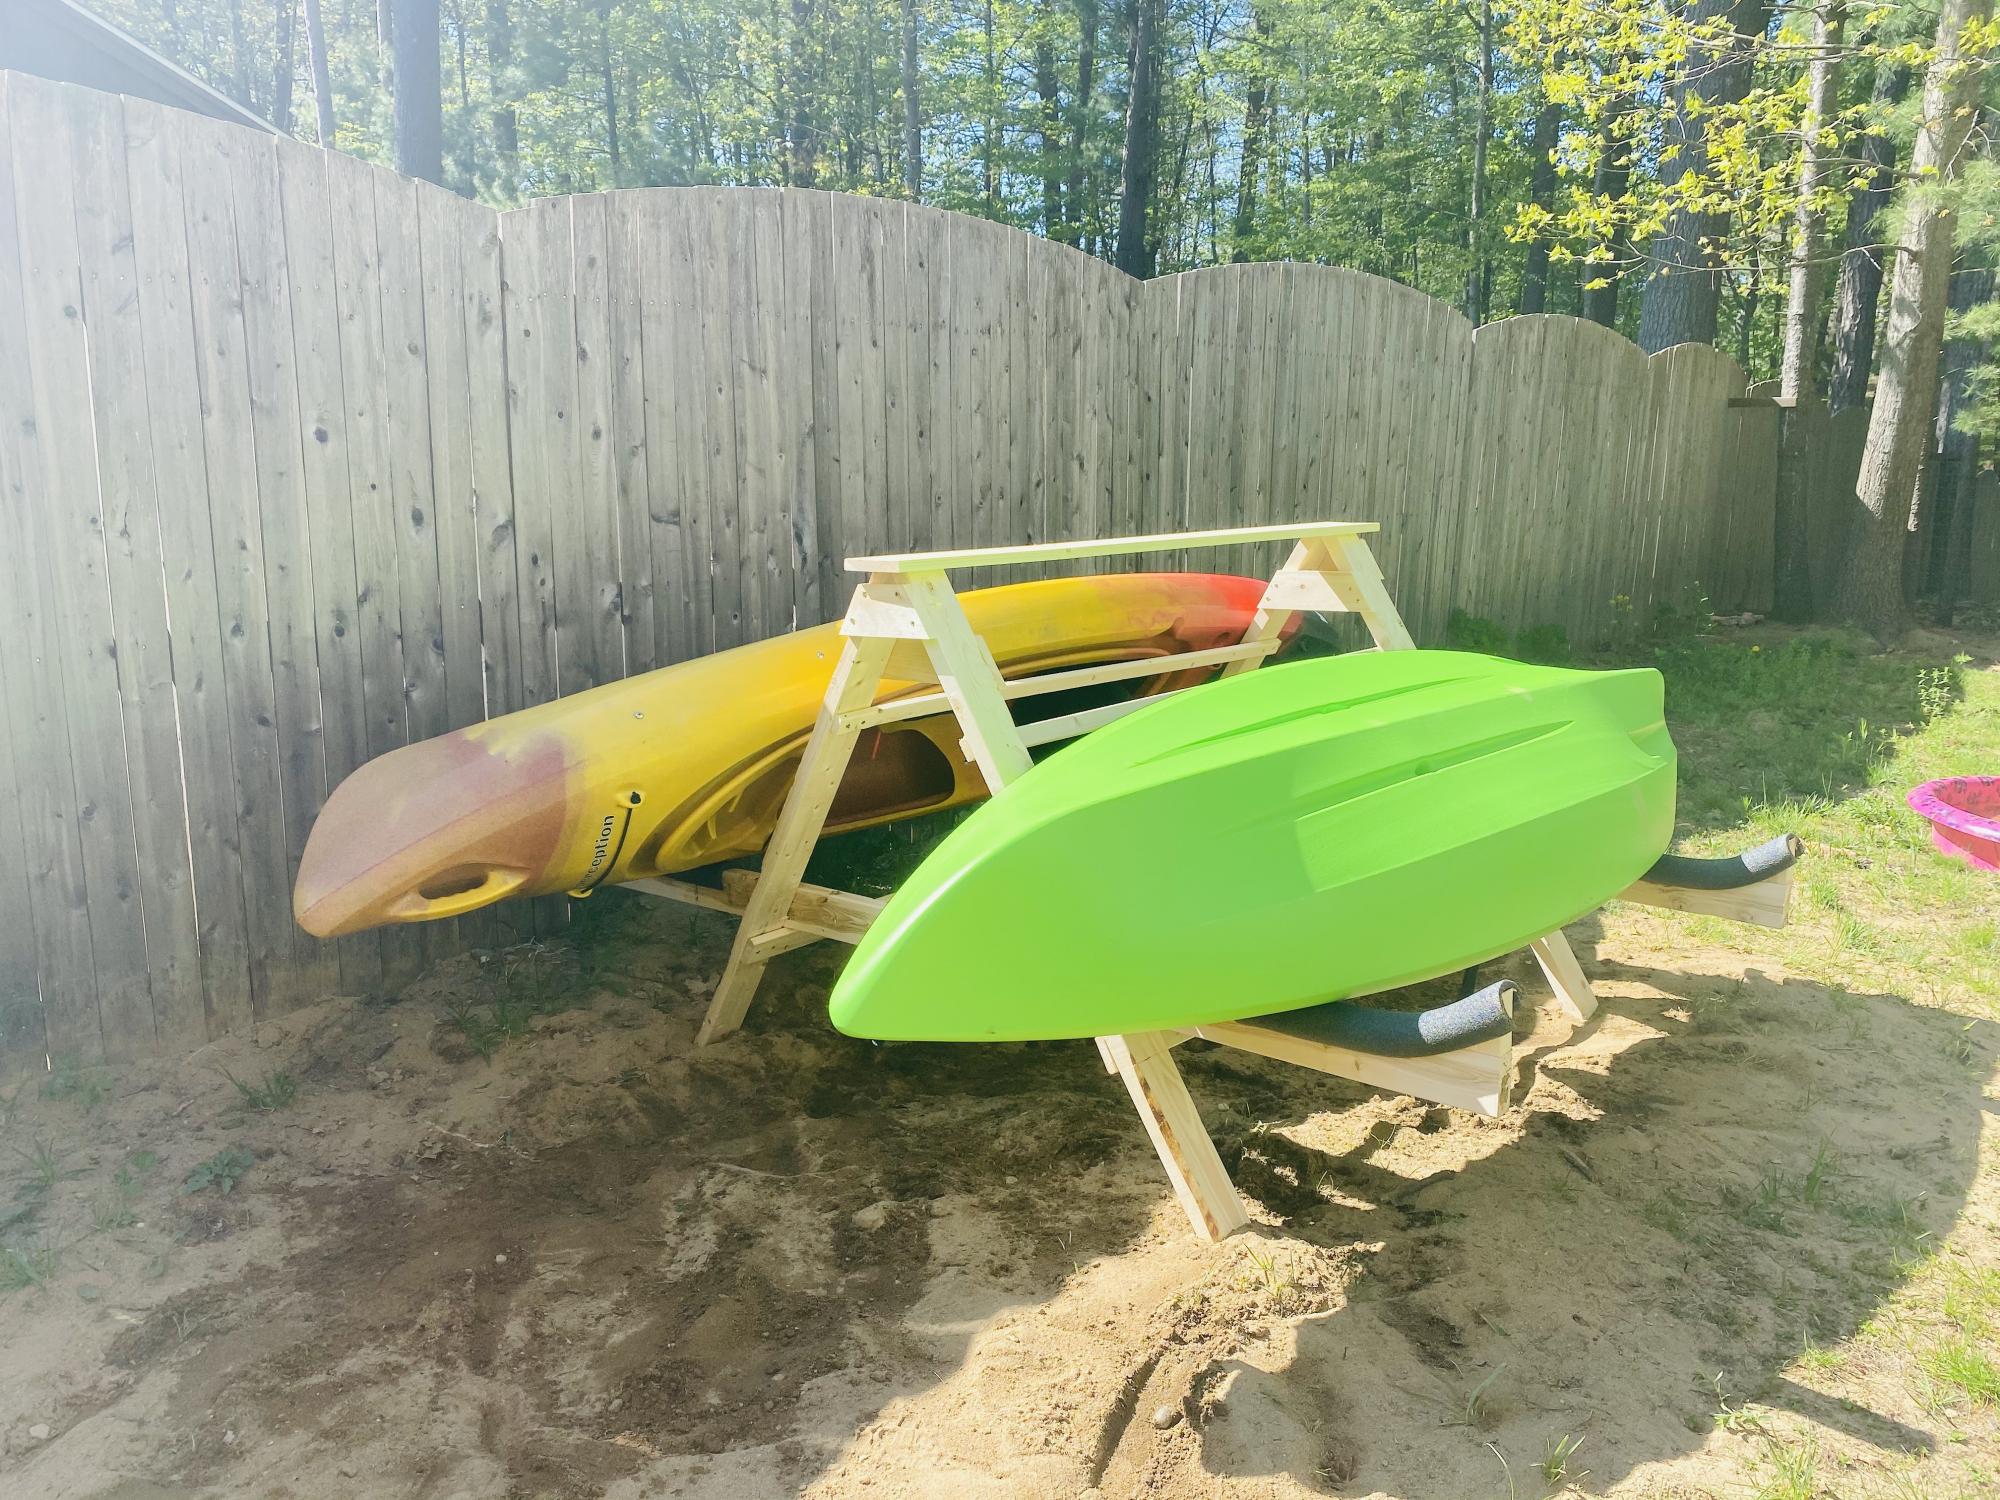
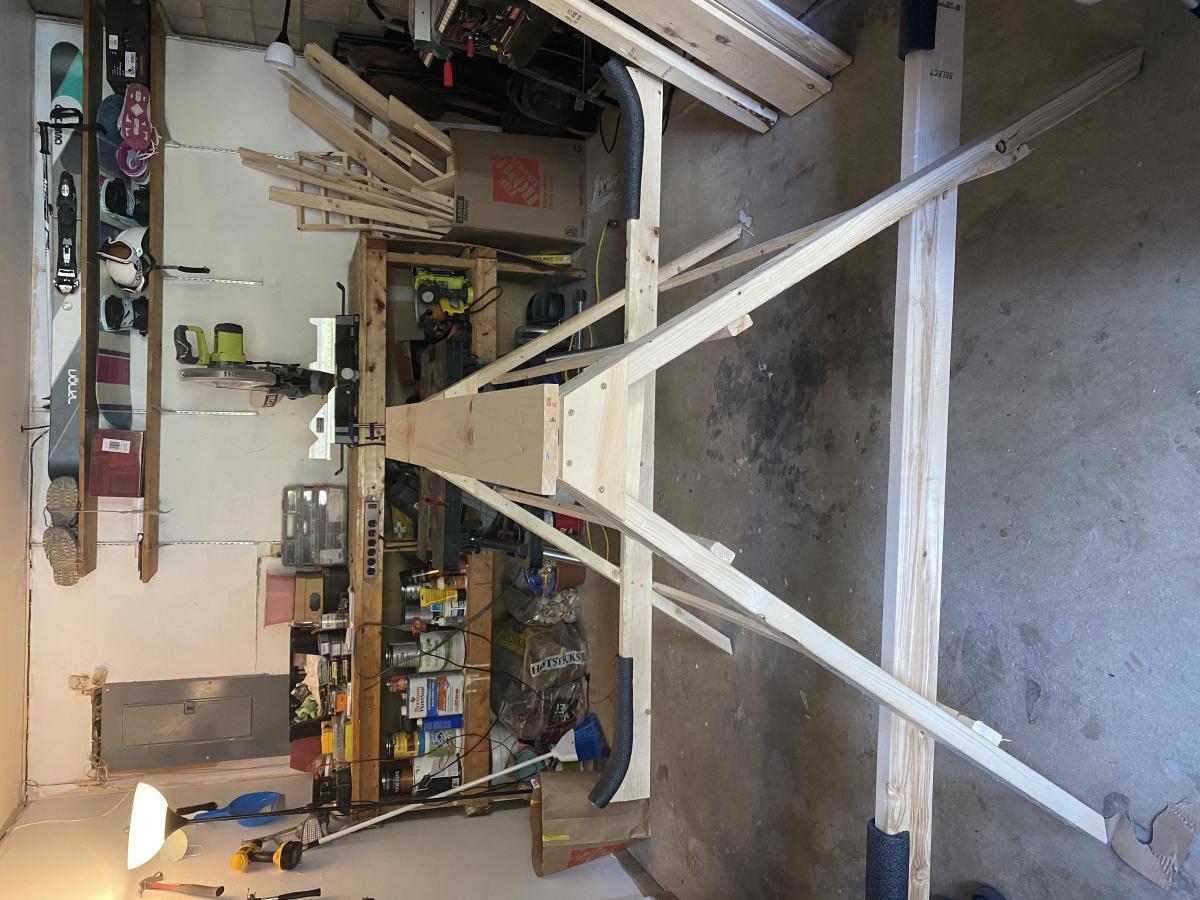
I saw Gina's post and this moved straight to the top of the to-build list. It's gotten my saw off the floor of my garage and provided a ton of storage for my other tools and bits. I also added another shelf after taking this picture. I modified this slightly: I made the wings 24" only, added a short back to provide more stability and reinforcement to the top shelf, added a diagonal support to the wings, and reinforced the top shelf from the sides with 3" dowels. I got my wood from a local lumberyard and the wheels from Blue.
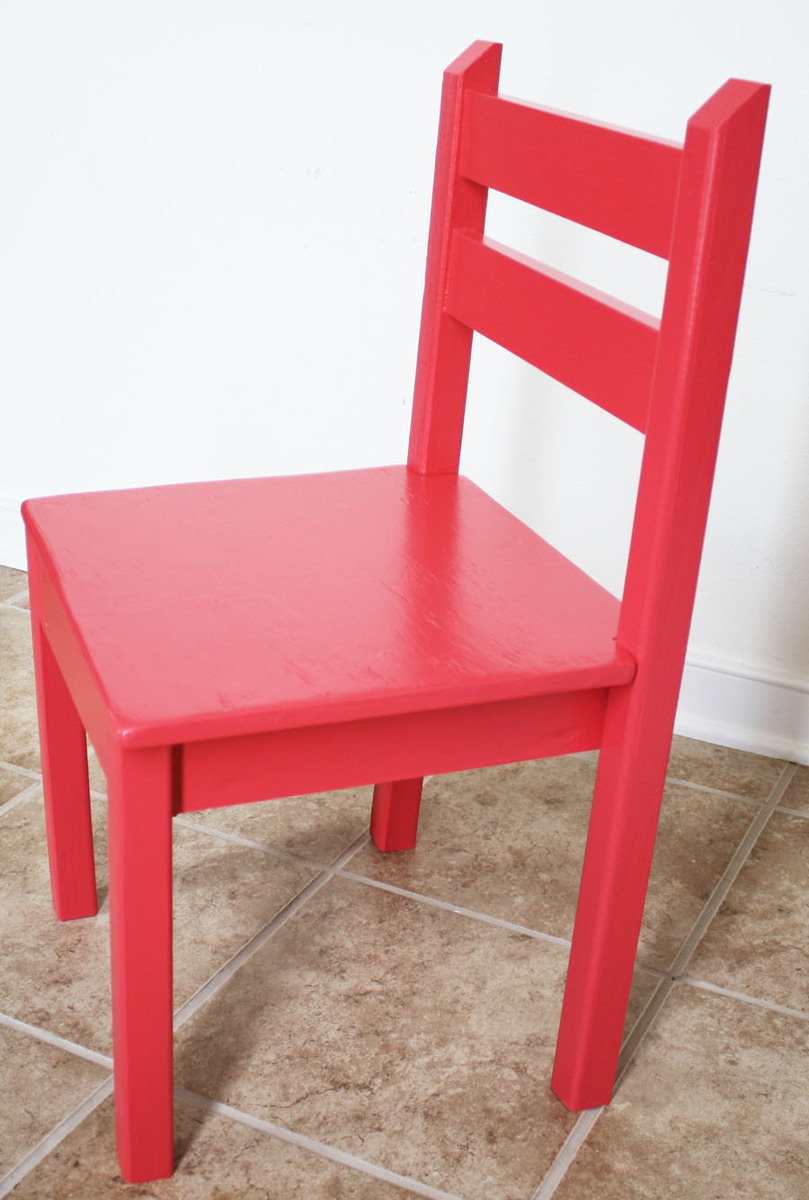
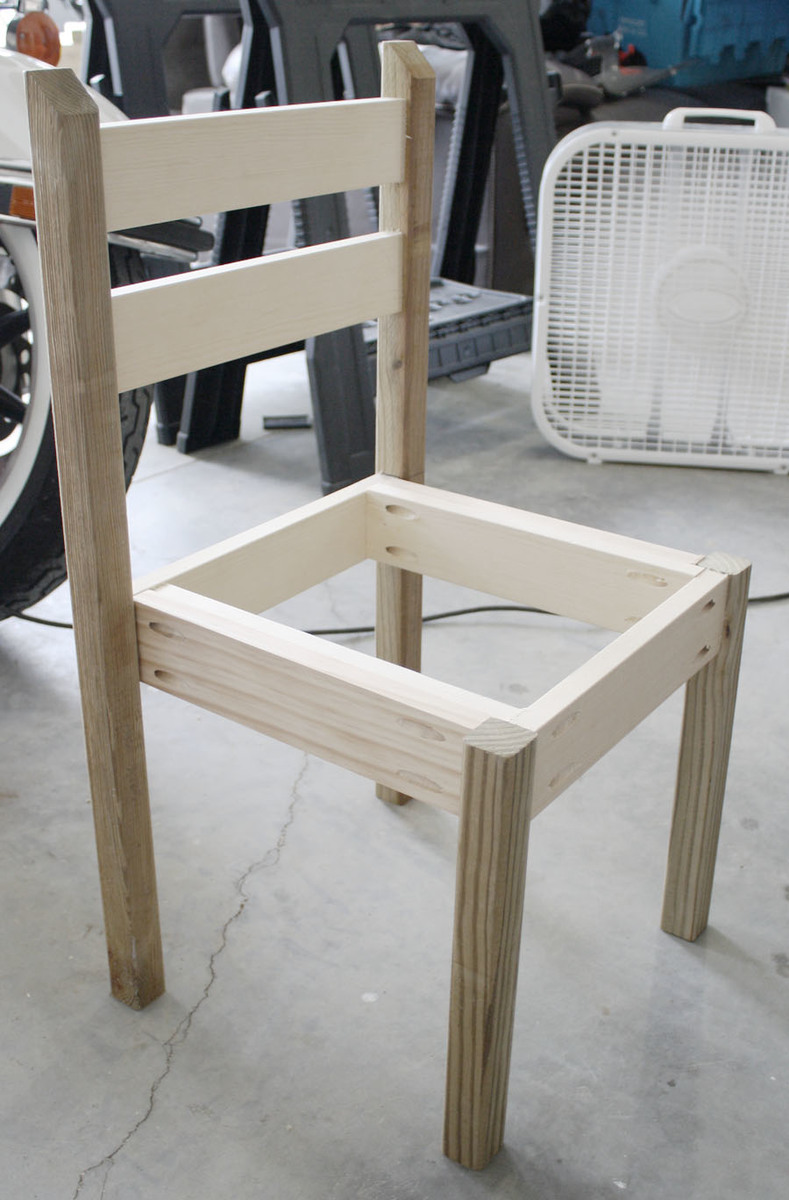
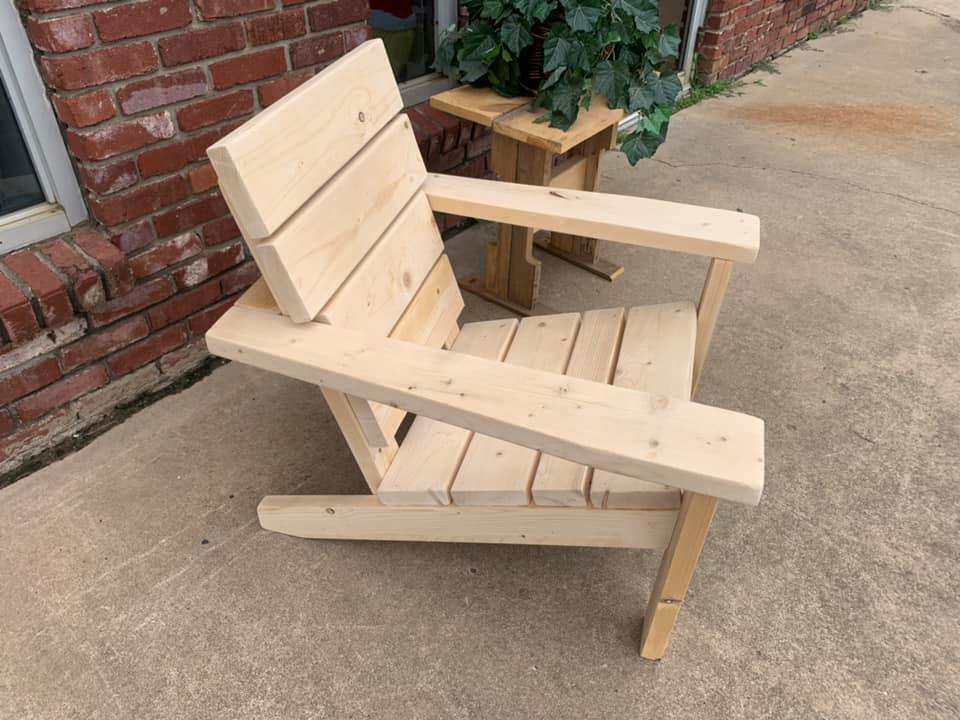
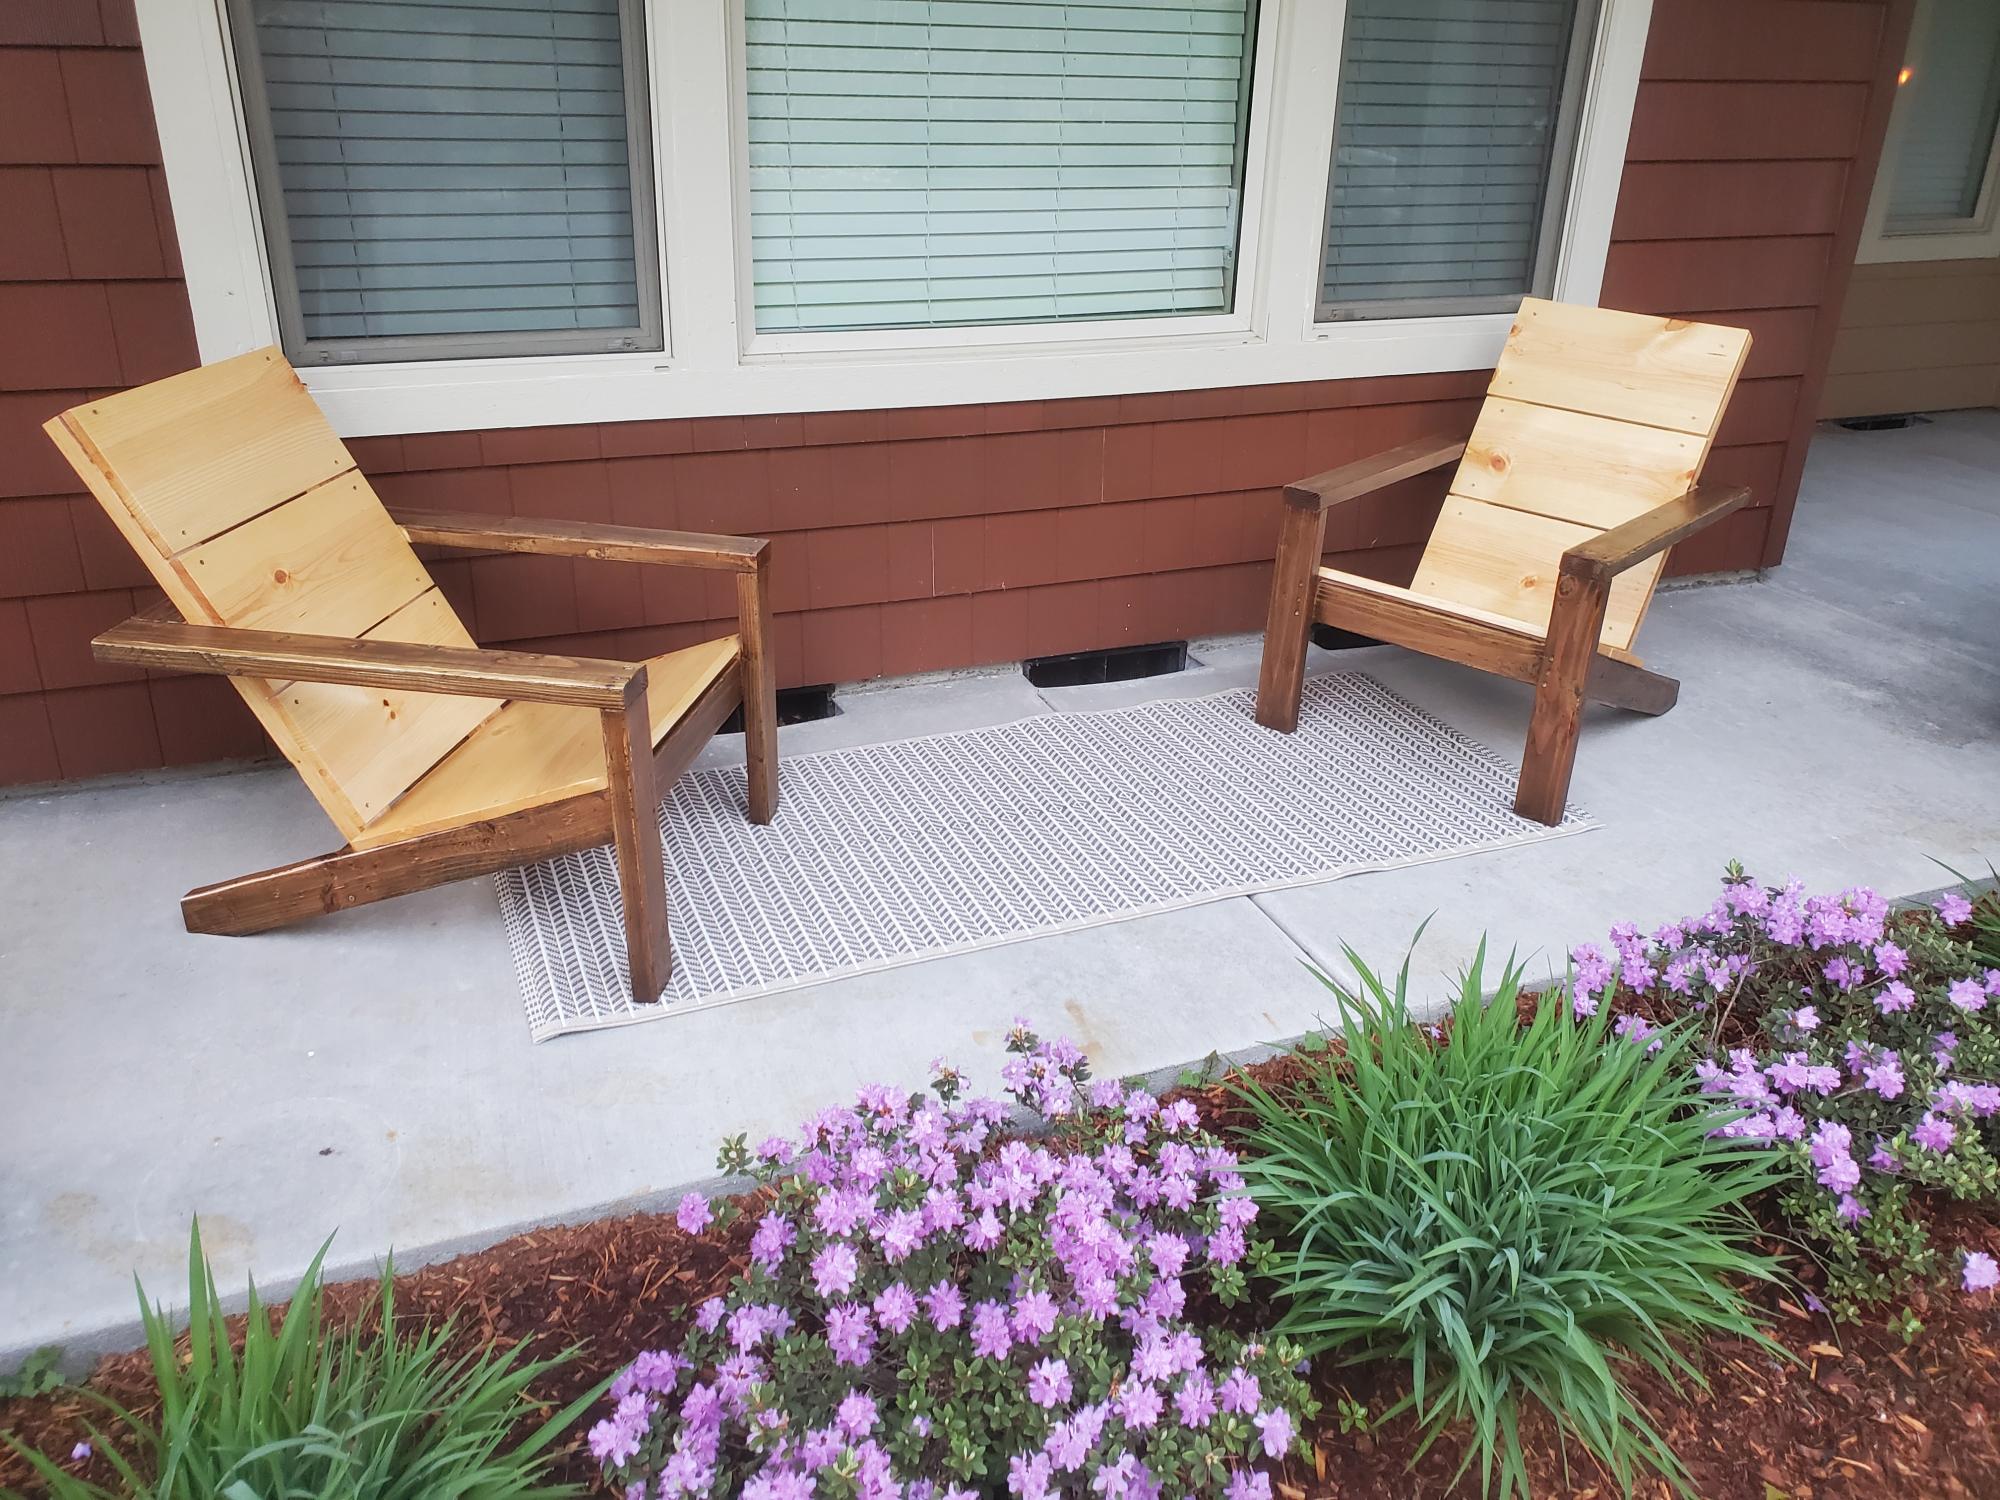
These chairs were easy to build, although I modified Ana's plans a little bit. I opted for solid wood 2x2s for the legs (I wanted it to be sturdier), and a solid seat instead of a slatted one. I notched out the back of the seat so it would fit flush against the back legs. Because of my modifications, my chair was just a couple bucks more.
Also, I was so excited to find solid wood balusters for the chair legs - they're not only better quality, but cheaper than furring strips!
Check out my blog link for a complete play-by-play!

Mon, 07/23/2012 - 08:25
Nice. I like the solid seat. Much easier to keep clean from kid grime.

Love the plan Ana! I made a couple slight revisions and made mine out of all 2x material. I used 2x6 for the arms with a taper and extended the arms over the front leg by 1.5 inches and used 2x6 and 2x4 for the seat and back slats. Boys it sits great! One other thing I did is I used pocket holes and concealed all my fasteners so I don't have any screws showing.
Mon, 10/19/2020 - 13:58
Great job. I too have prepped 2x6 for the arms, also with a taper, but only a 1" overhang on front. Appreciate the pics. I've made all my cuts but was starting to get concerned that the larger dimension arms would look funny. I also considered doing the stretchers as 2x6. Your pics make me rest easy that they'll look fine. Also using pocket holes where possible. Good stuff!
Cheers!

This was my first project ever. I had a lot of fun and it didn't quite turn out right but next time it will be perfect.
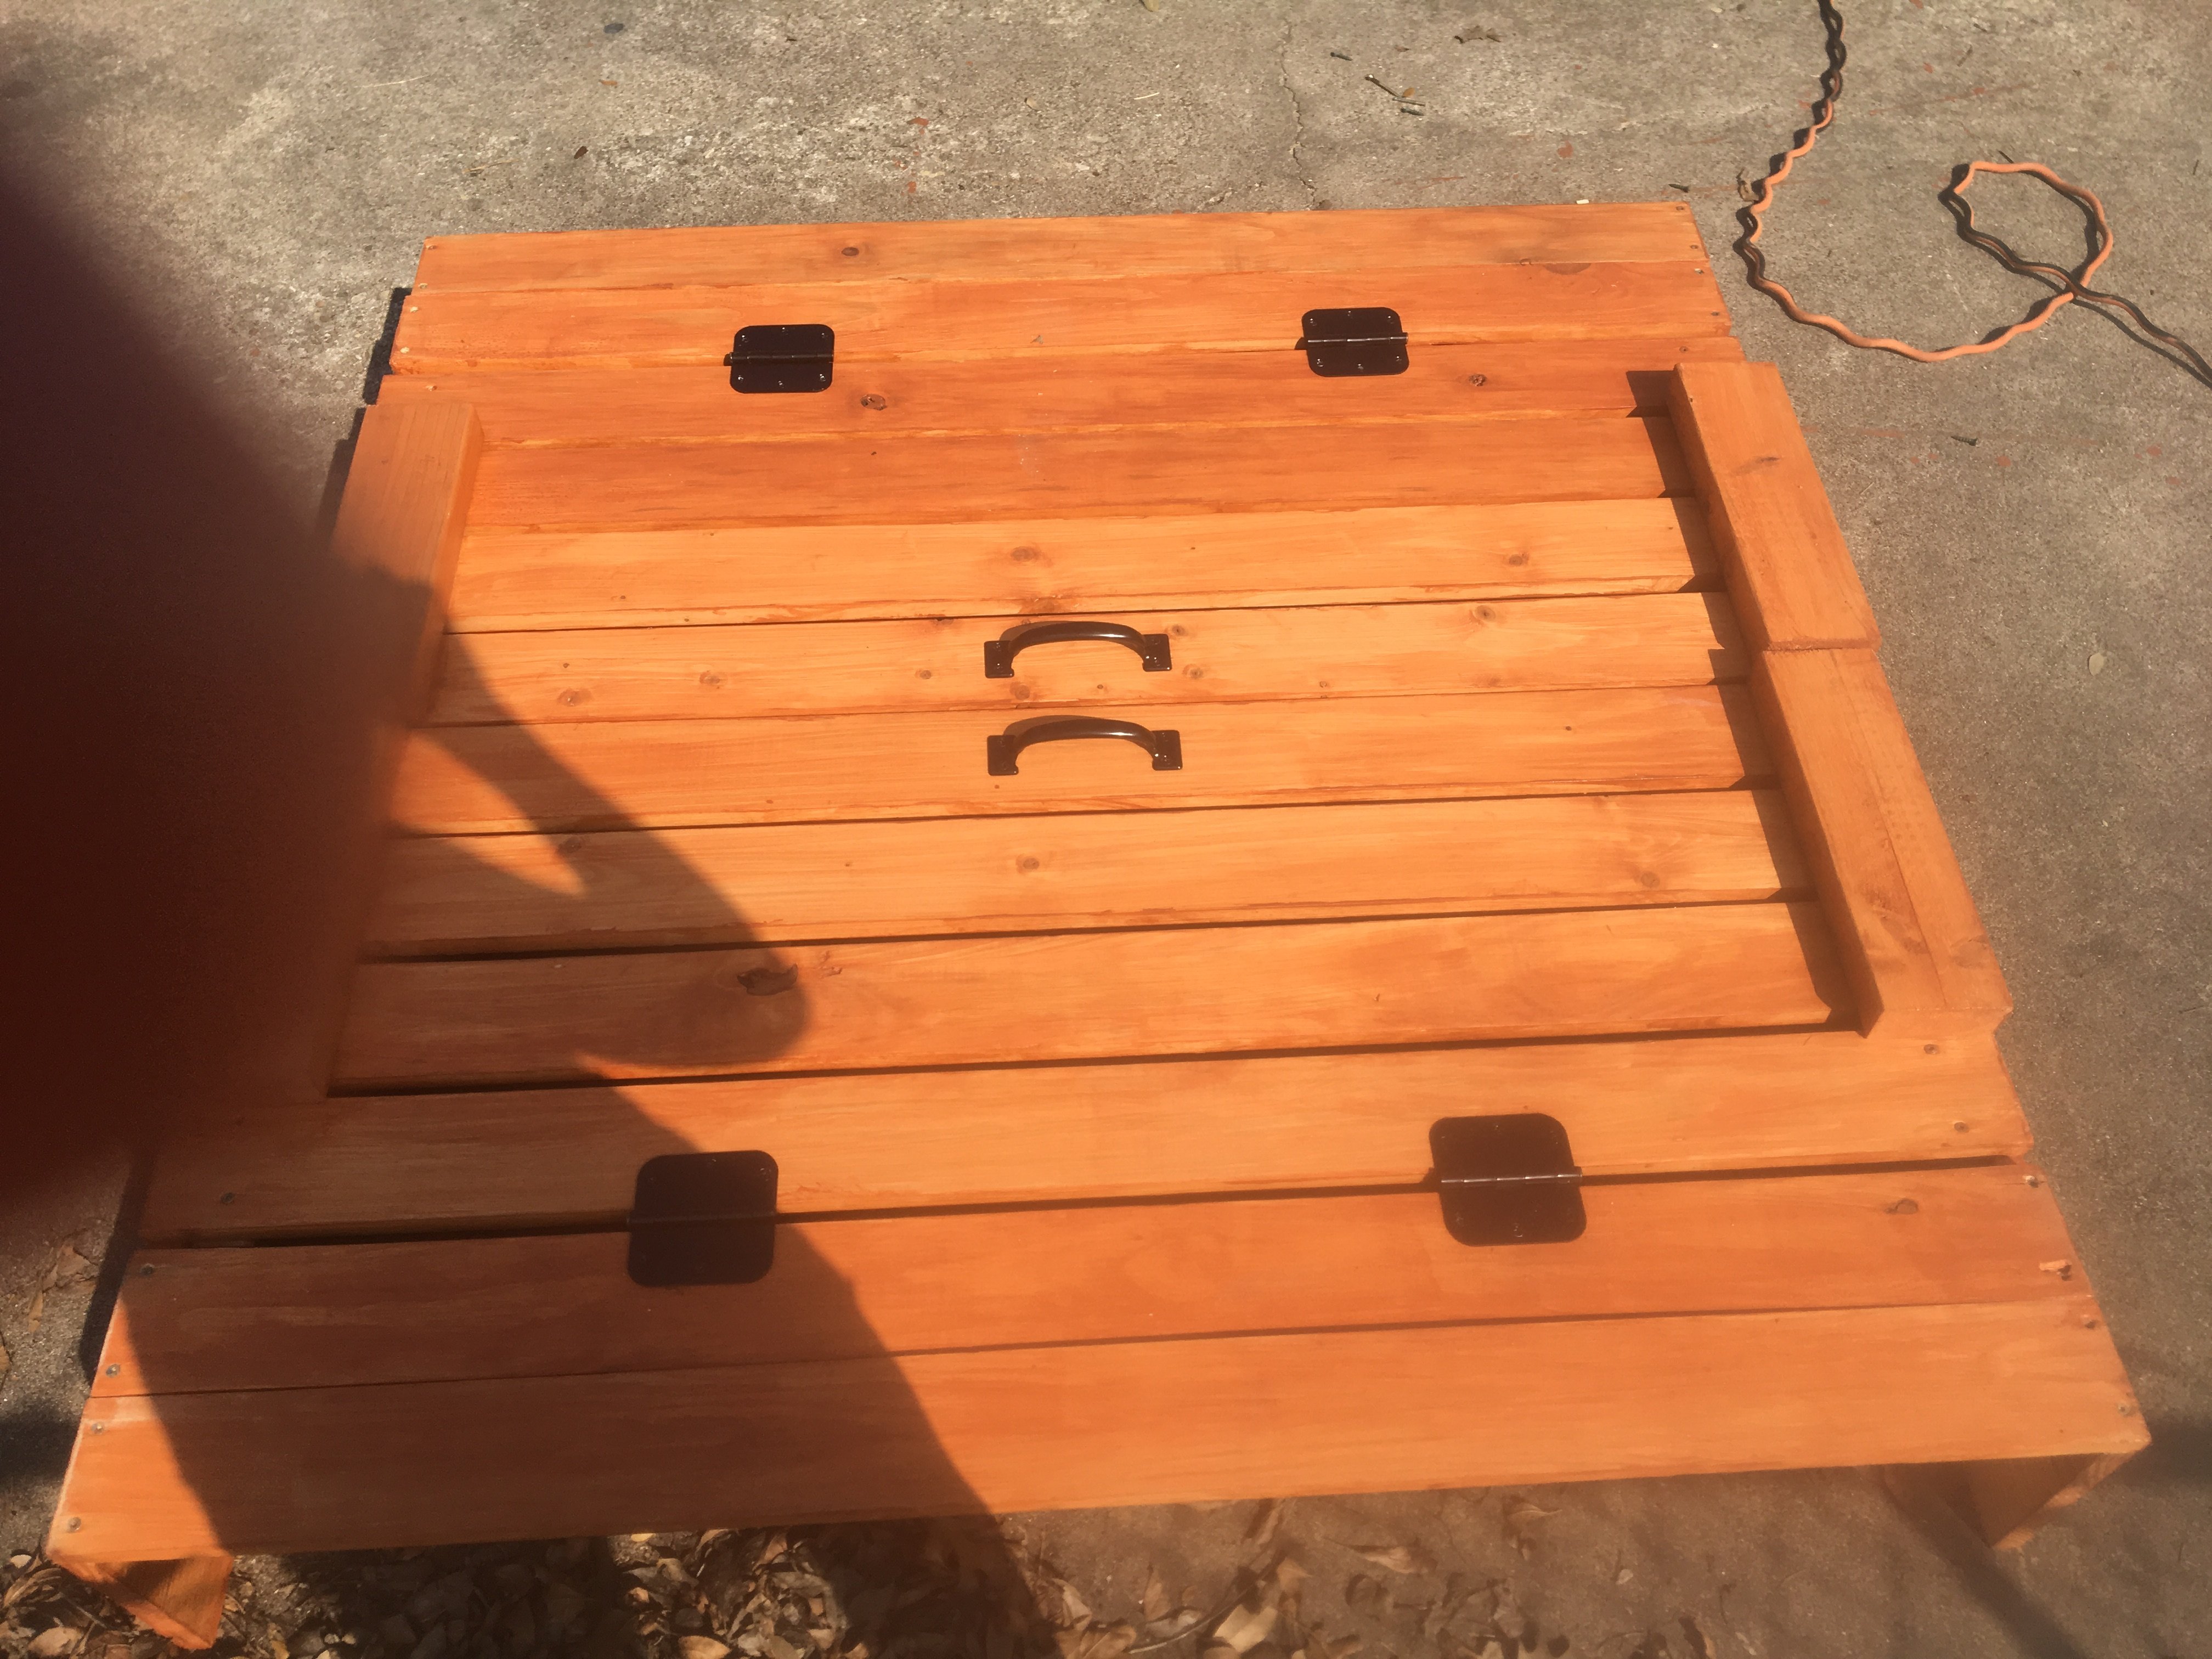
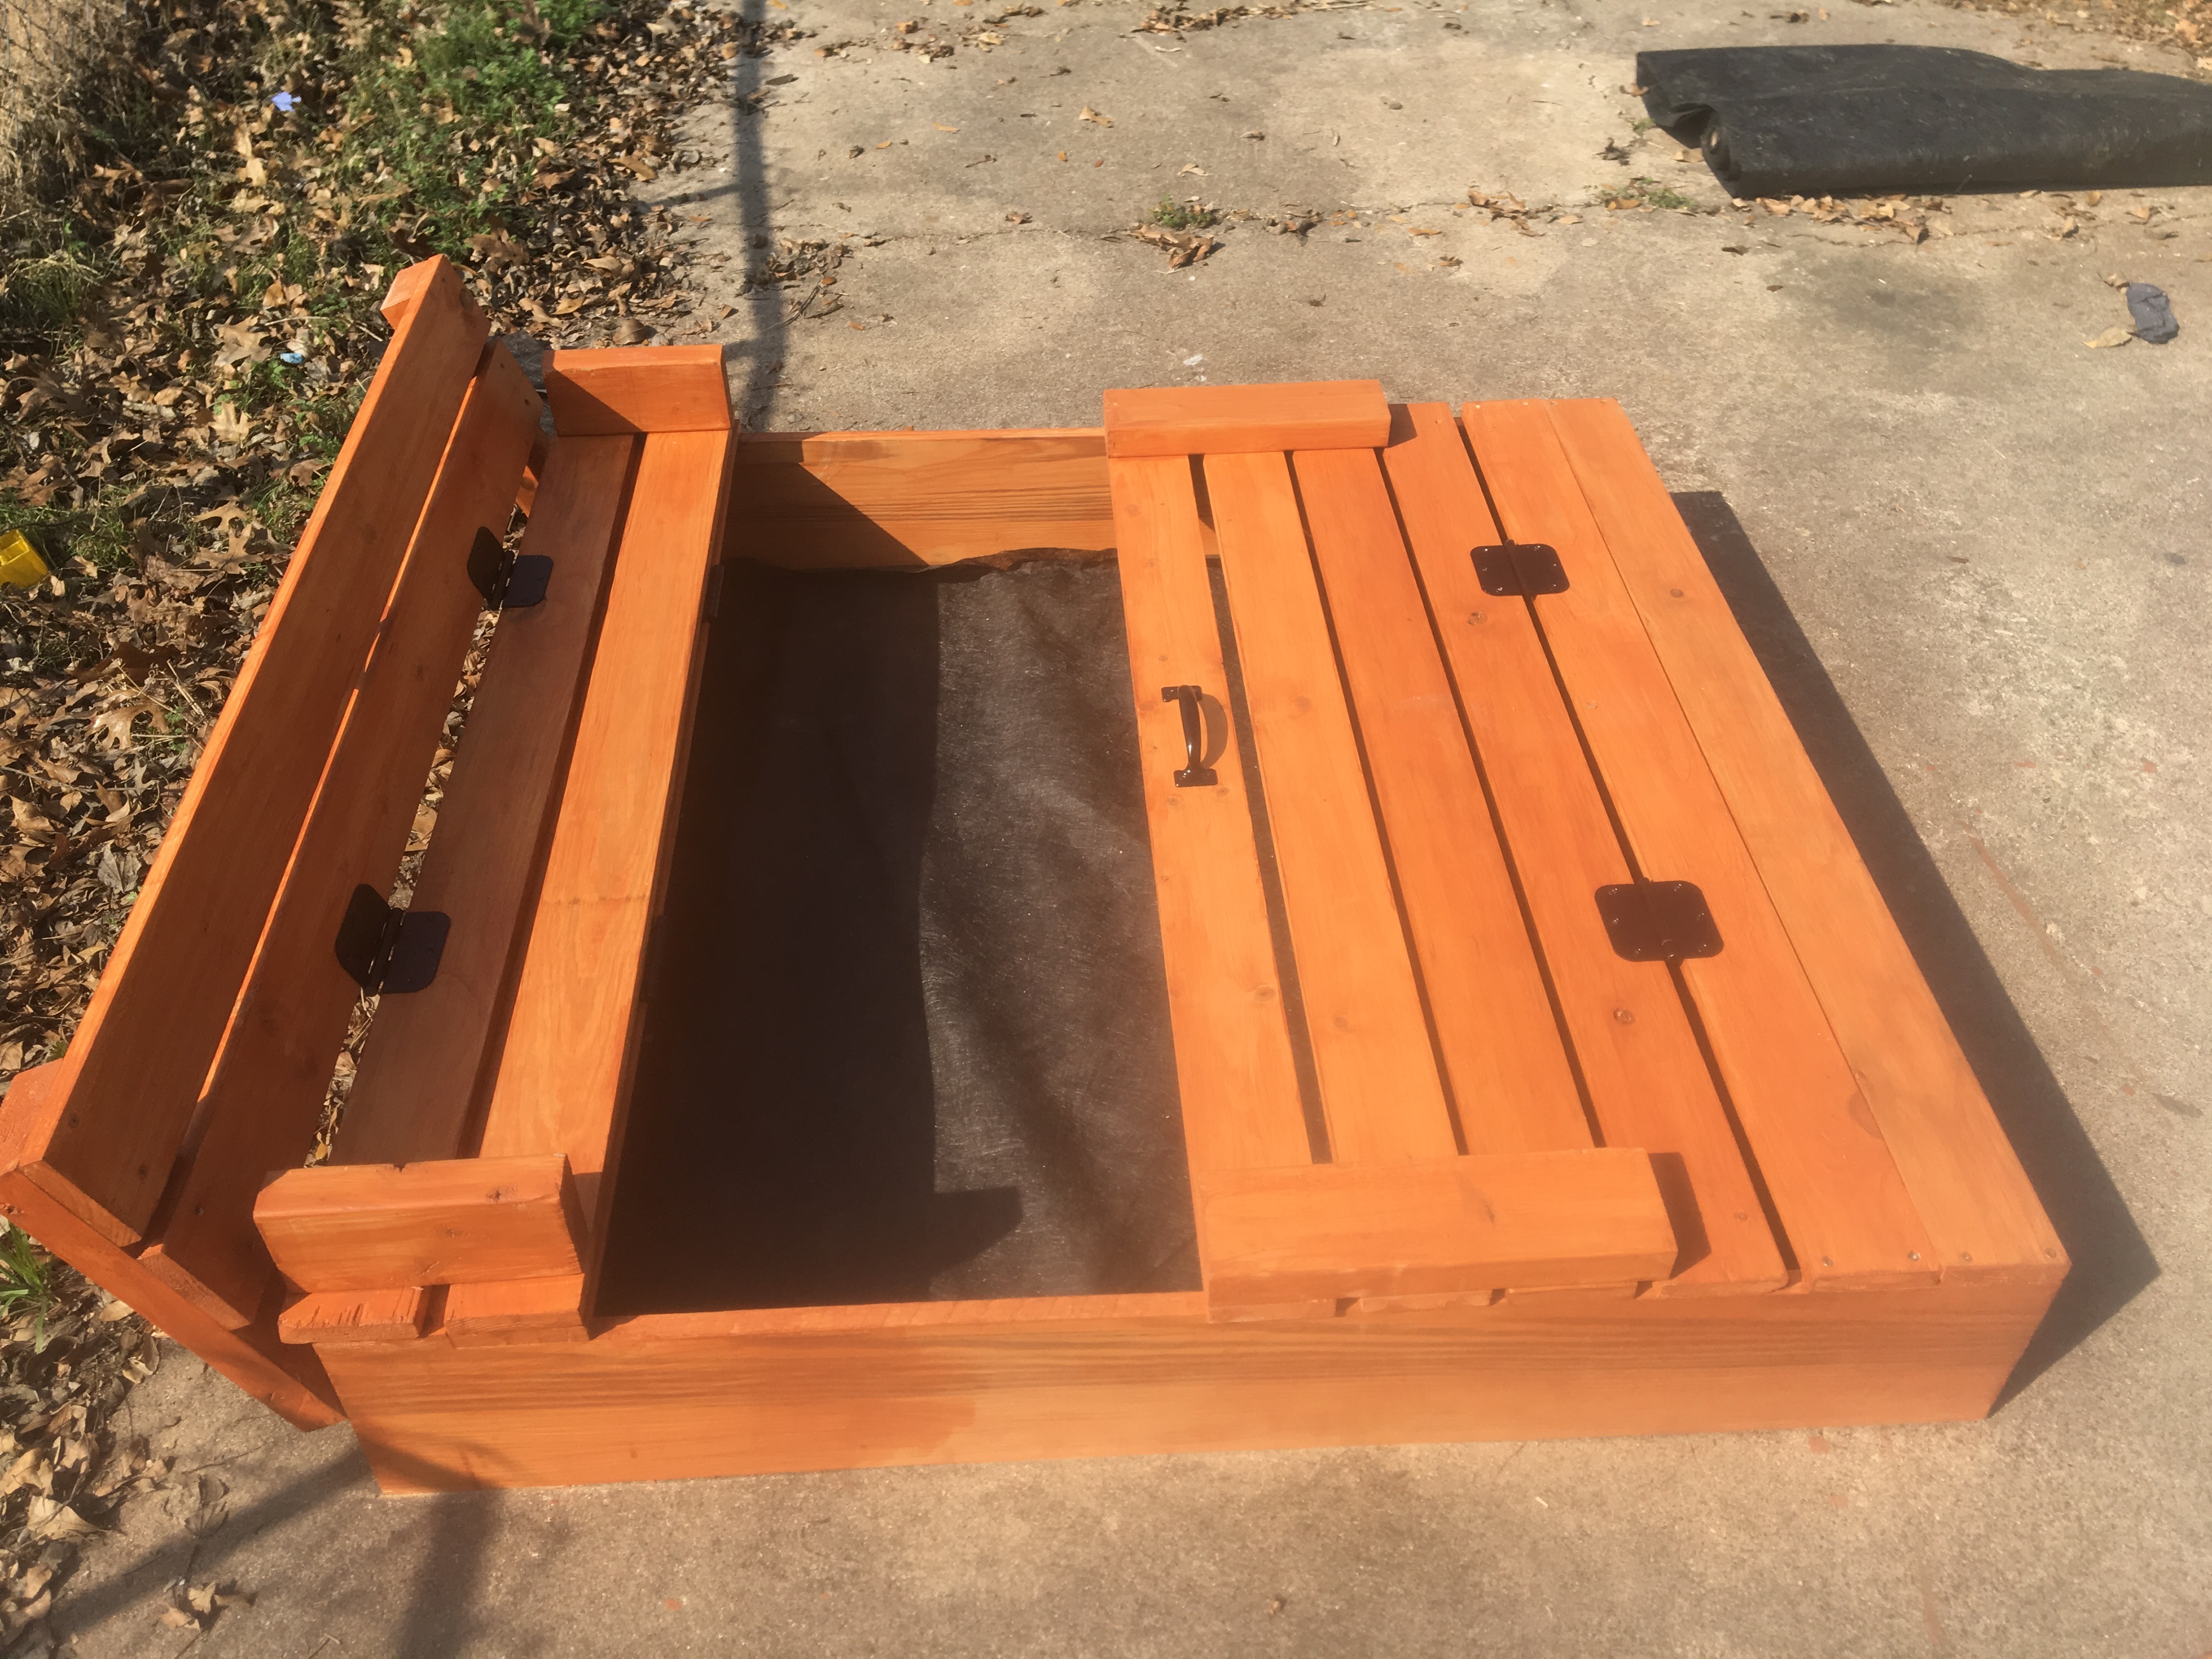
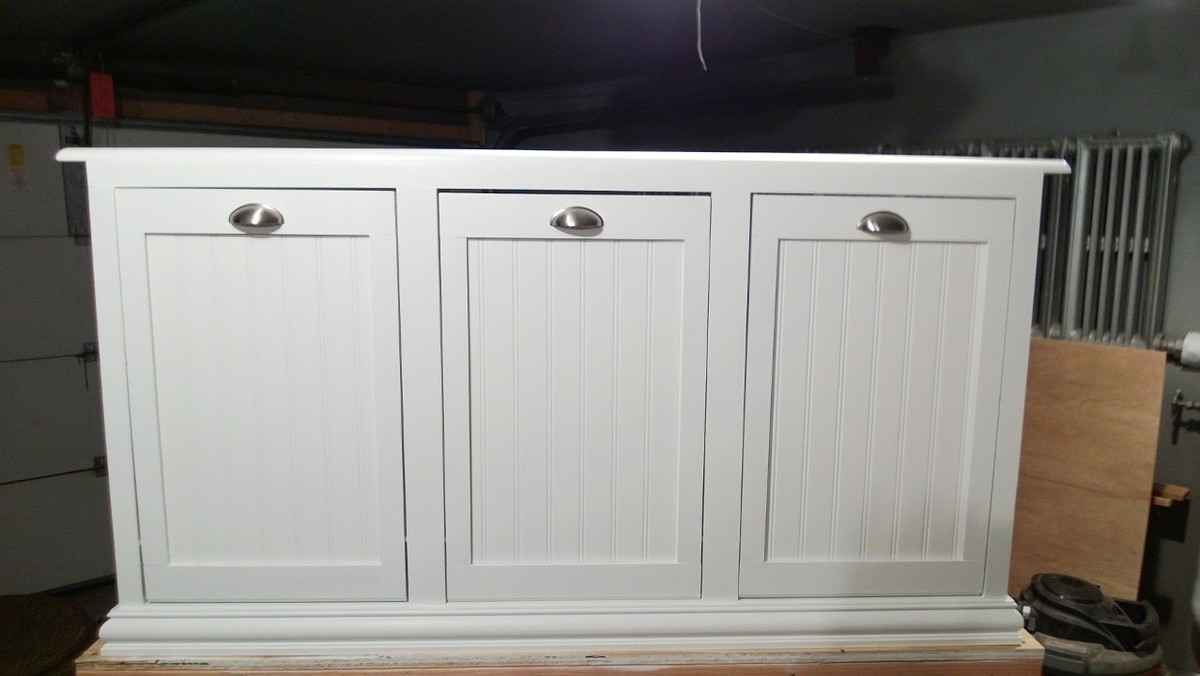
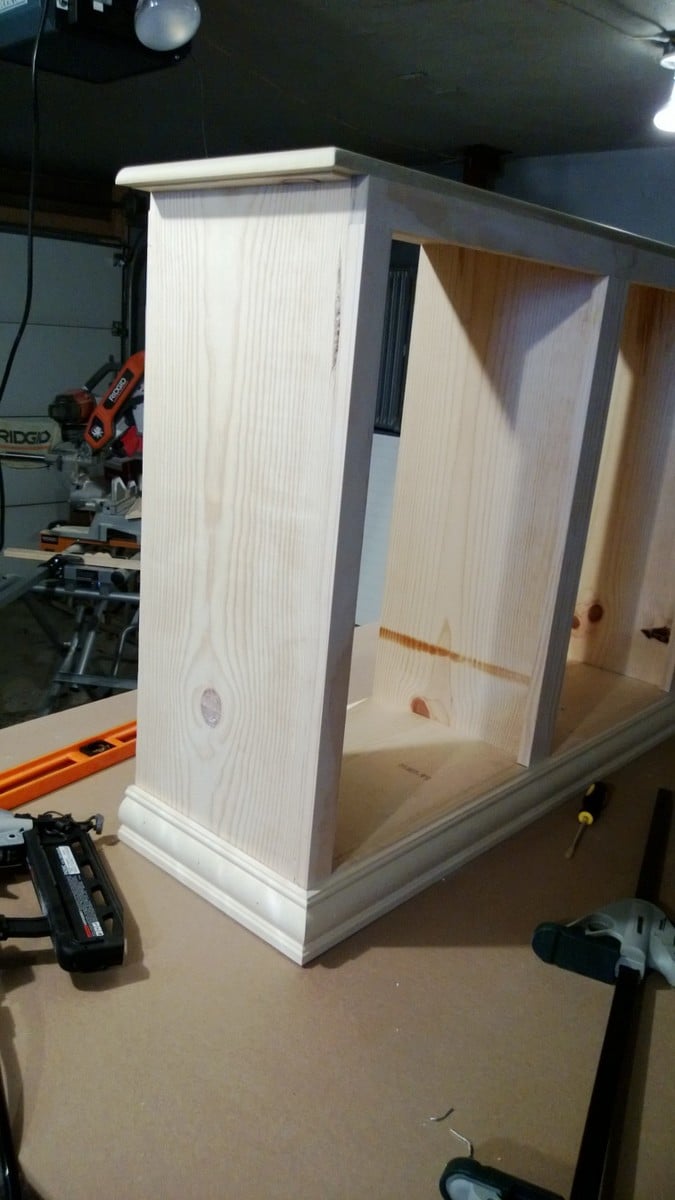
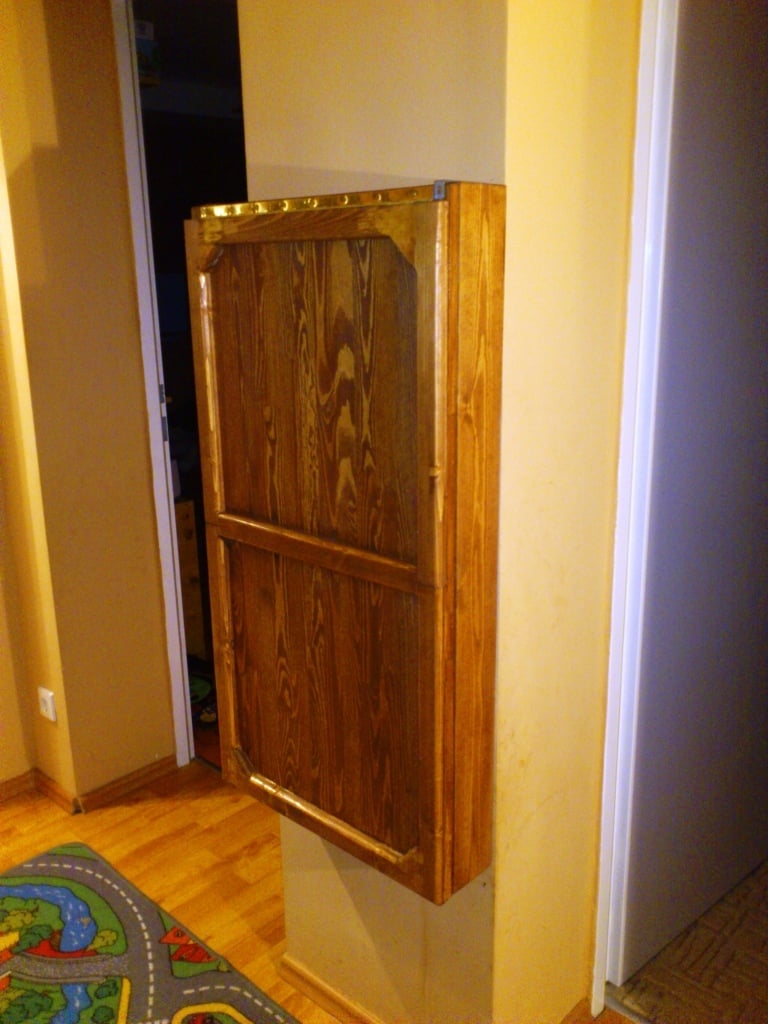
Modified the original plan to meet our needs of a laundry sorter. Had problems with the hinges so ditched them. I used dowels with a combination of a chamfer cut on the bottom of the door. Dado-ed the trim on the doors and slide the bead board panels in. The face frame is all held together with pocket hole screws, which I highly recommend because it eliminates nail holes and keeps the face frame square. This was my first wood working project, took me a little long to get it done. Thanks for looking.
Modified January 28
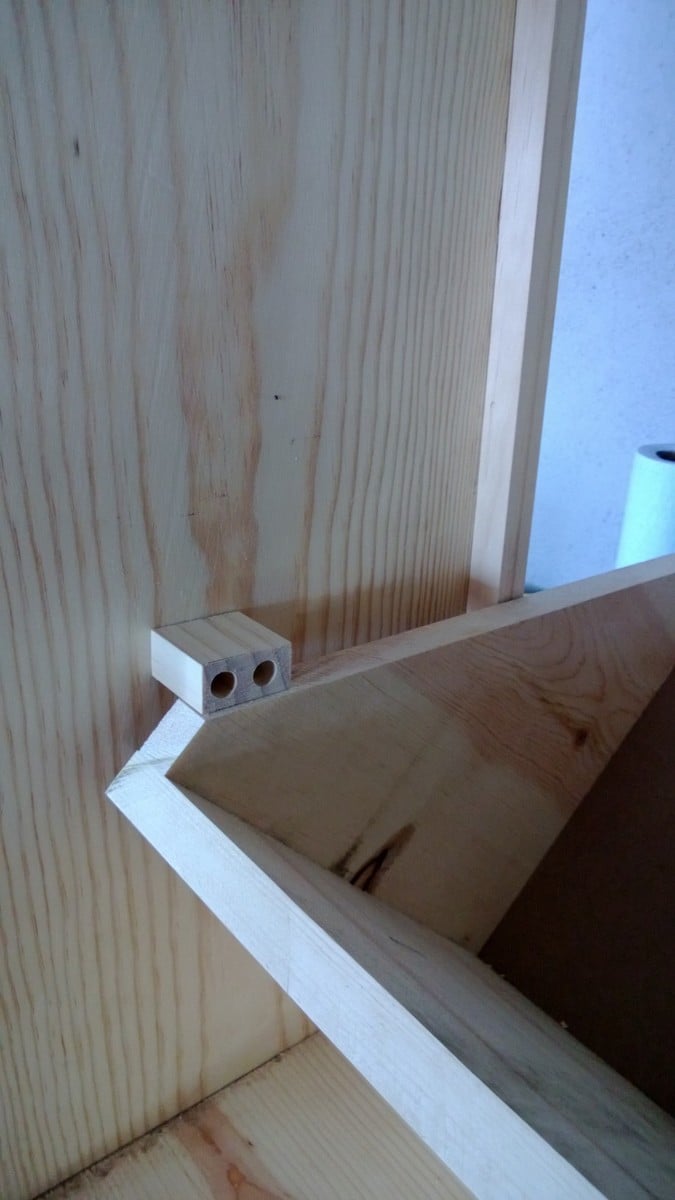
So here are some more pictures of my project. I don't really have any good pictures of the dowels. But what I can tell you is, I drilled holes through the sides of the face frame and the trim pieces and then measured where the holes would be in relation to the "drawer". I then drilled holes in the drawers at those measurements, I was careful to not go to deep. I think I went in half an inch. After that I started at one end and placed the dowels in, then put each drawer in. It wasn't easy but with a little patience it worked. The key is to wax the dowels so they will last longer as well. I also am including pictures of the top and bottom trim. On the top the original plans called for an overhang piece and I didn't like the way that looked. I ran the top board an inch long on each side and then wrapped it in quarter round trim. I did this because I plan on adding the Mimi Hutch Top. The bottom was built per the plan, but I ran into a problem with my bottom trim not being level and you could tell. So I raised the whole unit on 1 1/2 legs then placed it on a level surface and again wrapped it in a decorative trim. The key on both trims was a nice miter joint. Last picture I added was of my stoppers. I took scrap from the 1x2 trim and cut them to an inch and a half or two (can't really remember), then using the Kreg Jig drill bit drilled recessed holes. I then opened the doors until the side 45s were level then mounted the blocks on each side. I feel that it is better than a chain or string catch. Again thanks for looking and I hope I answered all of your questions.

Tue, 01/22/2013 - 11:29
Dowels! What a great idea! Would you mind sharing how you did it? Could you possibly add some pictures showing the dowels? You did a great job. It looks beautiful.
In reply to Dowels! What a great idea! by moosmani
Tue, 01/22/2013 - 20:11
Yes I will send you the info you requested, I'll try to get it out to you tomorrow or Thursday.
Wed, 02/15/2017 - 11:05
Can you send the plans to me?!?! I need this for my new home! [email protected]
Thu, 01/24/2013 - 09:27
I love what you have made! Could you post pictures of the top and the bottom trim? I'm very impressed that this is your first project!
Sat, 11/16/2013 - 18:23
I am a little confused. I love the three bin laundry sorter, but everyone is mentioning plans. I am not finding plans for it on the site. Also, what goes in to hold the clothes? There may be obvious answers, but I am not seeing them. I'd appreciate any help you could give.
Tue, 12/02/2014 - 02:58
I've been thinking of working up one very similar to this, also with 3 bins, but I didn't want to use chain either. Those stoppers will be ideal - do you put them on both sides or is one enough? Thanks for the share!
Sat, 01/24/2015 - 11:29
Hi-
Im not sure if you still have the plans to this awesome project, but if you do, would you be able to share them with me? Ive been looking to make something like this forever, but just couldnt find any help!
thanks,
karah
[email protected]
Wed, 02/25/2015 - 12:35
If you still have these plans, could you please send them to me? [email protected]
THANK YOU!
Wed, 02/25/2015 - 16:45
I am searching for the plans for the gray corner entertainment center. Does anyone still have them that could email it to me….
Tue, 01/19/2016 - 17:43
Hi there! If you still have the plans for this I would love to have them! Thanks a lot
Tue, 04/12/2016 - 18:51
I would love to have the plans for the laundry bin if they are still available, Thank you!
Wed, 02/15/2017 - 07:16
Can i also have the plans! This is perfect for what we want to do in our laundry room
Wed, 02/15/2017 - 11:24
Can you please send me the plans! [email protected]
Mon, 07/10/2017 - 04:19
I absolutely LOVE your laundry sorter!!!! You did a fabulous job and the TRIM, WOW amazing!!!! I've searched Ana's website and cant find the plans' could you please email me the plans to [email protected]. I started building my own furinture back in October 2016 and the reward is amazing... Keep up the good work.
Happy Building,
Lisa
Tue, 01/16/2018 - 19:55
Love this! Can you email the plans to [email protected] please?
Thank you
Tue, 01/16/2018 - 22:18
I'm too new at woodworking to be able to tackle this right now, but would love to download the plans for future. My most successful project so far is a pretty standard bookshelf. I got a free plan, with lots of guidelines and explanations, at https://tinyurl.com/ydeup8lo -- it came with a 440 page guide, "The Art of Woodworking" that has tips and techniques, and am plowing through that right now.
Wed, 02/28/2018 - 12:53
This is amazing. I am very new to woodworking. Could you send me the plans please? I would be most appreciatative
Wed, 03/11/2020 - 23:27
I would love to have the plans for the three bin laundry sorter to build for my laundry room. Are the plans available? Awesome work!
Thu, 07/16/2020 - 14:14
Looks amazing!! I want to build one just like that, can you please email me the plans, thanks!! [email protected]

Tue, 01/12/2021 - 06:26
This looks like something I can build. Would you please e-mail me the plans? The address is [email protected]

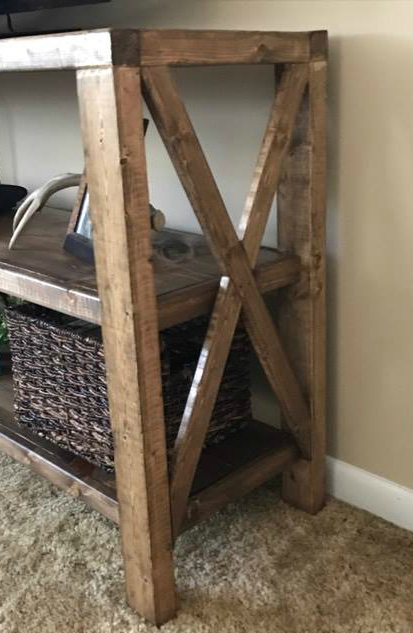
I loved the rustic X console, but it was a bit too big for our space. We decided to go with the Henry Media Console, but I had my dad add "X"s to each end. We took breaks and worked in between our busy schedules, but this could totally be a day project.
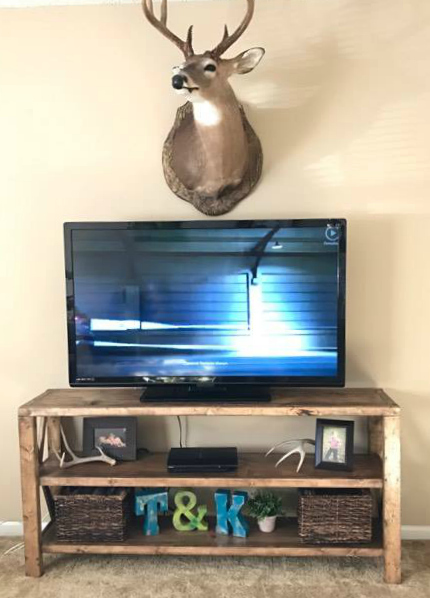
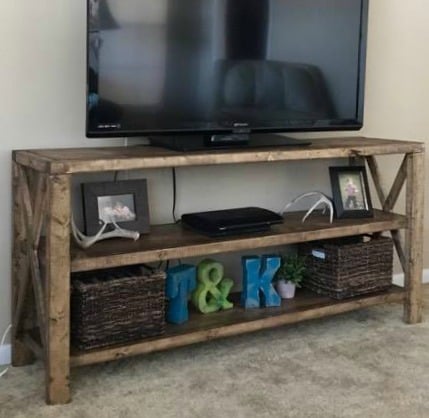
Love how this turned out!! Thank you thank you Ana!! Plans were great, I think we got it done for just about $250!
Thanks again!
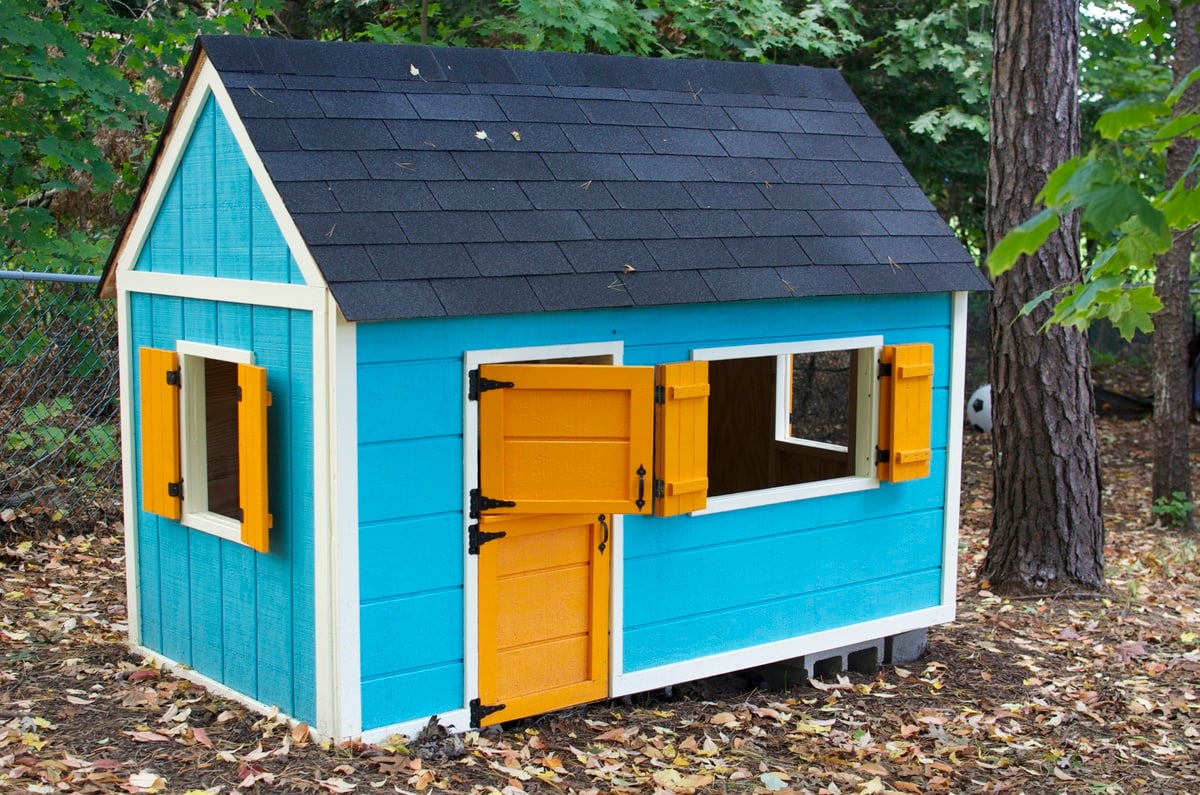
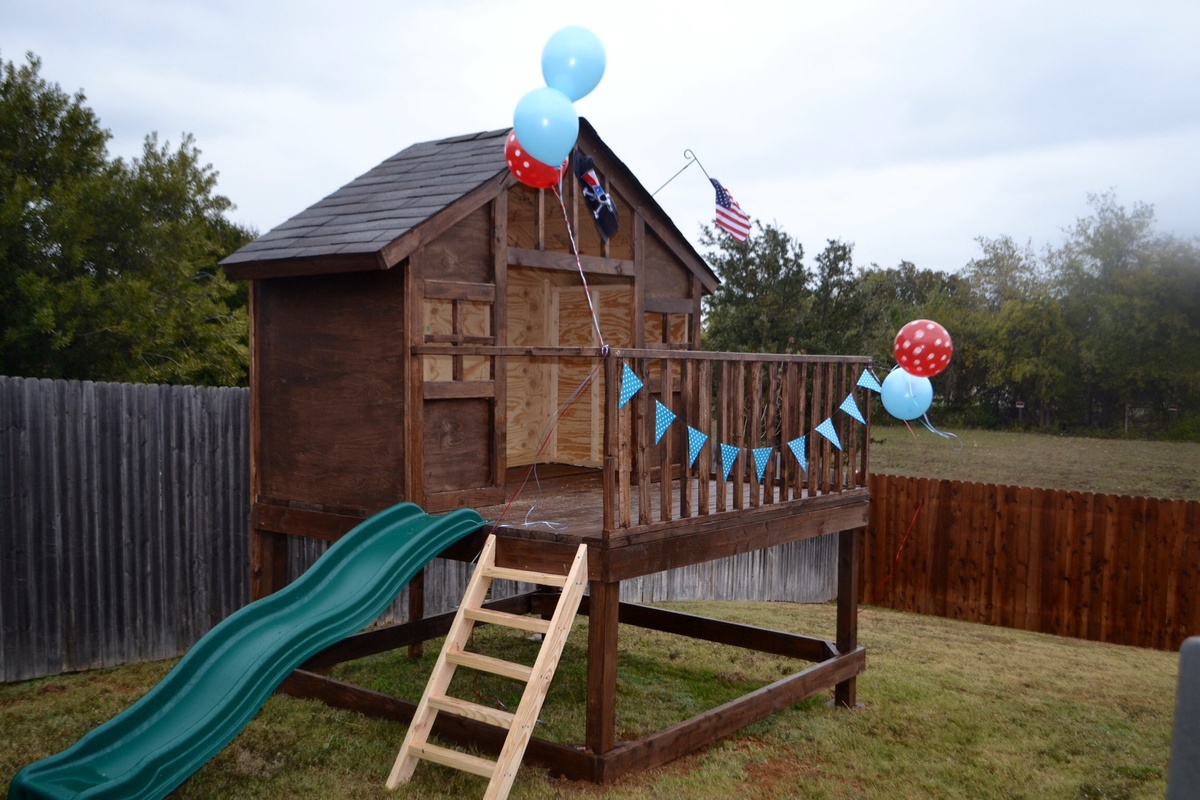
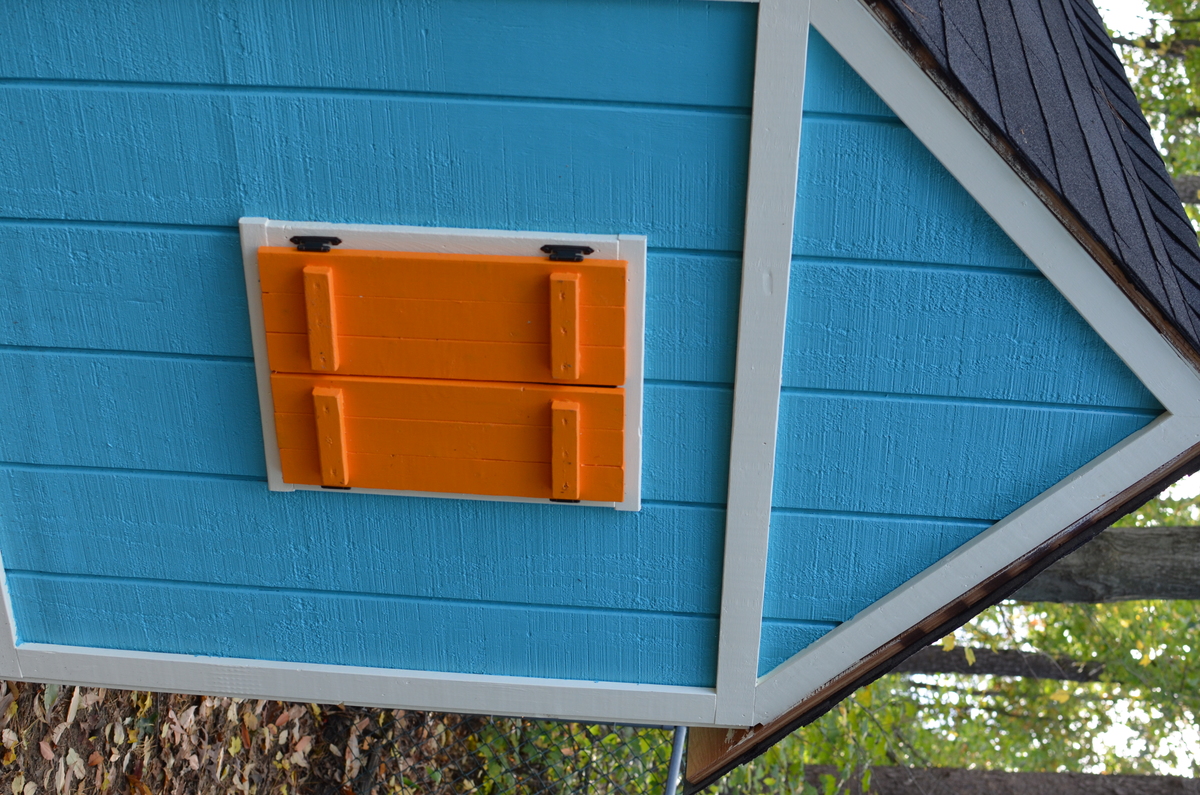
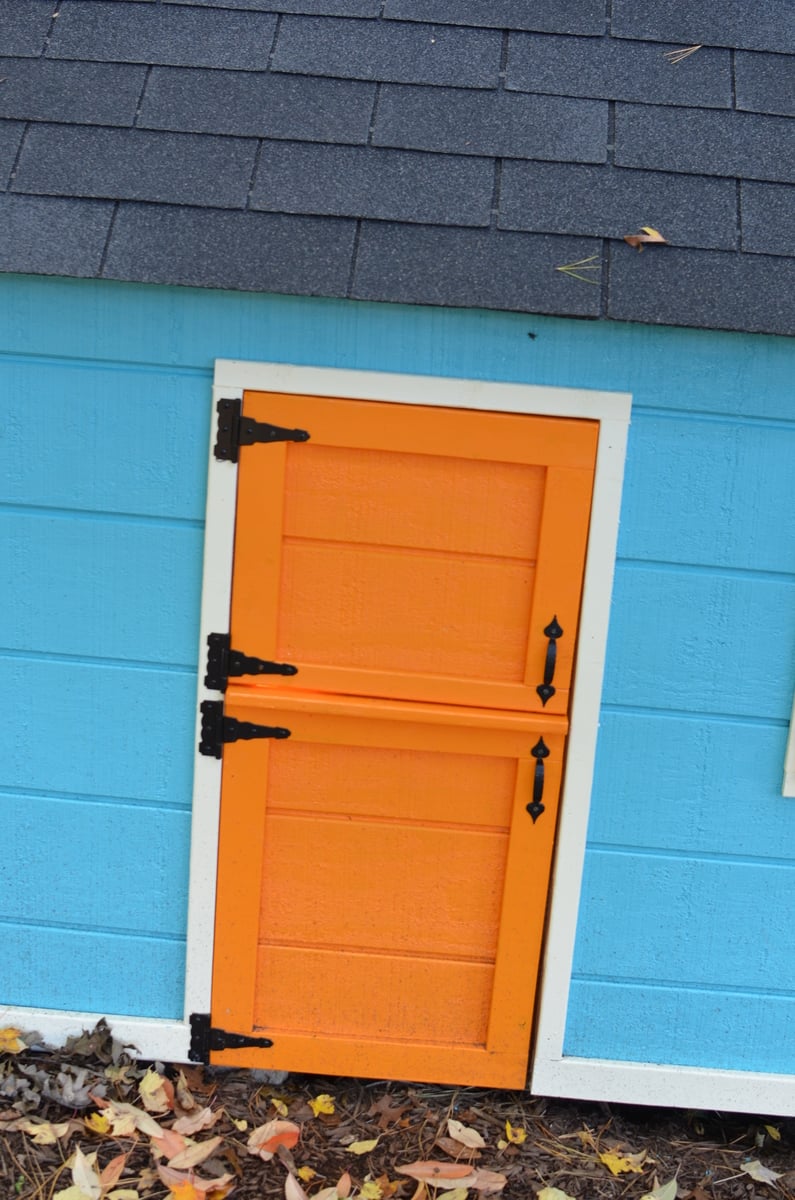
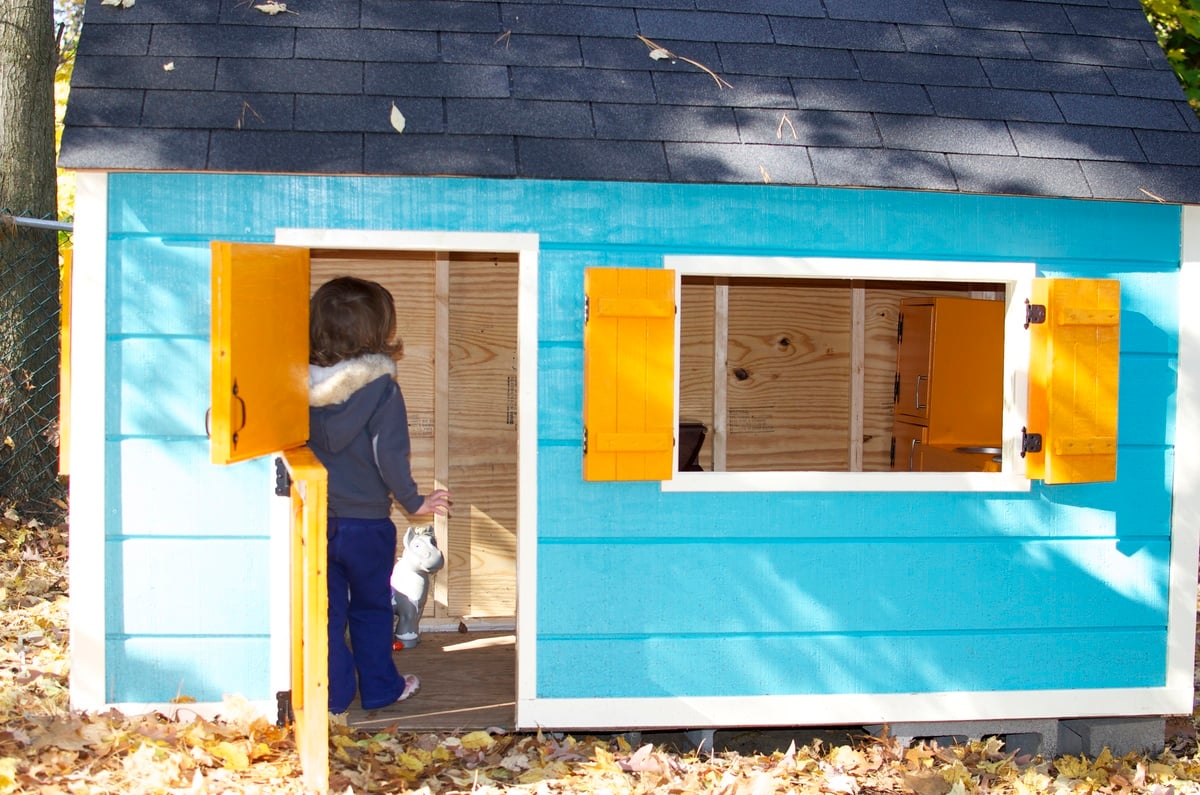
Olivia's Playhouse, built by mommy and daddy, though she did "help." Super-thankful to Ana for her awesome plans and making all this possible for our Little One. Modified the door to make it "barn style" which opens top/bottom. In the spring, plan on adding a small front porch/deck and railing.
Mon, 03/23/2015 - 13:15
Loving all the little details! Great job, thanks for sharing!
Sat, 05/14/2016 - 08:02
I love your playhouse. Would you happen to have the dimensions for the shutters? They look amazing! [email protected]
Sat, 05/14/2016 - 08:02
I love your playhouse. Would you happen to have the dimensions for the shutters? They look amazing! [email protected]
Sat, 05/14/2016 - 08:02
I love your playhouse. Would you happen to have the dimensions for the shutters? They look amazing! [email protected]
Sat, 05/14/2016 - 08:02
I love your playhouse. Would you happen to have the dimensions for the shutters? They look amazing! [email protected]
Sat, 05/14/2016 - 08:03
I love your playhouse. Would you happen to have the dimensions for the shutters? They look amazing! [email protected]
My first project from Ana’s plans. Loved having the material and cut list available!! I adjusted my measurements to fit a Cal King just as Ana suggested.
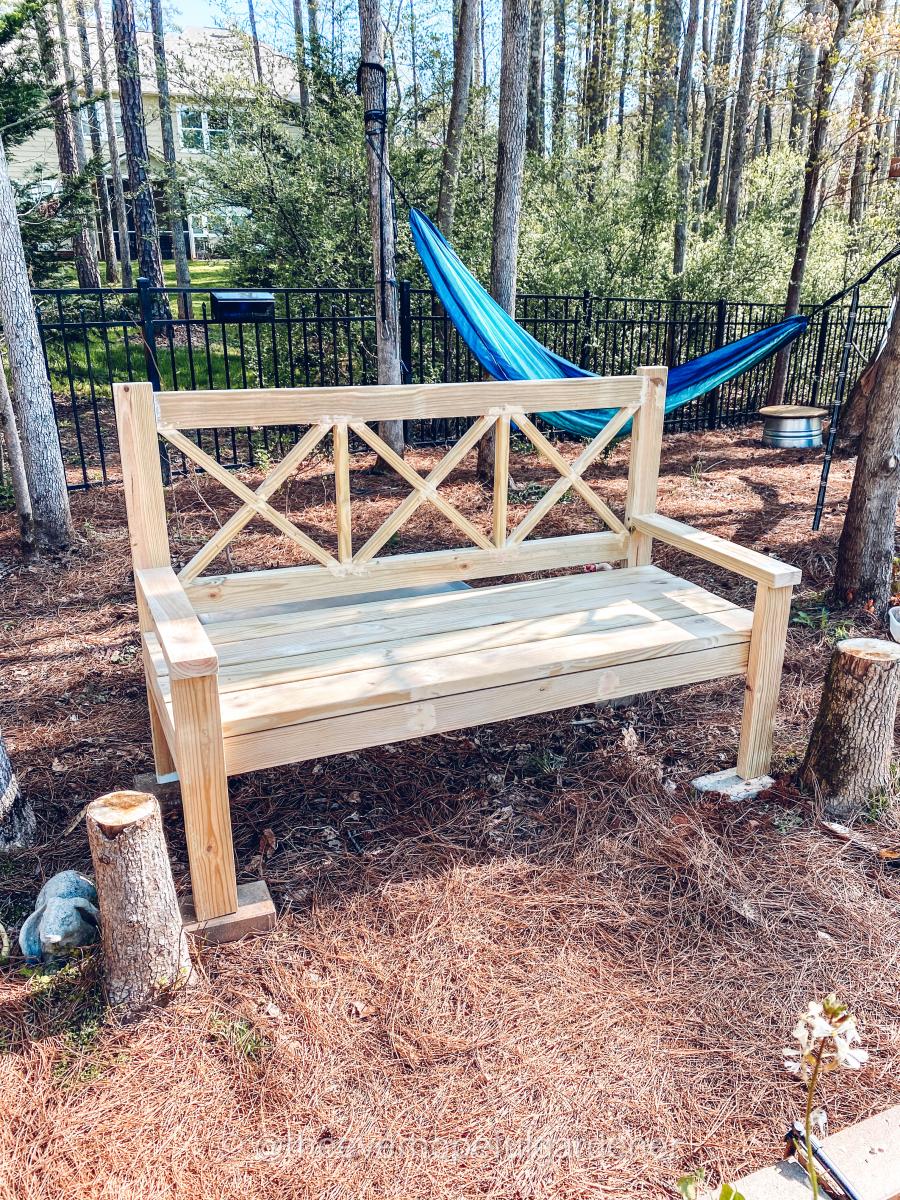
I love this bench. It is so solid. I have now built three of them for around our yard/porch. If you have the necessary tools and skills (intermediate level) you can build it in an afternoon. I built it in 4 hours with lots of breaks. My cost estimate includes paint and screws.
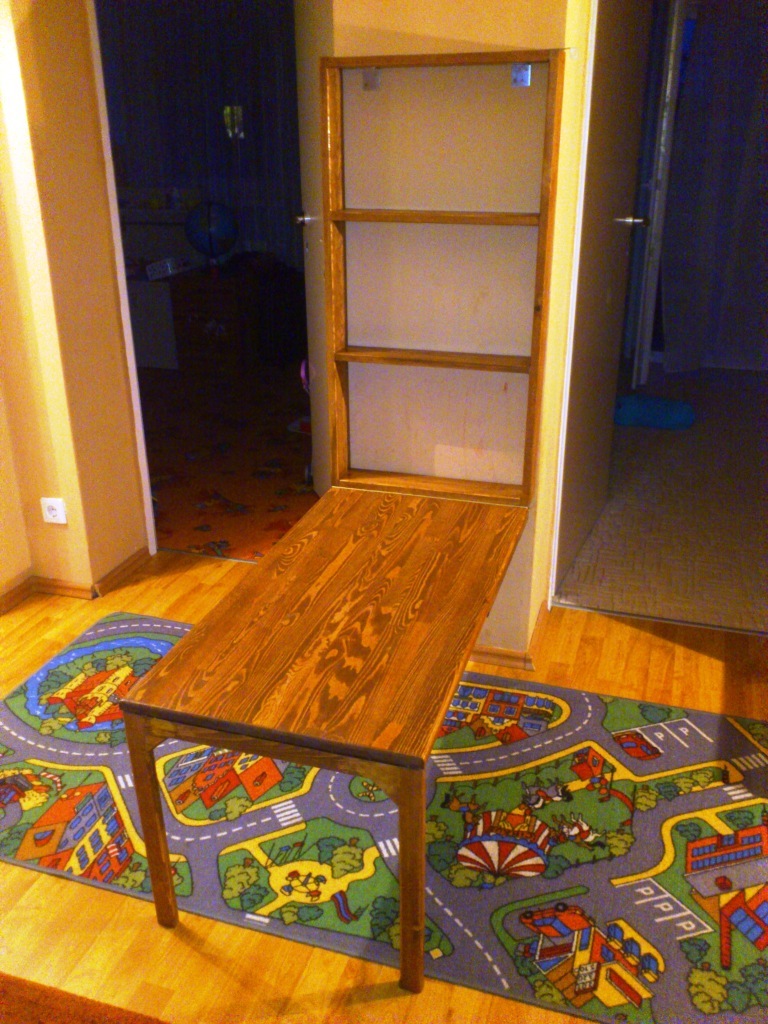
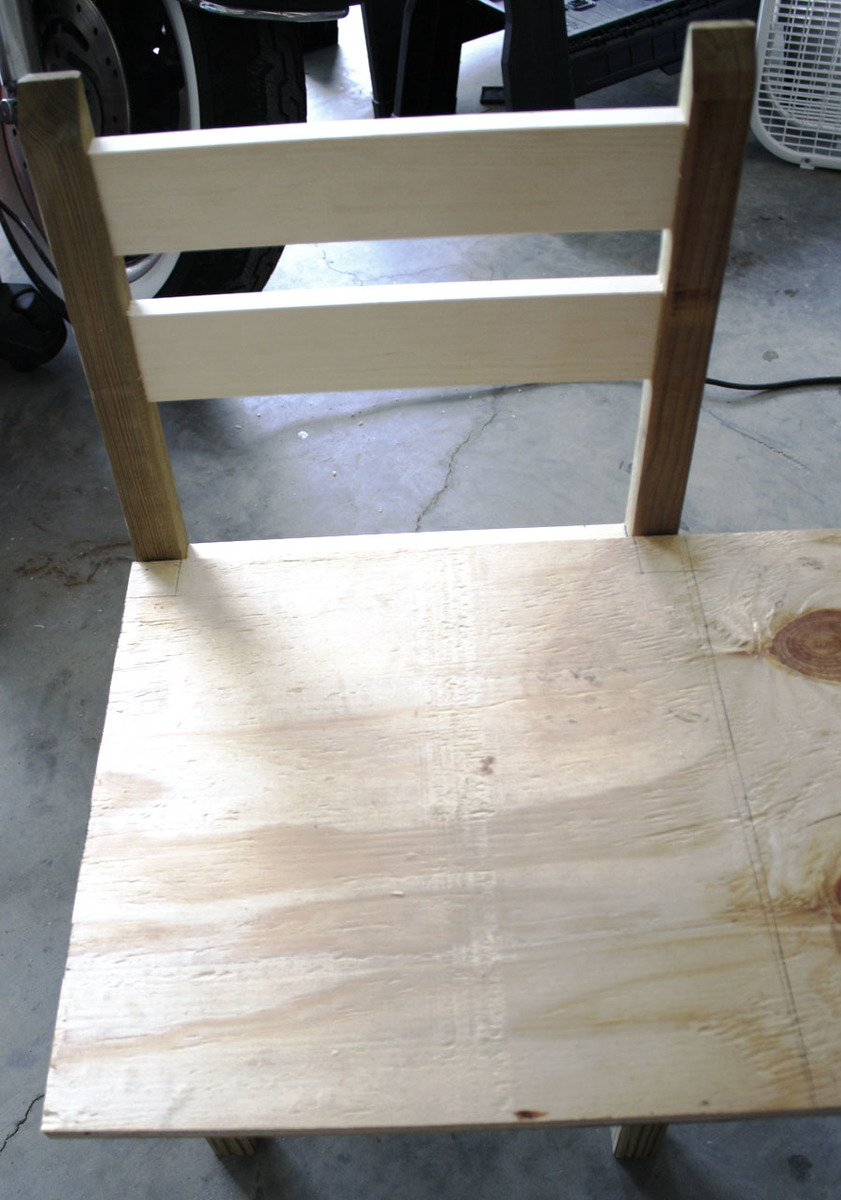
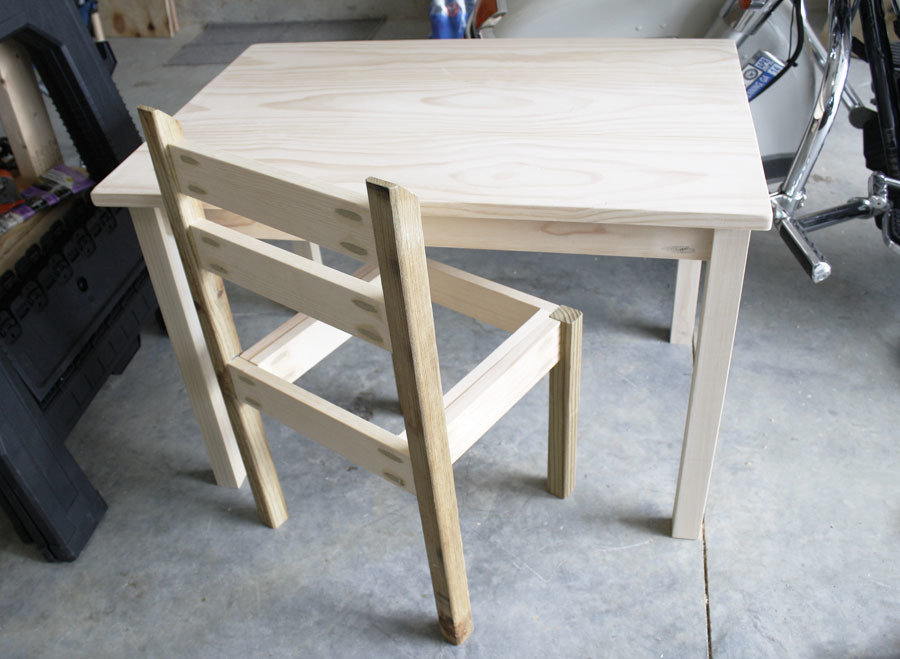
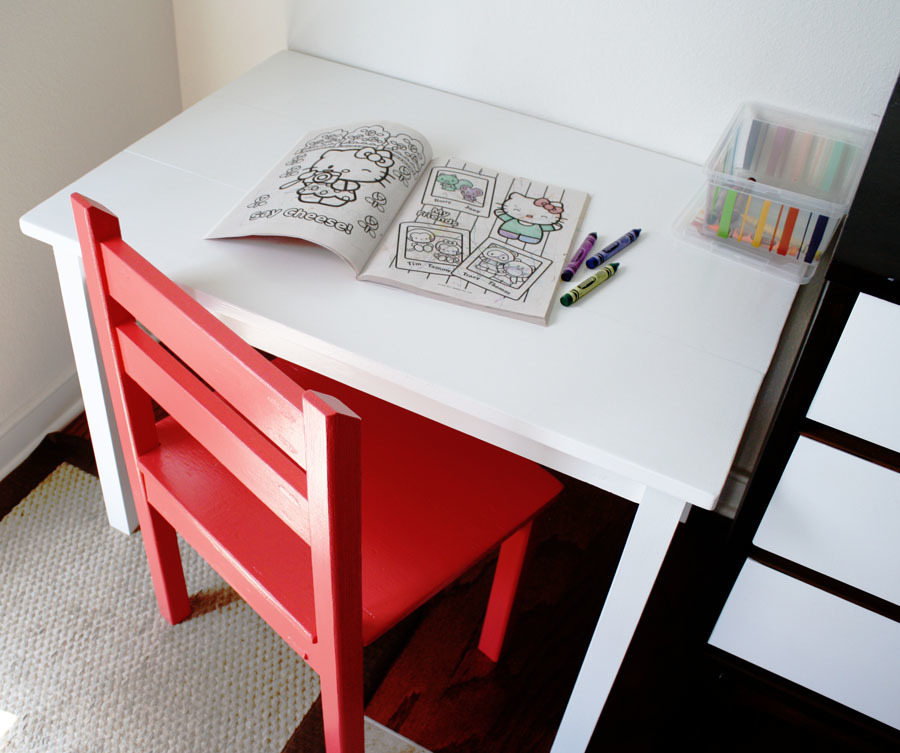
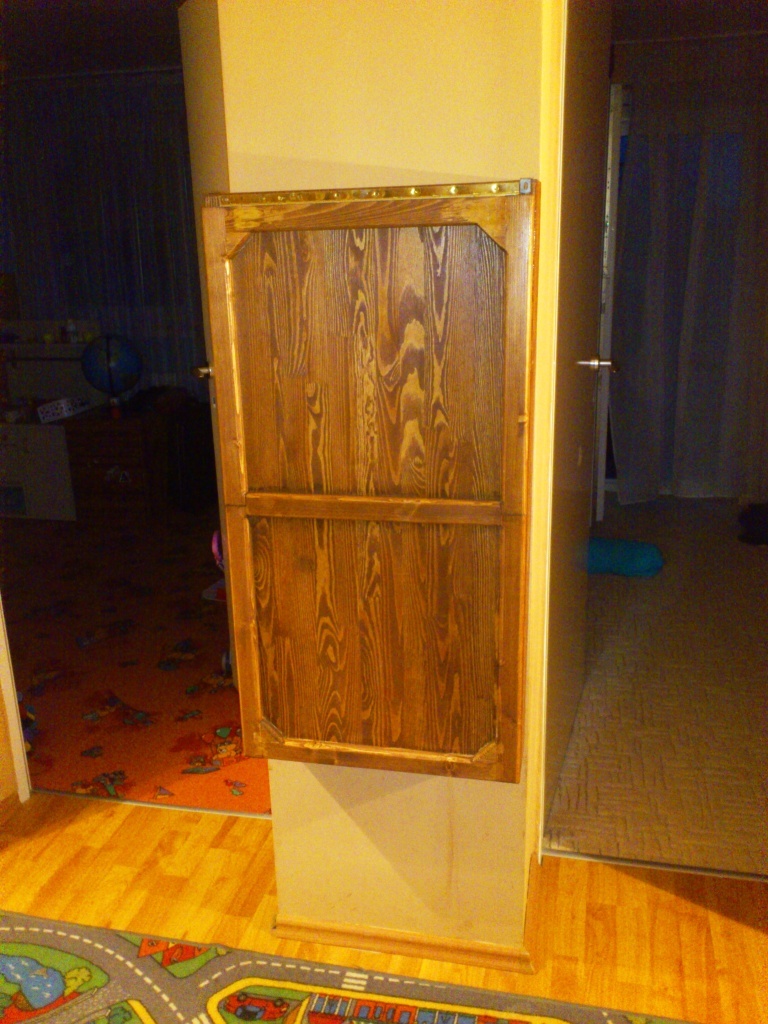
I saw this plan a couple of months ago, and knew right away that this is what we need for our kids - their old table was always filled with papers, crayons and they never had enough space to store whatever they did.
I made the table longer so that it would be enough for both of them, and added foldable legs to support the table top.
Since I didn't find the right hinges for the legs, I used a piece of 1x1 with wood dowels which are attached to the inner side of the legs when unfolded.

Fri, 03/22/2013 - 16:08
Well, I now know what I'm doing tomorrow! I'm going to make a small hinged one to go in our entryway because we have nowhere to put stuff while we're getting our shoes on. Yours looks great!
This was my second build ever, and I'm so extremely satisfied with the entire process! Ana's plan was super easy to follow, and I couldn't be more proud of how they turned out!
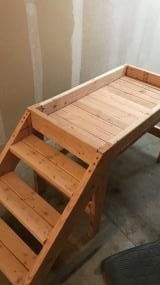
My dog loves to people watch all day while I'm at work and she needed a new bed so I took the plans for the lower platform and modified them so it would stand alone. Took the platform and put it on the bottom so that her bed would sit inside instead of on top where she could more easily fall off.
I tried building without PH screws at first and all I ended up with was a lot of cracked and wasted lumber. Got the PH jig and finished the whole build myself in 2 hours. Sanding, staining, and sealing tomorrow but I'm just so excited about it I had to post now!


Comments
Ana White Admin
Thu, 09/07/2023 - 11:10
Yoga Nook!
Love it, thank you for sharing, it looks so good!