Community Brag Posts

Retirement Gift Man Crate
Submitted by JoanneS on Sun, 11/17/2013 - 09:34

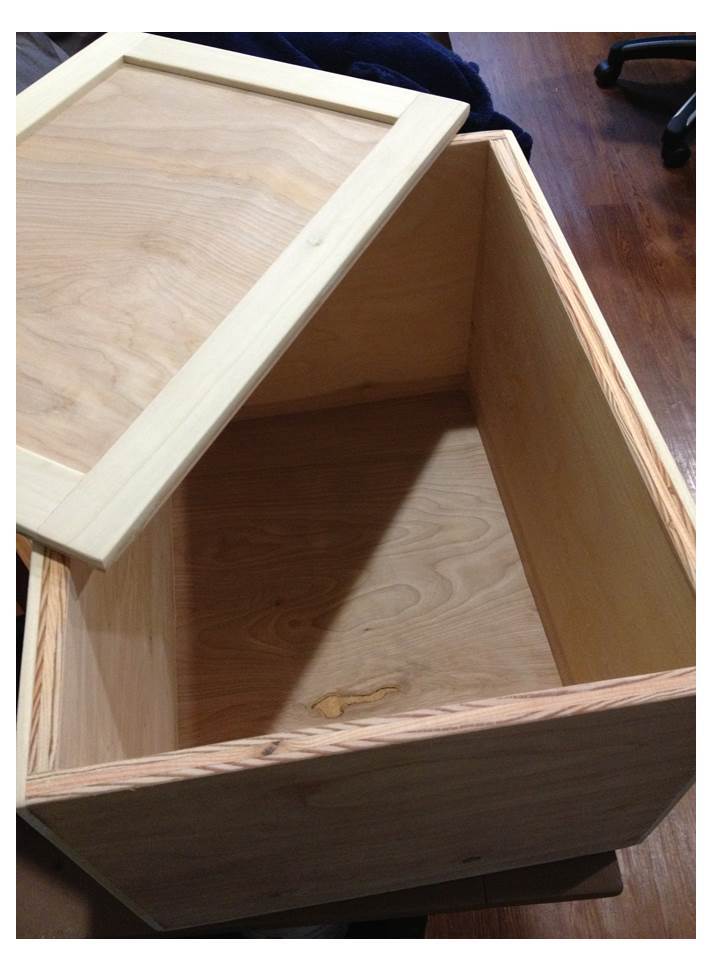
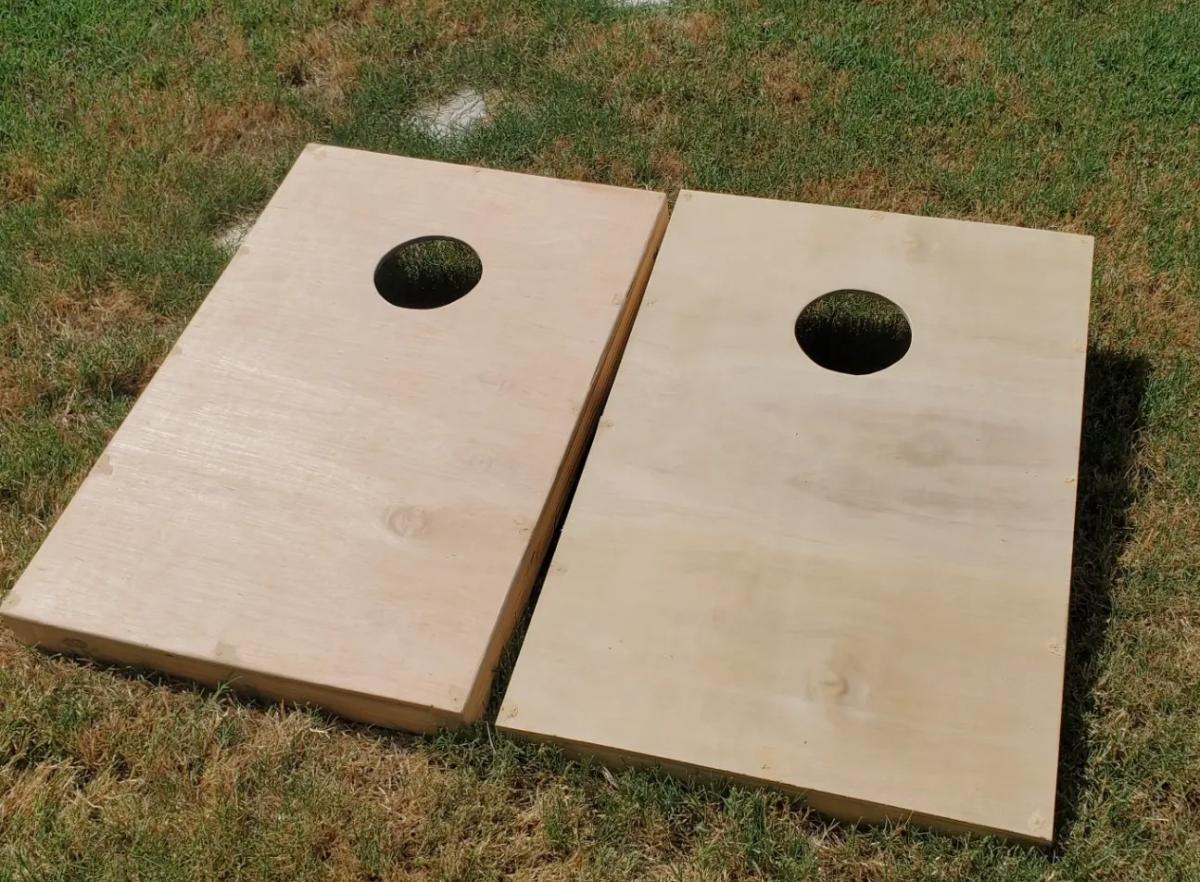
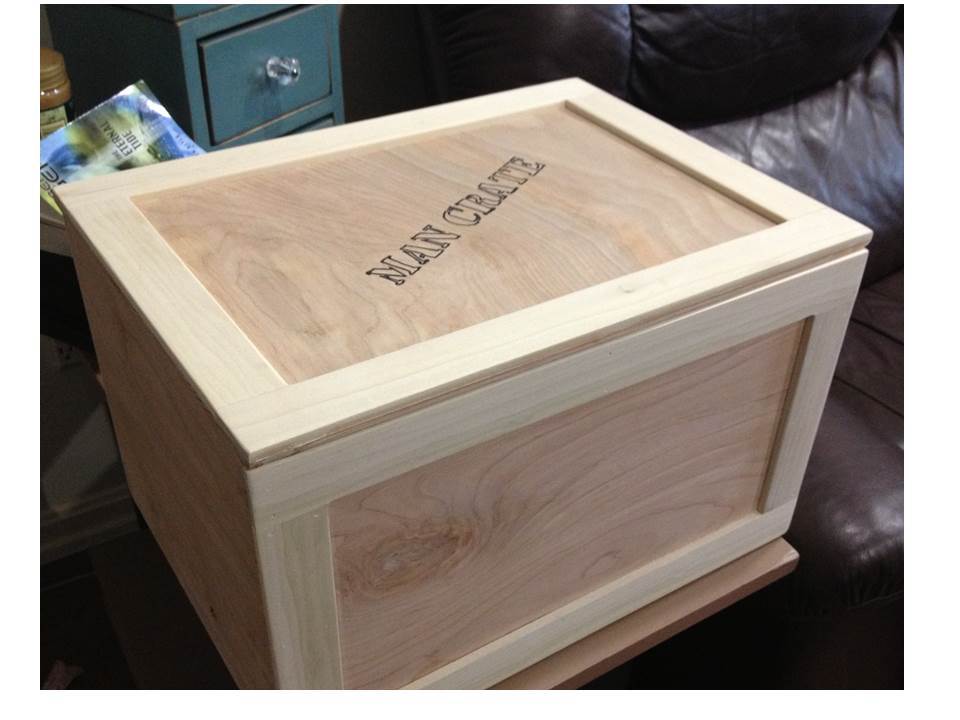
This man crate is a gift for a co worker who is retiring. We'll put all his keepsake gifts in here and he'll have to open it with a crowbar. :) The dimensions on this were adjusted to the size of 17" long, 12" wide, and 10 3/4" high (about the size of a case of copier paper). It is made with 1/2" birch plywood and poplar craft boards. I chose to use the hardwood plywood since I found out folks would be signing it, and it's much easier to write on this with a ballpoint pen than on regular plywood. Plus, less sanding for me to do ! ;)

To keep it from being so heavy when it's filled, I substituted 1/4" plywood for the top and bottom, and left the trim off of the ends. I arranged the pieces so the trim on the front & back covered the cut ends of the 1/2" plywood.

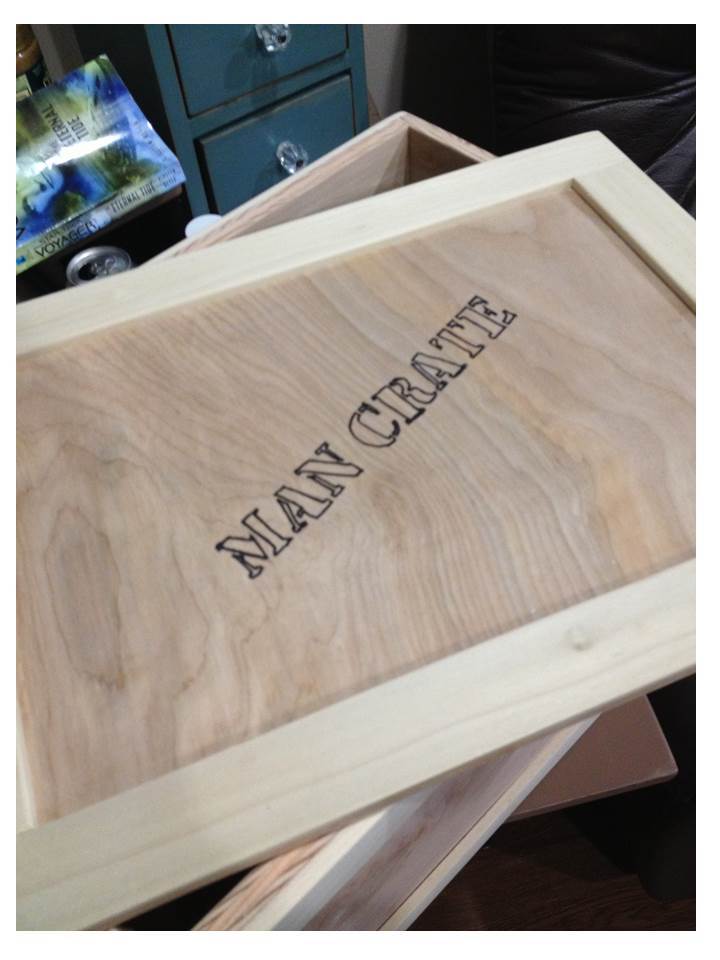
The lettering was traced on (it's "Stencil" font, in 105 pt size, printed from Powerpoint) using a ballpoint pen to dent the surface, then a black Sharpie pen to outline. Hubby thought it looked nice just with the letters in outline, and that's shown in the picture.

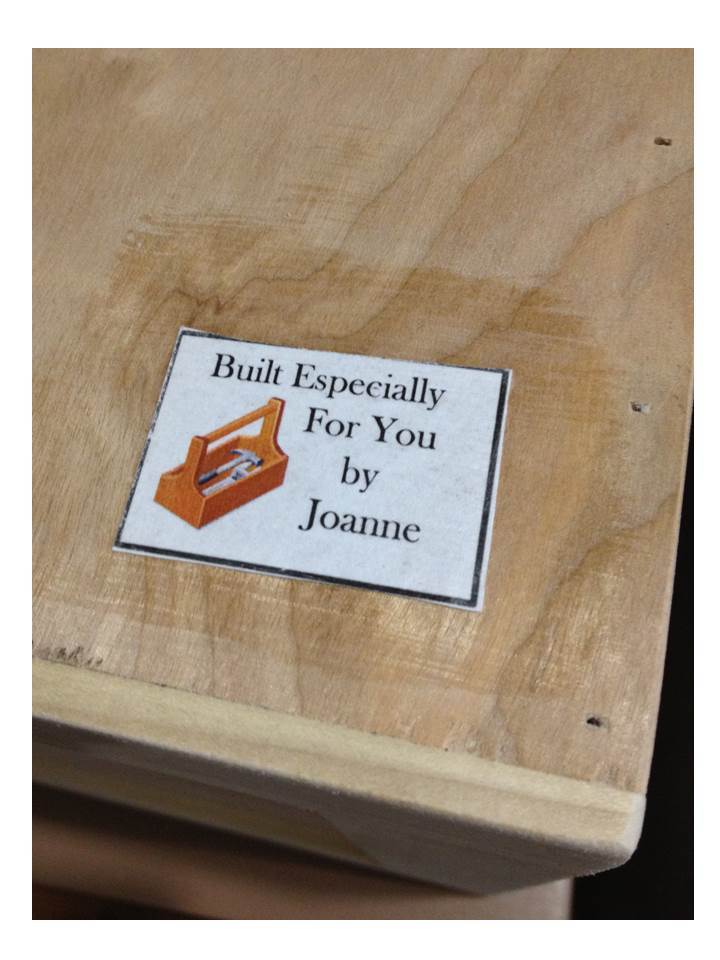
Also on this one, I made a little gift tag with some clip-art, and mod-podge'd it to the bottom.
Built from Plan(s)
Estimated Cost
$35 for hardwood plywood and poplar trim boards
Estimated Time Investment
An Hour or Two (0-2 Hours)
Finish Used
Unfinished - left it this way to make it easier for folks to sign the crate.
Recommended Skill Level
Starter Project

Comments

JoanneS

Tue, 11/19/2013 - 16:03

The man crate was a big hit at the retirement party! I think we're starting a tradition ;) We had his wife stash the crowbar, and when it was time for him to open it, we asked, "does anyone have a crowbar?" - and then his wife said, "Here you go!" and pulls one out of her shoulder bag! It was a hoot! :)

My First Project

Submitted by Anonymous (not verified) on Wed, 05/24/2023 - 05:04

My very first woodworking project and could not have done it without you!!

Mistakes were made and lots was learned but pretty happy with how it turned out in the end.

Built from Plan(s)

Comments

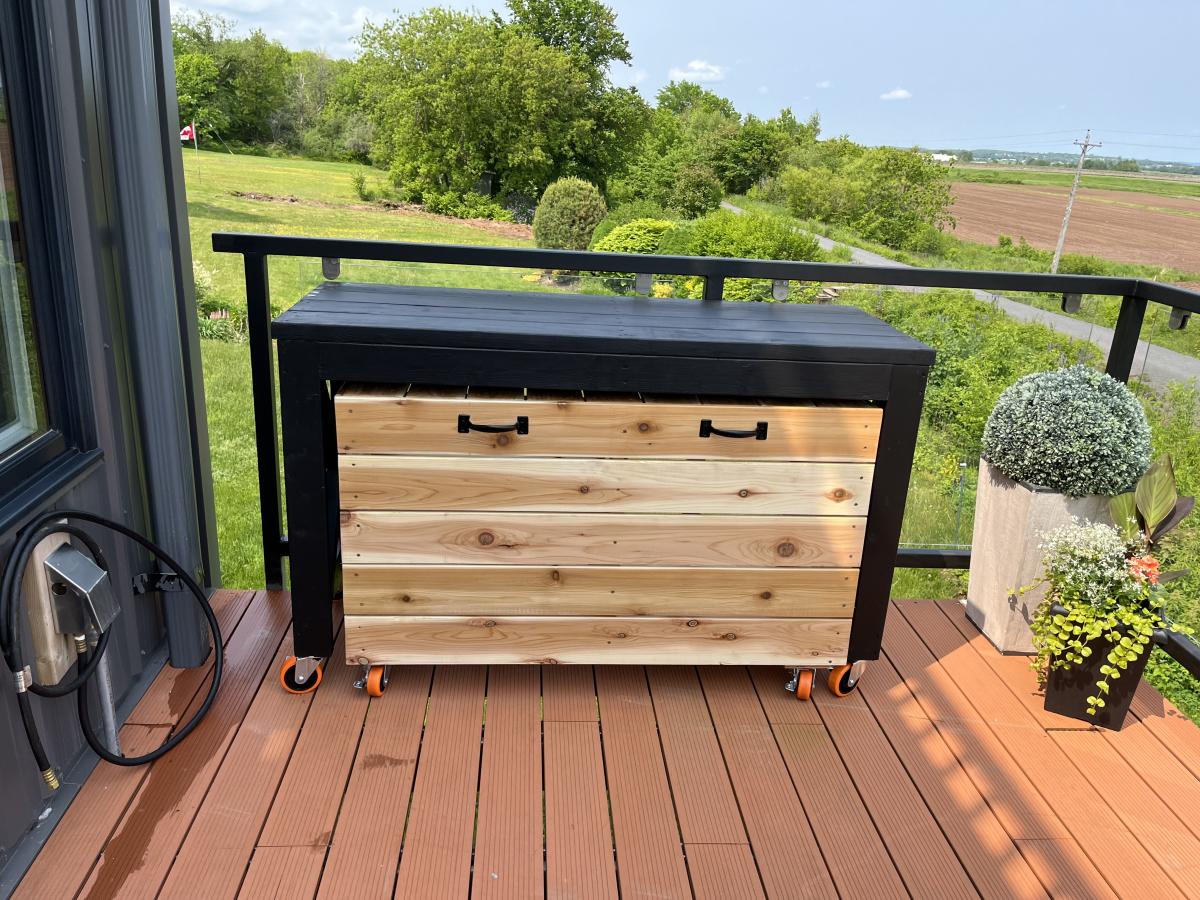
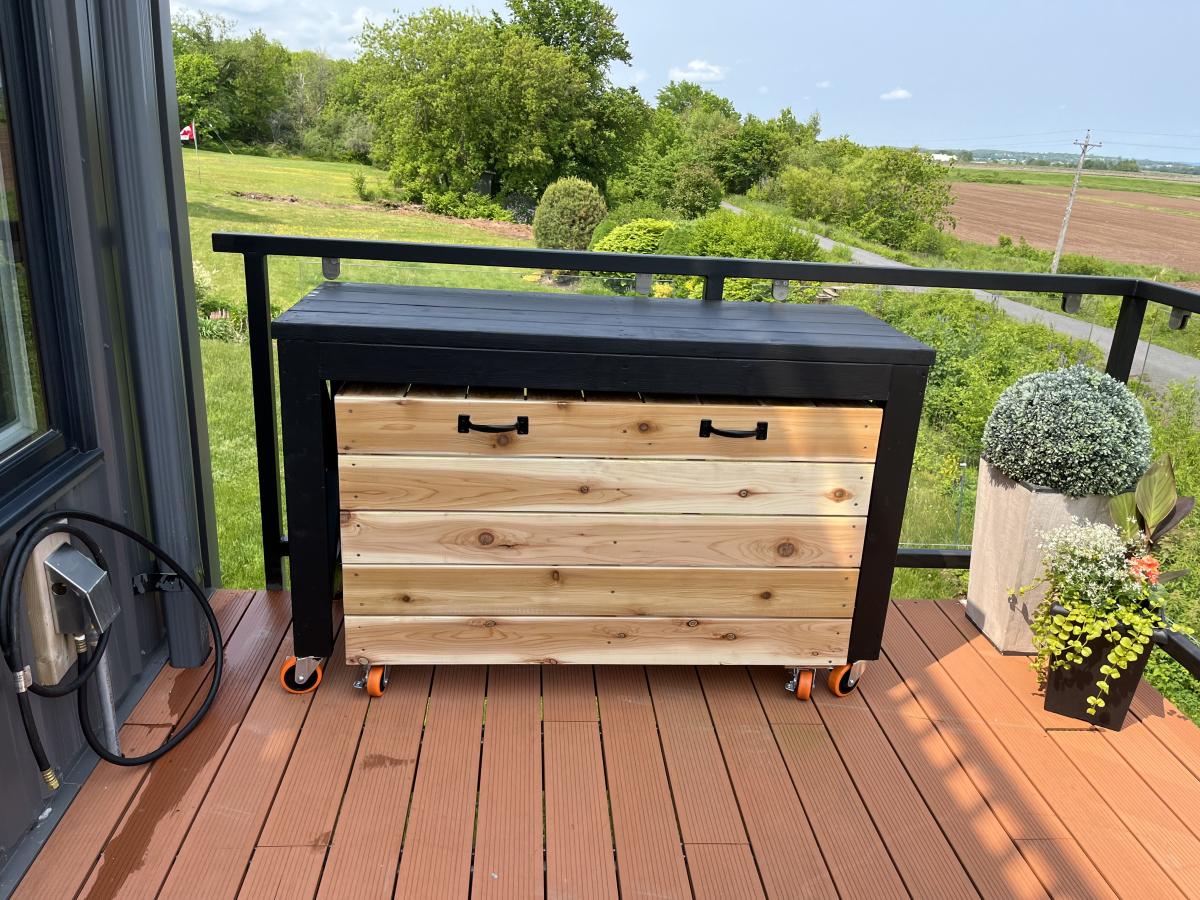
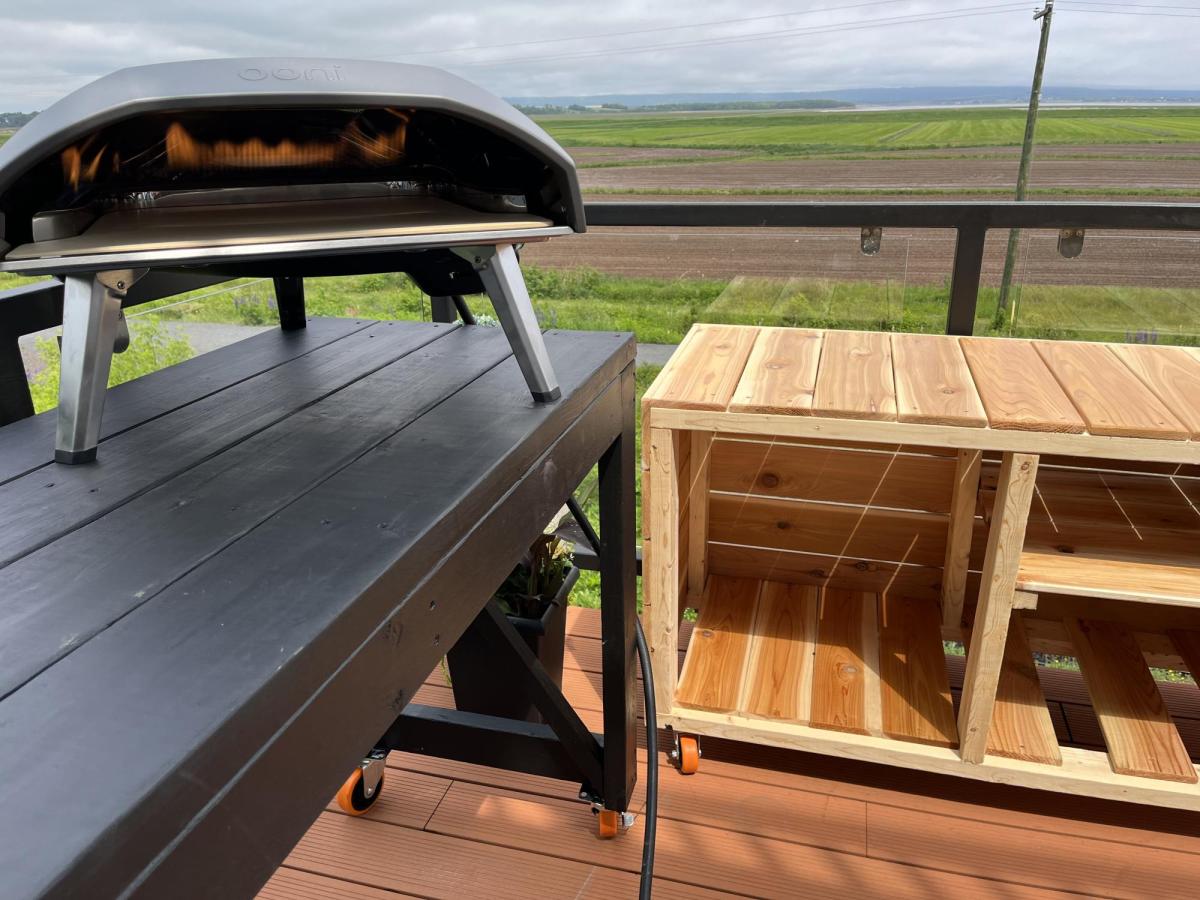
Pizza Oven Cart

Not quite big enough for Pizza Oven, but love the plans!

Comments

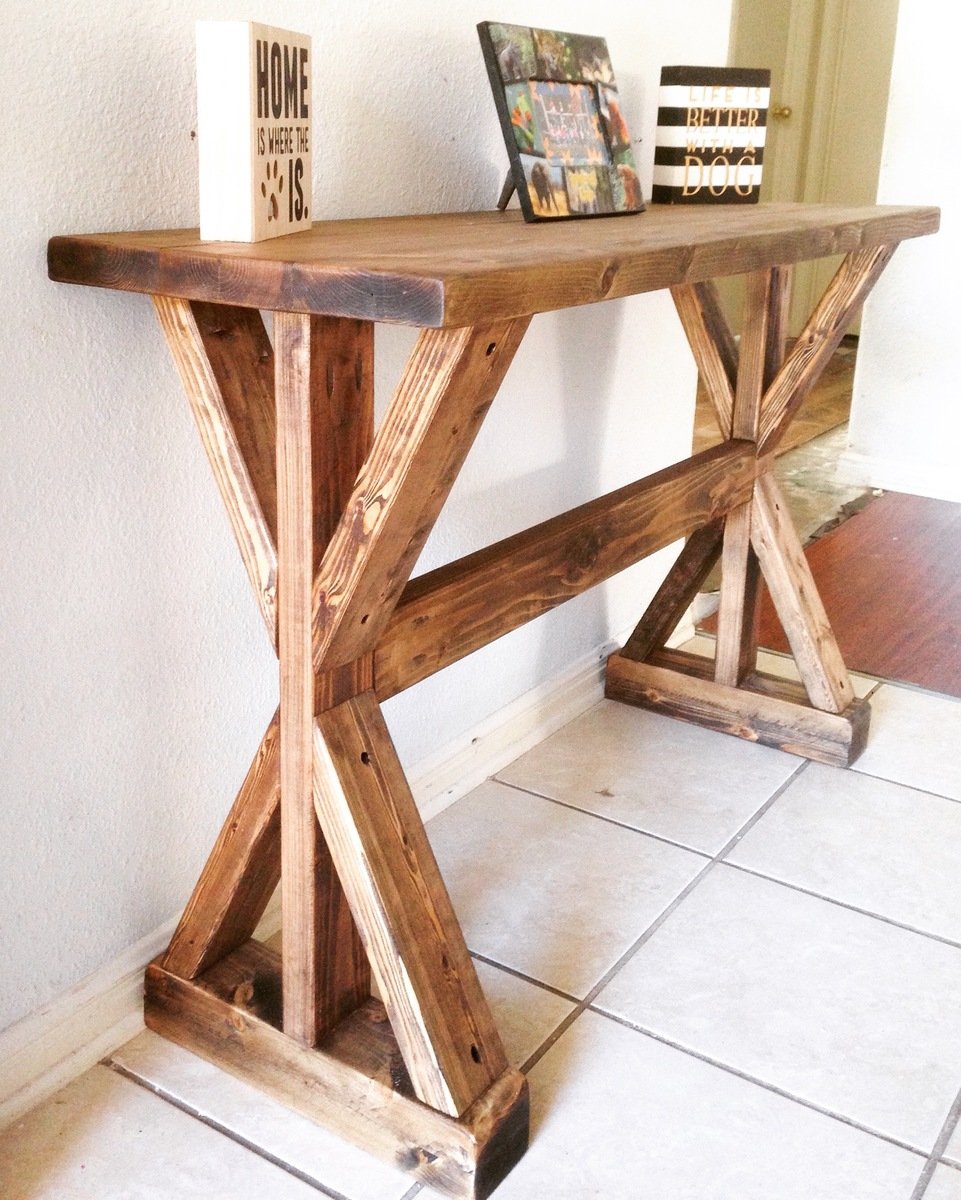
Rustic X-Entryway Table

Submitted by LN2014 on Mon, 03/14/2016 - 21:29

Handmade rustic entryway table. Stained with Varathane Stain and made from 2x4s & 2x6s Canadian white pine

Estimated Cost
$25
Estimated Time Investment
Day Project (6-9 Hours)
Finish Used
Varathane Ash Stain.
Varathane Polyurethane Satin
Recommended Skill Level
Intermediate

Comments

paveltrudel

Mon, 04/11/2016 - 05:30

Hi,

I really love your entryway table. Do you have a plan that we can use with dimensions and cut list?

Thank you

Tkkl07

Mon, 07/11/2016 - 06:38

This table is beautiful!  Are there any plans?  The link doesn't show the plans or the cut list. Thanks! 

elaina_tanaka

Sat, 08/06/2016 - 19:56

This table is beautiful!  Would you be able to share the plans for this?  Thank you!


Brian Famous

Sat, 03/17/2018 - 19:38

I modified the design slightly, by adding feet and a 1x4 board accent (that makes it easier to build).  I'm assuming the overall height is 29.5" and the length is 48".   If you want these to be different, feel free to reach out to me and I can help you adjust. 

You can find the plans here: http://famousartisan.com/diy-x-base-sofa-table-plans-or-entry-table/

Brian Famous

Sat, 03/17/2018 - 19:39

I modified the design slightly, by adding feet and a 1x4 board accent (that makes it easier to build).  I'm assuming the overall height is 29.5" and the length is 48".   If you want these to be different, feel free to reach out to me and I can help you adjust. 

You can find the plans here: http://famousartisan.com/diy-x-base-sofa-table-plans-or-entry-table/

Modern Dining Table

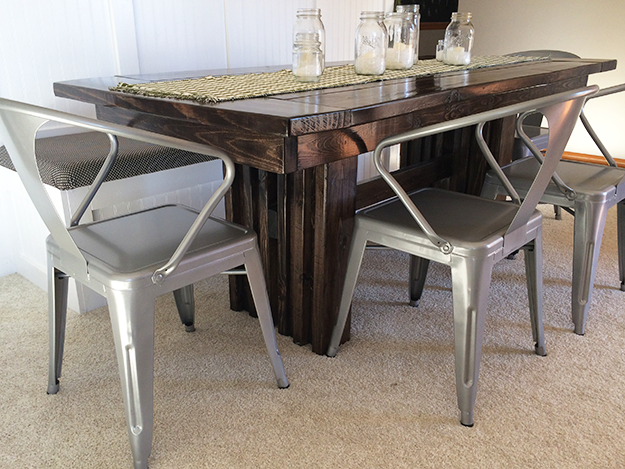
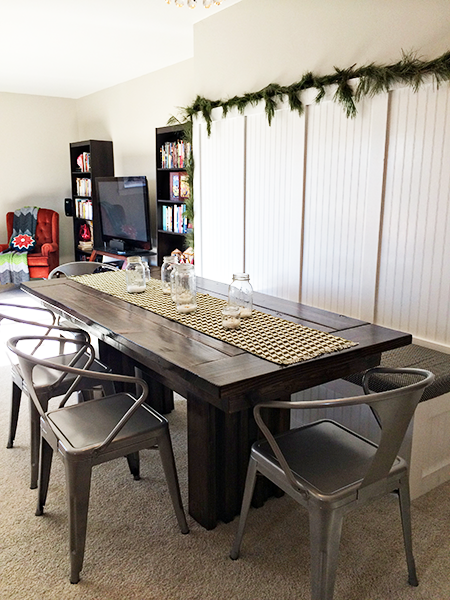
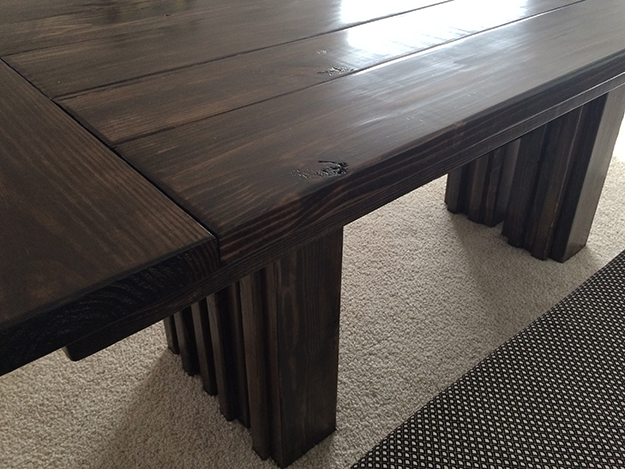
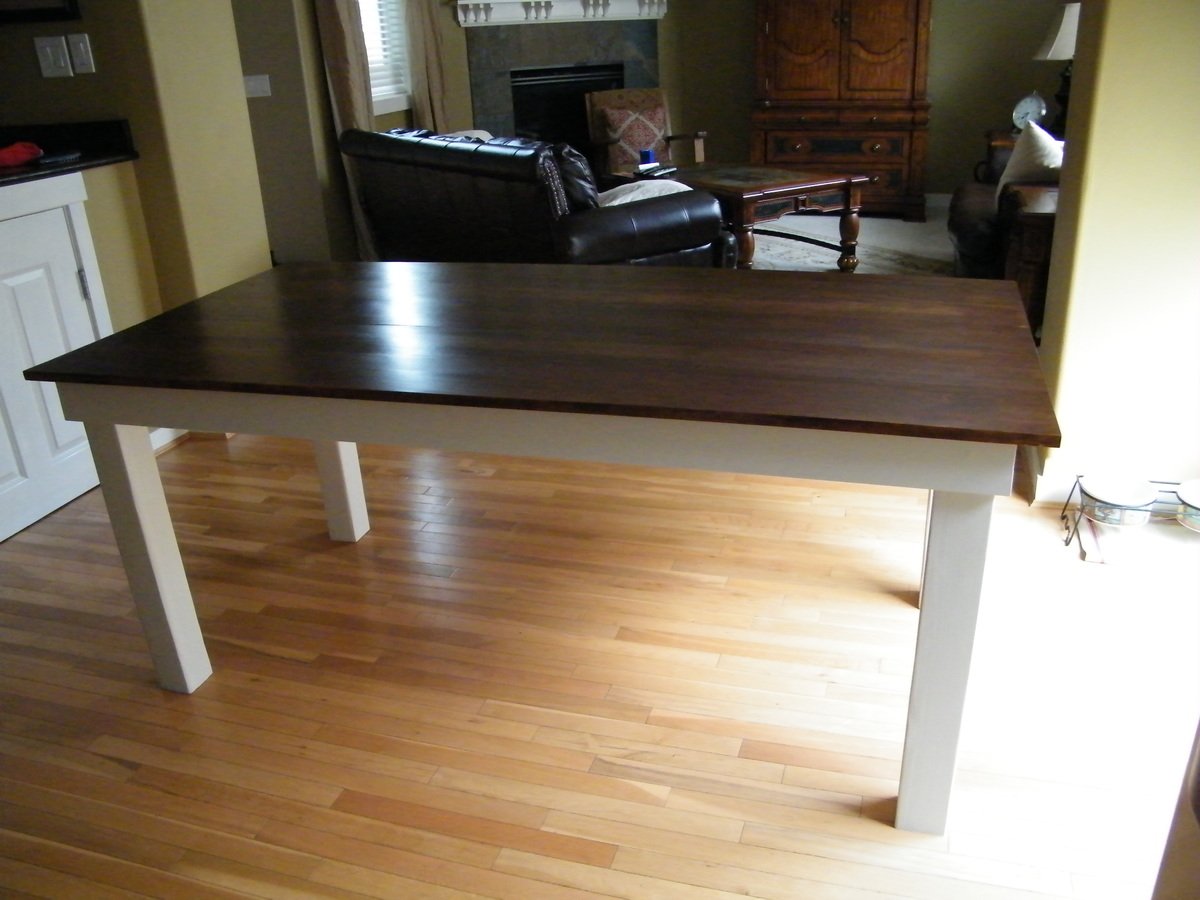
Our extra long living/dining room was just begging for a little definition. So I scoured all of Ana White's plans for some inspiration for the perfect-for-us table. I have never built anything, so I enlisted the help of my genius dad and we got to work!

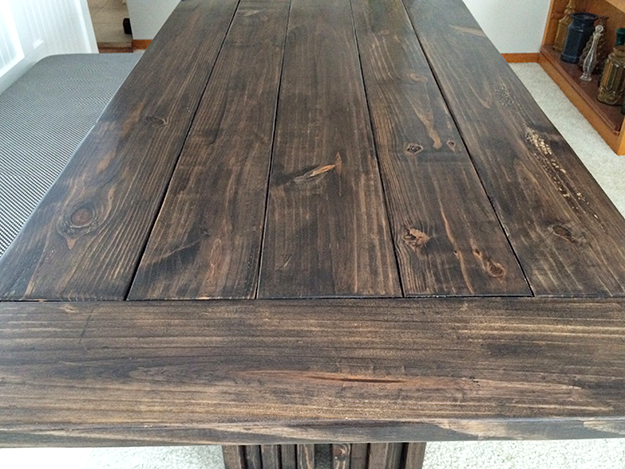
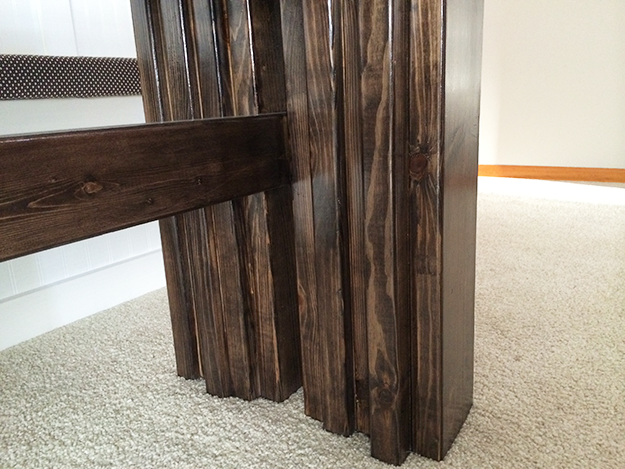
We ended up using elements of the Modern Outdoor Patio Table and the Farmhouse Table. We sized the patio table down to six feet long and used the board layout from the farmhouse table for the table top. We also changed up the table legs a bit to add some visual interest.

After tackling the table, we built the banquette and beadboard wall. I never thought I would learn so much about power tools. Ha! This project was so much fun. Thank you for the free plans!! I can't wait to work on our next project!

You can read more about our table here: ‎ http://www.becomingwhitney.com/dining-area-progress/
here: http://www.becomingwhitney.com/it-is-finished/
and here: http://www.becomingwhitney.com/christmas-cheerin-it-up/

Estimated Cost
$200
Estimated Time Investment
Weekend Project (10-20 Hours)
Finish Used
I sanded this baby within an inch of its life. I chose not to use a wood conditioner because I wanted a rough look, and I adored the unevenness of the stain in some areas. I put on one heavy coat of Minwax Espresso stain with a rag. I used a teeny paintbrush to get the legs and between the planks of the table. Then I sealed it with a semi-gloss water-based poly. I put five coats on the table top and sides and three coats on the legs. It gave it a great finish, but isn't too shiny in person.
Recommended Skill Level
Intermediate

Comments

Linda7

Tue, 01/07/2014 - 10:15

The fabulous thing about DIY is how you can modify a plan to suit your needs. You and your dad have built a one-of-a-kind that can be handed down to future generations. Love the style and finish. Keep up the good work!

Whitney Gothra

Tue, 01/14/2014 - 08:37

Thank you, Linda! That is one of my favorite aspects of DIY - the options are unlimited!

New Dining Room

New dining room with a board and batten, farmhouse table and six parson chairs.
Thanks Ana!

Estimated Time Investment
Week Long Project (20 Hours or More)
Finish Used
wengue stain and white paint.
Recommended Skill Level
Beginner

Comments

JoanneS

Mon, 03/19/2012 - 18:15

This room is absolutely gorgeous! You did an awesome job- love all the finishes and colors, and the fantastic chairs!

Cindy from Indiana (not verified)

Tue, 03/20/2012 - 12:43

Wow! This room turned out great - really fantastic job!

claydowling

Wed, 03/21/2012 - 05:14

I'm with Ana on the chairs. That's really amazing. The last time I made a chair it took a very full and tiring day to build the frame, and another evening to build the seat. Do you have tips for speeding the process up?

alamanda973

Wed, 03/21/2012 - 09:16

Thank you for all these compliments. I don't speak English very well because I'm french but I will try to make me understand. I built a chair with the modifications to see the result, then, I made all the cuttings with my miter saw for the 5 other chairs, then I made every chair within half an hour. I cut all that it was necessary foam and fabric in one step and I sewed everything for covers. To make covers, I made a paper pattern, then I sewed them in 10 minutes.
I am very happy I found this site with all that wonderful projects. It's my favorite site . Thank you Ana, you changed my life!

Milca (not verified)

Fri, 06/15/2012 - 07:44

Je suis impressionnee :)

kaytrishjr

Tue, 08/21/2012 - 13:16

I'm totally amazed, talk about getting busy! Your room is beautiful!

Angela Kempf (not verified)

Thu, 11/29/2012 - 14:24

Does your slip cover come off? I would like to make a couple of these to use as accent chairs in my living room. Yours look amazing.
I have one little boy, two cats, a large dog and a ferret. I need something that is WASHABLE =)

sugarhigh1605

Thu, 07/18/2013 - 12:37

I love your chairs and especially like the extra height. How tall did you make the backs of the chairs?

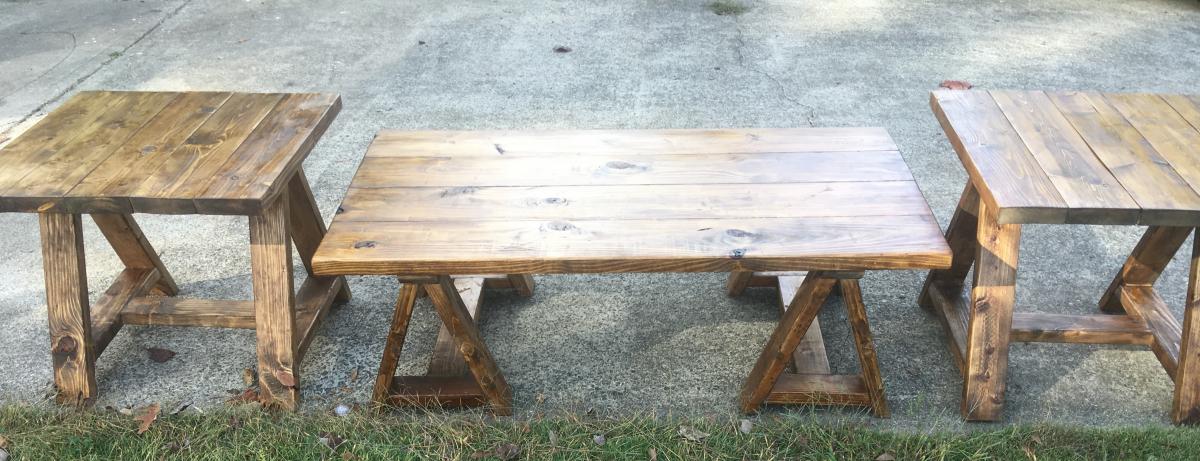
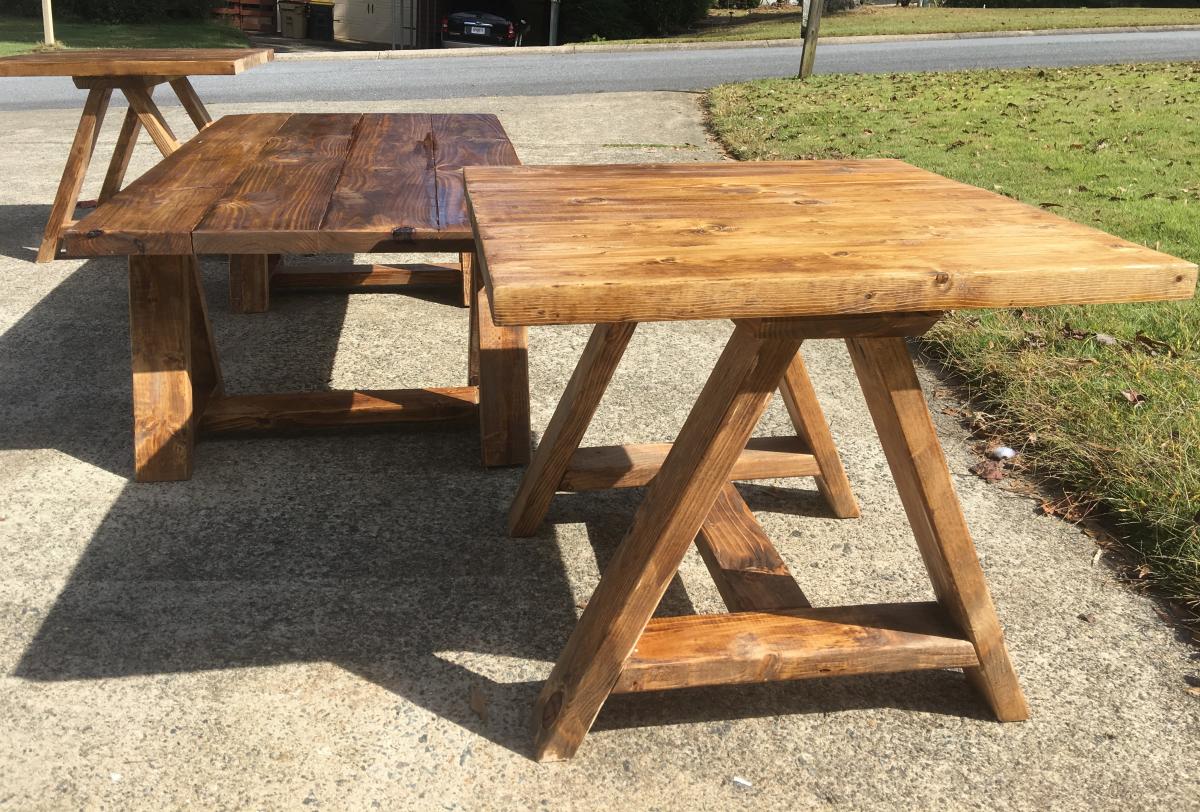
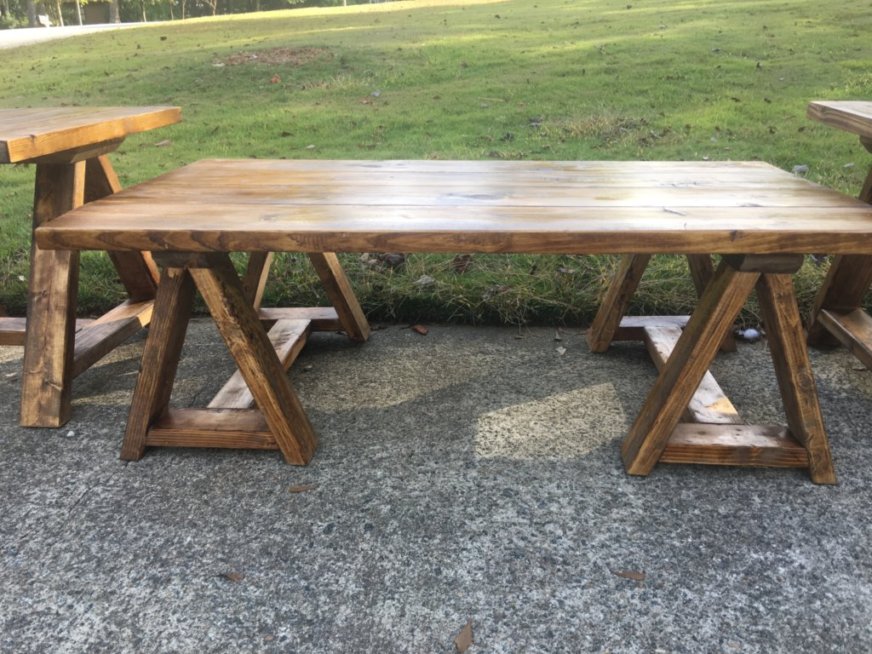
Sawhorse Coffee & Side Tables

Submitted by Anonymous (not verified) on Sat, 12/07/2019 - 11:59

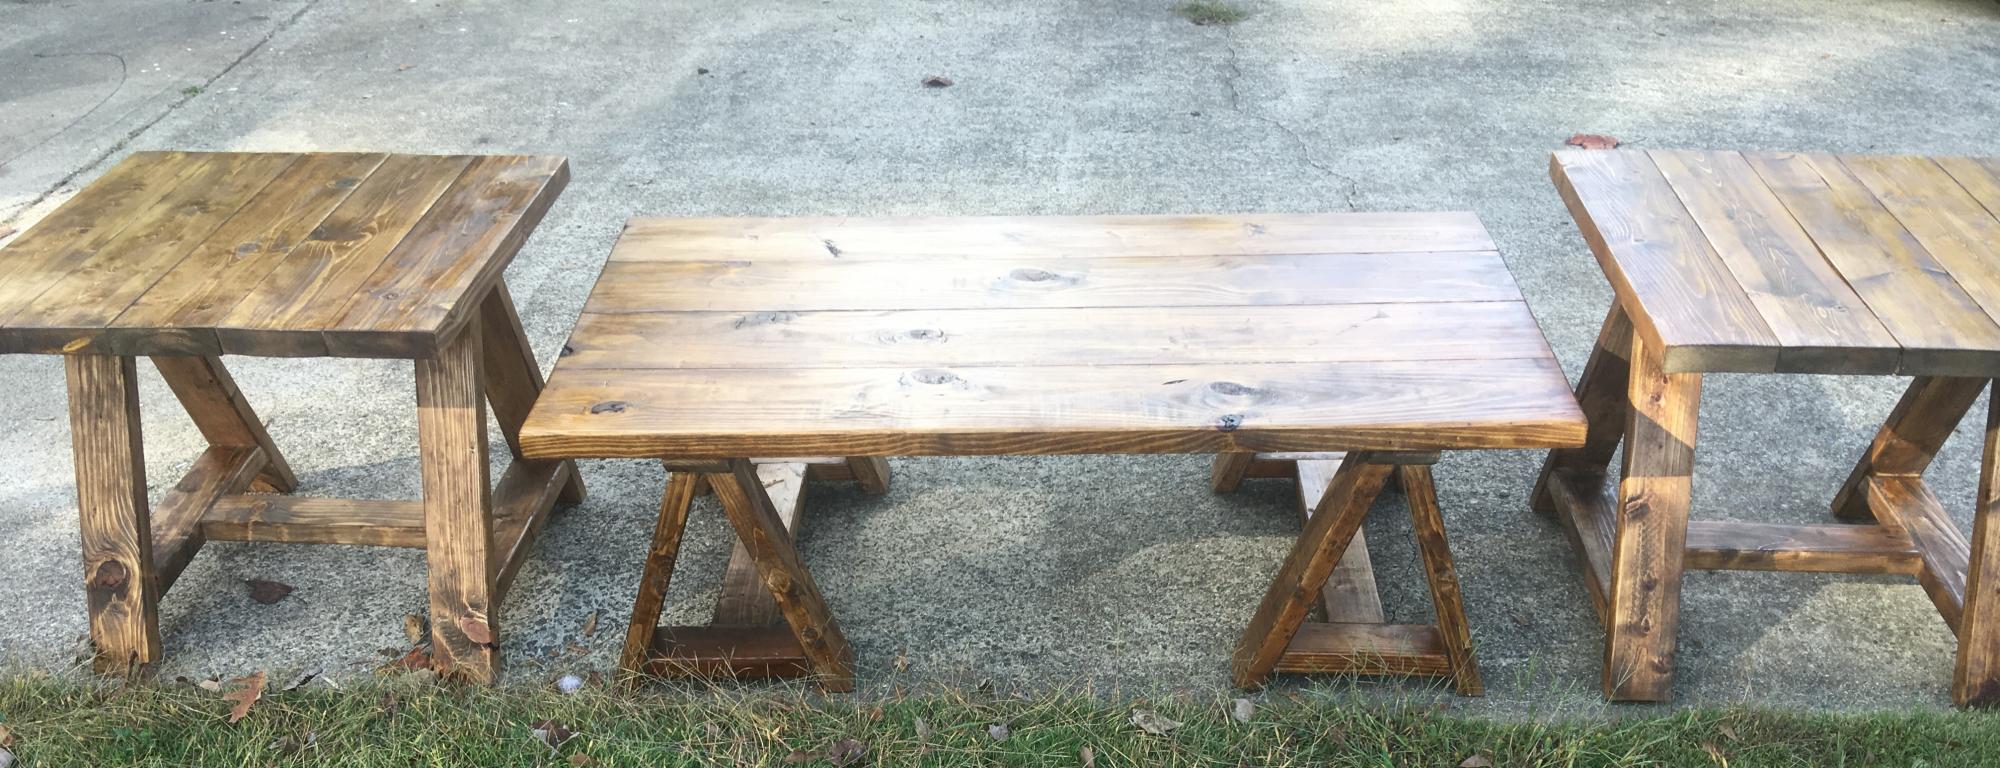
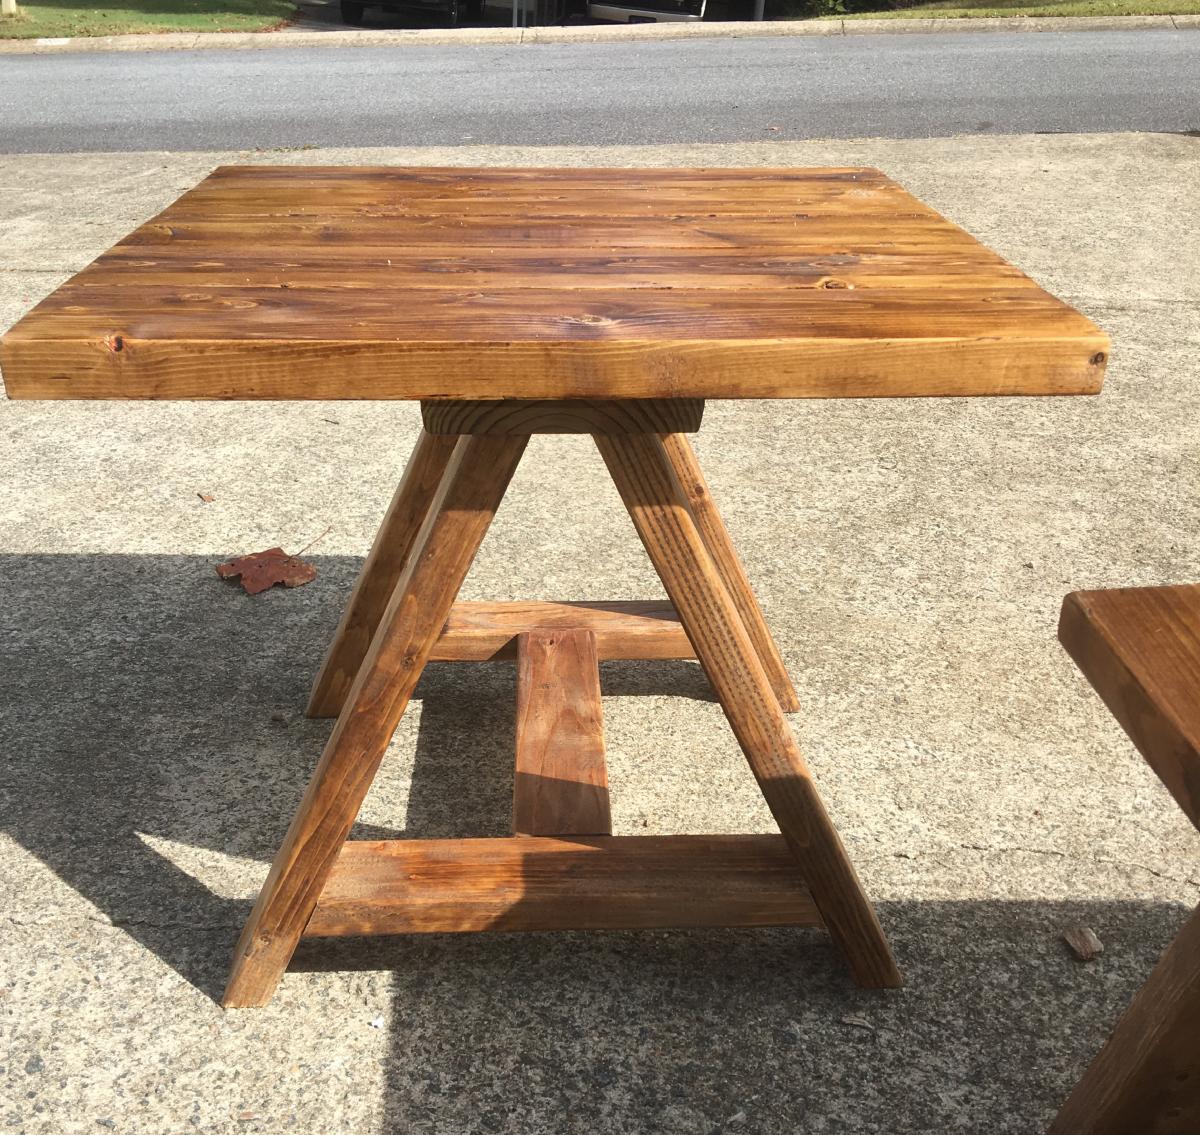
I made this as a gift for my friends son. They are expecting a new baby so I made sure every inch was sanded, and sanded and sanded. This was a fun different build. The slightly angled table legs need extra attention in order to guarantee level.

Estimated Cost
Around $100 for all 3 pieces
Estimated Time Investment
Weekend Project (10-20 Hours)
Finish Used
Watco Medium Walnut however it did not cover as well as I would have liked on this particular wood. sand really well before staining. I used 240 grit sandpaper and vacuum wood between applications. I ended up mixing the stain with small amount of Mix Wax Medium Stain to get better coverage.
Recommended Skill Level
Beginner

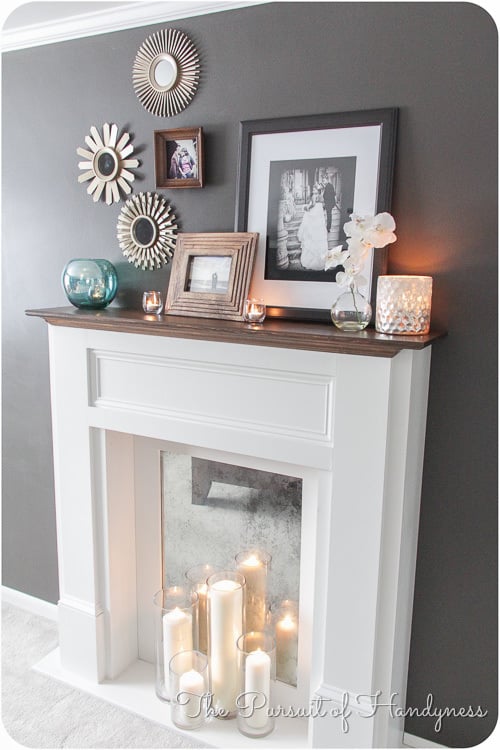
DIY Faux Mantle /Fireplace

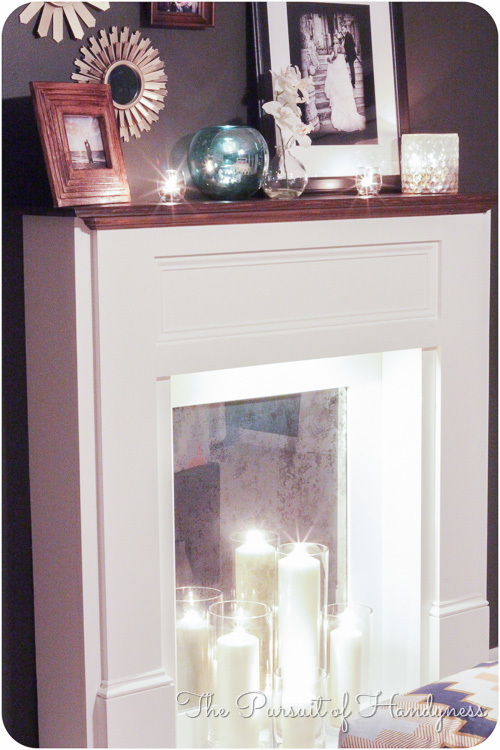
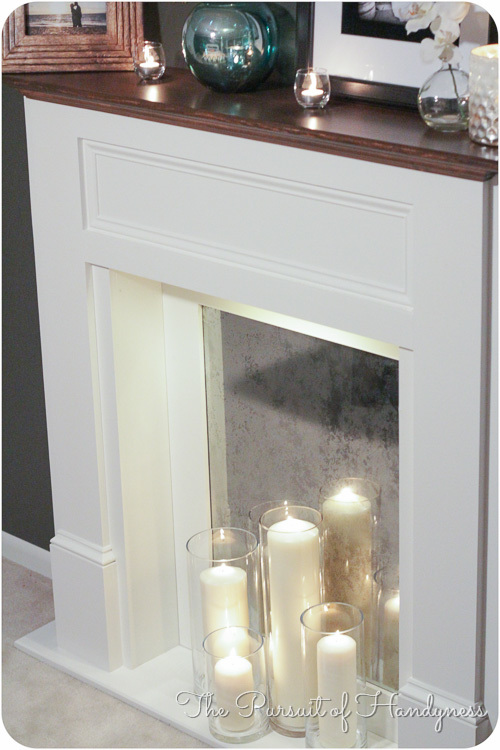
When I first saw Mimi's Faux Mantle I dreamed about building one for my house but I didn't know where. When I began renovating my Master Bedroom I found the perfect place for it on a bare uninteresting wall.

To add interest to the mantle, I stained the top and attached a faux hearth using a 1x12 painted the same color as the rest of the mantle. I also Diy'd a distressed mirror glass insert to bounce the lighting off. I added low voltage LED lights too.
It turned out better than I expected.

Visit my blog http://thepursuitofhandyness.com for a full tutorial of the building process and the distressed mirror glass.

Estimated Cost
$25.00 - $75.00
Estimated Time Investment
Day Project (6-9 Hours)
Finish Used
Behr Silky White in Satin & Rustoleum Ultimate Stain in Early American mixed with Dark Walnut. Sealed with Rustoleum Ultimate Polyurethane in Satin.
Recommended Skill Level
Intermediate

Comments

Sandbox with Benches

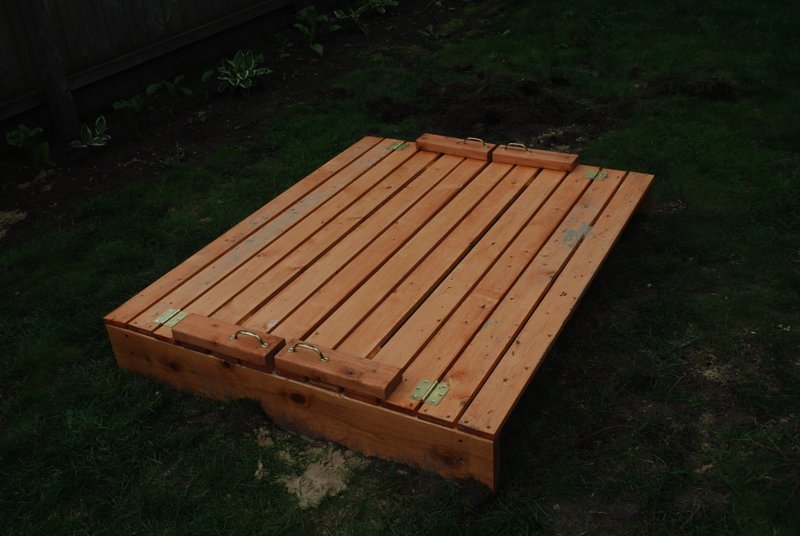
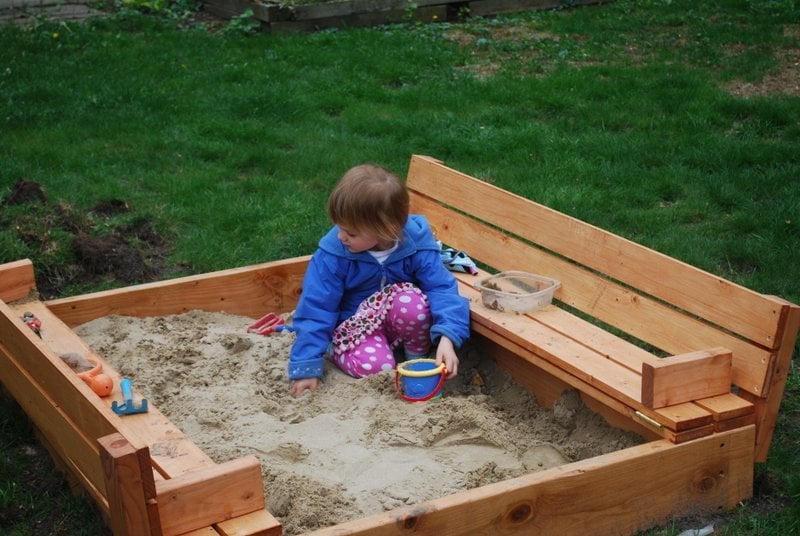
For the last year we have been kicking around making a sandbox. We really needed a cover and really wanted seats. So this worked out perfect. We did modify the plan a little to make it just a little bigger. It is 4' x 5' instead of the 4'x4' called for in the plans. Very easy to build...we have very little building experience and pulled it off. We did dig out the grass where the box was going to sit and stapled 2 layers of landscaping fabric to the bottom of the box frame. We also sealed the main box frame with a little silicone to minimize sand leakage.

Built from Plan(s)
Estimated Time Investment
Day Project (6-9 Hours)
Finish Used
Miniwax Polystain (Stain and Urethane in one) in Pecan color
Recommended Skill Level
Beginner

Comments

Lady Goats

Sun, 05/06/2012 - 21:06

Widening that had a HUGE impact! Did that mean you had to double the 1x4s you bought? Very nice!

queenmooshie

Mon, 05/07/2012 - 05:32

Thanks. There are the same number of 1x4s on the top they are just longer. I was worried about the benches sagging because of the increased length and was prepared with scrap 2x4s to add support under the first two boards if needed but it doesn't seem to be a problem. We only widened it to 5' though...I think at some point that extra support would be needed.
Miter Saw Cart

Submitted by Rennie82 on Fri, 05/18/2012 - 12:12

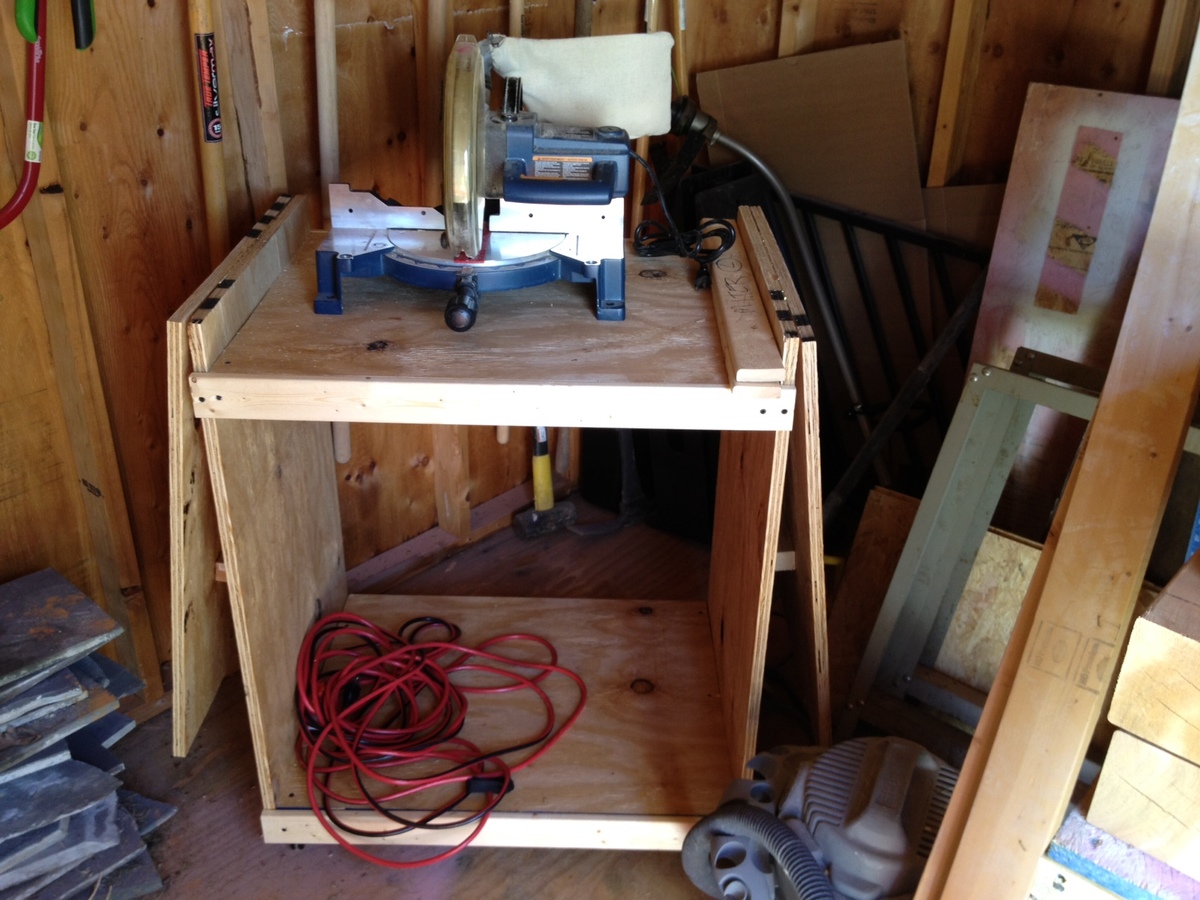
Coped the design almost to the "T." I loved this design because I only have a small shed to work out of and this stand for my miter saw was much needed.

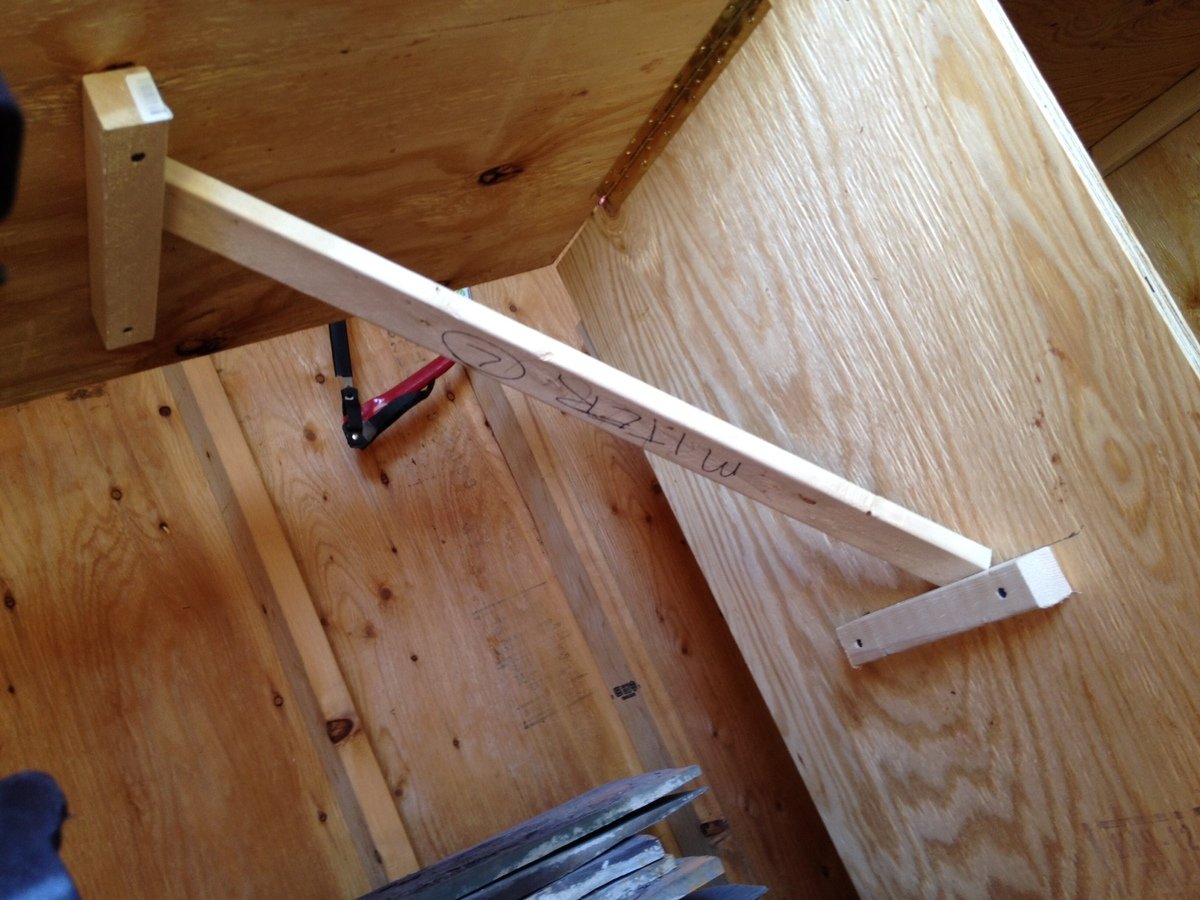
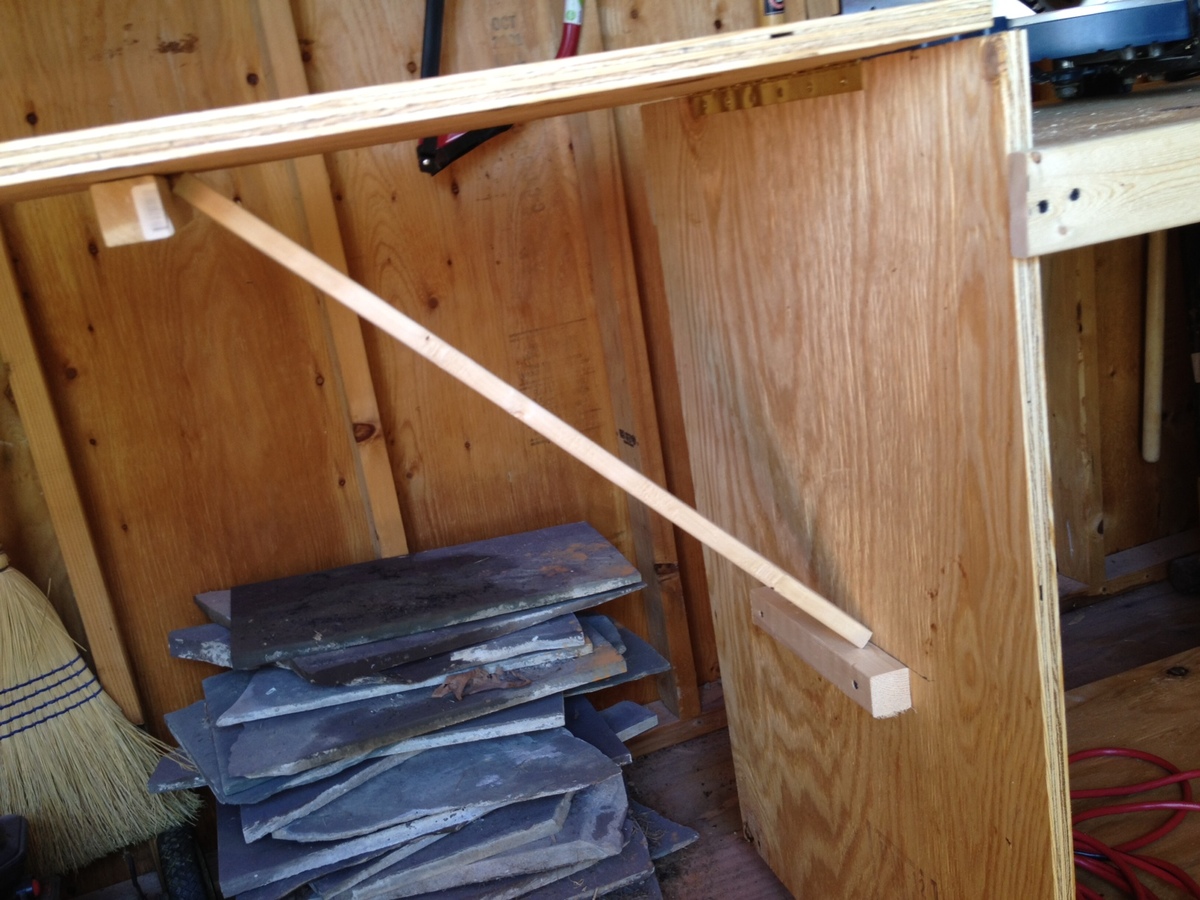
The major difference between the original and my design are the folding arms. I was working within a very small budget and couldn't afford the fancy folding arms so I was able to do a little creative thinking and decided to go with a removable piece of 1x3 that is wedged under the arms with a block installed on the "leaf" and the main table. I used the old pythagorean theorem to figure out how to make it a level 45 degrees. With a little playing around I have both arms completely level and the stand is perfect!! I am excited to get some other projects on the way now that I have somewhere other than the ground to work with my miter saw.

I didn't use any pocket holes, but am picking up a Kreg jig set from someone this upcoming week and am looking forward to putting that into some use on my next projects!

Built from Plan(s)
Estimated Cost
30 bucks or so
Estimated Time Investment
Afternoon Project (3-6 Hours)
Finish Used
None
Recommended Skill Level
Beginner

Comments

stephanier (not verified)

Fri, 05/18/2012 - 19:04

I would like to see a close up too if possible. I am wanting to make the saw cart plus two more carts with the middle flush with the top so I can push the two together to use for a workbench. How much weight do you think your sides can hold the way you set them up?

In reply to by stephanier (not verified)

Rennie82

Sun, 05/20/2012 - 11:28

I honestly am not too sure how much weight it would hold. I havent seen any bowing or pushing yet. I have used this so far to cut a piece of 4x4 12ft long made of cedar for my next project and didnt have any problems. I think if I need more weight holding strength, I think I would just change out the 1x3 and maybe use a 2x4 in there. I am also not a 100% sure how much weight the hinge can hold, maybe someone else reading these posts can be a little more helpful as far as that goes.

Providence Table

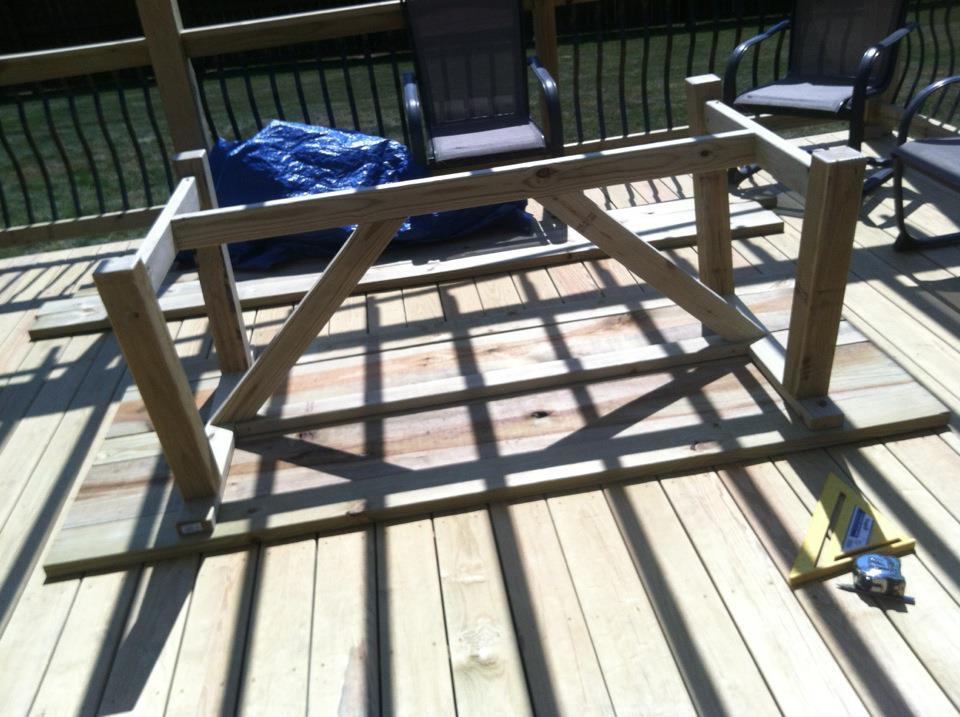
Here is my Providence Table made from scrap wood we had left from building our deck. I am not thrilled that it is made out of pressure treated wood but it is what it is. I used 2x6 mixed in with 2x10's for the top, 4x4's for the legs and used a 1/4 router bit for all the edges.

Built from Plan(s)
Estimated Cost
free from scrap
Estimated Time Investment
Afternoon Project (3-6 Hours)
Finish Used
It is still drying out but the plan is to paint the legs white and the top a stain color.
Recommended Skill Level
Intermediate

Comments

Shanty 2 Chic Cabinet

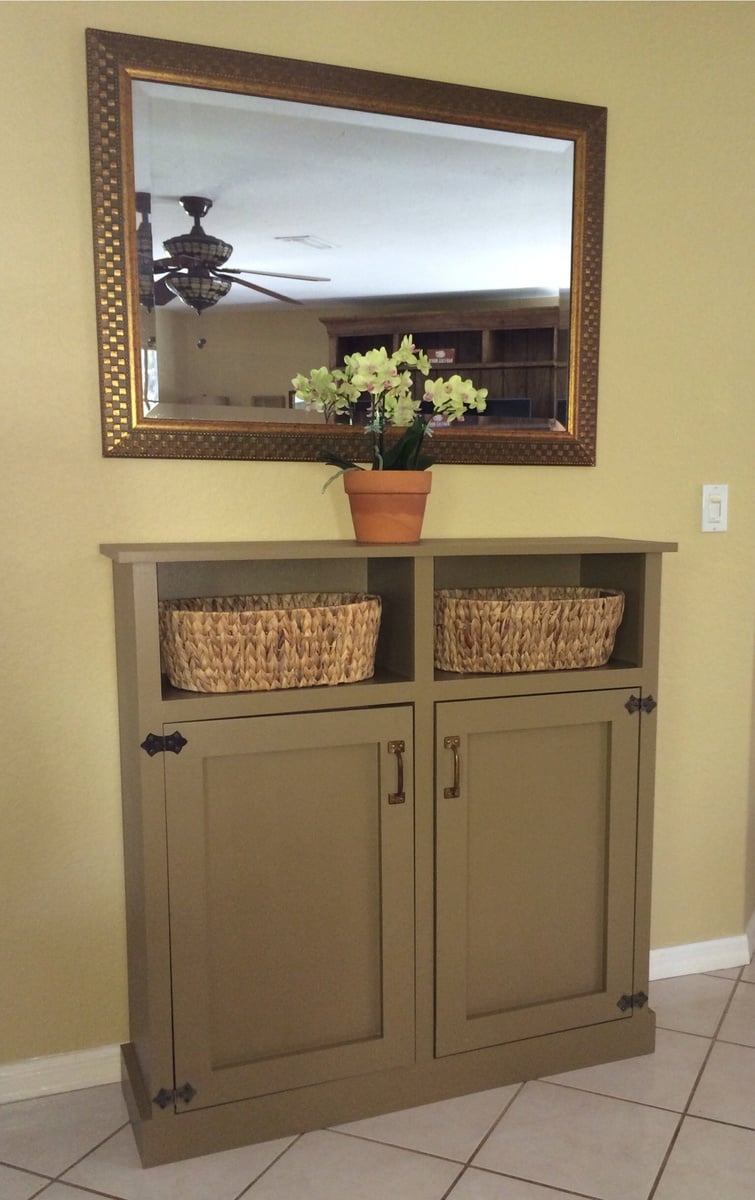
This is my first furniture build!!! I needed a narrow cabinet (from the wall) and found the plans on your site from Shanty2Chic. I LOVE this cabinet and I LOVE the Shanty girls along with you Ana! I finally put the doors on after I found the handles at a restoration store. I needed to make something 42.5" wide to fit under the mirror so I adjusted the length & height measurements of the original cabinet. This cabinet is 42.5W x 43H x 13D.

Built from Plan(s)
Estimated Cost
Less than $100
Estimated Time Investment
Weekend Project (10-20 Hours)
Finish Used
This cabinet was primed then painted with a Martha Stewart color called Spud (Glidden, satin finish) then I put a few coats of Polycrylic over the paint. I lightly sanded between the polycrylic coats.
Recommended Skill Level
Beginner

Cedar Planter Outdoor Speakers

Submitted by Hoosierdoc on Fri, 06/10/2016 - 10:53

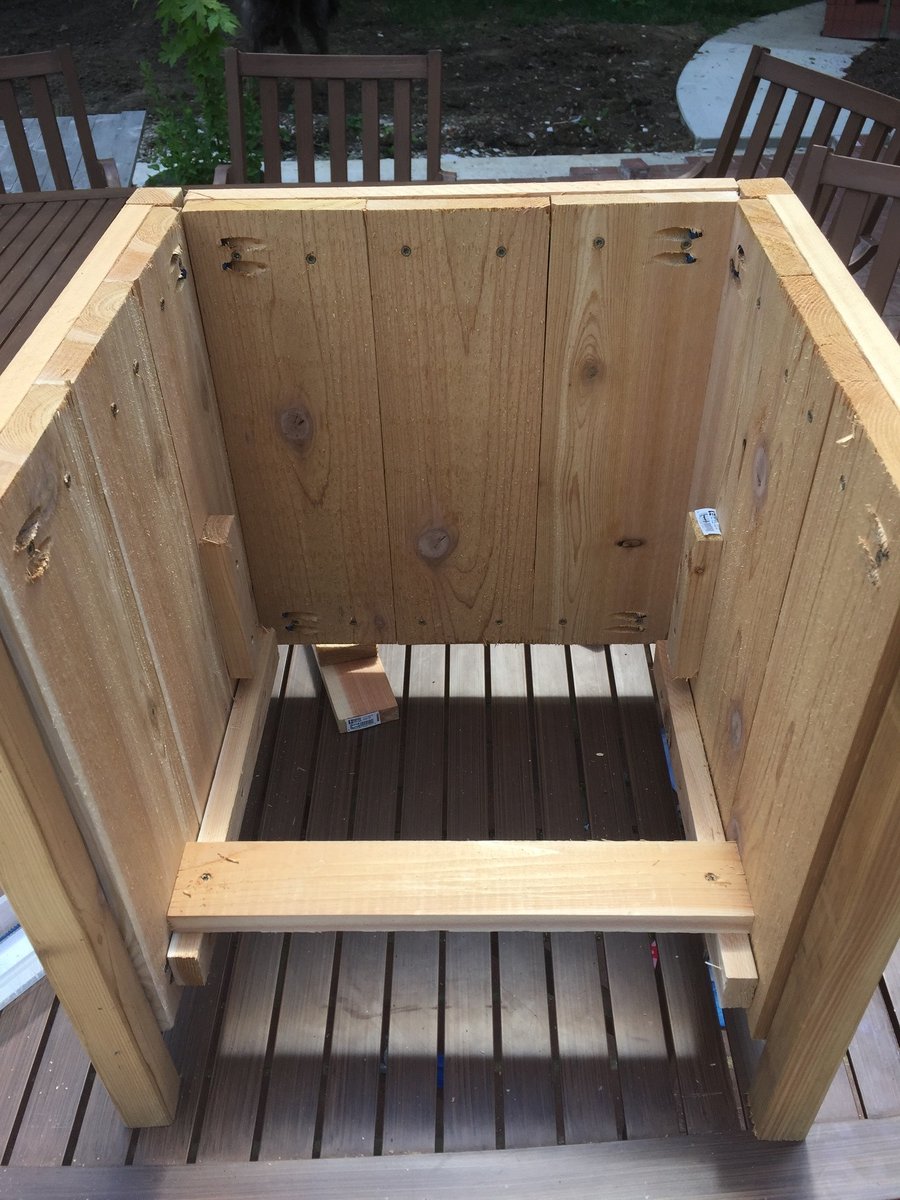
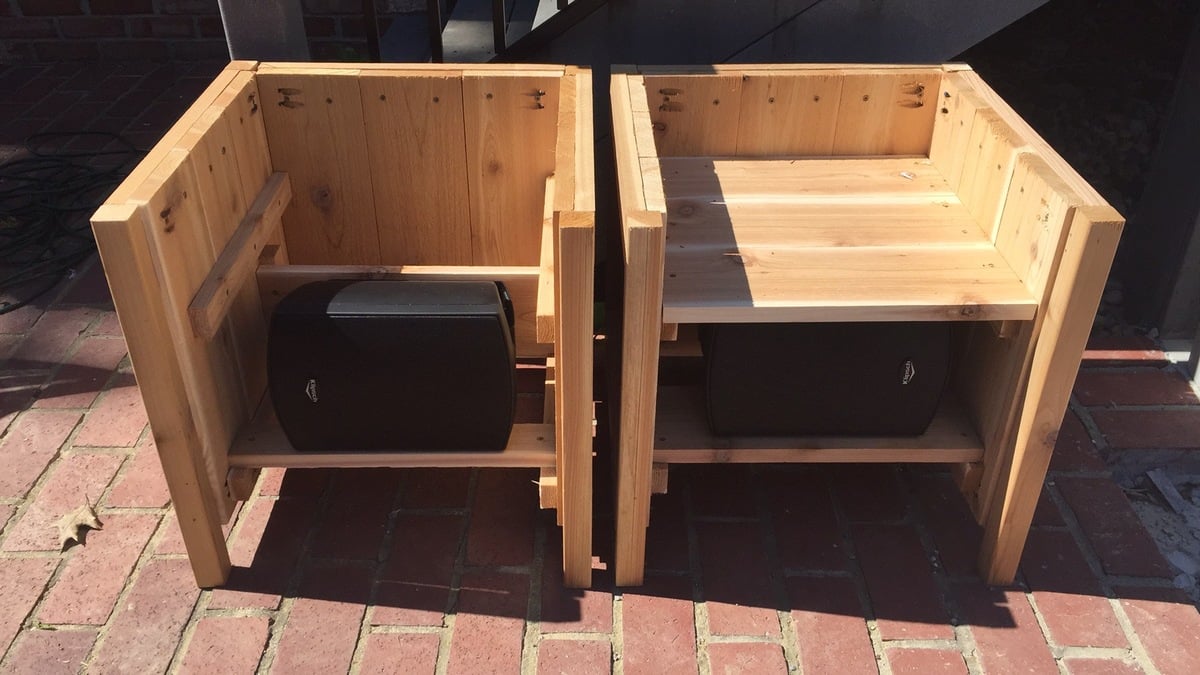
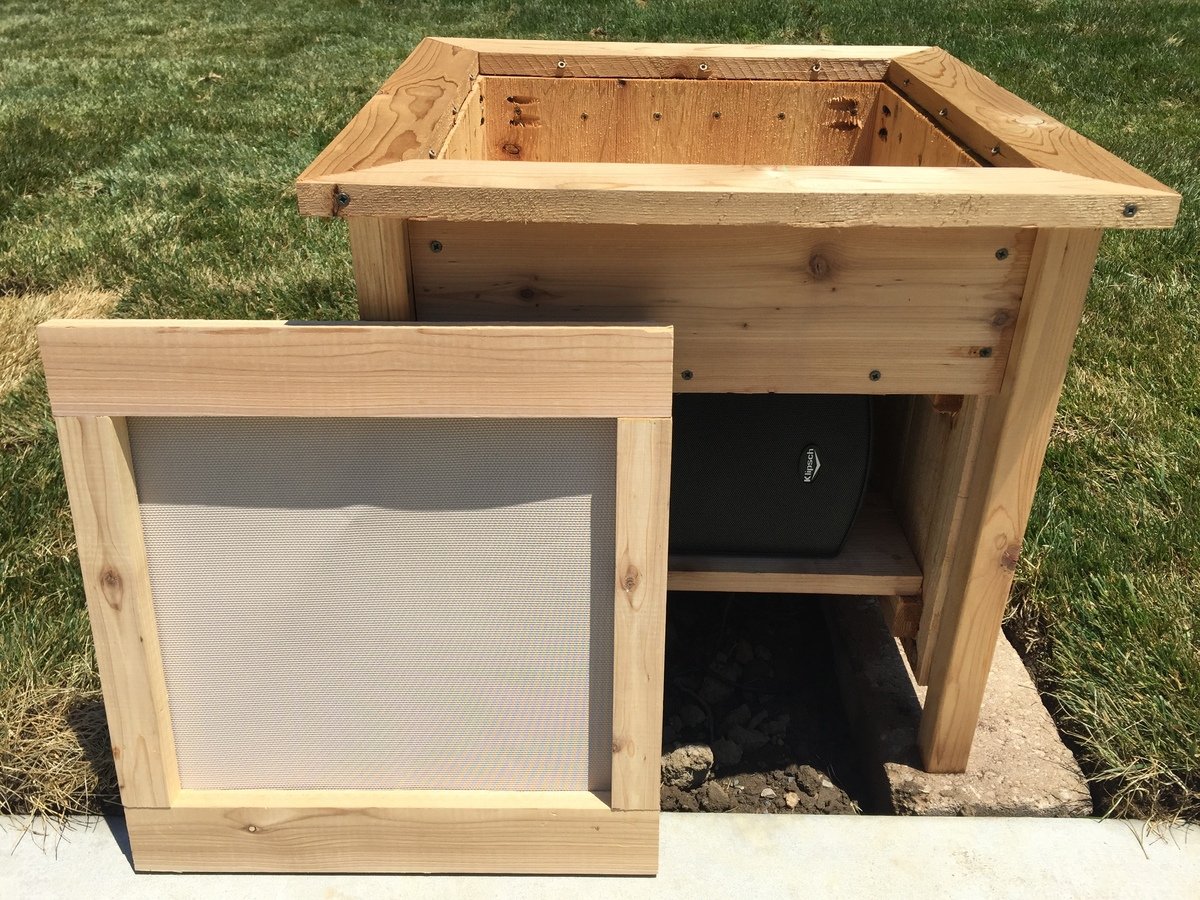
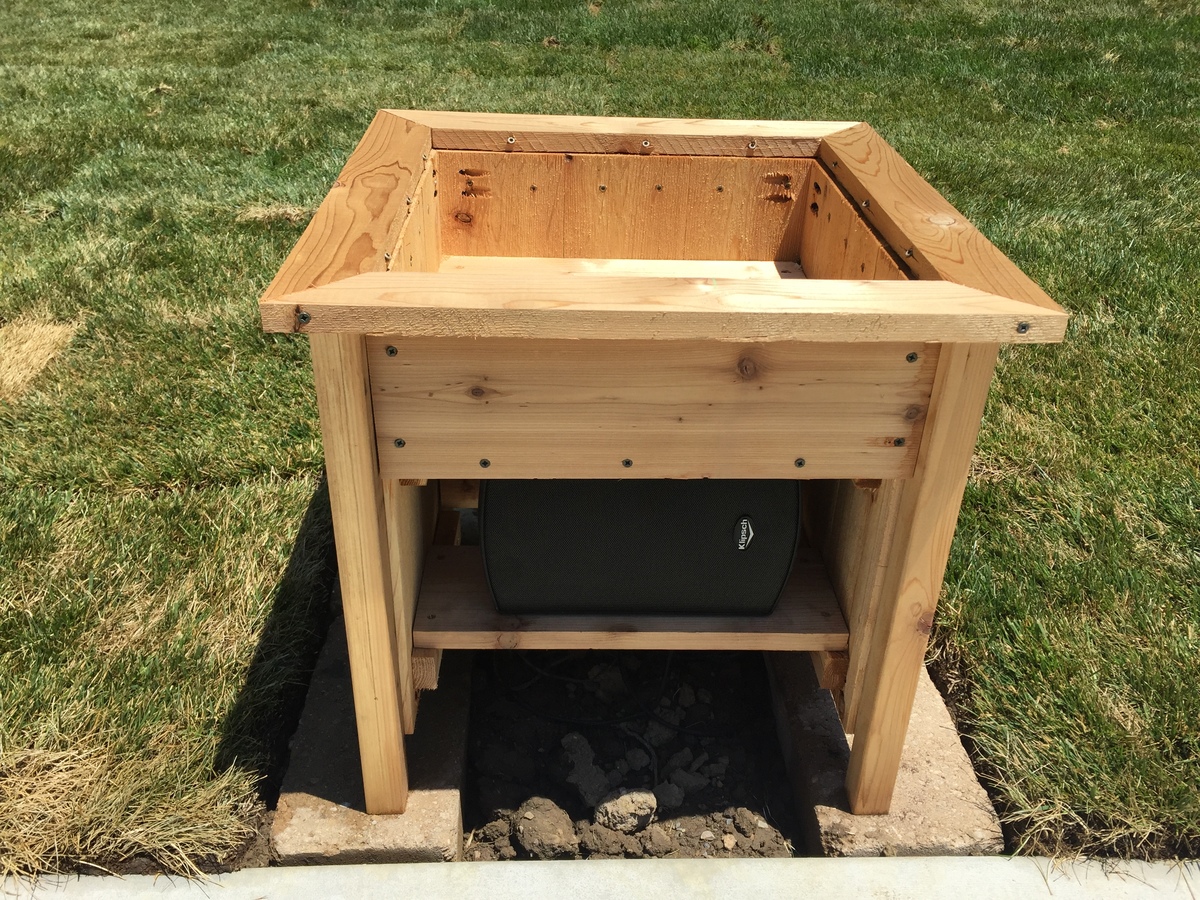
We just put in a pool and I needed something to hide a pair of outdoor speakers. I used Klipsh AW-525 speakers.

Basically I raised the bottom of the planter enough to fit the speaker under and had to add a few framing pieces to secure the speaker mount to. The mount attaches to a vertical board and the weight rests on a horizontal board. The wiring comes up from below.

The front panel uses vinyl mesh from Sailrite.com to hide the speaker but allow sound out. Imm planning to hang it with magnets if it doesn't distort sound too much.

Built from Plan(s)
Estimated Time Investment
Afternoon Project (3-6 Hours)
Recommended Skill Level
Beginner

Comments

Martina Bath Storage

Submitted by wahome on Mon, 05/28/2012 - 13:14

So happy to finally get around to this build. Super easy, though I found I am not that skilled with cove moulding...nothing a little wood putty couldn't hide.

Estimated Cost
$20
Estimated Time Investment
Afternoon Project (3-6 Hours)
Finish Used
Behr primer and paint in one, color was custom mixed based on Martha Stewart craft paint in Pool. Topped with Minwax waterbased poly.
Recommended Skill Level
Beginner

Benchmark Storage Tower

Submitted by katefago on Fri, 03/14/2014 - 20:00

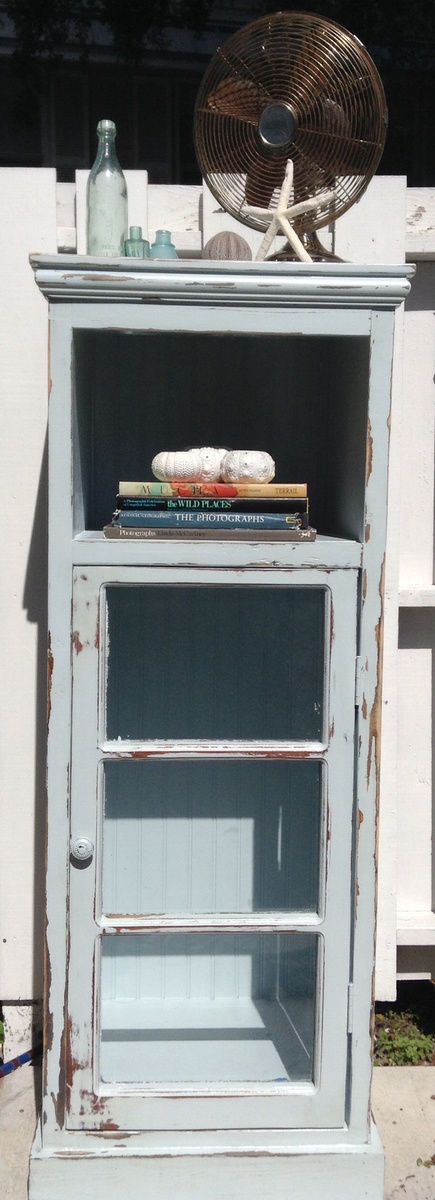
I was given an old window that was going into the trash from an old house in Key West that was being remodeled and decided I wanted to use the window as a door on a cabinet. These plans were very thorough and easy to follow. I modified the measurements to fit the window and am really happy with how it turned out. I added some trim to the top and bottom and used beadboard for the back to fancy it up a bit. I painted it in Sea Mist by Behr and distressed it by hand. This is my first post on this site. Thanks, Ana, for making this possible for me!

Estimated Cost
$125
Estimated Time Investment
Weekend Project (10-20 Hours)
Finish Used
Painted Sea Mist by Behr and distressed for an aged look, followed by two coats of polyurethane in Satin
Recommended Skill Level
Beginner

Comments

DIY Rustic Console

I had a friend make a request for a console table.  We came up with this design to fit her space and needs.  It was a pretty easy build.

Estimated Cost
$150-200
Estimated Time Investment
Weekend Project (10-20 Hours)
Finish Used
ECOS Paints Woodshield - Pine Needles; ECOS Paints Woodshield - Satin Varnish
Recommended Skill Level
Beginner

Barn Door Entertainment Console

Submitted by scubbis on Fri, 04/17/2020 - 10:03

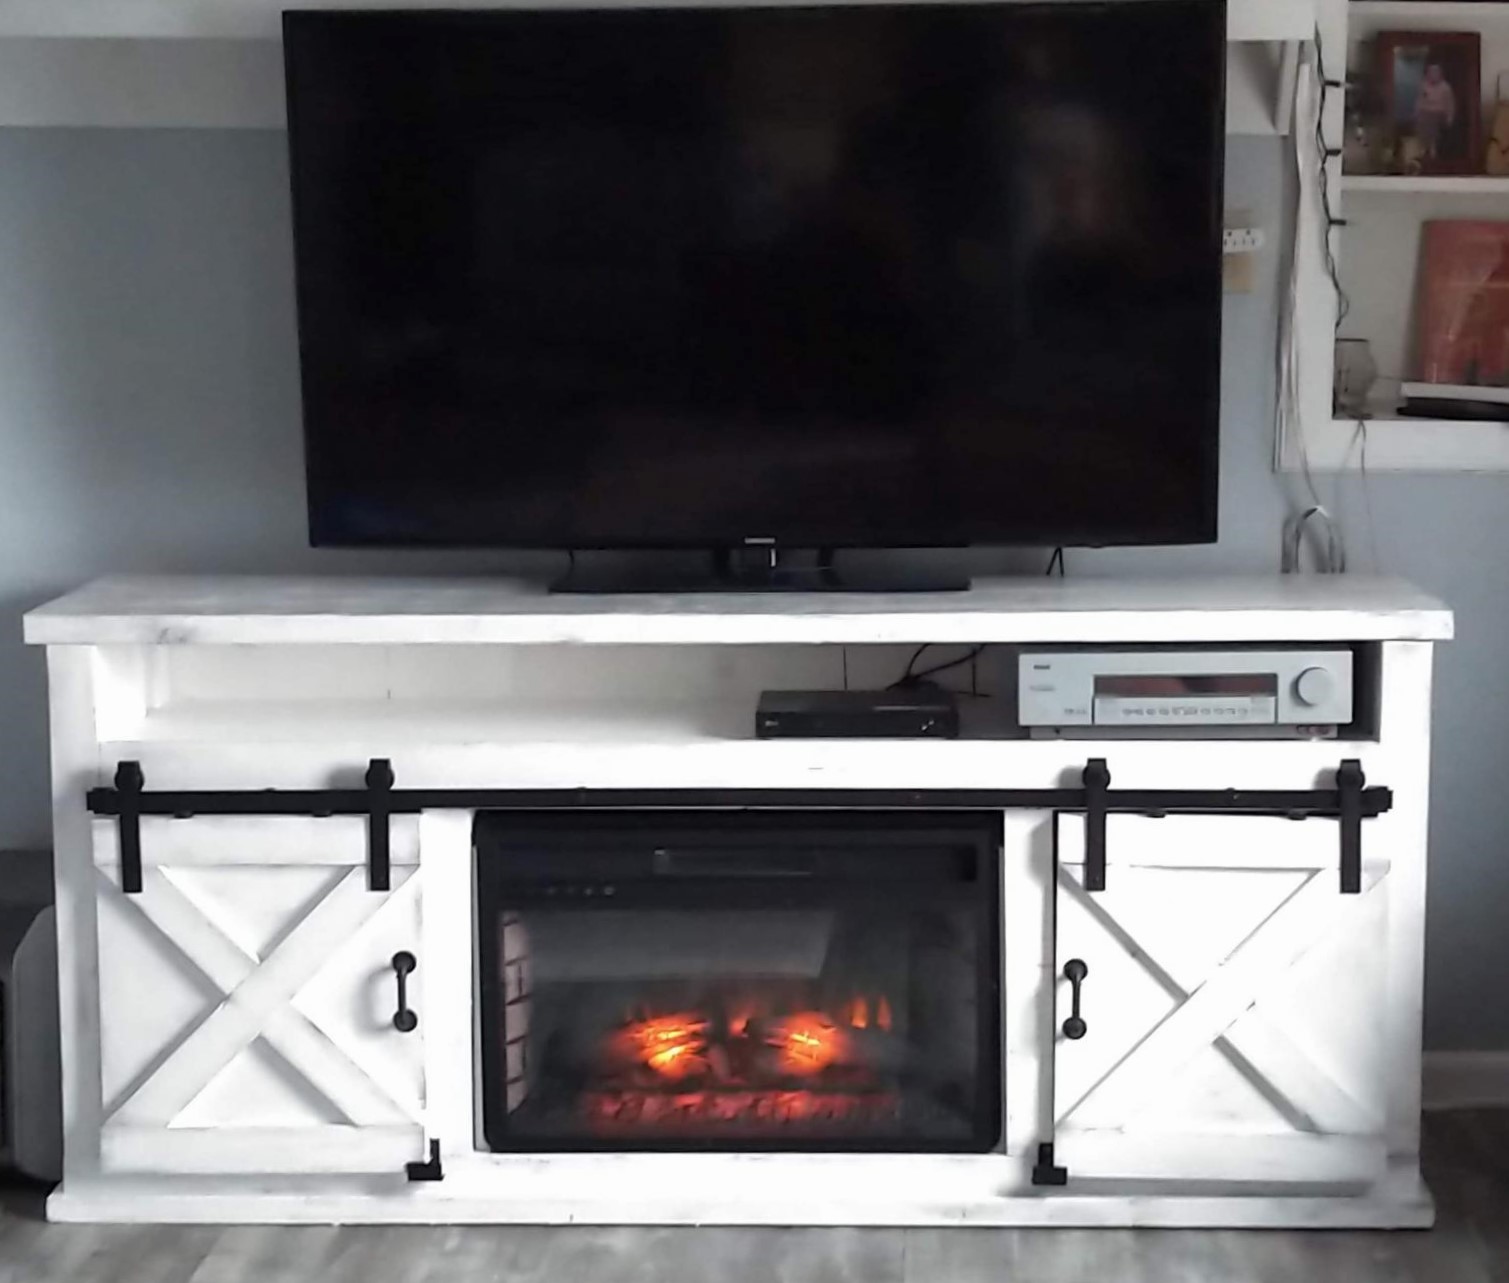
I used the plans from the "Grandy Barn Door Console" for the basic layout, and then altered them to accommodate an electric fireplace insert in between two cupboards, and an open shelf across the top to put in the stereo receiver. The tv is actually mounted to the wall over the top rather than sitting on the console. Overall, I love how it came out. It's exactly what we wanted!

Built from Plan(s)
Estimated Cost
$200
Estimated Time Investment
Day Project (6-9 Hours)
Recommended Skill Level
Intermediate

Middle School Class Builds Picnic Tables for School Grounds

Submitted by Anonymous (not verified) on Sat, 11/18/2023 - 12:59

Ana,

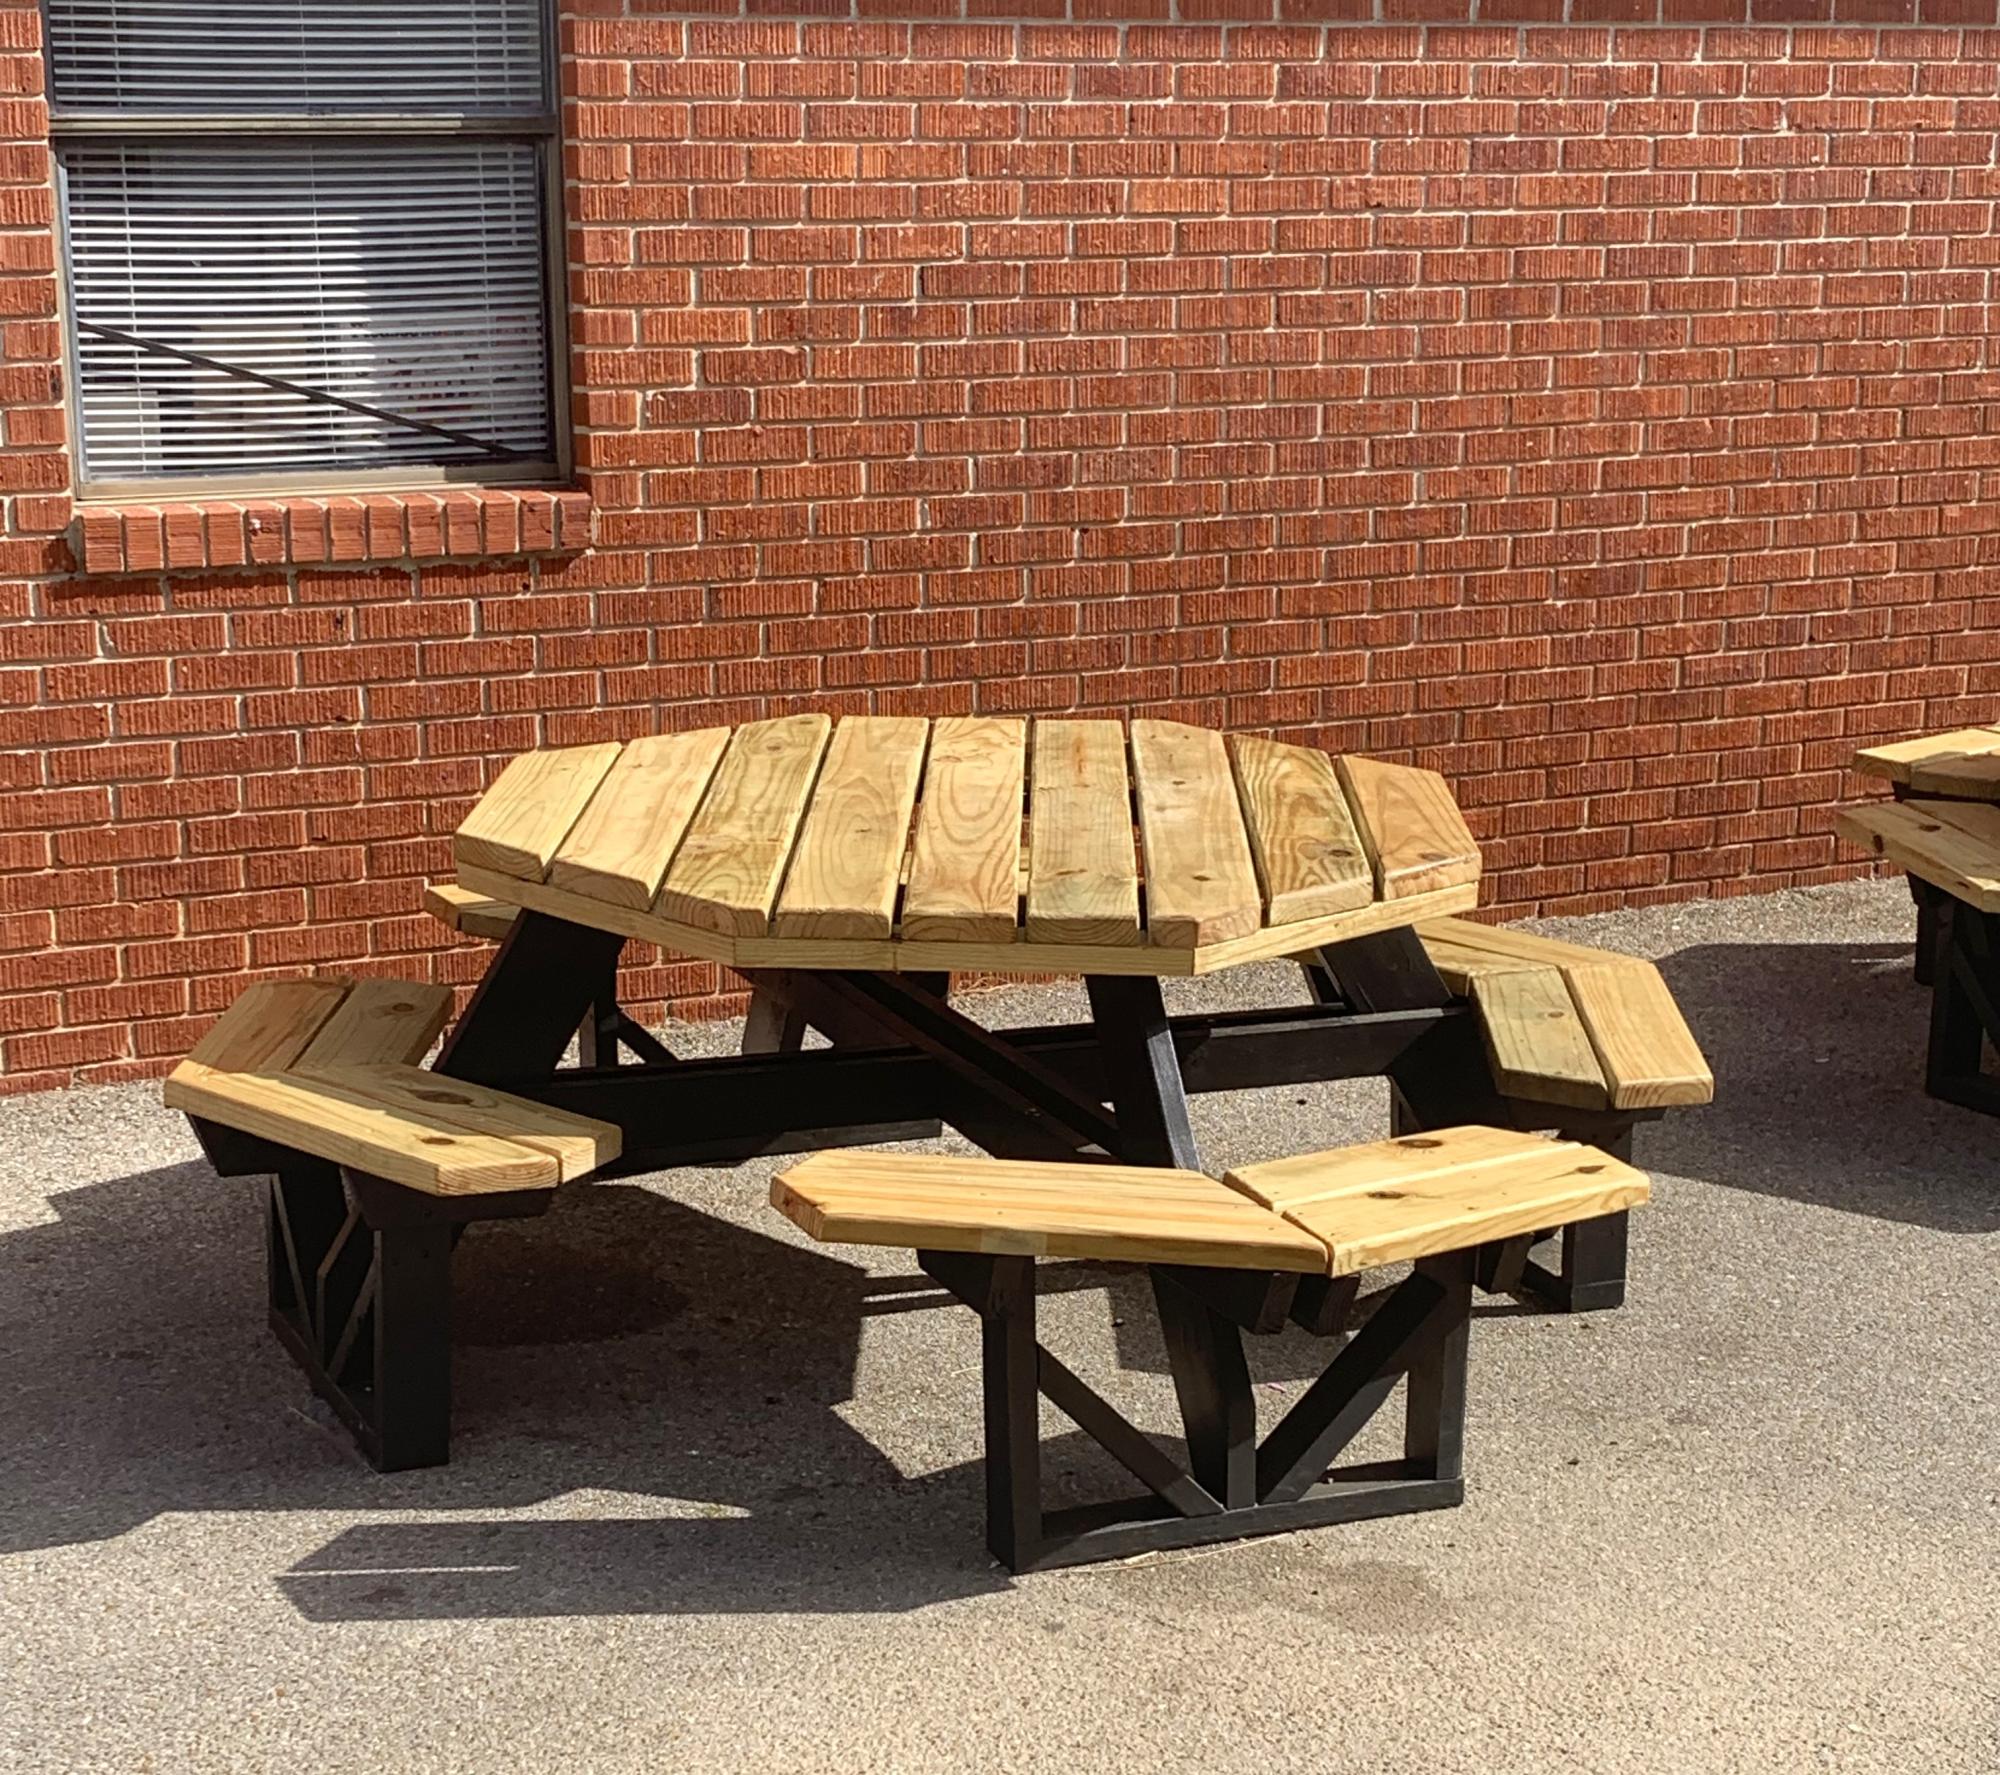
Thanks so much for your octagon picnic tables plans. I teach a Life Skills Class at Russell Christian Academy for middle school. This class of 18 students completed the build of 4 of these tables (with a little assistance from me) and are now being used as an outside dining area for all grades K-12. It was a great experience for the kids and I have received many positive comments about these tables.

Thanks again…


Dewayne Knight of Meridian, Mississippi

Comments

Rustic Kitchen Table

Submitted by sonji98 on Thu, 05/31/2012 - 07:54

Table mad using the Rustic Table plans.

Built from Plan(s)
Estimated Cost
$250 for all materials & finishes
Estimated Time Investment
Weekend Project (10-20 Hours)
Finish Used
Minwax Wood COnditioner, Minwax Stain in English Chestnut & Provincial, flat house paint and wax for apron and legs.
Recommended Skill Level
Beginner

Comments

Britt (not verified)

Wed, 10/10/2012 - 20:39

I love your tabletop! How did you finish your top to reduce the gaps between the boards?

Thanks for your picture!

Dinosaur Patchwork Dresser for Baby's Room

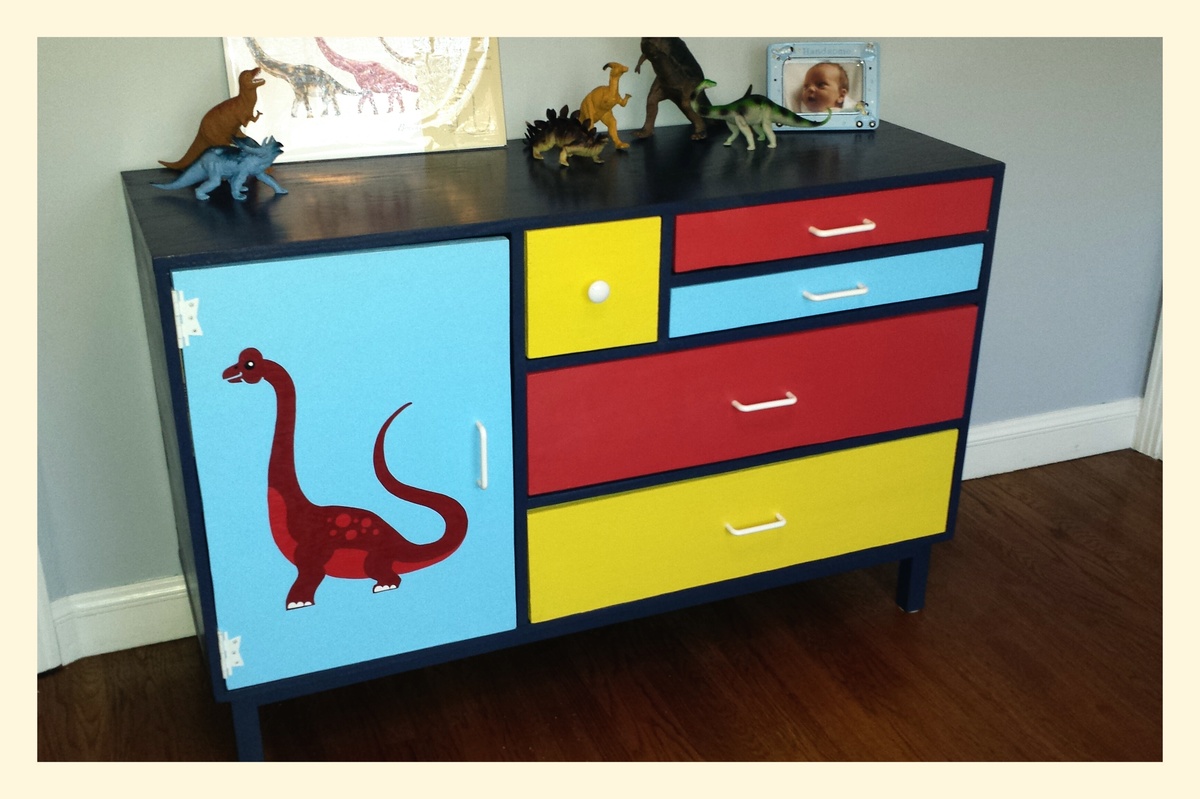
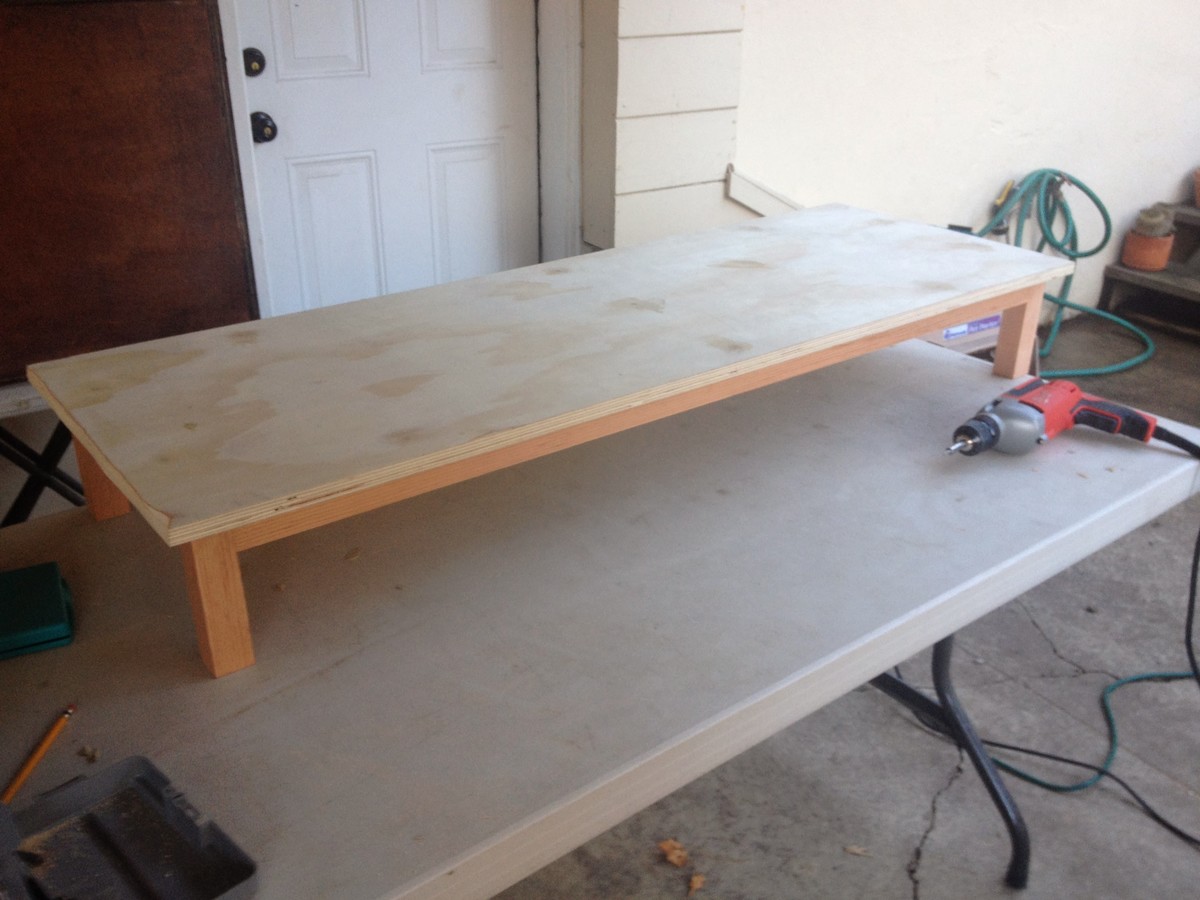
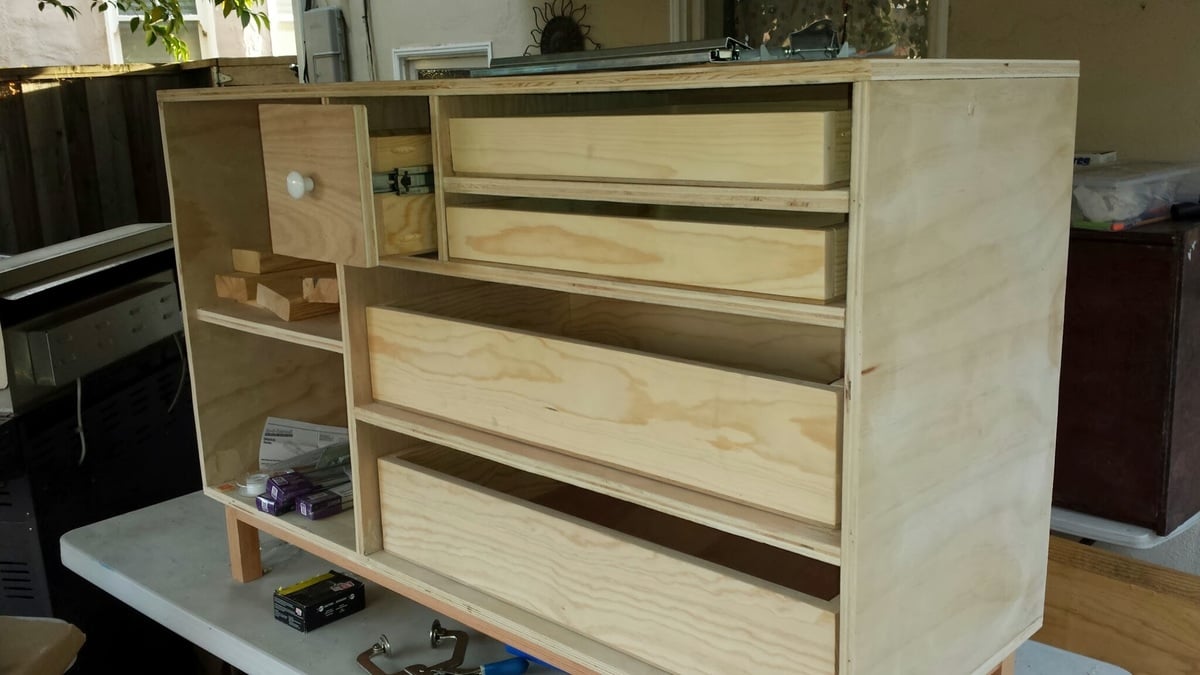
We wanted a bright and colorful dresser for the baby's room, and one that would match the Will Ruocco dinosaur prints that we purchased for the walls (http://etsy.me/PJ1yOs). This project spread out over many weekends but we were very happy with the results. We choose to go with legs instead of wheels, and made them tall enough that the Roomba would have clearance to get under. For the design, we used a combination of the plans here and a similar plan from The Design Confidential website.

Built from Plan(s)
Estimated Time Investment
Week Long Project (20 Hours or More)
Finish Used
Ben Moore Advance in semi gloss, plus a coat of wax.
Recommended Skill Level
Intermediate
Back